1
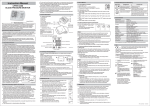
3
4
5
CONTENTS
Registration2
How to use these instructions
8
Caseback markings
9
Care of your watch
10
WEEE directive
15
Bracelet adjustment
18
International service agents
21
Resistance to water
23
Accurist guarantee
25
After sales service
Payment & postage instructions
26
6
27
Ceramic care instructions (ceramic watches only)
28
How to operate your watch
29
CP00 operating instructions (multi function)
30
OS60 / OS90 operating instructions (chronograph)
40
OS90 operating instructions (chronograph)
45
JS00 operating instructions (chronograph)
55
JS24 operating instructions (chronograph)
58
JS25 / JS15 / JS05 operating instructions (chronograph)
61
JS50 / JS54 operating instructions (chronograph)
64
0SA4 operating instructions (chronograph)
69
Y121ES operating instructions
76
Chronograph Reset (Incl. After Replacing Battery)
7
82
HOW TO USE THESE INSTRUCTIONS
This booklet contains setting instructions for the Accurist Quartz
Chronograph series of watches. Each section describes a particular calibre
(also called watch movement) which offers a unique set of functions and
features.
As such, it is necessary to identify the correct calibre of your watch before
proceeding to the appropriate section (see diagram opposite).
FURTHER INFORMATION
The latest setting instructions, technical manuals and interactive
instructions are available from our website at www.accurist.co.uk
When on the website please click on the service area for more information.
The Accurist technical helpline is also available during office hours:
+44 (0)20 7447 3945 or email [email protected]
8
CASEBACK MARKINGS
Model Number
Calibre Number
Battery Number
9
CARE OF YOUR WATCH
Avoid temperature extremes
1. Avoid leaving your watch in direct sunlight or in extremely warm
conditions for long periods of time: this will cause malfunctioning and
shorten the life of the battery.
2. Do not leave your watch for long periods of time in extremely cold
places; this may cause your watch to gain or lose time. Should it begin to
gain or lose time, place your watch on your wrist to restore it to its normal
working temperature.
Avoid wet conditions
1. Do not operate the buttons when your watch is wet, even on models
marked ‘Water Resistant’.
2. Check caseback markings and refer to the Resistance to water section.
10
Care Of Your Watch
Avoid strong shocks
1. This watch will withstand the bumps and jars normally incurred during
sports activities.
2. Avoid dropping your watch on the ground or otherwise imparting severe
shock to it.
Avoid strong magnetic fields
1. Keep your watch away from strong magnets.
2. Generally, your watch is not affected by magnetic fields from household
appliances such as television sets and stereo equipment.
11
Care Of Your Watch
Avoid harmful chemicals, solvents & gases
1. Avoid wearing your watch in the presence of strong chemicals, solvents
or gases.
2. Avoid materials such as gasoline, benzene, paint thinner, alcohol, spray
cosmetics, nail polish, nail polish remover, adhesives or paint.
Periodic inspection
1. A regular 4 to 5 years service by an authorised Accurist technician will
ensure trouble free operation.
2. Refer to the After Sales Service section for details.
12
IMPORTANT
1. Keep the batteries out of reach of infants and small children. Should
accidental ingestion occur consult a doctor immediately.
2. Do not attempt to replace the battery yourself as this invalidates your
guarantee.
Keep your watch clean
Wipe off any moisture that adheres to the case, glass or band with a soft,
clean cloth.
13
Care Of Your Watch
IMPORTANT
1. Keep the batteries out of reach of infants and small children. Should
accidental ingestion occur consult a doctor immediately.
2. Do not attempt to replace the battery yourself as this invalidates your
guarantee.
Keep your watch clean
Wipe off any moisture that adheres to the case, glass or band with a soft,
clean cloth.
14
WEEE DIRECTIVE
The crossed-out wheeled bin indicates that used electrical and electronic
equipment should not be mixed with general domestic waste. There is a
separate collection point for these products.
The objectives of the Community’s environment policy are, in particular,
to preserve, protect and improve the quality of the environment, protect
human health and utilise natural resources prudently and rationally.
15
WEEE Directive
Disposal information for consumers
EU Countries
In accordance with legislation that requires proper treatment, recovery and
recycling of used electrical and electronic equipment. Private households
within the EU states may return their used electrical and electronic
equipment to designated collection points free of charge. Equally return
your product to an Accurist stockist or Accurist headquarters, who will see
to the products disposal.
Please contact your authority for further details.
16
WEEE Directive
Non EU Countries
If you wish to discard this product, please contact your local authorities
and ask for the correct method of disposal. Otherwise please return to
Accurist headquarters, who will see to the products disposal.
Disposal information for business users EU Countries
Please contact your Accurist dealer who will inform you about the ‘take
back’ of products.
17
BRACELET ADJUSTMENT
The bracelet requires a small adjustment and the model has
a Z-type clasp.
1. Depress the end of the spring bar
on the centre clasp with a pin.
2. Relocate the spring bar in an
alternative hole.
18
Bracelet Adjustment
The bracelet requires a significant adjustment or the model does not have
a Z-type clasp.
1. Use the enclosed wrist gauge to measure and mark the size of your wrist.
2. Return the completed wrist gauge with your watch.
3. Follow the instructions in the After Sales Service section to return your
watch for adjustment. Your watch will be adjusted free of charge.
19
Using the Slide Rule Bezel
For further information on the slide rule bezel please visit
www.accurist.co.uk and follow the service link.
20
INTERNATIONAL SERVICE AGENTS
International Service Headquarters
AWL,
Asher House, Blackburn Road,
West Hampstead,
London, NW6 1AW
Tel: +44 (0)20 7447 3945
Fax: +44 (0)20 7447 3946
Netherlands
Sabre Nederland B.V.,
Ellermanstraat 23,
1099 BX Amsterdam,
The Netherlands
Tel: 0031 20 692 8888,
Fax: 0031 20 665 2184
Malta
Maxi Quartz Ltd,
311-313 Zabbar Road,
Fgura, Malta
Tel: 00356 21806661,
Fax: 00356 21676393
Kingdom of Saudi Arabia
Al Asasyah, Sitteen Street,
P.O. Box 19248 - 19249,
Jeddah 21435
Tel: 00966 261 92035,
Fax: 00966 676 2262
21
International Service Agents
Cyprus
Timeworx Ltd, 45
Andrea Demetriou St,
Nicosia 2024, Cyprus
Tel: 00357 22441328,
Fax: 00357 22441329
USA
Parsec Enterprises Inc, 7501
N.Harker Drive, Peoria , IL, 61615
Tel: 1 800 359 2508
22
RESISTANCE TO WATER
Indications on dial or caseback
Dial
-
Caseback
Light spray,
Perspiration,
Light rain, etc.
Swimming,
etc.
Water resistant
Ok
X
Water resistant
50M (5 ATM)
Water resistant
Ok
Ok
Water resistant
100M (10 ATM)
Water resistant
Ok
Ok
Water resistant
150M (15 ATM)
and deeper
Water resistant
Ok
Ok
23
Resistance To Water
IMPORTANT - Never pull out the crown when the watch is wet.
•
Tighten screwlock crown completely.
•
Water resistance is not a permanent property. We strongly
recommend you return your watch for resealing every 4 - 5 years and/
or when changing batteries.
•
“Water resistant” may sometimes be abbreviated as “Water resist”
or “WR”.
•
Never pull out the crown when the watch is wet.
•
Always set the crown in the normal position.
24
ACCURIST GUARANTEE
The terms of this guarantee provide rights that are in addition to your
statutory rights and do not in any way limit or otherwise affect those
statutory rights.
Your Accurist watch is guaranteed for 1 year from the date of original retail
purchase against any malfunction of the watch movement due to defective
materials or workmanship and extended to 3 years once registered at
www.accurist.co.uk/registration. This guarantee is applicable only to
watches purchased in the United Kingdom. This guarantee does not cover
the following: Breakages caused from maltreatment, mishandling or
accident; Water damage unless marked water resistant (5ATM or above);
batteries; the replacement or repair of bracelets and leather watch straps.
To make a claim under the guarantee please return your watch along with
your proof of purchase directly to the International Service Headquarters
at the address set out on page 17 or an International Service Agent.
25
AFTER SALES SERVICE
Each Accurist watch comes with a lifetime commitment to quality after
sales service. Our award winning customer service team are dedicated to
providing expert servicing from bracelet adjustments to full overhaul. We
pride ourselves in identifying our customer’s requirements and reacting
to their individual needs. An expert watchmaker personally services each
watch and Accurist guarantees quality at every step of the process.
26
PAYMENT & POSTAGE INSTRUCTIONS
1. Complete the payment details form on last page.
2. Return the watch and payment details form together with this guarantee
to the Accurist Service Centre address listed on page 17.
3. Enclose a cheque, postal order or MasterCard/Visa payment for £10.00
payable to Accurist Service Centre. This charge covers handling, return
packing, postage via mail and insurance for loss or damage whilst being
returned or undergoing repairs.
No liability for loss or damage will be accepted without this remittance.
4. Please do not return your presentation box as we cannot guarantee
its return.
27
Ceramic special Care Instructions (ceramic watches only)
Every care has been taken in the manufacture of this ceramic watch but
due to the nature of the material used extra care should be taken.
The ceramic although scratchproof is not shatterproof therefore
care must be taken to avoid dropping or knocking the watch against
a hard surface.
We would therefore recommend storing the watch in its watch box or
suitable storage box when not being worn. To clean just use a clean damp lint
free cloth do not use any cleaning agents as these may affect the look and
lustre of the ceramic.
28
/ HOW TO OPERATE
YOUR WATCH
29
7
CP00 Operating Instructions
(Multi Function)
6
KEY TO DIAGRAM
UTC dial - shows universal coordinated time (UTC)
in 24 hour format. UTC (or GMT) is the standard
from which all time zones are calculated.
24 hour dial - shows main hand time in 24 hour
UTC Dial
format. This can be used to determine the correct
Top Left (TL)
Top Right (TR) a.m. and p.m settings.
Mode indicator dial - shows main hand time in
24 hour format. This can be used to determine
the correct a.m and p.m. settings.
24 Hour
Main
Mode indicator dial - shows the mode that the
Indicator
Digital watch is in - TME (time), CAL (calendar),
Dial
Display AL-1, 2 or 3 (alarm 1, 2 or 3), CHR (chronograph),
TMR (timer), SET (set).
Main digital display - shows the digital time,
calendar, alarms, chronograph or timer depending
on which mode chosen.
Bottom Left (BL)
Bottom Right (BR) Button function displays - indicates the function
of each button at any moment,. as shown in the
Mode Indicator dial
diagram
diagram
on next
30(see
opposite.
> page).
To set the time:
1. Push the bottom right hand button until the mode hand
indicator points to TME.
2. Press and hold the upper left button for three seconds. The hour and minute
hand will retract to the 12 O’clock position.
3. Select the time zone on the digital display by pressing the upper right button
or the lower left button.
4. Pull the bottom right button out one click. The bottom part of the digital
display will start flashing. Press the bottom left button to adjust for daylight
saving time.
5. Press the upper right button. You will see the seconds flashing on the lower
half of the digital display. Press the lower left button to reset the seconds to 00.
Top Left Button
Top Right Button
Bottom Left Button
Bottom Right Button
31
8
13
13
CP00 Operating Instructions continued . . .
CP00 Operating Instructions continued . . .
To set the time zone
To
set thethe
time
zone
1. Setting
time
zones allows you to add or remove cities on the digital
1.
Setting
the time
zones allows
yousaving
to add
or standard
remove cities
the by
digital
display
or switch
between
daylight
and
time.on
Begin
pressing
display
or right
switch
between
daylight
and standard
Begin
by pressing
the lower
button
to move
the saving
mode hand
indicatortime.
to SET
mode
on the
the
lowerdial.
right button to move the mode hand indicator to SET mode on the
bottom
bottom
2. If the dial.
hour or minute hands are obscuring the digital display, press and hold
2.
the hour
minute
obscuring
the cause
digitalthe
display,
and hold
theIfupper
left or
button
forhands
three are
seconds.
This will
hour press
and minute
the
left button
seconds.
This will cause the hour and minute
handupper
to retract
to thefor
12 three
O’clock
position.
hand
to pull
retract
the right
12 O’clock
3. Now
the to
lower
buttonposition.
out one click. You will see the digital display
3.
Now pull
thethe
lower
right
one click.
will seethe
thecity
digital
display
flashing.
Press
upper
leftbutton
buttonout
to select
SETYou
to display
or OFF
to
flashing.
Press
to select
SET
display
the time
city or
to
not display
thethe
city.upper
Pressleft
thebutton
lower left
button
to to
turn
summer
onOFF
or off.
not
display
theiscity.
Press the
lower
left part
button
to turn
summer
on or off.
Summer
time
indicated
on the
lower
of the
digital
display.time
Daylight
Summer
timemust
is indicated
on thesetlower
part city.
of the digital display. Daylight
savings time
be manually
for each
savings
timethe
must
be right
manually
setwill
for allow
each city.
4. Pressing
upper
button
you to scroll through all the cities.
4.
Pressing
thepush
upper
button
allow
youin.to scroll through all the cities.
After
setting,
theright
lower
right will
button
back
32 back in.
After setting, push the lower right button
14
Troubleshooting
The analogue hands block the digital display.
1. Press and hold the upper left button for three seconds. The hour and minute hand
will retract to the 12 O’clock position allowing a clear view of the digital display.
2. Press the upper left button to return the analogue hands to the previous position.
The analogue time does not match the digital time for the selected zone.
1. Push the bottom right hand button until the mode indicator hand points to TME.
2. Select the time zone on the digital display by pressing the upper right button or the
lower left button.
3. Press the upper right and lower left buttons simultaneously and release. The hour
and minute hand will go to the time zone shown on the digital display. At this point
the digital display may go to UTC or another time zone. Press the upper right or lower
left button to scroll to the time zone you just set the analogue hands to.
33
13
13
CP00 Operating Instructions continued . . .
CP00 Operating Instructions continued . . .
To set the time zone
To
set thethe
time
zone
1. Setting
time
zones allows you to add or remove cities on the digital
1.
Setting
the time
zones allows
yousaving
to add
or standard
remove cities
the by
digital
display
or switch
between
daylight
and
time.on
Begin
pressing
display
or right
switch
between
daylight
and standard
Begin
by pressing
the lower
button
to move
the saving
mode hand
indicatortime.
to SET
mode
on the
the
lowerdial.
right button to move the mode hand indicator to SET mode on the
bottom
bottom
2. If the dial.
hour or minute hands are obscuring the digital display, press and hold
2.
the hour
minute
obscuring
the cause
digitalthe
display,
and hold
theIfupper
left or
button
forhands
three are
seconds.
This will
hour press
and minute
the
left button
seconds.
This will cause the hour and minute
handupper
to retract
to thefor
12 three
O’clock
position.
hand
to pull
retract
the right
12 O’clock
3. Now
the to
lower
buttonposition.
out one click. You will see the digital display
3.
Now pull
thethe
lower
right
one click.
will seethe
thecity
digital
display
flashing.
Press
upper
leftbutton
buttonout
to select
SETYou
to display
or OFF
to
flashing.
Press
to select
SET
display
the time
city or
to
not display
thethe
city.upper
Pressleft
thebutton
lower left
button
to to
turn
summer
onOFF
or off.
not
display
theiscity.
Press the
lower
left part
button
to turn
summer
on or off.
Summer
time
indicated
on the
lower
of the
digital
display.time
Daylight
Summer
timemust
is indicated
on thesetlower
part city.
of the digital display. Daylight
savings time
be manually
for each
savings
timethe
must
be right
manually
setwill
for allow
each city.
4. Pressing
upper
button
you to scroll through all the cities.
34 allow
4.
Pressing
thepush
upper
button
youin.to scroll through all the cities.
After
setting,
theright
lower
right will
button
back
After setting, push the lower right button back in.
14
Troubleshooting
The analogue hands block the digital display.
1. Press and hold the upper left button for three seconds. The hour and minute hand
will retract to the 12 O’clock position allowing a clear view of the digital display.
2. Press the upper left button to return the analogue hands to the previous position.
The analogue time does not match the digital time for the selected zone.
1. Push the bottom right hand button until the mode indicator hand points to TME.
2. Select the time zone on the digital display by pressing the upper right button or the
lower left button.
3. Press the upper right and lower left buttons simultaneously and release. The hour
and minute hand will go to the time zone shown on the digital display. At this point
the digital display may go to UTC or another time zone. Press the upper right or lower
left button to scroll to the time zone you just set the analogue hands to.
35
15
CP00 Operating Instructions continued . . .
Troubleshooting continued . . .
The analogue hands are not precisely synchronised with the digital time.
1. Press the lower right button to move the mode indicator hand to CHR.
2. Pull the lower right button out one click. The hour, minute and UTC hands will
retract towards the straight up 12 O’clock position. You will see UTC on the top
half of the digital display.
3. Press the upper right button to advance the hands to the straight up 24-hour
position. Use the lower left button to go in reverse.
36
4. Press the upper left button. You will see HR on the top half of the digital
display. Press the upper right button to advance the hour and 24-hour hand
clockwise until they both point straight up at the 24-hour position. Use the
lower left button to move the hand anti-clockwise until it is pointing straight up
at the 12 O’clock position.
5. Press the upper left button. You will see MIN on the top half of the digital
display. Press the upper right button to advance the minute hand clockwise or
the lower left button to move anti-clockwise until it is pointing straight up at
the 12 O’clock position.
6. Push the lower right button back in one click.
37
17
CP00 Operating Instructions continued . . .
Troubleshooting continued . . .
The watch malfunctions in some way and the above procedures do not work.
1. Press the lower right button until the mode indicator hand points to TME.
2. Pull the lower right button out one click. Press the other three buttons down
simultaneously for three seconds and release. You will see 8’s on the digital display.
3. Press the upper left button. You will see UTC on the top half of the digital display.
Press the upper right button to advance the hands of the top dial to the straight up
24-hour position. Use the lower left button to go in reverse.
4. Press the upper left button. You will see HR on the top half of the digital display.
Press the upper right button to advance the hour and 24-hour hand clockwise until
they both point straight up at the 24-hour position. Use the lower left button to move
the hand anti-clockwise.
38
5. Press the upper left button. You will see MIN on the top half of the
digital display. Press the upper right button to advance the minute hand
clockwise or the lower left button to move anti-clockwise until it is pointing
straight up at the 12 O’clock position.
6. Push the lower right button back in one click.
39
0S60 / 0S90 OPERATING INSTRUCTIONS (CHRONOGRAPH)
Top Right (TR)
Dial A (minute dial)
Date window
Dial C (hours dial)
Dial B (seconds dial)
Bottom Right (BR)
Positions: A
40
B
C
0S60 / 0S90 Operating Instructions (Chronograph)
To set the time:
1. Gently pull out crown to position C.
2. Turn crown either way to correct time.
3. Push in crown to position A.
To set the date:
1. Gently pull out crown to position B.
2. Turn crown anti-clockwise to adjust date.
3. Push in crown to position A.
41
0S60 / 0S90 Operating Instructions (Chronograph)
Using the chronograph:
1. Press BR Button to put the watch in chronograph mode. Making sure all
sub dials are zeroed. If not, refer to ‘Chronograph Zero Reset’.
2. Press TR Button to start and stop the chronograph.
3. Press BR Button to reset the chronograph.
4. When you have finished with the chronograph function, press BR Button
again; this re-starts the small second hand on Dial B.
Note: After 30 seconds the Second hand on Dial B will stop at the zero
position, however, the time is still continuing to be measured in seconds
and when TR Button is pressed to stop the timing, the second hands will
automatically move to show the time.
42
0S60 / 0S90 Operating Instructions (Chronograph)
Chronograph zero set:
This procedure is only necessary when the battery is replaced, or when
the Chronograph hands do not return to the ‘0’ position, when the
Chronograph mode is selected.
1. Gently pull out crown to position C.
2. Push TR Button to advance the sweep second hand to the 12 0’clock
position. Please note each push of the TR Button will advance the hand
1 second. Alternatively, depress and hold the Button for 2 seconds and the
hand advances continuously.
43
0S60 / 0S90 Operating Instructions (Chronograph)
3. Push BR Button; this automatically re-sets sub dials. Each subsequent
push will advance the Second hand on sub dials by 1 marking. Alternatively,
depress and hold Button for 2 seconds; the hand will advance continuously
until released.
4. Push in crown to Position A.
44
0S90 OPERATING INSTRUCTIONS (CHRONOGRAPH)
Chronograph 1/100
second hand
Chronograph second hand
(Chronograph minute hand)
Button A
2nd position
Calendar
Hour hand
24 hour hand
Small second hand
1st position
Normal crown position
Button B
45
0S90 Operating Instructions (Chronograph)
To set the time:
1. Pull the crown out to the 2nd position.
2. Turn the crown to set hour and minute hands.
3. When the crown is pushed back to the normal position, small second
hand begins to run.
To set the date:
1. Pull the crown out to the 1st position.
2. Turn the crown counter-clockwise to set the date.
*If the date is set between the hours of around 9:00 PM and 1:00 AM,
the date may not change on the following day.
3. After the date has been set, push the crown back to the normal position.
46
0S90 Operating Instructions (Chronograph)
Using the chronograph:
The chronograph is able to measure and display time in 1/100 second
united up to maximum of 59 minutes 59 seconds.
•
The chronograph 1/100 second hand moves for 61 seconds after
measurement is started, after which time it will stop at 0 position.
After that time, it then changes to demonstration operation, making
one revolution every minute.
47
0S90 Operating Instructions (Chronograph)
To start the chronograph:
•
Press button A.
•
The small second hand will advance to the zero position at the
same time the chronograph starts, and then begin to run as the
chronograph second hand. After 1 minute and 1 second after the
chronograph has been started.
•
The chronograph second hand will change over to running as the
chronograph minute hand.
48
0S90 Operating Instructions (Chronograph)
To stop the chronograph:
•
Press button A.
•
When the measured time is less than 61 seconds, the chronograph
minute, second and 1/100 second hands will stop at the measured
time.
•
When the measured time is over 61 seconds, the chronograph minute
and second hands will stop at measured time. The chronograph
1/100 second hand will remain stopped at the zero position. Read the
seconds and minutes from the chronograph at this time. Next, press
button A again to advance the chronograph 1/100 second hand to the
measured time. Read the time in 1/100 seconds from the chronograph
at this time.
49
0S90 Operating Instructions (Chronograph)
To reset the chronograph:
•
Press button B.
•
The chronograph second hand will change over to running as the
second hand for current time. The other chronograph hands are
returned to the zero position.
50
0S90 Operating Instructions (Chronograph)
Standard measurement.
Chronograph
minutes and
seconds are
read here
START
“A”
When the measured time is less than
61 seconds
STOP
*Read in
chronograph
1/100 seconds
“A”
When the
measured
time is over
61 seconds
“A”
51
RESET
“B”
0S90 Operating Instructions (Chronograph)
Standard measurement.
When the measured time is less than
61 seconds
START
“A”
Chronograph
minutes and
seconds are
read here
STOP
“A”
When the
measured
time is over
61 seconds
*Read in
chronograph
1/100 seconds
“A”
RESTART
“A”
STOP
“A”
RESET
Can be operated repeatedly
52
“B”
0S90 Operating Instructions (Chronograph)
Chronograph reset (incl. after replacing battery):
This procedure should be performed when the chronograph 1/100 second
hand and the chronograph second hand do not return to zero position
after the chronograph has been reset, and including after the battery has
been replaced.
1. Pull the crown out to the 2nd position.
2. Press button “A” to set the chronograph 1/100 second hand to zero
position.
3. Press button “B” to set the chronograph second hand at 6 o’clock
to zero position. The chronograph hands can be advanced rapidly by
continuously pressing button “A” or “B”.
53
0S90 Operating Instructions (Chronograph)
4. Once the hands have been zeroed, return the crown to the normal
position.
* Do not push the crown to the normal position while the chronograph
1/100 second hand and the chronograph second hand return to zero
position. Each hand stops on the way when crown is returned to the normal
position and these positions are recognised as zero position.
54
JS00 OPERATING INSTRUCTIONS (CHRONOGRAPH)
Top Right TR
Chronograph 30 minute
counterhand
24 hour dial
Chronograph 60
seconds counterhand
Position A
Position B
Bottom Right BR
55
JS00 Operating Instructions (Chronograph)
To set the time:
1. Gently pull out the crown to position B.
2. Turn the crown either way to correct time.
3. Push in crown to position A.
For timing events up to 30 minutes
1. To start chronograph press button TR.
2. To stop chronograph press button TR.
3. To return hand to zero position press button BR.
56
JS00 Operating Instructions (Chronograph)
Chronograph zero set:
This procedure is only necessary when the battery is replaced, or when
the chronograph hands do not return to the 12 o’clock position.
1. Gently pull out the crown to position B.
2. Push TR button which will advance the 60 second counterhand to the
12 o’clock position. Please note each push of the TR button will advance
the 60 second counterhand 1 second. Alternatively depress and hold the
button and the hands advance continuously.
3. When hands are aligned to 12 o’clock position push in crown
to position A.
57
Cal. JS24 Operating Instructions
58
Setting the day and time:
1. Pull the crown out to the 1st Click Position.
2. Turn the crown to set hour and minute hands.
3. When the crown is pushed back to the normal position in synchronization with a
time signal, second hand begins to run.
Using the stopwatch:
This stopwatch is able to measure and display time in 1 second intervals up to a
maximum of 29min 59sec.
The Stopwatch will stop automatically after running continuously for 30 minutes.
Measuring time with the stopwatch
1. Press button "A" to start the stopwatch.
2. The stopwatch can be started and stopped each time button "A" is pressed.
3. Pressing button "B" resets the stopwatch and stopwatch minute and second hands
return to their ZERO positions.
* Button A / B does not function during resetting the stopwatch.
59
Cal. JS24 Operating Instructions continued . . .
Stopwatch reset
This procedure should be performed when the stopwatch second hand does not
return to the ZERO second position after the stopwatch has been reset, and
including after the battery has been replaced.
1. Pull the crown out to the 1st Click Position.
2. Press button "A" to set the stop watch second hand to the ZERO position.
*The stopwatch minute hand is syncronized with stopwatch second hand.
*The stop watch second hand can be advanced rapidly by continuously pressing
button "A".
3. Once the hands have been zeroed, reset the time and return the crown to its
normal position.
60
JS25 / JS15 / JS05 OPERATING INSTRUCTIONS (CHRONOGRAPH)
Second hand
Button A
24 hour hand
Stopwatch
minute hand
Stopwatch
second hand
2nd position
7
1st position
Normal position
Calendar
Button B
61
JS25 / JS15 / JS05 Operating Instructions (Chronograph)
JS15
Stopwatch
minute hand
JS05
Second hand
Stopwatch
minute hand
24 hour hand
Calendar
24 hour hand
7
7
Second hand
Stopwatch
second hand
Stopwatch
second hand
62
Calendar
JS25 / JS15 / JS05 Operating Instructions (Chronograph)
Setting the time:
1. Pull the crown out to the 2nd Click Position.
2. Turn the crown to set hour and minute hands.
3. After the time has been set, push the crown back to the Normal position.
Setting the date
1. Pull the crown out to the 1st Click Position.
2. Turn the crown clockwise to set the date.
* If the date is set between the hours of around 9:00 PM and 1:00 AM, the
date may not change on the following day.
3. After the date has been set, push the crown back to the Normal position.
63
JS50 / JS54 Operating Instructions (Chronograph)
Measuring time with the stopwatch:
1. Press button “A” to start the stopwatch.
2. The stopwatch can be started and stopped each time button “A”
is pressed.
3. Pressing button “B” resets the stopwatch and stopwatch minute and
second hands return to their ZERO positions.
64
JS50 / JS54 Operating Instructions (Chronograph)
* Button A / B does not function during resetting the stopwatch.
“A”
RESET
TIME MEASUREMENT
STOP
“A”
“A”
“B”
Stopwatch reset (incl. after replacing battery)
This procedure should be performed when the stopwatch second hand
does not return to the ZERO second position after the stopwatch has been
reset, and including after the battery has been replaced.
65
JS50 / JS54 OPERATING INSTRUCTIONS (CHRONOGRAPH)
Button A
Second hand
Minute hand
Hour hand
Stopwatch
second hand
1st click position
Normal position
Stopwatch
minute hand
24 hour hand
Button B
66
JS50 / JS54 Operating Instructions (Chronograph)
Setting the time:
1. Pull the crown out to the 1st Click Position.
2. Turn the crown to set hour and minute hands.
3. When the crown is pushed back to the normal position in
synchronisation with a time signal, second hand begins to run.
Using the stopwatch
This stopwatch is able to measure and display time in 1 second units up to
maximum of 29 min 59 sec.
The stopwatch will stop automatically after running continuously
for 30 minutes.
67
JS50 / JS54 Operating Instructions (Chronograph)
1. Pull the crown out to the 1st Click Position.
2. Press button “A” to set the stop watch second hand to the ZERO
position.
*The stopwatch minute hand is synchronised with stopwatch second hand.
*The stopwatch second hand can be advanced rapidly by continuously
pressing button “A”
3. Once the hands have been zeroed, reset the time and return the crown
to its normal position.
68
0SA4 OPERATING INSTRUCTIONS (CHRONOGRAPH)
Minute hand
24 hour hand
Button A
1st click position
Chronograph
minute hand
Hour hand
Chronograph
hour hand
Chronograph
second hand
Button B
Second hand
or 1/20 chronograph hand
2nd click position
Normal crown position
Calendar
69
0SA4 Operating Instructions (Chronograph)
Setting the time:
1. Pull the crown out to the 2nd Click Position so that the second hand stops at ZERO position.
2. Turn the crown to set hour and minute hands.
3. When the crown is pushed back to the normal position in synchronization with a time
signal,small second hand begins to run.
Setting the Date:
This chronograph is able to measure and display time in 1/20(1/1) second united up to max
4 hrs 59 min 59 sec. The retrograde chronograph 1/20(1/1) second hand keeps continuously
for 60 seconds after starting, and then stops at ZERO position.
70
0SA4 Operating Instructions (Chronograph)
Using the Chronograph
This chronograph is able to measure and display time in 1/20(1/1) second united up to max
4 hrs 59 min 59 sec.
The retrograde chronograph 1/20(1/1) second hand keeps continuously for 60 seconds after
starting, and then stops at ZERO position.
71
0SA4 Operating Instructions (Chronograph)
Measuring time with the chronograph
1. Press button “B” to change the watch to the chronograph mode. The second hand stops at
the ZERO second position, and changes to the chronograph 1/20(1/1) second hand.
2. The chronograph can be started and stopped each time button “A” is pressed. The
chronograph 1/20(1/1) second hand stops at the ZERO second position 60 seconds after
starting, When button “A” is pressed to stop the chronograph, the chronograph 1/20(1/1)
second hand advances rapidly to display the measured time.
3. Pressing button “B” resets the chronograph and all hands return to their ZERO positions.
* Moving of the retrograde chronograph is a demo Actual measurement will be shown
when it stopped / STOP button is pushed.
72
0SA4 Operating Instructions (Chronograph)
“A”
“A”
RESET
TIME MEASUREMENT
“B”
73
STOP
“A”
“B”
0SA4 Operating Instructions (Chronograph)
Setting the time:
1. Pull the crown out to the 2nd Click Position so that the second hand stops at ZERO position.
2. Turn the crown to set hour and minute hands.
3. When the crown is pushed back to the normal position in synchronization with a time
signal,small second hand begins to run.
Setting the Date:
This chronograph is able to measure and display time in 1/20(1/1) second united up to max
4 hrs 59 min 59 sec. The retrograde chronograph 1/20(1/1) second hand keeps continuously
for 60 seconds after starting, and then stops at ZERO position.
74
0SA4 Operating Instructions (Chronograph)
Using the Chronograph
This chronograph is able to measure and display time in 1/20(1/1) second united up to max
4 hrs 59 min 59 sec.
The retrograde chronograph 1/20(1/1) second hand keeps continuously for 60 seconds after
starting, and then stops at ZERO position.
75
Y121ES OPERATING INSTRUCTIONS
LIGHT (Button A)
(Button D) START
mo
:08
1212
MODE (Button B)
2
(Button C) RESET
1. 10 digits to display hour, minute, second, date, month, the day of week.
2. 12 hour/24 hour format selectable.
3. Daily Alarm and Hourly Time Signal.
4. Stopwatch.
5. EL Backlight.
76
PRODUCT FUNCTION MODES
mo
:08
1212
Button B
al
:
Button B
Button B
ST
mo
:00
1:00
:08
0000
2
2
1212
2
In any mode, EL backlight illuminates for 3 seconds by pressing A.
In the timekeeping Mode, press D to toggle the time format between 12-hour and
24-hour. It is 24-hour format if indicator of ‘24H’ appears on the screen.
77
ALARM
In the alarm mode, press D button to turn on/off Alarm and Hourly Time Signal.
Following indicators display on the screen when Alarm or Hourly Time Signal is
turned on:
Alarm indicator ( ), or both of them (
turned on at the same time.
) display on the screen if they are
If alarm is turned on, once the preset time is reached, the alarm tone sounds for
20 seconds with alarm indicator ( ) flashes. To stop alarm tone after it starts to
sound, please press B, C or D button.
You can also turn on an Hourly Time Signal that causes the watch to beep every
hour on the hour.
Alarm setting: In the alarm mode, press C button until ‘hour’ digits start to flash,
78
Alarm
which indicates alarm time setting screen, then press D button to adjust hour
values, hold down D button for some time to quickly adjust it. Press C button
again ‘minute’ digits start to flash, then you also need to press D button to adjust
minute values, and hold down D button for some time to quickly adjust minute
values. After this, please press C button to exit alarm time setting screen.
In setting mode, the watch will automatically exit from setting screen if you do
not press any button within 90 seconds.
79
STOPWATCH
The display range of the stopwatch is 59 minutes, 59.99 seconds.
To measure times with stopwatch: In the Stopwatch Mode, you can press D
button to start counting and press D button again to stop counting. Press C
button to reset when Stopwatch stops Counting.
To measuere with split time: in the Stopwatch Mode, press D button to start
counting, and press C button to enter split time. Then press C button again to
exit split time in the process of splitting time, you can press D button to stop
counting. At this time, press C button to display all times of stopwatch and press
C once again to reset.
The stopwatch continues to run, restarting from zero after it reaches its limit,
until you stop it.
Press B button to display other function modes when stopwatch is running.
However, stopwatch continues running in the background.
80
Stopwatch
Elapsed Time
Button D
Button D
Button D
Button D
Button C
stop
restart
stop
clear
Button D
Button C
Button C
Button D
Button C
start
split
split release
stop
clear
start
Split Time
Two Finishes
Button D
Button C
Button D
Button C
Button C
start
split first
runner
finishes
split second runner
finishes
split release
display time
of second
clear
81
Chronograph Reset (Incl. After Replacing Battery)
This procedure should be performed when the chronograph second hand and
chronograph 1/20(1/1) second hand do not return to the ZERO second position after the
chronograph has been reset, and including after the battery has been replaced.
1. Pull the crown out to the 2nd Click Position.
2. Press button “A” to set the chronograph second hand to the ZERO position.
3. Press button “B” to set the chronograph 1/20 second hand to ZERO position.
The chronograph hands can be advanced rapidly by continuously pressing button “A” or “B”.
4. Once the hands have been zeroed, reset the time and return the crown to its normal
position.
5. Press button “B” to check that the chronograph hands are reset to the ZERO position.
* Do not return crown to the normal position while chronograph second hand and 1/20
chronograph second hand return to ZERO position.
Each hands stop on the way when crown are returned to normal position and these
positions are recognized as ZERO position.
82