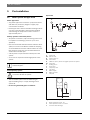
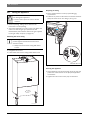
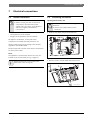
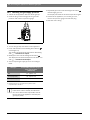
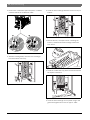
1
6 720 613 085-00.1O Hydronic Gas Condensing Boiler Condens 5000 W ZSB 30-2 A ...| ZWB 37-2 A ... 6 720 644 143 (2010/09) NZ/AU Installation and servicing instructions for contractors 2 | Contents Contents 1 Key to symbols and safety instructions . . . . . . . 5 1.1 Explanation of symbols . . . . . . . . . . . . . . 5 1.2 Safety instructions . . . . . . . . . . . . . . . . . . 5 2 Standard delivery . . . . . . . . . . . . . . . . . . . . . . . . . 6 3 Product details . . . . . . . . . . . . . . . . . . . . . . . . . . . 7 3.1 Intended use . . . . . . . . . . . . . . . . . . . . . . 7 3.2 Explanation of model code . . . . . . . . . . . 7 3.3 Gas type . . . . . . . . . . . . . . . . . . . . . . . . . 7 3.4 Type plate . . . . . . . . . . . . . . . . . . . . . . . . 7 3.5 Description of appliance . . . . . . . . . . . . . 8 3.6 Accessories . . . . . . . . . . . . . . . . . . . . . . . 8 3.7 Dimensions and minimum clearances . . . 9 3.8 Appliance layout . . . . . . . . . . . . . . . . . . 10 3.9 Electrical wiring diagram . . . . . . . . . . . . 12 3.10 Specification ZSB 30-2 ... . . . . . . . . . . . 16 3.11 Specification ZWB 37-2 ... . . . . . . . . . . . 17 3.12 Condensate composition . . . . . . . . . . . . 18 8 Commissioning . . . . . . . . . . . . . . . . . . . . . . . . . 35 8.1 Before commissioning . . . . . . . . . . . . . 36 8.2 Switching the appliance on/off . . . . . . 36 8.3 Starting the central heating . . . . . . . . . 37 8.4 Setting the heating control unit . . . . . . 37 8.5 After commissioning . . . . . . . . . . . . . . . 37 8.6 Appliances with hot water cylinder: setting the hot water temperature . . . . 38 8.7 ZWB appliances - setting hot water temperature . . . . . . . . . . . . . . . . . . . . . 39 8.8 Summer mode (central heating off, DHW only) . . . . . . . . . . . . . . . . . . . . . . . 39 8.9 Frost protection . . . . . . . . . . . . . . . . . . 39 8.10 Holiday mode . . . . . . . . . . . . . . . . . . . . 40 8.11 Fault mode . . . . . . . . . . . . . . . . . . . . . . 40 9 Thermal disinfection on appliances with hot water cylinder . . . . . . . . . . . . . . . . . 41 10 Pump anti-seizing function . . . . . . . . . . . . . . . . 42 4 Regulations . . . . . . . . . . . . . . . . . . . . . . . . . . . . . 19 5 Pre-Installation . . . . . . . . . . . . . . . . . . . . . . . . . . 5.1 Water system and pipe work . . . . . . . . . 5.2 Condensate pipe work . . . . . . . . . . . . . 5.2.1 Internal connections . . . . . . . . . . . . . . . 20 20 22 22 6 Installation . . . . . . . . . . . . . . . . . . . . . . . . . . . . . 6.1 Important notes . . . . . . . . . . . . . . . . . . . 6.2 Checking the size of the expansion vessel . . . . . . . . . . . . . . . . . . . . . . . . . . 6.3 Siting the appliance . . . . . . . . . . . . . . . . 6.4 Pre-installing pipes . . . . . . . . . . . . . . . . 6.5 Fitting the appliance . . . . . . . . . . . . . . . 6.6 Checking the connections . . . . . . . . . . . 24 24 7 Electrical connections . . . . . . . . . . . . . . . . . . . . 7.1 General information . . . . . . . . . . . . . . . . 7.2 Connecting accessories . . . . . . . . . . . . . 7.2.1 Connecting the heating controller or remote control units . . . . . . . . . . . . . . . 7.2.2 Connecting the DHW cylinder . . . . . . . . 7.2.3 Connecting temperature limiter TB 1 from the flow of an underfloor heating system . . . . . . . . . . . . . . . . . . . 6 720 644 143 (2010/09) 25 25 26 28 32 33 33 33 34 34 34 11 Heatronic settings . . . . . . . . . . . . . . . . . . . . . . . 11.1 General information . . . . . . . . . . . . . . . 11.2 Overview of service functions . . . . . . . 11.2.1 Service level 1 . . . . . . . . . . . . . . . . . . . 11.2.2 Service level 2 . . . . . . . . . . . . . . . . . . . 11.3 Description of service functions . . . . . 11.3.1 Service level 1 . . . . . . . . . . . . . . . . . . . 11.3.2 Service level 2 . . . . . . . . . . . . . . . . . . . 43 43 44 44 44 45 45 49 12 Converting the appliance to different gas types . . . . . . . . . . . . . . . . . . . . . . . . . . . . 50 12.1 Gas-type conversion . . . . . . . . . . . . . . . 50 12.2 Setting the gas-air ratio (CO2 or O2) . . 50 12.3 Checking the gas supply pressure . . . . 52 13 Flue gas testing . . . . . . . . . . . . . . . . . . . . . . 13.1 Central heating boost button . . . . . 13.2 Checking flue system for leaks . . . . 13.3 Measuring CO content of flue gas . ... ... ... ... 53 53 53 53 14 Environmental protection . . . . . . . . . . . . . . . . . 54 Contents | 3 15 Inspection/Servicing . . . . . . . . . . . . . . . . . . . . . 55 15.1 Checklist for inspection/servicing (Inspection/Servicing report) . . . . . . . . 56 15.2 Description of various servicing operations . . . . . . . . . . . . . . . . . . . . . . . 57 15.2.1 Retrieving last fault stored (service function 6.A) . . . . . . . . . . . . . . 57 15.2.2 Checking electrodes . . . . . . . . . . . . . . . 57 15.2.3 Strainer in cold water pipe (ZWB) . . . . 57 15.2.4 Plate type heat exchanger (ZWB) . . . . . 58 15.2.5 Heat exchanger . . . . . . . . . . . . . . . . . . 59 15.2.6 Burner . . . . . . . . . . . . . . . . . . . . . . . . . 61 15.2.7 Diaphragm in mixer unit . . . . . . . . . . . . 62 15.2.8 Cleaning condensate trap . . . . . . . . . . 62 15.2.9 Checking the expansion vessel (see also page 25) . . . . . . . . . . . . . . . . . 62 15.2.10 Setting the heating system pressure . . 63 15.2.11 Checking electrical wiring . . . . . . . . . . 63 16 Displays . . . . . . . . . . . . . . . . . . . . . . . . . . . . . . . 64 17 Fault mode . . . . . . . . . . . . . . . . . . . . . . . . . . . . 66 17.1 Troubleshooting . . . . . . . . . . . . . . . . . . 66 17.2 Faults that are shown on the display . . . . . . . . . . . . . . . . . . . . . . . . . . 67 17.3 Faults that are not shown on the display . . . . . . . . . . . . . . . . . . . . 70 17.4 Sensor values . . . . . . . . . . . . . . . . . . . . 71 17.4.1 Outside temperature sensor (for weather-compensated controllers, accessory) . . . . . . . . . . . . . . . . . . . . . . . 71 17.4.2 Flow and DHW sensors . . . . . . . . . . . . 71 17.5 Code Plug . . . . . . . . . . . . . . . . . . . . . . . 71 17.6 Settings for heating output with ZSB 30 ...23 . . . . . . . . . . . . . . . . . . . . . . 72 17.7 Settings for heating output with ZSB 30 ...31 . . . . . . . . . . . . . . . . . . . . . . 72 17.8 Settings for heating output with ZWB 37 ...23 . . . . . . . . . . . . . . . . . . . . . 73 17.9 Settings for heating output with ZWB 37 ...31 . . . . . . . . . . . . . . . . . . . . . 73 18 Commissioning report for the appliance . . . . . 74 Index . . . . . . . . . . . . . . . . . . . . . . . . . . . . . . . . . 76 6 720 644 143 (2010/09) 4 | Contents 6 720 644 143 (2010/09) Key to symbols and safety instructions | 5 1 Key to symbols and safety instructions 1.1 Explanation of symbols Warning symbols Safety instructions in this document are framed and identified by a warning triangle which is printed on a grey background. 1.2 Safety instructions If you smell gas B Turn off gas tap (Æ page 35). B Open windows and doors. B Do not operate any electrical switches. B Extinguish any naked flames. Electrical hazards are identified by a lightning symbol surrounded by a warning triangle. B Leave the building and telephone your gas supply utility and authorised contractor from an outside phone. Signal words indicate the seriousness of the hazard in terms of the consequences of not following the safety instructions. If you smell flue gas from the appliance • NOTICE indicates possible damage to property or equipment, but where there is no risk of injury. B Inform your heating contractor. B Switch off the appliance (Æ page 36). B Open windows and doors. • CAUTION indicates possible injury. Explosive and easily flammable materials • WARNING indicates possible severe injury. • DANGER indicates possible risk to life. Never use or store easily flammable materials (paper, thinners, paints, etc.) near the appliance. Important information Combustion air/ambient air Notes contain important information in cases where there is no risk of personal injury or material losses and are identified by the symbol shown on the left. They are bordered by horizontal lines above and below the text. Additional symbols Symbol Meaning B a step in an action sequence Æ a reference to a related part in the document or to other related documents • a list entry – To prevent corrosion, keep the supply of combustion/ ambient air free of corrosive substances (e.g. halogenated hydrocarbons that contain chlorine or fluorine compounds). Thermal disinfection B Risk of scalding! It is imperative to monitor operation at water temperatures over 60 °C (Æ page 41). a list entry (second level) Table 1 6 720 644 143 (2010/09) 6 | Standard delivery 2 Standard delivery Key: 1 2 3 4 5 6 7 8 9 10 1 2 3 4 5 6 7 9 8 10 6 720 64 4 143- 01 .1O Fig. 1 6 720 644 143 (2010/09) Gas condensing boiler Pre-plumbing jig Mounting rail Pre-plumbing jig for ZWB appliances (for ZSB appliances without cold and DHW water connections) Filling loop with key (ZWB) Adaptors for ZWB appliances (for appliances ZSB without adaptors for cold cold and DHW water connections) Lower cover Pressure relief valve hose (heating circuit) Fixing kit Set of printed documents for the appliance Product details | 7 3 Product details ZSB appliances are boilers for heating. They can be fitted with the diverter valve accessory to connect to an indirectly heated hot water cylinder. ZWB appliances are combi boilers for central heating (CH) and domestic hot water (DHW) heating according to the instantaneous water heating principle. 3.1 Intended use The appliance may only be installed in a sealed unvented central heating system. 3.3 Gas type The code number indicates the gas family according to AS 4552: Code number Wobbe index (WS) (15 °C) 23 12.2 - 55.0 MJ/m3 31 3 Gas type 72.9 - 87.2 MJ/m NG LPG Table 3 This appliance is intended for indoor use only. It is not to be used as a pool heater. LPG type1) Use Using the appliance for any other purpose will be considered incorrect use. Bosch accepts no liability for any damage resulting from such use. Commercial Propane recommended Commercial Butane permitted General Product permitted Universal LPG (U-LPG) permitted The commercial and industrial use of the appliance to generate process heat is not permitted. Table 4 1) according to NZS 5435 3.2 Explanation of model code ZSB 30-2 A 23 S2414 3.4 ZSB 30-2 A 31 S2414 ZWB 37-2 A 23 S2414 The type plate [47] can be found on the inside of the appliance at the bottom right (Æ Fig. 3, page 10). ZWB 37-2 A 31 S2414 Table 2 Z S W B 30 37 -2 A 23 31 S2414 Type plate It contains details of the output of the appliance, the order number, the approval data and the date of manufacture in encoded form. Central heating appliance Cylinder connection DHW heating Condensing boiler technology Output up to 30 kW DHW output up to 37 kW Version Fan-assisted appliance without draught hood Natural gas H Note: Appliances can be converted to LPG. LPG Special number for Australia/New Zealand 6 720 644 143 (2010/09) 8 | Product details 3.5 Description of appliance • Wall mounted boiler; installation independent of chimney location or room size. • Intelligent heating circuit pump control when connected to an weather-dependent heating controller 3.6 Accessories Below is a list of typical accessories for this appliance. You can find comprehensive details of all available accessories in our catalogue. • Heatronic 3 controls with 2-wire BUS • Flue kits • ZWB appliances can be supplied with water preheated by solar energy, Æ page 24 • Weather-compensated controller, e.g. FW 100 • Optimised electronic heating circuit pump with: • Digital time switch, e.g. DT 10 RF, DT 20 RF – 2 proportional pressure curves – 3 constant pressure curves – 6 stages can be selected – Run-dry protection and anti-seizing function • Connecting lead with mains plug • Display • Automatic ignition • Modulating output control • Fully featured safety system provided by Heatronic module with flame failure detection and solenoid valves to EN 298 • No minimum water circulation rate required • Suitable for underfloor heating • Connection option for concentric pipe for flue gas/ combustion air Ø 80/125 mm, Ø 60/100 mm • Variable speed fan • Premix burner • Temperature sensor and temperature control for central heating • Temperature sensor in flow • Safety temperature limiter in 24 V electrical circuit • Pressure relief valve, pressure gauge, expansion vessel • Optional for DHW cylinder temperature sensor (NTC) • Flue gas temperature limiter • DHW priority • Plate type heat exchanger (ZWB) • Motorised three-way valve (ZWB) • Filling loop (ZWB) • Pre-plumbing jig 6 720 644 143 (2010/09) • Room temperature controller, e.g. FR 10, FR 110 • Cylinder temperature sensor SF 2 for third party cylinders • Optional Diverter Valve Kit for DHW cylinder connection including cylinder temperature sensor (ZSB only). Product details | 9 3.7 Dimensions and minimum clearances 5 125 min. min. A 80 5 760 780 85 B 2 440 200 0 55 3 360 C 1 340 6 720 644 143-02.2J Fig. 2 1 2 3 A B C Pre-plumbing jig Casing Fascia Additional 30 mm above elbow Using 100 mm flue kit: 1112 mm / 120 mm flue kit: 1152 mm 20 mm to reversible door / 600 mm front clearance for service 6 720 644 143 (2010/09) 10 | Product details 3.8 Appliance layout 30 29 28 27 31 26 32 25 33 24 34 23 35 22 36 21 37 20 38 39 19 40 18 41 17 42 16 43 15 44 14 45 13 46 47 49 1 2 3 12 4 11 5 6 10 6 720 644 143-03.1O 7 Fig. 3 6 720 644 143 (2010/09) 8 9 48 Product details | 11 Key to figure 3: 1 2 3 4 5 6 7 8 9 10 11 12 13 14 15 16 17 18 19 20 21 22 23 24 25 26 27 28 29 30 31 32 33 34 35 36 37 38 39 40 41 42 43 44 45 46 47 48 49 Heatronic 3 Main switch Burner ON indicator Service button Central heating boost button Here, a weather-compensated control unit or a time switch (accessories) can be plugged in CH Flow temperature control DHW temperature control Holiday button eco button reset button Display DHW (ZWB) CH flow Adaptor for condensate hose Condensate syphon Gas supply pressure test port Gas valve DHW temperature sensor Adjustable gas throttle Test point for control pressure Flue gas temperature limiter Fan Flow temperature sensor Expansion vessel Mixer unit Bracket Removable cover Combustion air inlet Flue pipe Sight glass Set of electrodes Heat exchanger Temperature limiter for heat exchanger Access port for cleaning heat exchanger Condensate tray Automatic air vent valve Plate-type heat exchanger (ZWB) Turbine (ZWB) Heating circuit pump 3-way diverter valve Pressure relief valve (heating circuit) Pressure gauge Drain tap Cold water inlet Heating return Type plate Filling loop (ZWB) Gas connection 6 720 644 143 (2010/09) 12 | Product details 3.9 Electrical wiring diagram 9 8 10 11 7 12 6 5 15 17 4 k k 14 16 18 13 3 19 B B 4 2 1 F A 2 1 20 21 ST1 Fig. 4 ZSB 30-2 6 720 644 143 (2010/09) 22 Product details | 13 1 2 3 4 5 6 7 8 9 10 11 12 13 14 15 16 17 18 19 20 21 21 Spark transformer CH temperature control Wiring centre Safety solenoid Safety solenoid Gas valve Fan Flame sense eletrode Spark electrodes Flow NTC Heat exchanger overheat stat. Flue overheat stat. Earth Mains supply Pump Pump control Diverter valve (optional) Pump supply DHW temperature control Fluse slow T 0.5 A Fluse slow T 1.6 A Code plug 6 720 644 143 (2010/09) 14 | Product details 8 9 10 11 7 12 6 5 16 18 17 15 4 14 13 20 eutr iv 3 21 B B 4 2 1 F A 2 Ls Ns 1 22 23 24 Fig. 5 ZWB 37-2 6 720 644 143 (2010/09) 25 19 Product details | 15 1 2 3 4 5 6 7 8 9 10 11 12 13 14 15 16 17 18 19 20 21 22 23 24 25 Spark transformer CH temperature control 230 V room stat/programmer Safety solenoid Safety solenoid Gas valve Fan Flame sense eletrode Spark electrodes Flow NTC Heat exchanger overheat stat. Flue overheat stat. Earth Mains supply DHW sensor Pump Pump control Diverter valve Flow turbine Pump supply DHW temperature control External frost stat (optional) Fluse slow T 0.5 A Fluse slow T 1.6 A Code plug 6 720 644 143 (2010/09) 16 | Product details 3.10 Specification ZSB 30-2 ... Unit kW kW kW MJ/h kW kW kW MJ/h kW MJ/h ZSB 30-2 ... Natural gas Propane 32.1 32.1 31.8 31.8 30.0 30.0 123.4 123.4 8.6 12.4 8.6 12.3 7.7 11.0 31.9 11.5 30.9 45.9 123.4 123.4 Butane 36.6 36.3 34.2 140.5 14.2 14.0 12.6 52.3 35.2 140.5 Max. heat output (Pmax) 40/30 °C Max. heat output (Pmax) 50/30 °C Max. heat output (Pmax) 80/60 °C Max. gas consumption (Qmax), central heating Min. heat output (Pmin) 40/30 °C Min. heat output (Pmin) 50/30 °C Min. heat output (Pmin) 80/60 °C Min. gas consumption (Qmin), central heating Max. heat output (PnW), DHW Max. gas consumption (QnW), DHW Gas supply rate Natural gas (gross heating value 37.8 MJ/m3) m3/h 3.2 Butane/propane (gross heating value 50 MJ/kg) kg/h 2.4 2.8 Permissible gas supply pressure NG kPa 1.1 - 3.0 LPG kPa 2.75 2.75 Expansion vessel Pre-charge pressure kPa 75 75 75 Total capacity l 10 10 10 Calculation values for calculating cross-section to EN 13384 Flue gas mass flow rate, max./min. rated g/s 13.6/3.7 12.8/5.2 12.8/5.2 Flue gas temperature 80/60 °C max./min. rated °C 76/58 76/58 76/58 Flue gas temperature 40/30 °C max./min. rated °C 55/33 55/33 55/33 Residual pump head Pa 80 80 80 CO2 at max. rated output % 9.6 10.8 12.2 CO2 min. rated output % 9.0 10.2 11.5 Flue gas rating group to G 636/G 635 G61/G62 G61/G62 G61/G62 NOx class 5 5 5 Condensate Max. condensate quantity (tR = 30 °C) l/h 2.7 2.7 2.7 pH level, approx. 4.8 4.8 4.8 General data Power supply voltage AC ... V 220 - 240 220 - 240 220 - 240 Frequency Hz 50 50 50 Max. power consumption (central heating mode) W 150 150 150 EMC limit class B B B Noise output level ≤ dB(A) 43 43 43 Appliance enclosure rating IP X4D X4D X4D Max. flow temperature °C Approx. 90 Approx. 90 Approx. 90 Max. permissible operating pressure (PMS) heating kPa 300 300 300 Permissible ambient temperature °C 0 - 50 0 - 50 0 - 50 Nominal capacity of appliance heating l 3.5 3.5 3.5 Weight (excluding packaging) kg 46.5 46.5 46.5 Dimensions, W x H x D mm 440 x 760 x 360 440 x 760 x 360 440 x 760 x 360 Table 5 6 720 644 143 (2010/09) Product details | 17 3.11 Specification ZWB 37-2 ... Unit kW kW kW MJ/h kW kW kW MJ/h kW MJ/h ZWB 37-2 ... Natural gas Propane 32.1 32.1 31.8 31.8 30.0 30.0 123.4 123.4 10.6 15.7 10.5 15.5 9.4 13.9 39.1 57.9 37.0 37.0 147.7 147.7 Max. heat output (Pmax) 40/30 °C Max. heat output (Pmax) 50/30 °C Max. heat output (Pmax) 80/60 °C Max. gas consumption (Qmax), central heating Min. heat output (Pmin) 40/30 °C Min. heat output (Pmin) 50/30 °C Min. heat output (Pmin) 80/60 °C Min. gas consumption (Qmin), central heating Max. heat output (PnW), DHW Max. gas consumption (QnW), DHW Gas supply rate Natural gas H (gross heating value 37.8 MJ/m3) m3/h 3.9 Butane/propane (gross heating value 50 MJ/kg) kg/h Permissible gas supply pressure NG kPa 1.1 - 3.0 LPG kPa Expansion vessel Pre-charge pressure kPa 75 Total capacity l 10 DHW Max. DHW flow rate l/min 13.0 Outlet temperature range °C 40 - 60 Max. cold water inlet temperature °C 60 Max. permissible water supply pressure kPa 1000 Min. inlet pressure kPa 20 Specific flow rate acc. to EN 625 (D) l/min 16.9 Calculation values for calculating cross-section to EN 13384 Flue gas mass flow rate, max./min. rated g/s 16.2/4.5 Flue gas temperature 80/60 °C max./min. rated °C 83/58 Flue gas temperature 40/30 °C max./min. rated °C 60/35 Residual pump head Pa 80 CO2 at max. rated output % 9.7 CO2 min. rated output % 9.1 Flue gas rating group to G 636/G 635 G61/G62 NOx class 5 Condensate Max. condensate quantity (tR = 30 °C) l/h 2.7 pH level, approx. 4.8 Butane 36.6 36.3 34.2 140.5 17.9 17.7 15.9 65.9 42.2 168.5 2.9 3.4 2.75 2.75 75 10 75 10 13.0 40 - 60 60 1000 20 16.9 13.0 40 - 60 60 1000 20 16.9 15.3/6.5 83/58 60/35 80 10.8 10.2 G61/G62 5 15.3/6.5 83/58 60/35 80 12.2 11.5 G61/G62 5 2.7 4.8 2.7 4.8 Table 6 6 720 644 143 (2010/09) 18 | Product details Unit General data Power supply voltage Frequency Max. power consumption (central heating mode) EMC limit class Sound pressure level (in heating mode) Appliance enclosure rating Max. flow temperature Max. permissible operating pressure (PMS) heating Permissible ambient temperature Nominal capacity of appliance heating Weight (excluding packaging) Dimensions, W x H x D 220 - 240 50 220 - 240 50 220 - 240 50 W ≤ dB(A) IP °C 160 B 45 X4D Approx. 90 160 B 45 X4D Approx. 90 160 B 45 X4D Approx. 90 kPa °C l kg mm 300 0 - 50 3.75 48.5 440 x 760 x 360 300 0 - 50 3.75 48.5 440 x 760 x 360 300 0 - 50 3.75 48.5 440 x 760 x 360 3.12 Condensate composition Material Value [mg/l] Ammonium 1.2 ≤ 0.01 Cadmium ≤ 0.001 Chrome ≤ 0.005 Halogenated hydrocarbons ≤ 0.002 Hydrocarbons 0.015 Copper 0.028 Nickel 0.1 Mercury ≤ Sulphate 0.0001 1 Zinc ≤ 0.015 Tin ≤ 0.01 Vanadium ≤ 0.001 pH value Table 7 6 720 644 143 (2010/09) 4.8 Butane AC ... V Hz Table 6 Lead ZWB 37-2 ... Natural gas Propane Regulations | 19 4 Regulations Where no specific instruction is given, reference should be made to the following standards: • AS 5601 Gas Installations, • AS 1596 LPG storage and handling, • AS 4552 Gas fired water heaters for hot water supply and/or central heating, • AS/NZS 3000 Electrical Installations, • AS1697 Installation and maintenance of steel pipe systems for gas, • AS 4032 Water supply - valves for the control of hot water supply temperatures, • AS 3498 Authorization requirements for plumbing products - water heaters and hot-water storage tanks. • AS 1910 Water supply - float control valves for use in hot and cold water, AS 3500 National plumbing and drainage code. 6 720 644 143 (2010/09) 20 | Pre-Installation 5 Pre-Installation 5.1 Water system and pipe work System fill A Plastic pipe work: 1 • Any plastic pipe work must have a polymeric barrier with 600 mm (minimum) length of copper pipe connected to the boiler. 5 2 SV • Plastic pipe work used for underfloor heating must be correctly controlled with a thermostatic blending valve limiting the temperature of the circuits to approximately 50 °C. CV CV SV 4 3 Primary systems connections/valves: B • All system connections, taps and mixing valves must be capable of sustaining a pressure up to 3 bar (300 kPa). • Bosch recommends that thermostatic radiator valves (TRV’s) be used on all radiators within the sleeping accommodation but not the radiator where the room thermostat is sited. This must be fitted with lockshield valves and left open. • A drain point is required at the lowest part of the system. • An air vent is required at all the high points in the system. The boiler is equipped with an automatic internal by-pass. Sealed primary system: NOTE: Artificially softened water must not be used to fill the CH system. 6 1 CV D SV 7 6720644143-41.1J Fig. 6 A AA B CV D SV 1 2 3 4 5 6 7 System fill Auto air vent System make up Check valve 1000 mm (39 in.) above the highest point of the system Stop valve Heating return Hose union Temporary hose Test point Mains supply Make-up vessel Fill point 1 • The CH sealed system must be filled using an approved filling loop or comply with figure 6 for system fill. 2 6720644743-09.1Wo • Do not use galvanised pipes or radiators. 3 Fig. 7 1 2 3 6 720 644 143 (2010/09) Additional expansion vessel Boiler expanison vessel - CH Extra expanison vessel - CH return Pressure relief discharge- Pre-Installation | 21 S and Y plan systems: NOTE: The boiler is fitted with its own internal bypass. 3 2 NOTE: B A drain point should be fitted at the lowest part of the heating circuit and beneath the boiler. 7 6 5 Optional diverter valve This boiler is designed to operate on a sealed system only and will require a second return pipe from the water cylinder to the wall mounting frame. 6720644143-40.1J Fig. 10 Hot water supplied to sanitary fixtures In accordance with AS 3498 a temperature control device such as a tempering valve must be fitted when hot water is supplied to sanitary fixtures used primarily for the purposes of personal hygiene. 3 2 System layout with optional internal diverter valve (not supplied with boiler) Legend to Fig. 8 to Fig. 10: 1 2 3 4 5 6 7 Diverter valve Radiater valve (flow) Lock shield valve (return) Bypass Boiler flow Cylindr return Heating return 1 M M 4 6720644143-39.1J Fig. 8 S plan layout 3 2 1 M 6720644143-38.1J Fig. 9 Y plan layout with external diverter valve 6 720 644 143 (2010/09) 22 | Pre-Installation 5.2 Condensate pipe work NOTE: B Where a new or replacement boiler is being installed and freezing conditions are possible, access to an internal drain “gravity discharge” point should be one of the factors considered in determining boiler location. 1 2 3 20mm 6 4 B The condensate pipe must be a minimum of 40 mm Ø plastic pipe. 40mm Ø B The condensate pipe work must fall at least 50 mm per metre towards the outlet and should take the shortest practicable route. B Ensure that there are no blockages in the pipe run. Key to condensate illustrations 1 Condensate discharge 2 Air gap (20mm) 3 Tundish 4 Self sealing device 5 Dishwasher connection 6 Vent stack Fig. 11 Disposal to soil vent stack - vertical position 1 2 3 20mm 6 4 40mm Ø Table 8 5.2.1 6720646195-18.1Wo 40mm Ø Internal connections Where there is the possibility of freezing conditions and In order to minimise the freezing risk during prolonged cold spells, the following methods of installing condensate drainage pipe should be adopted, in order of priority. Wherever possible, the condensate drainage pipe should be routed and terminated so that the condensate drains away from the boiler under gravity to a suitable internal soil and vent stack. A suitable permanent connection to the foul waste pipe should be used. A self sealing device should be incorporated in the drainage path, if possible, in an upright position. A tundish should be used as a suitable air gap just before the self sealing device. The self sealing device can be used on a gradient as long as it preceded by a vertically mounted tundish. 6 720 644 143 (2010/09) 6720646195-19.1Wo Fig. 12 Disposal to soil vent stack - on gradient Pre-Installation | 23 Alternatively if the first option is not possible an internal kitchen or bathroom waste pipe can be used. 1 20mm 2 3 4 40/50mm Ø 40mm Ø 6720646195-16.1Wo Fig. 13 Disposal to a waste pipe A washing machine waste pipe or bifurcated pipe etc. can also be used. 1 20mm 2 3 4 40/50mm Ø 5 6720646195-17.1Wo Fig. 14 Bifurcated pipe disposal 6 720 644 143 (2010/09) 24 | Installation 6 Installation DANGER: Risk of explosion! B Isolate the gas supply before working on gas-carrying components. B Check for leaks before working on gascarrying components. Installation, power connection, connection on the gas and flue gas side and commissioning must only be carried out by a contractor approved for such work by the local gas or power supply utility. Anti-freeze The following anti-freeze fluids are permitted: Product Concentration Varidos FSK 22 - 55 % Alphi - 11 see manufacturer’s instructions Glythermin NF 20 - 62 % Table 10 Corrosion inhibitor The following corrosion inhibitors are permissible: 6.1 Important notes B Prior to installation, obtain the approval of the gas supply utility. Supply of water preheated by solar energy (only ZWB) WARNING: Risk of scalding! Hot water can lead to severe scalding. NOTE: Excessive temperatures through water preheated by solar energy can damage the equipment. B Install a solar transfer valve upstream of the appliance and set to 60 °C. B To prevent excessive lime scale being deposited, set the thermostatic mixer to 55 °C when encountering a total hardness of 15 °dH or higher. Heating system water Unsuitable fill and top-up water in the heating system can result in the heat exchanger scaling up and failing prematurely. Hardness range Water treatment soft (≤ 8.4 °dH) not required medium (8.4 - 14 °dH) recommended hard (≥ 14 °dH) required Table 9 6 720 644 143 (2010/09) Designation Concentration Fernox see supplier information Sentinel see supplier information Table 11 Open vented heating systems B Open vented heating systems must be converted to sealed systems. Gravity fed heating systems B Connect the appliance to the existing pipework via a low loss header with a dirt separator. Underfloor heating systems B The appliance is suitable for underfloor heating systems; observe permissible flow temperatures. If a room thermostat is used B Do not fit a thermostatic radiator valve to the radiator in the primary room. To increase efficiency of the sysetm, thermostatic radiator valves should be used on all other radiators. Sealants In our experience, adding sealants to the heating water may result in problems (deposits in the heat exchanger). We therefore advise against using them. Water circulation noises To prevent water circulation noises: B Fit an overflow valve, or, with two-pipe heating systems, a 3-way valve to the radiator furthest from the boiler. Installation | 25 Mono-lever taps and thermostatic mixer taps All types of mono-lever taps and thermostatic mixer taps can be used. 6.3 Siting the appliance Regulations concerning the installation site LPG B Observe relevant national regulations. To protect the appliance against excessive pressure: B Consult the flue kit installation instructions for details of minimum clearances required for flue gas routing. B Fit a pressure regulator with a safety valve. 6.2 Checking the size of the expansion vessel The integrated expansion vessel is pre-charged to 0.75 bar (75 kPA). Where the system volume is more than 100 litres or exceeds 2.65 bar (265 kPa) at maximum heating temperature, an additional expansion vessel must be fitted as close as possible to the appliance in the central heating return. All expansions vessels must have the same pressure. B Do not install the appliance outside. If the appliance is fitted into a cupboard or a compartment is built around the compliance after installation, then the compartment must be built from or lined with a non-combustible material. Combustion air In order to prevent corrosion, the combustion air must not contain any corrosive substances. Substances classed as corrosion-promoting include halogenated hydrocarbons which contain chlorine and fluorine compounds. They may be found in solvents, paints, adhesives, aerosol propellants and household cleaners, for example.. Surface temperature The maximum surface temperature of the appliance is below 85 °C. Therefore no special safety measures are required to protect flammable materials and fitted furniture. Ventilation This is a room sealed appliance and does not require any air for combustion from inside the property. There is no need for ventilation openings to be provided in the compartment because of the low heat loss from the appliance casing, if the clearances shown are maintained (Æ Section 3.7, Page 9) 6 720 644 143 (2010/09) 26 | Installation Gas and water connections Pre-installing pipes 340 B Position mounting plate against the wall, observing minimum side clearances of 100 mm (Æ page 9). B Mark out four holes: 75 55 28 B Hook mounting rail into the mounting plate. Ø 3/4" Ø 1/2" Ø 3/4" Ø 1/2" Ø 3/4" 85 6.4 – One of holes A – One of holes B 65 65 65 65 – Hole C 364 – Hole D B Drill Ø 10 mm holes. 158 A B R 1/2" R 3/4" R 1/2" R 3/4" 120 R 3/4" 370 6 720 644 143-07.1O Fig. 16 Pipe connections Additional adaptors are provided in the fittings kit for easy connection. It is very important to ensure that pipes are not secured in such a way that the fittings come under strain. C D 6 720 615 662-06.1O Fig. 15 Mounting plate B Secure mounting plate with mounting rail to the wall using the screws provided; do not tighten the two lower screws. B Hook in pre-plumbing jig and tighten screws. 6 720 644 143 (2010/09) Installation | 27 Pipework behind the appliance 1 2 3 2 3 The pipes can be routed behind the appliance in the guide on the mounting plate (Æ Fig. 18). 2 2 3 1 4 4 5 11 10 9 8 7 6 5 6 720 644 143-05.1O Fig. 17 1 2 3 4 5 6 7 8 9 10 11 Pipe connections Pre-plumbing jig Adaptor BSP 3/4" tapered thread with union nut G3/4" and olive to adapt to local piping connections Adaptor BSP 1/2" tapered thread with union nut G1/2" and olive (ZWB) to adapt to local piping connections Pressure relief valve drain Heating return ZWB: Cold water connection ZSB: Cylinder return Filling loop (ZWB) Gas connection ZWB: DHW connection ZSB: Cylinder flow Heating flow Condensate connector B The pipe for gas supply must be larger than 18 mm in diameter. B For filling and draining the system, fit drain & fill valves at the lowest point of the system. 6 6 720 644 143-10.1O Fig. 18 1 2 3 4 5 6 Pipework Heating flow ZWB: DHW ZSB: Cylinder flow Gas ZWB: Cold water ZSB: Cylinder return Heating return Filling loop (ZWB) 6 720 644 143 (2010/09) 28 | Installation 6.5 Preparing for fixing Fitting the appliance NOTE: Dirt and corrosion in the pipework can damage the appliance. B Flush out the system to remove all dirt residues. B Place sealing washers on the pre-plumbing jig connections. B Pull lever on pressure relief valve connection forwards and push down as far as it will go (Æ Fig. 12). B Remove packing, taking care to observe the instructions on the packing. B Check the destination country on the type plate and make sure that the gas type specified on the identification plate matches that of the gas supplied by the gas utility company (Æ page 10). Removing the outer casing The casing is secured with two screws to prevent against unauthorised removal for electrical safety. B Always secure the outer casing with these screws. B Untighten the screws. B Lift bracket and remove casing towards the front. 2. 6 720 644 143-12.1O Fig. 20 Securing the appliance B Hook appliance into the mounting rail at the top and position it at the bottom on the prepared pipework connections. B Tighten the union nuts on the pipe connections. 3. 1. 1. 6 720 644 143-06.1O Fig. 19 6 720 644 143 (2010/09) Installation | 29 Drain from pressure relief valve (heating circuit) Creating the condensate drain B Push lever on slider up until catch [1] rests on metal bracket [2] (Æ Fig. 13). B Push the condensate hose into the adaptor on the pre-plumbing jig. B Create the drain. B Do not use copper pipe. CAUTION: B Do not modify or seal off drain pipes. B Hoses must always slope downwards. 1 2 6 720 644 143-08.1O Fig. 21 B Route the drain line where it will be easily visible in the frost-protected area to a drainage point. WARNING: Risk of scalding Hot water or steam can lead to scalding B Stay clear of the pressure relief outlet during operation of the appliance. 6 720 644 143-15.1O Fig. 22 NOTE: B Ensure there are no blockages in the pipe run. B Insulate external pipework when freezing conditions can occur. 6 720 644 143 (2010/09) 30 | Installation Fitting the filling loop (ZWB) Filling the heating circuit (ZWB) B Close the isolating valves on the mains water inlet [9] and the CH return [1] connections. B Ensure that all system and boiler drain points are closed. B Remove the blanking plugs [2]. B Tigthen screw [1] on the filling loop as far as it will go (Æ Fig. 24). B Place the filter [7] into the inlet side of the filling loop [4] ensuring that the filter mesh faces into the filling loop. B Fit the filling loop [4] to the mains water inlet [9] and CH return [1] connections. Ensure that the filling loop is completely pushed into the stop tabs [6, 3] on both sides of the filling loop. B Fit two screws and washers [8] to each of the two connections [9] and [1]. Do not try to turn the brass hexagon connectors. B Open the cold water supply tap [3] and heating return tap [2]. B Insert key [4] in the filling direction so the arrow points to symbol . B Turn key [4] to position . B Fully undo screw [1] on the filling loop and fill the heating circuit to a pressure of 1 - 2 bar. 1 1.1 2 3 2 4 1 3 5 9 8 7 4 6 6 720 644 143-26.1O Fig. 23 6 720 644 143-13.1O Fig. 24 B After filling, turn in screw [1] as far as it will go. 6 720 644 143 (2010/09) Installation | 31 B Turn key [4] to position lower cover. , remove and insert into the Connecting the flue pipe B Push on the flue gas accessories and secure with the screws supplied. For more precise details of connecting the flue, refer to the installation instructions for the flue routing manual. 2 6 720 644 143-14.1O 1 Fig. 25 Fitting the lower cover B Push the lower cover into the two guide rails at the bottom of the appliance. 6 720 615 886-22.1O Fig. 27 1 2 Fitting the flue kit Flue/adaptor Screws B Check the flue gas path for tightness (Æ chapter 13.2). 6 720 644 143-18.1O Fig. 26 6 720 644 143 (2010/09) 32 | Installation 6.6 Checking the connections Water connections B Open the heating flow and return valves and fill the heating system. B Check sealing points for leaks (testing pressure: max. 2.5 bar (250 kPA) at the pressure gauge). B Open the cold water valve on the appliance and a turn on a hot water tap until water runs out. Max pressure: 10 bar (1000 kPA). Gas supply pipe B Close the gas valve to protect the gas valve from pressure damage. B Check sealing points for leaks. B Release the pressure on the gas supply pipe. 6 720 644 143 (2010/09) Electrical connections | 33 7 Electrical connections 7.1 General information DANGER: Risk of electric shock! 7.2 Opening the Heatronic unit B Before carrying out work on electrical components, disconnect the power supply (230 V AC) (fuse, circuit breaker) and secure against unintentional reconnection. • Supply: 220 - 240 V, 50 Hz. Connecting accessories CAUTION: Cable offcuts can damage the Heatronic. B Always strip cables away from the Heatronic. B Slide the clip down and pivot the Heatronic. • The appliance must be earthed. • All pipes to the appliance must be earthed. All appliance modulation, control and safety components are tested and ready-wired for use. 6 720 644 143-34.1O Observe safety measures according to the relevant regulations and AS/NZS 3000. No other electrical consumer units may be connected to the same power cable. Fuses The appliance is protected by three fuses. They are located on the circuit board (Æ Fig. 4, page 12). Replacement fuses can be found on the back of the cover (Æ Fig. 29). Fig. 28 B Remove screws, unhook cable and remove cover. 1. 1. 2. 1. 6 720 612 659-15.1R Fig. 29 6 720 644 143 (2010/09) 34 | Electrical connections B To provide anti-splash protection (IP), always cut cable grip to fit cable diameter. 8-9 7.2.2 Connecting the DHW cylinder Replace existing cylinder temperature sensor with Bosch cylinder temperature sensor. Cylinders with Bosch cylinder temperature sensors are connected directly to the appliance PCB. 5-7 B Snap off the plastic tongue. 10-12 B Insert the cylinder temperature sensor lead. 13-14 6 720 612 259-30.1R Fig. 30 B Plug the connector into the PCB. B Feed cable through cable grip and connect as appropriate. B Secure cable in cable grommet by means of cable grip. 7.2.1 Connecting the heating controller or remote control units Only operate this appliance with a Bosch controller. Heating controller FW 100 can also be mounted right at the front in the Heatronic 3. For installation and electrical connection, see the relevant installation instructions. 6 720 612 659-18.3O Fig. 31 7.2.3 Connecting temperature limiter TB 1 from the flow of an underfloor heating system Only for underfloor heating systems connected directly to the appliance. B LZ NZ B LS NS 4 2 PR PO NP LP 1 F 9 A 8 7 1 2 C J TB1 6 720 612 659-19.2O Fig. 32 If the temperature limiter trips, central heating and DHW modes are interrupted. 6 720 644 143 (2010/09) Commissioning | 35 8 Commissioning 7 8 9 6 5 4 3 reset 10 2 eco 11 1 12 13 20 19 18 14 17 16 15 6 720 644 143-17.1O Fig. 33 1 2 3 4 5 6 7 8 9 10 11 12 13 14 15 16 17 18 19 20 Flow temperature control DHW temperature control Chimney sweep button Service button Burner ON indicator Main switch Automatic air vent valve Display Pressure gauge reset button eco button Holiday button Drain from pressure relief valve (heating circuit) Gas tap CH return isolator Filling loop (ZWB) Cold water tap (ZWB), cylinder return (ZSB) DHW connection (ZWB), cylinder flow (ZSB) CH flow isolator Condensate hose 6 720 644 143 (2010/09) 36 | Commissioning 8.1 Before commissioning NOTE: Commissioning without water destroys the appliance! B Never run the appliance without water in it. 8.2 Switching the appliance on/off Switching on B Switch appliance on at the main switch. The display shows the heating water flow temperature. B Adjust pre-charge pressure of expansion vessel to static head of the heating system (Æ page 25). B Open cold water tap (Æ Fig. 33, [17]) and one DHW tap until water flows out. B Open heating flow and return taps [19 and 15] and fill heating system to 1 to 2 bar (100 - 200 kPa) (via filling loop [16]) and close filling tap. B Bleed radiators. B Top up heating system to pressure of 1 - 2 bar (100 200 kPa). B Check that the gas type specified on the type plate matches that of the gas supply. B Open gas tap [14]. B Do not operate the appliance if the flue terminal fitted on the outside wall or roof is obstructed or damaged. B Check that the pressure relief connector, located on the right hand side at the bottom of the wall frame, is in its up position. B Check that the condensate pipe has been connected to the adaptor. B Briefly open the pressure relief valve to test its operation. 3 2 1 4 5 6 max 6 720 613 896-05.1O B Open all system radiator valves. Fig. 34 When the appliance is switched on for the first time, it performs a once-only venting sequence. This involves the heating circuit pump switching on and off at intervals (for approx. 8 minutes). The display shows in alternation with the flow temperature. B Open automatic air vent valve [7] and close again after venting (Æ page 35). If the display shows in alternation with the flow temperature, the trap filling function is active (Æ page 48). Switching off the appliance B Switch appliance off at the main switch. The display goes out. B If the appliance is to be switched off for a longer period of time: observe correct frost protection procedures (Æ chapter 8.9). 6 720 644 143 (2010/09) Commissioning | 37 8.3 Starting the central heating 8.4 The maximum flow temperature can be matched to the heating system by the flow temperature controller. The current flow temperature is shown on the display. Setting on flow tem-perature controller Flow temperature 1 Approx. 35 °C 2 Approx. 43 °C 3 Approx. 50 °C Setting the heating control unit Follow the operating instructions for the heating controller used. Those instructions will tell you B how to set the operating mode and the heating curve for weather-dependent controllers, Sample application B how to adjust the room temperature, B how to heat economically and save energy. Underfloor heating system 4 Approx. 60 °C 5 Approx. 67 °C 6 Approx. 75 °C Radiator heating system max. Approx. 90 °C Convector heating system 9 12 h 15 18 6 3 24 h 21 6 720 612 660-07.2O Fig. 36 Table 12 With underfloor heating systems, take care to observe the maximum permissible CH flow temperatures. B Turn flow temperature controller maximum flow temperature. to adjust the reset eco 3 2 1 3 4 2 5 4 e 6 1 6 max min max 8.5 After commissioning B Check the gas supply pressure (Æ page 52). B Check the condensate drain to ensure that condensate runs out. If that is not the case, switch the main switch off and on again. This activates the siphon filling program (Æ page 48). Repeat this procedure several times until condensate starts running out. B Record the settings in the commissioning report (Æ page 74). B Affix the “Heatronic settings” label to the casing in a clearly visible position (Æ page 43). 6 720 644 143-27.1O Fig. 35 When the burner is firing, the green indicator lamp lights up. 6 720 644 143 (2010/09) 38 | Commissioning 8.6 Appliances with hot water cylinder: setting the hot water temperature eco button Pressing and holding the eco button until it lights up switches between Comfort mode and Economy mode. WARNING: Danger of scalding! Comfort mode, Eco button is not lit (default setting) B In normal operation, do not set the temperature higher than 60 °C. In Comfort mode, the hot water cylinder has priority. The hot water cylinder is heated to the set temperature first. Then the appliance switches to central heating mode. B Set the DHW temperature on the DHW temperature control . The set DHW temperature flashes on the display for 30 seconds. reset eco 3 4 2 1 3 2 5 6 max 1 4 e 6 max 6 720 644 143-28.1O Fig. 37 To prevent bacterial contamination such as legionella, we recommend setting the DHW temperature controller to at least “6” (60 °C). This setting ensures economical and convenient DHW heating. DHW thermostat DHW temperature min Approx. 5 °C (frost protection) e Approx. 55 °C 6 Approx. 60 °C max. Approx. 70 °C Table 13 6 720 644 143 (2010/09) Economy mode, Eco button lit In Economy mode, the appliance switches between central heating mode and hot water mode every ten minutes. Commissioning | 39 8.7 ZWB appliances - setting hot water temperature B Set the DHW temperature on the DHW temperature control . The set DHW temperature flashes on the display for 30 seconds. reset 8.8 Summer mode (central heating off, DHW only) B Note position of CH flow temperature control . B Turn CH flow temperature control anti-clockwise as far as the stop . The heating circuit pump and consequently central heating are switched OFF. However, the DHW supply as well as the power supply to the heating programmer and timer remain 'live'. eco reset 3 2 1 4 3 2 5 1 6 eco 4 e 6 4 3 3 max max 5 2 1 6 min max 6 720 644 143-29.1O e 2 1 6 Fig. 38 max 6 720 644 143-30.1O Fig. 39 DHW thermostat DHW temperature min Approx. 40 °C e Approx. 50 °C max. Approx. 60 °C Table 14 NOTE: Heating system at risk from frost. Additional instructions are contained in the operating instructions for the heating programmer. eco button Pressing and holding the eco button until it lights up switches between Comfort mode and Economy mode. 8.9 Comfort mode, (Eco button is not lit - default setting) B Leave appliance switched on, set CH flow temperature control to position 1 at least. The appliance is held constantly at the set temperature. This means that hot water is available almost instantaneously at the tap. Consequently the appliance will switch on at intervals, even if no hot water is being drawn. Frost protection Frost protection for the heating system: reset eco 5 • With a demand signal Briefly turning a hot water tap on and then off signals demand so that the water is then heated up to the set temperature. The demand signal enables gas and water savings. e 2 6 1 6 max min max Economy mode, Eco button lit • The water is not heated up until a hot water tap is turned on. 4 3 3 2 1 6 720 644 143-31.1O Fig. 40 B Add anti-freeze to the heating water (Æ page 24) and drain the DHW circuit. Additional instructions are contained in the operating instructions for the heating programmer. Frost protection for the cylinder: B Turn DHW temperature controller counter clockwise as far as it will go (5 °C). eco Hot water supplied to sanitary fixtures 3 In accordance with AS 3498 a temperature control device limited to +50 °C, such as a tempering valve must be fitted when hot water is supplied to sanitary fixtures used primarily for the purposes of personal hygiene. 2 1 4 3 5 2 6 max 1 min e 6 max 6 720 644 143-32.1O Fig. 41 6 720 644 143 (2010/09) 40 | Commissioning 8.10 Holiday mode 8.11 Fault mode To switch on holiday mode: All safety, modulation and control components are monitored by the Heatronic system. B Press and hold holiday button on the appliance until it lights up, and switch on holiday mode on the heating controller. In holiday mode, heating and DHW heating are switched off; frost protection remains active (Æ chap. 8.9). If a fault occurs during operation, a warning tone sounds. If you press a button, the warning tone stops. To switch off holiday mode: B Press and hold holiday button on the appliance until it goes out, and cancel holiday mode on the heating controller. The appliance returns to operation in standard mode according to the settings at the heating control unit. The display indicates a fault and the reset button may also flash. If the reset button flashes: B Press and hold the reset button until the display shows . The appliance will start up again and the flow temperature will be displayed. If the reset button does not flash: B Switch the appliance off and then on again at the main switch. The appliance will start up again and the central heating flow temperature will be displayed. If the fault persists: B Contact your authorised contractor or customer service for assistance, providing details of the fault and the appliance (Æ page 7). For an overview of faults, see page 67. For an overview of displays, see page 64. 6 720 644 143 (2010/09) Thermal disinfection on appliances with hot water cylinder | 41 9 Thermal disinfection on appliances with hot water cylinder To prevent the DHW becoming contaminated by bacteria such as legionella, we recommend you pasteurise the system after longer idle periods. With some heating controllers, thermal disinfection can be programmed for a fixed time; see heating controller operating instructions. Pasteurisation covers the DHW system including the draw-off points. For solar DHW cylinders, the solar portion of the cylinder is not covered. WARNING: Risk of scalding! Hot water can lead to severe scalding. B Only carry out thermal disinfection at times when the system is not normally in use. B The water in the cylinder will take a while to cool down to the set DHW temperature as a result of heat loss. Be aware that, after thermal disinfection, the hot water may be hotter than the set temperature. B Turn off all hot water points. B Warn occupants of risk of scalding. B If the heating programmer has a DHW program, set the time and DHW temperature accordingly. B If there is a circulation pump, set it to run continuously. B Turn DHW temperature control clockwise as far as the stop (approx. 70 °C). reset eco 3 2 1 4 3 2 5 6 max 1 4 e 6 max 6 720 644 143-33.1O Fig. 42 B Wait until the water reaches the maximum temperature. B Draw off water in turn from the nearest to the furthest hot water point until hot water has been running out at a temperature of 70 °C for 3 minutes. B Reset DHW temperature control, circulation pump and heating programmer to their standard settings. 6 720 644 143 (2010/09) 42 | Pump anti-seizing function 10 Pump anti-seizing function This function prevents the heating circuit pump and the 3-way valve seizing up during long periods of inactivity. Every time the pump is switched off, a timer starts to briefly switch on the heating circuit pump and the 3-way valve at regular intervals. 6 720 644 143 (2010/09) Heatronic settings | 43 11 Heatronic settings 11.1 General information The Heatronic unit enables easy setting and testing of a large number of appliance functions. For an overview of the service functions see chapter 11.2 on page 44. Settings on the Heatronic Service function Value 3 reset 2 1 eco 3 2 1 3 4 2 5 6 max 1 min 4 5 4 e 6 max 6 720 644 143-11.1O Fig. 43 1 2 3 4 5 Appliance controls Chimney sweep button Service button Display eco button or “Up” for service functions Holiday button or “Down” for service functions System installer: 6 720 644 145 (2010/09) Selecting service functions The service functions are subdivided into two levels (Æ tables 15 and 16 on page 44). B Press and hold the service button until it lights up. The display shows a code such as 1.A (service level 1). B Press eco button and holiday button simultaneously until a code such as 8.A appears (service level 2). B Repeatedly press the holiday button or eco button until the required service function is displayed. B Press and release the chimney sweep button . The chimney sweep button will light up and the display shows the setting for the selected service function. Making a setting B Repeatedly press the holiday button or eco button until the required service function value is displayed. B Enter the value on the “Heatronic settings” label supplied and affix in a clearly visible position. By using the "Heatronic settings" label, you will make it easier for your contractor to set modified service functions during servicing at a later date. Fig. 44 Saving a setting B Press and hold chimney sweep button display shows . until the The unit automatically exits the service level if no button is pressed for 15 minutes. Exiting the service function without saving settings B Briefly press the central heating boost button . The light in the central heating boost button will go out. Restoring standard settings To restore all values from service levels 1 and 2 to the standard settings: B In service level 2, select service function 8.E and save value 00. The appliance starts with the standard setting. 6 720 644 143 (2010/09) 44 | Heatronic settings 11.2.2 Service level 2 11.2 Overview of service functions Access from service level 1; service button lights up. B Press eco button and holiday button simultaneously until a code such as 8.A appears. 11.2.1 Service level 1 B Press service button until it illuminates. Service function Service function Display code Page Display code Page 8.A Software version 49 8.b Code plug number 49 8.C GFA status (not applicable) 49 45 8.d GFA error (not applicable) 49 Map pump step (heat.) 46 8.E Reset all parameters 49 1.E Pump switch mode 46 8.F Permanent ignition 49 2.b Max. flow temperature 46 9.A Operation mode permanent 49 2.C Air purge mode(burner keeps off while air purge mode is on) 47 9.b Actual fan speed 49 9.C Actual heat output 49 2.F Operating mode 47 9.d Start fan speed 49 3.b Anti-cycle time 47 9.E Turbine signal delay (ZWB only) 49 3.C Anti-cycle flow temperature differential 47 9.F Heating circuit pump run-on time 49 3.E Pre heat cycle time (hot water)(ZWB only) 47 3.F Burner off after DHW demand (hot water) (ZWB only) 47 4.F Syphon-fill programme 48 5.A Reset service reminder 48 5.b Fan run-on time 48 6.A Last fault 48 6.d Actual flow rate turbine (ZWB only) 48 6.E Programmer input 48 7.A Fault indicator LED on/off 48 1.A Max. output (heating) 45 1.b Max. output (hotwater - ZWB only) 45 1.C Pump map (heating) 1.d Table 15 Service functions, level 1 6 720 644 143 (2010/09) Table 16 Service functions, level 2 Heatronic settings | 45 11.3 Description of service functions 11.3.1 Service level 1 Service function 1.A: MAX. OUTPUT (HEATING) Some gas supply utilities charge a basic rate based on output. The heating output can be set to any level between min. rated heat output and max rated heat output to limit it to the specific heat requirements. Even if the output is limited, the full rated heat output remains available for hot water. The factory setting is maximum rated heat output: Appliance type Display indication ZSB 30 ... U0 (100%) ZWB 37 ... 84 Table 17 Service function 1.b: Max. output (hot water - only ZWB) The hot water output can be set to any level between minimum rated hot water output and maximum rated hot water output to limit it to the specific hot water requirements. The factory setting is maximum rated output – display shows U0. B Select service function 1.b. B Take the DHW output in kW and the associated parameter from the setting tables (Æ page 72 to 73). B Enter the setting code. B Measure the gas flow rate and compare with the figures for the setting shown. If they do not match, change the setting. B Save the setting. B Enter the selected DHW output on the “Heatronic settings” label supplied (Æ page 43). B Exit service functions. The display will show the CH flow temperature again. B Select service function 1.A. B Refer to the settings tables (Æ page 72) for the output in kW and the corresponding setting code. B Enter the setting code. B Measure the gas flow rate and compare with the figures for the setting shown. If they do not match, change the setting. B Save the setting. B Enter the selected output on the “Heatronic settings” label supplied (Æ page 43). B Exit service functions. The display will show the CH flow temperature again. Service function 1.C: Pump map (heating) The appliance is supplied with this function set to 4 (Proportional pressure high). See pump characteristics below. The pump map indicates how the pump is controlled in heating mode. The pump switches between the various pump speeds so as to reproduce the characteristic curve selected. Changing the pump characteristic can be helpful if a lower pressure difference will guarantee the necessary circulation on the basis of the system dimensions and pump characteristic. In order to save as much energy as possible and to minimise the possibility of water circulation noise, a low characteristic should be chosen. 6 720 644 143 (2010/09) 46 | Heatronic settings The following can be selected as the pump characteristic map: • 00 Pump step adjustable, service function 1.d (Æ page 46 ) • 01 Constant pressure high Service function 1.d: Map pump step (heating) This service function corresponds to the pump speed switch used on conventional heating pumps. However, the setting is only active if function 1.C (Pump map (heating)), is set to 0. The factory setting is 07. • 02 Constant pressure medium • 03 Constant pressure low • 04 Proportional pressure high H • 05 Proportional pressure low 0,6 (bar) 0,5 The factory setting is 04. 0,4 H 0,6 0,3 (bar) 0,5 7 1 0,2 2 0,4 3 4 5 6 2 0,1 0,3 3 0 0 200 400 600 800 1000 1200 0,2 1400 1600 Q (l/h) 6 720 612 126-45.1O 0,1 Fig. 47 Characteristics 0 0 200 400 600 800 1000 1200 1400 1600 Q (l/h) 6 720 612 126-43.1O Fig. 45 H Constant pressure 1-7 H Q Characteristics Pressure Water circulation rate Service function 1.E: Pump switch mode • Pump control mode 0: The BUS controller controls the central heating circuit pump. 0,6 (bar) 0,5 4 • Pump control mode 1: The pump is controlled by the central heating flow temperature control. 5 0,4 0,3 0,2 0,1 0 0 200 400 600 800 1000 1200 1400 1600 Q (l/h) 6 720 612 126-44.1O Fig. 46 Proportional pressure Legend for Fig. 45 and 46: 1-5 H Q Key to Fig. 47: Characteristics Pressure Water circulation rate • Pump control mode 2 (factory setting): For heating systems with room thermostat. The central heating flow temperature control controls only the gas, the pump is not affected. The room thermostat controls both the gas and the pump. The pump and fan have an over-run time of between 15 s and 3 min. • Pump control mode 3: Not applicable. Service function 2.b: Maximum flow temperature The maximum CH flow temperature can be set to between 35 °C and 88 °C. Even if the CH flow temperature control is set higher, the setting entered for 2.b (Max. flow temperature) is not exceeded. The factory setting is 88. 6 720 644 143 (2010/09) Heatronic settings | 47 Service functions 2.C: Air purge mode The first time the appliance is switched on, a onceonlyventing function is activated. The heating pump then switches on and off at intervals. This sequence lasts about 8 minutes. The 2-digit display shows in alternation with the flow temperature. The automatic vent will open during venting and then close once the venting sequence is complete. The venting function can be activated after servicing. Service function 3.C: Anti-cycle flow temperature differential The switching difference is the permissible differential from the specified CH flow temperature. It can be set in increments of 1 K. The adjustment range is 0 to 30 K. The minimum CH flow temperature is 35 °C. Note: 1 K = 1 °C. B Enter the switching difference setting on the commissioning record supplied with the appliance. The factory setting is 10 K. If the venting function is set to “On” (with automatic deactivation), the function is set to “Off” once the sequence has been completed. Service function 2.F: Operating mode There are 3 operating modes to choose from. • Normal mode: the appliance operates according to the commands received from the programmer. The Service function 3.E: Cycle time (Hot water) (ZWB only) The appliance is supplied with the pre-heat cycle time set to 20 minutes. After pre-heating or DHW demand, this function will stipulate the period of time before the next permissible pre-heat. This will prevent excessive pre-heat cycling. • display shows 0. • Minimum mode: the appliance runs constantly at minimum output. The display shows 1. The 2-digit display alternates between the CH flow temperature and . After 15 min. the minimal mode changes to normal mode. • Maximum mode: the appliance runs constantly at maximum output. The display shows 2. The 2-digit display alternates between the CH flow temperature and . After 15 min. the maximal mode changes to normal mode. Service function 3.F: Burner off after DHW demand (Hot water - ZWB only) The appliance is supplied with the hot water duration set to 1 minute. The “hot water duration” time specifies how long, after hot water has been drawn, that the heating mode remains disabled. The factory setting is 0. Service function 3.b: Anti-cycle time The anti-cycle time is factory set to 3 minutes. The shortest possible anti-cycle time is 1 minute (recommended for single-pipe and hot-air heating systems). If the setting 0 is entered, the anti-cycle time is disabled. B Enter the anti-cycle time on the commissioning record enclosed with the appliance. 6 720 644 143 (2010/09) 48 | Heatronic settings Service function 4.F: Siphon-fill programme The syphon filling function ensures that the syphon trap is filled when the appliance is first installed or shut down for a long period. Flue gas is prevented from escaping into the room where the appliance is installed. • the appliance is switched on at the main switch • the burner has not been in use for at least 48 hours • the appliance is switched from summer to winter mode The next time the heating or hot water system calls for heat, the appliance is held at minimum output for 15 minutes. The syphon filling programme remains active until the appliance has completed 15 minutes of operation at minimum output. and the CH DANGER: If the syphon is not filled, flue gas can escape. B Only deactivate the syphon filling programme in order to carry out servicing work. B Always re-activate trap filling programme once servicing is complete. Service function 5.A: Reset service reminder The burner service interval of 2324 hours has run out. After the service inspection store 0 for resetting the service interval. Service function 5.b: Fan over-run time B Set the time of fan over-run after a boiler demand. Service function 6.A: Last fault The last fault can also be recalled for servicing purposes when the appliance is functioning correctly. 6 720 644 143 (2010/09) The actual flow rate of the turbine is displayed. Service function 6.E: Programmer input The trap filling function is activated when: The 2-digit display alternates between flow temperature. Service function 6.d: Current turbine flow rate (ZWB only) Shows the status of channel 1 of the timer DT10/20. Left digit is “Heat demand”, heating mode will be activated according to the programmer commands. Shows the status of channel 2 of the timer DT20. Right digit is “DHW demand”, hot water mode will be activated according to the programmer commands. Service function 7.A: Fault indicator LED ON/OFF The fault indicator LED flashes in case of error even when its setting is off (0). Heatronic settings | 49 11.3.2 Service level 2 Service function 8.A: Software version Service function 9.b: Actual fan speed The current fan speed is displayed in Hertz (Hz). The version number of the software is displayed. Service function 9.C: Actual heating output Service function 8.b: Code plug The 4-digit part number of the code plug (digits no. 7 upto 10 of order no.) is indicated. The code plug determines the appliance functions. If the appliance is converted from natural gas to LPG or vice versa (using conversion kit) the code plug also has to be changed. Service function 8.C: GFA status This service function displays the current appliance heating output (in percent (%)). Service function 9.d: Start fan speed The actual start fan speed between 45 and 55 Hz is displayed in Hertz (Hz). Service function 9.E: Turbine signal delay (ZWB only) Sets a delay time relating to the beginning of DHW demand to avoid an undesired demand by water surge hammer. (not applicable) Service function 9.F: Pump over-run time (CH mode) Service function 8.d: GFA error (not applicable) Sets the time of pump over-run after the end of a heating demand. Service function 8.E: Reset all parameters This function enables you to reset the appliance to the standard settings. All service functions that have been altered are reset to their standard settings. To reset all settings on Service levels 1 and 2 to the factory settings: B Display the value of the service function 8.E (second service level, value = 0) and store it. The appliance restarts with factory settings. Service function 8.F: Permanent ignition This function allows permanent ignition without gas supply to be activated for the purposes of checking the ignition mechanism. NOTE: Ignition transformer may be damaged. B Do not run for more than 2 minutes. Service function 9.A: Operation mode permanent Set a fixed operation mode even when boiler has been switched off. 6 720 644 143 (2010/09) 50 | Converting the appliance to different gas types 12 Converting the appliance to different gas types The gas-air ratio must always be set on the basis of a CO2 or O2 reading taken at maximum rated heat output and minimum rated heat output using an electronic tester. Adjustment to different flue systems using throttle discs or baffle plates is not necessary. 12.1 Gas-type conversion The following gas type conversion sets are available: Appliance Conversion to Order No. Z... 30-2 A LPG 8 737 702 124 0 NG 8 737 702 125 0 LPG 8 737 702 122 0 NG 8 737 702 123 0 NG • Appliances for natural gas are factory-set to Wobbe index 50 MJ/m3 and 11.3 mbar (1.13 kPa) supply pressure and sealed. Z... 37-2 A Table 19 LPG • Appliances for LPG are factory-set to to Wobbe index 76.9 MJ/m3 and 27.5 (2.75 kPa) supply pressure and sealed. 12.2 Setting the gas-air ratio (CO2 or O2) B Switch appliance off at the main switch. B Remove the outer casing (Æ page 28). LPG type1) Use B Switch appliance on at the main switch. Commercial Propane recommended B Remove sealing plug from flue gas testing point. Commercial Butane permitted B Insert a flue gas probe approx. 135 mm into the testing point socket and seal the testing point. General Product permitted Universal LPG (U-LPG) permitted Table 18 1) according to NZS 5435 WARNING: Flue gas poisoning When undefined gas mixtures (General Product and Universal LPG) are used, adjustment of gas values can lead to dangerous levels of carbon monoxide production. B For any adjustment of the gas type use only Commercial Propane and Commercial Butane. Commercial Propane can be used at any outside temperature. Commercial Butane can only be used when the outside temperature is more than +5 °C. We do not recommend the use of General Product and U-LPG. The mixture of propane and butane in General Product and U-LPG can vary depending on the amount of fuel in the tank and the production process, which makes precise adjustment of the gas values impossible. 6 720 644 143 (2010/09) 6 720 612 688-32.1O Fig. 48 B Press and hold the cnetral heating boost button until it lights up. The display shows the flow temperature alternating with = maximum set heating output. B Briefly press the central heating boost button . The display shows the flow temperature in alternation with = maximum rated output. B Measure the CO2 or O2 level. Converting the appliance to different gas types | 51 B Remove the gas throttle seat with a screw driver as shown in Fig. 49. B Remove the sealed brass screw from gas valve adjusting screw and set CO2 or O2 level for minimum rated heat output. 2 . 1 . 2 1 6 7 2 0 6 1 2 6 5 9 -3 7 .1 R 6 720 614 090-22.1O Fig. 49 B Adjust the gas flow throttle to set the CO2 or O2 level for maximum rated output according to the table. Fig. 51 B Re-check settings at maximum and minimum rated output and re-adjust if necessary. B Repeatedly press the central heating boost button until the light goes out. The display will show the CH flow temperature again. B Record the CO2 or O2 levels in the commissioning log. B Remove flue gas probe from flue gas testing point and refit sealing plug. B Seal the gas valve and gas throttle. 6 7 2 0 6 1 2 6 5 9 -3 8 .1 R Fig. 50 max. rated heat output min. rated heat output Gas Type CO2 O2 CO2 O2 NG (23) 9.6 % 3,6 % 9.0 % 4,7 % LPG (Propane) 10.8 % 4.6 % 10.2% 5.5 % LPG (Butane) 12.2 % 2.8 % 11.5 % 3.8 % Table 20 B Briefly press the central heating boost button . The display shows the flow temperature in alternation with = minimum rated heat output. B Measure the CO2 or O2 level. 6 720 644 143 (2010/09) 52 | Converting the appliance to different gas types B Switch off the appliance and turn off the gas tap. B Repeatedly press the central heating boost button until the light goes out. The display will show the CH flow temperature again. B Undo the plug on the testing point for gas inlet pressure and connect a pressure gauge. B Switch off the appliance, turn off the gas cock, remove the pressure gauge and refit the plug. 12.3 Checking the gas supply pressure B Refit the outer casing. 6 720 614 090-34.1O Fig. 52 B Turn on the gas tap and switch on the appliance. B Press and hold the central heating boost button until it lights up. The display shows the flow temperature alternating with = maximum set output. B Briefly press the central heating boost button . The display shows the flow temperature in alternation with = maximum rated output. B Check required gas supply pressure according to table. Gas type Permissible pressure range at max. rated output [mbar/kPa] NG 11 - 30/1.1-3.0 LPG (Propane)1) 25 - 45/2.5-4.5 LPG (Butane) 25 - 35/2.5-3.5 Table 21 1) Standard figure for LPG with fixed cylinders with capacities up to 15 000 l Never commission the appliance above or below these values. Identify and eliminate the cause. Where that is impossible, shut off the gas side of the appliance and notify the gas supply utility. 6 720 644 143 (2010/09) Flue gas testing | 53 13 Flue gas testing 13.1 Central heating boost button The following appliance outputs can be selected by pressing the central heating boost button until it lights up: B Remove sealing plug from combustion air testing point (2, Æ Fig. 54). B Insert a flue gas probe into the testing point socket and seal the testing point. B Press the central heating boost button to select maximum rated output. = reset eco 3 2 1 4 3 5 6 max 2 4 e 2 6 1 min 1 max 6 720 644 143-35.1O Fig. 53 • = max. heating output setting • = max. rated heat output Fig. 54 • = min. rated heat output 1 2 6 720 612 688-35.1O You have 15 minutes in which to take your measurements. Afterwards, the appliance returns to standard mode. Flue gas testing point Combustion air testing point B Measure the CO2 and O2 levels. B Refit plug. 13.3 Measuring CO content of flue gas 13.2 Checking flue system for leaks Use a multiport flue gas probe for the measurements. Measuring O2 or CO2 levels in combustion air. B Remove sealing plug from flue gas testing point (1, Æ Fig. 54). Use an annular-slot flue gas probe for the measurements. With a type C13, C33 or C93 flue system, the gas tightness of the flue system can be tested by measuring the O2 or CO2 content of the combustion air. The O2 level must not be below 20,6 %. The CO2 level must not exceed 0,2 %. B Insert a flue gas probe as far as it will go into the testing point socket and seal the testing point. B Press the central heating boost button to select maximum rated output. = B Measure the CO levels. B Repeatedly press the central heating boost button until the light goes out. The display will show the CH flow temperature again. B Refit sealing plug. 6 720 644 143 (2010/09) 54 | Environmental protection 14 Environmental protection Environmental protection is a fundamental corporate strategy of the Bosch Group. The quality of our products, their economy and environmental safety are all of equal importance to us and all environmental protection legislation and regulations are strictly observed. We use the best possible technology and materials for protecting the environment taking account of economic considerations. Packaging Where packaging is concerned, we participate in country-specific recycling processes that ensure optimum recycling. All packaging materials are environmentally compatible and can be recycled. Used appliances Old appliances contain materials that should be recycled. The relevant assemblies are easy to separate, and all plastics are identified. This allows the various assemblies to be appropriately sorted for recycling or disposal. 6 720 644 143 (2010/09) Inspection/Servicing | 55 15 Inspection/Servicing To ensure that gas consumption and environmental impact remain as low as possible over an extended period of time, we recommend that you take out an inspection/servicing contract with an authorised contractor covering an annual inspection, and servicing at other times as required. Important notes For an overview of faults, see page 67. • The following test equipment is required: DANGER: Risk of explosion! – Electronic flue gas emission meter for CO2, CO and exhaust temperature B Turn off gas valve before working on gascarrying components. – Pressure gauge for 0 - 30 mbar (0 - 3 kPa) (resolution at least 0.1 mbar (0.01 kPa) B Check for leaks before working on gascarrying components. DANGER: Risk of poisoning! B Check for leaks before working on gascarrying components. DANGER: Risk of electric shock! B Before carrying out work on electrical components, disconnect the power supply (230 V AC) (fuse, circuit breaker) and secure against unintentional reconnection. • Special tools are not required • Permissible lucricants: – For components in contact with water: Unisilkon L 641 (8 709 918 413) – Unions: HFt 1 v 5 (8 709 918 010). B Use 8 719 918 658 as heat conducting paste. B Only use genuine spare parts! B Refer to the spare parts catalogue when ordering spare parts. B Always renew seals and O-rings removed during servicing or repair work. After inspection/servicing B Retighten all loosened threaded fittings. WARNING: Risk of scalding! B Recommission the appliance (Æ page 35). Hot water can cause severe scalding B Check all connections for leaks. B Drain the appliance before working on components that carry water. B Check the gas-air ratio and adjust if necessary (Æ page 50). NOTE: Leaking water may damage the Heatronic module. B Cover the Heatronic module before working on any parts that carry water. 6 720 644 143 (2010/09) 56 | Inspection/Servicing 15.1 Checklist for inspection/servicing (Inspection/Servicing report) Date 1 Retrieve last fault stored on the Heatronic module, service function 6.A (Æ page 57). 2 On Logamax plus GB042-22K appliances, check filter in cold water pipe (Æ page 57). 3 Perform a visual check of the air/flue gas routing. 4 Check the gas supply pressure, (Æ page 52). mbar (kPa) 5 Check the gas-air ratio at min./max. and adjust if necessary (Æ page 50). min. % max. % 6 Check for leaks on the gas and water connections (Æ page 32). 7 Check heat exchanger, (Æ page 59). 8 Check burner (Æ page 61). 9 Check electrodes (Æ page 57). 10 Check diaphragm in mixer unit (Æ page 62). 11 Clean condensate trap (Æ page 62). 12 Check the expansion vessel pre-charge pressure matches the static head of the heating system. bar (kPa) 13 Check the heating system pressure. bar (kPa) 14 Check electrical wiring for damage. 15 Check the heating controller settings. 16 Check the selected service functions in accordance with the “Heatronic settings” label (Æ Fig. 37, page 38) Table 22 6 720 644 143 (2010/09) Inspection/Servicing | 57 15.2 Description of various servicing operations 15.2.3 Strainer in cold water pipe (ZWB) B Undo cold water pipe and check filter for dirt. 1. 15.2.1 Retrieving last fault stored (service function 6.A) B Select service function 6.A (Æ page 43). For an overview of faults, see page 67. 15.2.2 Checking electrodes 3. B Remove electrode set (Æ page 10) and gasket. Check electrodes for dirt; clean or replace if required. B Refit electrode set and check for tightness (Fig. 56). 2. 1 6 720 612 659-48.1R Fig. 57 3+1Nm 6720613354-01.2O Fig. 55 Gas/Gaz? Fig. 56 6 20 613 3 4 02 2O 6 720 644 143 (2010/09) 58 | Inspection/Servicing 15.2.4 Plate type heat exchanger (ZWB) B Undo/remove pipe unions. If the DHW output is insufficient: B Check strainer in cold water pipe for dirt (Æ page 57). B Remove plate-type heat exchanger and replace -orB Descale only with a product that has been approved for stainless steel (1.4401). Remove the plate heat exchanger: B Disconnect electrical connectors. B Remove hose from pressure relief valve. 6 720 644 143-21.1O Fig. 59 B Undo the pressure gauge fastener. 6 720 644 143-20.1O Fig. 58 6 720 644 143-22.1O Fig. 60 6 720 644 143 (2010/09) Inspection/Servicing | 59 B Release the quick-acting closures and remove the hydraulic assembly completely. 15.2.5 Heat exchanger For cleaning the heat exchanger, use brush, accessory no. 1060, and cleaning blade, accessory no. 1061. B Check control pressure at maximum rated output at mixer unit. 2. 1. 1. 3. 6 720 644 143-23.1O Fig. 61 B Undo the plate-type heat exchanger. 6 720 644 143-25.1O Fig. 63 Appliance Control pressure Cleaning required? ZSB 30-2 A ≥ 3.9 mbar (0.39 kPa) No < 3.9 mbar (0.39 kPa) Yes ≥ 3.9 mbar (0.39 kPa) No < 3.9 mbar (0.39 kPa) Yes ZWB 37-2 A 6 720 644 143-24.1O Fig. 62 Table 23 B Fit new plate-type heat exchanger with new gaskets and reconnect the hydraulic assembly in reverse order. If cleaning is required: B Check all connections for leaks. B Remove the heat exchanger access panel (Æ page 10) and any panel behind, if installed. 6 720 644 143 (2010/09) 60 | Inspection/Servicing B Remove the condensate siphon and place a suitable container below the condensate outlet. 1 B Clean the heat exchanger with the brush from top to bottom. 2 6 720 612 563-14.1O Fig. 66 B Remove burner (Æ chapter 15.2.6 “Checking the burner”) and flush the heat exchanger with water from above. 6 720 644 143-19.1O 2 Fig. 64 B With the cleaning blade, clean the heat exchanger from the bottom to the top. 6 720 612 664-18.1R Fig. 67 B Clean the condensate tray (with reversed brush) and the siphon connection. 6 720 612 563-15.1O Fig. 65 6 720 610 332-75.2R Fig. 68 B Close the heat exchanger access panel using a new gasket and tighten the screws to approx. 5 Nm. 6 720 644 143 (2010/09) Inspection/Servicing | 61 15.2.6 Burner B Remove two screws [2] from top cover [1] and lift off cover (Æ Fig. 69). 1 2 2 7 181 465 330-08.2R Fig. 71 6 720 615 662-19.1O B Refit burner, possibly with a new gasket, in reverse order. B Adjust the gas-air ratio (Æ page 50). Fig. 69 B Remove clips [3], nuts [4] and [5] and two screws [7] (Æ Fig. 69). 3 5 4 6 7 7 6 720 615 662-20.1O Fig. 70 B Remove burner cover [6]. B Remove burner and clean its components. 6 720 644 143 (2010/09) 62 | Inspection/Servicing 15.2.7 Diaphragm in mixer unit CAUTION: Ensure that the diaphragm is not damaged during its release and refitting! 15.2.8 Cleaning condensate trap B Remove condensate trap and check that the heat exchanger connection is clear. B Open the mixing chamber. B Carefully withdraw diaphragm from fan intake tube and check for soiling and splits. 1 2 6 720 615 662-21.1O 6 720 644 143-19.1O Fig. 72 B Carefully refit the diaphragm into the fan connector, in the correct position. The diaphragm flaps must open upwards. B Close the mixing chamber. Fig. 73 B Remove and clean the condensate siphon sump. B Check condensate hose and clean if necessary. B Fill condensation trap with approx. 1/4 l of water and refit. 15.2.9 Checking the expansion vessel (see also page 25) The expansion vessel should be checked annually. B Depressurise the appliance. B If necessary, adjust charge pre-charge pressure of expansion vessel to the static head of the heating system. 6 720 644 143 (2010/09) Inspection/Servicing | 63 15.2.10 Setting the heating system pressure NOTE: Risk of damaging the appliance. B Only top up the heating system when the appliance is cold. Pressure gauge reading 1 bar (100 kPa) Minimum system pressure (when cold) 1 - 2 bar (100 - 200 kPa) Optimum system pressure 3 bar (300 kPa) Maximum system pressure at highest heating water temperature: must not be exceeded (otherwise pressure relief valve opens). Table 24 B If the gauge is below 1 bar (100 kPa) (when the system is cold), top up the system water between 1 and 2 bar (100 kPa and 200 kPa). B If there is a pressure drop: check the expansion vessel and heating system for leaks. 15.2.11 Checking electrical wiring B Check electrical wiring for physical damage and replace faulty leads. 6 720 644 143 (2010/09) 64 | Displays 16 Displays The display shows the following (table 25 and 26): Value displayed Description Number or letter, dot followed by letter Service function (Ætable 15/ 16, page 44) Letter followed by number or letter Fault code flashes (Æ table 27, page 67) Two numbers Decimal figure, e.g. flow temperature 00..99 U followed by 0..9 Decimal figure;100..109 is displayed as U 0..U9 0..109 One number (displayed for longer) followed twice by two numbers (displayed briefly) Decimal figure (three digits); first digit is shown alternating with the two last digits (e.g. 1...69..69 for 169) 0..999 Two dashes followed by two pairs of numbers Boiler coding card number; 1000 ... Value is shown in three stages: 1. Two dashes 2. First two numbers 3. Last two numbers (e.g.: -- ..10..04) Two letters followed by two pairs of numbers Version number; Value is shown is three stages: 1. First two letters 2. First two numbers 3. Last two numbers (e.g.: CF 10 20) Table 25 Displays Range Special display Description Acknowledge by pressing any key (except reset). Acknowledge by pressing two keys simultaneously Acknowledge by pressing and holding for more than 3 seconds (Save function). The display alternately shows the flow temperature and . The appliance operates for 15 minutes at the minimum rated output. The display shows the flow temperature alternating with . The appliance works with the set maximum rated output in heating mode, Æservice function 1.A. 9999 The display alternately shows the flow temperature and . The appliance operates for 15 minutes at the maximum rated output. Ventilation function is enabled, see service function 2.C. The display shows the flow temperature alternating with . The trap filling program is enabled, Æservice function 4.F. The display shows the flow temperature alternating with : the set inspection interval has elapsed, Æservice function 5.A. The display alternately shows the flow temperature and . The heating circuit pump is blocked. The display shows the flow temperature alternating with . The temperature gradient limiter is enabled. Excessive flow temperature increase: heating mode is suspended for two minutes. Table 26 Special displays 6 720 644 143 (2010/09) Displays | 65 Special display Description Screed drying function of the weathercompensated controller (Æoperating instructions) or building drying function (Æservice function 7.E) operational. Table 26 Special displays 6 720 644 143 (2010/09) 66 | Fault mode 17 Fault mode 17.1 Troubleshooting DANGER: Risk of explosion! B Turn off gas valve before working on gascarrying components. B Check for leaks before working on gascarrying components. DANGER: Risk of poisoning! B Check for leaks before working on gascarrying components. DANGER: Risk of electric shock! B Before carrying out work on electrical components, disconnect the power supply (230 V AC) (fuse, circuit breaker) and secure against unintentional reconnection. WARNING: Risk of scalding! Hot water can cause severe scalding B Drain the appliance before working on components that carry water. NOTE: Leaking water may damage the Heatronic module. B Cover the Heatronic module before working on any parts that carry water. 6 720 644 143 (2010/09) All safety, modulation and control components are monitored by the Heatronic system. If a fault occurs during operation, a warning tone sounds. If you press a button, the warning tone stops. The display indicates a fault (e. g. button may also flash. ) and the reset- If the reset button flashes: B Press and hold the reset button until the display shows . The appliance will start up again and the flow temperature will be displayed. If the reset button does not flash: B Switch the appliance off and then on again at the main switch. The appliance will start up again and the central heating flow temperature will be displayed. For an overview of faults, see page 67. For an overview of displays, see page 64. If a fault persists: B Check PCB, replace if required and set service functions as per "Heatronic settings" label (Æ Fig. 37, page 38). Fault mode | 67 17.2 Faults that are shown on the display Display code A7 A8 Description Remedy Temperature sensor for hot water is faulty. B Check temperature sensor and lead for breaks or short circuits, and replace if required. (ZWB) B Plug in boiler coding card correctly; replace if required. Communication fault. B Check BUS device connecting lead. B Check controller, replace if required. Ad Cylinder temperature sensor not detected. B Check cylinder temperature sensor and connecting lead. The cylinder temperature sensor was recognised as a BUS subscriber and then reconnected to the appropriate terminal. B Resetting the Heatronic 3 to its standard settings (Æ service function 8.E, page 49), resetting the IPM 1 or IPM 2 to its standard settings and carrying out the automatic system configuration on the heating controller. Code plug not detected. B Plug in boiler coding card correctly; replace if required. Internal data error. B Restore Heatronic 3 to standard settings (Æservice function 8.E). C6 Fan not running. B Check fan lead and connector, check fan, replace as necessary. CC Outside temperature sensor not detected. B Check outside temperature sensor and connecting lead for breaks. b1 b2/b3/ b4/b5/ b6 B Correctly connect outside temperature sensor to terminals A and F. d3 External temperature limiter faulty. External limiter has tripped. Temperature limiter locked out. B Check temperature limiter and lead for breaks or short circuits, and replace if required. B Temperature limiter has tripped. Jumper across 8-9 or PR-P0 is missing. B Reset the temperature limiter. d5 E2 External flow temperature sensor defective (flow equaliser). B Check temperature sensor and lead for breaks or short circuits, and replace if required. The external flow temperature sensor was recognised as a BUS subscriber and then reconnected to the appropriate terminal. B Check whether only one temperature sensor is connected; otherwise remove second temperature sensor. Temperature sensor in CH flow faulty. B Check temperature sensor and lead for breaks or short circuits, and replace if required. B Resetting the Heatronic 3 to its standard settings (Æ Service function 8.E: Reset all parameters), resetting the IPM 1 or IPM2 to its standard settings and carrying out the automatic system configuration on the heating controller. Table 27 Faults shown on the display 6 720 644 143 (2010/09) 68 | Fault mode Display code E9 Description Remedy Heat exchanger temperature limiter or flue gas temperature limiter has tripped. B Check heat exchanger temperature limiter and lead for breaks or short circuits; replace if required. B Check flue gas temperature limiter and lead for breaks or short circuits; replace if required. B Check the operating pressure of the heating system. B Check temperature limiter; replace if required. B Check pump starter; replace pump if required. B Check PCB fuse; replace if required. B Vent appliance. B Check heat exchanger on the water side; replace if required. B On appliances with displacement bodies in heat exchanger, check whether displacement bodies are fitted. EA Flame not detected. B Check earth lead is correctly connected. B Check whether gas valve is open. B Check gas supply pressure; correct if required. B Check power supply. B Check electrodes with lead; replace if required. B Check flue gas system; clean or repair if required. B Check gas/air ratio; correct if required. B For natural gas: Check external gas flow limiter; replace if required. B For open flue operation, check air supply or ventilation apertures. B Clean out condensation trap discharge pipe. B Remove diaphragm from fan inlet connection and check for contamination or tears. B Clean heat exchanger. B Check gas valve; replace if required. B Plug in boiler coding card correctly; replace if required. B Two-phase network (IT): 2 M Ω - insert resistance between PE and N at PCB power supply. F0 Internal fault. B Press reset for 3 seconds and release. When the button is released, the appliance will restart. B Check electrical plug-in contacts and ignition leads; replace PCB if required. B Check gas/air ratio; correct if required. F1 Internal data error. B Restore Heatronic 3 to standard settings (Æservice function 8.E). F7 A flame is detected although the appliance is switched off. B Check electrodes; replace if required. B Check flue gas system; clean or repair if required. B Check PCB for moisture; dry if required. Table 27 Faults shown on the display 6 720 644 143 (2010/09) Fault mode | 69 Display code FA Description Remedy A flame is detected after the gas has been switched off. B Check gas valve; replace if required. B Clean condensate trap. B Check electrodes and lead; replace if required. B Check flue gas system; clean or repair if required. Fd Reset was pressed in error. B Press reset again. B Check cable harness to high limit safety cut-out and gas valve for earth connection. Table 27 Faults shown on the display 6 720 644 143 (2010/09) 70 | Fault mode 17.3 Faults that are not shown on the display Appliance faults Remedy Combustion noise too loud; rumbling noises B Plug in boiler coding card correctly; replace if required. B Check gas type. B Check gas supply pressure; adjust if required. B Check flue gas system; clean or repair if required. B Check gas/air ratio in the combustion air and flue gas; replace gas valve if required. Flow noises B Set pump stages or pump characteristic maps correctly and match to maximum output. B Set pump mode correctly. Heat-up takes too long B Set pump stages or pump characteristic maps correctly and match to maximum output. B Set pump mode correctly. Flue gas readings incorrect; CO levels too high B Check gas type. B Check gas supply pressure; adjust if required. B Check flue gas system; clean or repair if required. B Check gas/air ratio in flue gas; replace gas valve if required. Ignition too harsh, poor B Check gas type. B Check gas supply pressure; adjust if required. B Check power supply. B Check electrodes with lead; replace if required. B Check flue gas system; clean or repair if required. B Check gas/air ratio; replace gas valve if required. B For natural gas: Check external gas flow limiter; replace if required. B Check burner; replace if required. Set flow temperature (e.g. of the FW-100 controller) exceeded B Switch OFF automatic cycle block, i.e. set value to 0. Condensate in air box B Insert diaphragm in the mixing facility as per installation instructions; replace if required. DHW temperature is not reached (ZWB) B Plug in boiler coding card correctly; replace if required. B Set the required cycle block, e.g. standard setting of 3 minutes. B Check turbine; replace if required. Heatronic is flashing (i.e. all keys, all display segments, burner indicator etc. are flashing) B Replace fuse Si 3 (24 V). Set room temperature not reached B De-areate the hydronic system. B Check the thermostatic radiator valves B Check the demand from the controller B Complete air purge (service function 2.C). Table 28 Faults not shown on the display 6 720 644 143 (2010/09) Fault mode | 71 17.4.2 Flow and DHW sensors 17.4 Sensor values 17.4.1 Outside temperature sensor (for weathercompensated controllers, accessory) Outside temperature / °C Testing tolerance ± 10% Resistance ( Ω) -20 2 392 -16 2 088 -12 1 811 -8 1 562 -4 1 342 0 1 149 4 984 8 842 10 781 15 642 20 528 25 436 Table 29 Temperature/ °C Measuring tolerance ± 10 % Resistance (k Ω) 20 14 772 25 11 981 30 9 786 35 8 047 40 6 653 45 5 523 50 4 608 55 3 856 60 3 243 65 2 744 70 2 332 75 1 990 80 1 704 85 1 464 90 1 262 95 1 093 100 950 Table 30 17.5 Code Plug Appliance Number ZSB 30-2 A 23 8 714 431 018 0 ZSB 30-2 A 31 8 714 431 019 0 ZWB 37-2 A 23 8 714 431 014 0 ZWB 37-2 A 31 8 714 431 015 0 Table 31 6 720 644 143 (2010/09) 72 | Fault mode 17.6 Settings for heating output with ZSB 30 ...23 17.7 Settings for heating output with ZSB 30 ...31 NG Propane Gross calorific value (MJ/m3) (15 °C): 37.8 Display Heat output (kW) Gas con~ sumption (MJ/m3) Heat output (kW) Gas con~ sumption (MJ/m3) 43 11.0 45.9 12.5 52.2 46 12.0 50.0 13.6 56.8 Net calorific value (MJ/m3) (15 °C): 34.0 Display Heat output (kW) Gas con~ sumption (MJ/m3) Gas flow rate1) (l/min) Butane 32 7.7 31.9 14 49 13.0 54.1 14.8 61.5 33 8.0 33.2 15 52 14.0 58.1 15.9 66.1 36 9.0 37.3 16 55 15.0 62.2 17.0 70.7 39 10.0 41.4 18 58 16.0 66.3 18.2 75.4 42 11.0 45.5 20 61 17.0 70.4 19.3 80.0 45 12.0 49.6 22 64 18.0 74.5 20.5 84.6 48 13.0 53.7 24 67 19.0 78.5 21.6 89.3 51 14.0 57.8 25 70 20.0 82.6 22.7 93.9 54 15.0 61.9 27 73 21.0 86.7 23.9 98.5 57 16.0 66.0 29 76 22.0 90.8 25.0 103.2 60 17.0 70.1 31 79 23.0 94.8 26.1 107.8 63 18.0 74.2 33 82 24.0 98.9 27.3 112.4 66 19.0 78.3 34 85 25.0 103.0 28.4 117.1 69 20.0 82.4 36 88 26.0 107.1 29.5 121.7 73 21.0 86.5 38 91 27.0 111.1 30.7 126.3 76 22.0 90.6 40 94 28.0 115.2 31.8 131.0 79 23.0 94.7 42 97 29.0 119.3 33.0 135.6 82 24.0 98.8 43 30.0 123.4 34.1 140.2 85 25.0 102.9 45 U0 (100) 88 26.0 107.0 47 91 27.0 111.1 49 94 28.0 115.2 51 97 29.0 119.3 52 U0 (100) 30.0 123.4 54 Table 32 1) Gas flow rate (l/min at tV/tR = 80/60 °C 6 720 644 143 (2010/09) Table 33 Fault mode | 73 17.8 Settings for heating output with ZWB 37 ...23 17.9 Settings for heating output with ZWB 37 ...31 NG Propane Gross calorific value (MJ/m3) (15 °C): 37.8 Display Heat output (kW) Gas consumption (MJ/m3) Heat output (kW) Gas consumption (MJ/m3) 45 13.9 57.9 15.8 65.8 45 14.0 58.3 15.9 66.3 Net calorific value (MJ/m3) (15 °C): 34.0 Display Heat output (kW) Gas consumption (MJ/m3) Gas flow rate1) (l/min) Butane 32 9.4 31.9 17 47 15.0 62.4 17.0 70.9 34 10.0 41.6 18 50 16.0 66.4 18.2 75.5 36 11.0 45.7 20 52 17.0 70.5 19.3 80.1 39 12.0 49.8 22 55 18.0 74.6 20.5 84.7 41 13.0 53.9 24 57 19.0 78.6 21.6 89.4 44 14.0 57.9 26 60 20.0 82.7 22.7 94.0 46 15.0 62.0 27 62 21.0 86.8 23.9 98.6 49 16.0 66.1 29 65 22.0 90.8 25.0 103.2 51 17.0 70.2 31 67 23.0 94.9 26.1 107.9 54 18.0 74.3 33 70 24.0 99.0 27.3 112.5 56 19.0 78.4 35 72 25.0 103.0 28.4 117.1 59 20.0 82.5 36 75 26.0 107.1 29.5 121.7 61 21.0 86.6 38 77 27.0 111.2 30.7 126.3 64 22.0 90.7 40 80 28.0 115.2 31.8 131.0 66 23.0 94.7 42 82 29.0 119.3 33.0 135.6 69 24.0 98.8 44 85 30.0 123.4 34.1 140.2 71 25.0 102.9 45 74 26.0 107.0 47 76 27.0 111.1 49 79 28.0 115.2 51 81 29.0 119.3 53 84 30.0 123.4 54 Table 35 Table 34 1) Gas flow rate (l/min at tV/tR = 80/60 °C 6 720 644 143 (2010/09) 74 | Commissioning report for the appliance 18 Commissioning report for the appliance Customer/system user: Surname, first name Street, house number Telephone/fax Postcode, town System installer: Order number: Appliance type: (Complete a separate report for every appliance!) Serial number: Date commissioned: Individual appliance | Cascade, number of appliances: ...... Installation room: Cellar | Attic | Other: Ventilation apertures: Number: ......, size: approx. Flue routing: cm2 Twin pipe system | LAS | Duct | Separate pipe routing Plastic | Aluminium | Stainless steel Total length: approx. ...... m | 90° bend: ...... pce | 15 - 45° bend: ...... pce Flue tightness test (with combustion air flowing in countercurrent): yes | no CO2 value in the combustion air at maximum rated output: % O2 value in the combustion air at maximum rated output: % Notes regarding underpressure or overpressure operation: Gas setting and flue gas test: Selected gas type: Natural gas H | Natural gas L | Natural gas LL | Propane | Butane Gas supply pressure: kPa Gas static supply pressure: Selected maximum rated output: kW Selected minimum rated output: Gas flow rate at maximum rated output: Net calorific value HiB: ltr/min Gas flow rate at minimum rated output: mbar kW ltr/min kWh/m3 CO2 at maximum rated output: % CO2 at minimum rated output: % O2 at maximum rated output: % O2 at minimum rated output: % CO at maximum rated output: ppm CO at minimum rated output: ppm Flue gas temperature at maximum rated output: Maximum measured flow temperature: °C Flue gas temperature at minimum rated output: °C °C Minimum measured flow temperature: °C System hydraulics: Low loss header, type: Heating circuit pump: Additional expansion vessel Size/pre-charge pressure: Automatic air vent valve installed? yes | no DHW cylinder/type/number/heating surface output: System hydraulics checked, notes: 6 720 644 143 (2010/09) Commissioning report for the appliance | 75 Modified service functions: (Select the modified service functions and enter the values here.) Example: service function 7.d changed from 00 to 01 “Heatronic settings” label filled out and affixed Heating control unit: FW 100 | FW 200 | FW 500 | FR 110 TA 250 | TA 270 | TA 300 FB 10 × ...... pce, heating circuit code(s): FB 100 × ...... pce, heating circuit code(s): FR 10 × ...... pce, heating circuit code(s): FR 100 × ...... pce, heating circuit code(s): ISM 1 | ISM 2 ICM × ...... pce | IEM | IGM | IUM IPM 1 × ...... pce., heating circuit(s) coding: IPM 2 × ...... pce., heating circuit(s) coding: Miscellaneous: Heating control unit set, notes: Modified heating control unit settings documented in the controller operating/installation instructions The following work has been carried out: Electrical connections checked, notes: Condensate trap filled Combustion air/flue gas test carried out Function check carried out Was a tightness test carried out on the gas and water sides? Commissioning includes checking the settings, a visual boiler tightness test and a function check of the boiler and control unit. The system installer conducts a test of the heating system. If, in the course of commissioning, any small installation faults in Bosch components are noticed, Bosch is always willing to remedy these installation faults after release by the customer. This does not imply any liability for the installation performance. The system named above has been checked to the extent described. The documents have been handed over to the user. The user has been made aware of the safety information and operation of the above-mentioned heat source, including accessories. Attention has been drawn to the requirement for regular servicing of the abovementioned heating system. ___________________________________________________________ Name of service engineer __________________________________________________________ Date, user's signature Affix the test report here. ____________________________________________________________ Date, system installer's signature 6 720 644 143 (2010/09) 76 | Index Index A Anti-freeze ........................................................... Appliance Switching off .................................................... Appliance commissioning report............................. Appliance details Specification - ZSB 30-2 .................................................... - ZWB 37-2... ................................................. Appliance layout ................................................... 24 36 74 16 17 10 B Before commissioning Venting the system ............................................ 36 C Call up last fault saved .......................................... 48 Calling up the most recently saved fault .................. 48 Central heating Switching on .................................................... 37 Checking gas supply pipe ...................................... 32 Checking the connections Gas and water connections ................................ 32 Checking the gas supply pressure........................... 52 Checking the size of the expansion vessel ............... 25 Checklist for inspection/maintenance ..................... 56 Checks by local safety inspector Flue system leakage check ................................. 53 Measuring CO content of flue gas ....................... 53 Combustion air ..................................................... 25 Comfort mode ................................................ 38–39 Commissioning ..................................................... 35 Condensate trap ................................................... 62 Connect, DHW cylinder ......................................... 34 Connecting the DHW cylinder................................. 34 Converting the appliance to different gas types ....... 50 Corrosion inhibitor ................................................ 24 Electrical wiring DHW cylinder .................................................... 34 Environmental protection ...................................... 54 Expansion vessel................................................... 62 Checking the size .............................................. 25 Explanation of model code ....................................... 7 F Fault mode ..................................................... 40, Faults .................................................................. Faults that are not shown on the display ................. Faults that are shown on the display ....................... Fitting the appliance ............................................. Flue gas testing .................................................... Flue system leakage check ..................................... Frost protection.................................................... Fuses Mains fuse ........................................................ 66 67 70 67 28 53 53 39 33 G Gas and water connections .................................... 32 Gas type .............................................................. 50 Gas-air ratio ......................................................... 50 H Heating system pressure........................................ 63 Heatronic Service functions ............................. 43, 45–49, 57 I Description of appliance .......................................... 8 Description of various inspection/maintenance operations ........................................................ 57 Checking the expansion vessel ........................... 62 Details of appliance Appliance layout ............................................... 10 Dimensions ........................................................ 9 Dimensions ............................................................ 9 Display of faults .............................................. 40, 66 disposal ............................................................... 54 Important notes for installation ........................ 24, 55 Important notes on inspection/maintenance ............ 55 Inspection and maintenance operations Cleaning condensate trap .................................. 62 Inspection and maintenance steps Plate heat exchanger ......................................... 58 Inspection and servicing operations Checking electrical wiring .................................. 63 Inspection/Maintenance ........................................ 55 Checking electrodes .......................................... 57 Inspection/Maintenance log ................................... 56 Installation ........................................................... 24 Important notes .......................................... 24, 55 pre-fitting piping ............................................... 26 Siting the appliance........................................... 25 Installation Site Combustion air ................................................. 25 Surface temperature ......................................... 25 Intended use .......................................................... 7 E L D Eco button ..................................................... 38–39 Economy mode ............................................... 38–39 Electrical connections ........................................... 33 Checking electrical wiring .................................. 63 Connecting accessories ..................................... 33 Heating controller, remote control units .............. 34 Temperature limiter........................................... 34 6 720 644 143 (2010/09) LPG ..................................................................... 25 Index | 77 M Maintenance operations Setting the heating system pressure ................... 63 Measuring CO content of flue gas ........................... 53 Minimum clearances ............................................... 9 Mono-lever taps .................................................... 25 N Natural gas ...................................................... 17, 50 O Open vented heating systems ................................ 24 Operating conditions........................................ 16, 18 Outlet siphon ....................................................... 29 P Packaging ............................................................ 54 Procedure for servicing and maintenance Retrieving last fault stored ................................. 57 Product details ....................................................... 7 Description of appliance ...................................... 8 Explanation of model code ................................... 7 Standard package ............................................... 6 Pump anti-seizing function ..................................... 42 R Recycling ............................................................. Regulations .......................................................... Retrieving last fault stored ..................................... Room thermostat .................................................. 54 19 57 24 Pump switching type for heating mode (service function 1.E) ...........................................................46 Reset inspection (service function 5.A) ............... 48 Restoring appliance (Heatronic 3) to standard settings (service function 8.E) .........................................49 Siphon filling program (service function 4.F)........ 48 Software version (service function 8.A) ............... 49 Switching differential (service function 3.C) ........ 47 Time switch input (service function 6.E) .............. 48 Turbine signal delay (only ZWB) (service function 9.E) ...........................................................49 Venting function (Service function 2.C) ............... 47 Setting the heating control unit .............................. 37 Setting the hot water temperature Appliances with hot water cylinder ..................... 38 Settings Heatronic ......................................................... 43 Settings for heating/DHW output ZSB 30...23................................................. 72–73 ZSB 30...31................................................. 72–73 Siting the appliance .............................................. 25 Specification .................................................. 16–17 Standard package ................................................... 6 Steps for inspection and maintenance Call up last fault saved....................................... 48 Summer mode ...................................................... 39 Surface temperature ............................................. 25 Switching off the appliance.................................... 36 Switching on the central heating ............................ 37 T Thermostatic mixer taps ........................................ 25 Troubleshooting.................................................... 66 S Safety instructions .................................................. 5 Sealants............................................................... 24 Service functions Coding card number (service function 8.b) .......... 49 Current fan speed (service function 9.b) ............. 49 Current heating output (service function 9.C) ...... 49 Current turbine flow rate (service function 6.d) ...........................................................48 Cycle block (Service function 3.b) ...................... 47 DHW output (ZSB appliances) (Service function 1.b) ...........................................................45 exiting without saving ........................................ 43 Fan run-on time (service function 5.b)................. 48 GFA fault (service function 8.d) .......................... 49 GFA status (service function 8.C) ....................... 49 Last fault saved (service function 6.A) ................. 48 Last fault stored (service function 6.A) ................ 57 Maximum flow temperature (Service function 2.b) ...........................................................46 Most recently saved fault (service function 6.A) ... 48 No function (service function 7.A)....................... 48 Output (service function 1.A) ............................. 45 Permanent ignition (service function 8.F) ............ 49 Permanent operating mode (service function 9.A) 49 Pump characteristic map (service function 1.C) ... 45 Pump curve (service function 1.d) ...................... 46 Pump run-on time (heating) (service function 9.F) ...........................................................49 U Underfloor heating ................................................ 24 Used appliance ..................................................... 54 Used appliances ................................................... 54 V Venting Venting function ................................................ 47 Venting the system ................................................ 36 W Water circulation noises ........................................ 24 Water connections Checking the connections .................................. 32 Water preheated by solar energy ............................ 24 6 720 644 143 (2010/09) 78 | Notes 6 720 644 143 (2010/09) | 79 Notes 6 720 644 143 (2010/09) Australia Robert Bosch (Australia) Pty Ltd 1555 Centre Rd Clayton, VIC 3168 Phone 1300 30 70 37 Fax 1300 30 70 38 www.bosch.com.au/hotwater New Zealand Phone 0800 4 Bosch or 08 543 352 www.bosch.co.nz