1
Assembly and installation
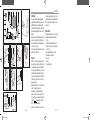
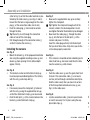
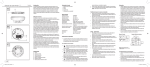
(refer to Fig. C), so that the cable feed hole is protected by the cable cover } (see Figs. C and H).
Ensure that the hole is large enough for the cable
plug R of the connection cable (min. 8 mm).
oPush the cable plug R from inside to outside
through the hole.
Tip! Do not try to cut through the connection
cable or take off the cable plug.
oPull through enough of the connection cable T
so that it reaches the camera Q.
Installing the camera
See Fig. C
o M
ount the bracket { at the proposed installation
site using the supplied mounting screws y and
dowels u (hole spacing 30 mm, drilled depth
approx. 25 mm).
See Fig. D
o T
he bracket, washer and attachment clamp r
have been preassembled together at the factory
with the nut q and clamp bolt t.
See Fig. E
oIf necessary loosen the clamp bolt t fastened
with the nut q using the supplied Allen key i,
so that the attachment clamp r can be moved.
oPush the ball joint E of the camera between the
bracket { and attachment clamp r.
See Fig. F
oNow use the supplied Allen key i to carefully
tighten the clamp bolt.
Tip! Tighten the clamp bolt enough so that the
camera is held in the desired position. Do not
over-tighten the bolt or the bracket may be damaged.
oNow insert the cable plug R through the cable
eye e into the hole in the ball joint E of the
camera and press it in firmly.
Insert the cable plug so firmly into the ball joint
that you hear three clicks. Only when you do this
is the cable properly connected.
See Fig. G
oIf the camera is mounted outside a building and a
cable feed hole p has been made then the hole
must be sealed, e.g. with silicone.
See Fig. H
oPush the cable cover } over the guide from front
to back. If the connection cable T is led over a
surface (not fed through a drilled hole directly behind the cable cover) then you must cut out one
of the three preformed breakout areas [ (see
Fig. I) in the cable cover.
See Fig. B
oLay the connection cable T back to your television and if necessary fix it in place using the supplied cable clips o.
GB/IE
KOE27_T02_Content.indd 8
23.10.2006 9:56:01 Uhr
Co
Se
Co
tele
you
the
rec
tive
ele
o
o
Op
o
o Op
Ex
Th