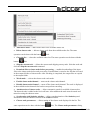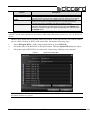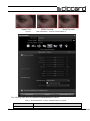
1
Elecard Converter Studio User Guide Version 3.6 Notices Elecard Converter Studio User Guide First edition: December 2006 Date modified: 11 September, 2013. For information, contact Elecard. Phone: +7-3822-492-609; Fax: +7-3822-492-642 More information can be found at http://www.elecard.com. For Technical Support, please contact the Elecard Technical Support Team: [email protected] Elecard provides this publication “as is” without warranty of any kind, either expressed or implied. This publication may contain technical inaccuracies or typographical errors. While every precaution has been taken in the preparation of this document, the publisher and author assumes no responsibility for errors or omissions. Nor is any liability assumed for damages resulting from the use of the information contained herein. Changes are periodically made to the information herein; these changes will be incorporated in new editions of the publication. Elecard may make improvements and/ or change in the product(s) and/or the program(s) described in this publication at any time. Other company, product, trademarks, and service names are trademarks or service marks of other companies or corporations. Copyright 2006-2013 Elecard. All rights reserved. Elecard Converter Studio 2 User Guide CONTENTS 1. INTRODUCTION ................................................................................................................................................................... 4 1.1 PREFACE .............................................................................................................................................................................. 4 1.2 USING THIS GUIDE ............................................................................................................................................................... 4 1.3 SYSTEM REQUIREMENTS ...................................................................................................................................................... 4 1.4 LICENSING AND TECHNICAL SUPPORT .................................................................................................................................. 4 2. DESCRIBING ELECARD CONVERTER STUDIO ........................................................................................................... 6 2.1 CONVERTER STUDIO FEATURES ........................................................................................................................................... 6 2.2 SPECIFICATIONS ................................................................................................................................................................... 9 3. ELECARD CONVERTER STUDIO INTERFACE ............................................................................................................ 11 3.1 MAIN MENU........................................................................................................................................................................12 3.2 BATCH LIST PANEL .............................................................................................................................................................13 3.3 PROFILES PANEL .................................................................................................................................................................16 3.4 TASK PARAMETERS PANEL ..................................................................................................................................................18 3.5 PREVIEW PANEL ..................................................................................................................................................................19 3.6 MESSAGES PANEL ...............................................................................................................................................................20 3.7 CLUSTER PANEL ..................................................................................................................................................................21 3.8 WATCH FOLDER MODE........................................................................................................................................................24 3.9 STATISTICS PANEL ...............................................................................................................................................................26 4. ADDING FILES FOR CONVERSION ................................................................................................................................27 5. SAVING, APPLYING AND CHANGING TASK PARAMETERS ....................................................................................31 5.1 PROFILE APPLYING ..............................................................................................................................................................31 5.2 FAST PROFILE CHANGING ...................................................................................................................................................32 5.3 TASK PARAMETERS CHANGING ...........................................................................................................................................33 5.4 INPUT FILE INFORMATION ...................................................................................................................................................33 5.5 STREAM TYPE PARAMETERS ...............................................................................................................................................35 5.6 VIDEO ENCODING PARAMETERS .........................................................................................................................................38 5.7 PICTURE TRANSFORMATION ................................................................................................................................................40 5.8 LOGO AND ADVERTISEMENT INSERTION..............................................................................................................................47 5.9 AUDIO PARAMETERS ...........................................................................................................................................................49 5.10 CHAPTER POINTS ..............................................................................................................................................................50 6. ADVANCED ENCODING SETTINGS ................................................................................................................................52 6.1 AVC/H.264 VIDEO ENCODER ADVANCED SETTINGS ...........................................................................................................53 6.2 AVC/H.264 HARDWARE VIDEO ENCODER ADVANCED SETTINGS .......................................................................................58 6.3 MPEG-1/2 VIDEO ENCODER ADVANCED SETTINGS ............................................................................................................60 6.4 MPEG-4 VIDEO ENCODER ADVANCED SETTINGS ...............................................................................................................63 6.5 MPEG MULTIPLEXER ADVANCED SETTINGS ......................................................................................................................65 7. TOOLS.....................................................................................................................................................................................68 7.1 FEATURE VIEWER................................................................................................................................................................68 7.2 ADVERTISEMENT SCHEDULE EDITOR ..................................................................................................................................69 7.3 CONVERTER STUDIO SERVICE MANAGER ...........................................................................................................................70 7.4 BATCH LIST FILTER .............................................................................................................................................................72 7.5 CONVERTER STUDIO CONSOLE ...........................................................................................................................................74 8. CONVERTER STUDIO PREFERENCES...........................................................................................................................76 9. CLUSTER NODE INSTALLATION AND ADJUSTMENT...............................................................................................78 10. HOT KEYS............................................................................................................................................................................79 Elecard Converter Studio 3 User Guide 1. Introduction 1.1 Preface Elecard Converter Studio is intended for professional conversion of media files at high-speed with high quality. The program converts video data into MPEG-1, MPEG-2, MPEG-4 ASP, AVC/H.264 (MPEG-4 Part 10), DV25, AVI Uncompressed and AVI HuffYUV formats. Audio data is converted into MPEG-1/2 Audio Layer I/II, AAC and WAV formats. 1.2 Using This Guide The guide is intended for users and developers. It describes all program functions, encoding parameters and provides the instructions for its usage. 1.3 System Requirements The Elecard Converter Studio program requires the following minimum system configuration: SSE-enhanced CPU (Intel® Pentium, Core2Duo, Xeon, AMD® Athlon, Opteron etc.) 512 MB RAM Any VGA card (NVIDIA video adapter with the CUDA technology support is strongly recommended) Windows® 2000/XP/2003 Server/Vista USB HASP HL key (for Pro/Pro HD versions only) 1.4 Licensing and Technical Support Elecard Converter Studio is available as a shareware or as a registered product. By installing, copying, or otherwise using the SOFTWARE PRODUCT or any UPDATES, you agree to be bound by the terms of the "Elecard'' End-User License Agreement (''EULA''). This EULA is a legal agreement between you (either an individual or a single entity) and Elecard for the "Elecard" software product(s) accompanying this EULA, which include(s) computer software and may include "online" or electronic documentation, associated media, and printed materials (''SOFTWARE PRODUCT''). For sales and licensing information, contact the Elecard Sales Department: [email protected] For technical support, contact the Elecard Technical Support Team: [email protected] Elecard Converter Studio 4 User Guide 2. Describing Elecard Converter Studio 2.1 Converter Studio Features Elecard Converter Studio is the program (series of programs) that performs the format conversion of media files at high-speed and with high quality. It supports the Watch Folder Mode that provides automatically converting of files from specified folder and can be started as Windows® service. The program allows user to use computing power of locally networked PCs for common task list encoding (distributed computing). Optimal encoding parameters can be selected from the preconfigured profiles. Profiles provide the compatibility of created files with different devices such as DVD, SVCD, HDV, AVCHD®, BluRay, FLV, Sony PlayStation® Portable (Sony PSP®), Sony PlayStation3®, Apple iPod®, etc. You can also create your own profile and save it for further use. The complete control over encoding parameters and extra facilities allow you to solve professional tasks. Elecard Converter Studio has the following features: Watch Folder mode. The program automatically scans the specified input folder and converts new media files according to the selected profile. Work as Windows® service. Allows the Watch Folder mode start as Windows® service. It is used only in Pro/Pro HD versions. Console application mode. The program can be started as console application that supports both the single file converting and the Watch Folder mode. MPEG-2 Encoding. Widespread and high-quality encoding format. It allows you to create DVD, HDV, and Blu-ray compatible files that can be used for further recording to discs and other storages. Intel® Quick Sync Video. Allows encoding of AVC/H.264 streams using the Intel® Quick Sync Video technology. It speeds up the encoding process even to 10 times. MPEG-4 ASP and AVC/H.264 Encoding. Foremost encoding format that is used in wide application area from network broadcasting to encoding of FullHD video for HD-DVD and Blu-ray storages. DV Encoding. Allows saving video into AVI DV format. It is a widely used format for video editing. The format provides easy editing and the optimal proportion of encoding quality to the output file size. Saving video to uncompressed or lossless format. Allows saving video to uncompressed AVI or using lossless encoding (to make file size smaller). Two pass MPEG-2 and AVC/H.264 encoding. Allows encoding quality improvement. Fast first pass for two pass encoding. Allows encoding acceleration in two pass mode. The total encoding time is reduced up to 30%. Elecard Converter Studio 5 User Guide MPEG-1/2 Layer I/II, AAC, LPCM and WAV PCM audio encoding. Support of different audio formats allows selection of the optimal encoding format for every task. Work with DVD. Allows conversion of the whole DVD or only the selected parts. Advertisement insertion. Allows advertisements adding to a file during conversion. Specifying part for transcoding. Allows transcoding the specified part of the file. Chapter Points adding. Allows adding key frames to the specified positions during video encoding in MPEG-2 format. Extended access to components settings. Allows complete control over encoding parameters. Work with multichannel streams. Allows you to open multichannel stream, to select the required tracks for work, and to create multichannel streams with individual settings for each track. Work with MPEG multiplexer is adapted for multiprogram files creation. It is used only in Pro/Pro HD versions. Stream Copy mode for video and audio. The mode of the original track transferring from the input file to the output file without conversion. It accelerates the conversion process and keeps the data quality. Multiplexing into AVI, FLV, MP4, 3GPP, AVCHD®, MPEG-1 SS, MPEG-2 PS/TS and elementary streams saving. Provides wide application of the output files. MPEG streams indexing. Provides index files creation for encoded MPEG files. This option is necessary for broadcasting. Set of preconfigured profiles for optimal encoding. Provides easy creation of files that are compatible with different devices. Profiles creation, editing and saving. Provides creation and further use of the user original profiles. Cluster encoding. Encoding of common task list using the computing power of locally networked PCs (distributed computing). Elecard Converter Studio is available as Elecard Converter Studio Mobile, Elecard Converter Studio AVC HD, Elecard Converter Studio, Elecard Converter Studio Pro и Elecard Converter Studio ProHD. Each version is intended for a certain range of tasks and provides respective functionality. The table below specifies features that are available in the different Elecard Converter Studio versions. Table 1. Elecard Converter Studio and Elecard Converter Studio Pro/Pro HD Features Features Mobile AVCHD Consumer Pro ProHD Supported Input Formats MPEG-1/2 MPEG-4 ASP AVC/H.264 HEVC/H.265 DV25 DVC Pro 50/100 DVD MPEG-1 Layer 1/2/3 Elecard Converter Studio √ √ √ √ √ √ √ - - √ √ √ 6 √ √ √ √ √ √ √ √ √ √ √ √ √ √ √ √ √ √ √ √ √ √ User Guide Features LPCM AAC Mobile √ √ AVCHD √ - Consumer √ √ Pro √ √ ProHD √ √ Supported Video Encoding Formats Maximal resolution limits MPEG-1/2 MPEG-4 ASP AVC/H.264 DV25 HEVC/H.265 √ (720x576) √ (MP@ML) √ √ ([email protected]) √ - √ (MP@HL) √ - √ (MP@HL) √ √ ([email protected]) √ - √ (720x576) √ (HP@HL) √ (HP@HL) √ √ √ ([email protected]) √ ([email protected]) √ √ √ √ Supported Audio Encoding Formats MPEG-1/2 Layer I/II AAC LPCM WAV PCM √ √ √ √ RAW AVI FLV MP4 3GPP AVCHD® MPEG-1 SS MPEG-2 PS MPEG-2 TS Apple HLS √ √ √ √ √ √ √ - Denoising Sound correction Logo insertion Chapter Point Advertisement insertion Enhanced file processing mode Indexing of output MPEG files MPEG-2 TS files encryption Encoding with constant bitrate (CBR) General settings of video encoders Advanced settings of encoders Advanced settings of MPEG-2 TS multiplexer Creation of multiprogram streams Watch Folder mode Console application mode Converter Studio service Cluster encoding * HASP HL protection - √ √ √ √ √ √ √ √ √ √ √ √ √ √ √ √ √ √ √ √ √ √ √ √ - √ √ √ √ √ √ √ √ √ √ √ √ √ √ √ √ √ √ √ √ √ - √ √ - √ √ √ √ √ √ √ √ √ √ - √ √ √ √ - - - √ √ - - - √ √ - - - √ √ - √ √ √ √ - - - √ √ - - - √ √ - - - √ √ - - - √ √ √ √ √ √ √ √ √ √ Multiplexing Formats √ √ √ √ √ √ √ Miscellaneous * - Delivered as option for Pro/Pro HD versions. Elecard Converter Studio 7 User Guide 2.2 Specifications Elecard Converter Studio supports the following multiplexed output formats: MPEG-1 System Stream (ISO/IEC 13818-1) MPEG-2 Program Stream (ISO/IEC 13818-1) MPEG-2 Transport Stream (ISO/IEC 13818-1) AVCHD® streams MP4 ISO compatible files (ISO/IEC 14496-14) MP4 Sony PSP compatible files MP4 Apple iPod compatible files MP4 ISMA compatible files MP4 3GPP compatible files FLV compatible files AVI files Apple HLS ES Annex B Type II (ISO/IEC 11172-1) Elecard Converter Studio supports the following output elementary stream formats: AVC/H.264 High Profile (ISO/IEC 14496-10) HEVC/H.265 MPEG-4 ASP (ISO/IEC 14496-2) MPEG-1 (ISO/IEC 11172-2) MPEG-2 HL@HP (ISO/IEC 13818-2) DV25 (SMPTE 314M-1999) AAC (ISO/IEC 13818-7) MPEG-1/2 audio Layer I/II (ISO/IEC 11172-3, ISO/IEC 13818-3) LPCM WAV PCM AVI Uncompressed files HuffYUV AVI DVB subtitles Closed Captions EIA-608, EIA-708 Teletext subtitles Elecard Converter Studio 8 User Guide Elecard Converter Studio supports the following input formats: AVI Uncompressed files (RGB, YV12, YUY2) DV25, DV50, DV100, MPEG-4 SP/ASP (AVI, MOV files) AVS (Avisynth Script) MPEG-1/2 (MPEG PS/TS, VES, ES, XPL) MPEG-4 SP/ASP (MOV, MP4, MPEG PS/TS, VES, XPL) AVC/H.264 (MOV, MP4, MPEG PS/TS, VES, XPL) LPCM WAV PCM Dolby Digital MPEG-1 Audio Layer II MPEG-1 Audio Layer III AAC (Advanced Audio Codec) Elecard Converter Studio 9 User Guide 3. Elecard Converter Studio Interface This section describes the Elecard Converter Studio GUI. Figure 1. Elecard Converter Studio – Main Window Batch List panel is the main program window that displays information about the tasks that will be converted. It also enables to manage tasks, change their settings and launch conversion process. Profiles panel contains the available profiles list with the brief description of their settings. Task Parameters panel allows quickly setting any task parameters and adding optional filters if they are required. Messages panel displays various information when the converting process is started. In particular, it displays warning messages if the encoder parameters or the other components are set incorrectly. Preview panel allows viewing the input media file. Cluster panel displays the list of cluster nodes and allows the node control. Watch Folder Mode panel allows task creation and control in the Watch Folder mode. Elecard Converter Studio 10 User Guide Statistics panel displays the encoding process information. 3.1 Main Menu The program main menu provides convenient access to the frequently used commands. All of the commands are divided into groups. Figure 1. Figure 2. Figure 3. Figure 4. Elecard Converter Studio Elecard Converter Studio – Main Menu Elecard Converter Studio – Main Menu – File Elecard Converter Studio – Main Menu – Batch List Elecard Converter Studio – Main Menu – Tools 11 User Guide Figure 5. Figure 6. Elecard Converter Studio – Main Menu – Window Elecard Converter Studio – Main Menu – Help 3.2 Batch List Panel When you start Elecard Converter Studio for the first time, the Batch list is empty. Tasks will be created after media files are added to the Batch list for conversion. Each task has the following information: name, conversion profile, status and path of the output folder for the converted files. Figure 1. Elecard Converter Studio — Batch List Panel Besides, the Batch List panel contains control buttons that are essential to manage tasks. They are as follows: Elecard Converter Studio 12 User Guide — Load Batch List. Click this button to load the earlier saved list of tasks. When a new tasks list is loaded, the previous one is cleared. — Save Batch List. Click this button to save the Batch list in order to open and use it later. — Clear Batch List. Clears the Batch list. — Delete Selected Task. Deletes the selected tasks from the Batch list. — Fast Task Profile Changing. Allows quickly changing the conversion profile and the output folder of the selected tasks. For more information see Section “Fast Profile Changing”. — Add File(s) to Batch List. Click this button to add media files to the Batch list. Open files are added to the Batch list. They have the Init waiting status. To prepare a task for conversion, apply a profile to the task. After it, this task has the Waiting status. For more information see Section “Profile Applying”. — Add (Save) Task to Batch List. Allows saving the parameters of the changed task to the Batch list. — Change Task Parameters. Allows quickly and visually setting any task parameters and adding optional filters if they are required. A task is changed on the Task Parameters panel. For more information see Section “Task Parameters Changing”. — Batch List Filter. Allows selection files for conversion according to the specified parameters. For more information see Section “Batch List Filter”. — Watch Folder Mode. Sets and starts the Watch Folder mode. For more information see Section “Watch Folder Mode”. — Run Batch List Encoding. Starts or stops the Batch list encoding. The Go to text box is intended for search of the task in task list. The task that name contains the typed string is highlighted in the task list. The buttons move highlighting to the previous or next task in the search list (tasks with names containing the typed string). The Cluster node box specifies the node that task list must be displayed at the moment. Many options are also available in the shortcut menu. The menu appears when the user clicks the right mouse button on the Batch List panel. Elecard Converter Studio 13 User Guide Figure 1. Batch List — Shortcut Menu Add File(s) to Batch List... — adds media files to the Batch list. The task parameters must be adjusted before the encoding process start. For more information see the Task Parameters Changing section. Add File(s) to Batch List with profile... — adds media files to the Batch list with profile. In this mode, when the file is opened, the encoding profile and output folder must be specified in the appeared window. For more information see the Task Parameters Changing section. Fast Profile Changing... — allows fast changing of the encoding profile and output folder for the group of selected files. Change Task Parameters — allows adjustment of the selected task parameters. Run only selected task — runs only the task selected from the Batch list. Set Task Status — disables the task or sets the Waiting status to the task. Scroll the Batch list to the current task — enable the Batch list scrolling to the current task. Show Save Batch List dialog on exit — enables the Save Batch List dialog box displaying on the program exit. If this option is disabled, the Batch list is saved automatically to a temporary file. Auto load the last Batch list — enables automatic loading of the last opened Batch list. Delete Successfully Completed Task(s) — deletes all completed task(s) from the Batch list. This option is disabled in the Watch Folder mode. Error information — displays the error information and possible ways to fix it. It happens when task encoding cannot be started and the task has the Failed status. 3.3 Profiles Panel The Profiles panel contains ready-for-use profiles. Each profile provides the optimal encoding settings and allows creating files that are compatible with different devices such as DVD, SVCD, HDV, Blu-Ray, Sony PlayStation® Portable (Sony PSP®), Sony PlayStation3®, Apple iPod® and Elecard Converter Studio 14 User Guide etc. There is overall information about the encoding parameters of every profile: audio and video format, bitrate and optional filters presence. Figure 1. Profiles Panel There are control elements at the upper-left corner of the panel. — Add New Profile. Allows saving the open task parameters as profile. After saving, the profile appears in the profiles list and can be applied to other tasks. — Delete Profile. Deletes a profile from the available profiles list. The profiles supplied with the program are protected from deletion. — Apply Profile to Task. Applies the selected profile to the task. The shortcut menu is available in the Profiles panel. The menu contains the following commands: Use profile as default — sets the profile that will be applied to all of opened files. Import profile — imports the profile created and saved previously into the profile list. Export profile — exports a profile from the list. Elecard Converter Studio 15 User Guide Figure 1. Profiles – Shortcut Menu In addition to the controls, there is the Speed/Quality slider. Some profiles allow speed/quality ratio adjustment for encoding. Use the Fastest mode in order to adjust the maximum encoding speed. And vice versa, the Highest mode provides the maximum quality. The optimal speed/quality ratio is set with the Optimal mode. Note: Speed/quality ratio should be adjusted before applying a profile. 3.4 Task Parameters Panel The Task Parameters panel opens by double-clicking any task in the Batch List. This panel allows quickly and visually changing the encoding and decoding parameters. The task parameters are grouped as tabs by its features. Click the appropriate button to set the parameter group. Figure 1. Task Parameters Panel — Input File Information displays general information about the current tracks in the task. For more information see Section “Input File Information”. — Stream Type Parameters allows selecting the output stream type and changing MPEG multiplexer parameters. For more information see Section “Stream Type Parameters” and Section “MPEG Multiplexer Advanced Settings”. — Video Encoding Parameters allows setting video encoder parameters. Any parameters can be individual for every track. For more information see Section “Video Encoding Parameters” and Section “Advanced Encoding Settings”. — Picture Transformation changes decoding parameters and applies appropriate filters to the picture. For more information see Section “Picture Transformation Parameters”. Elecard Converter Studio 16 User Guide — Logo and Advertisement Insertion overlays a static picture on the video during conversion and inserts advertisement in the file. For more information see Section “Logo and Advertisement Insertion”. — Audio Encoding Parameters allows setting audio parameters and using optional filters for work with audio streams. For more information see Section “Audio Encoding Parameters”. 3.5 Preview Panel The Preview panel allows viewing the source video and controlling its playback. There are the following control buttons on the panel: Figure 1. Preview Panel — Play. Starts media file playback. — Pause. Pauses media file playback. — Next/Previous. Plays forward and backward frame by frame in the Pause mode. — Slider. Quickly moves to the required file position. — Specifies the beginning and the end of the part for encoding. Specifies the frame where the Elecard Converter Studio 17 User Guide track encoding will be started, and the frame where the track encoding will be finished. — Go to the beginning/end of the part for encoding. Sets current position to the first/last frame of the part for encoding. — Remove the encoding part boundaries. Disables the partial encoding mode. The selected track will be converted entirely. — Adds chapter points. Adds key frames to the specified positions during the encoding process. For more information see Section “Add Chapter Points”. In addition to the controls, file duration and current playback position are displayed on the Preview panel. You can right-click in the Preview panel to open the shortcut menu. The menu allows the user to select video and audio channels for preview, to enable DVD, DVB, Teletext subtitles and Closed Caption option, and to set the video window size. Figure 1. Preview Panel — Shortcut Menu This menu allows scaling the preview window or spreading it up to the maximum size. 3.6 Messages Panel The Messages panel displays various information when the converting process is started. In particular, it displays warning messages if the encoder parameters or the other components are set incorrectly. The program checks all task parameters when you edit a task and save it to the Batch list, and sends warning messages if some errors are detected. Click the message text to display the detailed information at the lower part of the window. If you are sure that the settings are correct and want to stop checking and displaying messages, disable this option in the program settings. Elecard Converter Studio 18 User Guide Figure 1. Messages Panel 3.7 Cluster Panel The Cluster panel allows Converter Studio to use computing power of locally networked PCs for common task list encoding (distributed computing). The cluster node works in one of the following modes: Independent Watch Folder. The nodes working in this mode perform folder monitoring independently of one another and of main computer. Work folder, profile, and additional settings are specified for each node. Controlled by main computer. In this mode the tasks from list are distributed among the available nodes. Each node encodes its task using the specified profile and settings. The main computer can be used for the nodes control and for encoding of tasks from the common list. It is specified in the program settings. Figure 1. Cluster Panel In the beginning of work the cluster note must be added to the list of available computers. To add Elecard Converter Studio 19 User Guide node click the Add cluster node command from the shortcut menu (right-click opened) or click the button dialog. . Set the selected node parameters on the appeared Cluster node parameters Figure 2. Table 1. Cluster Node Parameters Dialog Cluster Node Parameters Dialog Controls Control Description Address Port Work mode Spesifies the IP address of remote computer on which the Converter Studio service is installed. The service installation and adjustment are described in the Converter Studio Service Manager section. Specifies the service control port. Specifies the service work mode: Independent Watch Folder. The nodes working in this mode perform folder monitoring independently of one another and of main computer. Work folder, profile, and additional settings are specified for each node. Controlled by main computer. In this mode the tasks from list are distributed among the available nodes. Each node encodes its task using the specified profile and settings. The main computer can be used for the nodes control and for encoding of tasks from the common list. It is specified in the program settings. Download files to cluster node before processing If the option is selected, media-files are downloaded into a temporary folder on the node hard disk before the task processing. Output files are also created in a temporary folder located on the node HD. After the task completion the output files will be copied from the temporary folder to the output folder. The default path of temporary folders is 'C:\'. The path can be changed in the config.xml file (located in the program folder). Most of options are adjustable via the shortcut menu (right-click the Cluster window): Elecard Converter Studio 20 User Guide Figure 1. Cluster Shortcut Menu Add cluster node — adds cluster node to the available nodes list. Delete cluster node — deletes cluster node from the available nodes list. The same operation can be done with the button click. Clear the list — clears the available nodes list. The same operation can be done with the button click. Skip the current task — allows the current task skipping on any node. Selet the node and click the Skip the current task command. Download files to cluster node before processing — enables downloading of the input files to the cluster node before task processing. Encoded data is stored to the file that is located in the temporal folder of cluster node. After encoding is completed, the output files are copied to the output folder. Work mode — selects the cluster node work mode. Enable cluster node/channel — turns on the cluster node/channel. Disable cluster node/channel — turns off the cluster node/channel. The node is displayed in the available nodes/channels list but does not perform encoding. Autodetection of cluster nodes — allows automatic search for available cluster nodes. The detected node is added to the list in off state. After addition the node must be tuned and turned on using the shortcut menu. Synchronize with Statistics window — allows synchronization of the Statistics panel information with the channel selected in the Cluster window. Cluster node parameters — allows tuning of the cluster node displayed in the list. The same operation can be done with the button Elecard Converter Studio 21 click. The Cluster node parameters dialog User Guide will be displayed in the form corresponding to the selected work mode. The Watch Folder mode is described in the Watch Folder Mode section. 3.8 Watch Folder Mode The Watch Folder mode provides the automatic conversion of any media files that are located in a folder or on a FTP server using the selected profile. If this mode is enabled, the program monitors the folder or FTP serner content, creates tasks for every media file in Batch list and starts encoding. During the conversion process, the folder monitoring is paused. Folder monitoring is executed every 20 seconds and will continue until a new file appears in the specified folder. Figure 1. Watch Folder Panel To start the Watch Folder mode click the parameters in the open window. Elecard Converter Studio button on the Watch Falder panel. Set the required 22 User Guide Tools – Watch Folder Mode Figure 2. The following table describes the Watch Folder Mode controls. Table 1. Watch Folder Mode Controls Control Enabled Watch Subdirectories Копировать с FTP Input Folder Output Folder Копировать на FTP Profile Speed/Quality Description Enables/Disables the Watch Folder mode. In this mode the program automatically scans the selected folder (or FTP server). If media files are found in this folder, then the program creates task in the Batch list and transcodes it with the selected profile. Enables/Disables subdirectory search in the input folder. Specifies the FTP server address for monitoring. Specifies the input folder for monitoring. Specifies the output folder for saving encoded files. Specifies the FTP server address for saving encoded files. Allows the user to select the most suitable profile from the profiles list. The Profiles list contains the optimal parameters for encoding and provides the creating of files that are compatible with different hardware devices. Allows the adjustment of the encoding speed/quality ratio. The Fastest mode is adjusted to the maximum encoding speed. And vice versa, the Highest mode provides the maximum quality. The optimal speed/quality ratio is provided with the Optimal mode. To stop the Watch Folder mode, click the button on the Batch List panel. Note: Shutdown computer after encoding option is unavailable in the Watch Folder mode. Elecard Converter Studio 23 User Guide 3.9 Statistics Panel The Statistics panel displays various information about the converting process. In particular, it displays the currently encoded task name, the number of encoded frames, the encoding speed, the remaining encoding time, disk free space. In the Streaming mode the CPU usage chart is depicted as well. The panel allows user to select the cluster node for statistical information displaying, to skip the task encoding in the File mode, and to stop the encoding process. Figure 1. Elecard Converter Studio Statistics Panel – File Mode 24 User Guide 4. Adding Files for Conversion When you start working with Elecard Converter Studio, first open media files and add tasks for conversion. There are some methods to add a new task: Click the Add File(s) to Batch List button on the Batch List panel or click the right mouse button to open the shortcut menu and select Add File(s) to Batch List…. Figure 1. Batch List Panel – Add File(s) to Batch List Select required files for conversion in the appeared window. The task with the Init Waiting status will be set for every file in the Batch list. It means that the profile for this task is not specified and the task will not be converted. To apply a profile and change its settings see the Saving, Applying and Changing Task Parameters section. On the File menu, click Open Media file… or press CTRL+O. Then select required file for conversion in the appeared window. Elecard Converter Studio 25 User Guide Figure 1. File Menu Change encoding parameters if it is necessary and save the task in the Batch list. Click the Save to batch list button on the Task Parameters panel or click the Save Task to Batch List button on the Batch List panel. For more information about task settings see the Task Parameters Changing section. Another method to add a new task: On the File menu, click Open Media Files… or press CTRL+M to open the Open Media File(s) dialog box. Elecard Converter Studio 26 User Guide Figure 1. Open Media File(s) Dialog Box This method allows opening both a separate file and also a group of files by using different modes of task setting. First, you should set a files list. So, click button and select media files for conversion in the open window. To clear the files list use button. The following table describes Open Media File(s) dialog box controls. Table 1. Open Media File(s) Dialog Box Controls Control Mode Description Selects media files group mode: Set of files − Each file will be added to the Batch list according to the selected profile. Multi-Source − File list will be created and then the group of files will be encoded and multiplexed into the single file. Single File − All files will be opened and recoded successively. Elecard Converter Studio 27 User Guide Control Add to Batch list Use profile Profile Speed/Quality Description Adds tasks to Batch list automatically according to the selected mode. Allows applying one profile to all tasks. If different settings are required for encoding, then this option must be disabled and tasks should be set separately. Allows the user to select the most suitable profile from the profiles list. The Profiles panel contains the optimal parameters for encoding and provides receiving files that are compatible with different hardware devices. Allows the adjustment of the encoding speed/quality ratio. The Fastest mode is adjusted to the maximum encoding speed. And vice versa, the Highest mode provides the maximum quality. The optimal speed/quality ratio is provided with the Optimal mode. Note: Single File mode operates only with MPEG PS/TS/VES files. To work with the program correctly, set the same parameters (resolution, audio and video format, frame rate, etc.) to all files in the list. Besides, the program allows working with DVD content. In this case the user can convert either a part of a film, recorded on DVD, or the whole film. Perform the following steps: 1. Select File/Open DVD… in the main program menu or press CTRL+D. 2. Select the folder with DVD files in the open window. Then the Open DVD dialog box opens. 3. Select the required DVD Titles for conversion. Unnecessary Chapters can be omitted. Figure 1. Open DVD Dialog Box Note: In the Open DVD mode it is possible to work only with DVDs without CSS (Content Scramble System) encryption. Elecard Converter Studio 28 User Guide 5. Saving, Applying and Changing Task Parameters The task has the Init waiting status if its profile is not specified. It means that the task will not be executed. Even if the task is ready for conversion, in some cases task parameters should be changed. There are some methods to change task settings. These methods differ from each other in features (from simple mode, when the ready profile is applied to the task, up to completely adjustable mode, when all settings are available to the user). 5.1 Profile Applying Use the Profiles panel when only a profile should be applied to the task. In this case select tasks in the Batch List panel and drag the appropriate profile from the Profiles panel to the Batch List. You can also drag the profile to the Task Parameters panel and apply it to the task that is selected for editing. Figure 1. Batch List — Profile Applying 5.2 Fast Profile Changing The program allows quickly changing the task profile and the output folder that is used for the encoded files. Perform the following steps to change a profile: Click the Fast Profile Changing button or use the shortcut menu by clicking the right mouse button on the Batch List panel. Elecard Converter Studio 29 User Guide Figure 1. Batch List – Fast Profile Changing In the open dialog box you can change the profile, adjust the Speed/Quality ratio and specify the output folder for saving of the encoded files. Figure 1. Fast Task Profile Changing Dialog Box The following table describes Fast Task Profile Changing controls: Table 1. Fast Task Profile Changing Dialog Box Controls Control Output Folder Current Profile Change Profile Profile Speed/Quality Elecard Converter Studio Description Specifies the output folder for saving of encoded files. Displays the information about the current task profile. Allows you to apply the same profile to all tasks. Allows you to select the most suitable profile from the profiles list. The Profiles panel contains the optimal parameters for encoding and provides receiving files that are compatible with different hardware devices. Allows the adjustment of the encoding speed/quality ratio. The Fastest mode is adjusted to the maximum encoding speed. And vice versa, the Highest mode 30 User Guide Control Description provides the maximum quality. The optimal speed/quality ratio is provided with the Optimal mode. 5.3 Task Parameters Changing To change any task parameters (add filters, disable unused tracks, etc.) click the Change Task Parameters button. Then the Task Parameters panel opens. You can also double-click the selected task in the Batch List panel to open this panel or use the shortcut menu by right-clicking the task. Figure 1. Batch List – Task Parameters Changing All parameters are grouped as controls by their functions in the Task Parameters panel. 5.4 Input File Information Click to open the Input File Information group. This group displays the path of the source file and its name, stream type, file size and its duration. In addition, there are three tabs. The Input tab contains general information (audio and video format, frame rate, frame size, etc.) about all audio, video tracks and subtitles (DVD, DVB, Teletext) available in the task that is selected for editing. The Output tab displays the output file information (audio and video format, frame rate, frame size, etc.). The DVD tab displays information about the selected title and DVD chapters. Clear the check box against the appropriate track to disable it. To add a new audio/video track from the media file to the Batch list, click required file in the open window. Elecard Converter Studio the Add Track(s) button and select the 31 User Guide Figure 1. Figure 2. Elecard Converter Studio Task Parameters – Input Tab Task Parameters – Output Tab 32 User Guide Figure 3. Task Parameters – DVD Tab Note: Converter Studio provides support of subtitles during conversion of DVD files. When media data is multiplexed into Transport Stream format, DVD subtitles are transformed to DVB subtitles. Otherwise the encoded video can be overlaid with one selected subtitle track. 5.5 Stream Type Parameters Click button to open the Stream Type Parameters group. It allows changing the output file parameters: stream type, compatibility, the number of encoding passes. The user can also see the estimated output file size and, if it is necessary to change the output size, encode to the target file size. By encoding file into the specified size the video bitrate is automatically adjusted according to the file duration and its required size. The audio track bitrate is set manually and remains unchanged. The "Encode to the target file size" mode is available only for 3GPP, FLV, MP4, MPEG-1 SS, MPEG-2 PS or MPEG-2 VES formats. Click the Advanced button to open MPEG/MP4 multiplexer advanced settings. For more information about MPEG multiplexer advanced parameters see Section 6, “MPEG Multiplexer Advanced Settings”. Elecard Converter Studio 33 User Guide Figure 1. Task Parameters – Stream Type Parameters The following table describes Stream Type Parameters controls. Table 1. Task Parameters – Stream Type Parameters Controls Control Elecard Converter Studio Description 34 User Guide Control Description Stream Type Allows selecting the output stream type. Depending on the selected stream type some audio and video encoding formats can be unavailable. Elementary — output audio and/or video streams will be saved into separate files without multiplexing. MPEG-1 Systemm — output streams will be multiplexed into System Stream and will be saved into the single file. MPEG-2 Program — output streams will be multiplexed into Program Stream and will be saved into the single file. MPEG-2 Transport — output streams will be multiplexed into Transport Stream and will be saved into single file. 3GPP - output streams will be multiplexed and saved into the single 3GPP file. FLV - output streams will be multiplexed and saved into the single FLV Compatible Number of Pass streams. Encode to target file size Output file size Description Indexing output file Convert subpictures to DVB stream Encrypt Transport Stream Elecard Converter Studio (f4v) file. MP4 — output streams will be multiplexed and saved into the single MP4 file. AVI — output streams will be multiplexed and saved into the single AVI file. HLS – output streams will be multiplexed and saved into the sequence of TransportStream files. Provides compatibility of the created files with different playback devices. Available values depend on the selected stream type. Some encoding parameters can be unavailable or limited to assure receiving file compatibility. For MP4 file are available the following values: ISMA — ISMA compatible file. Sony PSP — MP4 Sony PSP compatible file. The presence of an audio track is obligatory in this mode. No support for multichannel streams. Apple iPod — Apple iPod compatible file. No support for multichannel Specifies the number of encoding passes. One pass — Fast one-pass mode. In this mode the bitrate varies onthe-fly, starting at the specified bitrate, increasing toward the specified maximum in complex segments and decreasing toward the specified minimum in less complex segments. Two pass — Qualitative two-pass mode. In this mode the analysis pass is performed before the encoding pass. The analysis pass determines the best variable bitrate for the encoding pass. The actual bitrate varies between the specified minimum and maximum values. The bitrate increase and decrease are balanced to keep the average bitrate to the specified value. Allows encoding a file into the specified size that is selected from the standard sizes list or it is specified by the user. The video bitrate will be automatically adjusted according to the file duration and its target size. The audio track bitrates is set manually and remains unchanged. The "Encode to target file size" mode is available only for 3GPP, FLV, MP4, MPEG-1 SS, MPEG-2 PS or MPEG-2 VES formats. Indicates the estimated output file size. Allows setting the required file size during encoding in the "Encode to target file size" mode. Allows user to add file description, if the encoded file is Sony PSP compatible. Creates the index file after encoding (for VES\TS\PS only). Allows conversion of DVD subtitles to DVB subtitles. The option is available only for multiplexing into TS format. Otherwise the encoded video can be overlaid with one selected subtitle track. Allows encryption of Transport Stream. 35 User Guide 5.6 Video Encoding Parameters Click to open the Video Encoding Parameters group. It allows adjusting general settings for video encoders. By selecting a track from the video list (if there is a list of tracks), you can apply individual settings for every track. Select the Use these settings for all video tracks check box if the open file has several video tracks, and it is necessary to adjust the same settings for every track. So, select a first video track, set all necessary parameters for it and select this check box. Then save the task. Figure 2. Task Parameters – Video Encoding Parameters The following table describes Video Encoding Parameters controls. Table 2. Task Parameters – Video Encoding Parameters Controls Control Elecard Converter Studio Description 36 User Guide Control Description Encoding Format Specifies the video encoding format. The list of available video formats is formed according to the selected stream type. There are individual settings for some be Profile and Level formats. Click the Advanced button to open them. MPEG-1 – MPEG-1 video MPEG-2 – MPEG-2 video MPEG-4 – MPEG-4 ASP video AVC/H.264 – AVC/H.264 video DV – DV25 video AVI Uncompressed – uncompressed video AVI HuffYUV – lossless encoded video (the appropriate encoder must installed in the system) Specifies the profile and level for the video output format. Profile and level impose restrictions on video encoding parameters in order to guarantee compatibility with hardware devices. Some settings can be unavailable in this case. For MPEG-2 video format the following profiles and levels are available: Simple Profile/Main Level Main Profile/Simple Level Main Profile/Main Level Main Profile/High1440 Level Main Profile/High Level High Profile/Main Level High Profile/High1440 Level High Profile/High Level 422 Profile/Main Level 422 Profile/High Level 422 Profile/Unspecified Level For MPEG-4 ASP video format the following profiles and levels are available: Simple profile/Level 5 Advanced simple profile/Level 5 Rate Control Bitrate GOP Length Elecard Converter Studio For AVC/H.264 video format the following profiles and levels are available: Baseline profile/Level 5.1 Main profile/Level 5.1 High profile/Level 5.1 High422 profile/Level 5.1 Specifies the Rate Control mode. The following modes are available: Variable Bitrate. The number of transmitted bits per unit time may vary for the stream. Constant Bitrate .The number of transmitted bits per unit time is constant for the stream. Constant Quantizer. The stream rate is not controlled as fixed quantizers are set for every frame. Specifies the video bitrate. The range of available bitrates exists for each encoding format. Stream rate can be limited in some cases to assure file compatibility with different hardware. Specifies the maximum number of pictures in GOP (Group Of Pictures). Larger GOPs provide better compression while smaller GOPs provide faster access by positioning. Set the distance between reference frames no more than 12-15 to receive files compatibility with hardware devices. For MPEG-2 video format the following values are available: 0 - 100 For MPEG-4 and AVC/H.264 video format the following values are available: 0 - 300 37 User Guide Control B-frames Frame Encoding Type Description Specifies the maximum number of B-frames which have bidirectional prediction for encoding in GOP. B-frames significantly enhance video encoding quality. Use two B-frames for MPEG-2 and MPEG-4 ASP encoding and three B-frames for H.264 encoding. For MPEG-2, MPEG-4 ASP and AVC/H.264 video formats the following values are available: 0-3 Selects the video frame encoding type. For MPEG-2 video format the following modes are available: Progressive Interlaced (adaptive) Interlaced For MPEG-4 ASP video format the following modes are available: Progressive Interlaced For AVC/H.264 video format the following modes are available: Progressive Interlaced MBAFF (adaptive) The Progressive mode is optimized for encoding of video that contains only progressive frames. Use another mode for interlaced video. If interlaced encoding is not acceptable, the interlaced video can be converted into progressive format using the deinterlacing operation. Interlaced video can be encoded using the Interlaced and Interlaced (adaptive) modes. The first one is optimized for video that contains only interlaced frames. Adaptive mode provides the better encoding quality for interlaced and mixed (interlaced and progressive frames) video. Aspect Ratio Speed/Quality Specifies the output video aspect ratio. Allows the adjustment of the encoding speed/quality ratio. The Fastest mode is adjusted to the maximum encoding speed. And vice versa, the Highest mode provides the maximum quality. The optimal speed/quality ratio is provided with the Optimal mode. 5.7 Picture Transformation Click one of the transformation buttons to open the Picture Transformation group. It allows using such optional filters as: denoising, color correction, deinterlacing, resizing, frame rate conversion, etc. As in case with Video Encoder Parameters, you can also apply individual settings for every track or apply the first track settings to all available tracks in the file. Elecard Converter Studio 38 User Guide Figure 3. Task Parameters – Picture Transformation 1 The following table describes Picture Transformation 1 controls: Table 3. Task Parameters – Picture Transformation 1 Controls Control Resolution HQ Chroma Upsampling Elecard Converter Studio Description Sets the output resolution mode during decoding: Full — Output video has original frame size Half horizontal — Output video frame width is reduced by half Half vertical — Output video frame height is reduced by half Quarter — Output video frame width and height are reduced by half When you select this option, the decoding process can be accelerated but some small artifacts can appear on the picture. This option is available for MPEG-2 and DV video decoding. Improves the visual quality of the decoded video by using the better algorithm of chroma component decoding. It is especially noticeable during decoding video with color blends. It is recommended to use only if video is converted to MPEG-2 4:2:2 or to AVI 39 User Guide Control Postprocessing (deblocking) Input picture type Description Uncompressed/HufYUV. See example below. Removes the MPEG compression artifacts by using deblocking and deringing filters. For MPEG-4 AVC/H.264 streams this option must be enabled. See example below. According to the picture type all filters will be set for picture transformation in order to provide maximum quality of the output stream. You can select a picture type: Auto — Automatically defines a picture type Progressive — A picture type is set into progressive mode Interlaced — A picture type is set into interlaced mode. All frames will be processed by fields Teletext language Denoising Auto detect noise level Noise level Residual noise Denoise chroma Elecard Converter Studio Allows selection of the teletext language for overlay during the transcoding process. Allows visual improvement of the picture by reducing high-frequency noise. The denoising filter operates both in software and hardware mode on video adapters supporting NVIDIA CUDA technology. Concurrent utilization of several video cards makes it possible to boost the processing speed up to 33 times as compared to standard CPU performance. Enables the automatic noise level detection. This option provides more effective work of the denoising filter. Specifies the noise level value, if the automatic noise detection is disabled. The 2 value corresponds to the insignificant noise level, the 7 value corresponds to the heavy noise. The optimal values – from 3 to 5. Specifies the allowable residual noise level after the denoising process. The lower residual noise level the higher denoising effect and lower processing speed. The optimal values – from 0.2 to 0.4. Allows both luma and chroma component denoising. This option provides more effective work of the denoising filter. 40 User Guide Figure 4. Figure 5. Elecard Converter Studio Picture Transformation – HQ Upsampling Picture Transformation – Postprocessing (Deblocking) 41 User Guide Figure 6. Figure 7. Picture Transformation – Denoising Task Parameters – Picture Transformation 2 The following table describes Picture Transformation 2 controls. Table 4. Task Parameters – Picture Transformation 2 Controls Control Color correction Elecard Converter Studio Description Enables adjustment of the following video charasteristics: brightness, 42 User Guide Control Deinterlacing Description contrast, saturation, hue, gamma. Allows converting interlaced video into progressive. Two deinterlacing modes are available: High Speed — Uses the fast bicubic method. Deinterlacing does not affect conversion speed. High Quality — Uses the more qualitative adaptive method, but deinterlacing speed is lower. See examples below. Double frame rate Field order Allows convertion of interlaced video into progressive format using the frame rate doubling. Allows user to specify the field order in the input video. Figure 8. Elecard Converter Studio Picture Transformation – Deinterlacing 43 User Guide Figure 9. Task Parameters – Picture Transformation 2 Table 5. Task Parameters – Picture Transformation 3 Controls Control Description Frame rate Allows frame rate changing. The necessary frames will be added or removed to/from the video stream. Output picture type Cropping Allows user to set type of the output frame, if the frame rate is changed. Resizing Method Frame Size Elecard Converter Studio Allows cropping a frame from any side. Values must be set to the appropriate fields in pixels. Enables the filter and select the frame resizing method. Each method provides different speed and quality. Some methods provide well-defined edges or fuzzy edges. Sets the output frame size. You can select the current frame size from the list of presets or set arbitrary values. 44 User Guide Control Aspect Ratio/Method Description Controls aspect ratio change when video frame is resized. 5.8 Logo and Advertisement Insertion Click button to open the Logo and advertisement insertion group of parameters. These parameters allow logo insertion and advertisement addition to the beginning or to the end of the file during conversion. To insert logo into the video, select the required video track and select the Insert logo check box. Then click and select BMP file in the open window. To insert an advertisement, select the Insert advertisement check box, click and then select the schedule file in the open window. For creating and editing the advertisement schedule file see Section “Advertisement Schedule Editor”. Elecard Converter Studio 45 User Guide Figure 10. Task Parameters – Logo and Advertisement Insertion The following table describes Logo and advertisement insertion controls. Table 6. Task Parameters – Logo and Advertisement Insertion Controls Control Description Bitmap Path X/Y Use Transparent Color Specifies the path of BMP file that is used as the overlaid logo. Sets the logo position in the picture. If BMP file with logo has not alpha channel, then transparent color can be set. Schedule file Click button, put «eyedropper» on the required logo area, and click the left mouse button. Specifies the path of the advertisement schedule file. Note: Only 24-bit and 32-bit BMP files are supported. Transparent color should not be set for 32-bit BMP files with alpha channel. Elecard Converter Studio 46 User Guide 5.9 Audio Parameters Click button to open the Audio Parameters group of parameters. It allows the user to select encoding format, to change settings and to set audio frequency and level. When one audio track from the available tracks list is selected, you can set individual settings for it or apply the first track settings to all presented audio tracks in the file. Figure 11. Task Parameters – Audio Parameters The following table describes Audio Parameters controls. Table 7. Task Parameters – Audio Parameters Controls Control Encoding Format Elecard Converter Studio Description Specifies the output audio format. The list of available audio formats is formed according to the selected stream type: MPEG-1 — format that is used in DVD and SVCD standards and for DVB broadcasting. 47 User Guide Control Description Channel Mode AAC profile Number of Channels Stereo downmix mode Bitrate Resampling Frequency Level Correction MPEG-2 — format that is optimized for low bitrate audio streams. AAC — format with stronger compression abilities and better quality than the MPEG format. WAV — uncompressed audio data in WAV file. Stream copy — mode of the original track copying from the input file to the output file without conversion. Selects the encoding mode for stereo channels if the MPEG-1/2 encoder is selected: Mono — the left and right channels are mixed and encoded as mono. Joint stereo — Joint stereo is a special stereo format for MPEG-1 Layer II audio. In this mode the information about sound volume difference among channels is coded as balance signal. Encoding quality is some better than in stereo mode. Stereo — Encoding in common stereo mode. Selects the profile for AAC audio encoder. AAC profile restricts bitrate and the number of encoded channels. AAC LC — Bitrate is limited by 320 Kbps level. HE AAC — encoding mode that is more effective than AAC LC. Allows user to select the number of audio channels to be encoded into output stream, when Dolby Digital audio is decoded. Specifies the downmix mode of Dolby Digital 5.1 stream to stereo format. Specifies the audio stream bitrate. The range of available bitrates exists for each format. Bitrate can be limited to assure file compatibility with different hardware. Allows output audio resampling. The selection of the output frequency from the frequencies list is available. Allows correcting of audio signal level to remove waveform envelope distortions of the input audio data. The following parameters must be set: Level – sets the required level of output signal (dB). Gate – sets the noise threshold (dB). All sounds with level below the threshold are considered as noise. Attack – sets the response time to the signal level variation (ms). Separate channels processing – enables independent processing of each channel. 5.10 Chapter Points This feature allows adding key frames to the specified positions during encoding. For MPEG format it is possible to playback a file only from I-frame (key frame). Therefore, in some cases a key frame presence in encoded stream is required. The key frames insertion is supported only for MPEG-2 encoding. To add a chapter point select the required frame in the Preview window and click the button or press the STAR key ('*') on the numeric keypad. The Add Chapter Points window appears. Figure 12. Task Parameters – Add Chapter Points Click Add or Delete to insert or remove a chapter point. The Clear button allows clearing the whole list of added points. When chapter point is selected from the list, the corresponding frame is Elecard Converter Studio 48 User Guide displayed in the Preview window. Elecard Converter Studio 49 User Guide 6. Advanced Encoding Settings The following section describes the advanced settings of encoders and MPEG multiplexer. Click the Advanced button to open these settings. If you do not understand the options that are described below, we urge you not to change them and rather use the preconfigured profiles. Elecard Converter Studio 50 User Guide 6.1 AVC/H.264 Video Encoder Advanced Settings Figure 13. AVC/H.264 Video Encoder Advanced Settings – Page 1 The following table describes the first page of AVC/H.264 Video Encoder Advanced Settings controls. Table 8. AVC/H.264 Video Encoder Advanced Settings – Page 1 Control Elecard Converter Studio Description 51 User Guide Control Pulldown B-frames mode Scene Change Detection Adaptive GOP Max rate Buffer size Init Fullness Adaptive quantization mode Strength Transform size Entropy coding RD optimization Elecard Converter Studio Description Allows converting of video from 23.976 4 fps to 29.97 fps or 23.976 4 to 59.94 fps. The conversion is performed by adding special headers to the stream. Therefore the number of frames is not changed in the stream. No pulldown – Encoder ignores the presented pulldown headers and forms new timestamps for every frame. Auto mode – Encoder saves the information about pulldown headers presence/absence in the input stream. 3:2i/2:3i – mode «i» composes the stream by fields «duplication». It is designed for conversion of 24 into 30 fps. 3:2p/2:3p – mode «p» composes the stream by frames «duplication». It is designed for conversion of 24 into 60 fps. To convert 23.976 fps to 29.97 fps, select 3:2i pulldown and set fixed frame rate to 29.97 fps. To convert 23.976 fps to 59.94 fps, select 3:2p pulldown and set fixed frame rate to 59.94 fps. Sets the B-frames encoding mode: All disposable — B-frames do not contain information needed for another frames decoding. All reference - B-frames contain information needed for another frames decoding. It provides higher quality of compressed video. Hierarchical - allows encoder to use hierarchical structure of B-frames encoding. It increases quality of compressed video. The B-frames number must be set to 3. Recommended only for progressive video encoding. Enables the automatic insertion of I-frames (reference frames), when new scenes are detected. If this option is enabled, the encoded stream quality and positioning precision are improved. Some options will be inaccessible if the scene change detection mode (SCD) is disabled. Recommended for permanent use. Enables/disables adaptive B-frames placement. When video complexity is very high, the encoder decreases B-frames count to increase encoding quality. Recommended for permanent use. Specifies the hypothetic rate of the encoded data streaming. It is recommended to set high bitrate value (2-3 times greater than average stream bitrate). Is relevant only to the variable bitrate (VBR) mode. Specifies the video buffer size. Specifies the initial CPB removal delay. Recommended value is 67500 (90000 clock units per 1 second). Selects the adaptive quantization mode. The adaptive block quantization improves visual video quality. Macroblocks will have different quantizers according to the selected algorithm. The following modes are available: Do not use – Adaptive quantization is not used Complexity – Is based on macroblock complexity analysis Complexity and Luminance – Is based on macroblock complexity amd luminance analysis Specifies the variation range of quantizers. Selects dimension of DCT transformation. Sometimes higher DCT dimension provides better macroblock encoding and higher compression (for example for HD video with massive details). The automatic selection is recommended. Selects entropy (lossless) compression methods: CAVLC – basic compression method of video stream CABAC – more effective (about 15-20%) but needs more CPU resources when encoding and decoding The CABAC method is recommended. Selects the model of resource optimization for more effective compression: SAD – quick (is based on sum of absolute differences). SATD — slightly slow (is based on sum of absolute transformed differences). RDO - high-quality and high-effective model of resource optimization (rate-distortion optimization). 52 User Guide Chroma format Selects the chroma format for video encoding: Monochrome – video encoding without chroma component. 4:2:0 – chroma format with half horizontal and vertical color resolutions. The most commonly used and set as delault chroma format (including the Blu-ray Disc format). Search range Use subblock search Number of reference frames Field order Slice count Deblock mode Alpha offset Beta offset Video format Elecard Converter Studio 4:2:2 – chroma format allowable only in High Profile 422. Specifies the maximum motion vector length when searching for blocks shift in the previous/next frames. The value 255 is recommended for SD and 511 – for HD. Specifies whether to use sub-block (block size less than 16x16) search in motion estimation or not. The sub-block search extends the accuracy of motion prediction. Recommended for use. Sets the number of reference frames that are used by searching blocks shifts. The recommended value is 3 or 4. Specifies the order of fields in the encoded video stream. Specifies the number of independent slices. When this value is set equal to the number of physical (or virtual) CPUs (on multi-CPU computers), the encoding process can be slightly accelerated. Auto mode (value equals 0) is recommended to use. Enables deblock postprocessing. It essentially increases visual quality of encoded video (especially for low bitrates). Two modes are supported: Picture – standard deblocking mode. Slice – is relevant for encoding video into several slices. In this case each slice is processed independently. It increases encoding speed. But quality at the slice boundaries may be decreased. Specifies the deblocking strength (how much the defined macroblocks will be softened). Specifies the deblocking threshold (the strict selection of blocking by filter). Allows writing of the video format information into the stream. 53 User Guide Figure 14. AVC/H.264 Video Encoder Advanced Settings – Page 2 The following table describes the second page of AVC/H.264 Video Encoder Advanced Settings controls. Table 9. AVC/H.264 Video Encoder Advanced Settings – Page 2 Control Use of specified mode in I/P/B frame Use out of picture MV Elecard Converter Studio Description Enables/disables use of the spacial prediction modes for I, P, B frames. Enables/disables use in the motion predicion process of motion vectors over picture boundaries. 54 User Guide Control Cb/Cr chroma qp offset Quantizer for I/P/B slice in CQ mode Fix source/output frame rate Use Aspect Ratio Sample Aspect Ratio Write HRD parameters Write Access Unit Delimiter Write End of Sequence Write Closed Captions Elecard Converter Studio Description Specifies the quantization offset for Cb and Cr chroma components. Spesifies the quantizers for I-frames (reference frames), P-frames (predicted frames) and B-frames (bidirectional predicted frames) in the CQ (Constant Quantizer) mode. Allows fixing the input and output frame rate values (for instance, when the value specified in header is incorrect). Specifies the method of aspect ratio setting. The following methods are available: picture aspect ratio sample aspect ratio Sets one of standard aspect ratio or specifies the custom aspect ratio. Enables/disables the HRD model parameters writing into the encoded stream. The HRD model maintenance is mandatory for the encoded stream compatibility with various devices. And encoder tries to maintain the model, even though the option is disabled. Enables/disables the Access Unit delimiters (not obligatory) writing into the encoded stream. Enables/disables the Sequence End Code writing into the encoded stream. Enables/disables the Closed Captions keeping (if CC are contained in the input MPEG-2 or AVC/H.264 stream) in the output AVC/H.264 stream. 55 User Guide 6.2 AVC/H.264 Hardware Video Encoder Advanced Settings Figure 15. AVC/H.264 Hardware Video Encoder Advanced Settings Table 10. AVC/H.264 Hardware Video Encoder Advanced Settings Control Field order Slice count Pulldown Elecard Converter Studio Description Specifies the order of fields in the encoded video stream. Specifies the number of independent slices. When this value is set equal to the number of physical (or virtual) CPUs (on multi-CPU computers), the encoding process can be slightly accelerated. Auto mode (value equals 0) is recommended to use. Allows converting of video from 23.976 4 fps to 29.97 fps or 23.976 4 to 56 User Guide Control Scene Change Detection Entropy coding RD optimization Number of reference frames Max rate Buffer size Init Fullness Fix source/output frame rate Use Aspect Ratio Sample Aspect Ratio Write HRD parameters Write Access Unit Delimiter Write End of Sequence Write Closed Captions Elecard Converter Studio Description 59.94 fps. The conversion is performed by adding special headers to the stream. Therefore the number of frames is not changed in the stream. No pulldown – Encoder ignores the presented pulldown headers and forms new timestamps for every frame. Auto mode – Encoder saves the information about pulldown headers presence/absence in the input stream. 3:2i/2:3i – mode «i» composes the stream by fields «duplication». It is designed for conversion of 24 into 30 fps. 3:2p/2:3p – mode «p» composes the stream by frames «duplication». It is designed for conversion of 24 into 60 fps. To convert 23.976 fps to 29.97 fps, select 3:2i pulldown and set fixed frame rate to 29.97 fps. To convert 23.976 fps to 59.94 fps, select 3:2p pulldown and set fixed frame rate to 59.94 fps. Enables the automatic insertion of I-frames (reference frames), when new scenes are detected. If this option is enabled, the encoded stream quality and positioning precision are improved. Some options will be inaccessible if the scene change detection mode (SCD) is disabled. Recommended for permanent use. Selects entropy (lossless) compression methods: CAVLC – basic compression method of video stream CABAC – more effective (about 15-20%) but needs more CPU resources when encoding and decoding The CABAC method is recommended. Selects the model of resource optimization for more effective compression: SAD – quick (is based on sum of absolute differences). RDO - high-quality and high-effective model of resource optimization (rate-distortion optimization). Sets the number of reference frames that are used by searching blocks shifts. The recommended value is 3 or 4. Specifies the hypothetic rate of the encoded data streaming. It is recommended to set high bitrate value (2-3 times greater than average stream bitrate). Is relevant only to the variable bitrate (VBR) mode. Specifies the video buffer size. Specifies the initial CPB removal delay. Recommended value is 67500 (90000 clock units per 1 second). Allows fixing the input and output frame rate values (for instance, when the value specified in header is incorrect). Specifies the method of aspect ratio setting. The following methods are available: picture aspect ratio sample aspect ratio Sets one of standard aspect ratio or specifies the custom aspect ratio. Enables/disables the HRD model parameters writing into the encoded stream. The HRD model maintenance is mandatory for the encoded stream compatibility with various devices. And encoder tries to maintain the model, even though the option is disabled. Enables/disables the Access Unit delimiters (not obligatory) writing into the encoded stream. Enables/disables the Sequence End Code writing into the encoded stream. Enables/disables the Closed Captions keeping (if CC are contained in the input MPEG-2 or AVC/H.264 stream) in the output AVC/H.264 stream. 57 User Guide 6.3 MPEG-1/2 Video Encoder Advanced Settings Figure 16. MPEG-1/2 Video Encoder Advanced Settings The following table describes MPEG-2 Video Encoder Advanced Settings controls. Table 11. MPEG-1/2 Video Encoder Advanced Settings Controls Control Intra DC Precision Elecard Converter Studio Description Specifies the effective precision of DC coefficients in intra coded macroblocks. 8 bits — base value for MPEG-1 video encoding 9/10 bits — it is recommended for MPEG-2 video encoding 58 User Guide Control Chroma Format Description 11 bits — it is used only for MPEG-2 HL/HP encoding The 10-bits precision is recommended to use. Specifies the resolution of chrominance data. 4:2:0 — Half resolution in both dimensions (the most popular and default for all presets including DVD) Quantization Type Scan Type Intra VLC Picture structure Frame Sequence Top Field First Pulldown Frame Rate Scene Change Detection Closed GOP Adaptive GOP VBV Size Max rate GOP header time Start time Closed Caption 4:2:2 — Valid for the MPEG-2 High and 4:2:2 Profiles only Specifies the quantization scale type that is used for DCT coefficients quantization: Linear — it is used by default for MPEG-1. Non-linear — it is used by default for MPEG-2. Specifies the scan pattern that defines the decoding order of variable length coded DCT coefficients. Alternate scan — it is considered to be better for interlaced video. Zig-Zag scan — it suits better for progressive video. Specifies which of the two variable length coding (VLC) tables is used for the intra coded blocks: Table 0 — it is used by default Table 1 — it is optimized for MPEG-2 encoding with 0.3 - 0.6 bit/pixel. Specifies the picture structure when interlaced video is encoded. Specifies whether the frame sequence in MPEG-2 stream is interlaced or progressive. Specifies which of the two fields of the interlaced frame comes earlier - the top (odd) field or the bottom (even) one. Allows converting video with 24 fps to 30 fps. This conversion is performed with special headers that are added to the stream. That is why the number of frames is not changed in the stream. Specifies the frame rate of the source file. Must be set before the Pulldown mode activation. Specifies the scene changing detection (SCD) algorithm. This flag causes the Encoder to insert I-frames when new scenes are detected. If this option is enabled (recommended), the encoded stream quality and positioning precision are improved. Enables the closed GOPs usage. If the feature is enabled, every frame is located inside the GOP. It allows correct B-frame decoding during arbitrary access to the stream data. The encoded video quality may become slightly worse. Enables the adaptive GOP structure. When the video complexity is very high, the encoder decreases number of B-frames to increase the encoding quality. Recommended for permanent use. Specifies size of VBV buffer. If this parameter is equal to zero, the encoder automatically calculates the required buffer size. Specifies the maximum stream bitrate. It is set only in variable stream rate mode. Specifies the calculation method for the GOP header timestamps. Specifies the first frame time (if timestamp values are calculated from the frame number) or time shift relative to the PTS (if timestamp values are calculated using the frame PTSs). Enables the saving of closed caption data while transcoding from MPEG-2 and MPEG-4 AVC/H.264 streams into MPEG-2. Pad Skipped Frames Allows the encoder to detect gaps in the frame time stamps and Write sequence_header in Every GOP Specifies whether the sequence_header is inserted into every GOP or just once at the beginning of the stream. Note that this option must be enabled for VCD, SVCD and DVD encoding. Specifies whether the sequence_extension should be in every GOP. Some devices have problems with playing SVCDs that are encoded with sequence extensions. insert the skipped frames (by duplication). Write sequence_extension Elecard Converter Studio 59 User Guide Control Write picture_display_extension Write sequence_end_code Description Specifies whether the picture_display_extension should be in the video stream. Specifies whether the sequence_end_code should be added at the end of the stream. 6.4 MPEG-4 Video Encoder Advanced Settings Figure 17. Elecard Converter Studio MPEG-4 Video Encoder Advanced Settings 60 User Guide The following table describes MPEG-4 Video Encoder Advanced Settings controls. Table 12. MPEG-4 ASP Video Encoder Advanced Settings Controls Control Scene change detection Adaptive GOP Max rate Buffer size Skip frames for VBV compliance Field order Quantizer for I/P/B slice in CQ mode Quantization mode Adaptive motion estimation Chroma motion estimation Use 4MV Alternative vertical scan Short header Elecard Converter Studio Description Enables/disables the scene change detection (SCD) mode. This feature causes the Encoder to insert I-frames when new scenes are detected. If this option is enabled (recommended), the encoded stream quality and positioning precision are improved. Enables/disables the adaptive GOP structure. When the video complexity is very high, the encoder decreases number of B-frames to increase the encoding quality. Recommended for permanent use. Specifies the maximal stream bitrate. Relevant only to the variable bitrate (VBR) mode. Specifies the video buffer size. If the value is equal to zero then the encoder automatically calculates the required buffer size. Enables the encoder to respect VBV buffer underflow restriction by producing fake frame all block of which are skipped. Reduces quality while maintaining VBV compliance. It is recommended to select this option, when encoded video is intended for playback on particular devices (VBV model maintenance is obligatory) or for network broadcasting (fixed bandwidth). Specifies the order of fields in the encoded video stream. Spesifies the quantizers for I-frames (reference frames), P-frames (predicted frames) and B-frames (bidirectional predicted frames) in the CQ (Constant Quantizer) mode. Specifies the quantization scale type. During compression process the discrete cosine transformation (DCT) is performed on video data. The DCT coefficients are maked more coarse using division. The divisor is named quantizer. H263 – fixed (constant) quantizer. The same quantizer is used for all coefficients. MPEG – non-linear quantizer. Higher frequencies (are responsible for fine details) are usually quantized more coarsely (fewer values allowed) than lower frequencies. It provides higher compression, while video quality is degraded insignificantly. Allows the encoder to improve output video quality, when interlaced stream is encoded. The encoder checks which motion estimation mode (frame or field) is more effective for each macro-block. The checking procedure decreases the encoding speed. This option is useful, when quality is more significant than speed. It is recommended to use for encoding of interlaced video with both static (progressive mode provides better result) and dynamic (interlaced mode is more suitable) scenes. Enables the encoder to calculate motion vectors using the chromatic components of picture. The more informative chromatic fields allow the more efficient motion estimation. This option is useful, when quality is more significant than speed. Enables usage of blocks less than 16x16 in the motion estimation process. It insreases the motion prediction accuracy. Recommended for use. Enables the encoder to use alternative vertical scan instead of standard zigzag scan. Provides more efficient grouping of video data before DCT and (as a result) improves the quantization efficiency. This option is useful for pictures with significant correlation of vertically aligned components (such as grouped fields of interlaced video). It increases probability of long sequences of equal quantized coefficients and consequently provides better compression. Does not affect the encoding speed. It is recommended to use in interlaced video encoding. Provides compatibility of MPEG-4 Visual with the ITU-T H.263 video coding standard. A lot of MPEG-4 specific features ( for example, B-frames) will be disabled. Produced video stream will contain the H.263 FOURCC mark. It is recommended to select this option, when encoded video is intended for 61 User Guide Control Description playback on devices that support only H.263 standard (for example 3gp video for iPod or mobile phones). Enables insertion of VBV parameters into the encoded stream. Format of MPEG-4 sequence header allows declaration of the VBV model parameters (VBV buffer size, average bitrate) used in the video encoding process. The parameters declaration is optional. Enables insertion of GOV headers into the encoded stream. MPEG-4 video stream can be devided into Groups Of VOPs (GOV). Every GOV starts with Iframe that optionally contains GOV and VOL headers. GOV header contains the time stamp of group beginning and the group structure information. GOV is named 'open' if it contains B-frames referring to frames from neighbour groups. It is recommended to insert GOV headers into MPEG-4 video intended for further editing. Insert VBV parameters Use GOV headers VOL header for every IFrame Enables insertion of VOL headers for every I-frame. The VOL header contains the main parameters of encoded video stream that are needed for successful video decoding. VOL headers repeated in the stream allow the video stream decoding from any position (not only from the beginning). It is recommended to insert VOL headers into MPEG-4 video intended for network broadcasting. It is may be needed to turn the option off only when video with very low bitrate and small GOV is encoded (VOL headers before every Iframe waste the low bitrate reserve taking it away from video data). Custom aspect ratio Allows the non-standard aspect ratio setting. 6.5 MPEG Multiplexer Advanced Settings The MPEG multiplexer advanced settings allow the user both to adjust the multiplexing process and to create multiprogram streams. Figure 18. Multiplexing Advanced Settings Stream ID, Stream PES ID, Correct bitrate, Language and Shift are set separately for every Elecard Converter Studio 62 User Guide track. Click the required parameter and type the value. Other parameters are common for the whole stream. The following table describes controls of the Multiplexing Advanced Settings dialog. Table 13. Multiplexing Advanced Settings Controls Control Transport Stream ID PCR Interval Use Padding Required Bitrate Stream ID Stream PES ID Correct Bitrate Language Shift (ms) Description This is a 16-bit field. It identifies the transport stream among other streams over the network. The value is defined by the user (ISO/IEC 13818-1). This option is available only for Transport Stream. Allows the user to specify the time distance between two consecutive Program Clock Reference stamps. Allows the stream expanding with padding packets to provide the specified constant bitrate. Sets the total bitrate of transport stream. If this value is not specified, the stream bitrate is calculated as sum of bitrates of all multiplexed streams. This is a 13-bit field that indicates the type of the packet payload data. Specifies the type and number of elementary stream in Program Stream. In Transport Stream it may be set to any valid value that correctly describes the elementary stream type (defined in table 2-19 ISO/IEC 13818-1). In Transport Stream elementary stream types are defined in Program Specific Information (page 44 ISO/IEC 13818-1). This option allows the user to specify the stream real bitrate, if the stream declared bitrate is not correct. Specifies language of audio or subtitle tracks. Specifies time shift of the track beginning. Is used for elimination of synchronization problems. For multiprogram stream creation click multiplexing area to open the shortcut menu and select the Create program command. By using this menu you can also delete or change the program parameters. To set Program number and Program id use the Program Parameters window. This window is displayed when the program parameters are created or changed. Figure 19. Program Parameters The following table describes Program Parameters controls. Elecard Converter Studio 63 User Guide Table 14. Program Parameters Controls Control Program Number Program PMT ID Description This is a 13-bit field. It specifies the PID in Transport Stream. The value is defined by the user and is selected from the available value list in accordance with Table 2-4 (ISO/IEC 13818-1). This is a 16-bit field. It specifies the program to which the program_map_PID is applicable. If this is set to 0x0000, then the following PID reference will be the network PID. For all other cases, the value of this field is defined by the user. This field will not accept any single value more than once within one version of the program association table. The program number may be used as a designation for a broadcast channel, for example. (ISO/IEC 13818-1). Note: A language code can be specified in the Language column. The code standard values are described at http://en.wikipedia.org/wiki/List_of_ISO_639-2_codes Elecard Converter Studio 64 User Guide 7. Tools 7.1 Feature Viewer All program features are realized with additional models that are enabled automatically. This tool allows the user to view the program features and the relevant module states. To open Feature Viewer press CTRL + F or select Tools/ Feature Viewer in the main menu. Figure 20. Elecard Converter Studio Tools - Feature Viewer 65 User Guide 7.2 Advertisement Schedule Editor Advertisement Schedule Editor allows the user to create a schedule file that contains information about the advertisement inserting order into the conversion task. The schedule can describe several advertisement trailers which must be shown at the specified time. To start Schedule Editor press CTRL+R key combination or click Advertisement schedule editor on the Tools menu. Set the required parameters in the Advertisement Schedule Editor window. Figure 21. Tools – Advertisement Schedule Editor First, add files that must be further inserted as advertisement trailers. Click and select an advertisement file. Specify the inserting position (in seconds) for each advertisement trailer. Figure 22. Tools – Advertisement Parameters Note: Advertisement files are supported only in AVI Uncompressed format. Audio must be in PCM format. The advertisement parameters (frame rate and resolution) must be the same as the converted video parameters. Otherwise, the advertisement trailer will be skipped. 7.3 Converter Studio Service Manager Elecard Converter Studio allows the user to start the Watch Folder mode as Windows® service without GUI. For it during the program installation you should register the Converter Studio Service in the system, create special shortcuts for the service start and stop. The Converter Studio Elecard Converter Studio 66 User Guide service can be used both in the local Watch Folder mode and in the network service control mode (cluster node creation). To use the service in the local Watch Folder mode, start Converter Studio, select the Converter Studio Service... command from the Tools menu, set the required parameters in the open window and close the program. To start the service, click Start->All Programs->Elecard ->Elecard Converter Studio->Service>Start Service. To stop the service, click Start->All Programs->Elecard ->Elecard Converter Studio->Stop Converter Studio Service. The service system parameters are available for adjustment via Contrl Panel->Administrative Tools->Services. Figure 23. Converter Studio Service Manager The following table describes Converter Studio Service Manager controls. Table 15. Converter Studio Service Manager Controls Control Description User Specifies the user. Watch Subdirectories Enables subdirectories search in the input folder. Input Folder Output Folder Profile Specifies the input folder for monitoring. Specifies the output folder for saving encoded files. Allows the user to select the most suitable profile from the list. The Profile set contains the optimal parameters for encoding and provides creating of files that are compatible with different hardware devices. Elecard Converter Studio 67 User Guide Control Description Speed/Quality Allows the adjustment of the encoding speed/quality ratio. The Fastest mode is adjusted to the maximum encoding speed. And vice versa, the Highest mode provides the maximum quality. The optimal speed/quality ratio is provided with the Optimal mode. Overwrite Existing Output Files Allows overwriting the existing files without confirmation when converting is over. For the correct work of Converter Studio Service as the cluster node it is necessary to add the service to the Windows firewall exceptions. Start Control Panel->Windows Firewall, select the Exceptions tab, and click the Add Program... button. Add program 'C:\Program Files\Elecard\Elecard Converter Studio ProHD\csService.exe'. Note: The simultaneous work of the Converter Studio Service and the program is not allowed. 7.4 Batch List Filter The Batch list filter allows selecting files for conversion according to the specified parameters. The filter is a very useful tool when the program works in the Watch Folder mode and there is no need to convert all files in the folder. To set the Batch list filter click on the Batch List panel. You can also press CTRL+ALT+F key combination or click Batch List Filter on the Tools menu. Set the required parameters in the Batch List Filter window. Elecard Converter Studio 68 User Guide Figure 24. Tools – Batch List Filter The following table describes the Batch List Filter controls. Table 16. Tools – Batch List Filter Controls Control Use Batch List Filter File Size Frame Size Stream Type Video Format Audio Format Description Enables/Disables the Batch list filter according to the specified parameters. Sets the Batch list filter according to the specified file size, in KB. Sets the Batch list filter according to the specified video frame size. The filter compares this size with one of standard sizes. Sets the Batch list filter according to the stream type. Sets the Batch list filter according to the video format. Sets the Batch list filter according to the audio format. 7.5 Converter Studio Console Converter Studio can be started as console application that supports both the single file converting and the Watch Folder mode. More than one consoles can be started simultaneously. The console binary file is located in the program installation folder. To start the console application, click Start->Run... and type 'CMD'. In the open window type 'С:\Program Files\Elecard\Elecard Converter Studio ProHD\csConsole.exe'. Elecard Converter Studio 69 User Guide Figure 25. Tools – Console Converter Studio Command line allows the work mode selection and parameter settings. The command line format is following: csConsole.exe /mode -i “file” -o “file” -p “profile” [/additional parameters] where /mode – Sets the application work mode: /single – Single File mode /watch – Watch Folder mode -i «file» – Sets the path of input file in the Single File mode or the path of source folder in the Watch Folder mode. -iftp «path» – Sets the path to input FTP server in the Watch Folder mode. -o «file» – Sets the path of output file in the Single File mode or the path of destination folder in the Watch Folder mode. -oftp «path» – Sets the path to output FTP server in the Watch Folder mode. -p «profile» – Sets the name of profile. -speedquality «name» – Specifies the speed mode of encoding with the selected profile. If the parameter is not specified, the encoding is performed with the maximal quality and consequently with the lowest speed . /subdir — Enables scanning of subfolders in the source folder. /overwrite — Allows overwriting of existing files. -index_ext «name»— Specifies the default extension for index filename. -prefix «name» — Specifies the output filename prefix (is added automatically). -profile — Displays all available profiles. /debug — Turns on the program debug logging. /simple_log — Disables the statistical data logging during the encoding process. To display the list of available profiles, start the console application with the /profiles parameter. Command line samples: Elecard Converter Studio 70 User Guide csConsole.exe /single -i "С:\input.mpg" -o "С:\output.mp4" -p "Sony PSP" -speedquality "Optimal" -prefix "enc_" /overwrite csConsole.exe /watch -i "С:\media_in" -o "С:\media_out" -p "Sony PSP" speedquality "Optimal" -prefix "enc_" /overwrite /subdir Elecard Converter Studio 71 User Guide 8. Converter Studio Preferences To change the Elecard Converter Studio preferences, select Preferences in the program main menu. Figure 26. Converter Studio Preferences The following table describes Preferences controls. Table 17. Converter Studio Preferences Controls Control Use default Folder Elecard Converter Studio Description Allows the default output folder specification. 72 User Guide Control Index File Name Extension Indexing Input Files Priority Resources Output File Name Prefix Overwrite Existing Output Files Shutdown computer after encoding Sound after encoding Show Hints Show Save Batch List Dialog on Exit Auto Loading of Last Batch List Confirm Rewriting of Tasks Check the Encoder Settings Elecard Converter Studio Description Specifies the default index file name extension. Creates the index file before opening MPEG files. The indexing is used to determine the valid file duration and to improve positioning precision. It is preferable to enable this option by encoding the selected parts of the file and by the Chapter Points setting. Sets the converting process priority. Specifies the resources for task execution: This computer — local task execution. Cluster is not used. Cluster nodes — remote task execution.удаленное выполнение задач. The tasks from list are distributed among the available nodes. The main computer is used only for the nodes control. This computer and cluster nodes — distributed computing. The tasks from list are distributed among the available computers (cluster nodes and the main computer). Sets an additional prefix that is automatically added to the name of the output file. Allows the existing files overwriting without confirmation. Allows the computer shutdown, when all of the tasks from task list are completed. Enables beep notification of the task list completion. Allows the hints displaying for all GUI elements. Enables opening the Save Batch List dialog to save the Batch list in case the Batch list was changed and not saved. Enables the loading of the saved Batch list when Converter Studio is started. If this option is disabled, the initial Batch list is empty. If this option is enabled the program sends the warning message in case the task already exists in the Batch list. Allows checking encoder preferences and sending a message with detail description in case of errors. 73 User Guide 9. Cluster Node Installation and Adjustment When the program is installed, the Converter Studio Service is registered in the system and the service control shortcuts are created. For the correct work of Converter Studio Service as the cluster node it is necessary to add the service to the Windows firewall exceptions. Start Control Panel->Windows Firewall, select the Exceptions tab, and click the Add Program... button. Add program 'C:\Program Files\Elecard\Elecard Converter Studio ProHD\csService.exe'. Adjust the service system parameters via Contrl Panel->Administrative Tools->Services. To start the service, click Start->All Programs->Elecard ->Elecard Converter Studio->Service>Start Service. To stop the service, click Start->All Programs->Elecard ->Elecard Converter Studio->Stop Converter Studio Service. Elecard Converter Studio 74 User Guide 10. Hot Keys Table 18. Key Combination CTRL+O CTRL+M CTRL+D CTRL+ALT+S CTRL+SHIFT+S CTRL+ALT+O CTRL+ALT+X CTRL+ALT+С CTRL+W CTRL+S CTRL+R CTRL+ALT+F CTRL+F CTRL+I CTRL+P CTRL+A F1 F5 F6 F7 F8 F9 F11 [ ] * Elecard Converter Studio Hot Keys Command Open Media File.. Open Media Files... Open DVD... Save Batch List Save Batch List as... Load Batch List Clear Batch List Delete Completed Task(s) Watch Folder Mode Converter Studio Service Advertisement Schedule Editor Batch List filter Features Viewer Index the media file of the current task Preferences... Select all tasks in the Batch List Converter Studio Help Display Preview panel Display Batch List panel Display Profiles panel Display Messages panel Display Cluster panel Display Statistics panel Set the start position for the transcoding process Set the stop position for the transcoding process Add Chapter Point 75 User Guide