1
Burner Air Shutter Adjustment Procedure
WARNINGS
• Air shutter adjustment should
only be performed by a qualified professional service technician.
• Ensure front glass panel are
in place and sealed during
adjustment.
CAUTIONS
• Soot will be produced if the
air shutter is closed too much.
Any damage due to sooting
resulting from improperly
setting the air shutter is not
covered under the warranty.
• The air shutter door and nearby
appliance surfaces are hot.
Exercise caution to avoid
injury while adjusting flame
appearance.
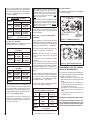
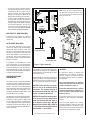
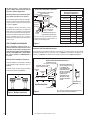
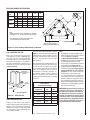
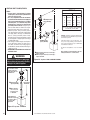
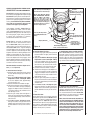
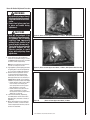
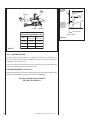
Figure 50 (Burner & Flame Appearance Model) ELDV35 (With Optional Brick Liner Kit)
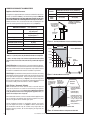
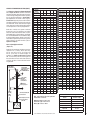
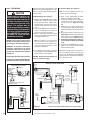
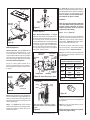
1. Locate adjustment rod and adjust air
shutter to the standard setting as shown
in Figure 53 (adjustment rod is located in
the lower control compartment).
Note: Move the adjustment rod down to
decrease air and up to increase.
2. Light appliance (follow lighting procedure
on lighting label in control compartment
or see the Care and Operation Manual).
3. Allow the burner to operate for at least
15 minutes while observing the flame
continuously to ensure that the proper
flame appearance has been achieved (see
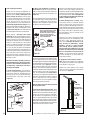
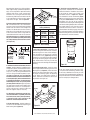
Figures 50 through 52). If the following
conditions are present, adjust accordingly.
• If flame appears weak or sooty, adjust
the air shutter, incrementally, to a
more open position until the proper
flame appearance is achieved.
• If flame remains blue, adjust the air
shutter, incrementally, to a more
closed position until the proper flame
appearance is achieved.
4. Leave the control knob (off/pilot/on)
in the ON position and the burner OFF/
ON switch OFF (and remote switches, if
applicable).
5. When satisfied that the burner flame appearance is normal, re-install the lower
control compartment door then proceed
to finish the installation.
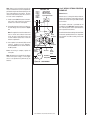
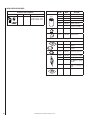
Figure 51 (Burner & Flame Appearance Model) ELDV40 (With Optional Brick Liner Kit)
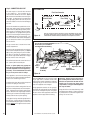
Figure 52 (Burner & Flame Appearance Model) ELDV45
NOTE: DIAGRAMS & ILLUSTRATIONS ARE NOT TO SCALE.
33