1
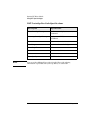
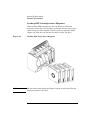
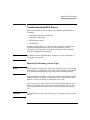
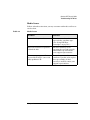
HP Tape Library & Autoloader
Drive Manual
Edition 2
Part Number: C7200-90090
February 2001
© Copyright 2001 Hewlett-Packard Company
Notice
This document contains information that is protected by copyright. All
rights are reserved. No part of this document may be photocopied,
reproduced, or translated into another language. The information
contained in this document is subject to change without notice.
Hewlett-Packard makes no warranty of any kind with regard to this
material, including, but not limited to, the implied warranties of
merchantability and fitness for a particular purpose. Hewlett-Packard
shall not be liable for errors contained herein or for incidental or
consequential damages in connection with the furnishing, performance,
or use of this material.
For warranty information for your HP Tape Library or Autoloader, refer
to your user’s guide.
Revision History
New editions of this manual incorporate all material updated since the
previous edition. The manual release date and part number indicate the
current edition. The release date changes when a new edition is released.
(Minor corrections and updates incorporated do not change this date.)
Edition 1:.
December 2000: C7200-90090
Initial release.
Edition 2:.
February 2001:
Added information on mixed media, a reference to
the HP Library & Tape Tools media migration
utility, additional DLT1 drive and media errors,
and additional Ultrium bar code label graphics.
ii
Typographical Conventions and Terms
Keycap:
Menu choices within the HP Library & Tape Tools
diagnostic utility.
WARNING
Warnings call attention to a procedure or practice that could
result in personal injury if not correctly performed. Do not
proceed until you fully understand and meet the required
conditions.
CAUTION
Cautions call attention to an operating procedure or practice that could
damage the product if not correctly performed. Do not proceed until you
understand and meet these required conditions.
NOTE
Notes explain significant concepts or operating instructions.
TIP
Tips provide hints or shortcuts for a procedure.
iii
Using this Manual
Hewlett-Packard Tape Libraries and Autoloaders support Quantum DLT
8000, Benchmark DLT1, and HP Ultrium drive technologies. This
manual provides information on drives and media that will assist you in
using, maintaining, and troubleshooting your product.
The following chapters are included in this manual:
Chapter 1
Overview: Provides a brief introduction to
Quantum DLT, Benchmark DLT1, and HP
Ultrium drives, media, compatibility, media
migration, mixed media, and general precautions.
Chapter 2
Quantum DLT Drives & Media: Provides DLT
drive and media specifications, using DLT media,
and DLT drive troubleshooting information.
Chapter 3
Benchmark DLT1 Drives & Media: Provides
DLT1 drive and media specifications, using DLT1
media, and DLT1 drive troubleshooting
information.
Chapter 4
HP Ultrium Drives & Media: Provides Ultrium
drive and media specifications, using Ultrium
media, and Ultrium drive troubleshooting
information.
iv
Supported Drive Technologies
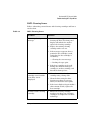
The following table lists Hewlett-Packard Tape Libraries and
Autoloaders, and their supported drive technologies.
Model
Drive Technology
Tape Autoloader 1/9
• Quantum DLT 8000
• Benchmark DLT1
• HP Ultrium
Tape Library 2/20
• Quantum DLT 8000
• HP Ultrium
Tape Library 4/40
• Quantum DLT 8000
• HP Ultrium
Tape Library 6/60
• Quantum DLT 8000
• HP Ultrium
Tape Library 6/140
• Quantum DLT 8000
• HP Ultrium
v
vi
Contents
1. Overview
Drive Technologies and Compatibility . . . . . . . . . . . . . . . . . . . . . . . . . . . . . . . . . . . . . . 1-2
Format Compatibility . . . . . . . . . . . . . . . . . . . . . . . . . . . . . . . . . . . . . . . . . . . . . . . . . . 1-2
Media Compatibility . . . . . . . . . . . . . . . . . . . . . . . . . . . . . . . . . . . . . . . . . . . . . . . . . . . 1-3
Mixed Media . . . . . . . . . . . . . . . . . . . . . . . . . . . . . . . . . . . . . . . . . . . . . . . . . . . . . . . . . . . 1-4
Media Migration. . . . . . . . . . . . . . . . . . . . . . . . . . . . . . . . . . . . . . . . . . . . . . . . . . . . . . . . 1-5
HP Library & Tape Tools . . . . . . . . . . . . . . . . . . . . . . . . . . . . . . . . . . . . . . . . . . . . . . . 1-5
Service Provider . . . . . . . . . . . . . . . . . . . . . . . . . . . . . . . . . . . . . . . . . . . . . . . . . . . . . . 1-6
Electrostatic Discharge (ESD) and Other Precautions . . . . . . . . . . . . . . . . . . . . . . . . . 1-7
2. Quantum DLT Drives & Media
Chapter Overview . . . . . . . . . . . . . . . . . . . . . . . . . . . . . . . . . . . . . . . . . . . . . . . . . . . . . . 2-2
DLT Drive and Media Specifications . . . . . . . . . . . . . . . . . . . . . . . . . . . . . . . . . . . . . . . 2-3
Using DLT Tape Cartridges. . . . . . . . . . . . . . . . . . . . . . . . . . . . . . . . . . . . . . . . . . . . . . . 2-5
Inspecting DLT Cartridges. . . . . . . . . . . . . . . . . . . . . . . . . . . . . . . . . . . . . . . . . . . . . . 2-6
Write-Protecting DLT Cartridges . . . . . . . . . . . . . . . . . . . . . . . . . . . . . . . . . . . . . . . . 2-8
Using DLT Cartridge Bar Code Labels . . . . . . . . . . . . . . . . . . . . . . . . . . . . . . . . . . . . 2-9
DLT Cartridge Bar Code Specifications. . . . . . . . . . . . . . . . . . . . . . . . . . . . . . . . . . . 2-10
Using DLT Cleaning Cartridges . . . . . . . . . . . . . . . . . . . . . . . . . . . . . . . . . . . . . . . . 2-11
Loading DLT Cartridges into a Magazine . . . . . . . . . . . . . . . . . . . . . . . . . . . . . . . . . 2-12
Troubleshooting DLT Drives . . . . . . . . . . . . . . . . . . . . . . . . . . . . . . . . . . . . . . . . . . . . . 2-13
Manually Rewinding a Stuck Tape . . . . . . . . . . . . . . . . . . . . . . . . . . . . . . . . . . . . . . 2-13
Removing a Stuck Tape . . . . . . . . . . . . . . . . . . . . . . . . . . . . . . . . . . . . . . . . . . . . . . . 2-15
DLT Cleaning Issues. . . . . . . . . . . . . . . . . . . . . . . . . . . . . . . . . . . . . . . . . . . . . . . . . . 2-16
Media Issues . . . . . . . . . . . . . . . . . . . . . . . . . . . . . . . . . . . . . . . . . . . . . . . . . . . . . . . . 2-17
3. Benchmark DLT1 Drives & Media
Chapter Overview . . . . . . . . . . . . . . . . . . . . . . . . . . . . . . . . . . . . . . . . . . . . . . . . . . . . . . 3-2
DLT1 Drive and Media Specifications . . . . . . . . . . . . . . . . . . . . . . . . . . . . . . . . . . . . . . 3-3
Using DLT1 Tape Cartridges. . . . . . . . . . . . . . . . . . . . . . . . . . . . . . . . . . . . . . . . . . . . . . 3-5
Using DLT Type IV Media . . . . . . . . . . . . . . . . . . . . . . . . . . . . . . . . . . . . . . . . . . . . . . 3-6
Bulk Erasing Tape Cartridges . . . . . . . . . . . . . . . . . . . . . . . . . . . . . . . . . . . . . . . . . 3-6
Inspecting DLT1 Cartridges. . . . . . . . . . . . . . . . . . . . . . . . . . . . . . . . . . . . . . . . . . . . . 3-7
Write-Protecting DLT1 Cartridges . . . . . . . . . . . . . . . . . . . . . . . . . . . . . . . . . . . . . . . 3-9
Using DLT1 Cartridge Bar Code Labels . . . . . . . . . . . . . . . . . . . . . . . . . . . . . . . . . . 3-10
Using DLT1 Cleaning Cartridges . . . . . . . . . . . . . . . . . . . . . . . . . . . . . . . . . . . . . . . 3-12
Loading DLT1 Cartridges into a Magazine . . . . . . . . . . . . . . . . . . . . . . . . . . . . . . . . 3-13
Troubleshooting DLT1 Tape Drives . . . . . . . . . . . . . . . . . . . . . . . . . . . . . . . . . . . . . . . 3-14
vii
Contents
Rewinding/Removing a Stuck Tape . . . . . . . . . . . . . . . . . . . . . . . . . . . . . . . . . . . . . . 3-14
DLT1 Cleaning Issues. . . . . . . . . . . . . . . . . . . . . . . . . . . . . . . . . . . . . . . . . . . . . . . . . 3-15
Media Compatibility Issues . . . . . . . . . . . . . . . . . . . . . . . . . . . . . . . . . . . . . . . . . . . . 3-16
Miscellaneous Issues . . . . . . . . . . . . . . . . . . . . . . . . . . . . . . . . . . . . . . . . . . . . . . . . . 3-17
4. HP Ultrium Drives & Media
Chapter Overview . . . . . . . . . . . . . . . . . . . . . . . . . . . . . . . . . . . . . . . . . . . . . . . . . . . . . . 4-2
HP Ultrium Drive and Media Specifications . . . . . . . . . . . . . . . . . . . . . . . . . . . . . . . . . 4-3
Using HP Ultrium Cartridges . . . . . . . . . . . . . . . . . . . . . . . . . . . . . . . . . . . . . . . . . . . . . 4-5
Maintaining Ultrium Cartridges . . . . . . . . . . . . . . . . . . . . . . . . . . . . . . . . . . . . . . . . . 4-5
Write-Protecting Ultrium Cartridges . . . . . . . . . . . . . . . . . . . . . . . . . . . . . . . . . . . . . 4-6
Using Ultrium Cartridge Bar Code Labels . . . . . . . . . . . . . . . . . . . . . . . . . . . . . . . . . 4-7
Using Ultrium Cleaning Cartridges . . . . . . . . . . . . . . . . . . . . . . . . . . . . . . . . . . . . . 4-10
Loading Ultrium Cartridges into a Magazine. . . . . . . . . . . . . . . . . . . . . . . . . . . . . . 4-11
Troubleshooting HP Ultrium Drives. . . . . . . . . . . . . . . . . . . . . . . . . . . . . . . . . . . . . . . 4-12
Rewinding/Removing a Stuck Tape . . . . . . . . . . . . . . . . . . . . . . . . . . . . . . . . . . . . . . 4-12
Ultrium Cleaning Issues . . . . . . . . . . . . . . . . . . . . . . . . . . . . . . . . . . . . . . . . . . . . . . 4-13
LTO-Cartridge Memory (LTO-CM) Issues. . . . . . . . . . . . . . . . . . . . . . . . . . . . . . . . . 4-14
viii
1
Overview
Chapter 1
1-1
Overview
Drive Technologies and Compatibility
Drive Technologies and Compatibility
Format Compatibility
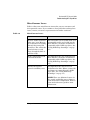
Table 1-1 shows read and write compatibility between Quantum DLT,
Benchmark DLT1, and LTO, Linear Tape-Open, Ultrium formats.
Table 1-1
Drive Format Compatibility
Drive Type
Read-Compatible
Write-Compatible
DLT 8000
DLT 4000
DLT 4000
DLT 7000
DLT 7000
DLT 8000
DLT 8000
DLT 4000
DLT1
DLT1
DLT1
LTO Ultrium
1-2
LTO Ultrium
LTO Ultrium
Chapter 1
Overview
Drive Technologies and Compatibility
Media Compatibility
CAUTION
It is critical to ensure that the media you use matches the format of your
tape drive. Cleaning cartridges and formatted data cartridges are unique
for each drive technology. Damage may occur if inappropriate media is
used in the tape drives.
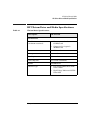
Table 1-2 shows drive technologies and compatible unformatted data
cartridges.
Table 1-2
Data Cartridge Compatibility (Unformatted)
Drive Type
Data Cartridge Type
Quantum DLT
DLT Type IIIXT
DLT Type IV
Benchmark DLT1
DLT Type IV
HP Ultrium
HP Ultrium 200 GB
Table 1-3 shows drive technologies and compatible cleaning cartridges.
Table 1-3
Cleaning Cartridges
Drive Type
Cleaning Cartridge Type
Quantum DLT
DLTtape Cleaning Cartridge only
Benchmark DLT1
DLT1 Cleaning Cartridge only
HP Ultrium
HP Ultrium Cleaning Cartridge
IBM Ultrium Cleaning Cartridge
NOTE
Ensure you use the correct cleaning cartridge for your tape drive. (See
“Using DLT Cleaning Cartridges” on page 2-11, “Using DLT1 Cleaning
Cartridges” on page 3-12, and “Using Ultrium Cleaning Cartridges” on
page 4-10.)
Chapter 1
1-3
Overview
Mixed Media
Mixed Media
HP Tape Libraries have a mixed media feature that allows the use of two
different drive technologies in the same library. (See page -v for a list of
libraries and the drive technologies they support.)
NOTE
Supported use models are described in detail in the Mixed Media White
Paper for the Network Administrator. This document is available from
www.hp.com/support/modularlibrary for tape library models 2/20, 4/40,
and 6/60, and from www.hp.com/support/tapelibrary for model 12/140.
General considerations when using mixed media:
• Upgrade kits are available from HP for Ultrium tape drives,
magazines, and tape cartridges.
• The same type of drive per level of the library is the only mixed media
configuration supported by HP. This excludes tape library model 2/20
from a mixed media use model at this time.
• HP recommends maintaining the same magazine ratio as the drive
ratio.
• In order to provide full mailslot support in a mixed media library, one
magazine is required for each drive type for a total of 10 mailslots.
Only DLT tapes can be used in a DLT magazine, and only Ultrium
tapes can be used in an Ultrium magazine.
• HP Library & Tape Tools version 2.2 or greater is required for
diagnostic support (see page 1-5).
1-4
Chapter 1
Overview
Media Migration
Media Migration
Utilities and services are available to assist you in migrating from one
drive technology to another where possible.
HP Library & Tape Tools
The HP Library & Tape Tools diagnostic assists you in installing and
supporting your tape library or autoloader. This tool provides an
intuitive graphical user interface with integrated context-sensitive help.
It can be downloaded free of charge from www.hp.com/support/tapetools.
Among the many features is a Migrate Backup Media option available from
the Utility menu. This utility will copy data from DLT drives to DLT or
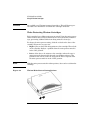
Ultrium drives. See Figure 1-1 for a screen shot from HP Library & Tape
Tools.
Figure 1-1
HP L&TT Media Migration Utility
Chapter 1
1-5
Overview
Media Migration
NOTE
Before using the media migration utility in HP Library & Tape Tools,
ensure that the source media is write-protected. This utility does not
provide any library control. You must load media into the selected drives
using the library or autoloader front panel, Web-Based Library
Administrator, or your backup software utility.
For more information on using HP Library & Tape Tools for media
migration, refer to www.hp.com/support/tapetools.
Service Provider
Vogon International provides migration, recovery, and forensic services
with offices in the United Kingdom, Germany, and the United States.
Vogon offers a standard service and a fast track service that generally
has a 50% quicker turnaround time from the standard service. Prices
vary depending on the complexity of the service requested.
Vogon International Ltd.
Web address:
www.vogon-international.com
Mailing address:
Talisman Business Centre
Talisman Road
Bicester, Oxfordshire
OX6 OJX
Telephone:
United States: (405) 321 2585
UK: 44 (0) 1869 355255
Germany: 49 (0) 89 3235030
1-6
Chapter 1
Overview
Electrostatic Discharge (ESD) and Other Precautions
Electrostatic Discharge (ESD) and Other
Precautions
Tape drives contain very sensitive electrical components. It is important
to follow the proper procedures to prevent electrostatic discharge (ESD),
which could result in damage to the product. Failure to take proper
precautions could lead to intermittent failures or premature hard
failures.
Use the following general precautions when handling tape
drives:
• Use a properly installed anti-static mat on your work surface.
• Use properly fitted wrist-grounding straps.
• Be careful not to touch any PC board components.
• If installing the tape drive, always leave it in its anti-static bag until
you are ready to install it.
• Place the tape drive on a properly grounded anti-static work surface
when it is out of its protective anti-static bag.
• Do not use the bag as a substitute for the work surface anti-static
mat. The outside of the bag may not have the same anti-static
properties as the inside.
• When removing or replacing the tape drive, never rest it on its front
bezel (the side containing the drive door where tapes are inserted).
• Do not place hands or foreign objects inside the tape drive’s door or
drive bay, or touch internal components. Skin oils will damage the
recording heads.
Chapter 1
1-7
Overview
Electrostatic Discharge (ESD) and Other Precautions
Use the following general precautions when handling tape
cartridges:
• Do not carry cartridges loosely in a container that exposes them to
unnecessary physical shock. Dropping or bumping cartridges may
dislodge and damage internal components.
• Store each cartridge vertically in its protective case until needed.
• Do not allow direct contact with the tape medium or open the tape
door unnecessarily. Dust or skin oils can contaminate the tape and
impact performance.
• Do not place cartridges on or near devices that may produce strong
magnetic fields. Such exposure may alter or erase data on the tape.
• Do not expose the cartridge to moisture or direct sunlight.
1-8
Chapter 1
2
Quantum DLT Drives & Media
Chapter 2
2-1
Quantum DLT Drives & Media
Chapter Overview
Chapter Overview
This chapter describes the following:
• DLT Drive and Media Specifications
• Using DLT Tape Cartridges
• Troubleshooting DLT Drives
2-2
Chapter 2
Quantum DLT Drives & Media
DLT Drive and Media Specifications
DLT Drive and Media Specifications
Table 2-1
DLT Drive Specifications
Description
Quantum DLT 8000
Performance
Read/write transfer rate:
maximum sustained (DLT
Type IV media)
• Non-compressed mode:
6.0 MB/second
Burst transfer rate
20 MB/second
Average access time
60 seconds
Loading time to BOT
(for previously written tape)
37 seconds (average)
Unloading time from BOT
17 seconds (average)
MTBF
250,000 hours
Interface type
• Low-Voltage Differential (LVD)
Fast wide SCSI
• Compressed (2:1 typical):
12.0 MB/second
• High-Voltage Differential (HVD)
Fast wide SCSI
Chapter 2
2-3
Quantum DLT Drives & Media
DLT Drive and Media Specifications
Table 2-2
DLT Media Specifications
Characteristic
DLT Type IV Media
Formatted capacity
DLT 8000 format:
• 40 GB (non-compressed)
• 80 GB (2:1 typical compression)
Basic description
0.5 inch (metal particle)
Tape length
557 meters (1828 feet)
Cartridge dimensions
10.4 x 10.4 x 2.5 cm
(4.1 x 4.1 x 1.0 in)
Shelf life
30 years (minimum) @ 20° C
40% RH (non-condensing)
Cartridge life
• 1,000,000 passes (any point on the
tape passing the recording head in
either direction)
• 2,000 loads/unloads
Cleaning cartridge life
NOTE
20 uses
You can also use DLT Type IIIXT media, though it has a significantly
reduced capacity and performance compared to DLT Type IV media.
2-4
Chapter 2
Quantum DLT Drives & Media
Using DLT Tape Cartridges
Using DLT Tape Cartridges
CAUTION
Quantum DLT tape drives require special cleaning cartridges and data
cartridges formatted specifically for Quantum DLT. To avoid damage to
your tape drive, it is critical to use appropriate DLT cleaning cartridges
and properly formatted DLT data cartridges.
This section describes the following:
• Inspecting DLT Cartridges
• Write-Protecting DLT Cartridges
• Using DLT Cartridge Bar Code Labels
• Loading DLT Cartridges into a Magazine
• Using DLT Cleaning Cartridges
In addition to the information provided in this manual, refer to the
documentation provided with your DLT media for more information.
NOTE
Quantum DLT tape drives use DLT Type IV media. Though the
unformatted media cartridges for Quantum DLT and Benchmark DLT1
are the same, the DLT format is unique. DLT1 formatted cartridges are
not useable in Quantum DLT tape drives. (See “Format Compatibility” on
page 1-2.)
Chapter 2
2-5
Quantum DLT Drives & Media
Using DLT Tape Cartridges
Inspecting DLT Cartridges
NOTE
Make it a practice to visually inspect your tape cartridges when removing
or loading them into your tape library or autoloader. Taking a few
minutes to check the condition of the cartridges will lower the risk of
repeated failures and help ensure uninterrupted backup.
Repeated drive failures may indicate defective tapes. Tapes need to be
inspected and replaced if they have been dropped, damaged, or used with
a failed drive. To determine if the tapes have been damaged:
• Gently shake the tape cartridge to verify that no internal parts are
rattling.
• Visually inspect the tape for a broken, unseated, or misaligned tape
leader (item A in Figure 2-1 on page 2-7).
To check the leader position:
1. Press in the door lock (item C in Figure 2-1) to release the
cartridge door.
2. While pressing in the door lock, push the tab down to open the
door. Be careful not to touch the tape after opening the door.
• Verify that the spring-loaded hub (item B in Figure 2-1 on page 2-7) is
centered within the circular opening on the bottom of the tape
cartridge. Gently press the hub and make sure that it springs back
into place.
2-6
Chapter 2
Quantum DLT Drives & Media
Using DLT Tape Cartridges
Figure 2-1
Leader in Correct Position, Hub, and Door Lock Tab
A
Tape leader
B
Spring-loaded hub
C
Door lock
Do NOT Use DLT Cartridges with:
• Tape or leaders that have been touched with bare fingers (may
transfer oils to the tape head).
• Labels used on the top, bottom, sides, or back of the cartridge. Use the
label slot only.
CAUTION
Always discard damaged tape cartridges. If a defective tape cartridge is
loaded into a tape drive, it may in turn damage the drive, potentially
requiring drive replacement.
Chapter 2
2-7
Quantum DLT Drives & Media
Using DLT Tape Cartridges
Write-Protecting DLT Cartridges
Each cartridge has a sliding write-protect switch. Using the write-protect
switch ensures data safety for files that have been previously written to
tape, preventing additional files from being written to that tape.
To change the write-protect setting, move the write-protect switch
(Figure 2-2):
• Left to prevent data from being written to the cartridge. The orange
indicator on the cartridge can be seen when the write-protect switch
is in the “ON” position.
• Right to allow data to be written to the cartridge. The orange
indicator on the cartridge cannot be seen when the write-protect
switch is in the “OFF” position.
NOTE
With the write-protect switch in either position, data can be read from the
cartridge.
Figure 2-2
DLT Write-Protect Button Settings
2-8
Chapter 2
Quantum DLT Drives & Media
Using DLT Tape Cartridges
Using DLT Cartridge Bar Code Labels
Make it a practice to use bar code labels on your tape cartridges. Your
host software may need to keep track of the following information and
the associated bar code:
• Date of format or initialization
• Cartridge owner (such as a group or department)
• Storage purpose
TIP
If the host software does not keep track of this information, create a
method for doing so.
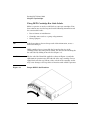
DLT cartridges have a front slide slot located on the face of the cartridge
next to the write-protect switch. Use this slot for inserting the bar code
label by sliding it into the slot (Figure 2-3).
CAUTION
Do not apply labels onto the top, bottom, sides, or back of the cartridge as
this may cause damage to the tape drive or interfere with reliable
operation.
Figure 2-3
Proper DLT Label Position
Chapter 2
2-9
Quantum DLT Drives & Media
Using DLT Tape Cartridges
DLT Cartridge Bar Code Specifications
NOTE
Description
Specification
Data Cartridge Message
6-character: 2 alpha, 4 numeric,
(AAnnnn)
Cleaning Cartridge Message
6-character: ‘CLN’, 3 numeric
(CLNnnn)
Dimensions
5.6 cm x 2.1 cm (2.2 in x .82 in)
Symbology
code 39 without check digit
Start/Stop Characters
*/*
Narrow Bar
0.036 cm (0.014 in)
Ratio
2.5:1
Print Quality
ANSI Grade “A”
You can order additional bar codes if needed. Bar code ordering
information is provided with your tape library or autoloader.
2-10
Chapter 2
Quantum DLT Drives & Media
Using DLT Tape Cartridges
Using DLT Cleaning Cartridges
DLT drives should only be cleaned if the clean drive icon displays on the
tape library or autoloader status bar. Only use the appropriate DLT
cleaning cartridges and follow the instructions in your tape library or
autoloader user’s guide. In general, replace DLT cleaning cartridges after
twenty uses. Marking the label on the cleaning cartridge after each use
will help you keep track of the number of uses.
CAUTION
Excessive use of the cleaning cartridge can cause unnecessary wear on
the drive head. The tape library or autoloader front panel will display a
message when the DLT cleaning cartridge needs to be replaced.
See “DLT Cleaning Issues” on page 2-16 for information on
troubleshooting common cleaning problems.
Chapter 2
2-11
Quantum DLT Drives & Media
Using DLT Tape Cartridges
Loading DLT Cartridges into a Magazine
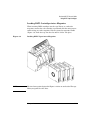
When inserting DLT cartridges into the tape library or autoloader
magazine, ensure that each cartridge is positioned with the write-protect
switch facing out of the magazine and away from the magazine handle
(Figure 2-4). Push the tape into the slot until it “clicks” into place.
Figure 2-4
Loading DLT Tapes into a Magazine
NOTE
The six-slot magazine depicted in Figure 2-4 is for an autoloader. The tape
library magazine has five slots.
2-12
Chapter 2
Quantum DLT Drives & Media
Troubleshooting DLT Drives
Troubleshooting DLT Drives
This section describes the procedures for troubleshooting DLT drives,
including:
• Manually Rewinding a Stuck Tape
• Removing a Stuck Tape
• DLT Cleaning Issues
• Media Issues
Refer to your tape library or autoloader user’s guide for information on
troubleshooting performance issues or other problems you may
encounter. If you experience problems not covered by these manuals,
contact your support representative.
NOTE
For information on upgrading drive firmware, see your tape library or
autoloader user’s guide.
Manually Rewinding a Stuck Tape
NOTE
Before manually rewinding a stuck tape, attempt to eject the tape using
the tape library or autoloader front panel, remote management card WebBased Library Administrator pages, and your host backup software.
Before manually rewinding a stuck tape, you must first remove the drive
module from the tape library or autoloader. Refer to “Removing a Drive
Module” in your tape library or autoloader user’s guide.
After removing the drive module, view the drive hub through the clear
plastic to determine if the tape has been rewound. If the tape has not
been rewound, follow the steps below and refer to Figure 2-5 on page 214:
CAUTION
The DLT drive does not automatically eject a cartridge if a power failure
occurs.
Chapter 2
2-13
Quantum DLT Drives & Media
Troubleshooting DLT Drives
1. Place the DLT drive module on its top side so that the bottom of the
drive module is facing up.
2. Insert a Phillips #2 screwdriver in the rewind hole on the bottom of
the drive module and engage the screw.
NOTE
Gently move the ribbon cable to one side of the rewind hole if necessary.
3. Turn the screwdriver counter-clockwise to rewind the tape. Continue
rewinding until the leader is seated in the tape cartridge.
CAUTION
Do not use a power screwdriver as damage may result to the tape.
Figure 2-5
Rewinding a Tape in the DLT Drive Module
2-14
Chapter 2
Quantum DLT Drives & Media
Troubleshooting DLT Drives
Removing a Stuck Tape
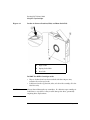
Use the following procedure and Figure 2-6 to remove a tape stuck in a
DLT drive module:
1. Locate the spring-loaded latch near the opening on the drive module,
and push it outward (item 1 in Figure 2-6). Ensure that you move
both parts of the latch.
2. While holding the latch outward, rotate the thumb-wheel (drive gear)
until the tape ejects (item 2 in Figure 2-6).
NOTE
If turning the thumb-wheel does not eject the tape, or if you encounter
high resistance in turning the thumb-wheel, check to ensure that the
spring-loaded latch has been rotated outward.
3. Verify the tape is not damaged (see “Inspecting DLT Cartridges” on
page 2-6).
Figure 2-6
Spring-Loaded Latch and Thumb-Wheel
Chapter 2
2-15
Quantum DLT Drives & Media
Troubleshooting DLT Drives
DLT Cleaning Issues
Table 2-3 describes situations you may encounter with cleaning
cartridges and how to resolve them.
Table 2-3
DLT Cleaning Issues
Problem
Solution
Recurring cleaning
message.
• If the message reappears after
cleaning the drive, the front panel
display will indicate the need to
replace the cleaning cartridge.
• Replace the existing cleaning
cartridge with a new one.
• If the message reappears when a
particular data cartridge is used,
verify that the data cartridge is
readable by:
— Clearing the error message.
— Reading the tape again.
• If the data cartridge can be read,
backup data from the damaged
cartridge to another cartridge, and
discard the damaged one.
A brand new data
cartridge is used and the
clean drive icon is
displayed.
• Clean the outside of the data
cartridge using a damp cloth.
• Clean the drive using the drive
cleaning procedure in your tape
library or autoloader user’s guide.
• If the icon is displayed again within a
short amount of time, replace the
data cartridge.
Cannot load the cleaning
cartridge.
2-16
• Ensure the cleaning cartridge
matches your drive type. Cleaning
cartridges are unique for each drive
technology.
Chapter 2
Quantum DLT Drives & Media
Troubleshooting DLT Drives
Media Issues
Table 2-4 describes situations you may encounter with media and how to
resolve them.
Table 2-4
Media Issues
Problem
Solution
Cannot load tape into drive.
Ensure your media and format
type matches your drive type.
(See “Using DLT Tape
Cartridges” on page 2-5.)
Tape has circular wear patterns
around the hub.
The drive hub may not be
engaging the tape hub properly.
Discard the tape and contact
your support representative.
Error message appears: “Drive
rejected load of tape” (error code
101, qualifier 65 H).
Retry the operation. If you
continue to get this error, replace
the tape cartridge. If data
recovery is needed, contact your
support representative.
Chapter 2
2-17
Quantum DLT Drives & Media
Troubleshooting DLT Drives
2-18
Chapter 2
3
Benchmark DLT1 Drives &
Media
Chapter 3
3-1
Benchmark DLT1 Drives & Media
Chapter Overview
Chapter Overview
This chapter describes the following:
• DLT1 Drive and Media Specifications
• Using DLT1 Tape Cartridges
• Troubleshooting DLT1 Tape Drives
3-2
Chapter 3
Benchmark DLT1 Drives & Media
DLT1 Drive and Media Specifications
DLT1 Drive and Media Specifications
Table 3-1
DLT1 Drive Specifications
Description
Benchmark DLT1
Performance
Read/write transfer rate:
maximum sustained (DLT Type
IV media)
• Non-compressed mode:
3.0 MB/second
Burst transfer rate
20 MB/second
Average access time
68 seconds
Loading time to BOT
(for previously written tape)
59 seconds (average)
Unloading time from BOT
17 seconds (average)
MTBF
200,000 hours
Interface type
Low-Voltage Differential (LVD)
Ultra Wide SCSI
Chapter 3
• Compressed (2:1 typical):
6.0 MB/second
3-3
Benchmark DLT1 Drives & Media
DLT1 Drive and Media Specifications
Table 3-2
DLT1 Media Specifications
Characteristic
DLT Type IV Media
DLT1 formatted capacity
• 40 GB (non-compressed
• 80 GB (2:1 typical
compression)
Basic description
0.5 inch (metal particle)
Tape length
557 meters (1828 feet)
Cartridge dimensions
10.4 x 10.4 x 2.5 cm
(4.1 x 4.1 x 1.0 in)
Shelf life
30 years minimum @ 20° C
40% RH (non-condensing)
Cartridge life
1,000,000 passes (any point on
the tape passing the recording
head in either direction)
Cleaning cartridge life
20 uses
3-4
Chapter 3
Benchmark DLT1 Drives & Media
Using DLT1 Tape Cartridges
Using DLT1 Tape Cartridges
CAUTION
Benchmark DLT1 tape drives require special cleaning cartridges and
data cartridges formatted specifically for DLT1. To avoid potential
damage to your tape drive, it is critical to use appropriate DLT1 cleaning
cartridges and properly formatted DLT1 data cartridges.
This section describes the following:
• Using DLT Type IV Media
• Inspecting DLT1 Cartridges
• Write-Protecting DLT1 Cartridges
• Using DLT1 Cartridge Bar Code Labels
• Loading DLT1 Cartridges into a Magazine
• Using DLT1 Cleaning Cartridges
In addition to the information provided in this manual, refer to the
documentation provided with your DLT1 media for more information.
NOTE
Benchmark DLT1 tape drives use DLT Type IV media. Though the
unformatted media cartridges for Quantum DLT and Benchmark DLT1
are the same, the DLT1 format is unique. Benchmark DLT1 tape drives
cannot read or write to DLT 7000 and 8000 formatted cartridges, but they
can read DLT 4000 formatted cartridges. (See “Format Compatibility” on
page 1-2.)
Chapter 3
3-5
Benchmark DLT1 Drives & Media
Using DLT1 Tape Cartridges
Using DLT Type IV Media
CAUTION
Always remove the cartridge from your DLT1 drive before powering down
your tape library or autoloader. Leaving a cartridge in the drive when
power is off can result in cartridge and drive damage. To prolong
cartridge life, always return the cartridge to its storage case after
removing it from the drive.
To ensure the most reliable operation when storing your data, HP
recommends that you use new unformatted DLT Type IV cartridges or
DLT Type IV cartridges that have been used only in DLT1 drives. If you
want to write to cartridges that were previously formatted with a
Quantum DLT drive, you must use a sufficiently rated bulk eraser to
prepare the cartridges for use with your Benchmark DLT1 drive. (See
page 1-2 for information on format compatibility.)
Bulk Erasing Tape Cartridges
Erasing the data cartridge in its original drive is not adequate because
the existing, incompatible format will remain on the tape cartridge. The
degaussing equipment used to bulk erase previously formatted media
must have an Oersted rating at least equal to, and preferably two or
three times greater than, the rating for the media being erased. For
example, DLT Type IV media is rated at 1850 Oersteds. Specific
procedures for degaussing your media should be included with your
degaussing equipment.
The following websites offer degaussing products or services. Other
sources can being found by doing an Internet search.
• www.audiolabelectronics.com/Degserv.htm
• www.datadev.com
• www.datasecurityinc.com/products.htm
• www.weircliffe.co.uk
CAUTION
All previously recorded data will be removed if you bulk erase a tape
cartridge.
3-6
Chapter 3
Benchmark DLT1 Drives & Media
Using DLT1 Tape Cartridges
NOTE
If you experience any failures with reused Quantum DLT formatted
(degaussed) cartridges, the degaussing may not have been sufficient to
fully erase the data. If this happens, use another piece of media
(preferably a new, unformatted DLT Type IV cartridge) before suspecting
other system components.
Inspecting DLT1 Cartridges
NOTE
Make it a practice to visually inspect your tape cartridges when removing
or loading them into your tape library or autoloader. Taking a few
minutes to check the condition of the cartridges will lower the risk of
repeated failures and help ensure uninterrupted backup.
Repeated drive failures may indicate defective tapes. Tapes need to be
inspected and replaced if they have been dropped, damaged, or used with
a failed drive. To determine if the tapes have been damaged:
• Gently shake the tape cartridge to verify that no internal parts are
rattling.
• Visually inspect the tape for a broken, unseated, or misaligned tape
leader (item A in Figure 3-1 on page 3-8).
To check the leader position:
1. Press in the door lock (item C in Figure 3-1) to release the
cartridge door.
2. While pressing in the door lock, push the tab down to open the
door. Be careful not to touch the tape after opening the door.
• Verify that the spring-loaded hub (item B in Figure 3-1 on page 3-8) is
centered within the circular opening on the bottom of the tape
cartridge. Gently press the hub and make sure that it springs back
into place.
Chapter 3
3-7
Benchmark DLT1 Drives & Media
Using DLT1 Tape Cartridges
Figure 3-1
Leader in Correct Position, Hub, and Door Lock Tab
A
Tape leader
B
Spring-loaded hub
C
Door lock
Do NOT Use DLT1 Cartridges with:
• Tape or leaders that have been touched with bare fingers (may
transfer oils to the tape head).
• Labels used on the top, bottom, sides, or back of the cartridge. Use the
label slot only.
CAUTION
Always discard damaged tape cartridges. If a defective tape cartridge is
loaded into a tape drive, it may in turn damage the drive, potentially
requiring drive replacement.
3-8
Chapter 3
Benchmark DLT1 Drives & Media
Using DLT1 Tape Cartridges
Write-Protecting DLT1 Cartridges
Each cartridge has a sliding write-protect switch. Using the write-protect
switch ensures data safety for files that have been previously written to
tape, preventing additional files from being written to that tape.
To change the write-protect setting, move the write-protect switch
(Figure 3-2):
• Left to prevent data from being written to the cartridge. The orange
indicator on the cartridge can be seen when the write-protect switch
is in the “ON” position.
• Right to allow data to be written to the cartridge. The orange
indicator on the cartridge cannot be seen when the write-protect
switch is in the “OFF” position.
NOTE
With the write-protect switch in either position, data can be read from the
cartridge.
Figure 3-2
DLT1 Write-Protect Button Settings
Chapter 3
3-9
Benchmark DLT1 Drives & Media
Using DLT1 Tape Cartridges
Using DLT1 Cartridge Bar Code Labels
Make it a practice to use bar code labels on your tape cartridges. Your
host software may need to keep track of the following information and
the associated bar code:
• Date of format or initialization
• Cartridge owner (such as a group or department)
• Storage purpose
TIP
If the host software does not keep track of this information, create a
method for doing so.
DLT1 cartridges have a front slide slot located on the face of the
cartridge next to the write-protect switch. Use this slot for inserting the
bar code label by sliding it into the slot (Figure 3-3).
CAUTION
The bar code label should be applied as shown in Figure 3-3 with the
alphanumeric portion facing the hub side of the tape cartridge. Do not
apply labels onto the top, bottom, sides, or back of the cartridge as this
may cause damage to the tape drive or interfere with reliable operation.
Figure 3-3
Proper DLT1 Label Position
3-10
Chapter 3
Benchmark DLT1 Drives & Media
Using DLT1 Tape Cartridges
NOTE
You can order additional bar codes if needed. Bar code ordering
information is provided with your tape library or autoloader.
Table 3-3
DLT1 Bar Code Specifications
NOTE
Description
Specification
Data Cartridge Message
7-character: 6 alphanumeric (user
preference) followed by 1 alpha (any
combination of alpha or numeric
with an ending character of B)
Cleaning Cartridge Message
7-character: ‘CLN’, 3 numeric, 1
alpha (CLNnnnA)
Dimensions
5.6 cm x 2.1 cm (2.2 in x .82 in)
Symbology
code 39 without check digit
Start/Stop Characters
*/*
Narrow Bar
0.036 cm (0.014 in)
Ratio
2.5:1
Print Quality
ANSI Grade “A”
For data and cleaning cartridge messages, ‘n’ represents the volume serial
number (or volser), and ‘A’ represents the media ID. The Benchmark
(DLT1) DLT Type IV media ID is ‘B’.
Chapter 3
3-11
Benchmark DLT1 Drives & Media
Using DLT1 Tape Cartridges
Using DLT1 Cleaning Cartridges
DLT1 drives should be cleaned when the clean drive icon displays on the
tape library or autoloader status bar. Only use the appropriate DLT1
cleaning cartridges and follow the instructions in your tape library or
autoloader user’s guide. In general, replace DLT1 cleaning cartridges
after twenty uses. Marking the label on the cleaning cartridge after each
use will help you keep track of the number of uses.
NOTE
The tape library or autoloader front panel will display a message when
the DLT1 cleaning cartridge needs to be replaced.
See “DLT1 Cleaning Issues” on page 3-15 for information on
troubleshooting common cleaning problems.
3-12
Chapter 3
Benchmark DLT1 Drives & Media
Using DLT1 Tape Cartridges
Loading DLT1 Cartridges into a Magazine
When inserting DLT1 cartridges into the tape library or autoloader
magazine, ensure that each cartridge is positioned with the write-protect
switch facing out of the magazine and away from the magazine handle
(Figure 3-4). Push the tape into the slot until it “clicks” into place.
Figure 3-4
Loading DLT1 Tapes into a Magazine
NOTE
The six-slot magazine depicted in Figure 3-4 is for an autoloader. The tape
library magazine has five slots.
Chapter 3
3-13
Benchmark DLT1 Drives & Media
Troubleshooting DLT1 Tape Drives
Troubleshooting DLT1 Tape Drives
This section describes troubleshooting information for DLT1 drives,
including:
• Rewinding/Removing a Stuck Tape
• DLT1 Cleaning Issues
• Media Compatibility Issues
• Miscellaneous Issues
Refer to your tape library or autoloader user’s guide for information on
troubleshooting performance issues or other problems you may
encounter. If you experience problems not covered in this manual,
contact your support representative.
NOTE
For information on upgrading drive firmware, see your tape library or
autoloader user’s guide.
Rewinding/Removing a Stuck Tape
If a tape gets stuck in the drive, attempt to eject the tape using:
• Tape library or autoloader front panel
• Remote management card Web-Based Library Administrator pages
• Host backup software
If these attempts are not successful, contact your support representative.
3-14
Chapter 3
Benchmark DLT1 Drives & Media
Troubleshooting DLT1 Tape Drives
DLT1 Cleaning Issues
Table 3-4 describes potential issues with cleaning cartridges and how to
resolve them.
Table 3-4
DLT1 Cleaning Issues
Problem
Solution
Recurring cleaning
message.
• If the message reappears after
cleaning the drive, the front panel
display will indicate the need to
replace the cleaning cartridge.
• Replace the existing cleaning
cartridge with a new one.
• If the message reappears when a
particular data cartridge is used,
verify that the data cartridge is
readable by:
— Clearing the error message.
— Reading the tape again.
• If the data cartridge can be read,
backup data from the damaged
cartridge to another cartridge, and
discard the damaged one.
A brand new data
cartridge is used and the
clean drive icon is
displayed.
• Clean the outside of the data
cartridge using a damp cloth.
• Clean the drive using the drive
cleaning procedure in your tape
library or autoloader user’s guide.
• If the icon is displayed again within a
short amount of time, replace the
data cartridge.
Cannot load the cleaning
cartridge.
Chapter 3
• Ensure the cleaning cartridge
matches your drive type. Cleaning
cartridges are unique for each drive
technology.
3-15
Benchmark DLT1 Drives & Media
Troubleshooting DLT1 Tape Drives
Media Compatibility Issues
Table 3-5 lists potential error messages and what may cause them.
Table 3-5
NOTE
Media Compatibility Issues
Message
Cause
Media format invalid for
drive type.
An attempt was made to load
incompatible media into a DLT1 tape
drive. Ensure your media and format is
compatible with a DLT1 tape drive. (See
“Using DLT1 Tape Cartridges” on page
3-5.)
Media is write protected restore from tape
successful.
Media with the DLT 4000 format was
loaded into a DLT1 tape drive. The data
is readable but the media must be bulk
erased before a DLT1 tape drive can
write to this tape. (See “Bulk Erasing
Tape Cartridges” on page 3-6.)
Media is write protected restore from tape NOT
successful.
An attempt was made to load media
with a DLT 7000 or 8000 format into a
DLT1 tape drive. The format is
incompatible and the data cannot be
read. The media must be degaussed
before a DLT1 tape drive can write to
this tape. (See “Bulk Erasing Tape
Cartridges” on page 3-6.)
If you experience any failures with reused Quantum DLT formatted
(degaussed) cartridges, the degaussing may not have been sufficient to
fully erase the data. If this happens, use another piece of media
(preferably a new, unformatted DLT Type IV cartridge) before suspecting
other system components.
3-16
Chapter 3
Benchmark DLT1 Drives & Media
Troubleshooting DLT1 Tape Drives
Miscellaneous Issues
Table 3-6 lists some miscellaneous issues that you may encounter and
their potential causes. If you continue to have problems resolving these
issues, contact your service representative for further assistance.
Table 3-6
Miscellaneous Issues
Issue
Cause
Receive ‘media invalid for
drive type’ error. Message
is cleared when navigating
through the front panel
menu tree. The autoloader
goes back into a ready
state, though the drive is
still not ready.
The autoloader was in random mode and
incompatible media was loaded into the
drive. Ensure your media and format is
compatible with a DLT1 tape drive. (See
“Using DLT1 Tape Cartridges” on page
3-5.)
Drive continuously loads
and unloads media.
Incompatible media was loaded into the
drive. Ensure your media and format is
compatible with a DLT1 tape drive. (See
“Using DLT1 Tape Cartridges” on page
3-5.)
Autoloader reports a
partial availability state.
Incompatible media may have been
loaded into the drive. Ensure your media
and format is compatible with a DLT1
tape drive. (See “Using DLT1 Tape
Cartridges” on page 3-5.)
NOTE: There are additional causes for
the partial availability state relating to
your autoloader’s configuration. Refer to
your autoloader user’s guide for more
information.
Chapter 3
3-17
Benchmark DLT1 Drives & Media
Troubleshooting DLT1 Tape Drives
3-18
Chapter 3
4
HP Ultrium Drives & Media
Chapter 4
4-1
HP Ultrium Drives & Media
Chapter Overview
Chapter Overview
This chapter describes the following:
• HP Ultrium Drive and Media Specifications
• Using HP Ultrium Cartridges
• Troubleshooting HP Ultrium Drives
4-2
Chapter 4
HP Ultrium Drives & Media
HP Ultrium Drive and Media Specifications
HP Ultrium Drive and Media Specifications
Table 4-1
Ultrium Drive Specifications
Description
HP Ultrium
Performance
Read/write transfer rate:
(maximum sustained)
• Non-compressed mode:
15 MB/second
• Compressed (2:1 typical):
30 MB/second
Burst transfer rate
80 MB/second
Average access time
90 seconds
Loading time
25 seconds (maximum)
Unloading time
13 seconds (maximum)
MTBF
250,000 hours
Interface type
• Low-Voltage Differential (LVD)
Ultra 2 SCSI
• High-Voltage Differential (HVD)
Ultra SCSI
Chapter 4
4-3
HP Ultrium Drives & Media
HP Ultrium Drive and Media Specifications
Table 4-2
Ultrium Media Specifications
Characteristic
Ultrium Media
Formatted capacity
200 GB (2:1 typical compression)
Basic description
0.5 inch (metal particle)
Tape length
580 meters (1903 feet)
Cartridge dimensions
10.2 x 10.5 x 2.2 cm
(4.02 x 4.15 x 0.85 in)
Shelf life
30 years
Cartridge life
• 1,000,000 passes
• 20,000 loads/unloads
Cleaning cartridge life
15 uses
NOTE
Only use approved Ultrium cleaning cartridges with HP Ultrium tape
drives (see page 1-3). For data cartridges, only use those specificed as
having met Ultrium standards. Approved media will have the Ultrium
format trademark (Figure 4-1), which indicates that the media has passed
Ultrium format compliance testing. For best results, always use HP
branded media.
Figure 4-1
Ultrium Format Trademark
4-4
Chapter 4
HP Ultrium Drives & Media
Using HP Ultrium Cartridges
Using HP Ultrium Cartridges
CAUTION
HP Ultrium tape drives require special cleaning cartridges and data
cartridges formatted specifically for HP Ultrium. To avoid damage to your
tape drive, it is critical to use appropriate cleaning cartridges and
properly formatted data cartridges.
A unique feature of Ultrium tape cartridges is LTO-Cartridge Memory
(LTO-CM). LTO-CM is an intelligent memory chip embedded into the
cartridge. It uses a radio frequency interface that eliminates the need for
a physical power or signal connection between the cartridge and drive.
Information normally stored in the header at the beginning of the tape is
contained in the LTO-CM, including identification and usage information
such as the number of times the cartridge has been loaded, when it was
last cleaned, and error logs.
See the following sections for information on:
• Maintaining Ultrium Cartridges
• Write-Protecting Ultrium Cartridges
• Using Ultrium Cartridge Bar Code Labels
• Loading Ultrium Cartridges into a Magazine
• Using Ultrium Cleaning Cartridges
In addition to the information provided in this manual, you may also
want to refer to the documentation provided with your Ultrium media.
Maintaining Ultrium Cartridges
Make it a practice to visually inspect your tape cartridges when loading
or removing them from your tape library or autoloader. Taking a few
minutes to check the condition of your cartridges will lower the risk of
repeated failures and help ensure uninterrupted backup.
For general precautions when using tape cartridges, see page 1-7. In
addition, do not apply more than one label onto Ultrium cartridges, as
extra labels can cause the cartridges to jam in the tape drive.
Chapter 4
4-5
HP Ultrium Drives & Media
Using HP Ultrium Cartridges
CAUTION
Do not bulk erase Ultrium formatted cartridges. This will destroy prerecorded servo information and make the cartridges unusable.
Write-Protecting Ultrium Cartridges
Each cartridge has a sliding write-protect switch. Using the write-protect
switch ensures data safety for files that have been previously written to
tape, preventing additional files from being written to that tape.
To change the write-protect setting, slide the red tab on the base of the
cartridge (Figure 4-2 on page 4-6):
• Right to prevent data from being written to the cartridge. The red tab
on the cartridge displays a padlock when the write-protect switch is
in the “ON” position.
• Left to allow data to be written to the cartridge (unless the tape is
write-protected electronically through your backup software). The
padlock on the red tab cannot be seen and the hole is exposed when
the write-protect switch is in the “OFF” position.
NOTE
With the write-protect switch in either position, data can be read from the
cartridge.
Figure 4-2
Ultrium Write-Protect Button Settings
4-6
Chapter 4
HP Ultrium Drives & Media
Using HP Ultrium Cartridges
Using Ultrium Cartridge Bar Code Labels
Make it a practice to use bar code labels on your tape cartridges. Your
host software may need to keep track of the following information and
the associated bar code:
• Date of format or initialization
• Cartridge owner (such as a group or department)
• Storage purpose
TIP
If the host software does not keep track of this information, create a
method for doing so.
Ultrium cartridges have a recessed area located on the face of the
cartridge next to the write-protect switch. Use this area for attaching the
bar code label (Figure 4-3). Do not apply labels onto the cartridge except
in this designated area.
Figure 4-3
Ultrium Cartridge Recessed Area
Chapter 4
4-7
HP Ultrium Drives & Media
Using HP Ultrium Cartridges
CAUTION
The bar code label should be applied with the alphanumeric portion facing
the hub side of the tape cartridge (Figure 4-3 on page 4-7). Never apply
multiple labels onto a cartridge, as extra labels can cause the cartridge to
jam in a tape drive.
To ensure successful operation of your storage device, place the bar code
label entirely within this area, ensuring that no part of the label is
outside of the recessed area (Figure 4-4).
Figure 4-4
Proper Ultrium Label Position
4-8
Chapter 4
HP Ultrium Drives & Media
Using HP Ultrium Cartridges
NOTE
You can order additional bar code labels if needed. Bar code label ordering
information is provided with your tape library or autoloader.
Table 4-3
Ultrium Cartridge Bar Code Specifications
NOTE
Description
Specification
Data Cartridge Message
8-character: 6 alphanumeric (user
preference) followed by 2
alphanumeric (media ID)
Cleaning Cartridge Message
8-character: ‘CLN’, ‘H’, 2 numeric,
and 2 alphanumeric (media ID)
Dimensions
7.8 cm x 1.7 cm (3.07 in x 0.67 in)
Symbology
code 39 without check digit
Start/Stop Characters
*/*
• Short Bar
• 6.0 mm (0.24 in)
• Long Bar
• 8.5 mm (0.33 in)
Ratio
2.75:1
Print Quality
ANSI Grade “A”
For data cartridge messages, ‘n’ represents the volume serial number (or
volser), and ‘XY’ represents the media ID. The HP Ultrium media ID is
‘Lg’ where ‘g’ (alphanumeric) designates a generation of the cartridge. For
example, the HP Ultrium media ID for first generation data cartridges is
‘L1”.
For cleaning cartridge messages, ‘CLN’ denotes that it is a cleaning
cartridge, ‘H’ represents Hewlett-Packard as the drive manufacturer, ‘n’
is the volume serial number, and ‘XY’ represents the media ID (as stated
above). Bar codes will resemble ‘CLNHnnL1’.
Chapter 4
4-9
HP Ultrium Drives & Media
Using HP Ultrium Cartridges
Using Ultrium Cleaning Cartridges
HP Ultrium drives should only be cleaned if the clean drive icon displays
on the tape library or autoloader status bar. Only use appropriately
formatted data cartridges and HP Ultrium cleaning cartridges and follow
the instructions in your tape library or autoloader user’s guide. In
general, replace cleaning cartridges after fifteen uses. Marking the label
on the cleaning cartridge after each use will help you keep track of the
number of uses.
CAUTION
Excessive use of the cleaning cartridge can cause unnecessary wear on
the drive head. The tape library or autoloader front panel will display a
message when the cleaning cartridge needs to be replaced.
See “Ultrium Cleaning Issues” on page 4-13 for information on
troubleshooting common cleaning problems.
4-10
Chapter 4
HP Ultrium Drives & Media
Using HP Ultrium Cartridges
Loading Ultrium Cartridges into a Magazine
When inserting Ultrium cartridges into the tape library or autoloader
magazine, ensure that each cartridge is positioned with the write-protect
switch facing out of the magazine and towards the magazine handle
(Figure 4-5). Push the tape into the slot until it “clicks” into place.
Figure 4-5
Loading Tapes into a Magazine
NOTE
The six-slot magazine depicted in Figure 4-5 is for an autoloader. The tape
library magazine has five slots.
Chapter 4
4-11
HP Ultrium Drives & Media
Troubleshooting HP Ultrium Drives
Troubleshooting HP Ultrium Drives
This section describes troubleshooting information for Ultrium drives,
including:
• Rewinding/Removing a Stuck Tape
• Ultrium Cleaning Issues
• LTO-Cartridge Memory (LTO-CM) Issues
Refer to your tape library or autoloader user’s guide for information on
troubleshooting performance issues or other problems you may
encounter. If you experience problems not covered by these manuals,
contact your support representative.
NOTE
For information on upgrading drive firmware, see your tape library or
autoloader user’s guide.
Rewinding/Removing a Stuck Tape
If a tape gets stuck in the drive, attempt to eject the tape using:
• Tape library or autoloader front panel
• Remote management card Web-Based Library Administrator pages
• Host backup software
If these attempts are not successful, contact your support representative.
4-12
Chapter 4
HP Ultrium Drives & Media
Troubleshooting HP Ultrium Drives
Ultrium Cleaning Issues
Table 4-4 describes potential issues with cleaning cartridges and how to
resolve them.
Table 4-4
Ultrium Cleaning Issues
Problem
Solution
Recurring cleaning
message.
• If the message reappears after
cleaning the drive, the front panel
display will indicate the need to
replace the cleaning cartridge.
• Replace the existing cleaning
cartridge with a new one.
• If the message reappears when a
particular data cartridge is used,
verify that the data cartridge is
readable by:
— Clearing the error message.
— Reading the tape again.
• If the data cartridge can be read,
backup data from the damaged
cartridge to another cartridge, and
discard the damaged one.
A brand new data
cartridge is used and the
clean drive icon is
displayed.
• Clean the outside of the data
cartridge using a damp cloth.
• Clean the drive using the drive
cleaning procedure in your tape
library or autoloader user’s guide.
• If the icon is displayed again within a
short amount of time, replace the
data cartridge.
Cannot load the cleaning
cartridge.
Chapter 4
• Ensure the cleaning cartridge
matches your drive type. Cleaning
cartridges are unique for each drive
technology.
4-13
HP Ultrium Drives & Media
Troubleshooting HP Ultrium Drives
LTO-Cartridge Memory (LTO-CM) Issues
The LTO-CM stores information that is normally stored in the header at
the beginning of the tape, including identification and usage information
such as the number of times the cartridge has been loaded, when it was
last cleaned, and error logs. If the LTO-CM becomes damaged, you may
experience difficulty with the cartridge.
Table 4-5
LTO-CM Issues
Problem
Cause
Solution
A new data
cartridge that is
write-enabled is
rejected by the
drive.
LTO-CM has failed
or is damaged.
Replace data cartridge.
A new data
cartridge that is
write-protected is
rejected in multiple
known good drives.
LTO-CM has failed
and the drive has
found no data to
recover.
Replace data cartridge.
A cartridge that has
data written to it
and is writeenabled is rejected
by the drive.
LTO-CM has failed
or is damaged.
The data can still be
recovered. Contact
your support
representative for
more information.
After data recovery,
replace the cartridge.
A cartridge that has
data written to it
and is writeprotected restores
very slowly.
LTO-CM has failed
and the drive cannot
use the tape
directory information
to recover the data.
The data can still be
recovered but may take
longer than normal.
4-14
Chapter 4
Index
A
autoloader
model 1/9, v
B
barcode
DLT labels, 2-9–2-10
DLT1 labels, 3-10–3-11
Ultrium labels, 4-7–4-9
bulk erasing, 3-6, 3-7, 3-16, 4-6
C
cleaning cartridge
compatibility, 1-3
DLT, 1-3, 2-5
cleaning problems, 2-16
DLT1, 1-3, 3-5
cleaning problems, 3-15
Ultrium, 1-3, 4-5
cleaning problems, 4-13
using DLT, 2-11
using DLT1, 3-12
using Ultrium, 4-10
compatibility
cleaning cartridges, 1-3
drives, 1-2
format, 1-2
media, 1-3
read-compatible, 1-2
write-compatible, 1-2
D
data cartridge
bulk erasing DLT1 media, 3-6,
3-7, 3-16
bulk erasing Ultrium media,
4-6
compatibility, 1-3
degaussing DLT1 media, 3-6
degaussing Ultrium media, 4-6
DLT, 1-3, 2-5
description, 2-4
dimensions, 2-4
length, 2-4
loading into magazine, 2-12
removing a stuck tape, 2-15
rewinding a stuck tape,
2-13–2-14
DLT Type IIIXT, 1-3, 2-4
DLT Type IV, 1-3, 2-5, 3-5
DLT1, 1-3, 2-5, 3-5, 3-6
description, 3-4
dimensions, 3-4
length, 3-4
loading into magazine, 3-13
rewinding a stuck tape, 3-14
hub, 2-6, 3-7
inspecting DLT, 2-6
inspecting DLT1, 3-7–3-8
leader, 2-6, 3-7
maintaining Ultrium, 4-5
Ultrium, 1-3, 4-5
description, 4-4
dimensions, 4-4
length, 4-4
loading into magazine, 4-11
rewinding a stuck tape, 4-12
using DLT media, 2-5
using DLT Type IV, 3-6
write-protecting DLT, 2-8
write-protecting DLT1, 3-9
write-protecting Ultrium, 4-6
degaussing, 3-6, 4-6
DLT
4000, 1-2
8000, 1-2
barcode labels, 2-9–2-10
cleaning cartridge, 2-11
cleaning problems, 2-16
format, 1-2
inspecting media, 2-6
interface types, 2-3
media cartridge life, 2-4
removing a stuck tape, 2-15
rewinding a stuck tape,
2-13–2-14
troubleshooting drives,
2-13–2-17
using tape cartridges, 2-5
DLT 7000, 1-2
DLT1
barcode labels, 3-10–3-11
bulk erasing
media, 3-6
bulk erasing media, 3-6, 3-7,
3-16
cleaning cartridge, 3-5, 3-12
cleaning problems, 3-15
degaussing
media, 3-6
drive, 3-3
format, 1-2
inspecting media, 3-7–3-8
interface types, 3-3
media, 2-5, 3-5
media formatted capacity, 3-4
media specifications, 3-4
rewinding a stuck tape, 3-14
specifications, 3-3
tape cartridge, 3-5
troubleshooting drives,
3-14–3-17
using DLT Type IV media, 3-6
using tape cartridges, 3-5–3-13
write-protecting media, 3-9
drives
compatibility, 1-2
DLT
cleaning problems, 2-16
removing a stuck tape, 2-15
rewinding a stuck tape,
2-13–2-14
troubleshooting, 2-13–2-17
DLT1
cleaning problems, 3-15
rewinding a stuck tape, 3-14
troubleshooting, 3-14–3-17
Index 1
Index
general precautions, 1-7–1-8
media format, 1-3
supported, v
Ultrium
cleaning problems, 4-13
rewinding a stuck tape, 4-12
troubleshooting, 4-12–4-13
E
electrostatic discharge (ESD),
1-7–1-8
F
format
compatibility, 1-2
DLT 4000, 1-2
DLT 8000, 1-2
DLT1, 1-2
media and drive, 1-3
Ultrium
format
DLT 7000, 1-2
H
HP Library & Tape Tools, 1-5
hub, 2-6, 3-7
I
inspecting media
DLT, 2-6
DLT1, 3-7–3-8
interface
DLT 8000, 2-3
DLT1, 3-3
Ultrium, 4-3
L
leader, 3-7
library
model 2/20, v
2Index
model 4/40, v
model 6/140, v
model 6/60, v
M
magazine
loading DLT media, 2-12
loading DLT1 media, 3-13
loading Ultrium media, 4-11
maintaining media
Ultrium, 4-5
manual
overview, iv
media
bulk erasing DLT1 tapes, 3-6,
3-7, 3-16
bulk erasing Ultrium tapes,
4-6
compatibility, 1-3
degaussing DLT1 tapes, 3-6
degaussing Ultrium tapes, 4-6
DLT
cartridge life, 2-4
cleaning problems, 2-16
inspecting, 2-6
loading into magazine, 2-12
rewinding a stuck tape,
2-13–2-14, 2-15, 3-14
DLT Type IIIXT, 2-4
DLT Type IV, 2-5, 3-5
DLT1
cartridge life, 3-4
cleaning problems, 3-15
compatibility, 3-16, 3-17
inspecting, 3-7–3-8
loading into magazine, 3-13
troubleshooting, 3-16, 3-17
drive format, 1-3
general precautions, 1-7–1-8
hub, 2-6, 3-7
leader, 3-7
migration, 1-5–1-6
mixing, 1-4
tape leader, 2-6
Ultrium
cartridge life, 4-4
cleaning problems, 4-13
loading into magazine, 4-11
maintaining, 4-5
rewinding a stuck tape, 4-12
unformatted, 1-3
using DLT cartridges, 2-5
using DLT Type IV, 3-6
using DLT1, 3-5–3-13
using Ultrium, 4-5–4-11
write-protecting DLT, 2-8
write-protecting DLT1, 3-9
write-protecting Ultrium, 4-6
mixed media, 1-4
P
precautions, 1-7–1-8
S
specifications
DLT
8000, 2-3
barcode labels, 2-10
drive, 2-3
formatted capacity, 2-4
media cartridge life, 2-4
media shelf life, 2-4
performance, 2-3
DLT1, 3-3
barcode labels, 3-11
drive, 3-3
formatted capacity, 3-4
media, 3-4
media cartridge life, 3-4
media shelf life, 3-4
performance, 3-3
Ultrium
barcode labels, 4-9
formatted capacity, 4-4
Index
media cartridge life, 4-4
media shelf life, 4-4
performance, 4-3
supported drive types, v
T
tape cartridge
bulk erasing DLT1 media, 3-6,
3-7, 3-16
bulk erasing Ultrium media,
4-6
degaussing DLT1 media, 3-6
degaussing Ultrium media, 4-6
DLT, 2-5
description, 2-4
dimensions, 2-4
length, 2-4
loading into magazine, 2-12
removing a stuck tape, 2-15
rewinding a stuck tape,
2-13–2-14
DLT Type IIIXT, 2-4
DLT Type IV, 2-5, 3-5
DLT1, 3-5
description, 3-4
dimensions, 3-4
length, 3-4
loading into magazine, 3-13
rewinding a stuck tape, 3-14
hub, 2-6, 3-7
inspecting DLT, 2-6
inspecting DLT1, 3-7–3-8
leader, 2-6, 3-7
maintaining Ultrium, 4-5
Ultrium, 4-5
description, 4-4
dimensions, 4-4
length, 4-4
loading into magazine, 4-11
rewinding a stuck tape, 4-12
using DLT media, 2-5
using DLT Type IV, 3-6
using DLT1 media, 3-5–3-13
using Ultrium media, 4-5–4-11
write-protecting DLT, 2-8
write-protecting DLT1, 3-9
write-protecting Ultrium, 4-6
tape leader, 2-6, 3-7
troubleshooting
DLT
cleaning problems, 2-16
drives, 2-13–2-17
removing a stuck tape, 2-15
rewinding a stuck tape,
2-13–2-14
DLT1
cleaning problems, 3-15
drives, 3-14–3-17
rewinding a stuck tape, 3-14
Ultrium
cleaning problems, 4-13
drives, 4-12–4-13
rewinding a stuck tape, 4-12
W
warranty, ii
write-protecting
DLT media, 2-8
DLT1 media, 3-9
Ultrium media, 4-6
U
Ultrium
barcode labels, 4-7–4-9
bulk erasing
media, 4-6
cleaning cartridge, 4-5, 4-10
cleaning problems, 4-13
degaussing
media, 4-6
drive, 4-3
interface types, 4-3
maintaining media, 4-5
media formatted capacity, 4-4
rewinding a stuck tape, 4-12
specifications, 4-3
tape cartridge, 4-5
troubleshooting drives,
4-12–4-13
using tape cartridges, 4-5–4-11
write-protecting media, 4-6
Index 3