1
W5460
Handlebar
CAUTION
Handlebar
Assembly
Assembly
Assembly
Parts
Front Base
(Small)
Seat
This product contains
small parts in an
unassembled state. Adult
assembly is required.
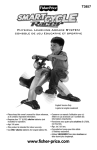
PHYSICAL LEARNING ARCADE SYSTEM
2
Pedal
Assembly
Seat Post
• Fit the front base (small) onto the
bottom of the frame, as shown.
Hint: The front base is designed to fit
onto the frame one way. If it does not
seem to fit, turn it around and try again.
• Insert four screws into the front base
and tighten.
Frame
with Console
Front Base
(Small)
Frame
1
Seat
Learning Adventure
Game Cartridge
with Key Ring
Back Base
(Large)
Pedal Assembly
Plug-and-Play Cord
Seat Post
Rear Base
(Large)
• Fit the pedal assembly into the groove in
the underside of the frame, as shown.
Hint: The pedal assembly is designed to
only fit one way. If it does not seem to
fit, turn it around and try again.
• Insert four screws into the pedal
assembly. Fully tighten the screws.
4
7
• Turn both the frame and seat post
assemblies upright.
• Fit the seat post assembly onto the
frame assembly.
• Insert two screws into the seat post
and tighten.
Hint: You may want to insert the
frame cover with bolt into the frame
assembly before inserting and
tightening screws in the post.
6
• Fit the handlebar onto the frame,
as shown.
Hint: The handlebar will only fit one way
onto the console. If it does not seem to
fit, turn it around and try again!
• Insert two screws into the handlebar
and tighten.
• Pull up on the handlebar to be sure it
is secure.
Frame Cover
(with Bolt)
Seat Height 3
(Shortest)
Seat Height 2
Seat Height 1
(Tallest)
• At an angle, fit the upper tabs on the
front of the seat into the slots on the
seat post.
• Lower the seat to fit the bottom tabs
on the seat into the slots on the seat
post. You should hear a "click".
• Push down on the seat to be sure it
is secure.
8
• For your child's comfort, the seat can
be adjusted to any of three seat heights
(upper slots for shorter children and
lower slots for taller children).
• To remove the seat, press the tabs
underneath and lift.
• Replace the seat at the desired height
and push down on the seat to be sure
it is secure in the slots in the seat post.
Frame Cover (with Bolt)
3
Adult assembly is Required. Required tool:
Phillips screwdriver (not included).
Please keep this owner’s manual for future reference, as it contains important information.
Requires four “D” (LR20) alkaline batteries (not included) for operation.
Age: 3-6 years.
This product is intended for indoor use only.
Use ONLY alkaline batteries for longest battery life.
Note: Tighten and loosen all screws with a Phillips screwdriver. Do not over-tighten.
www.fisher-price.com
2
• Fit the rear base (large) onto the end
of the seat post, as shown.
Hint: The rear base is designed to fit onto
the seat post one way. If it does not seem
to fit, turn it around and try again.
• Insert two screws into the rear base
and tighten.
#8 x 1,25" Screw - 14
Shown Actual Size
3
5
• Insert the frame cover with bolt into the
hole on the side of the frame assembly.
• Full tighten the bolt with a Phillips
screwdriver.
4
5
Battery Installation
Connecting Smart Cycle®
to your TV
1,5V x 4
“D” (LR20)
White
INPUT
AUDIO IN
Getting Started
Getting Started
Handlebar
Use for steering on the road or in games.
Safety Tips
• Always sit on the seat.
• Always wear shoes.
• Only one (1) rider at a time.
TV
Consumer Information
CONSUMER ASSISTANCE
1-800-432-5437 (US & Canada)
1300 135 312 (Australia)
LEFT
Battery Safety Information
In exceptional circumstances, batteries
may leak fluids that can cause a
chemical burn injury or ruin your toy.
To avoid battery leakage:
• Do not mix old and new batteries or
batteries of different types:
alkaline, standard (carbon-zinc) or
rechargeable (nickel-cadmium).
• Insert batteries as indicated inside the
battery compartment.
• Remove batteries during long
periods of non-use. Always remove
exhausted batteries from the toy.
Dispose of batteries safely. Do not
dispose of the product in
a fire. The batteries inside may
explode or leak.
• Never short-circuit the battery terminals.
• Use only batteries of the same or
equivalent type, as recommended.
• Do not charge non-rechargeable
batteries.
• Remove rechargeable batteries from
the toy before charging.
• If removable, rechargeable batteries
are used, they are only to be charged
under adult supervision.
• Locate the battery compartment on
front of the frame. Loosen the screw
and remove the door.
• Insert four “D” (LR20) alkaline
batteries.
Hint: We recommend using alkaline
batteries for longer battery life and
proper function.
• Replace the battery compartment
door and tighten the screw.
• If this product begins to operate
erratically, you may need to reset the
electronics. Slide the power switch off
and then back on.
• When function is erratic or stops,
or you see a low battery symbol on
your TV screen
, it’s time for an
adult to change the batteries!
• Protect the environment by not
disposing of this product with
household waste (2002/96/EC).
Check your local authority for
recycling advice and facilities
(Europe only).
OR
VIDEO IN
TV
VCR/DVD
Yellow
Important! Your TV or VCR/DVD player
must have audio and video input jacks
(located on the front or back of your TV
or VCR/DVD).
• Plug the audio-video pins into the
matching colored input jacks on your
TV or VCR/DVD player (Yellow for
Video In, White for Audio In).
• Place the Smart Cycle® in front of
your TV.
• Insert the plug on the end of the plug
and play cord into the socket on the
front of the cycle.
Snap Shot Button
Press to make a selection
or take "pictures" (see
page 11).
Horn Button
Press to make
a selection or
hear the horn.
Key Ring
• Insert the game cartridge into the
socket on top of the cycle console.
Push to be sure it is fully inserted.
Hint: You can easily attach other
cartridges (sold separately and not
included) to the key ring.
• Turn your TV or VCR/DVD player
power ON.
• Slide the power switch on the cycle
to ON .
• To find the picture on your TV screen,
set your TV's or VCR/DVD player's
mode selector to INPUT or VIDEO IN.
Hint: The plug-and-play cord is
designed to easily disconnect if it is
pulled. Simply connect the matching
connectors in the middle of the cord.
Travel Journal Button
Press to see the
pictures you took
along your journey.
Joystick
Use to make
selections on
the menus or
in activities.
Power Switch
Slide the switch to
ON or OFF O.
Map Button
Press to see a map
of all activities
(see next page).
Exit Button
When you’re finished with an
activity, press the exit button
to return to the road. Pedal to the
next activity!
Fisher-Price, Inc., 636 Girard Avenue, East Aurora, NY 14052.
Hearing-impaired consumers: 1-800-382-7470.
Outside the United States:
Canada: Mattel Canada Inc., 6155 Freemont Blvd.,
Mississauga, Ontario L5R 3W2; www.service.mattel.com.
Great Britain: Mattel UK Ltd, Vanwall Business Park,
Maidenhead SL6 4UB. Helpline: 01628 500303.
www.service.mattel.com/uk
Mattel Europa, B.V., Gondel 1, 1186 MJ Amstelveen, Nederland.
Australia: Mattel Australia Pty. Ltd., 658 Church Street,
Locked Bag #870, Richmond, Victoria 3121 Australia.
New Zealand: 16-18 William Pickering Drive,
Albany 1331, Auckland.
Care
• We recommend storing the game cartridge in the socket on the console when
not in use. This can help prevent dust from collecting in the socket (and causing
a malfunction).
• Wipe with a clean cloth dampened with a mild soap and water solution. Do not
use bleach. Do not use harsh or abrasive cleaners. Do not immerse.
• This product has no consumer serviceable parts. Do not take this product apart.
• Periodically check this product for wear and damage and replace any cracked part.
Fisher-Price, Inc., a subsidiary of Mattel, Inc., East Aurora, NY 14052 U.S.A. ©2011 Mattel, Inc.
All Rights Reserved. ® and ™ designate U.S. trademarks of Mattel, Inc., unless otherwise indicated.
PRINTED IN CHINA
6
7
8
9
W5460pr-0920
10
Customize
your
vehicle
The Map
Letter
Creek
Math Mountain
Shape
Lake
Number Fields
The Big
Race
Alphabet Barn
Bonus
Activity
3D Race
Customize Your Vehicle
Learning Adventure
• You can travel down the road and head onto an off-ramp to access activities or
simply press the map button
to visit any of the activities around the course.
NOTICE ABOUT EPILEPSY AND SEIZURES PLEASE READ THIS NOTICE BEFORE
YOU OR YOUR CHILD USE ANY VIDEO GAME.
A very small portion of the population has a condition, which may cause a
momentary loss of consciousness when viewing certain kinds of flashing lights or
patterns that are commonly present in our daily environment. This condition may
cause seizures while watching some kinds of television pictures or playing certain
video games. Players who have not had any previous seizures may nonetheless
have an undetected epileptic condition.
If you or anyone in your family has experienced symptoms linked to an epileptic
condition (e.g. a seizure or loss of awareness), consult your physician before
playing video games. We recommend that parents observe their children while
they play video games. If you or your child experience any of the following
symptoms such as dizziness, altered vision, eye or muscle twitching, involuntary
movements, loss of awareness, disorientation or convulsions, DISCONTINUE USE
IMMEDIATELY and consult your physician.
Additionally, please follow these precautions whenever playing a video game:
• Do not sit or stand too close to the television screen. Play as far back from the
screen as possible.
• Do not play if you are tired or need sleep.
• Always play in a well lit room.
• Be sure to take a 10-15 minute break every hour while playing.
11
• Use the joystick to choose the type of
vehicle you’d like to “drive.”
• Press either handlebar button to make
your selection.
• Repeat this process to choose a color,
horn sound and hood ornament style.
Alphabet
Barn
Learning
Adventure
A
Find the objects!
Off Ramps
Find the Letters!
• Pedal the cycle to move down the
road. The faster you pedal the faster
you go!
• Use the handlebar to steer.
• Find all the letters, numbers or
shapes shown in the upper left of the
screen. Simply ride over them. Don't
ride over other objects!
• Keep traveling down the road and go
all the way around the course or head
onto an off-ramp for other games and
activities. Simply bear to the side of
the road as you see one approaching.
Hint: If you miss a ramp, you can pedal
in reverse to back up.
• Listen carefully to the letter you need
to find.
• Move the joystick to scroll through
choices. Then press either handlebar
button to choose a letter.
• Select the correct letter to complete
a word!
Taking Snap Shots
• Press the right handlebar button
to take snap shots.
12
13
Letter
Creek
W d
Word
Frog Lives
The
Big Race
Score
Catch the letters to spell words!
• Look at the lower left corner of the
screen for the word you need to spell.
• Use the joystick to move the frog
left and right. Then, press either
handlebar button to catch the letter
bug as it flies across the screen.
• Score points for every word you
spell! Look at your score in the lower
right corner of the screen.
• Spell all the words correctly to move
to the next level.
Level 1 - Choose the correct letters,
but be careful not to choose a shape
or you'll lose a life.
Level 2 - Choose the correct letters,
but be careful not to choose a
number or you'll lose a life.
Level 3 - Choose the correct letters,
but be careful not to to choose the
wrong letter or you'll lose a life.
Pedal as fast as you can to the
finish line!
• Use the joystick to choose a 1 Player
or 2 Player game. Press either
handlebar button to select.
3D
Race
2 Player
• Each player takes a turn. Pedal down
the road as fast as you can to the
finish line. Look at your time.
• Now, it's time for Player 2 to beat
your time.
• The player with the fastest time wins.
Pedal
P
d l as fast
f t as you can iin 3D!
• Put on your 3D glasses.
• Use the joystick to choose a boat to
race in. Press a red handlebar button
to select it.
• Use the joystick to choose 1 Player
or 2 Player game. Press either
handlebar button to select the game.
• Pedal down the track as fast as you
can to the finish line!
• When you're finished with this
activity, remove the 3D glasses.
1 Player
• Pedal down the road as fast as you
can to the finish line. Try to speed
past the other cars. Get to the finish
line first and you win!
14
15
Shape
Lake
Number
Fields
Math
Mountain
Bonus
Activity
Travel
Journal
Troubleshooting Guide
Problem
Hint: Pedal the cycle to go faster!
• In each level the numbers disappear
faster and there are more obstacles
to avoid. Don't hit the obstacles or
you will lose points!
No image on the TV
Cause
TV or VCR is not set
to proper input
Solution
Press the channel down button on
the VCR or TV and check for an
INPUT channel below channel 2.
Use the menu system on your TV
or VCR to find INPUT or SOURCE.
Change to INPUT or SOURCE.
Refer to your TV's or VCR’s
instruction manual.
Shape Nozzle
Score
Match shapes to pop the bubbles!
• Look at the shape inside the nozzle.
Use the joystick to aim the nozzle
toward the matching shape.
• Press either handlebar button to
shoot the shape and "pop" the bubble.
• Pop the matching shape bubbles and
score points! If you hit the wrong
shape, the bubble is added to the
line up.
Hint: The blowfish
can be used to
hit any bubble shape.
• Try to pop all the bubbles before they
reach the bottom. When you pop
all the bubbles, move on to the next
level. The bubbles move faster!
Climbb M
Cli
Math
th M
Mountain!
t i !
• Pedal to climb the mountain.
Timer
Complete all the activities and
unlock the bonus activity!
Score
Use the tractor to run over
numbers in the field!
• Play a matching game with the
ants. Use the joystick to choose
a circle. Then, press a handlebar
button to flip it over.
• Flip another circle to find the match.
• Try to match all the circles.
• Use the joystick to move the tractor
around the field. Run over the
numbers before they disappear.
• Score points for every number you
hit! Try to get as many points as you
can before time runs out.
See previous
snap shot
See next
snap shot
• Press the travel journal button
.
Then use the joystick and handlebar
buttons to review and select a snap shot.
• Then, count how high you went!
Stamp Tool
St
T l EErase
• Next, use the joystick and handlebar
buttons to select the stamp tool
to decorate your picture.
• Choose a stamp with the joystick and
handlebar buttons and place it on the
snap shot.
• Select the erase button
to clear the
screen and decorate another picture.
16
17
18
Batteries in the cycle are
weak or dead
Replace all batteries in the
cycle with four, new “D” (LR20)
alkaline batteries.
Battery compartment door is loose
Fully tighten the screw in the
battery compartment door.
Plug-and-play cord
is disconnected
Make sure both ends of the plugand-play cords are fully connected
to the cycle and your TV or VCR.
Game cartridge is not fully inserted
into slot in cycle
Remove the game cartridge from
the cycle slot. Replace the cartridge
into the slot and push to be sure it
is fully inserted.
Dust has accumulated in the game
cartridge/cycle socket
Gently blow the dust from the game
cartridge and the cycle socket.
Replace the cartridge into the
cycle socket.
Low battery symbol
appears on TV
screen
Batteries in the cycle are weak
Replace all batteries in the
cycle with four, new “D” (LR20)
alkaline batteries.
Image is stretched or
distorted on a wide
screen TV
Wide screen TV aspect ratio
set incorrectly
For best picture, do not use a 16:9
aspect ratio (stretched) wide screen
setting. This product is designed
for a regular screen TV with a 4:3
aspect ratio (display setting). When
viewed on a wide screen TV, you
will see black bars on the sides of
the image. For more information on
changing the aspect ratio, refer to
your TV owner’s manual.
Short battery life
NiMH or rechargeable batteries are
being used
Use ONLY alkaline batteries in
this product.
19
Consumer Information
FCC Statement (United States Only)
This equipment has been tested and found to comply with the limits for a Class
B digital device, pursuant to Part 15 of the FCC Rules. These limits are designed
to provide reasonable protection against harmful interference in a residential
installation. This equipment generates, uses and can radiate radio frequency energy
and, if not installed and used in accordance with the instructions, may cause
harmful interference to radio communications. However, there is no guarantee that
interference will not occur in a particular installation. If this equipment does cause
harmful interference to radio or television reception, which can be determined
by turning the equipment off and on, the user is encouraged to try to correct the
interference by one or more of the following measures:
• Reorient or relocate the receiving antenna.
• Increase the separation between the equipment and receiver.
• Consult the dealer or an experienced radio/TV technician for help.
Note: Changes or modifications not expressly approved by the manufacturer
responsible for compliance could void the user’s authority to operate the equipment.
This device complies with Part 15 of the FCC Rules. Operation is subject to the
following two conditions: (1) this device may not cause harmful interference and
(2) this device must accept any interference received, including interference that
may cause undesired operation.
ICES-003
• This Class B digital apparatus complies with Canadian ICES-003.
• Operation is subject to the following two conditions: (1) this device may not
cause harmful interference and (2) this device must accept any interference
received, including interference that may cause undesired operation.
NMB-003
• Cet appareil numérique de la classe B est conforme à la norme NMB-003 du Canada.
• L’utilisation de ce dispositif est autorisée seulement aux conditions suivantes :
(1) il ne doit pas produire de brouillage et (2) l’utilisateur du dispositif doit être
prêt à accepter tout brouillage radioélectrique reçu, même si ce brouillage est
susceptible de compromettre le fonctionnement du dispositif.
20