1
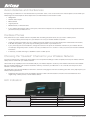
NETCOMM LIBERTY™ SERIES
3G Wireless N150 Mini Router m1
USER GUIDE
Preface
This manual provides information related to the installation, operation, and application of this device. The individual reading this manual is
presumed to have a basic understanding of telecommunications terminology and concepts.
If you find the product to be broken or malfunctioning, please contact technical support for immediate service by email at
[email protected]
For product update, new product release, manual revision, or software upgrades, please visit our website at
www.netcomm.com.au
Important Safety Instructions
With reference to unpacking, installation, use and maintenance of your electronic device, the following basic guidelines are recommended:
• Do not use or install this product near water, to avoid fire or shock hazard. For example, near a bathtub, kitchen sink or laundry tub,
or near a swimming pool. Also, do not expose the equipment to rain or damp areas (e.g. a wet basement).
• Do not connect the power supply cord on elevated surfaces. Allow it to lie freely. There should be no obstructions in its path and no
heavy items should be placed on the cord. In addition, do not walk on, step on or mistreat the cord.
• Use only the power cord and adapter that are shipped with this device.
• To safeguard the equipment against overheating, make sure that all openings in the unit that offer exposure to air are not blocked.
• Avoid using a telephone (other than a cordless type) during an electrical storm. There may be a remote risk of electric shock from
lightening. Also, do not use the telephone to report a gas leak in the vicinity of the leak.
• Never install telephone wiring during stormy weather conditions.
WARNING
• Disconnect the power line from the device before servicing.
Copyright
Copyright©2010 NetComm Limited. All rights reserved. The information contained herein is proprietary to NetComm Limited. No part of
this document may be translated, transcribed, reproduced, in any form, or by any means without prior written consent of NetComm Limited
NOTE:This document is subject to change without notice.
Save Our Environment
When this equipment has reached the end of its useful life, it must be taken to a recycling centre and processed separate from
domestic waste.
The cardboard box, the plastic contained in the packaging, and the parts that make up this router can be recycled in accordance with
regionally established regulations. Never dispose of this electronic equipment along with your household waste. You may be subject to
penalties or sanctions under the law. Instead, ask for disposal instructions from your municipal government.
Please be responsible and protect our environment.
3G Wireless N150 Mini Router m1-User Guide
2
YMLM1WN
www.netcomm.com.au
NetComm Liberty Series - 3G Wireless N150 Mini Router m1
Table of Contents
Overview�����������������������������������������������������������������������������������������������������������������������������������������������������������������������������������������������������5
What’s in the box?������������������������������������������������������������������������������������������������������������������������������������������������������������������������������������������������������������5
Key Features:��������������������������������������������������������������������������������������������������������������������������������������������������������������������������������������������������������������������5
Getting Started ������������������������������������������������������������������������������������������������������������������������������������������������������������������������������������������7
Network and System Requirements ���������������������������������������������������������������������������������������������������������������������������������������������������������������������������������7
Placement of your NetComm m1��������������������������������������������������������������������������������������������������������������������������������������������������������������������������������������7
Avoid obstacles and interferences ������������������������������������������������������������������������������������������������������������������������������������������������������������������������������������8
Cordless Phones ��������������������������������������������������������������������������������������������������������������������������������������������������������������������������������������������������������������8
Choosing the “Quietest” Channel for your Wireless Network ��������������������������������������������������������������������������������������������������������������������������������������������8
LED Indicators:�����������������������������������������������������������������������������������������������������������������������������������������������������������������������������������������������������������������8
Getting Online in 5 Minutes: ��������������������������������������������������������������������������������������������������������������������������������������������������������������������10
Hardware Installation�������������������������������������������������������������������������������������������������������������������������������������������������������������������������������������������������������10
Establishing WiFi Connection������������������������������������������������������������������������������������������������������������������������������������������������������������������������������������������10
Connecting your device to the Internet����������������������������������������������������������������������������������������������������������������������������������������������������������������������������10
3G Network Settings ������������������������������������������������������������������������������������������������������������������������������������������������������������������������������������������������������11
Further Configuration and Reset �������������������������������������������������������������������������������������������������������������������������������������������������������������������������������������12
Connecting to your NetComm m1 Wireless Network from Mac OS X �����������������������������������������������������������������������������������������������������������������������������12
Connecting to your NetComm m1 Wireless Network from a Windows PC ���������������������������������������������������������������������������������������������������������������������14
Settings in the NetComm m1 Web Configuration Wizard ������������������������������������������������������������������������������������������������������������������������������������������������16
Basic Settings�������������������������������������������������������������������������������������������������������������������������������������������������������������������������������������������18
Basic Settings >Network Setup���������������������������������������������������������������������������������������������������������������������������������������������������������������������������������������19
DHCP Server���������������������������������������������������������������������������������������������������������������������������������������������������������������������������������������������22
Basic Settings >Wireless�������������������������������������������������������������������������������������������������������������������������������������������������������������������������24
WPS (WiFi Protected Setup)��������������������������������������������������������������������������������������������������������������������������������������������������������������������������������������������25
Wireless Client List����������������������������������������������������������������������������������������������������������������������������������������������������������������������������������������������������������25
Basic Settings > Change Password��������������������������������������������������������������������������������������������������������������������������������������������������������������������������������26
Security Settings��������������������������������������������������������������������������������������������������������������������������������������������������������������������������������������28
Security Settings > Packet Filters������������������������������������������������������������������������������������������������������������������������������������������������������������������������������������28
Security Settings > URL Blocking������������������������������������������������������������������������������������������������������������������������������������������������������������������������������������29
Security Settings > MAC Control�������������������������������������������������������������������������������������������������������������������������������������������������������������������������������������30
Security Settings > Miscellaneous�����������������������������������������������������������������������������������������������������������������������������������������������������������������������������������31
Advanced Settings�����������������������������������������������������������������������������������������������������������������������������������������������������������������������������������33
Advanced Settings > System Log�����������������������������������������������������������������������������������������������������������������������������������������������������������������������������������33
Advanced Settings > System Time����������������������������������������������������������������������������������������������������������������������������������������������������������������������������������34
Tool Box����������������������������������������������������������������������������������������������������������������������������������������������������������������������������������������������������37
Tool Box > System Info���������������������������������������������������������������������������������������������������������������������������������������������������������������������������������������������������37
Tool Box> Firmware Upgrade������������������������������������������������������������������������������������������������������������������������������������������������������������������������������������������37
Tool Box > Backup Setting����������������������������������������������������������������������������������������������������������������������������������������������������������������������������������������������38
Tool Box > Reset to Default���������������������������������������������������������������������������������������������������������������������������������������������������������������������������������������������38
Tool Box > Reboot����������������������������������������������������������������������������������������������������������������������������������������������������������������������������������������������������������38
Troubleshooting ���������������������������������������������������������������������������������������������������������������������������������������������������������������������������������������40
Legal & Regulatory Information���������������������������������������������������������������������������������������������������������������������������������������������������������������42
YMLM1WN
www.netcomm.com.au
3G Wireless N150 Mini Router m1-User Guide
3
OVERVIEW
NetComm Liberty Series - 3G Wireless N150 Mini Router m1
Overview
3G Wireless N150 Mini Router m1; this product is specifically designed for the mobile user who needs to have internet access beyond his
home and office. It provides a complete solution for Internet surfing and broadband sharing. Instructions for installing and configuring this
product can be found in this manual. Before you install and use this product, please read this manual carefully to fully utilise the functions of
this product.
What’s in the box?
Your 3G Wireless N150 Mini Router m1 package contains the following items:
• 3G Wirless N150 Mini Router m1
• Quick Installation Guide
• User Guide on CD
• USB Cable
• Power Supply Unit
If any of the above items are damaged or missing, please contact your dealer immediately.
Key Features:
• Ultra compact 3G wireless router with internal antenna and hanging clip
• Supports Wireless N standard with WLAN data speeds up to 150Mbps1
• Pocket sized, easy to carry anywhere
• Easy WiFi Protected Setup (WPS) by the single touch of a button to establish a secure wireless connection
• Full Wireless security - WEP, WPA, WPA2
• Browser based interface for configuration and management: OS independent and easy to use
1
aximum wireless signal rate and coverage values are derived from IEEE Standard 802.11g and 802.11n specifications. Actual wireless speed and coverage are dependent on
M
network and environmental conditions included but not limited to volume of network traffic, building materials and construction/layout
YMLM1WN
www.netcomm.com.au
3G Wireless N150 Mini Router m1-User Guide
5
Getting Started
NetComm Liberty Series - 3G Wireless N150 Mini Router m1
Getting Started
Network and System Requirements
Before continuing with the setup of your NetComm m1, please confirm that you comply with the minimum system requirements below.
• Compatible 3G USB modem with an activated SIM card
• Computer or smart phone with Windows, Nokia Symbian, Android, Macintosh or Linux-based operating systems with TCP/IP
protocol installed and working, and a IEEE 802.11g, IEEE 802.11b or IEEE 802.11n compatible wireless adapter
• Web browser such as Internet Explorer, Safari, Mozilla Firefox, Opera, Google Chrome, Netscape Navigator etc.
Placement of your NetComm m1
Your wireless connection and performance will degrade as the distance between your NetComm m1 and connected devices increases.
This may or may not be directly noticeable, and is greatly affected by the individual setup environment.
If you have concerns about your network performance that might be related to range or obstruction factors, try moving the computer (or
WiFi device) to a position between 3 to 5 metres from your NetComm m1 in order to see if distance is the problem. If difficulties persist
even at close range, please contact NetComm Technical Support.
Note: While some of the items listed below can affect network performance, they will not prohibit your wireless network from functioning; if you are concerned that your
network is not operating at its maximum effectiveness, this checklist may help.
It is highly recommended that the NetComm m1 must be kept at least 20cm distances away from human body. This is a regulatory requirement and applies to all 3G /
WiFi capable devices meeting standard regulatory compliance – Please see the section on Safety and Legal Information for more information.
Place your NetComm m1 as close as possible to the centre of your wireless network devices.
To achieve the best wireless network coverage for your “wireless clients” (i.e. computers with built-in or USB wireless adapters, laptops with
built-in or USB wireless adapters, wireless enabled PDAs / Phones or wireless enabled gaming consoles, etc); ensure that your NetComm
m1 is positioned vertically. You can do this by detaching the front faceplate and using it “clip” onto a surface.
• In multi-storey homes, place your NetComm m1 on a floor that is as close to the centre of the home as possible. This may mean
placing your NetComm m1 on an upper floor.
• Try not to place your NetComm m1 near a cordless telephone that operates at the same radio frequency as the NetComm m1
(2.4GHz).
YMLM1WN
www.netcomm.com.au
3G Wireless N150 Mini Router m1-User Guide
7
Avoid obstacles and interferences
Avoid placing your NetComm m1 near devices that may emit radio “noise,” such as microwave ovens. Dense objects can also inhibit your
wireless signal. Some examples of dense objects that can inhibit wireless communication include:
• Refrigerators
• Washers and/or dryers
• Metal cabinets
• Large aquariums
• Metallic-based, UV-tinted windows
• If your wireless signal seems weak in some spots, make sure that objects such as these are not blocking the signal path between
your devices and your NetComm m1.
Cordless Phones
If the performance of your wireless network is impaired after considering the above issues, and you have a cordless phone:
• Try moving cordless phones away from your NetComm m1 and your wireless-enabled computers.
• Unplug and remove the battery from any cordless phone that operates on the 2.4GHz band (check manufacturer’s information).
If this fixes the problem, your phone may be interfering with the WiFi of your NetComm m1.
• If your phone supports channel selection, change the channel on the phone to the farthest channel from your wireless network.
For example, change the phone to channel 1 and set your NetComm m1 to channel 11. See your phone user manual for detailed
instructions.
• If necessary, consider switching to a 900MHz or 5GHz cordless phone.
Choosing the “Quietest” Channel for your Wireless Network
In locations where homes or offices are close together, such as apartment buildings or office complexes, there may be wireless networks
nearby that can conflict with your wireless network.
Use the site survey capability found in the wireless utility of your wireless adapter to locate any other wireless networks that are available
(see your wireless adapter’s user manual for assistance with this), and switch your NetComm m1 to a channel as far away from other
networks’ channel as possible.
Hint: Most WiFi routers set their Wireless G networks to channel 6. Changing the channel to something other than 6 may help improve your
wireless network performance.
• Experiment with more than one of the available channels in order to find the clearest connection and avoid interference from
neighbouring cordless phones or other wireless devices.
LED Indicators:
USB LED
WiFi LED
LED color
Description
Blue
3G/3.5G is on
Flashing Blue
Data access
Blue
WLAN is ON
Flashing Blue
Data access
Fast Flashing Blue
Device is in WPS Mode
3G Wireless N150 Mini Router m1-User Guide
8
YMLM1WN
www.netcomm.com.au
Getting Online in 5 minutes
Getting Online in 5 Minutes:
Hardware Installation
1. Connect power to the NetComm m1 by either:
A) Connecting the supplied power adapter to a wall power outlet and to the port labelled Power on the side of the NetComm m1
B) Connecting the supplied USB cable to the port labelled Power on the NetComm m1 and connects both USB connectors on the
other end to compatible USB ports on your laptop/desktop computer.
2. Slide the power switch to the ON position and wait around 2 minutes to allow the device to power up.
3. Connect a compatible 3G USB Modem to the 3G USB port of the NetComm m1. If you are unsure whether your 3G USB Modem is
compatible with the NetComm m1, please check the compatibility list on the NetComm website.
Establishing WiFi Connection
The NetComm m1 creates a personal WiFi coverage zone to provide Internet access to WiFi enabled devices.
1. Using your WiFi enabled device, scan for wireless networks in your area and select the network called NetComm Wireless.
2. Enter the following default security key: a1b2c3d4e5
Note: F
or optimal WiFi security, we recommend that you change the default settings through the web based user interface. For more details, please refer to the section titled “Basic
Settings – Wireless”. .
Connecting your Device to the Internet
After completing the hardware installation, you will need to enter the necessary settings in order to be able to connect to your broadband
service provider. You can achieve this via the product’s web based user interface by following the steps below:
1. On your computer, open a web-browser (such as Internet Explorer, Firefox, or Safari), type 192.168.1.1 into the address bar at the
top of the page and press enter.
2. At the login screen, type “admin” into the system password field. Then click Login to continue.
3. Next complete the setup wizard by filling in the details of your 3G connection. If you don’t know which settings to use here, please
contact your service provider to obtain this information.
4. If the SIM Card in your 3G USB modem was supplied with a PIN, enter it in the respective field and confirm your PIN settings and
select ‘Remember PIN’ if you want the PIN stored on the device.
5. After completing the wizard, wait for 2 minutes to allow the NetComm m1 to connect to the internet.
6. If you are connected successfully, the blue 3G light on the top of the unit will be lit. You can also check on the status of your
connection if necessary by clicking ‘Status’ after logging in to the web based user interface
3G Wireless N150 Mini Router m1-User Guide
10
YMLM1WN
www.netcomm.com.au
NetComm Liberty Series - 3G Wireless N150 Mini Router m1
Note: Y
our APN (Access Point Name) is the 3G mobile network name that is used to identify your 3G mobile broadband service provider. If you don’t have this information ready,
please contact your service provider to obtain this information.
APN Table: Access Point Name for various providers
MOBILE BROADBAND SERVICE PROVIDER
APN
AUSTRALIA
Telstra
Telstra.Internet
Telstra.datapack
Telstra.pcpack
Telstra.bigpond
Optus - post paid
connect
Optus - Prepaid
preconnect
Three - post paid
3netaccess
Three - Prepaid
3services
Vodafone - post paid
vfinternet.au
Vodafone - Prepaid
vfprepaymbb
Crazy John’s
purtona.net
DoDo
dodolns1
Virgin Mobile
VirginBroadband
Blink
splns888a1
Internode
Internode
Primus
primuslns1
TPG
internet
Exetel
Exetel1
NEW ZEALAND
Vodafone NZ
www.vodafone.net.nz
Virgin Mobile
VirginInternet
CallPlus
www.callplus.net.nz
Slingshot
www.slingshot.net.nz
Telstra Clear
www.telstraclear.net.nz
Telecomm NZ XT
internet.telecomm.co.nz
YMLM1WN
www.netcomm.com.au
3G Wireless N150 Mini Router m1-User Guide
11
Further Configuration and Reset
The NetComm m1 has been designed to work with minimal user configuration. However if you would like to set any advanced options this
can be done using the “Advanced” section of the web browser based user interface.
Advanced Settings
To access the advanced menu, click on ‘Advanced Settings’ located at the top of the web based user interface.
Changing Wireless Settings
After logging in to the web based user configuration as described above, click on “Basic Settings” and then select “Wireless” from the
menu on the left hand side to modify your network name, wireless security password or encryption strength. Save your settings by clicking
the “Save” button.
Setting a custom APN or other 3G Network settings
After logging in to the web based user configuration as described above, click on “Basic Settings” and select ”Network Setup” to modify
the 3G network settings. Save any changes by clicking the “Save” button.
Reset
If you make any errors the NetComm m1 can be reset to factory defaults by holding the WPS button for 10 seconds.
Connecting to your NetComm m1 Wireless Network from Mac OS X
Follow these steps to connect your MAC OSX computer to your NetComm m1 wireless network.
Click on the ‘Apple’ icon at the top left hand corner of your screen.
Click on ‘System Preferences’ option.
Under the ‘System Preferences’ parameters, click on the ‘Network’ icon under ‘Internet & Network.
3G Wireless N150 Mini Router m1-User Guide
12
YMLM1WN
www.netcomm.com.au
NetComm Liberty Series - 3G Wireless N150 Mini Router m1
Under the ‘Network’ selection, click on the ‘Airport’ and click on ‘Search Network Name’ to see all the wireless networks available to you.
Make sure your NetComm m1 is turned on. You should see a wireless network called ‘NetComm Wireless’
Click on network ‘NetComm Wireless’
Enter the password which is ‘“a1b2c3d4e5“
You are now connected to your NetComm m1. Open your browser and type in http://192.168.1.1 to access your device
YMLM1WN
www.netcomm.com.au
3G Wireless N150 Mini Router m1-User Guide
13
Connecting to your NetComm m1 Wireless Network from a
Windows PC
The following steps have been performed on a computer running the Windows 7 operating system. For other operating systems refer to the
Appendix at the end of this document.
Go to the Control Panel on your computer.
Then click on the ‘Network and Internet’ icon from the Control Panel menu.
From the ‘Network and Sharing Center’ category, select the ‘Connect to a network’ option. You will see a selection of wireless networks
pop-up at the bottom right hand side of your screen.
3G Wireless N150 Mini Router m1-User Guide
14
YMLM1WN
www.netcomm.com.au
NetComm Liberty Series - 3G Wireless N150 Mini Router m1
Search for a wireless network named ‘NetComm Wireless’ from the selection and click on it to connect.
Click on the ‘Connect’ button. Your computer will then try to connect to the NetComm m1. You should then be prompted to enter the
Security key. Enter the default security key which is ”a1b2c3d4e5” and click on the ‘OK’ button.
If you see a screen pop-up that asks you to select your location, please choose the ‘Home’ option.
If you click on the network icon at the bottom right hand side of your screen, your wireless network should be listed with “Connected” next
to it.
YMLM1WN
www.netcomm.com.au
3G Wireless N150 Mini Router m1-User Guide
15
Settings in the NetComm m1 Web Configuration Wizard
To access the NetComm m1 web based user configuration wizard open a web browser (Internet Explorer, Safari, Mozilla Firefox, Google
Chrome, etc.) and type http://192.168.1.1in the address bar at the top of the screen and hit ‘Enter’.
Login:
Type “admin” (without the quotes) in the System Password field. Then click on Login.
Click on Wizard
This page shows you the steps needed to configure your NetComm m1. Click Next to continue.
After choosing 3G, you need to enter the information supplied by your 3G provider. Click Apply Settings once you have finished.
7. After several minutes the NetComm m1 will save all the settings and the wizard is complete. Click Finish to go back to the Status
page. The router will now attempt to connect using the new settings.
3G Wireless N150 Mini Router m1-User Guide
16
YMLM1WN
www.netcomm.com.au
Basic Settings
Basic Settings
The Basic Settings page allows you to configure a number of basic settings on the unit. This section deals with those features. Click on any
of the menu items on the left to configure the associated settings.
3G Wireless N150 Mini Router m1-User Guide
18
YMLM1WN
www.netcomm.com.au
NetComm Liberty Series - 3G Wireless N150 Mini Router m1
Basic Settings >Network Setup
This page allows you to change the LAN (Local Area Network) and WAN (Wide Area Network) connection settings on your NetComm m1.
LAN Setup
•
LAN IP Address: the local IP address of this device.
•
Subnet Netmask: the subnet mask of the local IP address
WAN Setup
WAN fields may not be necessary for your connection.
1 WAN type 3G: The information on this page will only be used when your service provider requires you to enter a User Name and
Password to connect with the 3G network.
2 3G Networks: Please refer to your documentation or service provider for additional information.
3. APN: Enter the APN for your 3G connection here.(optional)
4. PIN Code: Enter the PIN Code for your SIM card (optional) account: Enter the username for your 3G connection here.
(Please contact your 3G service provider to obtain this information.)
5. Password: Enter the Password for your 3G connection here.
(Please contact your 3G service provider to obtain this information)
6. Authentication: Choose your authentication type.
7. Primary DNS: This feature allows you to assign a Primary DNS Server
(Please contact your 3G service provider to obtain this information)
8. Secondary DNS: This feature allows you to assign a Secondary DNS Server.
(Please contact your 3G service provider to obtain this information)
9. Connection Control: There are 3 modes to select:
• Connect-on-demand: The device will connect with 3G service when the connected clients send outgoing packets.
• Auto Reconnect (Always-on): The device will automatically reconnect with 3G service when the connection drops.
• Manually: The device will not make connect to the 3G service unless someone clicks the Connect-button in the Status-page.
10.Keep Alive: This will prevent your 3G connection from timing out.
YMLM1WN
www.netcomm.com.au
3G Wireless N150 Mini Router m1-User Guide
19
WAN Type- WiFi Hotspot:
This WAN type allows you to share one WiFi hotspot account with your friends or colleagues. Local clients connect to this router via a WiFi
connection, and surf the Internet by connecting to a remote WiFi hotspot. Follow the few steps below to connect to a remote WiFi hotSpot.
Note. If choosing WiFi HotSpot WAN type, the wireless channel of the Wireless network will be set to the same channel as used on the remote WiFi HotSpot.
Step 1:
Click “WiFi HotSpot Search” button to search for any available WiFi hotspots or WiFi APs (Access Points) nearby.
Step 2:
After searching, a list of the all available WiFi APs around you will be shown. Select the appropriate Wireless network and click the “Select”
button to start the connection or press “Refresh” button to search again.
Step 3:
If required, you can enter the Wireless security for the remote wireless network.
Click the “Save” button to save your selected settings.
Step 4:
Click the “Reboot” button to restart device so that the new settings take effect.
3G Wireless N150 Mini Router m1-User Guide
20
YMLM1WN
www.netcomm.com.au
DHCP Server
DHCP Server
1. DHCP Server: Enable or disable the DHCP server.
2. Lease Time: Length of the DHCP lease time
3. IP Pool Starting/Ending Address: Whenever there is a request, the DHCP server will automatically allocate an unused IP address
from the IP address pool to the requesting computer. You must specify the starting / ending address of the IP address pool
4. Domain Name: Optional, this information will be passed to the DHCP client
Click “Save” to save these settings or Undo to cancel.
You can also check the DHCP client list by pressing the “Clients List” button.
The “Fixed Mapping” button allows you to map a specific IP address to a specific MAC address.
Press “More…” for more options.
DHCP Clients List
The list of DHCP clients is shown here.
DHCP Fixed Mapping
The DHCP Server will reserve a specific IP for a specific MAC address, shown below.
3G Wireless N150 Mini Router m1-User Guide
22
YMLM1WN
www.netcomm.com.au
Wireless
Wireless
This page allows you to configure the wireless network features of the router.
Wireless settings allow you to set the wireless configuration items.
1. Transmit Power: The default is set to 100% for maximum range.
2. Network ID (SSID): Network ID is used for identifying the Wireless LAN (WLAN). Wireless Clients can roam freely over this product
and other Access Points that have the same Network ID. (The factory setting is “NetComm Wireless”)
3. SSID Broadcast: The router will broadcast the SSID so that wireless clients can find the wireless network.
4. Channel: The wireless radio channel in use by your network.
5. Wireless Mode: Choose B/G Mixed, B only, G only, and N only, G/N Mixed or B/G/N mixed. The factory default setting is B/G/N
mixed.
6. Authentication mode: You may select from seven kinds of authentication to secure your wireless network: Open, Shared, Auto,
WPA-PSK, WPA2-PSK, and WPA-PSK/WPA2-PSK.
a) WEP (Wired Equivalent Privacy). Enabling this security will protect your data while it is transferred from the computer to the
NetComm m1 router. Select the WEP Encryption (64bit or 128bit) and enter the WEP key in Key 1 field. Please note that a WEP
Encryption key can only use numbers from 0 to 9 and letters from A to F. 64 bit encryption needs a 10 digit key and 128 bit
encryption needs a 26 digit key.
3G Wireless N150 Mini Router m1-User Guide
24
YMLM1WN
www.netcomm.com.au
NetComm Liberty Series - 3G Wireless N150 Mini Router m1
b) WPA-PSK/WPA2-PSK : A newer type of security is WPA-PSK-TKIP and WPA-PSK2-AES. This type of security gives a more
secure network compared to WEP. Use TKIP Encryption type for WPA-PSK and AES for WPA2-PSK. Please enter the key in the
Passphrase field. The key needs to be more then 8 characters and less then 63 characters and it can be any combination of
letters and numbers. Please note that the configuration for WPA-PSK and WPA2-PSK is identical.
Notes: After configuring wireless security, you also need to configure your wireless adapter to use the same security settings before you can connect wirelessly. Not all wireless
adapter support WPA-PSK/WPA2-PSK/WPA/WPA2 security, please refer to your wireless adapter user guide for more details.
It is strongly recommended to set up wireless security such as WEP 64bit or WPA (when the wireless client supports WPA) in order to
secure your network.
Click “Save” to save these settings or click “Undo” to cancel.
WPS (WiFi Protected Setup)
WPS (WiFi Protection Setup) offers a safe and easy way to connect wirelessly.
Wireless Client List
The list of wireless clients is shown here.
YMLM1WN
www.netcomm.com.au
3G Wireless N150 Mini Router m1-User Guide
25
Basic Settings > Change Password
On this page you can change the NetComm m1 web based user configuration password. Please type in your old password
(The factory default password is “admin”) and then type in the new password. Type the same new password in the Reconfirm field.
Note:
if you change the password, please make sure that you use the new password the next time you log into the web based user configuration.
Click “Save” to save the settings or “Undo” to cancel.
3G Wireless N150 Mini Router m1-User Guide
26
YMLM1WN
www.netcomm.com.au
Security Settings
Security Settings
The Security Setting page allows you to configure the security management features on the router such as Packet filters and MAC Control.
Click on any of the menu items on the left to access the associated settings.
Security Settings > Packet Filters
The Packet Filter enables you to control what packets are allowed to pass through the router. There are two types of packet filter, the
“Outbound Packet Filter” which applies to all outbound packets and the “Inbound Packet Filter” which only applies to packets that are
destined for a Virtual Server or DMZ host only.
To enable an Outbound Filter, please make sure to tick the Enable tick box on the top of the page. There are two type of filtering policies:
1. Allow all data through the routerexcept data that matches the specified rules.
2. Deny all data through the router except data that matches the specified rules.
For each direction, you can specify up to 48 rules. For each rule you will need to define the following:
• Source IP address
• Source port
• Destination IP address
• Destination port
• Protocol: TCP or UDP or both.
• Use Schedule Rule#
3G Wireless N150 Mini Router m1-User Guide
28
YMLM1WN
www.netcomm.com.au
NetComm Liberty Series - 3G Wireless N150 Mini Router m1
For source or destination IP address, you can define a single IP address (192.168.1.1) or a range of IP
addresses (192.168.1.100-192.168.1.200). Empty fields imply all IP addresses.
For source or destination port, you can also define a single port (80) or a range of ports (1000-1999). Use the prefix “T” or “U” to specify
either the TCP or UDP protocol e.g. T80, U53, U2000-2999. No prefix indicates both
TCP and UDP are defined. An empty field implies all ports.
The Packet Filter also works with Scheduling Rules, and gives you more flexibility on Access control. For detailed instructions regarding
scheduling rules, please refer to the Advanced Setting > Scheduling section.
Click “Save” to save the settings or “Undo” to cancel.
Security Settings > URL Blocking
URL Blocking will block LAN computers from connecting to a pre-defined website. The major difference between
the Domain Filter and URL Blocking is that the Domain Filter requires users to input a suffix (e.g. xxx.com, yyy.net) while URL Blocking only
requires you to input a keyword.
To enable URL Blocking please make sure to tick the Enable box on the top of the page. To set a URL Blocking rule, you need to specify
the following:
• URL. If any part of the Website’s URL matches the pre-defined word then the connection will be blocked. For example, you can use
the pre-defined word “sex” to block all websites with this in their URLs.
• Enable. Tick to enable the filtering rule.
Click “Save” to save the settings or “Undo” to cancel.
YMLM1WN
www.netcomm.com.au
3G Wireless N150 Mini Router m1-User Guide
29
Security Settings > MAC Control
MAC Control allows you to assign different access rights for different users and to assign a specific IP address to
a specific MAC address.
To enable MAC Address Control please tick the Enable box on the top of the page. Two types of control are available:
• Connection control. Tick the “Connection Control” box to control which clients (wired and wireless) can connect to the unit. If a
client is not able to connect to this device, it means the client can not access to the Internet either. Choose allow or deny to allow or
deny clients with MAC addresses that are not in the list to connect to this device.
• Association control. Tick the “Association Control” to control which wireless client can associate with the unit.
If a client is not able to associate with the unit, it means the client can not send or receive any data via the router. Choose allow or deny to
allow or deny the clients with MAC addresses that are not in the list to associate to the wireless LAN
Click the “Next Page” or the “Previous Page” buttons to see the entire list.
Click “Save” to save the settings or “Undo” to cancel.
3G Wireless N150 Mini Router m1-User Guide
30
YMLM1WN
www.netcomm.com.au
NetComm Liberty Series - 3G Wireless N150 Mini Router m1
Security Settings > Miscellaneous
This page allows you to change various miscellaneous security settings on the unit.
Administrator Time-out
The period of time with no activity in the web based user configuration page to logout automatically, you may set it to zero to disable this
feature.
Remote Administrator Host/Port
In general, only Intranet users can browse the built-in web pages to perform administration tasks. This feature enables you to perform
administration tasks from a remote host. If this feature is enabled, only the specified IP address can perform remote administration. If the
specified IP address is 0.0.0.0, any host can connect to the router to perform administration tasks. You can use subnet mask bit (/nn)
notation to specify a group of trusted IP addresses for example, “10.1.2.0/24”.
NOTE: When Remote Administration is enabled, the web server port will be shifted to 80. You can also change the web server port.
Discard PING from WAN side
When this feature is enabled, your router will not respond to ping requests from remote hosts.
DoS Attack Detection
When this feature is enabled, the router will detect and log where the DoS attack comes from on the Internet. Currently, the router can
detect the following DoS attack types: SYN Attack, WinNuke, Port Scan, Ping of Death and Land Attack, as well as others.
Click “Save” to save the settings or “Undo” to cancel.
YMLM1WN
www.netcomm.com.au
3G Wireless N150 Mini Router m1-User Guide
31
Advanced
Settings
Placement
NetComm Liberty Series - 3G Wireless N150 Mini Router m1
Advanced Settings
The Advanced Settings page allows you to configure the advanced settings on the router such as the System log and System time . Click
on any of the menu items on the left to configure the associated settings.
Advanced Settings > System Log
This enables you to set up the system log feature of the router. You can also choose to export the system log via email (SMTP) or send it to
a remote syslog server (UDP).
IP address for Syslogd server
The IP address of the syslog server where the syslog information will be sent to. Click the “Enable” checkbox to enable this function.
Setting of Email alert
Check if you want to enable Email alerts (send syslog via email). Click the “Enable” checkbox to enable this function.
SMTP Server IP and Port
Enter the SMTP server IP (or FQDN) and port, separated by a ‘:’. If you do not specify port number, the default value is 25.For example,
“mail.your_url.com” or “192.168.1.100:26”.
SMTP username and password
Enter the user account and password for the SMTP server.
E-mail address
The recipients who will receive these logs, you can assign more than 1 recipient, using ‘;’ or ‘,’ to separate the email addresses.
E-mail Subject
The subject of email alert, this setting is optional.
View Log…
View the current system log.
YMLM1WN
www.netcomm.com.au
3G Wireless N150 Mini Router m1-User Guide
33
Advanced Settings > System Time
This page allows you to change the System time setting on the NetComm m1.
Time Zone
Select the time zone where this device is located.
Auto-Synchronization
Click the “Enable” checkbox to enable this function.
Time Server
Select a NTP time server to obtain the current UTC time from
Sync with Time Server
Select if you want to set the Date and Time by NTP Protocol.
Sync with my PC
Select if you want to set the Date and Time using your computers current Date and Time
Click “Save” to save the settings or “Undo” to cancel.
3G Wireless N150 Mini Router m1-User Guide
34
YMLM1WN
www.netcomm.com.au
Tool Box
Tool Box
The Tool Box page consists of various tools for the unit. Click on any of the menu items on the left to access the
associated page.
Tool Box > System Info
From this page you can view the system log and the routing table information for the router.
Tool Box> Firmware Upgrade
You can upgrade the router firmware by clicking the “Upgrade” button
3G Wireless N150 Mini Router m1-User Guide
36
YMLM1WN
www.netcomm.com.au
NetComm Liberty Series - 3G Wireless N150 Mini Router m1
Tool Box > Backup Setting
You can backup your current settings by clicking the “Backup Setting” button then and save it as a bin file. When you want to restore these
settings, click the “Firmware Upgrade” button and use the bin file you saved.
Tool Box > Reset to Default
Tool Box > Reboot
YMLM1WN
www.netcomm.com.au
3G Wireless N150 Mini Router m1-User Guide
37
Troubleshooting
Placement
NetComm Liberty Series - 3G Wireless N150 Mini Router m1
Troubleshooting
Are you having trouble connecting wirelessly?
1. Make sure that the WiFi device you are using to connect to the NetComm m1 is turned ON. For example, most laptops have a
manual WiFi ON/OFF button that is typically located to the front or the side of the laptop, depending on the brand. Please contact
your laptop or wireless device manufacturer for more information regarding this.
2. Ensure that the NetComm m1 is turned ON and has the Blue WiFi LED on.
3. Search for Wireless Network ‘NetComm Wireless and make sure you enter the right wireless security key which is ‘a1b2c3d4e5.’
4. Make sure DHCP is turned ON correctly for your WiFi device.
Are you having trouble accessing the Internet?
1. Make sure your 3G modem is compatible with the NetComm m1, please check the compatibility list on the NetComm website.
2. If you are using a Prepaid SIM, make sure that there is sufficient credit on your SIM.
3. If you are using a SIM from a service provider in Australia, please ensure you enter the correct APN If you don’t know the APN,
please contact your mobile service provider or check the selection of APN’s listed at www.netcomm.com.au/
YMLM1WN
www.netcomm.com.au
3G Wireless N150 Mini Router m1-User Guide
39
Legal and Regulatory Information
NetComm Liberty Series - 3G Wireless N150 Mini Router m1
Legal & Regulatory Information
This manual is copyright. Apart from any fair dealing for the purposes of private study, research, criticism or review, as permitted under
the Copyright Act, no part may be reproduced, stored in a retrieval system or transmitted in any form, by any means, be it electronic,
mechanical, recording or otherwise, without the prior written permission of NetComm Limited. NetComm Limited accepts no liability or
responsibility, for consequences arising from the use of this product.
NetComm Limited reserves the right to change the specifications and operating details of this product without notice.
NetComm is a registered trademark of NetComm Limited.
All other trademarks are acknowledged the property of their respective owners.
Customer Information
ACA (Australian Communications Authority) requires you to be aware of the following information and warnings:
(1) This unit shall be connected to the Telecommunication Network through a line cord which meets the requirements of the ACA
TS008 Standard.
(2) This equipment has been tested and found to comply with the Standards for C-Tick and or A-Tick as set by the ACA . These standards
are designed to provide reasonable protection against harmful interference in a residential installation. This equipment generates,
uses, and can radiate radio noise and, if not installed and used in accordance with the instructions detailed within this manual, may
cause interference to radio communications. However, there is no guarantee that interference will not occur with the installation of this
product in your home or office. If this equipment does cause some degree of interference to radio or television reception, which can be
determined by turning the equipment off and on, we encourage the user to try to correct the interference by one or more of the following
measures:
• Change the direction or relocate the receiving antenna.
• Increase the separation between this equipment and the receiver.
• Connect the equipment to an alternate power outlet on a different power circuit from that to which the receiver/TV is connected.
• Consult an experienced radio/TV technician for help.
(3) The power supply that is provided with this unit is only intended for use with this product. Do not use this power supply with any other
product or do not use any other power supply that is not approved for use with this product by NetComm. Failure to do so may cause
damage to this product, fire or result in personal injury.
YMLM1WN
www.netcomm.com.au
3G Wireless N150 Mini Router m1-User Guide
41
Product Warranty
The warranty is granted on the following conditions:
1. This warranty extends to the original purchaser (you) and is not transferable;
2. This warranty shall not apply to software programs, batteries, power supplies, cables or other accessories supplied in or with the
product;
3. The customer complies with all of the terms of any relevant agreement with NetComm and any other reasonable requirements of
NetComm including producing such evidence of purchase as NetComm may require;
4. The cost of transporting product to and from NetComm’s nominated premises is your responsibility; and,
5. NetComm does not have any liability or responsibility under this warranty where any cost, loss, injury or damage of any kind,
whether direct, indirect, consequential, incidental or otherwise arises out of events beyond NetComm’s reasonable control. This
includes but is not limited to: acts of God, war, riot, embargoes, acts of civil or military authorities, fire, floods, electricity outages,
lightning, power surges, or shortages of materials or labour.
6. The customer is responsible for the security of their computer and network at all times. Security features may be disabled within the
factory default settings. NetComm recommends that you enable these features to enhance your security.
GNU General Public License
This product includes software code that is subject to the GNU General Public License (“GPL”) or GNU Lesser General Public License
(“LGPL”). This code is subject to the copyrights of one or more authors and is distributed without any warranty. A copy of this software can be
obtained by contacting NetComm Limited on +61 2 9424 2059.
The warranty is automatically voided if:
1. You, or someone else, use the product, or attempts to use it, other than as specified by NetComm;
2. The fault or defect in your product is the result of a voltage surge subjected to the product either by the way of power supply or
communication line, whether caused by thunderstorm activity or any other cause(s);
3. The fault is the result of accidental damage or damage in transit, including but not limited to liquid spillage;
4. Your product has been used for any purposes other than that for which it is sold, or in any way other than in strict accordance with
the user manual supplied;
5. Your product has been repaired or modified or attempted to be repaired or modified, other than by a qualified person at a service
centre authorised by NetComm; and,
6. The serial number has been defaced or altered in any way or if the serial number plate has been removed.
Limitations of Warranty
The Trade Practices Act 1974 and corresponding State and Territory Fair Trading Acts or legalisation of another Government (“the relevant
acts”) in certain circumstances imply mandatory conditions and warranties which cannot be excluded. This warranty is in addition to and
not in replacement for such conditions and warranties.
To the extent permitted by the Relevant Acts, in relation to your product and any other materials provided with the product (“the Goods”)
the liability of NetComm under the Relevant Acts is limited at the option of NetComm to:
• Replacement of the Goods; or
• Repair of the Goods; or
• Payment of the cost of replacing the Goods; or
• Payment of the cost of having the Goods repaired.
All NetComm ACN 002 490 486 products have a standard 12 months warranty from date of purchase. However some products have an
extended warranty option (refer to packaging). To be eligible for the extended warranty you must supply the requested warranty information
to NetComm within 30 days of the original purchase by registering on-line via the NetComm web site at
www.netcomm.com.au
3G Wireless N150 Mini Router m1-User Guide
42
YMLM1WN
www.netcomm.com.au
NetComm Liberty Series - 3G Wireless N150 Mini Router m1
NETCOMM LIMITED Head Office
PO Box 1200, Lane Cove NSW 2066 Australia
P: 02 9424 2070 F: 02 9424 2010
E: [email protected]
W: www.netcommlimited.com.
DYNALINK NZ 12c Tea Kea Place, Albany, Auckland,
New Zealand P: 09 448 5548
F: 09 448 5549
E: [email protected]
W: www.dynalink.co.nz
Product Warranty
NetComm products have a standard 12 months warranty from date of purchase. However some products have an extended warranty option, via
registering your product online at the NetComm website www.netcomm.com.au.
Technical Support
If you have any technical difficulties with your product, please refer to the support section of our website.
www.netcomm.com.au/support
Note:NetComm Technical Support for this product only covers the basic installation and features outlined in the Quick Start Guide. For further information regarding the advanced features of this product, please
refer to the configuring sections in the User Guide or contact a Network Specialist.
Trademarks and registered trademarks are the property of NetComm Limited or their respective owners. Specifications are subject to change without notice. Images shown may
vary slightly from the actual product.
YMLM1WN
www.netcomm.com.au
3G Wireless N150 Mini Router m1-User Guide
43