1
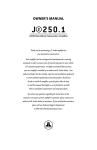
English
A19
HANDBOOK
Integrated amplifier
A19 INTEGRATED AMPLIFIER
MUTE
DISPLAY
BALANCE
PHONO
AUX
CD
TUNER
SAT
BD
PVR
AV
AUX
PHONES
POWER
safety
guidelines
CAUTION: To reduce the risk of electric shock, do not remove cover (or back). No user serviceable parts inside. Refer servicing to qualified
service personnel.
WARNING: To reduce the risk of fire or electric shock, do not expose this apparatus to rain or moisture.
The lightning flash with an arrowhead symbol within an equilateral triangle, is intended to alert the user to the presence of
uninsulated ‘dangerous voltage’ within the product’s enclosure that may be of sufficient magnitude to constitute a risk of electric
shock to persons.
The exclamation point within an equilateral triangle is intended to alert the user to the presence of important operating and
maintenance (servicing) instructions in the literature accompanying the product.
Class II product
This equipment is a Class II or double
insulated electrical appliance. It has been
designed in such a way that it does not
require a safety connection to electrical earth
(‘ground’ in the U.S.).
Warning
Mains plug/appliance coupler is used to disconnect
device and it shall remain readily operable.
CAUTION: In Canada and the USA, to prevent electric shock, match the wide blade of the plug to the wide slot in the socket and insert the
plug fully into the socket.
Important safety instructions
1. Read these instructions.
2. Keep these instructions.
3. Heed all warnings.
4. Follow all instructions.
5. Do not use this apparatus near water.
6. Clean only with dry cloth.
7. Do not block any ventilation openings. Install in
accordance with the manufacturer’s instructions.
8. Do not install near any heat sources such as
radiators, heat registers, stoves, or other apparatus
(including amplifiers) that produce heat.
9. Do not defeat the safety purpose of the polarized or
grounding-type plug.
A polarized plug has two blades with one wider than the
other. A grounding type plug has two blades and a third
grounding prong. The wide blade or the third prong are
provided for your safety. If the provided plug does not fit
into your outlet, consult an electrician for replacement
of the obsolete outlet.
10. Protect the power cord from being walked
on or pinched particularly at plugs, convenience
receptacles, and the point where they exit from the
apparatus.
12. Use only with the cart, stand,
tripod, bracket, or table specified by
the manufacturer, or sold with the
apparatus.
17. Cleaning
20. Damage requiring service
Unplug the unit from the mains supply before cleaning.
The equipment should be serviced by qualified service
personnel when:
A. the power-supply cord or the plug has been
damaged, or
B. objects have fallen, or liquid has spilled into the
equipment, or
C. the equipment has been exposed to rain, or
D. the equipment does not appear to operate normally
or exhibits a marked change in performance, or
E. the equipment has been dropped or the enclosure
damaged.
The case should normally only require a wipe with a
soft, lint-free cloth. Do not use chemical solvents for
cleaning.
When a cart is used, use caution when
moving the cart/apparatus combination
to avoid injury from tip-over.
We do not advise the use of furniture cleaning sprays or
polishes as they can cause permanent white marks.
13. Unplug this apparatus during lightning storms or
when unused for long periods of time.
18. Power sources
Only connect the equipment to a power supply of
the type described in the operating instructions or as
marked on the equipment.
14. Refer all servicing to qualified service personnel.
Servicing is required when the apparatus has been
damaged in any way, such as power-supply cord or plug
is damaged, liquid has been spilled or objects have fallen
into the apparatus, the apparatus has been exposed to
rain or moisture, does not operate normally, or has been
dropped.
The primary method of isolating the equipment from
the mains supply is to remove the mains plug. The
equipment must be installed in a manner that makes
disconnection possible.
19. Abnormal smell
15. Object or liquid entry
If an abnormal smell or smoke is detected from the
equipment, turn the power off immediately and unplug
the equipment from the wall outlet. Contact your dealer
and do not reconnect the equipment.
WARNING – Take care that objects do not fall and
liquids are not spilled into the enclosure through any
openings. The equipment shall not be exposed to
dripping or splashing. Liquid-filled objects such as vases
should not be placed on the equipment.
16. Climate
The equipment has been designed for use in moderate
climates and in domestic situations.
Safety compliance
This equipment has been designed to meet the IEC/EN
60065 international electrical safety standard.
This device complies with Part 15 of the FCC Rules.
Operation is subject to the following two conditions:
(1) This device may not cause harmful interference, and
(2) this device must accept any interference received,
including interference that may cause undesired
operation.
The building installation shall be regarded as providing
protection in accordance with the rating of the wall
socket outlet.
11. Only use attachments/accessories specified by the
manufacturer.
E-2
Thank you and congratulations for purchasing your Arcam FMJ Amplifier.
English
welcome…
Arcam has been producing specialist audio products of remarkable quality for over three
decades and the new A19 amplifier is the latest in a long line of award winning HiFi. The design
of the FMJ range draws upon all of Arcam’s experience as one of the UK’s most respected audio
companies, to produce Arcam’s best performing range of stereo amplifiers yet – designed and
built to give you years of listening enjoyment.
This handbook is a guide to installing and using the A19 Integrated Amplifier, including
information on the more advanced features. Use the contents list shown on this page to guide
you to the section of interest.
We hope that your FMJ amplifier will give you years of trouble-free operation. In the unlikely
event of any fault, or if you simply require further information about Arcam products, our
network of dealers will be happy to help you. Further information can also be found on the
Arcam website at www.arcam.co.uk.
The FMJ development team
Contents
safety guidelines........................................E-2
Important safety instructions..............................E-2
Safety compliance...................................................E-2
welcome…..................................................E-3
overview......................................................E-4
Placing the unit ........................................................E-5
Power............................................................................E-5
Interconnect cables.................................................E-5
A19 connections........................................E-6
Audio inputs...............................................................E-7
Phono input................................................................E-7
Record output...........................................................E-7
Pre-amplifier output...............................................E-7
E-3
remote control............................................E-8
The CR108 remote control...................................E-8
Amplifier commands..............................................E-8
loudspeakers..............................................E-9
Single wiring..............................................................E-9
Bi-amping....................................................................E-9
operation.................................................. E-10
Switching on........................................................... E-10
Selecting an audio source................................. E-10
Listening................................................................... E-10
Adjusting the balance......................................... E-11
Recording an audio source............................... E-11
Troubleshooting.................................................... E-11
specifications........................................... E-12
product guarantee................................. E-13
Arcam’s A19 Integrated Amplifier provides class-leading
sound quality.
overview
With a torrodial power supply, acoustically damped
chassis and very low levels of noise and distortion, the
A19 reproduces music with all its original authority and
detail.
Drawing on the many years of amplifier design
experience at Arcam, the A19 uses the best quality
components and engineering practice to produce a
product that will give many years of musical pleasure
and reliable service.
The A19 Integrated Amplifier is designed to produce a
level of performance that will truly bring music to life.
PH O N O
MUTE
DISPLAY
BALANCE
PHONO
E-4
AUX
CD
A19 INTEGRATED AMPLIFIER
20
TUNER
SAT
BD
PVR
AV
AUX
PHONES
POWER
English
Placing the unit
<< Place the amplifier on a level, firm surface, avoiding
direct sunlight and sources of heat or damp.
<< Do not place the A19 on top of a power amplifier or
other source of heat.
<< Do not place the amplifier in an enclosed space
such as a bookcase or closed cabinet unless there is
good provision for ventilation. The A19 is designed
to run warm during normal operation.
<< Do not place any other component or item on top
of the amplifier as this may obstruct airflow around
the heat-sink, causing the amplifier to run hot. (The
unit placed on top of the amplifier would become
hot, too.)
<< Make sure the remote-control receiver to the
right of the front panel display is unobstructed,
otherwise this will impair the use of the remotecontrol.
<< Do not place your record deck on top of this
unit. Record decks are very sensitive to the noise
generated by mains power supplies which will be
heard as a background ‘hum’ if the record deck is
too close.
<< The normal function of the unit may be disturbed
by strong electromagnetic interference. If this
occurs, simply reset the unit with the power button,
or move the unit to another location.
Power
Interconnect cables
The amplifier is supplied with a moulded mains plug
already fitted to the lead. Check that the plug supplied
fits your supply – should you require a new mains lead,
please contact your Arcam dealer.
We recommend the use of high-quality screened cables
that are designed for the particular application. Other
cables will have different impedance characteristics
that will degrade the performance of your system (for
example, do not use cabling intended for video use to
carry audio signals). All cables should be kept as short as
is practically possible.
If your mains supply voltage or mains plug is different,
please contact your Arcam dealer immediately
Push the IEC plug end of the power cable into the
socket on the back of the amplifier, making sure that it
is pushed in firmly. Plug the other end of the cable into
your mains socket and, if necessary, switch the socket
on.
It is good practice when connecting your equipment to
make sure that the mains power-supply cabling is kept
as far away as possible from your audio cables. Failure to
do so may result in unwanted noise in the audio signals.
E-5
A19
connections
Phono earth terminal
For connecting your turntable
earth lead, if required.
Speaker terminals
Aux input
See page 9 for information on
connecting loudspeakers.
Analogue 3.5mm stereo jack socket,
intended for connecting a portable
MP3 player.
Note that this terminal must
not be used as a safety earth.
Power inlet
Connect the correct
mains cable here.
A19 INTEGRATED AMPLIFIER
POWER INLET
AV
SWITCH POSITIONS
115 = 110 - 120V~
230 = 220 - 240V~
SUPPLY
VOLTAGE
PVR
BD
SAT
TUNER
CD
PHONO RECORD
(MM)
OUT
PRE
OUT
ACCESSORY
POWER
PHONO
GROUND
ONLY
OUTPUT: 6V DC 1A
110-120V/220-240V ~ 50-60 Hz
350W MAX
Voltage select
Ensure that the voltage selected
matches your local power supply.
Accessory Power
3.5mm mono jack socket for
accessory power cable (supplied).
The cable provides two 2.1mm DC
jacks to power rLink and/or rBlink
accessories.
AUX
4–16 OHMS. CLASS 2 WIRING
PHONES
POWER
Audio inputs
Pre-amplifier output
Phones
The labels above the connectors give
suggested audio inputs, although any
suitable device may be connected to the
line-level inputs. (Note, however, that the
name of the input shown on the frontpanel display cannot be changed.)
PRE OUT provides the pre-amp output for
3.5mm stereo jack socket,
intended for use with a set of
headphones.
See page 9 for more information.
See page 10 for more
information.
use in a bi-amplified system (for example,
with a P38 power amplifier).
AV, PVR, BD, SAT, TUNER and CD are all line-
level inputs.
The PHONO (MM) input has different
characteristics. See page 7 for more
information and page 12 for the phono
input specification.
Record output
RECORD OUT is a line level output for use in
recording from other sources.
See page 7 for more information.
Note
Please read the ‘Placing the unit’, ‘Power’ and
‘Interconnect cables’ sections on page 5 before
connecting up your A19 integrated amplifier!
E-6
English
Audio inputs
Phono input
Record output
Although the inputs are labelled for specific devices, all
have the same characteristics and each may be used with
any line-level product. The exception is the PHONO (MM)
input (see page 12 for the specification).
Phono-level input
The A19 is equipped with an audio recording loop
which may be used with recording devices such as a CD
recorder, DAT recorder, cassette recorder, VCR or PVR.
AV
Intended for the analogue outputs from general audiovisual equipment, such as a VCR or digital TV/satellite
receiver
Output volume is shown on the front display as
PHONO 20, for example.
PVR
Intended for the analogue outputs from a Personal
Video Recorder, or similar device.
BD
Intended for the analogue outputs from a Blu-ray or
DVD-player.
SAT
Intended for the analogue outputs from a satellite TV
receiver or cable TV box.
The A19 provides a pre-amplification stage to treat
the low-voltage output from a MM (moving magnet)
cartridge. Input specifications are given on page 12.
Connect the RECORD OUT output socket to the input
socket of your recording device (usually labelled RECORD
or IN).
To record from a particular source, press the appropriate
source button (for example, TUNER).
Line-level phono input
The phono input may be changed from phono-level to
line-level. Press the front panel PHONO and BALANCE
buttons simultaneously and use the control knob to
change the setting. The front panel display shows
LINE- OFF (i.e. phono) or LINE- ON respectively.
Pre-amplifier output
To use your A19 as a dedicated pre-amplifier, or as part
of a bi-amp’ed system, connect the PRE OUT sockets to
the input sockets of your power amplifier.
See page 9 for connection details and see page 12 for the
output specification.
If you wish to use an external phono amplifier, connect
its output to the PHONO (MM) input, but make sure that
LINE- ON is selected, since a phono amplifier produces
line-level input.
With the input defined in this way, output volume is
shown on the front display as LINE 20, for example.
TUNER
Intended for the analogue outputs from an FM, AM or
DAB radio tuner.
CD
Intended for the analogue outputs from a CD player.
AUX
This is a 3.5mm analogue input on the front panel
intended for use with devices such as MP3 players. To
connect an MP3 player (or other portable audio device)
you will need a 3.5mm to 3.5mm cable connected
between the AUX input and the headphone output socket
of the player.
E-7
The CR108 remote
control
remote
control
Amplifier commands
The CR108 is pre-programmed for use with the A19.
Make sure you have fitted the two AAA batteries
supplied before attempting to use the remote control.
1. With the CR108 remote face-down, press down
on the non-slip indentations of the battery
compartment cover and slide the cover off.
2. Insert the two ‘AAA’ batteries supplied. Take
care to insert the batteries in the right direction
by following the ‘+’ and ‘–’ marks in the battery
compartment.
3. Slide the battery compartment cover back and lock
it in place with a click.
+
DISP
BAL
-
2
This toggles a powered-on A19 amplifier
between ‘standby’ and ‘on’ modes.
-
Toggles the mute function to silence
speaker output. The source is displayed on
screen followed by Mt (mute), when active.
VOL –
VOL +
PVR
AV
CD
TUN
PHONO
SAT
CR108
E-8
Source
keys
Selects the amplifier input:
BD
Blu-ray Disc or DVD input
PVR
Personal Video Recorder input
TUN
DAB/FM/AM tuner input
AV
AV (television sound) input
PHONO Phono input
AUX Auxiliary line input
CD
CD input
SAT
Satellite decoder input
BAL
Adjust balance levels (using – and +
controls) between L9 (left), through 0, to
R9 (right)
DISP
Cycles through display panel brightness
options (bright, off, dim)
AUX
BD
The CR108 requires a clear line of sight to the front
panel display of A19 to ensure reliable operation.
Decrease (VOL–) and increase (VOL+)
amplifer volume
loudspeakers
Single wiring is the conventional wiring method of
running a single cable per channel between the amplifier
and the speaker; this is the easiest technique.
Similarly, connect the negative terminal of the amplifier
(coloured black and labelled with R–) to the negative
terminal of your speaker. Repeat the process for the left
speaker, using the amplifier terminals labelled +L and L–.
If each speaker has more than one pair of connecting
terminals, use the terminals labelled LF or ‘Low
Frequency’ for each speaker.
If your speakers support bi-wiring, then there is a strip
of conductive metal on the speakers connecting the lowfrequency terminals to those for the higher-frequencies;
this MUST NOT BE REMOVED in a single-wired
system.
Connect the positive terminal of the right speaker
connection on the amplifier (coloured red and labelled
+R) to the positive terminal of your right speaker.
Arcam A19
An A19 connected to speakers using single wiring
Bi-amping
Notes on making speaker
connections
<< Do not make any connections to any amplifier
while it is switched on. We recommend that
your amplifier is completely disconnected from
the mains supply before starting.
<< Before switching your amplifier(s) on for the
first time after connecting to speakers, please
check all connections thoroughly. Ensure that
bare wires or cables are not touching each other
or the amplifier’s chassis (which could cause
short circuits), and that you have connected
positive (+) to positive and negative (–) to
negative. Be sure to check the wiring for both
the amplifier and the speaker.
<< After making connections: switch the
amplifier(s) on, select a source signal, then
gradually increase the volume to the required
listening level.
<< If you are unsure as to how your system should
be connected, or need advice on bi-amping,
please contact your Arcam dealer who will be
happy to help you.
Note that the strip of metal on the speakers connecting
the lower terminals to the upper terminals MUST BE
REMOVED. Failure to do so will result in damage to
both amplifiers, which will not normally be covered
under warranty.
Bi-amping is the separation of the amplification of lowand high-frequency signals over two amplifiers.
Bi-amping requires the use of two amplifiers per
channel. Normally, your A19 is used to drive the highfrequency (treble) speakers, with a P38 used for the
lower (bass) frequencies.
Arcam A19
Connect your A19 to the speakers as described for
single wiring, with the exception that the A19 should
be connected to the speaker terminals labelled HF or
‘High Frequency’. Then connect the power amplifier
(an Arcam P38 for example) to the LF or ‘Low
Frequency’ terminals, as in the diagram. A pair of audio
interconnect cables are also required to connect the
pre-amp outputs of the A19 to the power amp inputs of
the P38.
Arcam P38
An A19 and P38 connected to speakers using bi‑amping
E-9
English
Single wiring
AU X
A19 INTEGRATED AMPLIFIER
31
operation
MUTE
DISPLAY
BALANCE
PHONO
AUX
CD
TUNER
SAT
BD
PVR
AV
AUX
Switching on
Selecting an audio source
Listening
The front panel POWER button switches the unit on and
off.
The audio source may be selected from the front panel
(PHONO, AUX, CD, TUNER, SAT, BD, PVR or AV), or the remote
control (BD, PVR, TUN, AV, PHONO, AUX, CD or SAT).
Volume control
The power light (next to the ‘A19 Integrated Amplifier’
text) indicates the state of the amplifier: it changes from
red to orange then green if mains power is connected
and the unit is switched on.
In each case, the source is selected from the input
sockets with the corresponding name.
PHONES
POWER
Use the control knob (or the +/– buttons on the remote)
to change the volume. Turn the knob clockwise to
increase the volume, anti-clockwise to reduce it.
Listening using headphones
The headphones socket (PHONES) accepts headphones
with an impedance rating between 8Ω and 2kΩ, fitted
with a 3.5mm stereo jack plug.
If the unit is left unused for an extended period of time
it will go into standby to reduce power consumption.
Press AUX & BALANCE to adjust the time of this
feature.
The pre-amp outputs and speakers are muted when
headphones are plugged in and the front panel display
shows Headphone.
Display
The front panel DISPLAY button (or DISP on the remote
control) changes the display brightness between ‘on’,
‘dimmed’ and ‘off ’. If the A19 is powered off with the
display brightness set to ‘off ’, the display resumes to
‘dimmed’ when the unit is powered on again.
The headphones socket is always active, unless output
has been muted.
Muting output
The output of the A19 can be silenced by pressing MUTE
on the front panel (or - on the remote control). If the
unit is muted, the power light changes to orange and
the source is shown on the front display panel (e.g.
PVR MT).
Press MUTE/- for a second time (or change the volume)
to cancel mute.
E-10
English
Adjusting the balance
Recording an audio source
Troubleshooting
The balance setting allows you to increase the volume of
one channel (left or right) relative to the other. Altering
the balance may help to restore the stereo image for an
off-centre listening position.
The A19 allows you to record and monitor the sound
from any connected source.
If you are having trouble with your amplifier, check the
following items.
The back panel REC OUT socket can be connected to the
input sockets of your recording device (these are usually
labelled RECORD or IN).
No sound
Balance can be adjusted from the front panel or from the
remote control. Click the BALANCE button (or BAL on the
CR108) to view the current setting, then use the control
knob (or the +/– buttons on the remote) to change the
setting – from L9 to R9, via the neutral value 0.
To record from a particular source, press the appropriate
source button (for example, TUNER).
Check the following:
<< The A19 amplifier is powered up and switched on.
<< The amplifier is not muted (i.e. MT (mute) is not
shown on the display panel; the power light is
showing green, not orange or red).
<< The selected source is generating audio (e.g., if CD
is selected, then the CD is playing).
<< The speaker outputs are connected on the A19 (or
on the power amplifier, in the case of a bi-amping
arrangement).
Sound cuts-out unexpectedly
If the temperature of the internal heatsink rises above
a safe level, then a thermal cut-out inside the amplifier
operates to protect the unit and the protection system
temporarily removes power to the speakers. The system
will reset itself as the heatsink cools down.
<< With two pairs of low-impedance speakers
connected (6Ω or less), overloads are more likely.
Overloading the amplifier may cause it to shut
down because of overheating.
<< Note that, due to the high output voltage from some
CD players, it is possible to drive your amplifier
at full power even though the volume is not set at
maximum.
E-11
Continuous power output (20Hz—20kHz at 0.5% THD), per channel
Both channels, 8Ω, 20Hz—20kHz
50W
Single channel, 4Ω, at 1kHz
specifications
90W
Harmonic distortion, 80% power, 8Ω at 1kHz
0.003%
Inputs
Phono (MM) cartridge:
Input sensitivity at 1kHz
5mV
Input impedance
47kΩ + 100pF
Frequency response (ref. RIAA curve)
20Hz—20kHz ± 1dB
Signal/noise ratio (Awtd) 50W, ref. 5mV input
80dB
Overload margin, 50mV at 1kHz
20dB
Line and AV inputs:
Nominal sensitivity
1V
Input impedance
10kΩ
Maximum input
4.6Vrms
Frequency response
20Hz—20kHz ± 0.2dB
Signal/noise ratio (Awtd) 50W, ref. 1V input
105dB
Preamplifier output
Nominal output level
630mV
Output impedance
230Ω
Headphone output
Maximum output level into 600Ω
4V
Output impedance
1Ω
Load range
16Ω—2kΩ
Accessory power output
Using accessory power cable supplied, provides two
2.1mm DC connectors
6V, 1A
General
Mains voltage
110–120V~ or 220–240V~
Power consumption (maximum)
350W
Dimensions W x D x H (including feet)
432 x 275 x 85mm
Weight (net)
8.5kg
Weight (packed)
10.2kg
Supplied accessories
Mains lead
CR108 remote control
2 x AAA batteries
Accessory power cable
E&OE
Continual improvement policy
NOTE: All specification values are typical unless otherwise stated.
Arcam has a policy of continual improvement for its
products. This means that designs and specifications
are subject to change without notice.
E-12
Worldwide Guarantee
English
product
guarantee
This entitles you to have the unit repaired free of charge, during the first two years after
purchase, provided that it was originally purchased from an authorised Arcam dealer.
The Arcam dealer is responsible for all after-sales service. The manufacturer can take no
responsibility for defects arising from accident, misuse, abuse, wear and tear, neglect or
through unauthorised adjustment and/or repair, neither can they accept responsibility
for damage or loss occurring during transit to or from the person claiming under the
guarantee.
The warranty covers:
Parts and labour costs for two years from the purchase date. After two years you must pay
for both parts and labour costs. The warranty does not cover transportation costs at any
time.
Claims under guarantee
This equipment should be packed in the original packing and returned to the dealer from
whom it was purchased. It should be sent carriage prepaid by a reputable carrier – not
by post. No responsibility can be accepted for the unit whilst in transit to the dealer or
distributor and customers are therefore advised to insure the unit against loss or damage
whilst in transit.
For further details contact Arcam at:
Arcam Customer Support Department, Pembroke Avenue, Waterbeach, CAMBRIDGE,
CB25 9QR, England or via www.arcam.co.uk.
Problems?
If your Arcam dealer is unable to answer any query regarding this or any other Arcam
product please contact Arcam Customer Support at the above address and we will do our
best to help you.
On-line registration
You can register your product on-line at www.arcam.co.uk.
Correct disposal of this product
This marking indicates that this
product should not be disposed
with other household waste
throughout the EU.
To prevent possible harm to the
environment or human health from
uncontrolled waste disposal and to
conserve material resources, this product should be
recycled responsibly.
To dispose of your product, please use your local
return and collection systems or contact the retailer
where the product was purchased.
E-13