1
220V Scissor Lift by Draper
page 2 of 6
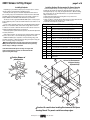
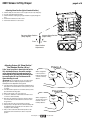
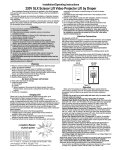
Installing Optional Environmental Air Space Housing
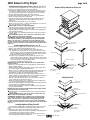
Installing Projector
Depending on job conditions and projector, it may be easier to remove
optional ceiling closure panel before installing projector.
Generally, the video projector should be suspended from the bottom
pan according to projector manufacturer’s instructions and recommended
standard ceiling mounting hardware. For projectors 10 kgs or below, use
Draper's SMS Low Profile Mount with Universal Projector Bracket.
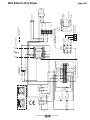
The Scissor Lift has a grounded 220V AC, 60Hz power cord for projector
power supply. The power cord is laced down the back scissor and is “hot” at
all times.
Control cables should be laced through our Cable Management System.
Make sure to use flexible cables, and to allow enough cable at each turn
so cables do not stretch or kink. This will ensure that cords do not become
tangled and damaged during Scissor Lift operation.
Unit and projection system should be operated, checked and adjusted as
necessary at this time.
After testing operations, the optional closure panel should be reattached.
Be sure to use Loctite®, or other thread locking compound on the nuts.
NOTE: Immediately upon completion of the surrounding ceiling, units
should be operated to confirm that optional ceiling closure panel stops just
short of touching ceiling in closed position.
Warning: Keep fingers and other objects away from automatic
ceiling closure and scissor mechanisms when unit is operating.
Serious injury or damage could result.
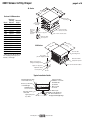
Some Environmental Air Space Housings are longer than
wide and mounting hole locations for Environmental Air
Space Housing will change.
Caution: Beware of
pinch points
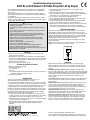
The Environmental Air Space Housing is shipped in pieces, and must be
assembled by the installer. The height of the Environmental Air Space Housing
can be adjusted by up to 2" (5 cm) by moving the trim frame to different mounting
holes in side panels. It is recommended that an access panel be installed in the
ceiling to allow future access.
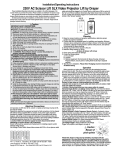
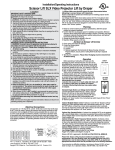
➀ Attach Environmental Air Space Housing frame to top of Scissor Lift.
➁ Install top panel to plenum frame.
➂ Attach assembly to overhead structure. Allow clearance between Environmental
Air Space Housing top and structure for ease of future access.
➃ Install side and end panels, and trim frame.
Parts List for Scissor Lift Environmental Air Space Housing
Item Quantity
Part
1
1
Environmental Air Space Housing Top Frame
2
2
Environmental Air Space Housing End Panel
3
2
Environmental Air Space Housing Side Panel
4
1
Environmental Air Space Housing Top Panel
5
varies
#10-32 x 3/8" (9.5mm) Hex Head Screw with Zinc Washer
6
varies
#8-32 Zinc Keps Lock Nut
7
varies
½" (8mm)-13 x 3½" (90 mm) Zinc Hex Head Screw
8
varies
½" (8mm)-13 Zinc Hex Grd 2
9
varies
3
10
varies
¼"(6mm)-20 x 1½"(38mm) Zinc Hex Head Screw
11
varies
¼" (6mm) Flat Zinc Washer
12
varies
¼"(6mm)-20 Zinc Nylon Insert Lock Nut
13
1
/16"(5 mm) ID x 5"(127mm) OD x 1/16"(3mm) tk Flat Washer
Trim Frame
4
Scissor Lift Environmental
Air Space Housing
(Exploded View)
2
3
6 5
13
7 8
1
10 11 12
6
9
Caution: Be careful when handling Environmental Air Space
Housing Panels. The panels could have sharp edges.
www.draperinc.com
(765) 987-7999