1
Contact SAMSUNG WORLD WIDE
If you have any questions or comments relating to Samsung products, please contact the SAMSUNG customer care centre.
Country
AUSTRALIA
NEW ZEALAND
CHINA
HONG KONG
INDIA
INDONESIA
JAPAN
MALAYSIA
PHILIPPINES
SINGAPORE
THAILAND
TAIWAN
VIETNAM
GEORGIA
ARMENIA
AZERBAIJAN
UZBEKISTAN
KYRGYZSTAN
TADJIKISTAN
MONGOLIA
BELARUS
MOLDOVA
Customer Care Centre
1300 362 603
0800 SAMSUNG (0800 726 786)
400-810-5858
(852) 3698 4698
1800 3000 8282
1800 266 8282
0800-112-8888
021-5699-7777
0120-327-527
1800-88-9999
1-800-10-SAMSUNG(726-7864) for PLDT
1-800-3-SAMSUNG(726-7864) for Digitel
1-800-8-SAMSUNG(726-7864) for Globe
02-5805777
1800-SAMSUNG(726-7864)
1800-29-3232
02-689-3232
0800-329-999
0266-026-066
1 800 588 889
0-800-555-555
0-800-05-555
088-55-55-555
8-10-800-500-55-500
00-800-500-55-500
8-10-800-500-55-500
+7-800-555-55-55
810-800-500-55-500
0-800-614-40
Web Site
www.samsung.com
www.samsung.com
www.samsung.com
www.samsung.com/hk (Chinese)
www.samsung.com/hk_en (English)
www.samsung.com/in
www.samsung.com/id
Plasma TV
user manual
www.samsung.com
www.samsung.com/my
www.samsung.com/ph
www.samsung.com
www.samsung.com/th
www.samsung.com/th
www.samsung.com
www.samsung.com
www.samsung.com
www.samsung.com
www.samsung.com
www.samsung.com
www.samsung.com
www.samsung.com
www.samsung.com
www.samsung.com
Thank you for purchasing this Samsung product.
To receive more complete service, please register
your product at
www.samsung.com/register
Model _____________ Serial No. _____________
© 2013 Samsung Electronics Co., Ltd. All rights reserved.
0_BN68-04813A-Cover_ENG.indd 1
BN68-04813A-02
2013-04-04 �� 7:00:27
Important Safety Instructions
Warning! Important Safety Instructions
(Please read the appropriate section that corresponds to the marking on your Samsung product before
attempting to install the product.)
CAUTION
This symbol indicates that high voltage is
present inside. It is dangerous to make any kind
of contact with any internal part of this product.
RISK OF ELECTRIC SHOCK DO NOT OPEN
CAUTION: TO REDUCE THE RISK OF ELECTRIC SHOCK, DO
NOT REMOVE COVER (OR BACK). THERE ARE NO USER
SERVICEABLE PARTS INSIDE. REFER ALL SERVICING TO
QUALIFIED PERSONNEL.
This symbol alerts you that important literature
concerning operation and maintenance has
been included with this product.
• The slots and openings in the cabinet and in the back or bottom are provided for necessary ventilation. To ensure reliable operation of this apparatus,
and to protect it from overheating, these slots and openings must never be blocked or covered.
−− Do not cover this apparatus in a confined space, such as a bookcase, or built-in cabinet, unless proper ventilation is provided.
−− Do not place this apparatus near or over a radiator or heat resistor, or where it is exposed to direct sunlight.
−− Do not place a water containing vessel(vases etc.) on this apparatus, as this can result in a risk of fire or electric shock.
• Do not expose this apparatus to rain or place it near water(near a bathtub, washbowl, kitchen sink, or laundry tub, in a wet basement, or near a
swimming pool etc.). If this apparatus accidentally gets wet, unplug it and contact an authorized dealer immediately. Make sure to pull out the power
cord from the outlet before cleaning.
• This apparatus use batteries. In your community there might be regulations that require you to dispose of these batteries properly under
environmental considerations. Please contact your local authorities for disposal or recycling information.
• Do not overload wall outlets, extension cords or adaptors beyond their capacity, since this can result in fire or electric shock.
• Power-supply cords should be routed so that they are not likely to be walked on or pinched by items placed upon or against them, paying particular
attention to cords at plug end, adaptors and the point where they exit from the appliance.
• To protect this apparatus from a lightning storm, or when it is left unattended and unused for long periods of time, unplug it from the wall outlet and
disconnect the antenna or cable system. This will prevent damage to the set due to lightning and power line surges.
• Before connecting the AC power cord to the DC adaptor outlet, make sure the voltage designation of the DC adaptor corresponds to the local
electrical supply.
• Never insert anything metallic into the open parts of this apparatus. Doing so many create a danger of electric shock.
• To avoid electric shock, never touch the inside of this apparatus. Only a qualified technician should open this apparatus.
• Make sure to plug the power cord in until it is firmly inserted. When removing the power cord, make sure to hold the power plug when pulling the
plug from the outlet. Do not touch the power cord with wet hands.
• If this apparatus does not operate normally - in particular, if there are any unusual sounds or smells coming from it - unplug it immediately and
contact an authorized dealer or service centre.
• Be sure to pull the power plug out of the outlet if the TV is to remain unused or if you are to leave the house for an extended period of time (especially
when children, elderly or disabled people will be left alone in the house).
−− Accumulated dust can cause an electric shock, an electric leakage or a fire by causing the power cord to generate sparks and heat or the
insulation to deteriorate.
• Be sure to contact an authorized service centre, when installing your set in a location with heavy dust, high or low temperatures, high humidity,
chemical substances and where it operates for 24 hours such as the aerial port, the train station etc.
• Failure to do so may cause serious damage to your set.
• Use only a properly grounded plug and receptacle.
−− An improper ground may cause electric shock or equipment damage. (Class l Equipment only.)
• To disconnect the apparatus from the mains, the plug must be pulled out from the mains socket, therefore the mains plug shall be readily operable.
• Do not allow children to hang onto the product.
• Store the accessories (battery, etc.) in a location safely out of the reach of children.
• Do not install the product in an unstable location such as a shaky self, a slanted floor or a location exposed to vibration.
• Do not drop or impart any shock to the product. If the product is damaged, disconnect the power cord and contact a service centre.
• Unplug the power cord from the power outlet and wipe the product using a soft, dry cloth. Do not use any chemicals such as wax, benzene, alcohol,
thinners, insecticide, aerial freshener, lubricant or detergent. This may damage the appearance or erase the printing on the product.
• Apparatus shall not be exposed to dripping or splashing.
• Do not dispose of batteries in a fire.
• Do not short circuit, disassemble or overheat the batteries.
• Danger of explosion if battery is incorrectly replaced. Replace only with the same or equivalent type.
• WARNING - TO PREVENT THE SPREAD OF FIRE, KEEP CANDLES OR OTHER OPEN FLAMES AWAY FROM THIS PRODUCT AT
ALL TIMES.
English - 2
[PF8500-AR]BN68-04813A-03ENG.indb 2
2013-04-03 �� 3:07:05
Contents
Basic Features
3D Basics
6
18
Using the Smart Touch Control
3D Active Glasses
7 Connecting to the TV
18 Pairing 3D Active Glasses
7 Inserting the Batteries (AAA X 2)
20 Watching 3D Video
8Touchpad
8 Show Status and Notification Banner
8History
Troubleshooting and Other
Information
8 Deleting History Data
8Searching
9 Adjusting the Touchpad
10
Turning on the TV
10
Built-in TV Camera
11 Extending the TV Camera
21
What is Remote Support?
22
Troubleshooting
22
Mounting the TV on the Wall Using
11 Retracting the Camera
12
the Wall Mount Kit (Optional)
Universal Remote Setup
24
Storage and Maintenance
12 Add the External Device
24
Providing Proper Ventilation for Your TV
25
Eco Sensor and Screen Brightness
26
Tip Prevention – Securing the TV to the Wall
13
SETUP
13
Switching Between Video Sources
14
The Evolution Kit Slot (Kit Sold Separately)
14
Viewing the e-Manual
14 Scrolling a Page
15 Using the Top Icons
Specifications
15 Returning to the Home Page
27
Specifications - TV
15 Searching the Index
28
Licences
15 Searching Pages
15 Closing the e-Manual
15 Jumping to a Menu Item
15 Updating the e-Manual
Network Configuration
16
Connecting to a Network
16 Network Connection - Wireless
16 Wireless Network Precautions
16 Network Security Protocols
17 Network Connection - Wired
English - 3
[PF8500-AR]BN68-04813A-03ENG.indb 3
2013-04-03 �� 3:07:06
Figures and illustrations in this User Manual are provided for reference only and may differ from the actual
product appearance. Product design and specifications may change without notice.
Features for your new TV
•• 3D: This new feature enables you to view 3D content.
•• SMART HUB:
This TV features Smart Hub, a multi-purpose entertainment and family centre. With Smart Hub, users
can surf the web, download applications, and stay in touch with family and friends through social
networking services. In addition, you can enjoy photo, video, and music files stored on external storage
devices.
Press ™ button to launch Smart Hub. Choose a service using the icons displayed in the top part of the
screen.
Social: Watch the latest YouTube videos and you and your friends' video posts on Facebook and
Twitter. You can also make video calls to friends by the TV camera.
Apps: Samsung Apps offers an extensive collection of free and paid news, sports, weather, and
gaming content you can directly download to and enjoy on your TV.
Photos, Videos & Music: Play back photo, video, and music files from an external storage device.
•• Anynet+ (HDMI-CEC): This allows you to control all connected Samsung devices that support
Anynet+ with your Samsung TV’s remote.
•• e-Manual: Provides a detailed, on-screen user's manual built into your TV.
•• SMART Interaction: Using this function, you can access and control menu options and functions
using motions.
•• Device Manager: Use the TV features with a USB or Bluetooth keyboard and mouse.
•• MHL & Screen Mirroring: Displays mobile device screens on your TV using a wired or wireless
connection.
For India only
This marking on the product, accessories or literature indicates that the product and its
electronic accessories should not be disposed of with other household waste at the end
of their working life. To prevent possible harm to the environment or human health from
uncontrolled waste disposal, please separate these items from other types of waste and
recycle them responsibly to promote the sustainable reuse of material resources.
For more information on safe disposal and recycling visit our website www.samsung.com/in or contact
our Helpline numbers -18002668282, 180030008282.
English - 4
[PF8500-AR]BN68-04813A-03ENG.indb 4
2013-04-03 �� 3:07:06
Accessories
✎✎ Please make sure the following items are included with your TV. If any items are missing, contact your
dealer.
✎✎ The items’ colours and shapes may vary depending on the models.
✎✎ Cables not included in the package contents can be purchased separately.
✎✎ Check that there is no accessory hidden behind packing materials when you open the box.
• Smart Touch Control & Batteries (AAA x 2)
• Power Cord
• User Manual
• Regulatory Guide
• Samsung 3D Active Glasses
• Warranty Card (Not available in some locations)
• Cleaning-Cloth
Component adapter
Blanking Bracket
AV Adapter
Holder-Wire stand
IR Extender Cable
Wireless Keyboard (Sold Separately)
Assembling the Holder-Wire stand
Warning: Screens can be damaged
from direct pressure when handled
incorrectly. We recommend lifting the
TV by the edges, as shown.
Don't Touch
This Screen!
English - 5
[PF8500-AR]BN68-04813A-03ENG.indb 5
2013-04-03 �� 3:07:07
Basic Features
Using the Smart Touch Control
You can use the MIC to give Voice Recognition commands.
Simply press the VOICE˜ button.
✎✎Voice Recognition function can be affected by unclear
pronunciation, voice level, or surrounding noise.
Turn on and off the cable set-top box
connected to the TV. For this, the Smart Touch
Control must be configured as a universal
remote control.
TV
Turns the TV on and off.
VOICE˜
Take your voice command and enter a text
using your voice.
Displays and selects the available video
sources.
Adjusts the volume.
TV
AD
MORE
AD
MUTE
MUTEM
Cuts off the sound temporarily.
Displays a virtual remote control on the screen.
See the e-Manual chapter, Controlling TV >
Using the Virtual Remote Control.
Press the touchpad to select a desired function
(e.g. MENU(m), TOOLS(T), INFO(`), etc.)
easily.
MORE
Touch Pad
• Drag on the Touch Pad to move the
focus on the screen.
• Press the Touch Pad to run, activate, or
select the highlighted item.
• Press and hold the touch pad to display
the Channel List.
HISTORY / SEARCH
A
EXIT
B
C
D
MENU
Toggles this button between
History and Search.
Returns to the previous menu.
Press and hold this button to exit all currently
running applications.
HISTORY SEARCH
A
B
MUTE
Changes channels.
C
D
MENU
EXIT
The colour buttons work differently, depending
on the function that the TV is currently
performing.
Opens the OSD Menu.
Brings up Smart Hub applications. See the
e-Manual chapter, Smart TV Features >
Smart Hub.
✎✎To exit an application that is running,
press the ™ button.
English - 6
[PF8500-AR]BN68-04813A-03ENG.indb 6
2013-04-03 �� 3:07:07
Connecting to the TV
In order to operate the TV using a Smart Touch Control, you must first pair it to the TV via Bluetooth.
However, the Smart Touch Control is only available for the paired Samsung TV.
1. When the TV is off, point the Smart Touch Control at the remote control receiver of the TV and press the TV button for the first pairing. Only this
buttons sends an IR signal.
2. A Bluetooth icon will appear at the bottom left of the screen as shown below. The TV will then attempt to connect to the Smart Touch Control unit
automatically.
<Attempting to connect and completion icons>
Reconnecting the Smart Touch Control
<The Smart Touch Control pairing button>
If you need to reestablish the connection between the TV and the Smart Touch Control, press the pairing button at
the back of the Smart Touch Control. The pairing button can be accessed by removing the Smart Touch Control's
battery cover. Pressing the pairing button automatically reestablishes the connection between the control and the
TV.
Low Battery Power Warning
If the battery becomes and blanks low while using the Smart Touch Control, the following alarm window blinks and appears
at the bottom left of the screen. Use alkaline batteries for longer usage.
Inserting the Batteries (AAA X 2)
1
3
2
1. Slightly lift the battery cover by pulling the strap or using a plastic card. Next, pull on the cover's notch
with a fingernail to remove the cover completely.
2. Insert 2 AAA batteries, making sure to align the positive and negative ends correctly.
3. Align the battery cover with the back of the remote control and press down along the edges until it is
cleanly attached to the remote control.
English - 7
[PF8500-AR]BN68-04813A-03ENG.indb 7
2013-04-03 �� 3:07:08
Touchpad
Use the touchpad to perform various commands. Navigate to Tutorial (System > Device Manager >
Smart Touch Control Settings > Tutorial) to view an on-screen guide to using the Smart Touch Control.
Dragging
HISTORY
TORY SEARCH
TO
Press
HISTORY
TORY SEARCH
TO
HISTORY SEARCH
HISTORY SEARCH
Drag on the touchpad in the desired direction.
Move the focus or the pointer in the direction the finger is dragging.
Press the touchpad. This selects the focused item.
Scrolling Up and Down
Scrolling Left and Right
HISTORY SEARCH
HISTORY SEARCH
Slide a finger along the raised line on either side of the Touch Pad to scroll
up or down in a list or webpage. The line on the left side is designed for
left-handed users.
HISTORY
Y SEARCH
HISTORY
Y SEARCH
Move your finger horizontally on the projected line at the top of the
touchpad. You can horizontally scroll a horizontal list or the Smart Hub
panel.
Show Status and Notification Banner
Press the MORE button on the Smart Touch Control and then select STATUS on the virtual control panel
to display the status and notification banner at the top of the screen.
History
Press the HISTORY/SEARCH and then select History from the list displayed at the bottom of the screen.
This displays an interactive list of recently accessed channels, media content and applications.
Deleting History Data
You can delete the history information about recently viewed channels, content and applications.
Searching
Press the HISTORY/SEARCH button. The list appears at the bottom of the screen. Press the HISTORY/
SEARCH button again. Enter search criteria to search not only many apps and their contents on the TV
but also the Web.
English - 8
[PF8500-AR]BN68-04813A-03ENG.indb 8
2013-04-03 �� 3:07:08
Adjusting the Touchpad
Users can adjust the sensitivity of the Smart Touch Control's touchpad. Set Touch Sensitivity to adjust
sensitivity and make it more convenient to use.
Using the Virtual Remote Control
Press MORE button to display the virtual remote panel on the screen. The virtual remote panel consists of
a number panel, a playback control panel, and a quick access panel. Use the touchpad to select numbers
and buttons. Press and hold the MORE button. A quick access panel of virtual remote panel appears. You
can select screen buttons easily.
Changing the Virtual Remote Control Panel
Choose the number panel, playback control panel, or quick access panel as the panel to be shown on the
screen.
Use the touchpad to keep moving the focus left or right. The panel changes when the focus is moved
beyond the leftmost or rightmost edge.
Use left/right scroll function on the touchpad to change the panel easily.
Change a position of the Virtual Remote Panel
Press the MORE button on the Smart Touch Control. The virtual remote panel appears on the screen.
Press and hold the touchpad for one second. Users can change a position of the virtual remote panel
of the screen.
Using the Number Panel
Use the number panel to enter numbers on a keypad screen or webpage or to change the channel while
watching TV. Changing the channel using the number pad leaves a record, allowing you to easily return to
previous channels.
Using the Playback Control Panel
Use the playback control panel to pause, rewind, fast forward, skip to the next file, and much more while
enjoying media content.
Using the Quick Access Panel
Quickly access the INFO, MENU and e-Manual buttons. However, the availability of buttons may vary
depending on the operating mode of the Smart Touch Control (with the TV only, as a universal remote,
etc.).
English - 9
[PF8500-AR]BN68-04813A-03ENG.indb 9
2013-04-03 �� 3:07:09
Turning on the TV
Turn on the TV using the P button on the remote control or TV panel.
✎✎ The product Colour and shape may vary depending on the model.
✎✎ The TV’s Controller, a small joy stick like button on the rear left side of the TV, lets you control the TV
without the remote control.
Camera
Function menu
m
R
P
TV Controller
The image is drawn as if you are
facing the front side of the TV.
Remote control sensor
When you use the Smart Touch
Control, the standby LED does not
respond, except when you press the
P button.
TV
RE
MO
CH
AR
SE
RY
TO
HIS
D
C
B
NU
ME
A
IT
EX
Built-in TV Camera
This TV features a built-in TV camera that can be used for the Motion Control, Voice Recognition (built-in
microphone), and Face Recognition features. You can also use the knob for camera's angle adjustment to
change the camera's viewing angle.
From the Top
From Behind
Microphone
Knob for camera's angle adjustment
Lens
Microphone
English - 10
[PF8500-AR]BN68-04813A-03ENG.indb 10
2013-04-03 �� 3:07:09
경고
주의
경고
Leave fingerprints that may affect the image quality.
주의
경고
주의
경고
If it is clogged, voice commands may not be recognized.
주의
Do not touch the lens while operating the TV camera.
If the lens gets dirty, clean it using a soft piece of cloth.
Keep the microphone from being clogged by dirt or dust.
Use a soft cloth to wipe the microphone.
Extending the TV Camera
In order to use the TV camera, you must first extend it.
Gently push the camera in without touching the lens until you hear a click.
Retracting the Camera
If you are not using the TV camera, keep it retracted inside the TV. The Motion Control and Face
Recognition features cannot be used while the TV camera is in the retracted state, but Voice Recognition
will still be available.
Gently push the camera in without touching the lens until you hear a click.
English - 11
[PF8500-AR]BN68-04813A-03ENG.indb 11
2013-04-03 �� 3:07:11
Universal Remote Setup
This TV has a universal remote control feature that lets you control cable boxes, Blu-ray players, home
theatres, and other third-party external devices connected to the TV using the TV's remote control.
5cm
Keep a distance of 5 cm at least between the IR EXTENDER CABLE and the external device, as the
illustration shows. Face the IR EXTENDER CABLE toward the external device’s remote control signal
receiver. Note that it should be no obstacle between IR Extender and external device. The presence of an
obstacle will interfere with the transmission of the remote control signal.
Add the External Device
1. Turn on the external device you wish to set up universal remote function for and then press SOURCE
to bring up the Source screen.
2. Select Universal remote setup from the top of the screen. This initiates the universal remote setup
process.
3. Follow the on-screen instruction and set up the universal remote control. If it does not work, set up the
remote control by entering the model number manually.
English - 12
[PF8500-AR]BN68-04813A-03ENG.indb 12
2013-04-03 �� 3:07:12
SETUP
The initial setup dialog appears when the TV is first activated.
Follow the on-screen instructions to finish the initial setup process, including menu language choice,
channel scan, network connection, and more.
At each step, either make a choice or skip the step.
Users can manually perform this process at a later time under the System > Setup menu.
Switching Between Video Sources
Press the SOURCE button to switch between devices connected to the TV.
For example, to switch to a game console connected to the second HDMI connector, press SOURCE
button. From the Source list, select HDMI2. The connector names may vary depending on the product.
Select Tools button at the upper-right corner of the Source screen to access the following functions.
•• Refresh
Select this if a connected device does not appear in the list. If the list does not show the device after
selecting Refresh, check the status of the TV-to-device connection.
✎✎ This function is only available if Anynet+ (HDMI-CEC) function is set to On.
•• Edit Name
You can rename devices connected to the TV to more easily identify external sources.
With a computer connected to the TV's HDMI (DVI) port via an HDMI cable, for example, you can
change Edit Name to PC.
With a computer connected to the TV's HDMI (DVI) port via an HDMI-to-DVI cable, for example, you
can change Edit Name to DVI PC.
With an AV device connected to the TV's HDMI (DVI) port via an HDMI-to-DVI cable, for example, you
can change Edit Name to DVI Devices.
•• Information
View detailed information about the connected devices.
•• Disconnect USB Device
Remove the USB device from the list to safely. This function is only available when the USB device
selected.
Universal remote setup
To add a new external device to control it with the Touch Remote Control, press the SOURCE button and
select Universal remote setup on the top right of the screen.
Using the universal remote control, users can control external devices connected to the TV, such as a settop box, Blu-ray player, and AV receiver.
English - 13
[PF8500-AR]BN68-04813A-03ENG.indb 13
2013-04-03 �� 3:07:12
The Evolution Kit Slot (Kit Sold Separately)
TV Rear
Attaching the Evolution Kit to your Samsung TV upgrades the TV’s hardware and software without your
needing to purchase a new TV. With the Evolution Kit, you can keep your TV updated with the latest
features and services provided by Samsung Electronics.
✎✎ The Evolution Kit is sold separately. When users purchase an Evolution Kit released in 2014 or later,
the user's TV can be upgraded to match the software version of the Evolution Kit. However, an
Evolution Kit may not be available, depending on the product.
Viewing the e-Manual
The embedded e-Manual contains information about your TV's key features.
This TV has a built-in user guide. To read it, use one of the following methods:
•• Open the Support menu and choose e-Manual.
•• Press the MORE button on the Smart Touch Control to display control buttons on the screen. Flick the
Touch Pad until e-Manual appears and select it.
✎✎ Words in blue refer to screen menu options and words in light blue refer to remote control buttons.
✎✎ A printable version of this guide is also available at www.samsung.com/support.
Scrolling a Page
To scroll a page, use of one of the following methods:
•• Press the
or
button on the scroll bar at the right edge of the screen.
•• Drag or flick up or down the line on either the left or right edge of the touchpad.
•• Place the focus on the
touchpad.
or
button at the right edge of the screen, drag or flick up or down on the
English - 14
[PF8500-AR]BN68-04813A-03ENG.indb 14
2013-04-03 �� 3:07:12
Using the Top Icons
Use the Back, Forward, and Opened page icons on the top left of the screen to navigate through pages.
These icons are available when two or more pages are passed.
Returning to the Home Page
To return to the home page, press the a button or select
on the top right of the screen.
Searching the Index
Press the b button or select
the page containing the term.
on the top right of the screen to display the index. Select a term to display
Searching Pages
Press the { button or select
on the top of the screen to access the search screen. Enter a search
phrase and select Done. Select an item from the search results list to navigate to the relevant page.
Closing the e-Manual
To close the e-Manual, press hold the RETURN button or select
screen.
at the upper-right corner of the
Jumping to a Menu Item
To directly jump to the menu item that is described in the current section, select
jump from a menu item directly to the related section in the e-Manual.
Try Now
. It is possible to
If you want to read an e-manual entry on a specific screen menu feature, press the Virtual Remote panel's
or the regular remote's E-MANUAL button to load the corresponding e-manual page.
✎✎ This feature may not be available, depending on the menu.
Updating the e-Manual
Press the ™ button to launch Smart Hub and select Apps, and then select More Apps. The e-Manual can
be updated in the same way with an application update.
On the More Apps screen, select Apps to update. Select e-Manual from the list. The e-Manual starts
updating to the latest version. However, Apps to update appears on the screen only when the update is
required.
English - 15
[PF8500-AR]BN68-04813A-03ENG.indb 15
2013-04-03 �� 3:07:13
Network Configuration
Connecting to a Network
Connecting the Smart TV to a network gives you access to online services such as the Smart Hub, as well
as software updates.
Network Connection - Wireless
Connect the TV to the Internet using a standard router or modem.
Wireless IP Router or Modem
that has a DHCP Server
The LAN Port on the Wall
LAN Cable (Not Supplied)
Wireless Network Precautions
•• This Smart TV supports the IEEE 802.11a/b/g /n communication protocols. Samsung recommends
using IEEE 802.11n. Otherwise when you play video over a network connection, the video may not play
smoothly.
•• To use a wireless network, the TV must be connected to a wireless router or modem. If the wireless
router supports DHCP, the TV can use a DHCP or static IP address to connect to the wireless network.
•• Select a channel that is not currently in use for the wireless router. If the channel set for the
wireless router is currently being used by another device, the result is usually interference and/or a
communications failure.
•• Most wireless networks have an optional security system. To enable a wireless network's security
system, you need to create a security key using characters and numbers. This security key is then
needed to connect to the wireless network.
Network Security Protocols
The TV only supports the following wireless network security protocols and is unable to connect to noncertified wireless routers:
•• Authentication Modes: WEP, WPAPSK, WPA2PSK
•• Encryption Types: WEP, TKIP, AES
If the wireless router has been set to Pure High-throughput (Greenfield) 802.11n mode and the Encryption
Type to WEP or TKIP, Samsung Smart TVs will not support the connection in compliance with the new WiFi certification specifications.
If the wireless router supports WPS (Wi-Fi Protected Setup), it is possible to connect to the network using
PBC (Push Button Configuration) or a PIN (Personal Identification Number). WPS automatically configures
the SSID and WPA key settings.
English - 16
[PF8500-AR]BN68-04813A-03ENG.indb 16
2013-04-03 �� 3:07:13
Network Connection - Wired
There are three main ways to connect your TV to your network using cable, depending on your network
setup. They are illustrated starting below:
TV Rear Panel
The Modem Port on the Wall
External Modem
(ADSL / VDSL / Cable TV)
Modem Cable (Not Supplied)
LAN Cable (Not Supplied)
TV Rear Panel
The Modem Port on the Wall
External Modem
(ADSL / VDSL / Cable TV)
Modem Cable
(Not Supplied)
IP Router that has a
DHCP Server
LAN Cable
(Not Supplied)
LAN Cable
(Not Supplied)
TV Rear Panel
The LAN Port on the Wall
LAN Cable (Not Supplied)
✎✎ The TV does not support network speeds less than or equal to 10Mbps.
✎✎ Use Cat 7 cable for the connection.
English - 17
[PF8500-AR]BN68-04813A-03ENG.indb 17
2013-04-03 �� 3:07:14
3D Basics
3D Active Glasses
Features
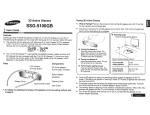
Samsung's SSG-5100GB 3D glasses enable you to view 3D images on your 3D TV. The Samsung 3D
glasses communicate with Samsung 3D TVs via the 2.4GHz RF band.
✎✎ The Samsung 3D glasses are only compatible with Samsung D, E, and F series 3D TV's that are
released 2011, 2012 and 2013. These 3D glasses cannot be connected to other Bluetooth devices.
Parts
✎✎ For details on how to attach the glasses'
LED Indicator & Power Button
temples and how to pair the glasses with the
TV, refer to the separate 3D glasses manual.
Battery Cover
Liquid crystal shutter
Replacing the Battery
If the red LED blinks every two seconds continually, replace the battery with a new one.
✎✎ Insert the "+" side of the battery into the side marked with "+" in the battery compartment.
✎✎ To check the remaining battery capacity, refer to the pairing section in this manual.
Pull the battery cover
downward
Open the battery cover
Remove the battery
Replace the battery
Push the battery cover Close the battery cover
downward
Pairing 3D Active Glasses
✎✎ What is Pairing? Pairing is the process of connecting 3D glasses and a 3D TV so that the two devices
can exchange data.
✎✎ Ensure your Samsung TV and 3D glasses are no farther than 19.5 in (50 cm) apart from each other
while pairing is in progress.
•• Turning the glasses on
Press the power button briefly. The green LED is turned on for 3 seconds.
(Make sure that 3D is activated on the TV before using the 3D glasses.)
•• Turning the glasses off
Press the power button briefly. The red LED is turned on for 3 seconds.
•• Performing the pairing process
Turn the TV on and let it power up completely. Press and hold the Power
button on the glasses. The green and the red LEDs blink alternately for 2
seconds.
English - 18
[PF8500-AR]BN68-04813A-03ENG.indb 18
2013-04-03 �� 3:07:14
•• Operating range
Recommended pairing distance
50cm
2~6m
Recommended viewing distance
2~6m (6.5 to 19.5 ft)
Recommended pairing distance
50 cm or less (19.5 in)
Recommended viewing distance
✎✎ Once the 3D glasses are paired, the remaining battery capacity is displayed on the TV screen. (This
feature only applies to Samsung F series 3D TVs and 3D glasses that have been available since 2013.)
✎✎ If you keep trying to pair the glasses and the TV, the battery level will decrease significantly. However,
the battery level will recover to a certain degree in about a minute.
✎✎ The working distance depends on the existence of obstacles (a person, metal, walls, etc.) between
the glasses and the TV and the strength of the Bluetooth signal.
✎✎ Turn off the 3D glasses while they are not in use. If you leave the 3D glasses on, the battery lifespan
decreases.
Pairing steps
1. Turn on the TV, and then move the glasses within 19.5 inches of the TV.
2. Press the power button on the 3D glasses briefly. The 3D glasses will power on and pairing will start.
3. The message “3D glasses are connected to TV.” will be displayed on the TV screen when the pairing is
successfully completed.
•• If pairing fails, the 3D glasses will power off.
•• If the first attempt to pair fails, power the TV off and on again and perform step 2.
•• How to pair again: Press the power button on the 3D glasses for more than 1 second.
Pairing is needed again in the following situations:
•• If the 3D glasses do not function, even when the power button is pressed, especially with a 3D TV
after a repair.
•• If you want to play 3D content on another Samsung 3D TV model that belongs to the D, E, or F
series released in 2011 through 2013. You must pair the glasses with the other TV.
English - 19
[PF8500-AR]BN68-04813A-03ENG.indb 19
2013-04-03 �� 3:07:14
Watching 3D Video
Some 3D modes may not be available depending on the format of the image source.
To watch in 3D, you must wear 3D Active Glasses and turn the glasses on by pressing the power button.
1. Go to the 3D screen. (Picture > 3D)
2. Select the 3D Mode. The 3D Mode screen appears.
3. Set the 3D Mode of the image you want to view.
Troubleshooting
If you encounter...
Try this...
Replace the battery.
The 3D glasses should be close to the TV. Make sure that the distance
My 3D glasses do not work. between the TV and your 3D glasses is less than 19.5 feet (6m) in a
straight line.
The LED keeps blinking
Check the 3D function settings of your TV.
The battery is dead. Replace the battery.
Specifications (Model Number: SSG-5100GB )
Liquid crystal
Transmittance
36±2%
2 ~ 6m (6.5 to 19.5 ft)
Field Rate
120 fields/second
Optics
Shutters
Recommended
operating
distance
Weight
Glasses
21.5g/.76 oz. (including the battery: 24.0±0.5g/.85.±.018oz. )
Power
Glasses
One 3V lithium/manganese dioxide battery 3V(CR2025)
Glasses
0.85mA (Average)
Battery
Type
Operating time
Power
consumption
Operating
conditions
Operating
temperature
Custody
temperature
165mAh, 3.0V (CR2025)
150 hours
50 °F ~ 104 °F (10°C ~ 40°C)
-4 °F ~ 113 °F (-20°C ~ 45°C)
✎✎ Product specifications may be changed without notice in order to enhance product performance.
✎✎ The continuous operating time may differ depending on the wireless communication environment and
usage conditions.
English - 20
[PF8500-AR]BN68-04813A-03ENG.indb 20
2013-04-03 �� 3:07:15
Troubleshooting and Other Information
What is Remote Support?
Samsung Remote Support service offers you one-on-one support with a Samsung Technician who can
remotely.
•• Diagnose your TV
•• Adjust the TV settings for you
•• Perform a factory reset your TV
•• Install recommended firmware updates
How Does it Work?
Having a Samsung Tech remotely service your TV is really pretty simple
1. Call Samsung
Contact Centre
and ask for remote
support.
2. Open the menu
on your TV and
go to the Support
section.
3. Select Remote
Management and
Provide the Pin# to
the agent.
4. The agent will then
access your TV.
That's it!
English - 21
[PF8500-AR]BN68-04813A-03ENG.indb 21
2013-04-03 �� 3:07:15
Troubleshooting
If you have any questions about the TV, first refer to this list. If none of these troubleshooting tips apply,
please visit “www.samsung.com,” then click on Support, or contact the call centre listed on the back-cover
of this manual.
Issues
Solutions and Explanations
The TV won’t turn on.
• Make sure the AC power cord is securely plugged in to the wall outlet and the TV.
• Make sure the wall outlet is working.
• Try pressing the P button on the TV to make sure the problem is not the remote. If the TV turns on,
refer to “Remote control does not work” below.
There is no picture/video.
• Check the cable connections. Remove and reconnect all cables connected to the TV and external
devices.
• Set the video outputs of your external devices (Cable/Sat Box, DVD, Blu-ray etc) to match the TV's
input connections. For example, if an external device’s output is HDMI, it should be connected to an
HDMI input on the TV.
• Make sure your connected devices are powered on.
• Be sure to select the correct input source.
• Reboot the connected device by unplugging it, and then reconnecting the device’s power cable.
The remote control does not work.
• Replace the remote control batteries. Make sure the batteries are installed with their poles (+/–) in the
correct direction.
• Clean the sensor’s transmission window on the remote.
• Try pointing the remote directly at the TV from 5~6 feet away.
The cable/set top box remote control
doesn’t turn the TV on or off or adjust the
volume.
• Programme the Cable/Set remote control to operate the TV. Refer to the Cable/Set-Top-Box user
manual for the SAMSUNG TV code.
✎✎ To keep your TV in optimum condition, upgrade to the latest firmware on the Samsung web site by
USB (Samsung.com > Support > Downloads).
✎✎ Some of above pictures and functions are available at specific models only.
Mounting the TV on the Wall Using the Wall Mount Kit
(Optional)
Wall or Ceiling Mounting
If you mount this product on a wall, it should be mounted only as recommended by the
manufacturer. Unless it is correctly mounted, the product may slide or fall, causing serious
injury to a child or adult, and serious damage to the product.
Installing the Wall Mount Kit
The wall mount kit (sold separately) lets you mount the TV on the wall.
For detailed information about installing the wall mount, see the instructions provided with the wall mount.
We recommend you contact a technician for assistance when installing the wall mount bracket. We do not
advise you to do it yourself. Samsung Electronics is not responsible for any damage to the product or injury
to yourself or others if you select to install the wall mount on your own.
English - 22
[PF8500-AR]BN68-04813A-03ENG.indb 22
2013-04-03 �� 3:07:15
Installing a Wall Mount
Attaching the Blanking Bracket
Blanking Bracket
For more detailed information, refer to the User
Manual of the Wall Mount Kit when you purchase.
When installing the TV onto a wall, attach the
Blanking Bracket as shown.
Wall Mount Kit Specifications (VESA)
✎✎ The wall mount kit is not supplied, but sold separately. Install your wall mount on a solid wall
perpendicular to the floor. When attaching to other building materials, please contact your nearest
dealer. If installed on a ceiling or slanted wall, it may fall and result in severe personal injury.
✎✎ NOTE
−− Standard dimensions for wall mount kits are shown in the table below.
−− When purchasing our wall mount kit, a detailed installation manual and all parts necessary for
assembly are provided.
−− Do not use screws that do not comply with the VESA standard screw specifications.
−− Do not use screws that are longer than the standard dimension or do not comply with the VESA
standard screw specifications. Screws that are too long may cause damage to the inside of the TV
set.
−− For wall mounts that do not comply with the VESA standard screw specifications, the length of the
screws may differ depending on the wall mount specifications.
−− Do not fasten the screws that are too strongly; this may damage the product or cause the product
to fall, leading to personal injury. Samsung is not liable for these kinds of accidents.
−− Samsung is not liable for product damage or personal injury when a non-VESA or non-specified
wall mount is used or the consumer fails to follow the product installation instructions.
−− Do not mount the TV at more than a 15 degree tilt.
−− Always have two people mount the TV on to a wall.
Product
Family
PDP TV
[Slim type]
Model
VESA Spec.(A x B)
PS51F8500AR
400 X 400
PS60F8500AR
PS64F8500AR
Standard Screw
Quantity
M8
4
600 X 400
Do not install your Wall Mount Kit while your TV is turned on. It may result in personal
injury due to electric shock.
English - 23
[PF8500-AR]BN68-04813A-03ENG.indb 23
2013-04-03 �� 3:07:15
Storage and Maintenance
✎✎ If a sticker was attached to the TV screen, some debris can remain after you remove the sticker.
Please clean the debris off before watching TV.
✎✎ The exterior and screen of the product can get scratched during cleaning. Be sure to wipe the exterior
and screen carefully using the cloth provided or a soft cloth to prevent scratches.
Do not spray water directly onto the product. Any
liquid that goes into the product may cause a
failure, fire, or electric shock.
Clean the product with a soft cloth dampened with
a small amount of water. Do not use a flammable
liquid (e.g. benzene, thinners) or a cleaning agent.
Providing Proper Ventilation for Your TV
When you install your TV, maintain a distance of at least 10 cm between the TV and other objects (walls,
cabinet sides, etc.) to ensure proper ventilation. Failing to maintain proper ventilation may result in a fire or a
problem with the product caused by an increase in its internal temperature.
✎✎ Whether you install your TV using a stand or a wall-mount, we strongly recommend you use parts
provided by Samsung Electronics only.
•• If you use parts provided by another manufacturer, it may cause difficulties with the product or result
in injury caused by the product falling.
Installation with a stand.
Installation with a wall-mount.
10 cm
10 cm
10 cm
10 cm
10 cm
10 cm
10 cm
Other Warnings
✎✎ The actual appearance of the TV may differ from the images in this manual, depending on the model.
✎✎ Be careful when you touch the TV. Some parts can be somewhat hot.
English - 24
[PF8500-AR]BN68-04813A-03ENG.indb 24
2013-04-03 �� 3:07:16
Eco Sensor and Screen Brightness
Eco Sensor measures the light in your room and optimizes the brightness of the TV automatically to reduce
power consumption. This causes the TV to brighten and dim automatically. If you want to turn this function
off, go to Menu > System > Eco Solution > Eco Sensor
Do not block the sensor with any material. It can decrease picture brightness.
1. Eco Sensor: This power-saving feature automatically adjusts the screen brightness of the TV according
to the ambient light intensity detected by the Light Sensor.
2. To enable or disable Eco Sensor, go to System > Eco Solution > Eco Sensor and select On or Off.
3. Precaution: If you find the screen too dark while watching the TV in a dark area, this may be caused by
the Eco Sensor.
English - 25
[PF8500-AR]BN68-04813A-03ENG.indb 25
2013-04-03 �� 3:07:16
Tip Prevention – Securing the TV to the Wall
Caution: Pulling, pushing, or climbing on the TV may cause the
TV to fall. In particular, ensure your children do not hang on or
destabilize the TV. Doing so may cause the TV to tip over, causing
serious injuries or death. Follow all safety precautions provided
in the Safety Flyer included with your TV. For added stability
and safety, you can purchase and install the anti-fall device as
described below.
To Avoid the TV from Falling
1. Put the screws into the clamps and firmly fasten them onto the wall. Confirm that the screws have been
firmly installed onto the wall.
✎✎ You may need additional material such as an anchor depending on the type of wall.
✎✎ Since the necessary clamps, screws, and string are not supplied, please purchase these
additionally.
2. Remove the screws from the back centre of the TV, put the screws into the clamps, and then fasten the
screws onto the TV again.
✎✎ Screws may not be supplied with the product. In this case,
please purchase the screws of the following specifications.
✎✎ Screw Specifications
•• For PS51F8500AR PS60F8500AR PS64F8500AR: M8
3. Connect the clamps fixed onto the TV and the clamps fixed onto the
wall with a strong cable and then tie the string tightly.
✎✎ NOTE
−− Install the TV near to the wall so that it does not fall
backwards.
−− It is safe to connect the string so that the clamps fixed on the
wall are equal to or lower than the clamps fixed on the TV.
−− Untie the string before moving the TV.
Wall
4. Verify all connections are properly secured. Periodically check the
connections for any sign of fatigue or failure. If you have any doubt
about the security of your connections, contact a professional
installer.
English - 26
[PF8500-AR]BN68-04813A-03ENG.indb 26
2013-04-03 �� 3:07:17
Specifications
Specifications - TV
Environmental Considerations
Operating Temperature
Operating Humidity
Storage Temperature
Storage Humidity
10°C to 40°C (50°F to 104°F)
10% to 80%, non-condensing
-20°C to 45°C (-4°F to 113°F)
5% to 95%, non-condensing
Stand Swivel (Left / Right)
0˚
Model Name
Screen Size
(Diagonal)
PS51F8500
PS60F8500
PS64F8500
129 cm
152 cm
163 cm
Sound
(Output)
Dimensions (W x H x D)
Body
With stand
10W x 2
119.0 x 71.1 x 5.5 cm
119.0 x 74.6 x 27.0 cm
139.2 x 83.1 x 5.5 cm
139.2 x 87.2 x 30.0 cm
148.2 x 88.0 x 5.5 cm
148.2 x 92.2 x 32.0 cm
20.9 Kg
23.4 Kg
29.2 Kg
32.4 Kg
32.8 Kg
36.2 Kg
1920 x 1080
1920 x 1080 (Black & White)
1920 x 1080
Weight
Without Stand
With Stand
Display Resolution
✎✎ Design and specifications are subject to change without prior notice.
✎✎ For information about the power supply, and more about power consumption, refer to the label
attached to the product.
✎✎ The actual appearance of the TV may differ from the images in this manual, depending on the model.
Standby mode
To decrease power consumption unplug the power cord when you don't use the TV for a long time.
English - 27
[PF8500-AR]BN68-04813A-03ENG.indb 27
2013-04-03 �� 3:07:17
L
C
LECOMMUN
TE
I
NS
TIO
CA
NATI
ON
A
Licences
OM
MISSI
O
N
Approved by PTA (2013)
Model : SSG-5100GB
BTA
REGISTERED No. :
BTA/TA/2012/385
NTC TAC
No.: ESD-XXXXXXXX
OMAN-TRA
TRA/TA-R/XXXX/YY
D100086
AGREE PAR L’ANRT Mauritanie
Numéro d’agrément : 0099/ARE/2012
Date d’agrément : 02/12/2012
TA-2012/1903
APPROVED
TRA
REGISTERED No. : ER0101541/13
DEALER No. : 0016333/08
ZMB/ZICTA/TA/
2013/1/1
28453/
SDPPI/2013
1258
Approval No : 18ETA12
Model : SSG-5100GB
Approved by PTA (2013)
Model : RMCTPF
AGREE PAR L’ANRT Mauritanie
Numéro d’agrément :0109/ARE/2013
Date d’agrément :28/01/2013
TA-2012/1902
APPROVED
English - 28
[PF8500-AR]BN68-04813A-03ENG.indb 28
2013-04-03 �� 3:07:18
User Instructions
•• Screen Image retention
Do not display a still image (such as on a video game) including the some small fixed logo on the
plasma display panel for more than several minutes as it can cause screen image retention. This
image retention is also known as “screen burn”. To avoid such image retention, reduce the degree of
brightness and contrast of the screen when displaying a still image.
•• Heat on the top of the Plasma TV
The top side of the product may be hot after long periods of use as heat dissipates from the panel
through the vent hole in the upper part of the product.
This is normal and does not indicate any defect or operation failure of the product.
However, children should be prevented from touching the upper part of the product.
•• The product is making a “cracking” noise.
A “cracking” noise may occur when the product contracts or expands due to a change in the
surrounding environment such as temperature or humidity. This is normal and not a defect of the unit.
•• Cell Defects
The PDP uses a panel consisting of 2,360,000(HD-level) to 6,221,000(FHD-level) pixels which require
sophisticated technology to produce. However, there may be a few bright or dark pixels on the screen.
These pixels will have no impact on the performance of the product.
•• Avoid operating the TV at temperatures below 41°F (5°C)
•• A still image displayed too long may cause permanent damage to the PDP Panel.
Watching the Plasma TV in 4:3 format for a long period of time may leave traces of
borders displayed on the left, right and centre of the screen caused by the difference of
light emission on the screen. Playing a DVD or a game console may cause similar effects
to the screen.
Damages caused by the above effect are not covered by the Warranty.
•• After-images on the Screen.
Displaying still images from Video games and PC for longer than a certain period of time may produce
partial after-images. To prevent this effect, reduce the “brightness” and “contrast” when displaying still
images for a long time.
•• Warranty
Warranty does not cover any damage caused by image retention.
Burn-in is not covered by the warranty.
•• Caution
The glass screen of your PDP TV can break if you accidently drop the TV. Handle the TV with
care. When moving the TV, always have two or more people pick it up and carry it as a safety
precaution. Do not lay the TV flat on its face or back.
Your Samsung Plasma TV is a high quality television that has been carefully packaged to protect the
integrity of its glass panel and component parts during shipment. It is, nonetheless, a fragile piece of
electronics that requires careful handling. Refrain from putting undue stress on any part of the packaging
when shipping or unpacking the TV. Use care when installing the TV. Avoid placing the TV in a location
where it may be struck, exposed to sharp impacts, or fall. Panel breakage caused by a fall or impact strike
is not covered under the manufacturer's warranty.
English - 29
[PF8500-AR]BN68-04813A-03ENG.indb 29
2013-04-03 �� 3:07:18