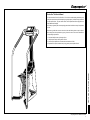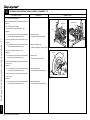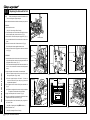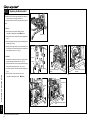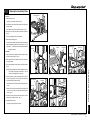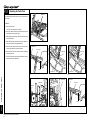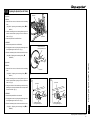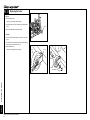
1
CAT EYE ERGOCISER
STAIR CLIMBER TYPE
Applicable Model EC-5000
SERVICE MANUAL
EC-5000
INDEX
• Name of Parts ------------------------------------------------------------------------------------------------------------- 4~5
Part B
Removing / Mounting the Frame Covers
D-1: Removing the Frame Covers ----------------------------------------------------------------------------- 28
• Circuit Diagram -------------------------------------------------------------------------------------------------------------- 6
D-2: Mounting the Frame Covers ------------------------------------------------------------------------------- 29
INTRODUCTION
• How to Use This Service Manual --------------------------------------------------------------------------------------- 3
Part A
Symptoms of Problems & Causes
Repair Methods
ES-1:
Replacing the Wiring within Frame (Inlet Metal Base Set) ------------------------------------------- 30
No Display on Control Unit after Power ON
ES-2:
Replacing the 5P Cable ---------------------------------------------------------------------------------------- 31
1. Back light does not turn on --------------------------------------------------------------------------------- 7~8
ES-3:
Replacing the Power Supply Board ------------------------------------------------------------------------- 32
2. Back light turns on ----------------------------------------------------------------------------------------------- 9
ES-4:
Correcting the Postion of Solenoid Coil -------------------------------------------------------------------- 33
T-2:
No Display of Cadence when the Pedal is Rotated -------------------------------------------------- 10~13
ES-5:
Replacing the Slenoid Coil Set ------------------------------------------------------------------------------- 34
T-3:
No Display of Pulse Rate ----------------------------------------------------------------------------------------- 14
ES-6:
Replacing the CDC Sensor set ------------------------------------------------------------------------------- 35
T-4:
No Display of Heart Rate (The Case with Wireless Chestbelt Pulse Sensor Kit) ------------ 15~16
ES-7:
Replacing the CDC Sensor Cable --------------------------------------------------------------------------- 36
T-5:
Improper Display on Control Unit ------------------------------------------------------------------------------- 17
ES-8:
Correcting the Postion of CDC Sensor --------------------------------------------------------------------- 37
T-6:
No Cadence Control
ES-9:
Replacing the Control Unit ------------------------------------------------------------------------------------ 38
1. Slower cadence control is not possible -------------------------------------------------------------- 18~19
ES-10: Replacing the Button Panel ----------------------------------------------------------------------------------- 39
2. Faster cadence control is not possible -------------------------------------------------------------- 20~23
MS-1:
Replacing the Workload Unit --------------------------------------------------------------------------------- 40
T-7:
Pedal will not be Restored to Original Position ------------------------------------------------------------- 24
MS-2:
Replacing the Accelerating Chain --------------------------------------------------------------------------- 41
T-8:
Unusual Noise
MS-3:
Replacing the Pedal Chain ------------------------------------------------------------------------------------ 42
1. Continuous and Increasing ----------------------------------------------------------------------------- 25~26
MS-4:
Replacing the V-Belt -------------------------------------------------------------------------------------------- 43
2. Unusual Noise Synchronized with Pedal Rotation ---------------------------------------------------- 27
MS-5:
Replacing the Idler Set ----------------------------------------------------------------------------------------- 44
MS-6:
Replacing the Pulley A ----------------------------------------------------------------------------------------- 45
MS-7:
Replacing the V-Belt tension Pulley ------------------------------------------------------------------------ 46
MS-8:
Replacing the Sprocket (Gear for Chains) ---------------------------------------------------------------- 47
MS-9:
Replacing the Shaft Set A ------------------------------------------------------------------------------------- 48
T-1:
MS-10: Replacing the Spring -------------------------------------------------------------------------------------------- 49
MS-11: Replacing the Spring Pulley Set ----------------------------------------------------------------------------- 50
MS-12: Replacing the Linkstep Set ------------------------------------------------------------------------------- 51~52
MS-13: Replacing the Pedal Stopper --------------------------------------------------------------------------------- 53
MS-14: Replacing the BB Set ------------------------------------------------------------------------------------------- 54
MS-15: Replacing the Front Reg Cover ------------------------------------------------------------------------------ 55
MS-16: Replacing the Caster -------------------------------------------------------------------------------------------- 56
INDEX
MS-17: Replacing the Rubber Stopper ------------------------------------------------------------------------------- 57
MS-18: Replacing the Tray ----------------------------------------------------------------------------------------------- 58
Part C
List of Genuine Parts --------------------------------------------------------------------------------------------------- 59~62
Cateye Ergociser EC-5000 Service Manual
2
How to Use This Service Manual
The manual consists of Part A, Part B and Part C. Part A refers to trouble-shooting which allows you to
identify the cause and areas to be fixed depending on typical symptoms. Part B shows how to repair and/
or adjust specific defects. This part contains sections; How to Repair Electrical Parts [ES] and How to
Repair Mechanical Parts [MS].
Part C lists up all genuine parts and corresponding parts numbers that will be necessary for replacement
or stock.
Whenever any problem has occurred on the main unit, take the following actions to repair or adjust it.
Before taking these actions,please always put on gloves and be sure to refer to and understand the
corresponding work procedures.
1. Check and identify the cause by referring to Part A.
2. Identify the part name by referring to Name of Parts.
3. Perform repair or adjustment in accordance with the instructions in Part B.
How to Use This Service Manual
4. Replacement, if required, should be done by using genuine parts as specified in Part C.
Cateye Ergociser EC-5000 Service Manual
3
EC-5000
Name of Parts
Consolepost Fastening Bolt
3 (cap bolt M8 x 25)
Pedal Chain
Coad Clip
Pully A
Sprocket A
Shaft Set A
t Crank Nut
5P Cable
Coad Clip
Axle & Nut Set (R/L)
V-Belt
o
Spring
Tapping Screw(2) 4 x 12
Power Suplly Board
Spring Pully Set
e Hexagonal Nut M8-3
Chain Joint
2P Cable
(Inlet Metal Base Set)
Rubber Stopper
Caster
Hexagonal Nut 10-1
Bolt (+) M6 x 45
Leg Cover
6 Spring Washer 6
9 Plain Washer 6-22-1.6
w Hexagonal Nut M6-1
Levelling Knob
Name of Parts
EC-5000 Pully B Set
Frame
Caster Pipe
CDC Sensor Cable
i Bolt (+) M6 x 16
V-Belt Tension Pulley
Cateye Ergociser EC-5000 Service Manual
4
Linkstep Set
y
r
5
Step Stopper
Step
t Crank Nut
Shaft Set A
Pedal Chain
Sprocket A
Chain Joint
5P Cable
Frame
Pully A
Sprocket B
Spring
1 Cap Bolt M6 x 22
Spring Pully Set
Copper Plate
Workload Unit
Caster
Plain Washer 6-13-1.0
E-Ring 4
8
q
Bolt (+) M6 x 12
u
Idler Set
Idler Spring
Tapping Screw (B) 4 x 16
Link Step Set
Accelerating
Chain
Rubber Stopper
Name of Parts
CDC Sensor Set
Solenoid Coil
4
CDC Sensor Cable
Solenoid Coil Fixing Metal Base
Cap Bot M8 x 20
Spring Washer 8
2
7
Plain Washer 8-17-1.6
0
Cateye Ergociser EC-5000 Service Manual
5
EC-5000
Circuit Diagram
Inlet Metal Base Set(2PCable)
AC Adapter
AC100V
Black Cable(−)
DC12V※
−
Switch
AC Plug
+
Red Cable(+)
DC Pulg
※Fluctuate depending on the electric load
about 16V when the load is zero.
JP6
AC Adapter Inlet
DC Power Supply
JP6
(2PConnector)
2 +
Power Supply Control Circuit
VI
1 −
JP1
(4PConnector)
REG
−
G
N
D
C1
CDC Sensor
※※
1
VO
C2
−
R76
2.2K
2
3
4
JP3
(3PConnector)
JP4
(5PConnector)
1
1
2
2
12VPower Supply
3
5VPower Supply
D3
3
Q4
U26A
R57
1
R53
2
VR2
4
5
+
3
−
C14
C15
+
R55
R54
R58
R56
Circuit Diagram
Solenoid Coil Current Control Circuit
Power Supply Board
Workload Unit - Copper Disk Plate
Coil
Electromagnet
※※
CDC Sensor
Cateye Ergociser EC-5000 Service Manual
6
CDC Sensor Turn Board
Speed Sensor Signal
Common Line
Solenoid Coil Current
Control Signal
T-1-1
No Display on Control Unit after Power ON. (Back light does not turn on.) (1)
Check Method of Causes
Explanation Figures
Repair Method
Check the power is available at the wall socket before proceeding to
checking of causes.
Normal for 14V thru 19V
Control Unit
[1] Checking the AC Adapter
Cable Connector
2. Connect the AC plug of the AC adapter to the wall socket.
3. Using a tester, measure the voltage at the DC plug which will
be connected to the main unit. (Fig. 1)
DC Plug Black Cable
The inner area of the DC plug is minus (-) and the outer area is
plus (+).
Tapping Screw
[Note]: Never short-circuit the plug of AC adapter. This will
damage the AC adapter.
Fig.1
Fig.2
[Judgment]
ⓦ When the measured voltage is within the range of 14V to
19V, the AC adapter will be working fine.
ⓦ When the measured voltage is 0V or less than 14V, the AC
adapter will be defective. In this case, you need to take
actions as specified in the repair method (a) described at
the right.
(a)
Replace the AC adapter.
When the AC adapter is found to be correct, proceed to the following
checkings.
[2] Checking the Wiring of Control Unit
1. Loosen the seven screws on the control unit cover to remove
the control unit. (Fig. 2)
2. Remove the cable connector at the tip of the 5P cable from the
cable inlet which is located at the back of the control unit. (Fig.
2)
(b) Firmly connect the 5P cable connector to the cable
inlet at the back of the control unit before installing
the control unit.
(See [ES-9: Replacing the Control Unit].)
T-1-1
ⓦ When the 5P cable has been already disconnected, this
will be the cause. In this case you need to take actions as
specified in the repair method (b) described at the right.
No Display on Control Unit after Power ON. (Back light does not turn on.) (1)
Red Cable
1. Turn off the power of the main unit, and detach the DC plug
from the AC adapter.
Cateye Ergociser EC-5000 Service Manual
7
T-1-1
No Display on Control Unit after Power ON. (Back light does not turn on.) (2)
Check Method of Causes
Repair Method
Explanation Figures
[3] Checking the Wiring within the Main Unit
Power Supply
Board
The case a short-circuiting is found:0/no short-circuiting:1.
1. Remove the cover of the main unit set.
T-1-1
No Display on Control Unit after Power ON. (Back light does not turn on.) (2)
(See [D-1: Removing the Frame Covers].)
5P Connector
2. Check if the 5P connector and the 2P connector of the inlet
metal base set are connected to the power supply board. (Fig.
3)
Red Cable
(Terminal 2)
2P Connector
[Judgment]
ⓦ When the 5P connector has been already disconnected,
this will be the cause. In this case you need to take actions
as specified in the repair method (c) described at the right.
(c) Firmly connect the 5P connector to the power sup-
ⓦ When the 2P connector has been already disconnected,
this will be the cause. In this case you need to take actions
as specified in the repair method (d) described at the right.
(d) Firmly connect the 2P connector to the power supply board.
ply board.
Black Cable
(Terminal 2)
5P Cable
Fig.4
Fig.3
When both 5P and 2P connectors are connected, proceed to the
following checkings:
Normal for 14V thru 19V
3. Remove the 5P connector at the power supply board. (Fig. 3)
Black Cable
(Terminal 1)
4. Check the short-circuiting by using a tester across the two connectors of the 5P cable (across two Terminal No. 2s). (Fig. 4)
If the two connectors are short-circuited, the tester reading will
be zero (0).
[Judgment]
ⓦ When there is no short-circuiting, the 5P cable may be disconnected.
(e) Replace the 5P cable. (See [ES-2: Replacing the
5P Cable].)
Power Cable
In this case, you need to take actions as specified in the repair
Fig.5
method (e) described at the right.
When short-circuiting is found, check the following:
5. Remove the 2P connector at the power supply board. (Fig. 3)
6. Connect the AC adapter to the main unit, and turn on the main
unit.
7. Measure the voltage by using a tester across the terminals of
the 2P connector. (Fig. 5)
The Terminal 1 is for minus (-) and Terminal 2 is for plus (+).
[Judgment]
ⓦ When the voltage is not same as in the case of checking
procedure [1] (in the range of 14V to 19V), the inlet metal
base set might be defective, or the 2P cable might be disconnected. In this case, you need to take actions as specified in the repair method (f) described at the right.
Cateye Ergociser EC-5000 Service Manual
8
(f) Replace the inlet metal base set.
(See [ES-1: Replacing the Wiring within
Frame (Inlet Metal Base Set)].)
Red Cable
(Terminal 2)
T-1-2
No Display on Control Unit after Power ON. (Back light turns on.)
Check Method of Causes
Explanation Figures
Repair Method
[1] Checking the Control Unit
Control Unit
1. Turn off the power of the main unit.
5P Connector
Cable Connector
2. Remove seven tapping screws at the cover of control unit, and
Power Supply Board
detach the control unit. (Fig. 1)
3. Disconnect the cable connector, which is at the tip of the 5P
cable, from the cable inlet at the back of the control unit. (Fig.
1)
4. Connect the 5P cable to the new control unit, and install to the
No Display on Control Unit after Power ON. (Back light turns on.)
control unit cover.
5. Turn on the power of the main unit, and check the display.
[Judgment]
ⓦ When the display works in the above procedures, the previous control unit might be defective. In this case, you need
to take actions as specified in the repair method (a) described at the right.
Tapping Screw
(a) Replace the control unit.
(See [ES-9: Replacing the Control Unit].)
Fig.2
Fig.1
The case a short-circuiting is found:0/no short-circuiting:1.
[2] Checking the 5P Cable
1. Remove the cover of the main unit set.
(See [D-1: Removing the Frame Covers].)
Red Cable
(Terminal 3)
Remove the 5P connector at the power supply board. (Fig. 2)
3. Check the short-circuiting by using a tester across the two connectors of the 5P cable (across two Terminal No. 3s). (Fig. 3)
Black Cable
(Terminal 3)
If the two connectors are short-circuited, the tester reading will
be zero (0).
5P Cable
[Judgment]
ⓦ When a short-circuiting is found, the power supply board
might be defective. In this case, you need to take actions
as specified in the repair method (b) described at the right.
(b) Replace the power supply board.
ⓦ When there is no short-circuiting, the 5P cable may be disconnected.
In this case, you need to take actions as specified in the
repair method (c) described at the right.
(c) Replace the 5P cable.
Fig.3
(See [ES-3: Replacing the Power Supply Board].)
(See [ES-2: Replacing the 5P Cable].)
T-1-2
2.
Cateye Ergociser EC-5000 Service Manual
9
T-2
No Display of Cadence when the Pedal is Rotated. (1)
Check Method of Causes
Repair Method
Explanation Figures
[1] Checking the Control Unit
1. Turn off the power of the main unit.
2. Loosen the seven screws on the cover of the control unit to
remove the control unit. (Fig. 1)
3. Remove the cable connector, which is at the tip of the 5P
cable, from the cable inlet at back of the control unit. (Fig. 1)
4. Turn on the power of the main unit.
5. Slowly move the pedal while measuring the voltage across the
terminals 1 and 4 of the cable connector. (Fig. 2)
Control Unit
Nomal condition: Frequently shifting
between 0V & 5V
Cable Connector
Red Cable
(Terminal 1)
Black Cable
(Terminal 4)
The Terminal 1 is for plus (+) and Terminal 4 is for minus (-).
T-2
No Display of Cadence when the Pedal is Rotated. (1)
[Judgment]
ⓦ When the voltage frequently changes between approx. 5V
and 0V, this shows that the main unit set is working fine but
that the control unit might be defective. In this case, you
need to take actions as specified in the repair method (a)
as described at the right.
ⓦ When the voltage does not change as stated above, check
and record the voltage readings. These numbers will be
necessary at later stages as conditions for checks and
[Judgment].
(a) Replace the control unit.
Tapping Screw
(See [ES-9: Replacing the Control Unit].)
Cable Connector
Fig.1
Fig.2
5P Connector
The case a short-circuiting is found:0/no short-circuiting:1.
Power Supply Board
When the voltage changes are found to be abnormal, check the following items:
Red Cable
(Terminal 4)
[2] Checking the 5P Cable
Black Cable
(Terminal 4)
1. Turn off the power of the main unit.
2. Remove the cover of the main unit set.
(See [D-1: Removing the Frame Covers].)
3. Remove the 5P connector at the power supply board. (Fig. 3)
4. Check the short-circuiting by using a tester across the two connectors (Terminals No. 4) across the 5P cable. (Fig. 4)
5P Cable
Fig.3
When there is a short-circuiting, the tester reading will be zero (0).
[Judgment]
ⓦ When there is no short-circuiting, the 5P cable might be
disconnected.
In this case, you need to take actions as specified in the
repair method (b) as described at the right.
ⓦ When there is a short-circuiting and the voltage having
been checked during the procedure [1] is approx. 2V to 3V,
the CDC sensor might be defective. In this case, you need
to take actions as specified in the repair method (c) as described at the right.
When there is a short-circuiting and the voltage having been
checked during the procedure [1] is 0V or fixed at approx. 5V, proceed to check [3].
Cateye Ergociser EC-5000 Service Manual
10
(b) Replace the 5P cable.
(See [ES-2: Replacing the 5P Cable].)
(c) Replace the CDC sensor set.
(See [ES-6: Replacing the CDC Sensor Set].)
Fig.4
T-2
No Display of Cadence when the Pedal is Rotated. (2)
Check Method of Causes
Explanation Figures
Repair Method
When the voltage having been checked during the procedure [1] on
the previous page is 0V or fixed at approx. 5V, proceed to the follow-
CDC Sensor Set
Power Supply Board
ing procedures.
[3] Checking the CDC Sensor
1. Replace the CDC sensor cable with a new one.
A. Remove the CDC sensor cable from the CDC sensor set.
(Fig. 5)
4P Connector
B. Remove the 4P connector at the power supply board, and
then remove the CDC sensor cable. (Fig. 6)
C. Connect the 4P connector, which is at the tip of the new
CDC sensor cable, to both the CDC sensor set and the
connector at the power supply board. (Figs. 5 and 6)
CDC Sensor Cable
the voltage. (Fig. 7)
Nomal condition: Frequently shifting
between 0V & 5V
5P Connector
A. Turn on the power of the main unit.
B. Slowly move the pedal while measuring the voltage across
Power Supply Board
Red Cable
(Terminal 1)
the terminals 1 and 4 at the cable connector of the 5P cable
(5P connector at the side of the control unit connection).
Black Cable
(Terminal 4)
(Fig. 8)
Terminal 1 is for plus (+) and Terminal 4 is for minus (-).
C. The CDC sensor is working fine when the voltage frequently
changes between approx. 5V and 0V.
[Judgment]
ⓦ When the voltage check is found to be alright, the CDC
sensor cable might be disconnected. In this case, you
need to take actions as specified in the repair method (d)
as described at the right.
(d) Replace the CDC sensor cable.
(See [ES-7: Replacing the CDC Sensor
Cable Connector
Fig.7
Fig.8
Cable].)
When the voltage check is found to be incorrect, proceed to the
T-2
checking procedures on the next page.
No Display of Cadence when the Pedal is Rotated. (2)
Fig.6
Fig.5
2. Connect the 5P cable to the power supply board, and check
Cateye Ergociser EC-5000 Service Manual
11
T-2
No Display of Cadence when the Pedal is Rotated. (3)
Check Method of Causes
Repair Method
Explanation Figures
[3] Checking the CDC Sensor (Continued)
3. Remove the CDC sensor set.
CDC Sensor Set
Turn Board
A. Remove the CDC sensor set by loosening screws. (Fig. 9)
B. Disconnect the CDC sensor cable from the CDC sensor set.
4. Rotate the CDC magnet to check if it is damaged or clogged.
(Fig. 10)
[Judgment]
ⓦ Damaged CDC magnet will be the cause of the problem. In
this case, you need to take actions as specified in the repair method (e) as described at the right.
(e)
Replace the workload unit. (See [MS-1: Re-
placing the Workload Unit].)
CDC Sensor Metal
Base
CDC Sensor Cable
5. When the CDC magnet is clogged, remove dust from the magnet.
Fig.10
Fig.9
T-2
No Display of Cadence when the Pedal is Rotated. (3)
6. Install the CDC sensor set.
5P Cable
A. First, connect the CDC sensor set and the CDC sensor
cable, and then mount it to the CDC sensor metal base.
Power Supply Board
(Fig. 9)
CDC Sensor Set
Turn Board
B. Rotate the CDC sensor around the screw, and adjust the
sensor so that it can be positioned to parallel with the CDC
magnet with the condition that the sensor does not touch the
magnet. (Fig. 11)
Parallel
7. Connect the 5P cable to the power supply board, and check
the voltage. (Fig. 12)
A. Turn on the power of the main unit.
B. Slowly move the pedal while measuring the voltage across
the terminals 1 and 4 at the cable connector of the 5P cable
Fig.11
(5P connector at the side of the control unit connection).
(Fig. 13) Terminal 1 is for plus (+) and Terminal 4 is for
Fig.12
Nomal condition: Frequently shifting
between 0V & 5V
minus (-).
Red Cable
(Terminal 1)
C. The CDC sensor is working fine when the voltage frequently
changes between approx. 5V and 0V.
[Judgment]
ⓦ When the voltage check is found to be all right, the possible
cause is the clogging of the CDC magnet or incorrect positioning of the CDC sensor. In this case, you need to take
actions as specified in the repair method (f) as described at
the right.
When the voltage is not correct, proceed to the checking procedures
described on the next page.
Cateye Ergociser EC-5000 Service Manual
12
(f)
Present status is correct. Go ahead to assemble Ergociser.
Cable Connector
Fig.13
Black Cable
(Terminal 4)
T-2
No Display of Cadence when the Pedal is Rotated. (4)
Check Method of Causes
Explanation Figures
Repair Method
[3] Checking the CDC Sensor (Continued)
8. Replace the CDC sensor set with a new one.
CDC Sensor Set
A. Remove the CDC sensor set by loosening screws. (Fig. 14)
B. Detach the CDC sensor cable from the CDC sensor set.
CDC Sensor Set
Turn Board
C. First, connect the CDC sensor set and the CDC sensor
cable, and then mount it to the CDC sensor metal base.
(Fig. 14)
Parallel
D. Rotate the CDC sensor around the screw, and adjust the
CDC Sensor Metal
Base
sensor so that it can be positioned to parallel with the CDC
magnet with the condition that the sensor does not touch the
CDC Sensor Cable
magnet. (Fig. 15)
9. Connect the 5P cable to the power supply board, and check
the voltage. (Fig. 16)
Fig.15
Fig.14
A. Turn on the power of the main unit.
B. Slowly move the pedal while measuring the voltage across
the terminals 1 and 4 at the cable connector of the 5P cable
Red Cable
(Terminal 1)
(5P connector at the side of the control unit connection).
(Fig. 17)
No Display of Cadence when the Pedal is Rotated. (4)
Nomal condition: Frequently shifting
between 0V & 5V
Black Cable
(Terminal 4)
Terminal 1 is for plus (+) and Terminal 4 is for minus (-).
C. The CDC sensor is working fine when the voltage frequently
changes between approx. 5V and 0V.
[Judgment]
ⓦ When the voltage check is found to be all right, the possible
cause is the breakage of the CDC sensor. In this case, you
need to take actions as specified in the repair method (g)
as described at the right.
(g) Replace the CDC sensor set.
ⓦ When the voltage is incorrect, the possible cause is the
breakage of the power supply board. In this case, you
need to take actions as specified in the repair method (h)
as described at the right.
(h) Replace the power supply board.
(See [ES-6: Replacing the CDC Sensor Set].)
Cable Connector
Fig.16
T-2
(See [ES-3: Replacing the Power Supply
Board].)
Cateye Ergociser EC-5000 Service Manual
13
T-3
No Display of Pulse Rate
Check Method of Causes
Repair Method
1. Turn on the power of the main unit to display the in-training
screen (any exercise program).
2. Install a brand new pulse sensor, and check if pulse rate will be
displayed.
[Judgment]
(a) Replace the pulse sensor.
ⓦ If the pulse rate cannot be displayed, the control unit is defective. In this case, you need to take actions as specified
in the repair method (b) described at the right.
(b) Replace the control unit.
T-3
No Display of Pulse Rate
ⓦ If the pulse rate can be displayed, the old pulse sensor is
defective. In this case, you need to take actions as specified in the repair method (a) described at the right.
Cateye Ergociser EC-5000 Service Manual
14
(See [ES-9: Replacing the Control Unit].)
Explanation Figures
No Display of Heart Rate (The case with Wireless Chestbelt Pulse Sensor Kit) (1)
Check Method of Causes
Explanation Figures
Repair Method
First, check the items as described in the section [Trouble-Shooting
and Handling Care] of the Operating Instructions which comes with
the Wireless Chestbelt Pulse Sensor Kit.
Cable Connector
Control Unit
When the symptom does not go with those items, proceed to the
following checks.
[1] Checking the Wireless Chestbelt Pulse Sensor
1. Turn on the power to display the in-training screen (any exercise program).
2. Install a new transmitter on the chestbelt as described in the
operating Instructions for the Wireless Chestbelt Pulse Sensor
Control Unit
Kit.
Check if your pulse rate will be displayed.
Tapping Screw
[Judgment]
ⓦ When the heart rate can be displayed, the previous transmitter might be defective. In this case, you need to take
actions as specified in the repair method (a) described at
the right.
Fig.2
Fig.1
(a) Replace the transmitter.
Control Unit
Receiver Board
When the heart rate cannot be displayed, proceed to the following
checks.
[2] Checking the Receiver Board
1. Turn off the power of the main unit.
2. Remove seven tapping screws on the control unit cover and
detach the control unit. (Fig. 1)
3. Disconnect the cable connector, which is at the tip of the 5P
cable, from the cable inlet at the back of the control unit. (Fig.
Connector Cable
Fig.3
1)
4. Remove ten screws at the back of the control unit and remove
the rear panel of the control unit. (Fig. 2)
5. Check that connectors at both ends of the connector cable
which connects the receiver board and the board within the
control panel are not disconnected from respective boards.
(Fig. 3)
[Judgment]
(b) Firmly connect the connector cable to the connectors of both the receiver board and the control unit.
18 27
ⓦ The disconnected connectors are the possible cause of the
problem.
In this case, you need to take actions as specified in the
repair method (b) described at the right.
No Display of Heart Rate (The case with Wireless Chestbelt Pulse Sensor Kit) (1)
T-4
When the connector cable is correctly connected, proceed to the
procedures as described in the next page.
Cateye Ergociser EC-5000 Service Manual
15
T-4
No Display of Heart Rate (The case with Wireless Chestbelt Pulse Sensor Kit) (2)
Check Method of Causes
Repair Method
Explanation Figures
[2] Checking the Receiver Board (Continued)
Control Unit
6. Replace the connector cable with a new one. (Fig. 4)
Control Unit Under Cover
Receiver Board
cover has been detached from the control unit. (Fig. 5)
8. Turn on the power to display the in-training screen (any exercise program).
9. Check if the heart rate will be displayed.
[Judgment]
ⓦ When the heart rate can be displayed, the previous connector cable might be defective. In this case, you need to
take actions as specified in the repair method (c) described
at the right.
(c) Replace the connector cable.
Control Unit
Connector Cable
Fig.4
When the heart rate cannot be displayed, proceed to the following
checks.
Fig.5
Control Unit
Control Unit
Receiver Board
10. Turn off the power of the main unit.
11. Replace the receiver board with a brandnew one. (Fig. 6)
12. Turn on the power to display the in-training screen (any exercise program.)
13. Check if the heart rate will be displayed.
[Judgment]
ⓦ When the heart rate can be displayed, the previous receiver board might be defective. In this case, you need to
take actions as specified in the repair method (d) described
at the right.
(d) Replace the receiver board.
ⓦ When the heart rate cannot be displayed, the control unit
might be defective. In this case, you need to take actions
as specified in the repair method (e) described at the right.
(e) Replace the control unit.
T-4
No Display of Heart Rate (The case with Wireless Chestbelt Pulse Sensor Kit) (2)
7. Connect the 5P cable to the control unit. Note that the rear
Cateye Ergociser EC-5000 Service Manual
16
(See [ES-9: Replacing the Control Unit].)
5P Cable
Fig.6
Fig.7
T-5
Improper Display on Control Unit
Check Method of Causes
Repair Method
Explanation Figures
In case of the problems stated below, check should be made by referring to corresponding “Symptoms of Problems & Causes.”
· No display of cadence is possible even when the pedal is rotated. (See T-2.)
· No display of pulse rate is possible. (See T-3.)
· No display of heart rate is possible. (In the case of the Wireless Chestbelt Pulse Sensor Kit is used.) (See T-4.)
[1] The displayed language is different from the one described in the
Operating Instructions.
ⓦ You need to take actions as specified in the repair method
(a) described at the right.
(a) Operate the select switch on the back of the control unit.
(See [ES-9: Replacing the Control Unit]: ASSEMBLE: 2.)
[2] Pulse rate, etc. can be displayed, but corresponding graphs cannot be displayed.
ⓦ You need to take actions as specified in the repair method
(b) described at the right.
(b) Replace the control unit.
(See [ES-9: Replacing the Control Unit].)
[3] Other problems (including breakage of display unit, and unclear
(c) Replace the control unit.
(See [ES-9: Replacing the Control Unit].).
T-5
ⓦ You need to take actions as specified in the repair method
(c) described at the right.
Improper Display on Control Unit
display quality)
Cateye Ergociser EC-5000 Service Manual
17
T-6-1
No Cadence Control (Slower cadence control is not possible.) (1)
Check Method of Causes
<1>
Repair Method
Explanation Figures
Checking the Mechanical System
Remove the cover of the main unit set, and observe the inner area of
Accelerating Chain
Pedal Chain
the main unit.
(See [D-1: Removing the Frame Covers].)
1. Check if the pedal chain has not been broken. (Fig. 1)
V-belt
[Judgment]
(a) Replace the pedal chain.
(See [MS-3: Replacing the Pedal Chain].)
2. Check if the accelerating chain has not been broken. (Fig. 2)
[Judgment]
ⓦ If it has been broken, you need to take actions as specified
in the repair method (b) described at the right.
(b) Replace the accelerating chain.
(See [MS-2: Replacing the Accelerating Chain].)
Fig.2
Fig.1
3. Check if the V-belt has not been broken. (Fig. 1)
Plastic Pulley
Timing Belt
[Judgment]
ⓦ If it has been broken, you need to take actions as specified
in the repair method (c) described at the right.
(c) Replace the V-belt.
(See [MS-4: Replacing the V-Belt].)
4. Check if the belt (timing belt) at the workload unit has not been
broken. (Fig. 3)
[Judgment]
ⓦ If it has been broken, you need to take actions as specified
in the repair method (d) described at the right.
(d) Replace the Workload Unit.
(See [MS-1: Replacing the Workload Unit].)
5. Check if the plastic pulley at the workload unit has not been
broken. (Fig. 3)
In order to view the timing belt, CDC sensor is omitted in
this figure.
Fig.3
[Judgment]
ⓦ If it has been broken, you need to take actions as specified
in the repair method (e) described at the right.
T-6-1
No Cadence Control (Slower cadence control is not possible.) (1)
ⓦ If it has been broken, you need to take actions as specified
in the repair method (a) described at the right.
Cateye Ergociser EC-5000 Service Manual
18
(e) Replace the Workload Unit.
(See [MS-1: Replacing the Workload Unit].)
T-6-1
No Cadence Control (Slower cadence control is not possible.) (2)
Check Method of Causes
Checking the Electrical System
5P Connector
[1] Checking the Control Unit
1. Replace the control unit with a new one.
(See [ES-9: Replacing the Control Unit].)
2. Check if the cadence will change (to slower rate) under the
manual training mode.
The check should be made by using a training mode which
provides frequent change in cadence.
The case a short-circuiting is found:0/no short-circuiting:1.
Power Supply Board
Red Cable
(Terminal 5)
[Judgment]
ⓦ When the cadence changes correctly, the previous control
unit might be defective. In this case, you need to take actions as specified in the repair method (f) described at the
right.
(f) Replace the control unit.
Black Cable
(Terminal 5)
(See [ES-9: Replacing the Control Unit].)
5P Cable
When no cadence change is noted, proceed to the following procedures.
Fig.4
Power Supply
Board
[2] Checking the 5P Cable
1. Turn off the power of the main unit and remove the cover of the
main unit set.
(See [D-1: Removing the Frame Covers].)
2. Remove the 5P connector at the power supply board. (Fig. 4)
3. Check any short-circuiting across the two connectors (Terminal 5s) at both ends of the 5P cable. (Fig. 5)
When there is a short-circuiting, the tester reading will be zero (0).
Fig.5
Normal for 9V thru 14V
3P Connector
Black Cable
(Terminal 1)
Red Cable
(Terminal 2)
[Judgment]
ⓦ When there is no short-circuiting, the 5P cable might be
disconnected.
In this case, you need to take actions as specified in the
repair method (g) described at the right.
(g) Replace the 5P cable.
(See [ES-2: Replacing the 5P Cable].)
3P Connector
Fig.6
Fig.7
When there is short-circuiting, proceed to the following procedures.
[3] Checking the 3P Connector
1. Remove the 3P connector at the power supply board. (Fig. 6)
2. Measure the resistance by using a tester across Terminals 1
and 2 on the 3P connector. (Fig. 7)
[Judgment]
ⓦ When the measured resistance is in the range of 9- to 14ohms, the 3P connector is normal but the power supply
board might be defective. In this case, you need to take
actions as specified in the repair method (h) described at
the right.
(h) Replace the power supply board.
ⓦ In case the measured resistance is excessively large, the
solenoid coil might be defective. In this case, you need to
take actions as specified in the repair method (i) described
at the right.
(i) Replace the solenoid coil set.
T-6-1
(See [ES-3: Replacing the Power Supply Board].)
No Cadence Control (Slower cadence control is not possible.) (2)
<2>
Explanation Figures
Repair Method
(See [ES-5: Replacing the Solenoid Coil Set].)
Cateye Ergociser EC-5000 Service Manual
19
T-6-2
No Cadence Control (Faster cadence control is not possible.) (1)
Check Method of Causes
Repair Method
Explanation Figures
[1] Checking the Control Unit
5P Connector
1. Replace the control unit with a new one.
(See [ES-9: Replacing the Control Unit].)
2. Check if the cadence can be changed (to faster rate) under the
manual training mode.
The case a short-circuiting is found:0/no short-circuiting:1.
Power Supply Board
The check should be made by using a training mode which
provides frequent change in cadence.
Red Cable
(Terminal 1)
T-6-2
No Cadence Control (Faster cadence control is not possible.) (1)
[Judgment]
ⓦ When the cadence changes correctly, the previous control
unit might be defective. In this case, you need to take actions as specified in the repair method (a) described at the
right.
(a) Replace the control unit with a new one.
(See [ES-9: Replacing the Control Unit].)
Black Cable
(Terminal 1)
5P Cable
When no cadence change is noted, proceed to the following procedures.
Fig.1
[2] Checking the 5P Cable
Fig.2
Black Cable
Normal for 14V thru 19V (Terminal 1)
1. Turn off the power of the main unit, and remove the cover of
the main unit set.
Power Supply
Board
Red Cable
(Terminal 2)
(See [D-1: Removing the Frame Covers].)
2. Remove the 5P connector at the power supply board. (Fig. 1)
3. Check any short-circuiting across the two connectors (Terminal 1s) at both ends of the 5P cable. (Fig. 2)
When there is a short-circuiting, the tester reading will be zero (0).
3P Connector
[Judgment]
ⓦ When there is no short-circuiting, the 5P cable might be
disconnected.
In this case, you need to take actions as specified in the
repair method (b) described at the right.
(b) Replace the 5P cable.
(See [ES-2: Replacing the 5P Cable].)
3P Connector
Fig.3
When there is short-circuiting, proceed to the following procedures.
[3] Checking the 3P Connector
1. Remove the 3P connector at the power supply board. (Fig. 3)
2. Measure the resistance by using a tester across Terminals 1
and 2 on the 3P connector. (Fig. 4)
[Judgment]
ⓦ When the measured resistance is in the range of 9- to 14ohms, the 3P connector is normal but the power supply
board might be defective. In this case, you need to take
actions as specified in the repair method (c) described at
the right.
(c) Replace the power supply board.
ⓦ In case the measured resistance is excessively large, the
solenoid coil might be defective. In this case, you need to
take actions as specified in the repair method (d) described
at the right.
(d) Replace the solenoid coil set.
Cateye Ergociser EC-5000 Service Manual
20
(See [ES-3: Replacing the Power Supply Board].)
(See [ES-5: Replacing the Solenoid Coil Set].)
Fig.4
T-6-2
No Cadence Control (Faster cadence control is not possible.) (2)
Check Method of Causes
Explanation Figures
Repair Method
[4] Checking the CDC Sensor
1. Replace the CDC sensor cable with a brandnew one.
Power Supply Board
CDC Sensor Set
A. Detach the CDC sensor cable from the CDC sensor set.
(Fig. 5)
B. Disconnect the 4P connector at the power supply board,
and disconnect the CDC sensor cable. (Fig. 6)
C. Connect the 4P connector of the new CDC sensor cable to
the connectors of both the CDC sensor set and the power
4P Connector
2. Connect the 5P cable to the power supply board, and check
the voltage. (Fig. 7)
CDC Sensor Cable
A. Turn on the power of the main unit.
Fig.6
Fig.5
B. Slowly move the pedal, while checking the voltage by using
5P Connector
a tester across Terminal 1 and Terminal 4 of the cable
connector (5P connector at the side of control unit
Nomal condition: Frequently shifting
between 0V & 5V
Power Supply Board
connection) of the 5P cable. (Fig. 8)
Red Cable
(Terminal 1)
Terminal 1 is for plus (+) and Terminal 4 is for minus (-).
Black Cable
(Terminal 4)
C. When the voltage frequently changes between approx. 5V
and 0V, the CDC sensor is all right.
[Judgment]
ⓦ When the voltage is found to be correct, the CDC sensor
cable has been disconnected. In this case, you need to
take actions in the repair method (e) described at the right.
(e) Replace the CDC sensor cable.
(See [ES-7: Replacing the CDC Sensor Cable].)
Cable Connector
Fig.7
Fig.8
T-6-2
When the voltage is not correct, proceed to the procedures on the
next page.
No Cadence Control (Faster cadence control is not possible.) (2)
supply board. (Figs. 5 and 6)
Cateye Ergociser EC-5000 Service Manual
21
T-6-2
No Cadence Control (Faster cadence control is not possible.) (3)
Check Method of Causes
Repair Method
Explanation Figures
[4] Checking the CDC Sensor (Continued)
3. Remove the CDC sensor set.
CDC Sensor Set
Turn Borad
A. Detach the CDC sensor set by loosening screws. (Fig. 9)
B. Detach the CDC sensor cable from the CDC sensor set.
4. Rotate the CDC magnet to check if it is damaged or clogged.
(Fig. 10)
T-6-2
No Cadence Control (Faster cadence control is not possible.) (3)
[Judgment]
ⓦ Damaged CDC magnet will be the cause of the problem. In
this case, you need to take actions as specified in the repair method (f) as described at the right.
(f) Replace the workload unit.
(See [MS-1: Replacing the Workload Unit].)
CDC Sensor Metal
Plate
CDC Sensor Cable
5. When the CDC magnet is clogged, remove dust from the magnet.
Fig.10
Fig.9
6. Install the CDC sensor set.
5P Cable
A. First, connect the CDC sensor set and the CDC sensor
cable, and then mount it to the CDC sensor metal base.
Power Supply Board
(Fig. 9)
CDC Sensor Set
Turn Borad
B. Rotate the CDC sensor around the screw, and adjust the
sensor so that it can be positioned in parallel with the CDC
magnet with the condition that the sensor does not touch the
magnet. (Fig. 11)
Parallel
7. Connect the 5P cable to the power supply board, and check
the voltage. (Fig. 12)
A. Turn on the power of the main unit.
B. Slowly move the pedal while measuring the voltage across
the terminals 1 and 4 at the cable connector of the 5P cable
Fig.11
(5P connector at the side of the control unit connection).
(Fig. 13)
Fig.12
Nomal condition: Frequently shifting
between 0V & 5V
Terminal 1 is for plus (+) and Terminal 4 is for minus (-).
Red Cable
(Terminal 1)
C. The CDC sensor is working fine when the voltage frequently
changes between approx. 5V and 0V.
[Judgment]
ⓦ When the voltage check is found to be all right, the possible
cause is the clogging of the CDC magnet or incorrect positioning of the CDC sensor. In this case, you need to take
actions as specified in the repair method (g) as described
at the right.
(g) Present status is correct. Go ahead to assemble
Ergociser.
Cable Connector
When the voltage is not correct, proceed to the checking procedures described on the next page.
Cateye Ergociser EC-5000 Service Manual
22
Fig.13
Black Cable
(Terminal 4)
T-6-2
No Cadence Control (Faster cadence control is not possible.) (4)
Check Method of Causes
Explanation Figures
Repair Method
[4] Checking the CDC Sensor (Continued)
8. Replace the CDC sensor set with a new one.
CDC Sensor Set
A. Remove the CDC sensor set by loosening screws. (Fig. 14)
B. Detach the CDC sensor cable from the CDC sensor set.
CDC Sensor Set
Turn Board
C. First, connect the CDC sensor set and the CDC sensor
cable, and then mount it to the CDC sensor metal base.
(Fig. 14)
Parallel
D. Rotate the CDC sensor around the screw, and adjust the
No Cadence Control (Faster cadence control is not possible.) (4)
CDC Sensor Metal
Base
sensor so that it can be positioned to parallel with the CDC
magnet with the condition that the sensor does not touch the
CDC Sensor Cable
magnet. (Fig. 15)
9. Connect the 5P cable to the power supply board, and check
the voltage. (Fig. 16)
Fig.15
Fig.14
A. Turn on the power of the main unit.
Nomal condition: Frequently shifting
between 0V & 5V
B. Slowly move the pedal while measuring the voltage across
the terminals 1 and 4 at the cable connector of the 5P cable
Red Cable
(Terminal 1)
(5P connector at the side of the control unit connection).
(Fig. 17)
Black Cable
(Terminal 4)
Terminal 1 is for plus (+) and Terminal 4 is for minus (-).
C. The CDC sensor is working fine when the voltage frequently
changes between approx. 5V and 0V.
[Judgment]
ⓦ When the voltage check is found to be all right, the possible
cause is the breakage of the CDC sensor. In this case, you
need to take actions as specified in the repair method (h)
as described at the right.
(h) Replace the CDC sensor set.
ⓦ When the voltage is incorrect, the possible cause is the
breakage of the power supply board. In this case, you
need to take actions as specified in the repair method (i) as
described at the right.
(i) Replace the power supply board.
(See [ES-6: Replacing the CDC Sensor Set].)
Cable Connector
Fig.16
T-6-2
(See [ES-3: Replacing the Power Supply Board]).
Cateye Ergociser EC-5000 Service Manual
23
T-7
Pedal will not be Restored to Original Position
Check Method of Causes
Repair Method
Explanation Figures
[1] Checking the Linkstep
1. Check if the linksetp has not been jammed in the rear leg.
Spring
Pedal Chain
[Judgment]
ⓦ When the linkstep is jammed in the rear leg, you need to
take actions as specified in the repair method (a) described
at the right.
(a) Replace the linkstep set.
(See [MS-12: Replacing the Linkstep Set].)
[2] Checking the Inner Area of the Main Unit
1. Remove the cover of the main unit set, and observe the inner
area of the main unit.
Link Step
(See [D-1: Removing the Frame Covers].)
2. Check if the spring has not been detached or broken. (Fig. 1)
Caster Pipe
Fig.1
ⓦ When the spring is detached, you need to take actions as
specified in the repair method (b) described at the right.
(b) Mount the spring correctly.
ⓦ When the spring is broken, you need to take actions as
specified in the repair method (c) described at the right.
(c) Replace the spring.
Sprocket B
(See [MS-10: Replacing the Spring].)
Sprocket A
(See [MS-10: Replacing the Spring].)
3. Check if the pedal chain has not been detached or broken.
(Fig. 1)
[Judgment]
ⓦ When the pedal chain is detached, you need to take actions as specified in the repair method (d) described at the
right.
(d) Mount the pedal chain correctly.
ⓦ When the pedal chain is broken, you need to take actions
as specified in the repair method (e) described at the right.
(e) Replace the pedal chain.
(See [MS-3: Replacing the Pedal Chain].)
(See [MS-3: Replacing the Pedal Chain].)
When no problems are found in the above procedures 2 and 3, proceed to the following checks.
4. By rotating the sprocket B, check if either of the sprocket A or B
has not been locked. For this check, be sure not to give excessive force to rotate the sprocket. (Fig. 2)
[Judgment]
ⓦ When the sprocket B has been locked, you need to take
actions in the repair method (f) described at the right.
(f) Replace the sprocket B.
ⓦ When the sprocket A cannot be rotated, you need to take
actions in the repair method (g) described at the right.
(g) Replace the sprocket A.
T-7
Pedal will not be Restored to Original Position
[Judgment]
Cateye Ergociser EC-5000 Service Manual
24
(See [MS-8: Replacing the Sprocket].)
(See [MS-8: Replacing the Sprocket].)
Fig.2
T-8-1
Unusual Noise (Continuous and Increasing) (1)
Check Method of Causes
Note that checks stated in this section should be carried out on all
items.
<1>
Explanation Figures
Repair Method
Accelcrating Chain
Noise is continuous and increasing.
V-belt
1. Remove the frame cover.
Idler
(See [D-1: “Removing the Frame Covers.”])
2. Check if the idler has been worn out. (Fig. 1)
[Judgment]
ⓦ When the idler is worn out, you need to take actions as
specified in the repair method (a) described at the right.
(a) Replace the idler set.
(See [MS-5: Replacing the Idler Set].)
3. Check if the V-belt has been worn out. (Fig. 2)
[Judgment]
ⓦ When the V-belt is worn out, you need to take actions as
specified in the repair method (a) described at the right.
(b) Replace the V-belt.
Fig.2
Fig.1
(See [MS-4: Replacing the V-Belt].)
Unusual Noise (Continuous and Increasing) (1)
4. Check if the accelerating chain has been excessively
tensioned. (Fig. 1)
A. Rotate the chain and find the most tensioned status of the
chain.
B. When the chain is correctly tensioned, the slagging should
be 3mm to 7mm under the most tensioned status of the
chain.
3~7mm
[Judgment]
ⓦ When the chain is excessively tensioned, you need to take
actions as specified in the repair method (c) described at
the right.
(c) Adjust the tension of the chain.
(See [MS-2: Replacing the Accelerating Chain].)
Fig.3
T-8-1
To be continued on the next page.
Cateye Ergociser EC-5000 Service Manual
25
T-8-1
Unusual Noise (Continuous and Increasing) (2)
Check Method of Causes
Repair Method
5. Check if the copper disk plate of the workload unit does not
contact the solenoid coil (core slit). (Figs. 4 and 5)
Explanation Figures
Copper Plate
Copper Plate
Solenoid Coil
[Judgment]
ⓦ If the copper disk plate contacts the solenoid coil, you need
to take actions as specified in the repair method (d) described at the right.
Core Slit
(d) Make positional adjustment of the solenoid coil.
(See [ES-4: Correcting the Position of Solenoid
Coil].)
Solenoid Coil
If the procedure in repair method (d) does not rectify the
contacting problem, then proceed to the repair method (d).
6. Check if the side of the timing belt does not contact the adja-
I mA
cent parts. (Fig. 6)
COIL
LOT No.
K6020
[Judgment]
ⓦ If it contacts any parts, you need to take actions as specified in the repair method (f) described at the right.
(e) Replace the workload unit.
The following checks should be done after the repair or adjustment,
V-Belt Tension Pully
Timing Belt
which is required during the above check procedures, has been
completed.
7. Rotate the pedal to check if unusual noise still occurs.
[Judgment]
ⓦ When noise is noted at around the V-belt tension pulley,
the bearings of this pulley might be defective. In this case,
you need to take actions as specified in the repair method
(g) described at the right. (Fig. 7)
(f) Replace the workload unit.
ⓦ When noise is available at the accelerating chain, you
need to take actions as specified in the repair method (h)
described at the right. (Fig. 8)
(g) Replace the V-belt tension pulley.
ⓦ In case noise is heard at the areas where repair or adjustment has been given in the procedures performed above,
the repair or adjustment is considered to be insufficient.
Apply repair or adjustment again.
(h) Apply grease to the accelerating chain. (Fig. 9)
T-8-1
Unusual Noise (Continuous and Increasing) (2)
Fig.5
Fig.4
(See [MS-1: Replacing the Workload Unit].)
(See [MS-1: Replacing the Workload Unit].)
(See [MS-7: Replacing the V-Belt Tension Pulley].)
In order to view the timing belt, CDC sensor is omitted in
this figure.
Fig.6
Accelerating Chain
Fig.8
Cateye Ergociser EC-5000 Service Manual
26
Fig.7
T-8-2
Unusual Noise (Unusual Noise Synchronized with Pedal Rotation)
Check Method of Causes
<3>
Explanation Figures
Repair Method
Unusual Noise Synchronized with Pedal Rotation
1. Contacting with adjacent parts may be occurring at the following areas:
Pedal Chain
Side
• Pedal Chain
• Linkstep Set
Chain Joint Fixing
Base
Apply grease in the following procedures.
1. Remove the frame cover.
(See [D-1: Removing the Frame Covers].)
Link Step Set
2. Apply grease in the following areas. (Figs. 1 and
2)
• Pedal Chain
• Linkstep Set
Link Step Set
Fig.1
Fig.2
Unusual Noise (Unusual Noise Synchronized with Pedal Rotation)
(a)
T-8-2
ⓦ You need to take actions as specified in the repair method
(a) described at the right.
Cateye Ergociser EC-5000 Service Manual
27
D-1
Removing the Frame Covers
Center Cover
When any repairs or adjustments of parts within the frame are required, remove the frame covers in the following procedures.
Mole
1. Disassemble the entire system to the main unit set only.
Mole
(See [Starting up 1: Let's start with Assembling] of the
Cateye Ergociser Model EC-5000 Operating Instruc-
Frame Cover
Center Cover Fixing Screw
tions.)
The disassembling procedures should be in the reverse way of
the assembling procedures stated in the Operating Instructions. You need not remove the rear leg.
Inlet Cover
2. Remove six fixing screws (three on either side) on the center
cover, and remove the center cover by lifting it upward. (Fig. 1)
3. Remove the inlet cover by loosening four screws. (Fig. 2)
Fig.2
Fig.1
4. Remove 14 screws (7 on either side) on the frame cover. (Fig.
Frame Cover
1)
5. Detach the left-side frame cover.
[NOTE]Since the front part of the frame cover engages with
the front leg, the frame cover may be damaged unless it
is detached in the correct direction. As depicted, you
should first tilt the frame frontward, making the engaged
portion being the fulcrum. (Fig. 4)
Frame
6. Detach the moles (three parts).
7. Remove the right-side frame cover, paying attention to the
[NOTE] in above procedure 5.
D-1
Removing the Frame Covers
Fig.4
Cateye Ergociser EC-5000 Service Manual
28
Fig.3
D-2
Mounting the Frame Covers
Frame Cover
1. Check if the direction of the speed nuts on the 14 frame metals
(seven pieces at either side) is set as depicted. (Fig. 1)
Frame Metal Base
If some nuts are set in wrong directions, set them in the correct
direction.
Frame Cover
2. Put the frame cover on the frame, by hooking it at the front leg.
(Fig. 2)
3. Using frame cover fixing screws (7 at either side), fix the right
Frame
and left frame covers. (Fig. 3)
4. Insert the mole in between the right and left frame covers. For
the pedal side, the mole should be inserted from the top. (Fig.
Speed Nut
4)
For the front side, the mole should be divided into up and down
Fig.2
Fig.1
Fig.3
side and inserted at the inlet area. (Figs. 5 and 6)
5. Mount the inlet cover by using four screws. (Fig. 7)
Frame Cover
Frame Cover
Mole
6. Put the center cover. (Fig. 3)
During this procedure, the 5P cable should be put through the
hole at the front of the center cover, and pull the tip of the cable
out of the center cover.
7. Fix the center cover by using center cover fixing screws (3
Mole
pieces at either side). (Fig. 3)
Mole
8. Assemble the entire Ergociser.
(See [Starting up 1: Let's start with Assembling] of the Cateye
Inlet Unit
Ergociser Model EC-5000 Operating Instructions.)
Fig.4
Fig.5
Mounting the Frame Covers
Inlet Unit
Fig.6
Center Cover
5P Cable
Inlet Cover
Center Cover Fixing Screw
Fig.8
D-2
Fig.7
Cateye Ergociser EC-5000 Service Manual
29
ES-1
Replacing the Wiring within Frame (Inlet Metal Base Set)
Power Supply Board
REMOVAL
1. Remove the frame cover.
Inlet Metal Base
(See [D-1: Removing the Frame Covers].)
2. Remove the 2P connector at the power supply board. (Fig. 1)
3. Detach the inlet metal base and inlet support metal by loosening two screws. (Fig. 2)
4. Cut the cable holder with a nipper or the like. (Fig. 3)
ASSEMBLE
1. Mount a new inlet metal base on the frame by using the inlet
support metal base and two screws. (Fig. 2)
2. Connect the 2P connector to the power supply board. (Fig. 1)
General Figure
2P Connector
placing the parts.
Inlet Metal Base
(1)
[Tests]
A. Connect the control unit and the 5P cable without mounting
the cover. (Fig. 4)
B. Turn on the power of the main unit, and check that the
display on the control unit appears.
Power Supply
Board
C. Then, turn off the power and detach the 5P cable from the
control unit.
4. By using a cable holder, fix the power cable and the 5P cable
to the frame. (Figs. 3 and 4)
As depicted in Fig. 1, the power cable and the 5P cable should
be bundled together before fixing them.
Inlet Sopprt Metal
Fig.1
Fig.2
5. Assemble the frame cover.
Control Unit
(See [D-2: Mounting the Frame Covers].)
5P Cable
Fig.4
ES-1
Replacing the Wiring within Frame (Inlet Metal Base Set)
3. Perform tests on the parts as specified for mounting and re-
Cateye Ergociser EC-5000 Service Manual
30
Fig.3
ES-2
Replacing the 5P Cable
5P Connector
5P Connector
Cable Connector
REMOVAL
5P Cable
1. Remove the frame cover.
Power Supply Board
Power Supply Board
(See [D-1 "Removing the Frame Covers."])
2. Detach the 5P connector at the power supply board. (Fig. 1)
3. Cut the cable holder which fixes the 5P cable to the frame, and
detach the 5P cable.
Put a Mark
93cm
ASSEMBLE
1. Put a mark at a place approx. 93cm from the control unit side
cable connector of the 5P cable. (Fig. 2)
2. Connect the 5P connector at the end of the 5P cable to the
power supply board. (Fig. 3)
Fig.3
Fig.2
Fig.1
3. Perform tests on the parts as specified for mounting and replacing the parts.
Control Unit
5P Cable
Mark
[Tests]
A. Connect the control unit and the 5P cable without mounting
the cover. (Fig. 4)
B. Turn on the power of the main unit, and check that the
display on the control unit appears.
(1)
C. Then, turn off the power and detach the 5P cable from the
control unit.
Power Cable
5P Cable
4. Fix the 5P cable with a cable holder. (Fig. 5)
Also, fix the 5P cable to the frame so that the marked position
should align with the upper edge of the frame.
As depicted in Fig. 1, the 5P cable should be fixed together
Fig.4
Fig.5
with the power cable.
Replacing the 5P Cable
5. Assemble the frame cover.
ES-2
(See [D-2: Mounting the Frame Covers].)
Cateye Ergociser EC-5000 Service Manual
31
ES-3
Replacing the Power Supply Board
Power Supply Board
REMOVAL
1. Remove the frame cover. (See [D-1: Removing the Frame
Covers].)
2. Remove all four connectors which are connected to the power
supply board. (Fig. 1)
3. Loosen the two screws which fix the power supply board to
remove the board. (Fig. 1)
ASSEMBLE
1. Securely fix the new power supply board by using two fixing
screws. (Fig. 1)
2. Connect three connectors, 2P, 4P and 5P. (Fig. 1)
General Figure
3. Perform tests on the parts as specified for mounting and replacing the parts.
5P Connector
[Tests]
Control Unit
2P Connector
A. Connect the control unit and the 5P cable without mounting
the cover. (Fig. 2)
B. Turn on the power of the main unit, and rotate the pedal
Power Supply Board
under the manual training mode. Check that the cadence of
the control unit will change.
4P Connector
C. Then, turn off the power and detach the 5P cable from the
control unit.
Power Supply
Board Fixing Screw
5P Cable
3P Connector
(See [D-2: Mounting the Frame Covers].)
Fig.1
ES-3
Replacing the Power Supply Board
4. Assemble the frame cover.
Cateye Ergociser EC-5000 Service Manual
32
Fig.2
ES-4
Correcting the Position of Solenoid Coil
[NOTE] When proceeding to the correction of solenoid coil, be sure
not to damage the copper disk plate.
The work stated in this section should be carried out by two persons.
In case the correction of solenoid coil position cannot be performed
through the following procedures, or when the copper disk plate is
significantly deformed, the entire workload unit should be replaced.
(See [MS-1: Replacing the Workload Unit].)
Workload Unit
Solenoid Coil
Preparatory Work
1. Detach the frame cover.
General Figure
(See [D-1: Removing the Frame Covers].)
Copper Plate
2. Loosen the adjust screw of the V-belt tension pulley and move
the V-belt tension pulley to loosen the V-belt. (Fig. 1)
Adjusting the Position of Solenoid Coil
Copper Plate
Core Slit
Solenoid Coil
V-Belt Tension Pully
1. Check the area contacting the solenoid coil (core slit) by slowly
rotating the copper disk plate with your hands. (Figs. 2 and 3)
Solenoid Coil
Adjust Screw
lowing procedures.
I mA
COIL
LOT No.
A. Loosen the four screws evenly which fix the solenoid coil.
K6020
(Fig. 2)
Note that screw lock paint has been applied to these screws.
B. Rotate the solenoid coil, and adjust it so that it will not
contact the copper disk plate. (Figs. 2 and 3)
Fig.1
Fig.2
Fig.3
Also, by giving the copper disk plate one full rotation, make
sure it does not contact the coil at any portion.
C. Evenly tighten the four screws to firmly fix the solenoid coil.
[NOTE] Be sure to tighten the four screws evenly, as otherwise
the position of the solenoid coil may be shifted.
D. Apply screw lock paint to the four screws.
Finishing Work
1. Adjust the position of the V-belt tension pulley and give tension
to the V-belt.
(See [MS-4: Replacing the V-Belt ]: REMOVAL: 2.)
Correcting the Position of Solenoid Coil
2. Perform the positional correction of the solenoid coil in the fol-
ES-4
2. Mount the frame cover.
(See [D-2: Mounting the Frame Covers].)
Cateye Ergociser EC-5000 Service Manual
33
ES-5
Replacing the Solenoid Coil Set
[NOTE]
When proceeding to the correction of solenoid coil, be
sure not to damage the copper disk plate.
The work stated in this section should be carried out by two persons.
REMOVAL
1. Detach the frame cover.
(See [D-1: Removing the Frame Covers].)
2. Loosen the adjust screw of the V-belt tension pulley and move
the V-belt tension pulley to loosen the V-belt. (Fig. 1)
3. Detach the 3P connector at the power supply board. (Fig. 2)
4. Cut the cable holder which fixes the solenoid coil cable to the
frame.
Solenoid Coil Set
General Figure
5. Remove four screws which fix the solenoid coil. (Fig. 3)
Screw lock paint has been applied to these screws.
6. Detach two solenoid coil fixing plates to detach the solenoid
coil. (Fig. 3)
Power Supply Board
V-Belt
Solenoid Coil Metal base
ASSEMBLE
1. Assemble the solenoid coil to the solenoid coil mounting base,
and provisionally fix the solenoid coil by using two solenoid coil
fixing plates and four screws. (Fig. 3)
V-Belt Tension
Pully
Solenoid Coil
Adjust Screw
3P Connector
The screws should be kept loosened to allow the solenoid coil
to move. Also, note that the four screws should be tightened
evenly.
Replacing the Solenoid Coil Set
2. Adjust the position of the solenoid coil as stated below.
A. Move and adjust the solenoid coil so that it will not contact
the copper disk plate. (Figs. 4 and 5)
B. Give the copper disk plate a full rotation. If it does not
contact the solenoid coil (core slit) at any portion, this
completes the adjustment.
Fig.1
Copper Plate
Fig.2
Fig.3
Copper Plate
Core Slit
Solenoid Coil
3. Evenly tighten the four screws to firmly fix the solenoid coil.
(Fig. 3)
[NOTE] Be sure to tighten the four screws evenly, as otherwise
the position of the solenoid coil may be shifted.
Solenoid Coil
Cable
CDC Sensor
Cable
Solenoid Coil
4. Apply screw lock paint to the four screws. (Fig. 3)
I mA
5. By using a cable holder, fix the solenoid coil cable to the frame
together with the CDC sensor cable. (Fig. 6)
COIL
LOT No.
K6020
6. Adjust the position of the V-belt tension pulley, and give tension to the V-belt.
ES-5
(See [MS-4: Replacing the V-Belt]: REMOVAL: 2.)
7. Mount the frame cover.
(See [D-2: Mounting the Frame Covers].)
Cateye Ergociser EC-5000 Service Manual
34
Fig.4
Fig.5
Fig.6
ES-6
Replacing the CDC Sensor Set
REMOVAL
1. Detach the frame cover.
(See [D-1: Removing the Frame Covers].)
2. Detach the CDC sensor set by loosening screws. (Fig. 1)
3. Detach the CDC sensor cable from the CDC sensor set.
ASSEMBLE
1. Connect the CDC sensor cable to a new CDC sensor set, and
then mount it to the CDC sensor metal base. (Fig. 1)
CDC Sensor Set
2. Adjust the position of the CDC sensor.
A. Rotate the CDC sensor around the screw. (Fig. 2)
General Figure
B. Rotate the CDC sensor around the screw, and adjust the
sensor so that it can be positioned to parallel with the CDC
magnet with the condition that the sensor does not touch the
magnet. (Fig. 2)
CDC Sensor Set
Control Unit
CDC Sensor Metal Base
CDC Sensor
3. Perform tests on the parts as specified for mounting and replacing the parts.
Turn Board
[Tests]
Parallel
A. Connect the control unit and the 5P cable without mounting
the cover. (Fig. 3)
B. Turn on the power of the main unit, and rotate the pedal
under the manual training mode to check that the cadence
C. Then, turn off the power and detach the 5P cable from the
control unit.
CDC Sensor Cable
Fig.1
Replacing the CDC Sensor Set
on the control unit will change.
5P Cable
Fig.2
4. Assemble the frame cover.
ES-6
(See [D-2: Mounting the Frame Covers].)
Cateye Ergociser EC-5000 Service Manual
35
ES-7
Replacing the CDC Sensor Cable
REMOVAL
1. Detach the frame cover.
(See [D-1: Removing the Frame Covers].)
2. Disconnect the 4P connector at the power supply board. (Fig.
1)
3. Cut the cable clip which fixes the CDC sensor cable to the
frame. (Fig. 2)
4. Detach the CDC sensor cable from the CDC sensor set. (Fig.
CDC Sensor Set
3)
CDC Sensor Cable
ASSEMBLE
1. Connect a new CDC sensor cable to the CDC sensor set. (Fig.
General Figure
3)
2. Adjust the position of the CDC sensor.
Power Supply Board
CDC Sensor Set
A. Rotate the CDC sensor around the screw. (Fig. 4)
Solenoid Coil
Cable
B. Rotate the CDC sensor around the screw, and adjust the
sensor so that it can be positioned to parallel with the CDC
magnet with the condition that the sensor does not touch the
magnet. (Fig. 4)
CDC Sensor
Set Cable
4P Connector
3. Connect the 4P connector at the end of the CDC sensor cable
to the power supply board. (Fig. 1)
4. Perform tests on the parts as specified for mounting and re-
CDC Sensor Cable
[Tests]
A. Connect the control unit and the 5P cable without mounting
Fig.2
Fig.1
Fig.3
the cover. (Fig. 2)
Control Unit
B. Turn on the power of the main unit, and rotate the pedal
under the manual training mode to check that the cadence
on the control unit will change.
CDC Sensor
C. Then, turn off the power and detach the 5P cable from the
Turn Board
control unit.
5. By using a cable holder, fix the CDC sensor cable to the frame
Parallel
together with the power cable. (Fig. 2)
6. Assemble the frame cover.
5P Cable
(See [D-2: Mounting the Frame Covers].)
Fig.4
ES-7
Replacing the CDC Sensor Cable
placing the parts.
Cateye Ergociser EC-5000 Service Manual
36
Fig.5
ES-8
Correcting the Position of CDC Sensor
The positional correction of the CDC sensor should be performed
after removing the frame cover.
(See [D-1: Removing the Frame Covers], [D-2: Mounting
the Frame Covers].)
Correcting the Position of the Solenoid Coil
1. Rotate the CDC sensor around the screw.
2. Adjustment will be completed when the CDC sensor is positioned in parallel with the CDC magnet with the condition that
the sensor does not touch the magnet.
CDC Sensor Set
General Figure
CDC Sensor
Turn Board
Correcting the Position of CDC Sensor
Parallel
ES-8
Fig.1
Cateye Ergociser EC-5000 Service Manual
37
ES-9
Replacing the Control Unit
REMOVAL
Control Unit
Cable Inlet
Cable
Connector
Select Switch
Control Unit
1. Remove the pulse rate sensor from the control unit. (Fig. 1)
2. Remove seven tapping screws from the control unit cover, and
then remove the control unit. (Fig. 2)
3. Disconnect the cable connector, which is at the end of the 5P
ON
1
cable, through the cable inlet at the back of the control unit.
(Fig. 2)
2
MD
3
4
ON
ASSEMBLE
1 2 3 4
1. In case the Wireless Chestbelt Pulse Sensor is used and the
control unit is going to be replaced with a new control unit, the
receiver board should be detached from the previous control
unit and mounted on the new control unit.
(See Operating Instructions for Wireless Chestbelt Pulse
Sensor Kit.)
2. Check that the select switches at the back of the control unit
should be set to the positions that reflect desired display. (Fig.
3)
[Unit Display]
• m/kg
1 : ON
• feet/lb
1 : OFF
• Japanese
2 : ON
3 : OFF
4 : OFF
• English
2 : OFF
3 : OFF
4 : OFF
• German
2 : OFF
3 : ON
4 : OFF
• French
2 : ON
3 : ON
4 : OFF
3. Firmly insert the cable connector, which is at the end of the 5P
cable, to the cable inlet at the back of the control unit. (Fig. 2)
4. Put the control unit on the control unit cover, and fix the unit
with seven tapping screws from beneath the cover. (Fig. 2)
5. Mount the pulse rate sensor to the control unit. (Fig. 1)
ES-9
Replacing the Control Unit
[Display Language]
Cateye Ergociser EC-5000 Service Manual
38
Pluse Sensor
Fig.1
Tapping Screw
Fig.2
Fig.3
Control Unit (under)
ES-10
Replacing the Button Panel
Control Unit
1. Insert a thin cutter knife in between the button panel and the
body, and carefully peel off the button panel. (Fig. 1)
[NOTE] Be careful not to damage the control unit.
2. Clean the adhesive agent, if any, on the control unit.
3. Peel off the seal at the back of the new button panel and put it
to the control unit.
Sufficiently press the button panel thus placed.
Button Panel
ES-10
Replacing the Button Panel
Fig.1
Cateye Ergociser EC-5000 Service Manual
39
MS-1
Replacing the Workload Unit
[NOTE]Be careful not to let the copper disk plate hit the frame, etc.
when removing or mounting the workload unit.
The procedures stated in this section should be performed by two
persons.
REMOVAL
1. Detach the frame cover and then detach the V-belt.
(See [MS-4: Replacing the V-Belt ]: REMOVAL.)
Workload Unit
2. Detach the 3P and 4P connectors at the power supply board.
(Fig. 1)
3. Detach the workload unit fixing hexagon head bolts (right and
left sides).(Figs. 2 and 3)
4. Starting from the right side, lift up the entire workload unit to
the position where it can be detached from the workload unit
General Figure
Workload Unit
Power Supply
Board
fixing metal base, and remove it. (Fig. 4)
ASSEMBLE
Workload
Unit
3P Connector
1. Assemble the workload unit so that it can engage with the
workload unit fixing metal base at the frame. (Fig. 5)
4P Connector
2. Fix the workload unit to the frame by using workload unit fixing
hexagon head screws (right and left). (Figs. 2 and 3)
3. Connect the 3P and 4P connectors to the power supply board.
(Fig. 1)
Replacing the Workload Unit
4. Mount the V-belt, and then mount the frame cover.
(See [MS-4: Replacing the V-Belt ]:
Workload Unit Fixing Hexagon
Head Bolt
Workload Unit Fixing Hexagon
Head Bolt
Fig.2
Fig.1
Fig.3
SEMBLY.)
Workload Unit
Workload
Unit
MS-1
Workload Unit Reinforcing Metal
Base
Fig.4
Cateye Ergociser EC-5000 Service Manual
40
Fig.5
MS-2
Replacing the Accelerating Chain
Accelerating Chain
REMOVAL
1. Detach the frame cover.
(See [D-1: Removing the Frame Covers].)
2. Loosen three screws which fix the Shaft Set A and the frame
from the top side.
Do not detach these screws, but just loosen them. (Fig. 1)
3. Remove two cap bolts, and shift the Shaft Set A frontward.
(Fig. 2)
Thus, the accelerating chain can be loosened.
4. Detach the accelerating chain.
The chain can be detached when the sprocket is rotated backward after detaching the lower part of the sprocket A. (Fig. 3)
[Reference] The sprocket A can be rotated backward when
the pedal is lowered.
General Figure
Cap Bolt
Shaft Set A
ASSEMBLE
Shaft Set A
Accelerating Chain
Sprocket B
Sprocket A
1. Hang the chain over the sprocket B, and then hang it over the
top portion of the sprocket A. (Fig. 4)
2. Rotate the sprocket A backward and hang the entire chain
Screw
over the sprocket B.
3. Connect the Shaft Set A and the frame by using two cap bolts.
(Fig. 2)
careful to evenly tighten the two cap bolts.
4. Tension adjustment of the accelerating chain can be performed by tightening the cap bolts, and thus sliding the
Fig.1
Accelerating Chain
sprocket A (Shaft Set A) back and forth.
Fig.2
Replacing the Accelerating Chain
[NOTE] Tightening should be made to the extent that the tip of
the cap bolt just engages the Shaft Set A. Also, be
Fig.3
Sprocket B
A. Rotate the chain and find the most tensioned status of the
chain.
Sprocket A
B. When the chain is correctly tensioned, the slagging should
be 3mm to 7mm under the most tensioned status of the
chain. (Fig. 5)
3~7mm
5. Tighten the screws which connects the Shaft Set A and the
frame from the top side to fix them. (Fig. 1)
6. Assemble the frame cover.
Fig.4
MS-2
(See [D-2: Mounting the Frame Covers].)
Fig.5
Cateye Ergociser EC-5000 Service Manual
41
MS-3
Replacing the Pedal Chain
Pedal Chain
When replacing with brand-new chains, be sure to replace both of
the two chains.
REMOVAL
1. Detach the frame cover.
(See [D-1: Removing the Frame Covers].)
2. Using a plier, detach the snap of the chain joint which connects
the pedal chains and the spring. (Fig. 1)
3. While slightly pulling the spring, detach the plate at the snap
side of the chain joint.
4. While holding the pedal chain with a single hand, detach the
spring from the chain joint by pulling the spring.
General Figure
5. Detach the chain joint that is left at the tip of the pedal chain,
and lower the pedal down to the lowest position.
Pedal Chain
Chain Joint
6. Detach the snap of the chain joint which connects the linkstep
Chain Joint
Chain Joint
set and the step chain.
7. Pull off the chain joints in the right and left directions to remove
the pedal chain from the linkstep set.
Spring
Link Step Set
Link Step Set
Fig.2
Replacing the Pedal Chain
Fig.1
Fig.3
Spring Pulley
Pedal Chain
Chain Joint
Pedal Chain
Shaft Set A
MS-3
Spring
Fig.4
Cateye Ergociser EC-5000 Service Manual
42
Fig.5
Fig.6
MS-4
Replacing the V-Belt
The procedures stated in this section should be performed by two
persons.
In the case of replacing the V-belts, be sure to change both of the
V-Belt
two belts.
REMOVAL
1. Detach the frame cover.
(See [D-1: Removing the Frame Covers].)
2. Loosen the adjust screws of the V-belt tension pulley to free
the V-belt tension pulley. (Fig. 1)
3. While rotating the pulley A, remove the two V-belts. (Fig. 2)
Ceneral Figure
Pulley A
ASSEMBLE
1. Hook the two V-belts on the large pulley, tension pulley and
the small pulley.
Spring Balancer
V-Belt Tension
Pulley
2. To obtain an adequate tension of the V-belt, use a spring balancer (special tool) to adjust the position of the V-belt tension
pulley.
A. Insert the spring balancer as depicted through between the
frames until the tip of the scale come to the position of the V-
V-Belt Tension Pulley
Adjust Screw
belt tension pulley. (Fig. 3)
Adjust Screw
B. Press the spring balancer until the reading is 10kg. While
maintaining this status, tighten the adjust screw.
3. Mount the frame cover.
Fig.1
Fig.2
Fig.3
MS-4
Replacing the V-Belt
(See [D-2: Mounting the Frame Covers].)
Cateye Ergociser EC-5000 Service Manual
43
MS-5
Replacing the Idler Set
REMOVAL
1. Detach the frame cover.
(See [D-1: Removing the Frame Covers].)
2. Detach the idler spring from the pawl of the idler metal base.
(Fig. 1)
3. Remove the idler mounting bolts,, and detach the idler set.
(Fig. 2)
Idler Set
ASSEMBLE
1. Mount the idler set by using an idler mounting bolt. (Fig. 2)
2. Hook the idler spring on the pawl of the idler to give tension to
the belt.
General Figure
3. Mount the frame cover.
Idler Metal Base
(See [D-2: Mounting the Frame Covers].)
Idler Spring
MS-5
Replacing the Idler Set
Fig.1
Cateye Ergociser EC-5000 Service Manual
44
Idler Fixing Bolt
Fig.2
MS-6
Replacing the Pulley A
Pulley A
The procedures stated in this section should be performed by two
persons.
REMOVAL
1. Detach the frame cover, and then remove the V-belt.
(See [MS-4: Replacing the V-Belt ]: REMOVAL.)
2. Install the cotterless gear crank removing/fastening tool, and
rotate it counter-clockwise by using a wrench to remove the
crank nut. (Fig. 1)
3. Change the direction of the cotterless gear crank removing/
fastening tool, and rotate it clockwise to remove the pulley A
General Figure
from the crank shaft. (Fig. 2)
Pulley A
ASSEMBLE
Pulley A
1. Assemble the pulley A into the crank shaft.
2. Firmly tighten the pulley nut by using the cotterless gear crank
removing/fastening tool and a wrench. (Fig. 1)
3. Mount the V-belts, and then mount the frame cover.
(See [MS-4: Replacing the V-Belt]: ASSEMBLE.)
Fig.2
Replacing the Pulley A
Fig.1
Cotterless Gear Crank
Removing/Fastening Tool
MS-6
Cotterless Gear Crank
Removing/Fastening Tool
Cateye Ergociser EC-5000 Service Manual
45
MS-7
Replacing the V-Belt Tension Pulley
The procedures stated in this section should be performed by two
persons.
REMOVAL
1. Detach the frame cover, and then remove the V-belt.
(See [MS-4: Replacing the V-Belt ]: REMOVAL.)
2. Remove the hexagon head bolt, and then remove the V-belt
tension pulley. (Fig. 1)
V-Belt Tension Pulley
ASSEMBLE
1. Mount the V-belt tension pulley by using a hexagon head bolt.
General Figure
2. Mount the V-belts, and then mount the frame cover.
Replacing the V-Belt Tension Pulley
(See [MS-4: Replacing the V-Belt ]: ASSEMBLE.)
Hexagon Bolt
MS-7
Fig.1
Cateye Ergociser EC-5000 Service Manual
46
MS-8
Replacing the Sprocket (Gear for Chains)
Sprocket A
[1] Sprocket A
REMOVAL
1. Detach the frame cover, and then remove the accelerating
chain.
(See [MS-2: Replacing the Accelerating Chain]: REMOVAL.)
2. Install the cotterless gear crank removing/fastening tool, and
rotate it counter-clockwise by using a wrench to remove the
crank nut. (Fig. 1)
Sprocket B
3. Detach the sprocket A from the Shaft Set A.
ASSEMBLE
General Figure
1. Assemble the sprocket A into the Shaft Set A.
Cotterless Gear Crank
Removing/Fastening Tool
2. Firmly tighten the crank nut by using the cotterless gear crank
removing/fastening tool and a wrench. (Fig. 1)
3. Mount the accelerating chain, and then mount the frame cover.
(See [MS-2: Replacing the Accelerating Chain]: REMOVAL.)
Replacing the Sprocket (Gear for Chains)
[2] Sprocket B
REMOVAL
1. Detach the frame cover, and then remove the accelerating
Sprocket A
chain.
(See [MS-2: Replacing the Accelerating Chain]: REMOVAL.)
Fig.1
2. Install the cotterless gear crank removing/fastening tool, and
rotate it counter-clockwise by using a wrench to remove the
crank nut. (Fig. 2)
Sprocket B
Sprocket B
3. Change the direction of the cotterless gear crank removing/
fastening tool, and rotate it clockwise to remove the sprocket B
from the crank shaft. (Fig. 3)
ASSEMBLE
1. Assemble the sprocket B into the crank shaft.
2. Firmly tighten the crank nut by using the cotterless gear crank
removing/fastening tool and a wrench. (Fig. 2)
Cotterless Gear Crank
Removing/Fastening Tool
(See [MS-2: Replacing the Accelerating Chain]: ASSEMBLE.)
Fig.2
Cotterless Gear Crank
Removing/Fastening Tool
MS-8
3. Mount the accelerating chain, and then mount the frame cover.
Fig.3
Cateye Ergociser EC-5000 Service Manual
47
MS-9
Replacing the Shaft Set A
REMOVAL
Shaft Set A
1. Detach the frame cover, and then detach the sprocket A.
(See [MS-8: Replacing the Sprocket (Gear for Chains)]: [1]
Sprocket A: REMOVAL.)
2. Using a plier, detach the snap of the chain joint which connects
the pedal chains and the spring. (Fig. 1)
3. While slightly pulling the spring, detach the plate at the snap
side of the chain joint.
4. While holding the pedal chain with a single hand, detach the
spring from the chain joint by pulling the spring.
5. Detach the chain joint that is left at the tip of the pedal chain,
and lower the pedal down to the lowest position.
General Figure
6. Detach the Shaft Set A by removing three screws which fix the
Shaft Set A from the top. (Fig. 2)
Pedal Chain
Shaft Set A
Pedal Chain
Chain Joint
Shaft Set A
ASSEMBLE
1. Assemble the Shaft Set A into the frame, and provisionally fix it
with three screws.
Screw
The screws should be left loosened so that the Shaft Set A can
slide back and forth. (Fig. 2)
2. Engage the pedal chains with the sprocket of Shaft Set A, and
pull the chains until the pedal should position at the highest
point. (Fig. 3)
MS-9
Replacing the Shaft Set A
3. While holding the pedal chain with a single hand, mount the
chain joints at the leading edge of the pedal chain.
Spring
Fig.2
Fig.1
4. While retaining the pedal chain with a single hand, use the
Pedal Chain
Spring Pulley
other hand to pull the spring, and hook the leading edge of the
spring on the chain joint.
Fig.3
Chain Joint
Be sure to ensure that the spring has been correctly hooked on
the spring pulley. (Fig. 4)
5. Slightly pull the spring, and mount the snap-side plate of the
chain joint.
6. Fix the snaps of the chain joints, which connect the pedal
chains and the spring, by using a plier.
7. Mount the sprocket A and the accelerating chain, and then
mount the frame cover.
(See [MS-8: Replacing the Sprocket (Gear for Chains)]: [1]
Sprocket A: ASSEMBLE.)
Cateye Ergociser EC-5000 Service Manual
48
Spring
Fig.4
Fig.5
MS-10
Replacing the Spring
In the case of replacing the spring, be sure to change both of the two
springs.
Spring
REMOVAL
1. Detach the frame cover.
(See [D-1: Removing the Frame Covers])
2. Using a plier, detach the snap of the chain joint which connects
the pedal chains and the spring. (Fig. 1)
3. While slightly pulling the spring, detach the plate at the snap
side of the chain joint.
4. While holding the pedal chain with a single hand, detach the
spring from the chain joint by pulling the spring.
General Figure
5. Remove the chain joint that is left at the leading edge of the
pedal chain.
Pedal Chain
Spring
Chain Joint
Spring Pulley
Hexagon Nut
6. Remove the hexagon head nut, and then detach the spring
from the frame. (Fig. 2)
ASSEMBLE
1. Mount the spring on the frame by using a hexagon head nut, a
spring washer and a plain washer. (Fig. 3)
2. While holding the pedal chain with a single hand, mount the
chain joints at the leading edge of the pedal chain.
Spring
3. While retaining the pedal chain with a single hand, use the
Fig.1
Be sure to ensure that the spring has been correctly hooked on
Fig.2
Fig.3
Pedal Chain
the spring pulley. (Fig. 4)
Chain Joint
Replacing the Spring
other hand to pull the spring, and the hook the leading edge of
the spring on the chain joint.
4. Slightly pull the spring, and mount the snap-side plate of the
chain joint.
5. Fix the snaps of the chain joints, which connect the pedal
chains and the spring, by using a plier. (Fig. 6)
6. Mount the frame cover
(See [D-2: Mounting the Frame Covers].)
MS-10
Spring
Fig.4
Cateye Ergociser EC-5000 Service Manual
49
MS-11
Replacing the Spring Pulley Set
REMOVAL
1. Detach the frame cover.
Spring Pulley Set
(See [D-1: Replacing the Frame Covers].)
2. Using a plier, detach the snap of the chain joint which connects
the pedal chains and the spring. (Fig. 1)
3. While slightly pulling the spring, detach the plate at the snap
side of the chain joint.
4. While holding the pedal chain with a single hand, detach the
spring from the chain joint by pulling the spring.
5. Remove the chain joint that is left at the leading edge of the
pedal chain.
General Figure
6. Remove the hexagon head nut, and then detach the spring
pulley set from the frame. (Fig. 2)
Pedal Chain
Spring Pulley Set
Spring Pulley
Chain Joint
ASSEMBLE
1. Mount the spring pulley set by using a hexagon head bolt.
(Fig. 2)
2. While holding the pedal chain with a single hand, mount the
chain joints at the leading edge of the pedal chain.
Hexagon Bolt
spring on the chain joint.
Spring
Be sure to ensure that the spring has been correctly hooked on
the spring pulley. (Fig. 4)
Fig.1
4. Slightly pull the spring, and mount the snap-side plate of the
chain joint.
Fig.2
Pedal Chain
5. Fix the snaps of the chain joints, which connect the pedal
chains and the spring, by using a plier. (Fig. 5)
Chain Joint
6. Mount the frame cover.
(See [D-2: Mounting the Frame Covers].)
Spring
MS-11
Replacing the Spring Pulley Set
3. While retaining the pedal chain with a single hand, use the
other hand to pull the spring, and hook the leading edge of the
Fig.4
Cateye Ergociser EC-5000 Service Manual
50
Fig.3
MS-12
Replacing the Linkstep Set (1)
Pedal Chain
The procedures stated in this section should be performed by two
persons.
Link Step Set
Also, prepare the following tools.
A. Metal Bar
2 pieces
(Dia: 7mm to 20mm, Length:
20cm or longer)
B. L Wrench
2 pieces
(Dia: 5mm to 12mm)
REMOVAL
1. Detach the frame cover.
(See [D-1: Removing the Frame Covers].)
2. One worker should lower the right and left pedals to the lowest
level. While maintaining this status, the other worker should
set, as stoppers, the two metal bars and two L wrenches as
depicted. (Figs. 1 and 2)
General Figure
Metal Bar
Frame
L wrench
3. Gradually move the right and left pedals, while paying caution
to the metal bar and the L wrench.
[CAUTION]
L wrench
Chain Joint
During this procedure, if the metal bar and the
Metal Bar
L wrench tend to be broken, change these tools to more
rigid metal after lowering the pedals and removing
Chain Joint
these tools.
5.
Pull off the chain joints in the right and left directions to
remove the linkstep set and the pedal chain.
6.
Remove the four cap bolts which fix the linkstep set
Pedal Chain
Link Step Set
Fig.2
Fig.1
Fig.3
and the frame, and then de-tach the linkstep set. (Fig.
4)
Link Step Set
[Reference]
For pulling the linkstep out of the frame, take
the following procedures.
Cap Bolt
A. Put the linkstep set sideways.
B. Move the linkstep set so that the link positions perpendicular
to the pedal as depicted. (Fig. 5)
C. Pull the linkstep set out of the frame.
Fig.4
MS-12
To be contined on next page ( ASSEMBLE)
Replacing the Linkstep Set (1)
Pedal Chain
4. Remove a snap, by using a plier, at the chain joints which connect the linkstep set and the pedal chain. (Fig. 3)
Fig.5
Cateye Ergociser EC-5000 Service Manual
51
MS-12
Replacing the Linkstep Set (2)
The procedures stated in this section should be performed by two
persons.
Link Step Set
Also, prepare the following tools.
Cap Bolt
A. Metal Bar
2 pieces
(Dia: 7mm to 20mm, Length:
20cm or longer)
B. L Wrench
2 pieces
(Dia: 5mm to 12mm)
Chain Joint
ASSEMBLE
1. Put the linkstep sideways as depicted, and insert it to the
Link Step Set
frame. (Fig. 6)
When the linkstep is moved so that the link positions perpendicular to the pedal, the entire shape becomes such as is depicted.
2. Using four cap bolts, fix the linkstep set to the frame. (Fig. 7)
3. Insert the chain joints to the linkstep set and the leading edge
of the pedal chain from right and left sides to connect them.
(Fig. 8)
4. Fix the snaps to the chain joints by using a plier. (Fig. 8)
5. Lower the right and left pedals down to the lowest level, and
the other worker should remove the metal bar and L wrench
that have been used as stoppers.
6. Restore the pedals to the original positions.
(See [D-2: Mounting the Frame Covers].)
MS-12
Replacing the Linkstep Set (2)
7. Mount the frame cover.
Cateye Ergociser EC-5000 Service Manual
52
Fig.6
Fig.7
Fig.8
MS-13
Replacing the Pedal Stopper
Step Stopper
The replacing procedures are different between the cases with and
without the wrench set.
[1] Without the Wrench Set
REMOVAL
1. Detach the frame cover.
(See [D-1: Removing the Frame Covers].)
2. Loosen the three-point pan-head screws (two pieces for each
pedal), and detach the pedal stoppers. (Fig. 1)
ASSEMBLE
General Figure
1. Mount the pedal stoppers by using three-point pan-head
Step Stopper
screws (two pieces for each pedal). (Fig. 1)
2. Mount the frame cover.
(See [D-2: Mounting the Frame Covers].)
[2] With the Wrench Set
REMOVAL
1. Loosen the three-point pan-head screws (two pieces for each
ASSEMBLE
Replacing the Pedal Stopper
Three-Point PanHead Screw
pedal), and detach the pedal stoppers. (Fig. 1)
Fig.1
MS-13
1. Mount the pedal stoppers by using three-point pan-head
screws (two pieces for each pedal). (Fig. 1)
Cateye Ergociser EC-5000 Service Manual
53
MS-14
Replacing the BB Set
The procedures stated in this section should be performed by two
persons.
BB Set
REMOVAL
1. Detach the frame cover, and then detach the pulley A.
(See [MS-6: Replacing the Pulley A]: REMOVAL.)
2. Detach the accelerating chain, and then detach the sprocket
B.
(See [MS-8: Replacing the Sprocket (Gear for Chains)]: [1]
Sprocket B: REMOVAL.)
3. Detach the lock ring by using a hanger rotating jig. (Fig. 1)
General Figure
4. Detach the right side hanger one by using a pin face wrench.
(Fig. 2)
Hanger Rotating Jig
5. Detach the pulley shaft.
Hanger Rotating Jig
6. Detach the left side hanger one by using the hanger rotating
jig. (Fig. 3)
ASSEMBLE
1. Check if no used retainer remains within the hanger pipe.
Right Side Hanger
2.
Assemble the pulley shaft retainer and right and left hanger
lock rings as depicted. (Fig. 4)
3.
Mount the sprocket B, and then mount the accelerating
BB Cup Locking
chain.
(See [MS-8: Replacing the Sprocket (Gear for Chains)]: [1]
Fig.1
Fig.2
Sprocket B: ASSEMBLE.)
Replacing the BB Set
4.
Mount the pulley A, and then mount the frame cover.
Right Side Hanger
(See [MS-6: Replacing the Pulley A]: ASSEMBLE.)
Front
Short
Left Side Hanger
Long
Retainer
Crank Shaft
MS-14
Retainer
Fig.4
Cateye Ergociser EC-5000 Service Manual
54
Left Side Hanger
Pin Face Wrench
BB Cup Locking
Fig.3
MS-15
Replacing the Front Leg Cover
1. Apply a blade-head screwdriver or the like to detach the front
leg cover. (Fig. 1)
2. Mount a brandnew leg cover.
Leg Cover
MS-15
Replacing the Front Leg Cover
Fig.1
Cateye Ergociser EC-5000 Service Manual
55
MS-16
Replacing the Caster
REMOVAL
1. Detach the frame cover.
(See [D-1: Removing the Frame Covers].)
2. Press a plier onto the E-ring, and detach it by pushing the plier.
(Fig. 1)
Caster
3. Detach the wheel shaft and detach the caster.
ASSEMBLE
1. Pass the wheel shaft through the caster hole on the frame.
(Fig. 2)
2. Put a plain washer onto the wheel shaft, and insert the E-ring
at the groove on the wheel shaft. (Fig. 2)
General Figure
3. Mount the frame cover.
(See [D-2: Mounting the Frame Covers].)
Caster
E-ring
Wheel Shaft
Caster
Plane Washer
MS-16
Replacing the Caster
Fig.1
Cateye Ergociser EC-5000 Service Manual
56
Fig.2
E-ring
MS-17
Replacing the Rubber Stopper
In the case of replacing the rubber stopper, be sure to change both
of the two rubber stopper.
Rubber Stopper
1. Detach the frame cover.
(See [D-1: Removing the Frame Covers].)
2. Lower the right side pedal to the lowest position.
3. While maintaining the status as obtained in 2 above, loosen
the hexagon head nut and detach the right side rubber stopper. (Fig. 1)
4. Place a new rubber stopper on the frame (right side) and fix it
with the hexagon nut.
After having detached the rubber stopper, restore the pedal to
the original position.
General Figure
5. Lower the left side pedal to the lowest position.
6. While maintaining the status as obtained in 4 above, loosen
the hexagon head nut and detach the left side rubber stopper.
(Fig. 2)
Rubber Stopper
Rubber Stopper
7. Plase a new rubber stopper on the frame (left side) and fix it
with the hexagon nut.
After having detached the rubber stopper, restore the pedal to
the original position.
Fig.2
MS-17
Fig.1
Replacing the Rubber Stopper
8. Mount the frame cover. (See [D-2: Mounting the Frame Covers].)
Cateye Ergociser EC-5000 Service Manual
57
MS-18
Replacing the Tray
Control Unit
REMOVAL
1. Remove the seven tapping screws at the control unit cover,
Cable
Connector
Tray(L)
and then detach the control unit.
2. Disconnect the 5P cable which is connected to the cable inlet
at the back of the control unit. Do this by holding the cable
Tray(R)
connector.
3. Remove the tapping screws (one for each joint pipe) at the
joint pipe, and detach the tray.
Washer
ASSEMBLE
1. Set the tray to each joint pipe, and fix it by using washers and
tapping screws from the back side.
2. Firmly insert the cable connector, which is at the leading edge
of the 5P cable, to the cable inlet at the back of the control unit
cover.
3. Put the control unit on the control unit cover, and fix it by using
MS-18
Replacing the Tray
seven tapping screws from underneath.
Cateye Ergociser EC-5000 Service Manual
58
Tapping Screw
Fig.1
EC-5000 Control Unit (E)
EC-5000 Control Unit (G)
EC-5000 Control Unit (F)
EC-5000 Control Unit (E) Black
EC-5000 Control Unit (G) Black
EC-5000 Control Unit (F) Black
unit:pieces
PNR.781-6108
PNR.781-6109
PNR.781-6031
Handrail Grip
PNR.781-6310
Control Unit Cover
(Control Unit Bottom Cover)
Control Unit Cover (Black)
unit:pieces
PNR.781-6040
PNR.781-6041
Console Post
PNR.781-6020
unit:pieces
PNR.781-6340
Metal Fitting(Joint Pipe Fitting)
unit:pieces
PNR.781-6441
PNR.781-6442
PNR.781-6443
EC-5000 Decal (E)
EC-5000 Decal (G)
EC-5000 Decal (F)
PNR.781-6111
EC-5000 Button Panel (E) (G) (F)
unit:pieces
PNR.781-6300
PNR.781-6301
Handrail Pipe
Handrail Pipe Black
unit:pieces
PNR.781-6030
PNR.781-6430
EC-5000 Control Unit Multi
EC-5000 Control Unit Multi Black
unit:pieces
Tray (R/L)
Tray (R/L) Black
Console Post cover
unit:pieces
PNR.781-5030
Pipe Spacer Set
unit:pieces
unit:sets
PNR.781-6320
Joint Pipe
unit:pieces
PNR.781-6010
unit:sets
Center Cover (Body Top Cover)
unit:pieces
unit:pieces
PNR.781-6000
PNR.781-6001
Frame Cover (R/L)
Frame Cover (R/L) Black
unit:sets
PNR.781-6050
Inlet Cover
PNR.781-6060
unit:pieces
Mole (F,R,L) (Rubber Lace Set)
unit:sets
PNR.781-6070
Leg Cover (Leg Pipe End)
PNR.781-6385
unit:pieces
Caster
unit:pieces
Cateye Ergociser EC-5000 Service Manual
59
List of Genuin Parts
PNR.781-6101
PNR.781-6102
PNR.781-6103
PNR.781-6106
PNR.781-6107
PNR.781-6104
PNR.781-6330
PNR.724-3950
Caster Pipe (R/L)
(Joint Leg Set)
Levelling Knob
(Hight Adjust Knob)
PNR.724-3010
Pedal Chain
unit:sets
PNR.781-6205
V-Belt
List of Genuin Parts
unit:sets
PNR.781-6240
Spring Pulley Set
PNR.781-6290
PNR.781-9200
Cartridge B.B (YST-986A)
PNR.781-6230
Sprocket A (36T)
PNR.781-6291
Sprocket B (14T)
EC-5000 Pulley B Set
unit:pieces
PNR.781-6220
Shaft Set A
unit:pieces
EC-5000 Pedal Set (L/R)
unit:sets
PNR.781-6360
unit:sets
unit:sets
Cateye Ergociser EC-5000 Service Manual
60
PNR.781-6230
unit:pieces
PNR.781-6420
Link Step Set
(Pedal and Link Set)
unit:pieces
EC-5000 Pulley A
unit:pieces
PNR.781-6210
unit:sets
Spring Spacer
unit:pieces
EC-5000 V-Belt Tension Pulley
unit:pieces
unit:sets
unit:pieces
PNR.781-6281
Chain Joint
(Chain/Link Joint)
unit:sets
PNR.781-6250
Spring
(Chain Spring)
unit:pieces
PNR.781-6270
Accelerating Chain
(Chain)
PNR.781-6280
Vibration-proof Rubber
(Levelling Knob Pad)
unit:pieces
unit:sets
PNR.781-6260
PNR.780-6550
Step Stopper
unit:pieces
PNR.781-6380
Rubber Stopper
(Pedal Stopper)
PNR.781-6410
EC-5000 Axle & Nut Set
PNR.781-6200
EC-5000 Workload Unit
unit:sets
PNR.780-2100
unit:sets
Solenoid Coil Set
(Electric Magnet Coil)
unit:pieces
PNR.780-2220
Idler Set
unit:sets
PNR.720-1110
Idler Spring
unit:sets
PNR.781-6370
unit:pieces
PNR.781-6371
Inlet Metal Base
(Inlet Metal Fitting)
Inlet Support Metal
unit:pieces
unit:pieces
PNR.781-6160
EC-5000 Power Supply Board
unit:pieces
PNR.781-6140
PNR.781-6141
PNR.781-6142
PNR.781-6143
AC Adapter JPN (100V)
AC Adapter UL/CSA (120V)
AC Adapter AS (240V)
AC Adapter EC (230V)
unit:pieces
PNR.782-0220
CDC Sensor Set
(Roller Revolution Sensor Set)
unit:pieces
TR
AN
SM
ITT
ER
PNR.781-6150
EC-5000 CDC Sensor Cable
(Revolution Sensor Cable)
unit:pieces
PNR.781-6801
Heart Rate Receiving Circuit
(Wireless Pulse Receiver Kit)
unit:sets
PNR.780-6220
PNR.780-1100
EC-5000 5P Cable
(5P Cable)
Pluse Sensor Set
PNR.701-6701
Wireless Heart Rate Sensor
(TM-1000 Wireless Pulse Sensor Kit)
unit:sets
PNR.781-6120
EC-5000 Data Card
unit:sets (10pieces)
unit:sets
unit:pieces
TR
AN
SM
ITTE
R TM
R
-10
00
D
A
T
A
C
A
R
D
PNR.788-1620
PNR.788-1621
TM-1000 Transmit
unit:sets
Electrode Belt (for TM-1000)
unit:sets
Cateye Ergociser EC-5000 Service Manual
61
List of Genuin Parts
R
TM
-100
0
PNR.
Cotterless Gear Crank Removing/Fastening Tool
unit:pieces
PNR.781-6390
PNR.781-9210
PNR.781-6131
PNR.781-6132
PNR.781-6133
EC-5000 Tool Kit
PNR.781-6400
unit:sets
PNR.758-1080
Spring Balancer
(V-Belt Tension Adjuster)
Pin Face Wrench
(Bottom Bracket Remover)
unit:sets
unit:sets
EC
-5
O
O
O
R
Cartridge B.B. Removing Tool
unit:sets
1
PNR.757-1622
EC-5000 Manual (E) (Owner´s Manual-E)
EC-5000 Manual (G) (Owner´s Manual-G)
EC-5000 Manual (F) (Owner´s Manual-F)
unit:pieces
2
PNR.757-1820
Bolt M6x22
(Hexagonal Cap Bolt)
3
Cap Bolt M8x20
(Hexagonal Cap Bolt)
PNR.757-1825
unit:pieces
unit:pieces
PNR.756-1413
Cap Bolt M8x25
(Post Fastening Bolt)
unit:pieces
5
List of Genuin Parts
4
PNR.756-1412
Tapping Screw with Washer 4x12CP
(Frame Cover Screw)
unit:pieces
6
PNR.753-0600
PNR.751-7816
Tapping Screw with Washer 4x12 Black
(Top Cover Screw)
unit:pieces
Tapping Screw (B) 4x16
PNR.751-1416
unit:pieces
PNR.753-6412
Tapping Screw (1) 4x16
(Console Screw)
Tapping Screw (2) 4x12
unit:pieces
unit:pieces
7
Thrust Washer 6
PNR.753-0800
unit:pieces
Thrust Washer 8
PNR.753-1410
unit:pieces
Plain Washer 4-10
PNR.753-1512
unit:pieces
Plain Washer 5-12
(Tray Washer)
unit:pieces
Cateye Ergociser EC-5000 Service Manual
62
8
Plain Washer 6-13-1.0
PNR.753-1615
Plain Washer 6-15.5-3.2
unit:pieces
q
PNR.752-6040
PNR.753-1622
PNR.752-1061
Hexagonal Nut M6-1
PNR.724-4803
PNR.752-1085
Hexagonal Nut M8-3
PNR.750-8645
unit:pieces
Bolt (+) M6x16 1.0x16
Hexagonal Nut M10-1
unit:pieces
Bolt (+) M6x45
(Assemble Bolt)
PNR.750-9612
Bolt (+) M6x12
unit:pieces
unit:pieces
PNR.751-2417
unit:pieces
PNR.752-1101
u
unit:pieces
PNR.750-9616
unit:pieces
unit:pieces
y
Crank Nut M10-1.25
Plain Washer 8-17-1.6
r
unit:pieces
t
Nut M6
(Handrail Nut)
PNR.753-1817
unit:pieces
e
unit:pieces
PNR.752-0161
Plain Washer 6-22-1.6
unit:pieces
w
E-Ring 4
0
Dish-Head Screw M4x0.7x16 Black
(Inlet Cover Screw)
unit:pieces
PNR.752-9440
List of Genuin Parts
PNR.753-1613
9
Speed Nut U4
unit:pieces
Cateye Ergociser EC-5000 Service Manual
63
®
CO.,LTD.
2-8-25, Kuwazu, Higashi Sumiyoshi-ku, OSAKA, 546-0041 JAPAN
TEL:81-6-6719-2631 FAX:81-6-6719-2363
Copyright© June. 1995 CAT EYE Co., Ltd.
ECSM5E-pdf-991207