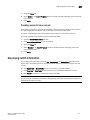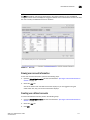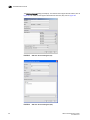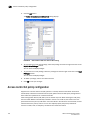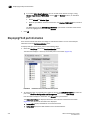
1
CA92344-0144-01
PRIMERGY
PRIMERGY FC スイッチブレード (8Gbps 18/8)
PRIMERGY FC スイッチブレード (8Gbps 18/8)&FC ポートアップグレード
PRIMERGY FC スイッチブレード (8Gbps 18/8)&拡張ライセンスオプション
PRIMERGY BX Fibre Channel Switch 8Gbit/s 18/8
(Brocade 5450)
Web Tools 管理者ガイド
Fabric OS v7.0.0
本書をお読みになる前に
外国為替及び外国貿易法に基づく特定技術について
当社のドキュメントには「外国為替および外国貿易管理法」に基づく特定技術が含まれていることがあります。特定技術が含まれて
いる場合は、当該ドキュメントを輸出または非居住者に提供するとき、同法に基づく許可が必要となります。
本書の内容について
このたびは、弊社の PRIMERGY ファイバーチャネルスイッチブレード(8Gbps 18/8)をお買い上げいただき、誠にありがと
うございます。
本書は、本製品の Web Tools (Web ユーザインタフェース)の使用方法を示した、Web Tools 管理者ガイドです。
なお、本文は英語で記載しています。
本書をよくお読みになり、正しい取り扱いをされますようお願いいたします。
53-1002152-01
29 April 2011
Web Tools
Administrator’s Guide
Supporting Fabric OS v7.0.0
®
Copyright © 2006-2011 Brocade Communications Systems, Inc. All Rights Reserved.
Brocade, the B-wing symbol, BigIron, DCX, Fabric OS, FastIron, IronPoint, IronShield, IronView, IronWare, JetCore, NetIron,
SecureIron, ServerIron, StorageX, and TurboIron are registered trademarks, and Brocade Network Advisor, Extraordinary
Networks, and SAN Health are trademarks of Brocade Communications Systems, Inc., in the United States and/or in other
countries. All other brands, products, or service names are or may be trademarks or service marks of, and are used to identify,
products or services of their respective owners.
Notice: This document is for informational purposes only and does not set forth any warranty, expressed or implied, concerning
any equipment, equipment feature, or service offered or to be offered by Brocade. Brocade reserves the right to make changes to
this document at any time, without notice, and assumes no responsibility for its use. This informational document describes
features that may not be currently available. Contact a Brocade sales office for information on feature and product availability.
Export of technical data contained in this document may require an export license from the United States government.
The authors and Brocade Communications Systems, Inc. shall have no liability or responsibility to any person or entity with
respect to any loss, cost, liability, or damages arising from the information contained in this book or the computer programs that
accompany it.
The product described by this document may contain “open source” software covered by the GNU General Public License or other
open source license agreements. To find-out which open source software is included in Brocade products, view the licensing
terms applicable to the open source software, and obtain a copy of the programming source code, please visit
http://www.brocade.com/support/oscd.
Brocade Communications Systems, Incorporated
Corporate and Latin American Headquarters
Brocade Communications Systems, Inc.
1745 Technology Drive
San Jose, CA 95110
Tel: 1-408-333-8000
Fax: 1-408-333-8101
E-mail: [email protected]
Asia-Pacific Headquarters
Brocade Communications Systems China HK, Ltd.
No. 1 Guanghua Road
Chao Yang District
Units 2718 and 2818
Beijing 100020, China
Tel: +8610 6588 8888
Fax: +8610 6588 9999
E-mail: [email protected]
European Headquarters
Brocade Communications Switzerland Sàrl
Centre Swissair
Tour B - 4ème étage
29, Route de l'Aéroport
Case Postale 105
CH-1215 Genève 15
Switzerland
Tel: +41 22 799 5640
Fax: +41 22 799 5641
E-mail: [email protected]
Asia-Pacific Headquarters
Brocade Communications Systems Co., Ltd. (Shenzhen WFOE)
Citic Plaza
No. 233 Tian He Road North
Unit 1308 – 13th Floor
Guangzhou, China
Tel: +8620 3891 2000
Fax: +8620 3891 2111
E-mail: [email protected]
Document History
Document Title
Publication Number
Summary of Changes
Publication Date
Web Tools User’s Guide v2.0
53-0001536-01
N/A
September 1999
Web Tools User’s Guide v2.2
53-0001558-02
N/A
May 2000
Web Tools User’s Guide v2.3
53-0000067-02
N/A
December 2000
Web Tools User’s Guide v3.0
53-0000130-03
N/A
July 2001
Web Tools User’s Guide v2.6
53-0000197-02
N/A
December 2001
Advanced Web Tools User’s
Guide v3.0 / v4.0
53-0000185-02
N/A
March 2002
Advanced Web Tools User’s
Guide v4.0.2
53-0000185-03
N/A
September 2002
Advanced Web Tools User’s
Guide v3.1.0
53-0000503-02
N/A
April 2003
Advanced Web Tools User’s
Guide v4.1.0
53-0000522-02
N/A
April 2003
Advanced Web Tools User’s
Guide v4.1.2
53-0000522-04
Insistent Domain ID Mode.
Port Swapping information. Minor
editorial changes.
October 2003
Advanced Web Tools
Administrator’s Guide, v4.2.0
53-0000522-05
Updates to support new switch types:
Brocade 3250, 3850, 24000.
Structural changes, support changes,
installation changes.
December 2003
Advanced Web Tools User’s
Guide
53-0000522-06
Clarifications on software and hardware March 2004
support, minor enhancements in
procedure text, minor rearranging of
content.
Advanced Web Tools
Administrator’s Guide
53-0000522-07
Updates to support new switch types
(3016, 4100) and Fabric OS v4.4.0,
including Ports on Demand, user
administration, and zoning wizards.
September 2004
Web Tools Administrator’s Guide
53-0000522-08
Updates to support new switch types
(200E, 48000) and Fabric OS v5.0.1,
including switchAdmin role, upfront
login, and Web Tools EZ.
April 2005
Web Tools Administrator’s Guide
53-0000522-09
Updates to add additional information
about refresh and polling rates.
July 2005
Web Tools Administrator’s Guide
53-1000049-01
Updates to support new switch types
(4900, 7500) and Fabric OS v5.1.0,
including FCR, FCIP, and the FR4-18i
port blade. Web Tools EZ information is
moved to a separate book.
January 2006
Web Tools Administrator’s Guide
53-1000049-02
Updates to the FCIP chapter to clarify
how to configure tunnels.
April 2006
Web Tools Administrator’s Guide
53-1000194-01
September 2006
Updates for Fabric OS v5.2.0 and the
FC4-16IP blade. Also new security for
Web Tools, including Role-Based Access
Control and administrative domains.
Web Tools Administrator’s Guide
53-1000435-01
Updates to reflect interface
enhancements, support for new switch
types, IPv6 support, and other
enhancements.
June 2007
Document Title
Publication Number
Summary of Changes
Publication Date
Web Tools Administrator’s Guide
53-1000606-01
Updates to reflect updates to enhanced October 2007
Access Gateway support, changes to
FCIP tunneling wizard, and other
enhancements.
Web Tools Administrator’s Guide
53-1000606-02
March 2008
Updates for support for new switches,
traffic isolation zoning, F_Port trunking,
removal of enhanced Access Gateway
support, and other enhancements.
Web Tools Administrator’s Guide
53-1001080-01
Updates to add features that require
the Enhanced Group Management
license, removal of features that are
now available from the Brocade
Network Advisor.
July 2008
Web Tools Administrator’s Guide
53-1001133-01
Updates to add support for Brocade
Encryption Switch and FS8-18
Encryption Blade.
August 2008
Web Tools Administrator’s Guide
53-1001194-01
Updates to add support for Virtual
Fabrics, IPsec, and consistency with
Brocade Network Advisor.
November 2008
Web Tools Administrator’s Guide
53-1001343-01
July 2009
Updates to add support for Brocade
7800 Extension Switch, Brocade 8000,
FCOE10-24 DCX Blade, and FX8-24 DCX
Extension Blade.
Web Tools Administrator’s Guide
53-1001772-01
Updates to add support for Brocade
Fabric OS 6.4.0.
March 2010
Web Tools Administrator’s Guide
53-1002152-01
Updates to add support for Brocade
Fabric OS 7.0.0.
April 2011
Contents
About This Document
In this chapter . . . . . . . . . . . . . . . . . . . . . . . . . . . . . . . . . . . . . . . . . . . xxi
How this document is organized . . . . . . . . . . . . . . . . . . . . . . . . . . . . xxi
Supported hardware and software . . . . . . . . . . . . . . . . . . . . . . . . . .xxii
What’s new in this document . . . . . . . . . . . . . . . . . . . . . . . . . . . . . . xxiii
Document conventions . . . . . . . . . . . . . . . . . . . . . . . . . . . . . . . . . . . xxiv
Text formatting . . . . . . . . . . . . . . . . . . . . . . . . . . . . . . . . . . . . . . xxiv
Notes, cautions, and warnings . . . . . . . . . . . . . . . . . . . . . . . . . xxiv
Key terms . . . . . . . . . . . . . . . . . . . . . . . . . . . . . . . . . . . . . . . . . . xxv
Notice to the reader . . . . . . . . . . . . . . . . . . . . . . . . . . . . . . . . . . . . . .xxv
Additional information. . . . . . . . . . . . . . . . . . . . . . . . . . . . . . . . . . . . .xxv
Brocade resources . . . . . . . . . . . . . . . . . . . . . . . . . . . . . . . . . . . xxv
Other industry resources . . . . . . . . . . . . . . . . . . . . . . . . . . . . . . xxvi
Getting technical help . . . . . . . . . . . . . . . . . . . . . . . . . . . . . . . . . . . . xxvi
Document feedback . . . . . . . . . . . . . . . . . . . . . . . . . . . . . . . . . . . . .xxvii
Chapter 1
Introducing Web Tools
In this chapter . . . . . . . . . . . . . . . . . . . . . . . . . . . . . . . . . . . . . . . . . . . . 1
Web Tools overview . . . . . . . . . . . . . . . . . . . . . . . . . . . . . . . . . . . . . . . . 1
Web Tools, the EGM license, and Brocade Network Advisor . . . . . . . 1
Web Tools features enabled by the EGM license. . . . . . . . . . . . . 2
Web Tools functionality moved to Brocade Network Advisor . . . 3
System requirements . . . . . . . . . . . . . . . . . . . . . . . . . . . . . . . . . . . . . . 4
Setting refresh frequency for Internet Explorer . . . . . . . . . . . . . . 5
Deleting temporary internet files used by Java applications . . . 6
Java installation on the workstation . . . . . . . . . . . . . . . . . . . . . . . . . . 6
Installing the JRE on your Solaris or Linux client workstation. . . 7
Installing patches on Solaris . . . . . . . . . . . . . . . . . . . . . . . . . . . . . 7
Installing the Java plug-in on Windows. . . . . . . . . . . . . . . . . . . . . 7
Java plug-in configuration. . . . . . . . . . . . . . . . . . . . . . . . . . . . . . . . . . . 8
Configuring the Java plug-in for Windows. . . . . . . . . . . . . . . . . . . 8
Configuring the Java plug-in for Mozilla family browsers . . . . . . 9
Value line licenses. . . . . . . . . . . . . . . . . . . . . . . . . . . . . . . . . . . . . . . . . 9
Opening Web Tools . . . . . . . . . . . . . . . . . . . . . . . . . . . . . . . . . . . . . . . 10
Logging in . . . . . . . . . . . . . . . . . . . . . . . . . . . . . . . . . . . . . . . . . . . 11
Logging out . . . . . . . . . . . . . . . . . . . . . . . . . . . . . . . . . . . . . . . . . . 12
Web Tools Adminstrator’s Guide
53-1002152-01
v
Role-Based Access Control. . . . . . . . . . . . . . . . . . . . . . . . . . . . . . . . . 13
Session management . . . . . . . . . . . . . . . . . . . . . . . . . . . . . . . . . . . . . 13
Ending a Web Tools session . . . . . . . . . . . . . . . . . . . . . . . . . . . . 14
Web Tools system logs . . . . . . . . . . . . . . . . . . . . . . . . . . . . . . . . . . . . 14
Requirements for IPv6 support . . . . . . . . . . . . . . . . . . . . . . . . . . . . . 15
Chapter 2
Using the Web Tools Interface
In this chapter . . . . . . . . . . . . . . . . . . . . . . . . . . . . . . . . . . . . . . . . . . . 17
Viewing Switch Explorer . . . . . . . . . . . . . . . . . . . . . . . . . . . . . . . . . . . 17
Persisting GUI preferences . . . . . . . . . . . . . . . . . . . . . . . . . . . . . 19
Tasks . . . . . . . . . . . . . . . . . . . . . . . . . . . . . . . . . . . . . . . . . . . . . . . 20
Fabric Tree . . . . . . . . . . . . . . . . . . . . . . . . . . . . . . . . . . . . . . . . . . 21
Changing the Admin Domain context . . . . . . . . . . . . . . . . . . . . . 21
Switch View buttons. . . . . . . . . . . . . . . . . . . . . . . . . . . . . . . . . . . 23
Switch View. . . . . . . . . . . . . . . . . . . . . . . . . . . . . . . . . . . . . . . . . . 23
Switch Events and Switch Information . . . . . . . . . . . . . . . . . . . . 25
Free Professional Management tool. . . . . . . . . . . . . . . . . . . . . . 26
Displaying tool tips . . . . . . . . . . . . . . . . . . . . . . . . . . . . . . . . . . . . . . . 26
Right-click options. . . . . . . . . . . . . . . . . . . . . . . . . . . . . . . . . . . . . . . . 27
Refresh rates . . . . . . . . . . . . . . . . . . . . . . . . . . . . . . . . . . . . . . . . . . . . 27
Displaying switches in the fabric . . . . . . . . . . . . . . . . . . . . . . . . . . . . 28
Working with Web Tools: recommendations . . . . . . . . . . . . . . . . . . . 29
Opening a Telnet or SSH client window . . . . . . . . . . . . . . . . . . . . . . . 29
Collecting logs for troubleshooting. . . . . . . . . . . . . . . . . . . . . . . . . . . 30
Chapter 3
Managing Fabrics and Switches
In this chapter . . . . . . . . . . . . . . . . . . . . . . . . . . . . . . . . . . . . . . . . . . . 31
Fabric and switch management overview . . . . . . . . . . . . . . . . . . . . . 31
Opening the Switch Administration window . . . . . . . . . . . . . . . . 33
Configuring IP and subnet mask information . . . . . . . . . . . . . . . . . . 33
Configuring Netstat Auto Refresh . . . . . . . . . . . . . . . . . . . . . . . . . . . 33
Configuring a syslog IP address . . . . . . . . . . . . . . . . . . . . . . . . . . . . . 34
Removing a syslog IP address . . . . . . . . . . . . . . . . . . . . . . . . . . . . . . 34
Configuring IP Filtering . . . . . . . . . . . . . . . . . . . . . . . . . . . . . . . . . . . . 35
Blade management. . . . . . . . . . . . . . . . . . . . . . . . . . . . . . . . . . . . . . . 35
Enabling or disabling a blade . . . . . . . . . . . . . . . . . . . . . . . . . . . 35
Setting a slot-level IP address . . . . . . . . . . . . . . . . . . . . . . . . . . . 36
Viewing IP addresses . . . . . . . . . . . . . . . . . . . . . . . . . . . . . . . . . . 37
vi
Web Tools Adminstrator’s Guide
53-1002152-01
Switch configuration . . . . . . . . . . . . . . . . . . . . . . . . . . . . . . . . . . . . . . 37
Enabling and disabling a switch . . . . . . . . . . . . . . . . . . . . . . . . . 37
Changing the switch name . . . . . . . . . . . . . . . . . . . . . . . . . . . . . 38
Changing the switch domain ID . . . . . . . . . . . . . . . . . . . . . . . . . 38
Viewing and printing a switch report . . . . . . . . . . . . . . . . . . . . . 38
Switch restart . . . . . . . . . . . . . . . . . . . . . . . . . . . . . . . . . . . . . . . . . . . 39
Performing a fast boot . . . . . . . . . . . . . . . . . . . . . . . . . . . . . . . . . 39
Performing a reboot. . . . . . . . . . . . . . . . . . . . . . . . . . . . . . . . . . . 39
System configuration parameters . . . . . . . . . . . . . . . . . . . . . . . . . . . 39
WWN-based Persistent PID assignment. . . . . . . . . . . . . . . . . . . 40
Configuring fabric settings . . . . . . . . . . . . . . . . . . . . . . . . . . . . . 41
Enabling insistent domain ID mode . . . . . . . . . . . . . . . . . . . . . . 41
Configuring virtual channel settings. . . . . . . . . . . . . . . . . . . . . . 42
Configuring arbitrated loop parameters . . . . . . . . . . . . . . . . . . . 42
Configuring system services . . . . . . . . . . . . . . . . . . . . . . . . . . . . 43
Configuring signed firmware . . . . . . . . . . . . . . . . . . . . . . . . . . . . 43
Licensed feature management . . . . . . . . . . . . . . . . . . . . . . . . . . . . . 44
Activating a license on a switch . . . . . . . . . . . . . . . . . . . . . . . . . 44
Assigning slots for a license key . . . . . . . . . . . . . . . . . . . . . . . . . 44
Removing a license from a switch . . . . . . . . . . . . . . . . . . . . . . . 45
Universal time-based licensing . . . . . . . . . . . . . . . . . . . . . . . . . . 45
High Availability overview . . . . . . . . . . . . . . . . . . . . . . . . . . . . . . . . . . 46
Admin Domain considerations . . . . . . . . . . . . . . . . . . . . . . . . . . 46
Launching the High Availability window . . . . . . . . . . . . . . . . . . . 46
Synchronizing services on the CP . . . . . . . . . . . . . . . . . . . . . . . . 47
Initiating a CP failover . . . . . . . . . . . . . . . . . . . . . . . . . . . . . . . . . 48
Event monitoring . . . . . . . . . . . . . . . . . . . . . . . . . . . . . . . . . . . . . . . . . 48
Displaying Switch Events . . . . . . . . . . . . . . . . . . . . . . . . . . . . . . . 49
Filtering Switch Events. . . . . . . . . . . . . . . . . . . . . . . . . . . . . . . . . 50
Filtering events by event severity levels . . . . . . . . . . . . . . . . . . . 50
Filtering events by message ID . . . . . . . . . . . . . . . . . . . . . . . . . . 51
Filtering events by service component . . . . . . . . . . . . . . . . . . . . 51
Displaying the Name Server entries . . . . . . . . . . . . . . . . . . . . . . . . . 51
Printing the Name Server entries . . . . . . . . . . . . . . . . . . . . . . . . 52
Displaying Name Server information for a particular device . . 52
Displaying zone members for a particular device . . . . . . . . . . . 52
Physically locating a switch using beaconing . . . . . . . . . . . . . . . . . . 53
Locating logical switches using chassis beaconing . . . . . . . . . . . . . 53
Virtual Fabrics overview . . . . . . . . . . . . . . . . . . . . . . . . . . . . . . . . . . . 53
Selecting a logical switch from the Switch View . . . . . . . . . . . . 54
Viewing logical ports . . . . . . . . . . . . . . . . . . . . . . . . . . . . . . . . . . 54
Chapter 4
Maintaining Configurations and Firmware
In this chapter . . . . . . . . . . . . . . . . . . . . . . . . . . . . . . . . . . . . . . . . . . . 57
Creating a configuration backup file . . . . . . . . . . . . . . . . . . . . . . . . . 57
Restoring a configuration . . . . . . . . . . . . . . . . . . . . . . . . . . . . . . . . . . 58
Web Tools Adminstrator’s Guide
53-1002152-01
vii
Admin Domain configuration maintenance. . . . . . . . . . . . . . . . . . . . 59
Uploading and downloading from USB storage. . . . . . . . . . . . . . . . . 60
Performing a firmware download . . . . . . . . . . . . . . . . . . . . . . . . . . . . 60
Chapter 5
Managing Administrative Domains
In this chapter . . . . . . . . . . . . . . . . . . . . . . . . . . . . . . . . . . . . . . . . . . . 63
Administrative Domain overview . . . . . . . . . . . . . . . . . . . . . . . . . . . . 63
Requirements for Admin Domains . . . . . . . . . . . . . . . . . . . . . . . 63
User-defined Admin Domains . . . . . . . . . . . . . . . . . . . . . . . . . . . 64
System-defined Admin Domains. . . . . . . . . . . . . . . . . . . . . . . . . 64
Admin Domain membership . . . . . . . . . . . . . . . . . . . . . . . . . . . . 65
Enabling Admin Domains . . . . . . . . . . . . . . . . . . . . . . . . . . . . . . . . . . 65
Admin Domain window . . . . . . . . . . . . . . . . . . . . . . . . . . . . . . . . . . . . 66
Opening the Admin Domain window. . . . . . . . . . . . . . . . . . . . . . 67
Refreshing fabric information . . . . . . . . . . . . . . . . . . . . . . . . . . . 68
Refreshing Admin Domain information . . . . . . . . . . . . . . . . . . . 68
Saving local Admin Domain changes . . . . . . . . . . . . . . . . . . . . . 68
Closing the Admin Domain window . . . . . . . . . . . . . . . . . . . . . . 69
Creating and populating domains . . . . . . . . . . . . . . . . . . . . . . . . . . . 69
Creating an Admin Domain . . . . . . . . . . . . . . . . . . . . . . . . . . . . . 69
Adding ports or switches to the fabric . . . . . . . . . . . . . . . . . . . . 70
Activating or deactivating an Admin Domain . . . . . . . . . . . . . . . 71
Modifying Admin Domain members. . . . . . . . . . . . . . . . . . . . . . . . . . 71
Renaming Admin Domains . . . . . . . . . . . . . . . . . . . . . . . . . . . . . 72
Deleting Admin Domains . . . . . . . . . . . . . . . . . . . . . . . . . . . . . . . 72
Clearing the Admin Domain configuration . . . . . . . . . . . . . . . . . 73
Chapter 6
Managing Ports
In this chapter . . . . . . . . . . . . . . . . . . . . . . . . . . . . . . . . . . . . . . . . . . . 75
Port management overview . . . . . . . . . . . . . . . . . . . . . . . . . . . . . . . . 75
Opening the Port Administration window . . . . . . . . . . . . . . . . . . 75
Port Administration window components. . . . . . . . . . . . . . . . . . 76
Controllable ports . . . . . . . . . . . . . . . . . . . . . . . . . . . . . . . . . . . . 79
Configuring FC ports . . . . . . . . . . . . . . . . . . . . . . . . . . . . . . . . . . . . . . 79
Allowed port types . . . . . . . . . . . . . . . . . . . . . . . . . . . . . . . . . . . . 80
Long distance mode . . . . . . . . . . . . . . . . . . . . . . . . . . . . . . . . . . 81
Ingress rate limit . . . . . . . . . . . . . . . . . . . . . . . . . . . . . . . . . . . . . 81
Assigning a name to a port. . . . . . . . . . . . . . . . . . . . . . . . . . . . . . . . . 82
Port beaconing . . . . . . . . . . . . . . . . . . . . . . . . . . . . . . . . . . . . . . . . . . 83
Enabling and disabling a port . . . . . . . . . . . . . . . . . . . . . . . . . . . . . . 84
Considerations for enabling or disabling a port?. . . . . . . . . . . . 84
Persistent enabling and disabling ports . . . . . . . . . . . . . . . . . . . . . . 85
Configuring NPIV ports . . . . . . . . . . . . . . . . . . . . . . . . . . . . . . . . . . . . 85
viii
Web Tools Adminstrator’s Guide
53-1002152-01
Port activation . . . . . . . . . . . . . . . . . . . . . . . . . . . . . . . . . . . . . . . . . . . 86
Enabling Ports on Demand . . . . . . . . . . . . . . . . . . . . . . . . . . . . . 87
Enabling Dynamic Ports on Demand . . . . . . . . . . . . . . . . . . . . . 88
Disabling Dynamic Ports on Demand. . . . . . . . . . . . . . . . . . . . . 88
Diagnostic ports . . . . . . . . . . . . . . . . . . . . . . . . . . . . . . . . . . . . . . 89
Reserving and releasing licenses on a port basis . . . . . . . . . . . 89
Port swapping index . . . . . . . . . . . . . . . . . . . . . . . . . . . . . . . . . . . . . . 90
Port swapping. . . . . . . . . . . . . . . . . . . . . . . . . . . . . . . . . . . . . . . . 90
Determining if a port index was swapped
with another switch port . . . . . . . . . . . . . . . . . . . . . . . . . . . . . . . 91
Configuring BB credits on an F_Port . . . . . . . . . . . . . . . . . . . . . . . . . 92
Configuring ALPA . . . . . . . . . . . . . . . . . . . . . . . . . . . . . . . . . . . . . . . . . 92
Configuring Port Octet Speed Combination. . . . . . . . . . . . . . . . . . . . 93
Configuring CSCTL. . . . . . . . . . . . . . . . . . . . . . . . . . . . . . . . . . . . . . . . 95
Inband Management . . . . . . . . . . . . . . . . . . . . . . . . . . . . . . . . . . . . . 96
Chapter 7
Enabling ISL Trunking
In this chapter . . . . . . . . . . . . . . . . . . . . . . . . . . . . . . . . . . . . . . . . . . . 99
ISL Trunking overview . . . . . . . . . . . . . . . . . . . . . . . . . . . . . . . . . . . . . 99
Disabling or enabling ISL Trunking . . . . . . . . . . . . . . . . . . . . . . . . . . 99
Admin Domain considerations . . . . . . . . . . . . . . . . . . . . . . . . .100
Viewing trunk group information . . . . . . . . . . . . . . . . . . . . . . . . . . .100
F_Port trunk groups . . . . . . . . . . . . . . . . . . . . . . . . . . . . . . . . . . . . .101
Creating and maintaining F_Port trunk groups . . . . . . . . . . . .101
Chapter 8
Monitoring Performance
In this chapter . . . . . . . . . . . . . . . . . . . . . . . . . . . . . . . . . . . . . . . . . .103
Performance Monitor overview . . . . . . . . . . . . . . . . . . . . . . . . . . . .103
Basic monitoring . . . . . . . . . . . . . . . . . . . . . . . . . . . . . . . . . . . .103
Advanced monitoring . . . . . . . . . . . . . . . . . . . . . . . . . . . . . . . . .104
Performance graphs . . . . . . . . . . . . . . . . . . . . . . . . . . . . . . . . .104
Admin Domain considerations . . . . . . . . . . . . . . . . . . . . . . . . .104
Predefined performance graphs. . . . . . . . . . . . . . . . . . . . . . . .105
User-defined graphs. . . . . . . . . . . . . . . . . . . . . . . . . . . . . . . . . . 107
Canvas configurations . . . . . . . . . . . . . . . . . . . . . . . . . . . . . . . .108
Opening the Performance Monitoring window . . . . . . . . . . . . . . . .108
Creating basic performance monitor graphs . . . . . . . . . . . . . . . . .109
Customizing basic monitoring graphs . . . . . . . . . . . . . . . . . . . . . . .109
Advanced performance monitoring graphs . . . . . . . . . . . . . . . . . . .111
Creating SID-DID Performance graphs . . . . . . . . . . . . . . . . . . .111
Creating the SCSI vs. IP Traffic graph . . . . . . . . . . . . . . . . . . . .112
Creating SCSI command graphs . . . . . . . . . . . . . . . . . . . . . . . .112
Tunnel and TCP performance monitoring graphs . . . . . . . . . . . . . .113
Tunnel and TCP graph chart properties . . . . . . . . . . . . . . . . . .114
Web Tools Adminstrator’s Guide
53-1002152-01
ix
Saving graphs to a canvas . . . . . . . . . . . . . . . . . . . . . . . . . . . . . . . .114
Adding graphs to an existing canvas . . . . . . . . . . . . . . . . . . . . . . . .115
Printing graphs . . . . . . . . . . . . . . . . . . . . . . . . . . . . . . . . . . . . . . . . .115
Modifying graphs. . . . . . . . . . . . . . . . . . . . . . . . . . . . . . . . . . . . . . . .116
Chapter 9
Administering Zoning
In this chapter . . . . . . . . . . . . . . . . . . . . . . . . . . . . . . . . . . . . . . . . . . 117
Zoning overview. . . . . . . . . . . . . . . . . . . . . . . . . . . . . . . . . . . . . . . . . 117
Basic zones . . . . . . . . . . . . . . . . . . . . . . . . . . . . . . . . . . . . . . . . 117
Traffic Isolation zones . . . . . . . . . . . . . . . . . . . . . . . . . . . . . . . . 117
LSAN zone requirements. . . . . . . . . . . . . . . . . . . . . . . . . . . . . .118
QoS zone requirements . . . . . . . . . . . . . . . . . . . . . . . . . . . . . . .118
Zoning configurations . . . . . . . . . . . . . . . . . . . . . . . . . . . . . . . . . . . .118
Opening the Zone Admin window . . . . . . . . . . . . . . . . . . . . . . .118
Setting the default zoning mode. . . . . . . . . . . . . . . . . . . . . . . .119
Zoning management. . . . . . . . . . . . . . . . . . . . . . . . . . . . . . . . . . . . .119
Refreshing fabric information . . . . . . . . . . . . . . . . . . . . . . . . . .121
Refreshing Zone Admin window information . . . . . . . . . . . . . .121
Saving local zoning changes . . . . . . . . . . . . . . . . . . . . . . . . . . .122
Selecting a zoning view . . . . . . . . . . . . . . . . . . . . . . . . . . . . . . .123
Creating and populating zone aliases . . . . . . . . . . . . . . . . . . .123
Adding and removing members of a zone alias. . . . . . . . . . . .124
Renaming zone aliases . . . . . . . . . . . . . . . . . . . . . . . . . . . . . . .124
Deleting zone aliases. . . . . . . . . . . . . . . . . . . . . . . . . . . . . . . . .125
Creating and populating zones . . . . . . . . . . . . . . . . . . . . . . . . .125
Adding and removing members of a zone . . . . . . . . . . . . . . . .126
Renaming zones. . . . . . . . . . . . . . . . . . . . . . . . . . . . . . . . . . . . .126
Cloning zones . . . . . . . . . . . . . . . . . . . . . . . . . . . . . . . . . . . . . . .127
Deleting zones . . . . . . . . . . . . . . . . . . . . . . . . . . . . . . . . . . . . . .127
Creating and populating enhanced traffic isolation zones . . .128
x
Web Tools Adminstrator’s Guide
53-1002152-01
Zone configuration and zoning database management . . . . . . . .128
Creating zone configurations . . . . . . . . . . . . . . . . . . . . . . . . . .129
Adding or removing zone configuration members. . . . . . . . . .130
Renaming zone configurations . . . . . . . . . . . . . . . . . . . . . . . . .130
Cloning zone configurations . . . . . . . . . . . . . . . . . . . . . . . . . . .131
Deleting zone configurations . . . . . . . . . . . . . . . . . . . . . . . . . .131
Enabling zone configurations . . . . . . . . . . . . . . . . . . . . . . . . . .131
Disabling zone configurations. . . . . . . . . . . . . . . . . . . . . . . . . .132
Displaying enabled zone configurations. . . . . . . . . . . . . . . . . .132
Viewing the enabled zone configuration name without
opening the Zone Admin window . . . . . . . . . . . . . . . . . . . . . . .132
Viewing detailed information about the enabled
zone configuration . . . . . . . . . . . . . . . . . . . . . . . . . . . . . . . . . . .133
Adding a WWN to multiple aliases and zones . . . . . . . . . . . . .133
Removing a WWN from multiple aliases and zones . . . . . . . .134
Replacing a WWN in multiple aliases and zones. . . . . . . . . . .134
Searching for zone members . . . . . . . . . . . . . . . . . . . . . . . . . .135
Clearing the zoning database . . . . . . . . . . . . . . . . . . . . . . . . . .135
Zone configuration analysis . . . . . . . . . . . . . . . . . . . . . . . . . . .136
Best practices for zoning . . . . . . . . . . . . . . . . . . . . . . . . . . . . . . . . .136
Chapter 10
Working with Diagnostic Features
In this chapter . . . . . . . . . . . . . . . . . . . . . . . . . . . . . . . . . . . . . . . . . .137
Trace dumps . . . . . . . . . . . . . . . . . . . . . . . . . . . . . . . . . . . . . . . . . . .137
How a trace dump is used. . . . . . . . . . . . . . . . . . . . . . . . . . . . .138
Setting up automatic trace dump transfers . . . . . . . . . . . . . . .138
Specifying a remote server . . . . . . . . . . . . . . . . . . . . . . . . . . . .138
Enabling automatic transfer of trace dumps . . . . . . . . . . . . . .138
Disabling automatic trace uploads. . . . . . . . . . . . . . . . . . . . . .139
Displaying switch information . . . . . . . . . . . . . . . . . . . . . . . . . . . . .139
Viewing detailed fan hardware status . . . . . . . . . . . . . . . . . . .140
Viewing the temperature status . . . . . . . . . . . . . . . . . . . . . . . . 141
Viewing the power supply status. . . . . . . . . . . . . . . . . . . . . . . . 141
Checking the physical health of a switch . . . . . . . . . . . . . . . . .142
Defining Switch Policy . . . . . . . . . . . . . . . . . . . . . . . . . . . . . . . . . . . .143
Port LED interpretation . . . . . . . . . . . . . . . . . . . . . . . . . . . . . . . . . . .144
Port icon colors . . . . . . . . . . . . . . . . . . . . . . . . . . . . . . . . . . . . .144
Chapter 11
Using the FC-FC Routing Service
In this chapter . . . . . . . . . . . . . . . . . . . . . . . . . . . . . . . . . . . . . . . . . .145
Fibre Channel Routing overview. . . . . . . . . . . . . . . . . . . . . . . . . . . .145
Supported switches for Fibre Channel Routing. . . . . . . . . . . . . . . .146
Setting up FC-FC routing . . . . . . . . . . . . . . . . . . . . . . . . . . . . . . . . . .146
FC-FC routing management . . . . . . . . . . . . . . . . . . . . . . . . . . . . . . . 147
Opening the FC Routing module . . . . . . . . . . . . . . . . . . . . . . . . 147
Viewing and managing LSAN fabrics . . . . . . . . . . . . . . . . . . . .148
Web Tools Adminstrator’s Guide
53-1002152-01
xi
Viewing EX_Ports. . . . . . . . . . . . . . . . . . . . . . . . . . . . . . . . . . . . . . . .148
Configuring an EX_Port . . . . . . . . . . . . . . . . . . . . . . . . . . . . . . . . . . .149
Editing the configuration of an EX_Port . . . . . . . . . . . . . . . . . .149
Configuring FCR router port cost . . . . . . . . . . . . . . . . . . . . . . . . . . .149
Viewing LSAN zones . . . . . . . . . . . . . . . . . . . . . . . . . . . . . . . . . . . . .150
Viewing LSAN devices . . . . . . . . . . . . . . . . . . . . . . . . . . . . . . . .150
Configuring the backbone fabric ID . . . . . . . . . . . . . . . . . . . . . . . . .150
Chapter 12
Using the Access Gateway
In this chapter . . . . . . . . . . . . . . . . . . . . . . . . . . . . . . . . . . . . . . . . . .153
Access Gateway overview . . . . . . . . . . . . . . . . . . . . . . . . . . . . . . . . .153
Viewing Switch Explorer for Access Gateway mode . . . . . . . . . . . .154
Access Gateway mode . . . . . . . . . . . . . . . . . . . . . . . . . . . . . . . . . . .155
Restricted access in the Port Administration window . . . . . . .155
Enabling Access Gateway mode. . . . . . . . . . . . . . . . . . . . . . . . . . . .155
Disabling Access Gateway mode . . . . . . . . . . . . . . . . . . . . . . . . . . .156
Viewing the Access Gateway settings . . . . . . . . . . . . . . . . . . . . . . .156
Port configuration . . . . . . . . . . . . . . . . . . . . . . . . . . . . . . . . . . . . . . .156
Creating port groups . . . . . . . . . . . . . . . . . . . . . . . . . . . . . . . . .157
Editing or viewing port groups. . . . . . . . . . . . . . . . . . . . . . . . . .157
Deleting port groups . . . . . . . . . . . . . . . . . . . . . . . . . . . . . . . . .158
Defining custom primary F-N port mapping . . . . . . . . . . . . . . .159
Defining custom static F-N port mapping. . . . . . . . . . . . . . . . .159
Defining custom WWN-N port mappings . . . . . . . . . . . . . . . . .159
Access Gateway policy modification . . . . . . . . . . . . . . . . . . . . . . . .160
Path Failover and Failback policies . . . . . . . . . . . . . . . . . . . . .160
Modifying Path Failover and Failback policies . . . . . . . . . . . . .160
Enabling the Automatic Port Configuration policy . . . . . . . . . .161
Access Gateway limitations on the Brocade 8000 . . . . . . . . . . . . .162
Chapter 13
Administering Fabric Watch
In this chapter . . . . . . . . . . . . . . . . . . . . . . . . . . . . . . . . . . . . . . . . . .163
Fabric Watch overview . . . . . . . . . . . . . . . . . . . . . . . . . . . . . . . . . . .163
Chapter 14
Administering Extended Fabrics
In this chapter . . . . . . . . . . . . . . . . . . . . . . . . . . . . . . . . . . . . . . . . . .165
Extended link buffer allocation overview. . . . . . . . . . . . . . . . . . . . .165
Configuring a port for long distance . . . . . . . . . . . . . . . . . . . . . . . .167
Chapter 15
Routing Traffic
In this chapter . . . . . . . . . . . . . . . . . . . . . . . . . . . . . . . . . . . . . . . . . .169
xii
Web Tools Adminstrator’s Guide
53-1002152-01
Routing overview . . . . . . . . . . . . . . . . . . . . . . . . . . . . . . . . . . . . . . . .169
Viewing fabric shortest path first routing . . . . . . . . . . . . . . . . . . . .170
Configuring dynamic load sharing . . . . . . . . . . . . . . . . . . . . . . . . . .170
Lossless dynamic load sharing . . . . . . . . . . . . . . . . . . . . . . . . . 171
Specifying frame order delivery . . . . . . . . . . . . . . . . . . . . . . . . . . . .172
Configuring the link cost for a port . . . . . . . . . . . . . . . . . . . . . . . . .172
Chapter 16
Configuring Standard Security Features
In this chapter . . . . . . . . . . . . . . . . . . . . . . . . . . . . . . . . . . . . . . . . . .175
User-defined accounts . . . . . . . . . . . . . . . . . . . . . . . . . . . . . . . . . . .175
Virtual Fabrics considerations. . . . . . . . . . . . . . . . . . . . . . . . . . 176
Admin Domain considerations . . . . . . . . . . . . . . . . . . . . . . . . . 176
Viewing user account information . . . . . . . . . . . . . . . . . . . . . . 177
Creating user-defined accounts . . . . . . . . . . . . . . . . . . . . . . . . 177
Deleting user-defined accounts . . . . . . . . . . . . . . . . . . . . . . . .180
Changing user account parameters . . . . . . . . . . . . . . . . . . . .180
Maintaining passwords . . . . . . . . . . . . . . . . . . . . . . . . . . . . . . .181
User-defined roles . . . . . . . . . . . . . . . . . . . . . . . . . . . . . . . . . . . . . . .183
Guidelines and restrictions . . . . . . . . . . . . . . . . . . . . . . . . . . . .184
Creating a user-defined role . . . . . . . . . . . . . . . . . . . . . . . . . . .184
Editing a user-defined role . . . . . . . . . . . . . . . . . . . . . . . . . . . .185
Access control list policy configuration . . . . . . . . . . . . . . . . . . . . . .186
Virtual Fabrics considerations. . . . . . . . . . . . . . . . . . . . . . . . . .187
Admin Domain considerations . . . . . . . . . . . . . . . . . . . . . . . . .187
Creating an SCC, DCC, or FCS policy . . . . . . . . . . . . . . . . . . . .187
Editing an SCC, DCC, or FCS policy. . . . . . . . . . . . . . . . . . . . . .187
Deleting all SCC, DCC, or FCS policies . . . . . . . . . . . . . . . . . . .188
Activating all SCC, DCC, or FCS policies . . . . . . . . . . . . . . . . . .188
Distributing an SCC, DCC, or FCS policy . . . . . . . . . . . . . . . . . .188
Moving an FCS policy switch position. . . . . . . . . . . . . . . . . . . .189
Configuring Advanced Device Security policy . . . . . . . . . . . . .189
Fabric-Wide Consistency Policy configuration . . . . . . . . . . . . . . . . .190
Authentication policy configuration . . . . . . . . . . . . . . . . . . . . . . . . .191
Configuring authentication policies for E_Ports. . . . . . . . . . . .191
Configuring authentication policies for F_Ports. . . . . . . . . . . .192
Distributing authentication policies . . . . . . . . . . . . . . . . . . . . .192
Re-authenticating policies. . . . . . . . . . . . . . . . . . . . . . . . . . . . .192
Setting a shared secret key pair . . . . . . . . . . . . . . . . . . . . . . . .193
Modifying a shared secret key pair. . . . . . . . . . . . . . . . . . . . . .193
Setting the Switch Policy Authentication mode . . . . . . . . . . . .193
SNMP configuration . . . . . . . . . . . . . . . . . . . . . . . . . . . . . . . . . . . . .194
Setting SNMP trap levels. . . . . . . . . . . . . . . . . . . . . . . . . . . . . .194
Changing the systemGroup configuration parameters . . . . . .194
Setting SNMPv1 configuration parameters . . . . . . . . . . . . . . .194
Setting SNMPv3 configuration parameters . . . . . . . . . . . . . . .195
Changing the access control configuration . . . . . . . . . . . . . . .195
Web Tools Adminstrator’s Guide
53-1002152-01
xiii
RADIUS management . . . . . . . . . . . . . . . . . . . . . . . . . . . . . . . . . . . .196
Enabling and disabling RADIUS . . . . . . . . . . . . . . . . . . . . . . . .196
Configuring RADIUS . . . . . . . . . . . . . . . . . . . . . . . . . . . . . . . . . .197
Modifying the RADIUS server . . . . . . . . . . . . . . . . . . . . . . . . . .197
Modifying the RADIUS server order . . . . . . . . . . . . . . . . . . . . .198
Removing a RADIUS server . . . . . . . . . . . . . . . . . . . . . . . . . . . .198
Active Directory service management . . . . . . . . . . . . . . . . . . . . . . .199
Enabling Active Directory service . . . . . . . . . . . . . . . . . . . . . . .199
Modifying Active Directory service . . . . . . . . . . . . . . . . . . . . . .199
Removing Active Directory service . . . . . . . . . . . . . . . . . . . . . .200
IPsec concepts . . . . . . . . . . . . . . . . . . . . . . . . . . . . . . . . . . . . . . . . .200
Transport mode and tunnel mode . . . . . . . . . . . . . . . . . . . . . .201
IPsec header options . . . . . . . . . . . . . . . . . . . . . . . . . . . . . . . . .201
Basic IPsec configurations . . . . . . . . . . . . . . . . . . . . . . . . . . . .202
Internet Key Exchange concepts. . . . . . . . . . . . . . . . . . . . . . . .203
IPsec over FCIP . . . . . . . . . . . . . . . . . . . . . . . . . . . . . . . . . . . . . . . . .205
FCIP Compression . . . . . . . . . . . . . . . . . . . . . . . . . . . . . . . . . . .206
Accessing the IPsec Policies dialog box . . . . . . . . . . . . . . . . . .206
Establishing an IKE policy for an FCIP tunnel . . . . . . . . . . . . .206
Establishing an IPsec policy for an FCIP tunnel . . . . . . . . . . . .207
IPsec over management ports . . . . . . . . . . . . . . . . . . . . . . . . . . . . .207
Enabling the Ethernet IPsec policies . . . . . . . . . . . . . . . . . . . .208
Establishing an IKE policy . . . . . . . . . . . . . . . . . . . . . . . . . . . . .208
Creating a security association . . . . . . . . . . . . . . . . . . . . . . . . .209
Creating an SA proposal . . . . . . . . . . . . . . . . . . . . . . . . . . . . . .209
Adding an IPsec transform policy . . . . . . . . . . . . . . . . . . . . . . .210
Adding an IPsec selector . . . . . . . . . . . . . . . . . . . . . . . . . . . . . .210
Manually creating an SA . . . . . . . . . . . . . . . . . . . . . . . . . . . . . .211
Editing an IKE or IPsec policy . . . . . . . . . . . . . . . . . . . . . . . . . .212
Deleting an IKE or IPsec policy . . . . . . . . . . . . . . . . . . . . . . . . .212
Establishing authentication policies for HBAs . . . . . . . . . . . . . . . .213
Chapter 17
Administering FICON CUP Fabrics
In this chapter . . . . . . . . . . . . . . . . . . . . . . . . . . . . . . . . . . . . . . . . . .215
FICON CUP fabrics overview . . . . . . . . . . . . . . . . . . . . . . . . . . . . . . .215
Enabling port-based routing . . . . . . . . . . . . . . . . . . . . . . . . . . . . . . .216
Enabling or disabling FICON Management Server mode . . . . . . . . 217
FMS parameter configuration . . . . . . . . . . . . . . . . . . . . . . . . . . . . .218
Configuring FMS mode parameters . . . . . . . . . . . . . . . . . . . . .219
Displaying code page information . . . . . . . . . . . . . . . . . . . . . . . . . .219
Viewing the control device state. . . . . . . . . . . . . . . . . . . . . . . . . . . .219
xiv
Web Tools Adminstrator’s Guide
53-1002152-01
Allow / Prohibit Matrix configuration . . . . . . . . . . . . . . . . . . . . . . . .220
Viewing Allow / Prohibit Matrix configurations. . . . . . . . . . . . .221
Modifying Allow / Prohibit Matrix configurations . . . . . . . . . . .221
Activating an Allow / Prohibit Matrix configuration . . . . . . . . .223
Copying an Allow / Prohibit Matrix configuration. . . . . . . . . . .223
Deleting an Allow / Prohibit Matrix configuration . . . . . . . . . .224
CUP logical path configuration . . . . . . . . . . . . . . . . . . . . . . . . . . . . .224
Viewing CUP logical path configurations . . . . . . . . . . . . . . . . .224
Configuring CUP logical paths . . . . . . . . . . . . . . . . . . . . . . . . . .224
Link Incident Registered Recipient configuration . . . . . . . . . . . . . .225
Viewing Link Incident Registered Recipient configurations . .225
Configuring LIRRs. . . . . . . . . . . . . . . . . . . . . . . . . . . . . . . . . . . .225
Displaying Request Node Identification Data . . . . . . . . . . . . . . . . .226
Chapter 18
Configuring FCoE with Web Tools
In this chapter . . . . . . . . . . . . . . . . . . . . . . . . . . . . . . . . . . . . . . . . . .227
Web Tools and FCoE overview . . . . . . . . . . . . . . . . . . . . . . . . . . . . .228
Web Tools, the EGM license, and Brocade Network Advisor . . . . .228
Port information that is unique to FCoE . . . . . . . . . . . . . . . . . .228
Switch administration and FCoE . . . . . . . . . . . . . . . . . . . . . . . . . . .229
FC0E configuration tasks . . . . . . . . . . . . . . . . . . . . . . . . . . . . . . . . .229
Quality of Service configuration . . . . . . . . . . . . . . . . . . . . . . . . . . . .230
Editing the DCB map . . . . . . . . . . . . . . . . . . . . . . . . . . . . . . . . .230
Adding a traffic class map. . . . . . . . . . . . . . . . . . . . . . . . . . . . .231
LLDP-DCBX configuration . . . . . . . . . . . . . . . . . . . . . . . . . . . . . . . . .231
Configuring global LLDP characteristics. . . . . . . . . . . . . . . . . .232
Adding an LLDP profile . . . . . . . . . . . . . . . . . . . . . . . . . . . . . . .233
Configuring DCB interfaces . . . . . . . . . . . . . . . . . . . . . . . . . . . . . . .234
Configuring a link aggregation group. . . . . . . . . . . . . . . . . . . . . . . .235
Configuring VLANs. . . . . . . . . . . . . . . . . . . . . . . . . . . . . . . . . . . . . . .236
Configuring FCoE login groups . . . . . . . . . . . . . . . . . . . . . . . . . . . . .237
Displaying FCoE port information. . . . . . . . . . . . . . . . . . . . . . . . . . .238
Displaying LAG information. . . . . . . . . . . . . . . . . . . . . . . . . . . . . . . .239
Displaying VLAN information . . . . . . . . . . . . . . . . . . . . . . . . . . . . . .239
Displaying FCoE login groups . . . . . . . . . . . . . . . . . . . . . . . . . . . . . .239
Displaying QoS information . . . . . . . . . . . . . . . . . . . . . . . . . . . . . . .239
Displaying LLDP-DCBX information . . . . . . . . . . . . . . . . . . . . . . . . .240
Displaying DCB interface statistics . . . . . . . . . . . . . . . . . . . . . . . . .240
Configuring a DCB interface from the Switch View . . . . . . . . . . . . .240
Configuring a DCB interface from the Port Admin panel . . . . . . . . 241
Enabling and disabling a LAG. . . . . . . . . . . . . . . . . . . . . . . . . . . . . . 241
Web Tools Adminstrator’s Guide
53-1002152-01
xv
Enabling and disabling LLDP . . . . . . . . . . . . . . . . . . . . . . . . . . . . . . 241
Enabling and disabling QoS priority-based flow control . . . . . . . . .242
Enabling and disabling FCoE ports . . . . . . . . . . . . . . . . . . . . . . . . .242
Chapter 19
Limitations
In this chapter . . . . . . . . . . . . . . . . . . . . . . . . . . . . . . . . . . . . . . . . . .243
General Web Tools limitations . . . . . . . . . . . . . . . . . . . . . . . . . . . . .243
Index
xvi
Web Tools Adminstrator’s Guide
53-1002152-01
Figures
Figure 1
Configuring Internet Explorer . . . . . . . . . . . . . . . . . . . . . . . . . . . . . . . . . . . . . . . . . 6
Figure 2
Default Java for browsers option . . . . . . . . . . . . . . . . . . . . . . . . . . . . . . . . . . . . . . 9
Figure 3
Web Tools interface. . . . . . . . . . . . . . . . . . . . . . . . . . . . . . . . . . . . . . . . . . . . . . . . 10
Figure 4
Virtual Fabric login option . . . . . . . . . . . . . . . . . . . . . . . . . . . . . . . . . . . . . . . . . . . 12
Figure 5
Switch Explorer . . . . . . . . . . . . . . . . . . . . . . . . . . . . . . . . . . . . . . . . . . . . . . . . . . . 19
Figure 6
USB port storage management . . . . . . . . . . . . . . . . . . . . . . . . . . . . . . . . . . . . . . 24
Figure 7
Right-click menu for ports (from Switch Explorer) . . . . . . . . . . . . . . . . . . . . . . . . 27
Figure 8
Switch Administration window, Switch tab . . . . . . . . . . . . . . . . . . . . . . . . . . . . . 32
Figure 9
Blade tab . . . . . . . . . . . . . . . . . . . . . . . . . . . . . . . . . . . . . . . . . . . . . . . . . . . . . . . . 36
Figure 10
High Availability window, CP tab . . . . . . . . . . . . . . . . . . . . . . . . . . . . . . . . . . . . . . 47
Figure 11
Information dialog box. . . . . . . . . . . . . . . . . . . . . . . . . . . . . . . . . . . . . . . . . . . . . . 57
Figure 12
Fabric ID selector. . . . . . . . . . . . . . . . . . . . . . . . . . . . . . . . . . . . . . . . . . . . . . . . . . 58
Figure 13
Port swapped label . . . . . . . . . . . . . . . . . . . . . . . . . . . . . . . . . . . . . . . . . . . . . . . . 90
Figure 14
Port swapping index . . . . . . . . . . . . . . . . . . . . . . . . . . . . . . . . . . . . . . . . . . . . . . . 91
Figure 15
ALPA Map selection . . . . . . . . . . . . . . . . . . . . . . . . . . . . . . . . . . . . . . . . . . . . . . . . 93
Figure 16
ALPA Map dialog . . . . . . . . . . . . . . . . . . . . . . . . . . . . . . . . . . . . . . . . . . . . . . . . . . 93
Figure 17
FC Explorer dialog . . . . . . . . . . . . . . . . . . . . . . . . . . . . . . . . . . . . . . . . . . . . . . . . . 94
Figure 18
Port Octet Speed Combination dialog . . . . . . . . . . . . . . . . . . . . . . . . . . . . . . . . . 94
Figure 19
Trunking tab . . . . . . . . . . . . . . . . . . . . . . . . . . . . . . . . . . . . . . . . . . . . . . . . . . . . . 100
Figure 20
Accessing performance graphs . . . . . . . . . . . . . . . . . . . . . . . . . . . . . . . . . . . . . 107
Figure 21
Canvas of six performance monitoring graphs . . . . . . . . . . . . . . . . . . . . . . . . . 108
Figure 22
Select Ports for customizing the Switch Throughput Utilization graph . . . . . . 110
Figure 23
Zone Admin window. . . . . . . . . . . . . . . . . . . . . . . . . . . . . . . . . . . . . . . . . . . . . . . 120
Figure 24
Sample zoning database. . . . . . . . . . . . . . . . . . . . . . . . . . . . . . . . . . . . . . . . . . . 129
Figure 25
Temperature Sensor States window . . . . . . . . . . . . . . . . . . . . . . . . . . . . . . . . . 140
Figure 26
Fan States window. . . . . . . . . . . . . . . . . . . . . . . . . . . . . . . . . . . . . . . . . . . . . . . . 140
Figure 27
Power States window . . . . . . . . . . . . . . . . . . . . . . . . . . . . . . . . . . . . . . . . . . . . . 141
Figure 28
Switch Report window . . . . . . . . . . . . . . . . . . . . . . . . . . . . . . . . . . . . . . . . . . . . . 142
Figure 29
Switch Status Policy dialog box. . . . . . . . . . . . . . . . . . . . . . . . . . . . . . . . . . . . . . 144
Figure 30
Switch Explorer view for Access Gateway mode . . . . . . . . . . . . . . . . . . . . . . . . 154
Figure 31
Access Gateway Auto Rebalancing. . . . . . . . . . . . . . . . . . . . . . . . . . . . . . . . . . . 161
Figure 32
Extended Fabric tab. . . . . . . . . . . . . . . . . . . . . . . . . . . . . . . . . . . . . . . . . . . . . . . 166
Figure 33
Routing tab. . . . . . . . . . . . . . . . . . . . . . . . . . . . . . . . . . . . . . . . . . . . . . . . . . . . . . 170
Figure 34
User tab . . . . . . . . . . . . . . . . . . . . . . . . . . . . . . . . . . . . . . . . . . . . . . . . . . . . . . . . 177
Figure 35
Add User Account dialog box (VF) . . . . . . . . . . . . . . . . . . . . . . . . . . . . . . . . . . . . 178
Figure 36
Add User Account dialog box (AD) . . . . . . . . . . . . . . . . . . . . . . . . . . . . . . . . . . . 178
Web Tools Adminstrator’s Guide
53-1002152-01
xvii
xviii
Figure 37
Switch Admin:Add User Defined Role dialog . . . . . . . . . . . . . . . . . . . . . . . . . . . 185
Figure 38
Switch Admin:Add User Defined Role dialog . . . . . . . . . . . . . . . . . . . . . . . . . . . 186
Figure 39
Transport mode and tunnel mode comparison . . . . . . . . . . . . . . . . . . . . . . . . . 201
Figure 40
AH header in transport mode and tunnel mode . . . . . . . . . . . . . . . . . . . . . . . . 202
Figure 41
ESP header in transport mode and tunnel mode . . . . . . . . . . . . . . . . . . . . . . . 202
Figure 42
Edit Allow / Prohibit Matrix dialog box swapped label . . . . . . . . . . . . . . . . . . . 221
Figure 43
Allow / Prohibit Matrix Configuration dialog box . . . . . . . . . . . . . . . . . . . . . . . . 223
Figure 44
Switch RNID information . . . . . . . . . . . . . . . . . . . . . . . . . . . . . . . . . . . . . . . . . . . 226
Figure 45
Switch Administration DCB subtabs. . . . . . . . . . . . . . . . . . . . . . . . . . . . . . . . . . 229
Figure 46
FCoE Ports tab, Port Administration panel. . . . . . . . . . . . . . . . . . . . . . . . . . . . . 238
Web Tools Adminstrator’s Guide
53-1002152-01
Tables
Table 1
Basic Web Tools features and EGM licensed features . . . . . . . . . . . . . . . . . . . . . 2
Table 2
Web Tools functionality moved to Brocade Network Advisor . . . . . . . . . . . . . . . . 3
Table 3
Certified and tested platforms. . . . . . . . . . . . . . . . . . . . . . . . . . . . . . . . . . . . . . . . . 5
Table 4
Supported platforms. . . . . . . . . . . . . . . . . . . . . . . . . . . . . . . . . . . . . . . . . . . . . . . . . 5
Table 5
Predefined Web Tools roles . . . . . . . . . . . . . . . . . . . . . . . . . . . . . . . . . . . . . . . . . 13
Table 6
Polling rates . . . . . . . . . . . . . . . . . . . . . . . . . . . . . . . . . . . . . . . . . . . . . . . . . . . . . . 28
Table 7
Switches that support WWN-based Persistent PID on Web Tools. . . . . . . . . . . . 40
Table 8
Event severity levels . . . . . . . . . . . . . . . . . . . . . . . . . . . . . . . . . . . . . . . . . . . . . . . . 49
Table 9
Ports enabled with POD licenses and DPOD feature . . . . . . . . . . . . . . . . . . . . . . 86
Table 10
Port octet speed combinations . . . . . . . . . . . . . . . . . . . . . . . . . . . . . . . . . . . . . . . 94
Table 11
Basic performance graphs . . . . . . . . . . . . . . . . . . . . . . . . . . . . . . . . . . . . . . . . . . 105
Table 12
Advanced performance monitoring graphs . . . . . . . . . . . . . . . . . . . . . . . . . . . . 105
Table 13
Supported port types for Brocade switches . . . . . . . . . . . . . . . . . . . . . . . . . . . . 106
Table 14
QoS zone name prefixes . . . . . . . . . . . . . . . . . . . . . . . . . . . . . . . . . . . . . . . . . . . 118
Table 15
Long-distance settings and license requirements . . . . . . . . . . . . . . . . . . . . . . . 167
Table 16
User role and permissions . . . . . . . . . . . . . . . . . . . . . . . . . . . . . . . . . . . . . . . . . . 176
Table 17
Relevant RFCs. . . . . . . . . . . . . . . . . . . . . . . . . . . . . . . . . . . . . . . . . . . . . . . . . . . . 200
Table 18
Encryption algorithm options . . . . . . . . . . . . . . . . . . . . . . . . . . . . . . . . . . . . . . . . 204
Table 19
Hash algorithm options . . . . . . . . . . . . . . . . . . . . . . . . . . . . . . . . . . . . . . . . . . . . 204
Table 20
FMS mode parameter descriptions. . . . . . . . . . . . . . . . . . . . . . . . . . . . . . . . . . . 218
Table 21
Web Tools limitations . . . . . . . . . . . . . . . . . . . . . . . . . . . . . . . . . . . . . . . . . . . . . . 243
Web Tools Adminstrator’s Guide
53-1002152-01
xix
xx
Web Tools Adminstrator’s Guide
53-1002152-01
About This Document
In this chapter
• How this document is organized . . . . . . . . . . . . . . . . . . . . . . . . . . . . . . . . . . xxi
• Supported hardware and software. . . . . . . . . . . . . . . . . . . . . . . . . . . . . . . . xxii
• What’s new in this document . . . . . . . . . . . . . . . . . . . . . . . . . . . . . . . . . . . . xxiii
• Document conventions . . . . . . . . . . . . . . . . . . . . . . . . . . . . . . . . . . . . . . . . . xxiv
• Notice to the reader . . . . . . . . . . . . . . . . . . . . . . . . . . . . . . . . . . . . . . . . . . . xxv
• Additional information . . . . . . . . . . . . . . . . . . . . . . . . . . . . . . . . . . . . . . . . . . xxv
• Getting technical help . . . . . . . . . . . . . . . . . . . . . . . . . . . . . . . . . . . . . . . . . . xxvi
• Document feedback . . . . . . . . . . . . . . . . . . . . . . . . . . . . . . . . . . . . . . . . . . . xxvii
How this document is organized
This document is organized to help you find the information that you want as quickly and easily as
possible.
The document contains the following components:
• Chapter 1, “Introducing Web Tools” provides some basic information about the Web Tools
interface, including system requirements and installation instructions.
• Chapter 2, “Using the Web Tools Interface” describes the components of the Web Tools
interface.
• Chapter 3, “Managing Fabrics and Switches” provides information on how to manage your
fabric and switches using the Web Tools interface.
• Chapter 4, “Maintaining Configurations and Firmware” provides information about uploading
and downloading configuration files and downloading firmware.
• Chapter 5, “Managing Administrative Domains” provides information on managing Admin
Domains.
• Chapter 6, “Managing Ports” provides information about managing FC and GbE ports.
• Chapter 7, “Enabling ISL Trunking” provides information on managing the licensed ISL Trunking
feature.
• Chapter 8, “Monitoring Performance” provides information on how to use the Brocade
Advanced Performance Monitoring feature to monitor your fabric performance.
• Chapter 9, “Administering Zoning” provides information on how to use the Brocade Advanced
Zoning feature to partition your storage area network (SAN) into logical groups of devices that
can access each other.
Web Tools Adminstrator’s Guide
53-1002152-01
xxi
• Chapter 10, “Working with Diagnostic Features” provides information about trace dumps,
viewing switch health, and interpreting the LEDs.
• Chapter 11, “Using the FC-FC Routing Service” provides information on using the FC-FC
Routing Service to share devices between fabrics without merging those fabrics.
• Chapter 12, “Using the Access Gateway” provides information on how to configure and manage
the Brocade Access Gateway.
• Chapter 13, “Administering Fabric Watch” provides information on how to use the Fabric Watch
feature to monitor the performance and status of switches and alert you when problems arise.
• Chapter 14, “Administering Extended Fabrics” provides information on how to configure a port
for long distance.
• Chapter 15, “Routing Traffic” provides information on how to configure routes.
• Chapter 16, “Configuring Standard Security Features” provides information on managing user
accounts, SNMP, and the RADIUS server.
• Chapter 17, “Administering FICON CUP Fabrics” provides information on how to administer and
manage FICON CUP fabrics. You can enable FMS mode, edit and create configurations, and
edit FMS parameters.
• Chapter 18, “Configuring FCoE with Web Tools” provides information on how to configure FCoE
features.
• Chapter 19, “Limitations” discusses limitations of and provides workarounds for using Web
Tools.
Supported hardware and software
In those instances in which procedures or parts of procedures documented here apply to some
switches but not to others, this guide identifies exactly which switches are supported and which are
not.
Although many different software and hardware configurations are tested and supported by
Brocade Communications Systems, Inc. for Fabric OS v7.0.0, documenting all possible
configurations and scenarios is beyond the scope of this document.
The following hardware platforms are supported by this release:
•
•
•
•
•
•
•
•
•
•
•
•
xxii
Brocade 300
Brocade 5100
Brocade 5300
Brocade 5410
Brocade 5424
Brocade 5450
Brocade 5460
Brocade 5470
Brocade 5480
Brocade NC-5480
Brocade 6510
Brocade 7800 Extension
Web Tools Adminstrator’s Guide
53-1002152-01
•
•
•
•
•
•
•
Brocade 8000
Brocade DCX 8510-4
Brocade DCX 8510-8 Backbone
Brocade DCX Backbone
Brocade DCX-4S Backbone
Brocade Encryption Switch
Brocade VA-40FC
The following blades are supported by this release:
•
•
•
•
•
•
•
•
•
•
•
•
•
•
•
•
Brocade CORE 8 blade
Brocade CP8 blade
Brocade CR16-4 blade
Brocade CR16-8 blade
Brocade CR4S-8 blade
Brocade FC10-6 port blade
Brocade FC16-32 port blade
Brocade FC16-48 port blade
Brocade FC8-16 port blade
Brocade FC8-32 port blade
Brocade FC8-48 port blade
Brocade FC8-64 port blade
Brocade FCOE10-24 blade
Brocade FR4-18i router blade
Brocade FS8-18 Encryption blade
Brocade FX8-24 Extension blade
What’s new in this document
The following major additions have been made since this document was last released:
•
•
•
•
•
•
•
•
•
DCFM has been changed to Brocade Network Advisor.
CEE has been changed to DCB.
Fabric Watch enhancements.
User-defined roles
Persistant user preferences
Port octet speed combination support
CSCTL mode support
Inband management configuration support
Support for port names of 128 characters.
For further information, refer to the release notes.
Web Tools Adminstrator’s Guide
53-1002152-01
xxiii
Document conventions
This section describes text formatting conventions and important notice formats used in this
document.
Text formatting
The narrative-text formatting conventions that are used are:
bold text
Identifies command names
Identifies the names of user-manipulated GUI elements
Identifies keywords and operands
Identifies text to enter at the GUI or CLI
italic text
Provides emphasis
Identifies variables
Identifies paths and Internet addresses
Identifies document titles
code text
Identifies CLI output
Identifies command syntax examples
For readability, command names in the narrative portions of this guide are presented in mixed
lettercase: for example, switchShow. In actual examples, command lettercase is often all
lowercase. Otherwise, this manual specifically notes those cases in which a command is case
sensitive.
Notes, cautions, and warnings
The following notices and statements are used in this manual. They are listed below in order of
increasing severity of potential hazards.
NOTE
A note provides a tip, guidance, or advice, emphasizes important information, or provides a
reference to related information.
ATTENTION
An Attention statement indicates potential damage to hardware or data.
CAUTION
A Caution statement alerts you to situations that can be potentially hazardous to you or cause
damage to hardware, firmware, software, or data.
DANGER
A Danger statement indicates conditions or situations that can be potentially lethal or extremely
hazardous to you. Safety labels are also attached directly to products to warn of these conditions
or situations.
xxiv
Web Tools Adminstrator’s Guide
53-1002152-01
Key terms
For definitions specific to Brocade and Fibre Channel, see the Brocade Glossary.
For definitions of SAN-specific terms, visit the Storage Networking Industry Association online
dictionary at:
http://www.snia.org/education/dictionary
Notice to the reader
This document may contain references to the trademarks of the following corporations. These
trademarks are the properties of their respective companies and corporations.
These references are made for informational purposes only.
Corporation
Referenced Trademarks and Products
Microsoft Corporation
Windows 7, Windows Server 2008 Standard, Windows Vista
Business, Windows XP- SP3,Internet Explorer
Oracle Corporation
Oracle, Solaris
Netscape Communications Corporation
Netscape
Red Hat, Inc.
Red Hat, Red Hat Network, Maximum RPM, Linux Undercover
Mozilla
Firefox
Additional information
This section lists additional Brocade and industry-specific documentation that you might find
helpful.
Brocade resources
To get up-to-the-minute information, go to http://my.brocade.com and register at no cost for a user
ID and password.
White papers, online demonstrations, and data sheets are available through the Brocade website
at:
http://www.brocade.com/products-solutions/products/index.page
For additional Brocade documentation, visit the Brocade website:
http://my.brocade.com
Release notes are available on the MyBrocade website and are also bundled with the Fabric OS
firmware.
Web Tools Adminstrator’s Guide
53-1002152-01
xxv
Other industry resources
For additional resource information, visit the Technical Committee T11 website. This website
provides interface standards for high-performance and mass storage applications for Fibre
Channel, storage management, and other applications:
http://www.t11.org
For information about the Fibre Channel industry, visit the Fibre Channel Industry Association
website:
http://www.fibrechannel.org
Getting technical help
Contact your switch support supplier for hardware, firmware, and software support, including
product repairs and part ordering. To expedite your call, have the following information available:
1. General Information
•
•
•
•
•
•
Switch model
Switch operating system version
Software name and software version, if applicable
Error numbers and messages received
supportSave command output
Detailed description of the problem, including the switch or fabric behavior immediately
following the problem, and specific questions
• Description of any troubleshooting steps already performed and the results
• Serial console and Telnet session logs
• syslog message logs
2. Switch Serial Number
The switch serial number and corresponding bar code are provided on the serial number label,
as illustrated below:
*FT00X0054E9*
FT00X0054E9
The serial number label is located as follows:
• Brocade 300, 5100, 5200, 5300, 6510, 7800, 8000, VA-40FC, and Brocade Encryption
Switch—On the switch ID pull-out tab located inside the chassis on the port side on the left.
• Brocade 5000—On the switch ID pull-out tab located on the bottom of the port side of the
switch.
• Brocade 7600—On the bottom of the chassis.
• Brocade DCX and 8510-8—On the bottom right on the port side of the chassis.
• Brocade DCX-4S and 8510-4—On the bottom right on the port side of the chassis, directly
above the cable management comb.
xxvi
Web Tools Adminstrator’s Guide
53-1002152-01
• Brocade 8000 —On the switch ID pull-out tab located inside the chassis on the port side
on the left.
3. World Wide Name (WWN)
Use the licenseIdShow command to display the WWN of the chassis.
If you cannot use the licenseIdShow command because the switch is inoperable, you can get
the WWN from the same place as the serial number, except for the Brocade DCX. For the
Brocade DCX, access the numbers on the WWN cards by removing the Brocade logo plate at
the top of the nonport side of the chassis.
Document feedback
Quality is our first concern at Brocade and we have made every effort to ensure the accuracy and
completeness of this document. However, if you find an error or an omission, or you think that a
topic needs further development, we want to hear from you. Forward your feedback to:
[email protected]
Provide the title and version number of the document and as much detail as possible about your
comment, including the topic heading and page number and your suggestions for improvement.
Web Tools Adminstrator’s Guide
53-1002152-01
xxvii
xxviii
Web Tools Adminstrator’s Guide
53-1002152-01
Chapter
Introducing Web Tools
1
In this chapter
• Web Tools overview . . . . . . . . . . . . . . . . . . . . . . . . . . . . . . . . . . . . . . . . . . . . . . 1
• Web Tools, the EGM license, and Brocade Network Advisor . . . . . . . . . . . . . 1
• System requirements . . . . . . . . . . . . . . . . . . . . . . . . . . . . . . . . . . . . . . . . . . . . 4
• Java installation on the workstation. . . . . . . . . . . . . . . . . . . . . . . . . . . . . . . . . 6
• Java plug-in configuration . . . . . . . . . . . . . . . . . . . . . . . . . . . . . . . . . . . . . . . . . 8
• Value line licenses . . . . . . . . . . . . . . . . . . . . . . . . . . . . . . . . . . . . . . . . . . . . . . . 9
• Opening Web Tools . . . . . . . . . . . . . . . . . . . . . . . . . . . . . . . . . . . . . . . . . . . . . 10
• Role-Based Access Control . . . . . . . . . . . . . . . . . . . . . . . . . . . . . . . . . . . . . . . 13
• Session management . . . . . . . . . . . . . . . . . . . . . . . . . . . . . . . . . . . . . . . . . . . 13
• Web Tools system logs . . . . . . . . . . . . . . . . . . . . . . . . . . . . . . . . . . . . . . . . . . 14
• Requirements for IPv6 support . . . . . . . . . . . . . . . . . . . . . . . . . . . . . . . . . . . 15
Web Tools overview
Brocade Web Tools is an embedded graphical user interface (GUI) that enables administrators to
monitor and manage single or small fabrics, switches, and ports. Web Tools is launched directly
from a web browser, or from the Brocade Network Advisor.
A limited set of features is accessible using Web Tools without a license, and is available free of
charge. Additional switch management features are accessible using Web Tools with the Enhanced
Group Management (EGM) license. Refer to “Web Tools, the EGM license, and Brocade Network
Advisor” for more information.
Web Tools, the EGM license, and Brocade Network Advisor
Beginning with Fabric OS version 6.1.1, Web Tools functionality is tiered and integrated with
Brocade Network Advisor. If you are migrating from a Web Tools release prior to Fabric OS version
6.1.1, this may impact how you use Web Tools.
A Web Tools license is not required, and a basic version of Web Tools is available for free.
Additional functionality may be added by obtaining the Enhanced Group Management (EGM)
license. Table 1 compares Basic Web Tools features to Web Tools with the EGM license. The EGM
license is only for 8 Gbps platforms, such as the Encryption Switch, and the 300, 5100, and 5300
switches. For non-8 Gbps platforms, all functionalities are available without the EGM license.
Beginning with Fabric OS version 6.1.1, some Web Tools capabilities are moved from Web Tools to
Brocade Network Advisor. Table 2 summarizes these changes.
Web Tools Adminstrator’s Guide
53-1002152-01
1
1
Web Tools, the EGM license, and Brocade Network Advisor
Web Tools features enabled by the EGM license
Table 1 describes those Web Tools features that require the EGM license.
TABLE 1
2
Basic Web Tools features and EGM licensed features
Feature
Basic Web Tools
Web Tools with EGM License
Active Directory support
yes
yes
AD Context Switching
no
yes
AD filtered views
yes
yes
Admin Domain Management
no
yes
AG Management
yes
yes
Analyze zone config
no
no
Basic Zoning and TI Zoning
yes
yes
Blade Management
yes
yes
Cloning a zone
no
yes
Configuration upload/download
yes
yes
Convenience function from Tools menu no
no
Device Accessibility Matrix
no
no
Easy to configure iSCSI wizard
yes
yes
Extended Fabric Management
no
yes
F_Port Trunk Management
no
yes
Fabric Events
no
no
Fabric Summary
no
no
Fabric Tree
yes
yes
FCIP Tunnel configuration
no
no
FCIP Tunnel Display
yes
yes
FCR Management
yes
yes
FCR Port Config
yes
yes
FICON CUP Tab
no
yes
FRU Monitoring
yes
yes
High Availability
yes
yes
IP Sec Policies
yes
yes
ISL Trunk Management
no
yes
ISL Trunking information
yes
yes
License Management
yes
yes
Long Distance
no
yes
Logical Switch Context Switching
no
yes
Allow/Prohibit Matrix
no
yes
Performance Monitoring Dialog
no
yes
Web Tools Adminstrator’s Guide
53-1002152-01
Web Tools, the EGM license, and Brocade Network Advisor
TABLE 1
1
Basic Web Tools features and EGM licensed features (Continued)
Feature
Basic Web Tools
Web Tools with EGM License
Port Administration
yes
yes
Print zone database summary
no
no
RBAC
yes
yes
Routing and DLS Configuration
no
yes
Security Policies Tab (like ACL)
yes
yes
Switch Info tab
yes
yes
Switch Status
yes
yes
Switch View right-click options
yes
yes
Trace dump
yes
yes
USB Management
yes
yes
User Management
yes
yes
Verify and troubleshoot accessibility
between devices
yes
yes
Web Tools functionality moved to Brocade Network Advisor
The functionality that was moved from Web Tools into Brocade Network Advisor is detailed in
Table 2.
TABLE 2
Web Tools functionality moved to Brocade Network Advisor
Function
Web Tools 6.1.0
Brocade Network Advisor
Add Un-Zoned
Devices
Zone Admin
Configure > Zoning
Reverse Find in the Zoning dialog box
provides the view of the zoned and unzoned
devices in the fabric if all zone members are
selected for Find.
Analyze Zone
Config
Zone Admin
1
2
Define Device
Alias
Web Tools Adminstrator’s Guide
53-1002152-01
Zone Admin
Comments
Configure > Zoning:
Reverse Find in the Zoning dialog box
provides the view of the zoned and
unzoned devices in the fabric if all zone
members are selected for Find.
Device Tree and Topology:
Connected End Devices — Custom
Display from the top level in the main
frame provides the device tree and
topology view for all the zoned devices
if all zones are selected in the active
zone configuration.
Configure > Zoning
3
1
System requirements
TABLE 2
Web Tools functionality moved to Brocade Network Advisor (Continued)
Function
Web Tools 6.1.0
Brocade Network Advisor
Comments
Device
Accessibility
Matrix
Zone Admin
Configure > Zoning
the Compare dialog box provides the
Storage-Host and Host-Storage view in a
tree representation that is comparable to
the Device Accessibility Matrix when all
devices are selected.
Fabric Events
Monitor > Fabric Events
Monitor > Logs > Events
Fabric
Summary
Reports > Fabric
Summary
Monitor > Reports > Fabric Summary Report
FCIP Tunnel
Configuration
Port Admin Module > GigE
tab
Configure > FCIP Tunnel
GigE Ports
Interface
Port Admin Module > GigE
tab
Configure > FCIP Tunnel
GigE Ports
Route
Port Admin Module > GigE
tab
Configure > FCIP Tunnel
Non-local
switch ports
display in
zoning tree
Zone Admin
Admin Domain
Switch Admin > DCC
policies
Performance Monitoring
Configure > Zoning
Remove
Offline or
Inaccessible
Devices
Zone Admin
Configure > Zoning
Replace/Replace All zone members by
selecting the offline devices from the zone
tree. Offline devices have an unknown
overlay badge with good visibility.
Zone database
summary print
Zone Admin
Configure > Zoning
Zoning report for both online and offline
database.
Viewing FCIP
tunnels is still
supported in Web
Tools 6.1.1, but
New, Edit Config,
and delete are
only available in
Brocade Network
Advisor.
In Web Tools,
non-local switch
port id/WWN can
be added using
text box.
System requirements
Before you install Web Tools on your workstation, verify that your switches and workstation meet
the Web Tools requirements listed in this chapter.
Web Tools requires any browser that conforms to HTML version 4.0, JavaScript version 1.0, and
Java Plug-in 1.6.0_24 or later.
4
Web Tools Adminstrator’s Guide
53-1002152-01
System requirements
1
Brocade has certified and tested Web Tools on the platforms shown in Table 3.
TABLE 3
Certified and tested platforms
Operating System
Browser
Windows Server 2008 R2 Standard (64-bit)
Internet Explorer 8.0
Windows Server 2008 Standard
Internet Explorer 7.0
Windows Vista Business
Internet Explorer 7.0
Red Hat Enterprise Server 5 Advanced
Platform
Internet Explorer 7.0
SUSE Linux Enterprise Server 10
Internet Explorer 7.0
Brocade supports the platforms shown in Table 4.
TABLE 4
Supported platforms
Operating System
Browser
Red Hat AS 4.0 (x86 32-bit)
Red Hat Enterprise Linux 5.4 Adv (x86 32-bit)
SUSE Linux Enterprise Server 10 (32-bit)
SUSE Linux Enterprise Server 11 (x86 32-bit)
Firefox 2.0
Windows 2000
Firefox 2.0, Internet Explorer 6.0
Windows 2003 Server, SP2
Firefox 2.0, Internet Explorer 7.0/8.0
Windows XP Pro SP3 (x86 32-bit)
Firefox 2.0, Internet Explorer 7.0/8.0
Windows Server 2003 Standard SP2 (x86
32-bit)
Firefox 2.0, Internet Explorer 7.0/8.0
Windows Server 2008 Standard
Firefox 2.0, Internet Explorer 7.0/8.0
Windows 7 Professional (x86)
Firefox 2.0
Solaris 9 (SPARC only)
Solaris 10 (SPARC only)
Firefox 2.0
For Windows systems, a minimum of 256 MB of RAM for fabrics comprising up to 15 switches, 512
MB of RAM for fabrics comprising more than 15 switches, and a minimum of 8 MB of video RAM
are recommended. Additionally, a DCX with a fully populated FC8-64 blade requires a minimum of
512 MB of RAM.
Setting refresh frequency for Internet Explorer
Correct operation of Web Tools with Internet Explorer requires specifying the appropriate settings
for browser refresh frequency and process model. Browser pages should be refreshed frequently to
ensure the correct operation of Web Tools.
To set the Internet Explorer options, perform the following steps.
1. Open your web browser and select Tools > Internet Options.
2. Select General > Temporary Internet Files > Settings.
Web Tools Adminstrator’s Guide
53-1002152-01
5
1
Java installation on the workstation
3. Choose Every visit to the page under “Check for newer versions of stored pages:” as shown in
Figure 1 on page 6.
FIGURE 1
Configuring Internet Explorer
Deleting temporary internet files used by Java applications
For Web Tools to operate correctly, you must delete the temporary internet files used by Java
applications.
To delete these files, perform the following steps.
1. From the Control Panel, open Java.
2. Select the General tab and click Settings.
3. Click Delete Files to remove the temporary files used by Java applications.
4. Click OK on the confirmation dialog box.
You can clear the Trace and Log files check box if you want to keep those files.
5. Click OK.
6. On the Java Control Panel, click View to review the files that are in the Java cache.
If you have deleted all the temporary files, the list is empty.
Java installation on the workstation
Java Plug-in must be installed on the workstation. If you attempt to open Web Tools without any
Java Plug-in installed:
• Internet Explorer automatically prompts and downloads the proper Java Plug-in.
• Firefox downloads the most recently released Java Plug-in.
6
Web Tools Adminstrator’s Guide
53-1002152-01
Java installation on the workstation
1
If you attempt to open Web Tools with a later version of Java Plug-in installed:
• Internet Explorer might prompt for an upgrade, depending on the existing Java Plug-in version.
• Firefox uses the existing Java Plug-in.
Installing the JRE on your Solaris or Linux client workstation
To do the JRE installation, perform the following steps.
1. Locate the JRE on the Internet, at the following URL:
http://java.sun.com/products/archive/j2se/6/index.html
NOTE
This URL points to a non-Brocade website and is subject to change without notice.
2. Click Download JRE.
3. Follow the instructions to install the JRE.
4. Create a symbolic link from this location:
$FIREFOX/plugins/libjavaplugin_oji.so
To this location:
$JRE/plugin/$ARCH/ns600/libjavaplugin_oji.so
Installing patches on Solaris
To install patches on Solaris, perform the following steps.
1. Search for any required patches for your current version of the JRE at the following website:
http://sunsolve.sun.com/pub-cgi/show.pl?target=patchpage
NOTE
This URL points to a non-Brocade website and is subject to change without notice.
2. Follow the link to download the patch
3. Exit the browser when you have downloaded the patch.
4. Install the patch and restart the system.
Installing the Java plug-in on Windows
To Install the Java plug-in on Windows, perform the following steps.
1. Select Start Menu > Settings > Control Panel and select the Java Plug-in Control Panel.
2. Select the About tab.
3. Determine whether the correct Java Plug-in version is installed:
• If the correct version is installed, Web Tools is ready to use.
Web Tools Adminstrator’s Guide
53-1002152-01
7
1
Java plug-in configuration
• If no Java Plug-in is installed, point the browser to a switch running Fabric OS 5.2.0 or later
to install JRE 1.6.0. For Fabric OS 6.3.0 install JRE 1.6.0 update 13. Web Tools guides you
through the steps to download the proper Java Plug-in.
• If an outdated version is currently installed, uninstall it, restart your computer, reopen the
browser, and enter the address of a switch running Fabric OS 5.2.0 or later to install JRE
1.6.0. For Fabric OS 6.3.0 install JRE 1.6.0 update 13. Web Tools guides you through the
steps to download the proper Java Plug-in.
Java plug-in configuration
If you are managing fabrics with more than 10 switches or 1000 ports, or if you are using the iSCSI
Gateway module extensively, you should increase the default heap size to 256 MB to avoid
out-of-memory errors.
If you are using a Mozilla family browser (Firefox, Netscape), you should set the default browser in
the Java control panel.
The following procedures instruct you in increasing the default heap size in the Java Control Panel
and in setting the default browser.
Configuring the Java plug-in for Windows
To configure Java plug-in for Windows, perform the following steps.
1. From the Start menu, select Settings > Control Panel > Java.
2. Click the Java tab.
3. In the section Java Applet Runtime Settings, click View.
The Java Runtime Settings dialog box displays.
4. Double-click the Java Runtime Parameters field and enter the following information to set the
minimum and maximum heap size:
-Xms256m -Xmx256m
In this example, the minimum and maximum sizes are both 256 MB.
5. Click Apply to apply your settings and close the Java Control Panel.
8
Web Tools Adminstrator’s Guide
53-1002152-01
Value line licenses
1
Configuring the Java plug-in for Mozilla family browsers
To configure Java plug-in for Mozilla family browsers, perform the following steps.
1. From the Start menu, select Settings > Control Panel.
2. Click the Advanced tab and expand the Default Java for browsers option, as shown in Figure 2
on page 9.
FIGURE 2
Default Java for browsers option
3. Select Mozilla family and click OK.
4. Click OK to apply your settings and close the Java Control Panel.
Value line licenses
If you open Web Tools on a switch with a limited license, and if the fabric exceeds the switch limit
indicated in the license, then Web Tools displays a warning message. Web Tools allows a 30-day
grace period, during which you can still monitor the switch while continuing to display warning
messages periodically.
These messages warn you that your fabric size exceeds the supported switch configuration limit
and tells you how long you have before Web Tools is disabled. After the 30-day grace period, you
are no longer able to open Web Tools from the switch with the limited switch license.
Web Tools is part of the Fabric OS of a switch. When you open Web Tools on a switch, you can
manage other switches in the fabric that have lower or higher firmware versions. It is important to
note that when accessing these switches you are opening the remote switch’s version of Web
Tools, and the functionality available for those switches might vary.
Web Tools Adminstrator’s Guide
53-1002152-01
9
1
Opening Web Tools
Opening Web Tools
You can open Web Tools on any workstation with a compatible Web browser installed. For a list of
Web browsers compatible with Fabric OS v7.0.0, refer to Table 3. Web Tools supports both HTTP
and HTTPS protocol.
To open Web Tools, perform the following steps.
1. Open the Web browser and enter the IP address of the device in the Address field, such as:
http://10.77.77.77
or
https://10.77.77.77
2. Press Enter.
The Web Tools login dialog box displays. Refer to “Logging in” on page 11 for more information.
NOTE
If you are using Firefox, the browser window is left open. You can close it anytime after the login
dialog box displays. If you are using Internet Explorer, the browser window automatically closes
when the login dialog box displays.
NOTE
If you have installed EZSwitchSetup on your workstation, the EZSwitchSetup Switch Manager
displays the first time you access the device. EZSwitchSetup provides an easy to use wizard
interface that may be used to simplify the initial setup procedure for smaller switches. Refer to
EZSwitchSetup Administrator’s Guide for information about the EZSwitchSetup interface.
If you want to use Web Tools instead of EZSwitchSetup, click Advanced Management in the
lower-left corner of the window to open the Web Tools interface. This book describes only the
Web Tools interface.
FIGURE 3
10
Web Tools interface
Web Tools Adminstrator’s Guide
53-1002152-01
Opening Web Tools
1
Logging in
When you use Web Tools, you must log in before you can view or modify any switch information.
This section describes the login process.
Prior to displaying the login window, Web Tools displays a security banner (if one is configured for
your switch), that you must accept before logging in. The security banner displays every time you
access the switch.
When you are presented with the login screen you must provide a user name and a password. Your
home Admin Domain is automatically selected. You can select to log in to an Admin Domain other
than your home domain.
NOTE
You must login before you can view Switch Explorer (shown in Figure 3 on page 10).
Use this procedure to log in to the Admin Domain.
1. Click Run on the signed certificate applet.
A warning dialog box may display. If you select the check box Always trust content from this
publisher, the warning dialog box is not displayed when you open Web Tools again.
2. Click OK in the security banner window, if one displays.
3. In the login dialog box, enter your user name and password.
If your current password has expired, you must also provide a new password and confirm the
new password.
Logging in to a Virtual Fabric
If you are logging in to a platform that is capable of supporting Virtual Fabrics, the login dialog box
provides the option of logging in to a virtual fabric. The following platforms support virtual fabrics:
•
•
•
•
•
•
Brocade DCX and DCX-4S
Brocade VA-40FC
Brocade 6510
Brocade DCX 8510-8 and DCX 8510-4
Brocade 5300
Brocade 5100
Web Tools Adminstrator’s Guide
53-1002152-01
11
1
Opening Web Tools
To log in to a Virtual Fabric, perform the following steps.
1. Select Options to display the Virtual Fabric options.
You are given a choice between Home Logical Fabric and User Specified Virtual Fabric
(Figure 4). Home Logical Fabric is the default.
FIGURE 4
Virtual Fabric login option
2. Log in to a logical fabric.
• To log in to the home logical fabric, select Home Logical Fabric and click OK.
• To log in to a logical fabric other than the home logical fabric, select User Specified Logical
Fabric, enter the fabric ID number, and click OK.
Logging in to an Admin Domain
If you are logging in to a platform that is capable of supporting Admin Domains, the login dialog box
displays. You do not have an Admin Domain option if the Access Gateway mode is enabled. Admin
Domains and Virtual Fabrics are mutually exclusive.
1. Select Options to select an Admin Domain other than your default home domain.
You are given a choice of Home Domain (the default), or User Specified Domain.
2. Log in to an Admin Domain.
• To log in to the home domain, select Home Domain and click OK.
• To log in to an Admin Domain other than the home domain, select User Specified Domain,
enter the Admin Domain name or number, and click OK.
If the user name or password is incorrect, a dialog box displays indicating an authentication
failure.
If you entered valid credentials, but specified an invalid Admin Domain, a dialog box displays
from which you can select a valid Admin Domain or click Cancel to log in to your home domain.
Logging out
You can end a Web Tools session either by selecting Manage > Log Out, or by closing the Switch
Explorer window.
You might be logged out of a session involuntarily, without explicitly selecting the Manage > Log
Out, under the following conditions:
• A physical fabric administrator changes the contents of your currently selected Admin Domain.
12
Web Tools Adminstrator’s Guide
53-1002152-01
1
Role-Based Access Control
• Your currently selected Admin Domain is removed or invalidated.
• Your currently selected Admin Domain is removed from your Admin Domain list.
• You initiate a firmware download from Web Tool’s Switch Administration window. In this case,
you are logged out a few minutes later when the switch restarts.
• Your session times out.
Role-Based Access Control
Role-Based Access Control (RBAC) defines the capabilities that a user account has based on the
assigned role. For each role, there is a set of predefined permissions on the jobs and tasks that can
be performed on a fabric and its associated fabric elements.
When you log in to a switch, your user account is associated with a predefined role. The role
determines the level of access you have on that switch and in the fabric. Table 5 describes these
roles.
For information about creating unique user account roles, refer to “User-defined accounts” on
page 175.
TABLE 5
Predefined Web Tools roles
Role
Description
admin
You have full access to all of the Web Tools features.
operator
You can perform any actions on the switch that do not affect the stored configuration.
securityadmin
You can perform actions that do not affect the stored configuration.
switchadmin
You can perform all actions on the switch, except the following:
• You cannot modify zoning configurations.
• You cannot create new accounts.
• You cannot view or change account information for any accounts. You can only
view your own account and change your account password.
zoneadmin
You can only create and modify zones.
fabricadmin
You can do everything the Admin role can do except create new users.
basicswitchadmin
You have a subset of Admin level access.
user
You have nonadministrative access and can perform tasks such as monitoring
system activity.
Session management
A Web Tools session is the connection between the Web Tools client and its managed switch. A
session is established when you log in to a switch through Web Tools. When you close Switch
Explorer, Web Tools ends the session.
A session remains in effect until one of the following happens:
• You log out
• You close the Switch Explorer window
• The session ends due to inactivity (time out)
Web Tools Adminstrator’s Guide
53-1002152-01
13
1
Web Tools system logs
A session automatically ends if no information was sent to the switch for more than two hours.
Because user key strokes are not sent to the switch until you apply or save the information, it is
possible for your session to end while you are entering information in the interface. For example,
entering a zoning scheme in the Zoning module does not require you to send information to the
switch until you save the scheme.
Web Tools does not display a warning when the session is about to time out. If your session ends
due to inactivity, all Web Tools windows become invalid and you must restart Web Tools and log in
again.
Web Tools enables sessions to both secure and nonsecure switches.
Access rights for your session are determined by your role-based access rights and by the contents
of your selected Admin Domain. After you log in, you can change to a different Admin Domain at any
time. However, you cannot change your role-based permissions.
Ending a Web Tools session
To end a Web Tools session, perform one of the following actions:
• Select Manage > Logout.
• Click the X in the upper-right corner of the Switch Explorer window to close it.
• Close all open Web Tools windows.
Web Tools system logs
Web Tools uses the log4j framework to write the logs into a file
When you launch Web Tools for the first time, it automatically creates the following directories.
These directories are created under Web Tools directory if they are not available:
• A <Web Tools> directory under the user home directory.
• The Web Tools Switch Support Save directory with the name format <Core Switch Name-Switch
IP Address-Switch WWN>.
The Web Tools Switch Support Save directory contains the following files:
• Log4j.xml
• WebTools.log
• SwitchInfo.txt
The SwitchInfo.txt file contains the following basic switch information:
•
•
•
•
•
•
14
Switch Name
Fabric OS version
Switch Type
Ethernet Ipv4
Ethernet IPv4 subnet mask
Ethernet IPv4 gateway
Web Tools Adminstrator’s Guide
53-1002152-01
1
Requirements for IPv6 support
The maximum size of the webtools.log file is 2MB. It is rolled into new file when the 5mb file size
limit is exceeded. A backup file named webtools1.log is automatically created. Web Tools maintains
only one webtools.log backup file at a time.
The Web Tools debug dialog box can be used to enable the debug state and level for a module at
runtime.
If you are familiar with XML scripting, you can edit the configuration file (log4j.xml) to collect the
data at startup. If you edit the configuration file, Web Tools need to be restarted. Contact your
switch support supplier for assistance.
Requirements for IPv6 support
The following list provides requirements for Web Tools IPv6 support:
• In a pure IPv6 environment, you must configure your DNS maps to the IPv6 address of the
switch.
• The switch name is required to match the DNS name that is mapped to the IPv6 address.
• If both IPv4 and IPv6 addresses are configured, Web Tools can be launched using any
configured IP address.
• Use a switch with v5.3.0 or later firmware to manage a mixed fabric of IPv4 and IPv6 switches.
• Switches running on version 5.2.0 do not discover IPv6 address-only switches in the same
fabric until the IPv4 address is configured.
Web Tools Adminstrator’s Guide
53-1002152-01
15
1
16
Requirements for IPv6 support
Web Tools Adminstrator’s Guide
53-1002152-01
Chapter
2
Using the Web Tools Interface
In this chapter
• Viewing Switch Explorer . . . . . . . . . . . . . . . . . . . . . . . . . . . . . . . . . . . . . . . . .
• Displaying tool tips. . . . . . . . . . . . . . . . . . . . . . . . . . . . . . . . . . . . . . . . . . . . . .
• Right-click options . . . . . . . . . . . . . . . . . . . . . . . . . . . . . . . . . . . . . . . . . . . . . .
• Refresh rates . . . . . . . . . . . . . . . . . . . . . . . . . . . . . . . . . . . . . . . . . . . . . . . . . .
• Displaying switches in the fabric . . . . . . . . . . . . . . . . . . . . . . . . . . . . . . . . . .
• Working with Web Tools: recommendations . . . . . . . . . . . . . . . . . . . . . . . . .
• Opening a Telnet or SSH client window . . . . . . . . . . . . . . . . . . . . . . . . . . . . .
• Collecting logs for troubleshooting . . . . . . . . . . . . . . . . . . . . . . . . . . . . . . . . .
17
26
27
27
28
29
29
30
Viewing Switch Explorer
The first thing you see when you log in to a switch with Web Tools is Switch Explorer, shown in
Figure 5 on page 19. Switch Explorer is divided into areas that provide access to, and information
about, the switch and fabric. The Switch Explorer areas are:
• The left pane, displaying the Tasks and Fabric Tree areas.
The Tasks area lets you perform management, monitoring, and other tasks. The Fabric Tree
displays a list of all the switches in the fabric.
• The menu bar, at the top of the window, providing access to commands and actions. The menu
bar displays the same commands as the left pane of Switch Explorer.
If you choose to collapse the left pane, you still have access to:
-
Management tasks, such as zone administration, switch administration, port
administration, admin domain administration, and Fabric Watch administration.
NOTE
You can manage basic zoning and Traffic Isolation zoning using Web Tools and Web Tools
with the Enhanced Group Management (EGM) license. To perform clone operations for
zoning, the EGM license must be installed on the switch; otherwise, access to this feature
is denied and an error message displays.
You must use Brocade Network Advisor to print the zone database summary configuration
and to analyze zone configurations. For more information on zoning management, refer to
“Zone configuration and zoning database management” on page 128.
-
Web Tools Adminstrator’s Guide
53-1002152-01
Reporting tasks, such as viewing the status of a switch.
Monitoring tasks, such as performance monitoring, and viewing the temperature or power
status.
17
2
Viewing Switch Explorer
NOTE
To perform monitoring tasks such as performance monitoring the EGM license must be
installed on the switch; otherwise, access to this feature is denied and an error message
displays.
-
Tools tasks, such as opening the Telnet window.
• The buttons above the Switch View provide access to switch information: status, temperature,
power, and fan data, beaconing, and the legend for the Switch View.
Although clicking a button can open a separate dialog box or window displays the management
tasks, all access control is established when you first log in to the switch.
Buttons in Switch Explorer are unavailable for two reasons: your account does not have
sufficient privileges to access this feature, or your currently selected Admin Domain does not
meet some condition to access the feature.
• The Admin Domain context field indicates the administrative domain you are viewing and
allows you to change it.
• The Switch View displays an interactive graphic of the switch.
• The Switch Events and Switch Information tabs allow you to view event information and switch
information, including connectivity, port, zone and other information.
• An indicator bar in the lower-right corner of every module window contains the Admin Domain
you are currently viewing, the current user name logged in to the switch, and the role
associated with that user account.
• The small right arrow near the Switch Event tab displays the switch. When you log out of Web
Tools, it remembers the last window settings the next time you log in to the application. If you
display the switch, the next time you log in to Web Tools, by default the Switch View displays.
The EGM license is required only for 8 Gbps platforms, such as the following:
•
•
•
•
•
18
Brocade Encryption Switch
Brocade 300, 5300, and 5100 switches
Brocade VA-40FC
Brocade 8000
Brocade 7800
Web Tools Adminstrator’s Guide
53-1002152-01
2
Viewing Switch Explorer
For non-8 Gbps platforms, all functionalities are available without EGM license.
2
3
4
1
8
5
6
1
2
3
4
5
6
7
8
FIGURE 5
7
Tasks and Fabric Tree
Menu bar
Switch View buttons
Changing the Virtual Fabric ID, or
Changing the Admin Domain
Switch Events and Switch Information
Indicator bar
Professional Management Tool
offering
Switch View
Switch Explorer
Persisting GUI preferences
Web Tools persists your GUI preferences across sessions for the Switch Explorer, Port Admin,
Switch Admin, Name Server, and Zone Admin dialog boxes on all web-browser platforms.
Persistence is performed on a per host basis.
Web Tools Adminstrator’s Guide
53-1002152-01
19
2
Viewing Switch Explorer
If you launch WebTools from Brocade Network Advisor (BNA), all of the Web Tools GUI persistence
data for each user name is stored in the BNA database.
The Port Admin GUI preferences that persist are:
•
•
•
•
•
•
Basic or Advance mode
Last selected tab by the user
Table column sorting
Table column positions
Auto refresh interval selection check box
Auto refresh interval value
The Switch Admin GUI preferences that persist are:
•
•
•
•
•
•
•
Basic or Advance modes
Last selected tab
Table column sorting
Table column positions
Last selected tab
Auto refresh interval selection check box
Auto refresh interval value
The Switch Explorer GUI preferences that persists are:
• Last selected tab
The Name Server GUI preferences that persist are:
•
•
•
•
Table column sorting
Table column positions
Auto refresh interval selection check box
Auto refresh interval value
The Zone Admin GUI preferences that persist are:
•
•
•
•
•
Basic Zones
Traffic Isolation Zones
Last selected tab
Table column sorting
Table column positions
Tasks
The Tasks menu lets you manage, monitor, and perform other tasks.
The Management section of the Tasks menu provides access to the following options:
• Zone administration
Zone information is collected from the selected switch. If an ACL-based FCS policy is in effect,
zoning can be administered only from the primary fabric configuration server (FCS) switch.
Refer to “Zoning management” on page 119 for more information.
20
Web Tools Adminstrator’s Guide
53-1002152-01
Viewing Switch Explorer
•
•
•
•
•
2
Switch administration
Port administration
Admin Domain administration
FCR (present only on the base switch when the Virtual Fabrics capability is enabled.)
Fabric Watch
NOTE
Some of these functions require a license key to activate them.
The Monitor section of the Tasks menu provides access to the following options:
• Performance monitoring—You must use Web Tools with the EGM license to perform
performance monitoring operations; otherwise, access to this feature is denied and an error
message displays.
• Name Server information—This feature is available with Web Tools and Web Tools with the EGM
license. Name Server information is collected from the selected switch. Refer to “Displaying the
Name Server entries” on page 51 for more information.
The Other section of the Tasks menu provides access to Telnet tools.
Fabric Tree
Fabric Tree displays all switches in the fabric, even those that do not have a Web Tools license and
that are not owned by your selected Admin Domain. Switches that are not owned by the Admin
Domain are shown in the Fabric Tree with switch status. Fabric Tree does not display switches
segmented before you opened Web Tools.
Only two types of switch icons display in Fabric Tree; one for a pizza box and one for a chassis. No
platform based icons are supported.
Use the drop-down menu at the top of the Fabric Tree area to view switches in the Fabric Tree by
switch name, IP address, or WWN. You can rest on the cursor over a switch to display the IP
address and current status. To manually refresh the status of a switch within the fabric, right-click
the switch in the Fabric Tree and select Refresh.
Although Fabric Tree displays all the switches in the fabric, you can manage switches that support
Fabric OS v6.1 and later versions because it does not requires Web Tools license. If a switch is
launched from Fabric Tree, preference will be given to IPV4, even though both IPV4 and IPV6 are
configured for that particular switch.
The versions earlier than Fabric OS v6.1 requires a Web Tools license and, if applicable, an EGM
license installed. Other switches must be managed through the Fabric OS command line interface
(CLI), another management application, or by using Brocade Network Advisor.
Changing the Admin Domain context
The Admin Domain field displays the currently selected Admin Domain and allows you to change to
a different one. The ability to change Admin Domain context requires that the EGM license is
enabled on the switch. Otherwise, an error message displays.
If you are logged in to Web Tools without the EGM license, you must log in again using a specific
Admin Domain.
Web Tools Adminstrator’s Guide
53-1002152-01
21
2
Viewing Switch Explorer
After you log in, all Admin Domains assigned to you are available in the drop-down menu. For most
administrative tasks, you must be in either AD0 or the physical fabric.
When changing the Admin Domain context, the option for selecting AD from the drop-down list is
not available if the EGM license is not present.
22
Web Tools Adminstrator’s Guide
53-1002152-01
2
Viewing Switch Explorer
To change the Admin Domain context, perform the following steps.
1. Select a domain from the Admin Domain menu.
2. Click OK in the confirmation window.
Switch Explorer refreshes to display the new Admin Domain context. You can monitor the
progress using the progress bar.
The system displays a list of all open windows. You can choose to change the Admin Domain,
which closes all the open windows, or cancel the action and return to Switch Explorer.
NOTE
The Telnet window and the Fabric Details are not AD-filtered and do not need to be closed.
Switch View buttons
The Switch View buttons let you access the following switch information:
•
•
•
•
•
Status—Click the button to view the status of the switch.
Temperature—Click the button to view temperature monitors.
Power—Click the button to view power supply information.
Fan—Click the button to view the status of the switch fans.
Beaconing—Click this button to enable or disable beaconing and to view the status of
beaconing from the button’s icon.
• Legend—Click the button to view the legend for the Switch View.
NOTE
For all status displays based on errors per time interval, any errors cause the status to show
faulty until the entire sample interval has passed.
Switch View
You can click the small right arrow towards the left of the Switch Event tab to display the Switch
View. The Switch View displays a graphical representation of the switch, including a real-time view
of switch and port status. Refer to area 8 in Figure 5 on page 19.
NOTES: With the upgrade license installed:
• For 7800, all FC ports and 6 GbE ports are enabled
Without the upgrade license installed:
• For 7800, 4 FC ports and 2 GbE ports are enabled
NOTE
Blades are graphically represented in the Web Tools GUI. They are vertical in the DCX, and horizontal
in the DCX-4S.
Web Tools Adminstrator’s Guide
53-1002152-01
23
2
Viewing Switch Explorer
The default Switch View display refresh rate is 60 seconds. However, the initial display of Switch
Explorer might take from 30 to 60 seconds after the switch is booted. Refresh rates are fabric-size
dependent. The auto refresh interval may not be less than 60 seconds. However, the refresh rate
varies depending on the activity in the fabric and on the host system you are using. The larger the
fabric, the longer it takes to poll the fabric and refresh the view. F_Port and L_Port connection
changes refresh immediately.
Port representations
The ports in the Switch View show the port type. Borders around the accessible ports indicate that
SFP modules are present. A colored border indicates the status of the port; for example, a green
border indicates that the port is connected and traffic is flowing. Ports that are not accessible do
not display the port type and do not have borders.
The port LEDs in the Switch View match the LEDs on the physical switch. However, the blink rate of
the LEDs in the Switch View does not necessarily match the blink rate of the LEDs on the physical
switch. Refer to “Port LED interpretation” on page 144 for more information.
Right-click a port in Switch View to get a menu that opens the Port Administration window, allowing
you to view detailed information about the port. From Port Administration, you can access
information on all other ports. Refer to Chapter 6, “Managing Ports” for more information.
NOTE
For detailed information on ISL Trunking, F_Port Trunking, and long distance, you must install the
EGM license on the switch; otherwise access to these features is denied and an error message is
displayed.
If the selected Admin Domain does not include ownership of some ports that are physically present
on the switch, these ports are represented as black rectangles with horizontal gray bars indicating
they are not accessible.
E_Ports are visible in all domains. You cannot open the Port Administration window by clicking
these ports. For the Brocade DCX, the Port Admin view is launched for ICL ports.
USB port representation
For switches with USB ports, the USB Storage Management view is launched for USB ports
(Figure 6).
FIGURE 6
24
USB port storage management
Web Tools Adminstrator’s Guide
53-1002152-01
2
Viewing Switch Explorer
NOTE
Click the USB port on the switch to launch the USB Storage Management window.
Switch Events and Switch Information
Switch Events and Switch Information display as tab forms under Switch View. The information in
the Switch Information View is polled every 60 seconds.
NOTE
You can click the column head to sort the events by a particular column, and drag the column divider
to resize a column. You can also right-click a column heading to resize one or all columns, sort the
information in ascending or descending order, or select which columns are displayed.
The Switch Information tab displays information about the following items:
• Switch
-
Name
Status
Fabric OS Version
Domain ID
WWN
Type
Role
Name of the switch.
Status of the switch.
Fabric OS version of the switch.
Domain ID of the switch.
World Wide Name of the switch.
Type of the switch.
Role of the switch.
The following information is specific to Virtual Fabrics:
Base Switch
Indicates whether or not the logical switch can act as a base
switch.
- Default Switch
Indicates whether or not the logical switch is the default
logical switch.
- Allow XISL Use
Indicates whether or not the logical switch is allowed to
connect to other logical switches using an extended
inter-switch link (XISL).
-
• Ethernet
- Ethernet IPv4
- Ethernet IPv4 subnet
Ethernet IPv4 address of the switch.
Ethernet IPv4 subnet mask address of the switch.
-
mask
Ethernet IPv4 gateway Ethernet IPv4 gateway address of the switch.
Ethernet IPv6
Ethernet IPv6 address of the switch.
-
IPFC IPv4
Fiber Channel IPv4 address.
IPFC IPv4 subnet mask Fiber Channel IPv4 subnet mask address.
• FC
• Zone
-
Web Tools Adminstrator’s Guide
53-1002152-01
Effective Configuration Indicates whether zone configuration is enabled or not.
25
2
Displaying tool tips
• Other
• RNID
-
Manufacturer serial number
Supplier serial number
License ID
Type
Model
Tag
Sequence number
Insistent Domain ID
Mode
Manufacturer
Manufacturer Plant
Displays the serial number of the manufacturer.
Displays the serial number of the supplier.
Displays the license ID.
Type of the switch.
Model of the switch.
Tag of the switch.
Sequence number of the switch.
Current status of the Insistent Domain ID mode of the switch.
Manufacturer of the switch.
Plant where the switch was manufactured.
For more information, refer to “Displaying switch information” on page 139.
Free Professional Management tool
You can use the Professional Management tool with Web Tools to view connectivity for each fabric,
to back up and restore last-known configurations, and more. You can also use it with the Enhanced
Group Management license to manage groups of switches, download firmware, manage security
settings, and deploy configurations across groups of switches. Contact your preferred storage
supplier to get a complimentary copy of the Professional Management tool.
Launch the install wizard for the free Professional Management tool through the link located at the
bottom of the Switch Explorer.
Displaying tool tips
When you rest the cursor over a Web Tools button, the system displays a brief description of the
button. If you rest the cursor over most components, the system displays tool tip information about
the component.
In the Fabric Tree you can rest the cursor over a switch to view its type, Ethernet IP, IPFC, and status
of the switch.
In Switch View, you can rest the cursor over a blade to view the blade ID and its status. It is easier
to use the top of the blade to display the tool tip so that you do not inadvertently display the port
tool tips. Firmware versions and IP addressing are displayed for CP blades.
When you rest the cursor over a port, you can view the:
•
•
•
•
•
•
26
port name
port ID
port beacon
port number
port index
port type (E, F, L, D, Ex, GIGe, or U_Port)
Web Tools Adminstrator’s Guide
53-1002152-01
Right-click options
2
• port status (online or offline)
• port state (in-sync, no_sync, no light, or no module)
Right-click options
You can right-click a port to quickly perform some basic port administration tasks, as shown in
Figure 7.
FIGURE 7
Right-click menu for ports (from Switch Explorer)
The tasks are:
• The Port Admin option displays the Port Administration window.
• The Port Details option displays read-only information about a port, without opening the Port
Administration window. You can right-click on the table content to export or copy the
information from the Port Details window.
• The Configure option provides another menu of options to allow you to rename, enable, and
disable ports, and to set persistent enable or disable without opening the Port Administration
window.
Refresh rates
Different panels of Web Tools refresh at different rates.
The refresh, or polling, rates listed in this section and throughout the book indicate the time
between the end of one polling period and the start of the next, and not how often the screen is
refreshed. A refresh rate of 15 seconds does not ensure that a refresh occurs every 15 seconds. It
ensures that the time between each refresh activity is no more than 15 seconds.
Autorefresh intervals might be not be exactly 15 seconds. The refresh rate varies depending on the
activity in the fabric and on the host system you are using. Following are some variables you should
consider when refreshing the fabric:
• Retrieval time increases when you are in a large fabric because there is more data to retrieve
from the switches.
• Processor speed of the system you are using may slow down the refresh rate.
• OS-Job Scheduling if you are using a host-system in the data center impacts the refresh rate.
• JVM-Performance can contribute to causing interval differences between what is on-screen
and how long it is actually taking.
Web Tools Adminstrator’s Guide
53-1002152-01
27
2
Displaying switches in the fabric
For these reasons, the time displayed in the port statistics tab might not be refreshed as expected.
The counter time indicates only that “this statistics data is retrieved from the switch in this time
period.” To ensure the correct information, the time field is updated along with the port statistics
data after every refresh.
The refresh rates are different for each module. Table 6 lists polling rates by module. Though these
rates are sample rates, they correctly illustrate variance in the refresh rates throughout Web Tools.
TABLE 6
Polling rates
Module
Polling rate
Name Server
User-defined; 15 sec minimum
Zoning Database
60 sec
Fabric Watch
45 sec
Performance Monitor
(This feature requires the EGM license.)
30 sec
Port Management
60 sec
FC Routing
45–90 sec, depending on network traffic
Displaying switches in the fabric
If your fabric has more than one switch, you can open Web Tools from one switch and then access
other switches. You can also launch Web Tools from the Brocade Network Advisor client as Element
Manager. This lets you manage Web Tool requests in the case where the fabric is in a private
network.
Launch Web Tools from Brocade Network Advisor if you need to access the fabric from a host that
is not in the same network and does not have direct access to the fabric.
NOTE
If you open switches, running Fabric OS v4.4.x or later, from a Fabric Tree displayed for a version
earlier than a v4.4.x switch. Some of the features might be disabled.
To display switches in the fabric, perform the following steps.
1. Open Web Tools as described in “Opening Web Tools” on page 10 and log in to the switch.
2. If the Fabric Tree is not expanded, click the plus sign (+) in the Fabric Tree to view all the
switches in the fabric.
3. Click a switch in the Fabric Tree.
A separate browser dialog box displays the selected switch. (If the launch switch is running a
Fabric OS version earlier than v5.0.1, the selected switch displays in the same browser
window.)
The graphic of the selected switch displays in Switch View. Additional switch information
displays in the Switch Events and Switch Information dialog box.
28
Web Tools Adminstrator’s Guide
53-1002152-01
Working with Web Tools: recommendations
2
Working with Web Tools: recommendations
Brocades makes the following recommendations for working with Web Tools:
• If you receive an error when saving changes in the Switch Administration window, note the
error messages, refresh the window, and make your changes again. Do not continue making
changes without refreshing the window and determining which changes were saved correctly.
• In a fabric containing switches and directors running different versions of firmware, use the
switches or directors with the latest firmware versions to control the fabric.
• If switches are accessed simultaneously from different connections (for example, Web Tools,
CLI, and API), changes from one connection might not be updated to the other, and some
modifications might be lost. Make sure that, when you connect with simultaneous multiple
connections, you do not overwrite the work of another connection.
• Several tasks in Web Tools make fabric-level changes, such as the tasks in Zone
Administration. When executing fabric-level configuration tasks, wait until you have received
confirmation that the changes are implemented before executing any subsequent tasks. For a
large fabric, this can take several minutes.
• Some data collection and processing operations in the iSCSI Gateway module might take a
long time to complete, especially in large fabrics or fabrics with large numbers of defined
Discovery Domains and Discovery Domain Sets. In most cases, progress bars are provided.
Allow the application a sufficient amount of time (30-40 seconds) to collect and display data
before taking any action or assuming the application is “hanging.”
• A maximum of five simultaneous HTTP sessions to any one switch is recommended. An HTTP
session is considered a Fabric Manager or Web Tools connection to the switch.
Opening a Telnet or SSH client window
When you open a Telnet or SSH client window, it connects to the IP interface of the switch. You
cannot connect to a CP blade on a director switch through a Telnet or SSH client window opened
from Web Tools, even when the blade has an IP address and supports Telnet sessions. Refer to the
Fabric OS Command Reference for information about the Telnet commands.
NOTE
Internet Explorer 7.0 default settings disable Telnet functionality. If you are using Internet Explorer
7.0, you must make the appropriate changes in the registry to open the Telnet window.
To open a Telnet or SSH client window, perform the following steps.
1. Select a switch in Fabric Tree.
You are prompted to log in if the OS is version 5.3.0 or later; otherwise, the selected switch
displays in Switch View.
2. Select Telnet/SSH Client in the Other section of the Tasks panel. The Preference dialog box
displays.
3. Select the client by clicking Telnet or SSH.
4. Enter the Telnet or SSH path, as defined for your implementation.
Web Tools Adminstrator’s Guide
53-1002152-01
29
2
Collecting logs for troubleshooting
To avoid the need to remember and key in the path, you can store the path on your PC and
browse to the location. Clicking the button to the right of the field initiates the browse
capability.
5. Click OK.
The Telnet or SSH window displays.
6. Enter your user credentials at the login prompt.
7.
To close the session, enter exit at the prompt and press the Enter key.
Collecting logs for troubleshooting
If you encounter problems using the Web Tools interface, collect Java logs for use in
troubleshooting. From Microsoft Windows, perform this procedure.
1. Open Control Panel and select Java.
2. Click on the Advanced tab.
3. Expand Java console.
4. Select Show console.
5. Restart Web Tools.
The Java console displays, along with the Web Tools opening page.
6. Perform the Web Tools operation that caused the problem.
7.
Collect the logs shown on the Java console.
8. If you no longer want to see the Java console when you start Web Tools, go back to the Control
Panel, repeat steps 1 and 2, and then deselect Show console.
30
Web Tools Adminstrator’s Guide
53-1002152-01
Chapter
3
Managing Fabrics and Switches
In this chapter
• Fabric and switch management overview . . . . . . . . . . . . . . . . . . . . . . . . . . .
• Configuring IP and subnet mask information . . . . . . . . . . . . . . . . . . . . . . . .
• Configuring Netstat Auto Refresh . . . . . . . . . . . . . . . . . . . . . . . . . . . . . . . . . .
• Configuring a syslog IP address . . . . . . . . . . . . . . . . . . . . . . . . . . . . . . . . . . .
• Removing a syslog IP address . . . . . . . . . . . . . . . . . . . . . . . . . . . . . . . . . . . .
• Configuring IP Filtering . . . . . . . . . . . . . . . . . . . . . . . . . . . . . . . . . . . . . . . . . .
• Blade management . . . . . . . . . . . . . . . . . . . . . . . . . . . . . . . . . . . . . . . . . . . . .
• Switch configuration . . . . . . . . . . . . . . . . . . . . . . . . . . . . . . . . . . . . . . . . . . . .
• Switch restart. . . . . . . . . . . . . . . . . . . . . . . . . . . . . . . . . . . . . . . . . . . . . . . . . .
• System configuration parameters . . . . . . . . . . . . . . . . . . . . . . . . . . . . . . . . .
• Licensed feature management . . . . . . . . . . . . . . . . . . . . . . . . . . . . . . . . . . .
• High Availability overview . . . . . . . . . . . . . . . . . . . . . . . . . . . . . . . . . . . . . . . .
• Event monitoring . . . . . . . . . . . . . . . . . . . . . . . . . . . . . . . . . . . . . . . . . . . . . . .
• Displaying the Name Server entries. . . . . . . . . . . . . . . . . . . . . . . . . . . . . . . .
• Physically locating a switch using beaconing . . . . . . . . . . . . . . . . . . . . . . . .
• Locating logical switches using chassis beaconing . . . . . . . . . . . . . . . . . . .
• Virtual Fabrics overview . . . . . . . . . . . . . . . . . . . . . . . . . . . . . . . . . . . . . . . . .
31
33
33
34
34
35
35
37
39
39
44
46
48
51
53
53
53
Fabric and switch management overview
Most of the management tasks described in this chapter are accessed through the Switch
Administration window. Information in the Switch Administration window is retrieved from the
selected switch, as shown in Figure 8 on page 32.
Web Tools Adminstrator’s Guide
53-1002152-01
31
3
Fabric and switch management overview
If the switch is not a member of the selected Admin Domain, most tabs in the Switch
Administration window display in read-only mode, regardless of your permission level. The User tab
is editable because most of its information does not require switch membership in the current
Admin Domain.
FIGURE 8
Switch Administration window, Switch tab
With the exception of switch time, information displayed in the Switch Administration window is not
updated automatically by Web Tools. To update the information displayed in the Switch
Administration window, click the Refresh button.
ATTENTION
Most changes you make in the Switch Administration window are buffered, and are not applied to
the switch until you save the changes. If you close the Switch Administration window without saving
your changes, your changes are lost. To save the buffered changes you make in the Switch
Administration window to the switch, click Apply before closing the module or before switching to
another tab.
The License tab, Firmware Download tab, and the Security Policies tab are exceptions. The changes
you make on these tabs take effect immediately and there is no Apply button. There is an Apply
button in all the subtabs of security policies except ACL.
You can also use Telnet commands to perform management tasks. Refer to “Opening a Telnet or
SSH client window” on page 29 for information on how to launch a Telnet window using Web Tools.
32
Web Tools Adminstrator’s Guide
53-1002152-01
Configuring IP and subnet mask information
3
Opening the Switch Administration window
Most of the management procedures in this chapter are performed from the Switch Administration
window.
To open the Switch Administration window, perform the following steps.
1. Select Tasks > Manage > Switch Admin.
The Switch Administration dialog box displays in basic mode, as shown in Figure 8 on page 32.
The basic mode displays the “basic” tabs and options.
2. Click Show Advanced Mode to see all the available tabs and options.
Configuring IP and subnet mask information
Before proceeding, collect all the information you need to configure the Ethernet IP interface. This
includes the subnet mask, gateway IP address, or IPFC, and subnet mask for your system. When
you configure or change the Ethernet IP, subnet mask, gateway IP, or IPFC, and subnet mask from
Web Tools, there is a normal loss of network connection to the switch. Close all current windows
and restart Web Tools with the new IP address.
NOTE
The IPFC address is specific for each logical switch. The IPFC address is set to FC0 for switches that
do not support Virtual Fabrics.
To configure the IP and subnet mask information, perform the following steps.
1. Select the Network tab.
2. In the appropriate IP address section, enter the IP address you want to use for the IP interface.
Use the IPv4 Address section or the IPv6 Address section to specify IP addresses.
3. In the IPv4 Address section:
• In the Ethernet IP field, enter the Ethernet IP address.
• In the Ethernet Mask field, enter the Ethernet mask address.
• In the GateWay IP address field, enter the gateway IP address.
4. In the IPv6 Address section, in the Ethernet IPv6 field, enter the Ethernet IP address.
5. You can also enable automatic configuration of IPv6 addresses by selecting Enable IPV6 Auto
Configuration.
The automatically generated IPv6 addresses are displayed under Auto Configured IPV6
Addresses. Eight auto-configured addresses are created per switch, and up to 24 for a DCX, or
DCX-4S chassis (eight per chassis, and eight per each installed CP).
Configuring Netstat Auto Refresh
The Netstat Performance window displays the details about Ethernet management port statistics
like the Interface, MTU, Met, RX-OK, RX-ERR, RX-DRP, RX-OVR, TX-OK, TX-ERR, TX-DRP, TX-OVR, and
Flag.
Web Tools Adminstrator’s Guide
53-1002152-01
33
3
Configuring a syslog IP address
To configure Auto Refresh, perform the following steps.
1. Open the Switch Administration window as described in “Opening the Switch Administration
window” on page 33.
2. Select the Network tab.
3. Click Netstat Performance.
4. Select the Auto Refresh check box to automatically refresh the port details.
Clear the check box to disable auto refresh.
5. When enabled, enter the interval time in seconds in the Auto-Refresh Interval field.
The port details are automatically refreshed, based on the configured time interval. The
minimum value is 15 seconds.
Configuring a syslog IP address
The syslog IP represents the IP address of the server that is running the syslog process. The syslog
daemon reads and forwards system messages to the appropriate log files or users, depending on
the system configuration. When one or more IP addresses are configured, the switch forwards all
error log entries to the syslog on the specified servers. Up to six servers are supported. Refer to
Fabric OS Administrator’s Guide for more information on configuring the syslog daemon.
To configure a syslog IP address, perform the following steps.
1. Open the Switch Administration window as described in “Opening the Switch Administration
window” on page 33.
2. Select the Network tab.
3. In the Syslog IP’s Configuration section, in the New IP field, enter an IP address in either IPv4
or IPv6 format.
4. Click Add.
The new IP address displays in the Syslog IP area.
5. Click Apply.
Removing a syslog IP address
To remove a syslog IP address, perform the following steps.
1. Open the Switch Administration window as described in “Opening the Switch Administration
window” on page 33.
2. Select the Network tab.
3. Select a syslog IP in the table and click Remove.
You can click Clear All to remove all of the syslog IP addresses from the table.
4. Click Apply.
34
Web Tools Adminstrator’s Guide
53-1002152-01
3
Configuring IP Filtering
Configuring IP Filtering
Web Tools provides the ability to control what client IP addresses may connect to a switch or fabric.
To set up IP Filtering, perform the following steps.
1. Open the Switch Administration window as described in “Opening the Switch Administration
window” on page 33.
2. Select the Security Policies tab.
3. Select IPFilter on the Security Policies menu.
4. Click Create Policy.
The Create IP Filter Policy dialog box displays.
5. Enter a policy name, select a policy type, and then click the Add Rule button.
6. Enter the rule order, rule type, source and destination IP addresses, and then modify the
service or destination port, protocol, and action as necessary.
Both the source and destination IP addresses are needed for the FWD rule type.
Only the source IP address is needed for the INPUT rule type, as the destination IP address
field is disabled.
7.
Click OK.
After you create a policy, you can use the following controls on this tab to manage the policies:
•
•
•
•
The Edit Policy button lets you select an existing policy and make changes to it.
The Show Policy button lets you view the details of the policy in a read-only window.
The Delete Policy button lets you delete a policy.
The Clone Policy button lets you copy a policy. Use this feature when you want to create
similar policies. After you create a clone, you can edit the policy to make the appropriate
changes.
• The Activate Policy button lets you make an existing policy active.
• The Distribute Policy button lets you distribute a policy to various switches.
• The Accepts Distribution check box lets you set the policy to accept or reject distributions.
Blade management
Web Tools provides the ability to enable and disable blades, and to set slot-level IP addresses for
blades. The procedure in this section applies only to the Brocade DCX 8510-4, Brocade DCX
8510-8,or the Brocade DCX and DCX-4S enterprise-class platforms.
Enabling or disabling a blade
The Firmware Version columns display the firmware loaded onto each blade. A blade can have
more than one firmware image loaded onto it. The Blade State column in the Blade tab pane
indicates whether the blade is enabled.
Web Tools Adminstrator’s Guide
53-1002152-01
35
3
Blade management
NOTE
The blade state is always shown as enabled, even if you perform a blade disable operation. When a
blade is set to a disable state, only the ports on the balde are disabled. The blade remains active.
To enable or disable a blade, perform the following steps.
1. Open the Switch Administration window as described in “Opening the Switch Administration
window” on page 33.
2. Select the Blade tab (Figure 9).
FIGURE 9
Blade tab
3. Select Blade Action > Enable Blade for each blade you want to enable, or Blade Action >
Disable Blade to disable a blade, and click Yes in the confirmation dialog.
Disabling a blade does not turn off the blade, it disables the ports on the blade. You cannot
enable or disable the CP blades.
Setting a slot-level IP address
To set an IP address, perform the following steps.
1. Open the Switch Administration window as described in “Opening the Switch Administration
window” on page 33.
2. Select the Blade tab.
3. Click Set IP address.
4. Select a slot number from the list.
36
Web Tools Adminstrator’s Guide
53-1002152-01
3
Switch configuration
5. Enter the IP address, subnet mask, and Gateway IP address.
6. Select a type from the list.
7.
Click Add to add the new entry to the table.
When you click Add, the values remain in the fields. The Clear Gateway and Clear IP buttons
are available for clearing fields in the table.
NOTE
To remove a configuration, select a row in the table and click Delete.
8. Click Apply to save the values currently shown in the table or click Cancel to close the dialog
box without saving any of your changes.
9. To update the switch with your changes, update the table using the Add and Delete buttons,
and then click Apply.
Viewing IP addresses
If you want to view the IP addresses configured on the switch for the currently populated slots, use
the Show IP Address button.
Use this procedure to display the IP addresses.
1. Open the Switch Administration window as described in “Opening the Switch Administration
window” on page 33.
2. Select the Blade tab.
3. Click Show IP Address.
4. Scroll through the list to view all the information.
5. When you are finished, click Close.
Switch configuration
Use the Switch tab of the Switch Administration window to perform basic switch configuration.
Figure 8 on page 32 displays an example of the Switch tab.
Enabling and disabling a switch
You can identify whether a switch is enabled or disabled in the Switch Administration window by
looking at the lower-right corner. If you rest the cursor over the icon, the system displays text that
indicates the status of the switch.
Use this procedure to enable or disable a switch.
1. Open the Switch Administration window as described in “Opening the Switch Administration
window” on page 33.
2. Select the Switch tab.
3. In the Switch Status section, click Enable to enable the switch or Disable to disable the switch.
4. Click Apply.
Web Tools Adminstrator’s Guide
53-1002152-01
37
3
Switch configuration
The system displays a confirmation window that asks if you want to save the changes to the
switch. You must click Yes to save the changes.
Changing the switch name
Switches can be identified by IP address, domain ID, World Wide Name (WWN), or switch names.
Names must begin with an alphabetic character, but otherwise can consist of alphanumeric,
hyphen, and underscore characters. The maximum number of characters is 30, unless FICON
mode is enabled. When FICON mode is enabled, the maximum number of characters is 24.
NOTE
Some system messages identify a switch service by the chassis name. If you assign meaningful
chassis names and switch names, system logs are easier to use.
1. Open the Switch Administration window as described in “Opening the Switch Administration
window” on page 33.
2. Select the Switch tab.
3. Enter a new name in the Name field and click Apply.
Changing the switch domain ID
Although domain IDs are assigned dynamically when a switch is enabled, you can request a
specific ID to resolve a domain ID conflict when you merge fabrics.
To change the switch domain ID, perform the following steps.
1. Open the Switch Administration window as described in “Opening the Switch Administration
window” on page 33.
2. Disable the switch, as described in “Enabling and disabling a switch” on page 37.
3. Select the Switch tab.
4. Enter a new domain ID in the Domain ID field.
For IM0, the range of valid values is from 1 athrough 239.
5. Click Apply.
6. Enable the switch, as described in “Enabling and disabling a switch” on page 37.
Viewing and printing a switch report
The switch report includes the following information:
•
•
•
•
•
•
38
A list of switches in the fabric
Switch configuration parameters
A list of ISLs and ports
Name Server information
Zoning information
SFP serial ID information
Web Tools Adminstrator’s Guide
53-1002152-01
Switch restart
3
To view or print a report, perform the following steps.
1. Open the Switch Administration window as described in “Opening the Switch Administration
window” on page 33.
2. Select the Switch tab.
3. Click View Report.
4. In the new window that displays the report, view or print the report using your browser.
Switch restart
When you restart the switch, the restart takes effect immediately. Ensure that there is no traffic or
other management on the switch, because traffic is interrupted during the restart; however, frames
are not dropped. Be sure to save your changes before the restart, because any changes not saved
are lost.
Performing a fast boot
A fast boot reduces boot time significantly by bypassing the power-on self test (POST).
To perform a fast boot, perform the following steps.
1. Open the Switch Administration window as described in “Opening the Switch Administration
window” on page 33.
2. Click Fastboot.
3. On the Fastboot Confirmation window, click Yes to continue.
4. Click Apply.
Performing a reboot
To reboot the CP and execute the normal power-on booting sequence, perform the following steps.
1. Open the Switch Administration window as described in “Opening the Switch Administration
window” on page 33.
2. Click Reboot.
3. On the Reboot Confirmation window, click Yes to continue.
4. Click Apply.
System configuration parameters
You must disable the switch before you can configure fabric parameters.
You can change the following system configuration parameters:
• Switch fabric settings
• Virtual channel settings
• Arbitrated loop parameters
Web Tools Adminstrator’s Guide
53-1002152-01
39
3
System configuration parameters
• System services
• Signed firmware
WWN-based Persistent PID assignment
WWN-based PID assignment allows you to configure a PID persistently using a device’s WWN.
When the device logs into the switch, the PID is bound to the device WWN. If the device is moved to
another port in the same switch, or a new blade is hot plugged, the device receives the same PID
(area) at its next login. For information on configuring WWN-based PID assignment, refer to
“Configuring fabric settings” on page 41.
This feature is deactivated by default. When the feature is enabled, bindings are created
dynamically; as new devices log in, they automatically enter the WWN-based PID database. The
bindings exist until you explicitly unbind the mappings through the CLI or change to a different
addressing mode. If there are any existing devices when you enable the feature, you must manually
enter the WWN-based PID assignments through the CLI.
Once WWN-based PID assignment is enabled you must manually enter the WWN-based PID
assignments through the CLI for any existing devices. Any new devices logging in are automatically
entered in the WWN-based PID database. Current WWN-based PID bindings are cleared when you
change to a different addressing mode.
PID assignments are supported for a maximum of 4096 devices; this includes both point-to-point
and NPIV devices. The number of point-to-point devices supported depends directly on the areas
available. For example, 448 are available on an enterprise-class platform and 256 are available on
switches. When the number of entries in the WWN-based PID database reaches the number 4096
or areas are used up, the oldest unused entry is purged from the database to free up the reserved
area for the new FLOGI. Refer to Table 7 for complete information.
TABLE 7
Switches that support WWN-based Persistent PID on Web Tools
Platform
DCX/DCX-4S
DCX 8510-4
DCX 8510-8
40
VF
Enabled
Default switch
Yes, if dynamic
area addressing
is enabled in the
default switch.
Logical switch
Area mode
FICON mode
0
If 8-bit dynamic
mode is
enabled, FMS is
not supported
1
Can be set
2
Not supported
Yes
Brocade 5100
Brocade 5300
Brocade VA-40FC
Brocade 6510
Enabled
Yes
Yes
Default-8 bit
dynamic
Configurable
Brocade 300
Brocade 5100
Brocade 5300
Brocade VA-40FC
Brocade 6510
Brocade 7800
Disabled
N/A
N/A
Default-8bit
dynamic
Configurable
Web Tools Adminstrator’s Guide
53-1002152-01
System configuration parameters
3
Configuring fabric settings
To configure the fabric settings, perform the following steps.
1. Open the Switch Administration window as described in “Opening the Switch Administration
window” on page 33.
2. Select the Configure tab.
3. Select the Fabric subtab.
4. Make the fabric parameter configuration changes.
5. Click Apply.
6. Enable the switch as described in “Enabling and disabling a switch” on page 37.
Fabric settings
Configure the following fabric settings on the Fabric subtab of the Configure tab:
BB Credit
The buffer-to-buffer credit is the number of buffers available to attached devices for frame
receipt. The default BB Credit is 16. The range of valid values is from 1 through 27.
R_A_TOV
Resource allocation timeout value (in milliseconds). This variable works with the E_D_TOV
to determine switch actions when presented with an error condition. The default is 10000.
The possible range is (2*E_D_TOV) –120000. Values must be multiples of 1000.
E_D_TOV
Error detect timeout value (in milliseconds). This timer is used to flag a potential error
condition when an expected response is not received within the set time. The valid range
is 1000 - (R_A_TOV/2)
Addressing mode
Displays the addressing mode present in the switch.
Datafield size
The largest possible data field size (in bytes). The range of valid values is from 256
through 2112.
Sequence Level
Switching
Select this box to enable frames of the same sequence from a particular group to be
transmitted together. When this option is not selected, frames are transmitted interleaved
among multiple sequences. Under normal circumstances, sequence-level switching
should be disabled for better performance. However, some host adapters have issues
when receiving interleaved frames among multiple sequences.
Disable Device Probing Set this mode only if the switch N_Port discovery process (PLOGI, PRLI, INQUIRY) causes
an attached device to fail. When set, devices that do not register with the Name Server are
not present in the Name Server database.
Per-Frame Routing
Priority
Select whether to select per-frame routing priority. When enabled, the virtual channel ID is
used in conjunction with a frame header to form the final virtual channel ID.
Suppress Class F Traffic Applies only if VC-encoded address mode is also set. When selected, translative
addressing (which allows private devices to communicate with public devices) is disabled.
Insistent Domain ID
Mode
Set this mode to make the current domain ID insistent across reboots, power cycles, and
failovers. This mode is required fabric wide to transmit FICON data.
WWN-based Persistent Set this mode to configure a PID persistently using a device’s WWN. When the device logs
PID
into the switch, the PID is bound to the device WWN. Refer to “WWN-based Persistent PID
assignment” on page 40.
Enabling insistent domain ID mode
To enable insistent domain ID mode, perform the following steps.
Web Tools Adminstrator’s Guide
53-1002152-01
41
3
System configuration parameters
1. Open the Switch Administration window as described in “Opening the Switch Administration
window” on page 33.
2. Disable the switch as described in “Enabling and disabling a switch” on page 37.
3. Select the Configure tab.
4. Select the Fabric subtab.
5. Select the Insistent Domain ID Mode check box.
6. Click Apply.
7.
Enable the switch as described in “Enabling and disabling a switch” on page 37.
Configuring virtual channel settings
You can configure parameters for eight virtual channels (VC) to enable fine-tuning for a specific
application. You cannot modify the first two virtual channels because these are reserved for switch
internal functions.
ATTENTION
The default virtual channel settings are already optimized for switch performance. Changing the
default values can improve switch performance, but can also degrade performance. Do not change
these settings without fully understanding the effects of the changes.
VC Priority specifies the class of frame traffic given priority for a virtual channel.
To configure the virtual channel settings, perform the following steps.
1. Open the Switch Administration window as described in “Opening the Switch Administration
window” on page 33.
2. Disable the switch as described in “Enabling and disabling a switch” on page 37.
3. Select the Configure tab.
4. Select the Virtual Channel subtab.
5. Enter a value in the VC Priority field you want to change.
The only valid numeric values for all fields are either “2” or “3”.
6. Click Apply.
7.
Enable the switch as described in “Enabling and disabling a switch” on page 37.
Configuring arbitrated loop parameters
To configure arbitrated loop parameters, perform the following steps.
1. Open the Switch Administration window as described in “Opening the Switch Administration
window” on page 33.
2. Disable the switch as described in “Enabling and disabling a switch” on page 37.
3. Select the Configure tab.
4. Select the Arbitrated Loop subtab.
42
Web Tools Adminstrator’s Guide
53-1002152-01
System configuration parameters
3
5. Select or clear the check boxes to enable or disable the corresponding arbitrated loop
parameters.
6. Click Apply.
7.
Enable the switch as described in “Enabling and disabling a switch” on page 37.
Arbitrated loop parameters
Configure the following arbitrated loop parameters on the Arbitrated Loop subtab of the Configure
tab:
Send Fan Frames
Select this check box to specify that fabric address notification (FAN)
frames are sent to public loop devices to notify them of their node ID
and address.
Always Send RSCN
Following the completion of loop initialization, a remote state change
notification (RSCN) is issued when FL_Ports detect the presence of
new devices or the absence of pre-existing devices. Select this check
box to issue an RSCN upon completion of loop initialization, regardless
of the presence or absence of new or pre-existing devices.
Configuring system services
You can enable or disable FCP read link status (RLS) probing for F_Ports and FL_Ports. It is
disabled by default.
To configure system services, perform the following steps.
1. Open the Switch Administration window as described in “Opening the Switch Administration
window” on page 33.
2. Disable the switch as described in “Enabling and disabling a switch” on page 37.
3. Select the Configure tab.
4. Select the System subtab.
5. Select the Disable RLS Probing check box to disable RLS probing.
-orClear the check box to enable RLS probing.
6. Click Apply.
7.
Enable the switch as described in “Enabling and disabling a switch” on page 37.
Configuring signed firmware
When the firmware is downloaded to a device, the system can validate the firmware based on a
configuration setting. By default, the signed firmware download is not validated.
NOTE
During the first download, the system ignores the signed firmware. After the first download, the
public key is downloaded and then, in subsequent downloads, you can turn on the feature.
You can view the public key on the Firmware Download tab in the Switch Administration window.
Web Tools Adminstrator’s Guide
53-1002152-01
43
3
Licensed feature management
To configure the signed firmware, perform the following steps.
1. Open the Switch Administration window as described in “Opening the Switch Administration
window” on page 33.
2. Select the Configure tab.
3. Select the Firmware subtab.
4. Select the Enable Signed Firmware Download check box.
5. Click Apply.
Licensed feature management
The licensed features currently installed on the switch are listed in the License tab of the Switch
Administration window. If the feature is listed, such as the EGM license, it is installed and
immediately available. When you enable some licenses, such as ISL Trunking, you might need to
change the state of the port to enable the feature on the link. For time-based licenses, the expiry
date is included. Right-click a license key to export data, copy data, or search the table.
Activating a license on a switch
Before you can unlock a licensed feature, you must obtain a license key. You can either use the
license key provided in the paperpack document supplied with switch software or refer to the
Fabric OS Administrator’s Guide for instructions on how to obtain a license key at the Brocade
website (my.brocade.com).
To activate a license, perform the following steps.
1. Open the Switch Administration window as described in “Opening the Switch Administration
window” on page 33.
2. Select the License tab and click Add.
The Add License dialog box displays.
3. Paste or enter a license key in the field.
4. Click Add License.
5. Click Refresh to display the new licenses in the License tab.
Some licenses, such as the Trunking or Brocade 7800 upgrade license, do not take effect until
the switch is restarted.
Assigning slots for a license key
This feature allows to increase the capacity without disrupting the slots that already have licensed
features running.
NOTE
You can enable slot based licenses only on 10 Gigabit Ethernet (FTR_10G), Advanced Extension
(FTR_AE), and Advanced FICON Acceleration (FTR_AFA) features.
To assign slots for a license key, perform the following steps.
44
Web Tools Adminstrator’s Guide
53-1002152-01
3
Licensed feature management
1. Open the Switch Administration window as described in “Opening the Switch Administration
window” on page 33.
2. Select the License tab.
3. Select the license key for which you want to assign slots from the License Administration table.
The Assign Slots window displays.
4. Select the slots you want to assign.
5. Click OK.
Removing a license from a switch
To remove a license from a switch in the Switch Administration window, perform the following
steps.
ATTENTION
Use care when removing licenses. If you remove a license for a feature, that feature no longer works.
1. Open the Switch Administration window as described in “Opening the Switch Administration
window” on page 33.
2. Select the License tab.
3. Click the license you want to remove.
4. Click Remove.
Universal time-based licensing
After v6.3.0, Web Tools supports universal time-based licensing. Each universal key is for a single
feature, and can be used on any product that supports the feature, for a defined trial period. At the
end of the trial period, the feature gets disabled. You can extend the universal key license. For
time-based licenses, the Expiry Date displays in the License Administration table.
The following features are supported for universal time-based license:
•
•
•
•
•
•
•
•
•
•
•
•
•
Fabric
Extended Fabric
Fabric Watch
Performance Monitor
Trunking
High-Performance Extension over FCIP/FC
Advanced Extension
Advanced FICON Acceleration
FICON Management Server (CUP)
Enhanced Group Management (EGM)
10GbE
Integrated Routing
Adaptive Networking
Web Tools Adminstrator’s Guide
53-1002152-01
45
3
High Availability overview
• Server Application Optimization
High Availability overview
High-Availability (HA) features provide maximum reliability and nondisruptive replacement of key
hardware and software modules. High Availability is available only on the Brocade DCX, DCX-4S,
DCX 8510-4 and DCX 8510-8 platforms. Refer to the Fabric OS Administrator’s Guide for additional
information about High Availability.
The High Availability window, as shown in Figure 10, displays information about the status of the HA
feature on each control processor (CP), and enables you to perform CP failover.
The background color of the HA button indicates the overall status of high availability on the switch.
The colors and their meanings are:
• Green—Healthy: HA Status is HA enabled, Heartbeat Up, HA State synchronized.
• Yellow—Disruptive mode: HA Status is HA enabled, Heartbeat Up, HA State not in sync.
• Red—HA is unavailable: HA Status is Non-Redundant.
Admin Domain considerations
HA is possible if the switch is a member of the current Admin Domain. If switch is not a member of
current Admin Domain, the Synchronize Services and Initiate Failover buttons are unavailable.
Launching the High Availability window
To launch the High Availability window, perform the following steps.
1. Select a Brocade DCX, DCX-4S, DCX 8510-4 or DCX 8510-8 platforms from the Fabric Tree.
The Switch View displays.
2. Click the HA button in the Switch View.
The High Availability dialog box displays.
The High Availability window contains the following two tabs:
• The Service tab displays information about the switch. When the hardware is configured as a
dual switch, the Service tab displays information about both switches.
46
Web Tools Adminstrator’s Guide
53-1002152-01
3
High Availability overview
• The CP tab displays information about slots. For Brocade DCX-4S or DCX 8510-4, CP blades are
placed in slot 4 and slot 5.,For the Brocade DCX or DCX 8510-8, CP blades are placed in slot 6
and 7.
FIGURE 10
High Availability window, CP tab
The High Availability window gets refreshed automatically. You can also click Refresh to update the
information displayed in the High Availability window.
Admin Domain considerations
To open the High Availability window, the switch must be a member of your current Admin Domain.
If the switch is not a member of the current Admin Domain, the Synchronized Services and Initiate
Failover buttons are unavailable.
Synchronizing services on the CP
A nondisruptive CP failover is only possible when all the services are synchronized between both
CPs.
To synchronize services on the CP, perform the following steps.
1. Open the High Availability window as described in “Launching the High Availability window” on
page 46.
2. Verify that the HA Status field displays HA enabled, Heartbeat Up, HA State synchronized.
If the HA Status field displays HA enabled, Heartbeat Up, HA State synchronized you are
finished.
If the HA Status field displays HA enabled, Heartbeat Up, HA State not in sync, continue with
step 3.
3. Click Synchronize Services.
The Warning dialog box displays.
Web Tools Adminstrator’s Guide
53-1002152-01
47
3
Event monitoring
4. Click Yes and wait for the CPs to complete a synchronization of services, so that a
nondisruptive failover is ready.
5. Click Refresh to update the HA Status field.
When the HA Status field displays HA enabled, Heartbeat Up, HA State synchronized a failover
can be initiated without disrupting frame traffic on the fabric.
Initiating a CP failover
A nondisruptive failover might take about 30 seconds to complete. During the failover, all of the
Web Tools windows and all associated child-windows are invalidated. You must close all Web Tools
windows and open Web Tools again.
To initiate a nondisruptive failover, perform the following steps.
1. Open the High Availability window as described in “Launching the High Availability window” on
page 46.
2. Verify that the HA Status field displays HA enabled, Heartbeat Up, HA State synchronized or HA
enabled, Heartbeat Up, HA State not in sync.
3. Click Initiate Failover.
The Warning dialog box displays.
4. Click Yes to initiate a nondisruptive failover.
5. When prompted, close the Web Tools Switch Explorer window and all associated windows, and
re-open Web Tools.
Event monitoring
Web Tools displays fabric-wide and switch-wide events. Event information includes sortable fields
for the following:
•
•
•
•
•
•
•
•
Switch name
Message number
Time stamp
Indication of whether the event is from a logical switch or a chassis
The number of successive events of the same kind
Severity level
Unique message identifier (in the form moduleID-messageType)
Detailed error message for root cause analysis
There are eight message severity levels:
•
•
•
•
•
48
Emergency
Alert
Critical
Error
Warning
Web Tools Adminstrator’s Guide
53-1002152-01
3
Event monitoring
•
•
•
•
Marginal
Notice
Information
Debug
Table 8 lists the event message severity levels displayed on the Switch Events tab and explains
what qualifies event messages to be certain levels.
On the Switch Events tab, you can click the Filter button to launch the Filter Events dialog box. The
Filter Events dialog box allows you to define which events should be displayed on the Switch Events
tab. For more information on filtering events, refer to “Filtering Switch Events” on page 50.
TABLE 8
Icon and level
Emergency
Critical
Alert
Error
Warning
Event severity levels
Description
Emergency-level messages indicate a partial or complete failure of a
subsystem.
Critical-level messages indicate that the software has detected serious
problems that will eventually cause a partial or complete failure of a subsystem
if not corrected immediately. For example, a power supply failure or rise in
temperature must receive immediate attention.
This event does not compromise data or prevent the use of the system;
however, the event warrants your attention.
Error-level messages represent an error condition that does not impact overall
system functionality significantly. For example, error-level messages might
indicate timeouts on certain operations, failures of certain operations after
retries, invalid parameters, or failure to perform a requested operation.
Warning-level messages highlight a current operating condition that should be
checked or it might lead to a failure in the future. For example, a power supply
failure in a redundant system relays a warning that the system is no longer
operating in redundant mode. The failed power supply must be replaced or
fixed.
Notices report important events, such as task completions or events.
Notice
Info
Information-level messages report the current nonerror status of the system
components, such as the online and offline status of a fabric port.
Debug messages deliver status messages relating to debugging systems.
Debug
Displaying Switch Events
The Switch Events tab displays a running log of events for the selected switch. Switch events are
polled and updated every 15 seconds; there is no refresh-on-demand option for switch events.
For two-switch configurations, all chassis-related events are displayed in the event list of each
logical switch for convenience.
Web Tools Adminstrator’s Guide
53-1002152-01
49
3
Event monitoring
To display Switch Events, perform the following steps.
1. Select the switch from the Fabric Tree.
The Switch View displays.
2. Select the Switch Events tab, if necessary.
Filtering Switch Events
You can filter the fabric and switch events by time, severity, message ID, and service. You can apply
either one type of filter at a time or multiple types of filters at the same time. When a filter is
applied, the filter information displays at the bottom of the filtered information and the Show All link
is available to allow you to view the information unfiltered.
To filter Switch Events, perform the following the procedure.
1. Open the Switch Events tab as described in “Displaying Switch Events” on page 49.
2. Click Filter.
The Event Filter dialog box displays.
3. To filter events within a certain time period:
• Select the From check box and enter the start time and date in the fields.
• Select the To check box and enter the finish time and date in the fields.
• To filter events beginning at a certain date and time, select only the From check box and
enter the start time and date.
• To filter events up until a certain date and time, select only the To check box and enter the
finish time and date.
4. Click OK.
The filter is enabled and the window is refreshed to show the filtered information.
Filtering events by event severity levels
To filter events by event severity levels, perform the following steps.
1. Open the Switch Events tab as described in “Displaying Switch Events” on page 49.
2. Click Filter.
The Event Filter dialog box displays.
3. Select Level.
4. Select the event levels you want to display.
5. Click OK.
The filter is enabled and the window is refreshed to show the filtered information.
50
Web Tools Adminstrator’s Guide
53-1002152-01
Displaying the Name Server entries
3
Filtering events by message ID
To filter events by message ID, perform the following steps.
1. Open the Switch Events tab as described in “Displaying Switch Events” on page 49.
2. Click Filter.
The Event Filter dialog box displays.
3. Select Message ID.
4. Enter the message IDs in the associated field.
NOTE
You can enter multiple message IDs as long as you separate them by commas. You can enter
either the full message ID (moduleID-messageType) or a partial ID (moduleID only). The
message ID filtering is case-sensitive.
5. Click OK.
The filter is enabled and the window is refreshed to show the filtered information.
Filtering events by service component
To filter events by service component, perform the following steps.
1. Open the Switch Events tab as described in “Displaying Switch Events” on page 49.
2. Click Filter.
The Event Filter dialog box displays.
3. Select Service. The event service menu is enabled.
4. Select either Switch or Chassis from the menu to show only those messages from the logical
switch or from the chassis.
5. Click OK.
The filter is enabled and the window is refreshed to show the filtered information.
Displaying the Name Server entries
Web Tools displays Name Server entries listed in the Simple Name Server database. This includes
all Name Server entries for the fabric, not only those related to the local domain. Each row in the
table represents a different device. You can click the column head to sort the events by a particular
column, and drag the column divider to resize a column. You can also right-click a column heading
to resize one or all columns, sort the information in ascending or descending order, or select which
columns are displayed.
Admin Domain considerations: The Name Server table is filtered based on Admin Domain
membership of the fabric devices. The Name Server table lists only devices that are part of your
current Admin Domain. This includes devices that are direct members of the Admin Domain and
devices that are attached to ports that are direct members of the Admin Domain. All other fabric
devices are filtered out of the Name Server view for the current Admin Domain. Refer to “Admin
Domain membership” on page 65 for information about direct and indirect members.
Web Tools Adminstrator’s Guide
53-1002152-01
51
3
Displaying the Name Server entries
For FICON devices: The Name Server table lists the request node identification (RNID) information.
To display the Name Servers, perform the following steps.
1. Select Tasks > Monitor > Name Server.
The Name Server window displays.
2. To set an autorefresh rate for the Name Server entries, select the Auto Refresh check box in
the Name Server window, and enter an auto-refresh interval (in seconds).
The minimum (and default) interval is 15 seconds.
Printing the Name Server entries
To set up printing preferences, perform the following steps.
1. Select Tasks > Monitor > Name Server.
The Name Server window displays.
2. Click Print.
3. On the Page Setup dialog box, set up your printing preferences and click OK.
The Print dialog box displays.
4. Select a printer and click OK.
Displaying Name Server information for a particular device
To display Name Server information for a particular device, perform the following steps.
1. Select Tasks > Monitor > Name Server.
The Name Server window displays.
2. Select a device from the Domain column.
3. Click Detail View.
The Name Server Information dialog box displays the information specific to that device.
Displaying zone members for a particular device
To display zone members for a particular device, perform the following steps.
1. Select Tasks > Monitor > Name Server.
The Name Server window displays.
2. Select a device from the Domain column.
3. Click Accessible Devices.
The Zone Accessible Devices window displays accessible zone member information specific to
that device.
52
Web Tools Adminstrator’s Guide
53-1002152-01
3
Physically locating a switch using beaconing
Physically locating a switch using beaconing
Use the Beacon button to physically locate a switch in a fabric. The beaconing function helps to
physically locate a switch by sending a signal to the specified switch, resulting in an LED light
pattern that cycles through all ports for each switch (from left to right).
NOTE
You must have an RBAC role of admin to initiate switch beaconing. The LED light pattern is initiated
on the actual switch or chassis. It is not mirrored in the Switch View.
To use beaconing, perform the following steps.
1. Select a logical switch using the drop-down list under Fabric Tree section in the Switch Explorer
window.
The selected switch displays in the Switch View.
2. Select Beacon for a switch, or Chassis Beacon for a chassis-based switch.
The LED lights on the actual switch light up on the physical switch in a pattern running back
and forth across the switch itself. In chassis-based switches, the LEDs glow across all the
blades.
3. Look at the physical switches in your installation location to identify the switch.
Locating logical switches using chassis beaconing
To locate all logical switches in a chassis, perform the following steps.
1. Select a logical switch using the drop-down list under the Fabric Tree section in the Switch
Explorer window.
The selected switch displays in the Switch View.
2. Click Chassis Beacon.
The LEDs on the logical switch light up on the blades associated with the logical switch.
Virtual Fabrics overview
Virtual Fabrics is an architecture that virtualizes hardware boundaries. Traditionally, SAN design
and management is done at the granularity of a physical switch. Each switch and all the ports in
the switch act as a single fabric element that participates in a single fabric. Virtual Fabrics allows
SAN design and management to be done at the granularity of a port. This enables partitioning of a
physical switch into multiple logical switches, which may be organized into logical fabrics.
The following platforms are Virtual Fabrics-capable:
•
•
•
•
•
Brocade DCX and DCX-4S
Brocade 5300
Brocade 5100
Brocade 6510
Brocade DCX 8510-4
Web Tools Adminstrator’s Guide
53-1002152-01
53
3
Virtual Fabrics overview
• Brocade DCX 8510-8
Virtual Fabrics cannot be configured or managed from Web Tools. Configuration and management
is done from either the Brocade Network Advisor, or the Fabric OS command line interface. For
information about configuring and managing Virtual Fabrics, refer to the Brocade Network Advisor
User Manual if you are using Brocade Network Advisor, or Fabric OS Administrator’s Guide if you
are using the Fabric OS command line interface.
You can use Web Tools to view Virtual Fabrics and logical switch configurations.
Selecting a logical switch from the Switch View
You can log in to a specific logical switch, as described in Chapter 1, or you can select a logical
switch from the Switch View. If you do not log in to a specific logical switch, you are presented with
the default logical switch.
Under the Switch Information tab, Base Switch, Default Switch, and Allow XISL Use are specific to
VIrtual Fabrics. These options perform these functions:
• Base Switch indicates whether or not the logical switch can act as a base switch. A base switch
is a special logical switch that can be used for chassis interconnection. Each chassis may only
designate only one logical switch as a base switch.
• Default Switch indicates whether or not the logical switch is the default logical switch. The
default logical switch is equivalent to the normal, discovered physical switch topology. It is
automatically assigned fabric ID 128. If you do not log in to a specific logical switch using
Options on the login dialog box, the default logical switch displays in the Switch View.
• Allow XISL Use indicates whether or not the logical switch is allowed to connect to other logical
switches using an extended inter-switch link (XISL). Base switches may use XISLs. Dynamically
created logical switches can use the XISL for traffic, only if Allow XISL Use is enabled through
CLI using the configure command.
To select a logical switch, perform the following steps.
1. Use the Logical Switch selector to select the fabric ID.
You must have the EGM license installed to view the Logical Switch selection on a Brocade
5100, 5300, or VA-40FC. A dialog box displays asking you to confirm your selection.
2. Click Yes to confirm.
The selected logical switch displays. Note that the Logical Switch selector is relocated above
the Switch View.
Viewing logical ports
When base switches are connected through XISLs, a base fabric is formed that includes logical
switches in different chassis. A logical link is formed dynamically among logical switches that have
the same FID to carry frames between the logical switches. Logical ports are created in the
respective switches to support the logical link.
54
Web Tools Adminstrator’s Guide
53-1002152-01
Virtual Fabrics overview
3
Logical ports are software constructs, and have no corresponding hardware to represent them on
the Switch View. Logical port information is available in the Port Administration window.
1. Select Port Administration. The Port Administration window displays. Logical ports are
displayed in the FC Ports Explorer tree structure.
2. To view logical port properties, expand the Logical Ports folder, and select a port. The General
properties are displayed.
Web Tools Adminstrator’s Guide
53-1002152-01
55
3
56
Virtual Fabrics overview
Web Tools Adminstrator’s Guide
53-1002152-01
Chapter
4
Maintaining Configurations and Firmware
In this chapter
• Creating a configuration backup file . . . . . . . . . . . . . . . . . . . . . . . . . . . . . . .
• Restoring a configuration . . . . . . . . . . . . . . . . . . . . . . . . . . . . . . . . . . . . . . . .
• Admin Domain configuration maintenance . . . . . . . . . . . . . . . . . . . . . . . . . .
• Uploading and downloading from USB storage . . . . . . . . . . . . . . . . . . . . . . .
• Performing a firmware download . . . . . . . . . . . . . . . . . . . . . . . . . . . . . . . . . .
57
58
59
60
60
Creating a configuration backup file
Keep a backup copy of the configuration file in case the configuration is lost or unintentional
changes are made. You should keep individual backup files for all switches in the fabric. You
should avoid copying configurations from one switch to another.
If you upload from a network, enter the host name or IP address in the Host Name or IP field, the
user ID and password required for access to the host in the User Name and Password fields, and
select the Protocol Type used for the upload. The default is FTP. If you select “Secure Copy Protocol
(SCP),” you cannot specify “anonymous” in the User Name field.
An info link is enabled when USB is chosen as the source of the configuration file. If you click on
info, the following information message displays (Figure 11).
FIGURE 11
Information dialog box
To create a configuration backup file, perform the following task.
1. Open the Switch Administration window.
2. Select Show Advanced Mode.
3. Select the Configure tab.
The Configure screen displays.
4. Select the Upload/Download tab.
The Upload/Download configuration screen displays.
Web Tools Adminstrator’s Guide
53-1002152-01
57
4
Restoring a configuration
NOTE
By default, Config Upload is chosen under Function, and Network is chosen as the source of
the configuration file.
5. Enter the configuration file with a fully-qualified path, or select the configuration file name in
the Configuration File Name field.
If you select USB as the configuration file source, the network parameters are not needed and
are not displayed. You can skip to step 6.
6. Use the Fabric ID selector to select the fabric ID of the logical switch from which the
configuration file is to uploaded.
The selector displays all the virtual fabric IDs that have been defined, the default of 128 for the
physical switch, chassis level configuration, and all chassis and switches.
FIGURE 12
Fabric ID selector
NOTE
If you are using a USB device, it must be connected and mounted before you upload or download.
Refer to “Uploading and downloading from USB storage” on page 60 for more information.
7.
Click Apply.
You can monitor the progress by watching the Upload/Download Progress bar.
Restoring a configuration
Restoring a configuration involves overwriting the configuration on the switch by downloading a
previously saved backup configuration file. Perform this procedure during a planned down time.
Make sure that the configuration file you are downloading is compatible with your switch model.
Configuration files from other model switches might cause your switch to fail.
If you download from a network, enter the host name or IP address in the Host Name or IP field, the
user ID and password required for access to the host in the User Name and Password fields, and
select the Protocol Type used for the upload. The default is FTP. If you select “Secure Copy Protocol
(SCP),” you cannot specify “anonymous” in the User Name field.
To restore a configuration, perform the following task.
1. Open the Switch Administration window.
2. Select Show Advanced Mode.
3. Select the Configure tab.
The Configure screen displays.
58
Web Tools Adminstrator’s Guide
53-1002152-01
4
Admin Domain configuration maintenance
4. Select the Upload/Download tab.
The Upload/Download configuration screen displays. By default, Config Upload is chosen
under Function, and Network is chosen as the source of the configuration file.
5. Under Function, select Config Download to Switch.
If you select USB as the configuration file source, the network parameters are not needed and
are not displayed, and you can skip to step 7.
An info link is enabled when USB is chosen as the source of the configuration file. If you click
info, an information message displays.
6. Enter the configuration file with a fully-qualified path, or select the configuration file in the
Configuration File Name field.
7.
Use the Fabric ID selector to select the fabric ID of the logical switch to which the configuration
file is to downloaded.
The selector displays all the virtual fabric IDs that have been defined, the default of 128 for the
physical switch, chassis level configuration, and all chassis and switches.
8. Enter the fabric ID of the logical switch in Template Fabric ID.
NOTE
If you are using a USB device, it must be connected and mounted before you upload or download.
Refer to “Uploading and downloading from USB storage” on page 60 for more information.
9. Click Apply.
You can monitor the progress by watching the Upload/Download Progress bar.
Admin Domain configuration maintenance
When you log in to the switch as a physical fabric administrator and back up a configuration, all
local switch configuration parameters are saved, as well as all Admin Domain membership
information and Admin Domain zone databases.
To perform a configuration upload or download, you should have the Admin Domain of AD255 or
AD0, if no other user-defined Admin Domains exist. A configuration upload or download gathers all
the configuration files for the fabric, including Admin Domains. For more information on Admin
Domains, refer to “Requirements for Admin Domains” on page 63.
When the configuration is backed up, one of the following scenarios is possible:
• If the current Admin Domain does not own the switch and you are logged in with any role that
allows configuration upload or download, the following items are saved in the configuration file:
-
Local zone configuration
No other configuration information
• If the current Admin Domain owns the switch and you are logged in with any role that allows
configuration upload or download, the following items are saved in the configuration file:
-
Web Tools Adminstrator’s Guide
53-1002152-01
Local zone configuration
All other configuration information except Admin Domain configuration information
59
4
Uploading and downloading from USB storage
• If you invoke Admin Domain from AD255 and you are logged in with any role that allows
configuration upload/download, the following items are saved in the configuration file:
-
Configuration information for zones in all Admin Domains
All other configuration information, including zoning from all Admin Domains
The filtering depends on the Admin Domain switch ownership, with additional access if you are in
AD255. Access to the command itself is limited by Role-Based Access (RBAC), and not by whether
the current user is a Physical Fabric Administrator or an admin user with enumerated access to the
relevant domains.
The ability to change Admin Domain context requires installing the EGM license. Refer to “Changing
the Admin Domain context” on page 21 for complete instructions.
The EGM license is required only for 8 Gbps platforms, such as the:
•
•
•
•
•
Brocade Encryption Switch
Brocade 300, 5300, and 5100 switches
Brocade VA-40FC
Brocade 8000
Brocade 7800
For non-8 Gbps platforms, all functionalities are available without the EGM license.
Uploading and downloading from USB storage
If you choose to upload or download from a USB device, you must click the USB port to launch the
USB Port Management wizard.
To update your USB storage, perform the following steps.
1. Select Mount USB Device, and select Yes at the confirmation prompt.
2. Right-click on a configuration file to access Export, Copy, and Search options.
3. Click Copy to upload and Export to download.
Performing a firmware download
During a firmware download, the switch restarts and the browser temporarily loses connection with
the switch. When the connection is restored, the version of the software running in the browser is
different from the new software version that was installed and activated on the switch. You must
close all of the Web Tools windows and log in again to avoid a firmware version mismatch. Note
that for chassis-based switches, you might get popup messages that imply the loss of connection is
temporary and will soon be resolved. You must still close all windows and re-log in.
When you request a firmware download, the system first checks the file size being downloaded. If
the compact flash does not have enough space, Web Tools displays a message and the download
does not occur. If this happens, contact your switch support supplier.
NOTE
You can perform a firmware download only when the current Admin Domain owns the switch.
60
Web Tools Adminstrator’s Guide
53-1002152-01
4
Performing a firmware download
To download a new firmware version, perform the following steps.
1. Open the Switch Administration window as described in “Opening the Switch Administration
window” on page 33.
2. Select the Firmware Download tab.
3. Choose to download either the firmware or the firmware key.
The download source can be located on the network or a USB device.
NOTE
When you select the USB button, you can specify only a firmware path or directory name. No
other fields on the tab are available. The USB button is available if the USB is present on the
switch.
4. Enter the host name or IP address, user name, password, and fully-qualified path to the file
release.plist.
You can enter the IP address in either IPv4 or IPv6 format.
The path name should use the following structure:
//<directory>/<fos_version_directory>/release.plist
where the <directory> is the path up to the entry point of <fos_version_directory> and
<fos_version_directory> is where the unzipped version of Fabric OS is located.
Example
//directory_1/my_directory/v7.0.0/release.plist
5. Select the protocol type in the Protocol Type field.
If you select “Secure Copy Protocol (SCP),” you cannot specify “anonymous” in the User field.
6. Click Apply.
The firmware download begins. You can monitor the progress by looking at the Firmware
Download progress bar.
NOTE
About halfway through the download process, after the firmware key is downloaded to the
switch, connection to the switch is lost and Web Tools invalidates the current session. Web
Tools invalidates all windows because upfront login is always enabled and cannot be disabled.
7.
Close all Web Tools windows and log in again.
If the firmware download is in progress when you log in, you can continue to monitor its
progress.
Web Tools Adminstrator’s Guide
53-1002152-01
61
4
62
Performing a firmware download
Web Tools Adminstrator’s Guide
53-1002152-01
Chapter
5
Managing Administrative Domains
In this chapter
• Administrative Domain overview . . . . . . . . . . . . . . . . . . . . . . . . . . . . . . . . . .
• Enabling Admin Domains . . . . . . . . . . . . . . . . . . . . . . . . . . . . . . . . . . . . . . . .
• Admin Domain window . . . . . . . . . . . . . . . . . . . . . . . . . . . . . . . . . . . . . . . . . .
• Creating and populating domains . . . . . . . . . . . . . . . . . . . . . . . . . . . . . . . . .
• Modifying Admin Domain members . . . . . . . . . . . . . . . . . . . . . . . . . . . . . . . .
63
65
66
69
71
Administrative Domain overview
Using Administrative Domains (Admin Domains or ADs), you can partition the fabric into logical
groups and allocate administration of these groups to different user accounts so that these
accounts manage only the Admin Domains assigned to them and do not make changes to the rest
of the fabric. The ability to assign an Admin Domain to a specific user account is performed in the
User tab of the Switch Administration window and not in the Admin Domain window.
You can create domains that are grouped together based on the type of members in the domain.
For example, you can create Admin Domains based on the type of switches in your fabric using the
WWN (not to be confused with the Admin Domain number) or put all the devices in a particular
department in the same Admin Domain for ease of administering those devices.
You can have up to 256 Admin Domains in a fabric (254 user-defined and 2 system-defined),
numbered from 0 through 255. Admin Domains are designated by a name and a number. This
document refers to specific Admin Domains using the format “ADn” where n is a number between
0 and 255.
NOTE
ADs and Virtual Fabrics are mutually exclusive. Virtual Fabrics must be disabled if you want to use
the AD feature.
Requirements for Admin Domains
The following are the requirements for using administrative domains:
• Admin Domains are supported on fabrics with switches running Fabric OS v5.2.0 or later.
• To manage Admin Domains, you must be a physical fabric administrator. A physical fabric
administrator is a user with the Admin role and access to all Admin Domains (AD0 through
AD255).
• The default zone mode setting must be set to No Access (refer to “Enabling Admin Domains”
on page 65).
Web Tools Adminstrator’s Guide
53-1002152-01
63
5
Administrative Domain overview
User-defined Admin Domains
AD1 through AD254 are user-defined Admin Domains. These user-defined Admin Domains can be
created only by a physical fabric administrator in AD255.
System-defined Admin Domains
AD0 and AD255 are special Admin Domains and are present in every AD-capable fabric.
AD0
AD0 is a system-defined Admin Domain that, in addition to containing members you explicitly
added (similar to user-defined Admin Domains), it contains all online devices, switches, and switch
ports that were not assigned to any user-defined Admin Domain.
AD0 also implicitly contains all devices from switches running Fabric OS versions earlier than 5.2.0,
as they can never be part of an Admin Domain unless they are upgraded to v5.2.0 or later.
Unlike user-defined Admin Domains, AD0 has both an automatic membership list and a fixed
membership list. User-defined Admin Domains have only a fixed membership list.
• Automatic membership list—Contains all devices and switches that were not assigned to any
other Admin Domain.
• Fixed membership list—Contains all devices and switches that you explicitly add to AD0 and
can be used to force device and switch sharing between AD0 and other Admin Domains.
The Admin Domain window displays the fixed members and not the automatic members, you can
use the View menu to display a list of the automatic members.
AD0 can be managed like any user-defined Admin Domain. The only difference between AD0 and
user-defined Admin Domains is the automatic membership list.
In filtered views, the automatic members of AD0 are considered direct members.
The automatic members of AD0 change dynamically as the membership of other Admin Domains
changes. The fixed members of AD0 are not deleted unless you explicitly remove them.
For example, if you explicitly add DeviceA to AD0 and it is not a member of any other Admin
Domain, then DeviceA is both an automatic and a fixed member of AD0. If you add DeviceA to AD2,
then DeviceA is deleted from the AD0 automatic membership list, but is not deleted from the AD0
fixed membership list. If you then remove DeviceA from AD2, DeviceA is added back to the AD0
automatic membership list (assuming DeviceA is not in any other Admin Domains).
AD0 is useful if you want to share its zone database (called “root zone database”) with a legacy
fabric.
AD255 or physical fabric
AD255 is a virtual domain that contains all devices, switches, and switch ports in the fabric. AD255
presents an unfiltered view of the fabric and is also referred to as the physical fabric.
You can use AD255 to do the following:
• Manage other Admin Domains.
• Get an unfiltered view of the fabric.
• Manage ACL and distribution (this can be managed in AD0 if no other Admin Domains are
present).
64
Web Tools Adminstrator’s Guide
53-1002152-01
Enabling Admin Domains
5
• Manage Advanced Performance Monitoring (this can be managed in AD0 if no other Admin
Domains are present, but only if you are using Web Tools with the EGM license).
The EGM license is required only for 8 Gbps platforms, such as the:
•
•
•
•
•
Brocade Encryption Switch
Brocade 300, 5300, and 5100 switches
Brocade VA-40FC
Brocade 8000
Brocade 7800
For non-8 Gbps platforms, all functionalities are available without EGM license.
You cannot manage zones with AD255, because AD255 does not have a zone database associated
with it.
Admin Domain membership
Switches, ports, and devices can be members of an Admin Domain. Admin Domain members can
be either direct or indirect members as described below:
• Direct members—Devices, switches, and ports that you explicitly add to an Admin Domain.
Direct members are listed in the Admin Domain membership list.
• Indirect port members—Ports that are implicitly added as part of an Admin Domain when any
of the following occurs:
-
A device that is connected to a port was added to the Admin Domain.
A switch to which the port belongs is a member of the Admin Domain.
• Indirect device members—Devices that are connected to ports that are direct members of an
Admin Domain.
Enabling Admin Domains
The default zone mode setting gives attached devices either All Access to all devices or No Access
to all devices. To begin implementing an Admin Domain structure within a SAN, you must set the
default zone mode to No Access. You must be in AD0 to change the default zone mode. After the
default zone mode is set to No Access, you cannot change it from the physical fabric.
NOTE
The term “physical fabric” is used in Web Tools only.
Even though the default zone mode access is set to No Access, you can still create and enable
zones within each Admin Domain. These zones are configurable only from the Admin Domain in
which they were created. Indirect port members cannot be zoned.
Web Tools Adminstrator’s Guide
53-1002152-01
65
5
Admin Domain window
To enable Admin Domains, perform the following steps.
1. Change the Admin Domain context to AD0. Refer to “Changing the Admin Domain context” on
page 21.
NOTE
Changing the Admin Domain context requires using Web Tools with the EGM license;
otherwise, access to this feature is denied and an error message displays. Change the Default
Zone mode to No Access. Refer to “Setting the default zoning mode” on page 119 for more
information.
2. Navigate to AD255 or the physical fabric and begin managing the Admin Domains.
Admin Domain window
You can view and manage Admin Domains through the Admin Domain window.
If you are not using Web Tools with the EGM licensed installed, managing Admin Domain
operations is denied and an error message displays.
The EGM license is required only for 8 Gbps platforms, such as the:
•
•
•
•
•
Brocade Encryption Switch
Brocade 300, 5300, and 5100 switches
Brocade VA-40FC
Brocade 8000
Brocade 7800
For non-8 Gbps platforms, all functionalities are available without EGM license.
The Admin Domain window displays information about the Admin Domains that are defined in the
fabric. If you launch the Admin Domain window from AD255 (physical fabric), the window contains
information about the current content of all Admin Domains. If you launch the Admin Domain
window from any other Admin Domain, the window displays the current Admin Domain only.
To manage Admin Domains, you must be logged in with the role of Admin.
ATTENTION
Any changes you make in the Admin Domain window are held in a buffered environment and are not
saved to persistent storage until you explicitly save the changes. If you close the Admin Domain
window without saving your changes, your changes are lost.
To save the buffered changes you make to persistent storage in the Admin Domain window, refer to
“Saving local Admin Domain changes” on page 68.
When you are logged into AD0, if a physical fabric administrator modifies the AD configuration from
another session, the changes in the membership might not be visible to you.
66
Web Tools Adminstrator’s Guide
53-1002152-01
Admin Domain window
5
When you launch the Admin Domain window and select the parent Admin Domains node in the tree
on the left pane, the Admin Domain window displays summary information about all of the Admin
Domains. You can also select a specific Admin Domain from the tree to display detailed information
about that Admin Domain. The detailed view displays summary information as well as information
about the online switch, port, and device members of the selected Admin Domain.
NOTE
The tree only displays launched switches and their ports. It also displays all the devices in the fabric.
Slot and port information of other switches are not displayed in the tree.
The Admin Domain window has the following buttons in a task bar at the top of the window:
•
•
•
•
•
•
New allows you to create a new Admin Domain.
Print allows you to print the current or effective configuration.
Refresh allows you to refresh the information for the entire fabric or a specific Admin Domain.
Apply allows you to apply a configuration.
Save allows you to save a configuration.
Clear allows you to clear the configuration.
You can right-click on any of the table content in the Admin Domain window to access Export, Copy,
and Search options. The options are not available if the table does not have any content.
NOTE
You must accept the Brocade Certificate at the beginning of the log in to Web Tools to enable the
functionality of Export and Copy.
• Click Export Row or Export Table to save the contents to a tab-delimited file.
• Click Copy Row or Copy Table to copy the contents in tab-delimited text format to a file.
• Click Search to search for a specific text string in the table.
The Switch Members dialog box displays.
In the Switch Members dialog box, enter the text string and press Enter. This is an incremental
search and allows 24 maximum characters including the wildcards question mark (?) and
asterisk (*). The first row containing the text string is highlighted. To find the next match, press
the down arrow. To find the previous match, press the up arrow. If the text is not found in the
table, the text turns red.
Opening the Admin Domain window
Use the Admin Domain window to perform all Admin Domain configuration procedures.
If you want to configure Admin Domains, you must launch the Admin Domain window from the
physical fabric context. If you are in any Admin Domain other than the physical fabric, the module
launches in read-only mode.
NOTE
The switch must be running Fabric OS v5.2.0 or later.
Web Tools Adminstrator’s Guide
53-1002152-01
67
5
Admin Domain window
To open an Admin Domain window, perform the following steps.
1. Select a switch from the Fabric Tree and log in when prompted.
Switch View displays information for the selected switch.
2. If you plan to modify the Admin Domain configuration, from the Admin Domain menu, select
Physical Fabric.
3. Click Admin Domain in the Manage section of the Tasks menu.
The Admin Domain window displays.
Refreshing fabric information
When you refresh, the system updates the display of fabric elements only (switches, ports, and
devices). It does not update Admin Domain changes in the Admin Domain window.
This option allows you to refresh the fabric element information displayed at any time.
To refresh the fabric information open the Admin Domain window and click Refresh. The status for
the fabric, including switches, ports, and devices is refreshed.
Refreshing Admin Domain information
Any changes you make in the Admin Domain window are saved to a local buffer. They are not
applied to persistent storage until you invoke one of the transactional operations listed in the
Actions menu.
You can refresh the Admin Domain information at any time to reflect changes that might have been
made by other users or to back out of current, unsaved work and start again.
ATTENTION
When you refresh the buffered information in the Admin Domain window, any Admin Domain
configuration changes you made and not yet saved are erased from the buffer and replaced with the
currently enabled Admin Domain information that is saved on the switch.
To update the information in the Admin Domain window with the information saved on the switch,
perform the following steps.
1. In the Admin Domain window, click the Refresh arrow.
2. Click Refresh Admin Domains.
The information in the Admin Domain window is updated with the saved information on the
switch. This action also refreshes the fabric information as described in “Refreshing fabric
information” on page 68. Any unsaved Admin Domain changes are deleted.
Saving local Admin Domain changes
All information displayed and all changes made in the Admin Domain window are buffered until you
save the changes. That means that any other user looking at the Admin Domain information for the
switch does not see the changes you made until you save them.
68
Web Tools Adminstrator’s Guide
53-1002152-01
5
Creating and populating domains
To save the local Admin Domain changes, perform the following steps.
1. Select Actions > Save AD Configuration to save your changes to persistent storage as the
defined Admin Domain configuration.
2. Select Actions > Apply AD Configuration to save your changes to persistent storage and make
your changes effective in the fabric.
These options are not enabled until you make a change to the Admin Domain configuration.
If another user has an Admin Domain operation in progress at the time that you attempt to save
changes, Web Tools displays a warning to indicate that another Admin Domain transaction is in
progress on the fabric. You can select to abort the other transaction and override it with yours.
This action updates the entire contents of the Admin Domain window, not just the selected Admin
Domain. You can save your changes at any time during the Admin Domain configuration session.
Closing the Admin Domain window
It is important to remember that any changes you make in the Admin Domain window are not saved
automatically.
To close the Admin Domain window, perform the following steps.
1. In the Admin Domain window, select File > Close.
If there are changes in the buffer that were not saved, a warning message displays. Confirm
that you want to close the Admin Domain session without saving the changes.
2. Click Yes to close without saving changes, or click No to go back to the Admin Domain window
to save the changes (refer to “Saving local Admin Domain changes” on page 68).
Creating and populating domains
Setting up an Admin Domain involves the following steps.
1. Creating an Admin Domain.
2. Assigning one or more administrators to the Admin Domain.
The Admin account always has access to administer the Admin Domains, even if no other
users are assigned (refer to “Changing user account parameters” on page 180).
When you create an Admin Domain, you can activate the Admin Domain after you finish creating it.
If you activate the Admin Domain, you must click Apply to transfer your changes from the Web Tools
database to the fabric database so that your changes are applied to the fabric. You can log in to an
active Admin Domain. You cannot log in to an Admin Domain that was deactivated.
Creating an Admin Domain
To create an Admin Domain, perform the following steps.
1. Open the Admin Domain window, as described in “Opening the Admin Domain window” on
page 67.
2. Click New.
The Create Admin Domain wizard displays.
Web Tools Adminstrator’s Guide
53-1002152-01
69
5
Creating and populating domains
3. In the Name area, assign an Admin Domain name.
You can specify a name or let the system assign the name for you.
4. In the ID area, assign an Admin Domain ID.
You can specify an ID or let the system assign the ID for you.
5. In the State area, select the Active check box to activate the Admin Domain when you finish
creating it.
NOTE
Clear the Active check box if you want the Admin Domain deactivated when you finish creating
it.
6. Click Next.
7.
In the Membership area, assign members to the Admin Domain by selecting them in the
Available Members section and clicking Add, Add Ports, or Add Devices as described below:
• Select a switch, port, or device in the Available Members tree and click Add to add the
selected element.
Alternatively, you can press the Insert key to add your selections.
• Select a switch or slot and click Add Ports to add all of the ports in the selected switch or
slot.
• Select a switch, slot, or port and click Add Devices to add all of the devices for the selected
element.
8. Optional: Click Manual to add offline devices.
NOTE
To add ports or other switches in the fabric, launch the Add Member wizard by clicking the
Manual button.
9. Click Next.
The wizard displays a summary of the Admin Domain. Read the summary to verify that the
Admin Domain setup is correctly.
10. Click Finish to close the wizard.
11. Click Save to save the new Admin Domain configuration to persistent storage.
12. Click Apply to enforce the new Admin Domain configuration as the effective configuration.
Adding ports or switches to the fabric
To add ports or switches to the fabric, perform the following steps.
1. From the Create Admin Domain wizard, click Manual.
The Add Member window displays.
2. Select Port and enter the member ID in the Member field using the Domain Index (D,I) format.
3. Click Apply to enforce the added members, and then click OK to accept the changes.
70
Web Tools Adminstrator’s Guide
53-1002152-01
5
Modifying Admin Domain members
Activating or deactivating an Admin Domain
To activate or deactivate an Admin Domain, perform the following steps.
1. Open the Admin Domain window.
2. From the tree on the left, select the Admin Domain you want to activate or deactivate.
3. Click Activate to activate the Admin Domain, or click Deactivate to deactivate the Admin
Domain.
4. Select Actions > Save AD Configuration to save the new Admin Domain configuration to
persistent storage.
5. Select Actions > Apply AD Configuration to enforce the new Admin Domain configuration as the
effective configuration.
ATTENTION
When you deactivate an Admin Domain, the members or devices assigned to the domain can
no longer access its hosts or storage unless those devices are part of another Admin Domain.
When you deactivate an Admin Domain, no one can use this Admin Domain to log in to a
switch.
Modifying Admin Domain members
To modify members from an Admin Domain, perform the following steps.
1. Open the Admin Domain window.
2. From the tree on the left, select the Admin Domain you want to modify.
3. Click Modify.
The Modify Admin Domain wizard displays the Membership step.
4. Assign members to the Admin Domain by selecting them in the Available Members section and
clicking Add, Add Ports, or Add Devices as described below:
• Select a switch, port, or device in the Available Members tree and click Add to add the
selected element.
Alternatively, you can press the Insert key to add your selections.
• Select a switch or slot and click Add Ports to add all of the ports in the selected switch or
slot.
• Select a switch, slot, or port, and click Add Devices to add all of the devices for the
selected element.
5. Optional: Click Manual to add offline switches and devices.
6. Remove members from the Admin Domain by selecting them in the Selected Members section
and clicking Remove.
Alternatively, you can press the Delete key to remove selected items.
7.
Click Next. Use the summary to verify that the Admin Domain setup is correct.
8. Click Finish.
Web Tools Adminstrator’s Guide
53-1002152-01
71
5
Modifying Admin Domain members
9. Select Actions > Save AD Configuration to save the new Admin Domain configuration to
persistent storage.
10. Select Actions > Apply AD Configuration to enforce the new Admin Domain configuration as the
effective configuration.
Renaming Admin Domains
You can change the name of an Admin Domain, including an auto-assigned ID name. The Admin
Domain name cannot exceed 63 characters and can contain alphabetic and numeric characters.
The only special character allowed is an underscore ( _ ).
NOTE
You cannot rename AD0 or AD255.
To rename an Admin Domain, perform the following steps.
1. Open the Admin Domain window.
2. From the tree on the left, select the Admin Domain.
3. Click Rename.
4. Enter the new name and click OK.
5. Select Actions > Save AD Configuration to save the new Admin Domain configuration to
persistent storage.
6. Select Actions > Apply AD Configuration to enforce the new Admin Domain configuration as the
effective configuration.
Deleting Admin Domains
When you delete an Admin Domain, its devices no longer have access to the members of the zones
with which it was associated.
To delete an Admin Domain, perform the following steps.
1. Open the Admin Domain window.
2. From the tree on the left, select the Admin Domain.
3. Click Delete.
4. In the confirmation dialog box, click Yes to delete the domain.
The system deletes the Admin Domain.
5. Select Actions > Save AD Configuration to save the new Admin Domain configuration to
persistent storage.
6. Select Actions > Apply AD Configuration to enforce the new Admin Domain configuration as the
effective configuration.
72
Web Tools Adminstrator’s Guide
53-1002152-01
Modifying Admin Domain members
5
Clearing the Admin Domain configuration
When you clear the Admin Domain configuration, all user-defined Admin Domains are deleted and
all fabric resources (switches, ports, and devices) are returned to AD0. You cannot clear the Admin
Domain configuration if zone configurations exist in any of the user-defined Admin Domains.
To clear the Admin Domain configuration, perform the following steps.
1. Open the Admin Domain window.
2. Select Actions > Clear AD Configuration.
3. In the confirmation dialog box, click Yes to clear the Admin Domain configuration.
Web Tools Adminstrator’s Guide
53-1002152-01
73
5
74
Modifying Admin Domain members
Web Tools Adminstrator’s Guide
53-1002152-01
Chapter
6
Managing Ports
In this chapter
• Port management overview . . . . . . . . . . . . . . . . . . . . . . . . . . . . . . . . . . . . . .
• Configuring FC ports . . . . . . . . . . . . . . . . . . . . . . . . . . . . . . . . . . . . . . . . . . . .
• Assigning a name to a port . . . . . . . . . . . . . . . . . . . . . . . . . . . . . . . . . . . . . . .
• Port beaconing. . . . . . . . . . . . . . . . . . . . . . . . . . . . . . . . . . . . . . . . . . . . . . . . .
• Enabling and disabling a port. . . . . . . . . . . . . . . . . . . . . . . . . . . . . . . . . . . . .
• Persistent enabling and disabling ports . . . . . . . . . . . . . . . . . . . . . . . . . . . .
• Configuring NPIV ports . . . . . . . . . . . . . . . . . . . . . . . . . . . . . . . . . . . . . . . . . .
• Port activation . . . . . . . . . . . . . . . . . . . . . . . . . . . . . . . . . . . . . . . . . . . . . . . . .
• Port swapping index . . . . . . . . . . . . . . . . . . . . . . . . . . . . . . . . . . . . . . . . . . . .
• Configuring BB credits on an F_Port . . . . . . . . . . . . . . . . . . . . . . . . . . . . . . .
• Configuring ALPA . . . . . . . . . . . . . . . . . . . . . . . . . . . . . . . . . . . . . . . . . . . . . . .
• Configuring Port Octet Speed Combination . . . . . . . . . . . . . . . . . . . . . . . . . .
• Configuring CSCTL . . . . . . . . . . . . . . . . . . . . . . . . . . . . . . . . . . . . . . . . . . . . . .
• Inband Management. . . . . . . . . . . . . . . . . . . . . . . . . . . . . . . . . . . . . . . . . . . .
75
79
82
83
84
85
85
86
90
92
92
93
95
96
Port management overview
This chapter describes how to manage FC and gigabit Ethernet (GbE) ports. Refer to “Viewing
EX_Ports” on page 148 for information on how to view and configure EX_Ports.
The Port Administration window is refreshed automatically every sixty seconds and is refreshed
immediately when you make any port changes through Web Tools.
To manage ports, you must be logged in with the role of switchadmin, admin, basicswitchadmin,
operator, or fabric admin. If you are logged in with a user, securityadmin, or zoneadmin role, you
can only view the port information.
For information about creating unique user account roles, refer to “User-defined accounts” on
page 175.
Opening the Port Administration window
To open the Port Administration window, click Port Admin in the Switch View window. The window
displays in Basic Mode. Refer to “Switch View” on page 23 for information about accessible ports.
The Port Administration window displays information about the ports on the switch. Click Show
Advanced Mode in the upper-right corner of the window to see more port management options.
Web Tools Adminstrator’s Guide
53-1002152-01
75
6
Port management overview
NOTE
You can drag the column divider to resize a column, or drag columns to re-arrange them in a custom
order. You can also right-click a column heading to resize one or all columns, or sort the information
in ascending or descending order.
Admin Domain considerations
In fabrics with user-defined Admin Domains, the Port Administration window is filtered to show only
ports that are direct or indirect members of the currently selected Admin Domain:
• Direct members are ports that were directly added to the Admin Domain as members.
• Indirect members are:
- Non-owned ports on a member switch
- Non-owned ports to which member devices are attached
• All active ports, as well as any inactive EX_Ports are shown.
Port Administration window components
The Port Administration window has the following four tabs in the top left corner.
• FC Ports tab displays all of the FC ports on the switch (physical FC ports and logical ports).
• VE/VEx Ports tab displays all of the VE/VEx ports on the switch. If the switch does not have
VE/VEx ports, the VE/VEx Ports tab does not display.
• ICL Ports tab displays all of the ICL ports on the switch. If the switch does not have ICL Ports,
the ICL ports tab does not display.
• GigE Ports tab displays all of the GigE ports. If the switch does not have GigE ports, the
GigE Ports tab does not display.
The GigE Ports tab has the following three subtabs:
-
General—General information about the GigE Ports.
SFP—Displays information about SFP ports.
Port Statistics—Displays statistics about the ports.
IP Interfaces—Lets you view interfaces
IP Routes—Lets you view routes
FCIP tunnel—Lets you view FCIP tunnels. This tab has two buttons: Go to FCIP port and
Show Security Policies.
On selecting an FCIP tunnel, the following circuit details with the circuit properties are displayed:
•
•
•
•
•
•
•
•
76
Circuit Number
Tunnel ID
Administrator Status
Operational Status
GigEPort
Source IP
Gateway
VLAN ID
Web Tools Adminstrator’s Guide
53-1002152-01
Port management overview
•
•
•
•
•
•
•
•
•
•
•
•
•
•
•
6
MTU Size
Compression Mode
Data L2COS Value
DSCP Data
IKE Policy Number
IPsec Policy Enabled
Keep Alive Timeout
MaximumCommunicationRate
MinimumCommunicationRate
MaxRetransmitRate
MinRetransmitRate
Metric
Pre-Shared key
QOS Mapping
Selective Ack
Ports Explorer tree
The Ports Explorer tree displays on the left side of the window. Items in the tree are displayed as
follows:
•
•
•
•
Switches—Switch ID, with switch name in parentheses; for example, 3(MapsSW_202)
Blades—Slot number of the blade, with blade ID in parentheses; for example, Slot 7(24)
Ports—Port number; for example, Port 2
10G SFP ports— A yellow triangle badge displays to visually distinguish the 10G SFP+ ports.
Button area
The button area contains buttons for all the tasks you can perform on the selected port. If you
select more than one port, buttons are available for only the tasks that you can perform on all of
the selected ports. Buttons are grayed (unavailable) if they are not applicable to the selected ports.
Port information displays in either a table of ports or information about a specific port, depending
on your selection. If you select a slot or switch, the system displays a table of all the ports for the
slot or switch. If you select a port, the system displays detailed information about the port.
Subtabs
You can view either Basic Mode or Advanced Mode, and to view the subtabs that contain additional
information about the port. The available subtabs depend on the type of port selected.
Web Tools Adminstrator’s Guide
53-1002152-01
77
6
Port management overview
When viewing detailed information about a port, Basic Mode provides these subtabs:
• General—All ports
- View Details
- Rename
- Edit Configuration
- Enable/Disable (port)
- Persistent Enable/Persistent Disable (port)
• SFP—Physical ports only (FC, CEE, and GbE)
- Basic information about the port equipment
• QSFP—Quad Small Form-factor Pluggable ports
- Basic Information about the port.
- UnitNumber
- ChannelIndex
- DeviceTech
• Port Statistics—All ports
- Basic port information and statistics
- Advanced port information
Note that on the Port Statistics subtab, you can view either absolute values or deltas for
port statistics. Viewing the deltas is useful if you want to view current port trends. To reset
the counters on the port statistics, click the Clear Counters button.
FCIP statistics for a GbE port are the accumulated statistics of all the FCIP tunnels for that
GbE port.
• IP Interfaces—GbE ports only
• IP Routes—GbE ports only
When viewing detailed information about a port, the Advanced Mode provides these additional
subtabs:
• General—All ports
- Enable/Disable Trunking
- Enable/Disable NPIV
- NPIV Max Login
- Port Swap
- F_Port Trunking
- Re-Authenticate
- Bind/Un-Bind PID
- F-Port BB Credit
- QoS Enable/Disable (requires Adaptive Networking License)
- CSCTL enable/disable (requires Adaptive Networking License)
- Speed combination (applicable only to the Brocade 6510 and Brocade DCX
8510-4,8510-8 with the FC16-32 or FC16-48
-
78
Port beacon enable/disable
Web Tools Adminstrator’s Guide
53-1002152-01
6
Configuring FC ports
• SFP—Physical ports only (FC, CEE, and GbE)
- Basic Information about the port.
- Advanced information about the port equipment
• QSFP—Quad Small Form-factor Pluggable ports
- Basic Information about the port.
- Advanced information about the port equipment.
- UnitNumber
- ChannelIndex
- DeviceTech
- MaxCaseTemp
• Port Statistics
- Advanced port statistics
- Error details
- FCIP Tunnels—GbE ports and logical FCIP ports only (not available for the FR4-16IP).
Controllable ports
All ports have a Controllable attribute visible from the Advanced Mode, which represents a
combination of the RBAC and Admin Domain permissions.
The Controllable attribute is No when non-owned E_Ports and indirect member ports on non-owned
switches are accessible in read-only mode and are not controllable, regardless of RBAC
permissions. Additionally, if you are logged in with read-only permission, the Controllable attribute
displays No for all ports.
The Controllable attribute is Yes for ports that are directly owned by the current Admin Domain and
for all ports on switches that are owned by the current Admin Domain, if your role gives you Modify
permission for ports. If a port is controllable, all configuration functionality is enabled.
Ports on a non-owned switch that are not E_Ports and are neither direct nor indirect members of
the current Admin Domain are inaccessible and are not displayed in the Port Administration
window.
Configuring FC ports
With the FC Port Configuration wizard, you can configure allowed port types, port speed, and long
distance mode for physical ports.
You must use Web Tools with the EGM license enabled on the switch to configure long distance;
otherwise, access to this feature is denied and an error message displays.
The EGM license is required only for 8 Gbps platforms, such as the following:
•
•
•
•
Brocade Encryption Switch
Brocade 300, 5300, and 5100 switches
Brocade VA-40FC
Brocade 8000
Web Tools Adminstrator’s Guide
53-1002152-01
79
6
Configuring FC ports
• Brocade 7800
For non-8 Gbps platforms, all functionality is available without EGM license.
The following procedure describes how to open the FC Port Configuration wizard. The wizard is
self-explanatory, so the explicit steps are not documented here.
1. Click a port in the Switch View to open the Port Administration window.
2. Select the Auto Refresh check box to automatically refresh the port details.
Clear the check box to disable auto refresh.
3. When enabled, enter the interval time in seconds in the Auto-Refresh Interval field.
The port details are automatically refreshed, based on the configured time interval. The
minimum value is 45 seconds.
4. Select the port you want to configure from the tree on the left.
5. Click the General subtab.
NOTE
Long distance does not display from the General or Table subtabs if the EGM license is not
enabled on the switch.
6. Click Edit Configuration.
The FC Port Configuration wizard displays. The fields are populated with the current
configuration values.
NOTE
Long distance is not displayed from the Edit Configuration window. You can view long distance
from the View tab when you display the port details.
7.
Follow the steps in the wizard.
NOTE
If you configure a disabled port as an EX_Port, the wizard displays the Enable Port after
configuration check box. If you select the check box, the disabled port is automatically enabled
after configuration; otherwise, the port remains in the same state after configuration.
Allowed port types
For FC ports, the Port Administration window displays the following values relating to port type:
Port Type
This is the actual or current port type. If the port is offline, this value is the
allowed types (or U_Port, if no type constraint is specified). If the port is
online, this value is the type to which the port has been configured.
Allowed Port Type
The allowed or configured port type.
The allowed port types indicate any constraints on what types the port can be configured when it
comes online. For normal (that is, non-EX_Port) ports, the following are the allowed port types:
80
L_Port
The port can be used to connect a loop device.
F_Port
The port can be used to connect a non-loop device.
Web Tools Adminstrator’s Guide
53-1002152-01
Configuring FC ports
6
E_Port
The port can be used to connect to another switch. On the Brocade FC8-64,
ports 56 through 63 are not available as E_Ports. This option is unavailable
for these ports.
U_Port
For a physical FC port: the port can be any one of E_Port, F_Port, or L_Port.
For a logical FC port: the port can be either VE_Port or VEX_Port.
When the wizard prompts you to select allowed port types, if all of these boxes are selected, there
are no constraints on port type. The port negotiated to its preferred type when the switch comes
up, depending on what type of device or switch to which it is connected.
Clearing a check box guarantees that the port does not attempt to function as a port of the
unchecked type. At least one type must remain selected. An FC port cannot be configured as an
E_Port and L_Port.
L_Ports are not supported on the Brocade FC16-32, Brocade FC16-48, or Brocade 6510.
NOTE
To configure a port as an EX_Port, the switch must be capable of supporting FCR or FCIP features.
The EX_Port option is disabled in the wizard if the switch does not meet these requirements.
Long distance mode
Port long distance configurations can be performed in the Switch Admin Extended Fabric tab if the
link is used over long distances. To configure the long-distance settings, the EGM license must be
enabled on the switch. Otherwise, access to this feature is denied and an error message displays.
For information about long-distance mode settings, refer to Chapter 14, “Administering Extended
Fabrics”.
The EGM license is required only for 8 Gbps platforms, such as the following:
•
•
•
•
•
Encryption Switch
300, 5300, and 5100 switches
Brocade VA-40FC
Brocade 8000
Brocade 7800
For non-8 Gbps platforms, all functionality is available without EGM license.
Ingress rate limit
Ingress rate limiting is a licensed feature that requires the Adaptive Networking license. Ingress
rate limiting restricts the speed of traffic from a particular device to the switch port, allowing
latency-sensitive applications to share the storage resources alongside throughput-intensive
applications. Ingress rate limiting delays the return of BB credits to the external device. By limiting
the throughput on the ingress side of a port, existing congestion can be removed or avoided.
The implication is as following:
• Ingress rate limiting is not supported if the F_Port is in AOQ.
• Ingress rate limiting is not supported if the F_Port is part of Trunk.
• Ingress rate limiting is not supported if the F_Port is not QoS enabled, but it connects to a QoS
enabled AG switch port.
Web Tools Adminstrator’s Guide
53-1002152-01
81
6
Assigning a name to a port
Ingress rate limiting is applicable only to F_Ports and FL_Ports and is available only on the following
platforms:
•
•
•
•
•
•
•
•
•
•
•
•
•
•
•
•
•
Brocade DCX
Brocade DCX-4S
Brocade DCX 8510
Brocade Encryption Switch
Brocade 300
Brocade 5100
Brocade 5300
Brocade 5410
Brocade 5424
Brocade 5450
Brocade 5460
Brocade 5470
Brocade 5480
Brocade 6510
Brocade 7800
Brocade VA-40FC
Brocade 8000
To configure the ingress rate limit feature, perform the following steps.
1. Select Port Admin > Advance Mode.
2. Select a port, or multiple ports, to configure.
3. Select the QoS Enable option.
This enables the QoS on selected ports. The selected port QoS status will be displayed in port
table.
4. Click the Edit Configuration button.
The Edit Configuration dialog displays. This dialog sets the QoS Ingress Rate Limit on selected
ports.
5. Configure the port using the pre-defined Ingress Rate Limits.
NOTE
You can set the Ingress Rate Limit even if QoS is disabled. It does not take effect until QoS is
enabled.
Assigning a name to a port
Port names are optional. You can assign a name to an FC or FCIP port to make port grouping
easier. You can also rename FC and FCIP ports to new names. You cannot rename GbE ports. The
Port Name column in the Ports tab displays the default port name.
82
Web Tools Adminstrator’s Guide
53-1002152-01
Port beaconing
6
Port names can be from 1 through 128 alphanumeric characters, unless FICON Management
Server (FMS) mode is enabled. If FMS mode is enabled, port names should be limited from 1
through 24 alphanumeric characters. The comma (,), semicolon (;), and “at” symbol (@) are not
allowed.
NOTE
Although it is not required, it is recommended that port names be unique.
To assign a name to a port, perform the following steps.
1. Click a port in the Switch View to open the Port Administration window.
2. Select the FC Ports tab.
3. From the tree on the left, select the switch or slot that contains the port you want to rename.
4. From the table, select the port you want to rename.
5. Click Rename.
6. Enter a name for the port and click Rename.
Port beaconing
Individual FC ports can be set to beacon using the Port Admin dialog box. Port beaconing status
displays in the Port Beaconing column. The Switch View reflects the port beaconing status by
flashing the port amber and green for 2.5 seconds each, in an alternating pattern.
To configure beaconing for an FC port, perform the following steps.
1. Open the Port Admin window.
2. Click Show Advanced Mode, if the Port Admin window is in Basic Mode.
3. Select the switch in the FC Ports Explorer list.
4. Select a port from the list in the main window.
The Port Beacon Enable or Port Beacon Disable button becomes active.
NOTE
You may select all the ports on the switch, but if you select a port that is not valid for
beaconing, the Port Beacon buttons are disabled.
There is an optional procedure for configuring a single FC port.
1. Open the Port Admin dialog box.
2. Click Show Advanced Mode, if the Port Admin window is in Basic Mode.
3. Select a port from the list in the main window.
The Port Beacon Enable or Port Beacon Disable button becomes active.
Web Tools Adminstrator’s Guide
53-1002152-01
83
6
Enabling and disabling a port
Enabling and disabling a port
To enable or disable a port, perform the following steps.
1. Click a port in the Switch View to open the Port Administration window.
2. Select the FC Ports or GigE Ports tab.
3. From the tree on the left, select the switch or slot that contains the port you want to enable or
disable.
4. From the table, select one or more ports.
NOTE
Use Shift+click and Ctrl+click to select multiple ports. You can select multiple ports from the
table. You cannot select multiple ports from the tree.
5. Click either the Enable or Disable button.
NOTE
If the button is gray (unavailable), the port is already in the enabled or disabled state. For
example, if the Enable button is unavailable, the port is already enabled.
If you select multiple ports in both enabled and disabled states, both buttons are active. When
you click either button, the action is applied to all selected ports.
6. Optional: If you are accessing a Brocade 7800 switch, you can set the media type for the GE0
and GE1 GigE ports to either copper or optical.
7.
a.
Select the GigE Ports tab.
b.
Select either the GE0 or GE1 port.
c.
Select either Copper or Optical from the Media Type selection list.
Click Yes in the confirmation window.
Considerations for enabling or disabling a port?
You should understand the following limitations and conditions when enabling or disabling a port:
• On FR4-18i and FC4-16IP port blades, all ports are disabled by default. You can disable and
re-enable them as needed.
• If a port is not licensed you cannot enable it until you install the appropriate license, such as a
Ports on Demand or N_Port ID Virtualization license (refer to “Port activation” on page 86 for
more information). The Licensed field located in the General tab in the Port Administration
window indicates whether a port is licensed.
• If you disable a principal ISL port (an ISL port that is designated by the fabric to be a part of the
path to communicate with the principal switch), the fabric automatically reconfigures.
• If you disable a port that was connected to a device, that device is no longer accessible from
the fabric. For more information, refer to Fabric OS Administrator’s Guide.
84
Web Tools Adminstrator’s Guide
53-1002152-01
Persistent enabling and disabling ports
6
Persistent enabling and disabling ports
To enable or disable a port so that it remains enabled or disabled across switch restarts, perform
the following steps.
NOTE
Ports cannot be persistently enabled or disabled when FMS is enabled.
1. Select a port in the Switch View to open the Port Administration window.
2. Select the FC Ports, VE/VEx Ports, ICL Ports, or GigE Ports tab.
3. From the tree on the left, select the switch or slot that contains the port.
4. From the table, select one or more ports.
NOTE
Use Shift-click and Ctrl-click to select multiple ports. You can select multiple ports from the
table. You cannot select multiple ports from the tree.
5. Click Persistent Enable or Persistent Disable.
NOTE
Persistent Enable or Persistant Disable is not supported in FMS mode.
NOTE
If the button is gray (unavailable), the port is already in that state or FMS mode is enabled on
the switch gray (unavailable), the port is already in the enabled or disabled state. For example,
if the Enable button is unavailable, the port is already enabled.
If you select multiple ports in both enabled and disabled states, both buttons are active. When
you click either button, the action is applied to all selected ports.
6. Optional: If you are accessing a Brocade 7800 switch, you can set the media type for the GE0
and GE1 GigE ports to either copper or optical.
7.
a.
Select the GigE Ports tab.
b.
Select either the GE0 or GE1 port.
c.
Select either Copper or Optical from the Media Type selection list.
Click Yes in the confirmation window.
Configuring NPIV ports
The NPIV license must be installed on a switch before NPIV functionality can be enabled on any
port. For detailed information about understanding and configuring NPIV ports, refer to the Fabric
OS Administrator’s Guide.
NOTE
NPIV feature cannot be disabled when Access Gateway mode is enabled.
Web Tools Adminstrator’s Guide
53-1002152-01
85
6
Port activation
The NPIV Max Login Limit option configures the maximum number of permitted logins per NPIV
port. Each NPIV port can support up to 255 logins. The range of valid values is from 1 through 255
logins per port. The default value is 126 logins.
This feature supports virtual switches, but not on physical switches. Each port can have a different
NPIV login limit value in each logical switch. The NPIV Max Login column displays the value
assigned to each port. The column is displays, by default, on the far right-hand side of the port
listing view.
To configure an NPIV port, perform the following steps.
1. Select Port Admin > Advanced Mode.
2. Select the FC Ports tab.
3. From the tree on the left, select the logical port you want to configure.
4. If the NPIV port is not already disabled, click Disable.
The NPIV login limit for a port can be set only for disabled ports.
5. Click NPIV Max Login.
The Configure NPIV Max Login dialog displays. You can configure only one port at a time.
6. Set the number of logins to allow on the selected port and click OK.
7.
Click Enable to bring the port back online.
Port activation
Brocade switches come with a preset number of ports enabled. Additional ports can be enabled
using the Ports on Demand (POD) licenses and the Dynamic Ports on Demand (DPOD) feature (for
supported switches only).
Ports on Demand is ready to be unlocked in the switch firmware. The license might be part of the
licensed Paper Pack supplied with the switch software, or you can purchase the license separately
from your switch vendor, who will provide you with a key to unlock it. You can install up to two Ports
on Demand licenses on each switch.
Table 9 lists the ports that are enabled by default settings and the ports that can be enabled after
you install the first and second Ports on Demand licenses for each switch type, and the ports that
can be enabled with the Dynamic PODs feature.
TABLE 9
86
Ports enabled with POD licenses and DPOD feature
Switch name
Enabled by
default
Enabled with Ports on Demand
licenses
Enabled with the Dynamic Ports on
Demand feature
Brocade
Encryption
0-15
Not supported
Not supported
Brocade 8000
None
0-7
Not supported
Brocade 6510
0-23
24-35, 36-47
Brocade VA-40FC
0-23
24-31, 32-39
Brocade NC-5480
1-8, 17-20
0, 9-16, 21-23
Brocade 5480
1-8, 17-20
0, 9-12, 13-16, 21-23
Brocade 5470
0-7, 15, 16
8-14, 17-19
Any available ports
Web Tools Adminstrator’s Guide
53-1002152-01
Port activation
TABLE 9
6
Ports enabled with POD licenses and DPOD feature (Continued)
Switch name
Enabled by
default
Enabled with Ports on Demand
licenses
Enabled with the Dynamic Ports on
Demand feature
Brocade 5460
0-3, 6-13
4, 5, 14-25
Brocade 5450
1-10, 19-22
0, 11-18, 23-25
Brocade 5424
1-8, 17-20
0, 9-16, 21-23
Brocade 5300
0-47
48-63, 64-79
Brocade 5100
0-23
24-31, 32-39
Brocade 5000
Brocade 4100
0-15
16-23, 24-31
Not supported
Brocade 4900
0-31
32-47, 48-63
Not supported
Brocade 4424
1-8, 17-20
0, 9-16, 21-23
Brocade 4024
1-8, 17-20
9-12, 13-16, 21-23
Any available ports
Brocade 4020
0-7, 15, 16
8, 9, 17-19, 10-14
Any available ports
Brocade 4018
0-11
12-17
Any available ports
Brocade 4016
0-7, 10-13
8, 9, 14, 15
Any available ports
Brocade 300
0-7
8-15, 16-23
Any available ports
When using the Brocade 4016, 4018, 4020, 4024, 4424, 5424, 5450, 5460, 5470, 5480, and
NC-5480 switches, you can enable the Dynamic Ports on Demand (DPOD) feature, which allows
you to select the ports to be enabled (instead of predefined sets of ports) after the POD license is
installed. Web Tools allows you only to enable or disable the DPOD functionality on a port. To
configure DPOD, refer to the Fabric OS Administrator’s Guide.
In the Port Administration window, the Licensed attribute indicates whether a port is licensed (yes),
whether it can be license (possible) because there are free licenses available (only applicable with
the Dynamic POD feature), or whether it is not licensed and cannot be licensed because there is no
available license.
After the license keys are installed, you must enable the ports. You can do so without disrupting
switch operation, as described in “Enabling and disabling a port” on page 84. Alternatively, you can
disable and re-enable the switch to activate all ports as described in “Enabling and disabling a
switch” on page 37.
To unlock a Ports on Demand license, you can use the supplied license key or generate a license
key. If you need to generate a key, open an Internet browser and go to the Brocade website at
www.brocade.com. Select Products > Software License Keys and follow the instructions to
generate the key.
Enabling Ports on Demand
To enable Ports on Demand, perform the following steps.
1. Install the Brocade Ports on Demand licensed product. For instructions, refer to “Activating a
license on a switch” on page 44.
2. Enable the ports as described in “Enabling and disabling a port” on page 84.
Web Tools Adminstrator’s Guide
53-1002152-01
87
6
Port activation
If you remove a Ports on Demand license, the licensed ports are disabled after the next platform
restart or the next port deactivation.
Enabling Dynamic Ports on Demand
You must be logged in as Admin to enable the Dynamic POD feature.
NOTE
The Dynamic PODs feature is supported on the Brocade 4018, 4020, 4024, 5460, and 5470
switches only. If you click the Enable DPOD button on an unsupported switch, an error message
displays.
To enable Dynamic Ports on Demand, perform the following steps.
1. Select a port in the Switch View to open the Port Administration window.
2. Select the FC Ports or GigE Ports tab.
3. From the tree on the left, select the switch or the slot that contains the port.
4. Click Enable DPOD to enable the licensing mechanism to be dynamic. If the button is labeled
Disable DPOD, the licensing mechanism is already set to dynamic.
The existing POD associations and assignments are set as the initial Dynamic POD
associations.
Two fields are displayed:
• Available Licenses indicate the number of free licenses. These can be allocated for any
port.
• Total Licenses indicate the total number of licenses.
Disabling Dynamic Ports on Demand
NOTE
Disabling DPODs causes traffic disruption. Any prior port associations and assignments are lost the
next time the switch is restarted.
To disable the Dynamic POD feature, log in as Admin and perform the following steps.
1. Select a port in the Switch View to open the Port Administration window.
2. Select the FC Ports or GigE Ports tab.
3. From the tree on the left, select the switch or the slot that contains the port.
4. Click Disable DPOD to set the licensing mechanism to static. If the button is labeled Enable
DPOD, the licensing mechanism is already set to static.
88
Web Tools Adminstrator’s Guide
53-1002152-01
Port activation
6
Diagnostic ports
Diagnostic ports (D_Port) are used for running diagnostics to isolate link level faults and
inter-switch link testing in fabric, optical and remote loopback modes. D_Ports are not part of any
fabric and it does not carry any data or protocol traffic with it. It is used only for running diagnostic
traffic for isolating link level faults. D_Port can be used to get estimated link distance measure as
done for long distance mode links. For information on configuring a D_Port, see the Fabric OS
Administrator’s Guide. Web Tools can not configure a D_Port.
Following list of features are not supported when a port is configured as a D_Port.
•
•
•
•
•
•
•
Port swap
Port bind
Port trunk
QOS Enable/Disable
BB credit
NPIV Enable/Disable/Max login
Allow/Prohibit Matrix
D_Ports do not take part in zoning. If D_Port is added to a zone it does not take part in the fabric.
Reserving and releasing licenses on a port basis
NOTE
If the Admin Domains feature is enabled, the Dynamic POD configuration is only applied to the ports
if the switch is a member of the current Admin Domain.
The Dynamic PODs feature is supported on the Brocade 4018, 4020, and 4024 switches only.
To reserve and release licenses on a port basis, perform the following steps.
1. Click a port in the Switch View to open the Port Administration window.
2. Click the FC Ports or GigE Ports tab.
3. From the tree on the left, click the switch or the slot that contains the port.
The License column identifies the port license status:
• If the port has a license allocated, the License field contains the value Yes.
• If the port does not have a license allocated and there are no free licenses that can be
allocated, the License field contains the value No.
• If the port does not have a license allocated and there are licenses that can be allocated
to the port, the License field contains the value Possible.
You can reserve or release a license on any port with a a license allocated. You must be logged
in as Admin to reserve and release licenses.
To reserve a license, click Reserve License in the Port Administration window.
To release a license, click Release License in the Port Administration window.
NOTE
You must disable the port or switch before reserving or releasing a license.
Web Tools Adminstrator’s Guide
53-1002152-01
89
6
Port swapping index
Port swapping index
If a port malfunctions, or if you want to connect to different devices without having to rewire your
infrastructure, you can move traffic from one port to another (swap ports) without changing the I/O
Configuration Data Set (IOCDS) on the mainframe computer.
NOTE
Port swapping is not applicable to GE or ICL ports because there are no areas assigned to these
ports.
The following restrictions apply to all ports:
• Ports can be swapped only once.
• A swapped port can only be un-swapped.
• Port binding is not supported on swapped ports.
Port swapping
In the Port Admin list view and detailed view, swapped ports are indicated with the “(Swapped)”
label appended to the Port Index column and field (Figure 13).
FIGURE 13
Port swapped label
To swap ports, perform the following steps.
1. Select a port in the Switch View to open the Port Administration window.
2. Select the FC Ports tab.
3. Click Advanced.
4. From the tree on the left, select the port you want to swap.
5. Click Disable.
You must disable the ports used for port swapping. If the port is not in the disable state, the
port swap operation internally disables and re-enables the port.
6. Click Port Swap.
NOTE
When the Port Swap dialog box is launched for a swapped port, the dialog box displays “The
Selected port is already Swapped”
7.
90
Enter the number of the port with which you want to swap the current port.
Web Tools Adminstrator’s Guide
53-1002152-01
Port swapping index
6
If the port is on a blade, you must also provide the slot number.
NOTE
Port swap is not supported above the 16th port in a 48 port card in FMS mode.
8. Click Swap.
Determining if a port index was swapped
with another switch port
To determine whether a port was swapped, perform the following steps.
1. Select a port in the Switch View to open the Port Administration window.
2. Select the FC Ports tab.
3. Click Show Advanced Mode.
4. From the tree on the left, select the port you want to swap.
5. Click the General tab.
NOTE
The Port Index attribute on the General tab indicates whether a port was swapped. For ports
that were swapped, the attribute name displays as Port Index (Swapped), as shown in
Figure 14. The value indicates with which port index the port was swapped.
FIGURE 14
Web Tools Adminstrator’s Guide
53-1002152-01
Port swapping index
91
6
Configuring BB credits on an F_Port
Configuring BB credits on an F_Port
In Fabric OS v6.4.0 and later, you can configure the BB credits value on an F_Port. Follow the steps
given below.
1. Select a port in the Switch View to open the Port Administration window.
2. Select the FC Ports tab.
3. Click Show Advanced Mode.
4. Click F-Port BB Credit.
5. Enter the BB credit value in the Enter BB Credit field (the default value is 8).
NOTE
You cannot modify the default BB credit value for VE and ICL ports.
6. Click OK.
The value displays in the table of the Port Administration window. If no value is configured, the
F-Port BB Credit column displays the default value.
Configuring ALPA
PID is the address assigned to the host when it performs a login with a fabric. The 24 bits of the PID
are built from three 1 byte fields. The most significant byte is the Domain ID, the second byte is the
Area which that device belongs to, and the least significant byte is the ALPA.
Persistent ALPA provides the hosts with the same ALPA which they recieved the first time they
logged in. If they login using the same port, the domain and the area for that device are still the
same. This ensures that whenever a host logs in using the same port, it recieves the same PID. The
hosts can select their ALPA and the switch provides the same value, if it’s available.
By default, persistent ALPA is disabled on Access Gateway switches. Access Gateway always tries to
request the same ALPA which the host has requested to the edge switch, but there is a possibility
that the ALPA value has already been taken by another host. Therefore, the device can either use a
different ALPA value (FLEXIBLE ALPA) which is available or can stick to the same requested ALPA
value (STRINGENT ALPA). As the Access Gateway controls the assignment of ALPA values to the
devices, it knows which ALPA value has been taken and which is free. With FLEXIBLE ALPA option,
the host login is accepted with either the requested ALPA value or a different ALPA value. With
STRINGENT ALPA, if the requested ALPA value is not available, the login is rejected.
The Enable/Disable of Persistent ALPA feature is available on the Switch tab of the Switch Admin
dialog. The Persistent ALPA tables start populating as soon as the Access Gateway boots and the
devices start logging in.
NOTE
Persistent ALPA is supported on all the Access Gateway platforms, except the Brocade Encryption
Switch. Persistent ALPA is not supported in non-Brocade fabric and the Brocade 8000.
To configure Persistent ALPA, perform the following steps.
1. Select Switch > Switch Admin > Switch tab.
2. Select the enable radio option of Persistent ALPA.
92
Web Tools Adminstrator’s Guide
53-1002152-01
6
Configuring Port Octet Speed Combination
After selecting enable, the stringent and flexible radio buttons are enabled. Neither radio
buttons are selected by default.
3. Select either stringent or flexible.
4. Click Apply.
5. Close the Switch page.
6. Select Port Admin.
7.
Select an F_Port or U_Port from the device tree or Port List table.
8. Click ALPA Map.
FIGURE 15
ALPA Map selection
A dialog launches listing the Port WWN to ALPA Map with the host. The Port WWN map
automatically populates.
FIGURE 16
ALPA Map dialog
9. Optional: Click Remove All to clear all of the Port WWN maps.
Configuring Port Octet Speed Combination
The Port Admin dialog provides an option to set the Port Octet Speed Combination. This option is
available only on the:
• Brocade DCX 8510-8 and DCX 8510-4 with the FC16-32 and FC16-48 port blades
• Brocade 6510
Web Tools Adminstrator’s Guide
53-1002152-01
93
6
Configuring Port Octet Speed Combination
The ports on these hardware models are segregated into 8 port octets. The Port Octet Speed
Combination is applied to the eight ports to which the selected port belongs. Based on this Port
Octet Speed combination, the speed options will be available in the Edit Configuration Dialog.
TABLE 10
Port octet speed combinations
Port Octet in Combination
Available port speeds within the Octet
1
ASN or Fixed 16G|8G|4G|2G
2
ASN or Fixed 8G|4G|2G, Fixed 10G
3
Auto or Fixed 10G, Auto or Fixed 16G
You can change the octet combination for the octet associated with first eight ports of a blade or
switch. The first eight ports are based on the slot port number (or user port number in case of the
Brocade 6510). The octet speed must be set consistently across all members of the port octet.
NOTE
Changing from one combination to another is disruptive operation. It may cause connected ports to
become No_Sync. The 10 GE license is required in order to set a port to speed 10G.
To configure the Port Octet Speed Combination, perform the following steps.
1. Select Port Admin > Advanced mode.
2. Select the FC Ports tab.
3. In the FC Ports Explorer, select a port to configure.
FIGURE 17
FC Explorer dialog
4. Click Speed Combination.
The Port Octet Speed Combination dialog displays.
FIGURE 18
Port Octet Speed Combination dialog
5. Select a Speed Combination and click OK.
94
Web Tools Adminstrator’s Guide
53-1002152-01
Configuring CSCTL
6
Configuring CSCTL
Unlike QoS Zone-based FC flow prioritization method, CSCTL enables the same SID/DID pair
exchange frames with different priorities.
To be able to prioritize a frame flow between two end nodes, Fabric OS v7.0.0 provides support for
up to 32 Virtual Channels (VCs) per port. This categorizes the frames entering into a fabric on the
basis of preset behavior defined with these VCs, and conserves the frame’s behavior until it is
transmitted out of fabric. However, out of the 32 VCs for each external port, only 16 are used.
With the CSCTL method of prioritization, there is no need to have explicit traffic segregation, such
as QOS_H, QOS_M and QOS_L. The classification is entirely based upon CSCTL database
programmed into the ASIC. As the name suggests, CSCTL bits in each frame are used to define the
VC number on the transmit port.
In order to achieve this kind of classification, Fabric OS v7.0.0 provides a CSCTL database table on
each chip, capable of storing 256 entries. Each entry in the database table is populated with a VC
number which, if this feature is enabled, is retrieved by indexing the CSCTL value into the table for
each frame entering the fabric.
Irrespective of the type of frame classification method used, the flow priority of a frame is primarily
determined by the VC number used to transmit the frames across the ISL ports. In both methods of
classification, the VC number for a frame is determined at the ingress Fabric port or Fabric Loop
port (F/FL), when the frame enters the fabric for the very first time. To maintain the same flow
priority for a frame across all the ISL hops in a fabric, the same VC number is used while
transmitting the frame at the egress E_Port until it is out of the fabric thru a F/FL port. The main
difference between QoS Zone method of classification and CSCTL VC based method of
classification is how the VC number is computed when the frame enters into the fabric thru an F/FL
port and, of course, the manner of setting up these two frame classification methods.
Once the CSCTL mode is enabled on an F/FL port in a switch, the CSCTL value in the frame header
of all the incoming frames on that F/FL port are used to index into the ASIC’s CSCTL database table
to compute the VC number, which will define the frame’s flow priority throughout its life in the fabric
until it exits out of the fabric thru another F/FL port. The QoS links (ISLs) preserve this classification
during frame’s traversal across all the hops in the fabric.
NOTE
When CSCTL mode and QOS zones are enabled, QoS zones lose priority to CSCTL mode.
To enable CSCTL mode, perform the following steps.
1. Select Port Admin > Advanced mode.
2. Select the F_Ports to configure.
3. Select CSCTL Mode > Enable.
To disable CSCTL mode, perform the following steps.
1. Select Port Admin > Advanced mode.
2. Select the F_Ports to configure.
3. Select CSCTL Mode > Disable.
Web Tools Adminstrator’s Guide
53-1002152-01
95
6
Inband Management
Inband Management
Inband Management is designed to allow the management of the switch through GigE ports. This
allows a management station located on the WAN side of the FCIP platform to communicate with
the control processor for management tasks, such as launching Web Tools, SNMP polling, SNMP
traps, trouble shooting, and configuration. To provide this communication, new interfaces have
been added to the control processor that have an external IP address, allowing IP connectivity
through the port processor to the control processor.
The Inband Management interface is protocol independent, so any traffic destined for these
Inband Management interfaces is passed through the distribution point to the control processor. It
is then handled on the control processor, according to the rules set forth for the normal
management interface and following any security rules that may be in place on the control
processor.
To provide redundancy, there is one inband management interface per GigE port. This allows the
management station on the WAN side of the network to have multiple addresses with which to
reach that switch, and allow redundancy in the event one of the GigE ports becomes unreachable
for any reason.
Communication is handled through external addresses that are configured independently for each
Inband Management interface. The Inband Management interfaces share the routing table on the
control processor. This is separate from the routing table for each GigE port that exists. Because of
this there are certain limits to the addresses that are allowed, and the routes that are allowed for
the Inband Management interfaces and route entries.
Inband Management is supported on the Brocade 7800 and Brocade FX8-24. Only one IP interface
entry can be configured per GigE port.
To configure Inband Management, perform the following steps.
1. Select Port Admin > GigE Ports > Inband IP Interface.
2. Click Add to configure a new Inband Management entry.
3. Set the IP Address Type to IPv4 .
4. Set the address options:
-
IP Address
Subnet Mask
MTU Size
5. Click OK.
6. Select the Inband IP Routes tab.
7.
Click Add to configure a new route entry.
You can create a maximum of 32 Inband IP Route entries.
8. Set the IP Address Type to either IPv4.
9. Set the address options of the management station on the WAN side of the FCIP platform:
-
96
Destination IP Address
Subnet Mask
Gateway IP Address
Web Tools Adminstrator’s Guide
53-1002152-01
Inband Management
6
10. Click OK.
11. Select the General sub-tab.
12. Select the Enable option from the Inband selection list to activate Inband Management.
Web Tools Adminstrator’s Guide
53-1002152-01
97
6
98
Inband Management
Web Tools Adminstrator’s Guide
53-1002152-01
Chapter
Enabling ISL Trunking
7
In this chapter
• ISL Trunking overview . . . . . . . . . . . . . . . . . . . . . . . . . . . . . . . . . . . . . . . . . . . 99
• Disabling or enabling ISL Trunking . . . . . . . . . . . . . . . . . . . . . . . . . . . . . . . . . 99
• Viewing trunk group information . . . . . . . . . . . . . . . . . . . . . . . . . . . . . . . . . 100
• F_Port trunk groups. . . . . . . . . . . . . . . . . . . . . . . . . . . . . . . . . . . . . . . . . . . . 101
ISL Trunking overview
Inter-Switch Link (ISL) Trunking optimizes network performance by forming trunking groups that
can distribute traffic between switches across a shared bandwidth.
A trunking license is required on each switch that participates in the trunk. For details on obtaining
and installing licensed features, refer to “Licensed feature management” on page 44. For
additional information about ISL Trunking, refer to the Fabric OS Administrator’s Guide.
You must use Web Tools with the EGM license to create ISL trunk groups and to manage F_Port
trunks.
The EGM license is required only for 8 Gbps platforms, such as the following:
•
•
•
•
•
Brocade Encryption Switch
Brocade 300, 5300, and 5100 switches
Brocade VA-40FC
Brocade 8000
Brocade 7800
For non-8 Gbps platforms, all functionality is available without EGM license.
For detailed information about ISL Trunking configurations and criteria, refer to the Fabric OS
Administrator’s Guide.
Disabling or enabling ISL Trunking
The trunking feature requires using Web Tools with the EGM license. If you attempt to use this
feature without the EGM license, an error message displays.
When the trunking license is activated, trunks are automatically established on eligible ISLs and
trunking capability is enabled by default on all ports. Trunking is not supported on logical ports or
GbE ports.
Web Tools Adminstrator’s Guide
53-1002152-01
99
7
Viewing trunk group information
To disable trunking on a port, or to re-enable trunking if it has been disabled, perform the following
steps.
1. Select a port in the Switch View to open the Port Admin window.
2. Select the FC Ports tab.
3. From the tree on the left, select the switch name or slot name.
4. From the table, select the port that you want to trunk.
You can select multiple ports from the table. You cannot select multiple ports from the tree.
5. Click the Show Advanced Mode button on Ports Admin.
Click either the Trunking Enable or Trunking Disable button.
If the button is unavailable, then the selected port is already in that state.
6. 6. Click Yes in the confirmation dialog box.
Admin Domain considerations
You can only enable and disable trunking for a port when the current Admin Domain owns the
switch. You can log in to a switch that is not in your Admin Domain, but most of the functionality is
unavailable. F_Port trunking should not be configured in physical fabric mode.
Viewing trunk group information
Use the Trunking tab on the Switch Administration window to view trunk group information.
FIGURE 19
Trunking tab
The following trunking attributes can be displayed from the Switch Admin view:
•
•
•
•
100
Trunk port state, either master or slave.
Trunk master port
Trunk index (applies only to F_Port trunking).
Trunk type
Web Tools Adminstrator’s Guide
53-1002152-01
F_Port trunk groups
7
• Bandwidth (shown only for E_Port, Ex_Port, F_Port, and N_Port).
• Throughput (shown only for E_Port, Ex_Port, F_Port, and N_Port).
• Utilization (shown only for E_Port, Ex_Port, F_Port, and N_Port).
Additionally, the following trunking attributes can also be displayed from the Port Admin view by
clicking the Show Advanced Mode button:
•
•
•
•
Trunk port state, either master or slave.
Master Port
Trunk Index (applies only to F_Port trunking).
Trunking Enabled
F_Port trunk groups
F_Port trunking provides extra bandwidth and robust connectivity for hosts and targets connected
by switches in Access Gateway mode. There are five general criteria for establishing F_Port
trunking:
• The F_Port trunking feature requires installing the EGM license; otherwise if you attempt to use
this feature in Web Tools without the license, an error message displays.
•
•
•
•
Trunking must be enabled on the ports.
The trunking license must be enabled on the switch in Access Gateway mode.
The ports should not be configured for long distance connections.
The ports should not be port-swapped.
When you create an F_Port trunk you create a logical entity called a trunk index (TI), which
represents the physical ports. The TI represents all ports in the trunk. If a master port fails, and a
slave port takes over, the TI remains the same.
The EGM license is required only for 8 Gbps platforms, such as the following:
•
•
•
•
•
Brocade Encryption Switch
Brocade 300, 5300, and 5100 switches
Brocade VA-40FC
Brocade 8000
Brocade 7800
For non-8 Gbps platforms, all functionality is available without EGM license.
Creating and maintaining F_Port trunk groups
The FS8 -18 Encryption blade provides trunk groups with a maximum of eight ports per trunk
group. The trunk groups are in the blade port ranges 0-7 and 8-15, which are applicable to front
end ports. On the Brocade Encryption Switch, the trunk groups are in the port ranges 0-7, 8-15,
16-23, and 24-31, which are applicable on the front end ports.
User this procedure to create an F_Port trunk group, and to add or remove member ports.
1. Select Port Admin.
2. Click Show Advanced Mode.
Web Tools Adminstrator’s Guide
53-1002152-01
101
7
F_Port trunk groups
3. Select any port from the port group in which you want to create the trunk group.
4. Select F_Port Trunking.
The F_Port Trunking dialog box displays.
5. Select one or more ports in the Ports for trunking pane.
A dialog box displays, asking you to select a trunk index.
6. Select the trunk index from the drop-down list populated with the index for all the ports.
A trunk group is created, identified by the trunk index, and containing the port you selected.
7.
Select the trunk group you just created.
Add Members becomes active.
8. Additional ports can be added by selecting a port from Ports for trunking table and then
clicking Add Members.
NOTE
To remove a port from the trunk group, select the port from Trunk Groups table and then click
Remove Members.
9. Click OK to save your changes.
102
Web Tools Adminstrator’s Guide
53-1002152-01
Chapter
8
Monitoring Performance
In this chapter
• Performance Monitor overview. . . . . . . . . . . . . . . . . . . . . . . . . . . . . . . . . . .
• Opening the Performance Monitoring window . . . . . . . . . . . . . . . . . . . . . .
• Creating basic performance monitor graphs. . . . . . . . . . . . . . . . . . . . . . . .
• Customizing basic monitoring graphs . . . . . . . . . . . . . . . . . . . . . . . . . . . . .
• Advanced performance monitoring graphs . . . . . . . . . . . . . . . . . . . . . . . . .
• Tunnel and TCP performance monitoring graphs . . . . . . . . . . . . . . . . . . . .
• Saving graphs to a canvas . . . . . . . . . . . . . . . . . . . . . . . . . . . . . . . . . . . . . .
• Adding graphs to an existing canvas . . . . . . . . . . . . . . . . . . . . . . . . . . . . . .
• Printing graphs. . . . . . . . . . . . . . . . . . . . . . . . . . . . . . . . . . . . . . . . . . . . . . . .
• Modifying graphs . . . . . . . . . . . . . . . . . . . . . . . . . . . . . . . . . . . . . . . . . . . . . .
103
108
109
109
111
113
114
115
115
116
Performance Monitor overview
The Web Tools Performance Monitoring tool graphically displays throughput (in megabytes per
second) for each port and for the entire switch. To utilize performance monitoring, the EGM license
must be enabled on the switch. Otherwise, when you select Performance Monitor tab, access to
this feature is denied and an error messages displays
Basic monitoring
The Basic Monitoring menu is standard in the Web Tools software. Any user logged into Web Tools
with an associated role of zoneadmin or securityadmin cannot open Performance Monitor. The
roles user, operator, basicswitchadmin, and properly configured user defined roles are allowed to
perform basic monitoring tasks, except save or display canvas operations in any Admin Domain
context. Only users with the admin, switchadmin and fabricadmin roles associated with their login
accounts are able to save or display a canvas. Use the Basic Monitoring option in the Performance
Graphs window to do the following:
• Create user-definable reports.
• Display a performance canvas for application-level or fabric-level views.
• Save persistent graphs across restarts (saves parameter data across restarts).
Web Tools Adminstrator’s Guide
53-1002152-01
103
8
Performance Monitor overview
Advanced monitoring
The Advanced Monitoring menu is an optionally licensed feature. To utilize the Advanced
Monitoring feature you must have a Performance Monitor license installed and you must log in
using an account with an admin, switchadmin, fabricadmin role, and properly configured user
defined roles.
The Advanced Monitoring option in the Performance Graphs window displays predefined reports
and filter-based performance monitoring. You can use this feature to track the following:
• The number of words received and transmitted in Fibre Channel frames with a defined SID/DID
pair.
• The number of times a particular filter pattern in a frame is transmitted by a port.
For detailed information on performance monitoring, refer to the Fabric OS Administrator’s Guide.
Performance graphs
Each performance graph is displayed individually in a window, so it can be minimized, maximized,
resized, and closed.
Graphs within the Performance Monitoring window are updated every 30 seconds. When you first
display the graph or if you modify the graph (such as to add additional ports), you might have to
wait up to 30 seconds before the new values are shown.
When you have multiple graphs open in the Performance Monitoring window, you can perform the
following tasks:
• Select Window > Tile to view all graphs at once, tiled in the Performance Monitoring window.
• Select Window > Cascade to view one graph at a time.
• Select Window > Close All to close all open Performance Monitor graphs in the Performance
Monitoring window.
In addition, the Window menu lists all open graphs. You can click Window, and then select a graph
name to view that graph.
The Tunnel and TCP Graph option in the Performance Graphs window displays real time
performance monitoring charts for Brocade 7800 Extension Switch and FX8-24 DCX Extension
Blade. This option is not available on other platforms.
Admin Domain considerations
You must consider the following when configuring Admin Domain:
• If you are not the switch owner, only directly and indirectly-owned E_Ports, including EX_Ports
are available.
• You can use the Advanced Performance Monitoring feature only in AD255 if there are user
defined Admin domains or in AD0 if there are no other user-defined Admin Domains.
Otherwise, access to Advanced Monitoring features in the Performance Graphs menu are
unavailable.
• It is recommended that you define a user with a switchadmin role and give that user access to
AD255 for the purpose of data collecting using the Advanced Performance Monitor.
104
Web Tools Adminstrator’s Guide
53-1002152-01
8
Performance Monitor overview
Predefined performance graphs
Web Tools predefines basic graph types to simplify performance monitoring. A wide range of
end-to-end fabric, LUN, device, and port metrics graphs are included.
Table 11 lists the basic monitoring graphs available. Table 12 lists the advanced monitoring
graphs.
The advanced monitoring graphs give more detailed performance information to help you manage
your fabric. You can access the basic monitoring graphs on all switches; advanced monitoring
graphs are available only on switches that have a Brocade Advanced Performance Monitoring
license activated.
TABLE 11
Basic performance graphs
Graph type
Display description
Port Throughput
The performance of a port, in bytes per second, for frames received and
transmitted.
Switch Aggregate Throughput
The aggregate performance of all ports on a switch.
Blade Aggregate Throughput
The aggregate performance of all ports on a port card. This graph is
available only for the Brocade DCX and DCX-4S enterprise-class platforms.
Switch Throughput Utilization
The port throughput, in Gbps at the time the sample is taken. For the
Brocade DCX and DCX-4S enterprise-class platforms, this graph displays the
throughput for each slot. You can customize this graph to display
information for particular ports.
Port Error
CRC errors for a given port.
Switch Percent Utilization
The percentage utilization for each port in a switch. For the Brocade DCX,
this graph displays the percent utilization for each slot. You can customize
this graph to display information for particular ports.
Port Snapshot Error
The CRC error count between sampling periods for all the ports on a switch.
For the Brocade DCX and DCX-4S enterprise-class platforms, this graph
displays the CRC error rate for each slot. You can customize this graph to
display information for particular ports.
TABLE 12
Advanced performance monitoring graphs
Graph type
Display description
SID/DID Performance
The traffic between the SID-DID pair on the switch being managed. The
member selection list in the LHS displays the port in the current switch only.
The All Devices tab lists all the devices in the fabric. SID/DID Performance
can be used to select the source and destination. For more information,
refer to “Creating SID-DID Performance graphs” on page 111.
SCSI vs. IP Traffic
The percentage of SCSI versus IP frame traffic on each individual port. For
more information, refer to “Creating the SCSI vs. IP Traffic graph” on
page 112.
SCSI Commands by port and LUN
(R, W, R/W)
The total number of read/write commands on a given port to a specific LUN.
For more information, refer to “Creating SCSI command graphs” on
page 112.
Web Tools Adminstrator’s Guide
53-1002152-01
105
8
Performance Monitor overview
Table 13 lists each graph and indicates the supported port types for each graph. The port selection
columns for each graph displays the supported ports.
TABLE 13
Supported port types for Brocade switches
Graph type
Physical FC ports
Logical FC ports
GbE ports
Port Throughput
P
P
P
Switch Aggregate
Throughput
N/A
N/A
N/A
Blade Aggregate
Throughput1
N/A
N/A
N/A
Switch Throughput
Utilization
P
N/A
P
Port Error
P
P
P
Switch Percent Utilization
P
N/A
P
Port Snapshot Error
P
P
N/A
SID/DID Performance
P
P
N/A
SCSI Commands
P
N/A
N/A
SCSI vs. IP Traffic
P
N/A
N/A
1. The Blade Aggregate Throughput graph is supported only on the Brocade DCX and DCX-4S enterprise-class
platforms.
The labeling of the axes in the graphs depends on the switch type:
• For the Brocade DCX 8510-8, DCX 8510-4, and the DCX and DCX-4S enterprise-class
platforms, slot numbers are displayed with expansion arrows next to them, as shown in Figure
20 on page 107. Click the arrows to expand and contract the list of ports per slot.
• Switches such as the Brocade 300, 5100, 5300, 6510, 8000, VA-40FC, 7800 Extension, and
the Brocade Encryption Switch do not have slot numbers because they have no blade FRUs,
and therefore there is no need for slot numbering.
• For Brocade the Brocade DCX 8510-8, DCX 8510-4, and the DCX and DCX-4S enterprise-class
platforms, the X-axis scales up to 409.6 Gbps in multiples of 2.
• For Brocade 300, 5100, 5300, VA-40FC, 6510, 8000, 7800 Extension, and the Brocade
Encryption Switch, the X-axis scales up to 8.0 Gbps in increments of 0.8 Gbps.
Port throughput utilization is represented by a horizontal bar for each selected port The horizontal
bar gets longer or shorter depending on the percent utilization for that port at the last poll time.
Thin short vertical intersecting bars give a historical perspective by representing the highest and
lowest values reached for each selected port since the graph was opened. A third bar between
them represents the average of all values polled.
NOTE
Virtual ports on logical switches cannot be graphed.
106
Web Tools Adminstrator’s Guide
53-1002152-01
Performance Monitor overview
8
Figure 20 shows how to access the list of Advanced Performance Monitoring graphs using Web
Tools with the EGM license. This example displays the graphs available in the Performance
Monitoring window with the Advanced Performance Monitoring license installed. Note that the slot
number is identified.
FIGURE 20
Accessing performance graphs
User-defined graphs
You can modify the predefined graphs to create your own customized graphs (refer to “Customizing
basic monitoring graphs” on page 109 for more information). These user-defined graphs can be
added and saved to canvas configurations.
Web Tools Adminstrator’s Guide
53-1002152-01
107
8
Opening the Performance Monitoring window
Canvas configurations
A canvas is a saved configuration of graphs. The graphs can be either the Web Tools predefined
graphs or user-defined graphs. Each canvas can hold up to eight graphs per window, with six shown
in Figure 21. Up to 20 canvases can be set up for different users or different scenarios. Each
canvas is saved with a name and an optional brief description.
FIGURE 21
Canvas of six performance monitoring graphs
Opening the Performance Monitoring window
To perform performance monitoring, you must use Web Tools with the EGM license; otherwise,
when you click on the Performance Monitor tab, access to this feature is denied and an error
messages displays.
To open the Performance Monitoring window, perform the following steps.
1. Select a switch from the Fabric Tree and log in when prompted.
2. In the Monitor area under Tasks, click Performance Monitor. The Performance Monitoring
window displays.
108
Web Tools Adminstrator’s Guide
53-1002152-01
8
Creating basic performance monitor graphs
Creating basic performance monitor graphs
To create the basic performance monitor graphs listed in Table 11 on page 105, perform the
following steps.
1. Open the Performance Monitoring window.
2. Select Performance Graphs > Basic Monitoring > Graph Type.
Depending on the type of graph you select, you might be prompted to select a slot or port for
which to create a graph.
3. If prompted, drag the port into the Enter/drag slot,port field, or manually enter the slot and
port information in the field, in the format slot,port.
NOTE
For the Brocade 300, 5100, 5300, 6510, VA-40FC, 7800 Extension, 8000, and the Encryption
Switch, enter only a port number.
4. Click OK.
The graph is displayed in a window in the Performance Monitoring window.
Customizing basic monitoring graphs
You can customize some of the basic performance monitoring graphs to display information for
particular ports. For the Brocade 8510-8, Brocade 8510-4, and Brocade DCX and DCX-4S
enterprise-class platforms, you can also customize these graphs to display information for a slot.
You can customize the following graphs:
• Switch Throughput Utilization
• Switch Percent Utilization
• Port Snapshot Error
The following procedure assumes that you already created one of these customizable graphs.
1. Create or access the graph you want to customize.
Refer to “Creating basic performance monitor graphs” on page 109 for instructions on creating
a graph.
2. For Brocade 8510-8, Brocade 8510-4, and Brocade DCX and DCX-4S enterprise-class
platforms, display the detailed port throughput utilization rates for each port in a slot by
clicking the arrows next to a slot. The port information for that slot displays in the graph.
NOTE
For the Brocade 300, 5100, 5300, 6510, VA-40FC, 7800 Extension, 8000, and the Encryption
Switch, proceed to step 3.
3. To display detailed port throughput utilization rates for particular ports only, right-click
anywhere in the graph and click Select Ports.
The setup dialog box displays, as shown in Figure 22.
Web Tools Adminstrator’s Guide
53-1002152-01
109
8
Customizing basic monitoring graphs
The title of the dialog box varies, depending on the type of graph you are customizing, but the
layout of the dialog box is the same. Figure 22 displays an example of the setup dialog box for
the Edit Switch Throughput Utilization graph.
FIGURE 22
Select Ports for customizing the Switch Throughput Utilization graph
You can perform the following in the dialog box:
a.
Double-click the domain to expand the slot or port list.
NOTE
For the Brocade 8510-8, Brocade 8510-4, and Brocade DCX and Brocade DCX-4S
enterprise-class platforms, click the plus (+) signs to expand the ports under each slot, as
shown in Figure 22.
b.
Click the port you want to monitor in the graph in the Port Selection List.
Use Shift+click and Ctrl+click to select multiple ports.
110
c.
Click Add to move the selected ports to the Selected Ports list.
d.
Optional: Click ADD ALL Ports to add all of the ports in the Port Selection List to the
Selected Ports list.
e.
Optional: Click Search to open the Search Port Selection List dialog box, from which you
can search for all E_Ports, all F_Ports, or all port names with a defined string. Select the
ports you want to add and click Search in the Search Port Selection List dialog box.
Web Tools Adminstrator’s Guide
53-1002152-01
8
Advanced performance monitoring graphs
f.
Click Apply.
Only the selected ports are displayed in the graph.
Advanced performance monitoring graphs
This section describes how to create the advanced performance monitor graphs listed in Table 12
on page 105. Because the procedure for creating these graphs differs depending on the type of
graph, each type is described separately in the sections that follow.
The advanced monitoring graphs are not supported for GbE ports.
NOTE
You must have an Advanced Performance Monitoring license installed to use the Advance
Performance Monitor features. If user-defined Admin Domains are configured, Advanced
Performance Monitoring works only in AD255.
Creating SID-DID Performance graphs
The SID/DID Performance graph displays the traffic between a SID-DID pair on the switch being
managed.
To create a SID-DID performance graph, perform the following steps.
1. Open the Performance Monitoring window.
2. Select Performance Graphs > Advanced Monitoring > SID/DID Performance. The SID/DID
Performance Setup dialog box displays.
• To see the end-to-end (EE) monitors that are currently set up on a particular port, proceed
to step 3.
• To specify the port, Source ID and Domain ID, skip to step 4.
NOTE
Only the FC ports of the launched switch display in the tree. The All Devices tab lists all the
devices in the fabric and lets you select the source and destination. Slot and port information
of other switches is not displayed in the tree.
3. Click a port from the Slot/Port or Sid/Did Selection List.
a.
Drag the selected port into the Enter/drag slot, port number field.
b.
Click Retrieve preset EE monitors. The current end-to-end monitors for that port are
displayed in the “Current EE monitors set for selected port” table.
c.
Optional: To display a performance graph for the current EE monitors set for the selected
port, click a SID-DID pair in the table. You can select multiple Source ID and Destination
IDs. Click Select. If you selected multiple SID/DID monitors, click OK in the confirmation
dialog box that displays. Skip to step 6. If you do not want to display a performance graph
for the current EE monitors set for the selected port, continue with step 4.
4. Select a source ID from the Port or Sid/Did Selection List, and click Add Sid.
You can also enter a source ID in the Enter/drag SID number field.
Web Tools Adminstrator’s Guide
53-1002152-01
111
8
Advanced performance monitoring graphs
5. Select a destination ID from the Port or Sid/Did Selection List, and click Add Did.
You can also enter a destination ID in the Enter/drag DID number field.
6. Click OK.
If you selected multiple EE monitors, SIDs, or PIDs, a confirmation dialog box displays,
reminding you that one graph is opened for each selection.
7.
Click Yes to display the graphs.
8. When you close a graph, a dialog box asks if you want to save the monitor.
If you click OK, the monitor is saved, and persists if the switch is restarted.
Creating the SCSI vs. IP Traffic graph
The SCSI vs. IP Traffic graph displays the SCSI versus IP traffic for selected ports. For Brocade
8510-8, Brocade 8510-4, and Brocade DCX and Brocade DCX 4S enterprise-class platforms, the
slot and port name are identified in the graph.
In a trunk group, the SCSI vs. IP Traffic graph displays only the master port and not the slave ports.
To create a SCSI vs. IP Traffic graph, perform the following steps.
1. Open the Performance Monitoring window.
2. Select Performance Graphs > Advanced Monitoring > SCSI vs. IP Traffic.
The SCSI vs. IP Traffic Setup dialog box displays. This dialog box is similar to that shown in
Figure 22 on page 110.
3. Double-click the domain to expand the slot/port list.
NOTE
For Brocade 8510-8, Brocade 8510-4, and Brocade DCX and Brocade DCX 4S enterprise-class
platforms, click the plus (+) signs to expand the ports under each slot, as shown in Figure 22.
4. Click the port you want to monitor in the graph in the Port Selection List. Use Shift+click and
Ctrl+click to select multiple ports.
5. Click Add to move the selected ports to the Selected Ports list.
6. Optional: Click ADD ALL Ports to add all of the ports in the Port Selection List to the Selected
Ports list.
7.
Optional: Click Search to open the Search Port Selection List dialog box, from which you can
search for all E_Ports, all F_Ports, or all port names with a defined string. Select the ports you
want to add and click Search in the Search Port Selection List dialog box.
8. Click Apply in the SCSI vs. IP Traffic Setup dialog box.
Only the selected ports are displayed in the SCSI vs. IP traffic graph.
Creating SCSI command graphs
This graph displays the total number of read or write (or both) commands on a given port or to a
specific LUN on a given port.
112
Web Tools Adminstrator’s Guide
53-1002152-01
Tunnel and TCP performance monitoring graphs
8
To create a SCSI command graph, perform the following steps.
1. Open the Performance Monitoring window.
2. Select Performance Graphs > Advanced Monitoring > SCSI Commands > Graph Type.
The applicable setup dialog box displays.
3. Navigate to a switch > slot > port in the Port Selection List.
4. Click the port from the Port Selection List and drag it into the Enter/drag port field.
5. Optional: For the LUN per port graphs, enter a LUN number, in hexadecimal notation.
For the Brocade Encryption Switch, you can enter up to eight LUN masks
For the Brocade 5100, 5300, 300, 7800, and 8000, you can enter up to eight LUN masks
For all other switches running Fabric OS 4.x or v5.x, you can enter up to two LUN masks.
For switches running Fabric OS 3.x, you can enter up to three LUN masks.
6. Click OK.
The selected graph displays in the canvas.
Tunnel and TCP performance monitoring graphs
This section describes how to generate the Tunnel and TCP performance monitor graphs. You can
launch maximum of four Tunnel and TCP graphs for a switch at a time. A total of 16 TCP connection
graphs can be launched for a switch.
The TCP graphs available are:
•
•
•
•
•
•
•
•
Sender RoundTrip
Sender RoundTripVariance
TCP DupAck
TCP OOS
TCP SlowStart
TCP FastRetransmit
TCP Tx(MB/sec)
TCP Rx(MB/sec)
The Tunnel graphs available are:
• Throughput(MB/sec)
• Effective Throughput(MB/sec)
• CompressionRatio
For TCP connection graphs, tool tip is displayed only for all selected connections.
To create a Tunnel and TCP graph, perform the following steps.
1. Select Monitor > Performance Monitoring.
The Performance Monitoring window displays.
2. Select Performance Graphs > Tunnel and TCP Graph.
The Tunnel and TCP Graph dialog box displays.
Web Tools Adminstrator’s Guide
53-1002152-01
113
8
Saving graphs to a canvas
3. Select the tunnel from the Tunnels drop-down list for which you want to generate the graphs.
For Brocade 7800 extension switch, you can have maximum six circuit connections in a tunnel
and for FX8-24 DCX extension blade, you can have maximum of ten circuit connections in a
tunnel.
4. In the Tunnel and TCP area at the bottom of the screen, select the required check boxes for the
statistic you want to graph.
Note that each column represents a different graph.
5. Click Options to set the display options for the graphs.
• Range: The range is from 3 through 30 seconds. The X axis is limited to 30 minutes. The
graph scale starts with 0 minutes and auto scales to draw the statistics. Once the 30
minutes graph is drawn, the first minute data is removed to accommodate the 31st minute
values.
• Global auto scaling: By default, this option is in disabled mode. User can either enable or
disable this option. If enabled, the graph's X-axis scale up to 30 minutes and if it is
disabled, the X-axis will scale up to 10 minutes
• Number of graphs per row: Designate how many graphs you wish to appear in each row.
6. Click Generate.
7.
Click Reset to reset all the graphs.
NOTE
Brocade Network Advisor has an option for launching the TCP circuit Performance statistics dialog .
Tunnel and TCP graph chart properties
When a Tunnel and TCP graph displays, you can right-click the graph to access the display
properties.
These properties include:
•
•
•
•
Font selection
Background color selection
Title text
Display zoom
These value selections are not persistent. When you close the graph, these values reset to the
default settings.
In addition, you can print the graph and save the graph to a file
Saving graphs to a canvas
Saving graphs is useful when you create customized graphs and do not want to recreate them each
time you access the Performance Monitoring window. When you save graphs, you must save them
to a canvas.
114
Web Tools Adminstrator’s Guide
53-1002152-01
8
Adding graphs to an existing canvas
The following procedure describes how to save graphs to a new canvas.
1. Open the Performance Monitoring window.
2. Create basic or advanced Performance Monitor graphs, as described in “Creating basic
performance monitor graphs” on page 109 and “Advanced performance monitoring graphs”
on page 111.
The graphs display in the Performance Monitor window.
3. Select File > Save Current Canvas Configuration.
The Save Canvas Configuration dialog box displays.
4. Enter a name and description for the configuration and click Save Canvas. A message displays,
confirming that the configuration was successfully saved to the switch.
Adding graphs to an existing canvas
The following procedure assumes that a canvas is already created.
To create a new canvas, you must first create graphs, as described in “Creating basic performance
monitor graphs” on page 109 and “Advanced performance monitoring graphs” on page 111, and
then save those graphs to a canvas, as described in “Saving graphs to a canvas” on page 114.
To add a graph to an existing canvas, perform the following steps.
1. Select File > Display Canvas Configurations.
The Canvas Configuration List displays. The error message “No Canvas configuration to
display” displays if there are no saved canvas configurations.
2. Click a canvas in the list.
3. Click Edit.
The Edit Canvas dialog box displays.
4. Click Add.
A list of graphs displays.
5. Click a graph to add it to the canvas and click Save.
Printing graphs
You can print a single graph or all the graphs displayed on the selected canvas configuration. Only
one canvas configuration can be opened at a time.
To print a graph, perform the following steps.
1. Open the Performance Monitoring window.
2. Create a basic or advanced Performance Monitor graph as described in “Creating basic
performance monitor graphs” on page 109 and “Advanced performance monitoring graphs”
on page 111.
3. To print a single graph, right-click the graph and choose Print. To print all the graphs displayed
on the selected canvas configuration, select File > Print All Graphs.
Web Tools Adminstrator’s Guide
53-1002152-01
115
8
Modifying graphs
4. In the print dialog box, click OK.
Modifying graphs
To modify an existing graph that is saved in a canvas, perform the following steps.
1. Open the Performance Monitoring window.
2. Select File > Display Canvas Configurations.
The Canvas Configuration List displays. A message “No Canvas configuration to display”
displays if there are no saved canvas configurations.
3. Select a canvas from the list and click Edit.
The Performance Monitor Canvas: Canvas Name dialog box displays.
4. Select a graph from the list and click Edit.
NOTE
The Edit button is enabled only for the graphs that are configurable or editable.
5. Make changes in the Edit dialog box, as necessary.
6. Click OK to close the Edit dialog box.
7.
Click Save to save the changes and close the Performance Monitor Canvas dialog box.
8. Click Close to close the Canvas Configuration List.
116
Web Tools Adminstrator’s Guide
53-1002152-01
Chapter
9
Administering Zoning
In this chapter
• Zoning overview . . . . . . . . . . . . . . . . . . . . . . . . . . . . . . . . . . . . . . . . . . . . . . .
• Zoning configurations . . . . . . . . . . . . . . . . . . . . . . . . . . . . . . . . . . . . . . . . . .
• Zoning management . . . . . . . . . . . . . . . . . . . . . . . . . . . . . . . . . . . . . . . . . . .
• Zone configuration and zoning database management. . . . . . . . . . . . . . .
• Best practices for zoning. . . . . . . . . . . . . . . . . . . . . . . . . . . . . . . . . . . . . . . .
117
118
119
128
136
Zoning overview
This chapter describes zoning and provides the procedures for managing zoning. The Zone Admin
window provides two zoning options on the left pane:
• Basic zones
• Traffic isolation zones
You can perform basic zoning and traffic isolation zones using Web Tools and Web Tools with the
EGM license.
Basic zones
Basic zoning enables you to partition a storage area network (SAN) into logical groups of devices
that can access each other. For example, you can partition a SAN into two zones, winzone and
unixzone, so that the Windows servers and storage do not interact with UNIX servers and storage.
Zones can be configured dynamically. They can vary in size, depending on the number of
fabric-connected devices, and devices can belong to more than one zone. Because zone members
can access only other members of the same zone, a device not included in a zone is not available
to members of that zone.
Traffic Isolation zones
A traffic isolation zone (TI zone) is a special zone that creates a dedicated path for a specific traffic
flow. TI zones are primarily for shaping and controlling traffic rather than partitioning access to
storage.
Web Tools Adminstrator’s Guide
53-1002152-01
117
9
Zoning configurations
LSAN zone requirements
An LSAN zone enables device connectivity between fabrics connected in Fibre Channel Routing
(FCR) configurations without forcing you to merge fabrics. Extension switches provide multiple
mechanisms to manage interfabric device connectivity. Zones that contain hosts and targets that
are shared between the two fabrics need to be explicitly coordinated. To share devices between
any two fabrics, you must create an LSAN zone in both fabrics considering the following:
• The name of an LSAN begins with the prefix LSAN_. The prefix is not case sensitive.
• Members must be identified by their port WWN because port IDs are not necessarily unique
across fabrics.
QoS zone requirements
A QoS zone is a special zone that assigns a Quality of Service (QoS) level for traffic flow between a
given host or target pair. The members of a QoS zone are WWNs of the host or target pairs. QoS
zones can contain only WWN members. A QoS zone has a special prefix, to differentiate it from a
regular zone. The formats and meaning of the QoS zone name prefix are shown in Table 14 (the
names are not case dependent).
TABLE 14
QoS zone name prefixes
QoS name prefix
Priority
Bandwidth assignment
QosH_
High
Five virtual circuits, 60% of available bandwidth
QosM_
Medium
Four virtual circuits, 40% of available bandwidth
QosL_
Low
Two virtual circuits, 10% of available bandwidth
Zoning configurations
The Zone Admin window is where all of the zoning tasks are performed.
When performing zoning tasks for switches in a mixed fabric—that is, a fabric containing two or
more switches running different fabric operating systems—you should use the switch with the
highest Fabric OS level. Refer to “Best practices for zoning” on page 136 for more
recommendations about zoning.
Opening the Zone Admin window
Launching the Zone Admin window and performing any kind of zone configuration takes more time
if there are a large number of entries in the zone database. If the zone count is above 10000, the
time taken for completing the operation increases proportionately.
You cannot open the Zone Admin window from AD255 (physical fabric).
To open a Zone Adminstration window, perform the following steps.
1. Select a switch from the Fabric Tree.
2. Click Zone Admin in the Manage section of the Tasks menu.
The Zone Admin dialog box displays, as shown in Figure 23.
118
Web Tools Adminstrator’s Guide
53-1002152-01
9
Zoning management
Setting the default zoning mode
The default zoning mode has two options:
• All Access—All devices within the fabric can communicate with all other devices.
• No Access—Devices in the fabric cannot access any other device in the fabric.
Web Tools supports default zoning on switches running firmware v5.1.0 or later. Default zoning on
legacy switches (switches running firmware versions prior to v 5.1.0) are not supported. Legacy
switches can use default zoning; however, they cannot manipulate the default zone or default
configuration.
NOTE
To use Admin Domains, you must set the default zoning mode to No Access prior to setting up the
Admin Domains. To use the Admin Domain feature, the EGM license must be enabled on the switch;
otherwise, access to this feature is denied. You cannot change the default zoning mode to All Access
if user-specified Admin Domains are present in the fabric.
To set the default zoning mode, perform the following steps.
1. Open the Zone Admin window (refer to “Opening the Zone Admin window” on page 118).
2. Select Zoning Actions > Set Default Mode, and then select the access mode.
Zoning management
You can monitor and manage basic and traffic isolation zoning through the Web Tools Zone Admin
window. The information in the Zone Admin window is collected from the selected switch.
If the FCS policy is activated in the fabric, zoning can be administered only from the primary FCS
switch. If the selected switch has an Advanced Zoning license installed, but is not the primary FCS
switch, the Zone Admin option is displayed, but not activated.
You must be logged into the switch using a user name with one of the following roles associated
with it to make changes to the zoning: zoneAdmin, admin, fabricAdmin, or any user-defined role
with modify rights. All other roles allow only a view or read-only access. Most of the zoning
operations are disabled in read-only mode.
A snapshot is taken of all the zoning configurations at the time you launch the Zone Admin window;
this information is not updated automatically by Web Tools. To update this information, refer to
“Refreshing Zone Admin window information” on page 121.
Web Tools Adminstrator’s Guide
53-1002152-01
119
9
Zoning management
When you log in to a virtual switch, or select a virtual switch using the drop-down list under Fabric
Tree section in the Switch Explorer window, only the ports that are associated with the Virtual
Fabric ID you selected are displayed in the member selection list, as shown in Figure 23. You can
use the Add Other button to add ports of other switches in the fabric.
FIGURE 23
Zone Admin window
ATTENTION
Any changes you make in the Zone Admin window are held in a buffered environment and are not
updated in the zoning database until you save the changes. If you close the Zone Admin window
without saving your changes, your changes are lost. To save the buffered changes you make in the
Zone Admin window to the zoning database on the switch, refer to “Saving local zoning changes” on
page 122.
Note the following:
• “Saving” means updating the zoning database on the switch with the local changes from the
Web Tools buffer.
• “Refreshing” means copying the current state of the zoning database on the switch to the Web
Tools buffer, overwriting its current contents.
In the Zone Admin window, all WWNs also display vendor names.
NOTE
The Member Selection List only lists the ports of the current switch and the devices of all the
switches in the fabric. Slot and port information of other switches are not displayed in the tree.
120
Web Tools Adminstrator’s Guide
53-1002152-01
9
Zoning management
Click the Alias tab to display which aliases the port or device is a member of. Also, you can
right-click the device nodes and click View Device Detail to display detailed information about the
selected device.
The Member Selection List panel displays only physical FC ports. To verify whether you have any
unzoned devices, you must use Brocade Network Advisor to analyze zone configurations.
Admin Domain considerations: The Member Selection List panel displays a filtered list of ports that
are:
• Direct port members that are zoneable and are displayed in the tree.
• Indirect port members to which owned devices are attached are displayed in the tree, but
cannot be added to a zone or alias.
• Direct device members that are zoneable and are displayed in the tree.
• Indirect device members (devices that are currently attached to owned ports) that are also
zoneable and displayed in the tree. But if such a device is later moved to a non-owned port it
will no longer be displayed or zoneable.
• Switches and blades that are displayed only if they contain owned ports or devices, regardless
of switch ownership, such as the FS8-18 Encryption blade.
• Ports that are indirect members only because the switch is owned are not displayed.
NOTE
When no user- defined Admin Domains are present on the switch, AD0 displays the port count. If
there are user-defined Admin Domains, AD0 does not show the port count and the user-defined AD
displays the port count.
Refreshing fabric information
This function refreshes the display of fabric elements only (switches, ports, and devices). It does
not affect any zoning element changes or update zone information in the Zone Admin window. You
can refresh the fabric element information displayed at any time.
To refresh fabric information.
1. Open the Zone Admin window.
2. Select View > Refresh From Live Fabric.
This refreshes the status for the fabric, including switches, ports, and devices.
NOTE
Depending on the role associated with your user name or if the switch is owned by the current
Admin Domain you are logged in to, you may not be able to modify zones or ports in other
Admin Domains.
Refreshing Zone Admin window information
The information displayed in the Zone Admin window is initially a snapshot of the contents of the
fabric zoning database at the time the window is launched. Any changes you make to this window
are saved to a local buffer; but they are not applied to the fabric zoning database until you invoke
one of the transactional operations listed in the Zoning Actions menu.
Web Tools Adminstrator’s Guide
53-1002152-01
121
9
Zoning management
Any local zoning changes are buffered by the Zone Admin window until explicitly saved to the fabric.
If the fabric zoning database is independently changed by another user or from another interface
(for example, the CLI) while Web Tools zoning changes are still pending, the refresh icon starts to
blink (after a 15–30 second polling delay). You can then decide to refresh the current Web Tools
zoning view to reflect the new, externally changed contents of the fabric zoning database, in which
case any pending local changes are lost, or you can ignore the blinking refresh icon and save your
local changes, overwriting the external changes that triggered the icon to blink.
You can refresh zoning to back out of current, unsaved work and start over.
You can refresh the zoning information at any time, either using the refresh icon (whether it is
flashing or not) or from the View menu.
The following procedure updates the information in the Zone Admin window with the information
saved in the zoning database on the switch.
ATTENTION
When you refresh the buffered information in the Zone Admin window, any zoning configuration
changes you made and not yet saved are erased from the buffer and replaced with the currently
enabled zone configuration information that is saved on the switch.
To refresh the Zone Admin window, perform the following steps.
1. Launch the Zone Admin window as described in “Opening the Zone Admin window” on
page 118.
2. Select View > Refresh Zoning or click Refresh.
This re-displays the information in the Zone Admin window with the information in the switch’s
zoning database. This action also refreshes the fabric information as described in “Refreshing
fabric information” on page 121. Any unsaved zoning changes are deleted.
Saving local zoning changes
All information displayed and all changes made in the Zone Admin window are buffered until you
save the changes. In that case any other user looking at the zone information for the switch do not
see the changes you have made until you save them.
Saving the changes propagates any changes made in the Zone Admin window (buffered changes)
to the zoning database on the switch. If another user has a zoning operation in progress at the time
that you attempt to save changes, a warning displays that indicates that another zoning transaction
is in progress on the fabric. You can select to abort the other transaction and override it with yours.
If the zoning database size exceeds the maximum allowed, you cannot save the changes. The
zoning database summary displays the maximum zoning database size.
This action updates the entire contents of the Zone Admin window, not just the selected zone,
alias, or configuration. You can save your changes at any time during the Zone Admin session.
To save the local zone changes, perform the following steps.
1. Make the zoning changes in the Zone Admin window.
2. Select Zoning Actions > Save Config.
NOTE
If you have made changes to a configuration, you must enable the configuration before the changes
are effective. To enable the configuration, refer to “Enabling zone configurations” on page 131.
122
Web Tools Adminstrator’s Guide
53-1002152-01
9
Zoning management
Selecting a zoning view
You can define how zoning elements are displayed in the Zone Admin window. The zoning view you
select determines how members are displayed in the Member Selection List panel (Figure 23). The
views filter the fabric and device information displayed in the Member Selection List for the
selected view, making it easier for you to create and modify zones, especially when creating “hard
zones.”
Depending on the method you use to zone, certain tabs might or might not be available in the Zone
Admin window.
There are two views of defining members for zoning:
• Fabric View—Displays the physical hierarchy of the fabric, a list of the attached and imported
physical devices (by WWN), and a list of the FC Virtual Initiators on switches that support iSCSI.
In the Fabric View, you can select ports for port-based zoning or devices for WWN-based
zoning.
• Devices Only—Displays a list of the attached and imported physical devices by WWN. You
cannot select ports for port-based or mixed zoning schemes, nor can you select virtual
initiators for iSCSI FC Zone creation.
To define the view of the fabric resource, perform the following steps.
1. Launch the Zone Admin window as described in “Opening the Zone Admin window” on
page 118.
2. Select View > Choose Fabric Resources View.
3. Define the way you want to view the fabric resource and click OK.
Creating and populating zone aliases
An alias is a logical group of port index numbers and WWNs. Specifying groups of ports or devices
as an alias makes zone configuration easier, by enabling you to configure zones using an alias
rather than inputting a long string of individual members. You can specify members of an alias
using the following methods:
• Identifying members by switch domain and port index number pair, for example, 2, 20.
• Identifying members by device node and device port WWNs.
For more information on enabling the configuration, refer to “Enabling zone configurations” on
page 131.
To create a zone alias, perform the following steps.
1. Open the Zone Admin window as described in “Opening the Zone Admin window” on page 118.
2. Select a format to display zoning members in the Member Selection List as described in
“Selecting a zoning view” on page 123.
3. Select the Alias tab and click New Alias.
The Create New Alias dialog box displays.
4. In the Create New Alias dialog box, enter a name for the new alias and click OK.
The new alias displays in the Name list.
5. Expand the Member Selection List to view the nested elements.
Web Tools Adminstrator’s Guide
53-1002152-01
123
9
Zoning management
The choices available in the Member Selection List depend on the selection in the View menu.
6. Click elements in the Member Selection List that you want to include in the alias. The right
arrow becomes active.
7.
Click the right arrow to add alias members.
Selected members move to the Alias Members window.
8. Optional: Repeat steps 6 and 7 to add more elements to the alias.
9. Optional: Click Add Other to include a WWN or port that is not currently a part of the fabric.
10. Select Actions > Save Config to save the configuration changes.
Adding and removing members of a zone alias
For more information on enabling the configuration, refer to “Enabling zone configurations” on
page 131.
NOTE
When you assign a node WWN to an alias or zone, all of the WWPN’s associated to that Node are
also moved. This functionality is supported only for IM0 mode. This behavior is duplicated in Brocade
Network Assistant zoning. This functionality is supported only by selecting the node WWN and
assigning it to the alias or zone.
To add or remove zone alias members, perform the following steps.
1. Open the Zone Admin window as described in “Opening the Zone Admin window” on page 118.
2. Select the Alias tab.
3. Select the alias you want to modify from the Name list.
4. Select an element in the Member Selection List that you want to add to the alias, or select an
element in the Alias Members list that you want to remove.
5. Click the right arrow to add the selected alias member, or click the left arrow to remove the
selected alias member.
The alias is modified in the Zone Admin buffer.
6. Select Zoning Actions > Save Config to save your configuration changes.
Renaming zone aliases
The new alias name cannot exceed 64 characters and can contain alphabetic, numeric, and
underscore characters.
For more information on enabling the configuration, refer to “Enabling zone configurations” on
page 131.
To change the name of a zone alias, perform the following steps.
1. Open the Zone Admin window as described in “Opening the Zone Admin window” on page 118.
2. Select the Alias tab and select the alias you want to rename from the Name list.
3. Click Rename.
The Rename an Alias dialog box displays.
124
Web Tools Adminstrator’s Guide
53-1002152-01
9
Zoning management
4. Enter a new alias name and click OK.
The alias is renamed in the Zone Admin buffer. At this point, you can either save your changes
or save and enable your changes.
5. Select Zoning Actions > Save Config to save the configuration changes.
Deleting zone aliases
You can remove a zone alias from the Zone Admin buffer. When a zone alias is deleted, it is no
longer a member of the zones of which it was once a member.
NOTE
If you delete the only member zone alias, an error message is issued when you attempt to save the
configuration.
To delete the zone aliases, perform the following steps.
1. Open the Zone Admin window as described in “Opening the Zone Admin window” on page 118.
2. Select the Alias tab.
3. Select the alias you want to delete from the Name list. and click Delete.
The Confirm Deleting Alias dialog box displays.
4. Click Yes.
The selected alias is deleted from the Zone Admin buffer. At this point, you can either save your
changes or save and enable your changes.
5. Select Zoning Action > Save Config to save the configuration changes.
To enable the configuration, refer to “Enabling zone configurations” on page 131.
Creating and populating zones
A zone is a region within the fabric where specified switches and devices can communicate. A
device can communicate only with other devices connected to the fabric within its specified zone.
To create a zone, perform the following steps.
1. Open the Zone Admin window as described in “Opening the Zone Admin window” on page 118.
2. Select a format to display zoning members in the Member Selection List as described in
“Selecting a zoning view” on page 123.
3. Select the Zone tab.
4. Click New Zone.
The Create New Zone dialog box displays.
5. In the Create New Zone dialog box, enter a name for the new zone, and click OK.
LSAN zones and QoS zones have specific naming requirements:
-
For LSAN zones, refer to “LSAN zone requirements” on page 118.
For QoS zones, refer to “QoS zone requirements” on page 118.
The new zone displays in the Name list.
Web Tools Adminstrator’s Guide
53-1002152-01
125
9
Zoning management
6. Expand the Member Selection List to view the nested elements. The choices available in the
list depend on the selection made in the View menu.
7.
Select an element in the Member Selection List that you want to include in your zone.
Note that LSAN zones should contain only port WWN members. The right arrow becomes
active.
8. Click the right arrow to add the zone member.
The selected member is moved to the Zone Members window.
9. Optional: Repeat steps 7 and 8 to add more elements to your zone.
10. Optional: Click Add Other to include a WWN or port that is not currently a part of the fabric. At
this point, you can either save your changes or save and enable your changes.
11. Select Zoning Actions > Save Config to save the configuration changes.
To enable the configuration, refer to “Enabling zone configurations” on page 131.
Adding and removing members of a zone
For information on enabling the configuration, refer to “Enabling zone configurations” on page 131.
NOTE
When you assign a node WWN to an alias or zone, all of the WWPN’s associated to that Node are
also moved. This functionality is supported only for IM0 mode. This behavior is duplicated in Brocade
Network Assistant zoning. This functionality is supported only by selecting the node WWN and
assigning it to the alias or zone.
To add or remove zone members, perform the following steps.
1. Open the Zone Admin window as described in “Opening the Zone Admin window” on page 118.
2. Select the Zone tab.
3. Select the zone you want to modify from the Name list.
The zone members for the selected zone are listed in the Zone Members list.
4. Highlight an element in the Member Selection List that you want to include in your zone, or
highlight an element in the Zone Members list that you want to delete.
5. Click the right arrow to add a zone member, or click the left arrow to remove a zone member.
The zone is modified in the Zone Admin buffer.
6. Select Zoning Actions > Save Config to save the configuration changes.
Renaming zones
For information on enabling the configuration, refer to “Enabling zone configurations” on page 131.
To change the name of a zone, perform the following steps.
1. Open the Zone Admin window as described in “Opening the Zone Admin window” on page 118.
2. Click the Zone tab.
3. Select the zone you want to rename from the Name list.
126
Web Tools Adminstrator’s Guide
53-1002152-01
Zoning management
9
4. Click Rename.
5. In the Rename a Zone dialog box, enter a new zone name and click OK. The zone is renamed in
the Zone Admin buffer.
6. Select Zoning Actions > Save Config to save the configuration changes.
Cloning zones
To perform clone operations for zoning, the EGM license must be installed on the switch;
otherwise, access to this feature is denied and an error message displays.
The EGM license is required only for 8 Gbps platforms, such as the following:
•
•
•
•
•
Brocade Encryption Switch
Brocade 300, 5300, and 5100 switches
Brocade VA-40FC
Brocade 8000
Brocade 7800
For non-8 Gbps platforms, all functionalities are available without EGM license.
To clone a zone configuration, perform the following steps.
1. Open the Zone Admin window as described in “Opening the Zone Admin window” on page 118.
2. Click the Zone tab.
3. Select the zone you want to clone from the Name list.
4. Click Clone
5. In the Clone an Existing Zone dialog box, enter a name for the copied zone.
6. Click OK. The selected zone is copied from the Zone Admin buffer.
7.
Select Zoning Actions > Save Config to save the configuration changes. Because no changes
were made to the effective configuration, you do not need to enable the configuration.
Deleting zones
For information on enabling the configuration, refer to “Enabling zone configurations” on page 131.
To delete a zone, perform the following steps.
1. Open the Zone Admin window as described in “Opening the Zone Admin window” on page 118.
2. Click the Zone tab.
3. Select the zone you want to delete from the Name menu and click Delete.
4. On the confirmation dialog box, click Yes.
The selected zone is deleted from the Zone Admin buffer. At this point, you can either save your
changes or save and enable your changes.
5. Select Zoning Actions > Save Config to save the configuration changes.
Web Tools Adminstrator’s Guide
53-1002152-01
127
9
Zone configuration and zoning database management
Creating and populating enhanced traffic isolation zones
An enhanced traffic isolation zone (TI zone) is a special zone that creates a dedicated path for a
specific traffic flow. When an enhanced TI zone is activated, inter-switch traffic from a zone
member is directed to E_Ports that are included in the TI zone. Traffic from outside the TI zone is
excluded. A maximum of 255 TI zones can be configured. LSAN devices can be added only in TI
zones created in the backbone switch.
A port may be assigned to more than one enhanced TI zone in a fabric. A port can be part of more
than one enhanced TI zone provided following conditions are satisfied:
• All the switches in the fabric should have Fabric OS v 6.4 or later.
• A port can be assigned to multiple TI Zones that have the same failover state.
• The fabric is composed entirely of Condor-2 or GoldenEye-2 switches:
To create and populate an enhanced TI zone, perform the following steps.
1. Open the Zone Admin window as described in “Opening the Zone Admin window” on page 118.
2. Under Zoning Modes, select Traffic Isolation Zones.
The Traffic Isolation Zones view displays.
3. Click New on the menu bar.
The Add TI Zone dialog box displays.
4. Expand the Member Selection List to view the nested elements.
5. Select an element in the Member Selection List that you want to include in your zone.
The right arrow becomes active.
6. Click the right arrow to add the zone member.
The selected member is moved to the Zone Members window.
NOTE
All switches in the fabric must be running Fabric OS v6.4.0 or later and all the ports in the TI
zones must be in the same failover mode.
7.
Optional: Repeat steps 5 and 6 to add more elements to your TI zone.
8. When you are finished, click OK. The Traffic Isolations Zones window displays.
9. Click Apply to save the TI zone configuration.
Zone configuration and zoning database management
A zone configuration is a group of zones; zoning is enabled on a fabric by enabling a specific
configuration. You can specify members of a configuration using zone names.
128
Web Tools Adminstrator’s Guide
53-1002152-01
9
Zone configuration and zoning database management
Figure 24 displays a sample zoning database and the relationship between the zone aliases,
zones, and zoning configuration. The database contains one zoning configuration, myconfig, which
contains two zones: Zone A and Zone B. The database also contains four aliases, which are
members of Zone A and Zone B. Zone A and Zone B also have additional members other than the
aliases.
Zone Configuration: myconfig
Zone A
Alias 1
Alias 2
WWN 1; WWN 2; WWN 3
WWN 4; <domain, portarea>
Other Elements
<domain, portarea>
Zone B
Alias 3
Alias 4
WWN 5
WWW 5; WWN 6; WWN7
Other Elements
WWW 9
FIGURE 24
Sample zoning database
Creating zone configurations
To create a zone configuration, perform the following steps. After creating a zone configuration, you
must explicitly enable it for it to take effect.
For information on enabling the configuration, refer to “Enabling zone configurations” on page 131.
NOTE
Any changes made to the currently enabled configuration does not display until you re-enable the
configuration.
To create zone configurations, perform the following steps.
1. Open the Zone Admin window as described in “Opening the Zone Admin window” on page 118.
2. Select a format to display zoning members in the Member Selection List as described in
“Selecting a zoning view” on page 123.
3. Select the Zone Config tab and click New Zone Config.
4. In the Create New Config dialog box, enter a name for the new configuration and click OK.
Web Tools Adminstrator’s Guide
53-1002152-01
129
9
Zone configuration and zoning database management
The new configuration displays in the Name list.
5. Expand the Member Selection List to view the nested elements.
The choices available in the list depend on the selection made in the View menu.
6. Select an element in the Member Selection List that you want to include in your configuration.
The right arrow becomes active.
7.
Click the right arrow to add configuration members.
Selected members are moved to the Config Members window.
8. Repeat steps 6 and 7 to add more elements to your configuration.
9. Select Zoning Actions > Save Config to save the configuration changes.
Adding or removing zone configuration members
For information on enabling the configuration, refer to “Enabling zone configurations” on page 131.
To add or remove members of a zone configuration, perform the following steps.
NOTE
You can make changes to a configuration that is currently enabled; however, changes do not display
until you re-enable the configuration.
To configure the zone members, perform the following steps.
1. Open the Zone Admin window as described in “Opening the Zone Admin window” on page 118.
2. Select the Zone Config tab.
3. Select the configuration you want to modify from the Name list.
4. Click an element in the Member Selection list that you want to include in your configuration or
select the element in the Config Members list that you want to delete.
5. Click the right arrow to add a configuration member or the left arrow to remove a configuration
member.
6. Select Zoning Actions > Save Config to save the configuration changes.
Renaming zone configurations
The new name cannot exceed 64 characters and can contain alphabetic, numeric, and underscore
characters.
NOTE
You cannot rename the currently enabled configuration.
To rename the zone configuration, perform the following steps.
1. Open the Zone Admin window as described in “Opening the Zone Admin window” on page 118.
2. Select the Zone Config tab.
3. Select the configuration you want to rename from the Name list and click Rename.
4. In the Rename a Config dialog box, enter a new configuration name and click OK.
130
Web Tools Adminstrator’s Guide
53-1002152-01
9
Zone configuration and zoning database management
The configuration is renamed in the configuration database.
5. Select Zoning Actions > Save Config to save the configuration changes.
Cloning zone configurations
You must use Web Tools with the EGM license to perform cloning operations for zone
configurations; otherwise, access to this feature is denied and an error message displays.
To clone a zone configuration, perform the following steps.
1. Open the Zone Admin window as described in “Opening the Zone Admin window” on page 118.
2. Select the Zone Config tab.
3. Select the zone configuration you want to clone from the Name list.
4. Click Clone.
5. In the Copy An Existing Zone Config dialog box, enter a name for the copied zone and click OK.
The selected zone is copied from the Zone Admin buffer.
6. Select Zoning Actions > Save Config to save the configuration changes.
No changes were made to the effective configuration. You do not need to enable the
configuration.
Deleting zone configurations
To delete a zone configuration, perform the following steps.
NOTE
You cannot delete a enabled configuration.
1. Open the Zone Admin window as described in “Opening the Zone Admin window” on page 118.
2. Select the Zone Config tab.
3. Select the configuration you want to delete from the Name list and click Delete.
4. On the confirmation dialog box, click Yes. The selected configuration is deleted from the
configuration database.
5. Select Zoning Actions > Save Config to save the configuration changes.
Enabling zone configurations
Several zone configurations can reside on a switch at the same time, and you can quickly alternate
between them. For example, you might want to have one configuration enabled during the business
hours and another enabled overnight. However, only one zone configuration can be enabled at a
time.
When you enable a zone configuration from Web Tools, the entire zoning database is automatically
saved, and then the selected zone configuration is enabled.
If the zoning database size exceeds the maximum allowed, you cannot enable the zone
configuration. The zoning database summary displays the maximum zoning database size.
Web Tools Adminstrator’s Guide
53-1002152-01
131
9
Zone configuration and zoning database management
To enable the zone configuration, perform the following steps.
1. Open the Zone Admin window as described in “Opening the Zone Admin window” on page 118.
2. Select Zoning Actions > Enable Config.
3. On Enable Config, select the configuration to be enabled from the menu.
4. Click OK to save and enable the selected configuration.
Disabling zone configurations
When you disable the active configuration, the Advanced Zoning feature is disabled on the fabric,
and all devices within the fabric can communicate with all other devices. This does not mean that
the zoning database is deleted, however, only that there is no configuration active on the fabric.
When you disable a zone configuration from Web Tools, keep in mind that the entire zoning
database is automatically saved, and then the selected zone configuration is disabled.
NOTE
When you disable the active configuration, Advanced Zoning is disabled on the fabric, and according
to the default zone set, devices within the fabric can or cannot communicate with other devices.
To disable a zone configuration, perform the following steps.
1. Open the Zone Admin window as described in “Opening the Zone Admin window” on page 118.
2. Select Zoning Actions > Disable Zoning.
The Disable Config warning message displays.
3. Click Yes to save and disable the current configuration.
Displaying enabled zone configurations
The enabled zone configuration screen displays the actual content of the single zone configuration
that is currently enabled on the fabric, whether it matches the configuration that was enabled
when the current Zone Admin session was launched or last refreshed. The zones are displayed,
and their contents (ports, WWNs) are displayed next to them. Aliases are not displayed in the
enabled zone configuration. If there is no active zone configuration enabled on the switch, a
message displays to that effect.
NOTE
The enabled configuration is listed in the lower-right corner of the Zone Admin window.
Viewing the enabled zone configuration name without
opening the Zone Admin window
To view the enabled zone configuration name, perform the following steps.
1. Select a logical switch using the drop-down list under Fabric Tree section in the Switch Explorer
window.
The selected switch displays in the Switch View.
132
Web Tools Adminstrator’s Guide
53-1002152-01
Zone configuration and zoning database management
9
2. You can view the current zone configuration name (if one is enabled) in the lower portion of the
Switch Events and Switch Information window.
If no zone configuration is enabled, the field displays “No configuration in effect”.
Viewing detailed information about the enabled
zone configuration
To view detailed information about the enabled zone configuration, perform the following steps.
1. Open the Zone Admin window, as described on “Opening the Zone Admin window” on
page 118.
The zone configuration in effect at the time you launched the Zone Admin window is identified
in the lower-right corner. It is also updated if you manually refresh the Zone Admin window
contents by clicking the refresh icon at the lower-right corner of the Zone Admin window, or
when you enable a configuration through the Zone Admin window.
CAUTION
Clicking the refresh icon overwrites all local unsaved zoning changes. If anyone has made any
changes to the zones outside of your Zone Admin session, those changes are applied.
2. To identify the most recently effective zone configuration without saving or applying any
changes you made in the Zone Admin window, select Print > Print Effective Zone Configuration
in the Zone Admin window.
NOTE
If no zone is enabled, a message displays, indicating that there is no active zoning
configuration on the switch.
3. Optional: Click Print located in the Print Effective Zone Configuration dialog box to print the
enabled zone configuration details.
NOTE
You must use Brocade Network Advisor to print the zone database summary configurations,
display zone configuration summaries and create configuration analysis reports.
Adding a WWN to multiple aliases and zones
This procedure enables you to configure a WWN as a member in a zone configuration prior to
adding that device to the fabric. Specifically, it is useful if you want to add a WWN to all or most
zoning entities. The added WWN does not need to currently exist in the fabric.
To add a WWN, perform the following steps.
1. Open the Zone Admin window as described in “Opening the Zone Admin window” on page 118.
2. Select Edit > Add WWN.
The Add WWN dialog box displays.
3. Enter a WWN value in the WWN field and click OK.
Web Tools Adminstrator’s Guide
53-1002152-01
133
9
Zone configuration and zoning database management
The Add WWN dialog box displays all the zoning elements that include the new WWNs. All of
the elements are selected by default.
4. Click items in the list to select or unselect, and click Add to add the new WWN to all the
selected zoning elements.
The WWN is added to the Zone Admin buffer and can be used as a member.
Removing a WWN from multiple aliases and zones
Use this procedure if you want to remove a WWN from all or most zoning entities.
1. Open the Zone Admin window as described in “Opening the Zone Admin window” on page 118.
2. Select Edit > Delete WWN.
The Delete WWN dialog box displays.
3. Enter a WWN value in the WWN field and click OK.
The Delete WWN dialog box displays all the zoning elements that include the WWN.
4. Click items in the list to select or unselect, and click Delete to delete the WWN from all the
selected zoning elements.
The WWN is deleted from the selected items in the Zone Admin buffer.
Replacing a WWN in multiple aliases and zones
This procedure enables you to replace a WWN throughout the Zone Admin buffer. This is helpful
when exchanging devices in your fabric and helps you to maintain your current configuration.
To replace a WWN in multiple aliases and zones, perform the following steps.
1. Launch the Zone Admin window as described in “Opening the Zone Admin window” on
page 118.
2. Select Edit > Replace WWN.
The Replace WWN dialog box displays.
3. Enter the WWN to be replaced in the Replace field.
4. Enter the new WWN in the By field and click OK.
The Replace WWN dialog box displays. It lists all the zoning elements that include the WWN.
5. Click an item in the list to select or unselect, and click Replace to replace the WWN in all the
selected zoning elements.
The former WWN is replaced in the Zone Admin buffer by the new WWN, including within any
alias or zone in which the old WWN was a member.
134
Web Tools Adminstrator’s Guide
53-1002152-01
Zone configuration and zoning database management
9
Searching for zone members
You can search zone member selection lists for specified strings of text. If you know some
identifying information about a possible member of a zoning entity, you can select the tab and view
for that entity and then search through its member selection list using the Search for Zone Member
option. If the target entity is an alias or zone, then the search domain includes elements like switch
names and domain numbers, port names and “domain, port” addresses, device WWNs and
manufacturer names, and also any aliases that might already have been defined. If the target
entity is a configuration, then zones are also included, along with the elements they contain.
The search starts from the top of the list, and when the target element is found, it is also selected
in the Member Selection List so it can be added or its parent or children can be found. By default,
the Member Selection List is searched from beginning to end one time. If you select the
wraparound option, the search continues to loop from the beginning to the end of the Member
Selection List.
To search for zone members, perform the following steps.
1. Open the Zone Admin window as described in “Opening the Zone Admin window” on page 118.
2. Select Edit > Search Member.
3. Enter the zone member name in the Member Name field.
Optional: Narrow the search by selecting one or more of the check boxes, such as Match Case.
4. Click Next to begin the zone member search.
Clearing the zoning database
Use the following procedure to disable the active zoning configuration, if one exists, and delete the
entire zoning database. You must disable any active configuration before you can delete the zoning
database.
ATTENTION
This action not only disables zoning on the fabric, but also deletes the entire zoning database. This
results in all devices being able to communicate with each other.
To clear the zone database, perform the following steps.
1. Open the Zone Admin window as described in “Opening the Zone Admin window” on page 118.
2. Select Actions > Clear All.
The Disable Config wizard displays.
3. Click Yes to do all of the following in the wizard:
• Disable the current configuration.
• Clear the entire contents of the current Web Tools Zone Admin buffer.
• Delete the entire persistent contents of the fabric zoning database.
The wizard allows you to define one and only one name for each device port (WWN). Devices
with one or more aliases are considered already named and are not displayed.
Web Tools Adminstrator’s Guide
53-1002152-01
135
9
Best practices for zoning
Zone configuration analysis
You must use Brocade Network Advisor to analyze the following zone configurations:
•
•
•
•
Add unzoned devices
Remove offline or inaccessible devices
Replace offline devices
Define device alias
Best practices for zoning
The following are recommendations for using zoning:
• Always zone using the highest Fabric OS-level switch.
Switches with lower Fabric OS versions do not have the capability to view all the functionality
that a newer Fabric OS provides as functionality is backwards compatible but not forwards
compatible.
• Zone using the core switch versus an edge switch.
• Zone using a director over a switch.
A director has more resources to handle zoning changes and implementations.
• Zone on the switch you connect to when bringing up Web Tools (the proxy switch).
136
Web Tools Adminstrator’s Guide
53-1002152-01
Chapter
10
Working with Diagnostic Features
In this chapter
• Trace dumps . . . . . . . . . . . . . . . . . . . . . . . . . . . . . . . . . . . . . . . . . . . . . . . . .
• Displaying switch information. . . . . . . . . . . . . . . . . . . . . . . . . . . . . . . . . . . .
• Defining Switch Policy . . . . . . . . . . . . . . . . . . . . . . . . . . . . . . . . . . . . . . . . . .
• Port LED interpretation . . . . . . . . . . . . . . . . . . . . . . . . . . . . . . . . . . . . . . . . .
137
139
143
144
Trace dumps
A trace dump is a snapshot of the running behavior within the Brocade switch. The dump can be
used by developers and troubleshooters at Brocade to help understand what might be contributing
to a specific switch behavior when certain internal events are seen. For example, a trace dump can
be created each time a certain error message is logged to the system error log. Developers can
then examine what led up to the message event by studying the traces.
Tracing is always “on.” As software on the switch executes, the trace information is placed into a
circular buffer in system RAM. Periodically, the trace buffer is “frozen” and saved. This saved
information is a “trace dump.”
A trace dump is generated when:
•
•
•
•
•
It is triggered manually (use the traceDump command).
A critical-level LOG message occurs.
A particular LOG message occurs (use the traceTrig command to set up the conditions for this).
A kernel panic occurs.
The hardware watchdog timer expires.
(For information about the traceDump and traceTrig commands, refer to the Fabric OS Command
Reference.)
The trace dump is maintained on the switch until either it is uploaded to the FTP host or another
trace dump is generated. If another trace dump is generated before the previous one is uploaded,
the previous dump is overwritten.
When a trace dump is generated, it is automatically uploaded to an FTP host if automatic FTP
uploading is enabled.
Using the Trace tab of the Switch Administration window, you can view and configure the trace FTP
host target and enable or disable automatic trace uploads.
Web Tools Adminstrator’s Guide
53-1002152-01
137
10
Trace dumps
How a trace dump is used
The generation of a trace dump causes a CRITICAL message to be logged to the system error log.
When a trace dump is detected, issue the supportSave command on the affected switch. This
command packages all error logs, the supportShow output, and trace dump, and moves these to
your FTP server. You can also configure your switch to automatically copy trace dumps to your FTP
server (refer to “Setting up automatic trace dump transfers”).
In addition to automatic generation of trace dumps on faults, you can also generate a trace dump
manually or when certain system error messages are logged. This is normally done with assistance
from Brocade customer support when diagnosing switch behavior.
For details on the commands, refer to the Fabric OS Command Reference.
Setting up automatic trace dump transfers
You can set up a switch so that diagnostic information is transferred automatically to a remote
server. Then, if a problem occurs you can provide your customer support representative with the
most detailed information possible. To ensure the best service, you should set up for automatic
transfer as part of standard switch configuration, before a problem occurs.
Setting up for automatic transfer of diagnostic files involves the following tasks:
• Specifying a remote server to store the files.
• Enabling the automatic transfer of trace dumps to the server. (Trace dumps overwrite each
other by default; sending them to a server preserves information that would otherwise be lost.)
Specifying a remote server
The switch must belong to your current Admin Domain before you can perform this task.
To specify a remote server, perform the following steps.
1. Open the Switch Administration window.
2. Click Show Advanced Mode, if it is not selected.
3. Select the Trace tab.
4. Enter the FTP host IP address, path of the remote directory for the trace dump files, FTP user
name, and FTP password in the appropriate fields.
The IP address can be IPv4 or IPv6 format, or a DNS name.
The password is optional if you log in as an anonymous user.
5. Click Apply.
Enabling automatic transfer of trace dumps
The switch must belong to your current Admin Domain before you can perform this task.
To enable the automatic transfer of trace dumps, perform the following steps.
1. Open the Switch Administration window.
2. Click Show Advanced Mode, if it is not selected.
138
Web Tools Adminstrator’s Guide
53-1002152-01
Displaying switch information
10
3. Select the Trace tab.
4. Select Enable in the Auto FTP Upload section to enable automatic uploading of the trace dump
to the FTP host.
5. Click Apply.
Disabling automatic trace uploads
If automatic uploading of a trace dump is disabled, you must manually upload the trace dump or
else the information is overwritten when a subsequent trace dump is generated.
The switch must belong to your current Admin Domain before you can perform this task.
To disable automatic trace uploads, perform the following steps.
1. Open the Switch Administration window.
2. Click Show Advanced Mode, if it is not selected.
3. Select the Trace tab.
4. Select Disable in the Auto FTP Upload section to disable automatic uploading of the trace
dump to the FTP host.
5. Click Apply.
Displaying switch information
You can right-click in the table content of Fan, Temperature, and Power Status windows to find
Export, Copy, and Search options. These options are not available if the table does not have any
content.
• Click Export Row or Export Table to save the contents to a tab-delimited file.
• Click Copy Row or Copy Table to copy the contents in tab-delimited text format to a file.
• Click Search to search for a specific text string in the table.
NOTE
You must accept the Brocade Certificate at the beginning of the login to Web Tools to enable the
functionality of Export and Copy.
Web Tools Adminstrator’s Guide
53-1002152-01
139
10
Displaying switch information
Enter the text string in the box that displays on the table, as shown in Figure 25, and press Enter.
This is an incremental search and allows 24 maximum characters including wildcards question
mark (?) and asterisk (*). The first row containing the text string is highlighted. To find the next
match, click the down arrow. To find the previous match, click the up arrow. If the text is not found
in the table, the text turns red.
FIGURE 25
Temperature Sensor States window
Viewing detailed fan hardware status
The icon on the Fan button indicates the overall status of the fans. For more information about the
switch fan, refer to the appropriate hardware documentation.
You can display status information about the fans, as shown in Figure 26.
FIGURE 26
Fan States window
The Fan No. column indicates either the fan number or the fan FRU number, depending on the
switch model. A fan FRU can contain one or more fans. The Fan No. column indicates the fan FRU
number when it is available, otherwise it displays the fan number.
The Wind Flow Direction column displays the direction state as either Forward or Backward for the
Brocade 6510. For all other hardware, the displayed value will be N/A.
NOTE
If the Fan States window has no “Fan Speed” column, the speed is not monitored.
140
Web Tools Adminstrator’s Guide
53-1002152-01
10
Displaying switch information
To view the detailed fan status of a switch, perform the following steps.
1. Select a logical switch using the drop-down list under Fabric Tree section in the Switch Explorer
window.
The selected switch displays in the Switch View. The icon on the Fan button indicates the
overall status of the fan.
2. Click the Fan button.
The detailed fan status for the switch displays, as shown in Figure 26.
Viewing the temperature status
The icon on the Temp button indicates the overall status of the temperature. For more information
regarding switch temperature, refer to the appropriate hardware documentation.
To view the temperature status, perform the following steps.
1. Select a logical switch using the drop-down list under Fabric Tree section in the Switch Explorer
window.
The selected switch displays in the Switch View. The icon on the Temp button indicates the
overall status of the temperature.
2. Click Temp on the Switch View.
The detailed temperature sensor states for the switch are displayed, as shown in Figure 25.
Viewing the power supply status
The icon on the Power button indicates the overall status of the power supply status. For more
information regarding switch power modules, refer to the appropriate hardware documentation.
FIGURE 27
Power States window
To view the power supply status, perform the following steps.
1. Select a logical switch using the drop-down list under Fabric Tree section in the Switch Explorer
window.
2. The selected switch displays in the Switch View. The icon on the Power button indicates the
overall status of the power supply.
Web Tools Adminstrator’s Guide
53-1002152-01
141
10
Displaying switch information
3. Click Power on the Switch View. The detailed power supply states are displayed (Figure 27). If
you are using the Brocade 6510, the Type column displays either AC or DC. For all other
hardware the value will be N/A.
Checking the physical health of a switch
The Status button displays the operational state of the switch. The icon on the button displays the
real-time status of the switch.
If no data is available from a switch, the most recent background color remains displayed.
Any error-based status messages that is based on a per time interval cause the status to show
faulty until the entire sample interval has passed.
If the switch status is marginal or critical, information on the trigger that caused that status
displays in the Switch Information view.
Click the Status button to display a detailed, customizable switch status report, shown in Figure 28.
Note that this is a static report and not a dynamic view of the switch.
FIGURE 28
Switch Report window
To check the physical health of the switch, perform the following steps.
1. Select a logical switch using the drop-down list under Fabric Tree section in the Switch Explorer
window.
The selected switch displays in the Switch View. The icon on the Status button indicates the
overall status of the switch.
2. Click Status on the Switch View.
The detailed switch health report displays, as shown in Figure 28.
3. Optional: Click the underlined links in the left panel to display detailed information about ports
and Switch Availability Monitoring (SAM).
142
Web Tools Adminstrator’s Guide
53-1002152-01
Defining Switch Policy
10
NOTE
The Port Detail Report and Switch Availability Monitor (SAM) reports display the details of only
those ports which are members of the current Admin Domain context and the E_Ports of the
switch.
4. Optional: Hold the cursor on the Action bar and click an action to perform one of the following
options:
•
•
•
•
•
Refresh the information displayed in the report
Customize the report
View the data in raw XML format
View the style sheet for the report
View the XML schema for the report
Defining Switch Policy
The Switch Policy dialog box lets you define the values for what you consider a healthy switch. The
parameters for Switch Policy define whether the unit is listed as being “Healthy”, “Marginal”, or
“Down”.
Use this dialog box to set policy parameters for calculating the overall status of the switch. The
policy parameter values determine how many failed or faulty units of each contributor are allowed
before triggering a status change in the switch from “Healthy” to “Marginal” or “Down”. The
existence of policies such as WWN, CP, and Blade might differ from platform to platform. Numerical
and percentage values that are above “Marginal” are considered to be “Healthy.”
Any single contributor can force the overall status of the switch to “Marginal” or “Down”. For
example, assuming that the switch contributor values are set to the default values, if there is one
faulty port in a switch, then this contributor would set the overall switch status to “Marginal”. If two
ports were faulty, then this contributor would set the overall switch status to “Down”.
Percentages are configured from a maximum of 100%. For example, setting the Marginal value to 6
means the percentage is 94% and up; setting the Marginal value to 12 means the percentage is
88% and up.
NOTE
Entering the value zero (0) for a parameter means that it is NOT used in the calculation. In addition,
if the range of configurable values in the prompt is zero (0..0), the policy parameter is NOT applicable
to the switch.
To define the Switch Status Policy, perform the following steps.
1. Open the Web Tools main page.
2. Click the Switch Status Policy button.
The Switch Status Policy dialog box displays, as shown in Figure 29.
Web Tools Adminstrator’s Guide
53-1002152-01
143
10
Port LED interpretation
NOTE
The options available in the dialog box may differ, depending on the options available on your
switch, including CP, core blades, blades, and WWN.
FIGURE 29
Switch Status Policy dialog box
3. Configure the numerical and percentage values to conform to your definition of a healthy
switch.
4. Optional: Right-click a row in the table to access options to copy the values to your clipboard, or
to export the values to a file.
5. Click OK.
Port LED interpretation
The Switch View displays port graphics with blinking LEDs, simulating the physical appearance of
the ports. One of the LEDs indicates port status; the other indicates port speed. For LED
information, refer to the hardware documentation for the switch you are viewing. (The blink rate of
the LEDs in the Switch View does not necessarily match the blink rate of the LEDs on the physical
switch.)
NOTE
All 8G and 16G Brocade switches and port blades do not have port speed LEDs, but only port status
LEDs.
Port icon colors
The background color of the port icon indicates the port status, as follows:
•
•
•
•
•
•
144
Green (healthy)
Yellow (marginal)
Red (critical)
Gray (unmonitored)
Blue (buffer-limited)
Dimmed (unlicensed)
Web Tools Adminstrator’s Guide
53-1002152-01
Chapter
11
Using the FC-FC Routing Service
In this chapter
• Fibre Channel Routing overview . . . . . . . . . . . . . . . . . . . . . . . . . . . . . . . . . .
• Supported switches for Fibre Channel Routing . . . . . . . . . . . . . . . . . . . . . .
• Setting up FC-FC routing . . . . . . . . . . . . . . . . . . . . . . . . . . . . . . . . . . . . . . . .
• FC-FC routing management . . . . . . . . . . . . . . . . . . . . . . . . . . . . . . . . . . . . .
• Viewing EX_Ports . . . . . . . . . . . . . . . . . . . . . . . . . . . . . . . . . . . . . . . . . . . . . .
• Configuring an EX_Port . . . . . . . . . . . . . . . . . . . . . . . . . . . . . . . . . . . . . . . . .
• Configuring FCR router port cost . . . . . . . . . . . . . . . . . . . . . . . . . . . . . . . . .
• Viewing LSAN zones . . . . . . . . . . . . . . . . . . . . . . . . . . . . . . . . . . . . . . . . . . .
• Configuring the backbone fabric ID . . . . . . . . . . . . . . . . . . . . . . . . . . . . . . .
145
146
146
147
148
149
149
150
150
Fibre Channel Routing overview
Fibre Channel Routing (FCR) provides connectivity to devices in different fabrics without merging
the fabrics.
For example, Fibre Channel Routing allows you to share tape drives across multiple fabrics without
the administrative problems, such as change management, network management, scalability,
reliability, availability, and serviceability that might result from merging the fabrics.
Fibre Channel Routing lets you create logical storage area networks (LSANs) that can span fabrics.
These LSANs allow Fibre Channel zones to cross physical SAN boundaries without merging the
fabrics while maintaining the access controls of zones.
Note the following terminology for Fibre Channel Routing:
backbone fabric
An FC Router can connect two edge fabrics; a backbone fabric connects FC
Routers. The FC Router fabric is the backbone fabric. A backbone fabric
consists of at least one FC Router and possibly a number of Fabric OS-based
Fibre Channel switches. Initiators and targets in the edge fabric can
communicate with devices in the backbone fabric through the FC Router.
edge fabric
A standard Fibre Channel fabric with targets and initiators connected through
an FC Router to another Fibre Channel fabric.
EX_Port
A type of port that functions somewhat like an E_Port, but does not propagate
fabric services or routing topology information from one fabric to another.
FC Router
A switch running FC-FC Routing Service.
interfabric link (IFL)
metaSAN
Web Tools Adminstrator’s Guide
53-1002152-01
The link between an E_Port and an EX_Port, or a VE_Port and a VEX_Port.
The collection of all SANs interconnected with FC Routers.
145
11
Supported switches for Fibre Channel Routing
VEX_Port
A virtual port that enables routing functionality through an FCIP tunnel. A
VEX_Port is similar to an EX_Port.
A device is shared between:
• The backbone fabric and edge fabric 1
• Edge fabric 1 and edge fabric 2
• Edge fabric 2 and edge fabric 3
Supported switches for Fibre Channel Routing
The FC-FC Routing Service is supported only on the following switch models:
•
•
•
•
•
Brocade VA-40FC
Brocade 6510
Brocade 5100 and 5300 switches
Brocade 7800 Extension Switch
Brocade DCX and DCX-4S enterprise-class platforms, when configured with FR4-18i, FC8-16,
FC8-32, FC8-48, FC8-64, FS8-18, or FX8-24 blades.
• Brocade DCX 8510-4 and DCX 8510-8, when configured with FC16-32 or FC16-48 blades.
Setting up FC-FC routing
The following procedure provides the basic steps for setting up FC-FC Routing using an FC Router.
1. Ensure that the backbone fabric ID of the FC Router is the same as that of other FC Routers in
the backbone fabric. Refer to “Configuring the backbone fabric ID” on page 150.
2. On the FC Router, ensure that the ports to be configured as EX_Ports are either not connected
or are disabled.
3. Configure EX_Ports by clicking the EX Ports tab and then clicking New.
Follow the instructions in the wizard. Refer to “Viewing EX_Ports” on page 148.
4. Connect the cables from the EX_Ports on the FC Router to the edge fabrics, if they were not
connected before.
NOTE
For a multi-FC Router backbone fabric, make sure that each FC Router is connected to a switch
in the backbone fabric.
5. Configure LSAN zones on the fabrics that share devices.
Refer to “Viewing LSAN zones” on page 150.
6. View the information in the EX Ports, LSAN Fabrics, LSAN Zones, and LSAN Devices tabs to
make sure that your configuration succeeded.
146
Web Tools Adminstrator’s Guide
53-1002152-01
11
FC-FC routing management
FC-FC routing management
You can perform Fibre Channel Routing operations using Web Tools, Web Tools with the EGM
license, and Integrated Routing license. You can manage FC-FC Routing through the FC Routing
module. The FC Routing module has tabbed panes that display EX_Ports, LSAN fabrics, LSAN
zones, LSAN devices, and general FCR information.
The FC Routing module provides a dynamic display. Any changes in the FCR configuration on the
switch are automatically updated in the FC Routing module within 30 to 90 seconds, depending on
the network traffic. The last refresh time is displayed in the lower left corner of the subtabs.
The switch must be FC Router-capable, as described in “Fibre Channel Routing overview” on
page 145.
The only things you need to configure on the FC Router are the EX_Ports and the backbone fabric
ID. You configure LSAN zones on the fabrics from where devices need to be shared. You can
configure LSAN zones on the backbone fabric to allow edge fabrics to share devices in the
backbone fabric.
To modify the data, you must log in as switchadmin, fabricadmin, basicswitchadmin, operator, or
any user-defined role configured with modify rights. If you log in as user, zoneadmin, or
securityadmin, you can only view the data.
If the FC-FC Routing service is disabled, the LSAN zones, LSAN fabric, and devices tabs continue to
display the existing entries, but display the entries related to the backbone fabric only. All of the
EX_Ports are disabled and you cannot enable them until FC-FC routing is enabled.
Opening the FC Routing module
The FCR button in the Switch View launches the FC Routing module. This button is displayed only
for the following switches:
•
•
•
•
Brocade VA-40FC
Brocade 6510
Brocade 5100 and 5300 switches, and the 7800 Extension Switch.
Brocade DCX and DCX-4S enterprise-class platforms, when configured with FR4-18i, FC8-16,
FX8-24, FC8-32, FC8-48, FC8-64, FC16-32, or FC16-48 blades.
NOTE
When the Virtual Fabrics capability is enabled on the switch, Fabric ID cannot be set using the Set
Fabric ID button.
To open the FC Routing module, perform the following steps.
1. Select a logical switch using the drop-down list under Fabric Tree section in the Switch Explorer
window.
The selected switch displays in the Switch View.
2. Click FCR in the Manage section of the Tasks menu.
The FC Routing module displays. If FC-FC Routing is disabled, a message to that effect displays
on all the tabs in the module.
Web Tools Adminstrator’s Guide
53-1002152-01
147
11
Viewing EX_Ports
Viewing and managing LSAN fabrics
The LSAN Fabric tab displays all the LSAN fabrics visible to your switch, in both a tabular and tree
form. (If FC-FC Routing is disabled, the table and tree nodes in this tab are empty and the tree
displays only the backbone switch.)
For more detailed information about a specific LSAN fabric, click a fabric name in the table and
then click View Details in the task bar. You can also click the fabric name in the tree on the left side
of the window.
When there is more than one router present in the backbone fabric with different backbone Fabric
IDs, the routers with the conflicting IDs are shown in a separate table on the LSAN Fabric tab.
To manage an LSAN fabric, select the fabric to manage and click Manage LSAN Fabric in the task
bar. A browser window is launched with the following URL:
http://ip-address-of-lsan-fabric-switch
For Brocade switches, this launches Web Tools. For non-Brocade fabrics, this launches the Element
Manager for that switch.
Viewing EX_Ports
The EX_Ports tab displays all of the EX_Ports on the switch, including configuration and status
information. The ports are sorted by slot number, and then by row number within each slot. IP
address information is displayed in IPv4 and IPv6 formats.
NOTE
To disable FC Routing, you must disable all Ex/Vex ports. You cannot enable these ports until FC
Routing is enabled.
For more detailed information about a specific port, click a port name in the table, and then click
View Details in the task bar. You can also click the port name in the tree on the left side of the
window.
From the EX_Ports tab, you can perform the following port management tasks by selecting a port in
the table, and then clicking a task in the task bar:
•
•
•
•
•
•
•
•
Configure EX_Ports
Edit an EX_Ports configuration
Rename an EX_Port
Swap the Port Index of an EX_Port (described in “Port swapping index” on page 90)
Enable or disable an EX_Port
Persistently enable or disable an EX_Port
Enable or disable trunking
Configure router port cost
ATTENTION
During EX_Port configuration, the port is automatically disabled, and then re-enabled when the
changes are applied. Be sure that you do not physically connect a port to a remote fabric before
configuring it as an EX_Port; otherwise, the two fabrics merge and you lose the benefit of Fibre
Channel Routing.
148
Web Tools Adminstrator’s Guide
53-1002152-01
Configuring an EX_Port
11
You can enable or disable multiple ports at one time. Use Shift-click and Ctrl-click to select multiple
ports in the table, and then click one of the enable or disable tasks in the task bar.
You can select multiple ports in the table, but you can select only one port at a time in the tree.
Configuring an EX_Port
To configure an EX_Port, perform the following steps.
1. Select Tasks > Manage > FCR.
2. Select the EX_Ports tab.
3. Click New in the task bar to configure one or more EX_Ports.
This launches the port configuration wizard, which guides you through the port configuration
process.
NOTE
Support for EX_PORTs on the Brocade FR4-18i switch has been removed in Fabric OS v7.0.0
You must specify the Fabric ID and, if configuring an FC port, the speed and long distance
mode. You can select any unique fabric ID as long as it is consistent for all EX_Ports that
connect to the same edge fabric.
Editing the configuration of an EX_Port
To edit the configuration of an EX_Port, perform the following steps.
1. Select Tasks > Manage > FCR.
2. Select the EX_Ports tab.
3. Select a port to configure, by clicking the row.
4. Click Edit Configuration in the task bar. This launches the port configuration wizard, which
guides you through the port configuration process. The current configuration values are
displayed in the wizard steps.
NOTE
If you decide to configure a disabled port, the wizard provides the Enable Port after
configuration check box. If you select this check box, the disabled port is automatically
enabled after configuration. If you leave this box cleared, the port remains in the same state
after configuration.
Configuring FCR router port cost
In FCR, EX_Ports can be assigned router port cost. The cost of the link is a positive number. The
router port path or tunnel path is chosen based on the minimum cost per connection. If multiple
paths exist with the same minimum cost, there will be load sharing over these paths. If multiple
paths exist where one path costs lower than the others, then the lowest cost path is used.
Web Tools Adminstrator’s Guide
53-1002152-01
149
11
Viewing LSAN zones
Every link has a default cost. For an EX_Port 1 Gbps, 2 Gbps, 4 Gbps, 8 Gbps, 10 Gbps, and 16
Gbps links, the default cost is 1000. For a VEX_Port, the default cost is 10000. If the cost is set to
0, the default cost are be used for that link.
To configure the FCR router port cost, perform the following steps.
1. Open the Switch View window.
2. Click FCR in the Manage section of the Tasks menu.
3. Click the EX_Ports tab.
4. Disable the EX_Port.
5. Click the Router Port Cost button.
Viewing LSAN zones
The LSAN Zones tab displays all the LSAN zones, in both a tabular and tree form. If FC-FC Routing is
disabled, the table and the tree node in this tab display only the LSAN zones present in the
backbone fabric.
For more detailed information about a specific LSAN zone, click a zone name in the table and then
click the View Details button in the task bar. You can also click the zone name in the tree on the left
side of the window.
The LSAN matrix is mapping of LSAN Zones with the edge fabric they are going to communicate
with. When an LSAN matrix is created in the backbone fabric, only the LSAN zones mapped in the
edge fabrics are displayed in the LSAN Zones tab.
Follow the procedure described in “Creating and populating zones” on page 125 to create LSAN
zones.
Viewing LSAN devices
The LSAN Devices tab displays information about the physical and proxy devices and displays these
devices in a tree on the left side of the window. (If FC-FC Routing is disabled, the tables and tree
nodes in this tab are empty.)
Click the LSAN Devices element in the tree to display a count of all the physical and proxy LSAN
devices. Note that this count is for all of the LSAN fabrics.
Click the Physical Devices or Proxy Devices element in the tree to see a detailed list of the physical
or proxy devices. Click the device name in the tree for more detailed information about a specific
device.
Configuring the backbone fabric ID
Web Tools automatically disables FC-FC Routing before setting the fabric ID. You should manually
enable FCR after setting backbone FID. However, you must first disable all of the EX_Ports before
you begin this operation. After the fabric ID is changed, you must re-enable these ports.
150
Web Tools Adminstrator’s Guide
53-1002152-01
Configuring the backbone fabric ID
11
NOTE
When the Virtual Fabrics capability is enabled on the switch, Fabric ID cannot be set using the Set
Fabric ID button.
To configure the backbone fabric ID, perform the following steps.
1. Open the Switch View window.
2. Select FCR in the Manage section of the Tasks menu.
3. Select the EX-Ports tab.
4. Select all the EX_Ports in the table, and click Disable.
5. Select the General tab.
6. Click Set Fabric ID in the task bar.
The Configure Backbone Fabric ID window displays.
7.
Select a fabric ID from the drop-down menu.
NOTE
The fabric ID is a number from 1 through 128. Web Tools warns you if you select a fabric ID
that is already in use.
8. Click OK.
9. Click Enable FCR in the task bar.
10. Select all the EX_Ports in the table, and click Enable.
Web Tools Adminstrator’s Guide
53-1002152-01
151
11
152
Configuring the backbone fabric ID
Web Tools Adminstrator’s Guide
53-1002152-01
Chapter
12
Using the Access Gateway
In this chapter
• Access Gateway overview . . . . . . . . . . . . . . . . . . . . . . . . . . . . . . . . . . . . . . .
• Viewing Switch Explorer for Access Gateway mode. . . . . . . . . . . . . . . . . . .
• Access Gateway mode. . . . . . . . . . . . . . . . . . . . . . . . . . . . . . . . . . . . . . . . . .
• Enabling Access Gateway mode . . . . . . . . . . . . . . . . . . . . . . . . . . . . . . . . . .
• Disabling Access Gateway mode . . . . . . . . . . . . . . . . . . . . . . . . . . . . . . . . .
• Viewing the Access Gateway settings. . . . . . . . . . . . . . . . . . . . . . . . . . . . . .
• Port configuration . . . . . . . . . . . . . . . . . . . . . . . . . . . . . . . . . . . . . . . . . . . . .
• Access Gateway policy modification. . . . . . . . . . . . . . . . . . . . . . . . . . . . . . .
• Access Gateway limitations on the Brocade 8000 . . . . . . . . . . . . . . . . . . .
153
154
155
155
156
156
156
160
162
Access Gateway overview
Access Gateway is a software feature that allows multiple host bus adapters (HBAs) to access the
fabric using fewer physical ports. You can set a switch in Access Gateway mode to transform them
into a device management tool that is compatible with different types of fabrics, including Brocade
Enterprise OS (EOS), and Cisco-based fabrics.
When a switch is in Access Gateway mode, it is logically transparent to the host and the fabric.
Brocade Access Gateway mode allows hosts to access the fabric without increasing the number of
switches and simplifies configuration and management in a large fabric by reducing the number of
domain IDs and ports.
For detailed descriptions of the Access Gateway, refer to the Brocade Access Gateway
Administrator’s Guide.
NOTE
When Access Gateway mode is enabled on switches managed through Web Tools, only a limited
subset of menus and options related to device management are available. A switch in Access
Gateway mode is considered a device management tool and not a fabric switch, therefore fabric
related options are disabled, fabric management menus are unavailable, and fabric-related service
requests are forwarded to the fabric switches.
Web Tools Adminstrator’s Guide
53-1002152-01
153
12
Viewing Switch Explorer for Access Gateway mode
Viewing Switch Explorer for Access Gateway mode
The Switch Explorer for Access Gateway mode displays as shown in Figure 30.
FIGURE 30
Switch Explorer view for Access Gateway mode
The Access Gateway mode Switch Explorer is divided into the following areas:
•
•
•
•
•
•
•
154
Menu bar
Tasks
Switch View buttons
Switch Events and Access Gateway information
Indicator bar
Professional Management Tool offering
Switch View
Web Tools Adminstrator’s Guide
53-1002152-01
Access Gateway mode
12
Access Gateway mode
The Access Gateway feature on the Brocade Encryption switch and the Brocade 8000 enables
interoperability with the Cisco fabrics. The Access Gateway mode of the switch presents standard
F_Ports to the hosts, but it connects to the Enterprise fabric as N_Port (rather than as E_Port in
case of a regular switch).
Restricted access in the Port Administration window
When Access Gateway mode is enabled, the following options are disabled in the Port
Administration window:
• Port Configuration Policy — Configuring the Auto or Advanced mode under Port Configuration
Policy is disabled.
• Enable Trunking and Disable Trunking — Enabling and Disabling of N_Port trunking is disabled.
• Configure N-Port Groups — You can only view the port group details from the Port Group
Configuration window. The following options are disabled:
-
Disable N-port Grouping
Add
Edit/View
Delete
• Configure F-N Port Mappings — Add and Remove buttons are disabled for primary mappings
and secondary failover mapping.
• N Port Configuration — By default all the ports are set to N_Ports and failover and fallback are
disabled. You can edit the speed. The following options are disabled in the N Port Configuration
window:
-
Lock as N Port
Allow as F, U Port
Enable N Port Failover Policy
Enable N Port Fallback Policy
Enabling Access Gateway mode
When you enable Access Gateway mode some fabric information, such as the zone and security
databases, is erased. To recover this information, save the switch configuration before enabling
Access Gateway mode.
To save the switch configuration using Web Tools, click Switch Admin in the Manage section under
Tasks, and then select the Configure > Upload/Download subtab and upload the configuration file.
NOTE
You cannot enable Access Gateway mode if Management Server is enabled. To disable
Management Server, enter the MsplmgmtDeactivate command.
Web Tools Adminstrator’s Guide
53-1002152-01
155
12
Disabling Access Gateway mode
To enable Access Gateway mode, perform the following steps.
1. Select a switch.
2. Click Switch Admin in the Manage section under Tasks.
The Switch Administration dialog box displays.
3. Click Disable in the Switch Status section.
You can enable Access Gateway mode only after the switch is disabled.
4. Click Enable in the Access Gateway Mode section.
5. Click Apply.
6. Click Yes to restart the switch in Access Gateway mode.
Disabling Access Gateway mode
To disable Access Gateway mode, perform the following steps.
1. Select a switch.
2. Click Switch Admin in the Manage section under Tasks.
The Switch Administration dialog box displays.
3. Click Disable in the Switch Status section. You can disable Access Gateway mode only after
the switch is disabled.
4. Click Disable in the Access Gateway Mode section.
5. Click Apply.
6. Click Yes to restart the device in native switch mode.
Viewing the Access Gateway settings
You can view the effective Access Gateway settings for the selected switch. The view can be
customized. To view the Access Gateway settings select Tasks > Monitor > Access Gateway
Devices. The Access Gateway Device Display dialog box displays.
Port configuration
You can configure the port types (N_Port, F_Port) on each individual port on an Access Gateway
enabled switch. When you configure ports, you can specify a global configuration policy using the
Port Configuration Policy button. By default, Advanced is selected and sets the initial defaults for
port types, groups, and the F_Port-to-N_Port mappings. When the policy is Automatic, the port type
assignments and mappings are configured automatically based on device and switch connections
and internal load-balancing and grouping; user controls are disabled.
When you configure ports, perform the tasks in the following order:
1. Configure N_Ports, if necessary. Use the Edit Configuration button to configure a port.
2. Configure N_Port groups.
156
Web Tools Adminstrator’s Guide
53-1002152-01
Port configuration
12
3. Configure F_Port-to-N_Port mappings. You can set up primary and secondary mappings. The
secondary mapping is the N_Port to which an F_Port is mapped when the primary N_Port
mapping goes offline.
4. Configure WWN-N_Port mappings
Creating port groups
You can group a number of N_Ports (and its mapped F_Ports) together to connect to multiple
independent fabrics or to create performance optimized ports. To group a number of ports, you
must create a new port group and assign desired N_Ports to it. The N_Port grouping option is
enabled by default, and all N_Ports are members of a default port group 0 (pg0). Access Gateway
prevents failover of F_Ports across N_Port groups.
NOTE
If you want to distribute F_Ports among groups, you can leave all ports in the default port group 0,
or you can disable N_Port grouping.
To create port groups, perform the following steps.
1. Click a port in the Switch View to open the Port Administration window.
2. Make sure that you have selected Advanced from the Port Configuration Policy drop-down list.
3. Click Configure N_Port Groups.
NOTE
Configure N_Port Groups is disabled if you select Automatic from the Port Configuration Policy
drop-down list.
4. In the Port Group Configuration dialog box, click Add.
The Add Port Group window displays.
5. Enter the ID for the new port group in the Port Group ID* field.
6. Enter the name for the new port group in the Port Group Name field.
7.
Select the Login Balancing check box to enable login balance for the port group.
8. Select the Fabric Name Monitoring check box to manually configure the managed fabric name
monitoring.
9. Under the Select Members(N-Port)* section, select the required ports you want to group.
10. Click Save.
11. Click Close on the Port Group Configuration dialog box.
Editing or viewing port groups
To edit port groups, perform the following steps.
1. Click a port in the Switch View to open the Port Administration window.
2. Click Configure N_Port Groups.
Web Tools Adminstrator’s Guide
53-1002152-01
157
12
Port configuration
3. On Port Group Configuration dialog box, select the group that you want to edit and then click
Edit/View.
The Edit/View Port Group window displays.
4. Edit the name of the port group in the Port Group Name field.
5. Select the Login Balancing check box and the Fabric Name Monitoring check box if you want to
enable these features. Clear the check boxes to disable these features.
Upon selecting the Login Balancing check box, the F Port Auto Rebalancing and N-Port Auto
Rebalancing check boxes and Manual Balancing button become enabled.
6. Click Failover Enable.
A confirmation dialog box displays.
7.
Click Yes to enable failover to all the ports in the port group or click No if you do not want to
enable failover.
8. Click Failover Disable.
A confirmation dialog box displays. Click Yes to disable failover to all the ports in the port group
or click No if you do want to disable failover.
9. Click Failback Enable.
A confirmation dialog box displays.
10. Click Yes to enable failback to all the ports in the port group or click No if you do not want to
enable failback.
11. Click Failback Disable.
A confirmation dialog box displays. Click Yes to disable failback to all the ports in the port
group or click No if you do not want to disable failback.
12. Under the Select Members(N-Port)* section, select the required ports you want to group and
clear the check boxes for the ports you want to remove from the port group.
13. Click Save.
14. Click Close on the Port Group Configuration dialog box.
Deleting port groups
NOTE
You cannot delete the default port group 0 (pg0).
To delete port groups, perform the following steps.
1. Click a port in the Switch View to open the Port Administration window.
2. Click Configure N_Port Groups.
3. In the Port Group Configuration dialog box, select the group that you want to delete and then
click Delete. A confirmation dialog box displays.
4. Click Yes to confirm the action.
5. Click Close.
158
Web Tools Adminstrator’s Guide
53-1002152-01
Port configuration
12
Defining custom primary F-N port mapping
To manually change primary F-N port mappings, perform the following steps.
1. Click a port in the Switch View to open the Port Administration window.
2. Click the FC Ports tab.
3. Click Configure F_N Port Mappings.
4. Select the Primary Mappings subtab on the right side of the dialog.
5. In the Primary Mappings area, select ports and use the Add (right arrow) button to map F_Ports
or U_Ports to N_Ports.
6. Optional: Use the Remove (left arrow) button to delete an F_Port mapping from an N_Port.
7.
Optional: Define a secondary N_Port in the Secondary Failover Mappings area, by selecting the
ports using the Add and Remove buttons to set up the secondary mappings.
The secondary mappings must be to a different port in the same group as the primary
mapping. If a secondary port is not defined, the failover moves to any online ports within the
same port group.
8. After you have made the appropriate changes, click Save.
Defining custom static F-N port mapping
In Fabric OS v7.0.0, the Static F port mapping and Static N port mapping columns have been added
to the Port Admin GUI to display static mapping information.
NOTE
Static mappings and custom WWN-N port mappings are mutually exclusive.
To manually change static F-N port mappings, perform the following steps.
1. Click a port in the Switch View to open the Port Administration window.
2. Click the FC Ports tab.
3. Click Configure F_N Port Mappings.
4. Select the Static Mappings subtab on the right side of the dialog.
5. In the Primary Mappings area, select ports and use the Add (right arrow) button to map F_Ports
or U_Ports to N_Ports.
6. Optional: Use the Remove (left arrow) button to delete an F_Port mapping from an N_Port.
7.
After you have made the appropriate changes, click Save.
Defining custom WWN-N port mappings
NOTE
Static mappings and custom WWN-N port mappings are mutually exclusive.
To manually change WWN-N port mappings, perform the following steps.
Web Tools Adminstrator’s Guide
53-1002152-01
159
12
Access Gateway policy modification
1. Open the Port Administration window.
2. Click the FC Ports tab.
3. Click Configure WWN-N Port Mappings.
4. In the Primary Mappings area, select a WWN from the left pane and a group or port from the
right pane.
5. Click the Add (right arrow) button to map the WWN to the port or port group.
6. Optional: Expand the port in the right page and select the WWN and then use the Remove (left
arrow) to remove the mapping.
7.
Optional: Define a failover in the Secondary Failover Mappings area, by selecting the ports
using the Add and Remove buttons to set up the secondary mappings.
The WWN fails over to the secondary mapping if the primary mapped port is offline. If a
secondary port is not defined, the failover moves to any online ports.
8. Optional: To create a detached WWN-N port mapping, enter the WWN value into the WWN field
and click Add.
The detached WWN port is now available for mapping.
9. After you have made the appropriate changes, click Save.
Any unused WWNs are discarded.
Access Gateway policy modification
Although you can control a number of policies on switches in Access Gateway mode, Web Tools only
provides the ability to enable and disable the policies. For more information on these policies
please refer to Access Gateway Administrator’s Guide.
Path Failover and Failback policies
The Path Failover and Failback policies determine the behavior of the F_Port if the primary mapped
N_Port they are mapped to goes offline or is disabled. The Path Failover and Failback policies are
attributes of the N_Port. By default, the Path Failover and Failback policies are enabled for all
N_Ports.
Modifying Path Failover and Failback policies
To modify Path Failover and Failback policies, perform the following steps.
1. Click a port in the Switch View to open the Port Administration window.
2. Select the N_Port for which you want to modify the policy.
3. Click Edit Configuration.
4. Select the appropriate check box to modify the policy.
5. Click Save.
160
Web Tools Adminstrator’s Guide
53-1002152-01
Access Gateway policy modification
12
Enabling the Automatic Port Configuration policy
The Automatic Port Configuration (APC) policy is a global configuration policy for a switch in Access
Gateway mode. By default, this policy is disabled. If you created an N_Port grouping and switching
over to the automatic mode, those port groups are lost. After you enable the APC policy, you cannot
define custom port type configurations, port mappings, Path Failover, and Failback settings.
NOTE
When port configuration is in auto mode, the Configure N port groups, Configure F-N port mapping,
and Configure WWN-N port mapping buttons are disabled.
To enable auto rebalancing from the Switch Administration window, perform the following steps.
1. Click a port in the Switch View to open the Port Administration window.
2. Select Automatic from the Port Configuration Policy drop-down list.
NOTE
When Port Configuration Policy is set to Advanced, you can enable the auto rebalancing
options from the Configure N_Port Groups dialog box through the Port Administration window.
3. Click Yes in the confirmation window.
4. In the Switch Explorer window, select Switch Admin. The Switch Administration window
displays (Figure 31).
FIGURE 31
Access Gateway Auto Rebalancing
5. Click Refresh.
6. Under the Access Gateway Mode section, do the following:
• Select the N Port Auto Rebalancing check box to enable N_Port rebalancing.
Web Tools Adminstrator’s Guide
53-1002152-01
161
12
Access Gateway limitations on the Brocade 8000
• Select F Port Auto Rebalancing check box to enable F_Port rebalancing.
• Click Manual Balancing and a confirmation dialog box displays. Click Yes to change F
Port-N Port Mapping or click No to cancel the changes.
7.
Click Apply to apply the changes.
Access Gateway limitations on the Brocade 8000
The following list the is a compilation of the limitations of using Access Gateway with the Brocade
8000 switch:
• Only the Port Grouping (PG) policy is supported. When the Access Gateway mode is first
enabled, the default PG policy is enforced.
• When the Brocade 8000 runs in Access Gateway mode, all the FCoE ports are F_Ports and all
the FC port are N-Ports.
• Static mapping is not supported on the Brocade 8000.
• When Access Gateway is enabled, F Ports mapping to N Ports is allowed and all 4 FCOE ports
in the trunk group are mapped to the same N Port.
•
•
•
•
•
•
•
162
F Ports mapping to the Port Group level is not allowed.
You cannot map individual FCoE Ports within the same trunk group to different FC ports.
All the four FCoE ports in a set will failover or failback to one FC N Port.
Enabling or disabling of N-port Port Grouping is not allowed
Port Group modification is allowed
Login Balancing and Fabric Name Monitoring is not allowed in Add Port Group configuration.
Login Balancing, Fabric Name Monitoring, F Port Auto Rebalancing, N Port Auto Rebalancing,
and Manual Balance options are not allowed in the Edit Port Group or View Port Group
configuration.
Web Tools Adminstrator’s Guide
53-1002152-01
Chapter
Administering Fabric Watch
13
In this chapter
• Fabric Watch overview. . . . . . . . . . . . . . . . . . . . . . . . . . . . . . . . . . . . . . . . . . 163
Fabric Watch overview
Fabric Watch is an optional Brocade licensed feature that monitors the performance and status of
switches. Fabric Watch can automatically alert you when problems arise, before they become costly
failures.
NOTE
If you do not own the switch, Fabric Watch is view-only. Owning ports on a switch is not enough to
enable Fabric Watch on that switch.
To use Fabric Watch, you must have the Fabric Watch license installed on the switch.
Fabric Watch tracks a number of SAN fabric elements, events, and counters. For example, Fabric
Watch monitors the following:
• Fabric resources, including fabric reconfigurations, zoning changes, new logins, domain ID
changes, E-Port failures, and segmentation changes
• Switch environmental functions, such as temperature, flash , CPU and memory usage, along
with security violations.
• Port state transitions, errors, and traffic information for multiple port classes as well as
operational values for supported models of Finisar “Smart” GBICs/SFPs.
Fabric Watch lets you define how often to measure each switch and fabric element and allows you
to specify notification thresholds. Whenever fabric elements exceed these thresholds, Fabric Watch
automatically provides notification using several methods, including e-mail messages, SNMP traps,
and log entries.
For detailed information regarding Fabric Watch, refer to the Fabric Watch Administrator’s Guide.
Web Tools Adminstrator’s Guide
53-1002152-01
163
13
164
Fabric Watch overview
Web Tools Adminstrator’s Guide
53-1002152-01
Chapter
Administering Extended Fabrics
14
In this chapter
• Extended link buffer allocation overview . . . . . . . . . . . . . . . . . . . . . . . . . . . 165
• Configuring a port for long distance. . . . . . . . . . . . . . . . . . . . . . . . . . . . . . . 167
Extended link buffer allocation overview
If the link is used over long distances, use the Extended Fabric tab of the Switch Administration
window to configure the long-distance setting of a port. Because buffer credits are a switch
resource, you must own the switch in order to modify extended fabric settings on a port. The EGM
license must be enabled on the switch; otherwise, access to configuring long distance is denied
and an error message displays.
The Extended Fabric tab displays information about the port speed, long-distance settings, and
buffer credits, as shown in Figure 32 on page 166. For detailed information on managing extended
fabrics, refer to the Fabric OS Administrator’s Guide.
The Extended Fabric tab displays the following columns:
• Port Number
• Buffer Limited—Indicates whether the port is buffer limited. A buffer-limited port can come
online with fewer buffer credits allocated than its configuration specifies, allowing it to operate
at a reduced bandwidth instead of being disabled for lack of buffers.
Buffer-limited operation is supported for the LS and LD extended ISL modes only and is
persistent across reboots, switch disabling and enabling, and port disabling and enabling.
• Port Speed—The port speed is displayed as follows:
- 1G—1 Gbps
- 2G—2 Gbps
- 4G—4 Gbps
- 8G—8 Gbps
- 10G—10 Gbps
- N1—Negotiated 1 Gbps
- N2—Negotiated 2 Gbps
- N4—Negotiated 4 Gbps
- N8—Negotiated 8 Gbps
- N16—Negotiated 16 Gbps
- Auto-Negotiation
• Buffer Needed/Allocated—The number of buffers needed and the number of buffers that are
actually allocated.
Web Tools Adminstrator’s Guide
53-1002152-01
165
14
Extended link buffer allocation overview
• Actual Distance (km)—The actual distance for the link in kilometers.
• Desired Distance (km)—Required for a port configured in LD or LS mode (Table 15 on
page 167), the desired distance, in kilometers, for the link.
For an LD-mode link, the desired distance is used as the upper limit of the link distance to
calculate buffer availability for other ports in the same port group. If the measured distance is
more than the desired distance, the desired distance is used to allocate the buffers. In this
case, the port operates in degraded mode instead being disabled due to insufficient buffers.
For an LS-mode link, the actual distance is not measured; instead the desired distance is used
to calculate the buffers required for the port.
• Long Distance—Table 15 describes the long-distance settings and identifies which settings
require a Brocade Extended Fabrics license.
FIGURE 32
Extended Fabric tab
For the Brocade DCX, DCX-4S, DCX 8510-4, and DCX 8510-8 the slots for CPs are not available.
166
Web Tools Adminstrator’s Guide
53-1002152-01
Configuring a port for long distance
14
The Brocade Encryption Switch and the FS8-18 Encryption blade support auto-negotiated link
speeds of 1, 2, 4, and 8 Gbps. The GE ports are always locked at 1 Gbps.
TABLE 15
Long-distance settings and license requirements
Value
Description
Extended Fabrics License
Required?
L0
No long-distance setting is enabled. The maximum supported link distance
is:
• 10 kilometers at 1 Gbps
• 5 kilometers at 2 Gbps
• 2.5 kilometers at 4 Gbps
• 1 kilometers at 10 Gbps
• 500 meters at 16 Gbps
No
LE
Extended normal setting is enabled, 10 km (6 miles) or less.
No
LD
Dynamic setting is enabled. Buffer credits for the given E_Port are
dynamically configured based on the actual link distance, as long as this is
less than the desired distance. If the actual link distance exceeds the
desired distance, the desired distance is used to allocate the buffers.
The LD-level link can operate at distances up to 500 km at 1 Gbps, 250 km
at 2 Gbps, or 125 km at 4 Gbps, depending on the switch platform and the
availability of frame buffers within the port group.
Yes
LS
Static setting is enabled. Buffer credits for the given E_Port are statically
configured based on the desired link distance.
The LS-level link can operate at distances up to 500 km at 1 Gbps, 250 km
at 2 Gbps, or 125 km at 4 Gbit/sec, depending on the switch platform and
the availability of frame buffers within the port group.
For the Brocade DCX 8510-8, Brocade 6510, and Brocade DCX 8510-4, the
buffer credits are 10 through X; where X is proportional to the available
buffers.
Yes
Configuring a port for long distance
When you configure a long-distance ISL, ensure that the ports on both sides of the ISL have the
same configuration in order to avoid fabric segmentation.
To configure a port for long distance, perform the following steps.
1. Open the Switch Administration window as described in “Opening the Switch Administration
window” on page 33.
2. Click Show Advanced Mode.
3. Select the Extended Fabric tab.
4. This step is switch-specific:
For the Brocade 8510-8, 8510-4, DCX and DCX-4S platforms, click the slot subtab that
corresponds to the correct slot for the logical switch.
For the Brocade 300, 5100, 5300, 6510, 7800 Extension, and the Encryption Switch, proceed
directly to the next step.
5. Select a distance that corresponds to the port from the Long Distance menu.
Web Tools Adminstrator’s Guide
53-1002152-01
167
14
Configuring a port for long distance
Depending on the distance selected, this might require a license. For information about the
various distances, refer to Table 15.
If you select a long-distance setting of LD or LS, you must also enter a value in the Desired
Distance column for that port number:
a.
Double-click the Desired Distance field for the port, as shown in Figure 32.
b.
Enter a number in the field to indicate the distance in kilometers. The allowed values
depend on the port capability:
•
•
•
•
•
If the port capability is 8 GB, type a number between 10 and 63 inclusive.
If the port capability is 4 GB, type a number between 10 and 125, inclusive.
If the port capability is 2 GB, type a number between 10 and 250, inclusive.
If the port capability is 1 GB, type a number between 10 and 500, inclusive.
For the Brocade 6510, Brocade DCX 8510-8 and Brocade DCX 8510-4, the buffer
credits are 10 through X; where X is proportional to the available buffers.
This value is the upper limit for calculating buffer availability for other ports in the same
port group. If the actual distance is more than the desired distance, the port operates in
buffer-limited mode.
c.
Press Enter or click another port entry for the value to be accepted.
6. Click Apply.
The warning message, “DLS should be disabled while enabling Long distance link with Credit
Recovery” displays.
7.
168
Click Yes to apply the changes, or click No to close the confirmation message window.
Web Tools Adminstrator’s Guide
53-1002152-01
Chapter
15
Routing Traffic
In this chapter
• Routing overview . . . . . . . . . . . . . . . . . . . . . . . . . . . . . . . . . . . . . . . . . . . . . .
• Viewing fabric shortest path first routing. . . . . . . . . . . . . . . . . . . . . . . . . . .
• Configuring dynamic load sharing . . . . . . . . . . . . . . . . . . . . . . . . . . . . . . . .
• Specifying frame order delivery . . . . . . . . . . . . . . . . . . . . . . . . . . . . . . . . . .
• Configuring the link cost for a port. . . . . . . . . . . . . . . . . . . . . . . . . . . . . . . .
169
170
170
172
172
Routing overview
NOTE
To perform routing operations and Dynamic Load Sharing (DLS) configurations, the EGM license
must be installed on the switch; otherwise, access to these features is denied and an error message
displays.
For Fabric OS v7.0.0, the supported routing policies are:
• Port-based routing — Port-based routing assigns a “static route,” in which the path chosen for
traffic never changes.
• Exchanged-based routing — Exchange-based routing policy is the default. Exchange-based
routing policy always employs “dynamic path selection,” in which the software defines a path
based on current traffic conditions.
Refer to the Fabric OS Administrator’s Guide for more information.
To optimize port-based routing, the DLS can be enabled to balance the load across the available
output ports within a domain. Exchange-based routing requires the use of DLS; when this policy is
in effect, you cannot disable the DLS feature.
Web Tools Adminstrator’s Guide
53-1002152-01
169
15
Viewing fabric shortest path first routing
Use the Routing tab of the Switch Administration window to view and modify routing information.
Figure 33 on page 170 displays the Routing tab.
FIGURE 33
Routing tab
Viewing fabric shortest path first routing
The Routing tab of the Switch Administration window displays information about routing paths.
To view the fabric shortest path first routing, perform the following steps.
1. Open the Switch Administration window as described in “Opening the Switch Administration
window” on page 33.
2. Select the Routing tab.
3. This step is switch-type specific:
• For the Brocade DCX 8510-8, DCX 8510-4, DCX or DCX-4S enterprise-class platforms, click a
slot number under the FSPF Route category in the navigation tree.
• For the Brocade 300, 5100, 5300, 6510, 7800 Extension switches, VA-40FC, and the
Encryption Switch, click the FSPF Route category in the navigation tree.
Configuring dynamic load sharing
The exchange-based routing policy depends on the Fabric OS dynamic load sharing feature (DLS)
for dynamic routing path selection. When this policy is in force, DLS is always enabled and cannot
be disabled.
170
Web Tools Adminstrator’s Guide
53-1002152-01
Configuring dynamic load sharing
15
When the port-based policy is in force, you can enable DLS to optimize routing. When DLS is
enabled, it shares traffic among multiple equivalent paths between switches. DLS recomputes load
sharing either when a switch boots up or each time an E_Port or FX_Port goes online or offline.
Enabling this feature allows a path to be discovered automatically by the FSPF path-selection
protocol.
For more information regarding DLS, refer to the dlsset command in the Fabric OS Command
Reference.
To configure dynamic load sharing, perform the following steps.
1. Open the Switch Administration window as described in “Opening the Switch Administration
window” on page 33.
2. Select the Routing tab.
3. Select On in the Dynamic Load Sharing (DLS) area to enable dynamic load sharing or select Off
to disable dynamic load sharing.
When the exchange-based routing policy is in effect, the DLS radio buttons display on the
Routing tab
4. Click Apply.
The warning message, “Credit Recovery for Long distance links should be turned off using CLI
while enabling DLS” displays.
5. Click OK.
Lossless dynamic load sharing
Lossless dynamic load sharing (DLS) is supported in following platforms:
•
•
•
•
•
•
•
•
•
•
Brocade FC16-32
Brocade FC16-48
Brocade DCX with 8G blades
Brocade DCX-4S with 8G blades
Brocade 300
Brocade 5100
Brocade 5300
Brocade 6510
Brocade 7800 on FC ports.
Brocade FX8-24 on FC ports.
You can enable this loss less feature from WT. If you try to enable loss less when DLS is OFF, an
error message displays.
To enable or disable loss less DLS, perform the following steps.
1. Open the Switch Administration window as described in “Opening the Switch Administration
window” on page 33.
2. Select the Routing tab.
3. Select On in the Loss Less (DLS) area to enable the mode, or select Off to disable dynamic load
sharing.
Web Tools Adminstrator’s Guide
53-1002152-01
171
15
Specifying frame order delivery
When the exchange-based routing policy is in effect, the Loss Less DLS radio buttons display
on the Routing tab
4. Click Apply, and then click OK.
Specifying frame order delivery
In a stable fabric, frames are always delivered in order, even when the traffic between switches is
shared among multiple paths. However, when topology changes occur in the fabric (for example, if
a link goes down), traffic is rerouted around the failure, and some frames could be delivered out of
order.
By default, frame delivery is out-of-order across topology changes. However, if the fabric contains
destination devices that do not support out-of-order delivery, you can force in-order frame delivery
across topology changes.
Enabling in-order delivery (IOD) guarantees that frames are either delivered in order or dropped.
For more information regarding IOD, refer to the Fabric OS Administrator’s Guide.
NOTE
Enabling in-order delivery can cause a delay in the establishment of a new path when a topology
change occurs, and therefore should be used with care.
To specify frame order delivery, perform the following steps.
1. Open the Switch Administration window as described in “Opening the Switch Administration
window” on page 33.
2. Select the Routing tab.
3. Click On in the In-Order Delivery (IOD) area to force in-order frame delivery across topology
changes or click Off to restore out-of-order frame delivery across topology changes.
4. Click Apply.
Configuring the link cost for a port
This section describes how to set the cost of an interswitch link (ISL). The cost of a link is a
dimensionless positive number. The fabric shortest path first (FSPF) protocol compares the cost of
various paths between a source switch and a destination switch by adding the costs of all the ISLs
along each path. FSPF defines the path with minimum cost. If multiple paths exist with the same
minimum cost, FSPF employs load sharing over these paths.
Every ISL has a default cost that is inversely proportional to its bandwidth.
Use this procedure to set a non-default, “static” cost for any port.
1. Open the Switch Administration window as described in “Opening the Switch Administration
window” on page 33.
2. Select the Routing tab.
172
Web Tools Adminstrator’s Guide
53-1002152-01
Configuring the link cost for a port
15
3. This step is switch-specific:
-
For the Brocade DCX and DCX-4S enterprise-class platforms, click the slot number of the
logical switch under Link Cost in the navigation tree.
-
For Brocade 300, 5100, 5300, and the Encryption Switch, click Link Cost in the navigation
tree.
4. Double-click in the row in the Cost column that corresponds to the appropriate port.
5. Enter the link cost. Valid values for link cost are from 1 through 65534. Setting the value to 0
sets the link cost to the default value for that port.
6. Click Apply.
Web Tools Adminstrator’s Guide
53-1002152-01
173
15
174
Configuring the link cost for a port
Web Tools Adminstrator’s Guide
53-1002152-01
Chapter
16
Configuring Standard Security Features
In this chapter
• User-defined accounts . . . . . . . . . . . . . . . . . . . . . . . . . . . . . . . . . . . . . . . . .
• User-defined roles . . . . . . . . . . . . . . . . . . . . . . . . . . . . . . . . . . . . . . . . . . . . .
• Access control list policy configuration . . . . . . . . . . . . . . . . . . . . . . . . . . . .
• Fabric-Wide Consistency Policy configuration . . . . . . . . . . . . . . . . . . . . . . .
• Authentication policy configuration . . . . . . . . . . . . . . . . . . . . . . . . . . . . . . .
• SNMP configuration . . . . . . . . . . . . . . . . . . . . . . . . . . . . . . . . . . . . . . . . . . .
• RADIUS management . . . . . . . . . . . . . . . . . . . . . . . . . . . . . . . . . . . . . . . . . .
• Active Directory service management . . . . . . . . . . . . . . . . . . . . . . . . . . . . .
• IPsec concepts. . . . . . . . . . . . . . . . . . . . . . . . . . . . . . . . . . . . . . . . . . . . . . . .
• IPsec over FCIP . . . . . . . . . . . . . . . . . . . . . . . . . . . . . . . . . . . . . . . . . . . . . . .
• IPsec over management ports . . . . . . . . . . . . . . . . . . . . . . . . . . . . . . . . . . .
• Establishing authentication policies for HBAs . . . . . . . . . . . . . . . . . . . . . . .
175
183
186
190
191
194
196
199
200
205
207
213
User-defined accounts
In addition to the default accounts—root, factory, admin, and user—Fabric OS v7.0.0 supports up to
256 user-defined accounts in each logical switch (domain). These accounts expand your ability to
track account access and audit administrative activities.
When the Virtual Fabrics capability is enabled, each user-defined account is associated with the
following:
• Virtual Fabric ID—Specifies the accessible Virtual Fabrics for a user account.
• Home Virtual Fabric—Specifies the default Virtual Fabric for a user account.
• Role—Determines functional access levels within the Virtual Fabric.
When the Admin Domain capability is enabled, each user-defined account is associated with the
following:
• Admin Domain list—Specifies the accessible Admin Domains for a user account.
• Home Admin Domain—Specifies the default Admin Domain for a user account. The home
Admin Domain must be a member of the user’s Admin Domain list.
• Role—Determines functional access levels within the bounds of the user’s current Admin
Domain.
NOTE
Virtual Fabrics and Admin Domains are mutually exclusive.
Web Tools Adminstrator’s Guide
53-1002152-01
175
16
User-defined accounts
Access rights for any user session are determined by the user’s role-based access rights. Refer to
Chapter 1, “Introducing Web Tools” for additional information about Role-Based Access Control
(RBAC).
The User tab of the Switch Administration window (Figure 34 on page 177) displays account
information. You can create and manage accounts depending on your role. The roles and
permissions are listed in Table 16.
TABLE 16
User role and permissions
Role
Permissions
admin
Create and manage all predefined and user-defined accounts
operator
Change your own password and cannot create, modify, or view predefined or
user-defined accounts
securityadmin
Create and manage all security roles.
switchadmin
Change your own password and cannot create, modify, or view predefined or
user-defined accounts
zoneadmin
Change your own password and cannot create, modify, or view predefined or
user-defined accounts
fabricadmin
Change your own password and cannot create, modify, or view predefined or
user-defined accounts
basicswitchadmin
Change your own password and cannot create, modify, or view predefined or
user-defined accounts
user
Change your own password and cannot create, modify, or view predefined or
user-defined accounts
Virtual Fabrics considerations
If no home logical fabric ID is specified for a user, the system provides a default home ID. The
default home ID is 128.
Admin Domain considerations
For legacy users with no Admin Domain specified, the user has access to AD 0 through 255
(physical fabricadmin) if their current role is Admin. Otherwise, the user has access to AD0 only.
If some Admin Domains were defined for the user and all of them are inactive, the user is not
allowed to log in to any switch in the fabric.
If no Home Domain is specified for a user, the system provides a default home domain. The default
home domain for predefined account is AD0. User-defined accounts, the default home domain is
the Admin Domain in the user’s Admin Domain list with the lowest ID.
176
Web Tools Adminstrator’s Guide
53-1002152-01
User-defined accounts
16
NOTE
The User tab displays and changes information in the switch database. If you have RADIUS
configured, note that this tab displays the logged-in RADIUS account information but does not allow
the user to modify the RADIUS host server database.
FIGURE 34
User tab
Viewing user account information
To view user account information, perform the following steps.
1. Open the Switch Administration window as described in “Opening the Switch Administration
window” on page 33.
2. Select the User tab.
A list of the default and user-defined accounts displays. If you are logged in using the
switchadmin role, only your account information displays.
Creating user-defined accounts
To create user-defined accounts, perform the following steps.
1. Open the Switch Administration window as described in “Opening the Switch Administration
window” on page 33.
2. Select the User tab.
3. Click Add.
Web Tools Adminstrator’s Guide
53-1002152-01
177
16
User-defined accounts
The Add User Account dialog box displays. For switches that support Virtual Fabrics, refer to
Figure 35. For switches that support Administrative Domains (AD), refer to Figure 36.
178
FIGURE 35
Add User Account dialog box (VF)
FIGURE 36
Add User Account dialog box (AD)
Web Tools Adminstrator’s Guide
53-1002152-01
16
User-defined accounts
4. Enter the user name.
The user name must begin with an alphabetic character. The name can be up to 40 characters
long. It is case-sensitive and can contain alphabetic and numeric characters, the dot (.) and
the underscore (_). It must be different from all other account names on the logical switch.
5. Select a role from the drop-down menu.
For VF-enabled switches, the selection is done per logical fabric ID. (Refer to “Role-Based
Access Control” on page 13 for information about these roles.)
6. Optional: Enter a description of the account.
7.
Click Enabled or Disabled to enable or disable the account.
8. Enter the password for the account.
The password is not displayed when you enter it on the command line. Passwords can be from
8 through 40 characters long. They must begin with an alphabetic or numeric character. They
can include alphanumeric characters, the dot (.), and the underscore
(_). They are case-sensitive.
Passwords must also meet any additional password rules that were set up. (Refer to the
procedure “Setting the rules for passwords” on page 182 for more information.)
9. Retype the password in the Confirm Password field for confirmation.
10. Check the available Virtual Fabrics or Admin Domains that you can access.
For Virtual Fabrics, all logical fabrics IDs (1-128) are displayed, even if they have not all been
created. Only Admin Domains that were created and are accessible to you display.
If all the Admin Domains in the list are inactive, then you cannot log in to the switch.
The All option does not mean all of the listed Admin Domains; it means all Admin Domains
from AD0 through AD255, regardless of whether they were already created.
The All button is disabled unless the following conditions are met:
• The selected role for the target user must be admin or securityadmin.
• You must be a physical fabric administrator.
Selecting All makes the target user account a physical fabric administrator.
11. Select a home logical fabric ID if Virtual Fabrics are enabled, or select a home domain for the
user from the Home AD menu if Admin Domains are enabled.
The default home logical fabric ID is 128.
NOTE
If AD0 is deselected in the user’s Admin Domain list and no other Admin Domains are selected,
the next available Admin Domain becomes the user’s default home Admin Domain.
12. For Virtual Fabrics environments, select a Chassis Role.
The chassis role determines the RBAC role and permissions of the user for performing all
chassis-level operations in all logical fabrics.
13. Click OK.
14. On the User tab, click Apply to apply your changes.
Web Tools Adminstrator’s Guide
53-1002152-01
179
16
User-defined accounts
Deleting user-defined accounts
To delete user-defined accounts, perform the following steps.
1. Open the Switch Administration window as described in “Opening the Switch Administration
window” on page 33.
2. Select the User tab.
3. Select the account to remove and click Remove.
4. Click Apply to save your changes.
You cannot delete the default accounts. An account cannot delete itself. All active command line
interface (CLI) sessions for the deleted account are logged out.
Changing user account parameters
You cannot change the user name of the account using this procedure. To change the user name,
you must delete the account and create a new account.
Users can select their own accounts in the user account table and change the password. All other
buttons are unavailable.
To change the user account parameters, perform the following steps.
1. Open the Switch Administration window as described in “Opening the Switch Administration
window” on page 33.
2. Select the User tab.
3. Select the account to modify.
NOTE
You cannot modify the default root and factory accounts, even if you are logged in as root.
4. Click Modify.
The Modify User Account dialog box displays.
NOTE
If the user account you are modifying does not have a subset of your Admin Domains, a
warning message displays to inform you of the permissions conflict.
5. Select a role from the menu.
You can change the role only on user-level accounts. You cannot change the role on the admin
or root accounts. You cannot change the role of your own account.
6. Enter a new description.
You can change the description only on user-level accounts. You cannot change the
description of the default accounts. You cannot change the description of your own account.
7.
Click Enabled or Disabled to enable or disable the account.
You can enable and disable user- and admin-level accounts, but not your own account. You
cannot enable or disable your own account or the factory account. Only the root account can
disable itself. If you disable an account, all active CLI sessions for that account are logged out.
180
Web Tools Adminstrator’s Guide
53-1002152-01
User-defined accounts
16
8. Check the available Admin Domains that the user can access.
Only Admin Domains that have already been created and are accessible to you display. If all
the Admin Domains in the list are inactive then you cannot log in to the switch.
NOTE
The All option does not mean all of the listed Admin Domains; it means all Admin Domains
from AD0 through AD255, regardless of whether they were already created.
The All button is disabled unless the following conditions are met:
• The selected role for the target user must be admin or securityadmin.
• You must be a physical fabric administrator.
Selecting All makes the target user account a physical fabric administrator.
9. Select a home domain for the user from the Home AD menu.
If AD0 is deselected in the user’s Admin Domain list and no other Admin Domains are selected,
the next available Admin Domain becomes the user’s default home Admin Domain.
10. Click OK and click Apply to apply your changes.
Maintaining passwords
When you expire a password, the next time that user logs in, Web Tools requires the user to provide
a new password.
NOTE
You have to own the switch in order to modify password rules.
A password becomes locked if a user has exceeded the maximum number of failed login attempts.
This number is specified in the Lockout Threshold field. To unlock a locked password, refer to the
unlock procedure in “Unlocking a password” on page 183.
Changing the password of an account
If you are logged in as admin, you can change the password of your own account, peer admin
accounts, switchadmin accounts, and user accounts. You can also change the root or factory
account passwords.
If you are changing the password of an admin account, you must also provide the current
password. You do not need to provide the current password if you are changing the password of a
lower-level user account.
Passwords can be from 8 through 40 characters long. They must begin with an alphabetic or
numeric character. They can include alphanumeric characters, the dot (.), and the underscore
(_). They are case-sensitive.
Passwords must also meet any additional password rules that were set up. (Refer to “Setting the
rules for passwords” on page 182 for more information.)
To change the password of an account, perform the following steps.
1. Open the Switch Administration window as described in “Opening the Switch Administration
window” on page 33.
2. Select the User tab.
Web Tools Adminstrator’s Guide
53-1002152-01
181
16
User-defined accounts
3. Select the account to modify.
If you are logged in as a switchadmin, you can only change the password of your own account.
4. Click Change Password.
The Set User Account Password dialog box displays.
5. Enter the current password of the account.
This step is required only if you are changing the password of your own or a peer admin
account.
6. Enter the new password of the account.
The new password must have at least one character different from the old password.
7.
Retype the new password in the Confirm Password field.
8. Click OK.
9. Click Apply to save your changes.
Setting the rules for passwords
To set rules for passwords, perform the following steps.
1. Open the Switch Administration window as described in “Opening the Switch Administration
window” on page 33.
2. Select the User tab.
3. Click Set Password Rule.
The Configure Password Rule dialog box displays.
4. Fill out the dialog box for the password rules you want to enforce.
The available options are:
•
•
•
•
•
•
•
•
Minimum number of days (0–999) before you can change the password again
Number of days (0–999) before a password expires
Number of password changes before you can reuse a password
Minimum password length (8–40 characters)
Minimum number of uppercase and lowercase characters required
Minimum number of digits and punctuation characters required
Number of characters that can be repeated in the password
Number of failed login attempts (0–999) before the password is locked from further
change attempts, and the amount of time the password is locked (0–99999 minutes)
• Number of days to warn user before password expiration (0–999)
5. Select whether to enable or disable the lockout administration features.
If you select to disable the lockout administration, the user is never locked out of the system.
6. Click OK to close the dialog box.
7.
182
Click Apply to save your changes.
Web Tools Adminstrator’s Guide
53-1002152-01
User-defined roles
16
Setting a password as expired
To set a password as expired, perform the following steps.
1. Open the Switch Administration window as described in “Opening the Switch Administration
window” on page 33.
2. Select the User tab.
3. Select the account.
4. Click Expire Password.
If the button is unavailable, the password is already expired.
5. Click Apply to save your changes.
Unlocking a password
To unlock a password, perform the following steps.
1. Open the Switch Administration window as described in “Opening the Switch Administration
window” on page 33.
2. Select the User tab.
3. Select the account.
4. Click Unlock Password.
If the button is unavailable, the password is already unlocked or was not locked out.
5. Click Apply to save your changes.
Displaying roles and assigned logical fabrics
You can display user role assignments for logical fabrics.
1. Open the Switch Administration window as described in “Opening the Switch Administration
window” on page 33.
2. Select the User tab.
3. Select an account.
4. Select Show Role and VF. The role mapping for that user displays.
User-defined roles
User-defined role provides the ability to create roles dynamically on the switch. The default roles
like Root, Factory, Admin, User, SwitchAdmin, ZoneAdmin, FabricAdmin, BasicSwitchAdmin,
SecurityAdmin and Operator are defined by giving different permissions for different features,or by
restricting access to various features. The default roles cannot be edited for assigning different
privileges. However, user-defined roles provide the ability to create new roles and define
permissions for the RBAC classes.
Web Tools Adminstrator’s Guide
53-1002152-01
183
16
User-defined roles
Guidelines and restrictions
Follow these guidelines and restrictions when creating and configuring user-defined roles:
• In order for the user-defined role to be able to edit the Port Admin and FCR configuration, you
must assign the RBAC_SwitchPortManagement and RBAC_SwitchPortConfiguration RBAC
classes to the role.
• In order for the user-defined role to be able to set the Fabric ID, you must assign the
RBAC_FabricRouting and RBAC_SwitchConfiguration RBAC classes to the role.
• In order for the user-defined role to be able to view reports, you must assign the
RBAC_SwitchManagement,RBAC_SwitchConfiguration and RBAC_FRUManagement RBAC
classes to the role.
For some functionality and operations, which needs chassis level access, the user-defined role
privileges must be assigned at both the chassis level and the Logical Fabric level to have the
corresponding tab enabled:
• In order for the user-defined role to have access to the Configure tab, you must assign either
the RBAC_ConfigManagement, RBAC_SwitchConfiguration, or RBAC_Configure classes to the
user-defined role, which is applied at the Logical Fabric level. Any of these three classes are
sufficient.
• In order for the user-defined role to have access to the Security Policy tab, you must assign
either the RBAC_Authentication, RBAC_FabricDistribution, RBAC_Security, RBAC_IPSec,
RBAC_AG, or RBAC_IPfilter classes to the user-defined role, which is applied at the Logical
Fabric level. Any of these six classes is sufficient.
• In order for the user-defined role to have access to the Switch tab, you must assign either the
RBAC_SwitchConfiguration, RBAC_SwitchManagement, RBAC_FRUManagement, RBAC_AG, or
RBAC_Configure classes to the user-defined role, which is applied at the Logical Fabric level.
Any of these five classes is sufficient.
Creating a user-defined role
To add a user-defined role, perform the following steps.
1. Open the Switch Administration window as described in “Opening the Switch Administration
window” on page 33.
2. Select the User tab.
3. Select the Role sub-tab.
4. Click the Add button.
184
Web Tools Adminstrator’s Guide
53-1002152-01
User-defined roles
16
The Switch Admin:Add User Defined Role dialog displays.
FIGURE 37
Switch Admin:Add User Defined Role dialog
5. Enter a role name in the Name field.
6. Enter a description of the role in the Description field.
7.
To grant the role a read/write privilege, select the privilege and click the right-arrow next to the
Read & Write Privileges section.
You can select multiple privileges.
8. To grant the role a read privilege, select the privilege and click the right-arrow next to the Read
Privileges section.
You can select multiple privileges.
9. To delete a privilege, select it and click left-arrow.
10. Click OK to save your changes.
Editing a user-defined role
To edit a user-defined role, perform the following steps.
1. Open the Switch Administration window as described in “Opening the Switch Administration
window” on page 33.
2. Select the User tab.
3. Select the Role sub-tab.
4. Select an existing user-defined role.
Web Tools Adminstrator’s Guide
53-1002152-01
185
16
Access control list policy configuration
5. Click the Edit button.
The Switch Admin:Edit User Defined Role dialog displays.
FIGURE 38
Switch Admin:Add User Defined Role dialog
6. To grant the role a read/write privilege, select the privilege and click the right-arrow next to the
Read & Write Privileges section.
You can select multiple privileges.
7.
To grant the role a read privilege, select the privilege and click the right-arrow next to the Read
Privileges section.
You can select multiple privileges.
8. To delete a privilege, select it and click left-arrow.
9. Click OK to save your changes.
Access control list policy configuration
Support for the Access Control List (ACL) policies is currently defined in the Switch Connection
Control (SCC) and Device Connection Control (DCC) policies. SCC and DCC policy configuration in
base Fabric OS is performed on a switch-local basis.
Fabric Configuration Server (FCS) Policy can be created only once. While creating the FCS policy,
the local switch WWN is automatically included in the list. In the FCS list, the switch in the first
position becomes the primary FCS switch. If the first switch in the FCS list is not reachable, the next
switch becomes the primary switch. You can also explicitly specify the primary FCS switch.
If there is no SCC, DCC, or FCS policy, the defined and active list is blank.
186
Web Tools Adminstrator’s Guide
53-1002152-01
Access control list policy configuration
16
Virtual Fabrics considerations
ACL policies can be implemented at the logical switch/logical fabric level.
Admin Domain considerations
ACL management can be done on AD255 and in AD0 only if there are no other user-defined Admin
Domains. Both AD0 (when no other user-defined Admin Domains exist) and AD255 provide an
unfiltered view of the fabric. If there are user defined Admin Domains, then ACL management can
be done on AD255 only.
Creating an SCC, DCC, or FCS policy
You can create the FCS policy only once.
To create an SCC, DCC, or FCS policy, perform the following steps.
1. Open the Switch Administration window as described in “Opening the Switch Administration
window” on page 33.
2. Select the Security Policies tab.
3. Select the ACL subtab.
4. Select a policy by clicking on the appropriate tab (SCC, DCC, or FCS).
5. Click Edit.
This launches the ACL Policy Configuration wizard.
6. Select the policy type you want to edit.
7.
Click Next and click Create.
8. SCC Option: Add switches to an SCC policy by selecting one or more switches and clicking Add
or Add All.
9. SCC Option: To add an offline switch, click Add other Switch and enter the WWN.
10. DCC Option: Select the ports to add to a DCC policy.
When you launch the DCC Policy Configuration wizard, only the launched switch and its ports
are listed in the tree. All the devices in the fabric are also listed in the tree.
11. In the ADD Domain, Port Index field, enter the value in the Domain, Index format and click Add.
12. Click OK to confirm the changes to the switch.
13. Activate the policy in order to implement it. Refer to “Activating all SCC, DCC, or FCS policies”
on page 188 for instructions.
Editing an SCC, DCC, or FCS policy
To edit an SCC, DCC, or FCS policy, perform the following steps.
1. Open the Switch Administration window as described in “Opening the Switch Administration
window” on page 33.
2. Make sure the Show Advanced Mode option is selected.
Web Tools Adminstrator’s Guide
53-1002152-01
187
16
Access control list policy configuration
3. Select the Security Policies tab.
4. Select a policy by clicking on the appropriate tab.
5. Click Edit.
This launches the ACL Policy Configuration wizard.
6. Select the policy type you want to edit.
7.
Click Next and click Modify.
8. Select a switch or highlight multiple switches to add to the policy by clicking Add or Add All.
9. Select a switch or highlight multiple switches to remove a policy by clicking Remove.
10. Click Next and click Finish to confirm the changes to the switch.
Deleting all SCC, DCC, or FCS policies
You cannot delete the FCS policy from non-primary or non-FCS switches.
The Delete All button is enabled only when there is at least one policy activated.
To delete all SCC, DCC, or FCS policies, perform the following steps.
1. Open the Switch Administration window as described in “Opening the Switch Administration
window” on page 33.
2. Select the Security Policies tab.
3. Click Delete All.
A warning message displays.
4. Click OK to delete all the policies.
Activating all SCC, DCC, or FCS policies
After a policy is created or modified, you can distribute it to the remaining fabric.
To delete a policy, you must activate a new or empty policy.
To activate all SCC, DCC, or FCS policies, perform the following steps.
1. Open the Switch Administration window as described in “Opening the Switch Administration
window” on page 33.
2. Select the Security Policies tab.
3. Click Activate All to activate all the policies.
NOTE
Activating the policy moves it into the Activate Policy Set window.
Distributing an SCC, DCC, or FCS policy
Perform this procedure to distribute an SCC, DCC, or FCS policy.
188
Web Tools Adminstrator’s Guide
53-1002152-01
Access control list policy configuration
16
NOTE
SCC and DCC policy can be distributed only for a primary switch.
To distribute an SCC, DCC, or FCS policy, perform the following steps.
1. Open the Switch Administration window as described in “Opening the Switch Administration
window” on page 33.
2. Select the Security Policies tab.
3. Select the appropriate tab (SCC, DCC, or FCS).
4. Click Distribute Policy.
5. Select the switches that will receive the policy.
6. Select OK.
If the policy distribution fails, an error dialog box displays.
Moving an FCS policy switch position
You can move the position of a primary switch in the FCS policy list.
To move an FCS policy switch position, perform the following steps.
1. Open the Switch Administration window as described in “Opening the Switch Administration
window” on page 33.
2. Click Show Advanced Mode.
3. Select the Security Policies tab.
4. Select the FCS tab.
5. Click Move FCS Switch.
6. Select the appropriate from and to positions.
7.
Click Apply.
8. After you move all the member switches, click Apply and Close.
Configuring Advanced Device Security policy
The ADS policy allows you to restrict devices that are logged into the fabric using a particular
F_Port. When this policy is enabled only authorized devices are allowed to login into the fabric. This
can be achieved by allowing all the devices, blocking all the devices, or giving access to selected
devices. ADS is supported only in Access Gateway mode.
The restrictions to device login are:
• All Access—Allows all the devices to login into the fabric through that F_Port.
• No Access—Blocks all the devices trying to login into the fabric through that F_Port.
• WWNs—Allows only selected WWNs to login into the fabric through that F_Port. NPIV capable
device port WWN’s can also be added to the allowed list of device port WWN’s for the
particular F_Port.
Web Tools Adminstrator’s Guide
53-1002152-01
189
16
Fabric-Wide Consistency Policy configuration
When the ADS policy is enabled first time, all the F_Ports are set to All Access and all the devices
are allowed to login into fabric. This configuration persists for subsequent logins from all devices.
Existing devices that are already logged into the fabric are not affected.
When the ADS policy is disabled, all the allowed lists are cleared and all the devices are allowed to
login into the fabric.
To configure ADS policy, perform the following steps.
1. Open the Switch Administration window as described in “Opening the Switch Administration
window” on page 33.
2. Click Show Advanced Mode.
3. Select the Security Policies tab to configure the ADS policy in Access Gateway mode.
4. Select the ADS option.
5. Select the Enable ADS Policy option.
The Configure Advanced Device Security Port WWN table displays.
6. Optional: Select an F_Port from the table and click the Edit button.
The ADS Port WWN Configuration dialog displays. You can configure device port WWN’s that
can be allowed to login to a particular F_Port by adding them to the Selected WWN list.
7.
Select either All Access, or a list of selected WWNs.
8. Optional: You can add the detached port WWN to the selected WWN’s list by adding the WWN
in the detached WWN text field and clicking Add.
9. Optional: For a selected F Port, if you select the Show device WWN connected to this port
check box of the ADS Port WWN Configuration dialog, only connected devices are listed in
Available WWN’s list. When you deselects the check box, all the connected device port WWN’s
and detached WWN’s added to the AG are listed in the Available WWN’s list.
Fabric-Wide Consistency Policy configuration
Fabric-Wide Consistency Policy (FWCP) configures the Fabric Wide Consistency behavior of
distributable ACL policies. The policy ensures that the switches in the fabric enforce the same
policies. Set a strict or tolerant fabric-wide consistency policy for each ACL policy type (SCC, DCC,
FCS) to automatically distribute that database when a policy change is activated. If a fabric-wide
consistency policy is not set, then the policies are managed on a per switch basis.
To set the fabric-wide consistency policy for an SCC, DCC or FCS policy, perform the following steps.
1. Open the Switch Administration window as described in “Opening the Switch Administration
window” on page 33.
2. Select the Security Policies tab.
3. Under Security Policies, click FWCP.
4. Select one of the following consistency behavior for the required policy type (SCC, DCC, FCS).
• Absent
• Tolerant
• Strict
190
Web Tools Adminstrator’s Guide
53-1002152-01
16
Authentication policy configuration
NOTE
You can change the consistency behaviors of SCC, DCC, or FCS policy only for a primary switch.
5. Click Apply.
6. Click Yes to accept the changes.
NOTE
If the switch is not a primary switch, an error message dialog box displays.
7.
Click No to discard the changes and click Refresh in the FWCP Configuration window to
manually refresh the window.
8. Click Close.
Authentication policy configuration
You can configure an authentication protocol policy for E_Port and F_Port authentication, and then
distribute the authentication policy to other switches in the fabric. You can also set shared secret
keys.
Configuring authentication policies for E_Ports
To configure authentication policies for E_Ports, perform the following steps.
1. Open the Switch Administration window as described in “Opening the Switch Administration
window” on page 33.
2. Select the Security Policies tab.
3. Select Authentication on the Security Policies menu.
4. In the Authentication Type field, select FCAP or DHCHAP.
5. Select the switch authentication policy mode:
:
On
Strict authentication is enforced on all E_Ports.
Active
The switches can be connected to a switch with any
type of policy.
Passive
The switch does not initiate authentication but
participates if the connecting switch initiates
authentication.
Hash
A hash function (like SHA or MD5) is used for
authentication.
Off
The switch does not support authentication. Any
authentication negotiation is rejected.
6. Select a DH-Group type.
7.
Optional: Set the device authentication policy mode to either off or passive and click Apply.
Web Tools Adminstrator’s Guide
53-1002152-01
191
16
Authentication policy configuration
Configuring authentication policies for F_Ports
To configure authentication policies for F_Ports, perform the following steps.
1. Open the Switch Administration window and click Show Advanced Mode, if not selected.
2. Select the Security Policies tab.
3. Select Authentication on the Security Policies menu.
4. In the Authentication Type field, select DHCHAP.
NOTE
You must select DHCHAP when you are configuring authentication for an F_Port.
5. Set the switch authentication mode to either off or passive and click Apply.
Distributing authentication policies
Authentication policies are distributed only if all the selected switches accept the distribution. Only
the policy mode is distributed to the selected switches. The switch initiating the distribution must
accept distribution.
NOTE
You cannot distribute authentication policies in AD0 unless it is the only Admin Domain.
To distribute authentication policies, perform the following steps.
1. Open the Switch Administration window as described in “Opening the Switch Administration
window” on page 33.
2. Select the Security Policies tab.
3. Select Authentication on the Security Policies menu.
4. Click Distribute Policy.
5. Select the switches or click the button to distribute to all.
6. Click OK.
Re-authenticating policies
A user who has changed authentication policy parameters or a shared secret key pair can
re-initialize the authentication.
To re-authenticate policies, perform the following steps.
1. Click a port in the Switch View to open the Port Administration window.
The Port Administration window displays with the port selected.
2. Click Re-Authenticate (active only for F_Ports and E_Ports).
3. Close the window.
192
Web Tools Adminstrator’s Guide
53-1002152-01
16
Authentication policy configuration
Setting a shared secret key pair
DH-CHAP requires a shared secret key pair between two entities to authenticate with each other. A
key pair consists of a local secret and a peer secret. The local secret identifies the local switch. The
peer secret identifies the entity to which the local switch may authenticate.
To set a shared secret key pair, perform the following steps.
1. Open the Switch Administration window as described in “Opening the Switch Administration
window” on page 33.
2. Select the Security Policies tab.
3. Select Authentication on the Security Policies menu.
4. Select the Shared Secret Keys subtab.
5. Click Add.
The Add Shared Secret Keys dialog box displays.
6. Enter the Switch WWN, name, or domain ID, or use the Browse button to select a switch.
7.
In the Peer Secret and Confirm Peer Secret fields, enter the peer secret value.
8. In the Local Secret and Confirm Local Secret fields, enter the local secret value.
9. Click Add.
10. When you are finished adding secret key pairs for switches, click Apply.
Modifying a shared secret key pair
You can edit and modify the secret key pairs by switch.
To modify a shared secret pair, perform the following steps.
1. Open the Switch Administration window as described in “Opening the Switch Administration
window” on page 33.
2. Select the Security Policies tab.
3. Select Authentication on the Security Policies menu.
4. Select the Shared Secret Keys subtab.
5. Select a secret key pair and click Edit.
6. Make the appropriate changes and click OK.
Setting the Switch Policy Authentication mode
This setting determines whether or not authentication is required when a switch logs in to a fabric.
To set the Switch Policy Authentication mode, perform the following steps.
1. Open the Switch Administration window as described in “Opening the Switch Administration
window” on page 33.
2. Select the Security Policies tab.
3. Select Authentication on the Security Policies menu.
Web Tools Adminstrator’s Guide
53-1002152-01
193
16
SNMP configuration
4. Use the Switch Policy Authentication Mode option to select the authentication policy.
SNMP configuration
This section describes how to manage the configuration of the SNMP agent in the switch. The
configuration includes SNMPv1 and SNMPv3 configuration, accessControl, and systemGroup
configuration parameters.
Access is read-only if you do not have admin or security admin authority.
For more information, refer to the snmpConfig command in the Fabric OS Command Reference.
Setting SNMP trap levels
To set SNMP trap levels, perform the following steps.
1. Open the Switch Administration window as described in “Opening the Switch Administration
window” on page 33.
2. Select the SNMP tab.
3. Select a trap level for a recipient from the corresponding Trap Level menu in the SNMPv1 and
SNMPv3 sections.
The level you select identifies the minimum event level that prompts a trap.
NOTE
Adding or editing the user name can be done only through the CLI and by selecting a user
name from the User Name menu in the SNMPv3 section.
4. Click Apply.
Changing the systemGroup configuration parameters
To change the systemGroup configuration parameters, perform the following steps.
1. Open the Switch Administration window as described in “Opening the Switch Administration
window” on page 33.
2. Select the SNMP tab.
3. Enter a contact name, description, and location in the SNMP Information section.
4. Optional: Select the Enable Authentication Trap check box to allow authentication traps to be
sent to the reception IP address.
5. Click Apply.
Setting SNMPv1 configuration parameters
To set SNMPv1 configuration parameters, perform the following steps.
1. Open the Switch Administration window as described in “Opening the Switch Administration
window” on page 33.
2. Select the SNMP tab.
194
Web Tools Adminstrator’s Guide
53-1002152-01
SNMP configuration
16
3. Double-click a community string in the SNMPv1 section and enter a new community string.
4. Double-click a recipient IP address in the SNMPv1 section and enter a new IP address.
5. Click Apply.
Setting SNMPv3 configuration parameters
NOTE
The port number is not included.
To set SNMPv3 configuration parameters, perform the following steps.
1. Open the Switch Administration window as described in “Opening the Switch Administration
window” on page 33.
2. Select the SNMP tab.
3. Select a user name from the User Name menu in the SNMPv3 section.
NOTE
The list is scrollable. If you do not see your user name, scroll down using the scroll bar or by
clicking the User Name heading.
4. Double-click a recipient IP address in the SNMPv3 section and enter a new IP address.
5. Select a trap level from the Trap Level menu.
6. Optional: Select the Enable SNMPv3 Informs for all Trap Recipients check box to enable or
disable inform requests for all trap recipients.
7.
Enabling SNMPv3 informs allows you to enter the Engine ID.
The Engine ID is required to authenticate the inform request. If informs request is disabled, the
SNMP manager does not send a response to the sender.
8. Click Apply.
Changing the access control configuration
NOTE
The port number is not included.
To change the access control configuration, perform the following steps.
1. Open the Switch Administration window as described in “Opening the Switch Administration
window” on page 33.
2. Select the SNMP tab.
3. Double-click an access host IP address in the Access Control List section and enter a new host
IP address. You can enter an IP address in either IPv4 or IPv6 format. When you use the IPv6
format, you must include a prefix; for example, fec0::2002/64.
NOTE
The list is scrollable. If you do not see your user name, scroll down using the scroll bar or by
clicking the Access Host heading.
Web Tools Adminstrator’s Guide
53-1002152-01
195
16
RADIUS management
4. Select a permission for the host from the Access Control List menu.
Options are Read Only and Read Write.
5. Click Apply.
RADIUS management
Fabric OS supports RADIUS authentication, authorization, and accounting service (AAA). When
configured for RADIUS, the switch becomes a Network Access Server (NAS) that acts as a RADIUS
client. In this configuration, authentication records are stored in the RADIUS host server database.
Login and logout account name, assigned role, and time accounting records are also stored on the
RADIUS server.
You should set up RADIUS through a secure connection such as SSH.
The following are the three choices in the drop-down menu when RADIUS is selected as the primary
service:
• Switch Database when RADIUS Authentication Fails—When selected, the switch user login
database is checked whenever RADIUS authentication fails.
• Switch Database When RADIUS Times Out—Switch user login database is checked only if the
physical connection to the RADIUS server fails.
• None—Switch user login database is never checked. Only a RADIUS server can be used for
authentication.
If the switch database is selected as primary, there is no secondary option. The RADIUS server
cannot be configured as a backup for the switch user login database.
When the primary AAA service is RADIUS, you have three secondary service choices:
• None
• Switch Database when RADUIS authorization fails
• Switch Database when RADIUS times out
When RADIUS login fails, even though RADIUS server is available, the additional service allows you
the option to use the Switch Database as backup authentication service when the RADIUS server is
not available. Alternatively, you can have no secondary AAA service, which means that only the
primary service is used for authentication.
Use the AAA Service tab of the Switch Administration window to manage RADIUS.
Enabling and disabling RADIUS
At least one RADIUS server must be configured before you can enable RADIUS.
To enable or disable RADIUS, perform the following steps.
1. Open the Switch Administration window as described in “Opening the Switch Administration
window” on page 33.
2. Select the AAA Service tab.
3. To enable RADIUS, select RADIUS from the Primary AAA Service drop-down menu.
4. Select None, Switch Database when RADIUS Login Failed, or Switch Database when RADIUS
Login Timeout from the Secondary AAA Service menu.
196
Web Tools Adminstrator’s Guide
53-1002152-01
16
RADIUS management
NOTE
To disable RADIUS, select Switch Database from the Primary AAA Service menu and select
None from the Secondary AAA Service menu.
5. Click Apply.
Configuring RADIUS
The configuration is chassis-based, so it applies to all logical switches (domains) on the switch and
it is replicated on a standby CP, if one is present. It is saved in a configuration upload, and can be
applied to other switches in a configuration download. You should configure at least two RADIUS
servers so that if one fails, the other server assumes the service.
You can configure RADIUS even if it is disabled. You can configure up to five RADIUS servers. You
must be logged in as admin, switchadmin, or securityadmin to configure RADIUS.
To configure RADIUS, perform the following steps..
1. Open the Switch Administration window as described in “Opening the Switch Administration
window” on page 33.
2. Select the AAA Service tab.
3. Click Add.
The RADIUS Configuration dialog box displays. You can configure up to five RADIUS servers. If
five RADIUS servers are already configured, the Add button is disabled.
4. Enter the RADIUS server name, as a valid IP address (in either IPv4 or IPv6 format) or Dynamic
Name Server (DNS) string.
Each RADIUS server must have a unique IP address or DNS name for the RADIUS server.
5. Enter the port number.
6. Enter the secret string.
7.
Enter the timeout time in minutes.
8. Select either CHAP or PAP as the authentication protocol.
The default value is CHAP, and if you do not change it, CHAP becomes the authentication
protocol.
9. Click OK to return to the AAA Service tab.
10. Click Apply.
Modifying the RADIUS server
To change the parameters of a RADIUS server that is already configured, perform the following
steps.
1. Open the Switch Administration window as described in “Opening the Switch Administration
window” on page 33.
2. Select the AAA Service tab.
3. Select a RADIUS server from the RADIUS Configuration list.
Web Tools Adminstrator’s Guide
53-1002152-01
197
16
RADIUS management
4. Click Modify.
The RADIUS/ADLDAP Configuration dialog box displays.
5. Enter new values for the port number, timeout time (in minutes), and secret string.
6. Select either CHAP or PAP as the authentication protocol.
The default value is CHAP, and if you do not change it, CHAP becomes the authentication
protocol.
7.
Click OK to return to the AAA Service tab.
8. Click Apply.
Modifying the RADIUS server order
The RADIUS servers are contacted in the order they are listed, starting from the top of the list and
moving to the bottom.
To modify the RADIUS server order, perform the following steps.
1. Open the Switch Administration window as described in “Opening the Switch Administration
window” on page 33.
2. Select the AAA Service tab.
3. Select a RADIUS server from the RADIUS Configuration list.
4. Click the up and down arrows to rearrange the order of the RADIUS servers.
5. Click Apply.
Removing a RADIUS server
To remove a RADIUS server, perform the following steps.
1. Open the Switch Administration window as described in “Opening the Switch Administration
window” on page 33.
2. Select the AAA Service tab.
3. Select a RADIUS server from the RADIUS Configuration list.
4. Click Remove.
If there is no RADIUS server configured, the Remove button is disabled. You cannot remove the
only RADIUS server if RADIUS is the primary AAA service.
The RADIUS server is not deleted until you apply the changes from the AAA Services tab.
5. Click Apply in the AAA Services tab.
A confirmation displays, warning you that you are about to remove the selected RADIUS server.
6. Click Yes in the confirmation.
198
Web Tools Adminstrator’s Guide
53-1002152-01
16
Active Directory service management
Active Directory service management
Active Directory is the directory server that holds all the user profiles. Active Directory provides user
authentication and authorization using LDAP as authentication protocol. Active Directory provides
better security while using remote authentication mechanism.
You can add, remove, and modify settings of Active Directory Server.
Enabling Active Directory service
For adding a new Active Directory server, you must provide the server IP address, port number,
secret string, timeout value, and LDAP as the authentication protocol. The server IP address may
be in either IPv4 or IPv6 format. Select Active Directory as the server type; the dialog box displays
LDAP as the only authentication protocol.
To enable Active Directory service, perform the following steps.
1. Open the Switch Administration window as described in “Opening the Switch Administration
window” on page 33.
2. Select the AAA Service tab.
3. To enable Active Directory service, select Active Directory from the Primary AAA Service menu.
4. Select None, Switch Database when Active Directory authentication failed, or Switch Database
when Active Directory timeout from the Secondary AAA Service menu.
NOTE
To disable Active Directory service, select Switch Database from the Primary AAA Service
drop-down menu and select None from the Secondary AAA Service drop-down menu.
5. Click Apply.
Modifying Active Directory service
To change the parameters of a Active Directory service that is already configured, perform the
following steps.
1. Open the Switch Administration window as described in “Opening the Switch Administration
window” on page 33.
2. Select the AAA Service tab.
3. Select a server from the ADLDAP Configuration list.
4. Click Modify.
The RADIUS/ADLDAP Configuration dialog box displays.
5. Enter new values for the port, timeout, and domain.
6. Click OK to return to the AAA Service tab.
7.
Click Apply.
Web Tools Adminstrator’s Guide
53-1002152-01
199
16
IPsec concepts
Removing Active Directory service
To remove a RADIUS server, perform the following steps.
1. Open the Switch Administration window as described in “Opening the Switch Administration
window” on page 33.
2. Select the AAA Service tab.
3. Select a server from the ADLDAP Configuration list.
4. Click Remove.
NOTE
The server is not deleted until you apply the changes from the AAA Services tab.
5. Click Apply in the AAA Services tab.
A confirmation dialog box displays, warning you that you are about to remove the selected
server.
6. Click Yes in the confirmation dialog box.
IPsec concepts
Internet Security Protocol (IPsec) is a set of open standards that provide cryptographic security
services for IP networks. Several protocols are available for providing authentication and secure
transmission of data.
From Web Tools, you can establish IPsec policies for FCIP implementations on 7800 extension
switches with the upgrade license, the 7500 extension switches and FR4-18i blades, and you can
establish IPsec policies for IP interfaces that provide management access to switches and control
processors.
There are several protocols and algorithms that can be applied. Choosing the protocols and
algorithms you want to use may be a matter of adapting to an implementation that is already in
place in your LAN, or you may need to do a significant amount of research and planning. The
supported protocols and algorithms are defined and described in the RFCs listed in Table 17.
TABLE 17
200
Relevant RFCs
RFC number
Title
RFC 4301
Security Architecture for the Internet Protocol
RFC 4302
IP Authentication Header
RFC 4303
IP Encapsulating Security Payload
RFC 4304
Extended Sequence Number (ESN) Addendum
to IPsec Domain of Interpretation (DOI) for
Internet Security Association and Key
Management Protocol (ISAKMP)
RFC 4305
Cryptographic Algorithm Implementation
Requirements for Encapsulating Security
Payload (ESP) and Authentication Header
RFC 4869
Suite B Cryptographic Suites for IPsec
Web Tools Adminstrator’s Guide
53-1002152-01
IPsec concepts
TABLE 17
16
Relevant RFCs (Continued)
RFC number
Title
RFC 4309
Using Advanced Encryption Standard (AES)
CCM Mode with IPsec Encapsulating Security
Payload (ESP)
RFC 4306
Internet Key Exchange Version 2 (IKEv2)
Protocol
RF C4307
Cryptographic Algorithms for Internet Key
Exchange Version 2 (IKEv2)
RFC 3971
Secure Neighbor Discovery
RFC 3972
Cryptographically Generated Addresses
RFC 3041
Privacy Extensions for Stateless Address Auto
configuration in IPv6
Transport mode and tunnel mode
Transport mode adds an authentication header (AH) before the IP header. Only a single pair of
addresses is used (those in the IP header). When transport mode is used, both endpoints
implement IPsec.
Tunnel mode encapsulates an IP datagram in a new datagram, with a new IP header specifying the
addresses of the tunnel end points. IPsec is implemented between tunnel endpoints. IPsec is
transparent to the actual endpoints within the IP header in the original packet.
Figure 39 provides a basic visual comparison of how transport mode and tunnel mode modify an IP
datagram.
FIGURE 39
Transport mode and tunnel mode comparison
IPsec header options
IPsec adds headers to an IP datagram to enable authentication and privacy. There are two options:
• Authentication Header (AH)
• Encapsulating Security Payload (ESP)
Web Tools Adminstrator’s Guide
53-1002152-01
201
16
IPsec concepts
Authentication Header
AH can be used to authenticate a data stream, but does not provide encryption needed for privacy.
The AH contains a message authentication code (MAC). The MAC is created by a hash algorithm
calculation. The MAC is transmitted in an IP datagram. The same hash algorithm is then used by
the receiver to verify the integrity of the packet. AH can be used in either transport mode or tunnel
mode, as shown in Figure 40.
FIGURE 40
AH header in transport mode and tunnel mode
Encapsulating Security Payload
ESP provides authentication, and also provides privacy by encrypting the IP datagram. The use of
an ESP header is similar to the use of the AH header. A hash algorithm is used to calculate an
authentication value, the authentication value is sent in an IP datagram, and the same hash
algorithm is used by the receiver to verify the authentication value. ESP can be used in either
transport mode or tunnel mode, as shown in Figure 41.
FIGURE 41
ESP header in transport mode and tunnel mode
Basic IPsec configurations
There are three basic configurations for IPsec use:
• Endpoint to Endpoint
• Gateway to Gateway
202
Web Tools Adminstrator’s Guide
53-1002152-01
IPsec concepts
16
• Endpoint to Gateway
Endpoint to Endpoint
In an endpoint to endpoint configuration, both endpoints implement IPsec. Transport mode is
commonly used in endpoint to endpoint configurations, and only a single pair of addresses is used.
Typically, this kind of configuration would be used for direct communication between hosts. There
are two drawbacks to consider:
• If network address translation (NAT) is used on the connection, one or both endpoints may be
behind a NAT node. If that is the case, UDP must be used to encapsulate the tunneled packets.
Port numbers in the UDP headers can then be used to identify the endpoint behind the NAT
node.
• Packets cannot be inspected or modified in transit. This means that QoS, traffic shaping, and
firewall applications cannot access the packets, and does not work.
Gateway to Gateway
In a gateway to gateway configuration, IPsec protection is implemented between network nodes.
Tunnel mode is commonly used in a gateway to gateway configuration. A tunnel endpoint
represents a set of IP addresses associated with actual endpoints that use the tunnel. IPsec is
transparent to the actual endpoints.
Endpoint to Gateway
In an endpoint to gateway configuration, a protected endpoint connects through an IPsec protected
tunnel. This can be used as a virtual private network (VPN) for connecting a roaming computer, like
a service laptop, to a protected network.
Internet Key Exchange concepts
Internet Key Exchange (IKE) is used to authenticate the end points of an IP connection, and to
determine security policies for IP traffic over the connection. The initiating node proposes a policy
based on the following:
• An encryption algorithm to protect data.
• A hash algorithm to check the integrity of the authentication data.
• A Pseudo-Random Function (PRF) algorithm that can be used with the hash algorithm for
additional cryptographic strength.
• An authentication method requiring a digital signature, and optionally a certificate exchange.
• A Diffie-Hellman exchange that generates prime numbers used in establishing a shared secret
key.
Web Tools Adminstrator’s Guide
53-1002152-01
203
16
IPsec concepts
Encryption algorithms
An encryption algorithm is used to encrypt messages used in the IKE negotiation. Table 18 lists the
available encryption algorithms. A brief description is provided. If you need further information,
please refer to the RFC.
TABLE 18
Encryption algorithm options
Encryption algorithm
Description
RFC number
3des_cbc
3DES processes each block three times, using
a unique 56-bit key each time.
RFC 2451
null_enc
No encryption is performed.
aes128_cbc
Advanced Encryption Standard (AES) 128 bit
block cipher.
RFC 4869
aes256_cbc
Advanced Encryption Standard (AES) 256 bit
block cipher.
RFC 4869
Hash algorithms
Hash message authentication codes (HMAC) check data integrity through a mathematical
calculation on a message using a hash algorithm combined with a shared, secret key. Table 19 lists
the available encryption algorithms. The sending computer uses the hash function and shared key
to compute a checksum or code for the message, and sends it to the receiving computer. The
receiving computer must perform the same hash function on the received message and shared key
and compare the result. If the hash values are different, it indicates that a third party may have
tampered with the message in transit, and the packet is rejected.
TABLE 19
Hash algorithm options
Hash algorithm
Description
RFC/Publication number
aes_xcbc
Uses a cypher block and extended cypher block
chaining (CBC).
RFC 3566
hmac_md5
The MD5 computation produces a 128-bit
hash.
RFC 1321
hmac_sha1
The SHA1 computation produces a 160-bit
hash.
FIPS Pub 180-1
Pseudo-Random Function algorithm
The Pseudo-Random Function (PRF) algorithm generates output that appears to be random data,
using the HMAC chosen as the hash algorithm as the seed value. PRF is used to strengthen
security.
Public key certificate-based authentication
Industry standard X.500 database servers are available as certificate authority servers to enable
certificate-based authentication of computers.
SA lifetime
The SA lifetime may be defined as the number of bytes transmitted before the SA is rekeyed, or as
a time value in seconds, or both. When both are used, the SA lifetime is determined by the
threshold that is first reached. Whenever an SA lifetime expires, the security association (SA) is
renegotiated and the key is refreshed or regenerated.
204
Web Tools Adminstrator’s Guide
53-1002152-01
IPsec over FCIP
16
For example, if a 200 MB file is transferred with a 100 MB lifetime, at least two keys are generated.
If a communication takes one hour, and you specify a lifetime of 300 seconds (five minutes), more
than 12 keys may be generated to complete the communication.
The SA lifetime limits the length of time a key is used before it is replaced by a new key, thus
limiting the amount of time a given key is available to a potential attacker. Part of a message may
be protected by an old key, while new keys protect the remainder of the message, so even if an
attacker deciphers one key, only a portion of the message is vulnerable.
Diffie-Hellman groups
Diffie-Hellman (DH) groups are used to determine the length of the base prime numbers for the
Diffie-Hellman exchange. Diffie-Hellman key exchange is a cryptographic protocol that allows two
parties that have no prior knowledge of each other to jointly establish a shared secret key over an
insecure communications channel.
DH group choices are 1(modp768), 2(modp1024), 14(modp2048), and 18(modp8192). Each
group provides an incrementally more secure key exchange by providing more bits (768, 1024,
2048, 8192).
Authentication methods
The methods used to authenticate the IKE peer are preshared key (psk), DSS digital signature
(dss), and RSA digital signature (rsasig):
• A Preshared key (PSK) is a shared secret that is shared between two parties over a secure
channel before it is used. Typically, the PSK is a password or pass phrase. PSKs are created in
the end systems used by the two parties. There are several tools available to help select a
strong key that will work with various operating systems. When choosing a tool and creating a
PSK, keep in mind that the cryptographic strength of a key generally increases with length.
• The Digital Signature Standard (DSS) makes use of a private key to generate a digital
signature. Each user possesses a private and public key pair. Signature generation can be
performed only by the possessor of the user's private key. The digital signature is sent to the
intended verifier in a message. The verifier of the message and signature verifies the signature
by using the sender's public key.
• The RSA digital signature process uses a private key to encrypt only the message digest. The
encrypted message digest becomes the digital signature and is attached to the original data.
To verify the contents of digitally signed data, the recipient generates a new message digest
from the data that was received, decrypts the original message digest with the originator's
public key, and compares the decrypted digest with the newly generated digest. If the two
digests match, the integrity of the message is verified. The identity of the originator also is
confirmed because the public key can decrypt only data that has been encrypted with the
corresponding private key.
IPsec over FCIP
FR4-81i blades use FCIP protocol to IP to carry Fibre Channel traffic over IP networks. IPsec can be
used to secure the IP flows over an FCIP tunnel.
At a high level, the steps to take are:
• Access the IPsec Policies dialog box.
• Create an IKE policy for authentication.
Web Tools Adminstrator’s Guide
53-1002152-01
205
16
IPsec over FCIP
•
•
•
•
•
Create a security association (SA).
Create an SA proposal.
Add an IPsec Transform policy, referencing the IKE policy and the SA proposal.
Add an IPsec selector that allows you to apply a Transform policy to a specific IP flow.
Enable the policy.
FCIP Compression
The FCIP tunnel compression mode allows IP packets to be compressed over the FCIP. The modes
available are None, Moderate, and Auto. FCIP tunnel configuration is available in Brocade Network
Advisor.
Accessing the IPsec Policies dialog box
To access the IPsec Policies dialog box, perform the following steps.
1. Open the Switch Administration window.
2. Select Show Advanced Mode.
3. Select the Security Policies tab.
4. Under Security Policies, select IPsec Policies.
The IPsec Policies window displays. The default view shows the IKE tab.
Establishing an IKE policy for an FCIP tunnel
To establish an IKE policy for an FCIP tunnel, perform the following steps.
1. From the IKE tab of the IPsec Policies screen, select Create.
The Add Policy dialog box displays.
2. Policy Type provides a way to toggle between the IKE and IPsec Add Policy dialog box boxes.
Make sure the Policy Type is set to IKE.
3. Assign a policy number.
The Policy Number selector allows you to select a number between 1 and 32.
4. Select the Encryption Algorithm used in this policy.
The choices are 3DES, AES-128, and AES_256.
5. Select an Authentication Algorithm for this policy.
The choices are SHA-1, MD5, and AES-XCBC.
6. Turn Perfect Forward Secrecy on or off.
The default is On. Perfect Forward Secrecy (PFS) provides additional security by means of a
Diffie-Hellman shared secret value. With PFS, if one key is compromised, previous and
subsequent keys are secure because they are not derived from previous keys.
7.
Select a Diffie-Hellman Group association.
The choices are 1 (modp768) and 14 (modp2048).
206
Web Tools Adminstrator’s Guide
53-1002152-01
16
IPsec over management ports
8. Set a Security Association Lifetime (in seconds).
The Security Association Lifetime is a time value in seconds. When this timer expires, the
security association (SA) is rekeyed. This limits the amount of time a given key is available to a
potential attacker.
9. Click OK.
Establishing an IPsec policy for an FCIP tunnel
To establish an IPsec policy for an FCIP tunnel, perform the following steps.
1. Select the IPsec tab.
The IPsec Policies window displays.
2. Select Create.
An Add Policy dialog box displays.
3. Policy Type provides a way to toggle between the IKE and IPsec Add Policy dialog boxes.
Make sure the Policy Type is set to IPSEC.
4. Assign a policy number.
The Policy Number selector allows you to select a number between 1 and 32.
5. Select the Encryption Algorithm used in this policy.
The choices are 3DES, AES-128, and AES_256.
6. Select an Authentication Algorithm for this policy.
The choices are SHA-1, MD5, and AES-XCBC. The remaining three fields are grayed out. They
apply only to IKE policies.
7.
Click OK.
IPsec over management ports
IPsec can be applied to the management port on a switch or a CP blade to establish a secure
connection between a PC or workstation and Web Tools. The connection can be used as a virtual
private network (VPN) interface to Web Tools.
At a high level, the steps to take are:
•
•
•
•
•
•
•
Access the Ethernet IPsec Policies dialog box.
Enable IPsec.
Create an IKE policy for authentication.
Create an security association (SA).
Create an SA proposal.
Add a IPsec Transform policy, referencing the IKE policy and the SA proposal.
Add an IPsec selector that allows you to apply a Transform policy to a specific IP flow.
Web Tools Adminstrator’s Guide
53-1002152-01
207
16
IPsec over management ports
Enabling the Ethernet IPsec policies
To access the Ethernet IPsec Policies dialog box, perform the following steps.
1. Open the Switch Administration window.
2. Select Show Advanced Mode.
3. Select the Security Policies tab.
4. Under Security Policies, select Ethernet IPsec.
The Ethernet IPsec Policies screen displays.
5. Ethernet IPsec policies can be configured only after enabling IPsec by clicking the Enable
button below the Ethernet IPsec policies table.
Establishing an IKE policy
When you establish an IKE policy, you identify a set of algorithms and authentication rules and
parameters to use in a key exchange. Refer to the Fabric OS Administrator’s Guide for details on
IKE functionality.
To establish an IKE policy, perform the following steps.
1. Select the IKE tab on the IPsec Policies window for Ethernet IPsec.
The Add IKE Policy dialog box displays.
2. Enter an IKE Policy Name.
3. Enter the IP address of the authentication partner in the Peer IP Address field.
4. Enter the switch’s local identifier in the Local Identifier field.
This is normally the IP address in IPv4 or IPv6 format, but it may also be a DNS name.
5. Enter the identifier of the remote peer switch in Peer Identifier.
This is normally the IP address in IPv4 or IPv6 format, but it may also be a DNS name.
6. Select the Encryption Algorithm option.
7.
Select the Hash Algorithm option.
8. Select the PRF Algorithm option.
9. Select the DH Group Number option.
10. Select the Authentication Method option.
11. If PSK is chosen as the authentication method, enter the name of the file that holds the
pre-shared key in the Pre-Shared Key filename field.
12. If you are using an X.509 certificate for authentication, enter the appropriate file names in the
Public Key filename, Private Key filename, and Peer Public Key filename fields in PEM format.
13. Use the PFS selector to turn Perfect Forward Secrecy (PFS) on or off.
PFS provides additional security by means of a Diffie-Hellman shared secret value. With PFS, if
one key is compromised, previous and subsequent keys are secure because they are not
derived from previous keys.
208
Web Tools Adminstrator’s Guide
53-1002152-01
IPsec over management ports
16
Creating a security association
A security association (SA) describes a set of parameters for providing secure communications
between two endpoints.
To create a security association, perform the following steps.
1. Select the IPsec tab.
The IPsec Policies screen displays.
2. Select the SA tab.
3. Select Add.
The Add SA dialog box displays.
4. Enter a name for the SA in the SA Name field.
5. Select the IPsec Protocol. option.
The choices are ah (for authentication header) and esp (for encapsulated security protocol).
6. Select the Authentication Algorithm option.
7.
Select the Encryption Algorithm option.
8. Optionally, enter a value in the SPI number field.
A Security Parameter Index (SPI) number is automatically assigned, but may be manually
overridden.
9. Click OK.
Creating an SA proposal
An SA proposal is sent from one endpoint to another to negotiate IKE and IPsec policies. An SA
proposal contains one or more security associations (SA). The endpoints must find a match for
each of the following in the SAs sent in the SA proposal:
•
•
•
•
•
•
•
•
The IKE authentication method.
The IKE encryption algorithm.
The IKE hash algorithm.
The Diffie-Hellman group number.
The IKE SA lifetime.
The IP addresses of the endpoints.
The IPsec protocol (AH or ESP).
The IPsec Transform policy.
To create an SA proposal, perform the following steps.
1. Select the SA Proposal tab on the IPsec Policies screen.
2. Select Add.
The Add-SA Proposal dialog box displays.
3. Enter a name in the SA Proposal Name field.
4. Enter the SAs in the SA(s) to use field.
Web Tools Adminstrator’s Guide
53-1002152-01
209
16
IPsec over management ports
5. Optionally, define SA lifetime parameters.
The SA lifetime may be defined as a time value in seconds (LifeTime in seconds), as the
number of bytes transmitted before the SA is rekeyed (LifeTime in bytes), or both. When both
are used, the SA lifetime is determined by the threshold that is first reached.
6. Click OK.
Adding an IPsec transform policy
The IPsec transform policy is the combination of protocols and algorithms applied to a flow of IP
packets. IPsec unidirectional, and policies need to be applied to both inbound and outbound flows.
Part of adding an IPsec transform policy is to select an IPsec Protection Type. The choices are
discard, bypass, and protect:
• Discard causes data packets to be rejected if there is an invalid pair of source and destination
addresses or invalid port addresses.
• Bypass allows a data packet to be transmitted or received without IPsec protection.
• Process indicates a data packet is processed using IPsec encryption, IKE authentication, or
both, using encapsulation security protocol (ESP) processing, or authentication header (AH)
protocol processing.
To add an IPsec transform policy, perform the following steps.
1. Select the Transforms tab.
The Transforms screen displays.
2. Select Add.
The Add Transform dialog box displays.
3. Enter a name in the Transform Name field.
4. Select the IPsec Mode.
The choices are Transport or Tunnel.
5. Enter the SA Proposal name.
6. Select the IPsec Protection Type option.
7.
Select the IKE Policy Name option.
IKE policies need to be created before adding a transform policy. If there are no names to
select from, you must create an IKE policy.
8. Optional: Enter a local and peer IP address.
9. Click OK.
Adding an IPsec selector
Selectors are used to apply transform policies to an IP flow. Flows are uni-directional. Selectors are
associated with a specific source IP address, a specific peer IP address, and a specific transform.
1. Select the Selectors tab.
The Selectors screen displays.
210
Web Tools Adminstrator’s Guide
53-1002152-01
IPsec over management ports
16
2. Select Add.
The Add Selector dialog box displays.
3. Enter a name in the Selector Name field.
4. Select the Traffic Flow Direction (in or out).
IPsec policies are unidirectional, and must be applied separately to inbound and outbound
flows.
5. Enter the IP address of the sender in the Source IP Address field.
6. Enter the IP address of the receiver in the Peer IP Address field.
7.
Enter the Transform Name value.
8. The Protocol Name selector allows you to select a specific protocol.
9. Click OK.
Manually creating an SA
Part of manually creating an security association (SA) is to select an IPsec Protection Type. The
choices are discard, bypass, and protect:
• Discard causes data packets to be rejected if there is an invalid pair of source and destination
addresses or invalid port addresses.
• Bypass allows a data packet to be transmitted or received without IPsec protection.
• Process indicates a data packet is processed using IPsec encryption, IKE authentication, or
both, using encapsulation security protocol (ESP) processing, or authentication header (AH)
protocol processing.
To manually create a SA, perform the following steps.
1. Select the SA(Manual) tab.
2. Select Add.
The Add Manual-SA dialog box displays.
3. Enter a security parameter index number in the SPI (Hexadecimal) field.
The SPI must be manually applied when manually adding an SA.
4. Enter the IP address of the endpoint that sends the SA in the Source IP Address field.
5. Enter the IP address of the endpoint that receives the SA in the Peer IP Address field.
6. Select the protocol used to carry the transmission using the Protocol Name selector.
7.
Select the Traffic Flow Direction (in or out).
IPsec policies are unidirectional, and must be applied separately to inbound and outbound
flows.
-
For the flow from peer to source, select in.
For the flow from source to peer select out.
8. Select the IPsec Mode.
The choices are Transport or Tunnel. Refer to “Transport mode and tunnel mode” on page 201
if you are unfamiliar with Transport and Tunnel modes.
Web Tools Adminstrator’s Guide
53-1002152-01
211
16
IPsec over management ports
9. Select the IPsec Protocol.
The choices are ah (for authentication header) and esp (for encapsulated security protocol).
10. Select the IPsec Protection Type option.
11. Select the Authentication Algorithm option.
12. Enter or copy a generated encryption key in the Encryption Key field.
13. Select the Encryption Algorithm.
14. Enter or copy a generated authentication key in the Authentication Key field.
15. Optional: Enter a local and peer tunnel IP address.
16. Click OK.
Editing an IKE or IPsec policy
An existing IKE or IPsec policy can be edited.
To edit an IKE or IPsec policy, perform the following steps.
1. Open the Switch Administration window.
2. Click Show Advanced Mode.
3. Select the Security Policies tab.
4. Under Security Policies, select Ethernet IPsec or Ethernet IPsec.
5. Select the policy you want to edit.
6. Select Edit.
An Edit Policy dialog box displays.
7.
Edit the policy as needed.
8. Click OK.
Deleting an IKE or IPsec policy
You can delete one or more IKE or IPsec policies.
To delete an IKE or IPsec policy, perform the following steps.
1. Open the Switch Administration window.
2. Select Show Advanced Mode.
3. Select the Security Policies tab.
4. Under Security Policies, select Ethernet IPsec or Ethernet IPsec.
5. Select the policy or policies you want to delete.
6. Select Delete.
The policy is deleted from the SA database (SADB), and is removed from the list.
212
Web Tools Adminstrator’s Guide
53-1002152-01
Establishing authentication policies for HBAs
16
Establishing authentication policies for HBAs
To establish and enable authentication policies for HBAs as the log in to a fabric, perform the
following steps.
1. Open the Switch Administration window.
2. Click Show Advanced Mode.
3. Select the Security Policies tab.
4. Select Authentication under Security Policies.
The Authentication Policy Settings screen displays.
5. Under Configure Authentication Policy, do the following.
•
•
•
•
Select the Authentication Type. The choices are FCAP, DHCHAP, or both.
Select the Switch Authentication Policy Mode. The choices are Passive, Active, On, or Off.
Select the Hash Type used. The choices are SHA1, MD5, or both.
Select the DH-Group Type. The choices are 0 (no DH authentication), 1 (1024 bit), 2 (1280
bit), 3 (1536 bit), or 4 (2048 bit).
• Use the Device Authentication Policy Mode selector to set the desired mode. The choices
are On, Off, or Passive.
• Click Apply.
6. If your authentication method uses a shared secret, select the Shared Secret Keys tab.
The Shared Secret Keys screen displays.
7.
Select Add.
The Add Shared Secret Keys dialog box displays.
8. Browse to select the switch WWN or name and domain ID, or enter the switch WWN or name
and domain ID in the Switch WWN: Name/Domain ID field.
9. Enter the shared secret key for the peer device (an HBA in this case) in the Peer Shared Secret
and Confirm Peer Shared Secret fields.
10. Enter the shared secret for switch in the Local Shared Secret and Confirm Local Shared Secret
fields.
11. Click Add.
An entry is added in the Switch WWN box.
12. Click OK.
13. Add more shared secrets, if needed.
Web Tools Adminstrator’s Guide
53-1002152-01
213
16
214
Establishing authentication policies for HBAs
Web Tools Adminstrator’s Guide
53-1002152-01
Chapter
17
Administering FICON CUP Fabrics
In this chapter
• FICON CUP fabrics overview . . . . . . . . . . . . . . . . . . . . . . . . . . . . . . . . . . . . .
• Enabling port-based routing . . . . . . . . . . . . . . . . . . . . . . . . . . . . . . . . . . . . .
• Enabling or disabling FICON Management Server mode . . . . . . . . . . . . . .
• FMS parameter configuration. . . . . . . . . . . . . . . . . . . . . . . . . . . . . . . . . . . .
• Displaying code page information . . . . . . . . . . . . . . . . . . . . . . . . . . . . . . . .
• Viewing the control device state . . . . . . . . . . . . . . . . . . . . . . . . . . . . . . . . . .
• Allow / Prohibit Matrix configuration . . . . . . . . . . . . . . . . . . . . . . . . . . . . . .
• CUP logical path configuration . . . . . . . . . . . . . . . . . . . . . . . . . . . . . . . . . . .
• Link Incident Registered Recipient configuration . . . . . . . . . . . . . . . . . . . .
• Displaying Request Node Identification Data . . . . . . . . . . . . . . . . . . . . . . .
215
216
217
218
219
219
220
224
225
226
FICON CUP fabrics overview
Control Unit Port (CUP) is a protocol for managing FICON directors. Host-based management
programs manage the switches using CUP protocol by sending commands to the emulated control
device implemented by Fabric OS. A Brocade switch or director that supports CUP can be controlled
by one or more host-based management programs or director consoles, such as Brocade Web
Tools or Brocade Fabric Manager. (Refer to the Fabric Manager Administrator’s Guide for
information about Fabric Manager.) The director allows control to be shared between host-based
management programs and director consoles.
NOTE
To perform FICON CUP operations, the EGM license must be enabled on the switches using the CUP
protocol. Also, the EGM license must be enabled to set the Allow/Prohibit Matrix parameters.
NOTE
While enabling FMS mode with online devices connected to ports with addresses of 0xFE or 0xFF,
the following error displays.
FMS mode enable failed due to port(s) with areas 0xFE or 0xFF is(are) connected to device(s).
User must disable the ports, or remove the online devices from those ports that are mapped to the
0xFE or 0xFF address.
To use FICON CUP, you must do the following:
• Install a FICON CUP license on a FICON director.
• Enable FICON Management Server (FMS) mode on the FICON director.
Web Tools Adminstrator’s Guide
53-1002152-01
215
17
Enabling port-based routing
• Install a FICON CUP license on the Brocade switch.
• Configure CUP attributes (FMS parameters) for the FICON director.
FMS mode enable failed due to ports with areas 0xFE or 0xFF are connected to devices.
You can use Web Tools for all of these tasks. You can also use Web Tools to manage FICON
directors (when FMS mode is enabled on those directors) to do the following:
• Display the control device state
• Display a code page
• Manage port connectivity configuration
You do not need to install the FICON CUP license to perform FICON CUP management; you must
install the FICON CUP license, however, if your switch is to enforce traffic between the FICON
director and the host-based management program.
NOTE
If the switch does not have the FICON_CUP license installed, Web Tools prevents the enabling of
FMS mode, and displays the following error message:
Enabling FMS mode requires FICON CUP license installed on the switch. Contact your
preferred storage vendor for more details.
Enabling port-based routing
Port-based path selection is a routing policy in which paths are chosen based on ingress port and
destination only. This also includes user-configured paths. All ports with FICON devices attached
must have port-based routing policy enabled. Port-based routing is a per-switch routing policy. After
port-based routing is enabled, you can continue with the remaining FICON implementation.
To enable port-based routing, perform the following steps.
1. Select a switch with FICON devices attached from the Fabric Tree.
2. Open the Switch Administration window as described in “Opening the Switch Administration
window” on page 33.
3. Click the FICON CUP tab.
If the EGM license is not installed on the switches using CUP protocol, access to this feature is
denied and an error message displays. If the EGM license is enabled, the FICON CUP tab is
available.
4. Click Enable in the FICON Management Server Mode section to enable the port-based routing
policy, or click Disable to disable port-based routing.
NOTE
While enabling FMS mode with online devices connected to FE ,FF the below error will be
shown.
FMS mode enable failed due to port(s) with areas 0xFE or 0xFF is(are) connected to device(s).
5. Click Apply to save your changes.
216
Web Tools Adminstrator’s Guide
53-1002152-01
Enabling or disabling FICON Management Server mode
17
Enabling or disabling FICON Management Server mode
FICON Management Server (FMS) is used to support switch management using CUP. To be able to
use the CUP functionality, all switches in the fabric must have FICON Management Server mode
(FMS mode) enabled. FMS mode is a per-switch setting. After FMS mode is enabled, you can
activate a CUP license without restarting the director. You can use Web Tools to install a CUP
license. For more information on installing licenses, refer to “Activating a license on a switch” on
page 44.
When FMS mode is disabled, mainframe management applications, director consoles, or alternate
managers cannot communicate with a director with CUP. In addition, when FMS mode is disabled
on a director, you cannot configure CUP attributes.
To enable or disable FICON Management Server, perform the following steps.
1. Select a FICON CUP-capable switch from the Fabric Tree.
2. Open the Switch Administration window as described in “Opening the Switch Administration
window” on page 33.
3. Click Show Advanced Mode.
4. Select the FICON CUP tab.
The FICON CUP tabbed page displays the FICON Management Server page. All attributes on
this tab are disabled until FMS mode is enabled.
5. Click Enable in the FICON Management Server Mode section to enable FMS mode or click
Disable to disable FMS mode.
6. Click Apply to save your changes.
Web Tools Adminstrator’s Guide
53-1002152-01
217
17
FMS parameter configuration
FMS parameter configuration
FMS parameters control the behavior of the switch with respect to CUP itself, as well as the
behavior of other management interfaces (director console, Alternate Managers). You can
configure FMS parameters for a switch only after FMS mode is enabled on the switch. All FMS
parameter settings are persistent across switch power cycles. There are six FMS parameters, as
described in Table 20.
TABLE 20
218
FMS mode parameter descriptions
Parameter
Description
Programmed
Offline State
Control
Controls whether host programming is allowed to set the switch offline. The parameter is set
as enabled by the hardware after system installation, and can be reset by Web Tools.
Active=Saved
Mode
Controls the IPL file update. The IPL file saves port connectivity attributes and port names.
After a switch restart or power cycle, the switch reads the IPL file and actives its contents as
default configuration.
When this mode is enabled, activating a configuration saves a copy to the IPL configuration
file. All changes made to the active connectivity attributes or port names by host programming
or alternate managers are saved in this IPL file. It keeps the current active configuration
persistent across switch restarts and power cycles.
You cannot directly modify the IPL file or save a file as an IPL file. When this mode is disabled,
the IPL file is not altered for either new configuration activation or any changes made on the
current active configuration. This parameter is set as enabled by the hardware after system
installation, and can be reset by Web Tools.
Note: When FMS mode is enabled and the Active=Saved parameter is disabled, you can
enable and disable ports, but the setting is not persistent. When the Active=Saved parameter
is enabled, you can enable and disable ports and the setting is persistent.
Alternate Control
Prohibited
Determines whether alternate managers are allowed to modify port connectivity.
Enabling this mode prohibits alternate manager control of port connectivity; otherwise,
alternate managers can manage port connectivity.
This parameter is set as enabled by the hardware after system installation, and can be reset by
Web Tools.
User Alert Mode
Controls director console behavior for alerts.
Enabling this mode prompts the director consoles to display a warning whenever you attempt
an action that changes switch parameters. When you disable this mode, no warning is
displayed. In this case, in which Web Tools is the director console, warning messages are
displayed by Web Tools regardless of the setting of the parameter, since Web Tools always
displays warning messages when you apply a change to a switch that changes parameters.
This parameter is always read-only in Web Tools. Each time that the switch is powered on, the
parameter is reset to disabled.
Director Clock
Alert Mode
Controls behavior for attempts to set the switch timestamp clock through the director console.
When it is enabled, the director console (Web Tools, in this case) displays warning indications
when the switch timestamp is changed by a user application. When it is disabled, you can
activate a function to automatically set the timestamp clock. There is no indication for
timestamp clock setting.
This parameter is set as disabled by the hardware after system installation, and can be reset
by Web Tools.
Host Control
Prohibited
Determines whether host programming allows modifying port connectivity.
Enabling this mode prohibits host programming control of port connectivity; otherwise, host
programming can manage port connectivity.
This parameter is set as disabled by the hardware after system installation. and can be reset
by Web Tools.
Web Tools Adminstrator’s Guide
53-1002152-01
17
Displaying code page information
Configuring FMS mode parameters
To configure FMS mode parameters, perform the following steps.
1. Select a FICON-enabled switch from the Fabric Tree.
2. Open the Switch Administration window as described in “Opening the Switch Administration
window” on page 33.
3. Select the FICON CUP tab.
The FICON CUP page displays the FICON Management Server page. All attributes on this page
are read-only until FMS mode is enabled.
4. To enable or disable an FMS mode parameter, click the check box next to the parameter.
A checked check box indicates that the parameter is enabled. You cannot configure the User
Alert Mode parameter in Web Tools, as it is read-only.
Displaying code page information
The Code Page section identifies the language used to exchange information between the FICON
director and Host Programming. It is a read-only field in Web Tools, as it is set by Host Programming
only. When FMS mode is disabled, the code page is displayed as unavailable.
To display code page information, perform the following steps.
1. Select a FICON-enabled switch from the Fabric Tree.
2. Open the Switch Administration window as described in “Opening the Switch Administration
window” on page 33.
3. Select the FICON CUP tab.
The FICON CUP page displays the FICON Management Server page in front. All attributes on
this tab are read-only until FMS mode is enabled.
The code page format is displayed in the Code Page section as shown in the following example:
Language used to exchange information with Host Programming: (EBCDIC)
USA/Canada -- 00037
Viewing the control device state
The control device is in either a neutral or a switched state. When it is neutral, the control device
accepts commands from any channel that has established a logic path with it and accepts
commands from alternate managers. When the control device is switched, it establishes a logical
path and accepts commands only from that logical path (“device allegiance”). Commands from
other paths cause a FICON CUP Busy Error. Most “write” operations from alternate managers are
also rejected.
Web Tools Adminstrator’s Guide
53-1002152-01
219
17
Allow / Prohibit Matrix configuration
Device allegiance usually lasts for a very short time. However, under abnormal conditions, device
allegiance can get “stuck” and fail to terminate. It might cause the switch to be unmanageable with
CUP, and you will continue to receive the FICON CUP Busy Error. In this case, you should check the
control device state and the last update time to identify if the device allegiance is stuck. The Web
Tools Switch Administration window displays the control device state and last update time. You can
click Refresh to get most recent update.
NOTE
You can manually reset allegiance to bring the control device back to the neutral state by clicking
Reset Allegiance in the FICON CUP Busy Error dialog box.
The following switch parameters being read or modified can cause the FICON CUP Busy error:
•
•
•
•
•
Mode Register
Port Names (also called Port Address Name)
Allow/Prohibit Matrix and Port Connectivity Attributes
Switch enable/disable
Switch name change
To access the FICON CUP tab, perform the following steps.
1. Select a FICON-enabled switch from the Fabric Tree.
2. Open the Switch Administration window as described in “Opening the Switch Administration
window” on page 33.
3. Select the FICON CUP tab.
The FICON CUP tabbed page displays, with the FICON Management Server subtabbed page in front.
All attributes on this tab are read-only until FMS Mode is enabled.
The control device state is displayed as neutral or switched in the Control Device Allegiance field.
NOTE
If FMS mode is enabled, and the control device state is unavailable, the FICON CUP Busy Error is
displayed. Click Reset Allegiance in the error message to reset the control device state to its correct
state.
Allow / Prohibit Matrix configuration
In the Allow / Prohibit Matrix subpanel, you can manage the configuration files and active
configuration. All configuration files and the active configuration are listed in a table. The active
configuration is listed as “Active Configuration*” and the description in the table is “Current active
configuration on switch.” The other special configuration file is the IPL. Any other files displayed are
user-defined configurations and are stored on the switch.
You can create, activate, copy, or delete saved Allow / Prohibit Matrix configurations; however, you
can only edit or copy a configuration while it is active. You can also activate, edit, or copy the IPL
configuration. You must have FMS mode enabled before you can make any changes to the
configurations. Click Refresh to get the latest configuration file list from the switch.
When creating a new configuration or editing an existing configuration, the Web Tools port name is
restricted to printable ASCII characters. Characters beyond printable ASCII characters are displayed
as dots.
220
Web Tools Adminstrator’s Guide
53-1002152-01
17
Allow / Prohibit Matrix configuration
When initially installed, a switch allows any port to dynamically communicate with any other port.
Two connectivity attributes are defined to restrict this any-to-any capability for external ports: Block
and Prohibit.
Block is a port connectivity attribute that prevents all communication through a port. Prohibit is the
port connectivity attribute that prohibits or allows dynamic communication between ports when a
port is not blocked. Each port has a vector specifying its Prohibit attribute with respect to each of
the other ports in the switch. This attribute is always set symmetrically in that a pair of ports is
either prohibited or allowed to communicate dynamically.
The Port Connectivity table (shown in Figure 43 on page 223) displays the Port number (in
physical-location format), Port Name (port address name), Block attribute, Prohibit attribute, and
Area Id (port address, displayed in hexadecimal) in fixed columns. The right side is a port matrix,
that lists all ports by Area ID and identifies prohibited ports. Those columns are scrollable and
swappable.
Viewing Allow / Prohibit Matrix configurations
To display a list of Allow / Prohibit Matrix configurations, perform the following steps.
1. Select a FICON-enabled switch from the Fabric Tree.
2. Select Tasks > Manage > Switch Admin.
3. Click Show Advanced Mode to see all the available tabs and options.
4. Select the FICON CUP tab.
The FICON CUP page displays the FICON Management Server page in front. All attributes on
this page are read-only until FMS mode is enabled.
5. Click the Allow / Prohibit Matrix subtab.
Modifying Allow / Prohibit Matrix configurations
In the Allow / Prohibit Matrix Configuration dialog box, swapped ports are indicated with the
“(Swapped)” label (Figure 42).
FIGURE 42
Web Tools Adminstrator’s Guide
53-1002152-01
Edit Allow / Prohibit Matrix dialog box swapped label
221
17
Allow / Prohibit Matrix configuration
To create a new Allow / Prohibit Matrix configuration or to edit an existing configuration, perform
the following steps.
1. Display the Allow / Prohibit Matrix configuration list.
2. You can either create a new configuration or edit an existing configuration:
• To create a new configuration, click New.
The Allow / Prohibit Matrix Configuration dialog box displays all ports and port names on
the selected switch (similar to the dialog box shown in Figure 43). The Block column,
Prohibit column, and prohibited ports matrix are displayed as empty, for you to configure.
• To edit an existing configuration, click the configuration, and then click Edit.
The Allow / Prohibit Matrix Configuration dialog box displays the content of the selected
configuration from the switch in a table format (Figure 43).
3. Optional: Select the check box corresponding to a port you want to block on the Block column.
Repeat this step for all ports you want to block. Select the Block All check box to block all ports.
4. Optional: Select the check box corresponding to a port you want to prohibit on the Prohibit
column. Repeat this step for all ports you want to prohibit. Select the Prohibit All check box to
prohibit all ports.
The cells in the matrix are updated with crossed-circle icons to identify prohibited ports.
FE and FF ports are not shown in the Allow / Prohibit Matrix dialog. The FE and FF Ports state
displays only in the Port Admin page.
5. Optional: Click the individual cells corresponding to the combination of ports you want to
prohibit. You cannot prohibit a port to itself.
If you prohibit E_Port, E-E connection, or E-F connection, a warning message is displayed, “You
have placed a prohibit on an E-Port. This has no effect for Fabric OS based fabrics”.
6. Review your changes. A blue background in a cell indicates that its value has been modified.
7.
After you have finished making changes, do any of the following:
• Click Activate to save the changes and make the configuration active immediately, as
described in “Activating an Allow / Prohibit Matrix configuration” on page 223.
• Click Save to save the changes but not make the configuration active.
• Click Save As to save the configuration to a new configuration file. When you click Save As,
a dialog box displays in which you should enter a file name and description for the
configuration file.
• Click Refresh to refresh the information from the switch.
• Click Cancel to cancel all changes without saving.
222
Web Tools Adminstrator’s Guide
53-1002152-01
17
Allow / Prohibit Matrix configuration
FIGURE 43
Allow / Prohibit Matrix Configuration dialog box
Activating an Allow / Prohibit Matrix configuration
When you activate a saved Allow / Prohibit Matrix configuration on the switch, the preceding
configuration (currently activated) is overwritten.
To activate an Allow / Prohibit Matrix configuration, perform the following steps.
1. Open theAllow / Prohibit Matrix configuration list.
2. Select the saved configuration from the list.
3. Click Activate.
The Activate Allow / Prohibit Matrix Configuration confirmation dialog box displays. The
message reminds you that the current configuration will be overwritten upon activation.
4. Optional: Click Active=Saved Mode to enable (selected) or disable (not selected) the
Active=Saved FMS parameter after the configuration is activated.
5. Click Yes to activate the configuration or click No to cancel the activation.
Copying an Allow / Prohibit Matrix configuration
To copy an Allow / Prohibit Matrix configuration to a new configuration, perform the following steps.
1. Display the Allow / Prohibit Matrix configuration list.
2. Select a saved configuration or the active configuration from the list.
Web Tools Adminstrator’s Guide
53-1002152-01
223
17
CUP logical path configuration
3. Click Copy.
The Allow / Prohibit Matrix Configuration dialog box displays.
4. In the dialog box, enter a name and description for the new configuration and click OK to save
the configuration to the target file; click Cancel to cancel copying the configuration.
The file name must be in alphanumeric characters and can contain only dashes or
underscores as special characters.
Deleting an Allow / Prohibit Matrix configuration
To delete a saved Allow / Prohibit Matrix configuration.
1. Display the Allow / Prohibit Matrix configuration list.
2. Select the saved configuration from the list.
3. Click Delete.
The Delete Allow / Prohibit Matrix Configuration confirmation dialog box displays.
4. Click Yes to delete the selected configuration; click No to cancel the deletion.
CUP logical path configuration
The logical reporting path is a CUP mechanism for sending FRU-failure type reports to a FICON
Logical Path via the FICON Protocol.
Viewing CUP logical path configurations
To display a list of CUP logical path configurations, perform the following steps.
1. Select a FICON-enabled switch from the Fabric Tree.
2. Select Tasks > Manage > Switch Admin.
3. Click Show Advanced Mode to see all the available tabs and options.
4. Select the FICON CUP tab.
The FICON CUP page displays the FICON Management Server page in front. All attributes on
this page are read-only until FMS mode is enabled.
5. Click the CUP Logical Paths subtab.
Configuring CUP logical paths
To configure a CUP logical path, perform the following steps.
1. Select a FICON-enabled switch from the Fabric Tree.
2. Select Tasks > Manage > Switch Admin.
3. Click Show Advanced Mode to see all the available tabs and options.
4. Select the FICON CUP tab.
224
Web Tools Adminstrator’s Guide
53-1002152-01
Link Incident Registered Recipient configuration
17
The FICON CUP page displays the FICON Management Server page in front. All attributes on
this page are read-only until FMS mode is enabled.
5. Click the CUP Logical paths subtab.
6. Select a logical path and click Set Current.
Link Incident Registered Recipient configuration
The Link Incident Registered Recipient (LIRR) receives Link Incident Reports (RLIR) on the source
N_Port. The LIRR database is stored on the switch.
Viewing Link Incident Registered Recipient configurations
To display a list of Link Incident Registered Recipient (LIRR) configurations.
1. Select a FICON-enabled switch from the Fabric Tree.
2. Select Tasks > Manage > Switch Admin.
3. Click Show Advanced Mode to see all the available tabs and options.
4. Select the FICON CUP tab.
The FICON CUP page displays the FICON Management Server page in front. All attributes on
this page are read-only until FMS mode is enabled.
5. Click the Link Incident Registered Recipient subtab.
Configuring LIRRs
To configure the Link Incident Registered Recipients (LIRR), perform the following steps.
1. Select a FICON-enabled switch from the Fabric Tree.
2. Select Tasks > Manage > Switch Admin.
3. Click Show Advanced Mode to see all the available tabs and options.
4. Select the FICON CUP tab.
The FICON CUP page displays the FICON Management Server page in front. All attributes on
this page are read-only until FMS mode is enabled.
5. Click the Link Incident Registered Recipient subtab.
6. Select a port from the list.
7.
Click Set Current.
8. Click Close.
9. Optional: The selected port can be reset using the reset button.
Web Tools Adminstrator’s Guide
53-1002152-01
225
17
Displaying Request Node Identification Data
Displaying Request Node Identification Data
Web Tools displays Request Node Identification Data (RNID) information for the local switch, and
for attached FICON devices and FICON channel paths. RNID information for the switch displays in
the Switch Information tab (Figure 44).
FIGURE 44
Switch RNID information
RNID information for attached FICON devices and channel paths displays on the Name Server view.
To view this information, Click Name Server to display the Name Server view. Ports that completed
an RNID exchange display FICON in the Capability column. For those ports, the following
information specific to RNID displays in the following columns:
•
•
•
•
•
•
226
Device Type
Model
Manufacturer
Manufacturer Plant
Unit Type
Tag
Web Tools Adminstrator’s Guide
53-1002152-01
Chapter
18
Configuring FCoE with Web Tools
In this chapter
• Web Tools and FCoE overview . . . . . . . . . . . . . . . . . . . . . . . . . . . . . . . . . . .
• Web Tools, the EGM license, and Brocade Network Advisor . . . . . . . . . . .
• Switch administration and FCoE . . . . . . . . . . . . . . . . . . . . . . . . . . . . . . . . .
• FC0E configuration tasks . . . . . . . . . . . . . . . . . . . . . . . . . . . . . . . . . . . . . . .
• Quality of Service configuration . . . . . . . . . . . . . . . . . . . . . . . . . . . . . . . . . .
• LLDP-DCBX configuration . . . . . . . . . . . . . . . . . . . . . . . . . . . . . . . . . . . . . . .
• Configuring DCB interfaces. . . . . . . . . . . . . . . . . . . . . . . . . . . . . . . . . . . . . .
• Configuring a link aggregation group . . . . . . . . . . . . . . . . . . . . . . . . . . . . . .
• Configuring VLANs . . . . . . . . . . . . . . . . . . . . . . . . . . . . . . . . . . . . . . . . . . . . .
• Configuring FCoE login groups . . . . . . . . . . . . . . . . . . . . . . . . . . . . . . . . . . .
• Displaying FCoE port information . . . . . . . . . . . . . . . . . . . . . . . . . . . . . . . . .
• Displaying LAG information . . . . . . . . . . . . . . . . . . . . . . . . . . . . . . . . . . . . . .
• Displaying VLAN information. . . . . . . . . . . . . . . . . . . . . . . . . . . . . . . . . . . . .
• Displaying FCoE login groups . . . . . . . . . . . . . . . . . . . . . . . . . . . . . . . . . . . .
• Displaying QoS information. . . . . . . . . . . . . . . . . . . . . . . . . . . . . . . . . . . . . .
• Displaying LLDP-DCBX information . . . . . . . . . . . . . . . . . . . . . . . . . . . . . . .
• Displaying DCB interface statistics. . . . . . . . . . . . . . . . . . . . . . . . . . . . . . . .
• Configuring a DCB interface from the Switch View . . . . . . . . . . . . . . . . . . .
• Configuring a DCB interface from the Port Admin panel . . . . . . . . . . . . . .
• Enabling and disabling a LAG . . . . . . . . . . . . . . . . . . . . . . . . . . . . . . . . . . . .
• Enabling and disabling LLDP . . . . . . . . . . . . . . . . . . . . . . . . . . . . . . . . . . . .
• Enabling and disabling QoS priority-based flow control . . . . . . . . . . . . . . .
• Enabling and disabling FCoE ports . . . . . . . . . . . . . . . . . . . . . . . . . . . . . . .
Web Tools Adminstrator’s Guide
53-1002152-01
228
228
229
229
230
231
234
235
236
237
238
239
239
239
239
240
240
240
241
241
241
242
242
227
18
Web Tools and FCoE overview
Web Tools and FCoE overview
Brocade Web Tools is an embedded graphical user interface (GUI) that enables administrators to
monitor and manage single or small fabrics, switches, and ports. Web Tools is launched directly
from a web browser, or from Brocade Network Advisor.
NOTE
For complete information on Web Tools, refer to the Web Tools Administrator’s Guide. This chapter
only discusses Web Tools and FCoE configuration.
A limited set of features is accessible using Web Tools without a license, and is available free of
charge. Additional switch management features are accessible using Web Tools with the Enhanced
Group Management (EGM) license. Refer to “Web Tools, the EGM license, and Brocade Network
Advisor” for more information.
A new view has been added to Web Tools for the Brocade 8000 switch and FCOE10-24 DCX blade,
and new tabs have been added to the Switch Administration panel and the Port Administration
panel to support FCoE interfaces and trunks.
Web Tools, the EGM license, and Brocade Network Advisor
Beginning with Fabric OS version 6.1.1, Web Tools functionality is tiered and integrated with
Brocade Network Advisor. If you are migrating from a Web Tools release prior to Fabric OS version
6.1.1, this may impact how you use Web Tools.
A Web Tools license is not required, and a basic version of Web Tools is available for free.
Additional functionality may be added by obtaining the Enhanced Group Management (EGM)
license.
The EGM license is required only for 8 Gbps platforms, such as the:
•
•
•
•
•
Brocade Encryption Switch
Brocade 300, 5300, and 5100 switches
Brocade VA-40FC
Brocade 8000
Brocade 7800
For non-8 Gbps platforms, all functionalities are available without the EGM license.
Port information that is unique to FCoE
The General tab of the Port Administration panel displays several parameters that are unique to
DCB/DCE interfaces:
• Interface Mode—The interface mode vales are either None or L2 mode.
• VLAN ID—The VLANs that carry traffic on the links are attached to this port.
• LAG—The ID of the Link Aggregation Group (LAG), with which this port is associated. If no ID is
specified, the port is not associated with any LAG.
228
Web Tools Adminstrator’s Guide
53-1002152-01
18
Switch administration and FCoE
• L2 Mode—The values are Access, Trunk, or Converged. Access mode allows only one VLAN
association, and allows only untagged frames. Trunk mode allows more than one VLAN
association, and allows tagged frames. Converged mode interface can be native (untagged or
access) in one VLAN and it could be non-native (trunk or tagged) type in more than one VLAN.
• DCB Map—The name of a DCB map that was created and associated with the port.
• Traffic Class Map—The name of a traffic class map that was created and associated with the
port.
•
•
•
•
LLDP Status—Indicates whether LLDP is active or inactive.
LLDP Profile—The name of an LLDP profile that was created and associated with the port.
FCoE Priority Bits—Each bit represents a user priority that is associated with FCoE traffic.
Default CoS—The default Class of Service.
Switch administration and FCoE
The DCB tab on the Switch Administration panel is specific to DCE and DCB configuration and
management. The DCB tab has five subtabs (Figure 45) that are used for FCoE switch
administration:
•
•
•
•
•
Link Aggregation
VLAN
FCoE Login Group
QoS
LLDP-DCBX
.
FIGURE 45
Switch Administration DCB subtabs
FC0E configuration tasks
There are several tasks related to FC0E configuration. The following list describes the high level
tasks in a suggested order:
• Quality of Service (QoS) configuration (optional)—If you intend to implement a specific QoS
scheme to prioritize data traffic, it is recommended that you finish your QoS configuration
before you begin port configuration. QoS values are referenced when you configure ports.
• LLDP-DCBX configuration (optional)—If you intend to implement DCBX, it is recommended that
you finish LLDP-DCBX configuration before you configure ports. LLDP-DCBX values are
referenced when you configure ports.
• DCB interface configuration (mandatory).
Web Tools Adminstrator’s Guide
53-1002152-01
229
18
Quality of Service configuration
• Link Aggregation Group (LAG) configuration (mandatory)—Ports must be configured before they
can be placed into a LAG. The parameters applied to the LAG reflects on each port that is
member of the LAG.
• VLAN configuration (optional)—Port and LAG names are referenced in VLAN configuration, and
must be defined before you can successfully complete a VLAN configuration.
• Login group configuration (optional)—Login group configuration is not dependent on any of the
above configurations. It can be done as a separate task.
Quality of Service configuration
As a general concept, Quality of Service (QoS) is a mechanism for classifying and scheduling data
traffic based on priority settings. QoS can be used to control traffic congestion, allocate bandwidth,
and carry data traffic with different characteristics over a common interface.
The following two configuration options are available:
• You can edit the DCB map. The DCB map defines priority and priority group tables that support
Enhanced Transmission Selection (ETS). ETS allows allocation of bandwidth to different traffic
classes. DCB maps also allow you to enable Priority Flow Control (PFC).
• You can create a traffic class map. A traffic class map can be used to map a specific class of
traffic to a specific Class of Service (CoS).
Editing the DCB map
The DCB map defines priority and priority group tables that support Enhanced Transmission
Selection (ETS). ETS allows bandwidth to be allocated based on priority settings through an
exchange of priority group tables.
To edit the DCB map, perform the following steps.
1. Select the DCB tab on the Switch Administration panel.
2. Select the QoS tab.
3. Select the DCB Map tab.
4. Select the default DCB map, and click Edit.
The DCB Map Configuration dialog box displays.
5. Enter a precedence value in the Precedence field.
The value is specified as a number. The allowable range is 1 to 100. The default is 1.
The precedence value controls QoS scheduling policies. The scheduler gives precedence to the
highest precedence value.
When the DCB Map Configuration dialog box displays, the default values shown in the Priority
Group Map match the IEEE 802.1Q recommendation for systems supporting eight traffic
classes. The Priority Group Map displays the Layer 2 Cos values mapped to Priority Group ID
(PGID). PGID values are in the form <policy>.<priority>. A policy value of 15 indicates
Priority values run from 0 (highest priority) to 7 (lowest priority). Note that this is contrary to the
CoS values, which run from 7 (highest priority) to 0 (lowest priority).
6. Create a new priority group by clicking Add next to the Priority Group table.
230
Web Tools Adminstrator’s Guide
53-1002152-01
18
LLDP-DCBX configuration
An entry is added to the Priority Group table.
NOTE
When you add an entry, a PGID is automatically assigned. The PGID is an integer from 0 to 7.
The first added entry is given a PGID of 0, and the PGID increments by one for each additional
added entry until a PGID of 7 is reached.
7.
Edit the Bandwidth entry to indicate the desired percentage of total bandwidth.
8. Change the Priority Flow Control Status to Enabled to enable PFC for the entry.
9. Click OK.
The new priority group displays in the Priority Group Map.
Adding a traffic class map
CoS priorities can be mapped to traffic classes using a traffic class map.
1. Select the DCB tab on the Switch Administration panel.
2. Select the QoS tab.
3. Select the Traffic Class Map tab.
4. Select Add.
The Traffic Class Map Configuration dialog box displays.
NOTE
This dialog box has the same structure as the Priority Group Map in the DCB Configuration
dialog box. The default CoS-to-traffic class structure is based on IEEE 802.1Q
recommendations, as in the default Priority Group Map.
5. Enter a name for the traffic class map in the Name field.
6. Select the Traffic Class that you want to assign to the CoS priority.
7.
Click OK.
LLDP-DCBX configuration
Link Layer Discovery Protocol (LLDP) is a IEEE standard for collecting and distributing device
information. Data Center Bridging Exchange (DCBX) extends LLDP by providing a protocol for
discovering, initializing, and managing DCB-compliant devices.
There are two configuration procedures:
• Configuring global LLDP characteristics.
• Configuring an LLDP profile.
Web Tools Adminstrator’s Guide
53-1002152-01
231
18
LLDP-DCBX configuration
Configuring global LLDP characteristics
Configuring at the global level enables you to apply changes to every port.
To configure the global LLDP characteristics, perform the following steps.
1. Select the DCB tab on the Switch Administration panel.
2. Select the LLDP-DCBX tab.
3. Select the Global tab.
4. Select the LLDP check box to enable LLDP globally.
You can clear the check box to disable LLDP.
5. Enter a name for the configuration in the System Name field.
6. Optionally, add a description in the System Description field.
7.
Select the Mode.
For Mode, the choices are Tx (transmit), Rx, (receive) or Both. The default is Both.
8. In the Hello field, enter a time value in seconds.
The Hello value sets the interval between hello bridge protocol data units sent by the root
switch configuration messages. The range of valid values is from 4 to 180 seconds. The
default is 30 seconds.
9. In the Multiplier field, set the number of consecutive misses allowed before LLDP considers
the interface to be down.
The range is 2 to 10. The default is 4. The multiplier is related to the Hello time interval. Using
the defaults, you wait four times (the multiplier value) at 30 second intervals (the hello value)
before giving up on the interface.
10. In the FC0E Priority Bits field, enter a value that indicates the desired user priority. Each bit
represents a user priority associated with FCoE traffic.
The range of valid values is from 0 through 255. The default is 8.
Even though setting multiple bits is allowed (exercising the full range of values), it doesn't
make sense to set more than one bit, because adapters don't support multiple priorities for
FCoE.
NOTE
Web Tools accepts only decimal values for this option, but the CLI allows only entries in list
format or hexadecimal. For example, if you enter the value 8 (decimal) in Web Tools, CLI
represents it as 3 in list format. If you enter the value 255 (decimal) iin Web Tools, CLI
represents it as 0 1 2 3 4 5 6 7 in list format.
11. Select the parameters you want to exchange.
Note that the term TLV indicates packaging of parameters into a Brocade-specific
Type/Length/Value (TLV):
232
Web Tools Adminstrator’s Guide
53-1002152-01
LLDP-DCBX configuration
18
• Advertise Optional-tlv—Advertises the following optional TLVs:
- system-description—Describes switch or blade characteristics.
- port-description—Describes the configured port.
- system-name—Specifies the system name.
- system-capabilities—Describes the system capabilities.
- management-address—The IP address of the management port on the 8000 switch.
• Advertise dot1-tlv—Select this check box to advertise to any attached device to send IEEE
802.1 LLDP type, length, and values.
• Advertise dot3-tlv—Select this check box to advertise to any attached device to send IEEE
802.3 LLDP type, length, and values.
• Advertise DCBx-tlv—Select this check box to advertise to any attached device the
respective LLDP type, length, and values.
• Advertise DCBx-fcoe-logical-link—Select this check box to advertise to any attached device
to send DCBX protocol over LLDP to negotiate the logical link type, length, and values.
• Advertise DCBx-fcoe-app—Select this check box to advertise application type, length, and
values to ensure interoperability of traffic over DCBX protocol running over LLDP.
12. Click Apply.
13. Click Save Configuration.
Adding an LLDP profile
The LLDP profile determines LLDP settings per port.
To add an LLDP profile, perform the following steps.
1. Select the DCB tab on the Switch Administration panel.
2. Select the LLDP-DCBX tab.
3. Select the LLDP Profile tab.
4. Click Add.
The LLDP Configuration dialog box displays.
5. Enter a name for the configuration in the Name field.
6. Optionally, add a description in the Description field.
7.
Select the Mode.
For Mode, the choices are Tx (transmit), Rx, (receive) or Both. The default is Both.
8. In the Hello field, enter a time value in seconds.
The Hello value sets the interval between hello bridge protocol data units sent by the root
switch configuration messages. The range is 4 to 180 seconds. The default is the global
configuration range.
9. In the Multiplier field, set the number of consecutive misses allowed before LLDP considers
the interface to be down.
Web Tools Adminstrator’s Guide
53-1002152-01
233
18
Configuring DCB interfaces
The range is 2 to 10. The default is the global configuration range. The multiplier is related to
the Hello time interval. Using the defaults, you wait four times (the multiplier value) at 30
second intervals (the hello value) before giving up on the interface.
10. Select the parameters you want to exchange.
Note that the term TLV indicates packaging of parameters into a Brocade-specific
Type/Length/Value (TLV).
-
Advertise Optional-tlv—Advertises the following optional TLVs:
•
•
•
•
•
system-description—Describes switch or blade characteristics.
port-description—Describes the configured port.
system-name—Specifies the system name.
system capabilities—Describes the system capabilities.
management-address—The IP address of the management port on the 8000 switch.
-
Advertise dot1-tlv—Advertises to any attached device to send IEEE 802.1 LLDP type,
length, and values.
-
Advertise dot3-tlv—Advertises to any attached device to send IEEE 802.3 LLDP type,
length, and values.
-
Advertise DCBx-tlv—Advertises to any attached device the respective LLDP type, length,
and values.
-
Advertise DCBx-fcoe-logical-link—Advertises to any attached device to send DCBX protocol
over LLDP to negotiate the logical link type, length, and values.
-
Advertise DCBx-fcoe-app—Advertises application type, length, and values to ensure
interoperability of traffic over DCBX protocol running over LLDP.
11. Click Save Configuration.
Configuring DCB interfaces
The DCB Interfaces tab on the Port Administration panel is used for configuring the DCB interfaces
on a switch.
To configure the DCB interfaces, perform the following steps.
1. Select the DCB Interfaces tab on the Port Administration panel.
2. Select the port you want to configure under the DCB Interface Explorer.
3. Select the General tab.
Normally, this tab is pre-selected.
4. Select Edit Configuration.
The DCB Edit Configuration dialog box displays.
5. Select the Interface Mode.
The options are None and L2. The default is None.
If you intend to use this port in a Link Aggregation Group (LAG), select None. L2 mode is
applied when you configure the LAG.
234
Web Tools Adminstrator’s Guide
53-1002152-01
Configuring a link aggregation group
18
6. Select the L2 Mode.
The choices are Access, Trunk, and Converged. The default is Access.
The L2 mode setting determines operation within a VLAN:
• Access mode allows only one VLAN association, and all frames are untagged.
• Trunk mode allows more that one VLAN association, and tagged frames are allowed.
• Converged mode interface can be Native (untagged or access) in one VLAN and it could be
non-native (trunk or tagged) type in another VLAN.
7.
If you are using the DCB map or a Traffic Class Map to apply QoS traffic priority, select the
appropriate button, and enter the name of the map you want to use.
For a TenGigabitEthernet port configured as an FCoE port, the default DCB map is applied
automatically. You cannot apply the Traffic Class Map to an FCoE port
8. Enter the profile name in the LLDP-DCBX Profile field for using a specific profile for the
interface.
9. In the FC0E Priority Bits field, enter a value that indicates the desired user priority. Each bit
represents a user priority that is associated with FCoE traffic.
The range is 0-255. The default is 8.
10. Assign a default class of service in the Default CoS field.
The default CoS range is 0-7. The default is 0.
11. Click OK.
12. Click Enable for Status and LLDP Status.
Configuring a link aggregation group
FCoE ports can be grouped to create a link aggregation group (LAG). The LAG is treated as a single
interface.
To configure a LAG, perform the following steps.
1. Select the DCB Interfaces tab on the Switch Administration panel.
2. Select the Link Aggregation tab.
3. Click Add.
The Add LAG Configuration dialog box displays.
NOTE
Only ports that you defined with an Interface Mode of None can be a LAG Member.
4. Click the Add arrow button to move the interfaces to the Selected List.
5. Select the Mode.
Web Tools Adminstrator’s Guide
53-1002152-01
235
18
Configuring VLANs
The choices are Static and Dynamic. Static mode does not use Link Aggregation Control
Protocol (LACP) to negotiate and manage link aggregation. Link participation in the LAG is
determined by the link’s operational status and administrative state. Dynamic mode uses
LACP. LACP allows partner systems to examine the attributes of the links that connect them
and dynamically form a LAG. When you select Dynamic mode, the Active and Passive options
are enabled:
• If you choose Active, your switch initiates an exchange of LACP data units.
• If you choose Passive, your switch waits to receive LACP data units from its partner system
and then respond. Passive is the default behavior.
6. Select the Type.
Type refers to the type of trunking used by the LAG. The choices are Standard and Brocade.
7.
Select the Interface Mode.
The options are None and L2. The default is None.
8. Select the L2 Mode.
The L2 mode setting determines operation within a VLAN:
-
Access mode allows only one VLAN association, and all frames are untagged.
Trunk mode allows more than one VLAN association, and allows tagged frames.
9. Select the operational Status.
The choices are Administratively Up and Administratively Down.
10. Click OK.
Configuring VLANs
The Virtual LAN (VLAN) capability allows multiple virtual LANs within a single physical LAN
infrastructure. The physical interface must be configured as L2 prior to configuring a VLAN, either
as an individual interface, or as a LAG. Before you start the VLAN configuration procedure, you
need to know which interfaces or LAGs you want to associate with each VLAN.
To configure a VLAN, perform the following steps.
1. Select the DCB tab on the Switch Administration panel.
2. Select the VLAN tab.
3. Click Add.
The VLAN Configuration dialog box displays.
4. Specify a VLAN ID.
The format is VLAN<bridge number><ID>. In this Fabric OS release, no bridge instances are
supported, so the bridge number is always 0, and the value under Bridge is statically defined
as VLAN0. The <ID> is an integer from 1 to 3583, that must be entered in the ID field.
5. Select the Native check box to add all the converged interfaces added in the present operation
as native to a VLAN.
236
Web Tools Adminstrator’s Guide
53-1002152-01
Configuring FCoE login groups
18
NOTE
If you want to modify any converged interface as either native or non-native, you must first
remove that particular member from that VLAN and then re-add it to the same VLAN.
6. Under the Selection List, click the plus sign (+) next to the Interface and LAG folders, and select
individual interfaces and LAGs you want to associate with the VLAN ID.
7.
Click Add to move the interfaces or LAGs to the Selected List.
Note the reminder that interfaces must be configured as L2, and that the interfaces or LAGs
must be in Trunk mode to be associated with multiple VLANs, Access mode interfaces can be
associated with only one VLAN, and the Converged mode interface can be Native in one VLAN
and it could be non-native type in more than one VLAN.
8. Click OK.
9. Repeat the procedure for additional VLANs.
10. To edit VLAN, select the detail from the table in the VLAN tab and click Edit.
NOTE
The FCoE check box is selected by default for FCoE VLAN. The FCoE check box is read-only, you
must use the CLI to make any changes to the FCoE VLAN.
11. Click OK to enable FCoE. Clear the check box to disable FCoE.
Configuring FCoE login groups
FCoE login groups control which FCoE devices are allowed to log in to a switch or fabric.
The FCoE Ports window is used for configuring the FCoE ports on a switch.
To configure an FCoE login group, perform the following steps.
1. Select the DCB tab on the Switch Administration panel.
2. Select the FCoE Login Group tab.
3. Click New.
The New Login Group dialog box displays.
4. Enter a name for the login group in the Login Group Name field.
5. Select the switch WWN.
The choices are:
• Self — WWN of your current switch
• Other Switch WWN
If you choose Other Switch WWN, you must enter the WWN of that switch in the provided field.
6. Under Login Member Configuration, select either Allow All Members or Allow Specific Member.
• If you select Allow All Members, all devices attached to FCoE ports are allowed to log in to
the switch.
Web Tools Adminstrator’s Guide
53-1002152-01
237
18
Displaying FCoE port information
• If you select Allow Specific Member, you can control which devices can log in, using
Member Type, Member PWWN/MAC, and the Add and Remove buttons, as described
below.
a.
Select Model2 as Member Type.
a.
Enter the port WWN in hexadecimal format in the Member PWWN/MAC field, and click
Add.
The WWN displays under Allowed Login Members. If you decide a member should not be
on the list, highlight the entry and click Remove.
7.
Click OK.
Displaying FCoE port information
There are 24 internal FCoE Ports that bridge FC and Ethernet traffic. You can view FCoE port
information from the Port Administration panel.
To display FCoE port information, perform the following steps.
1. Select the FCoE Ports tab on the Port Administration panel.
The initial view displays a summary of all FCoE ports on the switch (Figure 46).
FIGURE 46
FCoE Ports tab, Port Administration panel
2. To view information for a specific port, select the trunk in the FC0E Ports Explorer or select the
port in the FCoE Port Configuration and Management table and click View Details.
Port information displays in three tabs. The General tab is pre-selected.
The Connected Devices tab displays information about devices connected to the switch
(Figure 46). Six columns of information are displayed:
• Device WWN displays the WWN of the connected device.
• Device MAC displays the MAC address of the connected device.
238
Web Tools Adminstrator’s Guide
53-1002152-01
Displaying LAG information
18
• Connected Peer Type displays the port type on the connected device.
• Is Directly Connected indicates whether or not the device is directly connected to the
trunk.
• FCoE Port MAC displays the FCoE port MAC address.
• Switch Port displays the switch port WWN.
Displaying LAG information
To display LAG information, perform the following steps.
1. Select the DCB tab on the Switch Administration panel.
2. Select the Link Aggregation tab.
The LAG information displays.
Displaying VLAN information
To display VLAN information, perform the following steps.
1. Select the DCB tab on the Switch Administration panel.
2. Select the VLAN tab.
The VLAN information displays.
Displaying FCoE login groups
To display FCoE login group information, perform the following steps.
1. Select the DCB tab on the Switch Administration panel.
2. Select the FCoE Login tab.
The FC0E login group information displays.
Displaying QoS information
To display QoS information, perform the following steps.
1. Select the DCB tab on the Switch Administration panel.
2. Select the QoS tab.
From the QoS tab, you can select the DCB Map tab to display DCB map information, or select
the Traffic Class Map tab to display traffic class maps information.
Web Tools Adminstrator’s Guide
53-1002152-01
239
18
Displaying LLDP-DCBX information
Displaying LLDP-DCBX information
To display LLDP-DCBX information, perform the following steps.
1. Select the DCB tab on the Switch Administration panel.
2. Select the LLDP-DCBX tab.
• To display global settings, select the Global tab.
• To display LLDP profile information, select the LLDP Profile tab.
Displaying DCB interface statistics
The DCB interface Port Statistics tab displays basic and advanced statistics, and allows you to
change statistics collection parameters.
The DCB Interface Statistics Configuration section allows you to do the following:
• Toggle between showing Absolute Values or Delta Values (values that have changed since the
last data collection).
• Use the Clear Counters button to clear the counters in port statistics.
• Change the retrieval interval.
To view additional information, select Show Advanced Mode. An Advanced tab and an Error Detail
tab are added next to Basic Mode.
The Advanced tab displays DCB transmission statistics, and the Error Details tab displays
transmission error statistics.
To display DCB interface statistics, perform the following steps.
1. Select the DCB Interfaces tab on the Port Administration panel.
2. Under the DCB Interface Explorer, select a port.
3. Select the Port Statistics tab.
Configuring a DCB interface from the Switch View
DCB interfaces can be enabled and disabled from a right-click menu on the Switch View.
To enable or disable a DCB interface from the Switch View, perform the following steps.
1. Right-click the port to display the right-click menu.
2. Select Configure to display the Enable and Disable options.
240
Web Tools Adminstrator’s Guide
53-1002152-01
Configuring a DCB interface from the Port Admin panel
18
Configuring a DCB interface from the Port Admin panel
DCB interfaces can be enabled and disabled from the Port Administration panel.
To enable or disable a DCB interface from the Port Administration panel, perform the following
steps.
1. Select the DCB Interfaces tab on the Port Administration panel.
2. Under the DCB Interface Explorer, select the port you want to enable or disable.
3. Select the General tab.
This tab is normally pre-selected. You can follow either of the following options to enable or
disable the interface:
• Click Enable Interface or Disable Interface to enable or disable the interface, as desired.
• Click Edit Configuration to open the DCB Edit Configuration dialog box. Select Enable or
Disable for the Status field to enable or disable the interface.
Enabling and disabling a LAG
To enable or disable a LAG, perform the following steps.
1. Select the DCB tab on the Switch Administration panel.
2. Select the Link Aggregation tab.
3. Click Add.
The LAG Configuration dialog box displays.
4. Change the Status to Administratively Up or Administratively Down.
Enabling and disabling LLDP
To enable or disable LLDP on a DCB interface, perform the following steps.
1. Select the DCB Interfaces tab on the Port Administration panel.
2. Under the DCB Interface Explorer, select the port.
3. Select the General tab.
4. Click Edit Configuration.
The DCB Edit Configuration dialog box displays.
5. For the LLDP Status option, select Enable or Disable.
Web Tools Adminstrator’s Guide
53-1002152-01
241
18
Enabling and disabling QoS priority-based flow control
Enabling and disabling QoS priority-based flow control
Priority-based flow control (PFC) can be used to control network congestion. PFC can be used to
selectively pause lower priority traffic classes to ensure that high priority and delay-sensitive traffic
are not affected by network congestion. For example, if a large storage transfer is monopolizing the
network and causing congestion, PFC can be used to pause the storage transfer so other traffic
may use the network.
To enable or disable PFC, perform the following steps.
1. Select the DCB tab on the Switch Administration panel.
2. Select the QoS tab.
3. Select the DCB Maps tab.
4. Under the Priority Group area, enable or disable Priority Flow Control Status option for each
Priority Group ID.
Enabling and disabling FCoE ports
You can enable and disable FCoE Ports individually from the Port Administration panel.
1. Select the FCoE Ports tab on the Port Administration panel.
2. Select the port you want to enable or disable under the FC0E Ports Explorer, or from the list.
3. Click Enable or Disable to change the current status of the port.
You can also enable or disable by clicking Edit Configuration, and selecting Enable or Disable
on the FCoE Edit Configuration dialog box.
242
Web Tools Adminstrator’s Guide
53-1002152-01
Chapter
19
Limitations
In this chapter
• General Web Tools limitations . . . . . . . . . . . . . . . . . . . . . . . . . . . . . . . . . . . 243
General Web Tools limitations
Table 21 lists general Web Tools limitations that apply to all browsers and switch platforms.
TABLE 21
Web Tools limitations
Area
Details
Blade Failure
If a blade fails on the switch, the Web Tools interface can still display slot and ports as
healthy. In this case, the failure might not be visible in Web Tools until the Web Tools
window is reopened.
Browser
For Internet Explore 7.0, the default setting is to disable Telnet functionality. You must
make the appropriate changes in the registry to enable Telnet functionality if you want
to use it. Launching the default Telnet is not supported in Windows Vista and Windows
2008 server.
Browser
Fabric Watch, Switch Admin, HA, Name Server, and Zone Admin are separate applets
embedded in HTML pages. The successful launch of the applet depends on whether
the browser can successfully load the HTML page. Very occasionally, a blank browser
window displays with the message “loading pages...” that is stuck. This is likely caused
by a sudden loss of switch Web server (either by normal HA failover, restart, or other
causes).
Workaround: If Fabric Watch, Switch Admin, HA, Name Server, or Zone Admin hang,
close this window and relaunch the module.
Browser
A Web Tools browser window might stop responding following an HA failover
immediately after a zoning configuration was enabled or disabled. It is likely that the
Web daemon was terminated by the HA failover before the HTTP request was sent back.
Workaround: If one of the Web Tools modules is hanging, close the window and
relaunch the module. If the module is locked, shut down and relaunch the Web Tools
application.
Browser
When you launch Fabric Watch, Switch Admin, Name Server, and Topology from Switch
Explorer through Internet Explorer, the applet windows cannot be resized and the
Maximize button is disabled.
Chassis not ready for
management
If the switch is still in the process of booting and you try to launch the Web Tools by
entering the IP address, this message displays in the browser. You should wait for the
switch to finish the startup sequence.
Configuration
Web Tools does not support NAT router configurations and does not function correctly
with switches behind a NAT router.
Web Tools Adminstrator’s Guide
53-1002152-01
243
19
General Web Tools limitations
TABLE 21
Web Tools limitations (Continued)
Area
Details
Firmware download
There are multiple phases to firmware download and activation. When Web Tools
reports that firmware download completed successfully, this indicates that a basic
sanity check, package retrieval, package unloading, and verification was successful.
Web Tools forces a full package install.
A restart is required to activate the newly downloaded firmware. This restart is done
automatically; however, although Web Tools screens continue to display during the
restart, they are not available. Wait approximately 10 minutes to ensure that all of the
application windows are restored. If Web Tools fails to respond after 20 minutes, you
might need to close all Web Tools applications windows and restart them, or to contact
your system administrator for network assistance.
The Web Tools loss of network connectivity during a failover or restart (initiated through
the firmwareDownload) varies for different configurations:
Brocade DCX and DCX-4S enterprise-class platforms: loss of network connectivity is up
to 5 minutes if the power-on self-test (POST) is disabled. If POST is enabled, the loss of
network connectivity can exceed 5 minutes.
Brocade 300, 5100, 5300, 6510, 7800, 8000, VA-40FC, and the Encryption Switch:
Loss of network connectivity is up to 1 minute if POST is disabled. If POST is enabled,
the loss of network connectivity can exceed 1 minute.
Firmware downgrade
If you try to run Web Tools on a switch after downgrading the firmware, Web Tools may
not open. This is due to the presence of old application cache files in Java. The
workaround is to delete the application cache files using the Java Control Panel.
After upgrading or downgrading the firmware, delete the application cache files.
244
HTTP timeout
Occasionally, you might see the following message when you try to get data from a
switch or to send a request to the switch:
Failed to get switch response. Please verify the status of your last operation and try
again if necessary.
This indicates that an HTTP request did not get a response. The request was sent to the
switch, but the connection was down, probably caused by a temporary loss of the Web
server on the switch. Due to the nature of an HTTP connection, Web Tools reports this
error after a 90-second default timeout.
In this case, verify the status of your last request, using Telnet to check related status,
or click the Refresh button from the Web Tools application you were working on to
retrieve related data. If your request did not get through to the switch, resubmit it.
Executing a refresh from Web Tools retrieves a copy of switch data at that moment; the
data you entered can be lost if it had not already committed to the switch.
Inband management
support
Fabric OS v7.0.0 supports Web Tools, SNMP polling, and SNMP traps only in IPv4 on the
Brocade 7800 and FX8-24.
Java cache
If the Web Tools progress bar stops at 93 percent when initializing switch details, you
must clear the Java cache, as described in “Deleting temporary internet files used by
Java applications” on page 6.
Java Plug-in
If you have a Web Tools session open and you open a second session using the File >
New browser menu, this results in unexpected behavior of the original Web Tools
session. For example, you cannot change Admin Domains in the second session.
Web Tools supports only one browser instance per JRE, and when you open another
window using the File > New menu, the two windows share the same JRE environment.
Workaround: Open two independent browser sessions.
Web Tools Adminstrator’s Guide
53-1002152-01
General Web Tools limitations
TABLE 21
19
Web Tools limitations (Continued)
Area
Details
Loss of Connection
Occasionally, you might see the following message when you try to retrieve data from
the switch or send a request to the switch:
Switch Status Checking
The switch is not currently accessible.
The dialog box title may vary, because it indicates which module is having the problem.
This is caused by the loss of HTTP connection with the switch, due to a variety of
possible problems. Web Tools automatically tries to regain the connection. While Web
Tools is trying to regain the connection, check if your Ethernet connection is still
functioning. If the problem is not with the Ethernet connection, wait for Web Tools to
recover the connection and display the following message:
“You will have to resubmit your request after closing this message.”
If the temporary switch connection loss is caused by switch hot code load, or other
similar operation, Switch Explorer you are currently running can be downloaded from a
different firmware version than the new one. In this case the following message
displays:
“Switch connection is restored. The firmware version you are running is not in sync with
the version currently on switch. Close your browser and re-launch Web Tools.”
You need to close Switch Explorer and relaunch Web Tools to reopen the connection.
Non-FIPS secure mode
HTTPS
HTTPS supports only TLSv1 and SSLv3 protocols with !DH:HIGH:-MD5 cipher in non-fips
mode. These options must be enabled in your internet browser.
Out of Memory Errors
If you are managing fabrics with more than ten switches or more than 1000 ports, or if
you are using the iSCSI Gateway module extensively, you might encounter
out-of-memory errors such as the following:
java.lang.OutOfMemoryError: Java heap space
To avoid this problem, increase the default heap size in the Java Control Panel. Refer to
“Java plug-in configuration” on page 8 for instructions.
Performance Monitor
If the Web browser crashes or the Performance Monitor license is lost while the
Performance Monitoring window is running, some of the Performance Monitor
resources owned by Web Tools might not be cleaned up correctly.
Workaround: You might need to use the CLI to manually delete these counters. For
example, if you detect Web Tools owned resources (using perfshoweemonitor), but you
have verified that no Web users are actually using them, use the perfdeleemonitor or
perfcleareemonitor command to free the resources.
Performance Monitor
The Switch Throughput Utilization, Switch Percent Utilization, and Port Snapshot Error
graphs displays the faulty/powered off slot node in the Y-Axis of the graph.
Workaround: Launch any port selection dialog box and load the graphs accordingly.
Refresh option in
browsers
When a pop-up window requesting a user response is pushed into the background and
a refresh is requested, a fatal Internet Explorer error might occur.
Workaround: Restart the browser.
Refresh option in
browsers
Web Tools must be restarted when the Ethernet IP address is changed using the
NetworkConfig View command. Web Tools appears to hang if it is not restarted after
this operation is executed.
Workaround: Restart the browser.
Refresh option in
browsers
If you change the switch name or domain ID using the CLI after the Web Tools Switch
Administration window has started, the new switch name or domain ID is not updated
on the header of the Switch Administration page. Clicking the Refresh button does not
fix the problem.
Workaround: Click the Switch tab and the Switch Administration header updates.
Web Tools Adminstrator’s Guide
53-1002152-01
245
19
General Web Tools limitations
TABLE 21
246
Web Tools limitations (Continued)
Area
Details
Refresh option in
browsers
If you change the switch name using the Web Tools Switch Administration page or
SNMP and then open a Telnet window to verify the name change, the CLI prompt (for
example, switch:admin >) displays the previous name. The Telnet prompt cannot pick
up the new switch name until the switch is fastbooted.
Workaround: In order to display the correct switch name in the CLI prompt after a switch
name update using Web Tools or SNMP, fastboot the switch.
Refresh option in
browsers
Following a switch enable or disable, you must wait at least 25 to 30 seconds for the
fabric to reconfigure and for FSPF route calculations to complete before requesting
routing information. If accessed too early, routing information are not shown.
Workaround: Following a switch enable or disable, wait at least 25–30 seconds before
further action.
Refresh option in
browsers
The Web Tools Switch Explorer might continue to display a switch from the Switch View,
even when the switch has been removed from the fabric.
Workaround: If this behavior is seen, relaunch Switch Explorer. If the switch was
removed from the fabric, the Fabric View window lists the switch as unavailable.
Refresh option in
browsers
In the Switch Administration window, Switch tab, if you click the Refresh button, you
might not be able to click the data entry fields to enter text. This behavior occasionally
happens on a notebook or laptop computer; it rarely happens on a desktop computer.
Workaround: If this happens, you should close the browser window and restart it.
Switch Explorer closure
If a session times out or you log out or close Switch Explorer window, all other windows
belonging to the session are invalidated. After a short delay these windows become
unusable, but are not closed automatically. You must manually close these windows.
Switch View
Occasionally, switches might display the port icons correctly, but be missing one or
more control button icons.
Workaround: Close the Switch View of the switch and reopen it.
Windows Operating
Systems
Occasionally, you will not see the “Lost connection to the switch” message on the
Switch View, even though the Ethernet connection has been lost. You might still be able
to invoke various features from Switch View, such as Status, Fan Temp, Power, and
Beacon.
Workaround: Verify Ethernet connection to the switch by pinging the logical switch IP
address.
Web Tools Adminstrator’s Guide
53-1002152-01
Index
Numerics
2 domain/4 domain fabric licenses, 9
7800 switch, 84, 85
A
Access Control List. Refer to ACL
access control. Refer to RBAC.
Access Gateway mode
configuration, 153
disable, 156
enable, 155
F_Port trunk groups, 101
accessing switch event report, 49
activating
Allow / Prohibit Matrix configuration, 223
licenses, 44
Ports on Demand, 86
adding
performance graphs to a canvas, 115
zone alias members, 124
zone configuration members, 130
zone members, 126
Admin Domain window, 66
closing, 69
refreshing, 68
Admin Domains
assigning administrators, 180
creating, 69
deleting, 72
direct port membership, 76
indirect port membership, 76
opening, 66
to activate/deactivate, 71
aliases, zone. Refer to zone aliases
all access zoning, 119
Web Tools Adminstrator’s Guide
53-1002152-01
Allow / Prohibit Matrix configuration
activating, 223
copying, 223
deleting, 224
displaying, 221, 225
Allow / Prohibit Matrixconfiguration
displaying, 224
arbitrated loop parameters, configuring, 42
automatic trace dump transfers, 138
B
backbone fabric ID, configuring, 150
backing up configuration file, 57
basic performance monitoring graphs, 109
BB credit, 41
beaconing, enabling, 53
best practices for zoning, 136
blades, enabling and disabling, 35
browsers
limitations, 243, 246
refresh frequency, setting, 5
supported, 4
buffer-limited ports, 165
C
changing
domain ID, 38
passwords, 181
switch name, 38
class F traffic, 41
clearing temporary internet files, 6
clearing the zoning database, 135
closing
Admin Domain window, 69
sessions, 12
code page, displaying, 219
247
configuration
Access Gateway mode, 153
upload, 155
configuration file
Admin Domain considerations, 59
backing up, 57
restoring, 58
configuring
Allow / Prohibit Matrix, 220
arbitrated loop parameters, 42
backbone fabric ID, 150
default heap size, 8
EX_Ports, 148
fabric parameters, 41
FAN frame notification parameters, 42
FC ports, 79
FCR router cost, 149
FICON Management Server parameters, 218
IOD frames delivery, 172
Java Plug-in, 8
link cost, 172
long-distance settings, 167
port speed, 79
port type, 79
ports, 75
RADIUS server, 197
routes, 169
syslog IP address, 34
system services, 43
virtual channel settings, 42
configuring FCR router port costs, 149
Control Device state, 219
Control Unit Port. Refer to CUP
copper GigE, 84, 85
copying Allow / Prohibit Matrix configuration, 223
CP failover, initiating, 48
creating
Admin Domains, 69
basic performance graphs, 109
SCC/DCC policy, 187
SCSI command graphs, 112
SCSI vs. IP traffic graphs, 112
SID-DID performance graphs, 111
zone aliases, 123
zone configurations, 129
zones, 125
creating FCS policy, 187
customizing basic performance graphs, 109
D
datafield size, 41
default zoning, 119
deleting
Admin Domains, 72
Allow / Prohibit Matrix configuration, 224
user accounts, 180
zone aliases, 125
zone configurations, 131
zones, 127
device probing, 41
devices only view, 123
devices only zoning, 123
direct port membership in Admin Domains, 76
disabling
Access Gateway mode, 156
automatic trace uploads, 139
blades, 35
dynamic load sharing, 170
FICON Management Server mode, 217
ports, 84, 85
RADIUS, 196
RLS probing, 43
switch, 37
trunking mode, 99
zone configurations, 132
zoning, 132
displaying
Allow / Prohibit Matrix configuration, 221, 224, 225
Control Device state, 219
enabled zone configuration, 132
fan status, 140
FICON code page, 219
name server entries, 51
power supply status, 141
switch events, 49
temperature status, 141
user account information, 177
DLS, 170
domain ID, changing, 38
downloading
configuration file, 58
firmware, 60
Dynamic Load Sharing. Refer to DLS
E
E_D_TOV, 41
248
Web Tools Adminstrator’s Guide
53-1002152-01
edge fabrics, 145
EGM licensed features
FICON CUP, 215
Performance Monitoring, 18
enabled zone configuration, displaying, 132
enabling
Access Gateway mode, 155
automatic trace dump transfer, 138
beaconing, 53
blades, 35
DLS, 170
FICON Management Server mode, 217
insistent domain ID mode, 41
ports, 84
Ports on Demand, 86
RADIUS, 196
RLS probing, 43
switch, 37
trunking mode, 99
zone configurations, 131
ending sessions, 12
events
displaying, 49
filtering, 50
severity levels, 48
EX_Ports, configuring, 148
exchange-based routing, 169, 170
expiring passwords, 183
extended fabrics, 165
F
F_Port trunk groups
Access Gateway mode, 101
fabric ID, configuring, 150
fabric information, refreshing, 68, 121
fabric parameters, configuring, 41
Fabric Tree, 21
fabric view, 123
fabric view zoning, 123
Fabric Watch
about, 163
failover, initiating, 48
FAN frame notification parameters, configuring, 42
fan status, 140
fast boot, 39
FC ports, configuring, 79
FC Routing module, 147
Web Tools Adminstrator’s Guide
53-1002152-01
FC-FC routing
about, 145
setting up, 146
supported switches, 146
FCR router cost, 149
FCS policy
activate, 188
create, 187
deactivate, 188
delete, 188
distribute, 188
moving switch position, 189
feature licenses, 44
FICON Management Server
mode, enabling and disabling, 217
parameters, 218
filtering events, 50
Filtering IP Addresses, 35
firmware download, 60
FSPF routing, 170
fwdl. Refer to firmware download.
G
GigE
media type, 84, 85
graphs for performance monitoring, 105
GUI
preferences, 19
H
HA. Refer to High Availability
hard zones, 123
heap size, configuring, 8
High Availability, 46
HTTPS protocol, 10, 245
I
ID_ID mode
about, 41
enabling, 41
inactivity timeout, 14
indirect port membership in Admin Domains, 76
initiating CP failover, 48
249
in-order delivery. Refer to IOD
insistent domain ID mode
about, 41
enabling, 41
installing
Java Plug-in, 6, 7
JRE, 7
JRE patches on Solaris, 7
Solaris patches, 7
Internet Explorer 7.0, 29
IOD, frame delivery, 172
IP address
filtering, 35
ISL trunking, 99
J
Java Plug-ins
configuring, 8
installing, 6, 7
supported, 5
JRE, installing, 7
L
launching
FC Routing module, 147
Web Tools, 10
LEDs, port, 144
licensed features, 44
licenses
activating, 44
removing, 45
limitations
browsers, 243, 246
firmware download, 244
HTTP, 244, 245
Microsoft Windows Operating System, 246
Performance Monitor, 245
Switch View, 246
limited switch license, 9
link cost, 172
logging out, 12
LSAN
devices, 150
fabrics, managing, 148
zones, managing, 150
250
M
managing RADIUS server, 196, 199
media type
GigE, 84, 85
message severity levels, 48
MetaSAN, 145
modifying
performance graphs, 116
RADIUS server, 197
RADIUS server order, 198
zone aliases, 124
zone configurations, 130
zones, 126
monitoring performance, 103
mouse over information, 26
N
name server entries, displaying, 51
naming ports, 82
no access zoning, 119
non-FIPS, 245
NPIV ports
disable, 85
enable, 85
O
opening
Performance Monitoring window, 108
Switch Administration window, 33
optical GigE, 84, 85
P
passwords
changing, 181
expiring, 183
rules, 182
unlocking, 183
performance graphs
adding to a canvas, 115
modifying, 116
printing, 115
types of, 105
Performance Monitoring window, 108
Web Tools Adminstrator’s Guide
53-1002152-01
per-frame routing priority, 41
persistently disable a port, 85
platforms, supported, 5
polling rates, 28
port membership in Admin Domains, 76
port menu, 27
port names, assigning, 82
port speed, configuring, 79
port swapping, 91
port type, configuring, 79
port-based routing, 169
ports
buffer-limited, 165
configuring, 75
disabling, 84, 85
enabling, 84
LEDs, 144
long distance parameter, 167
naming, 82
Ports on Demand, enabling, 86
power supply status, 141, 142
preferences
persist, 19
printing
effective zone configuration, 133
performance graphs, 115
protocol options, 245
R
R_A_TOV, 41
RADIUS server
about, 196, 199
configuring, 197
enabling and disabling, 196
modifying, 197
modifying server order, 198
removing, 198
RAM requirements, 5
RBAC, pre-defined roles, 13
rebooting the switch, 39
recommendations
configuration tasks, 29
for Web Tools, 29
for zoning, 136
refresh frequency, setting, 5
refresh rates, 28
Web Tools Adminstrator’s Guide
53-1002152-01
refreshing
Admin Domain window, 68
fabric information, 68, 121
Zone Admin window, 121
removing
licenses, 45
RADIUS server, 198
zone alias members, 124
zone configuration members, 130
zone members, 126
renaming
zone aliases, 124
zone configurations, 130
zones, 126
replacing a WWN in zoning database, 134
requirements, Web Tools, 4
restoring configuration file, 58
right-click menu, 27
RLS probing, enabling and disabling, 43
Role-Based Access Control. Refer to RBAC
router cost path, 149
routes, configuring, 169
S
saving
performance graphs, 114
zoning changes, 68, 122
SCC/DCC policy
activate, 188
create, 187
deactivate, 188
delete, 188
edit, 187
SCSI command graph, 112
SCSI vs. IP traffic graph, 112
searching zone member selection lists, 135
sequence level switching, 41
session management, 13
sessions, ending, 12
setting
refresh frequency, 5
SNMP trap levels, 194
severity levels, 48
SID-DID performance graph, 111
SNMP trap levels, 194
Solaris patches, installing, 7
SSLv3, 245
starting Web Tools, 10
251
swapping port index IDs, 91
switch
7800, 84, 85
changing the name of, 38
enabling and disabling, 37
mouse over information, 26
rebooting, 39
Switch Administration window, 31
opening, 33
Switch Events and Switch Information, 25
switch events, displaying, 49
Switch Explorer, Admin Domains, 21
switch name, changing, 38
switch report, 38
switch status report, 142
Switch View, 23
Switch View buttons, 23
syslog IP address
configuring, 34
removing, 34
system services, configuring, 43
T
Telnet, 29
temperature status, 141
temporary internet files, 6
timeout, session, 14
TLS, 245
trace dumps, 137
transition, partial Web Tools functions to Brocade Network
Advisor, 3
troubleshooting
Web Tools, 29
trunking mode, enabling and disabling, 99
U
unlocking passwords, 183
user accounts, managing, 175
user-defined roles
guidelines and restrictions, 184
V
VC Priority, 42
viewing
EX_Ports, 148
LSAN devices, 150
LSAN fabrics, 148
LSAN zones, 150
swapped ports, 91
Switch Explorer, 17
switch status, 142
viewing FCR router cost, 149
virtual channel settings, configuring, 42
W
Web Tools
Access Gateway mode, enable, 155
GUI preferences, 19
launching, 10
partial function transition to Brocade Network Advisor,
3
WWN
adding to zones, 133
removing from zones, 134
replacing in zones, 134
Z
Zone Admin module, saving changes, 68
Zone Admin window
about, 119
refreshing, 121
saving changes, 122
zone aliases
creating, 123
deleting, 125
description, 123
modifying, 124
renaming, 124
zone configurations
creating, 129
deleting, 131
disabling, 132
enabling, 131
example, 129
modifying, 130
renaming, 130
zone member selection lists, searching, 135
value line licenses, 9
252
Web Tools Adminstrator’s Guide
53-1002152-01
zones
about, 117
adding WWNs, 133
best practices, 136
creating, 125
deleting, 127
description, 125
LSAN, 150
modifying, 126
removing WWNs, 134
renaming, 126
replacing WWNs, 134
selecting a view, 123
zoning
all access, 119
default zoning, 119
no access, 119
zoning database
clearing, 135
maximum size, 122, 131
zoning views, 123
zoning, disabling, 132
zoning, saving changes, 68, 122
Web Tools Adminstrator’s Guide
53-1002152-01
253
254
Web Tools Adminstrator’s Guide
53-1002152-01
PRIMERGY
PRIMERGY FCスイッチブレード (8Gbps 18/8)
PRIMERGY FCスイッチブレード (8Gbps 18/8)&FCポートアップグレード
PRIMERGY FCスイッチブレード (8Gbps 18/8)&拡張ライセンスオプション
PRIMERGY BX Fibre Channel Switch 8Gbit/s 18/8(Brocade 5450)
Web Tools 管理者ガイド (v7.0.0)
CA92344-0144-01
発行日 2012年3月
発行責任 富士通株式会社
●本書の内容は、改善のため事前連絡なしに変更することがあります。
●本書に記載されたデータの使用に起因する、第三者の特許権およびその他
の権利の侵害については、当社はその責を負いません。
●無断転載を禁じます。