1
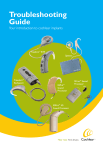
Troubleshooting
Guide
Your introduction to cochlear implants
Freedom™
Bodyworn
Freedom™ BTE
SPrint™
Sound Processor
ESPrit™ 3G
Sound Processor
Troubleshooting Guide
Contents
3
Introduction
5
SPrint™
11
17
25
ESPrit™ 3G
Freedom™ BTE,
Mini™ BTE and Babyworn™
Freedom™ Bodyworn
Introduction
This troubleshooting kit was developed by Cochlear™ Americas specifically for
individuals who work with children with cochlear implants in school settings.
It is intended to help identify and remedy simple problems with a child’s sound
processor and minimize the amount of time that a child is without auditory
stimulation. It is important that this kit only be used for a child implanted with
a Nucleus® cochlear implant system.
We currently support six speech processors in the Nucleus family. They include:
Nucleus cochlear implant
Compatible sound processor
ESPrit™ 3G for Nucleus 22 ear-level
Nucleus® 22
Nucleus® Freedom™ BTE
Nucleus® Freedom™ Bodyworn
Nucleus® Freedom™ Babyworn
Nucleus® 24
SPrint™ Bodyworn
ESPrit™ 3G ear-level
Nucleus® Freedom™ BTE
Nucleus® Freedom™ Bodyworn
Nucleus® Freedom™ Babyworn
Nucleus Freedom ®
™
Nucleus® Freedom™ BTE
Nucleus® Freedom™ Bodyworn
Nucleus® Freedom™ Babyworn
Each processor requires somewhat different troubleshooting procedures. Hence
the contents of this manual are separated according to the various models of
sound processors.
It is recommended that at least one person at the child’s school become
familiar with this kit and, most importantly, understand how to use it relative to
the applicable sound processor.
For information on working with a child with a Nucleus cochlear implant,
please refer to the booklet, “A Teacher’s Guide to the Nucleus® Cochlear
Implant System”. To order your free copy, please contact
Cochlear Americas 800 523 5798.
3
SPrint™ Sound Processor
The SPrint™ sound processor is compatible with the Nucleus® 24 cochlear implant.
The pieces pictured here are important parts comprising the external components
of the SPrint sound processor.
Earhook
Microphone
Transmitting
coil
External input
socket
Indicator
light
Transmitting
cable
Headset cable
cover
Processing unit
Headset cable
cover release
latch
LCD panel
Battery case
release latch
(not shown)
Battery cover
release latch
2 AAA
Battery case*
Battery
cover
Up button
Options button
Select button
Down button
Autosensitivity/ADRO button
Program
button
On/off button
* Note:
There is also a single AA battery case available.
5
Troubleshooting Guide
SPrint™ Sound Processor
Troubleshooting Steps
STEP 1: Check/change the batteries
• Look at the LCD panel on the SPrint. The low
battery symbol will appear if the batteries are
inserted wrong or if the batteries need replacing.
— Confirm the batteries are inserted correctly
into the battery pack.
— Replace both batteries using the alkaline
disposable AA batteries in the kit.
Troubleshooting Kit Contents
• 2 AA batteries
• 4” HS8 transmitting cable – beige
• 24” HS8 headset cable – beige
• Earhook, large
• Signal check
• 31” lapel microphone & clip for the SPrint
• Monitor earphones for the SPrint
Before doing step-by-step troubleshooting, conduct a maintenance
check of the equipment by visually inspecting it.
Microphone sensitivity
STEP 2: Check if the sound processor is transmitting
sound to the cochlear implant
• Turn on the sound processor and set at the
child’s “normal” settings.
• Place the transmitting coil over
the back of the SPrint.
Look
at the LCD display on the
•
front. If the sound processor is
transmitting a signal, the LCD
displays the radio frequency
(RF) test coil symbol.
• If no RF transmission, check the
transmitting coil [See STEP 3].
Transmitting coil
Back of SPrint
speech processor
➤
Segment meter
Alternatively, use the signal check to check the transmitting coil.
• Turn on the sound processor and
set at the child’s “normal” settings.
• Place the signal check over the
transmitting coil, if the signal
check lights up the coil is
functioning. If it does not,
replace the transmitting coil,
transmitting cable or headset.
IndicatorExternal
light input
➤
➤
Battery cover
release latch
Low battery symbol
Maintenance Check
Confirm:
• The headset and transmitting cable are properly connected.
• The cables are not broken or cracked.
• The correct transmitting coil is in place on the student’s
head (should see an “S” or “L” embossed on the coil).
Also check the following:
Program
Confirm
that
the
SPrint
is
‘ON’.
•
• Check that the segment meter on the LCD panel
responds within the normal range when speaking
into the microphone (with sensitivity set on at least 10).
• Confirm that the child is using the recommended
program setting(s).
• Check that the red indicator light at the top of
the sound processor is responding to sound input.
➤
If the child reports no sound from the processor and the above inspection
is good, take the following steps:
socket
Signal check
6
7
➤
➤
Microphone:
To ensure the ear-level microphone is working, use the lapel microphone from the kit.
External input
• Turn off the sound processor and remove
socket
from the child’s head.
• Insert the lapel microphone connector into
the top of the SPrint processor.
• Place the transmitting coil on the child’s head
or in your hand, turn on the sound processor
and set at the child’s “normal” settings.
• Speak into the microphone and check if the
segment meter responds to speech.
Accessory
• If the segment meter responds, the
ear-level microphone is faulty and
Monitor
the lapel microphone can be used
earphone
as a substitute until the child’s
headset microphone can be replaced.
• Inform the parent that a replacement
microphone is required.
➤
STEP 3: Check the headset components (cables, microphone)
Cables:
• Check that the cable connections are plugged in correctly.
• Hold the microphone case with one hand and
put your thumbnail in the slot on the microphone
cover. Remove the microphone cover by pulling
it away from the microphone case.
➤
• Plug the orange connector on the headset
cable (A) into the orange socket at the bottom
Slot
of the microphone case.
• Plug the transmitting cable (B) into the socket
at the top of the microphone case.
• Place the coil in your hand.
A
• Turn on the SPrint and set microphone
sensitivity to 10.
B
• Speak into the microphone and check if the
segment meter responds to speech.
A
• If no response, change each cable sequentially using
the cables from the kit.
— Check the segment meter after
each cable change to determine whether
Microphone sensitivity
it responds to speech.
• If the segment meter still does not respond,
go to the next step to check the
Segment meter
ear-level microphone.
Note: If the child needs to use the lapel microphone, clip the lapel microphone onto
the child’s clothing where it is least likely to be jostled, obstructed or contacted
(clothes, food or fingers brushing over the microphone will generate sounds).
If you have reached the end of these instructions, and have not been able to
address or identify the issue, please contact:
• The child’s family (spare processor)
• The child’s implant center (loaner processor)
• Cochlear, ask to speak with customer service or the audiologist on call (for additional troubleshooting/instructions) 800 523 5798
STEP 4: Identify help messages on LCD
• Read manual
• Service required
• Current speech processor is faulty
• Low battery
8
+
9
ESPrit™ 3G Sound Processor
The ESPrit 3G sound processor is compatible with both Nucleus® 24 cochlear
implants and Nucleus® 22 cochlear implants. The only difference between the
two sound processors is the transmitting coil/cable. These differences are
outlined below.
The pieces pictured here are important parts comprising the external
components of the ESPrit 3G sound processor.
Top controls
Microphone ports
Transmitting
coil
Earhook
Battery cover
Transmitting
cable
Mode controls
11
Troubleshooting Guide
If the child reports no sound from the processor and the above inspection is
good, take the following steps:
ESPrit™ 3G Sound Processor
Troubleshooting Steps
STEP 1: Check/change the batteries
• Switch the ESPrit 3G off and
open the battery cover.
Grip each side
Check
that
the
batteries
•
are inserted correctly with
the positive (flat) side up.
• Replace all batteries using
the 675 PowerOne HP
Grip each side
and squeeze lightly
zinc air batteries in the kit.
Troubleshooting Kit Contents
• 675 PowerOne HP zinc air batteries, 6 pack
• Signal check
• Accessories adapter for the ESPrit 3G
• 59” lapel microphone & clip ESPrit 3G
• Monitor earphones for the ESPrit 3G
• Soft earhook cover
• Earmold compatible earhook
Gently push battery out
from the back
Before troubleshooting step by step, conduct a maintenance check
of the equipment.
Cover slides
down and off
Tip battery out
Maintenance Check
Confirm:
• Transmitting cable is properly connected.
• Cable is not broken or cracked.
• Transmitting coil is on the child’s head and is correct N24
(yellow connector), N22 (green connector).
'W' for Whisper Setting
Program
selectionselection
/on/
Program
off control
control
Top controls
'T' for telecoil
'M' for microphone
Mode setting switch
Socket for attaching
the accessories
adaptor
12
STEP 2: Check whether the transmitting
coil/cable is sending a signal across the skin
• Check that the transmitting cable
connection is plugged in correctly.
— Cable/coil N24 = yellow, N22 = green
• Use the signal check from the
troubleshooting kit.
Signal check
• Turn ‘ON’ the sound processor and set
at the student’s normal settings.
• Hold the transmitting coil in one hand or place it on the child’s head.
• Hold the signal check over the transmitting coil.
Red light should illuminate.
• If it doesn’t light up, there is no coil transmission.
• Replace the transmitting coil.
• Place the coil on the child’s head or in your hand and turn
the sound processor ‘ON’.
• Try again using the signal check.
• If still no coil transmission, check the processor
microphone [See Step 3].
Also do the following:
• Confirm that the ESPrit 3G is ‘ON’.
— If no sound, switch the ESPrit 3G ‘Off ’ for about
3 seconds, and then ‘On’.
• Confirm that the student is using the recommended mode setting.
• Confirm that the child is using the recommended program setting.
• Confirm that the rotary wheel is set at the recommended setting.
Volume
or
orVolume
sensitivity
(rotary
wheel)
sensitivity
control
control
Slide
downwards
13
STEP 3: Check the processor microphone
Microphone:
To check the sound quality of the microphone:
• Use the monitor earphones.
• Turn the ESPrit 3G off and remove from the child’s head.
• Attach the monitor earphones.
• Place the listening earphones into your ears and turn
on the sound processor.
• With your mouth 8 inches from the microphone, speak into the
microphone listening for distortions.
— If no sound, check other programs to ensure
the monitor earphone is activated.
The
sound you hear is the sound received by the microphone
•
before it is processed by the sound processor.
• Be sure you’re not close to sources of electromagnetic interference
(i.e., radio and TV transmission towers, security systems, computers).
To check if the microphone is working:
• Use the lapel microphone and accessories adapter from
the troubleshooting kit.
• Turn off the ESPrit 3G and remove from the child’s head.
• Remove accessories adapter socket cover (if inserted).
• Attach the accessories adapter firmly into the base of the ESPrit 3G
until it snaps into place.
• Push the lapel microphone connector into the accessories adapter.
• Place the transmitting coil on the child’s head.
• Turn on the sound processor and set at the child’s “normal” settings.
• Speak into the microphone.
• If the child can hear, the ESPrit 3G microphone is faulty and the lapel
microphone can be used as a substitute until the child’s headset
microphone can be replaced.
If the child’s ESPrit 3G microphone appears to be producing poor sound quality,
a lapel microphone can be used until the child’s headset microphone can be
replaced. Inform the parent that a replacement microphone is required.
If you have reached the end of these instructions, and have not been able to address
or identify the issue, please contact:
Socket for attaching the
Accessories Adaptor
•
•
•
The child’s family (spare processor)
The child’s implant center (loaner processor)
Cochlear, ask to speak with customer service or the audiologist on call (for additional troubleshooting/instructions) 800 523 5798
Plug for your ESPrit 3G
Socket for your
monitoring earphones
Socket for your accessories or
wired assistive listening devices
14
15
Freedom™ BTE, Mini™ BTE
and Babyworn™ BTE
Sound Processors
The Freedom™ BTE, Mini™ BTE and Babyworn™ sound processors are compatible
with Nucleus® Freedom, Nucleus® 22 and Nucleus® 24 cochlear implants.
Each of the pieces pictured here is an important part comprising the external
components of the Freedom™ BTE sound processor.
Coil
Magnet
Indicator light
Processing unit
Earhook
Display
and control
buttons
Accessories
connection
BTE Controller with
three zinc air batteries or
rechargeable battery
17
Each of the pieces pictured here is an important part comprising the external
components of the Mini™ BTE sound processor.
Freedom™ BTE, Mini™ BTE
and Babyworn™ BTE
Sound Processor
Processing unit
Controller panel
Select
Display
Mini BTE
Increase/Decrease
Troubleshooting Guide
Battery holder
Each of the pieces pictured here is an important part comprising the external
components of the Babyworn™ BTE sound processor.
Troubleshooting Kit Contents
• 675 PowerOne HP, zinc air batteries, 6 pack
• Freedom coil (8cm)
• Freedom magnet - #2 beige
• Freedom lapel microphone
• Freedom monitor earphones
• Freedom earhook set (small and large)
• Freedom microphone protector
• Freedom battery holder
Before troubleshooting step-by-step, conduct
a maintenance check of the equipment.
Processing Unit
Accessory
Connection
Shoe/Cable
Case
BTE Controller *
(3ZA)
* Not
Clip Retention Option
Maintenance Check
Confirm:
• Transmitting cable is properly connected.
• Cable is not broken or cracked.
• Transmitting coil is on the child’s head.
Display
Decrease
button
Cover for
accessories
connection
Select
button
on/off
Increase
button
Also do the following:
• Confirm that the Freedom BTE is ‘ON’.
• If no sound, turn the Freedom BTE ‘Off ’ for about 3 sec. and then ‘On’.
• Confirm that the child is using the recommended program setting.
• Identify whether help messages are displayed on the LCD.
compatible with Mini™ controller or MicroLink™ Freedom™
Program 3 in use
Microphone only
18
Sample setting shown here:
Program 2 in use
Telecoil only
19
Help message H1 = battery flat
• Change the batteries (ensure that
all of the batteries are changed).
• Ensure that all of the batteries
are inserted correctly –
flat/positive side on the bottom.
• Insert a new battery holder
containing new batteries or
insert a fully charged
rechargeable battery.
Grip
Pull out
Help message H6 = Implant ID error, or bilateral interference.
• Check that the processor is on the correct ear.
• Remove any other sound processors from the area (the radio frequency signal from the transmitting coil may be interfering), or turn them off.
• If you are sure the processors are on the correct ears and you still see H6 on one or both screens as you look while both are on the
child’s head, contact his or her cochlear implant clinician.
Help message H2 = battery low
•
Replace all of the batteries or the rechargeable battery.
Magnet
Help message H3 = coil error
• Check that the coil is fully inserted in the socket.
• Check that the coil is correctly located over
the Implant.
• Check for cable damage.
• Change coil by placing your fingernails
underneath the coil plug where it meets
the sound processor body, then pulling
straight out. Ensure you are using the
correct coil for the child’s implant type:
green plug for Nucleus 22, black plug
for Nucleus 24 or Freedom.
Help message H4 = sound/stimulation error
• Turn processor ‘OFF’ then ‘ON’.
• Check sensitivity is above ‘0’. Typical use setting is 12, but check with child's audiologist.
• After removing the coil, check/change microphone protector cover.
• Check/change coil.
• Try using the lapel microphone. To use: turn off processor, lift rubber cover on bottom of processor, insert lapel microphone and turn processor back on.
• Change the processing unit (use backup processing unit).
• Contact the child’s cochlear implant clinician.
20
Battery holder
Help message H5 = MAP corrupt
• Try alternate program.
• Contact the child’s cochlear implant clinician.
Presented Complaints:
No sound/intermittent sound (help messages H1, H2, H3, H4)
• Change the batteries (ensure that all of the batteries are changed).
• Check using the lapel microphone.
• Check that the coil is fully inserted in the processing unit socket
(and correctly located over the implant).
• Change the coil.
• Change the controller (ensure new batteries are fitted).
• Change the processing unit (use back-up processing unit or contact
the child’s cochlear implant clinician).
Sound unclear/muffled
• Check the LCD for help message (H4 = see steps 2 – 5,
H5 = contact your clinician).
• Check using the lapel microphone. Determine whether
the sound improves. If so, replace microphone cover.
• If the sound does not improve with new mic cover, use lapel micro
phone clipped to child's shirt until processor is repaired or replaced.
• Replace the processing unit (use back-up processing unit or contact the child’s cochlear implant clinician).
LCD blank (but sound OK)
• Change the controller (return the suspected faulty controller).
• Stop the power to the processing unit and then restart it.
Sounds uncomfortably loud
• Contact the child’s cochlear implant audiologist.
• Check settings as prescribed by audiologist.
21
Indicator light
When the indicator light is turned on*, it:
• Flickers when incoming sounds are being received.
• Shows a slow flash rate as a low battery warning.
• Shows a fast flash rate for all other warnings e.g. the coil is off its
position over the implant, or there is a sound error (help message H4).
• To stop the alarm, push any button.
*
Note that the programming audiologist may activate the indicator light for one or all of the above alerts (incoming sound and/or help messages).
Microphone and accessories
Monitor earphones can be used by a hearing person to listen to the sound signal from either of the following:
• Microphone
• Built-in telecoil
• Microphone and built-in telecoil, together
• Accessory
• Accessory and microphone together
• Monitor earphones and lapel mic can not be used with Mini BTE
• For Babyworn BTE, ensure monitor earphones are plugged into
Babyworn cable shoe accessory connection (see image page 18)
Note that EA does not remain on screen. It appears when pressing the
increase/decrease buttons together to activate an accessory, but then
screen reverts to main display (P 1, 2, 3, or 4).
To use the lapel microphone:
• Turn off sound processor.
• Use your fingernail to lift the socket cover.
• Insert the lapel mic plug.
• Turn on the sound processor.
• The lapel microphone will automatically
be activated.
• To stop using the lapel
microphone, unplug it.
22
To use the monitor earphones:
• Ensure the sound processor is on.
• Plug the monitor earphones into the base of the BTE controller.
— Caution: Do not use force.
Monitor
earphones will turn off after 90 seconds.
•
• Push both the ‘Increase’ and ‘Decrease’ buttons at the same time for a few seconds to activate.
• Should you wish to test an accessory, plug it in to the monitor
earphone connector.
• Listen to sounds.
• While listening, press any button
on the BTE controller, for more
than one second, to re-activate
the earphones, or if they turn off,
press increase/decrease again.
• Should you wish to test an accessory,
plug it in to the monitor earphone connector.
• Listen to sounds.
Monitor earphones only indicate that sound can be heard. They do not
indicate the quality of sound as heard by the sound processor user.
Electromagnetic interference
Move away from any electronic device that may be causing interference, e.g. buzzing sounds or distorted speech.
Most electronic devices produce electromagnetic fields. Headset cables, like antennae, pick them up. Common sources of interference include:
• Radio and TV transmission towers
• Mobile phone towers
• Shopping center and airport security systems
• Some digital mobile phones
• Battery chargers
The electronic interference (EMI) will be no louder than the programmed levels and will neither hurt nor damage the processor. If buzzing is still heard,
or distorted speech, turn off the speech processor, take off the coil and
consult the implant clinician.
23
Freedom™ Bodyworn
Sound Processoressor
The Freedom™ Bodyworn sound processor is compatible with Nucleus® Freedom
cochlear implants.
Each of the pieces pictured here is an important part comprising the external
components of the Freedom™ Bodyworn sound processor.
Bodyworn Controller
with two AAA batteries
Control
buttons
Coil
Magnet
On/Off//Select
Buzzer
ports
Processing
unit
Indicator
light
Display
Earhook
Accessories
connection
Bodyworn Controller
Shoe and Cable
25
Troubleshooting Guide
Help message H1 = battery flat
• Change the batteries (ensure that both of the batteries are changed).
• Ensure that both of the batteries are inserted correctly (make sure the “+” and “-” symbols on the batteries match the “+” and “-” symbols on the compartment.
Freedom Bodyworn
Sound Processor
™
Troubleshooting Kit Contents
• Disposable AAA batteries (2)
• Freedom coil (8cm)
• Freedom magnet – #2 beige
• Freedom lapel microphone
• Freedom monitor earphones
• Freedom Bodyworn shoe and cable
• Freedom earhook set (small and large)
• Freedom microphone protector
Before troubleshooting step-by-step, conduct a maintenance check
of the equipment.
Maintenance Check
Confirm:
• Transmitting cable is properly connected.
• Cable is not broken or cracked.
• Transmitting coil is on the child’s head.
Troubleshooting:
Also do the following:
• Confirm that the Freedom
Bodyworn is ‘ON’.
• If no sound, turn the Freedom
Bodyworn ‘Off ’ for about
3 seconds, and then ‘On’.
• Confirm that the child is using
the recommended program setting.
• Identify any help messages
on the LCD.
Select on/off
Button
Increase Button
Help message H2 = battery low
• Replace/recharge both of the batteries.
Decrease Button
Sample Settings
Battery full
Battery low
Battery flat
Help message H3 = coil error
• Check that the coil is fully inserted in the socket.
• Check that the coil is correctly located over the implant.
• Check for cable damage.
• Change coil by placing your fingernails underneath the coil plug where
it meets the sound processor body, then pulling straight out.
Ensure you are using the correct coil for the child’s implant type: green
plug for Nucleus 22, black plug for Nucleus 24 or Freedom.
26
27
Help message H4 = sound/stimulation error
• Turn processor ‘OFF’ then ‘ON’.
• Check sensitivity is above ‘0’.
• After removing the coil, check/change microphone protector cover.
• Check/change coil.
• Try using the lapel microphone. To use: turn off processor, lift rubber
cover on the "shoe" portion of the cable, insert lapel microphone and
turn processor back on.
• Change the processing unit (use backup processing unit).
• Contact the child’s cochlear implant clinician.
Help message H5 = MAP corrupt
• Try another program location.
• Use back-up processing unit.
• Contact the child’s cochlear implant clinician.
Help message H6 = Implant ID error
(incorrect implant detected by your processor)
• Check that the processor is on the correct ear.
• Remove any other sound processors from the area (the radio frequency signal from the transmitting coil may be interfering), or turn them off.
• If you are sure the processors are on the correct ears and you still see H6 on one or both screens as you look while both are on the
child’s head, contact his or her cochlear implant clinician.
Presented Complaints:
No sound/intermittent sound (help messages H1, H2, H3, H4, H6)
• Ensure processor is on the correct implant.
• Check that the batteries are correctly inserted.
• Turn the sound processor off and then on.
• Change the batteries (ensure that all of the batteries are changed).
• Check using the lapel microphone.
• Check that the coil is fully inserted in the processing unit socket
(and correctly located above the Implant).
• Change the coil.
• Change the bodyworn controller (can also try the BTE controller).
• Change the processing unit (use back-up processing unit or contact the child’s cochlear implant clinician).
Sound unclear/muffled
• Check the LCD for help message (H4 = see steps 2 – 5,
H5 = contact your clinician).
• Check using the lapel microphone. Determine whether
the sound improves.
• Disconnect the lapel microphone and replace the microphone cover.
Determine whether the sound improves.
• Replace the processing unit (use back-up processing unit or contact the child’s cochlear implant clinician).
LCD blank (but sound OK)
• Change the bodyworn controller (return the suspected faulty controller).
Sounds uncomfortably loud
• Check settings as prescribed by audiologist.
• Contact the child’s cochlear implant audiologist.
Indicator light
When the indicator light is turned on, it:
• Flickers when incoming sounds are being received.
• Shows a slow flash rate as a low battery warning.
• Shows a fast flash rate for all other warnings e.g. the coil
is off its position over the implant, or there is a sound error
(help message H4).
• To stop the alarm, push any button.
28
29
Public alarm
When the public alarm is turned on, it:
• Provides an audible beep for button presses or for help messages.
Lapel microphone and accessories
Monitor earphones can be used by a hearing
person to listen to the sound signal from either
of the following:
• Microphone
• Built-in telecoil
• Microphone and built-in telecoil, together
• Accessory
• Accessory and microphone together
An ‘X’ on the
Bodyworn controller
display shows the
accessory has been
activated.
To use the lapel microphone:
• Use your fingernail to lift the
socket cover.
Turn
off sound processor.
•
• Use your fingernail to lift the socket cover.
• Insert the lapel mic plug.
• Turn on the sound processor.
• The lapel microphone will automatically
be activated.
• To stop using the lapel microphone,
unplug it.
Monitor earphones only indicate that sound can be heard. They do not
indicate the quality of sound as heard by the speech processor user.
Electromagnetic Interference
Move away from any electronic device that may be causing interference, e.g. buzzing sounds or distorted speech.
Most electronic devices produce electromagnetic fields. Headset cables, like
antennae, pick them up. Common sources of interference include:
• Radio and TV transmission towers
• Mobile phone towers
• Shopping center and airport security systems
• Some digital mobile phones
• Battery chargers
The electronic interference (EMI) will be no louder than the programmed levels and will neither hurt nor damage the processor. If buzzing is still heard,
or distorted speech, turn off the speech processor, take off the coil and
consult the implant clinician.
To use the monitor earphones:
• Ensure the sound processor is on.
• Plug the monitor earphones into the Bodyworn
controller shoe accessory connection.
— Caution: Do not use force.
• Press any button on the Bodyworn controller, for more than
one second, to activate the earphones.
• Should you wish to test an accessory, plug it in to the monitor
earphone connector.
• Listen to sounds.
30
31
Cochlear Americas
13059 East Peakview Avenue
Centennial, CO 80111
USA
Tel:
1 303 790 9010
Fax:
1 303 792 9025
Toll Free:1 800 523 5798
www.cochlear.com
We believe.
At Cochlear,™ we believe in the joy of sound. We believe
that our purpose is to bring the sounds of life to the ears of
those who cannot hear by providing the tools and confidence
they need to explore the world around them. Our passionate
dedication to providing the best hearing performance and most
reliable technology has enabled our implant systems to deliver
the miracle of sound to over 140,000 individuals around the
world. And we promise to continue this tradition, giving you
the best possible sound. For life.
Nucleus is a registered trademark of Cochlear Limited. Freedom is a trademark
of Cochlear Limited, registered in the U.S. and other countries. Cochlear and the
elliptical logo are trademarks of Cochlear Limited.
FUN599 ISS3 JAN09