1
Section 61181300L1-5C
Issue 3, October 2000
CLEI Code # M3O1CD0C_ _
Total AccessTM QFO-C
Installation and Maintenance
CONTENTS
1. GENERAL ............................................................................ 1
2. INSTALLATION .................................................................. 2
3. OPERATION ........................................................................ 5
4. MAINTENANCE ................................................................ 28
5. WARRANTY AND CUSTOMER SERVICE ................... 28
FIGURES
Figure 1.
Figure 2.
Figure 3.
Figure 4.
Figure 5.
Figure 6.
Figure 7.
Figure 8.
Figure 9.
Figure 10.
Figure 11.
Figure 12.
Figure 13.
Figure 14.
Figure 15.
Figure 16.
Figure 17.
Figure 18.
Figure 19.
Figure 20.
Figure 21.
Figure 22.
Figure 23.
Figure 24.
Figure 25.
Figure 26.
Figure 27.
Figure 28.
Figure 29.
Figure 30.
Figure 31.
Figure 32.
Figure 33.
Figure 34.
Figure 35.
Figure 36.
Figure 37.
Total Access QFO-C .............................................. 1
Total Access 3000 CO Mounting Shelf ................. 5
Fiber Optic Receiver Cabling ................................. 6
QFO-C FCD Menu Tree ....................................... 10
Fiber Main Menu Screen ...................................... 12
QFO-C Configuration Screen ............................... 12
Provisioning Screen .............................................. 13
Service State Screen ............................................. 13
Port Service Status Screen .................................... 14
Provisioning of All Ports Screen .......................... 14
DSX Equalization Screen ..................................... 15
Loopback Timeout Screen .................................... 15
AIS to DSX (Loss of T1) Screen ......................... 16
AIS to DSX (FLOS) Screen ................................. 16
Restore Factory Defaults Screen .......................... 17
Status Screen ......................................................... 17
Port Status Screen ................................................. 18
Status of All Ports Screen ..................................... 18
Alarms Screen ....................................................... 19
Alarm Reporting Screen ....................................... 19
Alarm Provisioning Screen .................................. 20
ES Threshold (15-Minutes) Screen ...................... 20
SES Threshold (15-Minutes) Screen .................... 21
UAS Threshold (15-Minutes) Screen .................. 21
ES Threshold (24-Hours) Screen ......................... 22
SES Threshold (24-Hours) Screen ....................... 22
UAS Threshold (24-Hours) Screen ...................... 23
Test Screen ............................................................ 23
Port Test Screen .................................................... 24
Loopback RT Screen ............................................ 24
Loopback DSX Screen ......................................... 25
Performance Monitoring Screen .......................... 25
Port Performance Monitoring Screen .................. 26
Protection Switch Screen ..................................... 26
Protection Switch Activate Screen ....................... 27
Circuit ID Screen .................................................. 27
Port Current Circuit ID Screen ............................. 28
TABLES
Table 1.
Table 2.
Table 3.
Table 4.
Table 5.
Table 6.
Table 7.
Compliance Codes .................................................. 2
QFO-only Populated Total Access Chassis ........... 2
Pin-out for Pair 5 and 7 on TA 3000 ...................... 3
Pin-out for Pair 6 and 8 on TA 3000 ...................... 3
Pin-out for Pair 5 and 7 on TA 3010 ...................... 4
Pin-out for Pair 6 and 8 on TA 3010 ...................... 4
QFO-C Front Panel Indicators ............................... 7
61181300L1-5C
Table 8.
Table 9.
Table 10.
QFO-C Provisioning Options ................................. 8
QFO-C Menu Hierarchy ....................................... 11
QFO-C Specifications .......................................... 29
QF0-C
1181300L1
PWR
DSX
#1
DSX
#2
DSX
#3
DSX
#4
TST
ALM
ACT
A
P
S
GRN = NORM
YEL = MAN
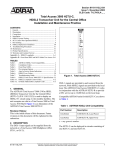
Figure 1. Total Access QFO-C
1. GENERAL
This practice is an installation and maintenance guide
for the ADTRAN Total Access QFO-C, P/N
1181300L1, illustrated in Figure 1. See Table 5 for a
description of QFO-C front panel indicators.
Revision History
This is the third issue of this practice. This issue includes
the removal of the four-character display (FCD)
five-minute time out feature.
Features
The Total Access QFO-C carries up to four
asynchronous DS1 circuits over a single-mode fiber
pair with an optical budget of 22 dB (minimum). The
Total Access QFO-C has the following features:
Trademarks: Section
Any brand names
and product names included
61181300L1-5C,
Issue in3 this document are
trademarks, registered trademarks, or trade names of their respective holders.
1
• Installs in both the Total Access 3000 (23-inch)
and the Total Access (19-inch) chassis.
• End-to-end transmission for one to four DS1
circuits
• Operating wavelength 1310 nm
• Single mode fiber operation
• Power budget of 25dB (typical)
• Launch power of -5dBm (typical)
• Receiver sensitivity of -35dBm (typical)
• DS1 receiver sensitivity of -9dBm
• Optical laser transmitter
• Configured for Central Office (CO) operation
• SC connectorized optics
• Performance monitoring
• Automatic AMI/B8ZS provisioning
• Can be equalized for 0 to 655 feet of ABAM
cable
Performance monitoring and manual loopback on
each DS1
• Front panel LEDs indicate:
PWR - Power is on or off, flashes during craft
panel access
DSX - Individual DSX alarm status is OK, errors
or Loss of Signal
TST - Card in loopback test mode
ALM - Alarm present
ACT - Online indication
2. INSTALLATION
C A U T I O N !
SUBJECT TO ELECTROSTATIC DAMAGE
OR DECREASE IN RELIABILITY.
HANDLING PRECAUTIONS REQUIRED.
After unpacking the unit, inspect it for damage. If
damage is noted, file a claim with the carrier, then
contact ADTRAN. See Warranty and Customer Service.
Compliance Codes
Table 1 shows the Compliance Codes. This product
intended for use in Restricted Access Areas only, and
is intented to be installed in a Type “B” or “E”
enclosure.
Table 1. Compliance Codes
Code
Power Code (PC)
Telecommunication Code (TC)
Installation Code (IC)
Input
Output
F
–
A
C
–
–
Wiring
The QFO-C can only be used in a DSX-1 fed system.
If the QFO-C module is to be mixed in the same shelf
with other line technologies such as T1 or HDSL,
refer to the wiring for that specific card type (See
Section 3, Application Guide, in the Total Access
3000 System Manual). The QFO-C will reach the
network via Amphenol connectors Pair 5 through Pair
8, located on the backplane, which correspond to
DSX-1 connectors A and B. See Table 2. Table 3
includes the pin-outs for pairs 5 and 7, while Table 4
includes the pin-outs for pairs 6 and 8.
Table 2. QFO-only Populated Total Access Chassis
From Total Access
To FDF
To DSX-1
AMP Connector Pair 5
DSX-1 IN B
AMP Connector Pair 6
DSX-1 OUT B
AMP Connector Pair 7
DSX-1 IN A
AMP Connector Pair 8
DSX-1 OUT A
*RX
RX (IN)
*TX
TX (OUT)
*Fiber connections are made to the QFO-C via the connector on its PCB.
2
Section 61181300L1-5C, Issue 3
61181300L1-5C
Table 3. Pin-out For Pair 5 and 7 on TA 3000
Binder Group Color
NONE
BLUE
61181300L1-5C
Wire Color
64-Pin AMP Pin
Total Access
3000 Slot
Tip/Ring
(In)
WHT/BLU
BLU/WHT
33
1
1
WHT/ORG
ORG/WHT
34
2
WHT/GRN
GRN/WHT
Table 4. Pin-out For Pair 6 and 8 on TA 3000
Wire Color
64-Pin AMP Pin
Total Access
3000 Slot
Tip/Ring
(Out)
T
R
WHT/BLU
BLU/WHT
33
1
1
T
R
2
T
R
WHT/ORG
ORG/WHT
34
2
2
T
R
35
3
3
T
R
WHT/GRN
GRN/WHT
35
3
3
T
R
WHT/BRN
BRN/WHT
36
4
4
T
R
WHT/BRN
BRN/WHT
36
4
4
T
R
WHT/SLT
SLT/WHT
37
5
5
T
R
WHT/SLT
SLT/WHT
37
5
5
T
R
REDBLU
BLU/RED
38
6
6
T
R
REDBLU
BLU/RED
38
6
6
T
R
RED/ORG
ORG/RED
39
7
7
T
R
RED/ORG
ORG/RED
39
7
7
T
R
RED/GRN
GRN/RED
40
8
8
T
R
RED/GRN
GRN/RED
40
8
8
T
R
RED/BRN
BRN/RED
41
9
9
T
R
RED/BRN
BRN/RED
41
9
9
T
R
RED/SLT
SLT/RED
42
10
10
T
R
RED/SLT
SLT/RED
42
10
10
T
R
BLK/BLU
BLU/BLK
43
11
11
T
R
BLK/BLU
BLU/BLK
43
11
11
T
R
BLK/ORG
ORG/BLK
44
12
12
T
R
BLK/ORG
ORG/BLK
44
12
12
T
R
BLK/GRN
GRN/BLK
45
13
13
T
R
BLK/GRN
GRN/BLK
45
13
13
T
R
BLK/BRN
BRN/BLK
46
14
14
T
R
BLK/BRN
BRN/BLK
46
14
14
T
R
BLK/SLT
SLT/BLK
47
15
15
T
R
BLK/SLT
SLT/BLK
47
15
15
T
R
YEL/BLU
BLU/YEL
48
16
16
T
R
YEL/BLU
BLU/YEL
48
16
16
T
R
YEL/ORG
ORG/YEL
49
17
17
T
R
YEL/ORG
ORG/YEL
49
17
17
T
R
YEL/GRN
GRN/YEL
50
18
18
T
R
YEL/GRN
GRN/YEL
50
18
18
T
R
YEL/BRN
BRN/YEL
51
19
19
T
R
YEL/BRN
BRN/YEL
51
19
19
T
R
YEL/SLT
SLT/YEL
52
20
20
T
R
YEL/SLT
SLT/YEL
52
20
20
T
R
VOL/BLU
BLU/VOL
53
21
21
T
R
VOL/BLU
BLU/VOL
53
21
21
T
R
VOL/ORG
ORG/VOL
54
22
22
T
R
VOL/ORG
ORG/VOL
54
22
22
T
R
VOL/GRN
GRN/VOL
55
23
23
T
R
VOL/GRN
GRN/VOL
55
23
23
T
R
VOL/BRN
BRN/VOL
56
24
24
T
R
VOL/BRN
BRN/VOL
56
24
24
T
R
VOL/SLT
SLT/VOL
57
25
25
T
R
VOL/SLT
SLT/VOL
57
25
25
T
R
WHT/BLU
BLU/WHT
58
26
26
T
R
WHT/BLU
BLU/WHT
58
26
26
T
R
WHT/ORG
ORG/WHT
59
27
27
T
R
WHT/ORG
ORG/WHT
59
27
27
T
R
WHT/GRN
GRN/WHT
60
28
28
T
R
WHT/GRN
GRN/WHT
60
28
28
T
R
WHT/BRN
BRN/WHT
61
29
WHT/BRN
BRN/WHT
61
29
WHT/SLT
SLT/WHT
62
30
WHT/SLT
SLT/WHT
62
30
REDBLU
BLU/RED
63
31
REDBLU
BLU/RED
63
31
RED/ORG
ORG/RED
64
32
RED/ORG
ORG/RED
64
32
Binder Group Color
NONE
BLUE
Shield
Ground
Section 61181300L1-5C, Issue 3
Shield
Ground
3
If the system is configured with only QFO-Cs, all four
DSX-1 connections are made. The connections are
made via four Amphenol connectors to Pair 5 through
Pair 8 on the backplane.
Table 5. Pin-out For Pair 5 and 7 on TA 3010
Binder Group Color
NONE
Table 6. Pin-out For Pair 6 and 8 on TA 3010
Wire Color
50-Pin AMP Pin
Total Access
3010 Slot
Tip/Ring
(Out)
T
R
WHT/BLU
BLU/WHT
26
1
1
T
R
2
T
R
WHT/ORG
ORG/WHT
27
2
2
T
R
28
3
3
T
R
WHT/GRN
GRN/WHT
28
3
3
T
R
WHT/BRN
BRN/WHT
29
4
4
T
R
WHT/BRN
BRN/WHT
29
4
4
T
R
WHT/SLT
SLT/WHT
30
5
5
T
R
WHT/SLT
SLT/WHT
30
5
5
T
R
REDBLU
BLU/RED
31
6
6
T
R
REDBLU
BLU/RED
31
6
6
T
R
RED/ORG
ORG/RED
32
7
7
T
R
RED/ORG
ORG/RED
32
7
7
T
R
RED/GRN
GRN/RED
33
8
8
T
R
RED/GRN
GRN/RED
33
8
8
T
R
RED/BRN
BRN/RED
34
9
9
T
R
RED/BRN
BRN/RED
34
9
9
T
R
RED/SLT
SLT/RED
35
10
10
T
R
RED/SLT
SLT/RED
35
10
10
T
R
BLK/BLU
BLU/BLK
36
11
11
T
R
BLK/BLU
BLU/BLK
36
11
11
T
R
BLK/ORG
ORG/BLK
37
12
12
T
R
BLK/ORG
ORG/BLK
37
12
12
T
R
BLK/GRN
GRN/BLK
38
13
13
T
R
BLK/GRN
GRN/BLK
38
13
13
T
R
BLK/BRN
BRN/BLK
39
14
14
T
R
BLK/BRN
BRN/BLK
39
14
14
T
R
BLK/SLT
SLT/BLK
40
15
15
T
R
BLK/SLT
SLT/BLK
40
15
15
T
R
YEL/BLU
BLU/YEL
41
16
16
T
R
YEL/BLU
BLU/YEL
41
16
16
T
R
YEL/ORG
ORG/YEL
42
17
17
T
R
YEL/ORG
ORG/YEL
42
17
17
T
R
YEL/GRN
GRN/YEL
43
18
18
T
R
YEL/GRN
GRN/YEL
43
18
18
T
R
YEL/BRN
BRN/YEL
44
19
19
T
R
YEL/BRN
BRN/YEL
44
19
19
T
R
YEL/SLT
SLT/YEL
45
20
20
T
R
YEL/SLT
SLT/YEL
45
20
20
T
R
VOL/BLU
BLU/VOL
46
21
21
T
R
VOL/BLU
BLU/VOL
46
21
21
T
R
VOL/ORG
ORG/VOL
47
22
22
T
R
VOL/ORG
ORG/VOL
47
22
22
T
R
VOL/GRN
GRN/VOL
48
23
23
(unassigned)
(unassigned)
VOL/GRN
GRN/VOL
48
23
23
(unassigned)
(unassigned)
VOL/BRN
BRN/VOL
49
24
24
(Test)
(Test)
VOL/BRN
BRN/VOL
49
24
24
(Test)
(Test)
VOL/SLT
SLT/VOL
50
25
25
GND
VOL/SLT
SLT/VOL
50
25
25
Wire Color
50-Pin AMP Pin
Total Access
3010 Slot
WHT/BLU
BLU/WHT
26
1
1
WHT/ORG
ORG/WHT
27
2
WHT/GRN
GRN/WHT
Tip/Ring
(In)
Note: Only Pairs 7 and 8 have the test pair (pins 24 and 49) on the 50-pin Amphenol.
4
NOTE
Total Access 3000 uses 64-pin Amphenol
cables. Total Access 3010 uses 50-pin Amphenol
cable.
Binder Group Color
NONE
(GND)
Note: Only Pairs 7 and 8 have the test pair (pins 24 and 49) on the 50-pin Amphenol.
Section 61181300L1-5C, Issue 3
61181300L1-5C
See Table 3 and Table 4 for Total Access 3000 pin-out
information. See Table 5 and Table 6 for Total
Access 3010 pin-out information.
If no protection switching is provided, the Main unit
plugs into any odd-numbered slot. The next higher
even-numbered slot may contain a blank card or can
be left empty. See Figure 2.
For further details about QFO-C connections, see
APP-301 and APP-306 in the Application Guide of
the TA 3000 System Manual.
Installing the QFO-C
1. Set the right switch segment S2-2 to Working
“on” or Protect “off” depending on where the
QFO-C is to be located (even- or odd-numbered
slot).
• Odd-numbered slot - set to Working
• Even-numbered slot - set to Protect
WARNING
Risk of electric shock. Voltages up to 140 Vdc
(with reference to ground) may be present on
telecommunications circuits.
NOTE
The left switch segment S2-1 should be in the
“off” position.
1. Never install telephone wiring during a lightning
storm.
2. Never install telephone jacks in wet locations
unless the jack is specifically designed for wet
locations.
3. Never touch uninsulated telephone wires or
terminals unless the telephone line has been
disconnected at the network interface.
4. Use caution when installing or modifying
telephone lines.
5. This equipment is intended to be used behind
devices that provide primary lightning protection.
6. Never look into the end of the fiber cable.
2. Plug the transmit and receive fiber cables into the
fiber optic transceiver (U8) and route the cables
as shown in Figure 3.
CAUTION
For proper operation, the ends of the fiber cables
must remain clean. Do not touch the ends of the
cables. When routing the cables, make sure the
cables have no sharp bends.
For 1:1 Automatic Protection Switching (APS), two
identical units are installed into adjacent slots. The
Main unit plugs into any odd-numbered slot and its
Auxiliary unit plugs into the next even-numbered slot
to the right.
3. Position the QFO-C into the selected shelf slot.
While holding the fiber cables between the two
cable guides on the top of the QFO-C front panel,
lower the card retention lever and slide the unit
into the shelf assembly.
Total Access 3000 Chassis
S
C
U
Q
F
O
C
Q
F
O
C
Q
F
O
C
Q
F
O
C
Q
F
O
C
B
L
A
N
K
C
A
R
D
1
2
3
4
5
6
Main
Auxiliary
7
8
9
10
11
12
13
14
15
16
17
18
19
20
21
22
23
24
25
26
27
28
Blank Card
(or Empty)
Main
Auxiliary
Main
(No Protection)
NOTE: The Total Access 3010 (19-inch) chassis has only 22 access slots.
Figure 2. Total Access 3000 CO Chassis
61181300L1-5C
Section 61181300L1-5C, Issue 3
5
S2-1 S2-2
S2
ON Working
Protect
XMT
U8
RCV
Fiber Optic Transceiver
NOTE: S2-2 set to off = Protect
Figure 3. Fiber Optic Receiver Cabling
Release the card retention lever and carefully seat
the card into the backplane connector by firmly
pressing on the QFO-C front panel. Verify the
fiber cables move freely between the cable guides
and the shelf.
When installed and powered, the PWR LED (green)
on the front panel lights steady.
Options
The QFO-C is software configurable through the
System Controller Unit (SCU). A comprehensive
guide to all options and configuration information is
in the menu sections of this practice.
3. OPERATION
The QFO-C transports up to four T1 signals from the
near (CO/CEV) end to the far Remote Terminal (RT)
end via a single mode fiber pair (transmit/receive) that
has an optical budget up to 22 dB. The functions of
the card are set up through the Total Access SCU via a
VT100 type terminal or via the FCD on the SCU front
panel.
The DSX T1 signals are terminated in transformers
reflecting a 100 ohm termination. The signal from a
DSX channel is monitored for BPV errors and loss of
signal. Signals up to -9 dBm may be recovered from
the incoming DSX signal. The T1 signal may be
manually looped back by a VT100 command. Up to
four T1 signals are then multiplexed. The resulting
signal is transmitted to the far end via the laser
transmitter.
The received fiber signal is detected via the fiber
receiver and de-multiplexed into four T1 signals.
6
These signals are de-jittered and sent to the DSX by
the T1 line drivers. The line driver circuits provide
the appropriate pulse shape for line lengths ranging
from 0 to 655 feet.
The Fiber transceiver provides a minimum launch
power of -8 dBm (optical) and a minimum receive
sensitivity of -30 dBm. This supports a minimum
optical budget of 22 dB over a single mode 1310 nm
fiber optic cable.
Connectors are single or duplex SC type. The
receiver input level is -3 dBm maximum so the
transmitter may be connected to the receiver without
overdriving the receiver input. Optical coding is ANSI
X3T9.5.
The Fiber transmitter is constantly monitored for “end
of life.” If this condition is detected, a minor alarm is
generated. In a protected system, service is switched
to the auxiliary card and a minor alarm is generated.
The QFO-C has a single dip switch (S2), which must
be set before installing the card in the Total Access
chassis. If the card is used in a non-protected mode or
is the main card in a protected mode, set S2-2 to
Working “on” (towards the top to the card). If the
card is used as the auxiliary fiber card in a protected
operation mode, set S2-2 to “off” (toward the center
of the card). The switch is set in the Working when
received from the factory.
QFO-C Front Panel Indicators
The QFO-C front panel LEDs give status
information about the card and are described in
Section 61181300L1-5C, Issue 3
61181300L1-5C
Table 7. QFO-C Front Panel Indicators
Indicator
Color
Description
PWR
(Power)
Solid Green
Flashing Green
Off
Power is on
Card being accessed by the SCU via the SCU MODE/SELECT toggle switch
Power is off
DSX 1 to 4
(Individual alarm
status of each of 4
T1 circuits)
Solid Green
Off
Flashing
Green and Orange
T1 is present with no errors
T1 Loss of Signal from DSX or channel is disabled
T1 Bipolar Violations from DSX
TST
(Test)
Solid Orange
Off
Card in loopback
Normal indication (no loopback)
ALM
(Combination
of all 4 T1’s
alarm status)
Solid Red
Off
Major/Minor alarm active
No alarms present or alert/lower-level severity alarm active
ACT
(Online indication)
Solid Green
Off
Card is online
Card is offline
Table 7.
QFO-C Card Provisioning
The card is provisioned through the craft port on the
SCU or by the FCD. Detailed procedures for
provisioning the QFO-C start on page 11 with the
section labeled Fiber (QFO-C) Main Menu. The
screenshots are accompanied by steps to assist in
provisioning the unit. Table 8 includes a list of the
functions that may be provisioned in the QFO-C card.
Four-Character Display (FCD) Guidelines
This section provides guidelines for using the FCD
menu interface for configuration, provisioning and
system maintenance.
Menu Structure
The menu structure for a card is a multi-layered menu
tree. Each menu level consists of menu elements,
which may be either a main menu or a sub-menu item.
Sub-menus are menu elements that when selected
descend down to the next menu level. Menu items
consist of two types:
• Read-only – Elements that display information
that may change based on the status of the unit,
but are not changeable directly by the user, for
61181300L1-5C
example, “STAT OK.”
• Read/write – Elements that display information,
but the value may be altered by selecting the
item, for example, “DSX EQ 134 FT.” The user
can select the item and change its value.
Navigating the Menu Structure
The three-position, return-to-center MODE/SELECT
toggle switch on the SCU provides the FCD menu
interface. The FCD displays strings four characters at
a time. A string greater than four characters long is
displayed as 4-character sub-strings for 1 second per
sub-string. The string repeats when the end of the
string is reached.
Four input values are available from the switch:
• MODE – press the switch in the MODE direction
and release it within 1.5 seconds to toggle among
selections on the current menu. The switch must
be held for at least 24 milliseconds.
• SELECT – press the switch in the SELECT
direction and release it within 1.5 seconds to
select a menu item.
The switch must be held for at least 24
milliseconds. If the SELECT switch is held for
more than 1.5 seconds, the input is ignored.
Section 61181300L1-5C, Issue 3
7
Table 8. QFO-C Provisioning Options
8
Option
Description
Values
Default
Service State
Enables normal connection to the DSX or multiplexer
interface
In Service
Out of ServiceUnassigned
Loops will train up but will not connect to the DSX or
multiplexer interface
Out of Service Unassigned
Supports active connections to the DSX or multiplexer
interface; however, alarms cannot be generated
Out of Service Maintenance
DSX Equalization
Conditions the signal to provide a proper 0dB level
output to the DSX
0 to 133' ABAM
134 to 266' ABAM
267 to 399' ABAM
400 to 533' ABAM
534 to 655' ABAM
0 to 133' ABAM
Loopback Timeout
Releases a code-activated loopback in the time selected
after initial activation
Disabled
20 minutes
60 minutes
120 minutes
120 minutes
AIS to DSX (Loss of T1)
Generates AIS to network on LOS from facility for a
specific port
Enabled, Disabled
Disabled
AIS to DSX (FLOS)
Generates AIS to network on all ports on Fiber LOS
from facility
Enabled, Disabled
Disabled
ES Threshold (15-Min.)
Enters a specific ES 15-minute threshold that, when
exceeded, will generate an alarm
30, 150
150
SES Threshold (15-Min.)
Enters a specific SES 15-minute threshold that, when
exceeded, will generate an alarm
15, 75
75
UAS Threshold (15-Min.)
Enters a specific UAS 15-minute threshold that, when
exceeded, will generate an alarm
15, 75
75
ES Threshold (24-Hour)
Enters a specific ES daily threshold that, when exceeded,
will generate an alarm
2880, 14400
14400
SES Threshold (24-Hour)
Enters a specific SES daily threshold that, when
exceeded, will generate an alarm
1440, 7200
7200
UAS Threshold (24-Hour)
Enters a specific UAS daily threshold that, when
exceeded, will generate an alarm
1440, 7200
7200
Circuit ID (one for each port)
32-character alphanumeric character field
Section 61181300L1-5C, Issue 3
Null string
61181300L1-5C
• ESCAPE – press the switch in the MODE
direction and release it between 1.5 seconds and
3 seconds to ascend the menu tree.
• ROOT - press the switch in the MODE direction
and release it after 3 seconds to return to the first
element of the Level 1 card menu.
To enter the SCU, MUX, or LINE CARD (T1-OR,
HTU-C or QFO-C) menu trees, activate the menu
function by performing the following steps:
1.
2.
3.
4.
4a.
4b.
Push the toggle switch momentarily to the
MODE position and release.
The SCU FCD will enter the login function.
Each of the four digits of the password must
be individually selected. To select a digit,
move the toggle switch momentarily to the
SELECT position. To change a digit, move
the toggle switch momentarily to the MODE
position. The default password is 0000 (four
zeros).
At the shelf status “STAT” display, press and
release the MODE/SELECT switch in the
MODE direction to toggle among menu
selections SCU, MUX (if equipped), and
LINE CARD.
Press the MODE/SELECT switch in the
SELECT direction to select the desired menu
item.
For the MUX selection, the FCD displays
MUXA. Press and release the MODE/
SELECT switch in the MODE direction to
display MUXB (if equipped). Press the
MODE/SELECT switch in the SELECT
direction to enter the selected multiplexer
menu tree.
For the LINE CARD selection, the number of
the first occupied line card slot displays (for
example, 05). Press and release the MODE/
SELECT switch in the MODE direction until
the desired line card slot number displays.
Press the MODE/SELECT switch in the
SELECT direction to enter the selected line
card menu tree.
Figure 4 shows the QFO-C FCD Menu Tree. The
MODE command toggles among the selections on the
current menu level. For example, if the FCD is
61181300L1-5C
displaying QFO-C “STAT MAJ ALRM” (Figure 4,
Level 1) and the MODE command is issued, the
“VIEW” menu displays. If the MODE command is
issued again, the “PROV” menu displays, etc.
The SELECT command selects a menu element and
descends the menu to the next level. For example, if
the FCD is displaying QFO-C “ALRM PROV”
(Figure 4, Level 1) and the SELECT command is
issued, the “ES” sub-menu displays. If the SELECT
command is issued again, the “15 MIN ERR THLD”
sub-menu displays, etc. If a read/write element is
selected, the display prompts the user to save the
setting. The message “SAVE” flashes on the display
followed by the message “NO.” If the user wishes to
go back to the original setting, press the MODE/
SELECT switch to SELECT. If the user wishes to
choose the new setting, press the MODE/SELECT
switch to MODE. The message “YES” displays.
Press the MODE/SELECT switch to SELECT to have
the new setting take effect. After selecting the new
setting, the display returns to flashing between the
option name and the current setting for that option.
The MODE switch can then be used to scroll through
the remaining options.
The ESCAPE command ascends the menu tree.
Issuing an ESCAPE command on any menu item
ascends the menu one level and displays the first
element on that level. For example, if the FCD is
displaying QFO-C “20 MIN” on level 3 of Figure 4
and the ESCAPE command is issued, the “LB TOUT”
menu displays. If the element is a read/write value, it
maintains its original value.
The ROOT command ascends to the first element of
the Level 1 card menu. If the ROOT command is
issued from any non-level 1 location, the menu
displayed is the first element of level 1. For the
QFO-C Menu Tree (Figure 4), the FCD displays
QFO-C “STAT” (first element of Level 1). If the
ROOT command is issued from a level 1 location, the
software interprets the ROOT command as an
ESCAPE command and displays the SCU menus.
QFO-C Protection
A fully-protected system may be established by
installing a second (Auxiliary) card to the right of the
Section 61181300L1-5C, Issue 3
9
SELECT (<1.5 sec.)
10
ESCAPE (1.5-3 sec.)
Section 61181300L1-5C, Issue 3
61181300L1-5C
Level 5
Level 4
Level 3
Level 2B
Level 2A
Level 1
IN
SRVC
P0
MIN
ALRM
MAJ
ALRM
OK
STAT
P2
UNAS
0
FT
P1
VIEW
ROOT (>3 sec.)
134
FT
267
FT
MAINT
P3
P4
SRVC
STAT
PROV
400
FT
DEX
EQ
534
FT
DSBL
LB
TOUT
150
60
MIN
2800
120
MIN
14400
NO
SAVE
NO
15
DSBL
DONE
SAVE
YES
75
ENBL
AIS TO
DSX
FLOS
1440
Figure 4. QFO-C FCD Menu Tree
30
20
MIN
AIS TO
DSX
LOS
MODE (<1.5 sec)
7200
15
MIN
ERR
THLD
24
HR
ERR
THLD
ES
ALRM
PROV
15
MIN
ERR
THLD
SES
24
HR
ERR
THLD
UAS
DSBL
NET
LBRT
P1
P2
DSBL
DUAL
P3
TEST
NET
LB
DSX
P4
Main card. The Main card is installed in an
odd-numbered slot and the Auxiliary card must be
installed in the even-numbered slot to the right of the
Main card. The remote terminal (RT) must also have a
Auxiliary card installed in the RT shelf. When
installed, a Main/Auxiliary communication is
established. Service is transferred from the Main to
the Auxiliary card if a failure occurs in the Main card.
The following conditions cause a switch:
• Fiber Loss signal (either fiber)
• Laser degrade signal
• Module power supply failure
• Manual switch via the APS switch or a VT100
command
After the faulty circuit has been restored or following
a user-defined timeout, transmission reverts back to
the Working card.
NOTE
A manual switch can be performed only from
the Working card.
Fiber (QFO-C) Menu Screen
This subsection provides procedures for entering the
fiber menu screens to provision and maintain the
QFO-C and the QFO-R. The Fiber menu hierarchy
(QFO-C Main Menu screen and its eight submenu
screens) is shown in Table 9.
61181300L1-5C
Table 9. QFO-C Menu Hierarchy
QFO-C Main Menu
Configuration
Provisioning
Service State
Port 0/1/2/3/4
All Provisioning
DSX Equalization
Loop Back Timeout
AIS to DSX (Loss of T1)
AIS to DSX (FLOS)
Restore Factory Defaults
Status
Port 1/2/3/4
All Ports
Alarms
View Alarms
Alarm Provisioning
ES Threshold (15-Min)
SES Threshold (15-Min)
UAS Threshold (15-Min)
ES Threshold (24-Hour)
SES Threshold (24-Hour)
UAS Threshold (24-Hour)
Test
Port 1/2/3/4
Loopback RT
Loopback DSX
Performance Monitoring
Port 1/2/3/4 (Near End)
Port 1/2/3/4 (Far End)
Protection Switching
ACT Activate
Circuit ID
Port 1/2/3/4
Section 61181300L1-5C, Issue 3
11
Entering the Fiber Main Menu Screen
From the Total Access Main Screen Menu, type 4 and
press Enter to select Access Modules. Type “1” and
press Enter to select the Module Menus Screen.
Choose the desired QFO-C slot number. The Fiber
Main Menu Screen (Figure 5) will appear.
Shelf:
Slot: 10
Unacknowledged Alarms:
Viewing the QFO-C Configuration Screen
From the Fiber Main Menu screen, type “1” and press
Enter to select Configuration. The Configuration
screen (Figure 6) will appear.
Total Access System
MINOR
07/15/99 10:37
QFO-C Main Menu
1.
2.
3.
4.
5.
6.
7.
8.
Configuration
Provisioning
Status
Alarms
Test
Performance Monitoring
Protection Switching
Circuit Id
Selection:
‘?’ - System Help Screen
Figure 5. Fiber Main Menu Screen
Shelf:
Slot: 10
Unacknowledged Alarms:
Total Access System
MINOR
07/15/99 10:42
Configuration
Unit Name
Clei Code
Part Number
Serial Number
Product Revision
Software Revision
Manufacture Date
QFO-C
M3O1CD0CAA
1181300L1
A903C7322
A
A.00
10/99
‘?’ - System Help Screen
Figure 6. QFO-C Configuration Screen
12
Section 61181300L1-5C, Issue 3
61181300L1-5C
Accessing the QFO-C Provisioning Screen
1. From the Fiber Main Menu Screen, type “2” and
press Enter to select Provisioning. The Provisioning
Screen (Figure 7) will appear.
Shelf:
Slot: 10
Unacknowledged Alarms:
2. Type “1” and press Enter for the Service State of
the individual ports. The Service State Screen
(Figure 8) will appear.
Total Access System
MINOR
07/15/99 10:42
Provisioning
1.
2.
Service State
All Provisioning
Selection:
‘?’ - System Help Screen
Figure 7. Provisioning Screen
Shelf:
Slot: 10
Unacknowledged Alarms:
Total Access System
07/15/99 10:42
None
Service State
1.
2.
3.
4.
5.
Port
Port
Port
Port
Port
0
1
2
3
4
Out
Out
Out
Out
Out
of
of
of
of
of
Service
Service
Service
Service
Service
-
Unassigned
Unassigned
Unassigned
Unassigned
Unassigned
Selection:
‘?’ - System Help Screen
Figure 8. Service State Screen
61181300L1-5C
Section 61181300L1-5C, Issue 3
13
Type the number corresponding to the desired service
state. Press Enter.
NOTE
Port 0 is the QFO-C access module itself.
Changing the Port Service State
From the Service State Screen, type the desired port
number and press Enter. The Port Service Status
Screen (Figure 9) will appear.
Shelf:
Slot: 10
Unacknowledged Alarms:
From the Provisioning screen (Figure 7) type “2” and
press Enter to select All Provisioning. The
Provisioning of All Ports Screen (Figure 10) will
appear.
Total Access System
MINOR
07/15/99 10:42
Port 1: Out of Service - Unassigned
1.
2.
3.
In Service
Out of Service - Unassigned
Out of Service - Maintenance
Selection:
‘?’ - System Help Screen
Figure 9. Port Service Status Screen
Shelf:
Slot: 10
Unacknowledged Alarms:
Total Access System
MINOR
07/15/99 10:45
Provisioning for All Ports
1.
2.
3.
4.
5.
DSX Equalization
Loopback Timeout
AIS to DSX (Loss of T1)
AIS to DSX (FLOS)
Restore Factory Defaults
0 to 133' ABAM
120 Min.
Disabled
Disabled
Selection:
‘?’ - System Help Screen
Figure 10. Provisioning of All Ports Screen
14
Section 61181300L1-5C, Issue 3
61181300L1-5C
NOTE
Port 0 (all ports) “Out of Service” disables the
entire module. Port 0 must be “In Service” for
any Port 1 to 4 to be active.
Changing the DSX Equalization
1. From the Provisioning of All Ports screen, type “1”
and press Enter to select DSX Equalization. The DSX
Equalization Screen (Figure 11) will appear.
Shelf:
Slot: 10
Unacknowledged Alarms:
2. Type the number corresponding to the desired
equalization value and press Enter.
Changing the Loopback Timeout Value
1. From the Provisioning of All Ports screen
(Figure 10), type “2” and press Enter to select
Loopback Timeout. The Loopback Timeout Screen
(Figure 12) will appear.
2. Type the number corresponding to the desired
loopback timeout value and press Enter.
Total Access System
MINOR
07/15/99 10:43
DSX Equalization: 0 to 133' ABAM
1.
2.
3.
4.
5.
0 to 133' ABAM
134 to 266' ABAM
267 to 399' ABAM
400 to 533' ABAM
534 to 655' ABAM
Selection:
‘?’ - System Help Screen
Figure 11. DSX Equalization Screen
Shelf:
Slot: 10
Unacknowledged Alarms: None
Total Access System
Loop Back Timeout:
1.
2.
3.
4.
07/15/99 10:43
O min.
Disabled
20 min.
60 min.
120 min.
Selection:
‘?’ - System Help Screen
Figure 12. Loopback Timeout Screen
61181300L1-5C
Section 61181300L1-5C, Issue 3
15
Enabling/Disabling AIS to DSX (Loss of T1)
1. From the Provisioning of All Ports Screen, type “3”
and press Enter to select AIS to DSX (Loss of T1).
The AIS to DSX (Loss of T1) Screen (Figure 13) will
appear.
2. Type “1” and press Enter to select Disabled, or type
“2” and press Enter to select Enabled.
Shelf:
Slot: 10
Unacknowledged Alarms: None
Enabling/Disabling AIS to DSX (FLOS)
1. From the Provisioning of All FLOS screen, type
“4” and press Enter to select AIS to DSX (FLOS). The
AIS to DSX (FLOS) Screen (Figure 14) will appear.
2. Type “1” and press Enter to select Disabled, or type
“2” and press Enter to select Enabled.
Total Access System
AIS to DSX (Loss of T1):
1.
2.
07/15/99 10:43
Disabled
Disabled
Enabled
Selection:
‘?’ - System Help Screen
Figure 13. AIS to DSX (Loss of T1)
Shelf:
Slot: 10
Unacknowledged Alarms: None
Total Access System
AIS to DSX (FLOS):
1.
2.
07/15/99 10:43
Disabled
Disabled
Enabled
Selection:
‘?’ - System Help Screen
Figure 14. AIS to DSX (FLOS) Screen
16
Section 61181300L1-5C, Issue 3
61181300L1-5C
Restore Factory Default Settings
1. From the Provisioning of All Ports Screen, type “5”
and press Enter to select Restore Factory Defaults.
The Restore Factory Defaults Screen (Figure 15) will
appear.
Accessing the Status Screen
1. From the QFO-C Main Menu Screen, type “3” and
press Enter to select Status. The Status screen
(Figure 16) will appear.
2. Type “2” and press Enter to select Yes, and restore
factory default settings.
Shelf:
Slot: 10
Unacknowledged Alarms: None
Total Access System
07/15/99 10:43
Restore Factory Defaults?
1.
2.
No
Yes
Selection:
‘?’ - System Help Screen
Figure 15. Restore Factory Defaults Screen
Shelf: 1 Slot: 5
Unacknowledged Alarms:
Total Access System
MAJOR MINOR
09/11/00 09:28
Status
1.
2.
3.
4.
5.
Port 1
Port 2
Port 3
Port 4
All Ports
Selection:
‘?’ - System Help Screen
Figure 16. Status Screen
61181300L1-5C
Section 61181300L1-5C, Issue 3
17
Viewing the Status of a Single Port
From the Status Screen, type the number of the
desired single port and press Enter. The Port Status
Screen (Figure 17) will appear.
Shelf: Slot:
Unacknowledged Alarms: None
Viewing the Status of All Ports
From the Status Screen, type “5” and press Enter to
select All Ports. The Status of All Ports Screen
(Figure 18) will appear.
Total Access System
02/18/98 02:24:18
Port 1 Status
Port
Loss of Signal
Loop Back DSX
Loop Back RT (Network)
Loop Back RT (Customer)
Severely Errored
Errored
Framing (Customer)
ESF Framing (Customer)
Unframed T1 (Customer)
Near End
Disabled
No
No
N/A
N/A
No
No
No
No
No
Far End
Disabled
No
N/A
Yes
No
No
No
No
No
No
‘?’ - System Help Screen
Figure 17. Port Status Screen
Shelf:
Slot: 10
Unacknowledged Alarms: None
Total Access System
07/15/99 10:43
Status of All Ports
Fiber Loss
Laser Bias Alarm
Adjacent Card
On Line
Switched Manually
RT Auto Mode
Port 1
Port 2
Port 3
Port 4
Near End
No
No
Present
No
No
No
Disabled
Disabled
Disabled
Disabled
Far End
No
No
N/A
No
No
No
Disabled
Disabled
Disabled
Disabled
‘?’ - System Help Screen
Figure 18. Status of All Ports Screen
18
Section 61181300L1-5C, Issue 3
61181300L1-5C
Accessing the Alarms Screen
From the QFO-C Main Menu Screen, type “4“ and
press Enter to select Alarms. The Alarms Screen
(Figure 19) displays.
Shelf: Slot:
Unacknowledged Alarms: None
Viewing Alarms
From the Alarms screen, type “1” and press Enter to
view alarms. The Alarms Reporting Screen
(Figgure 20) appears.
Total Access System
02/18/98 02:24:18
Alarms
1. View Alarms
2. Alarm Provisioning
Selection:
‘?’ - System Help Screen
Figure 19. Alarms Screen
Shelf: Slot:
Unacknowledged Alarm: None
Total Access System
02/18/98 02:24:18
Alarms
Level
–––––––––––––––––––––––––––––––––––––––––––––––––––––––––––––––––––––––––
QFO-C Fiber LOS from Facility
QFO-C Laser Bias
QFO-R Discretionary
Major
Minor
Minor
? - System Help Screen
Figure 20. Alarm Reporting Screen
61181300L1-5C
Section 61181300L1-5C, Issue 3
19
Changing Alarm Settings and Thresholds
1. From the QFO-C Main Menu screen, type “4” and
press Enter to select Alarms. The Alarms Screen
(Figure 19) will appear.
2. Type “2” and press Enter to select Alarm
Provisioning. The Alarm Provisioning Screen
(Figure 21) will appear.
Shelf: Slot:
Unacknowledged Alarms: None
Setting the ES Threshold (15-Min.)
1. From the Alarm Provisioning Screen, type “1” and
press Enter to select ES Threshold (15-Min.). The ES
Threshold Screen (Figure 22) will appear. Type the
number of desired setting and press Enter.
Total Access System
02/18/98 02:24:18
‘?’ - System Help Screen
Alarm Provisioning
1.
2.
3.
4.
5.
6.
ES Threshold (15 Min.)
SES Threshold (15 Min.)
UAS Threshold (15 Min.)
ES Threshold (24 Hours)
SES Threshold (24 Hours)
UAS Threshold (24 Hours)
30
15
15
14400
7200
7200
Selection:
Figure 21. Alarm Provisioning Screen
Shelf: Slot:
Unacknowledged Alarm: None
Total Access System
ES Threshold (15 Min.):
02:24:18 02/18/98
30
1. 30
2. 150
Selection:
? - System Help Screen
Figure 22. ES Threshold (15-Minute) Screen
20
Section 61181300L1-5C, Issue 3
61181300L1-5C
Setting the SES Threshold (15-Min.)
1. From the Alarm Provisioning Screen, type “2” and
press Enter to select SES Threshold (15-Minute). The
SES Threshold Screen (Figure 23) will appear.
2. Type “1” and press Enter to select 15 or type “2”
and press Enter to select 75.
SHELF: SLOT:
UNACKNOWLEDGED ALARMS: NONE
Setting the UAS Threshold (15-Min.)
1. From the Alarm Provisioning Screen, type “3” and
press Enter to select UAS Threshold (15-Minute).
The UAS Threshold Screen (Figure 24) will appear.
Type number of desired setting and press Enter.
TOTAL ACCESS SYSTEM
02:24:18 02/18/98
SES THRESHOLD (15 MIN.): 15
1. 15
2. 75
SELECTION:
‘?’ - System Help Screen
Figure 23. SES Threshold (15-Minute) Screen
Shelf: Slot:
Unacknowledged Alarms: None
Total Access System
02/18/98 02:24:18
UAS Threshold (15 Min.): 15
1. 15
2. 75
Selection:
‘?’ - System Help Screen
Figure 24. UAS Threshold (15-Minute) Screen
61181300L1-5C
Section 61181300L1-5C, Issue 3
21
Setting the ES Threshold (24-Hour)
From the Alarm Provisioning Screen, type “4” and
press Enter to select ES Threshold (24-Hour). The ES
Threshold Screen (Figure 25) will appear. Type the
number of the desired setting and press Enter.
Shelf: Slot:
Unacknowledged Alarm: None
Setting the SES Threshold (24-Hour)
From the Alarm Provisioning Screen, type “5” and
press Enter to select SES Threshold (24-Hour). The
SES Threshold Screen (Figure 26) will appear. Type
the number of the desired setting and press Enter.
Total Access System
ES Threshold (24 Hour):
02:24:18 02/18/98
14400
1. 2880
2. 14400
Selection:
? - System Help Screen
Figure 25. ES Threshold (24-Hour)
Shelf: 3 Slot: 11
Unacknowledged Alarms:
Total Access System
MAJOR
ALERT INFO
12/15/99 09:38
SES Threshold (24 Hour): 7200
1. 1440
2. 7200
Selection:
‘?’ - System Help Screen
Figure 26. SES Threshold (24-Hour)
22
Section 61181300L1-5C, Issue 3
61181300L1-5C
Setting the UAS Alarm Threshold (24-Hour)
From the Alarm Provisioning Screen, type “6” and
press Enter to select UAS Alarm Threshold (24-Hour).
The UAS Alarm Threshold Screen (Figure 27) will
appear. Type the number of the desired setting and
press Enter.
Shelf: 3 Slot: 11
Unacknowledged Alarms:
Setting Up Loopbacks for a Test
From the QFO-C Main Menu Screen, type “5” and
press Enter to select Test. The Test Screen (Figure
28) will appear.
Total Access System
MAJOR
ALERT
12/15/99 11:22
UAS Threshold (24 Hours): 7200
1. 1440
2. 7200
Selection:
‘?’ - System Help Screen
Figure 27. UAS Alarm Threshold (24-Hour)
Shelf: Slot:
Unacknowledged Alarms: None
Total Access System
02/18/98 02:24:18
Test
1.
2.
3.
4.
Port
Port
Port
Port
1
2
3
4
Loopback
Loopback
Loopback
Loopback
Selection:
‘?’ - System Help Screen
Figure 28. Test Screen
61181300L1-5C
Section 61181300L1-5C, Issue 3
23
Performing Loopback Testing
1. From the Test Screen, type the number that
corresponds to the desired port and press Enter. The
Port Test Screen (Figure 29) displays.
Shelf: Slot:
Unacknowledged Alarms: None
2. Type “1” and press Enter for remote loopback
testing. Type “2” and press Enter for network
loopback testing. Figure 30 displays the Loopback
RT screen. Type the number of the desired remote
test and press Enter.
Total Access System
02/18/98 02:24:18
Port 1/2/3/4 Test
1. Loopback RT
2. Loopback DSX
Disabled
Disabled
Selection:
‘?’ - System Help Screen
Figure 29. Port Test Screen
Shelf: Slot:
Unacknowledged Alarms: None
Total Access System
02:24:18 02/18/98
Loopback RT: Disabled
1. Disabled
2. Network
3. Dual
Selection:
‘?’ - System Help Screen
Figure 30. Loopback RT Screen
24
Section 61181300L1-5C, Issue 3
61181300L1-5C
Accessing the Performance Monitoring
Screen
1. From the QFO-C Main Menu screen, type 6 and
press Enter to select Performance Monitoring. The
Performance Monitoring Screen (Figure 32) will
appear.
Figure 31 shows the Loopback DSX Screen. Type
the number of the desired DSX test and press Enter.
SHELF: SLOT:
UNACKNOWLEDGED ALARMS: NONE
TOTAL ACCESS SYSTEM
02:24:18 02/18/98
Loopback DSX: Disabled
1. Disabled
2. Network
Selection:
‘?’ - System Help Screen
Figure 31. Loopback DSX Screen
Shelf: Slot:
Unacknowledged Alarms: None
Total Access System
02:24:18 02/18/98
Peformance Monitoring
1.
2.
3.
4.
5.
6.
7.
8.
Port
Port
Port
Port
Port
Port
Port
Port
1
2
3
4
1
2
3
4
(Near End)
(Near End)
(Near End)
(Near End)
(Far End)
(Far End)
(Far End)
(Far End)
Selection:
‘?’ - System Help Screen
Figure 32. Performance Monitoring Screen
61181300L1-5C
Section 61181300L1-5C, Issue 3
25
Viewing Performance Monitoring Screens
Type the number corresponding to the port and type of
Performance Monitoring data desired, Near or Far End
and press Enter. The Port Performance Monitoring
Screen (Figure 33) will display.
Switching the QFO-C from On Line to Protect
From the QFO-C Main Menu Screen, type “7” and
press Enter to select Protection Switching. The
Protection Switching Screen for the Working card
(Figure 34) will appear.
NOTE
Port 1, Near End, is shown in Figure 33 as an
example. PM options 2 through 8 display the
same.
Shelf: 3 Slot: 11
Unacknowledged Alarms:
Total Access System
MAJOR
ALERT
12/15/99 11:22
Port 1 Performance (Near End)
-1
-2
-3
-4
-5
-6
-7
-8
-9
-10
-11
-12
-13
-14
-15
15 Minute Registers
24 Hour Registers
ES——SES—UAS—————
ES——SES—UAS
ES——SES—UAS
0000
0000 0000
-16 0000
0000 0000
00006 0000 00000
0000
0000 0000
-17 0000
0000 0000
-1 00000 0000 20373
0000
0000 0000
-18 0000
0000 0000
-2 00007 0000 00000
0000
0000 0000
-19 0000
0000 0000
-3 00001 0000 00000
0001
0001 0000
-20 0000
0000 0000
-4 00000 0000 00000
0000
0000 0000
-21 0000
0000 0000
-5 00001 0000 00000
0000
0000 0000
-22 0000
0000 0000
-6 00003 0000 00000
0000
0000 0000
-23 0000
0000 0000
-7 65533 6553 46373
0000
0000 0000
-24 0000
0000 0000
-8 00003 0000 00000
0000
0000 0000
-25 0001
0001 0000
0000
0000 0000
-26 0000
0000 0000
0000
0000 0000
-27 0000
0000 0000
0000
0000 0000
-28 0001
0001 0000
0000
0000 0000
-29 0000
0000 0000
0001
0001 0000
-30 0000
0000 0000
0000
0000 0000
-31 0000
0000 0000
Press ‘N’ for Next Page, ‘P’ for Previous Page
Figure 33. Port Performance Monitoring Screen
Shelf: Slot:
Unacknowledged Alarms: None
Total Access System
02/18/98 02:24:18
APS Switching
1. ACT Activate
Selection:
‘?’ - System Help Screen
Figure 34. Protection Switch Screen
26
Section 61181300L1-5C, Issue 3
61181300L1-5C
Setting the Port Circuit ID
1. From the QFO-C Main Menu Screen, type “8” and
press Enter to select Circuit ID. The Circuit ID
S creen (Figure 36) will appear.
2. Type “2” and press Enter to switch the Working
QFO-C to protect (Figure 35).
Shelf: Slot:
Unacknowledged Alarms: None
Total Access System
02/18/98 02:24:18
ACT Activate
1. Do Not Switch
2. Switch
Selection:
‘?’ - System Help Screen
Figure 35. Protection Switch Activate Screen
Shelf: Slot:
Unacknowledged Alarms: None
Total Access System
02/18/98 02:24:18
Circuit ID
1.
2.
3.
4.
Port
Port
Port
Port
1
2
3
4
Selection:
‘?’ - System Help Screen
Figure 36. Circuit ID Screen
61181300L1-5C
Section 61181300L1-5C, Issue 3
27
2. Type the number of the corresponding port whose
Circuit ID is to be set or changed and press Enter. The
Port Current Circuit ID Screen (Figure 37) will
display.
Contact Customer and Product Services (CAPS)
prior to returning equipment to ADTRAN.
For service, CAPS requests, or further information,
contact one of the following numbers:
3. Type the new Circuit ID and press Enter.
ADTRAN Sales
Pricing/Availability
(800) 827-0807
4. MAINTENANCE
The QFO-C requires no routine maintenance to
operate properly.
ADTRAN cautions against performing major repairs
in the field. Repair services are available if you return
damaged units to ADTRAN. (Refer to the “Warranty
and Customer Service” subsection of this Practice.)
ADTRAN Technical Support
Presales Applications/Postsales Technical Assistance
(800) 726-8663
Standard hours: Monday-Friday, 7 a.m. - 7 p.m. CST
Emergency hours: 7 days/week, 24 hours/day
Refer to Table 10 for the QFO-C Multiplexer Module
Specifications.
ADTRAN Repair/CAPS
Return for Repair/Upgrade
(256) 963-8722
5. WARRANTY AND CUSTOMER SERVICE
ADTRAN will replace or repair this product within 10
years from the date of shipment if it does not meet its
published specifications or fails while in service (see
ADTRAN Carrier Networks Equipment Warranty,
Repair, and Return Policy and Procedure, document
60000087-10A).
Shelf: Slot:
02:24:18
Unacknowledged Alarm: None
Repair and Return Address
ADTRAN, Inc.
CAPS Department
901 Explorer Boulevard
Huntsville, Alabama 35806-2807
Total Access System
02/18/98
Port 1 Current Circuit ID
Enter New Circuit ID:
Selection:
‘?’ - System Help Screen
Figure 37. Port Current Circuit ID Screen
28
Section 61181300L1-5C, Issue 3
61181300L1-5C
Table 10. QFO-C Specifications
DS1
Input Level ..............................................................0 to -9 dBm
Output Level ........................................................... 0 dB with DSX buildout from 0 to 655 ft. in 133 ft. increments
Data Frequency Acceptance
1.544 Mb/sec. ±200 b/s
In/Out Impedance ...................................................100 Ω
Output Jitter ............................................................< 0.08 UI (unit interval)
Max. Delay ..............................................................Four data bits
Severe BPV Error Threshold .................................. 10 -3
Optical Transport
ANSI X3T9.5 Fiber Distributed Data Interface
Optical Specifications
Cable Type ..............................................................9/125 mm single mode
Connector Type .......................................................SC (single or duplex)
Operating Wavelength ............................................1310 nm
Transmitter ..............................................................Laser type
Output Launch Power ............................................. -8 dBm, minimum; -6 dBm, typical
Receiver Sensitivity ................................................-30 dBm, minimum; -33 dBm, typical
Receiver Input Level ............................................... -3.0 dBm maximum
Minimum Optical Budget ....................................... 22 dBm
Typical Optical Budget ...........................................25 dBm
Payload Specifications
Four independent DS1 (1.544) Circuits
Performance/Alarm Overhead (System Use Only)
Temperature Range
Operating ................................................................. -40 to +65° C
Storage ....................................................................-40 to 85° C
Humidity
0 to 95%, non-condensing
General Specifications
Supply Voltage ........................................................-42 to -56 Vdc
Maximum Power ..................................................... 8 Watts @ -48 Vdc
Supply Current ........................................................150mA at -48 Vdc, typical
Dimensions .............................................................5.5” Height; .75” Width; 10” Depth
Weight .....................................................................10.6 oz. in an anti-static bag
61181300L1-5C
Section 61181300L1-5C, Issue 3
29
30
Section 61181300L1-5C, Issue 3
61181300L1-5C