1
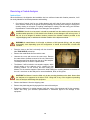
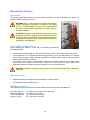
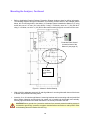
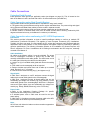
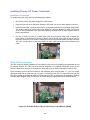
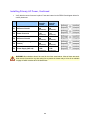
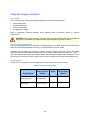
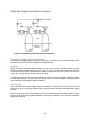
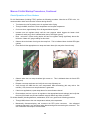
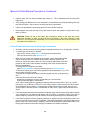
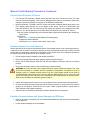
Maxum II Initial Startup Procedures, Continued Observe when the over temp shutdown light comes on. This is indicated when the fourth LED lights (red). Verify through the MMI that the oven temperature (or heated device) starts decreasing (this may take a few minutes). Also, that an over temp fault alarm is generated. If dual oven applications, repeat steps above for second heater channel. Reset analyzer and verify that the oven(s) will reach set point and maintain set point without any faults or failures. CAUTION Turning off the air will cause the air pressure switch on the right side of the electronics enclosure to open and shut off the oven heating. If the oven continues to heat without air, turn the power off immediately. Do not continue with the rest of the procedures until the heater circuit checks out. Check Flows and Pressures at Operating Temperature Close the oven door and set the oven pressure regulators between 12 to 15 psig (84 to 105 kPa.) To monitor the oven heater on the MMI, from the EPC screen, press Back > 5 to bring up the heater screen. From any other screen, press Home > 8 > 5. When the oven heater has stabilized at the setpoint, use an appropriate bubble type or mass flow meter to measure the flows at the detector, column, and reference vents at the sides of the oven. This will require adjustment of the EPC pressures and column valve positions according to the notes provided with the factory documentation. To change the EPC setpoint at the MMI, press Change Setpoint > enter the desired pressure > Accept Change. To actuate a column valve, first find the appropriate valve abbreviation, e.g., CR1, at the bottom of the EPC screen. To access the complete list of valves (and other digital outputs), scroll right using the “-.” Once the correct valve is found in the list, actuate it by pressing the number corresponding to it on the screen. Press that number again to de-actuate it. Note: Valves requiring two air signals from separate solenoid valves (Valco, SLIV, etc.) will be listed twice, e.g. 3.CR2 ON 4. CR2 OFF. In this case, pressing 3 will pressurize the ON air signal and actuate the valve. Pressing 3 a second time will depressurize the air signal; however, the valve will still be actuated. Press 4 to de-actuate the valve, then 4 again to de-pressurize the air signal. If the flows measured at the factory pressure setpoints agree with the factory flows within nominal error expected for two different flowmeters, the flow check is complete. Proper flows will be checked again by comparison of peak retention times after generating the first chromatograms. If the flows measured at factory setpoint pressures are significantly lower than factory flows, cool the oven and leak check as a leak is indicated. If the flows measured are significantly higher than factory flows at the same pressure setpoints, generate chromatograms and compare them to the factory peak retention times before deciding to establish new pressure setpoints. 35