1
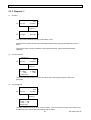
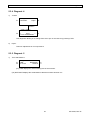
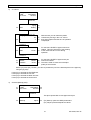
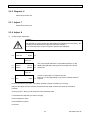
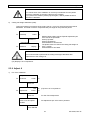
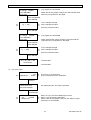
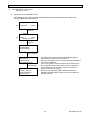
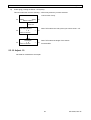
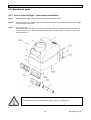
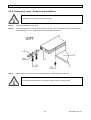
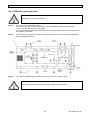
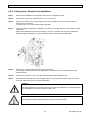
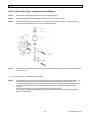
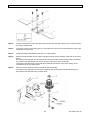
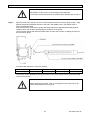
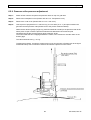
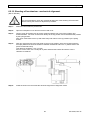
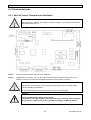
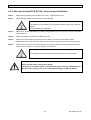
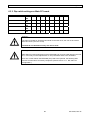
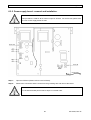
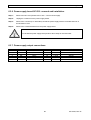
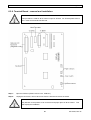
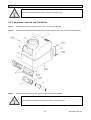
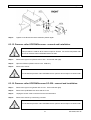
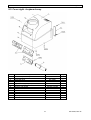
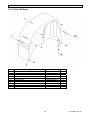
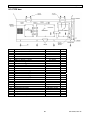
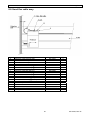
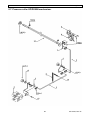
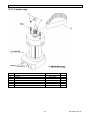
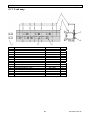
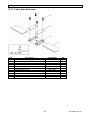
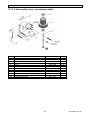
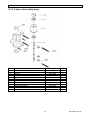
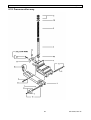
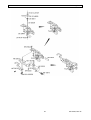
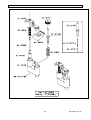
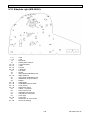
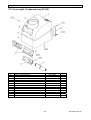
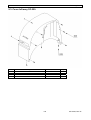
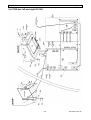
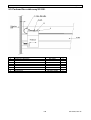
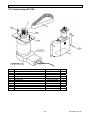
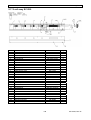
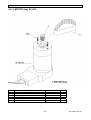
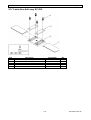
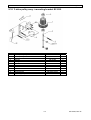
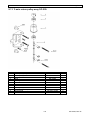
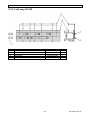
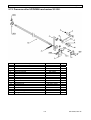
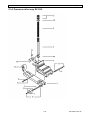
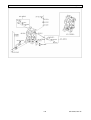
Maintenance Manual – SC Cutting Plotter
6.2.4. Y-rail cover : Removal and installation.
Step 1 :
Remove the transparent cover (Please refer to 6.2.2. Transparent cover).
Step 2 :
Remove 2 screws on top of the cover and 2 screws at the back.
Step 3 :
Remove the Y-rail cover.
Note :
To reinstall the Y-rail cover perform above steps in reversed order.
6.2.5. Grid cover : Removal and installation.
Step 1 :
Remove covers left and right (Please refer to 6.2.1. Covers left and right).
Step 2 :
Remove the transparent cover (Please refer to 6.2.2. Transparent cover).
Step 3 :
Remove the Y-rail cover (Please refer to 6.2.4.Y-rail cover).
Step 4 :
Open the PCB box (Please refer to 6.2.3. PCB box).
Step 5 :
Remove the rear paper guide with 4 screws. 2 screws on each side of the machine (Please refer
to #30 and #31 on the picture mentioned below). Lift the platen a little and pull it straight out
between the side plates.
Step 6 :
Remove the small hexagon screws that fix the gridcover.
Use L-shaped hex-key of 1.27 / 1/20”.
Push the gridcover about 3mm to the back, lift the cover and remove it to the rear side of the
machine.
51
AP-74030, Rev / B