1
CORPAFROAS Manual
0. Introduction ............................................................................................................................ 2
1. Annotation structure ............................................................................................................... 2
2. Fieldwork ................................................................................................................................. 5
2.1. Recording material ................................................................................................................................................................. 5 2.2. Consent and metadata ........................................................................................................................................................... 6 3. Methodology of prosodic segmentation .................................................................................. 7
3.1 Intonation units ........................................................................................................................................................................ 8 3.2. Transcription and segmentation in Praat ..................................................................................................................... 9 3.2.1. Opening an audio sound-‐file in Praat ........................................................................................................................ 10 3.2.2. Creating a Mono object from a stereo one .............................................................................................................. 10 3.2.3. Saving an audio file ........................................................................................................................................................... 10 3.2.4. Cutting the sound file into a new file / Editing a file .......................................................................................... 10 3.2.5. Creating an annotation object Textgrid ................................................................................................................... 11 3.2.6. Visualizing aligned sound with the text ................................................................................................................... 11 3.2.7. Creating the boundaries of the prosodic units ....................................................................................................... 12 3.2.8. Transcription strategy ..................................................................................................................................................... 13 3.2.9. Typing Methods ................................................................................................................................................................... 14 3.3. Notation and symbols ........................................................................................................................................................... 18 4. From Praat to ELAN ................................................................................................................ 19
4.1. How to import a Praat document into Elan ............................................................................................................... 20 4.2. Preparing the mot line in Elan from a one-‐tier transcription in Praat ........................................................... 21 4.3. Exporting the transcription lines to Praat (for further investigations) .................................................................. 23 5. ELAN-‐CorpA: Elan for CorpAfroAs .......................................................................................... 24
6. Glossing principles ................................................................................................................. 34
6.1. Principles of glossing in the GE line .............................................................................................................................. 35 6.2. Principles of glossing in RX tier ...................................................................................................................................... 38 6.3. Code-‐switching glossing principles ............................................................................................................................... 38 6.4. Free translation in Elan ...................................................................................................................................................... 41 6.5. Search in Elan ......................................................................................................................................................................... 42 7. Toolbox as alternative to Elan-‐CorpA ..................................................................................... 42
0. Introduction
CorpAfroAs is a pilot corpus aiming at providing a structured database of spontaneous and
solicited recordings of AfroAsiatic languages, transcribed, translated, and annotated with a
view to allowing complex queries.
CorpAfroAs is organized along two axes, prosodic analysis, and morphosyntactic glossing.
The transcription, segmentation, and annotation of the corpus are linked to the nature of
the materials and to the aim of the project, which is typological comparability among
languages.
We annotated one hour per language: 20 minutes of conversation/dialogue when possible,
plus 40 minutes minimum of narratives/monologues (life stories, folktales…). The
minimal length of excerpts is 2 minutes (if possible).
1. Annotation structure
CorpAfroAs organizes its transcription and annotation set in six tiers, which follow the
reference tier: tx (phonetic transcription), mot (word transcription), mb (morphemic
parsing), ge (gloss), rx (other annotations) and ft (translation).
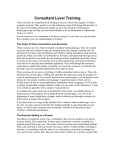
Screen capture of an ELAN window with waveform and tiers
2
The text (tx) line is the one that holds the transcription of phonological words. Its
purpose is to reflect as closely as possible the spoken data, including truncations, internal
and boundary assimilation (the latter may be interesting for the phonology-syntax
interface), and other phenomena found in spontaneous speech. Major and minor
boundaries (see §3.1 below) are indicated (/ & //), and pauses over 100 to 200 ms appear
in a separate unit (the threshold over which we consider that the pause is significant
depends on genre, language, rhythm).
Transcription is broad: vowels and consonants are written according to their broad
phonetic realization, i.e. in a way that makes the transcription close to the phonetic
realization, but with some phonologization, the idea being to retain phenomena that are
relevant to segmentation (assimilation, dissimilation, ...).
IPA characters are systematically used (except for geminated consonants which are
doubled) as opposed to characters specific to some traditions, unless there is motivation
to do differently. The so-called “emphatics” in Arabic and Berber are an example of such a
treatment: as they are not necessarily pharyngealized, but can be velarized, while
nevertheless forming a homogeneous phonological class, we use a subscript dot; i.e.,
velarized /dɣ/ and pharyngealized /dʕ/ (IPA) are both written /ḍ/ in our Arabic files.
The mot line is mainly an intermediary tier that allows the subsequent segmentation into
‘morphosyntactic words’, the definition of those words being language-dependent. This
tier does not reflect exactly the (phonological-)word segmentation of the tx tier. No
morphemic separators (- =) are used, and the transcription is in its essence phonological
(i.e. 'regularized' as compared to the broad phonetic one). The vowels and consonants are
written according to their phonological value. Phonetic assimilation disappears, but
morphophonological changes (which are not automatic and absolute but depend on the
morphological environment) remain.
The comparison between tx and mot lines allows the retrieval of the phonetic and
phonological phenomena that are characteristic of connected speech.
The mot line is then automatically tokenized into morphemes. Then the resulting mb line
is glossed in ge.
The mb line is segmented into morphemes (one cell per morpheme), allowing for
allomorphs and all such variation desirable for a varied morpheme inventory. Whereas
the mot lines may include allomorphs, the mb line has a single underlying form for each
morpheme. Separator - goes in the cell that contains the affix, while separator = goes in
the cell that contains the clitic.
3
The comparison between the mot and mb lines makes it possible to pinpoint
morphophonological phenomena in the language (variations, allomorphs, etc.) as well as
word structures (clitics, affixes).
All annotations are based on the transcription of the mb line.
The ge line is the morpheme-by-morpheme gloss of the mb line. Its syntax is based on the
Leipzig Glossing Rules (see §6.1. below).
The rx line is the tier in which all information relevant and necessary for retrieval
purposes is entered: part-of-speech, but also complementary morphological information
(neutralization or syncretism, morphological verb-class, etc.), as well as syntactic
(grammatical roles, etc.) and semantic (stative verb, etc.) information. If there is more
than one label per cell, we separate them with a slash.
The labels used in rx are sometimes the same as those used in ge. But they cover a
different domain. For instance PREP in ge is a special prepositional paradigm of affixes,
which is found in Berber, Semitic and Chadic. The prepositions in ge are glossed by their
value only (either grammatically, e.g. LOC, or semantically, e.g. ‘between’). In rx, PREP
means that the morpheme is a preposition. This is useful for specific queries, because
sometimes, the same morpheme can be a preposition, or a conjunction.
Finally, the ft line was apparently unproblematic, but eventually raised some questions
since it appeared that translating each minor unit was only possible in some languages,
while others were better translated using larger units. It also appeared that translating a
text was in no way an easy task, since contrary to the translation of isolated examples for
grammatical purposes, text translations must also provide equivalences for pragmatic
dimensions.
We therefore decided to merge the ft line into groups that were longer than the prosodic
units of the tx line. Further investigations on CorpAfroAs are needed, in order to propose
a segmentation that will fit more closely the pragmatic organization of speech (and
therefore, presumably, facilitate its translation into another language). For verb final
languages, such as Beja, a Mft free translation line was added, with chunks which can be
longer than in the ft line, to make the free translation more reader friendly (see 6.4).
4
2. Fieldwork
2.1. Recording material
Most of the recordings were done with the flashdisk EDIROL by Roland, R-09 wave/mp3
recorder, and a Sennheiser MKE 2-60 Gold-C microphone. We recommend at least this
type of device, in order to preserve a high sound quality for archiving purposes, as well as
for prosodic analysis.
Other digital recorders are also acceptable, provided they allow .wav recordings (mp3 are
unsuitable for long-term archiving, and not optimal for prosodic analysis).
The following practical points have to be borne in mind:
Settings: Wav format; frequency rate: 44.1 Khz; depth: 16 bits; Channel: Mono.
●
Alcaline batteries last approx. 5 hours of continuous recording. Only alcaline or
rechargeable batteries should be used.
●
An external hard disk is strongly advised, in order to stock the audio files.
●
The Memory Card that is in the pack (2.0 GB) allows recording approx. 3 hours.
●
Be careful when opening the battery compartment, it is very fragile.
●
In the case of a power cut, the Edirol does NOT automatically switch to the battery
feed, even if there are batteries inside.
●
We should regularly check that the recording is going smoothly. The device flashes
intermittently when it is recording, so we can think everything is OK, whereas the
external microphone is switched off. Sometimes the microphone is not fully inserted
into its socket in the Edirol. Therefore, make sure that the contact point of the
microphone is reached when you plug it into the Edirol.
●
Batteries must be changed BEFORE the ‘low battery’ indicator starts flashing,
because then it is too late, the last recorded document is corrupt. Batteries should
be changed when the last battery unit is reached on the display screen.
●
The basic settings of the Edirol for our purposes are: Mic Gain = High, AGC= off,
Low cut=off, and External mike = Mono. The Hold button must be off.
For narratives, as for conversation, the preferred method is to ask the speaker to tell
her/his story to another speaker of the language, instead of to the collector. This in order
to avoid adaptation of the language to the sometimes low competence of the fieldworker
in the language, or to avoid codeswitching in the vehicular language used for
communication.
5
For conversation each speaker has her/his own recording device and microphone. And it
is preferable to restrict the interaction to two speakers, otherwise the transcription
process becomes too complex.
2.2. Consent and metadata
Three levels of consent have been considered relevant:
a) consent to the recording
b) consent to restricted diffusion (community of researchers, password to consult the
data)
c) consent to unrestricted diffusion (open access on the web).
Written consent forms can be used, but a recorded spoken consent is valid, and often
preferred by consultants.
The first level of consent is not sufficient for corpus projects, as it prevents the data from
being viewed by other researchers. It should be limited to short files and exceptional
situations. It is of course a prerequisite to levels (b) and (c).
We use the IMDI format for the metadata of our files.
The link is http://www.mpi.nl/IMDI/.
6
For Corpafroas, we used the following labels:
For Content Type
*Genre: all members (NARR, CONV) have ticked “Discourse”.
*Subgenre: if not Language play (for riddles, humor), or Procedural (for instructions), we
ticked “Narrative” or “Conversation”.
*Task: We left it Unspecified
*Modalities: We all ticked “Speech”
*Subject: we decided to use this entry as a sub-subgenre specification:
· Narrative = Folktale, Personal experience story, Free style, Historical narrative,
Religious story, Description, Anecdote;
· Conversation = Personal experience story, Informal conversation, Debate, Description;
· Procedural = Traditional medicine, Recipe;
· Language Play = Riddle, Humor, …
3. Methodology of prosodic segmentation
Once we have recorded and documented the data, we need to transcribe it. Our purpose
in CorpAfroAs is to provide an accurate prosodic segmentation of the data. We therefore
use Praat for that purpose (see below).
Speech is naturally segmented into prosodic units. Our purpose is therefore to segment
our data according to its natural segmentation, avoiding the type of segmentation marks
that is often inspired by written sources (full stops, commas etc.), and does not fit the
transcription of spoken data. We do not segment our data into clauses, sentences or
phrases.
The basic unit we chose for the segmentation of CorpAfroAs is the Intonation Unit. The
Intonation Unit (henceforth: IU) is recognized by its boundaries (using the following cues:
pause, pitch reset, final lengthening before the boundary and initial rush after it) and by
its single coherent intonation contour.
The IU may encapsulate a clause, but it may also consist of lesser syntactic units, like
noun phrases, adverbials etc. In several cases an IU may not correspond to a coherent
syntactic unit as traditional grammar would suggest.
We detect intonation units on the basis of perception (of the researcher, in collaboration
with native speakers), along with (or following) an acoustic check of boundary cues on
Praat for control. Praat allows the precise location of the boundary on the transcription
7
file. We therefore start our transcription/segmentation with Praat, not ELAN. Moreover,
Praat files can be used for further studies on intonation, which is not possible with ELAN.
3.1 Intonation units
In practice, segmentation of a discourse flow into intonation units is mostly made by
detecting their boundaries. The major perceptual and acoustic cues for boundary
recognition are the following:
(1) final lengthening; (2) initial rush (anacrusis); (3) pitch reset; (4) pause.
Still, some inner-unit prosodic features can be used for the recognition and segmenting of
a speech stretch into intonation units. The main two "internal" features are:
(1) declination; (2) isotony (or tonic parallelism).
We distinguish between units with minor (non-terminal) break and units with major
(terminal) breaks, using the software Praat. No other specification (tones, contours, etc.)
is given to those boundaries, but the fact that the transcription is indexed to the sound,
itself available in .wav format, will allow more in-depth prosodic studies on the available
data.
A major unit is one that is perceived as carrying a terminal boundary tone. A minor unit
is perceived as carrying a continuing boundary tone. The distinction between major and
minor units is a fine-grained one, which becomes clearer with practice. Pitch dropping
towards the bottom of the range is the unmarked cue of final boundary. But final
boundaries can sometimes go up. A convenient procedure is to listen to the current
Intonation Unit, without getting influenced by the following one: if you feel the utterance
should be continued, then the IU is minor (non-terminal). Note that the size of pitch reset
is not decisive for distinguishing between major and minor.
For more information: Izre'el and Mettouchi, Representation of Speech in CorpAfroAs:
Transcriptional Strategies and Prosodic Units
(http://web.me.com/aminamettouchi/CORPAFROAS/Publications.html).
There can be confusion between pauses and prosodic breaks. Intonation-unit boundaries
are not necessarily indicated by pauses, but rather by a cluster of acoustic parameters.
Pauses are silent moments whose duration can be calculated. Pauses are not necessarily
the sign of the presence of a boundary but they often do indicate a boundary.
There can be other cues for segmentation: parallelism of the two pitch curves, length of
the final syllable, rush of the following one, creaky voice, pitch reset … Please note that
some languages rely more on some cues than others do. So it might be the case that the
language a researcher is working on uses duration or creaky voice as dominant cues, and
8
his/her mother-tongue does not. This makes intuitive recognition more difficult for a
language which is not the researcher’s mother tongue. However, those cues are easily
learned by practice, and their identification is of crucial scientific importance.
Note that because prosody interacts with syntax (and other domains) in cognitive
processing, there often are “mismatches” between prosodic grouping and traditional
syntactic units (although in narratives, clause-boundaries tend to coincide with
intonational boundaries). This is normal, and should not make researchers uneasy.
There might be intonation units consisting of one word. Do not hesitate to mark those
units.
Note also that there can be mismatches between intonation units and the final translation
into English. This is a practical problem, linked to the on-screen display of our texts. One
solution to that is to index longer stretches of discourse to the translation (i.e. have
translation units that cover more than one IU). For prosodic units larger than the
Intonation Unit as defined in CorpAfroAs, see Izre’el and Mettouchi (draft), pdf on the
CorpAfroAs website.
A good way of learning to identify intonation units is by beginning with folktales or
fables: intonation units will be more stylized and easy to recognize, and this will
familiarize researchers with that type of segmentation. Conversation (which is more
difficult to segment) would then be broached more easily.
3.2. Transcription and segmentation in Praat
Once the recording is finalized in the form of a .wav file corresponding to a narrative or a
conversation (leaving a small blank at the beginning and the end of the file), and once it
has been given a name (LanguageCode_InitialsRersearcher_type_number.wav (type =
CONV(ersation) or NARR(ation) ; number = file’s serial number ), it is ready for annotation.
Example of a file name: KAB_AM_NARR_03.wav is a file in Kabyle, recorded and
transcribed by Amina Mettouchi, that is a narrative, the third one in the Kabyle database.
It is recommended to have those files stored in a special Praat folder, within a larger
corpus folder, which for us was named: CorpAfroAs.
When you open Praat you will find three menus at the top of the ‘Praat Objects’ screen:
New, Read, Write.
Go into Read and select:
Read from file…
9
The name of the file you select, here KAB_AM_NARR_03.wav, will appear on the list of
“Objects”.
You select it (click on it) and choose from the menu to the right.
3.2.1. Opening an audio sound-file in Praat
File, Read from file: this takes a lot of the computer’s memory, and may slow down
applications. Editing is possible.
File, Open long sound file: this draws less on the computer’s memory. Any editing is
possible.
3.2.2. Creating a Mono object from a stereo one
Convert, Convert to mono
3.2.3. Saving an audio file
Write, Write to .wav file
We must have a sound file in Praat that corresponds exactly to what we want in the final
stage. Do all the changes (noises at the beginning, etc.) in Praat at the very beginning of
the procedure (edit, etc). Then save your file as .wav.
Start with a short blank (< 70 ms) so that it's easier to listen to. Do that BEFORE any
transcription in Praat.
3.2.4. Cutting the sound file into a new file / Editing a file
If you wish to cut a sound file into a smaller file you must first “Edit” the original file you
recorded, which you named for instance “Tale of the seven girls.wav”. It appears in the
window called “Sound”. You select the part you wish to cut by clicking-dragging the
mouse on the part you need, and then you choose in the menu “File” of this window,
“extract selected sound (time from 0)”. The sound appears in the window “Praat objects”.
You must rename it (using the option “rename” below the list of Praat objects), for
instance: KAB_AM_NARR_04.wav.
It can be easier to cut files using another device (Audacity, or SoundForge for example)
before opening them in Praat. Praat is more useful if you want to cut the sound into
smaller chunks, for analytical purposes for instance.
If the file is fine as it is, you may want first to just play the sound, or have a look at F0 or
Intensity values. In that case, click on “edit” in the “Praat objects” window, and click on
the “visible part” below your Sound window.
10
If you want to stop the sound playing, press “Escape” on your keyboard.
If you want to see the spectrogram, click on ‘spectrum’, ‘show spectrogram’. To deselect,
click again. Same thing for Pitch, Intensity. Spectrograms are essential in order to locate
precisely the intonation unit boundary, as they display the relevant cues allowing the
recognition of consonants and vowels.
If you want to have values for F0 and Intensity, just place the cursor somewhere in the
file and click. A vertical line appears, and values are given on the right and left of the
window.
Once the .wav file is in the Objects menu, we need to annotate it.
Click on the file you want to annotate, and choose from the menu to the right of Praat
objects:
3.2.5. Creating an annotation object Textgrid
Annotate, to Text Grid
Within the menu of “Annotate”, choose
To TextGrid…
Annotate
All Tier names:
For a single speaker annotation: ref@SP
2 speakers: ref@SP1 ref@SP2 (without comma)
3 speakers: ref@SP1 ref@SP2 ref@SP3
Point Tiers: nothing (delete the content of the box if any)
You may prefer to have two transcription tiers for each speaker, one for the broad
phonetic transcription and one for the phonological transcription into grammatical words
(which will serve to generate the mot tier in ELAN). In this case you should list in the All
Tier names box: ref@SP tmp@SP (ref@SP1 tmp@SP1 ref@SP2 tmp@SP2... for multiple
speakers).
Now you have two objects: the new element which you created is called “TextGrid X”
(where “X” is the name of the audio file you chose to work on), and the sound file which
you had loaded (which automatically has the same name).
3.2.6. Visualizing aligned sound with the text
Select both the Sound and TextGrid files (with the maj or ctrl buttons)
11
Click on Edit
A window opens, with multiple lines; from the top:
•
a line showing the signal in black (you won’t use it much);
•
a line containing a blue and a green line (if the commands 'show pitch' and 'show
intensity' have been activated); they are the pitch and the intensity lines,
respectively; do not worry if the blue line is not beautiful — e.g., if it is not
continuous and looks flat: we’ll try to have it look nicer in a second;
•
a yellow line: it will contain your transcription:
What if you are not happy with your blue line?
You may try to correct this by changing the values of the pitch.
To do this you look at the top of your window: you go to the menu
•
Pitch
and select
•
Pitch settings
Which values are to be chosen? The values will change from speaker to speaker,
especially according to gender and age. They may also change in the course of the
recording. Therefore, adjustments are to be made.
For adult males, it is better to choose low values, such as 15, or 30, or 50 as low value,
and 200, or 300 as high value.
For females better values range from 50 to 500, sometimes higher.
In general, do not trust Praat if the blue line (the pitch) shows sudden and very sharp
(vertical or almost so) changes. Try changing the pitch settings in that case.
You can start working on the transcription:
You can select a part of the window by clicking and dragging with the mouse and then
clicking on “sel” (for “select”) on the lower left-hand part of the window.
You can always revert to the whole picture by clicking on “all”.
You can make as many selections as you want.
3.2.7. Creating the boundaries of the prosodic units
Begin with segment delimitation while using the spectrograms as well as the wave-form
for boundary indication.
12
Click on the audio area at the beginning of a segment. Click on the small circle on the
vertical line in the desired tier in order to create a boundary.
Click on the audio area at the end of the selected segment, Click on the small circle on the
vertical line in the desired tier in order to create a boundary.
Boundaries are created also for pauses that last more than 200 ms.
Note that in Praat there is automatically a left and a right boundary in the sound file
(beginning and end) you are working on: DON'T ADD THEM.
3.2.8. Transcription strategy
Praat may contain various transcription tiers for one sound file (phonetic transcription
tier, orthographical tier, words tier, phonemes tier…), but those multiple tiers are not
hierarchically dependent. In the CorpAfroAs ELAN annotation model,
the annotation tiers are hierarchically dependent: ref is the main tier
directly related to time. It has two time associated tiers: tx and ft.
Then the mot tier is a child of tx tier, mb tier a child of mot tier, finally
ge and rx are associated to mb.
For this reason we recommend two or three ways of entering the transcription for
importation into ELAN.
As the mot tier can be generated in ELAN by tokenizing a text tier, the simplest procedure
is to prepare a transcription line in Praat containing as many (grammatical) words as
necessary for the mot tier. This line should be named ref@SP. When imported into ELAN,
that ref tier will be duplicated into a tx tier, which will be used to generate the mot line.
The initial (morphophonological) transcription of this tx tier will then be modified by hand
so that it becomes a broad phonetic line, with phonological words instead of grammatical
ones.
On the other hand, you may prefer to enter the broad phonetic transcription from the
start in the ref@SP tier of Praat, because you are planning to use Praat for some prosodic
or phonetic investigation for example. Then after importation into ELAN, you will have to
duplicate that ref tier as an intermediary tier whose annotations will be modified by hand
to reflect the grammatical words transcription. That intermediary tier will be tokenized
into a mot tier, then the mot tier will be made dependent on a tx line (created from
another copy of the ref), and the intermediary tier will be deleted. That process is more
complex than the previous one. See 4.3 for an alternative.
13
A two-tier transcription Praat file, with a ref@SP tier (broad phonetics) and a tmp@SP tier
(grammatical words), is about the same complexity to deal with: after importation into
ELAN, you will have to duplicate the tmp tier as an intermediary tx tier. That tx tier will
be tokenized into a mot tier. Then the ref tier will be duplicated into the real tx tier and
the mot tier will be made dependent of it, then the intermediary tx tier will be deleted.
Those last two methods are described on the website (in the TOOLS tab).
3.2.9. Typing Methods
To enter the phonetic transcription in Praat there are three options:
- On PC and Mac, using the Praat trigraphs method (see below)
- On PC, using the AFU keyboard (for more details see the section AFU keyboard)
- On Mac, using the Ukelele keyboard. For more details see the section Ukele keyboard
Click on the segment in the selected tier. A box will open.
Write down the annotated text. To save and leave the editing box, do Ctrl/Enter.
Special characters
We should use IPA whenever it is unproblematic to do so. The full list of characters is to
be decided among each language family.
For Berber and Semitic, we have had a discussion on emphatics and affricates. The
decision for emphatics is to use the traditional under-dotted letters in mot (and possibly
tx) (cf explanation above in section 1), since there is a scientific basis for that decision.
For affricates we decided to use the single IPA character in tx (ex: ts, ʧ, ʤ).
Units with minor break and units with major break
Put a slash (or double slash) at the end of the text of each IU, after a space. In other
terms: / (non terminal) // (terminal) are to appear at the end of a cell containing speech.
Pause cells also have boundary marks. All pauses above 200ms are obligatorily marked
and their duration entered in the corresponding cell.
3.2.9.1. Method using Praat trigraphs (PC and Mac)
In the Textgrid window, open the Help menu on the right, click on Phonetic Symbols, and
open the various lists. Charts appear; under each phonetic symbol, a series of characters
beginning with an anti-slash is given. For instance, under schwa, you can read \sw. This is
14
the sequence you should type to obtain a schwa in your annotation tier in the Praat
textgrid line, type your characters using the trigraphs method. Then, as often as you like,
in the Edit menu, click on Convert entire Textgrid to Unicode.
3.2.9.2. Using the AFU keyboard (PC)
Those who have a French Windows system may download the new Microsoft keyboard
"AFU", with some extra characters (non-IPA emphatics) accessibility, in a zipped form :
"reflex07.zip" (http://corpafroas.tge-adonis.fr/Tools_files/reflex07.zip)
1) Unzip the file at the root.
2) Go to the "reflex" folder just created by the unzip and Double-click on the "setup"
file.
The keyboard should be installed beside the French one.
NB: If a keyboard with the same name already exists, start by removing it:
1) Launch, configuration panel, add/delete programs
2) Select Français (Afr-U), Delete
You will find a description of this keyboard in the file: "AFU'reflex.doc" in the "reflex"
folder or the "OutilsInfo" folder of the list.
You can choose this keyboard by clicking on the AFU keyboard icon on the bottom right
of the screen.
How the Microsoft keyboard works:
As this keyboard is based on a french keyboard, it can be used for French as well as
phonetics.
Deadkeys are typed before the base character. E.g : <e gives ɛ
'<'
to access the more frequent special characters
'>'
for some other frequent phonetic characters (retroflex…)
';'
mainly characters with dot underneath
'.'
character with dot above
','
double articulation, other diacritics
'µ, $, £, %' to access vowels with tone/accent incorporated characters
15
3.2.9.3. Favorite Characters in Mac
For Mac users, a simpler method consists in defining your list of favorite characters from
the character palette (near the battery sign at the top-right of the screen), character
viewer (create 'favorites') and then simply click on them when needed while writing in
Praat. Make sure that you have downloaded and installed the CharisSIL font (or another
Unicode font), and that your favorite characters are in that font.
3.2.9.4. With the Ukelele keyboard (Mac)
Install Ukelele on your computer in the “Applications” folder :
http://mac.softpedia.com/get/System-Utilities/Ukelele.shtml or
http://scripts.sil.org/cms/scripts/page.php?site_id=nrsi&id=ukelele
A. Open Ukelele. An empty keyboard appears.
You have to base any keyboard you will create on a Unicode one: the easy way to do
that is to modify an existing Unicode keyboard adding the phonetic characters you
need. A set of keyboards is provided with Ukelele. You find them in Ukelele > System
keyboards > Unicode, and in Ukelele > Logitech Keyboard Layouts (Italian, French
and Spanish keyboards and in the Logitech folder).
B.
Create your phonetic keyboard in Ukelele
o File > New Based On... > Applications → Ukelele → Logitech Keyboard Layouts
o choose the keyboard you need (for example Logitech Italian or French or Spanish).
o File > Save as > Choose a name > Format: Keyboard layout file → Macintosh
Hard disk → Library → Keyboard Layouts > Save.
16
The combinations you’ll create for the insertion of phonetic characters are those shown in
the AFU table (see section “How the keyboard works (Microsoft)”).
C.
Create the dead keys
o Keyboard > Create Dead key.
Note that below the keyboard there is a message “Press or click the new dead key”.
o Click on the one you want, for example you may start with “<“, which is the the
first one in the AFU table.
A window appears asking to enter a name of the dead key state, i.e. the group of
characters associate to that dead key. You can leave the default name
o "State 0" > OK.
Another window appears. You have to
o press the dead key button “<” and then OK.
The keyboard is cleared because you have to fill it with new characters associated to the
dead key you have chosen. If you want to go back to the whole keyboard you have to
leave the actual dead key state: Keyboard > Leave Dead Key State.
D.
Create the combinations
In order to create the combinations with a deadkey you have to enter in the “dead key
state” you determined previously:
o Keyboard > Enter Dead Key State > Choose the name of the State (State 0 in our
example) > OK.
o Open the document “AFU-reflex.doc” (you will find it in the zipped file reflex07.zip
(see above)).
o Select the first character associated to your first dead key. Copy the character and
go back to your Ukelele keyboard. Double click on the key you want to assign,
paste in the window that appears > OK.
o Repeat the same procedure for the insertion of the other characters associated to
the first dead key.
E.
F.
Repeat the same procedures as in D. to create new dead key associations and add
more associated phonetic characters.
Save everything, close Ukelele and restart the computer!
You can use the functions of the keyboards only if you have restarted the computer!
This is valid every time you further modify the keyboard. You can re-open the same
keyboard in order to modify it and update it any time you need.
G. Using the keyboard
17
o Go to System preferences > International > Input source > Show keyboard, tick
the name of the keyboard you have created, the little icon of the keyboard will
appear at the top right beside the energy indicator. Select it whenever you need it
and with any program .
For the annotation of code-switching, see §6.3.
3.2.9.5. Saving annotations in Praat
Warning: Check in the Praat menu that the Text Writing Preferences is set to UTF-8
•
File, Write TextGrid to Text file
Be careful not to forget this step! Otherwise you'll loose the annotated text when leaving
Praat.
3.3. Notation and symbols
These recommandations concern the segmentation into prosodic units and their
annotations. In Praat it concerns the ref@SP tier (and the tmp@SP tier, if any). As this tier
will be duplicated as tx@SP tier after importation into ELAN, these recommendations
remain the same for the tx tier.
All pauses above 200 ms are obligatorily marked. For pauses between 100 ms and 200
ms, each member decides for each text on the minimal duration of the pause (according
to what is perceptible in this text), and indicates her/his choice in the grammatical
sketch.
Regarding word-internal pauses: we mark the duration of the pause, e.g. be(761)eda
If breath intake (BI) (which can be physiological or rhetorical and is different from a
normal pause) is audible, duration of pause is given together with the abbreviation, e.g.
BI_210, for Breath Intake of 210 ms.
a) / (non-terminal) // (terminal). Don't forget to type a space before boundary marks.
b) Truncations of a word inside the intonation unit or of an intonation unit:
If a word is truncated and is inside the IU, use # right at the end of the truncated word,
without a space, and mark the end of the unit with the relevant sign (/ or //) :
ex : he ca# came //
If an intonation unit is abruptly cut, then add a space and use ##, instead of / or //.
ex: he decided to ## the father answered //
18
c) Overlaps are not marked as they are visually obvious in the Elan layout.
d) Noise and peripheral phenomena are indicated in between braces, without space
between braces and text, with an underscore between English words if there are several of
them. (Afterwards, the braces and their contents can be erased in the mot line).
ex: uːtak{door_banging,_someone_enters_the_room} rha
e) External laughter {LAUGHTER}, laughter of the speaker (LAUGHTER).
f) Incomprehensible passages are conventionally marked in all tiers by XX.
g) If we hear a word perfectly, but we do not know its meaning, we transcribe it in
ref@SP.
h) Lengthening: in ref@SP only, we use the IPA symbols ː three times in case of phonetic
lengthening, e.g;. aːːː
Phonological length is marked just with one IPA symbol ː e.g. aː
Ex :
tx əmːːː (hesitation marker)
mot əm
mb əm
ge əm
rx HESIT
Some languages (Wolaitta) have to mark their vowel length as " aa " in ref@SP line
instead of aːːː, because they have to place tonal markers on the first or second mora of the
syllabe (case alternations).
i) Consonant gemination: write two consonants.
j) Sung passages: %from beginning to end%
4. From Praat to ELAN
Important
Don’t forget the following steps in Praat before importing into ELAN:
19
In Praat, Preferences, check that Text writing Preferences is set to 'UTF-8'. If it isn’t, change
it to UTF-8 and write again to Textgrid to save the new file in UTF-8; if you don’t do that,
an Elan importation error will occur ("operation interrupted...").
This is to be checked each time you update the Praat version.
In the textGrid, the initial interval tiers (initially Mary John Bell) should be labelled
a) ref@SP (not tx), or ref@SP1 and ref@SP2 if there are two speakers, etc. in case you
have just one line of transcription (into grammatical words) per speaker,
b) ref@SP (for the broad phonetic transcription into phonological words) and tmp@SP
(for the morpho-phonological transcription into grammatical words) for a two-line
transcription (or ref@SP1, tmp@SP1, ref@SP2, tmp@SP2, etc. if there are several
speakers). This case will not be treated here, but on the web site.
If for some reason the name of the Praat tier was not ref, rename it from Praat
•
•
Open the textGrid in Praat, Select the corresponding object, Edit
Tier, Rename Tier, Change the name of the tier to ref , Ok
If you have used the trigraph method to transcribe, convert the entire textGrid to Unicode
•
Edit the textGrid object,
•
Edit, Convert entire textGrid to Unicode.
To save the corrected textGrid
•
File, Write TextGrid to text file
Before you start importing Praat documents, copy Corpo1.etf, Corpo2.etf and Corpo3.etf
files into the ELAN folder, and if you are using Toolbox, copy refCorp.typ and mdf.typ in
the Toolbox\Settings folder. This is done once and for all.
The Praat transcribed document including the intonation unit boundaries is now ready to
be opened in ELAN in order to be prepared for the other annotations.
4.1. How to import a Praat document into Elan
Creating a new ELAN Document.
●
File, New
●
in Files of type, select: Media files (NOT Template), and choose in the left window the
audio file you want to annotate.
●
Click on the >> button between the 2 windows, then click on OK.
To give the new ELAN document a name:
●
File, Save As: (enter the name of your file in the following format):
20
LanguageCode_Author’s Initials_type_num
type = conv(ersation) or narr(ation); num = serial number of the file.
Importing the model of linguistic types
ELAN needs information on the hierarchical dependency of the tiers. To be consistent
throughout the corpus, we will load a template for that.
●
Type, Import Types, Browse, look for Corpo1.etf (Corpo2.etf if 2 speakers; Corpo3.etf if 3
speakers), Import, Close.
Deleting the Default tier
We don’t need this default tier.
●
right-Click on Default; Select Delete Default; press YES.
Importing the TextGrid file created with Praat
●
File, Import, Praat TextGrid, Browse, look for and select the TextGrid file you want to
import;
●
Check the Skip empty interval/annotations box to avoid the creation of empty segments.
Next;
●
Make sure that Linguistic type: ref is selected under Type Name, NOT default’
●
Finish
●
Operation completed, OK
4.2.
Preparing
the
mot
line
in
Elan
from
a
one-tier
transcription in Praat
●
As we need a main labelled and numbered reference line ref for each annotation
unit as well as a tx line, we will have to duplicate the ref@SP tier to create the tx
tier. Then the ref tier will be labelled and numbered. Next, after the importation of
the other tiers, the mot tier will be filled in by tokenizing the tx tier into it. Finally,
the tx tier will be modified by hand to reflect the broad phonetics transcription of
the sound file.
●
Creating a new tx tier
●
In order to create a new tx tier, let’s duplicate the ref tier.
●
If there is only one speaker:
●
In the Tier menu
●
Copy Tier
●
select ref@SP, Next
●
once again: select ref@SP, Next
●
as Type Name, choose tx, Finish
21
●
Operation completed, OK
A tier ref@SP-cp was created.
If there are 2 speakers:
●
Copy, Tier
●
select ref@SP1, Next
●
once again: select ref@SP1, Next
●
select as Linguistic type : tx, Finish
Second speaker :
●
Copy, Tier
●
select ref@SP2, Next
●
once again: select ref@SP2, Next
●
select as Linguistic type: tx, Finish
And so on for other speakers.
Renaming the new ref@SP-cp tier as tx@SP
(resp. ref@SP1-cp as tx@SP1, ref@SP2-cp as tx@SP2... if multiple speakers)
In the Tier menu:
●
Change tier attributes
●
Select ref@SP-cp
●
Type tx@SP as its new Tier Name
●
Click on Change
For multiple speakers, do the same for each ref@SP1-cp, ref@SP2-cp or ref@SP3-cp
●
Close the window when finished
Labelling and numbering the ref tier(s)
(for more than one speaker, do the same thing with ref@SP1, ref@SP2 and ref@SP3)
●
Tier, Label and Number, select ref@SP
○
Include label part:
1 speaker: LanguageCode_Author’s Initials_type_num (= name of the .wav file)
more than 1 speaker: LanguageCode_Author’s Initials_type_num_SPnumber
○
Insert other delimiter : _ (underline symbol)
○
OK, Close
Importing the remaining tiers
●
Tiers, Import Tiers, Browse, look for Corpo1.etf, Import, Close.
(for two speakers, look forCorpo2.etf, for three speakers, look for Corpo3.etf)
Filling in the mot tier
22
We will just tokenize (i.e. split the words of the prosodic units into individual cells) the
grammatical word tier(s) tx@SP into the mot@SP tier(s). (Respectively tx@SP1 into
mot@SP1; tx@SP2 into mot@SP2; tx@SPp into mot@SP3 for multiple speakers):
●
Tier, Tokenise tier
●
Source : tx@SP
●
Destination : mot@SP
●
Start, Close
Displaying the tiers in the right order
The imported tiers may appear in a mixed order
●
Click-Drag and Drop the labels of the tiers you want to move
or
●
Right-click on the labels area
●
Sort Tiers, sort by hierarchy
Changing the transcription of the tx tier
The tx@SP line(s) contain(s) the morphophonological transcription. This line has to be
changed in ELAN by hand, unit by unit, into a broad phonetic transcription closely
mirroring the audio file (assimilations and dissimilations retained), and containing
phonological words instead of grammatical words.
At the end the ELAN file is correctly prepared and the mot tier is ready to be segmented
into morphemes and annotated with the help of the lexicon and the internal parser.
4.3. Exporting the transcription lines to Praat (for further
prosodic investigations)
This is a parenthesis for those who are concerned about having both a broad phonetic
transcription and a grammatical word transcription in Praat. Here is a way of obtaining
that result through ELAN, instead of doing those two transcriptions in Praat. Indeed, it is
easy to export tiers content and time delimitation from ELAN to Praat.
From ELAN:
●
File, Export As, choose Praat textGrid
●
Uncheck the Show only root tiers checkbox
●
Choose tx and mot (even ref if you want), OK
●
Choose the directory where to save the textGrid, and give the file a name
Now, this textGrid can be opened in Praat. The first tier will be the broad phonetic
translation, the second one the grammatical word transcription. Be aware that the time
boundaries of each word of the mot tier are correctly inside the time boundaries of the tx
23
unit they belong to, but they are not correctly related to their real time duration because
ELAN just divides the duration of the parent tx unit into equal cells for each word
contained in this unit. If you are concerned about the real time duration of each word, you
will have to move the boundaries of each word to align them according to their proper
duration, by playing the sound of the current word (click on the bar under it).
5. ELAN-CorpA: Elan for CorpAfroAs
You are now in Elan for CorpAfroAs .
Changing the ELAN preferences
While typing your annotations, if you want to save a cell in ELAN, the default method is
CTRL+ENTER (or CMD+ENTER in Mac). But there is a faster way: in the Edit/preferences
menu, there is an item writing preferences, which contains editing in which you can choose
enter key commits changes in the inline edit box. Then, by pressing only the ENTER key, you
save your changes.
When a virtual keyboard is used, system shortcuts may conflict with some ELAN shortcuts.
The solution is to change the ELAN shortcuts in the menu: Edit, Preferences, Edit shortcuts.
Interlinearizing process into ELAN
Until now, ELAN was not able to generate the segmentation and glossing lines mb, ge and
rx on its own. What was possible was:
- doing the job manually by splitting the segments and adding the gloss in the cells,
- exporting the data prepared in ELAN to Toolbox, then parsing and annotating using the
functionalities of Toolbox, then re-importing the Toolbox file into ELAN.
The idea was to simplify this process by giving the user access to some Toolbox-like
functionalities directly in ELAN, i.e to allow the segmentation of words by means of a
lexicon containing affixes, and to propose glossing by looking up into the same lexicon .
To do this, an « Interlinearize » tab has been added .
Once a file is opened, Click on the « Interlinearize » tab.
Creating, Opening, Importing a lexicon
The interlinearizing process relies on the
existence of a lexicon which can be •
a brand new ELAN lexicon
•
an existing ELAN lexicon
•
a lexicon imported from Toolbox
into ELAN
24
The « Lexicon » menu allows the choice Click on the «Lexicon » tab
Creating an ELAN lexicon
When you choose Create, a file selection window will open. Choose the folder where you
want to save your lexicon and give it a name. The .eafl extension will be automatically
added.
On the left part of the screen, you will see a table with the different columns of the
lexicon and a menu above, and on the right part of the screen, a display area with tabs
and buttons relative to the interlinearizing process and the lexicon management (cf. figure
below ary_AB_narr_3.eaf.)
Opening an ELAN lexicon
When you choose Open, a file selection window will appear. Choose the folder where your
lexicon was saved (extension .eafl), select it, then open it.
Importing a Toolbox dictionary
When you choose Import, a file selection window will appear. Choose the folder where
your Toolbox dictionary is saved, select it.
Not all the fields of a Toolbox dictionary are needed for the interlinearizing process
(examples, definitions...). ELAN is aware of the following concepts (right box):
Lexeme (all kinds of entries in the lexicon: word entries, stems, word forms, affixes),
Variant (alternate form of a lexeme, principally depending on the context),
Underlying form (underlying segments of an entry or a variant of it),
Gloss (the meaning or sense of the lexeme),
Part of speech (grammatical category). This is not used in the CorpAfroAs format.
Tier X (category related to the entry, may be grammatical or other),
Date (last modified date of the entry).
Those ELAN lexicon concepts (right box) have to be related to the fields found in the
Shoebox/Toolbox file (left box) for a correct importation of the dictionary data.
It is imperative for Lexeme, Gloss and Tier X to
be related to a Shoebox/Toolbox field
If you don't have an \rx field in Toolbox,
associate the Toolbox part of speech field (e.g
\ps) to ELAN Part of Speech. This will copy the
content of the Toolbox field into Tier X.".
You can define the relations you want by
pairing the fields and concepts one by one,
25
from the right box to the left and clicking on the >> button.
●
Select (click on) the concept in the right box
●
Select the corresponding label field in the left box
●
Click on the arrow button >> between the two boxes
Now, the concept selected from the right box has an arrow followed by the label of the
corresponding Toolbox field.
To delete a correspondence, select the concept in the right box
●
Click on the red cross button
To move a correspondence on top of the concept above
Click on the upward arrow button
To move a correspondence under the concept below
●
Click on the downward arrow button
When all the correspondences are ok,
●
Click on the « OK » button.
The program retrieves all the relevant data for interlinearization and copies them in a
new ELAN lexicon file (that you will save); this newly created XML file (with .eafl
extension) will be used as a lexicon for the interlinearizing process.
On the left part of the screen, a table showing the lexicon data is displayed with a menu
above. On the right side, there are tabs and buttons for the interlinearizing process
(Segmentations) and for the lexicon management (Lexicon).
Be aware that importation will not actually isolate the possibly multiple gloss of a lexeme,
separated by a semicolon in the Toolbox gloss tier. Those entries must be edited in ELANCorpA to isolate each gloss and giving them their proper (rx) category.
26
Self-opening of the lexicon
To the right of the Lexicon section menu, there is the Linkedfile menu. By default, the
checkbox before the name of the lexicon is checked, so this lexicon will open
automatically next time you open the ELAN file to which it is associated. If for some
reason you don’t want to open the lexicon automatically when opening the ELAN file,
uncheck the lexicon in the Linkedfile.
Setting up the interlinearization process
Before launching the interlinearization process on the words of a tier, you have to choose
this tier and define the associated annotation tiers. By default, those lines are « mot » for
the line containing the words to be segmented and annotated, « mb » for the line
containing the morpheme breaks, « ge » for the gloss of the morphemes, and « rx » for the
grammatical labels of the morphemes. If those tiers already exist, the current annotations
will be overwritten during the interlinearization process.
If those tiers don't exist in the ELAN files, do the following:
Parameters, tier Parameters, configure interlinear Tiers
Choose the source tier to be segmented and annotated: Choose interlinear tier (mot)
Click on OK
Choose the labels for the morpheme breaks tier (mb), gloss (ge) and category (rx)
Click on the Create tiers button
The tiers are created, the process can start.
27
Remark that if a tier already exists with the same label as one of those you just enterede
during the configure interlinear tiers process, a new tier will be created with this label
ended by –cp, avoiding the loss of the original one. If you want to overwrite that existing
tier, you should delete it beforehand.
Principles of annotation into ELAN
There are three kinds of entries (called here Lexeme) into the ELAN lexicon:
Lemma (base form chosen to represent the various forms of a word in context) – which
may present alternate (contextual) forms known herein as variants,
Stem, which is a form which cannot appear on its own as a word; it needs a
complementary affix. A stem may present a symbol (e.g _ ) to its left or right (or both) to
distinguish it from a lemma if desirable,
or an Affix. Affixes represent all the morphemes that can be agglutinated to a lemma, a
stem or another affix. By default, the affixes present a hyphen (-) to the left or to the right
if they are respectively suffixes or prefixes. Clitics can be distinguished by the use of an
equal sign (=) to the left or right, reduplication can also be represented by a tilde ~ at
the beginning of the segment (cf. parameters)
Lookup at the words in the lexicon
The principle of the ELAN-CorpA annotation is, as a first step, to try and match the
current word with the lemma or stems of the lexicon, or with their alternate forms
(variants). If the word is found in the lexicon, the value of the fields Lexeme, Gloss and Tier
X of the entry goes to the corresponding mb, ge and rx tiers under the current word in the
annotation area. Notice that if the word corresponds to a variant of a lexeme, it is the
underlying lexeme value that shows in the mb tier. Now as a second step, if the word is not found, the parser tries to segment it using the
affixes of the lexicon.
Segmentation
When a word is not found in the lexicon, the parsing process takes place, trying to match
all the affixes (prefixes, suffixes, clitics, reduplications...) of the lexicon to the end and/or
beginning of the word. When an affix matches, the parser isolates the affix, and the rest of
the word is, in turn, searched in the lexicon, and so on. If the rest is not found, an asterisk
will precede it, meaning it is a possible new entry. All the combinations are explored and
the various segmentations are displayed in the Segmentations section. At this stage, to
parse a new word, you should start by entering its affixes.
28
Affixes
To add a new affix in the lexicon, you can right-click the word containing this affix, in the
segmentation area, and choose « Insert a record ». In the box where the word appears,
delete everything but the affix. If it is a prefix, type a hyphen at the end, if it is a suffix,
type the hyphen at the beginning.
When you launch the interlinearization process, the affix you entered is isolated from the
word, then the rest is searched into the lexicon and if not found, the parser tries to find all
the affixes that match the end or beginning of the rest, and so on. At the end, all the
possible parsings of the word are displayed in the table of the segmentation area. If the
parser did not give you the correct parsing, you have to add the (lexical or grammatical)
morphemes that will fit this parsing, in the lexicon.
Launching the interlinearization process
The parser will search, one by one, all the words of the source tier in the lexicon, and if it
doesn't find anything, it will try all the possible segmentations allowed by the current
lexicon depending on the affixes it contains.
Click on the first word of the line to be annotated. Its segment will be underlined in blue.
Click on the « Interlinearize » button in the Segmentations section (to the right side of the
screen).
The different possible morpheme breaks of the word are displayed in the Segmentations
section, and now the lexicon will only show the entries that are involved in the
morpheme break of the current word. The last unsegmentable segment is preceded by an
asterisk, meaning that it has not been found in the lexicon.
29
In the above example, the word ʔarjabwa presents three possible segmentations. The
suffixes -a, -b and -wa found in the lexicon lead to the isolation of a possible stem *ʔarj.
Adding an entry into the lexicon (Insert record)
To add a new word to the lexicon, whether
a lexeme, a stem or an affix, click on the
« Insert record » button, in the Segmentations
area, or here just Right-click on the word
preceded by an asterisk (in the above
example, *ʔarj)
Selected tab: Insert record
A window appears with the selected word. It can be modified. For example, here the word
to be added is ʔarjab which is glosed as the proper noun Aryab.
Click on Save Record button
If the morpheme you are glossing contains morphological features which cannot be
segmented, or that you do not want to isolate as a separate morpheme, you can use the
box to the right of symbol '\' to enter those features. Notice that you do not have to type
the delimiter (\) before the grammatical label, it will be added automatically in the
annotation line.
Once the entry is created, the process may be launched again with the « Interlinearize »
button.
Here, as the new word ʔarjab has been entered into the lexicon, three new possible
segmentations remain.
Selecting the segmentation and the gloss
When there are several possible segmentations for the word, you have to choose the one
that fits
Double-click on the appropriate first segment of the correct segmentation line (here *ʔarj
on the first line).
The lexicon narrows down to the corresponding entries (which can be multiple in case of
polysemy or homonymy).
Double-click on the correct entry in the lexicon area, depending on the gloss and the
category.
30
The annotation of the first segment is displayed under it, in the Segmentation area, then
the next segment is selected.
And so on: a double-click on the selected segment will narrow down the lexicon to the
corresponding entries, then a double-click on the correct entry in the lexicon will display
the values of this choice under the current segment. (Notice that, for saving clicks and
time, when the next segment is automatically selected in the segmentation area, you can
double-click directly on the correct lexicon entry without double-clicking on the current
segment in the Segmentation section; in this case the lexicon will stay fully displayed.)
When the last segment of the current word is annotated, the chosen annotations are transferred under the word (in the annotation area), each in its own tier, and the next word is
selected.
Extended features of the parsing
Morphophonology (lemma and variant)
When a morphophonological change appears at the boundary of a stem and an affix (or of
two successive affixes), you should always bear in mind that the parser searches for a
match between what remains to be treated and the lexicon entries at Lexeme or Variant
level.
In the example above, the parser cannot give the correct segmentation of the word
‘rhisaːnheːb’ (should be rh –is -aːna =heːb) because of the collapse of the vowel ‘a’ of the
suffixe ‘-aːna’ before the last clitic ‘=heːb’. When ‘=heːb’ is isolated, for the parser being
able too correctly isolate the suffixe ‘-aːna ‘ already in the lexicon, we can enter ‘-aːn’ as a
variant of it..
Adding a variant to an entry
Change the « Insert Record » button into
« Insert
Variant »
button
with
the
downward little arrow, then click on it.
31
Enter the variant form (-aːn) and select the associated entry (-aːna).
Save the record
As the parser searches for a match at
the level of the lexeme or the variant
level of the entries, it will now
propose the variant ‘-aːn’ of the
entry ‘-aːna’ as fitting the match.
The
annotation
continue
by
may
then
validating
the
correct entries of the lexicon,
and the morphem ‘-aːn’ will be
returned with its lexeme base
form value ‘-aːna’ to the mb annotation tier. When the morphophonology is too complex for the parser to give the correct
segmentation, even with alternate forms of affix or stem, it is always possible to give the
correct segmentation directly into an entry of the lexicon. But be aware that the various
segments composing the current entry have to already exist in the lexicon.
Inserting an underlying form
Right-Click on the word to enter in the
segmentation area,, or or Click the « Insert
Record » button .
Select the « Insert underlying form» tab
Find the first segment (here tʼaáro) in the
drop list in front of Choose Segment 1
idem for segment 2, (here -a)
then add a segment if necessary by clicking
the Add button, and choose the segment (here –n)
Validate with the Save Record button, then close the window.
In case of homonymy or polysemy of the lexical entries, it can be difficult to choose the
right morpheme among several for the current segment. The Show button allows
displaying the content of the lexical entry to verify if it is the correct one.
From this window, it is also possible to add an entry that is lacking in the lexicon and
would be necessary for the segmentation.
Click on the Insert button on the same line as the current segment. A little window Insert
Morpheme will open allowing you to add an entry in the lexicon. Validate with OK. This
entry will constitute the new segment for the word to be segmented.
32
It should be noted that this method of giving the parser an ad hoc segmentation for a
word, should be avoided as much as possible and only be used when the parser fails to
give the correct segmentation with regard to the content of the lexicon (lemma, variants
and affixes). As a matter of fact, this kind of specific entry of the lexicon only resolves the
segmentation of one word (or maybe a complex combination of affixes). Recall that the
principle of the parser consists in providing the lemma in one part and the affixes in the
other part (with possible alternate forms), a method which is less time consuming and
more consistent and less error-prone.
The auto-interlinearization function
To save time in the process of interlinearization, it is possible to choose the automatic
process which will continue word after word, whenever the segmentation of the words is
possible, unique and without ambiguity in the glossing.
Launching of the auto-interlinearization process
This function can be launched from any word in the annotation base tier (here the mot
tier).
Click on the first word where the process must start (the base line of the word turns blue)
Click on the Auto-Interlinearize button
The segmentation starts, and will continue word by word until a word cannot be
segmented or until an ambiguity arises.
Parse-lexicon
Once the annotation of a text is completed, another type of lexicon can be created with all
the words of the text as entries and their glossed segmentations as data. This lexicon may
be saved as a Parse lexicon, or merged with an older one. It can be used then for
increasing the speed of the auto-interlinearize process.
Creating, merging, opening a Parse lexicon
To export the lexicon of the words and their glossed segmentation, go to the Lexicon area
and choose the Parse menu Parse, Export Parse data
Browse to the destination folder and give the file a name. The extension .eafp will be
added.
To merge the current segmentations and annotations of the text with an older Parse
lexicon, choose the Parse menu in the Lexicon area :
Parse, Export Parse data
Browse to the destination folder and select the parse file in which you want to merge the
new parsing.
33
To open a Parse lexicon for the auto-interlinearize process, choose the Parse menu
Parse, Open Parse data
Self-loading of a Parse lexicon
By default, once a parse lexicon has been created for an ELAN annotation file, it will be
automatically opened next time the annotation file is opened. If you want to avoid this,
you have to delete the link between these two files,
Go to the Linked File menu in the Lexicon area
Uncheck the checkbox before the name of the Parse file
The Parse file will not be loaded next time the ELAN file is opened.
Saving the linked files
When you close the ELAN annotation file, a window will appear allowing you to unselect
the linked files (lexicon and/or parse) you do not want to save (for any reason). Normally
you should save the lexicons.
Anyway, it is advisable to save the ELAN lexicon regularly during the
intelinearizing process with the Save item in the Lexicon menu, because the Ctrl/S
shortcut in ELAN will not save the lexicons.
6. Glossing principles
The whole glossing process is crucial, because all the queries and their results depend on
the consistency and accuracy of the annotations. This is why glossing must not be seen as
simply giving the descriptive morpheme-by-morpheme annotation that allows a reader to
better understand the meaning of an example, or the details of a morphosyntactic
construction, in a paper or grammar.
Glossing in a software such as Elan for CorpAfroAs implies thinking about the
implications of the chosen labels and chosen annotation system for future retrieval of
relevant data. What is meant by relevant data is data organized as a body of query results
such as to enable the resolution of a problem. For instance, (a) "what type of verb is
preferably used in the Imperfective aspect in my corpus", or (b) "what are the contexts of
use of the different focus particles of my corpus", or (c) "when are color terms realized as
adjectives and when are they realized as verbs in my corpus", or (d) "how often is the
distinction between genitive and locative neutralized in my corpus", etc.
The resolution of (a) implies that verb types should be coded in rx, and aspect should be
annotated in ge; the resolution of (b) implies that different focus particles should be given
systematically different annotations, be it by different labels or by different numbers
34
(FOC1, FOC2, etc.); the resolution of (c) implies that adjectives and verbs be tagged in rx;
the resolution of (d) implies that neutralization should be indicated in rx while case is
annotated in ge, etc.
In order for those queries to be formulated, the proper annotations have to be used in
both GE and RX.
6.1. Principles of glossing in the GE line
Morphological glosses are in capital letters; lexical glosses in small letters (exception:
proper nouns have initial capitals, negative glosses have a small n as prefix (nFCT = nonfactual);
Lexical glosses refer to basic stems only, irrespective of the semantic changes induced by
derivational and other material; e.g., Gawwada ʧox- ‘to milk’ is glossed “milk-”, ʧox~x
‘to milk one teat only of a cow’ is glossed “milk~SEM-”
Digits are used for persons; no dot is used between them and the following alphabetic
gloss: e.g.: SBJ.3SG.M ‘third singular masculine subject’.
Glosses reflect the order of elements: prefix(es), stem, suffix(es).
The ordering of elements within a single tag reflects a general principle “the more
inclusive (general) category precedes the more specific one(s)”.
Composite tags: with a dot between elements also found as single tags. E.g.: PFV.NEG for
Perfective Negative.
If a verb has a Ø person marker, this should be indicated by square brackets (cf. Leipzig
glossing rules)
ex: ʃrəb = drink\PFV[3SG.M] (‘he drank’)
ʃrəb-t = drink\PFV-1SG (‘I drank’)
Epenthesis at morpheme boundary: Keep the epenthetic segment with the suffix (i.e. to
the right of the boundary), or the prefix (i.e. to the left of boundary): e.g. jə-lla (not jəlla).
35
When feminine gender marking is optional only gloss F when overtly marked (in the
example below raː=k can be either F or M).
raː=k
raː=ki
see=OBL.2SG
see=OBL.2SG.F
Morphological feminine is marked as F in ge line even if it has a collective or diminutive
meaning. The meaning is given in rx (DIM for diminutive, COL for collective)
Plural with ablaut are glossed “\PL” on the ge tier.
mb klaːb
ge
dog\PL
rx
N
Mixed plurals with both ablaut and affixes (e.g. in Arabic):
mb tərq –aːn
ge
road\PL-PL
rx
N-AFFX
Construct state
Construct state is glossed in GE as CS if it has a morphological realization.
Example:
\tx
ʕaddət
sukkan
ṭṛabləs /
\mot
ʕəddət
sukkaːn
ṭṛaːbləs /
\mb
ʕədd
-t
ukkaːn
ṭṛaːbləs /
\ge
number
-F\CS
inhabitant\PL
Tripoli
\rx
N
-AFFX N
/
N.PR
/
\ft The number of Tripoli inhabitants
\tx
alf u tamən mijt nasama /
\mot
aːlf
u
təmn
\mb
aːlf
u
təmn
\ge
thousand
and
eight\CS
\rx
NUM
CONJ
NUM
\mot
miːjt
nasama
\mb
miːj
-t
nasam
-a
/
\ge
hundred\CS
-F\CS
person
-F
/
\rx
NUM
-AFFX N
-PNG
/
/
\ft One thousand and eight hundred persons
36
The aspectual markers of the verbal system, in case of specific patterns of the stem, PFV
and IPFV are glossed only once in the ge tier (not also on the personal indices): \PFV and
\IPFV after the translation of the verb. Always gloss IPFV and PFV in the ge line.
Demonstratives: In general for demonstratives we use PROX or DIST in the ge tier and
DEM in the rx tier. If the language has only one DEM then use DEM in the ge tier and
DEM in the rx tier.
Pre-/post/ad-positions are translated on the ge tier according to their semantic value
(only one translation serving as gloss, even if the preposition has several meanings in ft)
or role (e.g. DAT, GEN). A complete list will be given in the grammatical sketch of each
language.
Converbs should be labelled semantically, not numbered.
Subject affixes or clitics:
If in your language personal indexes are agreement markers, only mark 3SG.M in ge, and
PNG in rx. The “lexical” subject (if any) should then be marked SBJ in rx (in addition to
its characterization as N.M. for instance, for noun+masculine).
If in your language personal indexes are bound pronouns carrying grammatical function,
then use SBJ.3SG.M in ge, and AFFX (or CL) in rx. ‘Lexical’ subjects should also be
labelled SBJ in rx if word order alternations are to be retrieved.
In Omotic, both reported discourse and a kind of emphasis when one repeats his/her own
discourse (marked by extra-lengthening of the last vowel of the utterance) are glossed RD
in ge tier (keeping the lengthening of the vowel on the mot line). The difference between
repetition of the same speaker’s words and reported discourse is glossed in the rx tier.
General symbols
symbol
description
examples, notes
_
separates parts of the lexical description of a stem
pull_out, go_home
.
separates parts of morphemes
PFV.3SG.M
-
affix boundary
-DET
\
stem alternation
\PFV
37
~
stem reduplication (complete or partial)
~IPFV
=
clitic boundary
=DET
<>
encloses material in another language (codeswitching)
<lavaliz>
>
the sign > immediately preceding a gloss label in tier >DEM
rx indicates that this gloss refers to the source of
grammaticalization of the morpheme. This indication
is optional.
6.2. Principles of glossing in RX tier
The \rx tier gives us two types of information:
•
on morphosyntax : the paradigm or part of speech the morpheme belongs to; for
that, we use a more or less standardized set of labels called the “ps” labels (written
in capital letters);
•
on certain phenomena which are either not directly accessible through the \ge and
ps labels (covert categories; circumfixes; apophony) or which relate the morpheme
to other morphemes in the corpus (homonymy, etc.); these are called indices
(written in small letters)
Elements of Syntax
•
Labels and indices are separated by slashes: PRO/cov. “ps” labels are followed by
indices. The different elements of compound “ps” labels are separated by dots:
PRO.DEICT;
•
“ps” labels are arranged more or less in the same way as in \ge, going from left to
right from general to particular.
•
Indices will tend to be idiosyncratic: they will reflect the current state of research
in terms of unsolved problems, questions, current typological debates, etc. As full
names for these labels would be far too long we finally opted for abbreviations.
6.3. Code-switching glossing principles
In general, the choice of a gloss for CSW phenomena depends on what we think should be
retrieved by the users of the corpus. Possible glosses are also dependent on the different
theoretical approaches to CSW. During our discussion two main options for CSW glossing
emerged:
38
1) A gloss intended to mark a distinction between inter-sentential and intra-sentential
CSW.
2) A gloss intended to mark the embedded language against the matrix language.
We consider that the priority of marking CSW, for this project, is essentially because we
cannot gloss loan elements as we gloss our language. Therefore, the proposal is to mark,
with an easily retrievable symbol, the embedded language against the matrix language
regardless of the kind of CSW. Thus, we propose to mark CSW by mean of the symbols
<…> embedding the code-switched elements in the lines tx, mot, mb, ge and ft. We put
in rx the language following the abbreviation for codeswitching CSW.ENG (ISO
abbreviation for the language).
As in the following examples (from Moroccan Arabic):
\tx
<donc>əlħəlldjaːlu huːwamṛaħaːmla //
\mot <donc> əlħəll djaːlu huːwa mṛa ħaːmla //
\mb
<donc>
əl=ħəll
djaːl=u
\rx
CSW.FRA
DET=N.M
PREP.POSS=PRO PRO.IDP N-AFFX ADJ-AFFX //
\ft
<so> it’s solution is the pregnant woman
\ge
<donc>
DEF=solution of=OBL.3SG.M
huːwa
3SG.M
mṛ-a
ħaːml-a
//
woman-Fpregnant-F //
We can use standard orthography if there is one. However, we suggest using IPA, when it
is necessary or relevant to highlight the degree of phonological integration of the "codeswitched" elements.
Example of IPA transcription from Juba Arabic, code-switching toward Sudanese Standard
Arabic and English:
\tx de amulu gal<luɣa al-arabiyya al-fusħa>
\mot de amulu gal <luɣa al-arabiyya al-fusħa>
\mb de
amulu
gal
<luɣa al-arabiyya al-fusħa>
\ge PROX.SG
do
say
<luɣa al-arabiyya al-fusħa>
\rx PRO.DEM
V
SVC
CSW.ARB
\ft “they call (it) <the classical Arabic>”
Generally speaking, we decided not to mark lexical borrowings, but the separation of
loan-words from CSW is not always clear. The parameter of phonetic realization of the
39
code-switched items cannot be a solution since it is relevant only in certain sociolinguistic conditions (it is relevant for Moroccan Arabic but not for Juba Arabic). At the
same time, it is not possible to rely on the evaluation of the individual’s language skills,
because bilingualism is also a very relative factor. Thus, only the contributor can decide if
the occurrence of a given item in his/her language could be due to a contingent lexical
need (in this case he/she is dealing with a case of CSW) or if it is a common borrowed
form. Everyone will have to choose whether it is integrated borrowing or some kind of
CSW. The theoretical choice (CSW, borrowing, interference...) is explained in the
grammatical sketch presenting our language.
For instance in Juba Aarabic, the high occurrence of the forms sistá < “sister”, partí <
“party”, ánkol < “uncle” would lead one to consider them as loanwords. Conversely, it
seems that the use of plant names from Bari is due to the fact that those are the only
words that can express the contingent semantic reference needed by the speakers.
\tx <keɲuket> da jaːːːni
\mot <keɲuket> de jani
\mb <keɲuket>
de
jani
\ge <keɲuket>
PROX.SG
that_is
\rx
DEM
INTJ
CSW.BFA
\ft “The <kenyuket> is…”
Apart from CSW, there is another contact-induced phenomenon that can be signaled in
the \rx tier. This is the synchronic morphosyntactic interference (INTF) occurring in Juba
Arabic. This is exclusively related to the post-creole continuum in which Juba Arabic is
integrated, which resulted in the functional integration of morphological material from
(Sudanese) Arabic. Differently from CSW, instances of interference are glossed also in the
\ge tier (note that the list of the glosses used for marking interference on \ge is the same
as in other Arabic dialects and will be provided in the grammatical sketch). The label
INTF is followed by canonical \rx glosses describing the morphosyntactic categories
related to interference from Arabic.
\tx
∫edera <haggu> kebir
\mot ∫edera <ħaggu>
kebir
\mb ∫edera <ħagg=u>
kebir
\ge trunk
<of=OBL.3.SG.M>
big
\rx N
<INTF.PREP.POSS=3.SG.M> ADJ
\ft its trunk is big
40
6.4. Free translation in Elan
As the main segment into CorpAfroAs model is the prosodic unit, the free translation of
some segments may become semantically inadequate and then a wider segmentation tier
may be necessary for the free translation line.
It is provided to add a Mft tier to translate longer chunks (M is for ‘main’). But this tier
cannot be dependent on ref because its segments are wider than the refs. An independent
tier synchronized to time as the tier ref can be created on the base of the ft segments (or
ref ).
To add this tier,
o Tier, Copy Tier
o Select ft, Next
o Select Transcription (No parent), Next
o Select the (only) linguistic type ref, Finish
A new tier named ref-cp has been created. We will rename it.
o Right click on the tier label
o Change attribute of ref-cp
o Tier name : Mft, Change
The segments from Mft can now be merged to form wider segments as needed to allow a
correct free translation.
o On the Mft tier, Select the first segment that need to be merged with next.
o Right-click on it, Select Merge with next annotation
The texts (copied from ft ) of the merged segments have been concatenated.
o Edit the free translation text as needed
There can be a development of this. Instead of renaming Mft the copy of the tier ref, we
could have renamed it Mref (for ‘main’ ref). Then after merging the segments that needed
to, we could have created a copy of this Mref with the linguistic type ft and rename it Mft.
Then the Mref tier could be labelled and numbered just as ref have been. Finally, tier ref
could be made child of Mref with the linguistic type ‘included in’.
41
6.5. Search in Elan
You can search a word or a gloss in order to replace it. Once you have found it, you
choose the correct occurrence and then you replace it:
Search, Find (And replace)
An annotation on tier: select the tier where you want to replace (you can select all tiers)
That matches: what do you want to replace, here the colon character ‘ : ’
Check regular expression
Click on Search
The list of occurrences appears.
Edit, Replace
Replace matched substrings with: type the replacement character (here the API character ‘ː’)
OK (the search window displays no more occurrences, they have been replaced)
7. Toolbox as alternative to Elan-CorpA
The new Elan document (as at the end of section 4) can be exported in Toolbox format.
Toolbox is now used to segment the words into morphemes and to annotate them by
means of a lexicon. When segmentation and annotation are finished, the Toolbox
document is imported back into Elan.
If empty segments still exist in ELAN, they can be deleted there, but it is simpler to do this
during the Toolbox annotation, just by deleting the empty records one by one. When
importing back into ELAN they will no longer exist. Then the final ‘labeling’ of the
segments may be done. In this process, pauses will be enumerated in sequence with
spoken IUs.
42
Before exporting to Toolbox, each tier in ELAN needs to have its 'Participant' parameter set
to SP if there is only one speaker; if there are 2 speakers, it must be set to SP1 for the first
speaker tier and SP2 for the second speaker tier; if there are 3 speakers, SP1 for the first
speaker tier, SP2 for the second speaker tier, and SP3 for the third speaker tier. Don’t
forget to check (via the Change tier attributes button) that each tier has an SP as
participant.
Creating a new Toolbox project
Use Start New Project from Start, All programs, Toolbox, to create a new folder with all the
standard settings files (standard database types and language encodings files). By default,
this new project manages a dictionary and a text file to be interlinearized. These standard
settings may be adapted afterwards.
Create your Toolbox project
Start with the creation of your main folder (let's say CorpAfroAs) where you want.
Then, Click on the Windows Start button, and look in All the programs for the Toolbox
menu, then launch Start New Project.
Click on Next, then Browse until you find the folder you have just created.
Choose the (CorpAfroAs) folder in which you are going to install the Toolbox project. The
selection window adds Toolbox at the end of the path you chose (if it adds Toolbox project
delete project). Then validate with OK.
Click on Next, Next, then Finish.
Remark: Below the CorpAfroAs Toolbox folder, a Settings folder was created that contains
all the necessary standard setting files, and the project file itself Toolbox Project.prj. A
shortcut to this file was placed on the Desktop.
On the desk, rename the shortcut Toolbox Project into CorpAfroAs. (Right-Click on the icon,
Rename it).
Remark: this will rename the shortcut, not the project name itself.
Start your project
Double-click on the shortcut CorpAfroAs located on the Desktop. Toolbox will open. It
contains two empty databases, Texts.txt and Dictionary.txt.
Close the Texts.txt database by clicking on the red cross of its window (top-right) (we will
not use this standard database).
Remark: The Dictionary.txt database is displayed twice as Dictionary.txt:1 and
Dictionary.txt:2. You should close one of these windows.
Rename the project
<optional>
43
The default name of the toolbox project is Toolbox Project and is displayed at the bottom
right of the toolbox window. We suggest renaming it by saving it under a different name
as follows:
In the Projet menu, choose Save as, and give the project a new name, eg. CorpAfroAs, then
click on Save. The name of the project is changed.
Close Toolbox by means of the menu File, Quit (beware, Quit!, not Close)
Correct the shortcut of your project
Since we’ve changed the name of the file project, we have to correct the shortcut that has
to point to this new name, for doing this :
Right-Click on the CorpAfroAs icon on the Desk.
Select
Properties
and
change
the
filename
in
target
which
should
point
to
X\CorpAfroAs\Toolbox\Settings\CorpAfroAs.prj (where X is the root where you firstly
created the folder CorpAfroAs. Then close with OK.
Export the ELAN transcription to Toolbox / Shoebox
In ELAN, the delimitation of the prosodic units is made in the ref tier, and the various
segments are transcribed in the tx tier. The words of each segment are split into
individual cells in the mot tier, by means of the tokenize process. The translation
associated to each prosodic unit is made in the ft tier (free translation).
The ELAN file is then exported as a Toolbox/Shoebox file:
File, Export As, Shoebox file (it seems there is a bug when exporting as Toolbox file)
Select Time format: hh:mn:ss.ms if there is more than one speaker
Check Use Shoebox database type
If it is not already there, Click on the <...> button and Look for the refCorp.typ file (it
should be in the folder CorpAfroAs\Toolbox\Settings)
Tick Encode all markers in Unicode (UTF-8)
OK
44
Select the folder to which to export the file: e.g. CorpAfroAs\Toolbox and give it a name
(it should be the same as the ELAN file, with .txt extension)
Save
Close Elan
Import the Elan transcription into Toolbox
Launch Toolbox with its shortcut on the desk
File, Open
Look for the folder Toolbox (here CorpAfroAs) where the file to import is located, and
select it
Click on Open
The file will open, showing the first record corresponding to the first segment referenced
in the ELAN document. One can display the next/preceding segment by means of the
arrow buttons.
45
The interlinear process begins by clicking on the interlinear button (or Alt/i). When the
dictionary is empty, no word is found, and then each word is annotated with asterisks.
Insertion of (lexical and/or grammatical) morphemes into the dictionary
Select the prefix
ye
Right-Click
on
the
to
prefix
open
the
insertion pop-up
window
Insert into the
dictionary
by
clicking
on
insert
To
enter
a
homonymous
morpheme, do a
Ctrl/Right-Click
on the morpheme
46
A hyphen is added
to the right of the
morpheme
to
indicate that it is a
prefix,
then
gloss
(after
the
the
label \ge) and the
part
of
(after
speech
\rx)
are
added.
Place
the
cursor
back on the word
to
be
interlinearized
on
the mot line, in the
text window.
Click
on
interlinear
the
button
(or Alt/i)
The
word
segmented;
is
the
rest of the word lla
can
entered
now
into
be
the
dictionary, and so
on…
Special characters in Toolbox
If you want to use for instance the apostrophe as part of a character, you have to declare
it as such in the Encoding Language devoted to the text (tx, mot) and morpheme (mb)
lines. In order to do that :
Project, Encoding languages,
Choose the language, then the Sort Order tab
then add e.g. the digraphs ts’ and q’ where you want them in the alphabetical order.
47
Make sure that the apostrophe is not elsewhere in other boxes (e.g. ‘character to ignore’
or ‘diacritics’...)
It is possible to correct the segmentation of a prosodic unit that is too long. It is to be
done in Toolbox, not in Praat.
French special characters
Members working on French codeswitching have "ç", "é" etc. which are problematic. The
problem is due to the encoding language of the ge and rx fields in Toolbox. The encoding
was ‘Default’ or ‘English’ and these encodings were not declared as Unicode. To turn these
encodings into a Unicode format do the following for each of them:
Project, Language Encodings, 'Default', Modify, Options, Advanced, check Unicode.
The annotations containing French special characters need to be corrected before the
importation into ELAN is done. The French entries of the dictionary need to be corrected
too.
How to correct a prosodic unit in Toolbox?
In Toolbox, each record refers to a temporal segment of the audio file, delimited with
Praat, then imported into ELAN and finally exported into Toolbox. If, for some reason, a
temporal segment corresponding to a prosodic unit has to be split into two prosodic units,
the process for integrating this correction into Toolbox is as follows:
In Praat
Check and remember the temporal index corresponding to the new boundary between the
two new units.
In ELAN
It is not necessary to correct the file in ELAN: when the Toolbox file is re-imported into
ELAN, it will be updated automatically.
In Toolbox
Duplicate the record corresponding to the unit to modify
Database, Copy record
Make sure to choose the current database as destination, then click OK (the two identical
records follow one another).
48
Rename the first record by adding an ‘a’ at the end of the reference.
Replace the end index \ELANEnd by the one you remember from Praat.
Delete the part of the text (and its annotations) corresponding to the second segment.
Go to the next record.
Rename the record by adding a ‘b’ at the end of the reference.
Replace the begin index \ELANBegin by the one you remember from Praat.
Delete the part of the text (and its annotations) corresponding to the first segment.
In ELAN
Once the corrected Toolbox file has been re-imported into ELAN, update and renumber
the labels of the reference tier
Tier, Label and Number Annotations
Automatic replacements in Toolbox (only if you are 100% sure it concerns all cases,
because it is difficult to undo):
Example: Edit, Replace, Text to find: [#]e Replace: i, Find in the Field ‘mot’, whole
database (which means find ‘e’ at the beginning and replace by i).
All replacements (consonants, etc.) in the mot tier must be done in Toolbox, NOT in
ELAN.
Re-import the toolbox annotation back into Elan
Launch ELAN
File, Import, Shoebox file
49
Look for the Toolbox annotated file by means of the Browse button <...>
Shoebox type file: Look for and select the refCorp.typ file (generally in Toolbox/Settings)
Check All markers are Unicode
OK
If the tier labels contain @unknown, rename these tiers. (This is due to the fact that in
Toolbox, the ELANParticipant was missing).
Link the audio file to the annotated file
Edit, Linked file
Add
Look for the audio file, then Select
Apply, then Cancel
Displaying the morpheme annotations
To display the gloss ge and the extra annotations rx associated to each morpheme in an
ELAN file:
Select the Grid Tab
Check the little square box to the top left-hand side to display the corresponding tiers
Choose the mb@SP1 or mb@SP2 tier instead of Empty
Right-click on the grid area
Export as Tab-delimited Text
Choose the folder and filename, then save
From the Windows Explorer, look for this folder and select the file you just exported
Open the file with Word by right-clinking on it
Open with Word
50
Coded text: yes
Select the text and convert it into a table
Table, Convert to table, 5 columns
Delete the empty column if necessary
Sort the table by morphemes
Select the table
Table, Sort, Column 2, OK
33
dà
REL
CONJ/hom
61
dà
REL
CONJ/hom
64
dà
with
PREP/hom
90
dà
COP2 PTCL.SYNT/hom
153
dà
REL
CONJ.hom
189
dà
with
PREP.hom
258
dà
with
PREP.hom
270
dà
with
PREP.hom
282
dà
with
PREP.hom
376
dà
REL
CONJ.hom
381
dà
with
PREP.hom
470
dà
REL
CONJ.hom
487
dà
with
PREP.hom
533
dà
and
CONJ.hom
606
dà
and
CONJ.hom
624
dà
and
CONJ.hom
Remark: it is not possible to display the list of different tiers at the same time. If
necessary, select the list of the morphemes of mb@SP2, then merge the two exported files
into Word, and sort the merged table.
This is copyrighted material. Please quote as follows: Author: CorpAfroAs team.
Title : ‘The
CorpAfroAs
Manual’.
Year
of
publication:
2011.
References:
http://corpafroas.tge-adonis.fr/Manual.html. Page number. Accessed on: date of access.
51