1
LQ-570+
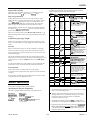
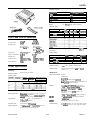
The Control Panel
ALT
While holding down this button, pressing certain other buttons
results in the following:
The indicator lights give you the current status of the printer. The
buttons let you control many of the printer settings.
BUFFER CLEAR
(PAUSE) clears the printer’s buffer and initializes
the printer settings
MICRO FEED
? (LOAD/EJECT) feeds paper forward in l/ 180-inc :h
increments
& (LF/FF) feed paper backward in 1/18@inch
increments
Lights
Bin Select/TEAR OFF
OPEMTE(green)
This button selects the paper bin when both optional cut-sheet
feeders are installed and you are printing on single sheets. When
printing on continuous paper, press this button once to feed paper
from the loading position to the tear-off position Press this button
again to feed the paper backward to the loading position
On when operate switch is on and power is supplied.
PAUSE(yellow)
On when the printer is not ready to print data. Stays off unless you
press the PAUSE button to prevent printing.
CONDENSED
DATA(yellow)
Press this button to print condensed characters. Press again to return
to normal character printing.
On when data is present in the printer’s buffer.
FONT
MULTI-PART (green)
On when you move the paFer-thickness lever to position 2 or higher.
The printing speed is reduced when this light is on
Press this button to select from among the built-in fonts.
Note: The panel’s font name typestyles are meant as guides only;
actual printed results may differ slightly.
PAPEROUT (red)
On when the printer runs out of paper.
BIN 1 (green)
On when bin 1 of the optional cut-sheet feeder is selected for paper
feeding.
Other control-panel features
The control panel also gives you access to two special functions:
self test
BIN 2 (green)
On when bin 2 of the optional cut-sheet feeder is selected for paper
feeding.
TEAROFF(yellow)
On when you press the TEAR OFF button to feed the paper to the tearoff position
Hold down the LF/FF button (for LQ printing) or the
LOAD/EJECT button (for draft printing) while turning on
the printer to perform the self test. The self test lets you
check that your printer is operating properly and gives
you a printout of the current DIP-switch settings.
Data dump: Hold down both the LF/FF button and LOAD/EJECT
button while turning on the printer to enter data dump
mode. Data dump mode allows advanced users to find
the cause of communication problems between the
printer and the computer.
Fonts(green)
On when a specific font is selected.
Buttons
PAUSE
Press this button to temporarily stop printing. Press this button again
to resume printing.
Setting the DIP Switches
LOAD/EJECT
DIP-switch tables
Press this button to load single-sheet or continuous paper to the
loading position (however, the printer normally loads paper
automatically). If single-sheet paper is already in the loading
position, use this button to elect the sheet. If continuous paper is in
the loading or tear-off posib;on, press this button to feed it backward
to the standby position.
The section below shows the settings and functions of each DIP
switch. You can see the current DIP-switch settings at any time by
running the self test.
Table 1 DIP switch 2
SW
LWFF (Line feed/Form feed)
DWlXlptlOll
International character sets/
character tables
ON
1 OFF
See Tables 3 and 4 below
Unldirectlonal
Bldirectlonal
None
On
8 Kbytes
Off
Tap this button briefly to feed the paper forward one line. Hold this
button down to elect a single sheet of paper or advance continuous
paper to the top of the next page. You can also use this button to load
a single sheet of paper from the cut-sheet feeder or to feed
l-l
l-2
l-3
l-4
1-5
Print direction
continuous paper from the standby position to the loading position.
l-6
Not used
l-7
l-8
Input buffer
I -inch skip-over-perforation
24-Pin Printers
.
5/93
”
LQ-570+ - 3