1
3/27/97
............
11:24 am
Final Version Given to Printer
.........................................................................................
HP OfficeJet Series 500
User’s
Guide
.............................................................................................
HP Company Confidential
3/27/97
11:23 am
Final Version Given to Printer
.......................................................................................................................
© Copyright HewlettPackard Company 1997
All rights are reserved. No
part of the document may
be photocopied,
reproduced, or translated
to another language
without the prior written
consent of HewlettPackard Company.
OmniPage® Limited
Edition V5.0 is a U.S.
registered trademark of
Caere Corporation.
Microsoft® is a U.S.
registered trademark of
Microsoft Corporation.
Windows® is a U.S.
registered trademark of
Microsoft Corporation.
Publication number:
C3801-90001
First Edition,
February 1997
Printed in USA.
This product is
approved for use in the
United States Only.
Local country laws may
prohibit the use of this
product outside of United
States. It is strictly
forbidden by law in
virtually every country to
connect nonapproved
telecommunications
equipment (fax machines)
to public telephone
networks.
7.
Safety Information
Always follow basic safety
precautions when using
this product to reduce risk
of injury from fire or
electric shock.
8.
9.
1. Read and understand
all instructions in the
User’s Guide.
WARNING:
Potential Shock Hazard
10.
2. Use only a grounded
electrical outlet when
connecting the HP
OfficeJet to a power
11.
source. If you don’t
know whether the
outlet is grounded,
check with a qualified
electrician.
3. Telephone lines can
develop hazardous
voltages. To avoid
electrical shock, do not
touch the contacts on
the end of the cord, or
any of the sockets on
the HP OfficeJet.
Replace damaged
cords immediately.
4. Never install telephone
wiring during a
lightning storm.
5. Observe all warnings
and instructions
marked on the product.
from wall outlets and
telephone jacks before
cleaning.
Do not install or use
this product near
water or when you are
wet.
Install the product
securely on a stable
surface.
Install the product in a
protected location
where no one can step
on or trip over line
cord, and the line cord
will not be damaged.
If the product does not
operate normally, see
Troubleshooting.
No operatorserviceable parts
inside. Refer servicing
to qualified service
personnel.
Notice
The information contained
in this document is subject
to change without notice.
Hewlett-Packard shall not
be liable for errors
contained herein or for
consequential damages in
connection with the
furnishing, performance,
or use of this material.
Information regarding
FCC Class B, Parts 15 and
68 requirements can be
found in the back of the
User’s Guide.
This product may
contain remanufactered
parts that have been fully
tested to meet 100% of
original performance
specifications.
6. Unplug this product
Complete the following information. You’ll need it if you contact your dealer or Hewlett-Packard Company:
Date of Purchase:
Serial Number:
❏❏-❏❏-❏❏❏❏
❏❏❏❏❏❏❏❏❏❏❏❏
(Located on the back of the machine.)
.......................................................................................................................
HP Company Confidential
3/27/97 11:25 am
Final Version Given to Printer
Table of Contents
1
Setting Up the HP OfficeJet for Your Office.......1-1
Make Sure Everything Is in the Box .........................................1-2
If you don’t have a CD-ROM disc drive ............................1-2
1. Load the Tray ........................................................................1-3
2. Plug in the Line Connector ...................................................1-3
3. Connect the Cables................................................................1-4
4. Insert the Print Cartridges .....................................................1-4
5. Load the Paper Supply ..........................................................1-6
6. Connect Your Office Equipment - REQUIRED! .................1-7
What should you connect?..................................................1-7
How to tell if you have a modem.................................1-9
How tell if your modem is inside
your computer or an external box ................................1-9
How should you connect? ..................................................1-9
Dedicated line ............................................................1-10
Dedicated line with a PC-modem ..............................1-10
Dedicated line with external modem .........................1-11
Shared line .................................................................1-12
Shared line with a PC-modem ...................................1-13
Shared line with an external modem..........................1-14
Shared line with answering machine .........................1-15
Shared line with computer voicemail ........................1-16
Shared line with PC-modem &
answering machine.....................................................1-17
Shared line, PC- modem &
computer voicemail....................................................1-18
Shared line with external modem and
answering machine.....................................................1-19
Shared line with external modem and
computer voicemail....................................................1-20
Shared line with distinctive ring ................................1-22
7. Install the Software - REQUIRED! ....................................1-23
8. Make Sure Everything Works Properly ..............................1-24
...............................................................................................................
ii
HP Company Confidential
3/27/97 11:25 am
Final Version Given to Printer
1
Setting Up the HP OfficeJet for
Your Office (continued)
Receive a fax ....................................................................1-24
Print a report .....................................................................1-24
Make a copy .....................................................................1-25
Scan a page to your computer ..........................................1-25
What’s Next ............................................................................1-26
2
A Quick Tour of How to Do Everything ..............2-1
Sending Faxes ...........................................................................2-2
Sending paper documents...................................................2-2
From the HP OfficeJet’s keypad..................................2-2
From the Document Assistant screen ..........................2-2
Sending a fax directly from your software program ..........2-3
Copying .....................................................................................2-4
Basic copying from the HP OfficeJet’s keypad .................2-4
Using advanced copy settings in the
HP OfficeJet’s software......................................................2-5
Scanning....................................................................................2-6
Scanning images .................................................................2-6
Scanning text for editing (OCR).........................................2-7
Printing......................................................................................2-7
Using the Help System..............................................................2-8
Other ways to get help ..............................................................2-9
3
Faxing......................................................................3-1
Sending a Paper Document .......................................................3-2
Using a document carrier to protect your original..............3-2
Sending from the keypad....................................................3-3
Dialing in real time ......................................................3-3
Dialing from a telephone that’s
connected directly to the HP OfficeJet ........................3-4
Speed dialing................................................................3-5
Sending from the HP OfficeJet Document Assistant .........3-6
Sending a Fax Directly from Your Software Program .............3-7
Receiving Printed Faxes............................................................3-8
...............................................................................................................
iii
HP Company Confidential
3/27/97 11:26 am
3
Final Version Given to Printer
Faxing (continued)
Loading the paper supply ...................................................3-8
Answering settings .............................................................3-9
Manually receiving faxes ...................................................3-9
Receiving Faxes to Your PC ............................................3-10
Using Advanced Fax Features and Settings............................3-11
Advanced fax send settings ..............................................3-11
Controlling how your faxed documents will look .....3-11
Changing the Resolution .....................................3-11
Changing the Contrast .........................................3-14
Redialing a fax number..............................................3-15
Redialing manually with the
Redial/Pause button .............................................3-15
Changing the Automatic Redial
setting in the software..........................................3-15
Entering a pause during keypad dialing.....................3-15
Assigning Speed Dial codes.......................................3-16
Assigning a speed dial code to a
single fax number ................................................3-16
Assigning a speed dial code to a
group of fax numbers ..........................................3-17
Faxing to a group of fax numbers ..............................3-18
Changing the information printed
at the top of the faxes you send..................................3-19
Setting Tone or Pulse dialing type .............................3-19
Other advanced features for sending faxes ................3-19
Advanced fax receive settings ..........................................3-21
Phone Answering: Automatic or Manual ..................3-21
Changing the number of rings before answering .......3-22
Using Distinctive Ring...............................................3-23
Updating your fax receive setup ................................3-24
Changing the paper size setting .................................3-25
Other advanced features for receiving faxes..............3-25
Viewing Lists of All Sent and Received Faxes ................3-25
Printing the Fax Reports ...................................................3-26
Adjusting sound volumes .................................................3-26
Changing the time and date ..............................................3-27
...............................................................................................................
iv
HP Company Confidential
3/27/97 11:26 am
4
Final Version Given to Printer
Copying ...................................................................4-1
Loading the Paper Supply for Copying.....................................4-2
Using a Document Carrier to Protect Your Original ................4-3
Copying from the Keypad.........................................................4-3
Controlling how your copies will look ...............................4-4
Optimizing the quality (Resolution setting) .......................4-4
Darkening and lightening (Contrast setting) ......................4-5
Automatic collating ............................................................4-5
Copying from the Document Assistant.....................................4-6
Controlling how your copies will look ...............................4-7
Optimizing the quality ........................................................4-7
Darkening and lightening (Contrast setting) ......................4-7
Reducing and enlarging ......................................................4-7
Collating: On or Off ...........................................................4-8
5
Scanning..................................................................5-1
Using a Document Carrier to Protect Your Original ................5-2
Scanning Your Document As an Image....................................5-2
Scanning from the Document Assistant .............................5-2
Scanning directly into your
TWAIN-compliant software program ................................5-5
How to tell if your software program
supports TWAIN..........................................................5-5
How to scan with TWAIN ...........................................5-5
Scanning Your Document to Edit the Words (OCR)................5-7
6
Printing ...................................................................6-1
Using Paper and Other Media Types ........................................6-2
Selecting paper/media types and sizes ...............................6-2
Loading tips for paper and other media..............................6-2
Loading plain and special papers .................................6-3
Loading letterhead paper..............................................6-3
Loading the single-envelope slot .................................6-3
Loading multiple envelopes .........................................6-4
Loading transparencies ................................................6-4
...............................................................................................................
v
HP Company Confidential
3/27/97 11:26 am
6
Final Version Given to Printer
Printing (continued)
Using the Print Settings.............................................................6-5
Locating the print settings ..................................................6-5
Using the Paper tab settings ...............................................6-5
Using the Setup tab settings ...............................................6-6
Print quality and speed.................................................6-6
Printing in color ...........................................................6-6
Printing in grayscale ....................................................6-7
Using the Advanced tab settings ........................................6-7
Printing from Your Windows Software Program .....................6-8
Printing from the HP OfficeJet Manager ..................................6-8
7
Getting Help............................................................7-1
Sources of Information and Help ..............................................7-2
Using the HP OfficeJet’s Help System .....................................7-5
Understanding the Messages Displayed on the Keypad ...........7-6
8
Specifications ..........................................................8-1
Product Specifications...............................................................8-2
Overall Specifications ........................................................8-2
Printing Specifications........................................................8-2
Faxing Specifications .........................................................8-3
Copying Specifications.......................................................8-4
Scanning Specifications......................................................8-5
Ordering Information ................................................................8-5
Obtaining a Material Safety Data Sheet (MSDS) .....................8-6
Regulatory Information.............................................................8-6
Notice to Users of the U.S. Telephone Network:
FCC Requirements .............................................................8-6
Electromagnetic or Radio Frequency Interference:
FCC Requirements .............................................................8-7
Declaration of Conformity .................................................8-8
...............................................................................................................
vi
HP Company Confidential
3/27/97
10:47 am
Final version given to printer
1
.................................................................................................................
Refer to this chapter for more details about setting up the
HP OfficeJet in your office than are provided in the
Ready, Setup, Go card. Perform each step in sequence.
Make Sure Everything Is in the Box ......................1-2
• If you don’t have a CD-ROM disc drive .................. 1-2
1. Load the Paper/Document Tray .........................1-3
2. Plug in the Fax/Phone Line Connector .............1-3
3. Connect the Cables..............................................1-4
4. Insert the Print Cartridges ..................................1-4
5. Load the Paper Supply ........................................1-5
6. Connect Your
Office Equipment - REQUIRED! ....................1-7
• What should you connect?......................................... 1-7
• How should you connect? ........................................ 1-10
7. Install the Software - REQUIRED! .................1-23
8. Make Sure Everything Works Properly ...........1-24
• Receive a fax ............................................................. 1-25
• Print a report ............................................................ 1-25
• Make a copy .............................................................. 1-25
• Scan a page to your computer ................................. 1-25
What’s Next? .........................................................1-26
.............................................................................................
HP Company Confidential
1. Setting Up
Setting Up
the HP OfficeJet
for Your Office
3/27/97
10:47 am
Final version given to printer
Make Sure Everything
Is in the Box
Check to make sure you have everything that’s shown and listed
below.
a
OfficeJ
et
b
j
i
c
d
e
f
h
g
a) HP OfficeJet Series 500
b) Bidirectional parallel cable
c) Paper/Document loading tray
d) HP OfficeJet Series 500
software on compact disk (CDROM)
e) HP OfficeJet Series 500 Ready,
Setup, Go Card
f) Warranty statement
g) OmniPage LE Optical Charater
Recognition (OCR)
documentation
h) Carrier Sheets
(for faxing, copying, and
scanning smaller-than-standardsized documents and for
protecting photos)
i) Fax/Phone line connector with
attached phone cord
j) Black and color print cartridges
If you don’t have a CD-ROM disc drive
Please call the HP OfficeJet Fulfillment Center at 1-888-HPDISKS
(1-888-473-4757) to receive the software on 3.5-inch floppy diskettes
by overnight mail.
...............................................................................................................
1-2
HP Company Confidential
3/27/97
10:47 am
Final version given to printer
1. Load the Tray
This is easiest to do when you are standing directly over the HP
OfficeJet with the front facing you. The tray fits into the back of the
HP OfficeJet near the top as shown.
Paper/Document
Tray
OJ-OJ
After proper
tray placement
Bottom tab
Guide
● Hold the sides of the paper/document tray and insert the bottom
tabs into the guides as shown.
● The tray should click into place. Refer to the above inset drawing
for how it should look after proper placement.
2. Plug in the Line Connector
This is easiest to do when you’re facing the back of the HP OfficeJet.
● Insert the fax/phone line connector into its
housing area on the back of the HP OfficeJet. Press it firmly into place. (Once in
place, it’s difficult to remove.)
OJ-3insliu
● Plug the loose end of the phone cord into
the telephone wall jack you’ll be using for
your fax number.
...............................................................................................................
1-3
HP Company Confidential
1. Setting Up
Perform each step in sequence:
All steps are required!
3/27/97
10:47 am
Final version given to printer
3. Connect the Cables
Important: You must attach the enclosed bidirectional parallel cable
from the HP OfficeJet to your computer. If you don’t, the OfficeJet
won’t work.
● For safety, turn off your computer before connecting the cables.
● Connect the
notched end of the
bidirectional parallel cable firmly to
the cable port on
the back of the HP
OfficeJet. Snap
both metal clips
into the notches on
the connector.
OJ-5insbidi
Cable port
Notched end
of cable
● Plug the other end
of the cable into the parallel (LPT1) port on the back of your
computer. Tighten the connector’s screws.
● Plug the HP OfficeJet’s power cable into a grounded outlet.
4. Insert the Print Cartridges
● After you plugged in the power, the HP OfficeJet powered up
automatically. Note that the display on the keypad will read, “See
instructions to print demo” until after you install the software in
Step 7.
● Wait until the HP OfficeJet finishes making start-up noises (about
10 seconds), then open the cover of the HP OfficeJet. The empty
print cartridge holder will move into view.
Cover
OJ-7ocover
...............................................................................................................
1-4
HP Company Confidential
3/27/97 10:43 am
Final version given to printer
● Remove the black print cartridge from its packaging.
Holding the blue top of the cartridge, gently remove
both pieces of tape - clear blue and solid white covering the ink nozzles and vent hole. (If you don’t
remove the white tape, the ink cartridge will be
depleted prematurely.)
Be careful not to touch the ink nozzles or the copper
contacts; fingerprints may damage them.
● Next, place the
black print cartridge
into the left
cartridge holder as
shown:
1) First slide in the
bottom until it
clicks into place.
2
1
2) Then push the
top forward until
the cartridge snaps
into place.
● Remove the color print cartridge box from its packaging. Peel off
the clear blue tape covering the ink nozzles, then place the color
print cartridge into the right cartridge holder and push it forward
until it snaps into place. Again, try not to touch the ink nozzles or
copper contacts.
● Close the HP OfficeJet’s cover.
Note: If the print cartridge holder moves out of sight before you finish
inserting both print cartridges, close the cover all the way, then open
it again; the holder will come back into view. To prevent ink drying
and clogging the nozzles, the holder will return to the parked position
after a few minutes.
...............................................................................................................
1-5
HP Company Confidential
1. Setting Up
OJ-8btpblck
3/27/97 10:44 am
Final version given to printer
5. Load the Paper Supply
Now it’s time to load blank paper into the paper supply tray. First, a
quick description of the three parts of the paper/document tray:
Paper supply tray - Use this tray to load
blank paper or a stack of
envelopes.
Single-envelope tray - Use this tray to
print on a single envelope.
Document loading tray - Use this tray
to load your original documents printside away from you and top-down for
faxing, copying, and
scanning.
● Pull the front document loading tray forward all the way.
Document
loading tray
Paper supply tray
Paper guide
OJ-13puldoc
● The paper supply tray is factory set for letter- and legal-size paper.
If necessary, adjust the paper guides by pinching and sliding
them.
● Load up to 150 sheets
of 20-lb paper (about a
1/2-inch-thick stack)
into the paper supply
tray. Make sure the
stack of paper fits
behind the stack
guides on the lower
part of the tray as
shown. Load sheets
with the print side facing toward you.
Stack
guides
OJ-14loadpa
● Push the front document loading tray backward until it rests
against the paper tray.
Note: Refer to Chapter 6 for detailed instructions on loading envelopes and other special paper/media types.
...............................................................................................................
1-6
HP Company Confidential
3/27/97 10:44 am
Final version given to printer
When you were installing the
fax/phone line connector in
Step 2, you may have noticed
that two of the ports on the
back of the connector were
labelled, “To Phone, Answering Machine, or Modem.”
That means that either one of
these ports can be used to connect any of these three types of
Connect other
devices you have in your
equipment to either
office; the two ports are interof these two ports.
changeable.
Remove the plugs from the two ports. (If they’re stuck, use the tip of
your pen to pry them out.) Then refer to the following instructions to
connect your other equipment.
What should you connect?
Based on your particular office equipment and the number of telephone lines you have, there’s only ONE optimum way to connect.
Please answer the questions in the following table, circle your
answers, then look up the appropriate setup scenario in the following
“How should you connect?” section.
...............................................................................................................
1-7
HP Company Confidential
1. Setting Up
6. Connect Your Office
Equipment - REQUIRED!
3/27/97 10:44 am
Final version given to printer
Read these questions:
1 Do you subscribe to a distinctive ring
service through your telephone company on
the same phone line to which you connected
your HP OfficeJet (in Step 3)?
(This telephone service, which is unavailable
in many areas, allows you to have 2 or 3
phone numbers on the same phone line. Each
number has a ring with a different pattern so
you can tell the difference between incoming
calls.)
Circle your answers:
Circle A or B below, then read
what to do next.
A. No, I don’t have a distinctive
ring service.
Continue with question 2.
B. Yes, I have a distinctive ring
service.
You don’t need to answer any
more questions; skip directly to
“Shared line with distinctive
ring” later in this chapter for
connection instructions.
Circle C or D below, then read
separate phone line that’s dedicated to send- what to do next.
C. Yes, the OfficeJet will be
ing and receiving your fax calls (no voice
connected to a dedicated line.
calls received)?
Skip to question 4.
D. No, the OfficeJet will be
connected to a shared phone line
that receives both fax and voice
calls.
Continue with question 3.
2 Is the HP OfficeJet connected to a
Circle E, F, or G below, then
voicemail feature in your computer to answer continue with question 4.
E. I use an answering machine.
voice calls on your shared phone line?
F. I use a voicemail feature in my
computer.
G. I neither use an answering
machine nor a voicemail
feature in my computer.
3 Do you use an answering machine or a
4 Do you have a modem - either internal to Circle H, I, or J below. Then
your computer or an external box - on the
same phone line you’ll be using for the HP
OfficeJet?
(If you’re not sure if you have a modem, refer
to the following section, “How to tell if you
have a modem,” before answering this question.)
refer to “How should you
connect?” to match all of your
responses in this column to the
right setup scenario.
H. Yes, I have a modem inside
my computer.
I. Yes, I have a modem that’s an
external box.
J. No, I don’t have any kind of
modem.
...............................................................................................................
1-8
HP Company Confidential
3/27/97 10:44 am
Final version given to printer
If you answer “Yes” to any of the following questions, then you have
a modem. Do you:
a. Send/receive faxes directly to/from your computer programs?
b. Use electronic mail (e-mail) on your computer?
c. Access the Internet or the World Wide Web from your computer?
d. Transfer data from/to other computers?
How tell if your modem is inside your computer or an
external box
If your modem is inside your computer, then you’ll have a phone cord
connected to the back of your computer and going to a wall jack.
If your modem is an external box, one phone cord will be connected
from the back of your computer to the box, and another phone cord
will go from the box to a wall jack.
How should you connect?
Write down all of your responses to the questions in “What should
you connect?,” then refer to the appropriate setup case indicated
below. For example, if you answered “A” to question 1, “D” to question 2, “E” to question 3, and “H” to question 4, look up “ADEH.”
For responses: Refer to this section for connection instructions:
ACJ
“Dedicated line”
ACH
“Dedicated line with a PC-modem”
ACI
“Dedicated line with external modem”
ADGJ
“Shared line”
ADGH
“Shared line with a PC-modem”
ADGI
“Shared line with an external modem”
ADEJ
“Shared line with answering machine”
ADFJ
“Shared line with computer voicemail”
ADEH
“Shared line with PC-modem & answering machine”
ADFH
“Shared line, PC-modem, computer voicemail”
ADEI
“Shared line with external modem and answering machine”
ADFI
“Shared line with external modem and computer voicemail”
B
“Shared line with distinctive ring”
...............................................................................................................
1-9
HP Company Confidential
1. Setting Up
How to tell if you have a modem
3/27/97 11:2 am
Final version given to printer
Dedicated line (Case ACJ)
If in Step 2 you connected the HP OfficeJet to a dedicated phone line
(no voice calls received) that has no other office equipment connected
to it, then use this connection diagram.
Phone optional,
Telephone
but recommended
wall jack
● Connect your phone to the HP OfficeJet. Connect the cord from
your phone to either of the two ports on the back of the HP OfficeJet labelled, “To Phone, Answering Machine, or Modem.”
OJ-phconfig
The benefits of connecting a phone in this situation are 1) For the
convenience of having a phone close by to make outgoing voice
calls, and 2) In case you need to send a fax (press START) after
calling someone who must receive their faxes manually.
● After you install the software in Step 7, and answer the Setup
Wizard questions for this connection case, here’s how you’ll automatically receive faxes with the HP OfficeJet: Your fax line will
ring once, then the HP OfficeJet will answer and begin emitting fax
tones to the sending machine.
● Continue with Step 7, “Install the Software - REQUIRED!”
Dedicated line with a PC-modem (Case ACH)
If in Step 2 you connected the HP OfficeJet to a dedicated phone line
(no voice calls received) that also has a PC-modem connected to it,
then use this connection diagram.
Phone optional,
but recommended
PC with
internal modem
OJ-phpcmodm
Telephone
wall jack
...............................................................................................................
1-10
HP Company Confidential
3/27/97 11:2 am
Final version given to printer
● Connect your PC-modem to the HP OfficeJet. Find the phone
Important: If your PC-modem’s software is set to automatically
receive faxes to your computer, turn off that setting; if you don’t,
your HP OfficeJet will not be able to receive faxes properly.
● Connect your phone to the HP OfficeJet. Connect the cord from
your phone to either of the two ports on the back of the HP OfficeJet labelled, “To Phone, Answering Machine, or Modem.”
The benefits of connecting a phone in this situation are 1) For the
convenience of having a phone close by to make outgoing voice
calls, and 2) In case you need to send a fax (press START) after
calling someone who must receive their faxes manually.
● After you install the software in Step 7, and answer the Setup
Wizard questions for this connection case, here’s how you’ll automatically receive faxes with the HP OfficeJet: Your fax line will
ring once, then the HP OfficeJet will answer and begin emitting fax
tones to the sending machine.
● Continue with Step 7, “Install the Software - REQUIRED!”
Dedicated line with external modem (ACI)
If in Step 2 you connected the HP OfficeJet to a dedicated phone line
(no voice calls received) that also has an external modem connected
to it, then use this connection diagram.
Phone optional,
but recommended
External
modem
OJ-phxmo
Telephone
wall jack
● Connect your external modem to the HP OfficeJet. Find the
phone cord that goes from the back of your external modem to a
wall jack. Disconnect the cord from the wall jack and plug it into
either of the two ports on the back of the HP OfficeJet labelled,
“To Phone, Answering Machine, or Modem.”
...............................................................................................................
1-11
HP Company Confidential
1. Setting Up
cord that goes from the back of your computer (your PC-modem)
to a wall jack. Disconnect the cord from the wall jack and plug it
into either of the two ports on the back of the HP OfficeJet
labelled, “To Phone, Answering Machine, or Modem.”
3/27/97 11:2 am
Final version given to printer
Important: If your external modem’s software is set to automatically receive faxes to your computer, turn off that setting; if you
don’t, your HP OfficeJet will not be able to receive faxes properly.
● Connect your phone to the HP OfficeJet. Connect the cord from
your phone to either of the two ports on the back of the HP OfficeJet labelled, “To Phone, Answering Machine, or Modem.”
The benefits of connecting a phone in this situation are 1) For the
convenience of having a phone close by to make outgoing voice
calls, and 2) In case you need to send a fax (press START) after
calling someone who must receive their faxes manually.
● After you install the software in Step 7, and answer the Setup
Wizard questions for this connection case, here’s how you’ll automatically receive faxes with the HP OfficeJet: Your fax line will
ring once, then the HP OfficeJet will answer and begin emitting fax
tones to the sending machine.
● Continue with Step 7, “Install the Software - REQUIRED!”
Shared line (Case ADGJ)
If in Step 2 you connected the HP OfficeJet to a shared phone line
(receives both voice and fax calls) that has no other office equipment
connected to it, then use this connection diagram.
Telephone
Phone optional,
wall jack
but recommended
● Connect your phone to the HP OfficeJet. Connect the cord from
your phone to either of the two ports on the back of the HP OfficeJet labelled, “To Phone, Answering Machine, or Modem.”
OJ-phconfig
The main benefits of connecting a phone in this situation are 1)
For the convenience of having a phone close to the HP OfficeJet
so that you can reach the START button when you receive faxes
manually, and 2) In case you need to send a fax (press START)
while having a conversation with someone who must receive their
faxes manually.
● Because you don’t have an answering machine or computer voice-
mail on this phone line, you’ll need to receive faxes manually;
...............................................................................................................
1-12
HP Company Confidential
3/27/97 11:2 am
Final version given to printer
the HP OfficeJet will NOT answer incoming calls automatically.
receiving faxes” in Chapter 3 for more information.
● Continue with Step 7, “Install the Software - REQUIRED!”
Shared line with a PC-modem (Case ADGH)
If in Step 2 you connected the HP OfficeJet to a shared phone line
(receives both voice and fax calls) that also has a PC-modem connected to it, then use this connection diagram.
Telephone
PC with
wall jack
internal modem
● Connect your PC-modem to the HP OfficeJet. Find the phone
cord that goes from the back of your computer (your PC-modem)
to a wall jack. Disconnect the cord from the wall jack and plug it
into either of the two ports on the back of the HP OfficeJet
labelled, “To Phone, Answering Machine, or Modem.”
Phone optional,
but recommended
OJ-phpcmodm
Important: If your PC-modem’s software is set to automatically
receive faxes to your computer, turn off that setting; if you don’t,
your HP OfficeJet will not be able to receive faxes properly.
● Connect your phone to the HP OfficeJet. Connect the cord from
your phone to either of the two ports on the back of the HP OfficeJet labelled, “To Phone, Answering Machine, or Modem.”
The main benefits of connecting a phone in this situation are 1)
For the convenience of having a phone close to the HP OfficeJet
so that you can reach the START button when you receive faxes
manually, and 2) In case you need to send a fax (press START)
while having a conversation with someone who must receive their
faxes manually.
● Because you don’t have an answering machine or computer voice-
mail on this phone line, you’ll need to receive faxes manually;
the HP OfficeJet will NOT answer incoming calls automatically.
To receive a fax manually: When the phone rings, pick it up and listen for fax tones; if your hear fax tones, press the START button on
the HP OfficeJet, then hang up the phone. Refer to “Manually
...............................................................................................................
1-13
HP Company Confidential
1. Setting Up
To receive a fax manually: When the phone rings, pick it up and
listen for fax tones; if your hear fax tones, press the START button
on the HP OfficeJet, then hang up the phone. Refer to “Manually
3/27/97 11:2 am
Final version given to printer
Receiving Faxes” in Chapter 3 for more information.
● Continue with Step 7, “Install the Software - REQUIRED!”
Shared line with an external modem (Case ADGI)
If in Step 2 you connected the HP OfficeJet to a shared phone line
(receives both voice and fax calls) that also has an external modem
connected to it, then use this connection diagram.
Telephone
External
wall jack
modem
● Connect your external modem to the HP OfficeJet. Find the
phone cord that goes from the back of your external modem to a
wall jack. Disconnect the cord from the wall jack and plug it into
either of the two ports on the back of the HP OfficeJet labelled,
“To Phone, Answering Machine, or Modem.”
Phone optional,
but recommended
OJ-phxmo
Important: If your external modem’s software is set to automatically receive faxes to your computer, turn off that setting; if you
don’t, your HP OfficeJet will not be able to receive faxes properly.
● Connect your phone to the HP OfficeJet. Connect the cord from
your phone to either of the two ports on the back of the HP OfficeJet labelled, “To Phone, Answering Machine, or Modem.”
The main benefits of connecting a phone in this situation are 1)
For the convenience of having a phone close to the HP OfficeJet
so that you can reach the START button when you receive faxes
manually, and 2) In case you need to send a fax (press START)
while having a conversation with someone who must receive their
faxes manually.
● Because you don’t have an answering machine or computer voice-
mail on this phone line, you’ll need to receive faxes manually;
the HP OfficeJet will NOT answer incoming calls automatically.
To receive a fax manually: When the phone rings, pick it up and listen for fax tones; if your hear fax tones, press the START button on
the HP OfficeJet, then hang up the phone. Refer to “Manually
Receiving Faxes” in Chapter 3 for more information.
● Continue with Step 7, “Install the Software - REQUIRED!”
...............................................................................................................
1-14
HP Company Confidential
3/27/97 11:3 am
Final version given to printer
If in Step 2 you connected the HP OfficeJet to a shared phone line
(receives both voice and fax calls) that also has an answering machine
connected to it, use this connection diagram.
Phone optional,
but recommended
if there’s no phone
handset on your
answering machine
Answering
machine
OJ-phoneans
Telephone
wall jack
● Connect your answering machine to the HP OfficeJet. Plug the
phone line from your answering machine to either of the ports
labelled, “To Phone, Answering Machine, or Modem” on the back
of the HP OfficeJet.
Important: Set your answering machine to answer calls after 4 or
fewer rings, and make sure your outgoing greeting message is no
longer than 30 seconds. If you don’t, you may not receive faxes
properly.
● Connect your phone to the HP OfficeJet. If your answering
machine doesn’t have an attached phone handset, connect the cord
from your phone to either of the two ports on the back of the HP
OfficeJet labelled, “To Phone, Answering Machine, or Modem.”
The main benefits of connecting a phone in this situation are 1) In
case you need to send a fax (press START) while having a conversation with someone who must receive their faxes manually,
and 2) For the convenience of having a phone close by to make
and receive voice calls.
● After you install the software in Step 7, and answer the Setup
Wizard questions for this connection case, here’s how you’ll automatically receive faxes with the HP OfficeJet: Your answering
machine will pick up the call after the number of rings you’ve set,
then the HP OfficeJet will “listen” while the answering machine
plays its greeting. If the HP OfficeJet detects fax tones, it will cut off
the answering machine and receive the fax. If you don’t connect
your answering machine directly to the HP OfficeJet as described
here, you may not receive your faxes properly.
...............................................................................................................
1-15
HP Company Confidential
1. Setting Up
Shared line with answering machine (Case ADEJ)
3/27/97 11:3 am
Final version given to printer
● Continue with Step 7, “Install the Software - REQUIRED!”
...............................................................................................................
1-16
HP Company Confidential
3/27/97 11:3 am
Final version given to printer
If in Step 2 you connected the HP OfficeJet to a shared phone line
(receives both voice and fax calls) that also has computer voicemail
to answer voice calls, use this connection diagram.
Phone optional,
but recommended
Computer with
voicemail feature
OJ-phpcmodm
Telephone
wall jack
● Connect your computer voicemail phone cord to the HP
OfficeJet. Locate the phone cord that goes from the back of your
computer to a wall jack. Disconnect the cord from the wall jack
and plug it into either of the two ports on the back of the HP
OfficeJet labelled, “To Phone, Answering Machine, or Modem.”
Important: Set your voicemail software to answer calls after 4 or
fewer rings, and make sure your outgoing greeting message is no
longer than 30 seconds. If you don’t, you may not receive faxes
properly.
● Connect your phone to the HP OfficeJet. Connect the cord from
your phone to either of the two ports on the back of the HP OfficeJet labelled, “To Phone, Answering Machine, or Modem.”
The main benefits of connecting a phone in this situation are 1) In
case you need to send a fax (press START) while having a conversation with someone who must receive their faxes manually,
and 2) For the convenience of having a phone close by to make
and receive voice calls.
● After you install the software in Step 7, and answer the Setup
Wizard questions for this connection case, here’s how you’ll automatically receive faxes with the HP OfficeJet: Your computer
voicemail will pick up the call after the number of rings you’ve set,
then the HP OfficeJet will “listen” while voicemail plays its greeting.
If the HP OfficeJet detects fax tones, it will cut off the voicemail and
receive the fax. If you don’t connect your computer voicemail phone
cord directly to the HP OfficeJet as described here, you may not
receive your faxes properly.
● Continue with Step 7, “Install the Software - REQUIRED!”
...............................................................................................................
1-17
HP Company Confidential
1. Setting Up
Shared line with computer voicemail (Case ADFJ)
3/27/97 11:3 am
Final version given to printer
Shared line with PC-modem &
answering machine (Case ADEH)
If in Step 2 you connected the HP OfficeJet to a shared phone line
(receives both voice and fax calls) that also has a PC-modem and an
answering machine connected to it, use this connection diagram.
Phone optional,
Answering
but recommended machine
if there’s no phone
handset on your
answering machine
Computer with
PC-modem
Telephone
wall jack
● Connect your PC-modem to the HP OfficeJet. Find the phone
cord that goes from the back of your computer (your PC-modem)
to a wall jack. Disconnect the cord from the wall jack and plug it
into either of the two ports on the back of the HP OfficeJet
labelled, “To Phone, Answering Machine, or Modem.”
Important: If your PC-modem’s software is set to automatically
receive faxes to your computer, turn off that setting; if you don’t,
your HP OfficeJet will not be able to receive faxes properly.
● Connect your answering machine to the HP OfficeJet. Plug the
phone line from your answering machine to either of the ports
labelled, “To Phone, Answering Machine, or Modem” on the back
of the HP OfficeJet.
Important: Set your answering machine to answer calls after 4 or
fewer rings, and make sure your outgoing greeting message is no
longer than 30 seconds. If you don’t, you may not receive faxes
properly.
● Connect your phone to your answering machine. If your
answering machine doesn’t have an attached phone handset, connect the cord from your phone to the back of your answering
machine.
The main benefits of connecting a phone in this situation are 1) In
case you need to send a fax (press START) while having a conversation with someone who must receive their faxes manually,
and 2) For the convenience of having a phone close by to make
and receive voice calls.
...............................................................................................................
1-18
HP Company Confidential
3/27/97 11:3 am
Final version given to printer
● After you install the software in Step 7, and answer the Setup
machine will pick up the call after the number of rings you’ve set,
then the HP OfficeJet will “listen” while the answering machine
plays its greeting. If the HP OfficeJet detects fax tones, it will cut off
the answering machine and receive the fax. If you don’t connect
your answering machine directly to the HP OfficeJet as described
here, you may not receive your faxes properly.
● Continue with Step 7, “Install the Software - REQUIRED!”
Shared line, PC- modem &
computer voicemail (Case ADFH)
If in Step 2 you connected the HP OfficeJet to a shared phone line
(receives both voice and fax calls) that also has a PC-modem connected to it and computer voicemail to answer voice calls, use this
connection diagram.
Phone optional,
but recommended
Telephone
Computer with
wall jack
PC-modem and
voicemail feature
● Connect your PC-modem and voicemail phone cord to the HP
OfficeJet. Find the phone cord that goes from the back of your
computer (for your PC-modem and voicemail) to a wall jack. Disconnect the cord from the wall jack and plug it into either of the
two ports on the back of the HP OfficeJet labelled, “To Phone,
Answering Machine, or Modem.”
OJ-phpcmodm
Important: Set your voicemail software to answer calls after 4 or
fewer rings, and make sure your outgoing greeting message is no
longer than 30 seconds. If you don’t, you may not receive faxes
properly.
Important: If your PC-modem’s software is set to automatically
receive faxes to your computer, turn off that setting; if you don’t,
your HP OfficeJet will not be able to receive faxes properly.
...............................................................................................................
1-19
HP Company Confidential
1. Setting Up
Wizard questions for this connection case, here’s how you’ll automatically receive faxes with the HP OfficeJet: Your answering
3/27/97 11:3 am
Final version given to printer
● Connect your phone to the HP OfficeJet. Connect the cord from
your phone to either of the two ports on the back of the HP OfficeJet labelled, “To Phone, Answering Machine, or Modem.”
The main benefits of connecting a phone in this situation are 1) In
case you need to send a fax (press START) while having a conversation with someone who must receive their faxes manually,
and 2) For the convenience of having a phone close by to make
and receive voice calls.
● After you install the software in Step 7, and answer the Setup
Wizard questions for this connection case, here’s how you’ll automatically receive faxes with the HP OfficeJet: Your computer
voicemail will pick up the call after the number of rings you’ve set,
then the HP OfficeJet will “listen” while voicemail plays its greeting.
If the HP OfficeJet detects fax tones, it will cut off the voicemail and
receive the fax. If you don’t connect your computer voicemail phone
cord directly to the HP OfficeJet as described here, you may not
receive your faxes properly.
● Continue with Step 7, “Install the Software - REQUIRED!”
Shared line with external modem and
answering machine (Case ADEI)
If in Step 2 you connected the HP OfficeJet to a shared phone line
(receives both voice and fax calls) that also has an external modem
and an answering machine connected to it, then use this connection
diagram.
Phone optional,
Answering
but recommended machine
if there’s no phone
handset on your
answering machine
External
modem
OJ-phansxmo
Telephone
wall jack
● Connect your external modem to the HP OfficeJet. Find the
phone cord that goes from the back of your external modem to a
wall jack. Disconnect the cord from the wall jack and plug it into
either of the two ports on the back of the HP OfficeJet labelled,
“To Phone, Answering Machine, or Modem.”
Important: If your external modem’s software is set to automatically receive faxes to your computer, turn off that setting; if you
don’t, your HP OfficeJet will not be able to receive faxes prop-
...............................................................................................................
1-20
HP Company Confidential
3/27/97 11:3 am
Final version given to printer
erly.
phone line from your answering machine to either of the ports
labelled, “To Phone, Answering Machine, or Modem” on the back
of the HP OfficeJet.
Important: Set your answering machine to answer calls after 4 or
fewer rings, and make sure your outgoing greeting message is no
longer than 30 seconds. If you don’t, you may not receive faxes
properly.
● Connect your phone to your answering machine. If your
answering machine doesn’t have an attached phone handset, connect the cord from your phone to the back of your answering
machine.
The main benefits of connecting a phone in this situation are 1) In
case you need to send a fax (press START) while having a conversation with someone who must receive their faxes manually,
and 2) For the convenience of having a phone close by to make
and receive voice calls.
● After you install the software in Step 7, and answer the Setup
Wizard questions for this connection case, here’s how you’ll automatically receive faxes with the HP OfficeJet: Your answering
machine will pick up the call after the number of rings you’ve set,
then the HP OfficeJet will “listen” while the answering machine
plays its greeting. If the HP OfficeJet detects fax tones, it will cut off
the answering machine and receive the fax. If you don’t connect
your answering machine directly to the HP OfficeJet as described
here, you may not receive your faxes properly.
● Continue with Step 7, “Install the Software - REQUIRED!”
Shared line with external modem and
computer voicemail (Case ADFI)
If in Step 2 you connected the HP OfficeJet to a shared phone line
(receives both voice and fax calls) that also has an external modem
connected to it and computer voicemail to answer voice calls, then
use this connection diagram.
...............................................................................................................
1-21
HP Company Confidential
1. Setting Up
● Connect your answering machine to the HP OfficeJet. Plug the
3/27/97 11:3 am
Final version given to printer
Phone optional,
but recommended
if there’s no phone
handset on your
answering machine
Computer with
voicemail feature
External
modem
Telephone
wall jack
● Connect your external modem to the HP OfficeJet. Find the
phone cord that goes from the back of your external modem to a
wall jack. Disconnect the cord from the wall jack and plug it into
either of the two ports on the back of the HP OfficeJet labelled,
“To Phone, Answering Machine, or Modem.”
Important: If your external modem’s software is set to automatically receive faxes to your computer, turn off that setting; if you
don’t, your HP OfficeJet will not be able to receive faxes properly.
● Connect your computer voicemail phone cord to the HP
OfficeJet. Locate the phone cord that goes from the back of your
computer to a wall jack. Disconnect the cord from the wall jack
and plug it into either of the two ports on the back of the HP
OfficeJet labelled, “To Phone, Answering Machine, or Modem.”
Important: Set your voicemail software to answer calls after 4 or
fewer rings, and make sure your outgoing greeting message is no
longer than 30 seconds. If you don’t, you may not receive faxes
properly.
● Connect your phone to your answering machine. Connect the
cord from your phone to the back of your answering machine.
The main benefits of connecting a phone in this situation are 1) In
case you need to send a fax (press START) while having a conversation with someone who must receive their faxes manually,
and 2) For the convenience of having a phone close by to make
and receive voice calls.
● After you install the software in Step 7, and answer the Setup
Wizard questions for this connection case, here’s how you’ll automatically receive faxes with the HP OfficeJet: Your computer
voicemail will pick up the call after the number of rings you’ve set,
then the HP OfficeJet will “listen” while voicemail plays its greeting.
If the HP OfficeJet detects fax tones, it will cut off the voicemail and
receive the fax. If you don’t connect your computer voicemail phone
cord directly to the HP OfficeJet as described here, you may not
receive your faxes properly.
...............................................................................................................
1-22
HP Company Confidential
3/27/97 11:3 am
Final version given to printer
● Continue with Step 7, “Install the Software - REQUIRED!”
If in Step 2 you connected the HP OfficeJet to a phone line that uses a
distinctive ring service through
your telephone company, use
this connection diagram.
The distinctive ring telephone
service, which is unavailable in
many areas, allows you to have
2 or 3 phone numbers on the
same phone line. Each number
has a ring with a different pattern so you can tell the difference between incoming calls.
For more detailed information
on setting up Distinctive Ring,
refer to “Using Distinctive Ring” under “Using Advanced Fax Features and Settings” in Chapter 3.
Phone optional,
but recommended
OJ-phconfig
Telephone
wall jack
● Connect your phone to the HP OfficeJet. Connect the cord from
your phone to either of the two ports on the back of the HP OfficeJet labelled, “To Phone, Answering Machine, or Modem.”
The main benefits of connecting a phone in this situation are 1) In
case you need to send a fax (press START) while having a conversation with someone who must receive their faxes manually,
and 2) For the convenience of having a phone close by to make
outgoing voice calls.
Important: If you have an answering machine for receiving voice
calls on this phone line (different phone number), set it to answer
after 3 or more rings. If you don’t, your HP OfficeJet will not be
able to receive your fax calls.
Important: If you have a PC-modem or an external modem on this
phone line (different phone number), turn off the setting in the
modem’s software that automatically receive faxes to your computer; if you don’t, your HP OfficeJet will not be able to receive
faxes properly.
...............................................................................................................
1-23
HP Company Confidential
1. Setting Up
Shared line with distinctive ring (Case B)
3/27/97 11:3 am
Final version given to printer
● Continue with Step 7.
...............................................................................................................
1-24
HP Company Confidential
3/27/97 11:3 am
Final version given to printer
You must install the software before using your new HP OfficeJet
Series 500 – if you don’t, the OfficeJet won’t work.
Important: If you don’t have a CD-ROM disc drive, please call the
HP OfficeJet Fulfillment Center at 1-888-HPDISKS
(1-888-473-4757) to receive the software on 3.5-inch floppy diskettes
by overnight mail.
1. Turn on your computer. Or, if you did not turn off your computer
previously in Step 3, restart your computer now.
2. This step has two different sets of instructions: one for Windows
95 users, and one for Windows 3.1 users. Use the appropriate set,
then continue with step 3 on the next page.
Windows 95 users:
One of two things will happen: Either the “New Hardware Found”
screen will be displayed, or just the Windows 95 desktop will be
displayed.
If “New Hardware Found” is displayed:
Choose “Driver from disk provided by manufacturer,” then click
OK. Insert the HP OfficeJet Series 500 CD into your CD-ROM
drive, or if you have floppy disks, insert Disk #1 into your floppy
drive. Make sure the correct drive is displayed in the dialog box,
for example, “d:” for your CD-ROM drive or “a:” for your floppy
drive. Click OK. Continue at step 3 below.
If just the Windows 95 desktop is displayed:
Insert the HP OfficeJet Series 500 CD into your CD-ROM drive,
or if you have floppy disks, insert Disk #1 into your floppy drive.
If you’re installing from the CD, the HP OfficeJet Welcome
screen will be displayed after a few seconds. If you’re installing
from a floppy disk, choose Run from the Start menu in Windows
95, then type:
a:\setup.exe
where “a:” represents the letter of your floppy disk drive. Click
OK. Continue at step 3 on the next page.
...............................................................................................................
1-25
HP Company Confidential
1. Setting Up
7. Install the Software REQUIRED!
3/27/97 11:3 am
Final version given to printer
Windows 3.1 users:
Insert the HP OfficeJet Series 500 CD into your CD-ROM drive,
or if you have floppy disks, insert Disk #1 into your floppy drive.
Choose Run from the File menu in the Windows 3.1 Program
Manager, then type:
d:\setup.exe
where “d:” represents the letter of your CD-ROM drive or floppy
drive. Click OK.
3. At the HP OfficeJet Welcome screen, click Install to begin
installing your software. You’ll be asked to confirm the file location and computer port where the OfficeJet will be installed. Follow all instructions on the screen.
After the files are copied to your computer, the HP OfficeJet
Setup Wizard will help you customize your HP OfficeJet so that it
runs best with your particular office setup.
If you installed from the HP OfficeJet Series 500 CD, register
your HP OfficeJet software now to unlock free software from the
CD!
8. Make Sure Everything
Works Properly
Congratulations! Your office is now set up to print, fax, copy and
scan with your new HP OfficeJet!
If you want to make sure everything is working well — or to get a
quick start on learning some basics — follow the simple instructions
below to fax, print, copy, and scan. You’ll be amazed at how fast and
easy it is!
Receive a fax
To verify that you can receive faxes properly, call 1-800-44FAXHP
to have HP product information faxed to you.
If you have any trouble receiving the fax, review Step 6. If you still
have problems, refer to Chapter 7: Getting Help.
Print a report
Print the Self Test Report to test the printing feature. Here’s how:
1 On your Windows desktop, double-click HP OfficeJet
Manager, click HP OfficeJet, then select Settings and
Maintenance.
...............................................................................................................
1-26
HP Company Confidential
3/27/97 11:4 am
Final version given to printer
Make a copy
Make a copy of the Self Test Report to test the copying feature.
Here’s how:
1 Place the report in the document tray with the printed side
away from you.
2 Press the Copy button once, then enter the number of copies you want (up to 99).
3 Press the Copy button again to begin copying.
Scan a page to your computer
Scan the Self Test Report to test the scanning feature. Here’s how:
1 Place the report in the document tray with the printed side
facing away from you.
2 Now look at your computer screen! The HP OfficeJet
Prompt asks you what you want to do. Click Scan. The Scan
dialog box will be displayed.
3 Click Start Scan to begin scanning. The scanned document will be displayed on your computer screen.
...............................................................................................................
1-27
HP Company Confidential
1. Setting Up
2 Click the Maintenance tab, then click Self Test to begin printing
the Self Test Report.
This report shows you the current and factory settings in your
OfficeJet, and can help you diagnose print cartridge problems.
3/27/97 11:4 am
Final version given to printer
What’s Next?
Now that you’ve successfully set up your new HP OfficeJet, why not
start using it right away?
For a really quick start, try this:
● Read through the “executive summary-style” Chapter 2: A Quick
Tour of How to Do Everything. This chapter will get you up-andrunning quickly, as well as point you in the direction of help alternatives (if you should need them).
● While using the software, click Help and check out the new HP
OfficeJet Series 500 on-line Help. This exciting new Help system
was designed to give you exactly the information you need, when
you need it - Help will even guide you step-by-step through solving problems!
● If you get stuck, refer to Chapter 7: Getting Help. You’ll find lots
of troubleshooting information and other sources of help.
...............................................................................................................
1-28
HP Company Confidential
3/27/97 11:05 am
Final version given to printer
.................................................................................................................
Read this chapter for a quick start in learning
the basics about the HP OfficeJet Series 500.
This is the “executive summary” that contains abbreviated information
about how to do your everyday tasks. You’ll also find many pointers to
more information and how to get help.
Sending Faxes .........................................................2-2
• Sending paper documents.......................................... 2-2
From the HP OfficeJet’s keypad......................................2-2
From the Document Assistant screen ..............................2-2
• Sending a fax directly from your software
program .................................................................. 2-3
Copying....................................................................2-4
• Basic copying from the HP OfficeJet’s keypad ....... 2-4
• Using advanced settings
in the HP OfficeJet’s software.............................. 2-5
Scanning..................................................................2-6
• Scanning images ......................................................... 2-6
• Scanning text for editing (OCR) ............................... 2-7
Printing....................................................................2-7
Using the Help System ............................................2-8
Other Ways to Get Help ..........................................2-9
.............................................................................................
HP Company Confidential
2. Quick Tour
2
A Quick Tour
of How to Do
Everything
3/27/97 11:05 am
Final version given to printer
Sending Faxes
Sending paper documents
Fax paper documents from the keypad anytime, or fax from the Document Assistant screen on your computer when you want additional
fax options like attaching a cover sheet, or sending to more than one
location.
From the HP OfficeJet’s keypad
1 Load your document top down in the document tray with
the printed side facing away from you (up to 20 pages). If necessary, slide the document guides on the tray to the left or
right to adjust them for the width of your document.
2 Dial the fax number on the HP OfficeJet’s keypad.
OJ-dialOJ
3 Press the Start button to begin faxing.
For information on redialing and other dialing methods, see
Chapter 3.
From the Document Assistant screen
1 Load your document top down in the document tray with the
printed side facing away from you (up to 20 pages).
2 Look at your computer screen! The Document Assistant asks you
what you want to do with the document you’ve loaded.
The Document Assistant
is displayed on your
computer when you
load your document into
the document tray.
...............................................................................................................
2-2
HP Company Confidential
3/27/97 11:05 am
Final version given to printer
3 Click Fax and explore the additional options you have in the Send
Fax dialog box: attaching a cover sheet, selecting a name from a
phone book you’ve built, and much more. (To find out more about the
settings in the Send Fax dialog box, click the Help button.)
2. Quick Tour
The Send
Fax dialog
box has
additional
faxing
options.
4 Enter the fax number and any other information, then click Send
Fax Now to begin sending.
Sending a fax directly from your
software program
1 While your software program is open and your document file is
displayed on your computer screen, select Print from the File menu.
2 Select HP OfficeJet Series 500 Fax as the printer and click OK.
(Note: Select this name from wherever your particular software program stores your printer list. For example, in Microsoft Word you can
find the printer list by clicking the Printer button in the Print dialog
box.)
3 Print the document. The Send Fax dialog box will be displayed
(see above).
4 Enter the fax number, or select an entry from your phone book.
5 Click Send Fax Now to begin faxing.
...............................................................................................................
2-3
HP Company Confidential
3/27/97 11:05 am
Final version given to printer
For information about....
....Options available in the Send Fax dialog box, click the Help button
in the lower right-hand corner.
....How to use the Phone Book for entering fax names, numbers and
speed dial setup, double-click HP OfficeJet Manager on your Windows desktop, click Fax, and select Phone Book. Then click the
Help button in the lower right-hand corner.
Copying
Basic copying from the
HP OfficeJet’s keypad
1 Make sure blank paper is loaded in the paper tray. Only
letter- and legal-size paper may be used for copying.
OJ-loadpaper
2 Load your document in the document tray with the
printed side facing away from you (up to 20 pages). If necessary, slide the document guides to adjust them for the width
of your document.
3 Press the Copy button, then enter the number of
copies you want (up to 99).
4 Press the Copy button again to begin copying. The
entire original document will be scanned before copying
begins. The original document will be face-down in the output tray, and the copies will be face-up.
See Chapter 4 for more detailed information about copying.
...............................................................................................................
2-4
HP Company Confidential
3/27/97 11:05 am
Final version given to printer
Using advanced copy settings in the HP
OfficeJet’s software
1 Load your document in the HP OfficeJet’s document tray, then
look at your computer screen. The Document Assistant asks you what
you’d like to do with the document.
2. Quick Tour
The Document Assistant
asks you what you want
to do.
2 Click Copy and the Copy dialog box will be displayed.
The Copy dialog box has
advanced copy settings.
Now you can do any of the following:
• Enter the number of copies you want – up to 99
• Turn off collating (the factory setting)
• Copy a photograph or graphic at the optimum setting
• Reduce your document to as small as 50% of the original size or
enlarge your document to as much as 200%
• Make the copy lighter or darker than the original
3 When finished making your custom selections, click Start Copy
to begin copying.
For more information about the settings in the Copy dialog box, click
the Help button on the lower right-hand corner of the screen, or refer
to Chapter 4.
...............................................................................................................
2-5
HP Company Confidential
3/27/97 11:05 am
Final version given to printer
Scanning
Scanning images
1 Load your document top down in the document tray with
the printed side facing away from you (up to 20 pages). If necessary, slide the document guides to adjust them for the width
of your document. The Document Assistant will be displayed
on your computer screen.
2 Click Scan at the Document Assistant. The Scan dialog box will
be displayed.
Select your scan settings from
the Scan dialog box.
3 Click Text, Photo, or Graphic to optimize one of these during
the scan. (Click Help for more information about each of these scanning options.)
4 If necessary, adjust the contrast.
5 Click Start Scan to begin scanning. The scanned document will
be displayed on your computer screen as it’s scanned.
6 Explore the many options in the Image Viewer pull-down menus
to find out what you can do to enhance your scanned image.
For more information about scanning images, see Chapter 5, click the
Help button in the Scan dialog box, or pull down the Help menu and
select Help Topics in the Image Viewer screen.
...............................................................................................................
2-6
HP Company Confidential
3/27/97 11:05 am
Final version given to printer
Scanning text for editing (OCR)
1 Follow the previous instructions for scanning images, except in
step 3, click the Scan text for editing (OCR) checkbox.
2 Now you can make changes to the text you scanned. Pull down
the Help menu in the Image Viewer screen and select Help Topics
for information about your editing options.
You can print on many types of paper and other media: plain paper,
premium paper, transparencies, envelopes, and more. Refer to Chapter 6 for specific information on supported media sizes, types, and
weights, and for special loading instructions.
• To access the printing controls — the Paper, Setup, and Advanced
tabs — double-click HP OfficeJet Manager on your Windows
desktop, click Print, then select Print Settings.
Explore all three Print
settings tabs: Paper, Setup,
and Advanced.
See the Help system and Chapter 6 for more information on printing
and the print settings.
...............................................................................................................
2-7
HP Company Confidential
2. Quick Tour
Printing
3/27/97 11:06 am
Final version given to printer
Using the Help System
The HP OfficeJet Series 500 Help system was designed to give you
the information you need, when you need it - Help will even guide
you step-by-step through solving problems.
Just click the Help button on any of the HP OfficeJet dialog boxes
when you need it, or explore the many topics from the main menu of
Help.
Here’s how to access the main menu:
1 On your Windows desktop, double-click HP OfficeJet Manager.
The HP OfficeJet Manager menu will be displayed.
The HP OfficeJet Manager
menu.
2 Click the Help button in the upper right-hand corner.
The main menu of
the Help system.
Click through each of the three main menu tabs to learn more about
the types of help that are available to you.
How Do I? - Provides step-by-step instructions on accomplishing
your tasks.
...............................................................................................................
2-8
HP Company Confidential
3/27/97 11:06 am
Final version given to printer
Other ways to get help
Here are some other ways to get help if you need it:
If you need to . . .
Look at . . .
Make changes to your HP
OfficeJet equipment or
software setup
• The Ready, Setup, Go guide
• Chapter 1 of this User’s Guide
Verify correct operation of
your HP OfficeJet
• Chapter 1, “Step 8. Make Sure
Understand the meaning of a
particular message
displayed on the HP
OfficeJet’s keypad
• Chapter 7, “Understanding the
Call someone to help you
solve a problem, get product
information, or place an order
• Chapter 7, “Sources of Informa-
See a list of detailed
OfficeJet specifications
• Chapter 8
Everything Works Properly”
section
Messages Displayed on the HP
OfficeJet’s Keypad” section
tion and Help” section
...............................................................................................................
2-9
HP Company Confidential
2. Quick Tour
Troubleshooting - Helps you pinpoint the causes of problems and
solve any difficulties you may experience.
Reference - Contains other information you might like to know about
your HP OfficeJet, as well as a detailed guide to using each feature in
the OfficeJet software.
? - Help is also available in every HP OfficeJet dialog box. Click the
? in the upper right corner of the dialog box, then click the setting you
want to know more about. A brief description of the setting will be
displayed.
3/27/97 11:06 am
Final version given to printer
...............................................................................................................
2-10
HP Company Confidential
3/27/97 11:07 am
Final version given to printer
3
Faxing
.................................................................................................................
Read this chapter to learn how to send and
receive faxes, both from the HP OfficeJet’s
keypad and from the software. You’ll also learn how to change the fax
settings in both locations.
Sending a Paper Document ....................................3-2
Sending a Fax Directly
from Your Software Program ............................3-7
Receiving Printed Faxes .........................................3-8
• Loading the paper supply .......................................... 3-8
• Answering settings...................................................... 3-9
• Manually receiving faxes ........................................... 3-9
• Receiving Faxes to Your Computer (PC)............... 3-10
Using Advanced Fax Features and Settings ........3-11
• Advanced fax send features..................................... 3-11
• Advanced fax receive features................................. 3-21
• Viewing lists of all sent and received faxes ............ 3-25
• Printing the fax reports............................................ 3-25
• Adjusting sound volumes......................................... 3-26
• Changing the date and time..................................... 3-26
.............................................................................................
HP Company Confidential
3. Faxing
• Using a document carrier
to protect your original ......................................... 3-2
• Sending from the keypad........................................... 3-3
• Sending from the
HP OfficeJet Document Assistant........................ 3-6
3/27/97 11:07 am
Final version given to printer
Sending a Paper Document
To fax paper documents, load the document in the document tray,
then either dial from the OfficeJet’s keypad, or select Fax from the
Document Assistant.
Using a document carrier to protect
your original
Three document carriers are provided in the box with your HP
OfficeJet. (They are protective “sleeves” that have a transparent plastic front and white paper backing.) Use these document carriers to
protect your fragile or damaged original documents from potential
harm while they’re fed through the HP OfficeJet’s document tray.
Place your document inside a document carrier before copying, faxing, or scanning when your original document is:
• Smaller than standard letter size (8.5 x 11 inches). Non-standard
pages may not load properly and could jam inside the HP OfficeJet.
• Torn. Rough edges may cause a paper jam inside the HP OfficeJet.
• Precious or fragile. For example, a photograph or a legal
document.
• Very thin paper. Less than 20-lb weight paper may not load
properly and could jam inside the HP OfficeJet.
When placing the document carrier into the document tray, load it
with the sealed edge down and the transparent side facing away from
you.
Caution: To avoid damaging the HP OfficeJet, do not use the document carrier to protect anything thicker than a photograph.
...............................................................................................................
3-2
HP Company Confidential
3/27/97 11:07 am
Final version given to printer
Sending from the keypad
Document
guides
1 Load your document top down in the
document tray, and with the printed side
facing away from you (up to 20 pages, or a
single document carrier).
If necessary, slide the document guides on
the tray to the left or right to adjust them for
the width of your document.
Note: Always remove staples and paper
clips from your original before faxing to
avoid equipment damage.
3 Press the Start button to begin faxing.
OJ-dialOJ
To cancel a fax in progress, press the Stop
button on the HP OfficeJet’s keypad.
Notes: For more information about the following topics, look under
“Using Advanced Fax Features and Settings” later in this chapter:
1) Resolution and Contrast settings are described under “Controlling
how your faxed documents will look.”
2) Redialing instructions are in the “Redialing a fax number” section.
Dialing in real time
With the faxing method described above, dialing begins after you
press the Start button. There may be times, however, when you want
to dial in real time instead. For example, if you’re charging your fax
call to a calling card, you’ll need to wait for the acceptance tone of
your telephone company before dialing the calling card number.
...............................................................................................................
3-3
HP Company Confidential
3. Faxing
2 Dial the fax number on the HP OfficeJet’s keypad.
See the following three sections to learn
about other ways of dialing.
Note: When entering the fax number, be
sure to include all the numbers you would
enter if you were dialing the number from a
phone. (For example, enter 1 and the area
code for long-distance calls.)
3/27/97 11:08 am
Final version given to printer
To dial in real time:
1 Load your document in the document tray.
2 Press the Start button on the HP OfficeJet’s keypad.
The message display on the HP OfficeJet will read “Off hook...” and
you’ll hear a dial tone.
3 Dial your phone company’s access code, then dial the fax number on the HP OfficeJet’s keypad. The numbers will be dialed immediately, as if you were dialing from a telephone. Listen for the
acceptance tone of your phone company, then dial your calling card
number.
Dialing from a telephone that’s connected
directly to the HP OfficeJet
Instead of dialing from the HP OfficeJet’s keypad, you may prefer to
dial your fax number directly from a telephone. Use a phone that’s
connected either directly to the back of the HP OfficeJet, or to another
device that’s connected directly to the back of the OfficeJet (like an
answering machine or modem).
To dial directly from a telephone:
1 Load your document in the document tray.
2 Pick up the handset of your telephone.
The message display on the HP OfficeJet will read, “Phone offhook.”
3 Dial the fax number on the telephone’s keypad and wait for the
line to begin ringing.
4 Press the Start button on the HP OfficeJet to begin faxing.
...............................................................................................................
3-4
HP Company Confidential
3/27/97 11:08 am
Final version given to printer
Speed dialing
Once you’ve assigned speed dial codes to your fax numbers using the
HP OfficeJet Manager software (look under “Advanced fax send features” later in this chapter), you can quickly dial those numbers using
the Speed Dial button and a one- or two-digit speed dial code.
To speed dial:
1 Load your document in the document
tray.
3 Dial the 1- or 2-digit speed dial code.
4 Press the Start button on the HP OfficeJet’s keypad.
OJ-dialOJ
...............................................................................................................
3-5
HP Company Confidential
3. Faxing
2 Press the Speed Dial button on the HP
OfficeJet’s keypad.
3/27/97 11:08 am
Final version given to printer
Sending from the HP OfficeJet
Document Assistant
1 Load your document top down in the document tray, and with
the printed side facing away from you (up to 20 pages, or a single
document carrier). If necessary, slide the document guides on the tray
to the left or right to adjust them for the width of your document.
Note: Always remove staples and paper clips from your original
before faxing to avoid equipment damage.
Now look at your computer screen: The Document Assistant asks you
what you want to do with the document you’ve loaded.
When you load your
document, the Document
Assistant asks you what
you want to do.
2 Click the Fax button. The Send Fax dialog box is displayed.
Enter the
fax number
or click
a Phone
Book entry.
3 Enter the fax number in the Fax Number box, or click an entry
in your Phone Book. Enter any other information, such as a name.
...............................................................................................................
3-6
HP Company Confidential
3/27/97 11:08 am
Final version given to printer
Note: When entering the fax number, be sure to include all the numbers you would enter if you were dialing the number from a phone.
(For example, enter 1 and the area code for long-distance calls.)
For more information about the other features and settings in the Send
Fax dialog box, click the Help button.
4 Click Send Fax Now when you’re ready to begin sending.
To cancel a fax in progress, click the Cancel button in the HP OfficeJet status dialog box (displayed while your fax is proceeding) or press
Stop on the HP OfficeJet’s keypad.
Notes: For more information about the following topics, look under
“Using Advanced Fax Features and Settings” later in this chapter:
1) Resolution and Contrast settings are described under “Controlling
how your faxed documents will look.”
2) Redialing instructions are in the “Redialing a fax number” section.
You don’t need to print a document before faxing it. When you want
to fax a document directly from your software program, use this procedure.
1 While your software program is open and your document file is
displayed on your computer screen, select Print from the File menu.
2 Select HP OfficeJet Series 500 Fax as the printer and click OK.
(Note: Select this name from where your particular software program
stores your printer list. For example, in Microsoft Word you can find
the printer list by clicking the Printer button in the Print dialog box.)
3 Print the document. The Send Fax dialog box will be displayed
(illustrated on the facing page).
4 Enter the fax number in the Fax Number box, or click an entry
from your Phone Book.
5 Click Send Fax Now to begin sending the fax.
To cancel a fax in progress, click the Cancel button in the HP OfficeJet’s status dialog box that’s displayed while your fax is proceeding.
Notes: For more information about the following topics, look under
“Using Advanced Fax Features and Settings” later in this chapter:
1) Resolution settings are described under “Controlling how your
faxed documents will look.”
2) Redialing instructions are in the “Redialing a fax number” section.
...............................................................................................................
3-7
HP Company Confidential
3. Faxing
Sending a Fax Directly from
Your Software Program
3/27/97 11:08 am
Final version given to printer
Receiving Printed Faxes
The HP OfficeJet is factory-set to print received faxes. Before you
receive a fax call, be sure to load one of the supported paper sizes for
receiving faxes, as described below.
Loading the paper supply
1 Pull the document tray forward all the
way until it snaps into the upright position.
Stack
guides
2 Load up to 150 sheets of 20-lb paper
(about a 1/2-inch-thick stack) into the paper
tray.
The paper should fit behind the stack guides
on the lower part of the tray as shown. Load
sheets with the print side facing you.
Notes:
1) Only plain paper may be used for printing
faxes.
2) Only letter (A or A4)- or legal-size paper
may be used for printing faxes.
3) If you change the paper size in the tray, be
sure to update the paper size setting in the
HP OfficeJet Manager software. Refer to
“Changing the paper size setting” later in
this chapter under “Advanced fax receive
settings” for instructions.
3 Push the document tray back to its nor-
mal position, resting in front of the paper
tray.
4 Extend the output tray slowly until it
Output
tray
stops.
...............................................................................................................
3-8
HP Company Confidential
3/27/97 11:09 am
Final version given to printer
Answering settings
Manually receiving faxes
If you’re set up to receive faxes manually (Auto Answer light on keypad is off), use the following procedure to receive faxes.
1 Make sure there are no documents in the document tray, or they
may be faxed after the next steps.
...............................................................................................................
3-9
HP Company Confidential
3. Faxing
When you first installed the HP OfficeJet Series 500 software, the
Setup Wizard asked you a series of questions about your phone lines
and equipment. Your answers determined which option was automatically chosen for each of the Answering settings, and therefore determined how your HP OfficeJet was set up to receive faxes.
There are two answering settings that affect how you receive faxes:
• Phone Answering (Automatic or Manual). When set to Automatic,
the HP OfficeJet will automatically answer every call received at
your fax number. When set to Manual, you must answer fax calls
manually (see the following section, “Manually Receiving Faxes” for
instructions).
For instructions on how to change this setting, refer to “Phone
Answering: Automatic or Manual” later in this chapter under
“Advanced fax receive settings.”
• Rings to Answer (1 ring through 6 rings). When Phone Answering
is set to Automatic, the HP OfficeJet will automatically answer all
calls after the number of rings specified in this setting. For example,
when Rings to Answer is set to 1 ring, your fax line will ring once,
then the HP OfficeJet will begin sending fax tones. For instructions
on how to change this setting, refer to “Changing the number of rings
before answering” later in this chapter under “Advanced fax receive
settings.”
Notes:
1) If you haven’t changed your office equipment setup since you
answered the questions in the software during your first-time installation, don’t change your answering settings now or you may not
receive your faxes properly. If you have changed your office equipment setup, refer to “Updating your fax receive setup” later in this
chapter under “Advanced fax receive settings” for instructions on
how to re-run the HP OfficeJet Setup Wizard.
2) For a detailed description of how your office equipment should be
set up and the corresponding answering settings, see “Step 6. Connect
Your Office Equipment” in Chapter 1.
3/27/97 11:09 am
Final version given to printer
2 When the HP OfficeJet rings, pick up the
handset of a telephone that’s on the same telephone line as the HP OfficeJet.
OJ-lifthand
OJ-dialphn
Press START OR Dial 1-2-3
from an
extension
phone
3 Listen for the fax tone, press the Start
button on the HP OfficeJet’s keypad, OR, if
you’re receiving from an extension phone
(one that’s on the same telephone line as the
HP OfficeJet, but not connected directly to
it), dial 123.
4 Now you can hang up the phone anytime,
or you can stay on the line to have a
conversation after the fax finishes.
Receiving Faxes to Your PC
The HP OfficeJet is factory-set to print faxes, not receive them to
your PC. To receive faxes to your PC (also called PC faxes), change
the Receive Faxes setting.
1 On your Windows desktop, double-click HP OfficeJet Manager,
click Fax, and select Receive Settings. The Receiving tab will be
displayed.
2 Select To PC, then click OK.
To receive faxes to your PC
instead of printing them,
change the Receive Faxes
setting to To PC.
...............................................................................................................
3-10
HP Company Confidential
3/27/97 11:10 am
Final version given to printer
Notes:
1) Your computer must be powered on to receive faxes. If it is turned
off, your received faxes will be printed.
2) If you’re set up to receive faxes manually, follow the previous
instructions under “Manually receiving faxes.” To view or print a
received fax, use the instructions in the “Viewing lists of all sent and
received faxes” section under “Using Advanced Fax Features and
Settings.”
Using Advanced Fax Features
and Settings
Advanced fax send settings
Controlling how your faxed documents
will look
There are two settings that control how your faxed documents will
look when they’re printed at the receiving fax machine: Resolution
and Contrast.
Changing the Resolution
The Resolution setting affects the quality, in dots-per-inch (dpi), of
your faxed documents, and your transmission speed.
Use this
Resolution setting:
Fine
(factory setting)
(203 x 196 dpi)
For this result:
Higher quality for words (factory setting).
• Use this higher-quality setting for good all-around
quality.
• Most fax machines can receive faxes at this higher
quality setting; if you select this setting and the
receiving fax machine doesn’t support it, your
fax will be sent at Standard resolution.
• Words will have better quality than graphics and photographs.
...............................................................................................................
3-11
HP Company Confidential
3. Faxing
The following sections describe some of the advanced fax features
available with the HP OfficeJet, both from the keypad and from the
software.
3/27/97 11:10 am
Use this
Resolution setting:
Standard
(203 x 98 dpi)
300 dpi
(300 x 300 dpi)
Photo
(Grayscale image scan
up to 300 x 300 dpi)
Final version given to printer
For this result:
Standard quality for words.
• Use this setting when transmission speed is more
important than quality.
• All fax machines can receive at this setting.
• Words will have better quality than graphics and photos.
• Fastest fax transmission speed of all the Resolution
settings.
Best quality for words.
• Only a few types of machines can receive faxes at this
setting; if you select this setting and the receiving fax
machine doesn’t support it, your fax will be sent
at the highest supported resolution.
• Words will have better quality than graphics and photos.
Best quality for photographs and graphics.
• Use this setting when the quality of photographs
and graphics in your document is more important
than the quality of the words.
• Your document will be scanned as a grayscale
image (which simulates shades of gray) at up to
300 x 300 dpi.
• Slowest fax transmission speed of all the
Resolution settings.
The table on the following page describes how to change the resolution for each type of fax. This setting needs to be changed before you
begin faxing.
Notes:
1) When you change the Resolution setting, it will stay at that setting
until you change it again.
2) The Contrast/Resolution button settings also affect the quality of
copies made from the HP OfficeJet’s keypad. See “Optimizing the
quality” under “Copying from the Keypad” in Chapter 4.
...............................................................................................................
3-12
HP Company Confidential
3/27/97 11:10 am
Final version given to printer
Type of fax sent:
Where and how to change the Resolution:
Paper fax sent from
the HP OfficeJet’s
keypad
Change the Resolution with the Contrast/Resolution
button on the HP OfficeJet’s keypad.
1 Press the Contrast/Resolution button.
2 Press 1 to select Resolution.
Paper fax sent from
the HP OfficeJet
Document Assistant
Change the Resolution setting in the HP OfficeJet
Manager software.
1 Double-click the HP OfficeJet Manager icon on
your Windows desktop.
2 Click Fax and select Send Settings.
3 In the Paper Fax Quality tab, click Standard,
Fine, or 300 dpi to select the Resolution you want.
4 Click the Optimize for photo or graphic checkbox if appropriate, then click OK. When selected,
your document will be scanned as a grayscale image,
then sent at the selected resolution setting (Fine,
Standard, or 300 dpi).
Note: When you change the Resolution setting from
the HP OfficeJet Manager software, the keypad
setting will be automatically updated with the
same Resolution setting.
PC fax sent directly
from your software
program
Change the Resolution setting in the HP OfficeJet
Manager software.
Use the instructions above for “Paper fax sent from
the HP OfficeJet’s Document Assistant.” Choose
Fine or Standard only; other choices will result in
Fine quality transmission.
...............................................................................................................
3-13
HP Company Confidential
3. Faxing
3 Press 1, 2, 3, or 4 to select the Resolution you
want:
1 = Standard
2 = Fine (the factory setting)
3 = 300 dpi
4 = Photo
Note: When you change the Resolution setting from
the keypad, the HP OfficeJet Manager software will
automatically be updated with the same Resolution
setting.
3/27/97 11:10 am
Final version given to printer
Changing the Contrast
Change this setting if you want the faxed document to be lighter or
darker than your original document. This setting needs to be changed
before you begin faxing.
Notes:
1) When you change the Contrast setting, it will stay at that setting
until you change it again.
2) The Contrast/Resolution button settings also affect the quality of
copies made from the HP OfficeJet’s keypad. See “Optimizing the
quality” under “Copying from the Keypad” in Chapter 4.
Type of fax sent:
Where and how to change the Contrast:
Paper fax sent from
the HP OfficeJet’s
keypad
Use the Contrast/Resolution button on the HP
OfficeJet’s keypad to lighten or darken your fax.
1 Press the Contrast/Resolution button.
2 Press 2 to select Contrast.
3 Press 1, 2, or 3 to select the Contrast you want:
1=Normal (the factory setting)
2=Lighten
3=Darken
Note: When you change the Contrast setting from
the keypad, the HP OfficeJet Manager software will be
automatically updated with the same Contrast
setting.
Paper fax sent from
the HP OfficeJet’s
Document Assistant
Change the Contrast setting in the HP OfficeJet
Manager software.
1 Double-click the HP OfficeJet Manager icon
on your Windows desktop.
2 Click Fax and select Send Settings.
3 In the Paper Fax Quality tab, Drag the slider
bar in the Contrast area to the setting you want (five
settings are available), then click OK.
Note: When you change the Contrast setting from the
HP OfficeJet Manager software, the keypad setting
will be automatically updated with the same
Contrast setting.
PC fax sent directly
from your software
program
Contrast settings are not applied to this type of fax.
...............................................................................................................
3-14
HP Company Confidential
3/27/97 11:10 am
Final version given to printer
Redialing a fax number
If you dialed the fax number from the HP OfficeJet’s keypad, you can
press the Redial/Pause button any time to redial the last-dialed fax
number.
The HP OfficeJet is factory-set to automatically redial at timed intervals up to 5 times after a busy signal.
Redialing manually with the Redial/Pause button
• To immediately begin redialing the last fax number you dialed on
Changing the Automatic Redial setting in the software
Here’s how the Automatic Redial feature works:
The fax number will be redialed one minute after the unsuccessful fax
(busy, no answer, or both, depending on your settings). If the first
redial was unsuccessful, the second redial will begin after a 5-minute
wait. After this, the fax number will be redialed up to 3 more times if
the transmission continues to be unsuccessful.
If you dialed the fax number from the HP OfficeJet’s keypad, the
message display will show the redial countdown time in seconds during the waiting periods (unless the message display is already in use).
1 Double-click HP OfficeJet Manager on your Windows desktop.
2 Click Fax and select Send Settings.
3 Click the Dialing tab.
4 In the Automatic Redial area, select either or both Redial on
busy signal and Redial on no answer. To turn off the Automatic
Redial feature, make both checkboxes blank.
Entering a pause during keypad dialing
Press the Redial/Pause button to enter a 2-second pause in the middle
of your dialing sequence.
A dash (-) will appear on the message display, indicating that the
pause will occur at that point in the dialing sequence.
...............................................................................................................
3-15
HP Company Confidential
3. Faxing
the HP OfficeJet’s keypad, press the Redial/Pause button. Make sure
your document is still loaded in the document tray.
Notes: 1) If you press Redial/Pause while in the middle of dialing a
fax number, the Pause feature takes effect and a dash (-) will appear
in the message display. 2) You can’t use the Redial/Pause button to
redial a fax number that you originally entered in the Send Fax dialog
box, however, the automatic redial process described below will
begin.
3/27/97 11:10 am
Final version given to printer
Notes:
1) The preferred method of dialing with pauses (to enter a calling card
number, for example) is to use the instructions in the “Dialing in real
time” section earlier in this chapter.
2) If you press Redial/Pause at any other time except while dialing a
fax number, the manual Redial feature takes effect (see description in
previous section).
Assigning Speed Dial codes
The number of speed dial codes you have depends upon the model
number of your HP OfficeJet. To check your model number, look on
the lower right-hand corner of the keypad.
HP OfficeJet
Model Number
Number of speed dial
codes available
Model 500
40
Model 520
80
Model 570
50
Model 580
80
Model 590
100
Assigning a speed dial code to a single fax number
To quicken the keypad dialing process for a fax number you dial frequently, store it into a speed dial code.
1 Double-click HP OfficeJet Manager on your Windows desktop.
2 Click Fax and select Phone Book.
3 Choose a) or b) below.
a) To create a new phone book name:
Enter any name and number information, then click the arrow next
to the Speed Dial entry box and select a speed dial code.
b) To add a speed dial code to an existing phone book name:
Click the name in the list and select a speed dial code.
4 Click Add to Phone Book (for new phone book names) or
Apply Changes (for existing phone book names) to save the information you just entered.
See “Speed dialing” earlier in this chapter for speed dialing
instructions.
...............................................................................................................
3-16
HP Company Confidential
3/27/97 11:10 am
Final version given to printer
Assigning a speed dial code to a group of fax numbers
You can group fax numbers you dial frequently (such as your department members at work), and store them into a group speed dial code.
You can store up to 20 numbers in a speed dial group.
Each group member must have an assigned speed dial code. If you
add the name of someone who doesn’t have a speed dial code, one
will be automatically assigned to them (if available), and you’ll be
asked to confirm it. If you prefer to pick your own speed dial code,
use the instructions in the previous section to assign it before adding
the name to a group speed dial code.
1 Double-click HP OfficeJet Manager on your Windows desktop.
2 Click Fax and select Phone Book.
3 Choose a) or b) below.
4 In the Phone Book list, click on the first name you want to add
to this group, then click Add to Group.
5 Add more names to your group, for a total of up to 20 group
members.
...............................................................................................................
3-17
HP Company Confidential
3. Faxing
a) To create a new speed dial group:
Click Create/Modify Group, then click Create Group. In the
Create Group entry box, enter a name for the group you’ll create,
and click OK. Then select an unassigned speed dial code from the
group Speed Dial box. Continue at Step 4.
b) To add names to an existing speed dial group:
Select a name from the Group Name box, then continue at Step 4.
3/27/97 11:10 am
Final version given to printer
Faxing to a group of fax numbers
Choose from these many methods of faxing to groups.
Type of fax sent
How to fax to a group of fax numbers
Paper fax sent from
the HP OfficeJet’s
keypad
Dial a group speed dial code you assigned
previously in the Phone Book.
Use the faxing instructions in the “Speed dialing” section
earlier in this chapter. In step 3 of that procedure, enter a
speed dial code that you’ve assigned to a group of numbers.
See “Assigning a speed dial code to a group of fax
numbers” earlier in this chapter for instructions on
creating a speed dial group.
Paper fax sent from
the HP OfficeJet’s
Document Assistant
Choose from these two methods (a or b):
a) In the Send Fax dialog box, select a group name from
the Phone Book list.
Use the faxing instructions in the “Sending from the HP
OfficeJet Document Assistant” section earlier in this chapter. In step 3 of that procedure, select a group name from the
Phone Book list, then click Send Fax Now.
To create a group in the Phone Book, follow the instructions
in the “Assigning a speed dial code to a group of fax numbers” earlier in this chapter, with these exceptions:
1) Assigning a group speed dial code is optional,
2) Assigning a speed dial code to individual group members
is optional,
3) If you didn’t store your group to a speed dial code, you
can add as many names as you want to the group, instead of
being limited to a total of 20 names.
b) In the Send Fax dialog box, create a temporary group
to be used only for the current fax.
1 In the Send Fax dialog box, click Create List.
2 Enter new names and numbers in the “Fax to:” area, or
select names or groups from the Phone Book list.
3 Click the appropriate Add to List button.
4 Click Send Fax Now to begin faxing.
PC fax sent directly
from your software
program
Choose from these two methods (a or b):
a) In the Send Fax dialog box, select a group name from
the Phone Book list.
Use the faxing instructions in the “Sending a fax directly
from your software program” section earlier in this chapter.
In step 4 of that procedure, select a group name from the
Phone Book list, then click Send Fax Now.
To create a group in the Phone Book, use the instructions
above for the Document Assistant faxes.
b) In the Send Fax dialog box, create a temporary group
to be used only for the current fax.
Use the instructions above for the Document Assistant faxes.
...............................................................................................................
3-18
HP Company Confidential
3/27/97 11:10 am
Final version given to printer
Changing the information printed at the top of
the faxes you send
When you first installed the HP OfficeJet software, you were asked to
enter your name and fax number. This information was stored for use
in the header that’s printed at the top of all of your outgoing faxes.
Notes:
1) Only the fax recipient will see this information upon receipt of
your fax; it’s not printed on your original document.
2) The Telephone Consumer Protection Act of 1991 requires that, in
the U.S., all outgoing faxes display the sender’s identifying name and
fax number in a header, footer, or on the cover page of the outgoing
fax.
Use the following procedure to change the fax header information.
1 Double-click HP OfficeJet Manager on your Windows desktop.
3 Click the Personal Information tab and change the information
in the two entry boxes in the Fax Header Content area.
Setting Tone or Pulse dialing type
The HP OfficeJet is factory-set for tone dialing. Nearly all phones
being used in the U.S. have tone dialing.
Note: Don’t change this setting unless you know your phone isn’t
capable of tone dialing. Pulse dialing is much slower than tone
dialing.
1 Double-click HP OfficeJet Manager on your Windows desktop.
2 Click Fax and select Send Settings.
3 Click the Dialing tab and select Tone Dial or Pulse Dial in the
Phone Dialing Type area.
Other advanced features for sending faxes
There are many advanced features available in the HP OfficeJet software. The best way to learn about these features is to explore them in
the dialog boxes referenced in the following table, and click the Help
button on the screen if you need more information.
...............................................................................................................
3-19
HP Company Confidential
3. Faxing
2 Click Fax and select Send Settings.
3/27/97 11:10 am
Final version given to printer
.
Additional features for
sending faxes
Where to locate these features in the HP
OfficeJet Manager software
Using the Phone Book
Phone Book dialog box.
1 Double-click HP OfficeJet Manager on
your Windows desktop.
2 Click Fax and select Phone Book.
Including an electronic
cover page when sending
a fax
Send Fax dialog box.
Use the faxing instructions in the appropriate
section earlier in this chapter to navigate to
the Send Fax dialog box. Then click the Cover
Page checkbox and click the Edit button to
add a message on your cover page.
Faxing a one-page note
that you type into the
Cover Page Data dialog
box
Cover Page Data dialog box.
1 Double-click HP OfficeJet Manager on
your Windows desktop.
2 Click Fax and select Send Quick Note.
Changing your personal
information in the
electronic cover page
Personal Information tab of the Send Fax
Settings dialog box.
1 Double-click HP OfficeJet Manager on
your Windows desktop.
2 Click Fax and select Send Settings.
3 Click the Personal Information tab and
change the information in any of the four entry
boxes in the Cover Page Information area.
Scheduling a fax to send
at a future time
Select Fax Send Time dialog box.
1 Double-click HP OfficeJet Manager on
your Windows desktop.
2 Click Fax and select Send Fax.
3 Click Send Fax Later and fill in the entry
boxes in the Select Fax Send Time dialog box.
...............................................................................................................
3-20
HP Company Confidential
3/27/97 11:10 am
Final version given to printer
Advanced fax receive settings
Phone Answering: Automatic or Manual
1 Look at the HP OfficeJet’s keypad to determine the current
Phone Answering setting.
If the green Auto Answer light is on, the Phone Answering setting is
Automatic, and your HP OfficeJet is set to receive faxes automatically. It will automatically answer every call you receive at your fax
number — after the number of rings specified in the Rings to Answer
setting — then send receiving fax tones.
If the Auto Answer light is off, the Phone Answering setting is Manual, and your HP OfficeJet can only receive faxes manually. It will
never answer incoming calls automatically.
2 Press the Auto Answer button to change the setting.
Notes:
1) If you haven’t changed your office equipment setup since you
answered the questions in the software during your first-time installation, don’t permanently change this setting now or you may not
receive your faxes properly.
2) For a detailed description of how your office equipment should be
set up and the corresponding answering settings, see “Step 6. Connect
Your Office Equipment” in Chapter 1.
...............................................................................................................
3-21
HP Company Confidential
3. Faxing
When Phone Answering is set to Automatic, the HP OfficeJet will
automatically answer every call received at your fax number. When
set to Manual, you must answer fax calls manually (see the previous
section, “Manually Receiving Faxes” for instructions).
When you first installed the HP OfficeJet Series 500 software, the
Setup Wizard asked you a series of questions about your phone lines
and equipment. Your answers determined the appropriate option for
this setting (and many others) and the Setup Wizard set it for you
automatically.
If you decide to change this setting now, you should do it only temporarily (for one fax only), then change it back, or, if you have changed
your office equipment setup since you first installed the HP OfficeJet,
re-run the Setup Wizard and make your changes there. (Refer to
“Updating your fax receive setup” later in this chapter for instructions
on how to locate the Setup Wizard.)
To change the Phone Answering setting:
3/27/97 11:10 am
Final version given to printer
Changing the number of rings
before answering
When Phone Answering is set to Automatic, the HP OfficeJet will
automatically answer all calls after the number of rings specified in
the Rings to Answer setting. For example, when Rings to Answer is
set to 1 ring, your fax line will ring once, then the HP OfficeJet will
begin sending fax tones.
When you first installed the HP OfficeJet Series 500 software, the
Setup Wizard asked you a series of questions about your phone lines
and equipment. Your answers determined the appropriate option for
this setting (and many others) and the Setup Wizard set it for you
automatically.
If you decide to change this setting now, you should do it only temporarily (for one fax only), then change it back, or, if you have changed
your office equipment setup since you first installed the HP OfficeJet,
re-run the Setup Wizard and make your changes there. (Refer to
“Updating your fax receive setup” later in this chapter for instructions.)
To change the Rings to Answer setting:
1 On your Windows desktop, double-click HP OfficeJet Man-
ager, click Fax, and select Receive Settings.
2 Click the Answering tab.
Change the Rings to Answer
setting in the Answering tab.
3 In the box to the right of the Number of Rings to Answer area,
enter a number between 1 and 6, inclusive.
...............................................................................................................
3-22
HP Company Confidential
3/27/97 11:10 am
Final version given to printer
Using Distinctive Ring
If you have one phone line that receives both voice and fax calls, you
may want to use this feature.
The Distinctive Ring feature of the HP OfficeJet, when used in conjunction with your telephone company’s distinctive ringing service,
allows both you and the HP OfficeJet to distinguish between voice
calls and fax calls when you receive both on the same phone line.
Note: Your telephone company may use a different name for this service. For example, it’s called “Identa-ring” in parts of New Jersey and
“RingMaster” in parts of Florida.
Use the following procedure to set up your HP OfficeJet and your
telephone line for Distinctive Ring.
2 When you set up the distinctive ringing service with your telephone company, decide how many rings you want to assign to your
fax line: single, double, or triple rings.
3 If you’ve already installed the HP OfficeJet software, re-run the
HP OfficeJet Setup Wizard and enter the Distinctive Ring information.
a) To locate the Setup Wizard, double-click HP OfficeJet Manager
on your Windows desktop, click HP OfficeJet, and select Fax Setup
Wizard.
b) In the screen that asks if you subscribe to a distinctive ring service,
click Yes.
c) In the screen that asks you to choose a distinctive ring pattern, click
the number of rings you assigned in Step 2 above to your fax line
(single, double, or triple). Note: If you want the HP OfficeJet to
answer both double and triple rings — for example, if you have two
separate fax numbers on your distinctive ring line — choose double
and triple rings.
d) In the screen that asks you to enter the phone number of your dedicated fax line, enter the distinctive ring fax number.
...............................................................................................................
3-23
HP Company Confidential
3. Faxing
1 Call your telephone company to find out if they have a distinctive
ringing service available in your area. At the time of this printing, it is
still unavailable in many areas.
Important: If you can’t subscribe to this service through your telephone company, the Distinctive Ring feature on the HP OfficeJet will
not work, and should be set to All Rings.
The telephone company’s distinctive ringing service allows you to
have 2 or 3 phone numbers on the same phone line, which saves you
the cost of paying for 2 or 3 separate lines. It also allows you and the
HP OfficeJet to hear which phone number has been dialed. Each of
the phone numbers will have a different ringing sound: One can have
a single ring, another can have a double ring, and the third can have a
triple ring.
3/27/97 11:10 am
Final version given to printer
4 If you have an answering machine for receiving voice calls on
this phone line (using one of the other distinctive ring phone numbers
for your voice calls), set it to answer after 3 or more rings. If you
don’t, your HP OfficeJet will not be able to receive your fax calls.
5 If you have a PC-modem or an external modem on this phone
line (using one of the other distinctive ring phone numbers), turn off
the setting in the modem’s software that automatically receive faxes
to your computer; if you don’t, your HP OfficeJet will not be able to
receive faxes properly.
Updating your fax receive setup
When you first installed the HP OfficeJet’s software, you were asked
a series of questions about your office equipment setup. Your answers
determined how the HP OfficeJet was automatically set to receive
faxes.
If any of the following information has changed since you first
installed the software, use the instructions in this section to update
your fax receive software settings.
Note: If you don’t update the software settings, you may not receive
faxes properly.
If this information has changed, use the numbered
instructions that follow this table:
• Have you added or removed a distinctive ring feature to your telephone line?
(This service, if available from your telephone company, allows
you to have 2 or 3 phone numbers assigned to the same line.
Each number rings with a different pattern so you can tell the
difference between incoming calls.)
• Have you added, changed, or removed any phone numbers or
fax numbers?
• Have you changed from a dedicated fax line (no voice calls
received) to a shared fax line (receive both voice and fax calls) or
vice versa?
• Have you added or removed an answering machine or
computer voicemail feature on the same telephone line that’s
connected to the HP OfficeJet?
• Have you added or removed a modem - either internal to your
computer or an external box - on the same telephone line that’s
connected to the HP OfficeJet?
...............................................................................................................
3-24
HP Company Confidential
3/27/97 11:10 am
Final version given to printer
To update your fax receive settings in the software:
1 Double-click HP OfficeJet Manager on your Windows desktop.
2 Click HP OfficeJet and select Fax Setup Wizard.
3 Follow the instructions in all of the Fax Setup Wizard screens,
updating where appropriate.
Changing the paper size setting
When you load a different paper size in the HP OfficeJet’s paper supply tray, you also need to change the paper size in the Fax Receive
settings if you’ll be receiving faxes on the new paper.
The factory-set paper size to print faxes on is Letter (8.5 x 11 inches).
You can also print faxes on Legal-size paper (8.5 x 14 inches) or on
A4-size paper (210 x 297 mm).
2 Select a new paper size in the Load Paper Size area.
Other advanced features for receiving faxes
There are many advanced features available in the HP OfficeJet software. The best way to learn about these features is to explore them by
clicking the tabs in the Receive Fax Settings dialog box. Click the
Help button in each of the tabs for more information about the features and settings.
• To locate the Receive Fax Settings dialog box, double-click on HP
OfficeJet Manager on your Windows desktop, click Fax, and select
Receive Settings.
Viewing Lists of All Sent and Received
Faxes
1 Double-click HP OfficeJet Manager, click Fax, and select Fax
History.
2 Do any of the following:
a) Click the Sent Faxes tab to see a list of all the faxes you’ve sent
from the HP OfficeJet. Both paper faxes and PC faxes (from your
software program) you’ve sent are included.
b) Click the Received Faxes tab to see a list of all the faxes you’ve
received, both printed faxes and PC faxes. To view a PC fax, doubleclick it. To print a PC fax, click it once, then click Print Fax.
c) Click the Pending tab to see a list of faxes that are scheduled to be
sent at a future time. (For instructions on how to schedule a fax, see
“Scheduling a fax for a future time” under “Advanced fax send features” later in this chapter.)
...............................................................................................................
3-25
HP Company Confidential
3. Faxing
1 On your Windows desktop, double-click on HP OfficeJet Manager, then click Fax and select Receive Settings.
3/27/97 11:11 am
Final version given to printer
Printing the Fax Reports
There are two fax reports you may want to print from time to time:
the Fax History report, and the Last Fax report.
• Fax History report
The Fax History report is a list of the last 30 fax transmissions: both
sent and received faxes.
Here’s how to print this report:
1 Double-click HP OfficeJet Manager, click Fax, and select Fax
History.
2 Click the Settings tab.
3 Click the Print Fax History button.
• Last Fax report
The Last Fax report is factory-set to print automatically if an error
occurs while a fax is being sent or received (Error only setting).
To change when the Last Fax report is automatically printed, follow
steps 1 and 2 above, then click one of the buttons in the Automatic
Report Printing area.
Adjusting sound volumes
There are three sound volumes you can adjust: the volume of outgoing fax calls (dial tone, ringing, and fax tones), the rings for incoming
calls, and the beep sounds for the keypad buttons.
1 On your Windows desktop, double-click HP OfficeJet Manager, click HP OfficeJet, and select Settings and Maintenance. The
Volume tab will be displayed.
2 Adjust the volume of outgoing fax calls by making a selection in
the Sound Volume area, which is factory-set to Soft.
3 Adjust the volume of incoming calls by turning the sound on or
off. When Fax machine rings for incoming calls is checked, you’ll
hear the rings; when the checkbox is blank, you won’t hear anything
when incoming fax calls are received.
4 Adjust the volume of the button beeps by turning the sound on or
off. When Buttons beep when pressed is checked, you’ll hear beeps
while pressing buttons, and you’ll hear the error beeps when you
press the wrong button; when the checkbox is blank, you won’t hear
anything when you press the buttons.
...............................................................................................................
3-26
HP Company Confidential
3/27/97 11:11 am
Final version given to printer
Changing the time and date
• When the HP OfficeJet is connected to your computer with the bidirectional parallel cable, the time and date shown on the keypad display are taken from the time that’s set in your computer. If you need
to change the time (for daylight savings, for example) and date, reset
them on your computer, and they will be automatically updated in the
HP OfficeJet.
• When the HP OfficeJet is disconnected from your computer, then
powered off, the time and date information will be lost. The message
Press START to set time/date, or STOP to skip will be displayed on
the HP OfficeJet. To reset the time and date, you can either reconnect
the HP OfficeJet to your computer with the bidirectional parallel
cable, or you can press the Start button on the keypad and follow the
instructions for setting the time and date.
3. Faxing
...............................................................................................................
3-27
HP Company Confidential
3/27/97 11:12 am
Final version given to printer
4
Copying
.................................................................................................................
Read this chapter to learn how to make copies
both from the HP OfficeJet’s keypad and
from the software. You’ll also learn how to
change
the copy settings in both locations.
For basic copying, use the keypad. To gain more control over how your
copies will look, and to copy long or complex documents, copy from the
Loading the Paper Supply for Copying ..................4-2
Using a Document Carrier
to Protect Your Original ...................................4-3
Copying from the Keypad........................................4-3
Copying from the Document Assistant...................4-6
• Controlling how your copies will look ...................... 4-7
• Optimizing the quality ............................................... 4-7
• Darkening and lightening (Contrast setting) ........... 4-7
• Reducing and Enlarging ............................................ 4-7
• Collating: On or Off................................................... 4-8
.............................................................................................
HP Company Confidential
4. Copying
• Controlling how your copies will look ...................... 4-4
• Optimizing the quality (Resolution setting) ............. 4-4
• Darkening and lightening (Contrast setting) ........... 4-5
• Automatic collating .................................................... 4-5
3/27/97 11:12 am
Final version given to printer
Loading the Paper Supply
for Copying
1 Pull the document tray forward all the
way until it snaps into the upright position.
Stack
guides
2 Load up to 150 sheets of 20-lb paper
(about a 1/2-inch-thick stack) into the paper
tray. The paper should fit behind the stack
guides on the lower part of the tray as
shown.
Notes:
1) Use only plain paper for copying.
2) Use only letter- or legal-size paper for
copying.
3) If you change the paper size in the tray, be
sure to update the paper size setting in the
software. Refer to “Changing the paper size
setting” in Chapter 3 under “Advanced fax
receive settings” for instructions.
3 Push the document tray back to its normal position, resting in front of the paper
tray.
4 Extend the output tray slowly until it
stops.
Output
tray
...............................................................................................................
4-2
HP Company Confidential
3/27/97 11:12 am
Final version given to printer
Using a Document Carrier to
Protect Your Original
Copying from the Keypad
Because of the limited memory available in the HP OfficeJet, this
method is not recommended for copying large or complex documents. If more memory is needed, copy using the Document Assistant, which uses your computer’s memory.
If your original document is a photograph, or if you want your copies
to be darker or lighter than your original, use the instructions in the
following section, “Controlling how your copies will look.”
...............................................................................................................
4-3
HP Company Confidential
4. Copying
Three document carriers are provided in the box with your HP
OfficeJet. (They are protective “sleeves” that have a transparent plastic front and white paper backing.) Use these document carriers to
protect your fragile or damaged original documents from potential
harm while they’re fed through the HP OfficeJet’s document tray.
Place your document inside a document carrier before copying, faxing, or scanning when your original document is:
• Smaller than standard letter size (8.5 x 11 inches). Non-standard
pages may not load properly and could jam inside the HP OfficeJet.
• Torn. Rough edges may cause a paper jam inside the HP OfficeJet.
• Precious or fragile. For example, a photograph or a legal
document.
• Very thin paper. Less than 20-lb weight paper may not load
properly and could jam inside the HP OfficeJet.
When placing the document carrier into the document tray, load it
with the sealed edge down and the transparent side facing away from
you.
Caution: To avoid damaging the HP OfficeJet, do not use the document carrier to protect anything thicker than a photograph.
3/27/97 11:13 am
Document
guides
Final version given to printer
1 Load your document with the printed
side facing away from you (up to 20 pages,
or a single document carrier). If necessary,
slide the document guides on the tray to the
left or right to adjust them for the width of
your document.
Note: Always remove staples and paper
clips from your original before faxing to
avoid equipment damage.
2 Press the Copy button, then enter the
number of copies you want (up to 99).
3 Press the Copy button again to begin
copying.
The entire original document will be
scanned before copying begins.
The original document will be face-down in
the output tray, and the copies will be
face-up. For copy collating information, see
“Automatic collating” later in this chapter.
To cancel a copy in progress, press the Stop button on the HP OfficeJet’s keypad.
Controlling how your copies will look
When you make a copy from the HP OfficeJet’s keypad, the way it
looks is determined by the Contrast and Resolution settings that are
selected on the keypad with the Contrast/Resolution button.
Note: The Contrast/Resolution button settings also affect the quality
of paper faxes sent from the keypad. See “Changing the Resolution”
under “Using Advanced Fax Features” in Chapter 3.
Optimizing the quality
(Resolution setting)
Before beginning to copy, change the Resolution setting on the keypad to optimize for words, drawings, or photographs
1 Press the Contrast/Resolution button.
2 Press 1 to select Resolution.
3 Press 1, 2, or 3 to select the best quality for words, or press 4 to
select the best quality for photographs and graphics.
...............................................................................................................
4-4
HP Company Confidential
3/27/97 11:13 am
Final version given to printer
Use this Resolution:*
For this result:
Standard, Fine, or
300 dpi
(factory setting)
Best quality for words and for simple line
drawings (factory setting).
• Use any of these three settings when the quality
of the words and simple line drawings is more
important than quality of photographs and more
complex graphics.
• Your document will be scanned at up to 300 dpi
no matter which of these three Resolution settings
is selected.
(All three settings scan at
up to 300 dpi)
Photo
Best quality for photographs and for more
complex graphics.
(Scans as a grayscale image • Use this setting when the quality of photographs
and graphics in your document is more important
at up to 300 dpi)
than the quality of the words.
• Your document will be scanned as a grayscale
image (which simulates shades of gray) at up to
300 dpi.
* When you change the Resolution setting, it will stay at that setting until you change it.
Before beginning to copy, change this setting if you want the copy to
be darker or lighter than your original document.
1 Press the Contrast/Resolution button.
2 Press 2 to select Contrast.
3 Press 1, 2, or 3 to select the Contrast you want:
1 = Normal (the factory setting)
2 = Lighten
3 = Darken
Note: When you change the Contrast setting, it will stay at that setting
until you change it again.
Automatic collating
Copies made from the keypad will be automatically collated (printed
in sets), with one exception: When the Photo setting is selected for the
Resolution using the Contrast/Resolution button (described previously under “Optimizing the quality”), copies will not be collated.
For examples of page number sequences when collating is on and off,
refer to “Collating: On or Off” later in this chapter.
...............................................................................................................
4-5
HP Company Confidential
4. Copying
Darkening and lightening
(Contrast setting)
3/27/97 11:13 am
Final version given to printer
Copying from the
Document Assistant
This copying method is recommended if you’re copying a long document or a complex document (like a photograph) that requires a lot of
memory to scan. When you copy from the keypad, only the HP
OfficeJet’s limited memory is used, but when you copy using the
Document Assistant, the memory in your computer is used.
1 Load your document in the document tray with the printed side
facing away from you (up to 20 pages).
Now look at your computer screen. The Document Assistant asks you
what you’d like to do with the document you’ve loaded.
When you load
your document,
the Document
Assistant asks you
what you want
to do.
2 Click Copy and the Copy dialog box will be displayed.
Change any of these copy
settings before beginning to
copy.
3 Click Start Copy to begin copying.
To cancel a copy in progress, click the Cancel button in the HP
OfficeJet status dialog box (displayed during copying) or press the
Stop button on the HP OfficeJet’s keypad.
...............................................................................................................
4-6
HP Company Confidential
3/27/97 11:13 am
Final version given to printer
Controlling how your copies will look
When you make a copy from the Document Assistant, the way it
looks is determined by the settings in the Copy dialog box. These settings will not affect copies made from the keypad.
Optimizing the quality
The HP OfficeJet software is factory-set to optimize the words in
your copies. When your original is a photograph or graphic, click the
Original is photo or graphic checkbox for best quality.
Darkening and lightening
(Contrast setting)
When you want the copy to be darker or lighter than your original
document, drag the slider bar in the Contrast area to the Contrast setting you want.
Reducing and enlarging
When you want the copy to be smaller or larger than your original
document, change the Reduce/Enlarge setting.
Note: When Original is photo or graphic is selected in the Copy
dialog box, you won’t be able to enlarge your document.
Settings available:
Change the number in the
entry box.
Enter a number between 50 and 200 to
(Factory setting = 100%)
Choose from the selection box.
(Factory setting = Actual size)
reduce to as small as half of the original size or
to enlarge to up to twice the size.
Actual Size makes the copy the same size as
your original.
Legal to Letter reduces the original from
legal-size to letter-size.
Letter to A4 reduces the original from lettersize width to A4-size width.
A4 to Letter enlarges the original from A4size width to Letter-size width. (Make sure you
have letter-size paper in the paper tray when
you choose this setting, or your copy will print
on multiple pages.)
Drag the slider bar.
(Factory setting = 100%)
Drag to a number between 50 and 200 to
reduce to as small as half the original size or to
enlarge to up to twice the size.
* If you enlarge to a size that won’t fit on the paper you have loaded, your copy will be
printed on multiple pages.
...............................................................................................................
4-7
HP Company Confidential
4. Copying
Reduce/Enlarge* method:
3/27/97 11:13 am
Final version given to printer
Collating: On or Off
The HP OfficeJet is factory-set with the collating feature turned on.
Example when Collating is turned on:
If you make 3 copies of a 3-page document, the
copies will be printed as shown at left.
Copies are printed face-up, so the last page is
printed first in order to maintain the proper
collated order in each set.
Example when Collating is turned off:
• To turn off the collating feature, click the
Collate checkbox to remove the check mark.
Zothecas
miscere
quadrupei,
Zothecas
miscere
quadrupei,
With collating turned off, each page of your original will be scanned and copied before the next
page is scanned. If you make 3 copies of a 3-page
document, the copies will be printed as shown at
left.
Notes:
1) The Collating setting will return to the factory setting (On) after
you complete an uncollated copy job.
2) Copies made from the keypad will always be collated, regardless
of the Collating setting in the Copy dialog box. The only exception to
this is when the Photo setting is selected for the Resolution using the
Contrast/Resolution button (see “Optimizing the quality” under
“Copying from the Keypad” earlier in this chapter); copies made at
this Photo setting will not be collated.
...............................................................................................................
4-8
HP Company Confidential
3/27/97 11:14 am
Final version given to printer
5
Scanning
.................................................................................................................
Read this chapter to learn how to scan your
document as an image, and how to scan your
document to edit the words (OCR scanning).
All images and text will be scanned in black-and-white or in shades of
gray, depending upon which scanning settings you choose.
For more detailed information on using the HP OfficeJet’s software to
scan, click the Help button in the Scan Settings dialog box.
For more detailed information on OCR scanning, refer to the Caere ® OCR
product documentation that was included in the box with the HP OfficeJet,
the OmniPage® Limited Edition User’s Guide.
Using a Document Carrier to
Protect Your Original .......................................5-2
Scanning Your Document As an Image.................5-2
• Scanning from the Document Assistant ................... 5-2
• Scanning directly into your
TWAIN-compliant software program ................. 5-5
Scanning Your Document to
Edit the Words (OCR).......................................5-7
.............................................................................................
HP Company Confidential
5. Scanning
How to tell if your software program
supports TWAIN......................................................5-5
How to scan with TWAIN ...............................................5-6
3/27/97 11:14 am
Final version given to printer
Using a Document Carrier to
Protect Your Original
Three document carriers are provided in the box with your HP
OfficeJet. (They are protective “sleeves” that have a transparent plastic front and white paper backing.) Use these document carriers to
protect your fragile or damaged original documents from potential
harm while they’re fed through the HP OfficeJet’s document tray.
Place your document inside a document carrier before copying, faxing, or scanning when your original document is:
• Smaller than standard letter size (8.5 x 11 inches). Non-standard
pages may not load properly and could jam inside the HP OfficeJet.
• Torn. Rough edges may cause a paper jam inside the HP OfficeJet.
• Precious or fragile. For example, a photograph or a legal
document.
• Very thin paper. Less than 20-lb weight paper may not load
properly and could jam inside the HP OfficeJet.
When placing the document carrier into the document tray, load it
with the sealed edge down and the transparent side facing away from
you.
Caution: To avoid damaging the HP OfficeJet, do not use the document carrier to protect anything thicker than a photograph.
Scanning Your Document
As an Image
Scanning from the Document Assistant
1 Load your document in the document tray with the printed side
facing away from you. You can load up to 20 pages (see Step 2 for
page-loading restrictions with certain settings), or a single document
carrier. If necessary, slide the document guides on the tray to the left
or right to adjust them for the width of your document. (If you’re
using a document carrier, load it in the tray with the sealed edge
down.)
Now look at your computer screen. The OfficeJet Document Assistant asks you what you’d like to do with the document.
...............................................................................................................
5-2
HP Company Confidential
3/27/97 11:14 am
Final version given to printer
When you load your
document, the Document
Assistant asks you what
you want to do.
2 Click Scan and the Scan Settings dialog box will be displayed.
Change any of the scan
settings, then click Start Scan.
Make any changes you’d like to any of the settings.
• Text is factory-selected. Use this setting to make the words and sim-
...............................................................................................................
5-3
HP Company Confidential
5. Scanning
ple line drawings in your document appear to be the clearest elements
after scanning. You can scan up to 20 pages, or a single document
carrier with this selection.
Note: Do not click Scan text for editing (OCR) unless you want to
do OCR scanning; refer to “Scanning Your Document to Edit the
Words (OCR)” later in this chapter for OCR scanning instructions.
• Click Photo to make photographs in your document appear to be the
sharpest elements after scanning. You can only scan one page at a
time with this selection.
• Click Graphic to make more complex illustrations or graphic
images in your document appear to be the sharpest elements after
scanning. You can only scan one page at a time with this selection.
3/27/97 11:15 am
Final version given to printer
• Click Other to choose one of the custom scanning settings. You can
only scan one page at a time when you choose grayscale
scanning.
Notice that the Resolution setting and the scanning method (blackand-white or grayscale) for the selection is shown on the right side of
the dialog box (for example, 300 x 300 dpi and black-and-white for
Text).
For more information about the Optimize settings or the Contrast settings in the Scan Settings dialog box, click the Help button.
3 Click Start Scan to begin scanning.
Your scanned image will be displayed in the Image Viewer window.
(To cancel a scan in progress, click the Cancel button in the HP
OfficeJet’s Uploading Image screen, which is displayed during scanning.)
4 Use the tools in the Image Viewer window if you want to
modify the scanned image.
To view multiple scanned pages, click the right and left arrows in the
tool bar.
For instructions on using the Image Viewer tools, pull down the Help
menu in the Image Viewer window and select Help Topics.
Now that you’re finished modifying the image, you can save it and
then either copy-and-paste or import it into a document.
5 Pull down the File menu and select Save. The Save As dialog
box will be displayed:
Change the file name,
location, or type in the
Save As dialog box.
Your first scanned image will be assigned the name “scan1,” and subsequent images will be named “scan2,” “scan3,” etc. Or you can
change the name of your scanned document in the “File name” box.
If you don’t change the location in the Save in box, your scanned
image will be saved to c:/Program Files/HP OfficeJet Series 500/
Images (Windows 95 users) or to c:/HPOJ_500/Images (Windows
3.1 users).
...............................................................................................................
5-4
HP Company Confidential
3/27/97 11:15 am
Final version given to printer
Select the file format you want in the Save as type box.
6 Choose either of the following methods to place the scanned
image into a document:
To copy-and-paste the scanned image into a document:
a) From the Image Viewer, select the entire image (choose Select All
from the Edit menu), or the portion of the image that you want to
keep (use the Image Viewer tools), then select Copy from the Edit
menu.
b) Open the document in your software program where you want to
place the image.
c) Select Paste from the Edit menu.
OR
To import the scanned image into a document:
a) Open the document in your software program where you want to
place the image.
b) Select Import File (or whatever command your software program
uses) from the File menu. (Check your software program’s documentation if you can’t find which command to use.)
c) Browse to the location in which you saved the scanned image and
select its file name.
Scanning directly into your
TWAIN-compliant software program
Some software programs use an industry standard called TWAIN to
allow images to be acquired directly from scanners. This eliminates
some steps from the scanning procedure.
How to tell if your software program
supports TWAIN
How to scan with TWAIN
Note: If your software program does not support TWAIN, the follow-
...............................................................................................................
5-5
HP Company Confidential
5. Scanning
At the time of this printing, only a few software programs support the
TWAIN standard. Typically, they are image-processing and graphics
programs. To find out if your application uses this standard:
• Look for Acquire or Acquire Image under the File menu.
• Check the software’s documentation. If you can’t find any references to TWAIN, your program doesn’t support it.
• Check the Software Compatibility Matrix that’s available on the HP
OfficeJet Series 500 CD in the Reference Shelf. This document maintains an updated list of popular software programs that are TWAINcompliant.
3/27/97 11:15 am
Final version given to printer
ing procedure will not work.
1 Make sure your software program has the HP OfficeJet Series
500 selected as the scanning source. Usually, you can check this by
choosing Select Source from the File menu or by selecting Acquire/
Select Source from the File menu in your software program.
If you can’t find where to select the scanning source in your software
program, check the program’s documentation.
2 Open the file in your software program where you want the
image to be placed.
3 Load your document in the document tray with the printed side
facing away from you (as many pages as your software program will
allow, or a single document carrier). If necessary, slide the document
guides on the tray to the left or right to adjust them for the width of
your document.
Note: If the Document Assistant is displayed at this point, please
close it.
4 Select Acquire Image from the File menu in your software pro-
gram. (Some programs may have a slightly different command, like
Acquire.)
If the Scan Settings dialog box is displayed (illustrated on page 5-3),
choose from the many scanning options, or click Help for information about the options. Some applications scan using their own settings, however, and in this case the Scan Settings dialog box won’t be
displayed.
The image will be scanned directly into your application. Now you
can edit the image using the tools in your TWAIN-compliant software program.
...............................................................................................................
5-6
HP Company Confidential
3/27/97 11:15 am
Final version given to printer
Scanning Your Document to
Edit the Words (OCR)
Scan using the optical character recognition (OCR) method when
your original document has words that you want to edit in your word
processing program.
When you scan using OCR, each separate letter and character in your
document is compared to a library of letters and characters that have
been programmed into the OCR software. When the software finds a
match, it’s placed in your word processing program.
Keep in mind that this technology isn’t perfect. After OCR scanning,
you’ll still need to proofread your document carefully to make sure
none of the letters or characters have been misinterpreted by the software. Even a spell checker won’t catch everything.
For more information about the OCR software, refer to the Caere documentation that was shipped in the box with the HP OfficeJet, the
OmniPage Limited Edition User’s Guide.
To scan using OCR:
1 Load your document in the document tray with the printed side
facing away from you (up to 20 pages, or a single document carrier).
If necessary, slide the document guides on the tray to the left or right
to adjust them for the width of your document.
Now look at your computer screen. The OfficeJet Document Assistant asks you what you’d like to do with the document.
5. Scanning
When you load your
document, the Document
Assistant asks you what
you want to do.
2 Click Scan and the Scan Settings dialog box will be displayed.
...............................................................................................................
5-7
HP Company Confidential
3/27/97 11:15 am
Final version given to printer
3 Click the Text and Scan text for editing (OCR) checkboxes.
Click Scan text for editing
(OCR) to edit the words in
your document.
4 Click Start Scan.
Your document will be scanned into the word processing program
that you selected when you first installed the OmniPage OCR software (at the end of the HP OfficeJet software installation procedure).
Note: To change the selected word processing program, double-click
the HP OfficeJet Manager icon on your Windows desktop, click HP
OfficeJet and select Settings and Maintenance, click the Software
tab, and select from the File format for OCR results menu.
5 Edit and proofread your scanned document.
...............................................................................................................
5-8
HP Company Confidential
3/27/97 11:17 am
Final version given to printer
6
Printing
.................................................................................................................
Read this chapter to learn how to select and
load paper, envelopes, and other media, how to
find and use the print settings, and two ways to begin printing – from your
Windows software program and from the HP OfficeJet Manager software.
Using Paper and Other Media Types .....................6-2
• Selecting paper/media types and sizes...................... 6-2
• Loading tips for paper and other media .................. 6-3
Loading plain and special papers.....................................6-3
Loading letterhead paper..................................................6-3
Loading the single-envelope slot .....................................6-4
Loading multiple envelopes.............................................6-4
Loading transparencies ....................................................6-5
Using the Print Settings ..........................................6-6
• Locating the print settings......................................... 6-6
• Using the Paper tab settings ...................................... 6-6
• Using the Setup tab settings....................................... 6-7
Print quality and speed.....................................................6-7
Printing in color ...............................................................6-7
Printing in grayscale ........................................................6-8
• Using the Advanced tab settings ............................... 6-8
Printing from Your
Windows Software Program .............................6-9
Printing from the HP OfficeJet Manager ..............6-9
6. Printing
.............................................................................................
HP Company Confidential
3/27/97 11:17 am
Final version given to printer
Using Paper and Other
Media Types
Selecting paper/media types and sizes
The HP OfficeJet can print on any of the following paper and media
types. Refer to Chapter 8 for HP paper/media ordering information.
Note: To produce intense, high quality color printing results, use HP
Premium InkJet Paper or HP Premium Glossy Paper.
Types of Media
Sizes of Media*
Weight
Plain Paper
20 to 32 lb
U.S. letter = 8.5 x 11 in
U.S. legal = 8.5 x 14 in
U.S. executive = 7.25 x 10.5 in
A4 = 210 x 297 mm
A5 = 148 x 210 mm
B5 = 182 x 257 mm
Envelopes
U.S. #10 = 4.12 x 9.5 in
U.S. #9 = 3.88 x 8.88 in
DL = 110 x 220 mm
C6 = 114 x 162 mm
A2 = 111 x 146 mm
n/a
Cards
U.S. index cards = 4 x 6 in,
and 5 x 8 in
A6 = 105 x 148 mm
40 to 60 lb
HP Premium InkJet Paper
U.S. letter = 8.5 x 11 in
A4 = 210 x 297 mm
n/a
HP Premium Transparency Film
HP Bright White Paper
HP Premium Glossy Paper
HP Greeting Card Paper
Avery paper labels (for InkJet print-
U.S. letter = 8.5 x 11 in
n/a
ers)
* Refer to the “Printing Specifications” section in Chapter 8 for the printing margins (maximum
printable area) of each media size.
Loading tips for paper and other media
Most papers have a side that’s been conditioned for printing and a
side that’s not conditioned for printing. The so-called “print side” is
usually indicated on the paper’s packaging. Before loading, check
your paper’s packaging to determine which is the print side, and
always load with the print side facing toward you.
...............................................................................................................
6-2
HP Company Confidential
3/27/97 11:17 am
Final version given to printer
For more detail on paper-tray loading, refer to the step-by-step, illustrated instructions in Chapter 1, “Step 5. Load the Paper Supply.”
Loading plain and special papers
• Refer to the following maximums when loading paper:
Plain paper (20-lb bond)
HP Premium InkJet Paper
HP Bright White Paper
HP Premium Glossy Paper
HP Greeting Card Paper
Avery paper labels
Card stock
Up to 150 sheets
Up to 100 sheets
Up to 150 sheets
Up to 50 sheets
Up to 50 sheets
Up to 25 sheets
Up to 50 sheets
The print side
of the paper
should face you
during loading.
OJ-14loadpa
The legal extension
piece supports
extra-long paper.
• Load sheets of the above-listed
paper with the print side facing
toward you.
HP Premium InkJet Paper:
The print side has no corner arrow.
HP Premium Glossy Paper:
Load with the glossy side facing you.
Avery paper labels:
Load with the labels facing you.
• Before loading legal-size paper,
or other extra-long paper, be sure
to pull up the legal extension
piece at the back of the paper
tray. Note: If it’s difficult to
extend the legal extension piece,
hold the side of the tray with one
hand, and pull up on the extension piece with the other hand.
Loading letterhead paper
Load the
letterhead-edge
down and
facing toward
you.
• Load letterhead paper with
the letterhead-edge down
and facing toward you.
• To print on a single envelope, it’s most convenient to use the singleenvelope slot, so you don’t have to remove any paper you already
have loaded in the paper tray.
...............................................................................................................
6-3
HP Company Confidential
6. Printing
Loading the single-envelope slot
3/27/97 11:17 am
Final version given to printer
• Load a single envelope as
Load a single
envelope with
the address
facing you and
the stamp-edge
down.
shown, with the address-side facing toward you and the stampedge down.
• Change the paper size in the
print settings to the envelope size
you loaded. Refer to “Using the
Paper tab settings” later in this
chapter.
Loading multiple envelopes
1 Pull the document tray forward and remove any paper from
the paper supply tray.
Slide the right
paper guide
to the envelope
position.
Load envelopes
with the address
facing you and
the stamp-edge
down.
2 Pinch and slide the right
paper guide to the envelope
position.
3 Load the stack of envelopes
(up to 10) with the address-side
facing toward you and the
stamp-edge down. Align the right
edge of the stack with the right
paper guide.
Slide the left
paper guide
to the edge
of the envelope
stack.
4 Pinch and slide the left paper
guide until it touches the left edge
of the envelope stack.
5 Push the document tray backward until it rests against the
paper tray.
Loading transparencies
Load the
transparencies
with the rough
side facing
you and the
adhesive-strip
edge down.
• Load transparencies (up to 50)
with the adhesive-strip edge
down and facing away from
you, and the rough side facing
toward you. The arrows on the
adhesive strip will be on the side
of the transparency that faces
away from you.
...............................................................................................................
6-4
HP Company Confidential
3/27/97 11:18 am
Final version given to printer
Using the Print Settings
Locating the print settings
Two of the ways you can locate the print settings are described below.
Note: There are other ways to locate the print settings, but the paths
are specific to the Windows version you’re running – Windows 3.1 or
Windows 95. Refer to your Windows documentation for instructions.
• From within your Window’s software programs. Use this
method to make temporary (per job) changes to the settings. Typically, you first select Print or Print Setup from the File menu of
your software program, then select Setup. However, each software
program determines the path you need to take through its menus
and printer setup dialog box in order to display the print settings.
• From the HP OfficeJet Manager. Use this method to change the
factory (default) settings, which will be applied to all print jobs
until you change the setting. Double-click the HP OfficeJet
Manager icon on your Windows desktop, then click Print and
select Print Settings.
Using the Paper tab settings
Use the Paper tab to change the paper orientation, the paper size, the
paper type, the sequence of the pages, and the number of copies.
For detailed information about each setting, click the Help button at
the bottom of the dialog box, then click the Reference tab.
The Paper tab
in the print settings
6. Printing
...............................................................................................................
6-5
HP Company Confidential
3/27/97 11:18 am
Final version given to printer
Using the Setup tab settings
Use the Setup tab to control the print quality, the print speed, and the
ColorSmart print settings.
For detailed information about each setting, click the Help button at
the bottom of the dialog box, then click the Reference tab.
The Setup tab
in the print settings
Print quality and speed
Normal is the factory-set quality. It has medium quality and medium
speed: 2.5 pages per minute (ppm) for monochrome printing, and 0.7
ppm for color printing.
Choose EconoFast for draft quality and the fastest speed: 4 ppm for
monochrome printing, and 1 ppm for color printing.
Choose Best for the highest quality output. It has the slowest speed: 1
ppm for monochrome printing, and 0.3 ppm for color printing.
Printing in color
The HP OfficeJet prints in color when a color-capable software program is used with the HP OfficeJet Manager software.
To print in color, be sure you have created color text or pictures
within your document, then make sure color printing is turned on in
your software program. Color printing is typically turned on as the
factory setting in your software program’s Print dialog box.
The HP OfficeJet is factory-set to print in color; however, if you have
changed the settings, be sure the Automatic ColorSmart option is
selected and the Print in Grayscale option is unselected in the Setup
tab of the print settings.
...............................................................................................................
6-6
HP Company Confidential
3/27/97 11:18 am
Final version given to printer
The quality of your color printing depends partly on how the four inks
— black, cyan, yellow, and magenta — are placed on the printed
page. Your HP OfficeJet uses HP’s ColorSmart technology to intelligently analyze your documents at the time of printing to provide the
best color output. ColorSmart identifies each element on a page —
text, simple graphics, or complex graphics such as photographic
images — and automatically applies the appropriate color settings to
each element during printing.
Printing in grayscale
If you want to economize on the use of the color print cartridge, or if
you want to print significantly faster, print draft copies of your color
documents in grayscale.
• To print in grayscale, select the Print in Grayscale option in the
Setup tab.
Using the Advanced tab settings
The Help system recommends that aligning or cleaning the print cartridges may solve some printing problems. If this corrective action is
recommended for your particular problem, click the appropriate button in the Print Cartridge Maintenance area in the Advanced tab.
If you print from DOS programs that run under Windows, you may
need to change the Paper Size, Character Set, or Form Feed Timeout settings in the Advanced tab.
For detailed information about each setting, click the Help button at
the bottom of the dialog box, then click the Reference tab.
Advanced tab
in the print settings
6. Printing
...............................................................................................................
6-7
HP Company Confidential
3/27/97 11:18 am
Final version given to printer
Printing from Your Windows Software Program
1 In your software program, select Print from the File menu. The
software program’s Print dialog box is displayed.
2 Make sure the HP OfficeJet Series 500 Printer is the selected
printer, then select All, Current Page, or the specific pages of the file
you want to print and the number of copies.
3 If necessary, change any of the other print settings (in the three
previously-described tabs: Paper, Setup, and Advanced) by clicking
Properties, Printer Setup, or Printer in the program’s Print dialog
box or Print, Print Setup, or Page Setup in the File menu. Changes
made to these print settings will affect only the current print job.
Note: Instead of Print, Print Setup, or Page Setup, your program may
have another similarly-named option in the File menu.
4 Click Print to begin printing.
Printing from the
HP OfficeJet Manager
1 If necessary, change any of the print settings (in the Paper,
Setup, and Advanced tabs) using either of the methods described in
“Locating the print settings” earlier in this chapter.
2 Double-click the HP OfficeJet Manager on Windows desktop.
3 Click Print and select Print from the menu. The Print dialog box
will be displayed.
4 Select the file you want to print and click the Print button.
...............................................................................................................
6-8
HP Company Confidential
3/27/97 11:19 am
Getting Help
.................................................................................................................
Read this chapter to learn how to answer any
questions you may have while using your
HP OfficeJet. You’ll find many sources of helpful information, plus you’ll
learn where to look up any displayed messages you may find confusing,
how to clear error messages, and where to find additional troubleshooting
information.
Sources of Information and Help...........................7-2
Using the HP OfficeJet’s Help System...................7-5
Understanding the Messages Displayed.................7-6
on the HP OfficeJet’s Keypad
.............................................................................................
HP Company Confidential
7. Getting Help
7
Final version given to printer
3/27/97 11:19 am
Final version given to printer
Sources of Information and Help
Follow these four steps if you encounter a problem:
1 Review this chapter and the Help system for problemsolving information.
The fastest way to solve most problems is to take the corrective steps
outlined in this chapter, or in the Help system.
• If you’re not sure about the meaning of a displayed message, or you
want to know how to clear an error message, refer to “Understanding
the Displayed Messages” later in this chapter.
• If you experience a problem while using the HP OfficeJet, refer to
the Troubleshooting topics in the Help system. (See “Using the Help
System” later in this chapter to locate Troubleshooting help topics).
• Explore the How Do I? topics in the Help system if you want stepby-step instructions or maintenance information. (See “Using the
Help System” later in this chapter to locate How Do I? help topics.)
• For additional problem-solving tips, try using the following support
services: HP’s on-line support, HP’s fax-back support, or the HP support Web site. (To access these services, refer to the table on the next
page.)
2 Make sure you are operating your HP OfficeJet in the
correct environment.
The HP OfficeJet is not supported in any of the following situations:
• Roll-over phone systems (such as the automatic answering systems
often used in large companies), voicemail, call waiting, and some
other advanced features provided by your phone company.
• PC local area networks
• Windows NT
• Switch boxes
• External parallel-port peripheral connections, such as a Zip drive
(The HP OfficeJet must be connected directly to an LPT port on your
computer.)
3 Gather some basic information if you plan to call HP for
help.
If you suspect that your HP OfficeJet will have to be returned for
repair, be sure to have the following information readily available
before you contact HP or your dealer:
• Product name, model number (printed on the keypad), and serial
number (printed on the back of the HP OfficeJet),
• A description of the problem, including any error messages, and
• Purchase date and proof of purchase.
...............................................................................................................
7-2
HP Company Confidential
3/27/97 11:19 am
Final version given to printer
4 Call your dealer or the HP Customer Support Center. (Refer
to the phone numbers on the following pages.)
If you’re unable to resolve your problem after reviewing this chapter,
either contact your dealer or the HP Customer Support Center for further assistance.
An HP Customer Support representative will work with you to
quickly determine and solve any problems you may have, and let you
know whether repair is necessary.
Caution: To avoid printing problems and ink spillage, please remove
the print cartridges before repackaging and shipping the HP OfficeJet.
Organization
Telephone
Number
Support
Provided
HP Reseller
Locator Service
(800) 243-9812
Internet/World
Wide Web
http://www.hp.com/ Information on
24 hours per day
go/cposupport
products, printer
7 days per week
drivers, and support.
America Online
Log on and at the
prompt, type:
HP or HP Support
To become a
subscriber, call
(800) 827-6364.
(AOL connect
charges apply to
caller)
CompuServe
Log on and at the
prompt, type: HP
To become a
subscriber, call
(800) 524-3388 and
ask for Agent #51.
(CompuServe
connect charges
apply to caller)
(800) 333-1917
Press 1 for faxed tips
or
(24-Hour automated (208) 344-4809
faxback support
service)
HP FIRST Fax-
back
Help locating the
nearest HP
authorized dealer.
Hours of
Operation
24 hours per day
7 days per week
24 hours per day
Interactive dialog
with worldwide HP 7 days per week
customer community. Exchange of
information and links
to the HP electronic
support center home
page on the World
Wide Web. Drivers
and support
documentation.
Same as above.
24 hours per day
7 days per week
24 hours per day
Detailed product
support information 7 days per week
on common software applications
and troubleshooting
tips (all sent by fax).
...............................................................................................................
7-3
HP Company Confidential
7. Getting Help
Note: If you’re unsure of the warranty coverage, refer to the “HewlettPackard Limited Warranty Statement for Teleconnected Products,” a
short document in the box with the HP OfficeJet.
3/27/97 11:20 am
Organization
HP Bulletin
Board Service
Final version given to printer
Telephone
Number
Post Warranty
Information
(Fee-based support)
Hours of
Operation
(208) 344-1691
Electronic download 24 hours per day
of HP product infor- 7 days per week
mation, troubleshooting hints and updated
HP printer driver
information.
(208) 323-2551
Technical assistance
with setup and
operation. Repair
information and
exchange program
information.
6:00 am - 10:00 pm
MST
Mon-Fri
Post-warranty
assistance on product questions and the
most common
software
applications.
6:00 am - 10:00 pm
MST
Mon-Fri
(Real-time access
over modem)
HP Customer
Support Center
Support
Provided
(900) 555-1500
($2.50* per minute
U.S. charges start
only when you connect with a support
technician)
or
(800) 999-1148
($25.00* fee per call
U.S. Visa, or
MasterCard)
9:00 am - 4:00 pm
MST
Sat
9:00 am - 4:00 pm
MST
Sat
* Prices subject to
change without notice
(888) HP DISKS
HP OfficeJet
Software by Mail
Order floppy disks if 8:00 am - 5:00 pm
you don’t have a
EST weekdays
CD-ROM. Obtain
future software
updates.
HP Direct
Ordering
(800) 538-8787
Customer-orderable 6:00 am - 5:00 pm
supplies and accesso- PST weekdays
ries, and some documents.
(800) 227-8164
Order user’s guides.
(800) 633-3600
HP North
American
Response Center
HP service contract
information.
24 hours per day
7 days per week
...............................................................................................................
7-4
HP Company Confidential
3/27/97 11:20 am
Final version given to printer
The HP OfficeJet Series 500 Help system was designed to give you
the information you need, when you need it - Help will even guide
you step-by-step through solving problems.
Just click the Help button on any of the HP OfficeJet dialog boxes
when you need it, or explore the many topics from the main menu of
Help.
Here’s how to access the main menu:
1 On your Windows desktop, double-click HP OfficeJet Manager.
The HP OfficeJet Manager menu will be displayed.
The HP OfficeJet Manager
menu.
2 Click the Help button in the upper right-hand corner. The main
menu of the Help system will be displayed.
The main menu of
the Help system has
three tabs: How Do
I?, Troubleshooting,
and Reference.
Click through each of the three main menu tabs to learn more about
the types of help that are available to you.
...............................................................................................................
7-5
HP Company Confidential
7. Getting Help
Using the HP OfficeJet’s Help
System
3/27/97 11:20 am
Final version given to printer
How Do I? - Provides step-by-step instructions on accomplishing
your tasks.
Troubleshooting - Helps you pinpoint the causes of problems and
solve any difficulties you may experience.
Reference - Contains other information you might like to know about
your HP OfficeJet, as well as a detailed guide to using each feature in
the OfficeJet software.
? - Help is also available in every HP OfficeJet dialog box. Click the
? in the upper right corner of the dialog box, then click the setting you
want to know more about. A brief description of the setting will be
displayed.
Understanding the Messages
Displayed on the Keypad
The following messages are listed alphabetically for easy reference.
This keypad
message:
Black ink low
Has this meaning:
The black print cartridge
may be low on ink.
Depending on the density
of ink in your printouts,
you may be able to print
up to 50 pages more
before the black print
cartridge runs out of ink.
And this action is
recommended:
You are the best judge of when
it’s time to replace the black
print cartridge.
After this message is displayed,
check your printouts periodically. When the quality of the
black ink in your printouts
becomes unacceptable, remove
the used print cartridge and
replace it with a new one (HP
part number HP 51629A).
To display step-by-step, illustrated instructions on your computer screen, follow this path: HP
OfficeJet Manager/Help/How Do I?/
Maintaining the HP OfficeJet/
Replacing print cartridges.
...............................................................................................................
7-6
HP Company Confidential
3/27/97 11:20 am
Has this meaning:
And this action is
recommended:
Clear document jam, then One of the following has
press START.
happened:
• Your document jammed
while being fed through
the document tray, or
• The HP OfficeJet
loaded multiple sheets of
your document simultaneously, instead of one at
a time, or
• You loaded a document
in the document tray
that’s longer than the 14inch (35.6-cm) maximum.
• Remove the document from the
One of the following has
happened:
• Paper jammed while
being fed through the
paper supply tray, or
• The HP OfficeJet
loaded multiple sheets of
the paper supply simultaneously, instead of one at
a time, or
• The paper you loaded in
the paper supply tray is
longer than the 14-inch
(35.6-cm) maximum.
1 Remove the paper from the
paper supply tray.
Clear paper jam, then
press START.
and
Clear paper jam
document tray*, then reload it
and press Start to clear the message. Re-start your job.
Note: Do not load documents
that are longer than 14 inches
(35.6 cm).
*If the document is jammed, lift the
cover and clear the jam. To display
document jam-clearing instructions
on your computer screen, follow this
path: HP OfficeJet Manager/Help/
Troubleshooting/Scanning/Paper is
jammed or isn’t feeding properly/
Document is stuck in the HP OfficeJet.
2 Open the cover and clear
the paper path. (To display stepby-step, illustrated instructions
on your computer screen, follow
this path: HP OfficeJet Manager/
Help/How Do I?/Maintaining the HP
OfficeJet/Clearing a paper jam.)
3 Pull the document tray forward, reload the paper* into the
paper supply tray, then push the
document tray back into place.
* If you have plain paper loaded,
turn over the stack of paper before
reloading it, so that any curl in the
paper is reversed.
Note: Do not load paper that’s
longer than 14 inches (35.6 cm)
into the paper supply tray.
4 Press Start to clear the message and reset the HP OfficeJet.
...............................................................................................................
7-7
HP Company Confidential
7. Getting Help
This keypad
message:
Final version given to printer
3/27/97 11:20 am
This keypad
message:
Final version given to printer
Has this meaning:
Clear paper/document
One of the following has
jam, then power Off/On. happened:
• A serious print jam has
occurred, or
• You manually moved
the print cartridge holder
out of its position, or
• Part of the printing
mechanism has been
damaged.
And this action is
recommended:
1 Open the cover and clear
the paper path. (To display stepby-step, illustrated instructions
on your computer screen, follow
this path: HP OfficeJet Manager/
Help/How Do I?/Maintaining the HP
OfficeJet/Clearing a paper jam.)
2 Remove any documents
from the document tray.
3 Reset the HP OfficeJet by
pressing the On/Off button on
the keypad twice (this turns it
off, then on again), then click the
Reconnect Now button on your
computer screen.
If this doesn’t clear the display,
try unplugging and replugging
the power cord from the wall.
If the message still isn’t cleared,
write it down and call the HP
Customer Support Center at
(208) 323-2551 for help.
Close cover
One of the following has
happened:
• The cover of the HP
OfficeJet was opened.
• The scanner cover was
removed or misinstalled.
Copy failed
The HP OfficeJet ran out Copy using the HP OfficeJet’s
of memory while copying Document Assistant screen on
your document.
your computer, instead of from
the keypad.
Copies made from the Document
Assistant use your computer’s
memory, which is more extensive than the HP OfficeJet’s
memory.
Refer to Chapter 4 for step-bystep copying instructions.
Close the cover on the front of
the HP OfficeJet, and make sure
you hear the “click” that tells
you it’s completely closed.
If this doesn’t clear the message,
follow the instructions under the
“Replace scanner cover” message later in this table.
Print jobs will be susAny print jobs that were suspended temporarily, and pended will continue normally.
all other jobs will be can- You will need to re-start any
celled.
faxes you were sending, and any
copy or scan jobs.
...............................................................................................................
7-8
HP Company Confidential
3/27/97 11:20 am
Has this meaning:
And this action is
recommended:
Dialed fax busy
While sending a fax, the
HP OfficeJet encountered a busy signal.
To redial the fax number, you
can do either of the following:
• You can press the Redial button to redial the fax number
manually, or
• If the Automatic Redial feature
is turned on (the factory setting),
the number will be automatically
redialed at intervals.
Refer to the “Redialing a fax
number” section in Chapter 3 for
redialing information.
Doc memory full
The HP OfficeJet’s docu- This message should clear automent memory has been
matically when the next task
completely filled.
starts (for example, when you
start a copy or receive a fax).
• If this message persists, press
the On/Off button twice to reset
the HP OfficeJet, then click the
Reconnect now button on your
computer screen.
Fax send failed
An error occurred during Refer to the Fax History log for
faxing.
the reason the fax failed, then try
resending if appropriate.
To display the Fax History log
on your computer screen, follow
this path: HP OfficeJet Manager/
Fax/Fax History/Sent Faxes tab.
Getting document from
PC
A document is being
No action is required.
transferred from your
software application to
the HP OfficeJet in preparation for faxing it.
Group fax failed
An error occurred during
faxing to a group of fax
numbers.
The HP OfficeJet may
have faxed successfully
to some of the group of
fax numbers.
Refer to the Fax History log for
the reason the fax failed, then try
resending, if appropriate.
To display the Fax History log
on your computer screen, follow
this path: HP OfficeJet Manager/
Fax/Fax History/Sent Faxes tab.
...............................................................................................................
7-9
HP Company Confidential
7. Getting Help
This keypad
message:
Final version given to printer
3/27/97 11:20 am
This keypad
message:
Final version given to printer
Has this meaning:
And this action is
recommended:
If new black cartridge,
press 1.
If used, press 2.
You have just installed a
black print cartridge.
You are being prompted
to specify whether you
removed and replaced a
used cartridge, or whether
you installed a brand new
cartridge (just out of the
box).
If you removed a used cartridge
and replaced it with a brand new
one: Press 1 on the keypad. A
message on your computer
screen prompts you to align the
new print cartridge; this action is
recommended for best output.
If you removed a used cartridge
and replaced the same cartridge:
Press 2 on the keypad.
If new color cartridge,
press 1. If used,
press 2.
You have just installed a
color print cartridge.
You are being prompted
to specify whether you
removed and replaced a
used cartridge, or whether
you installed a brand new
cartridge (just out of the
box).
If you removed a used cartridge
and replaced it with a brand new
one: Press 1 on the keypad. A
message on your computer
screen prompts you to align the
new print cartridge; this action is
recommended for best output.
If you removed a used cartridge
and replaced the same cartridge:
Press 2 on the keypad.
Ink drying, press START To avoid smearing, the
to cancel.
ink on the printout in the
output tray requires time
to dry.
The HP OfficeJet will
display this message for
up to six minutes.
Nothing will be printed
during the ink drying
time.
No action is required.
Optional: To skip the ink drying
time and continue your current
job: Remove the top page from
the output tray, then press the
Start button to clear this message.
Insert black cartridge
Install a black print cartridge.
If you’re replacing a used black
print cartridge with a brand new
one, and you want step-by-step,
illustrated instructions displayed
on your computer screen, follow
this path: HP OfficeJet Manager/
You removed the black
print cartridge from its
holder.
Most HP OfficeJet functions are inoperative until
the black print cartridge is
replaced.
Help/How Do I?/Maintaining the HP
OfficeJet/Replacing print cartridges.
Insert color cartridge
You removed the color
print cartridge from its
holder.
Most HP OfficeJet functions are inoperative until
the color print cartridge is
replaced.
Install a color print cartridge.
If you’re replacing a used color
print cartridge with a brand new
one, and you want step-by-step,
illustrated instructions displayed
on your computer screen, follow
this path: HP OfficeJet Manager/
Help/How Do I?/Maintaining the HP
OfficeJet/Replacing print cartridges.
...............................................................................................................
7-10
HP Company Confidential
3/27/97 11:20 am
Insert connector
Has this meaning:
The fax/phone line connector has been removed.
(This is the connector to
which your phone cords
are attached. It fits into
the back of the HP
OfficeJet.)
The HP OfficeJet can’t
send or receive faxes until
the connector is replaced.
And this action is
recommended:
1 For safety, press the
On/Off button to turn off the HP
OfficeJet before re-installing the
fax/phone line connector.
2 Re-install the fax/phone line
connector.
For illustrated instructions, refer
to Step 2 in the HP OfficeJet
Series 500 Ready/Setup/Go
guide.
3 Press the On/Off button to
turn on the HP OfficeJet, then
click the Reconnect now button
on your computer screen.
Load A-size paper, then
press START.
The paper or envelope
you loaded in the paper
supply tray has a narrower width than the
paper size that’s needed
for receiving faxes or
printing.
(A-size is letter-size
paper, 8.5 inches wide by
11 inches high.)
Load A4-size paper, then The paper or envelope
press START.
you loaded in the paper
supply tray has a narrower width than the
paper size that’s needed
for receiving faxes or
printing.
(A4-size is European letter-size paper, 210 mm
wide by 297 mm high.)
Load doc to send
You’ve specified that you
want to begin sending a
group fax, but there’s no
document loaded in the
document tray.
1 Do either of the following:
• Load A-size paper in the paper
supply tray, or
• If you’re printing on envelopes,
change the paper size (in your
software program’s page setup
settings) to envelopes.
2 Press the Start button to
clear the message.
1 Do either of the following:
• Load A4-size paper in the
paper supply tray, or
• If you’re printing on envelopes,
change the paper size (in your
software program’s page setup
settings) to envelopes.
2 Press the Start button to
clear the message.
Load the document in the document tray that you want to send
as a group fax. Then press the
Start button.
...............................................................................................................
7-11
HP Company Confidential
7. Getting Help
This keypad
message:
Final version given to printer
3/27/97 11:20 am
This keypad
message:
Load legal-size paper,
then press START.
Final version given to printer
Has this meaning:
The paper or envelope
you loaded in the paper
supply tray has a narrower width than the
paper size that’s needed
for receiving faxes or
printing.
(Legal-size paper is 8.5
inches wide by 14 inches
high.)
And this action is
recommended:
1 Do either of the following:
• Load legal-size paper in the
paper supply tray, or
• If you’re printing on envelopes,
change the paper size (in your
software program’s page setup
settings) to envelopes.
2 Press the Start button to
clear the message.
Memory full, press
START
While you were sending a
1 Press Start to clear the mesgroup fax or making a
sage.
copy, the HP OfficeJet’s
memory filled to its
2 Select the appropriate case:
capacity.
• If you were sending a group fax
from the keypad using a speed
dial code:
a) Send the document using the
Document Assistant (more memory is available), or
b) Send a document with fewer
pages.
• If you were making a copy:
Try copying from the Document
Assistant. For step-by-step illustrated instructions, refer to Chapter 4.
No fax answered
There were no answering Check to make sure you faxed to
fax tones at the receiving the correct number, then try
fax machine.
sending the fax again.
If the recipient needs to receive
faxes manually, you may need to
call to notify the recipient that
you’re sending a fax.
No group send
You have begun real-time
dialing, and you entered a
speed dial code that’s
been assigned to a group
of fax numbers.
In this situation, faxing to
a group is not allowed.
Use the dialing instructions in
the “Speed dialing” section of
Chapter 3 (under “Sending
from the keypad”).
...............................................................................................................
7-12
HP Company Confidential
3/27/97 11:20 am
Has this meaning:
And this action is
recommended:
Off hook...
You pressed the Start
button, and this gives you
a dial tone so that you can
begin real-time dialing to
send a fax.
Phone off-hook
You lifted the receiver of Begin dialing a phone or fax call
at any time.
a phone that’s attached
directly to the HP OfficeJet, and you have a dial
tone.
Press START to
re-enter date, or
STOP to skip.
While the HP OfficeJet
was disconnected from
your computer, you
entered an invalid date on
the HP OfficeJet’s keypad.
The current date will be
entered on the header of
the faxes you send, so
accuracy is important.
Press the Start button to enter a
valid date, or re-connect to your
computer.
When you re-connect the HP
OfficeJet to your computer, the
current time and date will be
automatically sent to the HP
OfficeJet. (See note below.)
Press START to set time/ The HP OfficeJet was
date, or
disconnected from your
STOP to skip.
computer and then lost
power, so you are being
prompted to manually
enter the current time and
date.
Note: The current time
and date will be entered
on the header of the faxes
you send, so accuracy is
important.
Press the Start button to begin
entering the current time and
date, or re-connect to your computer.
Note: When the HP OfficeJet is
connected to your computer
(using the bi-directional parallel
cable that’s included in the box),
you won’t need to set the date
and time; the date and time on
the HP OfficeJet’s message display are automatically loaded
from your computer. (Refer to
the illustrated connection
instructions in the Ready/Setup/
Go guide.)
Receive failed
Begin dialing the fax number to
send a fax using the real-time
dialing method.
For step-by-step, illustrated
instructions, refer to “Dialing in
real time” (under the “Sending
from the keypad” section) in
Chapter 3.
While you were receiving If you know the identity of the
a fax, a communication person sending the fax, call and
ask them to resend it.
error occurred between
the HP OfficeJet and the
sending fax machine.
Failed transmissions are
most often caused by
“noise” on the telephone
line.
...............................................................................................................
7-13
HP Company Confidential
7. Getting Help
This keypad
message:
Final version given to printer
3/27/97 11:20 am
This keypad
message:
Final version given to printer
Has this meaning:
And this action is
recommended:
Reconnect to PC
You replaced the original
fax/phone line connector
with one that’s intended
for a different country,
then reset the HP
OfficeJet’s power.
Faxing may not be possible until you reconnect
the HP OfficeJet to your
computer.
Click the Reconnect now
button on your computer screen.
This message should be cleared.
If the message persists, try pressing the On/Off button twice,
then clicking Reconnect now
again on your computer screen.
Redial in xxx s
You sent a fax that was
unsuccessful (due to a
busy signal or no
answer).
Now the Automatic
Redial procedure has
begun. The next redial
will occur after the number of seconds indicated
on the message display.
You don’t need to do anything.
If you prefer to manually redial
again right away, instead of waiting for the next automatic redial,
press the Redial/Pause button
any time.
For information about manual
and automatic redialing, refer to
“Redialing a fax number”
(under “Using Advanced Fax
Features”) in Chapter 3.
Re-insert black cartridge The black print cartridge
has either been misinstalled, or it is defective.
Most HP OfficeJet functions will be inoperative
until this problem is
resolved.
Remove the black print cartridge, re-install* it, and close
the cover.
If the message is still displayed,
try the above procedure one
more time. If the message hasn’t
cleared, replace* the black print
cartridge with a brand new one.
*To display step-by-step, illustrated
instructions on your computer
screen, follow this path: HP OfficeJet Manager/Help/How Do I?/Maintaining the HP OfficeJet/Replacing
print cartridges.
Re-insert color cartridge
The color print cartridge
has either been misinstalled, or it is defective.
Most HP OfficeJet functions will be inoperative
until this problem is
resolved.
Remove the color print cartridge,
re-install* it, and close the cover.
If the message is still displayed,
try the above procedure one
more time. If the message hasn’t
cleared, replace* the color print
cartridge with a brand new one.
*To display step-by-step, illustrated
instructions on your computer
screen, follow this path: HP OfficeJet Manager/Help/How Do I?/Maintaining the HP OfficeJet/Replacing
print cartridges.
...............................................................................................................
7-14
HP Company Confidential
3/27/97 11:20 am
Has this meaning:
And this action is
recommended:
While copying, sending a
fax, or scanning, the HP
OfficeJet wasn’t able to
load a sheet you placed in
the document tray.
Remove the document from the
document tray, reload it, and restart the job you were doing.
Note: You don’t need to reload
pages that were already faxed.
Reload paper, then press One of the following
START.
problems has occurred:
• There’s no paper in the
paper supply tray, or
• Paper was loaded incorrectly in the paper supply
tray, or
• The HP OfficeJet
wasn’t able to load a
sheet from the paper
supply tray.
If there’s no paper in the paper
tray when the error occurred:
Pull the document tray forward,
load paper in the paper supply
tray*, push the document tray
back into place, and press the
Start button.
If there’s paper in the paper tray
when the error occurred:
Remove the paper and stack it on
a flat surface. Pull the document
tray forward, load the paper in
the paper supply tray*, push the
document tray back into place,
and press the Start button.
Reload document, then
re-start job.
*For step-by-step, illustrated paperloading instructions, refer to “5.
Load the paper supply” in Chapter 1.
Replace scanner cover
One of these problems
happened with the scanner cover:
• You removed the scanner cover from inside the
HP OfficeJet and didn’t
replace it, or
• You replaced the scanner cover incorrectly.
Open the HP OfficeJet’s top
cover, then perform the
appropriate action:
If the scanner cover is missing:
Replace the scanner cover* and
close the top cover.
Scanner
cover
If the scanner cover is in place:
Remove the scanner cover*,
replace it, then close the cover.
...............................................................................................................
7-15
HP Company Confidential
7. Getting Help
This keypad
message:
Final version given to printer
3/27/97 11:20 am
This keypad
message:
Replace wrong black
cartridge.
Final version given to printer
Has this meaning:
And this action is
recommended:
The black print cartridge
you loaded is not supported by the HP OfficeJet and will not work.
Most HP OfficeJet functions will be inoperative
until this problem is
resolved.
Open the cover and remove the
black print cartridge.
Replace it with the correct black
print cartridge, which has part
number HP 51629A.
To display step-by-step, illustrated instructions on your computer screen, follow this path: HP
OfficeJet Manager/Help/How Do I?/
Maintaining the HP OfficeJet/
Replacing the print cartridges.
Replace wrong
color cartridge.
The color print cartridge
you loaded is not supported by the HP OfficeJet and will not work.
Most HP OfficeJet functions will be inoperative
until this problem is
resolved.
Open the cover and remove the
color print cartridge.
Replace it with the correct color
print cartridge, which has part
number HP 51649A.
To display step-by-step, illustrated instructions on your computer screen, follow this path: HP
OfficeJet Manager/Help/How Do I?/
Maintaining the HP OfficeJet/
Replacing the print cartridges.
Scan failed
The communication
between the HP OfficeJet
and your computer failed
during scanning.
Look at your computer screen
for any error messages, and take
the recommended corrective
action.
Speed dial empty
You tried to dial a speed
dial code that doesn’t
have a fax number stored
in it.
Choose a speed dial code to
which you have already assigned
a fax number.
To check which speed dial codes
you’ve assigned, follow this path
to look in your Phone Book: HP
OfficeJet Manager/Fax/Phone Book.
Storing received fax on
PC.
You have specified that
received faxes should be
stored on your computer,
not printed from the HP
OfficeJet.
This message is notifying
you that a received fax is
in the process of being
stored to your computer
(PC).
No action is recommended.
To view your received fax on
your computer screen, select it in
the Received Faxes tab* and
click View Fax.
* Follow this path to find the
Received Faxes tab: HP OfficeJet
Manager/Fax/Fax History/Received
Faxes tab
...............................................................................................................
7-16
HP Company Confidential
3/27/97 11:20 am
Has this meaning:
SYSTEM ERROR XXXX A very serious error has
occurred that may
require the HP OfficeJet
to be serviced.
All HP OfficeJet functions will be inoperative
until this problem is
resolved.
XX Unassigned
And this action is
recommended:
Press the On/Off button once to
reset the HP OfficeJet, then click
Reconnect Now on your computer screen. If the message is
cleared from the display, the
problem has been solved and you
can continue using your HP
OfficeJet normally.
If the message continues to be
displayed, there’s an internal
problem that requires servicing.
Please record the 4-digit error
number in the message, then
contact the HP Customer Support Center at (208) 323-2551.
The displayed speed dial Choose a speed dial code to
code (XX) doesn’t have a which you have already assigned
fax number stored in it. a fax number.
To check which speed dial codes
you’ve assigned, follow this path
to look in your Phone Book: HP
OfficeJet Manager/Fax/Phone Book.
Will dial soon
No action is recommended.
The HP OfficeJet’s fax
line was unavailable
when trying to dial a fax
number.
The HP OfficeJet will try
to dial the number again
after a few seconds.
Wrong connector
The wrong type of fax/
phone line connector is
installed.
(This is the connector to
which your phone cords
are attached. It fits into
the back of the HP
OfficeJet.)
Write down the error message
and call the HP Customer Support Center at (208) 323-2551.
...............................................................................................................
7-17
HP Company Confidential
7. Getting Help
This keypad
message:
Final version given to printer
3/27/97 11:21 am
Final version given to printer
.................................................................................................................
This chapter provides detailed information on
the product specifications, ordering instructions
for supplies and accessories, and regulatory information.
Product Specifications ............................................8-2
• Overall Specifications ................................................ 8-2
• Printing Specifications ............................................... 8-2
• Faxing Specifications.................................................. 8-3
• Copying Specifications............................................... 8-4
• Scanning Specifications.............................................. 8-5
Ordering Information .............................................8-5
Obtaining a Material Safety Data Sheet ................8-6
Regulatory Information ..........................................8-6
.............................................................................................
HP Company Confidential
8. Specifications
8
Specifications
3/27/97 11:21 am
Final version given to printer
Product Specifications
The specifications that follow are subject to change without notice.
Overall Specifications
Dimensions
Operating Environment
With tray installed
17.0w x 14.15d x 10.15h (inches)
430w x 359d x 258h (mm)
Without tray installed
17.0w x 11.25d x 8.15h (inches)
430w x 285d x 207h (mm)
Temperature range for best print quality:
15°C (59°F) to 35°C (95°F)
Weight
Maximum noise level generated:
Sound Power, LwAd = 5.8 dB(A)
Sound Pressure, LpAm = 50 dB(A)
15 lb (6.80 kg)
Allowable temperature/humidity range:
5°C (41°F) to 40°C (104°F)
15-80% relative humidity non-condensing
Power Supply
120 V, grounded
Reliability
Power Consumption
50,000 page life (printer)
20,000 pages life (scanner)
830 printed pages per month maximum
9 watts at idle, 25 watts maximum
Printing Specifications
Print Method
Print Speed
Plain paper drop-on-demand thermal inkjet
Monochrome
Best Mode = 1 ppm (page per minute)
Normal Mode = 2.5 ppm
EconoFast Mode = 4 ppm
Color
Best Mode = 0.3 ppm
Normal Mode = 0.7 ppm
EconoFast = 1 ppm
Print Resolution
Monochrome
Best Mode = 600 x 600 dpi
Normal Mode = 600 x 300 dpi
EconoFast Mode = 300 x 300 dpi
Color
Best Mode = 300 x 300 dpi
Normal Mode = 300 x 300 dpi
EconoFast = 300 x 300 dpi
Printer Command Language
HP PCL Level 3
Software Compatibility
Microsoft Windows 3.1 and Windows 95.
Also compatible with a range of DOS applications.
DOS software must be able to run under Windows.
Printer I/O Interface
Bi-directional Parallel (Centronics)
(continued on next page)
...............................................................................................................
8-2
HP Company Confidential
3/27/97 11:21 am
Final version given to printer
Printing Specifications (Continued)
Paper Sizes*
Paper Weight
Plain paper
U.S. letter = 8.5 x 11 in
U.S. legal = 8.5 x 14 in
U.S. executive = 7.25 x 10.5 in
A4 = 210 x 297 mm
A5 = 148 x 210 mm
B5 = 182 x 257 mm
Envelopes
U.S. #10 = 4.12 x 9.5 in
DL = 110 x 220 mm
D6 = 114 x 162 mm
A2 = 111 x 146 mm
Cards
U.S. index cards = 4 x 6 in; 5 x 8 in
A6 = 105 x 148 mm
Transparencies
U.S. letter = 8.5 x 11 in
Plain = 20 to 32 lb
Card Stock = 40 to 60 lb
Plain paper:
Top margin = 2.0 mm
Bottom margin = 14 mm
Left/Right margins:
U.S. = 6.3 mm
International = 3.4 mm
8. Specifications
* Maximum width = 8.5 in (214 mm)
Maximum length = 14 in (355 mm)
Paper Margins (Printing)*
Envelopes and cards:
Top margin = 2.0 mm
Bottom margin = 19 mm
Left/Right margins = 3.2 mm
* These margins represent the maximum printable
area for this device. However, your printer driver may
create a smaller printable area.
Tray Capacities
Paper/Media Types
Plain paper
Card Stock
Envelopes
HP Premium InkJet Paper
HP Premium Transparency Film
HP Bright White Paper
HP Premium Glossy Paper
HP Greeting Card Paper
Avery paper labels (for InkJet printers)
Plain paper (20-lb bond) 150 sheets
Card stock
50 sheets
Envelopes
10 envelopes
HP Premium InkJet Paper 100 sheets
HP Premium Transparency50 sheets
HP Bright White Paper
150 sheets
HP Premium Glossy Paper50 sheets
HP Greeting Card Paper 50 sheets
Avery Paper Labels
25 sheets
Faxing Specifications
Compatibility
Fax Image Memory
ITU Group 3 fax / standard Error
Correction Mode (ECM)
OfficeJet 500
35 pages (ITU-T Test Image #1)
OfficeJet 520 & 570
45 pages (ITU-T Test Image #1)
OfficeJet 580
55 pages (ITU-T Test Image #1)
OfficeJet 590
65 pages (ITU-T Test Image #1)
Transmission Speed
6 seconds/page (ITU-T Test Image #1)
Modem Speed
14400, 12000, 9600, 7200, 4800, 2400 bps
Automatic Fax/Telephone Answering Machine (TAM) Switching
Distinctive Ring Detect
Yes
Yes
(continued on next page)
...............................................................................................................
8-3
HP Company Confidential
3/27/97 11:22 am
Final version given to printer
Fax Specifications (Continued)
Fax Blocking/
Automatic Fax Forwarding*
Paper/Media Types (Faxes Sent)
HP OfficeJet Models 570, 580, and 590.
Plain paper
HP Document Carrier Sheets
*This option is only available using the HP OfficeJet
Manager software.
Paper Margins (Faxes Sent)
Top margin = 3.0 mm
Bottom margin = 2.0 mm
Left/Right margins:
U.S. letter = 0.0 mm
A4 = 0.0 mm
Fax Resolution
Standard = 200 x 100 dpi
Fine = 200 x 200 dpi
300 dpi = 300 x 300 dpi
Photo = 300 dpi grayscale
Paper Sizes (Faxes Sent)*
U.S. letter = 8.5 x 11 in
U.S. legal = 8.5 x 14 in
A4 = 210 x 297 mm
Document Tray Capacity
20 sheets of 20 lb bond paper
Speed Dial Numbers
* Maximum Width = 8.5 in (216 mm)
Maximum Length = 14 in (355 mm)
Paper Weight (Faxes Sent)
OfficeJet 500 = 40
OfficeJet 520 = 80
OfficeJet 570 = 50
OfficeJet 580 = 80
OfficeJet 590 = 100
20 to 24 lb
Copying Specifications
Copy Speed
Paper Sizes (Document Tray)*
1 ppm (page per minute) first page
2 ppm thereafter
Copy Resolution
Text setting = 600 x 300 dpi
Photo setting = 300 dpi grayscale
Up to 99
Copy Reduction/Enlargement*
50-200%
* This option is only available using the HP OfficeJet
Manager software.
Paper Sizes (Paper Tray)*
* Plain paper only 20 to 32 lb.
* Maximum Width = 8.5 in (216 mm)
Maximum Length = 14 in (355 mm)
Paper Margins (Copying)
Multiple Copies
U.S. letter = 8.5 x 11 in
U.S. legal = 8.5 x 14 in
A4 = 210 x 297 mm
U.S. letter = 8.5 x 11 in
U.S. legal = 8.5 x 14 in
A4 = 210 x 297 mm
Top margin = 3.0 mm
Bottom margin = 2.0 mm
Left/Right margins:
U.S. letter = 0.0 mm
A4 = 0.0 mm
Paper/Media Types (Document
Tray)
Plain paper
HP Document Carrier Sheets
Paper Weight (Document Tray)
20 to 24 lb
...............................................................................................................
8-4
HP Company Confidential
3/27/97 11:22 am
Final version given to printer
Scanning Specifications
Paper Sizes (Document Tray)*
OfficeJet Models 500 and 520
300 dpi — up to 256 shades of gray
OfficeJet Model 570, 580, and 590
600 dpi — up to 256 shades of gray
(enhanced)
U.S. letter = 8.5 x 11 in
U.S. legal = 8.5 x 14 in
A4 = 210 x 297 mm
Paper Margins (Scanning)
Top margin = 3.0 mm
Bottom margin = 2.0 mm
Left/Right margins:
U.S. letter = 0.0 mm
A4 = 0.0 mm
* Maximum Width = 8.5 in (216 mm)
Maximum Length = 14 in (355 mm)
Paper/Media Types (Document Tray)
Plain paper
HP Document Carrier Sheets
Paper Weight (Document Tray)
20 to 24 lb
Ordering Information
To order the HP supplies and accessories listed below, contact your
nearest HP dealer. To order user’s guides, call 1-800-227-8164.
Supply/Accessory
HP Reorder
Number
Bi-directional Parallel Interface Cable
C2590A or C2591A
High Capacity Black InkJet Print Cartridge
51629A
High Capacity Color InkJet Print Cartridge
51649A
Media
HP Premium Transparency Film (U.S. letter)
HP Premium Transparency Film (A4)
HP Premium InkJet Paper (U.S. letter)
HP Premium InkJet Paper (A4)
HP Bright White Inkjet Paper (U.S. letter)
HP Bright White Inkjet Paper (A4)
HP Greeting Card Paper (U.S. letter)
HP Premium Glossy Paper (U.S. letter)
HP Premium Glossy Paper (A4)
C3828A
C3832A
51634Y
51634Z
C1824A
C1825A
C1812A
C3836A
C3837A
HP OfficeJet Series 500 User’s Guide
C3801-90001
...............................................................................................................
8-5
HP Company Confidential
8. Specifications
Scan Resolution
3/27/97 11:22 am
Final version given to printer
Obtaining a Material Safety
Data Sheet (MSDS)
You can obtain the current MSDS for the print cartridges (HP Part
Numbers 51629A and 51649A) used in the HP OfficeJet Series 500
by mailing a request to this address in the USA:
Hewlett-Packard
Direct Marketing Organization, Bldg. 51LSE
P.O. Box 58059
Santa Clara, CA 95051-8059
Regulatory Information
The following sections describe the product requirements from the Federal
Communications Commission (FCC, U.S. only).
Notice to Users of the U.S. Telephone
Network: FCC Requirements
This equipment complies with FCC rules, Part 68. On this equipment is a
label that contains, among other information, the FCC Registration Number
and Ringer Equivalent Number (REN) for this equipment. If requested, provide this information to your telephone company.
An FCC compliant telephone cord and modular plug is provided with this
equipment. This equipment is designed to be connected to the telephone network or premises wiring using a compatible modular jack which is Part 68
compliant. This equipment connects to the telephone network through the
following standard network interface jack: USOC RJ-11C.
The REN is useful to determine the quantity of devices you may connect to
your telephone line and still have all of those devices ring when your number
is called. Too many devices on one line may result in failure to ring in
response to an incoming call. In most, but not all, areas the sum of the RENs
of all devices should not exceed five (5). To be certain of the number of
devices you may connect to your line, as determined by the REN, you should
call your local telephone company to determine the maximum REN for your
calling area.
If this equipment causes harm to the telephone network, your telephone
company may discontinue your service temporarily. If possible, they will
notify you in advance. If advance notice is not practical, you will be notified
as soon as possible. You will also be advised of your right to file a complaint
with the FCC.
Your telephone company may make changes in its facilities, equipment,
operations, or procedures that could affect the proper operation of your
equipment. If they do, you will be given advance notice so you will have the
opportunity to maintain uninterrupted service.
If you experience trouble with this equipment, please contact the manufac-
...............................................................................................................
8-6
HP Company Confidential
3/27/97 11:22 am
Final version given to printer
•
•
Note:
Remain on the line and explain to the dispatcher the reason for the call.
Perform such activities in the off-peak hours, such as early morning or late
evening.
The FCC hearing aid compatibility rules for telephones are not applicable to this
equipment.
The Telephone Consumer Protection Act of 1991 makes it unlawful for any
person to use a computer or other electronic device, including fax machines,
to send any message unless such message clearly contains in a margin at the
top or bottom of each transmitted page or on the first page of transmission,
the date and time it is sent and an identification of the business, other entity,
or other individual sending the message and the telephone number of the
sending machine or such business, other entity, or individual. (The telephone
number provided may not be a 900 number or any other number for which
charges exceed local or long-distance transmission charges.) In order to program this information into your fax machine, you should complete the steps
described in the software.
Electromagnetic or Radio Frequency
Interference: FCC Requirements
This equipment generates and uses radio frequency energy and may cause
interference to radio and television reception. Your facsimile complies with
the specifications of Part 15 of the Federal Communications Commission
rules for a Class B digital device. These specifications provide reasonable
protection against such interference in residential installation. However,
there is no guarantee that interference will not occur in a particular installation. If the facsimile does cause interference to radio or television reception,
which can be determined by turning the facsimile off and on, you can try to
eliminate the interference problem by doing one or more of the following.
•
•
•
•
Reorient the receiving antenna.
Reorient the position of the facsimile with respect to the receiver.
Move the facsimile away from the receiver.
Plug the facsimile into a different outlet so that the facsimile and the receiver are
on different branch circuits.
If necessary, consult an authorized HP service agency or an experienced
radio/television technician for additional suggestions. You may find the following booklet, prepared by the Federal Communications Commission, to
be helpful: “How to Identify and Resolve Radio/TV Interference Problems.”
This booklet is available from the US Government Printing Office, Washington DC 20402, Stock No. 004-000-00345-4.
CAUTION:
Changes or modifications not expressly approved by Hewlett-Packard for compliance could void the user's authority to use the equipment.
...............................................................................................................
8-7
HP Company Confidential
8. Specifications
turer, or look elsewhere in this manual, for warranty or repair information.
Your telephone company may ask you to disconnect this equipment from the
network until the problem has been corrected or until you are sure that the
equipment is not malfunctioning.
This equipment may not be used on coin service provided by the telephone
company. Connection to party lines is subject to state tariffs. Contact your
state's public utility commission, public service commission, or corporation
commission for more information.
This equipment includes automatic dialing capability. When programming
and/or making test calls to emergency numbers:
3/27/97 11:22 am
Final version given to printer
Declaration of Conformity
According to ISO/IEC Guide 22 and EN 45014
Manufacturer’s Name:
Manufacturer’s Address:
Hewlett-Packard Company
16399 West Bernardo Drive
San Diego, CA 92127-1899, USA
declares that the product
Product Name:
OfficeJet Series 500
Printer/Fax/Copier/Scanner
Model Number:
Product Options:
C3801A, C3803A
500, 520, 570, 580, 590
conforms to the following product specifications:
Safety:
IEC 950:1991+A1+A2+A3 / EN 60950:1992+A1+A2+A3
IEC 825-1:1993 / EN 60825-1:1994 Class 1 (Laser/LED)
EMC:
CISPR 22:1993+A1 / EN 55022:1994 Class B1
EN 50082-1:1992
IEC 801-2:1991 / prEN 55024-2:1992 - 4 kV CD, 8kV AD
IEC 801-3:1984 / prEN 55024-3:1991 - 3V/m
IEC 801-4:1988 / prEN 55024-4:1992 - 0.5 kV Signal Lines
1.0 kV Power Lines
IEC 1000-3-2:1995 / EN61000-3-2:1995
IEC 1000-3-3:1994 / EN61000-3-3:1995
FCC Title 47 CFR, Part 15 Class B2 / ICES-003, Issue 2
AS / NZS 3548:1992 / CISPR 22:1993 Class B1
1 The product was tested in a typical configuration with Hewlett-Packard Personal Computer Systems.
2 This Device complies with Part 15 of the FCC Rules. Operation is subject to the following two conditions:
(1) this device may not cause harmful interference, and (2) this device must accept any interference
received, including interference that may cause undesired operation.
Supplementary Information:
The product herewith complies with the requirements of the following Directives and carries the
CE-marking accordingly:
•the EMC directive 89/336/EEC
•the Low Voltage Directive 73/23/EEC
For Compliance Information ONLY
Australia:
Europe:
USA:
Product Regulations Manager, Hewlett-Packard Australia Ltd., 31-41 Joseph Street,
Blackburn, Victoria 3130, Australia
Your local HP sales and service office or Hewlett-Packard Gmbh, Department HQTRE / Standards Europe, Herrenberger Straße 130, D-71034 Böblingen (FAX: +497031-14-3143)
Product Regulations Manager, Hewlett-Packard Company, San Diego Division,
16399 West Bernardo Drive, San Diego, CA, 92127-1899 (Ph: 619-487-4100)
...............................................................................................................
8-8
HP Company Confidential
3/27/97 11:24 am
Final Version Given to Printer
Index
Symbols
cartridges. See print cartridges
(-) dash
indicating pause during dialing 3-15
A
collating
automatic 4-5
how to turn on/off 4-8
ColorSmart settings 6-6
accessories, ordering information 8-5
Advanced tab settings 6-7
computer voicemail. See connecting
America Online, help sources 7-3
answering settings, receiving faxes 3-9,
3-21
answering machine. See connecting
AutoAnswer button 3-9
automatic collating 4-5
automatic receiving, of faxes
changing settings for 3-9
Automatic Redial setting 3-15
B
bidirectional cable. See printer cable
buttons
AutoAnswer 3-9
Cancel 3-7, 4-6, 5-4
Contrast/Resolution 3-12, 3-14, 4-4, 4-5
Help (software) 2-8, 6-5, 7-5
Redial/Pause 3-15
Speed Dial 3-5
Start 3-3
Stop 3-3, 4-6
C
cables. See printer cable
calling card charging, of fax call 3-3
Cancel button 3-7, 4-6, 5-4
cancelling
of fax in progress 3-3, 3-7
of scan in progress 5-4
cards. See media types
CompuServe, help sources 7-3
connecting
dedicated fax line
with external modem 1-11
with no other office equipment 1-10
with PC-modem 1-10
office equipment to OfficeJet 1-7, 1-8
shared fax and phone line
with answering machine 1-15
with computer voicemail 1-16
with distinctive ring 1-22
with external modem 1-14
and answering machine 1-19
and computer voicemail 1-20
with no other office equipment 1-12
with PC-modem 1-13
and answering machine 1-17
and computer voicemail 1-18
Contrast/Resolution button 3-12, 3-14,
4-4, 4-5
contrast settings
for copying 4-5
for paper fax
from Document Assistant 3-14
from keypad 3-14
for PC fax 3-14
for scanning 5-3, 5-4
Copy dialog box
collating 4-8
illustration of 2-5
settings 2-5, 4-6
copying
automatic collating 4-5
controlling how they look 4-4, 4-7
changing size 4-7
...............................................................................................................
i
HP Company Confidential
3/27/97 11:24 am
Final Version Given to Printer
Cover Page Data 3-20
Fax Send Time 3-20
Phone Book 3-20
Print Settings 6-5
Scan 2-6
Scan Settings 5-3
Send Fax 2-3, 3-6
darkening and lightening 4-5, 4-7
quality 4-4, 4-7
error messages 7-8
from Document Assistant 2-5, 4-6
from keypad 2-4, 4-3
loading document for 4-3, 4-4
loading paper supply for 4-2
margins 8-4
overview 2-4, 2-5
resolution 8-4
specifications 8-4
speed 8-4
tests to ensure working properly 1-25
display messages. See error messages
distinctive ring
how to use 3-23
in shared fax and phone line 1-22
Document Assistant
faxing paper documents from 2-2, 3-6
contrast settings 3-14
resolution settings 3-13
to group of fax numbers 3-18
for copying 2-5
scanning documents 2-6, 5-2
using OCR 2-7, 5-7
Cover Page Data dialog box 3-20
cover page, for fax 3-20
D
darkening your copies 4-5, 4-7
date
how to change 3-27
document carrier
description of 3-2
for copying 4-3
for faxing 3-2
for scanning 5-2
date, error messages 7-13
dedicated fax line, connecting instructions
with a external modem 1-11
with a PC-modem 1-10
with no other office equipment 1-10
document jam. See paper jam
documents
adding scanned image to 5-5
copying 2-4
loading
error messages 7-11, 7-12, 7-15
into document tray 3-8, 6-3–6-5
scanning 2-6, 5-2
device settings
Phone Answering 3-9
Reduce/Enlarge 4-7
Rings to Answer 3-9
dialing fax number
using Document Assistant 3-6
procedures 3-6
pulse or tone 3-19
using keypad 3-3
entering a pause 3-15
in real time 3-3
procedures 3-3
redialing 3-15
speed dialing 3-5
using calling or credit card 3-3
using phone connected to OfficeJet 3-4
dialog boxes
Copy 2-5, 4-6
document tray
capacity 8-4
illustration of 1-2
installing 1-3
loading paper into 3-8, 6-3–6-5
parts of 1-6
E
editing scanned documents 5-7
Scan text for editing setting (OCR) 2-7,
5-7
...............................................................................................................
ii
HP Company Confidential
3/27/97 11:24 am
Final Version Given to Printer
error messages 7-9
from software programs 3-7
including electronic cover page 3-20
modem speed capabilities 8-3
paper documents 3-2
from Document Assistant 2-2, 3-6,
3-18
from keypad 2-2, 3-3, 3-18
Phone Book 3-20
resolution 3-11, 8-4
sending at future time 3-20
speed dial codes 3-16, 3-17
to group of fax numbers 3-17, 3-18
unsuccesful attempts, what to do for 7-14
using calling or credit card 3-3
enlarging the copy 4-7
envelopes 6-2–6-4
error messages 7-6
external modem. See connecting
F
fax line
dedicated. See dedicated fax line
shared. See shared fax and phone line
fax (receiving)
advanced settings 3-11
answering settings 3-9, 3-21
cancelling 3-3
distinctive ring 3-23
error messages 7-9, 7-14
loading the paper supply 3-8
number of rings before answering 3-22
OfficeJet Setup 3-24
paper size setting 3-25
PC fax 3-10
automatically receiving 3-12
manually receiving 3-12
printed fax
automatically receiving 3-9
manually receiving 3-9
Receive Fax settings 3-10
stored in memory 7-17
tests to ensure working properly 1-24
updating setup 3-24
Fax Send Time dialog box 3-20
fax reports, printing of
Fax Log 3-25
Fax History 3-26
Last Fax 3-26
fax/phone line connector
illustration of 1-2
installing 1-3
faxing (sending)
advanced settings 3-11
cancelling of 3-3, 3-7
changing header information 3-19
changing information at top of 3-19
contrast settings 3-14
files
faxing from software programs 2-3, 3-7
receiving as fax 3-10
fine resolution settings, when to use
for copying 4-5
for faxing 3-11
Form Feed Timeout 6-7
G
grayscale, print in 6-7
group dialing, of fax numbers 3-17, 3-18
H
header (fax), changing information on
3-19
help
accessing 2-8
correct operation 2-9
equipment changes 2-9
for scanning 2-6
for Send Fax dialog box 2-3
how to use 7-5
HP Customer Support Center 7-4
information to get before calling Support
Center 7-2
keypad display messages 2-9
orientation 1-26
printing 6-5
software installation 2-9
sources of 7-2
...............................................................................................................
iii
HP Company Confidential
3/27/97 11:24 am
Final Version Given to Printer
redialing 3-15
resolution settings 3-14
online 7-3
technical support 2-9
Help button (software) 2-8, 6-5, 7-5
L
HP Bulletin Board Service 7-4
legal-size paper. See paper sizes
HP Customer Support Center 7-3
letter-size paper. See paper sizes
HP FIRST Faxback 7-3
letterhead paper, how to load 6-3
HP OfficeJet Series 500 Fax, as selected
printer 3-7
lightening your copies 4-5, 4-7
line connector, installing 1-3
HP OfficeJet Series 500 Printer, selection
as printer 6-8
loading
envelopes
multiple 6-4
single 6-3
into the document tray 3-8, 6-3–6-5
letterhead paper 6-3
paper into paper supply 1-6
error messages 7-11, 7-12
for copying 4-2
for faxing 3-3
maximum amounts 3-8, 6-3
print cartridges 1-4
transparencies 6-4
I
illustrations, scanning of 2-6, 5-3
Image Viewer window,
scanned images 5-4
for
editing
images, scanning of 5-3
error messages 7-16
from Document Assistant 2-6, 5-2
importing image into existing documents
5-5
loading into paper/document tray 2-6
saving 5-4
inks. See printer cartridges
installing software 1-23–1-24
Internet/World Wide Web, help sources
7-3
M
manual receiving, of faxes 1-12
AutoAnswer button 3-9
changing settings for 3-9
printed fax 3-9
margins
copying 8-4
printing 8-3
J
jam. See paper jam
K
keypad
contrast settings 3-14
copying 2-4
advanced settings 2-4
controlling how copies look 4-4, 4-7
dialing fax number 3-3, 3-15
speed dialing 3-16
to group of fax numbers 3-18
faxing paper documents 2-2, 3-3
resolution settings 3-13
media types
cards 6-2
envelopes 6-2
for printing 2-7, 6-2, 8-3
ordering information 8-5
transparency 6-2
memory, error messages 7-12
messages. See error messages
modem
connecting. See connecting
speeds 8-3
...............................................................................................................
iv
HP Company Confidential
3/27/97 11:24 am
Final Version Given to Printer
O
for printing 8-3
for scanning 8-5
settings to adjust 3-8, 4-2
off hook, error messages 7-13
OfficeJet Manager
copy settings 4-6
Help system 2-8, 7-5
print settings 2-7, 6-5
printing 6-5
scan settings 5-3
Paper tab settings 6-5
online services 7-3-7-4
Optical Character Recognition (OCR) 5-7
originals, document carrier for
description of 3-2
for copying 4-3
for faxing 3-2
for scanning 5-2
P
paper
letterhead 6-3
loading into paper supply tray 1-6, 3-8
error messages 7-11, 7-12
for copying 4-2
for faxing 3-3
on "print side" of paper 6-2
maximum amounts 3-8, 6-3
selecting right type of 6-2
paper documents
copying 2-4
faxing
from Document Assistant 3-6
to group of fax numbers 3-18
from keypad
to group of fax numbers 3-18
faxing (sending)
from Document Assistant 2-2
from keypad 2-2
loading into document tray 3-8, 6-2
scanning 2-6, 5-2
paper jam, error messages 7-7
paper sizes 6-2
error messages 7-11, 7-12
for copying 8-4
for receiving fax 3-25
paper supply tray
capacity 3-8, 6-3, 8-3, 8-4
illustration of 1-2
installing 1-3
loading envelopes
multiple 6-4
single 6-3
loading paper into 1-6, 6-3
error messages 7-11, 7-12
for copying 4-2
for faxing 3-3
letterhead 6-3
loading transparencies 6-4
parts of 1-6
pause, during dialing 3-15
PC fax
contrast settings 3-14
group of fax numbers 3-18
receiving 3-10
resolution settings 3-13
sending 2-3, 3-7
PC-modem. See connecting
pens. See printer cartridges
Phone Answering settings 3-9
Phone Book 3-20
phone line
dedicated. See dedicated fax line
shared. See shared fan and phone line
photo resolution settings, when to use
for faxing 3-12
photographs
resolution settings
for copying 4-5
for faxing 3-11
scanning 5-3
post warranty information 7-4
print cartridges
...............................................................................................................
v
HP Company Confidential
3/27/97 11:25 am
Final Version Given to Printer
sending fax 7-14
setting date/time 7-13
storing of fax in memory 7-17
error messages 7-6, 7-15
ink drying 7-10
installing 1-4
ordering information 8-5
Print Cartridge Maintenance 6-7
replacing 1-4
error messages 7-16
Print Settings dialog box 6-5
Advanced tab 6-7
Paper tab 6-5
Setup tab 6-6
protecting, of documents. See document
carrier
pulse dialing 3-19
Q
quality of copies. See resolution
R
printer cable
illustration of 1-2
connecting 1-4
real time dialing, of fax number 3-3
printing
advanced settings 6-7
from DOS programs 6-7
from OfficeJet Manager 6-8
from Windows software programs 6-8
in color 6-6
in grayscale 6-7
margins 8-3
media types 2-7, 8-3
quality and speed 6-6
settings 2-7, 6-5
Advanced tab 6-7
in OfficeJet Manager 6-5
in software programs 6-5–6-7
Paper tab 6-5
Setup tab 6-6
specifications 8-2
tests to ensure working properly 1-24
problem solving
answering fax call 7-12
copy failure 7-8
document jam 7-7
fax failure 7-14
faxing 7-9
loading documents 7-11
loading paper 7-11
paper jam 7-7
print cartridges 7-10, 7-11, 7-14
reloading documents 7-15
reloading paper 7-15
replacing scanner cover 7-16
scanning failure 7-16
Receive Fax setting
for list of all fax operations 3-25
receiving faxes. See fax (receiving)
Redial/Pause button 3-15
redialing, of fax number 3-15
Automatic Redial 3-15
manually 3-15
reducing the copy 4-7
regulations 8-6
reloading, of paper or documents 7-15
reports, printing
Fax Log 3-25
Fax History 3-26
Last Fax 3-26
tests to ensure working properly 1-24
resolution
changing
for PC fax 3-13
from Document Assistant 3-13
from keypad 3-13
for copying 4-4, 4-5, 4-7, 8-4
for faxing 3-11
for printing 8-2
for scanning 8-5
settings 3-11
Rings to Answer setting 3-9
changing 3-22
...............................................................................................................
vi
HP Company Confidential
3/27/97 11:25 am
Final Version Given to Printer
S
for copying 2-5
for printing 2-7, 6-5
paper size 3-8
Scan dialog box
illustration of 2-6
settings 2-6
Setup tab settings 6-6
Scan Settings dialog box
illustraion of 5-3
settings 5-3
Scan text for editing setting (OCR) 2-7,
5-7
Scan Viewer menu 2-6
scanning
cancelling a scan in progress 5-4
custom settings 5-4
error messages 7-16
how to tell if you have TWAIN-supported software 5-5
importing image into existing documents
5-5
into TWAIN-supported software 5-5
overview 2-6
resolution 8-5
saving 5-4
specifications 8-5
tests to ensure working properly 1-25
text for editing (OCR) 2-7, 5-7
shared fax and phone line, connecting instructions
with answering machine 1-15
with computer voicemail 1-16
with distinctive ring 1-22
with external modem 1-14
and answering machine 1-19
and computer voicemail 1-20
with no other office equipment 1-12
with PC-modem 1-13
and answering machine 1-17
and computer voicemail 1-18
software
compatibility 8-2
installing 1-23–1-24
software programs
faxing documents from 3-7
sound. See volume
specifications 8-2-8-5
Speed Dial button 3-5
speed dialing
codes
number of available codes 3-16, 8-4
to group of fax numbers 3-17
to single fax number 3-16
error messages 7-17
using keypad 3-5
scheduling, of fax 3-20
Self Test Report 1-24
Send Fax dialog box
faxing from
paper documents 2-3, 3-6
illustration of 2-3
sending faxes. See faxing (sending)
setting up
check for all components 1-2
connecting the cables 1-4
inserting the paper/document tray 1-3
inserting the print cartridges 1-4
installing the software 1-23
loading the paper supply 1-6
plugging in the line connector 1-3
tests to ensure working properly 1-24
standard resolution settings, when to use
for copying 4-5
for faxing 3-11
Start button 3-3
Stop button 3-3, 4-6
supplies, ordering information 8-5
support. See technical support
system errors 7-17
settings
...............................................................................................................
vii
HP Company Confidential
3/27/97 11:25 am
Final Version Given to Printer
T
technical support
information sources 2-9, 7-3
online 7-3
telephone
connected to OfficeJet, fax dialing 3-4
text, scanning of 5-3
time
how to change 3-27
tone dialing 3-19
transmission speeds, of faxes
photo resolution settings 3-12
tray. See document tray; paper tray
troubleshooting. See problem solving
TWAIN-supported software 5-5
U
user’s guides, ordering information 8-5
V
voicemail, computer. See connecting
volume, adjusting 3-26
W
World Wide Web, help sources 7-3
...............................................................................................................
viii
HP Company Confidential

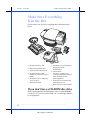
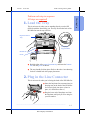
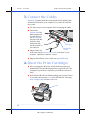
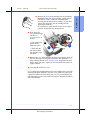
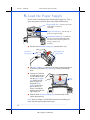
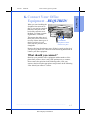

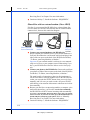
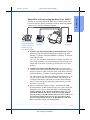
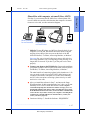
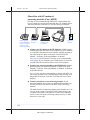
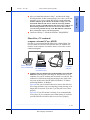
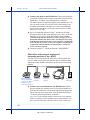
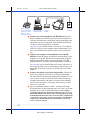
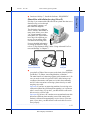

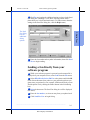
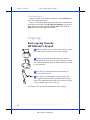
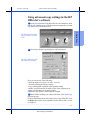
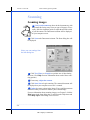
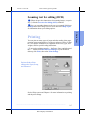
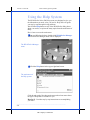

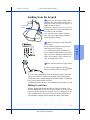
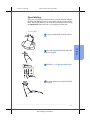
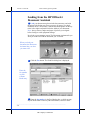
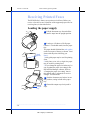
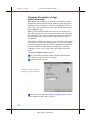

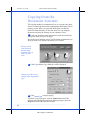
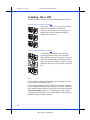
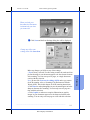
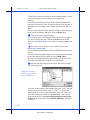
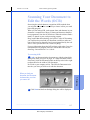
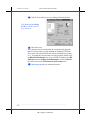
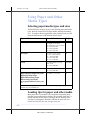
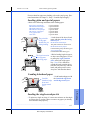
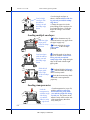
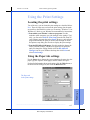
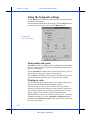
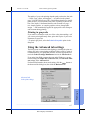

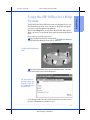
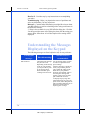

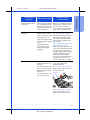


![2.サービス利用規約(SNC-M01AA) [PDF形式]](http://vs1.manualzilla.com/store/data/006583153_2-f03ab53a2a6908698034e83976dc58bb-150x150.png)