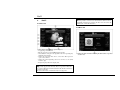
1
Preface
This manual explains how to properly use the Visteon Navigation
Radio System and contains the information that a driver should know
for an enjoyable and safe driving experience.
Please keep this manual available inside the car for other drivers and
passengers to refer to.
:Danger:
It provides information that the users must keep to prevent from the
possibility of serious or fatal injury to themselves or others.
2008
All rights reserved. No part of this manual may be reproduced, copied,
transmitted, disseminated, transcribed, downloaded or stored in any
storage medium, in any form or for any purpose without the express prior
written consent. Furthermore, any unauthorized commercial distribution
of this manual or any revision hereto is strictly prohibited.
:Caution:
It provides information that the users must keep to prevent from the
possibility of vehicle or product damage.
Information in this document is subject to change without notice. Visteon
Corporation reserves the right to change the content herein without the
obligation to notify any person or organization of such changes.
All trademarks used herein remain the exclusive property of their
respective owners. Nothing contained in this manual should be construed
as granting, by implication or otherwise, any license or right to use any of
the trademarks displayed herein. Misuse of any trademarks or any other
content in this manual is strictly prohibited.
:Recycling:
It provides information for environmental protection.
:Note:
It provides additional information.
-2-
Preface
USA-Federal Communications Commission (FCC)
Manufactured
under
license
from
Dolby
Laboratories.
"Dolby" and the double-D symbol are trademarks
of Dolby Laboratories.
This device complies with part 15 of the FCC Rules. Operation is
subject to the following two conditions: (1) This device may not
cause harmful interference, and (2) this device must accept any
interference received, including interference that may cause
undesired operation.
Note:
This product incorporates copyright protection technology that is
protected by U.S. patents and other intellectual property rights. Use
of this copyright protection technology must be authorized by
Macrovision, and is intended for home and other limited viewing
uses only unless otherwise authorized by Macrovision. Reverse
engineering or disassembly is prohibited.
This equipment has been tested and found to comply with the limits
for a Class B digital device, pursuant to Part 15 of FCC Rules.
These limits are designed to provide reasonable protection against
harmful interference in a residential installation. This equipment
generates, uses, and can radiate radio frequency energy. If not
installed and used in accordance with the instructions, it may cause
harmful interference to radio communications. However, there is no
guarantee that interference will not occur in a particular installation.
If this equipment does cause harmful interference to radio or
television reception, which can be determined by tuning the
equipment off and on, the user is encouraged to try and correct the
interference by one or more of the following measures:
-Reorient or relocate the receiving antenna
-Increase the distance between the equipment and the receiver.
-Connect the equipment to outlet on a circuit different from that to
which the receiver is connected.
-Consult the dealer or an experienced radio/TV technician for help.
Any changes or modifications not expressly approved by the party
responsible for compliance could void the user’s authority to
operate the equipment.
Caution: Exposure to Radio Frequency Radiation.
To comply with FCC RF exposure compliance requirements, for
mobile configurations, a separation distance of at least 20 cm must
be maintained between the antenna of this device and all persons.
This device must not be co-located or operating in conjunction with
any other antenna or transmitter.
-3-
Contents
1.
Cautions............................................................................ 5
11.
Precautions ..............................................................................5
Discs ........................................................................................5
Safety Instructions....................................................................7
Cautions before Use.................................................................7
Cautions while Using the Product .............................................8
Cautions before Install, and anytime during the Use of this Product.8
2.
SIRIUS GUI............................................................................ 26
Channel List ........................................................................... 27
Direct Channel Number Entry ................................................. 27
Preset .................................................................................... 28
Memo – Song Seek & Alert..................................................... 28
Jump – Shortcut to favored channel........................................ 29
Option – INFO ........................................................................ 29
Option – Channel ................................................................... 30
Option – Song Seek Alert ....................................................... 31
Product Features.............................................................. 9
Main Unit..................................................................................9
Remote Control ......................................................................10
3.
Basic Operation.............................................................. 12
12.
Initial Use and Power Supply ..................................................12
Volume Adjustment.................................................................12
Mute.......................................................................................12
Adjusting the Slope of LCD Panel...........................................13
Inserting and Removing Disc/SD Memory Card ......................13
Using the Touch Screen..........................................................14
Replacing the Remote Control Batteries .................................14
4.
13. Movie ............................................................................... 36
Movie GUI .............................................................................. 36
Movie Playlist Edit .................................................................. 37
Inputting File No. .................................................................... 37
Movie Playlist ......................................................................... 38
14. Music ............................................................................... 39
Selecting a Source on the Main Menu ....................................15
Moving to the Main Menu .......................................................15
Common GUI .................................................................. 16
6.
Navigation....................................................................... 17
7.
Radio............................................................................... 18
Music GUI .............................................................................. 39
Music List ............................................................................... 40
Radio GUI ..............................................................................18
Inputting Radio Frequency......................................................18
8.
15.
Photo ............................................................................... 42
16.
Rear View Camera........................................................... 43
17.
Phone Mute ..................................................................... 44
18.
Setup................................................................................ 45
Display ................................................................................... 45
Sound .................................................................................... 48
System................................................................................... 51
Version................................................................................... 57
Disc ................................................................................. 19
Disc GUI.................................................................................19
Inputting Title/Chapter/Track ...................................................20
DVD/VCD Control...................................................................20
9.
19.
iPod™ ............................................................................. 21
Appendix ......................................................................... 59
Trouble Shooting .................................................................... 59
Notices for Installation and Service ......................................... 61
Installation and Removal of the Main Unit ............................... 62
Components and Accessories ................................................ 63
System Connection ................................................................ 64
Specifications ......................................................................... 65
iPod Video GUI.......................................................................21
iPod Music GUI ......................................................................21
iPod Menu & List ....................................................................22
10.
Bluetooth ......................................................................... 33
Bluetooth GUI......................................................................... 33
Phone Book ........................................................................... 34
Selecting Source ............................................................ 15
5.
SIRIUS (Optional) ............................................................ 26
AV-IN................................................................................ 25
-4-
Cautions
1.
Discs
• Playable Discs
Cautions
Type of
Media
Precautions
WARNING:
TO PREVENT FIRE OR ELECTRICAL SHOCK, DO NOT
EXPOSE THIS PRODUCT TO RAIN OR MOISTURE.
CAUTION:
TO REDUCE THE RISK OF ELECTRIC SHOCK, DO NOT
REMOVE COVER (OR BACK). NO USER SERVICEABLE PARTS
INSIDE. REFER SERVICING TO QUALIFIED SERVICE
PERSONNEL.
This symbol warns the user of uninsulated voltage
within the unit that can cause dangerous electric
shocks.
This symbol alerts the user that there are important
operating and maintenance instructions in the literature
accompanying this unit.
Mark
(Logo)
Recorded
Signals
DVD-Video
Digital Video
(MPEG2)
DVD-RW
DVD-R
Digital Video
Divx
Digital Audio
MP3/WMA/OGG
DVD+RW
DVD+R
Digital Video
Divx
Digital Audio
MP3/WMA/OGG
Audio CD
Digital Audio
CD-RW
CD-R
Divx
Digital Audio
MP3/WMA/OGG
VCD
Digital Video
is a trademark of DVD Format/Logo Licensing Corporation.
CAUTION:
THIS DVD VIDEO RECORDER IS A CLASS 1 LASER PRODUCT.
USE OF CONTROLS, ADJUSTMENTS OR PERFORMANCE OF
PROCEDURES OTHER THAN THOSE SPECIFIED HEREIN MAY
RESULT IN HAZARDOUS RADIATION EXPOSURE. DO NOT
OPEN COVERS AND DO NOT REPAIR THE PLAYER
YOURSELF. REFER SERVICING TO QUALIFIED PERSONNEL.
• Unplayable Discs
- DVD-RAM, DVD-audio, CD-i, photo CD, super audio CD, DVD with
region codes other than 1 or ALL, DTS-CD, DVD-ROM for personal
computers, CD-ROM for personal computers.
- Any other discs without compatibility indications.
- Do not insert any disc that is not round such as specialty or novelty discs.
- Any disc size that is not either 120mm or 80mm in diameter.
-5-
Cautions
• Handling Discs
Do not use discs with rough edges. Using such discs could cause the
product to malfunction or be damaged.
Do not attach labels to the disc surface or mark it with a pencil or a pen.
Doing so could cause the product to malfunction or be damaged.
Do not use discs if they have tape or other adhesive materials or traces of
such material on them. Using such discs could cause the product to
malfunction or be damaged.
Do not use discs that are badly scratched, deformed or cracked. Using such
discs could cause the product to malfunction or be damaged.
Do not use commercially available CD protectors or disc stabilizers. Doing
so could cause the product to malfunction or be damaged.
Do not touch the disc surface when inserting or removing the disc.
• DVD Region Code
DVD Video System assigns the region code to DVD Video Players and
DVD Discs, according to the regions of the world where they are sold. For
example, DVD Video Players that are sold in U.S.A. can only play discs
with the correct number (‘1’ or ‘ALL’ or any combination of numbers
including ‘1’) The DVD region number is indicated on the disc as shown
below.
• Cleaning Discs
Use a soft cloth to wipe the disc from the center out towards the
circumference.
Do not use any cleaner, static-proof spray or thinner on the disc. The discs
can be damaged.
Please, refer to the provided manual in the DVD Title which you purchased
for the detailed information of region codes per country.
• Keeping Discs
Do not store discs in places that may experience extreme hot or cold
temperatures. Doing so could deform the disc. Using a deformed disc could
cause the product to malfunction or be damaged.
Do not keep discs in places exposed to direct sunlight or close to heaters.
Doing so could deform the disc. Using a deformed disc could cause the
product to malfunction or be damaged.
Do not keep discs in places that are exposed to high levels of dust or
humidity. Using discs stored in such places could cause the product to
malfunction or be damaged.
• Color Monitor System
DVD player can only play discs with NTSC or PAL video formats, it will
not play discs with SECAM format.
-6-
Cautions
Safety Instructions
• Do not cut or modify the provided cable.
• Do not use when the product contains a defect or malfunction.
Do not cut or modify the provided cable. The power cord has its own fuse
for preventing over current. If the user uses the cord without the fuse, the
protection circuit does not work and it may cause a product failure or fire.
Do not operate the product while it is in abnormal conditions. When any
foreign material is inserted or a smoke or strange smell is continuously
detected, stop using the product and contact with a purchase site or
customer support center. It may cause an accident, fire, or electric shock.
• Never manipulate or watch the product while driving.
Do not manipulate or watch the product while driving. It may cause a traffic
accident by careless driving. Be sure to park or stop the car in a safe area to
manipulate or watch the product.
• This product uses 12V DC vehicle power supply.
This product operates on 12V vehicle power supply. Be sure to use the
cable enclosed with the product. Or it may cause a product failure or serious
malfunction of the vehicle.
Cautions before Use
• Be cautioned not to damage any vehicle parts during installation.
• Install the product correctly for use.
Be careful not to damage any vehicle parts (electric devices, wiring, pipes,
screws, etc.) while installing the product. When the product is abnormally
installed, it may cause an abnormal control of vehicle, fire, electric shock,
or traffic accident by damage of vehicle parts.
Before using the product, correctly install the product after reading the
system connection section in this user guide.
• Use the product after starting the engine.
Using the product for a long time without the engine running can drain the
battery and may result in not being able to start the engine.
• Never arbitrarily disassemble or modify the product.
Do not arbitrarily disassemble or modify the product. It may cause a fire,
electric shock, or product damage. If a product failure was caused by a
user’s fault, the user cannot get after-sales services.
• Configure all settings for use before driving.
If the driver manipulates or changes the settings while driving, operation
can be interrupted. When the user especially uses the navigation function,
start driving after finishing the configuration for path setting, search, and
similar features. If any configuration change is needed while driving, park
the car in a safe place, change to the desired settings, and drive the car again.
• Set the volume at an adequate level while using the product.
When the product is used in a large volume, a traffic accident may happen
because the driver cannot hear sound from outside. Adjust the volume level
of the product for right use.
• Use only the navigation GPS antenna provided.
• Use genuine parts only.
For the navigation GPS antenna to be connected to the product, use the
provided antenna and extension cable only. Place the navigation antenna
over 30cm away from metal body surfaces.
When the antenna is installed outside the car, its cable may be damaged,
disconnected, or stolen.
Use genuine parts only. Or it may cause product damage, wrong installation,
or malfunction. In this case, the user assumes all responsibility for errors.
When any parts are lost or damaged, contact with a purchase site or
customer support center.
• Preserve the product from humidity or by direct contact with liquid,
and do not block the ventilation hole.
When any humidity or liquid substance is inserted inside the product, it may
cause a product failure or fire. Do not block the ventilation hole. If it is
blocked, a product failure or fire may happen due to accumulated heat.
-7-
Cautions
Cautions while Using the Product
• The operation temperature range of the product is +15 to +140
degrees F (-10 to +60 degrees C).
Use the product only when the ambient temperate is within the temperature
range. If the product is used out of the temperature range, it may cause a
product malfunction. Because of the nature of LCD panel, the screen may
be darker when it is initially operated at very low temperatures. After
several minutes, the brightness of the screen returns to normal.
Do not operate the product after turning on the heater when the temperature
in the car is very low. It may cause a product malfunction or damage due to
frost or condensation on the optical lens surface.
• Be cautioned when using the LCD panel.
Be careful not to manually pull out or push in the LCD panel. Do not apply
an impact to the LCD panel. It may cause damage to the panel.
When any foreign material is caught between the LCD panel and its body
while adjusting the slope of the panel, product damage may happen.
Do not forcibly press the case around the touch panel. It may cause a
product malfunction or damage.
• Observe actual traffic laws and regulations.
While the navigation function is active, the driver can encounter guidance
information that is different from actual traffic situation due to change of
traffic regulations. Be sure to follow the actual traffic regulations. Visteon
assumes no responsibility for damage or injury caused by not observing
actual traffic regulations. Drive carefully all the time.
Cautions before Install, and anytime during the Use of this Product
• Do not disable or circumvent the parking brake safety interlock of
this unit, which is designed to prohibit viewing of movies or
pictures while the vehicle is moving, unless the vehicle parking
brake is engaged.
Many states prohibit the display of video and/or television in view of the
driver of the vehicle. Check your local state and federal laws and
regulations for more information.
-8-
Product Features
2.
[
] Power Button
- It turns ON the radio’s power if it is currently off. (Ignition key is in
ACC or ON position)
- It sequentially switches between currently running functions when
pressed momentarily and the radio’s power is currently ON.
- When pressed and held for over one second, the radio’s power is turned
OFF.
Product Features
Main Unit
[
] Home & Setup Button
- It goes to the main menu for you to select a function.
- When pressed and held for over one second, it goes to Setup.
[Tilt] Button
- While pressing it, the slope of LCD panel continuously changes.
- By adjusting the slope to the end of the V direction the two SD Card
slots are exposed. You can insert or remove the SD cards in this
position.
[
] Eject Button
- It automatically moves the LCD panel to eject the disc or to insert a disc
into the DVD player.
Wide TFT LCD Touch Screen
- It displays video signals on the touch screen.
- You can select the various functions by touching its icon.
Remote Control Receiver
- It receives signals from the remote control.
:Note: Use of Remote Control
[Mute] Button
- It mutes the sound or cancels the Mute function.
When you have any other devices with remote controls in the vehicle, the
use of the remote control may interfere with the other devices.
[Volume] Button
- It increases or decreases the volume level.
Reset Button (recessed)
- It will reset the radio system in case of a malfunction by poking a paperclip or other blunt wire through this hole.
] Repeat Voice & Navigation Button
[
- It repeats the recent navigation voice message.
- When pressed and held for over one second, it selects the navigation
function.
-9-
Product Features
Remote Control
Numeric Button
• Radio
- Selects any of stations stored in Presets (1–6).
- When pressed for over one second, the current frequency is stored in the
corresponding preset (1–6).
- Enters the frequency in the frequency input panel.
• Disc: Enters values for Chapter, and Track in the corresponding panel.
• Movie/Music/Photo: Selects a file in the file No. input panel.
• Phone: Enters the phone number.
• SAT Radio
- Selects the preset number.
- Enters the channel number in the direct channel input keypad.
- When pressed for over one second, the current frequency is stored in the
corresponding preset (1–6).
[SETUP] Button
- It goes to Setup.
[DIRECT] Button
• Radio: Opens or closes the frequency input panel.
• Disc: Opens or closes the Chapter/Track input panel.
• Movie/Music/Photo: Opens or closes the file No. input panel.
• SAT Radio: Opens or closes the Channel input panel.
[VOLUME] Button
- It increases or decreases the volume level.
[▲/▼/ / ] Button
• Radio
- / : Scans Up/Scan Down tunes to next station for 8 seconds then
moves to next station. Press again to stop Scan.
- ▼: Removes the frequency entered in the frequency input panel.
• Disc: Moves the cursor on the DVD control.
• iPod
/ : Performs the Rewind/Fast Forward function.
• Photo
- ▲/▼: Doubles/Halves in size each time you press until it is 0.25/4X
normal size.
- / : Rotates the photo by 90° to the counter-clockwise/ clockwise
direction.
[PWR/SRC] Power & Source Select Button
] button on the radio.
- It functions the same as the [
[BAND] Button
• Radio: Switches the frequency band (AM → FM1 → FM2→ AM).
• SAT Radio: Switches the preset bank A/B/C.
- 10 -
Product Features
• SAT Radio
- ▲/▼: Selects the category.
- / : Selects the channel.
[SEEK] Button:
• Radio: Used to select a previous or next receivable frequency.
• Disc: Used to select a previous or next chapter/track.
• iPod/ Phone/Movie/Music/Photo: Used to select a previous or next file.
[ENT] Button
• Radio: Selects a frequency that has been entered in the frequency input
panel.
• Disc
- Selects values for Chapter, and Track entered in the corresponding input
panel.
- Selects the item where the cursor is located in the DVD control.
• iPod: Stops the Rewind/Fast Forward function.
• Phone: When a phone call is placed or received for the entered phone
number, it answers.
• Movie/Music/Photo: Selects a file entered in the file No. input panel.
• SAT Radio: Selects a channel that has been entered in the channel input
keypad.
:Note: Multi Zone Rear Source Usage
When Multi Zone Rear Source is active, the remote controls the rear
source only. In this case, the front source is controlled by touching the
icons.
~
Buttons are only for the navigation source.
[▲/▼/ / ] Button
- It moves the map up/down/left/right on menu.
[MENU] Button
- It displays menu, jump to main menu.
[RETURN] Button
• Radio: Closes the frequency input panel.
• Disc: Closes the Title/Chapter/Track input panel.
• Movie/Music/Photo: Closes the file No. input panel.
• SAT Radio: Jumps to a pre-registered channel.
[MAP] Button
- It centers map on current vehicle location.
[
] Select Button
- It selects the currently highlighted item.
[MUTE] Button
- Performs or cancels the Mute function.
[
] Repeat Voice Button
- It repeats voice instruction.
[PLAY/PAUSE] Button
• Disc/iPod/Phone/Movie/Music: Plays back a file or pauses it.
• Photo: Starts or stops a slideshow.
[PAGE] Button
- It pages up/down in displayed list.
[ZOOM] Button
- It zooms in the map to show a smaller area or out it to show a larger area.
:Note: Manipulation of MP3 Player on the Bluetooth Mobile Phone
This function works only when your mobile phone supports the Bluetooth
stereo headset and has the MP3 player function.
[STOP] Button
• Disc/iPod/Phone/Movie/Music/Photo: Stops the playback.
- 11 -
Basic Operation
3.
Basic Operation
Volume Adjustment
When you press the [Volume] button or Volume (+)/(-) icons on the LCD
screen, the volume level increases or decreases.
Initial Use and Power Supply
The power of this product is set to Off by default. Accordingly when you
use this product for the first time after installation, move the ignition key
location to ACC or ON and press the [
] button to supply power to the
product. When the power is supplied, the LCD panel is moved inside and
returns to the original position.
:Danger: Volume for Safe Driving
Set to a comfortable volume level in which you can still hear the sounds
from outside.
:Danger: Max. Volume Setting
:Caution: Battery Discharge
If the power is turned off while the volume is higher than the Max.
Volume set in Setup > Sound > Speaker Control, when you turn on the
power again, the volume is adjusted down to Max. Volume setting.
It is recommended to use this product while the car engine is running. If
you use this for a long time while the engine is not started, the battery
may become exhausted and you may not be able to start the car engine.
Mute
When you press the [Mute] button or the Mute icon on the LCD screen, the
Mute function is activated and a red X appears over the speaker icon. When
you press the icon again, the Mute function is deactivated.
When the ignition key is turned to LOCK or extracted, the current source
and settings are automatically saved and the power is turned off. When the
ignition key is turned to ACC or ON, the power is automatically turned on
and the saved settings are returned.
When the [
] button is pressed for over one second, the power is turned
]
off. In this case, turn the ignition key to ACC or ON and press the [
button to supply power.
:Note: No Sound
When the video of the product is normal but no sound is heard, check
whether the Mute function is active.
:Note: Automatic Start
] button for over one second to turn off the
When you press the [
power, the power of the product will not be automatically turned on when
starting the engine. To automatically turn on the product with the Ignition
key, do not use the [
] button to turn off power. Simply let the
product power down when the ignition key is turned to OFF.
:Note: Disk Resume Play
If you turned off the power with a disc inserted, when you play back the
disc after turning on the power, it is played back from the location where
you previously listened.
:Note: Illumination at Night Driving
When you turn on the headlights the buttons will be illuminated whether
the product is turned on or off.
- 12 -
Basic Operation
Adjusting the Slope of LCD Panel
By pressing the [Tilt] button momentarily, you can change the slope of
LCD panel little by little.
When you press the [Tilt] button continuously, the slope of LCD panel
changes continuously.
Inserting and Removing Disc/SD Memory Card
When you press the [
] button, the LCD panel moves downward to
expose the slot for disc insertion. Push a disc into the slot as shown to insert
] Eject button. The LCD panel moves
it. To remove a disc push the [
downward and extracts the disc. After removing it, press the [
] button
again to move the LCD panel to its previous position.
:Note: Auto Close
• You can set this in Setup > System > ETC.
• ON: When the engine is stopped, the LCD panel is automatically closed.
When the engine is started, the tilt of the LCD panel is automatically
adjusted to the last saved position.
Angle adjustment during use
Power OFF by ignition key
Power ON by ignition key
• OFF: Even if the engine is stopped or started, the LCD panel is not
automatically closed and stays at the current angle.
:Note: Disc Ejection and LCD Panel Angle
Angle adjustment during use
Power OFF by ignition key
If the current angle of the LCD panel is lower than the moving angle of
the [
] button, when you press the [
] button, the LCD panel does
not move but (if a disc is inserted) just extracts the disc. When you
insert/remove/replace a disc and press the [
] button again, the LCD
panel does not move. In this case, adjust the angle by using the [Tilt]
button.
Power ON by ignition key
:Caution: LCD Panel TILT Mechanism
Do not forcibly move the LCD panel or press it
hard. It may result in product damage or
malfunction.
By using the [Tilt] button, you can move the LCD panel downward to
remove or insert an SD memory card as shown above.
:Note: SD Card Slot
The SD card slot on the right is used exclusively by the Navigation
Function, it is not for any other use. The SD card slot on the left is for the
storing of Movie, Music or Photo files the user may desire for use with
the radio’s multimedia playback features.
- 13 -
Basic Operation
Using the Touch Screen
This product uses a touch screen LCD display. You can perform functions
by touching their respective icons on the screen.
When video sources such as DVD, iPod VIDEO, AV-IN, Movie, Photo,
and Rear View CAM are played, the previous function is stopped and the
function pressed will play.
When the icon does not appear, touch the LCD screen to display the icon.
Be sure not to manipulate the touch screen while driving.
:Danger: Handling Remote Control Batteries
• If you do not use batteries properly, they may explode.
• Do not disassemble or apply heat to the batteries.
• Do not place the batteries near any heat source.
• After removing the batteries, please recycle or dispose of properly.
:Recycling: Disposing of used Remote Control Batteries
Replacing the Remote Control Batteries
Push the battery cover of the remote control in arrow direction to open it.
Install two AAA (AM4 1.5V) batteries with correct polarity as shown in
the remote control.
Close the cover.
• If you do not use the batteries any more, scrap them properly.
• If the batteries are left for a long time, it may cause harms to children or
animals, or cause environmental pollutions. Scrap in a designated place
after keeping them.
:Note: Handling Remote Control Batteries
• When you replace batteries, always replace both batteries with new ones
of the same type.
• Remove the batteries from the remote control if it is not going to be used
for a long time.
- 14 -
Selecting Source on
4.
:Note: Source Deactivation
Selecting Source
When the Movie is set for rear source, Disc, iPod, AV-IN, and Music are
deactivated.
Selecting a Source on the Main Menu
:Note: Movie is ended automatically if you execute Navi
• If you could execute the Navigation source while the Movie source is
running on, the Movie source is ended automatically.
• If you run the Navigation when the Movie is set for rear source, the
Movie source is ended and Multi Zone is switched to Single Zone
automatically.
Moving to the Main Menu
• Click any source icon on the main menu to run it.
• If you select any other source when a source is running, the sources are
running at the same time or the former is ended automatically.
] button on the body or [PWR/SRC] button on
• When you press the [
the remote control, the next source among the currently running sources is
selected.
• The sources that cannot be run with the currently running source are
deactivated. (Grayed Out) In order to run a deactivated source, stop the
running source first and then select the desired source.
• The currently running sources appear on the bar at the bottom. The
exception is the rear view camera source which does not appear.
• When you press the [
] button on the body or the [SETUP] button
on the remote control while a source is running, the main menu appears.
• When you click the menu icon on the upper left corner, the main menu
appears while the current source is running.
• When you click the [ X ] icon on the upper right corner, the current source
stops running and the main menu appears.
• When video sources such as DVD, VCD, iPod VIDEO, AV-IN, Movie,
Photo, and Rear View CAM are played, the icon disappears in three
seconds.
• When the icon does not appear, touch the LCD screen to display the icon.
:Note: Source to Run Automatically
• A rear source can be selected in Setup > Display > Zone > Multi Zone.
• When the phone rings, Bluetooth automatically runs.
• When you back your car, Rear View Camera automatically runs (If
equipped).
- 15 -
Common GUI
5.
Common GUI
Changes to the main menu while the current source is running.
Changes to the main menu after stopping the current source running.
Performs or stops the Mute function. The shape of icon changes
according to the Mute function’s activation.
Increases or decreases the volume level.
Displays the currently running sources. Depending on the source, some
sources cannot run at the same time.
Multi Zone Rear Source appears in Setup > Display > Zone. When
Single Zone is selected, it does not appear.
Displays the current output source.
Indicates that the product is connected to a Bluetooth mobile phone.
Indicates that a disc (DVD/CD/VCD/MP3CD) is inserted.
Displays the current time.
- 16 -
Navigation
6.
Navigation
Insert the SD memory card that contains the Navigation map program into
the NAVI slot and refer to the user guide for the Navigation map program
that is separately provided.
:Note: Moving to the Main Menu while Navigation is Running
The icon does not appear while the Navigation is running or outputting.
] button on the body or the [SETUP] button on the
Press the [
remote control to move to the main menu.
- 17 -
Radio
7.
Inputting Radio Frequency
Radio
Radio GUI
Enter the frequency to listen to.
Changes to the main display and sets the input frequency.
Deletes the input frequency.
Cancels inputting the frequency and closes the frequency input panel.
Displays the input frequency.
Saves local frequencies to maximum 6 presets after scanning the
bandwidth for the selected radio band. When pressed again, it ends.
Seeks to the previous or next frequency on the band.
Scans for available stations and holds for 7 seconds. When pressed again,
it ends.
Shows a radio source such as AM-FM.
Sequentially select frequency bands for AM-FM sources such as AM,
FM1, and FM2.
Displays the preset number for the current frequency. Additionally it
sequentially selects the stored frequencies.
Opens the frequency input touch pad panel.
Displays the preset frequencies that have been set automatically or
manually. You can directly select the desired frequency. The selected
frequency is distinguished with blue background. When pressed for over
one second, the current frequency is stored in the corresponding preset.
Displays the currently listening PS (program service code), Stereo or not,
frequency, band, RT (radio text), and the like.
- 18 -
Disc
8.
Changes to the DVD/VCD control. If the disc is CD/MP3CD, this is not
supported.
Displays the current playback position. You can change it by clicking the
desired position on the bar or dragging the arrow.
Displays the played time and the running time.
Disc
Disc GUI
• DVD
:Note: Disc Auto-Play When a Disc Inserted into
When you insert a DVD/CD/VCD/ MP3CD into the slot, it begins playing
automatically. But in the case that the Movie is set for rear source, Disc
Auto-Play doesn’t work.
• MP3CD
Plays a disc or pauses it.
Pauses the disc playback and displays the message, “Press Play Key To
Continue”. When pressed again, it ends.
In case of DVD, it plays back the previous/next chapter. In case of CD,
VCD, or MP3CD, it plays back the previous/next track.
Selects Random or Repeat for the playback mode. If not selected, it
repeatedly plays back all chapters or tracks in a disc.
Displays the list of MP3 files and playable files in the folder. When
pressed, it is played back.
Changes to the track input panel.
Displays the current folder. When pressed, it opens or closes the folder
playback list panel.
Moves to the previous/next page.
Displays the current page and total page number.
:Note: Exceptional Cases for Disc Playback
• DVD: Does not support the random playback mode.
• MP3CD: Repeatedly plays back all tracks in the folder (not in the disc).
Displays the playback information. When pressed, it opens the
corresponding input panel. It does not support the playback period.
- In case of DVD, it displays the title, chapter, and played time.
- In case of CD/VCD, it displays the track and played time.
- In case of MP3CD, it displays the track and folder name.
- 19 -
Disc
Inputting Title/Chapter/Track
The following figure displays the chapter input panel that has been open by
clicking the chapter icon.
DVD/VCD Control
Moves the cursor on the root/title menu or selects the item where the
cursor is located.
Moves to the DVD root menu.
When pressed for over one second, it moves to the DVD title menu.
Used to change the output of audio while playing DVD.
But the DVD must support this function.
Used to change the angle while playing DVD.
But the DVD must support this function.
Used to change the subtitle (caption) while playing DVD.
But the DVD must support this function.
Enter the chapter number to play back.
Changes to the main display and starts playing the input chapter.
Deletes the input chapter number.
Cancels inputting the chapter and closes the chapter input panel.
Displays the current chapter and total chapter number.
Displays the input chapter number.
:Note: Title/Chapter/Track Input Panel
According to the icon pressed just before the input panel appears, the title
input panel, chapter input panel, or track input panel is open.
• In case of DVD, you can input or set the title number and chapter
number.
• In case of CD/VCD/MP3CD, you can input or set the track number.
:Note: Root/Title Menu
The Root/Title menu differs depending on the DVD product and its
version. You can select the desired item using (▲)/(▼)/( )/( ) and
(
) icons and confirm or change it.
:Note: VCD Control Screen
In VCD control, only the
- 20 -
icon is displayed and supported.
iPod™
9.
:Note: iPod Source Deactivation/Activation
iPod™
When this product is connected to an external device, the iPod source is
automatically deactivated. To activate the iPod source, disconnect the
external device, connect the iPod device.
iPod Video GUI
iPod Music GUI
Starts playing a video/MP3 file or pauses to play it.
Stops playing a video/MP3 file.
Plays the previous or next video/MP3 file in the playlist.
Selects Random or Repeat for the playback mode. Or it repeatedly plays
all the files in the playlist.
Displays the video file, iPod owner’s, or list name. When pressed, it
opens or closes the list.
Displays the current playback position. You can move to the desired
location to play.
Displays the played time and total play time.
Displays the music information including the album jacket, song, artist,
and album title.
:Note: Controllable iPod
This product supports music and video files for 3rd generation iPod Nano,
6th generation iPod Classic, and iPod Touch models. The iPod Touch does
not support video files.
In case of other models, some functions may not be supported.
- 21 -
iPod™
iPod Menu & List
• Music List
The following shows the music list panel that is selected on the main menu.
• iPod Main Menu
Music list. When the list is selected, it changes to the corresponding list
panel.
Opens or closes the music list panel.
Changes to the main menu.
Main menu. When MUSIC or VIDEO is selected, it changes to the
corresponding list panel.
- 22 -
iPod™
• Artists List
The following shows the Artists list panel that is selected on the top music
list.
• Artist Albums List
The following shows the Artist (e.g. Bigbang) album list panel that is
selected in the upper Artists list.
Artists list. When Artist is selected, it changes to the corresponding Artist
album list panel.
Opens or closes the music list panel.
Changes to the upper music list panel.
Artist albums list. When the album is selected, it changes to the
corresponding album playlist panel.
Opens or closes the album list panel.
Changes to the upper Artists list panel.
- 23 -
iPod™
• Artist Album Playlist
The following shows the playlist panel of the album (e.g. For The World)
selected in the upper Artist album list.
Album playlist. When pressed, it starts playing.
Opens or closes the playlist panel.
Changes to the upper Artist albums list.
- 24 -
AV-IN
10.
AV-IN
It outputs the CVBS video signals and stereo audio signals received from an
external device that is connected to the external input port.
:Note: AV-IN Source Deactivation/Activation
When this product is connected to an iPod device, the AV-IN source is
automatically deactivated. To activate it, disconnect the iPod device and
connect the RCAs to an external input device; and then select AV-IN.
- 25 -
SIRIUS/XM
11.
it tune to that channel.
Jumps to a favored channel instantly. This icon is supposed to be preregistered to jump to a channel which is accessed frequently and
temporarily such as traffic. The (Jump) icon lets you quickly tune to a
specific channel and then tune back to the original channel by pressing
the icon again. The registration is made in Option menu.
Selects a channel by direct number entry which is three digit channel
number. Numeric keypad screen will be shown.
Stores and recalls presets 1 ~ 6. Stored channel number will be displayed
on button
Displays signal strength, jump indicator, song alert indicator, and
category of current channel. Song alert indicator flashes and generate
alert sound when a programming in other channel has the memorized
song/artist. Touching the (Display) icon will show that channel.
Displays channel number, channel symbol, and channel name.
Displays the song information like title, album, and lyric.
SIRIUS (Optional)
:Note: SIRIUS
See your authorized dealer or installer for more information.
SIRIUS GUI
:Note: SIRIUS Satellite Radio
To use this function, external SIRIUS satellite radio box should be
installed in car and also it should be activated. Satellite radio is the next
generation of audio entertainment, with over to 100 digital channels. For a
small monthly fee, subscribers can hear crystal-clear music, sports, news
and talk, coast-to-coast via satellite.
For more information, visit SIRIUS' website at www.sirius.com, or call 1888-539-SIRIUS.
Changes display format in list mode. During song alert indicated, jump to
alerted channel or channels.
Selects channel by Category. A channel in previous or next category is
tuned. Long touch will show channel list for a selected category.
Category is changed by left and right arrow. The [ X ] icon makes the list
disappear and screen reverts to default.
Selects channel. Previous or next channel will be tuned. Long touch will
show whole channel list and let you browse and select channel. The [ X ]
icon makes the list disappear and screen reverts to default.
Displays current preset bank. There are three banks (Band A/B/C).
Set up SIRIUS radio configurations or display information, such as
software version, SIRIUS ID, etc.
Saves or recalls Memo items in which favored artists or songs are
registered and alert when the items are broadcasting in some channel.
The song seek indicator firstly flashes and then (Memo) icon will make
- 26 -
SIRIUS/XM
Direct Channel Number Entry
Channel can be selected by direct channel number
Channel List
Long touch of CH button will show this list. List is scrollable by left/right
arrow. Channel list scrolls up/down by a page when clicking the (Up/Down)
arrow icon at the right scroll bar.
Enters a number and tune it and revert to SIRIUS default screen.
Deletes a digit.
Cancels the entry and reverts SIRIUS default screen.
Displays entered digits.
Changes display format as Artist → Song → Channel Name cyclically.
Displays channel symbol, channel number, and channel name. Touch of a
line in this area will make the channel tuned.
Moves to the previous/next page.
Displays the current page and total page number.
:Note: SIRIUS Satellite Radio Channel
Channel 184 is promotion channel. If your tuner is not activated, channel
184 is only tunable.
- 27 -
SIRIUS/XM
Preset
Preset lets you store and recall favorite channels. Up to six channels can be
stored for a memory bank and there are three banks –A/B/C. Totally 18
channels can be stored.
Memo – Song Seek & Alert
This feature lets you to capture and store the contents information, such as,
artist or song of the programming on the currently tuned channel, up to a
total of 30 items. It then continuously searches all the SIRIUS channels and
alerts you when a match to a saved program is being played. At that time,
song alert indicator turns on and ”Display” will make it tune to the alerted
channel. If multiple channels are matched, “Display” will make it jump to
the channel one by one.
The radio will display a menu to choose to store the artist name or the song
title. If the programming doesn’t have either artist or song information, that
button is not activated. Neither of artist nor song is not available, both
button is not activated and you can’t store it in memory.
Selects preset bank by touching this button.
Touch to recall a preset channel. The stored channel number is drawn on
this button. Touch and hold to store current channel to this slot of
memory.
Stores artist information in this memory if this programming has it.
Stores song title information in this memory if this programming has it.
Cancel the storing operation.
Diplays memory slot number.
:Note: Memo
• Momentary touch of the (Memo) icon will store artist or song
information in memory as the above screen.
• Touch & hold of the (Memo) icon will recall each memory contents.
- 28 -
SIRIUS/XM
Jump – Shortcut to favored channel
“Jump” is a shortcut feature for tuning to a favored channel instantly.
Jump feature has two mode: jump to entertainment channel or jump to
traffic channel which is covering your specific city. For traffic broadcast
cities, refer to “Option - Jump” section where currently available city list is
shown.
:Note: Jump-Traffic
If the (Jump) icon is set to Traffic under the “Option” menu, touching the
(Jump) icon will take you to your stored traffic channel. If your traffic
report is not immediately available, the jump indicator on the display will
change to the (Jump) icon to indicate a jump is active. Once your local
traffic report is ready, the radio will automatically tune to your stored
traffic channel. You may have to wait a few minutes for your desired
report.
:Note: Jump - Channel
If the (Jump) icon is set to Channel under the “Option” menu, touching
the (Jump) icon will immediately tune to the pre-registered channel.
Touching the (Jump) icon again will return to the channel you had been
listening immediately prior to touching the (Jump) icon.
Option – INFO
• SIRIUS ID
(Jump) icon: Jumps to pre-registered channel by momentary touch. Jump
back to previous channel by one more touch.
(Jump) indicator: It is activated when the (Jump) icon is pressed. It shows
and hides when you go back and forth between pre-registered jump
channel and previous channel.
SIRIUS ID is asked when you activate tuner box and make it subscribable.
- 29 -
SIRIUS/XM
Option – Channel
Channel tab can let you set up your own channel configurations.
It has three submenus; Jump, Parental Lock and Skip.
• Signal
• Jump
To use Jump feature, you should register a channel in this Jump menu.
There’s two sub-categories in Jump. You can register a city of interest from
the list in traffic menu under Jump. If your city is not found there, traffic
broadcasting service in your area is not available.
Signal strength is useful when you set up SIRIUS antenna.
• Versions
SW version shows version information of applications and firmware.
- 30 -
SIRIUS/XM
• Add/Skip
This is the similar ability to lock channels but it lets you edit channel list so
that it looks as your favored channels collection. Unfavored channel can be
skipped in channel browsing. Operation is almost the same with Lock
channel but it does not ask secret pass code.
• Lock
This is the ability to lock some channels you do not want others to access
without your permission. Like the Skip channel feature, the locked channel
will not appear when browsing channels.
Pass code can be changed in an Edit Code submenu.
The channel which has LOCK flag will not be shown during channel
browsing and pass code is asked when direct tuning is tried.
Option – Song Seek Alert
• General
To set up lock channel, 4-digit pass code is requested. If you are first time to
use lock feature, default pass code is “0000”.
If you enter correct 4-digit pass code, channel list is shown and LOCK flag
can be turned on or off.
General menu enables or disables song alert function.
- 31 -
SIRIUS/XM
• Browse
Browse S-seek menu can let you edit the s-seek memory.
• Delete All
Delete All S-seek menu will delete all S-seek list entries.
- 32 -
Bluetooth
12.
Indicates that the Bluetooth mobile phone is connected.
Displays the mobile phone that is connected via Bluetooth.
Bluetooth
:Note: Miscellaneous Icons
Bluetooth GUI
Icon
Description
When a phone rings, it answers the phone by replacing
the (Call) icon
When the call is connected, the hands-free function is
performed or cancelled by replacing the (Call)/(Answer)
icon.
When a phone rings, it rejects answering by replacing the
(Hang Up) icon.
Performs or cancels the mute on talking function (my
voice is not heard to the counter person).
.
:Note: Available Mobile Phone
To use this function, the mobile phone must support the Bluetooth handsfree, stereo headset, and data telecommunication, and it must have the
MP3 player function.
Plays or pauses the mobile MP3 player songs. Because the playback
information cannot be given from the mobile phone, the icon does not
change regardless of playback.
Stops the mobile MP3 player.
Plays back the previous/next MP3 file in the playlist of the mobile phone
MP3 player.
Make a phone call by voice command: The icon will only appear if the
cell phone has voice command features.
Changes to the phone book.
Makes a phone call to the entered or selected phone number.
Disconnects the current call in progress.
Deletes the entered phone number one by one (character).
Deletes the entered phone number.
⑩ Keypad used to enter the phone number.
Displays the connection status between Bluetooth mobile phone and HFP
service. If the service is not connected, the red slant line appears.
Displays the caller’s phone number, receiver’s phone number, or
entered/selected phone number.
:Note: Authentication and Service Connection
This source can be used only when the service is connected after
authentication by the mobile phone. You can set the authentication and
service connection in Setup > System > Phone.
:Note: Stereo Headset
Only when the stereo headset HFP+A2DP is selected and is connected to
the mobile phone authenticated in Setup > System > Phone, play, stop,
and previous/next icons are displayed and the functions are supported.
:Note: When a Phone Call is Received
When the Bluetooth mobile phone and hands-free or headset service are
connected, if a phone call is received, it automatically changes to the
phone source and the bell rings. When the call ends, it goes to the
previous status.
- 33 -
Bluetooth
Phone Book
• Phone Book 01
• Phone Book 02
The following shows the phone book that is selected in Phone Book
Main.
Changes to the phone book missed calls.
Changes to the phone book received calls.
Changes to the phone book dialed calls.
Changes to the phone address book.
Changes to the phone mode.
Through the Bluetooth mobile phone and data telecommunication
connection (PBAP), each phone number is transferred from the mobile
phone and saved in the radio.
Deletes their respective phone numbers saved in the radio.
Moves to the previous panel.
Displays the names saved in the phone book. When a name is selected, it
goes to the corresponding phone number panel.
Changes to the previous/next page.
Displays the current page and total page number.
:Note: Phone Book Download
This function may vary depending on your phone make and model. If
your phone does not support Phone Book Access Profile (PBAP) user
may have to download one contact at a time. Some phone models with
SIM cards might require transferring the phone book to the phone
memory from the SIM card. Read your phone manual for more
information.
- 34 -
Bluetooth
• Phone Book 03(e.g. Joe Richards)
The following shows the phone book that is selected in the previous phone
book.
Changes to the previous panel.
Mobile phone number saved.
Home phone number saved.
Company phone number saved.
Miscellaneous phone numbers. If nothing, blank is displayed.
When you select a blank space, change to the phone mode, enter the
phone number, and click the (Add) icon, the phone number is saved in
the selected blank space.
When you select the saved phone number and click the (Delete) icon, it is
deleted.
Displays the selected phone number.
- 35 -
Movie
13.
:Note: Playable File Format and Codec
Movie
• Playable Audio/Video Codec: MPEG4 ASP, MPEG4 SP, Xvid, WMV
• Files with incompatible movie file extension can not be added to the
movie playlist.
• Part of the files may not be played according to the encoding method of
supported codecs. In this case, the unit will show a warning message of
Movie GUI
“NOT SUPPORTED VIDEO FILE”.
• The unit only supports English filenames. If a special character or other
language is used for the filename, the filename will be shown differently.
(Ex: □□□.avi)
:Note: Caption Support
Captions may be shown only when a smi file identical to the filename of a
movie file exists within the same folder.
:Note: Movie Source Deactivation/Activation
When the Navigation source is running, the Movie source is deactivated.
To activate the Movie source, quit the running Navigation source.
:Note: Video Safety Lockout
Plays the movie or pauses it.
Stops playing the movie.
Plays the previous/next movie.
Selects the Random or Repeat for the playback mode. If not selected, this
is the mode that repeatedly plays all files within the playlist.
Displays the file number. Open or close the file No. input panel by
pressing this menu.
Shows the movie filename. Open or close the playlist panel by pressing
this menu.
Switches to the playlist edit for the playable files saved in the SD
Memory Card and USB Memory Device.
Shows the current play position and the user can move to a desired play
position by dragging the arrow or pressing on the bar.
Shows the current play time and entire play time.
When a movie is playing, the Screen will display the following message:
“Video safety lockout”; this message will not be displayed if the vehicle
parking is on.
- 36 -
Movie
Movie Playlist Edit
You can add or delete playable files saved in the SD memory card and USB
memory device and change their sequences.
:Note: Playlist Edit
• Screen on the left: The movie file administrator displays the folders and
playable files saved in the SD memory card or USB memory device.
You can perform the folder select/unselect/open/close and file
select/unselect.
• Screen on the right: In the movie playlist, you can add the folders and
files selected in the movie file administrator and select/unselect/delete/
move the added file. In case of adding a folder, all the playable movie
files in the folder are added.
Inputting File No.
Displays the folder open/close. When pressed, it open/close.
Displays the memory/folder/file select/unselect. When pressed, it is
selected/unselected.
The edition is saved and closed in the movie playlist editing page and it
goes to the previous status.
Changes to the previous/next movie playlist page.
Selects the currently selected folder or upper folder.
Adds the selected folder or file in the movie playlist.
Moves to the previous/next movie file administrator page.
All files in the movie playlist are selected.
Deletes the file selected from the movie playlist. But the files in the SD
memory card or USB memory device are not deleted.
Can change the play sequence by moving the selected file in the movie
playlist.
Displays the movie playlist page number and total page number.
Displays the current page number of the movie file administrator and
total page number.
Enter the file number to play back.
Opens or closes the file No. input panel and displays the current file
number and total file number.
③ Opens or closes the playlist panel.
④ Starts playing the input file and closes the file No. input panel.
⑤ Deletes the input file number.
⑥ Cancels inputting the file number and closes the file No. input panel.
Displays the input file number.
- 37 -
Movie
Movie Playlist
Movie playlist. When selected, it starts playing.
Opens or closes the file No. input panel.
Opens or closes the playlist panel.
Moves to the previous/next movie playlist page.
Displays the current page number of the movie playlist and total page
number.
- 38 -
Music
14.
:Note: Playable File Format
Music
• Playable File Format: MP3, WMA, OGG
• Files with incompatible music file extension can not be added to the
music playlist.
• You will see a warning message of “NOT SUPPORTED AUDIO FILE”
when a damaged file or wrong file is selected.
• This unit only supports English filenames. If a special character or other
language is used for the filename, the filename will be shown differently
(Ex: □□□.mp3).
Music GUI
:Note: Music File No. Input Panel
The method of using the music file No. input panel is the same as that of
movie.
:Note: Music Playlist Edit
The method of using the music playlist edit is the same as that of movie.
Plays the music player or pause it.
Stops playing the music player.
Plays the previous/next music song.
Selects the Random or Repeat for music playback mode. If not selected,
the mode is set at default to play all music files within the playlist
repeatedly.
Displays the file number. Open or close the file No. input panel by
pressing this menu.
Playlist, Artist – Artist name, Album – Album title or Genre – show the
genre. And open or close the panel by pushing this button.
Switches to the music playlist edit mode for the files stored in the SD
Memory Card and USB Memory Device.
Shows the current play position and the user can move to a desired play
position by dragging the arrow or pressing on the bar.
Shows the current playback time and entire playback time.
- 39 -
Music
Music List
• Playlist
• Top List
This is a music playlist. Select and push a desired file to play the music.
Opens or closes the file No. input panel.
Opens or closes the music playlist.
Switches to the upper list panel. In case of the upper screen, the user can
select the playlist, artist list, album list and genre list by switching to the
top list screen.
Moves to the previous/next music playlist page.
Shows the current page and entire page of the music playlist.
This is the top list screen. You can switch to the corresponding list panel
by selecting the list.
-Playlist: Switches to the edited playlist panel.
-Artist: Switches to the artist list panel.
-Album: Switches to the album list panel.
-Genre: Switch to the genre list panel
Opens or closes the file No. input panel.
Opens or closes the list panel.
- 40 -
Music
• Artist
This is the artist list selected from the top list..
• Artist Playlist (e.g. Mariah Carey)
This is the playlist of the artist selected from the artist list (Ex: Mariah
Carey).
This is the artist list. Switch to the corresponding artist playlist panel by
selecting an artist.
Opens or closes the file No. input panel.
Opens or closes the artist list panel.
Moves to the top list panel.
Select the artist playlist to play the music immediately.
Opens or closes the file No. input panel.
Opens or closes the playlist panel.
Returns to the upper artist list panel.
:Note: When no file exists in the category list despite of the files
existing in the playlist
Either the ID3 Tag is missing or damaged in the music files. The ID3 Tag
contains the basic information about the music such as title, artist, album,
year, comment and genre.
- 41 -
Photo
15.
Photo
: Note: Playable File Format
• Playable File Format: BMP, JPEG
• Files with incompatible photo file extension can not be added to the
photo playlist.
• You will see a warning message of “NOT SUPPORTED IMAGE FILE”
when a damaged file or wrong file is selected from the photo playlist.
• This unit only supports English filenames. If a special character or other
language is used for the filename, the filename will be shown differently
(Ex: □□□.jpg).
:Note: Photo File No. Input Panel
The method of using the photo file No. input panel is the same as that of
movie.
:Note: Photo Playlist Edit
The method of using the photo playlist edit is the same as that of movie.
Runs the photo slide show or pauses it.
Shows the previous/next photo file.
Rotates the photo by 90° to the clockwise-clockwise/counter direction.
The Photo doubles/ halves in size each time you press until it is 0.25/4X
normal size.
Open or close the file No. input panel by pressing this menu and displays
the file number.
Shows the photo file name. Open or close the photo playlist panel by
pushing this button.
Switches to the photo playlist edit mode for the files stored in the SD
Memory Card and USB Memory Device.
- 42 -
Rear View Camera
16.
Rear View Camera
When the Rear CAM is set to “On” after installing/connecting a rear view
camera, it will automatically switch to the Rear View Camera Source if the
transmission is set to the rear gear regardless of the source being executed
and receive and display the CVBS video signal from the rear view camera.
If the rear gear is released, the system returns to the previous state.
:Note: Rear View Camera Setup
To turn on Rear CAM go to Setup > System > Rear CAM.
- 43 -
Phone Mute
17.
Phone Mute
The telephone lead is connected to the car kit. Upon making or receiving a
call, it switches to Phone Mute Source, mute the running source during a
phone call, and the call is diverted through the speakers of the vehicle. After
the call ends, it goes to the previous status.
:Note: Phone Mute
This feature is used only if the vehicle is equipped with an older version
phone that is not Bluetooth compatible.
- 44 -
Setup—Display
18.
• Dimmer
Adjust the brightness of LCD screen according to the brightness of use
environment.
Setup
:Note: Initialization
If the (Default) icon is pushed from every setting mode, the value is set to
the initial value set at the time of manufacture.
Display
• Screen
Adjust the LCD Screen of CONTRAST, TINT, COLOR, and BRIGHT.
- Auto Day/Night
ON: Sets the screen brightness automatically to a value of
Daytime/Nighttime Dimmer according to the On/Off state of vehicle
headlight switch.
OFF: Set the screen brightness manually to the Daytime Dimmer
regardless of the On/Off state of vehicle headlight switch.
- Daytime/Nighttime Dimmer: Adjust the screen brightness by pushing the
(+)/(-) icon.
- Bright: Adjust the brightness of the LCD screen by pushing the ( )/( )
icon.
:Note: Night Drive in the Auto OFF Mode
When the mode is set to Auto OFF, the user can set to show only the
Daytime Dimmer. In the state of setting to Auto OFF, the screen
brightness is kept with the value set in the Daytime Dimmer during a
nighttime drive.
- Contrast: Adjust the contrast effect of LCD screen by pushing the ( )/( )
icon.
- Hue: Adjust the hue effect of LCD screen by pushing the ( )/( ) icon.
- Saturation: Adjust the color saturation of LCD screen by pushing the
( )/( ) icon.
- 45 -
Setup—Display
• Touch Adjustment
The screen icon may not work well as the touch sensitivity of the LCD
screen is changed due to the severe temperature change of environmental
change. In this case, the user can optimize the touch sensitivity by the
adjusting the touch sensitivity of the LCD screen.
After adjusting the sensitivity by pushing the plus marks a total of five
times, push the screen to apply the newly adjusted values. To return to
the previous setting values of the touch screen, please wait for 30
seconds.
Start the Touch Adjust Mode.
:Note: Emergency Mode
When it is not possible to touch the touch adjustment icon because the
touch sensitivity of LCD screen is severely altered, push the main unit
button [
] for 2 seconds to switch to the Setup > Display >
Screen and again, push the main unit button [
] for 2 seconds.
Then, you can enter the Touch Adjustment screen.
Touch the center of plus marks (+) correctly that moves in the order of
center → left top → left bottom → right bottom → right top.
- 46 -
Setup—Display
• Clock
• Zone
- SYNC
ON: Automatically adjust the time displayed on the bottom of the
product based on the time received from RDS.
OFF: Do not use the automatic time adjust function. In this case, the
system shows the time adjusted by the user.
- Single Zone: Output the current source to an external A/V device
connected to the A/V OUT terminal.
:Note: RDS Time
The time received from RDS is updated every minute. However when it is
not possible to receive FM signal or is listening to the FM broadcasting
without RDS signal, the time is not updated.
- Hour/Minute: Adjust the hour/minute by using the ( )/( ) icon.
- Set: Save the time adjusted by the user.
- Multi Zone: Output the selected rear source to an external A/V device
connected to the A/V OUT terminal.
:Note: Rear Source Deactivation
When you are in multi-zone, some of the rear sources will be deactivated
depending on what the main source is set to.
For example, if the current source is Music, Movie can’t be selected for
the rear source.
- Rear Speaker
ON: Output the voice signal of Rear Source to the Rear Speaker.
OFF: Do not output the voice signal of Rear Source to the Rear Speaker.
- 47 -
Setup—Sound
Sound
:Danger: Max. Volume Setting and Passenger Safety
• Speaker Control
You can set the volume and various other effects on the front/rear/left/right
speaker.
If the Max. Volume is set too high, it can be harmful to the health of the
weak and elderly, pregnant women and nursing mothers and patients from
a sudden increase of voice output.
- LOUD
ON: Stress the low pitched sound (100Hz) or high pitched sound
(10KHz).
OFF: Set at the default sound.
:Note: LOUD Effect
The LOUD effect may be diminished if the volume is too high.
- BASE EX
ON: Stress the low pitched sound (100Hz).
OFF: Set at the default sound.
• Sub Speaker
5.1 Adjust the center of channel speaker and volume respectively.
- BAL/FADER: Adjust the volume of the front/rear/left/right speaker by
pushing the arrow icon.
- Max. Volume: As a function of preventing an excessive volume output for
the driving safety of user, set the maximum volume output when the
product power is turned on.
The system automatically sets to a lower volume by comparing the Max.
Volume with the volume at the time of previous power Off.
Max. Volume < Volume at the Time of Previous Power OFF: Max.
Volume
Max. Volume ≥ Volume at the Time of Previous Power OFF: Volume at
the Time of Previous Power OFF
:Danger: Max. Volume Setting and Safe Driving
If the maximum volume is set too high, this can interfere with safe driving
from a sudden increase of voice output. Please adjust the Max. Volume so
that you can listen to the outside sound well.
- Center: Adjust the volume by pushing the (+)/(-) icon.
- Woofer: Adjust the volume by pushing (+)/(-) icon.
- V.Woofer: Select whether to output the 2-channel sound source through
the virtual woofer.
- 48 -
Setup—Sound
• EQ Select
Set the equalizer (EQ).
There are three default modes of POP, Classic and Rock and three user
setting modes.
• My EQ
Set the EQ according to one's own taste.
Set the values of three frequency zones such as BASS, MID and Treble.
They can be set to 15 levels respectively from -7 to +7.
- POP: Set to the EQ suitable to the POP genre.
- BASS(100Hz): Set the value by pushing the (+)/(-) icon.
- Classic: Set to the EQ suitable to the Classic genre.
- MID(1KHz): Set the value by pushing the (+)/(-) icon.
- Rock: Set to the EQ suitable to the Rock genre.
- TREBLE(10KHz): Set the value by pushing the (+)/(-) icon.
- User 1/2/3: Set to the EQ saved according to the taste of user.
- After finishing the setup, save the setting value to User 1/2/3 by pushing
one of three icons like ( )/( )/( ).
- 49 -
Setup—Sound
• Source Offset
The volume level can be adjusted Independently according to the source.,
Set the Volume level of each source to output an appropriate volume level
that will match the other available sources , Ideally all sources when
selected separately should be at the same volume level when they are
selected.
The source offset value can be adjusted in 7 levels up or down in 2 db
increments by simply pressing the + or – icons on the screen.
• Voice
- Navigation Voice Control: When the source is switched ON while running
the navigation system, the system interrupts the current video and voice
signal by default, However If a navigation voice command occurs I, the
system overrides the current source and outputs the voice command
through the speakers.
ON: Run the voice navigation override function.
OFF: Do not run the voice navigation override function.
- Call Voice: When calling by using the hands-free unit through Bluetooth,
pre adjust the incoming talk volume by pushing the (+)/(-) icons.
:Note: Source Selection When Setting the Source Offset
For an appropriate volume offset, it is desirable to adjust the setting while
listening to the current source sound. When setting the volume offset of
the source other than the source being currently played, it is difficult to set
an appropriate value since no audio sound is heard.
- 50 -
Setup—System
System
• Disc - AUDIO - Speaker Output
• Disc - AUDIO - Speaker
Set the respective speakers of a5.1 speaker system when playing a DVD.
- DOWNMIX: Set this function when listening to multi-voice channel CD’s
or DVD’s. This will remix the content down so it may be heard in the two
channel (stereo) audio mode.
OFF: Do not use the Downmix function.
LT/RT: Merge the multi-channel voice signal and send to the left/right
channel.
STEREO: Output in the stereo sound.
V SURR: Output in the virtual surround sound.
- FRONT SPEAKER: Select Large or Small according to the size of the
front speaker in use.
- REAR SPEAKER: Select either Large, Small or Off according to the size
of the rear speaker in use.
- CENTER SPEAKER: Select either Large, Small or Off depending on the
size of the center speaker in use. If a center speaker is not installed, set Off.
- SUBWOOFER SPEAKER: If the subwoofer is in use, set On. And if a
subwoofer is not installed, set Off.
:Note: Speaker Setup
• Large: The speakers output the full band of audio.
• Small: The speakers output the audio signal whose the low frequency
(less than 200Hz) is cut off.
:Note: Speaker Setup for CD
• The source of CD has 2-channel audio. Thus its speaker output is related
with front speaker setup only. Even if you change the rear, center, and
subwoofer speaker setup, the speaker output doesn’t change.
• If you change the speaker setup for a 5.1-channel DVD disc, it might be
inappropriate for a CD. In that case, make a change in the speaker setup
for a CD.
- 51 -
- DYNAMIC: Sets the Dynamic Range of Dolby Digital Audio Source
when playing a DVD. The Dynamic Range, allows setting a difference
between the maximum and minimum levels of sound, the sound becomes
more dynamic as the value is larger. The range values are 12.5%, 25%,
37.5%, 50%, 62.5%, 75%, 87.5%, FULL.
OFF: Turn off the dynamic range effect.
Setup—System
• Disc - AUDIO - SPDIF (Sony/Philips Digital Interface)
When inputting a voice signal by connecting to an external digital audio
unit, set the audio signal output to SPDIF.
• Disc - AUDIO - Delay
Adjust the Delay Time of each speaker independently by setting the distance
from the front speakers.
- SETTINGS
OFF: Do not output the digital audio signal.
STREAM: Output the digital audio signal directly. Select it when the
external digital audio unit has the Dolby Digital Decoding function.
PCM: Output the decoded digital audio signal. Select when the external
digital audio has a 2-channel digital stereo amplifier. Generally, this
mode is used for Normal CD playback l.
• Disc - Preference - Disc Menu
Set the disk menu language supported by DVD. But, this function can only
be used with a DVD supporting multiple languages.
- MAX FREQ: Set to the maximum sampling rates of SPDIF.
- 52 -
Setup—System
• Disc - Preference - Audio
Set the language supported by DVD.
• Disc - Preference – Parental (Limited View Option)
This is the function that limits viewing in order to keep children from
watching adult program material.
• Disc - Preference - Subtitle
Set the closed caption language supported by DVD.
:Note: Parental Setup Ratings
• G: General Audiences
• PG: Parental Guidance suggested; Some material may not be suitable for
children
• PG13: Parents Strongly Cautioned; Some material may not be
inappropriate for children under 13
• PGR: Parental Guidance Recommended; Parents very strongly
Cautioned.
• R: Restricted; Under 17 Requires Accompanying Parent or Adult
Guardian
• NC17: No One 17 and Under Admitted
• ADULT: Adults Only
:Note: Parental Setup Password
Password should be entered for changing the Parental Setup Rating when
password mode is on.
- 53 -
Setup—System
• Disc - Password - Mode
• Disc - Initialization
- Password Mode: Select whether or not to set a password.
ON: Use the password mode.
OFF: Do not use the password mode.
If the user has set the System – DVD setup incorrectly by mistake, the
system can be initialized by pushing the (Start) icon.
• Disc - Password - Change
- Password Change: Change the 4-digit password. Please use the provided
remote control for the password entry.
OLD: Enter current password.
NEW: Enter new password.
CONFIRM: Enter new password again.
:Note: Default Password
The default password is ‘1111’.
- 54 -
Setup—System
• Bluetooth
Set the authentication, service connection/disconnection between this unit
and mobile phone for the Bluetooth communication.
:Note: Paring
Refer to the owner’s manual of the mobile phone for more information on
pairing.
- Pairing(Authentication Process)
- Connection (Service Connection)
After selecting a device registered through the authentication process, either
push the (Connect) icon of this product or select the supported services (Ex:
Hands-free, stereo headset, headset, data communication, etc.) from the
mobile phone to make the service connection.
Execute the pairing mode by pushing the left (Start) icon.
Set the Bluetooth mode of the mobile phone ON in this paring mode.
Search a device for connection in the Bluetooth mode of the phone.
If the “VNMC-1000” item is found, stop the search.
Select the “VNMC-1000” item and enter the password“0000”.
If the connection is established, the system will display the
“CONNECTED” phrase along with HFP, A2DP, HSP or PBAP according
to the service selected.
If HFP+A2DP are selected, two services will be supported at the same time.
Also, the user can cancel or delete the authenticated device item.
If a unique address of the mobile phone is created in the list
(authentication list) on the right, the authentication process is normally
terminated.
- 55 -
Setup—System
• Photo
Set the time interval of photo slide show.
• ETC
- Beep: Turn on/off the beep sound when pushing a button or touch screen.
- Auto Close
ON: When the engine is stopped, the LCD panel will be closed
automatically. If the engine is started again, it will automatically move to
the angle position of LCD panel that was adjusted for the last time.
OFF: The LCD panel is not closed whether or not the engine has started
and the current angle will be kept.
- Phone Mute: Set whether phone mute feature is used or not.
• Rear CAM
Set when connecting the rear view or backup camera.
- Rear CAM
ON: When a rear view camera is connected, it will automatically receive
and display the video signal when moving backward.
OFF: Select when no rear view camera is connected.
- Mirror
ON: Reverses the image of the camera to emulate a rear view mirror.
OFF: Allows the image from the camera to be shown without the mirror
effect.
- 56 -
Setup—Version
Version
The user can check the currently installed/used program versions of Boot,
OS, Application, Phone and Micom. E-updates and other information may
be posted on the product website of manufacturer and reseller.
The update of this product such as Boot, OS, Application, Phone or Micom
shall be performed by an authorized service technician. If you require
technical service, please contact the customer support center or place of
purchase.
Check the update information about firmware and push the (Start
Update) icon.
:Caution: Power Interruption When Updating an Application
The product may not function properly if the power is interrupted while
updating a program. Continued Powering of the unit until any and all
updating has been completed is critical, otherwise it might render the unit
inoperable and would have to be returned to a service center.
:Note: SD Memory Card Slot While in Update
Please insert the SD memory card of holding the download file for
program update into the NAVI slot. Otherwise, the system can not
recognize the update file.
Wait until the update is completed.
Push the (Upgrade) icon.
- 57 -
Setup—Version
If the update is completed, push the (Restart System) icon. The unit
power will be automatically turned Off and On. The main menu will
appear.
:Note: In Case it doesn’t Restart
When the power of this product is set to Off, it doesn’t turn on
] button to restart.
automatically. In this case you should press the [
If the update not needed, the update information as below is shown.
:Note: Forced Update
If necessary, you could update the firmware by pressing the (Forced
Update) icon. But it is not recommended to use it.
- 58 -
Appendix
19.
No satellite signal is
being received.
Check for obstacles
over or around the
satellite antenna.
Change the vehicle
location to eliminate
nearby obstacles
(bridges, overpasses,
tress, buildings, etc.).
Cause
Action
Appendix
Trouble Shooting
If the problem continues after performing the following actions, please
contact the place of purchase or customer support center.
Acquiring Signal
• DVD Player
Message
Please
Check Disc
Err 0
Err 1
Err 5
Tray Error
Symptom
When the unit can not
read the disk.
When the temperature
of DVD Mechanism r
is too hot.
When the temperature
of DVD Mechanism is
too cold.
When the spindle
motor does not work
properly.
When the tray is
locked because of an
inserted disc.
Input Invalid
When pushing a button
or icon incorrectly.
Play Back Only
When entering a playback
command not supported in
the current mode.
Action
• General
Check the disk for
finger prints or
scratches, Clean the
disk or replace it with
another disk.
Turn off the power and
allow the product and
vehicle to cool down.
Turn off the power and
allow the product and
vehicle to warm up.
Symptom
Turn off and on the
power again.
Turn off and on the
power again. Take out
the disk manually by
pushing and holding
the [
] button for a
few seconds.
Power does not turn
on.
Possible blown fuse or
dead vehicle battery
Nothing happens
when buttons are
pressed. Display is
not accurate.
The operating
environment is too cold
or too hot.
The microprocessor
has malfunctioned due
to electrical noise,
static or other causes.
Touch screen is not
working properly.
The touch screen is
incorrectly aligned.
Push the correct button
or icon.
• SDARS
Message
Symptom
Action
Antenna Not
Detected.
The satellite antenna is
not connected to the
tuner.
Check the satellite
antenna connection.
The remote control
does not work.
- 59 -
Sunlight is interfering
with the remote control
IR Sensor.
Batteries of remote
control are weak or
dead.
Replace with a fuse of
same amperage. If the
fuse blows again,
consult with the dealer
from whom you
purchased the unit.
Allow the product and
vehicle to warm up or
cool down.
Turn off the unit and
then power it up again.
Press and hold SETUP
button for more then
one second to display
Setup Menu. Press
and hold SETUP
button again to display
Touch Adjust Mode.
Follow directions on
screen.
Try using the remote
where there in no
direct sunlight hitting
the sensor.
Check and/or replace
the batteries in the
remote control unit.
Appendix
• LCD Screen
• Disc
Symptom
Cause
Action
Symptom
Cause
Action
The Video image is
not displayed.
The parking brake is
not set
The screen bright setup
is too low.
The operating
temperature is too low.
Check that the parking
brake is set.
Adjust the Bright
setting.
Allow interior to
warm up.
The Dimmer’s Auto
Day/Night is set to On,
the display brightness
is automatically
reduced when the
headlights are on.
Disc cannot be
loaded.
Another disc is already
loaded in the player.
A DVD disc with a
different region code is
loaded.
Eject the disc before
loading another one.
Use only discs with the
same region code as
this unit.
Clean the disc with a
soft cloth.
Replace with an
undamaged disc.
The display is dark.
The headlights of the
vehicle are turned on.
Display color of the
Video is light or
pale.
Video image is poor
when other video
source is connected.
• Sound
Display color is
incorrectly adjusted.
Adjust Color, Hue and
Saturation settings.
NTSC/PAL setting is
incorrect.
Set the NTSC/PAL
properly according to
the other video source.
Symptom
Cause
Action
No sound.
The volume is set too
low.
Speaker wires are not
connected correctly.
Mute function is
active.
No sound is heard
from a speaker.
In the Speaker setup, a
speaker is set to OFF.
The Bal/Fader setup is
incorrectly set.
DVD disc will not
play
Sound skips, or
sound is noisy.
Sound is bad
immediately after
power is turned on.
Increase the volume.
Connect the speaker
wires correctly.
Cancel the mute
function.
Correct the speaker
setting in Setup >
System > Disc >
Audio > Speaker.
Press (Default) icon in
Setup > Sound > SPK
Ctrl.
- 60 -
Disc is dirty.
Disc is heavily
scratched or warped.
Droplets may have
formed on the internal
lens when the car is
parked in humid
location.
Disc cannot be
played, and the
display reads
“Parental
Violation”.
Viewing has been
restricted by the unit’s
Parental setting.
DVD pauses during
playback.
The disc is a dual-layer
DVD disc.
MP3 files will not
play.
The disc storage
standard or file format
is incorrect.
Leave the power on for
about one hour to dry
out the unit.
Release the restriction
or change the Parental
setting.
It is normal for duallayer discs to pause
during playback briefly
and then resume
playback.
Use only discs which
have files storage
according to ISO9600
Level 1/Level 2
standards.
Appendix
Notices for Installation and Service
• Please be careful so that the blue wire of this product is not connected
directly power a powered antenna, this wire is to be used as a power
antenna activation trigger. Not to power an antenna motor directly.
:Danger: Product Installation
• The installation and other related information of this product have been
prepared for experts familiar with the product. The manufacturer
assumes no responsibility for product damage occurred at the time of
installation by non qualified installation personnel.
• All wiring shall be completed by protecting connections with a quality
insulating tape.
• Please do not connect the blue/white wire of this product to directly power
an external amplifier. This wire is to be used as an Amplifier trigger wire
not a direct feed.
• Please cover all exposed wire connections with electrical tape. Any
unused speaker cables also should be wrapped with electrical tape. If the
connection cables are not insulated, it may cause damage to the unit.
• Please do not pierce the fire wall between the engine compartment and the
interior to connect to the BATTERY (yellow) wire of this product to the
vehicle battery. Please use a more convenient and safe method for the
battery power preferably at the vehicles interior fuse box.
• This product may not be installed into a vehicle that does not have
ACC/ON (Accessory/ ON) on the vehicles Ignition switch.
• Please install this product carefully so that the wiring does not interfere
with any of the vehicle functions such as the gear shift, parking brake, seat
sliding mechanism, etc. Poor installation practices may interfere with
driving and become a possible safety hazard..
• Please connect radio to DC 12V battery only after grounding the unit first.
• Please ground the ground wire (black colored wire) separately from
another the product ground. Make sure ground is sufficient by checking
resistance from the negative side of the vehicle battery terminal to ground
connection.
• When installing this product to an RV, SUV, truck or bus, please check
for the proper battery voltage of +12VDC. If the voltages are different,
please use this product only after adjusting the voltage by using an
appropriate voltage converter (optional).
• Please turn off the product power prior to connecting the vehicles battery
cable.
• Please do not connect any other device to the power supply cable. It may
damage the product or cause a fire if the current capacity of the cable is
exceeded.
• When replacing a fuse, please use only the fuse conforming to the
specifications shown on the fuse holder. If a fuse other than the one
specified is used, it may cause a fire or cause damage to the product.
• Speakers connected to this product, should be the high power type with
impedance in the 4 to 8 Ω range and a minimum rated power capability of
50Watts.
- 61 -
Appendix
Installation and Removal of the Main Unit
• Installation–Installation Method by Using Universal Mounting Bracket
• Removal
Insert the universal mounting bracket into the Instrument Panel of the car.
Bend all the stoppers of the bracket toward the inside by using a screw
driver. There are 5 stoppers on the upper and lower sides of the bracket.
Please remove the screws from the rear side of main unit in the reverse
order of installing the main unit.
Remove the Trim Cover.
Insert a removal tool between spring and universal mounting bracket.
Take out the main unit by using the removal tools.
:Caution: Product Fixing State
Please fasten the product so that the main unit does not move.
Insert the main unit into the universal mounting bracket so that the
product can be locked in.
Install the connection wires while referring to the “System Connection”
section.
Attach the Trim Cover. Check whether all hooks are connected.
:Caution: Removal Tool Storage
The main unit can not be removed without the removal tools. Please keep
the removal tools in a secure place.
- 62 -
Appendix
Components and Accessories
Main Unit
Mounting Bracket
Trim Cover
Remote Control
USB Extension Cable
ISO Antenna Adapter
Power & Speaker Out
Cable Assembly
AV IN/OUT
Cable Assembly
Bluetooth Microphone
iPod
Cable
GPS Antenna
Steering
Wheel
Remote Out Cable
CD - Navigation Map
and Apps Backup
disc
Machine Screw(8EA)
Split Bar
SD Card
Owner’s Manual
Battery
(AAA Type, 2EA)
- 63 -
Multi-media
Appendix
System Connection
- 64 -
Appendix
Specifications
• Monitor
Screen Size
Display Method
Resolution
Color system
• DVD Player
Playable Disc Formats
Playable Disc Types
Distortion
Signal-to Noise Ratio
6.98
inch
Wide
(167.35mm×93.0mm×6.8mm)
TFT Active Matrix LCD
800(V) × 480(H)
NTSC, PAL
80㏈ or higher (1KHz, IHF-A)
AC-3/LPCM
• AM Tuner
Tuning Range
Usable Sensitivity
530KHz ~ 1,710KHz, 10KHz Step
35dB or lower
Stereo Separation
Frequency Response
Map Memory Type
GPS Receiver
• General
Input Voltage
87.5MHz ~ 107.9MHz, 200KHz Step
12㏈µ or lower
26㏈ (98.1MHz) or higher
20Hz ~ 12.5KHz
• Audio AMP
Rated Power Output
(THD=10%)
Power Output, Max.
Speaker Impedance
AUX AV IN, Rear CAMERA IN, USB2.0, iPod
AUX AV Out, SPDIF
5.1 CH Pre-Amp Line Out
25W × 4CH (1KHz, 4Ω)
45W × 4CH
4Ω ~ 8Ω
- 65 -
SD Memory Card
SiRFstar™ III GPS with Patch Antenna/Indoor
Fuse Capacity
Operation Temp. Range
Storage Temp. Range
14.4V (Allowable Voltage Range: 11V~16V)
11.0A (14.4V)
15A
-20° ~ + 70° C
-40° ~ + 85° C
Dimensions
178㎜(W) × 100㎜(H) × 183㎜(D)
Weight
2.6㎏
Current Max.
• AV IN/OUT
Input
Output
etc
Bluetooth V 2.0
Class 2
HFP, A2DP, HSP, AVRCP, PBAP, OPP
• Navigation
DVD-Video, Audio CD, MP3 CD
CD, CD-R/RW, DVD-R/RW, DVD+R/RW
120mm & 80mm diameter round discs
0.3% or less (1KHz)
Digital Output Format
• FM Tuner
Tuning Range
Usable Sensitivity
• Bluetooth
Core Version
Range
Profile
Format
Appendix
- 66 -