1
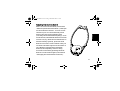
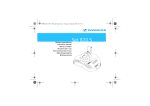
Set 820.book Seite 1 Freitag, 9. Dezember 2005 12:36 12
Set 820
Bedienungsanleitung
Instruction Manual
Notice d´emploi
Istruzioni per l´uso
Instrucciones para el uso
Gebruiksaanwijzing
Bruksanvisning
Set 820.book Seite 2 Freitag, 9. Dezember 2005 12:36 12
Set 820.book Seite 1 Freitag, 9. Dezember 2005 12:36 12
Deutsch........................................................................................................3
English ...................................................................................................... 23
Français .................................................................................................... 43
Italiano...................................................................................................... 63
Español ..................................................................................................... 83
Nederlands............................................................................................. 103
Svenska .................................................................................................. 123
Set 820.book Seite 2 Freitag, 9. Dezember 2005 12:36 12
Set 820.book Seite 23 Freitag, 9. Dezember 2005 12:36 12
The Set 820 is an assistive listening system for your radio, TV, hi-fi system or
similar sound sources at the volume you choose. The transmitter has a range
of up to 100 m which allows you to move around freely – without the
constrictions of cables. The system uses RF audio signals for sound
transmission.
23
English
Set 820
Thank you for choosing Sennheiser! Over half a century of accumulated
expertise in the design and manufacture of high-quality audio equipment
has made Sennheiser a world leader in the field of audiology.
Set 820.book Seite 24 Freitag, 9. Dezember 2005 12:36 12
Delivery includes
English
The Set 820 consists of the following
components and accessories:
- Stethoset receiver
- Transmitter
(charging unit)
- Rechargeable battery
- Power supply
- Connecting cable for
headphone output
- Adapter for SCART socket
- Replacement ear pads
- Instruction manual
24
RR 820
TR 820
BA 151
NT 820
Set 820.book Seite 25 Freitag, 9. Dezember 2005 12:36 12
Connecting the transmitter (charging unit)
English
The rear of the transmitter is
fitted with two audio inputs:
A socket (LINE) for connection
to the audio output or the
headphone socket on your TV,
and a microphone socket (MIC).
Plug in one end of the connecting cable to the audio output or the
headphone socket on your TV, and the other end to the LINE socket on the
transmitter.
If your TV set is fitted with a SCART socket, use the supplied adapter.
If your TV does not have a headphone or SCART socket, you can use an
external microphone which is described in the section “Accessories”.
25
Set 820.book Seite 26 Freitag, 9. Dezember 2005 12:36 12
Only use one of the two audio inputs on the transmitter (MIC or LINE).
English
Connect the power cable to the POWER socket on the transmitter. Plug the
power supply into a household electrical outlet.
Pull the power supply unit out of the electrical outlet when the unit will not
be used for extended periods of time.
Complete freedom of movement
It is not necessary that the transmitter and
stethoset receiver are in a direct line of
sight, so you can move around freely in the
home or outside in the garden. One
transmitter can be used to transmit to
several receivers on the same frequency.
The transmitter’s range may decrease due
to the surface/composition of walls.
26
Set 820.book Seite 27 Freitag, 9. Dezember 2005 12:36 12
Where to place the transmitter
Choose a suitable place near or on
top of your hi-fi system or TV set.
English
Do not place the transmitter close
to metal objects such as shelf bars,
reinforced concrete walls, etc.
The transmitter features a
convenient automatic on/off
function. The transmitter is
turned on by the audio signal.
If there is no audio signal for about 3 minutes, the transmitter automatically
turns off. The transmitter is now in stand-by mode, its power consumption is
very low so that it can remain connected to the mains. Batteries can always
be recharged when the transmitter is connected to the mains.
27
Set 820.book Seite 28 Freitag, 9. Dezember 2005 12:36 12
Using the stethoset receiver
English
When putting the stethoset receiver on,
make sure the operating control is
pointing downwards and the letters are
at the front.
The stethoset receiver automatically
turns on if you pull the earbows apart.
After use, the receiver automatically
turns off.
28
Set 820.book Seite 29 Freitag, 9. Dezember 2005 12:36 12
Adjusting the volume
Adjust the receiver’s volume with
the operating control.
English
If you are not using the stethoset
receiver, store it in the transmitter’s
charging compartment so that the
battery can be recharged (see
section “Charging the battery”).
29
Set 820.book Seite 30 Freitag, 9. Dezember 2005 12:36 12
English
Changing the transmission channel
To avoid interference caused by the
simultaneous operation of several
transmitters, select a different channel
on each transmitter. Several
switchable transmission channels are
available (CHANNEL).
Due to the required approval two
channels are selectable:
Positions 1 or 3 = channel 1
Position 2 = channel 2
Turning the automatic compression system on
Use the COMP switch (compression) at the rear of the transmitter to turn the
automatic compression system on. This system reproduces soft
passages louder and decreases loud sounds.
Use the MO/ST switch to choose between mono and stereo transmission.
For mono TVs and when using the MKE 800 TV microphone, the switch must
be set to mono (MO).
30
Set 820.book Seite 31 Freitag, 9. Dezember 2005 12:36 12
Adjusting the receiver channel
English
First turn on the transmitter (see section
“Where to place the transmitter”). Then put
on the stethoset receiver - as soon as the
receiver is put on it automatically tunes
itself to the first strong signal found
(normally the transmitter frequency). If, for
some reason, the selected channel is not the
correct one (e.g. because of interference or
another nearby system), press the TUNE
button at the rear of the receiver until you
can hear the audio signal loud and clear. If
you decide to change the transmitter
channel, the frequency search tuning
must be re-started by pressing the TUNE
button on the receiver again (see section
“Changing the transmission channel”).
31
Set 820.book Seite 32 Freitag, 9. Dezember 2005 12:36 12
Charging the battery
English
Place the receiver into the transmitter’s
charging compartment, with the operating
control at the front. The left LED on the
transmitter must light up.
Charge the battery for 24 hours before you use
it for the first time. The normal charging time
is 4-5 hours. A fully charged battery has an
operating time of approx. 4 hours.
Always store the receiver on the
transmitter to ensure that it is fully charged.
The transmitter automatically switches to trickle charging so that the
battery cannot be overcharged. The receiver can remain in the charging
compartment even when the battery has been fully charged.
32
Set 820.book Seite 33 Freitag, 9. Dezember 2005 12:36 12
Additional information
Varnish or furniture polish may degrade the rubber feet of the transmitter.
Place the transmitter on a nonslip pad to avoid potential staining of
furniture.
Delivery includes a pair of replacement ear pads. If necessary, remove the
old ear pads and slide on the new ones.
Use a soft cloth for cleaning the units. Do not use abrasive cleaners.
33
English
The audio transmission technology used with this unit is basically that of a
radio. According to today’s scientific knowledge, the radio waves
emitted by this unit are not harmful to humans or animals.
Set 820.book Seite 34 Freitag, 9. Dezember 2005 12:36 12
English
WARNING:
34
Volume up? - No!
When people use headphones, they tend to choose a higher
volume than with loudspeakers. However, if your hearing has
deteriorated and you need to rely on an assitive listening
system, please avoid listening at high volume levels for a long
time. Please protect your hearing.
Set 820.book Seite 35 Freitag, 9. Dezember 2005 12:36 12
Accessories
ATTENTION:
Components from other manufacturers (e.g. for power supply
or battery) may cause damage to the unit and will invalidate
the warranty.
The following accessories are available from your authorized dealer:
Rechargeable battery
BA 151
Charger
L 151-2
Stethoset receiver
RR 820
Clip-on receiver with audio socket
RR 820 S
Transmitter
TR 820
External microphone
MKE 800 TV
35
English
Only use original Sennheiser spare parts and accessories.
English
Set 820.book Seite 36 Freitag, 9. Dezember 2005 12:36 12
BA 151 rechargeable battery
By using a spare battery, you can use the stethoset receiver for more than
four hours of continuous operation. Always store the spare battery in the
small charging compartment at the right of the transmitter. The right LED on
the transmitter lights up green to show charging is taking place. When
charging a battery in the small charging compartment, the charging time is
10-12 hours.
A battery has a service life of 1-2 years and should be replaced if the
operating time decreases.
Sennheiser batteries can be recycled. Please dispose of the batteries as
special waste or return them to your specialist dealer. To protect the
environment, only dispose of totally exhausted batteries which cannot be
recharged.
L 151-2 charger
Spare batteries can be charged via the L 151-2 charger.
36
Set 820.book Seite 37 Freitag, 9. Dezember 2005 12:36 12
RR 820 stethoset receiver
One transmitter can transmit to several receivers. Additional RR 820
receivers are available from your authorized dealer.
English
RR 820 S clip-on receiver
Instead of earbows, this receiver features a socket for connecting a
headphone or a connecting cable which allows its use with a hearing aid.
MKE 800 TV external microphone
If your TV doesn’t have a headphone output, SCART or RCA socket, you
can use your Set 820 together with the MKE 800 TV microphone.
Fix the microphone to the loudspeaker of your TV by means of Velcro tape.
Connect the microphone connector to the MIC socket on the transmitter and
set the transmitter’s MO/ST switch to mono (MO).
37
Set 820.book Seite 38 Freitag, 9. Dezember 2005 12:36 12
English
If problems occur...
- Are all jack plugs connected correctly?
- Are the receiver and sound source turned on and is the volume of the
- receiver and sound source sufficient?
- Have you pulled the earbows apart?
- Is the battery inserted properly into the receiver?
- Have you charged the battery for at least 20 minutes?
- Are you too far from the transmitter? (if so, move closer)
- Choose a different channel.
- Adjust the setting with the TUNE button.
- Should the problem persist, please contact your authorized dealer for
assistance.
Never oper the unit!
38
Set 820.book Seite 39 Freitag, 9. Dezember 2005 12:36 12
Adjusting the earbow pressure
Loosen the screw at the rear of the stethoset receiver.
Move the screw in the long hole to the desired position
(continuously adjustable).
1 = Low earbow pressure
2 = High earbow pressure
Tighten the screw.
English
Additional information for hearing aid acousticians
1
2
Adjustments for hearing disabilities
Turn the operating control fully counterclockwise (0). Remove
the operating control by carefully lifting it over the "guide
notch" on the inside. Use the 4 potentiometers on the circuit
board to individually adjust the max. volume and the bass
response for the left and right headphone system.
Bass response L Bass response R
Max. volume L Max. volume R
39
English
Set 820.book Seite 40 Freitag, 9. Dezember 2005 12:36 12
Adjusting the max. volume:
Potentiometer turned fully counterclockwise
Potentiometer turned fully clockwise
0 dB
125 dB
Adjusting the bass response:
Potentiometer turned fully counterclockwise
Potentiometer turned fully clockwise
attenuation of -25 dB at 100 Hz
attenuation 0 dB
The adjustments can also be made when the receiver is
being used.
When replacing the operating control, make sure the
"projections" on the inside of the operating control point in
the direction of the earbows.
After replacing the operating control, synchronize the
operating control with the volume control by once turning it
fully counterclockwise and then fully clockwise.
40
Set 820.book Seite 41 Freitag, 9. Dezember 2005 12:36 12
Modulation
Carrier frequencies
AF frequency response
S/N ratio
FM, stereo
see type plate at the base of the transmitter
40 Hz ....... 15 kHz
60 dB A rms
Transmitter
RF output power
Audio input
Microphone socket
Charging time for battery
Charging time (spare battery)
Power supply
Weight
Dimensions
typ. up to 10 mV
3.5 mm jack, stereo/mono
2.5 mm jack, mono
approx. 4 h
approx. 10-12 h
12 V DC via NT 820 mains unit
approx. 94 g (without battery)
diameter: 3.8 inch, heigth: 1.1 inch
Receiver
Max. sound pressure level
Power supply
Operating time
Weight
Dimensions
> 125 dB
2.4 V via BA 151 battery
more than 4 hours per battery
approx. 60 g (without battery)
length: 9.0 inch, width: 4.9 inch, heigth: 1.0 inch
English
Technical data
41
Set 820.book Seite 42 Freitag, 9. Dezember 2005 12:36 12
Manufacturer declarations
English
CE Declaration of Conformity
This equipment is in compliance with the essential requirements and other relevant provisions of Directives 1999/5/EC, 89/336/EC or 73/23/EC. The declaration is available on the internet site at www.sennheiser.com.
Before putting the device into operation, please observe the respective country-specific regulations!
WEEE Declaration
Your Sennheiser product was developed and manufactured with highquality materials and components which can be recycled and/or reused. This symbol indicates that electrical and electronic equipment must be disposed of separately from normal waste at the end of its operational lifetime.
Please dispose of this product by bringing it to your local collection point or recycling centre for such
equipment. This will help to protect the environment in which we all live.
Batteries
The supplied rechargeable batteries can be recycled. Please dispose of rechargeable batteries as special waste or return them to your specialist dealer. In order to protect the environment, only dispose of exhausted batteries.
42
LetzteSeite_Sp7.fm Seite 3 Freitag, 9. Dezember 2005 12:46 12
LetzteSeite_Sp7.fm Seite 4 Freitag, 9. Dezember 2005 12:46 12
Sennheiser electronic GmbH & Co. KG
30900 Wedemark, Germany
Phone +49 (5130) 600 0
Fax +49 (5130) 600 300
www.sennheiser.com
Printed in Germany
Publ. 01/06
511982/A01