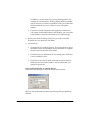
1
Canon MultiPASS F80/F60
MultiPASS™ Suite for Windows
Version 4.2
Software User’s Guide
Copyright
© 2002 by Canon, Inc. All rights reserved.
This manual may not be reproduced in any form, in whole or part,
without the prior written consent of Canon, Inc.
Trademark Acknowledgments
Adobe Photoshop is a registered trademark, and Adobe Photo Deluxe is
a trademark, of Adobe Systems Corporation.
Canon and BJ are registered trademarks, and MultiPASS, and ScanGear
are trademarks of Canon, Inc.
Microsoft, Windows, Exchange, Outlook, and Outlook Express are
registered trademarks of Microsoft Corporation.
OmniPage is a registered trademark of ScanSoft, Inc.
Pentium is a registered trademark of Intel Corporation.
All other trademarks identified herein are the property of their
respective owners.
ii
Preface
Contents
Chapter 1
Introduction........................................................................................................ 1
System Requirements ........................................................................................ 1
About This Guide............................................................................................... 3
Conventions Used in This Guide.............................................................. 3
Other User Assistance........................................................................................ 4
Chapter 2
Installing and Getting Started ........................................................................ 7
Installing the MultiPASS Suite ......................................................................... 8
Setting the Default Printer ....................................................................... 15
Sharing the Printer Installation ............................................................... 15
Understanding the My MultiPASS Folders.................................................. 17
Reading photographs on the memory card.................................................. 21
Chapter 3
Printing.............................................................................................................. 23
Changing Print Settings .................................................................................. 23
Defining Main Print Settings .......................................................................... 25
Setting a Custom Print Quality ............................................................... 27
Setting a Custom Color Adjustment ...................................................... 29
Defining Page Settings..................................................................................... 30
Defining a Custom Paper Size................................................................. 32
Printing More Than One Page on a Single Sheet.................................. 33
Printing a Poster........................................................................................ 34
Printing a Banner ...................................................................................... 34
Using Printer Control (Windows 98/Me only)..................................... 35
Using Stamps and Backgrounds .................................................................... 36
Creating or Changing a Stamp or Background .................................... 38
Defining Special Effects ................................................................................... 49
Saving Your Settings As a Print Profile ......................................................... 50
Cleaning printhead, setting quiet mode and various other functions ..... 53
Chapter 4
PC Faxing (F80 only) ....................................................................................... 63
Sending a Fax from Your Computer (PC Faxing)........................................ 63
Specifying a Fax Recipient from the Address Book ............................. 66
Attaching and Previewing a Cover Sheet.............................................. 68
Defining Fax Settings................................................................................ 69
Creating and Sending a Quick Fax ......................................................... 70
Working with Jobs in the Outbox Folder............................................... 72
Contents
iii
Receiving a Fax ................................................................................................. 74
Automatically Forwarding Received Faxes .......................................... 75
Using the Fax Log ..................................................................................... 78
Setting Up an Address Book........................................................................... 79
Working with the Address Book............................................................. 80
Designating a Different Windows Address Book................................. 86
Chapter 5
Scanning............................................................................................................ 89
Multi-Photo Scan / Multi Crop in ScanGear................................................ 92
Viewing the Scanner Driver............................................................................ 96
Changing the scanner driver (Windows XP only)....................................... 97
Working with Scan Settings in ScanGear (Windows 98/Me/2000/XP) .. 97
Defining Preview Scan Settings in Simple Mode ................................. 98
Defining Preview Scan Settings in Advanced Mode ......................... 100
Adjusting the Preview Image for Final Scan....................................... 101
Adjusting the Tone of a Color or Grayscale Image in Advanced
Mode ......................................................................................................... 104
Adjusting the Tone of a Black and White Image in Advanced
Mode ......................................................................................................... 109
Adjusting ScanGear Preferences ........................................................... 110
Working with Scan Settings in WIA (Windows XP only)..........................111
Defining Toolbar Settings.............................................................................. 114
Viewing the Toolbar................................................................................ 119
Chapter 6
Viewing and Enhancing Images................................................................. 121
Specifying Display Preferences .................................................................... 122
Manipulating a Document or Image ........................................................... 125
Saving Documents and Images.................................................................... 130
Specifying Viewer Preferences ..................................................................... 133
Specifying a Photo Editor ...................................................................... 136
Enhancing Your Images (Photo Enhancer)................................................. 138
Chapter 7
Fine-tuning the MultiPASS Suite............................................................... 147
Defining Device Fax Settings (F80 only) ..................................................... 147
Setting Up Speed Dial Assignments..................................................... 156
Defining System Settings (F80 only)............................................................ 159
Using the MultiPASS Status Monitor .......................................................... 160
Removing the MultiPASS Suite.................................................................... 162
Reinstalling the MultiPASS Suite.......................................................... 163
Changing the Port Connection..................................................................... 163
iv
Contents
Chapter 8
Troubleshooting............................................................................................. 165
Problems installing and removing software .............................................. 165
Problems turning on the computer (when the MultiPASS Suite opens) 168
Problems printing from your computer...................................................... 170
Problems using a memory card.................................................................... 175
Problems scanning to a computer................................................................ 178
Appendix A Fax/Phone Characters.................................................................................... 183
Appendix B Sharing Your Printer Cross-Platform in Windows 2000/XP .................. 185
Glossary .................................................................................................................................. 187
Index ........................................................................................................................................ 191
Contents
v
vi
Contents
Chapter 1
Introduction
1
Welcome and congratulations on your purchase of the Canon MultiPASS
F80/F60 (also referred to in this guide as the printer) and its
accompanying MultiPASS Suite for Windows.
With your printer, the MultiPASS Suite enables you to perform a
variety of tasks, such as:
❏ Printing a document
Print a document from any Windows application that supports
printing. Define and customize print settings that affect the output of
your printed documents.
❏ Faxing a document (F80 only)
Fax a document from your PC, attaching a predefined fax cover page
as needed. Receive faxes directly into your PC.
❏ Scanning an image
Scan documents, photographs, and other images into your PC.
❏ Viewing and managing your document
View and manage a document that has been faxed or scanned to your
PC.
❏ Defining printer settings (F80 only)
From your PC, define settings that affect fax operations of your
printer.
System Requirements
0
To successfully install and operate the MultiPASS Suite, your system
must meet the following minimum requirements:
Chapter 1
Introduction 1
❏ Windows Operating System
Microsoft Windows 98, Windows Me, Windows 2000, or Windows
XP
❏ Other Software
Internet Explorer 4.01 or later
❏ Computer Processor
Windows 98: An IBM or compatible computer with a Pentium 90
processor or higher
Windows Me: An IBM or compatible computer with a Pentium 150
processor or higher
Windows 2000: An IBM or compatible computer with a Pentium 133
processor or higher
Windows XP: An IBM or compatible computer with a Pentium 233
processor. A Pentium 300 processor or higher is recommended.
❏ Memory
Windows 98/Me: 32 megabytes (MB) of RAM. 64 MB of RAM or
more is recommended.
Windows 2000/XP: 64 megabytes (MB) of RAM. 128 MB of RAM or
more is recommended.
❏ Hard Disk Space
60 MB of available hard disk space. 150 MB of available hard disk
space is recommended.
❏ Disk Drive
CD-ROM drive, or access to one over a network connection
❏ Monitor
256-color SVGA monitor or greater
❏ Printer Cable
A USB cable 16.4 feet (5 meters) in length or shorter.
2 Introduction
Chapter 1
About This Guide
0
This guide assumes you have a basic understanding of Windows. This
includes how to start your system and navigate within the Windows
environment. You should be familiar with common Windows terms, such
as window, dialog box, point, and drag. For assistance in familiarizing
yourself with Windows, see your Microsoft Windows user
documentation.
For this guide, generally the images of the MultiPASS Suite were taken
using a Windows 98 system. However, where necessary, some images
were taken using a Windows 2000/XP system. Images may appear
slightly different on other supported operating systems.
Conventions Used in This Guide
0
The following types of formatting identify specific types of information
provided in this guide.
Italicized text
Used to stress the importance of a word
or phrase, or to refer to the title of
another guide. For example:
You cannot access the dialog box....
-or...the MultiPASS Suite User’s Guide....
Text in quotation marks
Used to refer to the title of a section
within the guide. For example:
...the “Installing the Software” section....
Click, double-click
Use of the word click or double-click
provides instructions for selecting or
choosing a command or option,
generally with a mouse. For example:
Click OK to continue.
Chapter 1
Introduction 3
Monospaced text
Used for commands you might type
when installing the software, or system
messages that may display on your
screen. For example:
A:\SETUP
Capitalization
Used for all the key words in the name
or title of an option on the screen. For
example:
In the dialog box, click Image Type to
set....
Other User Assistance
0
In addition to this guide, the following information is available:
❏ Online Help
Provides information online about a window or dialog box, and stepby-step instructions for performing MultiPASS Suite tasks.
❏ Setup Sheet
Read this sheet first!
This sheet includes instructions for setting up your machine and
getting it ready for use. Follow all steps in this sheet before using your
machine.
❏ Basic Guide
After following instructions in the Setup Sheet, we recommend you
read this guide to familiarize yourself with basic operation of all
functions of your machine. For detailed instructions or for advanced
functions, you will be referred to either the PDF Software Guide or
the PDF Comprehensive Guide described in the following page.
4 Introduction
Chapter 1
❏ Comprehensive Guide
This guide, included as a PDF file in the MultiPASS Suite software
CD-ROM, includes comprehensive instructions on functions that can
be performed directly from your machine. Refer to this guide if you
are looking for in-depth instructions not included in the Basic Guide,
or if you want to learn more about advanced features of your
machine.
Chapter 1
Introduction 5
6 Introduction
Chapter 1
Chapter 2
Installing and Getting Started
2
The MultiPASS Suite includes the following software components which
are installed automatically:
❏ Printer Driver
Enables you to print in any Windows application that supports
printing.
❏ Fax Driver (F80 only)
Enables you to send a PC fax from any Windows application that
supports printing.
❏ Scan Driver
If you are using Windows 98/Me or 2000, ScanGear for MultiPASS
will be installed. If you are using Windows XP, both the WIA Driver
and ScanGear for MultiPASS will be installed.
•
ScanGear for MultiPASS (Windows 98/Me/2000/XP)
Enables you to scan an image into your PC when you use
Windows 98/Me/2000/XP.
•
WIA Driver (Windows XP)
Enables you to scan an image into your PC when you use
Windows XP.
❏ My MultiPASS
Enables you to store and manage your MultiPASS documents in
folders on your PC.
❏ MultiPASS Viewer
Enables you to view your documents stored in My MultiPASS.
❏ MultiPASS Status Monitor
Tracks the activity occurring through the port to which the printer is
connected. The Status Monitor can be set to start automatically each
time you start Windows.
Chapter 2
Installing and Getting Started 7
❏ MultiPASS Toolbar
Enables you to scan an image directly to a destination, such as a
desired application (for example your e-mail application or a graphic
application).
If you are using Windows 2000/XP, MPService (MultiPASS Service) is
automatically created and must be running for jobs to be processed with
the MultiPASS Suite and the printer. MPService starts automatically
when you start your computer, even if you have not yet logged into
Windows. If you log off Windows and leave the computer on, MPService
continues to run, to process any MultiPASS jobs.
Installing the MultiPASS Suite
The MultiPASS Suite installation program installs all the appropriate
software components on your local hard drive. The MultiPASS Suite
should not be installed on a network drive.
MultiPASS Suite 4.1 or earlier must be removed from your PC before
installing MultiPASS Suite 4.2.
To install the MultiPASS Suite software if you are using Windows 2000/
XP, you must log on as Administrator or have Administrator privileges.
If the MultiPASS Suite has been copied on a local or network drive, you
can install the software on your system from that drive, rather than using
the installation disk.
If you are using Windows 98/Me/2000:
See “A) To install the MultiPASS Suite (Windows 98/Me/2000):” for
instructions for installing the MultiPASS Suite.
If you are using Windows XP:
8 Installing and Getting Started
Chapter 2
See “B) To install the MultiPASS Suite (Windows XP):” for
instructions for installing the MultiPASS Suite.
A) To install the MultiPASS Suite (Windows 98/Me/2000):
1. Turn on the printer, but do not connect the printer to your PC until
prompted.
2.
Switch on your PC and when the New Hardware Found, Update
Device Driver Wizard, or Add New Hardware Wizard appears, click
Cancel. Then quit any applications (including virus checkers) that are
currently running.
3.
Insert the installation disk into your disk drive.
If you are installing with a copy of the MultiPASS Suite located on
another drive, skip to the next step.
4.
If AutoRun is enabled, the installation starts automatically.
If the CD-ROM does not run automatically, double-click My
Computer in the Windows screen, double-click the CD-ROM icon,
then double-click “csplash” or “csplash.exe”.
5.
Chapter 2
When the main menu appears, click Install MultiPASS Suite.
Installing and Getting Started 9
6.
On the welcome screen, click Next.
Follow the on-screen instructions.
7.
Read the License Agreement. If you agree to the terms, click Yes. If
you do not agree, click No. You will not be allowed to continue the
installation process.
8.
When prompted, click your printer model, and click Next.
10 Installing and Getting Started
Chapter 2
9.
When prompted, connect your USB cable to the ports on your printer
and PC, so the printer can be automatically detected.
Once the cable is connected, if a system message appears indicating
the system driver is being installed, wait until the installation process
is completed, and then click Yes to continue.
10. Continue to follow the on-screen instructions to complete the
installation process.
When the installation is finished, restart your PC before using the
MultiPASS Suite software. If your PC does not restart automatically,
restart it manually.
Chapter 2
Installing and Getting Started 11
B) To install the MultiPASS Suite (Windows XP):
1. Turn on the printer, but do not connect the printer to your PC until
prompted.
2.
Switch on your PC and when the New Hardware Found, Update
Device Driver Wizard, or Add New Hardware Wizard appears, click
Cancel. Then quit any applications (including virus checkers) that are
currently running.
3.
Insert the installation disk into your disk drive.
If you are installing with a copy of the MultiPASS Suite located on
another drive, skip to the next step.
4.
If AutoRun is enabled, the installation starts automatically.
If the CD-ROM does not run automatically, double-click My
Computer in the Windows screen, double-click the CD-ROM icon,
then double-click “csplash” or “csplash.exe”.
5.
When the main menu appears, click Install MultiPASS Suite.
6.
On the welcome screen, click Next.
12 Installing and Getting Started
Chapter 2
Chapter 2
7.
Read the License Agreement. If you agree to the terms, click Yes. If
you do not agree, click No. You will not be allowed to continue the
installation process.
8.
When prompted, click your printer model, and click Next.
Installing and Getting Started 13
9.
When prompted, connect your USB cable to the ports on your printer
and PC. Then, wait until the Found New Hardware Wizard appears.
10. In the Found New Hardware Wizard dialog box, click Install the
Software Automatically, and then click Next. Wait until the
installation process is complete. Click Finish to close the dialog box.
Then, in the Setup dialog box, click Yes to continue. Follow the onscreen instructions to complete the installation.
14 Installing and Getting Started
Chapter 2
If you are installing over a network, click Install from a list or specific
location and specify the following files and folders.
MultiPASS/USBDrv/Win2KXP/mp42uNT.INF
When the installation is finished, restart your PC before using the
MultiPASS Suite software. If your PC does not restart automatically,
restart it manually.
Setting the Default Printer
When you install the software, the system automatically sets the printer
as the default printer. If necessary, however, follow these instructions to
set the default printer.
To set the default printer:
1. On the Windows desktop, click Start.
2.
On the Start menu, point to Settings and then click Printers
(in Windows XP, click Printers and Faxes on the Start menu).
3.
In the Printers window (in Windows XP, the Printers and Faxes
window), click the printer icon.
4.
On the File menu, click Set As Default (Windows 98/Me) or Set as
Default Printer (Windows 2000/XP).
Sharing the Printer Installation
You may be using your computer and the printer connected to your
computer in an environment where multiple computers are connected by
a network. In this case, you can share the use of your printer with the
other computers on the network.
If you choose to share the use of your printer, your computer acts as the
host system or server to the other computers (also referred to as remote or
client systems).
Chapter 2
Installing and Getting Started 15
After you set up your printer for sharing, the client systems must install
the printer driver onto their systems. They can do so directly from your
system. Based on which Windows operating system you are using, the
following client system can share your printer:
If your system (server) is:
Install on client system:
Windows 98/Me
Windows 98/Me
Windows 2000/XP
Windows 98/Me or Windows 2000/XP
When a document is printed by the client system to a shared printer, any
printing messages (status or error messages) display on the server
system.
To set up the printer for sharing:
1. On the MultiPASS server system, on the Windows desktop, click
Start.
2.
On the Start menu, point to Settings and then click Printers
(in Windows XP, click Printers and Faxes on the Start menu).
3.
In the Printers window (in Windows XP, the Printers and Faxes
window), click the MultiPASS printer icon.
4.
On the File menu, click Sharing.
If the Sharing command is not available, you need to set up printer
sharing in Windows. For details, see your Windows user
documentation.
5.
In the Properties dialog box, on the Sharing tab, click Shared, Shared
As, or Share this printer.
6.
In the Share Name box (Windows 98/Me/XP) or Shared As box
(Windows 2000), type a name you want to assign to the shared
printer.
If available, you may also want to assign a password, which would
then be required by the client system when using the printer.
16 Installing and Getting Started
Chapter 2
7.
If your situation matches the following, set up an alternate or
additional driver:
•
Windows 2000/XP server system sharing with Windows 98/Me
client systems
For detailed instructions, see Appendix B in this guide. (P. 185)
8.
In the Properties dialog box, click OK.
To install the printer driver on a client system:
1. On the server system, verify that the Status Monitor is running.
2.
On the client system, on the Windows taskbar, click Start.
3.
On the Start menu, point to Settings, and then click Printers
(in Windows XP, click Printers and Faxes on the Start menu).
4.
In the Printers window (in Windows XP, the Printers and Faxes
window), double-click Add Printer (in Windows XP, click Add a
printer).
5.
Follow the on-screen instructions.
Install the printer driver as a network printer, based on the name
assigned to the shared printer.
You cannot install the printer driver on a client system that has a previous
version of the MultiPASS software (version 4.1 or earlier).
Understanding the My MultiPASS Folders
During the MultiPASS installation, the following My MultiPASS folders
are created, which the MultiPASS system uses to store faxes and scanned
images:
Chapter 2
Installing and Getting Started 17
❏ Outbox (F80 only)
The Outbox folder stores pending and failed fax transmissions.
Pending fax transmissions include documents currently being faxed,
scheduled to be faxed, or on hold.
You can manage faxes in the Outbox using the MultiPASS menu
commands. For more information about managing faxes in the
Outbox, see Chapter 4, “PC Faxing (F80 only).” (P. 63)
❏ Received Faxes (F80 only)
The Received Faxes folder stores received PC faxes. Received PC
faxes are assigned a unique name with a .mlj file name extension.
Unopened received faxes are marked to indicate this status. The
number of unopened faxes is indicated in parentheses after the folder
name. The name of the unopened fax within the folder is marked
with a red icon (in list view) or asterisks (*) both preceding and
following the file name (in icon or thumbnail view).
❏ Scan to Save
When the Save As button on the MultiPASS Toolbar is clicked on, the
image is scanned from the computer and is usually stored in the My
Pictures folder. The factory predefined setting is the My Pictures
folder in My Documents.
If there is no My Pictures folder, the image will be stored in the My
Documents folder. If there is no My Documents folder, it will be
stored in this Scan to Save folder. Scanned documents are assigned a
unique name with a file name extension such as .bmp, .tif, or .jpg
according to the file format. If you have saved a picture and cannot
fine it you can search for it by the file name.
❏ Sent Faxes (F80 only)
After a PC fax is sent successfully, it moves from the Outbox into the
Sent Faxes folder. Sent faxes in this folder are assigned a unique name
with a .mlj file name extension.
18 Installing and Getting Started
Chapter 2
Outbox, Received
Faxes, and Sent Faxes
folders: F80 only
The My MultiPASS folders work within Windows Explorer, and thus
have a similar structure. However, only the system can place documents
into these folders. In addition, you cannot delete, move, or rename these
folders. The folders can only be deleted by uninstalling the MultiPASS
Suite.
You can perform basic Windows Explorer tasks on any document in a My
MultiPASS folder, such as renaming or copying (and then pasting the
document to another Windows folder). You can view documents as
thumbnails, icons, or a list (sorting the list as needed). For more
information, see your Windows Explorer documentation. However, note
the following exceptions for the Outbox folder:
❏ You cannot copy a document in the Outbox folder.
❏
Documents always display as a list in the Outbox folder.
A document remains in a My MultiPASS folder until it is deleted by you
or, additionally for the Outbox folder, moved by the system to the Sent
Faxes folder.
Chapter 2
Installing and Getting Started 19
To open My MultiPASS:
Do one of the following:
❏ On the MultiPASS Toolbar, click MultiPASS.
❏ On the Windows desktop, double-click the My MultiPASS icon.
When you open My MultiPASS, the MultiPASS menu appears on the
menu bar.
To rename a document in a My MultiPASS folder:
1. In the My MultiPASS window, under My MultiPASS, click the
desired folder (Received Faxes, Scan to Save, or Sent Faxes folder
only).
2.
Click the desired document.
3.
On the File menu, click Rename.
4.
In the Rename dialog box, enter the new name for your document.
Because My MultiPASS works within Windows Explorer, as an
alternative, you can open My MultiPASS in Windows Explorer. In
Windows Explorer, My MultiPASS appears under Desktop.
20 Installing and Getting Started
Chapter 2
Reading photographs on the memory card
When you connect the printer, Removable Disk will appear in My
Computer. This is the printer’s memory card drive.
If a memory card used in a digital camera is inserted in the printer and
you open the removable disk, you can open photographs on the memory
card as well as copy them to the hard disk.
You do this in the same way as general files on the hard disk etc.
Chapter 2
Installing and Getting Started 21
22 Installing and Getting Started
Chapter 2
Chapter 3
Printing
3
Once you have installed the software, you are ready to print a document
from any Windows application that supports printing, such as Word for
Windows.
Your printer is initially installed using factory-predefined settings,
enabling you to print immediately. These settings determine what your
documents look like when printed. For example, the settings define print
properties such as the paper size and page orientation.
Instructions for printing a document can vary somewhat for different
Windows applications. Therefore, for detailed instructions, see the user
documentation for the specific application from which you are printing.
The following instructions summarize the general procedures for printing
a document.
To print a document:
1. With your document open in your Windows application, click the
print command. (In most applications, the print command is on the
File menu or toolbar.) To print your document with the current
driver settings, click the print button on the toolbar.
2.
In the Print dialog box, make sure the printer is selected in the Printer
box.
3.
Click the command to print your document (usually OK or Print).
Changing Print Settings
0
The factory-predefined print settings can be changed when printing a
particular document. For example, to suit your exact printing
requirements, you can define settings for printing a draft copy of a report,
and save the settings as a new print profile.
Chapter 3
Printing 23
Unless you save your settings as a print profile, your settings are
available only for the current print job.
Changes can be made to general quality print settings (such as media
type), and to page setup and special effects you want to apply to your
printed image.
Print settings are changed in the printer’s Properties dialog box. There are
two methods of displaying the printer’s Properties dialog box.
❏ Displaying from the Print dialog box when printing a document
When printing a document, click Properties in the Print dialog box.
Changes made using this method will only be effective for the current
print job.
❏ Displaying from the printer icon
On the Windows desktop click Start, point to Settings and click
Printers. In the Printers window, right-click the printer icon, then
click Properties. (If you are using Windows XP, click Start on the
Windows desktop, then click Printers and Faxes. In the Printers and
Faxes window, right-click the printer icon, then click Printing
Preferences.)
Changes made using this method will be effective for all subsequent
print jobs.
You have two methods by which you can define print settings:
❏ Print Advisor
The Print Advisor displays as a wizard that guides you through a
series of questions. Your responses enable the Print Advisor to
automatically specify the appropriate print settings.
❏ Manually
You can manually change the individual settings to produce the most
desirable results for your printed documents.
To change print settings using the Print Advisor:
1. In the Print dialog box when printing your document, click
Properties.
2.
24 Printing
In the Properties dialog box, on the Main tab, click Print Advisor.
Chapter 3
3.
Follow the on-screen instructions.
To change print settings manually:
1. In the Print dialog box when printing your document, click
Properties.
2.
In the Properties dialog box, on the appropriate tabs or dialog boxes,
define your desired print settings.
3.
If you are dissatisfied with your changes on a particular tab and want
to revert to the default settings, click Defaults.
4.
To accept your changes and close the dialog box, click OK.
If available, to accept your changes while leaving the dialog box
open, click Apply.
To cancel your changes and close the dialog box, click Cancel.
Defining Main Print Settings
0
You can define settings that determine the overall quality of your printed
document.
To change settings on the Main tab:
Chapter 3
Printing 25
❏ Media Type
Click the type of media you are printing to, such as plain paper.
❏ Paper Source
If a selection is available, click the source for feeding paper into your
printer.
❏ Print Quality
Click the predefined print quality that best suits your document.
26 Printing
•
High
Click if you want to print your document with a higher print
quality, which may print more slowly.
•
Standard
Click to print your document with average speed and quality.
Chapter 3
•
Draft
Click if you want to print your document quickly but with a
lower print quality. This setting is ideal for longer documents and
proofreading purposes.
•
Custom
Click to set the print quality and halftoning individually. For
details, see the “Setting a Custom Print Quality” section.
❏ Color Adjustment
Click the preferred method for adjusting the color in your document.
•
Auto
Click to have the printer driver automatically adjust the color.
•
Manual
Click to define the color adjustment manually. For details, see the
“Setting a Custom Color Adjustment” section.
❏ Grayscale Printing
Click to print a black and white version of a color document.
The printer picture illustrates the current settings.
❏ Preview before printing
You can display a preview of what you are going to print on your
screen before you select to print it. Select Preview to display an
example of what you are going to print.
Setting a Custom Print Quality
0
If the available Print Quality settings do not suit your needs, you can
make finer adjustments to the print quality and halftone settings.
1.
Chapter 3
Under Print Quality, click Custom. Then, click Set.
Printing 27
28 Printing
2.
In the Set Print Quality dialog box, move the print quality slider to
choose the best balance between printing speed and print quality.
3.
Click the halftoning method:
•
Auto Fine (Auto in Windows 2000/XP)
Click to automatically change dithering and diffusion based on
the characteristics of the image.
•
Auto Fast (Windows 98/Me)
When Quality is set to 5, Auto Fine changes to Auto Fast. Click to
automatically change dithering and diffusion based on the
characteristics of the image.
•
Dither and Dither Fast (Windows 98/Me), Dither (Windows
2000/XP)
Click to arrange image pixels in a fixed pattern to create
halftones. This setting is suitable for business charts and graphics
with well-defined color boundaries. Dither Fast prints at a higher
speed after performing simple dithering.
•
Diffusion
Click to arrange image pixels randomly. This setting is suitable
for photographs and graphics that require a finer color gradation.
Chapter 3
Setting a Custom Color Adjustment
0
Since color is generally adjusted from within your application, you
should set the color balance here only for finer adjustments.
Chapter 3
1.
Under Color Adjustment, click Manual. Then, click Set.
2.
In the Manual Color Adjustment dialog box, move the color balance
sliders to adjust the color balance and intensity.
3.
Click Enable ICM (Image Color Management) to activate the color
correction function built into Windows.
4.
In the Print Type box, click the type of image you are printing.
5.
In the Brightness box, click a level of brightness you prefer for your
image.
Printing 29
Defining Page Settings
0
Page settings enable you to determine properties such as the overall size
of the printed page and its contents, and how the document is oriented on
the page.
To change the settings on the Page Setup tab:
❏ Page Size
Click the size of the page you are printing, which matches the page
size specified in the Windows application. To specify a custom size
paper, click Custom or Custom Size. For details, see the “Defining a
Custom Paper Size” section.
30 Printing
Chapter 3
❏ Orientation
Click to determine how your document is printed on the page:
Portrait to print the contents of your document vertically on the page,
or Landscape to print the contents of your document horizontally on
the page.
❏ Printer Paper Size
Based on the printing type you select, click the size of the paper on
which you want to print. To specify a custom size paper, click
Custom or Custom Size. For details, see the “Defining a Custom
Paper Size” section.
❏ Printing Type
Click the type of printing you want to use for your document.
•
If your page size and printer paper size are different, click Fit-toPage Printing to automatically print your document to fit the
printer paper size.
•
If you want to enlarge or reduce the printed document, click
Scaled Printing.
•
If you want to print more than one page on a single sheet of paper
(for example, to conserve paper for reviewing the draft copy of a
report), click Page Layout Printing.
See the “Printing More Than One Page on a Single Sheet” section
for details.
•
If you want to print your image as a poster, click Poster Printing.
For details, see the “Printing a Poster” section.
•
If you want to print your image or document as a banner, click
Banner Printing. For details, see the “Printing a Banner” section.
Banner Printing can be performed only when Plain Paper is
selected under Media Type.
❏ Scaling
If you selected Scaled Printing as your printing type, click, or type,
the percentage to enlarge or reduce the print size of your document.
Chapter 3
Printing 31
❏ Borderless Printing
Click to make your data larger than the paper size and print over
the entire surface of the paper with no white borders.
For borderless printing, use PR-101 and GP-301/GP-301N. For all
other media types, the print quality may decrease.
If borderless printing is selected, it is not possible to set the
following:
Printer Paper Size and Printing Type on the Page Setup tab, and all
items on the Stamp/Background tab.
❏ Amount of Extension
When you select Borderless Printing, the sections that extend beyond
the paper are not printed because the image is enlarged to a size
slightly larger than the paper size. You can use the slide bar to adjust
how much the image extends beyond the paper. It is recommended
that you normally set the slide bar to the right end. If you move the
slide bar to the left to reduce the extension amount, a border may
appear.
❏ Copies
Click or type the number of copies you want to print.
❏ Reverse Order
If you are printing a multiple page document, click to print pages in
sequence, starting with the last page. The result is the pages of the
document are stacked in the proper order.
❏ Collate
If you are printing multiple copies of a multiple page document, click
to print all pages of the document before the next copy is printed.
When not selected, each page is printed for the specified number of
copies before the next page is printed.
Defining a Custom Paper Size
0
You can specify a custom size for the page size or printer paper size.
32 Printing
Chapter 3
1.
In the Page Size or Printer Paper Size box, click Custom or Custom
Size.
2.
In the Custom Paper Size dialog box, click a unit of measure, and
specify the width and height.
Printing More Than One Page on a Single Sheet
0
If you want to print more than one page of your document on a single
sheet of paper, do the following:
Chapter 3
1.
In the Printing Type box, click Page Layout Printing. Then, click
Specify.
2.
In the Page Layout Printing dialog box, in the Pages box, click the
number of pages you want to print on a single sheet.
3.
To rearrange the printing order of the pages, in the Page Order box,
click the desired position.
4.
To print a border around each page, click Page Border.
Printing 33
Printing a Poster
0
You can print a single image divided across several sheets of paper. When
the printed sheets are pasted together, they form a poster. The number of
divisions determines the number of printed pages, and thus the overall
size of the poster. You can also print text in the margins that serve as
guidelines for pasting the poster together.
1.
In the Printing Type box, click Poster Printing. Then, click Specify.
2.
In the Poster Printing dialog box, under Image Divisions, click the
number of pages on which to print the poster.
3.
Click if you want the words “Cut” and “Paste,” cut lines, or both
printed in the margins as guidelines.
Printing a Banner
0
When printing a banner, be aware of the following limitations:
❏ You can print a document as a banner on banner paper from two to
six sheets in length.
❏ Banner printing consumes large quantities of ink. You will not be able
to change an ink tank during printing, so check the ink supply before
printing, and load a new ink tank if needed.
34 Printing
Chapter 3
❏ In your Windows application for your document, make sure the
number of copies to print is set to 1. Banner printing does not operate
properly if you specify more than one copy.
❏ When Banner printing is selected, certain print options may be
unavailable.
To prepare your printer for banner printing:
1. Cut the banner paper one sheet longer than the document requires.
2.
Insert the banner paper into your printer. Make sure the printing
surface faces up.
3.
Gently hold the sheet in place until paper feeding starts.
To set your banner printing options and print your banner:
1. In the Printing Type box, click Banner Printing.
2.
If the banner printing message box appears, click OK.
3.
In the Printer Properties dialog box, click OK.
4.
In the Print dialog box click the print command (usually OK or Print).
If you are prompted to accept your printing options, click OK.
Using Printer Control (Windows 98/Me only)
0
You can define settings that control certain print operations.
1.
Chapter 3
On the Page Setup tab, click Printer Control.
Printing 35
2.
In the Printer Control dialog box, click Background Printing if you
want printing to continue in the background while you process other
work on your PC.
3.
If you selected Background Printing, click Print During Spooling if
you want printing to start while the document is being sent to the
print queue. Otherwise, printing will not begin until the entire
document is sent to the queue.
Using Stamps and Backgrounds
0
You can add stamps and background images to your printed documents.
The software contains a library of images to use as stamps or
backgrounds, stored as .bmp files, that were installed with the software.
You can also define a stamp or background of your own.
For example, you may want to use a stamp that designates the status of
the document, such as confidential or a draft version.
To use a stamp:
1. In the Printer Properties dialog box, on the Stamp/Background tab,
click Stamp and then click a stamp in the list.
36 Printing
Chapter 3
2.
To print the stamp over the text in your document, click Place Stamp
Over Text.
To preserve the readability of your printed document, clear this
setting to print the text of your document over the stamp.
3.
To print the stamp only on the first page of your printed document,
rather than all the pages, click Stamp First Page Only.
To use a background:
1. In the Printer Properties dialog box, on the Stamp/Background tab,
click Background and then click a background in the list.
2.
Chapter 3
To print the background on the first page only, rather than all the
pages, click Background First Page Only.
Printing 37
Creating or Changing a Stamp or Background
0
You can change the settings of a predefined stamp or create one of your
own. When creating or changing a stamp, you define its various
characteristics, such as the text and font. After defining stamp settings,
you can save the stamp for later use.
Once you select a background image from the factory-predefined list or
by importing one, you can define the settings for the background.
To create or change a stamp:
1. On the Stamp/Background tab, do one of the following:
•
To change an existing stamp, click Stamp and then click the name
of the stamp in the list.
•
To create a new stamp, clear Stamp.
2.
Click Define Stamp.
3.
In the Stamp Settings Properties dialog box, on the appropriate tabs,
set your desired options.
To define the text and color of a stamp (Windows 98/Me):
1. On the Text tab, enter the stamp text.
38 Printing
Chapter 3
Chapter 3
2.
Specify the font characteristics, such as type, style, size, and outline.
3.
On the Color tab, under Palette, click an available color shown in the
palette.
Printing 39
4.
If you want to customize a stamp color, under Palette, click the color
that is closest to your desired custom color. Then, click Detailed Color
Adjustment.
5.
Move the slider for each of the listed colors until you have reached
the desired mix for your custom color.
6.
If you want to save the custom color in the palette, click Add to
Palette. The newly created color is added to the last row on the color
palette. If the last row has been filled with custom colors you created
previously, you can choose to replace the earliest existing custom
color.
To define the text and color of a text stamp (Windows 2000/XP):
1. On the Stamp tab, click Text for the Stamp Type.
40 Printing
Chapter 3
Chapter 3
2.
In the Stamp Text box, enter the stamp text.
3.
Specify the font characteristics, such as font type, style, size and
outline.
4.
Click Select Color to change the color of your stamp text.
Printing 41
42 Printing
5.
In the Color dialog box, under Basic Colors, click an available color.
6.
If you want to customize a stamp color, under Basic Colors, click the
color that is closest to your desired custom color. Then, click Define
Custom Colors.
7.
Move the slider, or enter the color values, until you have reached the
desired mix for your custom color.
Chapter 3
8.
If you want to save the custom color in the Custom Colors palette,
click Add to Custom Colors. The newly created color is added to the
Custom Colors palette. If the Custom Colors palette is filled with
custom colors you created previously, the earliest existing custom
color is replaced.
To define the image for a graphic stamp (Windows 2000/XP):
1. On the Stamp tab, click Bitmap for the Stamp Type.
2.
Chapter 3
Click Select File.
Printing 43
3.
In the Open dialog box, specify the path and filename for your
graphic. Then, click OK.
4.
On the Stamp tab, move the Size slider to the left to decrease the size
of the graphic, right to increase.
5.
Click Transparent White Area to make the white areas in the graphic
transparent.
To define the placement of a stamp:
On the Placement tab, specify the following settings:
44 Printing
Chapter 3
Values for X-Position and
Y-Position may vary with
the operating system
❏ Position
Click the desired placement on the page. If you want to define your
own placement, click Custom. Then, in the X-Position and Y-Position
boxes, click or type the X-position and Y-position coordinates for the
position of the stamp.
You can also click the stamp in the page illustration on the left and
drag the stamp to the desired position on the page.
❏ Orientation (Text Stamp)
Click or type the number of degrees to specify the angle of rotation of
your stamp. A negative number of degrees rotates the stamp
clockwise. A positive number of degrees rotates the stamp counter
clockwise.
To save a stamp:
1. On the Save Settings tab, in the Title box, enter a name for the stamp.
Chapter 3
Printing 45
2.
Click Save.
3.
When prompted, confirm that you want to save the stamp.
To delete a stamp:
1. On the Save Settings tab, click the stamp in the list that you want to
delete.
2.
Click Delete.
3.
When prompted, confirm that you want to delete the stamp.
To select and define a background:
1. On the Stamp/Background tab, do one of the following:
2.
46 Printing
•
To change the properties of an existing background, click
Background and then the name in the list.
•
To select a new background image, clear Background.
Click Select Background.
Chapter 3
Values for X-Position and
Y-Position may vary with the
operating system
To select a new background image:
1. In the Background Settings Properties dialog box, on the Background
tab, click Select File.
2.
In the Select Image File (Windows 98/Me) or Open (Windows
2000/XP) dialog box, specify the path and file name for the graphic
that you want to use as the background image. Then, click OK.
To define the properties of the background:
1. In the Background Settings Properties dialog box, make sure the
name of the graphic you want to change displays in the File box.
2.
On the Background tab, specify the layout method for the
background image. If you want to define your own layout position,
click Custom.
When Center, Top Left, Top Right, Bottom Left, Bottom Right, or
Custom is selected under Layout Method, you can also click the
background image in the page illustration on the left and drag the
background image to the desired position on the page.
3.
Chapter 3
If you selected Custom as your layout position, in the X- and YPosition boxes, click or type the desired coordinates.
Printing 47
4.
Under Intensity, move the slider to lighten or darken the background.
To save a background:
1. In the Background Settings Properties dialog box, click the Save
Settings tab.
2.
In the Title box, enter a name for the background. Then, click Save.
3.
When prompted, confirm that you want to save the setting.
To delete a background setting:
1. In the Printer Properties dialog box, on the Stamp/Background tab,
click the background you want to delete in the Background list.
48 Printing
2.
Click Select Background.
3.
In the Background Settings Properties dialog box, click the Save
Settings tab.
4.
In the Title box, confirm the background setting you want to delete
appears. Then, click Delete.
5.
When prompted, confirm that you want to delete the setting.
Chapter 3
Defining Special Effects
0
You can set effects to make images appear more interesting, such as
making a photograph resemble a drawing or changing the colors of an
image to monochrome.
To change the settings on the Effects tab:
❏ Simulate Illustration
Click to convert full-color and 256-color images into a simulated
hand-drawn illustration. When Simulate Illustration is selected, the
Contrast option enables you to adjust the image contrast using the
slider.
❏ Monochrome Effects
Click to display full-color and 256-color images in a single color.
Then, click the desired color from those listed.
Chapter 3
Printing 49
To set a custom monochrome effect, click Select Color. In the Color
box, move the slider to set a custom color.
❏ Vivid Photo
Click to use the vivid photo function. This function allows you to
print images in vivid colors.
By using this function, you can reproduce breathtaking sceneries in
which colors, especially blues and greens, appear even more brilliant.
A major feature of this function is its ability to create vivid
backgrounds of fields, trees, oceans, and sky, while maintaining the
natural skin tones of people that appear in the images.
❏ Image Optimizer
Click to smooth the jagged edges in graphics and photos that have
been enlarged by your application. This feature is also useful when
printing low-resolution images from Web pages.
❏ Photo Optimizer PRO
Click to correct problems with images taken with a digital camera or
acquired by a scanner. It is specifically designed to compensate for
color shift, underexposure, and overexposure.
❏ Apply Throughout Page
If you selected Photo Optimizer PRO and there are multiple images
on a page, click if you want the effect applied to all images.
Saving Your Settings As a Print Profile
0
If you use certain print settings frequently, you can save these settings as
a print profile to use for printing future documents. A print profile can be
easily retrieved for use at any time. The settings associated with the
profile are then applied to the options on the Main, Page Setup,
Stamp/Background and Effects tabs.
When a print profile is no longer needed, you can delete it. The factorypredefined profiles (Current Settings and Default Settings) cannot be
deleted.
50 Printing
Chapter 3
After using a custom print profile, you can restore the settings on the
Main, Page Setup, Stamp/Background and Effects tabs to their factorypredefined settings.
To save a print profile:
1. Specify your desired print settings on the Main, Page Setup,
Stamp/Background and Effects tabs.
Chapter 3
2.
Click the Profiles tab.
3.
Click Add to Profiles.
Printing 51
4.
In the Add to Profiles dialog box, in the Name box, enter a name for
the profile.
5.
In the Icon box, click an icon to associate with the profile.
6.
Enter a description of the profile.
To retrieve and use a print profile:
1. On the Profiles tab, in the Printing Profiles list, click the desired
profile.
2.
Click Retrieve from Profiles. When the confirmation message
appears, click OK.
To delete a print profile:
1. On the Profiles tab, in the Printing Profiles list, click the profile.
2.
Click Delete. When the confirmation message appears, click OK.
To restore the factory-predefined settings:
1. On the Profiles tab, in the Printing Profiles list, click Default Settings.
2.
52 Printing
Click Retrieve from Profiles. When the confirmation message
appears, click OK.
Chapter 3
To change the default printer settings before actually printing a
document, do the following: On the Windows desktop, click Start, point
to Settings, and then click Printers (in Windows XP, click Start, and then
click Printers and Faxes). In the Printers window (in Windows XP, the
Printers and Faxes window), click the icon of the printer that you want to
use. On the File menu, click Properties (in Windows 2000/XP, click
Printing Preferences). In the next window that appears, specify your
changes and click OK.
Cleaning printhead, setting quiet mode and
various other functions
0
On the Maintenance tab, you can adjust cleaning of the printhead,
printing of the nozzle check pattern, quiet mode, and various other
functions.
Chapter 3
Printing 53
❏ Cleaning (Head Cleaning)
Removes blockages in the printhead nozzles.
Use if printing is blurred or a particular color is not printing even
though there is enough ink.
Click Cleaning and in the Print Head Cleaning dialog box choose
from one of the following and then click Execute.
All Colors: To clean the four colors of cyan, magenta, yellow and
black.
Black: To clean black only.
Color: To clean the three colors of cyan, magenta and yellow.
When the following dialog box appears, click OK. Do not perform
another operation while the printhead is being cleaned.
Please note that if you use Cleaning too often, the ink will be
consumed quickly.
54 Printing
Chapter 3
❏ Deep Cleaning (Head Refreshing)
Use if you have tried the Cleaning option several times and there has
been no improvement in printing results. Deep Cleaning will give the
printhead an even deeper clean than Cleaning (Head Cleaning).
Click Deep Cleaning (Head Refreshing) and when the following
dialog box appears, click OK. Do not perform another operation
while the printhead is being cleaned.
Please note that Deep Cleaning will use even more ink than Cleaning.
❏ Print Head Alignment
Align the printhead if the color is uneven or if streaks appear in the
nozzle check pattern.
Chapter 3
1.
Load paper in the machine.
2.
On the Windows desktop, click Start.
3.
On the Start menu, point to Settings and then click Printers (in
Windows XP, click Printers and Faxes).
4.
In the Printers window (in Windows XP, the Printers and Faxes
window), click the printer icon.
5.
On the File menu, click Properties (Windows 98/Me) or Printing
Preferences (Windows 2000/XP).
6.
In the Properties dialog box, on the Maintenance tab, click the
printhead alignment icon.
7.
Click OK.
Printing 55
8.
Click OK.
Do not perform another operation until printhead alignment is
completed.
9.
After the pattern is printed, click Yes.
If the pattern is not printed successfully, check that the ink tanks are
properly installed.
10. In the samples of printed pattern A, find the one in which the vertical
lines are the least obvious, enter the number and press Tab.
In the same way, enter the number of the B–F sample in which the
vertical lines are the least obvious, and finally click OK.
56 Printing
Chapter 3
BAD SAMPLE
Least solid
box
GOOD SAMPLE
Most solid
box
11. Click OK.
12. Click OK.
Chapter 3
Printing 57
13. In the samples of printed pattern G, find the one in which the
horizontal line is the least obvious, enter the number and press Tab.
In the same way, enter the number of the H sample in which the
horizontal line is the least obvious, and click OK.
GOOD SAMPLE
Most solid
box
14. Click OK.
58 Printing
Chapter 3
❏ Nozzle Check
Print the nozzle check pattern if printing is blurred or if a particular
color is not printing even though there is enough ink. You can see the
condition of the printhead by looking at the nozzle check pattern.
Load paper in the machine. Click Nozzle Check and when the
following dialog box appears, click OK. If you click OK in the next
dialog box also, the nozzle check pattern will be printed.
The nozzle check pattern should appear as follows when ink is
discharged properly.
Lines missing here
indicate the printhead
requires cleaning.
Unevenness in these
patterns indicates the
printhead requires
alignment.
Horizontal stripes in
these patterns indicate
the printhead requires
alignment.
Chapter 3
Printing 59
❏ Custom Settings
This function can only be used when the printer properties dialog box
is opened from the printer icon. (See Displaying from the printer icon,
P. 24.)
You can switch between drying wait times for the printer ink.
Click Custom Settings and the Custom Settings dialog box will
appear.
•
Ink Drying Wait Time
If you are printing on paper that takes a long time for the ink to
dry or if you are printing at a high density, adjust the time it takes
to print with the slide bar.
The further right you slide it, the more the printer will rest and
rubbing of the printhead against the paper will diminish.
The further left you slide it, the less the printer will rest and
printing speed will be faster.
Once set up, check that the printer is on, click Send and the
settings will be registered in the printer.
To return the settings in this dialog box to default settings, click
Defaults.
60 Printing
Chapter 3
❏ Quiet Mode
This function can only be used when the printer properties dialog box
is opened from the printer icon. (See Displaying from the printer icon,
P. 24.)
Click to control the sound of the printer when operating. Click the
button and the Quiet Mode dialog box appears.
•
Do not use quiet mode
Select if you do not want to use quiet mode. The printer is
normally set on this setting.
•
Always use quiet mode
Select if you want the printer to use quiet mode.
The printer will continue to use quiet mode regardless of the
time.
Printing speed will be slower than normal.
•
Use quiet mode within specified time
Select if you wish to automatically use quiet mode within certain
times.
You can set the printer on quiet mode at nighttime.
Select and you will be able to enter times in Start time and End
time using the 24-hour clock.
Once set up, check that the printer is on, click Send, and in the
following dialog box, click OK. The settings will be registered in
the printer.
Chapter 3
Printing 61
To return the settings in this dialog box to default settings, click
Defaults.
62 Printing
Chapter 3
Chapter 4
PC Faxing (F80 only)
4
With your printer, you can send and receive faxes from and to your PC.
You can also set up an Address Book, containing fax and e-mail
information for people to whom you often send faxes. To assist you in
managing your faxes, a Fax Log maintains a record of every fax you send
or receive.
Before sending a PC fax, confirm that you have specified a unit name and
fax number for your printer in the Device setup. For more information,
see Chapter 7, “Fine-tuning the MultiPASS Suite.” (P. 147)
Sending a Fax from Your Computer
(PC Faxing)
0
You can send a PC fax from any Windows application that supports
document printing.
The MultiPASS Suite sends the PC fax to the Outbox, where progress is
tracked until it is actually transmitted. If you specified multiple
recipients, an individual fax job for each recipient is generated. Once
transmitted, the fax is placed in the Sent Faxes folder. A record of the sent
fax is also recorded in the Fax Log. If a fax fails (for example, because of
an incorrect fax number), it remains in the Outbox until you attempt to
resend it or delete it.
You can send a fax as an e-mail message if you have a Messaging
Application Program Interface (MAPI) compliant application installed.
The e-mail application must be set up as the system default MAPI client.
For details, see your e-mail application documentation.
Chapter 4
PC Faxing (F80 only) 63
To send a PC fax:
1. With the document you want to fax open in a Windows application
(such as Word), click the Print command. (In most Windows
applications, the command is on the File menu.)
2.
In the Print dialog box, click Canon MultiPASS FAX in the Printer list,
and then click OK.
3.
In the Send Fax dialog box, on the Send FAX tab, enter the required
recipient information: recipient’s name and fax number or e-mail
address. Then, click Add to Recipient List.
•
A maximum of 150 recipients can be added.
•
When you enter a fax number, you use the actual numeric
characters plus any valid characters that separate the different
segments of the number. For example, you can use 0 through 9,
dash (-), and parentheses (). For a complete list of valid
characters, see Appendix A. (P. 183)
64 PC Faxing (F80 only)
Chapter 4
In addition, you must enter any necessary dialing prefixes. For
example, in some businesses, dialing 9 before the phone number
may be necessary to obtain an outside line. Thus you would enter
the fax number as 9xxx-xxxx; where xxx-xxxx is the phone
number.
•
If you have a MAPI compliant e-mail application installed on
your system (as described earlier in this chapter), you can use the
e-mail address to transmit a document as an e-mail message.
4.
Specify your Send As setting. Click Fax if you want to send the
document as a fax; otherwise, click Email.
5.
Process the job.
•
Click Send Now to send the fax now. The fax document is sent to
the Outbox until it is transmitted. Once transmission is complete,
the fax is moved to the Sent Faxes folder.
•
Click Send Later to schedule the fax for sending later. Send Later
is only available for faxes.
•
Click Hold to store the fax until you decide to send or delete it.
Held faxes are stored in the Outbox. Any fax information you
specified is preserved.
If you clicked Send Later, to schedule the fax:
In the Send Later dialog box, select the desired date and time.
The fax is sent to the Outbox folder for processing at the specified date
and time.
Chapter 4
PC Faxing (F80 only) 65
Specifying a Fax Recipient from the Address Book
0
In addition to entering recipient information directly into the Send Fax
dialog box, you can specify a fax recipient from the Address Book. This
prevents you from having to re-enter the information of recipients that
you often send faxes to.
In addition, in the Send Fax dialog box, you can make recipient
information that you enter directly available for future use by adding the
recipient to the Address Book. If you do not add the recipient to the
Address Book, the information is available only for the current fax.
The first time you open the Address Book, the Setup Windows Address
Book dialog is displayed. For details see “Setting Up an Address Book.”
To specify a recipient from the Address Book:
1. In the Send Fax dialog box, on the Send FAX tab, click Display
Address Book.
66 PC Faxing (F80 only)
Chapter 4
2.
In the Select Recipient From Address Book dialog box, select the
desired recipient in the Recipients list and click Add to Recipient List.
Then click OK.
3.
If the entry you added has both a fax and e-mail address, the entry is
automatically added with the fax number. If you want to send the fax
as an e-mail message instead, in the Send Fax dialog box, on the Send
FAX tab, in the Recipient list, right click the recipient. Then, on the
displayed menu, click Email.
To add a recipient to the Address Book:
1. In the Send Fax dialog box, on the Send FAX tab, enter the recipient
information in the Name, Fax, and Email boxes.
2.
Click Add to Address Book.
3.
The required information you entered in the Send Fax dialog box is
automatically inserted on the appropriate tabs in the Properties
dialog box.
Optionally, enter any other desired information. Then click OK.
Chapter 4
PC Faxing (F80 only) 67
For more information about setting up the address book, see the “Setting
Up an Address Book” section.
Attaching and Previewing a Cover Sheet
0
As desired, you can attach a cover sheet to your fax. Before sending the
fax, you can preview the attached cover sheet. You can select from a
number of predefined cover sheet styles. On the cover sheet, you can
specify sender information and memo text for your fax.
To attach a cover sheet:
1. In the Send Fax dialog box, click the Cover Sheet tab.
2.
On the Cover Sheet tab, click Use this cover sheet for all my faxes.
Then, click a cover sheet style in the list.
68 PC Faxing (F80 only)
Chapter 4
3.
Enter the sender’s information in the Name, Fax Number, and Phone
Number boxes. Optionally enter the sender’s company name in the
Company box.
4.
In the Memo box, optionally enter a memo to display on the cover
sheet.
To preview a cover sheet:
With the desired cover sheet selected, click Preview.
The cover sheet displays in the Viewer. This display is read only and
cannot be edited.
Characters such as transmission destination are not displayed in the
preview.
To print a cover sheet:
1. With the cover sheet open in the Viewer window, click Print on the
File menu or toolbar.
2.
In the Print dialog box, specify your printing options.
Defining Fax Settings
0
You can change your preferred fax settings, such as paper size and
orientation of your fax. The settings you define, including cover sheet
settings and send to information, is used for the current fax, as well as
future faxes.
To define fax settings:
1. In the Print dialog box, click the Fax Options tab (Windows 2000), or
click Properties (Windows 98/Me) or click Preferences or Properties
(Windows XP).
Chapter 4
PC Faxing (F80 only) 69
2.
On the Fax Options tab (Windows 2000/XP) or dialog box (Windows
98/Me), specify the preferred fax settings.
Creating and Sending a Quick Fax
0
A Quick Fax is a brief, one-page fax sent directly from My MultiPASS.
You specify the fax information as described in the previous sections of
this chapter.
To create and send a Quick Fax:
1. In My MultiPASS, click Send Quick Fax on the MultiPASS menu.
70 PC Faxing (F80 only)
Chapter 4
2.
Chapter 4
In the Send Fax dialog box, on the Send FAX tab, specify your
recipient information as described in the previous sections.
PC Faxing (F80 only) 71
3.
On the Cover Sheet tab, select a cover sheet and specify your sender
information.
4.
Because the fax memo is not originating from a document created in
another Windows application, enter the memo message in the Memo
box.
5.
After completing the entries in the Send Fax dialog box, click Send
Now or Send Later.
Working with Jobs in the Outbox Folder
0
The Outbox folder stores the active job currently being sent, queued jobs,
jobs that were stopped from being sent, jobs that failed during sending,
faxes that are scheduled for later, and jobs that were put on hold. You can
perform a variety of tasks to these jobs.
72 PC Faxing (F80 only)
Chapter 4
To view a fax:
Click the job you want to view, and then click Open on the MultiPASS
menu. Or, double-click the job.
When opened, the document displays in the Viewer, but cannot be edited.
To stop the active fax:
Click the active job, and then click Stop on the MultiPASS menu.
To delete a fax:
1. Click the job you want to delete. To select all the jobs, click Select All
on the Edit menu.
2.
Click Delete on the File menu, or press the Delete key.
3.
When prompted, confirm that you want to permanently delete the
job.
To send, resend, hold a fax, or change fax information:
1. Click the desired job.
2.
Chapter 4
If you clicked the active or a scheduled job, click Stop on the
MultiPASS menu.
PC Faxing (F80 only) 73
3.
With the appropriate job selected, click Resend on the MultiPASS
menu.
4.
In the Send Fax dialog box, change any fax information as needed on
the Send FAX tab.
You can change the information that you initially entered for the PC
fax. Additionally, you can add a new cover sheet to the fax.
5.
Click Send Now, Send Later, or Hold.
Receiving a Fax
0
All incoming faxes are received by your printer. The incoming faxes can
be uploaded to the Received Faxes folder in My MultiPASS, based on
what you specified for the MultiPASS Receive Fax settings. (For more
information about Receive Fax settings, see Chapter 7, “Fine-tuning the
MultiPASS Suite.” (P. 147))
You can receive a fax regardless of whether your computer is turned on
or off.
❏ If the computer is on
If your computer is turned on when the printer receives a fax,
depending on the When Computer is On setting, the fax is either
printed directly by the printer, or uploaded to the My MultiPASS
Received Faxes folder.
❏ If the computer is off
If your computer is turned off when the printer receives a fax,
depending on the When Computer is Off setting, the fax is either
printed directly by the printer, or saved in printer memory.
If your computer is going to be off for a long time, or you are
expecting many incoming faxes, it is recommended that you set the
printer to automatically print incoming faxes. This setting enables
you to leave the computer off for a long time, and still be assured of
receiving your faxes.
74 PC Faxing (F80 only)
Chapter 4
If you set the printer to save a fax in memory, it can later be printed or
sent to the My MultiPASS Received Faxes folder when your
computer is turned on. When a fax is saved in printer memory, a
notification message appears on the printer LCD display, indicating
the fax is received in a file.
To move received faxes from printer memory to My MultiPASS:
1. Turn on your computer and start Windows.
2.
Open My MultiPASS.
In Device Setup, on the Receive Fax tab, the When Computer is Off option
must be set to Save in Memory and the When Computer is On option must
be set to Send to PC. See the “Defining Device Fax Settings” section. (P.
147)
Automatically Forwarding Received Faxes
0
If you are going to be away from your computer for a long period of time,
you can have faxes automatically forwarded to you at a remote location.
You specify the specific fax number to which all faxes are forwarded.
Faxes are forwarded to you for as long as the Auto Forward setting is
enabled.
When you automatically forward faxes, color faxes are forwarded as
black and white documents.
The following requirements must be met for the Auto Forward feature to
work correctly:
❏ The PC must be on. Standby or Sleep mode must be inactive.
❏ The power to the printer is on and the device is connected to the
computer with a USB cable.
❏ In the Device Setup, on the Receive Fax tab, the When Computer Is
On option must be set to Send to PC.
Chapter 4
PC Faxing (F80 only) 75
To setup fax forwarding:
1. On the MultiPASS menu, click Auto Forward.
2.
In the Auto Forward dialog box, click Enable Auto Forward and
specify your auto-forwarding options.
•
Click the device that you want to automatically forward your
faxes.
•
Enter the desired fax number.
•
Click to add a cover sheet.
•
Select whether to limit the number of pages of each automatically
forwarded fax.
If you clicked Add Cover Sheet, to configure the cover sheet:
1. Click Configure.
76 PC Faxing (F80 only)
Chapter 4
2.
In the Configure Auto Forward Cover Sheet dialog box, click the
cover sheet style to use.
3.
In the Sender and Recipient boxes, enter the sender and recipient
information that applies to all forwarded faxes.
4.
In the Notes Field box, optionally enter memo text. The text displays
on the cover sheet each time a fax is forwarded.
To disable fax forwarding:
1. On the MultiPASS menu, click Auto Forward.
2.
Chapter 4
In the Auto Forward dialog box, clear Enable Auto Forward.
PC Faxing (F80 only) 77
Using the Fax Log
0
The Fax Log contains a list of fax activity (faxes sent and received) for
both PC and machine faxes. Each fax lists historical information, such as
transmission status, date and time the fax was sent or received, the sender
and recipient of the fax, and the number of pages. You can use the Fax
Log for a variety of purposes, such as reviewing the status of a sent PC
fax. Entries in the Fax Log cannot be opened in the Viewer. Fax Log
entries remain in the Fax Log until you delete them or for the duration
that you specified in the Options setup. The Fax Log does not record fax
transmissions sent as e-mail messages.
To display the Fax Log:
In My MultiPASS, on the MultiPASS menu, click Fax Log.
To print the Fax Log:
1. In the Fax Log dialog box, click Print.
2.
In the Print dialog box, specify the desired print options.
78 PC Faxing (F80 only)
Chapter 4
To delete an entry in the Fax Log:
Click the job you want to delete. Then, click Delete.
Setting Up an Address Book
0
Using an address book can make sending a PC fax quicker and easier.
When set up, the address book contains a list of names, fax and phone
numbers, and e-mail addresses for contacts to whom you send PC faxes.
You can also use address book entries for defining speed dial assignments
for your printer.
The MultiPASS Suite uses Windows Address Book (WAB), a (.wab) file
for your contact information. When you first decide to use an address
book, you designate whether you want to set up the WAB file directly in
My MultiPASS or use a previously set up WAB file provided with
Windows. Whichever WAB file you designate, you can use My
MultiPASS to add and edit any contact information. If you choose to set
up an address book in My MultiPASS, you can later change your
designated WAB file and use a different address book for MultiPASS.
To designate the address book to use:
1. On the Windows Desktop, click Start, point to Programs or All
Programs, point to Canon MultiPASS Suite, and then click Canon
MultiPASS Address Book Profile.
2.
Chapter 4
In the Setup Windows Address Book dialog box, click if you want to
create the address book file in MultiPASS or if you want to use an
existing address book file.
PC Faxing (F80 only) 79
If you click to use an existing address book file, you will not have an
opportunity later on to create a separate address book file directly in
MultiPASS.
3.
If a WAB file already exists, you clicked the Select existing Windows
Address Book file, and if the system detects more than one file
available, click the desired file in the list box.
4.
Click OK.
5.
In the Address Books dialog box, click OK.
To open the address book you designated:
In My MultiPASS, on the MultiPASS menu, click Address Book.
Working with the Address Book
0
The address book contains the following types of entries:
❏ WAB Contact
Contact entries enable you to identify each individual to whom you
frequently send PC faxes. Once entered, you can quickly specify the
recipients of a PC fax by selecting them from the address book.
80 PC Faxing (F80 only)
Chapter 4
❏ WAB Distribution List
Distribution lists identify two or more contact entries to whom you
repeatedly send the same PC fax. For example, you may want to
setup a distribution list to include those contacts involved in a
particular business project. When you specify the distribution list
entry as the fax recipient on your PC fax, the PC fax is sent to each
contact in the list. If you specify more than one distribution list
address for a fax, and the distribution lists contain the same contacts,
the duplicate contacts are automatically removed.
You can add, edit, search for, and delete both entry types.
To add a contact:
1. In the Address Book dialog box, click New.
2.
Chapter 4
In the New Entry dialog box, click WAB Contact, and then click OK.
PC Faxing (F80 only) 81
3.
In the Properties dialog box, enter the following required
information:
•
First name and last name
•
Fax number (home or business) or e-mail address.
To edit a contact entry:
1. In the Address Book dialog box, click the entry to edit in the Recipient
list, and then click Properties.
2.
In the Properties dialog box, make the desired changes.
To add a distribution list entry:
1. In the Address Book dialog box, click New.
82 PC Faxing (F80 only)
Chapter 4
2.
In the New Entry dialog box, click WAB Distribution List, and then
click OK.
3.
In the Properties dialog box, in the Group Name box, enter the name
of the distribution list.
4.
To add members to the group, do one of the following.
•
Chapter 4
Click Select Members to add existing address book contacts to the
group.
PC Faxing (F80 only) 83
•
5.
Click New Contact to create a new contact for the group.
Do one of the following:
84 PC Faxing (F80 only)
Chapter 4
•
If you clicked Select Members in the previous step, in the Select
Group Members dialog box, in the Address Book list, click the
individual entry you want to add to the group, and then click
Select. When you have added all the desired members, click OK.
•
If you clicked New Contact in the previous step, in the Properties
dialog box, enter the new member’s information and click OK.
Repeat this step for each individual that is not in your Contact
list.
6.
To remove an entry from the group, click the name in the Distribution
list, and then click Remove.
7.
Click OK to add your new group to your address book.
To edit a Distribution List entry:
1. In the Address Book dialog box, in the Recipient list, click the
Distribution List entry to edit. Then click Properties.
2.
Chapter 4
In the Properties dialog box, make the desired changes.
PC Faxing (F80 only) 85
To search for an entry in the address book:
Enter the name of the contact you want in the Type Name or Select From
List box. If an entry exists with that name, it is selected.
You can only search through entries by name, you cannot search using
any other entry characteristic.
To sort the address book:
Click the applicable heading for the column containing the information
by which you want to sort the list. For example, to sort the list by name,
click the column heading Recipient Name.
To delete an address book entry:
Click the name in the list. Then click Delete. If prompted, confirm that
you want to delete the entry.
Designating a Different Windows Address Book
0
You can designate to use a different Windows address book file for
MultiPASS, from the one you previously designated. You can change the
designated WAB file as needed.
To change the designated Windows address book for MultiPASS:
1. On the Windows Desktop, click Start, point to Programs or All
Programs, point to Canon MultiPASS Suite, and then click Canon
MultiPASS Address Book Profile.
86 PC Faxing (F80 only)
Chapter 4
2.
In the Address Books dialog box, click Windows Address Book, and
then click Edit.
3.
In the Add/Edit Windows Address Book dialog box, enter a name for
your WAB file.
4.
Click Browse. In the Select WAB File dialog box, specify the path and
name of the .wab file you want to use. Then, click Open.
Once designated, you open and use the Windows address book file as
described in a previous section of this chapter.
As an Alternative: Importing Your Address Book
You can import the entries from one Windows Address Book file into
another, combining both sets of address book entries (for example, import
from the address book created directly in MultiPASS to an existing
Windows Address Book). The following summarizes the procedure for
importing the entries. For details on importing the entries, see your
Windows user documentation.
On your system, search for the appropriate .wab files (for example, the
address book file created in MultiPASS and the existing Windows
Address Book file). Using Windows commands, open the Windows
Address Book file into which you want to import entries. Then, import
the entries from the other Windows Address Book file.
Chapter 4
PC Faxing (F80 only) 87
88 PC Faxing (F80 only)
Chapter 4
Chapter 5
Scanning
5
You can use the printer to scan documents by the following methods:
❏ Using the MultiPASS Toolbar
The MultiPASS Toolbar (also referred to as the Toolbar) enables you
to scan a document or image into your PC. The appearance of the
Toolbar can change based on the settings (such as shown buttons and
size) you define for the Toolbar.
❏ Using a TWAIN or WIA compliant Windows application
If you are using Windows 98/Me/2000, use ScanGear for MultiPASS,
the TWAIN-compliant driver. You cannot use a WIA-compliant
driver. If you are using Windows XP, you can use either the ScanGear
for MultiPASS or the WIA-compliant driver. On the MultiPASS
Toolbar, click on Settings and then choose which driver you would
like to use. Both drivers allow you to use a printer to scan documents
to a Windows application such as a PhotoShop, that supports a
TWAIN interface. Some applications allow multiple page scans,
while others do not. If you are unsure whether your Windows
application supports this feature, refer to the user documentation for
the application you are using.
When you scan a document, the system uses predefined settings that
determine the characteristics of your scanned image (such as the image
type and resolution), enabling you to begin scanning immediately.
However, you can change these settings as needed.
Chapter 5
Scanning 89
To scan an image with the Toolbar:
When two or more pages are scanned from the ADF (Automatic
Document Feeder) (F80 only) and the scanned documents are set up to be
saved, if the file format is TIFF, one file is created with a multi-page TIFF
format and all the pages are saved in this file. BMP format and JPG format
files are saved into separate files as separate pages.
1.
Place your image facedown on the platen glass, or load it in the
automatic document feeder (F80 only), of your printer.
If the file format is not TIFF, only one sheet can be scanned if you plan
on scanning with the Viewer, OCR, Custom1, Custom2, or Custom3
button (see next step).
2.
90 Scanning
On the Windows desktop, on the MultiPASS Toolbar, click the
appropriate scan button.
•
Click Fax to scan your document and automatically send it as a
fax from your PC (F80 only).
•
Click E-Mail to scan your document and automatically attach it to
a message in your e-mail application.
•
Click Save As to scan your document and automatically save it in
the My Pictures folder in the My Documents folder. When
MultiPASS Suite is installed and there is no My Pictures folder,
images will be saved to the My Documents folder. If there is no
My Documents folder either, the images are set up to be saved to
the Scan to Save folder.
This save location can be changed with the Toolbar Settings.
Scanned documents are assigned a unique name with a file name
extension such as .bmp, .tif, or .jpg according to the file format.
•
Click Viewer to scan your document and automatically have it
display in a graphic application (such as MultiPASS Viewer).
•
If the buttons appear on the Toolbar, click OCR, Custom1,
Custom2, or Custom3 to scan your document and automatically
have it display in an application you assigned in the Toolbar
settings (such as OmniPage or Microsoft Paint).
Chapter 5
3.
If the scanner window appears, define your scan settings as desired
and scan your document.
For details on setting the scanner window to appear, see the
“Defining Toolbar Settings” section. For details on defining scan
settings, see the “Working with Scan Settings in ScanGear” or
“Working with Scan Settings in WIA” section.
If the scanner window does not appear, skip to the next step.
4.
When the scan is complete, do one of the following:
•
If you clicked Fax in Step 2 (F80 only):
In the Send Fax dialog box, enter the appropriate information and
send the fax.
•
If you clicked E-Mail in Step 2:
In the e-mail message window, enter the appropriate information
and send the e-mail message.
•
If you clicked Save As in Step 2:
The image is automatically saved in the My Pictures folder, or if
not available, in the My Documents folder or Scan to Save folder.
•
If you clicked Viewer in Step 2:
The image automatically appears in the associated graphic
application.
•
If you clicked OCR, Custom1, Custom2, or Custom3 in Step 2:
The image automatically appears in the software application set
up as the linked application in your Toolbar settings.
To scan an image from a TWAIN or WIA compliant Windows
application:
1. Place your image facedown on the platen glass, or load it in the
automatic document feeder (F80 only), of your printer.
2.
In your Windows application, click the command to scan a document.
In some applications, the appropriate command may be listed as
Acquire or Acquire Image.
Chapter 5
Scanning 91
3.
In the scanner window, specify the preview scan options for your
document as necessary.
4.
Click Preview.
5.
Review the display of your scanned preview image. Adjust the
properties of the image as necessary.
6.
Replace your document in the automatic document feeder (F80 only).
7.
Click Scan.
When complete, the image appears in the display area of your Windows
application.
Multi-Photo Scan / Multi Crop in ScanGear 0
You can scan two or more photos (small documents) at one time using
Multi-Photo Scan (Simple Mode) or Multi Crop (Advanced Mode).
Each photo will constitute as one image.
Multi-Photo Scan (Scanning two or more photos at one time (No
detailed settings))
When scanning two or more photos without having to specify in detail
such things as the scanning area, use Multi-Photo Scan in Simple Mode.
However, photos that have an overall whitish appearance or have a
whitish border may not be cropped accurately. Also, documents other
than photos (particularly documents printed on white paper, handwritten text, business cards etc.) may also not be cropped accurately.
Automatically there is a correction of documents that are not straight.
However this will not happen if the image is off by more than 10 degrees.
The document is scanned in the Color Mode of Color and Resolution of
300 dpi.
1.
92 Scanning
If using the Toolbar to scan, click Settings on the Toolbar. On the
Toolbar Settings tab, click Show scanner driver before scanning, select
it and click OK.
Chapter 5
2.
Place the photos on the platen glass.
Please leave a gap of at least 0.4 inches (1 cm) between each photo
and the edge of the platen glass. You should be able to place up to 10
photos on the platen glass at any one time if desired.
photo
photo
photo
photo
Keep more than 0.4 inches (1 cm) between the photos and edges
of the platen.
Chapter 5
3.
Either click a button on the Toolbar, or in a TWAIN-compliant
application select a command such as Acquire or Acquire Image to
scan the document. You can use the Fax (F80 only) and E-mail buttons
on the Toolbar. You can also use the Save As, Viewer, OCR, Custom
1, Custom 2, and Custom 3 buttons when TIFF is selected as the Save
as type. See "To scan an image with the Toolbar" for the function of
individual buttons.
4.
Please note, the image source will change to the Platen Glass if set on
the document feeder (F80 only).
5.
Click the Simple Mode button if it is displayed.
6.
Click Preview if you wish to see a preview. The image will be
scanned provisionally as a preview.
Scanning 93
7.
Click Multi-Photo Scan.
8.
When the Multi-Photo Scan dialog box appears, click Next. Scanning
of multiple photos will begin.
9.
Depending on which operation was selected in 3, continue with the
procedures that follow.
Multi Crop (Scanning two or more photos at one time (Detailed
settings)):
If you use Multi Crop (Advanced Mode), you can specify detailed
settings for scanning of two or more photos (small documents) at one time.
In the same way as Multi-Photo Scan, photos that have an overall
whitish appearance or have a whitish border may not be cropped
accurately. Also, documents other than photos (particularly documents
printed on white paper, hand-written text, business cards etc.) may also
not be cropped accurately.
Automatically there is a correction of documents that are not straight.
However this will not happen is the image is off by more than 10 degrees.
Unlike Multi Crop, Color Mode and Resolution can be set freely.
1.
If using the Toolbar to scan, click Settings on the Toolbar. On the
Toolbar Settings tab, click Show scanner driver before scanning, select
it and click OK.
2.
Place the photos on the platen glass.
Please leave a gap of at least 0.4 inches (1 cm) between each photo
and the edge of the Platen glass. You should be able to place up to 10
photos on the platen glass at any one time if desired.
94 Scanning
Chapter 5
photo
photo
photo
photo
Keep more than 0.4 inches (1 cm) between the photos and edges
of the platen.
3.
Either click a button on the Toolbar, or in a TWAIN-compliant
application select a command such as Acquire or Acquire Image to
scan the document. You can use the Fax (F80 only) and E-mail buttons
on the Toolbar. You can also use the Save As, Viewer, OCR, Custom
1, Custom 2, and Custom 3 buttons when TIFF is selected as the Save
as type. See "To scan an image with the Toolbar" for the function of
individual buttons.
4.
Please note, the image source will change to the Platen Glass if set on
the Document Feeder (F80 only).
5.
Click the Advanced Mode button if it is displayed.
6.
Click Preview. The image will be scanned provisionally as a preview.
7.
If necessary, specify settings.
8.
On the Main tab, click Multi Crop.
Each of the preview photos is surrounded by dotted lines. Each of the
documents is separated from the others by its frame of dotted lines
and is scanned as a separate document.
Chapter 5
Scanning 95
9.
Drag the dotted lines with your mouse pointer if you wish to adjust
the frame of the dotted lines.
If you wish to delete the frame, right-click the frame and then click
Delete.
10. Click Scan.
Scanning of multiple photos will begin.
11. Depending on which operation was selected.
You may not be able to crop when the resolution is low. If you cannot
crop properly, increase the resolution and try cropping again.
Viewing the Scanner Driver
0
When scanning with the MultiPASS Toolbar (also referred to as the
Toolbar), you can set the scanner driver to always appear before scanning
is performed.
To view the scanner driver:
1. On the Windows desktop, on the Toolbar, click Settings.
2.
Click Show scanner driver before scanning, in the Toolbar Settings
tab.
If the Show scanner driver before scanning option is cleared, the image is
scanned based on the scan settings defined in the Toolbar settings.
96 Scanning
Chapter 5
Changing the scanner driver (Windows XP
only)
0
Specify before you begin scanning whether you want to use the ScanGear
or the WIA-compliant driver. See below to switch between them.
1.
On the Windows desktop, on the Toolbar, click Settings.
2.
In Select driver type, click either ScanGear driver or WIA driver.
Working with Scan Settings in ScanGear
(Windows 98/Me/2000/XP)
6
When you use ScanGear before scanning, typically you scan a preview of
the document first. The preview image enables you to review the results
of your scanned image and make any necessary adjustments (for
example, to size, tone, and so on). When you are satisfied with the results,
you then perform the final scan of the document.
The following instructions summarize the procedures for scanning an
image with ScanGear.
To scan an image in ScanGear:
1. On the Toolbar, click one of the following buttons:
Fax (F80 only), E-Mail, Save As or Viewer, OCR, or Custom (1, 2, 3).
Chapter 5
2.
In the ScanGear window, click whether you want to work in Simple
Mode or Advanced Mode.
3.
On the appropriate tabs, specify the desired preview scan settings for
your image, such as the color mode, scan resolution, and page size.
4.
Click Preview.
5.
Review the display of the scanned preview image. Adjust the
properties of your image as necessary.
Scanning 97
6.
With your document in the printer, click Scan to perform the final
scan of your image.
Defining Preview Scan Settings in Simple Mode
6
Simple Mode enables you to use a more simplified screen, providing
basic but fewer choices, in defining the scan settings for the preview
image. You choose an image type that determines the predefined color
mode and resolution for scanning your image. You can define and delete
custom image types as needed.
To define preview scan settings in Simple Mode:
1. On the Simple Mode tab, in the Image Type box, click the type of
image you are scanning, which automatically sets the color mode and
resolution.
2.
98 Scanning
In the Paper Size list, click the size of the source document or image
you are scanning.
Chapter 5
3.
In the Width and Height lists, click the unit of measure by which you
want to display the dimensions of your selected paper size.
4.
With the F80, click either Platen Glass (flatbed) or Document Feeder
(ADF) in Image Source.
To define a custom image type:
1. In the Image Type box, click Custom.
2.
Click Edit Image Type.
3.
In the Image Type Settings dialog box, enter a name for the image
type you are defining.
4.
Click the preferred color mode and resolution.
5.
Click Save.
To delete a custom image type:
1. In the Image Type box, click the name of the image type you want to
delete.
Chapter 5
2.
Click Edit Image Type.
3.
In the Image Type Settings dialog box, click Delete.
4.
When prompted, click Yes to delete the image type.
Scanning 99
Defining Preview Scan Settings in Advanced Mode
6
In addition to defining scan settings similar to Simple Mode, Advanced
Mode enables you to adjust the preview image before the final scan.
These adjustments can include setting the tone and brightness of your
scanned image.
To define preview scan settings in Advanced Mode:
1. On the Main tab, click the color mode for your image.
2.
Click or type the resolution, as dots per inch (dpi).
3.
On the Preferences tab, set the following:
•
Text Enhanced Instead of B&W
Click to use with OCR (Optical Character Recognition) software.
This setting increases the contrast in black and white scanning to
promote the accurate recognition of characters in OCR software.
Resolution should be at least 300 dpi for OCR scans.
If selected, the text enhanced setting is used for applications that
request a black and white scan and do not use the scan window
(including most OCR applications).
100 Scanning
Chapter 5
•
Canon ColorGear Color Matching
Click to enable your system to show an image in colors that best
represent the original, based on the display characteristics of your
monitor.
Since results can vary, it is recommended that you experiment
scanning your image with this option turned on and off. Results
can vary based on the type of image you are scanning and the
output of your final scan.
•
Change Monitor Profile
If the appropriate monitor profile is not displayed, click to change
your monitor profile. Then, in the displayed list, click your
monitor. If your monitor is not listed, click Canon’s Default
Profile for Monitors.
Since the quality of your scanned image could be affected if the
correct monitor profile is not selected, changing the monitor
profile enables a better quality scanned image.
4.
On the F80 (F60) tab, in the Paper Size list, click the size of the source
image you are scanning.
Adjusting the Preview Image for Final Scan
6
Once an image has been previewed, you can adjust the image and the
area in which it is viewed.
To resize a preview image, to better view its details:
1. On the toolbar, click Zoom.
2.
Chapter 5
To enlarge the view, left-click the mouse pointer on the image.
Scanning 101
To reduce the view, right-click the mouse pointer on the image.
To move an enlarged image:
If the image is too large to see in its entirety, on the toolbar, click Scroll
and drag the zoomed image to display the appropriate section.
To reverse the tone of an image:
On the toolbar, click Negative/Positive.
To create a mirrored view of your image:
On the toolbar, click Flip.
To rotate the image 90o left or right:
On the toolbar, click Rotate Left or Rotate Right to change the orientation
of the image.
To display rulers in the preview area:
On the toolbar, click Rulers to work more precisely with a preview image,
by displaying rulers on the top and left borders of the preview area.
To remove the current preview image:
Click Clear if the preview image does not serve your purpose.
To reduce the moire pattern in the preview image:
In Advanced Mode, on the F80 (F60) tab, click Descreen.
It is only effective for images which are a color or grayscale picture type
and which are less than 600 dpi.
If you are scanning at a higher resolution, the descreen process may take
several minutes to complete.
To sharpen the outline of an image:
In Advanced Mode, click Unsharpmask in the F80 (F60) tab.
Select to sharpen an image in a natural way without changing the
brightness and contrast, or hue of an image.
Photos with a soft focus can also be sharpened.
If moire does not disappear even if you have selected Descreen, try
turning off Unsharpmask.
It is only effective for images which are a color or grayscale picture type.
102 Scanning
Chapter 5
Cropping Your Preview Image
You can crop your preview image by selecting only that portion of the
image that you want. Then, when you rescan the image, only that portion
of the image appears.
There are different methods available for cropping your image.
To automatically crop the image:
Click Auto Crop. Click repeatedly to reduce the size of the cropped area.
You can manually resize and reposition the cropped area, as explained in
the following procedure.
To manually define the cropped area:
1. Click Advanced Mode.
2.
On the Main tab, if you want to maintain the current width and
height proportions of the image while cropping, click Keep
Proportions.
3.
Do one of the following:
4.
5.
Chapter 5
•
To draw the cropped area:
Click Select. Position the mouse point at the upper left corner of
the area you want to select, and drag the mouse to the lower right
corner of the desired area.
•
To define the cropped area by its size:
In the Width and Height boxes, type the appropriate dimensions.
To resize the cropped area, do one of the following:
•
In the Width and Height boxes, type the appropriate dimensions.
•
Drag any sizing handle on the crop border.
To reposition the crop border, place the mouse cursor inside the
border and drag to the appropriate area.
Scanning 103
6.
If you want to clear the current selection, click outside the crop
border.
7.
To preview the cropped image, click Preview.
Scaling the Image Output Size
You can scale the size of your preview image, to maintain the image size
while enlarging or reducing the output size. For example, if you scale
your image by 50%, the output size of the image is half the size of the
actual image size.
To set an image scale:
On the Main tab, in the Scale box, enter a percentage.
Adjusting the Tone of a Color or Grayscale Image in
Advanced Mode
6
If you selected Color or Grayscale as your color mode, you can produce a
wide range of visual effects or corrections in your preview image by
adjusting the settings on the Tone tab. The tone settings can be adjusted
using the following methods.
To automatically correct the tone:
Click Auto on the ScanGear toolbar or the Tone tab.
To adjust the contrast or brightness of an image:
1. On the Tone tab, click Contrast/Brightness.
104 Scanning
Chapter 5
2.
If you are working with a color image, click the appropriate color
channel.
3.
Move the Contrast and Brightness sliders to the left for less contrast
or brightness, and to the right for more contrast or brightness.
4.
To return to the original setting, click Reset.
To adjust the tone with the gamma value:
1. On the Tone tab, click Gamma.
Chapter 5
Scanning 105
2.
If you are working with a color image, click the appropriate color
channel.
3.
Move the slider to the left to decrease, to the right to increase, the
contrast displayed in the middle of the tonal range (midtones) of your
image. Or, enter the value in the box.
4.
To return to the original setting, click Reset.
To adjust the tone using a histogram:
1. On the Tone tab, click Histogram.
106 Scanning
Chapter 5
2.
If you are working with a color image, click the appropriate color
channel.
3.
For the black-point, midpoint, or white-point, do one of the following
to make a change:
•
Click the appropriately labeled button. Then click the portion of
the image in the preview area that is darkest (for black-point),
lightest (for white-point), or in the middle of the tonal range (for
midpoint).
•
Drag the appropriate arrow at the bottom of the histogram to the
level you want.
When you adjust the black-point, all tones in the image darker than
the selected black-point are adjusted to black.
When you adjust the midpoint, all tones in the image between the
black-point and the white-point are adjusted to the selected midpoint.
Chapter 5
Scanning 107
When you adjust the white-point, all tones in the image lighter than
the selected white-point are adjusted to white.
4.
To return to the original setting, click Reset.
To save the histogram setting:
1. Click Save.
2.
In the Save As dialog box, specify the file name and location where
you want to save the setting, and click Save.
To open a previously saved histogram setting:
1. Click Load.
2.
In the Open dialog box, click the file name for the tone setting you
want to load and click Open.
To correct a common tone problem with a predefined tone curve:
1. On the Tone tab, click Special Tone Curves.
108 Scanning
Chapter 5
2.
If you are working with a color image, click the appropriate color
channel.
3.
In the Select Special Curve box, click the desired correction.
4.
To return to the original setting, click Reset.
Adjusting the Tone of a Black and White Image in
Advanced Mode
6
If you selected Black and White as your color mode, you can define the
following tone settings on the Black & White tab.
Chapter 5
Scanning 109
❏ Options
Click the method that produces the most desirable results for your
black and white image, based on how the method represents the
black and white portions of your image. To better understand how
each method affects the black and white portions of your image, it is
recommended that you select each method in turn and preview the
results in the sample image.
❏
Brightness
Move the slider to the right to decrease the brightness, to the left to
increase the brightness, or enter a value in the box.
Although the Black & White tab appears when you select Text Enhanced
as the color mode, the settings are not available and cannot be changed.
Adjusting ScanGear Preferences
6
In addition to scan preferences you can set prior to scanning a preview
image (described previously), you can adjust other preferences for
ScanGear that affect the scan behavior the next time you scan an image.
To adjust scan behavior preferences:
1. In Advanced Mode, click the Preferences tab.
2.
Under Preview at Opening of ScanGear, click whether or not you
want ScanGear to automatically scan a preview of the image in your
printer, or to display the previous preview image.
3.
Since not all Windows scan applications may close the ScanGear
window automatically, click if you want to ensure that ScanGear will
automatically close after the final scan is complete.
110 Scanning
Chapter 5
Working with Scan Settings in WIA
(Windows XP only)
6
You can scan a document by placing it on the flatbed (platen glass) or the
automatic document feeder (ADF) (F80 only). Furthermore, you can
specify the picture type, such as color or grayscale, and then scan the
document.
To scan an image:
If you are using the Automatic Document Feeder (ADF) (F80 only),
specify the desired picture type and page size, and then click Scan.
To specify a picture type:
In the Scan dialog box, click the type of picture to scan.
❏ Click a predefined picture type to scan a color, grayscale, or black and
white image using predefined settings.
Chapter 5
Scanning 111
❏ Create a customized picture type by making changes to a predefined
picture type or defining your own custom picture type.
To customize a picture type:
1. Do one of the following:
•
To customize a predefined picture type, click the picture type,
and then click Adjust the quality of the scanned picture.
•
To customize a picture type, click Custom Settings and then click
Adjust the quality of the scanned picture.
Contrast slider available
for Color and Grayscale
picture types
2.
112 Scanning
In the Advanced Properties dialog box, specify the desired scan
settings.
•
Click the desired picture type.
•
To adjust brightness, move the slider to the left for less
brightness, or to the right for more. Or, enter the desired values.
•
For color or grayscale picture types, to adjust contrast, move the
slider to the left for less contrast, or to the right for more. Or, enter
the desired values.
Chapter 5
•
3.
Chapter 5
Click or enter the desired resolution.
Click OK to enable the scan settings you specified in the previous step
and close the Advanced Properties dialog box.
Click Cancel to disable the scan settings you specified in the previous
step and close the Advanced Properties dialog box.
Click Reset to restore the default scan settings.
Scanning 113
Defining Toolbar Settings
6
You can define settings on the Toolbar that affect the behavior of the scan
buttons and other general settings.
To change the scan button settings:
1. On the Windows desktop, on the MultiPASS Toolbar, click Settings.
2.
In the Toolbar Settings dialog box, click the appropriate tab for the
scan button whose settings you want to change (for example,
Custom1).
3.
On the appropriate tab, make your preferred changes:
Illustration of
Custom tab.
However, the
options on each
tab are very
similar.
114 Scanning
Chapter 5
•
Show This Button on Toolbar
Click to display the button associated with this scan destination
on the Toolbar. If this option is cleared, the button does not
appear on the Toolbar.
•
Link To
On the Scan to Fax tab (F80 only), this setting displays the fax
driver that is used to send your scanned document as a fax.
On the OCR, Viewer, and Custom tabs, this setting displays the
path and executable file for the application associated with the
scan destination. The OCR and Viewer buttons may be factorypredefined with an application bundled with your MultiPASS
Suite. For example, the OCR button may be linked to the
OmniPage application (omnipage.exe). The Custom tabs enable
you to associate your preferred applications with the Custom
buttons.
•
Set
On the Scan to Fax tab, click to change the fax options used when
faxing the scanned document with the Fax button. In the FAX
Properties dialog box, specify your changes (such as paper size)
and click OK (F80 only).
On the OCR, Viewer and Custom tabs, click to associate an
application with this scan button (for example, Microsoft Paint).
In the Select Application dialog box, click the path and file name
for the application executable (.EXE) file. Then click Open.
Chapter 5
•
Button name
Enter name (up to nine characters), to be displayed in the Toolbar
for Custom 1, Custom 2, and Custom 3.
•
Open folder after scanning (Save As tab only)
If you select Open folder after scanning, the folder in which
scanned images were saved with Save As will be displayed in
Explorer after scanning.
Scanning 115
•
Image File
On the Save As tab, click Browse to select a location (drive and
folder) where you want your image files to be saved. The factorypredefined setting is the My Pictures folder in My Documents.
When MultiPASS Suite is installed and there is no My Pictures
folder, images will be saved to the My Documents folder. If there
is no My Documents folder either, the images are set up to be
saved to the Scan to Save folder.
•
Filename and Numbering
On the Save As tab, in the Filename box, enter the base file name
you want to use to define your own preference for naming files.
For Numbering, click whether you want to continue numbering
from the previously saved file, or to begin the numbering from
the specified number.
MultiPASS uses a naming rule for automatically assigning file
names to scanned images that are saved as files. This rule
includes a base file name plus a sequential number.
For example, if you enter SavedScan as the base file name, and
you specify the numbering to start at 100, your subsequent image
files would be named: SavedScan100, SavedScan101, and so on.
116 Scanning
•
Save as Type
If available, click the file format in which you want your scanned
image saved, such as BMP or TIF. This option is available only for
those scan destinations where saving the image file is
appropriate.
•
Image Type
If available, click the type of image you are scanning, such as
Black and White.
Chapter 5
•
Image Quality (Resolution)
If available, click the resolution (in dots per inch, dpi) for the
image you are scanning. A higher resolution results in a better
image quality, but may take longer to scan. A lower resolution
generally scans faster, but may generate a lesser quality image.
•
Paper Size (if available)
Click the physical size of the image being scanned, such as
letter or business card size.
If you want to specify a custom paper size, click Custom. Then,
click the unit of measure by which you want to define your
custom paper size. In the Width and Height boxes, enter the
dimensions of your custom paper size.
•
Width and Height
Click the unit of measure to display the dimensions of the paper
size you selected.
To change general Toolbar settings:
1. On the Windows desktop, on the Toolbar, click Settings.
Chapter 5
Scanning 117
2.
118 Scanning
On the Toolbar Settings tab, specify your changes:
•
Image Source
Click the printer you prefer to use for scanning.
•
When Scanner Push Button Pressed
Click the desired action that occurs when you push the scan
button on your printer. For example, you can set the button to
display the Toolbar, or to send the scanned document to a
particular destination, such as E-mail.
•
Show scanner driver Before Scanning
Click to display the scanner window or dialog box before
scanning an image. In the window or dialog box, you can select
the desired scan options.
Chapter 5
If this option is cleared, the image is scanned based on the scan
settings defined in the Toolbar.
•
Toolbar Always on Top
Click to keep the Toolbar displayed on top of all applications that
may appear on the Windows desktop.
•
Load on Windows Startup
Click to open the Toolbar when Windows is started. If this setting
is cleared, you need to open the Toolbar when you want to use it.
•
Button Size
Click your preferred display size for the Toolbar buttons.
•
Select driver type
If you use Windows XP, choose whether you will use ScanGear
driver (TWAIN-compliant driver) or the WIA driver for
scanning.
Viewing the Toolbar
6
If the Toolbar does not automatically open, you will need to open it when
necessary. Under certain circumstances, you may be required to close the
Toolbar (for example, when removing the software). The display of the
Toolbar can also be minimized or maximized on the Windows taskbar or
desktop.
To open the Toolbar:
On the Windows desktop, click Start, point to Programs or All Programs,
point to MultiPASS Suite, and then click MultiPASS Toolbar. Or, doubleclick the MultiPASS Toolbar icon on the Windows desktop.
To close the Toolbar:
On the Windows taskbar, right-click the Toolbar icon. On the displayed
menu, click Exit MultiPASS Toolbar.
To minimize the Toolbar open on the desktop:
On the Toolbar, click the Close button on the title bar.
Chapter 5
Scanning 119
To maximize the Toolbar from an icon on the taskbar:
Double-click the Toolbar icon.
As an alternative for performing some of the tasks described for the
Toolbar (such as scanning to a particular destination), you can use the
Toolbar menus. To do so: On the Windows taskbar, click or right-click the
Toolbar icon. On the displayed menu, click the desired command.
120 Scanning
Chapter 5
Chapter 6
Viewing and Enhancing Images
6
You can open and view documents stored in the My MultiPASS folders
with the MultiPASS Viewer (also referred to as the Viewer).
Once open in the Viewer, if you want to edit your document, you can
open it in the MultiPASS Photo Enhancer (also referred to as the Photo
Enhancer). The Photo Enhancer enables you to make advanced image
adjustments, such as applying filters or effects to your images.
Since the appearance and behavior of both the Viewer and Photo
Enhancer are very similar, many of the procedures in this chapter are
used for working with documents in either application.
To open a document in the Viewer:
In the My MultiPASS folders, click the document, and then click Open on
the File menu. Or, double-click the document.
Chapter 6
Viewing and Enhancing Images 121
To close the Viewer:
On the File menu, click Exit.
To open an image in the Photo Enhancer:
1. Open the document that you want to edit in the Viewer.
2.
Click Edit on the Viewer toolbar or Tools menu.
Documents containing metadata can be opened with the Photo Enhancer.
However, if the document is edited and saved, all metadata is lost.
To close the Photo Enhancer:
On the File menu, click Exit.
Specifying Display Preferences
6
While working with a document, you may want to modify the display of
the document or Viewer window layout area to suit your needs.
122 Viewing and Enhancing Images
Chapter 6
To page through a multipage document:
1. Open your multipage document in the Viewer or Photo Enhancer.
2.
In the Viewer:
On the View menu, point to Page. Then, click to the next, previous,
first, or last page. Or, on the toolbar, click Previous Page or Next Page.
In the Photo Enhancer:
On the Page toolbar, click to the previous, next, first, or last page.
For a specific page, click Goto Page. Then, in the Goto Page dialog
box, enter the page number.
To move through the images in a My MultiPASS folder (Viewer):
1. Open an image from the My MultiPASS folder you want to page
through.
2.
On the View menu, point to Image. Then, click to the next, previous,
first, or last image. Or, on the toolbar, click Previous or Next.
To adjust the magnification of the document or image:
In the Viewer or Photo Enhancer, do one of the following:
❏ On the Zoom menu or toolbar, click to zoom out or in, decreasing or
increasing the magnification, by increments.
❏ On the Zoom menu, click a specific setting.
Chapter 6
•
In the Viewer, display the image at its full size, resized so that the
entire image fits the window, resized so the image width fits the
window (while maintaining the aspect ratio for the height), or
resized so the image height fits the window (while maintaining
the aspect ratio for the width).
•
In the Photo Enhancer, display the image resized so that the
entire image fits the window, or at its full size.
Viewing and Enhancing Images 123
To specify the magnification at which the image will open next
(Viewer):
Click Lock in the Zoom menu and set to ON. Images opened with Next
and Previous will be displayed at the magnification at which the image
was displayed when you set Lock to ON. If Lock is set to OFF, images will
be displayed according to settings such as Fit Image set to ON in the
Zoom menu.
If Lock is set to ON, the * mark will appear in the magnification display at
the bottom of the window.
To scroll through a zoomed document (Viewer):
Drag the mouse pointer to move your view of the image.
To scroll through a zoomed image (Photo Enhancer):
1. On the toolbar or Edit menu, click Scroll.
2.
In the image layout area, drag the mouse pointer to move your view
of the image.
To view the document in full-screen mode (Viewer):
On the View menu, click Full Screen.
The document displays as the only item on the screen.
To return from full-screen to the regular window view (Viewer):
1. Right-click anywhere in the document.
2.
Clear Full Screen.
To hide or show the toolbar or status bar (Viewer):
On the View menu, do one of the following:
❏ To toggle the toolbar on or off, click Toolbar.
❏ To toggle the Status bar on or off, click Status Bar.
124 Viewing and Enhancing Images
Chapter 6
Manipulating a Document or Image
6
You can perform a variety of tasks that affect your document image, such
as printing, reloading, and changing the orientation of your document;
flipping the image on a horizontal or vertical axis; and rotating the image
clockwise or counter-clockwise by selected increments.
To print a document (Viewer):
1. On the File menu or Viewer toolbar, click Print.
2.
In the Print dialog box, specify the desired print options.
To print documents in a folder as thumbnails (Viewer):
1. Open a document in the folder that you want to display thumbnails
of.
Chapter 6
2.
On the File menu, click Print Thumbnails.
3.
In the Print dialog box, select the printer and click OK (in Windows
2000/XP, click Print). The thumbnails display in the Preview
window.
4.
In the Print Setup dialog box, specify your print settings:
Viewing and Enhancing Images 125
•
Click, or type, the margins you want to use along the edge of the
paper.
•
If the one or more thumbnail images do not fill the page, click the
position where the thumbnails should be printed.
•
Click the size you want to use for the thumbnails. To keep the
width and height properly proportioned, click Maintain Aspect
Ratio. Then, enter the appropriate width or height.
•
Click other information you may want shown on the printed
document.
•
Click the preferred resolution for the printed document.
Generally, the higher the resolution, the higher the print quality.
However, print speed may be slower.
•
Click if you want to correct the image’s brightness and contrast
(gamma). Then, specify the gamma value. Generally, the higher
the value, the higher the correction to produce a more subtle
brightness and contrast.
To change the print setup (Viewer):
1. On the File menu, click Print Setup.
126 Viewing and Enhancing Images
Chapter 6
2.
Chapter 6
In the Print Setup dialog box, make the desired changes:
•
Click, or type, the margins you want to use along the edge of the
paper.
•
If the image does not fill the page, click the position where the
image should be printed.
•
Click how you want the image sized. To specify a size, click
Specified Size. To keep the width and height properly
proportioned, click Maintain Aspect Ratio. Then, enter the
appropriate width or height.
•
Click other information you may want shown on the printed
document.
•
Click the preferred resolution for the printed document.
Generally, the higher the resolution, the higher the print quality.
However, print speed may be slower.
Viewing and Enhancing Images 127
•
Click if you want to correct the image’s brightness and contrast
(gamma). Then, specify the gamma value. Generally, the higher
the value, the higher the correction to produce a more subtle
brightness and contrast.
To flip an image (Photo Enhancer):
1. On the toolbar or Edit menu, click Flip.
2.
In the Flip dialog box, click the Horizontal or Vertical Flip button.
To rotate a document or image:
1. Do one of the following:
•
In the Viewer, on the toolbar or Tools menu, click Rotate.
•
In the Photo Enhancer, on the toolbar or Edit menu, click Rotate.
128 Viewing and Enhancing Images
Chapter 6
2.
In the Rotate dialog box, click the Rotation button that corresponds to
the direction you want to rotate the document or image.
3.
Click Rotate All Pages or Rotate All Pages of This Image if you want
to rotate all the pages in the document.
To reload a document or image:
Do one of the following:
❏ To reload a document that you have already saved, in the Viewer, on
the View menu, click Reload.
❏ In the Photo Enhancer, on the File menu, click Revert.
Reloading a document replaces the current document with the most
recently saved version of the document.
Chapter 6
Viewing and Enhancing Images 129
Saving Documents and Images
6
You can save your documents to preserve the changes you made. If the
document you are saving is a multipage .tif or .mlj file, you can save each
page in the document as a separate image. The system assigns unique
names to each of the individually saved documents. For example, a three
page document originally named File.tif would become three separate
documents named File-0001.tif, File-0002.tif, and File-0003.tif.
In addition, when saving an image as a .jpg or .tif image, you can change
the options that apply to the image file type.
To save a document or image:
1. On the File menu, click Save As.
2.
In the Save Image As dialog box, specify the Windows folder where
you want to save the file.
3.
Enter a name for the file in the File Name box.
4.
Click a file type in the Save As Type list.
5.
If you are working with a multipage document, click if you want to
save only the currently selected page, or each page as a separate
image (.mlj and .tif file types only).
130 Viewing and Enhancing Images
Chapter 6
6.
If you selected the .jpg or .tif file type, click Options to specify save
settings for your file.
If you selected .jpg as the save as type, and clicked Options:
1.
In the JPEG Options dialog box, move the Image Quality slider or
enter a value to specify the desired compression.
Move the slider to the left for more compression and less image
quality, to the right for more quality and less compression.
2.
Chapter 6
Click the appropriate Encoding.
•
Progressive
Click to create an image that displays progressively in a Web
browser. The image displays as a series of overlays, enabling
viewers to see a low-resolution version of the image before
downloading it completely. Progressive .jpg files are not
supported by some browsers and require more RAM for
Viewing.
•
Optimize Huffman Codes
Click to optimize the color quality of the image while making a
slightly more compressed file. Optimized .jpg images are not
supported by some Web browsers.
Viewing and Enhancing Images 131
•
3.
Store Exif Thumbnail
Click to create a preview thumbnail for the image. Preview
thumbnails appear as icons on the desktop and in file lists (when
the view is set to Large Icons). Selecting this option will increase
the file size of the saved image. This option is available only if
you did not click Progressive.
Select whether to use color component sampling.
If you select color component sampling, the color accuracy of your
image is slightly reduced, resulting in a smaller image file size. If
color accuracy is more important than image size, you should not use
color component sampling.
4.
Click Save These Settings as the Defaults if you always want .jpg
images saved in these settings.
If you selected .tif as the save as type, and clicked Options:
1.
In the TIFF Options dialog box, click the desired compression type. If
you do not want to compress the image data, click None.
•
CCITT Group 3
Click if your image is black and white and you want to optimize
viewing in PDF or PostScript language file formats.
132 Viewing and Enhancing Images
Chapter 6
2.
•
CCITT Group 4
Click to compress the file more than CCITT Group 3. Use this
technique if you want to achieve the same goals as CCITT Group
3, while compressing the image more.
•
Deflate
Click if your image contains large areas of a single color. This
technique is supported by the PDF file format, but is not
supported by all .tif file format readers.
•
JPEG
Click for continuous-tone images (such as photographs) that you
want to compress, but save in the .tif file format. This technique is
supported by both the PDF and PostScript language file formats.
Click Save These Settings as the Defaults if you always want .tif
images saved in these settings.
Specifying Viewer Preferences
6
You can set the Viewer window and photo editor preferences. You can
also set the current document as the desktop wallpaper.
If desired, you can make the Viewer the default viewing application for
some image types, such as jpg or tiff. When you open an image of the
specified type located anywhere on your system, it opens in the Viewer.
To specify and save Viewer window options:
1. On the Viewer toolbar or Tools menu, click Options.
Chapter 6
Viewing and Enhancing Images 133
2.
In the Options dialog box, specify whether to show or hide Viewer
window attributes, such as the toolbar, or status bar.
3.
Specify your Viewer window background preferences. Click a color
from the color list or browse to an image to be used for the Viewer
window background.
4.
Specify your window position options.
5.
•
Click Change Window Size to Fit Image if you want the Viewer
Window to automatically shrink to fit the displayed image.
•
If you clicked Change Window Size to Fit image, you can also
click Center Window When Auto-sizing to center the Viewer
window after the window is resized.
•
Click Automatically Save Window Position if you want to save
the Viewer window position for the viewing of future images.
Specify your window attributes.
•
Click Always On Top if you want the Viewer window to stay in
the forefront of other windows.
134 Viewing and Enhancing Images
Chapter 6
•
Click Hide Mouse Cursor in Full-screen if you want the mouse
cursor to disappear when viewing a document in full-screen
mode.
To make the Viewer the default viewing application for some image
types:
1. On the Tools menu, click File Associations.
2.
In the File Associations dialog box, select the desired image file types.
To set the current document as the desktop wallpaper:
On the Tools menu, point to Set Wallpaper, and then do one of the
following:
❏ Click Centered to center a single document image on the desktop.
❏ Click Tiled to tile multiple document images to fill the desktop area.
To restore the previous desktop wallpaper:
On the Tools menu, point to Set Wallpaper, and then click Restore.
Chapter 6
Viewing and Enhancing Images 135
Specifying a Photo Editor
6
The MultiPASS Photo Enhancer is the default photo editor for the Viewer.
However, you can setup another photo editor (such as Paint Shop Pro) as
the default editor. To add a third-party editor, it must be installed on your
system.
To add a photo editor:
1. On the Viewer toolbar, click the Edit arrow button. Then, click
Configure Editors.
2.
In the Configure Photo Editors dialog box, click Add.
136 Viewing and Enhancing Images
Chapter 6
3.
In the Browse for Photo Editor Application dialog box, locate the
executable file for the editor you want to add, and then click Open.
4.
In the Configure Photo Editor dialog box, change the application
name as needed. Then, click OK.
To specify a different default photo editor:
1. On the Viewer toolbar, click the Edit arrow button, and then click
Configure Editors.
2.
In the Configure Photo Editors dialog box, click the photo editor that
you want, and then click Set As Default.
To edit the properties of the associated photo editor:
1. On the Viewer toolbar, click the Edit arrow button. Then, click
Configure Editors.
2.
In the Configure Photo Editors dialog box, select the photo editor to
edit, and then click Edit.
3.
Make the desired changes to the name and/or location.
To remove a photo editor:
1. On the Viewer toolbar, click the Edit arrow button. Then, click
Configure Editors.
2.
Chapter 6
In the Configure Photo Editors dialog box, select the photo editor that
you want to remove, and then click Remove.
Viewing and Enhancing Images 137
Enhancing Your Images (Photo Enhancer) 6
You can perform a variety of image enhancing tasks with your images in
the Photo Enhancer.
To resize an image:
1. On the toolbar or Edit menu, click Resize.
2.
In the Resize dialog box, if you want to maintain the original image
proportions, click Maintain Aspect Ratio.
3.
Click or enter the dimensions of the new size in the Width or Height
boxes.
4.
Click the desired resampling filter. Changing the pixel dimensions
(and therefore display size) of an image is referred to as resampling.
The Lanczos setting generally gives the best quality to the resized
image.
To crop an image:
1. On the toolbar or Edit menu, click Crop.
2.
Drag the mouse pointer so that the area you want is framed, and then
double-click the area.
When you crop an image you cut the selected area out of the base page of
the current image.
138 Viewing and Enhancing Images
Chapter 6
To adjust the image type:
On the Color menu, click the desired image type (such as Truecolor or
Black and White).
To adjust color balances (Truecolor image type):
1. On the toolbar or Adjust menu, click Color Balance.
In the Color Balance dialog box, the original image appears on the
left. As you modify the image, you can see the results on the right.
2.
Chapter 6
Move the sliders to the left to decrease, to the right to increase. Or,
enter the desired value in the appropriate box.
•
When you adjust the hue, you adjust the shade or tint of colors in
the image. Hue is measured on a circular spectrum running from
red to green to blue and returning to red.
•
When you adjust the saturation, you adjust the purity of the hue.
A color with 100% saturation is bright and vivid, and a color with
-100% saturation is a shade of gray.
Viewing and Enhancing Images 139
•
When you adjust the lightness, you adjust the brightness of the
color. A color with 100% lightness is always pure white, and a
color with -100% lightness is always pure black.
To automatically adjust color levels (Truecolor, 256 Grays image types):
On the Adjust menu or toolbar, click Auto Levels.
The system automatically adjusts the color level for better viewing with
your computer monitor or other output device.
To manually adjust color levels (Truecolor, 256 Grays image types):
1. On the toolbar or Adjust menu, click Levels.
In the Levels dialog box, the original image appears on top. As you
modify the image, you can see the results on the bottom.
2.
Move the sliders to the left to decrease, to the right to increase. Or,
enter the desired value in the appropriate box.
•
When you adjust the black point and white point levels, you
specify what you want the darkest and lightest points in the
range to be when you change the brightness and contrast.
140 Viewing and Enhancing Images
Chapter 6
•
When you change the brightness and contrast, you set the values
in the specified black point and white point range.
•
When you change the gamma, you adjust the mid-tones of the
image to increase its contrast and enhance the overall image.
When you increase the gamma value, light areas are made lighter,
and dark areas are made darker.
To blur an image (Truecolor image type):
1. On the toolbar or Filter menu, click Blur.
In the Blur dialog box, the original image appears on the left. As you
modify the image, you can see the results on the right.
Images appear with a blur value of 50. Because the modified image
cannot be made clearer than the original, specifying a blur value of
less than 50 does not affect the modified image.
2.
In the Blur dialog box, specify the desired value or move the slider to
the left for less blur, right for more blur.
When you blur an image, you average the color values of adjacent pixels,
removing peaks, to make the image smoother.
To sharpen an image (Truecolor image type):
1. On the toolbar or Filter menu, click Sharpen.
Chapter 6
Viewing and Enhancing Images 141
In the Sharpen dialog box, the original image appears on the left. As
you modify the image, you can see the results on the right.
Images appear with a sharpen value of 50. Because the modified
image cannot be made less sharp than the original, specifying a
sharpen value of less than 50 does not affect the modified image.
2.
Move the slider to the left to sharpen less, to the right to sharpen
more. Or, specify a value in the Amount box.
When you sharpen an image, you increase the difference between color
values of adjacent pixels, sharpening the appearance of a color.
To remove noise (despeckle) from an image (Truecolor image type):
On the toolbar or Filter menu, click Despeckle.
When you despeckle an image, you remove image noise while preserving
detail. Despeckle removes noise by detecting the edges in an image and
blurring all of the selection except those edges.
To reduce the redeye effect (Truecolor image type):
1. On the toolbar or Filter menu, click Redeye Reduction.
142 Viewing and Enhancing Images
Chapter 6
In the Redeye Reduction dialog box, the original image appears on
the left. As you modify the image, you can see the results on the right.
2.
Click Zoom In to zoom in on the eyes.
3.
After zooming, if the eyes do not appear in the After box, click Scroll.
On the image in the After box, use the mouse pointer to circle the
eyes.
4.
Click Select. On the image in the After box, drag the mouse pointer to
outline the eyes.
5.
Click the appropriate eye color.
6.
Move the slider to the right to increase the colored area, to the left to
decrease. Or, specify a value in the Amount box.
When you use the redeye reduction feature, you reduce the redness of the
eyes that appears on some images.
Chapter 6
Viewing and Enhancing Images 143
To make your image sepia-toned (not available with Black and White
or 2 Color image types):
On the toolbar or Effects menu, click Sepia.
Applying the Sepia effect gives your image an antique look. When you
apply this effect, the colors in your image are converted to shades of
reddish brown.
To colorize your image (not available with Black and White or 2 Color
image types):
1. On the toolbar or Effects menu, click Colorize.
The original image appears on top in the Colorize dialog box. As you
modify the image, you can see the results on the bottom.
2.
Move the slider up to increase the hue or saturation values, down to
reduce. Or, specify a value in the appropriate box.
Applying the Colorize effect converts your image to a monochrome. The
image can then be adjusted by defining the hue and saturation values.
144 Viewing and Enhancing Images
Chapter 6
To convert your image into a negative (not available with High Color
image type):
On the toolbar or Effects menu, click Negative.
Applying the Negative effect inverts the image. When you apply this
effect, the colors in your image are converted to black and white.
Chapter 6
Viewing and Enhancing Images 145
146 Viewing and Enhancing Images
Chapter 6
Chapter 7
Fine-tuning the MultiPASS Suite
7
To successfully operate your MultiPASS system, you need to be familiar
with defining device and system settings, using the Status Monitor, and
disconnecting the printer or removing the software.
Defining Device Fax Settings (F80 only)
6
Although you can set fax options directly in the printer itself, you can also
define the settings on your PC. You define settings that affect general
preferences for sending and receiving a fax and speed dial assignments.
In My MultiPASS, on the MultiPASS menu, point to Device Setup/Speed
Dial, and then click MultiPASS F80.
Once in the Device Setup Window, this chapter will guide you through
the fine-tuning of the MultiPASS Software and the performance of the
F80.
To define general fax preferences:
On the Preferences tab, define the following settings:
Chapter 7
Fine-tuning the MultiPASS Suite 147
❏ Date Format
Click the format you want to use to display the date on the printer
LCD and for printing the date on a fax.
❏ Display Language
Click the language you want to use on the printer LCD.
❏ Volume
Click the volume level of the various sound components of your
printer to best suit your office environment.
❏ Paper Size
Click the size of the paper you are using for printing a fax, based on
the source of the paper.
❏ Paper Type
Click the paper on which you want to print faxes.
148 Fine-tuning the MultiPASS Suite
Chapter 7
❏ Extension Amount
Specify the extension amount that will print beyond the edges of the
paper for borderless printing or direct printing from a memory card.
Because the image is enlarged and printed, if the extension amount is
increased, the part of document that does not print will increase. If
the extension amount is reduced, there may be a white margin.
Large: approximately 10%
Small: approximately 5%
❏ Quiet Print Mode
When printing a local job, you will need to specify if you want quiet
printing. Printing noise is reduced when quiet printing is on.
❏ Print Activity Report Automatically
Click to have the printer automatically print an activity report after
every 20 faxes sent and received. If this option is cleared, an activity
report is not printed.
Chapter 7
Fine-tuning the MultiPASS Suite 149
To define send fax settings:
On the Send Fax tab, define the following settings:
❏ Fax Information
Specify the following information to appear as the header for all
faxes: your name and your fax number.
❏ Phone Line
Click the dialing method the printer uses: touch tone or rotary pulse.
❏ Automatic Retries
Specify the number of retries the system should attempt when
sending a fax transmission, and the length of time between each retry.
❏ Automatic Report
Click whether or not you want a report to print with each fax
transmission, only when there is an error, or no report.
Also, click if you want an image of the first page of the fax included in
the report (not available with PC faxing).
150 Fine-tuning the MultiPASS Suite
Chapter 7
To define advanced send fax options:
On the Send Fax tab, click Advanced. In the Advanced Send Fax dialog
box, define the following settings:
❏ Speed
Click the transmission speed to want to use to send faxes. The higher
the setting, the faster the transmission. If you experience problems
when sending faxes, try a lower speed setting.
❏ Pause Duration
Click the length of the pause that you may have to insert when
dialing a long distance number.
❏ Error Correction (ECM)
Click to reduce system and line errors when sending a fax. With this
option selected, the system checks each outgoing fax for lost data. If
data has been lost from a portion of a page, the system transmits that
portion again after confirming that all data within that portion can be
transmitted successfully.
❏ Auto Start Send
Click if you want the unit to start scanning automatically if a speed
dial number is pressed.
❏ Off Hook Alarm
Click to turn on the alarm after the printer has received or sent a fax if
the telephone is off-hook.
Chapter 7
Fine-tuning the MultiPASS Suite 151
❏ Color Direct Send
Click to have a color fax printed in black and white if the receiving fax
machine cannot receive a color fax.
❏ Position
Click where you want the sent fax heading information (your fax
number, your name, and date and time) to print on the faxes you
send. This information is known as the Transmit Terminal
Identification (TTI).
❏ Mark Faxes With
Click how you would like to identify the fax/phone number in the
header of a fax you send. For example, if you typically use the
designated number for phone calls rather than sending faxes, you can
identify the number as a telephone number. Otherwise, identify the
number as a fax number, used primarily for sending and receiving
faxes.
To define receive fax options:
On the Receive Fax tab, define the following settings:
152 Fine-tuning the MultiPASS Suite
Chapter 7
❏ Reduce to Fit Paper
You can specify whether you want an incoming fax reduced to ensure
the contents fits on the paper on which it is printed. If you want to
reduce the incoming fax, you can fit to height only, or both the height
and width, to fit the paper size.
❏ Answer Receive Mode
Click the mode by which you want the printer to receive incoming
calls:
•
Automatically switch for receiving a call either as a fax or
telephone call
•
Automatically receive only fax calls
•
Require you to manually answer the incoming call, and then set
the printer for an incoming fax
•
Automatically receive a call with your answering machine
•
Automatically switch between receiving a call either as a fax or
telephone call based on the ring tone for each type of call. (U.S.
only. This setting is applicable only if you subscribe to a special
network service with your phone company that defines multiple
ring tones for your phone line.)
❏ Answer Silent Receive
Click to set the printer not to ring for an incoming fax.
❏ Answer Number of Rings
If you cleared the Silent Receive option, indicating you want the
printer to ring for incoming fax calls, click the number of times the
printer should ring for the fax call. The printer only rings if you have
connected an extension telephone.
❏ Receive Conditions
Click how the system should handle an incoming fax under the
following conditions:
Chapter 7
Fine-tuning the MultiPASS Suite 153
•
If your computer is turned off:
Click to set the printer to print the fax or save the fax in its
memory.
•
If your computer is turned on:
Click to set the printer to move the fax to your computer, or to
print the fax.
❏ Report Print
Click whether or not you want a report to print with each fax
reception, or only when there is an error.
To define advanced receive fax settings:
On the Receive Fax tab, click Advanced. In the Advanced Receive Fax
dialog box, define the following settings:
❏ Speed
Click the transmission speed used to receive faxes. The higher the
setting, the faster the fax is received. If you experience problems
when receiving faxes, try a lower speed setting.
154 Fine-tuning the MultiPASS Suite
Chapter 7
❏ Error Correction (ECM)
Click to reduce system and line errors when receiving a fax. With this
option selected, the system checks each incoming fax for lost data. If
data has been lost from a portion of a page, the system receives that
portion again after confirming that all data within that portion can be
received successfully.
❏ Listen Time Before Ringing
When a call is received, the printer checks to see if the call is from a
fax machine or a telephone.
❏ Ring Time
When your printer is set to receive both fax and telephone calls, it
rings to inform you of an incoming telephone call. If you do not pick
up the telephone receiver within a certain amount of time, the printer
stops ringing. Click to set the appropriate amount of time the printer
should ring.
❏ Ring Tone
Click to set the volume level of the ring tone.
❏ Default Action If No Answer to Telephone
Click Receive if you want the printer to handle an incoming call,
detected as a telephone call that is not answered, as an incoming fax.
If no fax is received, the line is then disconnected. If you set this
option to Disconnect, the printer automatically disconnects the
unanswered call, without switching to try and receive a fax.
❏ Manual/Auto Switch
To prevent missing incoming documents when the printer is set to
manual receiving, click to set the unit to automatically answer the
phone and switch to automatic. The unit can receive the incoming fax
after the specified ring time (the number of seconds you specify).
❏ Remote Receive
Click so that you can set the printer, from a telephone extension, to
receive a fax if an incoming call is ringing on the printer. If you select
this option, you must assign a remote identification number that
signals the printer to receive the fax.
Chapter 7
Fine-tuning the MultiPASS Suite 155
❏ Remote Identification Number
If the Remote Receive option is selected, enter the identification
number you will use to set the printer to receive a fax.
❏ DRPD Switch Option
If you subscribe to the Distinctive Ring Pattern Detection (DRPD)
service through your phone company click the desired ring pattern.
Setting Up Speed Dial Assignments
6
You can set up fax numbers for speed dialing with the printer. You use
the fax recipients set up in your address book, assigning the desired
individual to speed dial codes. You can also set up a group speed dial, by
assigning two or more individual speed dial assignments to a single
speed dial assignment. For reference, you can print the list of speed dial
assignments to display near the printer.
To assign a fax recipient to a speed dial code:
1. On the Speed Dial tab, in the Address Book box, click Address Book
to display the contents.
156 Fine-tuning the MultiPASS Suite
Chapter 7
Any speed dial entries assigned using the printer or this dialog box
will be displayed in the Speed Dial list.
2.
In the Address Book list, click the recipient that you want to assign to
a speed dial code.
3.
On the Speed Dial list, click the speed dial number to which you want
to assign the recipient, and click Add.
4.
To remove a recipient from a speed dial number, in the Speed Dial
list, click the speed dial number, and then click Remove.
5.
When all the desired members are listed in the Member's list, click
OK to save your group. To close the dialog box without saving your
group, click Cancel.
To print the speed dial assignment list:
Click Print List.
To define a group speed dial:
1. On the Speed Dial tab, make sure the desired recipients for your
group are set up as individual speed dial assignments.
2.
Chapter 7
Click the speed dial number to which you want to assign the group of
recipients, and click Group Dial.
Fine-tuning the MultiPASS Suite 157
3.
In the Group Dial dialog box, in the Group Name box, enter a name
for the group.
4.
In the Speed Dial list, click the first recipient and click Add. Repeat
this procedure until the desired recipients are included in the
Members list.
5.
To remove a member from the group, click the member in the
Members list and click Remove.
158 Fine-tuning the MultiPASS Suite
Chapter 7
Defining System Settings (F80 only)
6
You can define general settings that affect the operation of the MultiPASS
Suite.
To define general system preferences:
In My MultiPASS, on the MultiPASS menu, click Options. In the Options
dialog box, define the following settings:
❏ Click at what point entries in the Fax Log should be automatically
removed.
❏ Click to restore showing any dialog boxes where “Don’t show again”
had been clicked previously.
❏ Click the MultiPASS printer model that you want to use as the default
fax device.
❏ Click whether you want a warning message to appear when a fax
transmission fails.
❏ Click whether you want a message to appear when a new fax is
received.
Chapter 7
Fine-tuning the MultiPASS Suite 159
Using the MultiPASS Status Monitor
6
You can use the Status Monitor to review the current status of the printer
and any error conditions needing your attention. You cannot interrupt
MultiPASS activity with the Status Monitor.
When the Status Monitor is open, it displays as a window on the
Windows desktop and an icon in the Windows taskbar.
Status Monitor
window
To open the Status Monitor, if currently closed:
On the Windows desktop, click Start, point to Programs or All Programs,
point to MultiPASS Suite, and then click MultiPASS Status Monitor.
To display the Status Monitor menu:
Right-click the Status Monitor window or icon.
To display the Status Monitor window:
If the Status Monitor appears only as an icon on the taskbar, click Restore
on the Status Monitor menu.
To specify the Status Monitor window as the top window:
Click Always On Top on the Status Monitor menu.
To display the port on which the printer is connected:
Click Device Information on the Status Monitor menu.
To minimize the Status Monitor window:
If the Status Monitor window currently appears, and you prefer to
display only the icon on the taskbar, click Minimize on the Status Monitor
menu or click the Minimize button on the title bar.
To set the Status Monitor to open when you start Windows:
Click Load on Windows Startup on the Status Monitor menu.
160 Fine-tuning the MultiPASS Suite
Chapter 7
To close the Status Monitor:
As needed (for example, if you are removing the MultiPASS Suite
software), click Close on the Status Monitor menu.
Chapter 7
Fine-tuning the MultiPASS Suite 161
Removing the MultiPASS Suite
6
If you are planning on reinstalling the MultiPASS Suite, you must first
remove the current installation of the software.
If you are using Windows 2000/XP, you must log on as a member of the
Administrator group to remove the MultiPASS Suite software.
When you remove the MultiPASS Suite, all the software components
(such as the printer and fax drivers) are automatically removed.
To remove the MultiPASS Suite:
1. Close the MultiPASS Suite and all of its components, including the
Toolbar and Status Monitor.
Be sure to close, and not just minimize, the Toolbar and Status
Monitor. To close the Toolbar, right-click the Toolbar icon on the
Windows taskbar, and then click Exit MultiPASS Toolbar on the
Toolbar menu.
2.
On the Windows desktop, click Start, point to Settings, and then click
Control Panel (in Windows XP, click Start, and then click Control
Panel).
3.
In Control Panel, double-click Add/Remove Programs (in Windows
XP, click Add or Remove Programs).
4.
In the Add/Remove Programs Properties dialog box (in Windows
XP, the Add or Remove Programs Properties dialog box), click
MultiPASS Suite, and then click the Add/Remove button (Windows
98/Me) or the Change/Remove button (Windows 2000/XP).
5.
Follow the on-screen instructions.
When prompted, click Remove to remove the MultiPASS Suite.
6.
If prompted when the removal process is complete, restart your PC.
162 Fine-tuning the MultiPASS Suite
Chapter 7
If your installation of the MultiPASS Suite becomes damaged at some
point (for example, program files are accidentally deleted from the
system), you can repair your installation without having to remove and
reinstall the software. To do so, follow the instructions for removing the
MultiPASS Suite. However, when prompted, click Repair instead of
Remove. Then, follow the on-screen instructions. You may need to have
your MultiPASS Suite installation disk available during the repair
process.
If you are still unable to install using the method above, carry out the
operation in Chapter 8, “Installation stops before it is completed”.
Reinstalling the MultiPASS Suite
6
After you have uninstalled the MultiPASS Suite, you use the same
instructions for reinstalling as described in Chapter 2, “Installing the
MultiPASS Suite.”
Changing the Port Connection
6
To change ports between USB ports, or a USB port with a hub:
Simply disconnect the USB cable from the USB port on your computer
and, when ready, reconnect to the other USB port or hub.
When changing the port connection, it is not necessary to remove and
reinstall the MultiPASS Suite software.
Chapter 7
Fine-tuning the MultiPASS Suite 163
164 Fine-tuning the MultiPASS Suite
Chapter 7
Chapter 8
Troubleshooting
8
Problems installing and removing software 6
See below if you were unable to install or remove the software.
Cannot install the software.
1.
6
Have you followed the instructions in the Setup Sheet to install the
software?
If you have not followed the installation procedure correctly, try
reinstalling the software. If there was an error during installation
and installation was not completed, restart your computer and
try installing again.
2.
Are any other applications open?
If you have other applications open, quit all of these and try
installing again.
3.
Have you installed an earlier version of the MultiPASS Suite
software (version 4.1 or earlier)?
(Is Canon MultiPASS registered as the startup item in the Start
menu program?)
Remove the old version of the MultiPASS Suite software
following the instructions in the Software Guide of that version
and try installing again.
Chapter 8
Troubleshooting 165
During installation, you were prompted to connect a USB
cable, and you could not proceed further.
6
Remove the device from the Device Manager as follows:
1.
In the dialog box prompting you to connect a USB cable, click No and
exit installation of the MultiPASS Suite.
2.
On the Windows desktop, click Start, point to Settings, then click
Control Panel. (Windows XP: On the Windows desktop, click Start,
then Control Panel.)
3.
In the Control Panel window, double-click System. (Windows XP:
Click Performance and Maintenance, then System.)
4.
On the Device Manager tab (Windows 2000/XP: On the Hardware
tab, click Device Manager), under Other Devices, click MultiPASS F80
or MultiPASS F60, then press the Delete key.
If you follow this procedure and are unable to remove the device,
repeat the procedure.
5.
Remove the USB cable from the port.
6.
Install the MultiPASS Suite following the instructions in this guide.
Installation or removal of the MultiPASS Suite cannot be
completed.
6
1.
On the Windows desktop, double-click My Computer, then
double-click the CD-ROM icon. In the MultiPASS folder, in Setup,
click FrcInst or FrcInst.exe.
2.
Install the MultiPASS Suite following the instructions
in this guide.
166 Troubleshooting
Chapter 8
Cannot use the MultiPASS Suite software after upgrading
to Windows XP.
6
If the MultiPASS Suite was installed in Windows 98/2000/Me and you upgraded to
Windows XP without removing the MultiPASS Suite, the machine may not being
recognized.
Follow this procedure to remove the device from the Device Manager, remove the
MultiPASS Suite and then reinstall it:
1.
On the Windows desktop, click Start, then Control Panel.
2.
In the Control Panel window, click Performance and Maintenance,
then System.
3.
On the Hardware tab, click device Manager. Under Other devices,
click MultiPASS F80 or MultiPASS F60, then press the Delete key.
If you follow this procedure and are unable to remove the device,
repeat the procedure.
Chapter 8
4.
Remove the MultiPASS Suite (P. 162).
5.
Restart your computer.
6.
Reinstall the MultiPASS Suite (P. 8).
Troubleshooting 167
Problems turning on the computer (when the
MultiPASS Suite opens)
6
When you install the MultiPASS Suite and you turn on your computer,
the MultiPASS Toolbar is set to open.
See below if you have problems executing job.
The message <Unable to communicate with the device>
appears on your computer.
6
The MultiPASS Suite operates after checking that there is a USB cable connecting the
machine and the computer.
This message appears and the MultiPASS Suite will not open if there is no USB cable
connected or the machine is not turned on.
1.
Is there anything displayed in the LCD?
If nothing is displayed, see Basic Guide.
2.
Is the USB cable connecting the computer to the machine?
The USB cable may have become disconnected when the
MultiPASS Suite was running. If it has, connect the cable.
3.
Is another printer connected to the USB port?
You might have connected a different printer to the USB port
allocated to the machine when the MultiPASS Suite was running.
Reconnect the machine to the USB port.
4.
Replace the USB cable with another USB cable.
The USB cable may be too long or defective. Replace it with
another USB cable that complies with the requirements (P. 1).
5.
The machine has been configured to use a port on the computer
which does not exist or which is malfunctioning.
168 Troubleshooting
Chapter 8
Disconnect the USB cable. Reconfigure the port, then reconnect
the USB cable.
6.
Did you disconnect then reconnect the USB cable during standby?
Reconnect the USB cable.
Chapter 8
Troubleshooting 169
Problems printing from your computer
6
See below if you have tried unsuccessfully to print from your computer,
or if you cannot print images scanned or faxed to your computer.
Cannot print at all.
1.
6
Is there anything displayed in the LCD?
If nothing is displayed, see Basic Guide.
2.
Is the Alarm light blinking?
If it is blinking, see Basic Guide.
3.
Is there a warning or attention displayed in the Status Monitor?
If displayed, see Basic Guide.
4.
Print the nozzle check pattern (P. 59).
5.
Are you trying to print in DOS?
You can only print in Windows and not in DOS.
6.
Is there an application error or General Protection Fault error
displayed on the computer?
Is the application you are using to print with compatible with the
operating system?
Refer to the application’s documentation. If the application is not
compatible, generally you will be unable to print.
Has the application been allocated enough memory?
If other applications are open, close them to increase the available
memory.
Refer to the application’s documentation to check the amount of
memory the application requires.
170 Troubleshooting
Chapter 8
If a problem occurs when printing a specific document
Try printing again after opening and editing the document.
7.
Does the hard disk have enough available space?
If not, delete files you do not need to increase the available disk
space.
8.
Restart the computer.
9.
There may be a problem with the printer driver.
Remove the MultiPASS Suite software and try installing again.
To remove the MultiPASS Suite, see P. 162. To install, see P. 8.
Cannot print to a shared printer.
1.
6
Is the server (the computer to which the machine is connected)
turned on?
Turn the server on.
2.
Is the server set up for printer sharing?
Set up the server for printer sharing (P. 15).
3.
Is the server set up to allow your system access to the
shared printer?
Set up the server to allow your system access to the shared
printer.
Printing stops in the middle.
1.
Chapter 8
6
Has the machine been printing continuously over a long period?
Troubleshooting 171
If so, the printhead will overheat. To protect the printhead,
printing will stop temporarily and resume after a period of time.
Interrupt printing when appropriate, turn off the machine and
wait 15 minutes.
•
2.
CAUTION
The area around the printhead may be extremely hot.Do not
under any circumstances touch it.
Are you printing large files such as photographs or illustrations?
If you are printing large files, it will take time to process the data
and printing will appear to have stopped. Wait until data is
processed.
Meaningless characters and symbols are printing.
1.
6
If this problem only occurs when printing a specific document
Open and edit the document and try printing again. If this does
not work, there may be a problem with the application. Contact
the application’s manufacturer.
White streaks appear on the printout.
1.
Print the nozzle check pattern (P. 59).
2.
Are you printing on coated paper?
6
In the Properties dialog box, on the Main tab, click High in Print
Quality.
Printout is rubbed or stained.
1.
6
Is the paper thickness lever set correctly?
172 Troubleshooting
Chapter 8
When you print documents that contain large quantities of ink
such as documents with a lot of detail, the paper may curl and
rub. Move the paper thickness lever to the right (Basic Guide).
2.
Does the paper stack exceed the paper limit mark ( ) or exceed the
capacity of the multipurpose tray?
If so, reduce the amount of paper.
3.
Are you printing outside the printable area?
Change the margin settings in the application to keep the
document within the recommended printable area.
4.
Is intensity set too high?
The paper may curl or rub if intensity is set too high in the printer
driver. In the Properties dialog box, on the Main tab, click Manual
in Color Adjustment, then click Set. In the Manual Color
Adjustment dialog box, reduce the intensity with the Intensity
slider.
5.
Are you using recommended print media?
For recommended print media, see Basic Guide.
6.
Clean the machine’s interior.
If the machine’s interior is dirty with ink or there is a build-up of
paper dust, your printout may contain ink stains. Clean the
machine (Basic Guide).
7.
Are you printing on the wrong side of the paper?
Some papers have a “right” side for printing. Turn the paper over
and try printing again. There are also types of paper such as
Photo Paper Pro that can only be printed on one side.
8.
Borderless printing
Check the print media.
Chapter 8
Troubleshooting 173
For borderless printing, the quality of the printout at the top and
bottom edges of the paper may deteriorate or the printout may be
stained. If the printout is dirty even on recommended print
media, move the paper thickness lever to the right (Basic Guide).
174 Troubleshooting
Chapter 8
Problems using a memory card
6
See the information below if the memory card is not recognized when inserted into the
card slot, or the image data is not being read.
Memory card is not recognized.
1.
6
Is the memory card securely inserted into the card slot?
When securely inserted, a PCMCIA-compatible memory card
will click into position and protrude a maximum of 0.3 inches (7
mm) from the slot.
Correct
2.
Incorrect
The memory card is not recognized although it is inserted securely
into the card slot.
Remove and reinsert the memory card as explained on Basic
Guide.
3.
Are there any images on the memory card?
Check if there is any image data on the memory card using your
digital camera or computer.
4.
Chapter 8
Is the image data valid?
Troubleshooting 175
If standby mode is displayed in photo print mode, there are valid
images on the memory card. If a message is displayed, see Basic
Guide.
You have followed the procedures above and the memory
card is still not recognized.
6
1.
Try again with another memory card.
1. Try with another memory card and if you do not experience a
problem, the first memory card may be damaged. In this case,
reformat the memory card with the digital camera.
When you reformat the memory card with the digital camera, all
the data on the memory card will be deleted. If you can read
image data on the computer, reformat the memory card after you
have backed up the image data.
2. If you still have a problem with another memory card, the PC
card adapter may be defective, or the card is having difficulties
operating with the machine. Try again with a recommended
memory card and PC card adapter.
Cannot write to the memory card (write protect error
displayed in Windows).
1.
6
Is the machine in photo print mode and card protection set to
<ON>?
Windows 98/ME: Switch to a different mode and set the <CARD
PROTECT> setting to <OFF> (Basic Guide). Then disconnect and
reconnect the USB cable.
Windows XP: Switch to a different mode and set the <CARD
PROTECT> setting to <OFF> (Basic Guide).
If necessary, disconnect then reconnect the USB cable.
2.
If a delayed write failed error is displayed in Windows 2000
176 Troubleshooting
Chapter 8
This error appears if you do not disconnect then reconnect the
USB cable after setting <CARD PROTECT> to <ON> or switching
to photo print mode. Disconnect then reconnect the USB cable
after setting <CARD PROTECT> to <ON> or switching to photo
print mode.
•
3.
CAUTION
In Windows 2000, when you move from the hard disk to the
memory card, writing will fail and the original file may be lost.
If you have connected in Windows XP
The date and time of access is written in the Windows XP
preview and if <CARD PROTECT> is set to <ON> or photo print
mode is selected, a write protect error may be displayed.
Disconnect then reconnect the USB cable.
Removable disk does not appear in Windows Explorer. 6
This behavior can occur if you map a network drive to the next available
drive letter after the local volumes and CD-ROM drives have been
assigned drive letters. Do the following if you experience this problem:
1. Assign the network drive to any other drive letters.
2. Restart your computer.
Chapter 8
Troubleshooting 177
Problems scanning to a computer
6
See below if you have problems scanning a document to your computer
from the machine.
Cannot scan a document.
1.
6
Is there anything displayed in the LCD?
If nothing is displayed, see Basic Guide.
2.
Is the Alarm light blinking?
If it is blinking, see Basic Guide.
3.
Is there a warning or attention displayed in the Status
Monitor?
If displayed, see Basic Guide.
4.
Is the document loaded correctly?
Check that the document is loaded correctly on the platen glass or
ADF (F80 only) (Basic Guide).
5.
Restart the computer.
6.
If using a USB hub or repeater, try connecting the USB
cable directly to the computer.
If you can scan when the USB cable is connected directly to the
computer, the USB hub or repeater may be defective. Replace
them.
7.
Is the paper feed method set correctly in the MultiPASS Toolbar
settings (F80 only)?
Choose between loading the document on the platen glass or
ADF.
178 Troubleshooting
Chapter 8
8.
After installing the MultiPASS Suite, did you install a TWAINcompatible application?
If this is the case, the TWAIN system file is replaced with
something inappropriate and you will be unable to scan images.
If this happens, reinstall the MultiPASS Suite.
9.
Is the machine recognized in the Scanners and Cameras
Windows Control Panel (XP only)?
Follow this procedure to check if Canon MultiPASS is in Scanners
and Cameras.
1. On the Windows desktop, click Start, then Control Panel.
2. In the Control Panel window, click Printers and Other Hardware,
then Scanners and Cameras.
3. If Canon MultiPASS F80 scanner or Canon MultiPASS F60
scanner is present, the machine is recognized. If not, remove the
MultiPASS Suite and reinstall.
Computer has hung up or frozen.
1.
6
Quit other open applications and try again.
Memory may be insufficient. Quit other open applications and try
again.
2.
Does the hard disk have enough available space?
Check that hard disk has enough available space, in particular
when scanning large documents at a high resolution. For
example, a letter-size document scanned at 600 dpi, full color
requires a minimum of 300 MB of space.
3.
Chapter 8
If an error occurs when scanning an image in Photoshop
Troubleshooting 179
Change the allocated memory. On the Edit menu, point to
References, then click Memory & Image Cache. Change the
Physical Memory Usage to 10% or 20%.
4.
Remove the MultiPASS Suite software and reinstall.
When you click a button on the Toolbar, another
application opens.
When you click a button on the Toolbar, you want another
application to open.
6
1.
Set the application you want to open in Link To in the Toolbar
Settings dialog box (P. 114).
The image you have scanned looks dirty.
6
1.
If the image looks grainy, increase the scan resolution (P. 114).
2.
Display the image at 100%.
Some applications do not display an image well at small sizes.
Try displaying the image at 100% magnification.
3.
There is moire when you scan printed material.
In ScanGear, click Descreen (P. 102).
4.
Set the monitor display colors to 16-bit or higher.
In Display Properties, set the display colors to Medium (16-bit),
High Color 16 bit color or 24 bit color or higher.
5.
Clean the platen glass and document cover (Basic Guide).
180 Troubleshooting
Chapter 8
White margins appear around the scanned image.
1.
6
Specify the scan area.
In ScanGear, click Multi-Photo Scan to automatically specify the
scan area.
If there are white margins around documents such as
photographs, or if you want to trim a document (i.e. you want to
scan only one part of a document), specify the area of the scan
manually (P. 103).
To display ScanGear when scanning: On the Windows desktop,
on the Toolbar, click Settings. Click Show scanner driver before
scanning (P. 118).
2.
When you do not want to display ScanGear
Even if you do not want to display ScanGear, you can make a
scan at the paper size specified and the area outside the paper
size will not be scanned. Do the following:
On the Windows desktop, on the Toolbar, click Settings. In the
Toolbar Settings dialog box, in the tab for the button used to scan,
specify the paper size (P. 114).
White lines appear on the left side of the image.
1.
Place the document approximately 0.1 inches (3 mm) from the edge
of the platen glass.
Cannot scan multiple photographs correctly.
1.
Chapter 8
6
6
Does the position of the photographs and the way they are
positioned fulfil the following requirements?
•
There should be a gap of at least 0.4 inches (1 cm) between the
edge of the platen glass and photographs.
•
There should be a gap of at least 0.4 inches (1 cm) between the
edges of the photographs.
Troubleshooting 181
2.
•
There should be no more than ten photographs.
•
The photographs should be straight (any tilting should be kept
within 10 degrees).
Some applications do not accept multiple scans of more than two
images.
Check the application’s documentation or contact the
application’s manufacturer.
3.
Clean the platen glass and document cover (Basic Guide).
Scanned image is displayed at a large (small) size on the
computer screen.
6
1.
Enlarge or reduce the image display in the application.
However, if you open the image in Paint or Imaging, it may
display at a large size and you will not be able to reduce it. Open
it in the MultiPASS Viewer.
2.
Change the resolution in ScanGear and try scanning again.
The image will be large if resolution is high. It will be small if
resolution is low (P. 99).
182 Troubleshooting
Chapter 8
Appendix A
Fax/Phone Characters
A
Whenever entering or setting up a fax or phone number in the MultiPASS
Suite—when sending a PC fax, setting up an entry in the Address Book,
or making a phone call—you use only the following characters.
Appendix A
Character
Description
0 to 9 * #
Dialing digits
,p
Pause
P
Last Pause
T
Tone switch over function
.
DT detection function
(Europe)
R
PSTN/PBX switchover function
(Europe)
+ - ( ) Space
Display-only characters. Space cannot be
used at the beginning of a number.
Fax/Phone Characters 183
184 Fax/Phone Characters
Appendix A
Appendix B
Sharing Your Printer Cross-Platform in
Windows 2000/XP
B
If you are using Windows 2000/XP, you may need to set up an additional
driver in the following situation:
❏ Windows 2000/XP server system sharing with Windows 98/Me
client systems
For the setup procedure, have the MultiPASS Suite installation disk
available.
To share your printer in Windows 2000/XP:
1. On the MultiPASS server system, on the Windows taskbar, click Start,
point to Settings, and then click Printers (in Windows XP, click Start,
and then click Printers and Faxes).
2.
In the Printers window (in Windows XP, the Printers and Faxes
window), click the printer icon.
3.
On the File menu, click Sharing.
4.
In the Properties dialog box, on the Sharing tab, click Shared As or
Share this printer.
5.
In the Shared As box or Share name box, type a name you want to
assign to the shared printer.
6.
Click Additional Drivers.
7.
Follow the on-screen instructions:
•
Appendix B
When prompted in the Additional Drivers dialog box, click the
environment you want to support on your Intel Pentium system:
Windows 95/98 (Windows 2000).
Windows 95/98 and Me (Windows XP).
Sharing Your Printer Cross-Platform in Windows 2000/XP 185
•
When prompted to insert your Windows 2000 disk into your disk
drive, insert the MultiPASS Suite installation disk instead (if you
are using Windows 2000).
When Please provide a printer driver dialog box appears, insert
the MultiPASS Suite installation disk (if you are using Windows
XP).
•
When prompted for an .inf file, browse your MultiPASS Suite
installation disk for the following folder:
MultiPASS\PrnDrv\F80F60\Win98Me
186 Sharing Your Printer Cross-Platform in Windows 2000/XP
Appendix B
Glossary
G
A
application
Software prepared for a specific function or set of functions. Examples of
an application program include word processing programs and the
MultiPASS Viewer. Developers who make application programs include
drivers that support different types of printers.
ASCII
Acronym for American Standard Code for Information Interchange. A set
of definitions for the bit composition of characters and symbols. ASCII
defines 128 symbols using 7 binary bits and 1 parity bit.
automatic feed
Method by which paper can be fed into the printer when the built-in
document feeder is used.
D
default setting
A value or a setting that the software assumes until or unless you specify
another value.
dpi
Dots per inch. A unit of measurement for indicating a printer’s resolution.
G
gamma
Contrast displayed within the middle of the tonal range (midtones) of
your image.
graphic
A written, printed, or electronically displayed symbol or drawing. Also,
characters or text that have been generated by a computer graphics
application program.
grayscale
A color in black and white as a result of different intensities of black.
Glossary
187
H
halftone
A bilevel (single bit) image composed of dots, lines, or another pattern,
that mimics the appearance of a black and white image.
L
landscape orientation
The horizontal orientation of your document or image across the length
of the page. The term landscape is derived from pictures of the landscape,
which are usually horizontal in format.
M
MAPI
Acronym for Messaging Application Program Interface.
metadata
Data about data. Metadata describes how, when, and by whom a
particular set of data was collected, and how the data is formatted. For
example, the title, subject, author, and size of a document or image file
constitute metadata about the file.
midtone
The middle of the tonal range of your image.
P
paper feed
Movement of a sheet of paper into the printer’s paper path.
PC fax
An electronic way to send and receive faxes from your computer. A PC
fax is sent from or received in a computer. Using the printer you can send
and receive PC faxes and the MultiPASS Suite lets you save, sort, and
print the PC faxes.
portrait orientation
The vertical orientation of your document or image across the width of
the page (letter style). This is the opposite of landscape orientation.
188
Glossary
printer driver
Software that sends printing instructions to a printer. The printer driver
keeps track of the attributes of a printer and the codes a program must
send to access those attributes.
T
threshold
In a bilevel (single bit) image, the point at which a gray pixel is
determined to become black or white.
TWAIN
Both a protocol and an application programmer’s interface (API) that
allows you to input image data directly from any source (for example:
desktop and handheld scanners, video capture boards, digital cameras,
and other imaging equipment) without requiring you to switch out of the
application. It provides compatibility between image input devices and
applications by acting as the liaison between hardware devices and
software applications. Because your printer supports TWAIN, you can
use the scanning features of the printer with any Windows application
that supports TWAIN. Twain, the industry standard, was developed by
the TWAIN working group which consists of representatives from many
leaders in the scanner hardware and software industry.
U
USB
Universal Serial Bus (USB) is a connectivity specification for attaching
peripherals to computers. It eliminates the need to install cards into
dedicated computer slots and reconfigure the system.
W
WAB
Acronym for Windows Address Book. The associated file is named with
the .wab file extension.
Glossary
189
WIA
Windows Image Acquisition is a standard for downloading images from
scanners and digital cameras. The MultiPASS Suite includes a TWAINcompliant driver and a WIA-compliant driver. If you are using Windows
98/Me/2000/XP, ScanGear, which is TWAIN-compliant, will be
installed. If you are using Windows XP, both the WIA driver and
ScanGear will be installed. Both of these drivers allow you to use a printer
to scan documents to Windows applications, such as PhotoShop, that
support a TWAIN interface.
190
Glossary
Index
A
activity report
setting up a fax preference 149
Address Book
adding a contact entry 81
adding a distribution list entry 82
adding a fax recipient 67
creating for MultiPASS 79
deleting an entry 86
editing a distribution list entry 85
editing contact information 82
opening 80
replacing the default address book 86
searching for an entry 86
setting up 79
specifying a different Windows Address
Book file 86
specifying a fax recipient 66
types, described 79
advanced mode
scanning a preview image 100
Amount of Extension
setting for printing 32
answer receive mode
setting for receiving faxes 153
application
setting a scan preference on the Toolbar 115
apply throughout page
setting print effects 50
auto start send
setting for sending faxes 151
Index
I
automatic retries
setting for sending faxes 150
B
background
defining the properties 47
deleting from printing 48
saving for printing 48
selecting a new image 47
selecting and defining for printing 46
using when printing 36
background printing
setting 36
banner
printing 34
black and white
adjusting tone when scanning 109
blur
an image in the Photo Enhancer 141
Borderless printing
setting for printing 32
brightness
adjusting tone when scanning 104
button size
setting a Toolbar preference 119
C
cable
system requirement 2
Cleaning
for printing 54
191
close
the Photo Enhancer 122
the Toolbar 119
Viewer 121, 122
collate
setting for printing 32
color adjustment
setting for printing 27
setting manually for printing 29
color balance
adjusting in the Photo Enhancer 139
color level
automatically adjusting in the Photo
Enhancer 140
manually adjusting in the Photo Enhancer
140
ColorGear Color Matching
setting when scanning 101
colorize
images in the Photo Enhancer 144
computer processor
system requirement 2
contact
adding to the Address Book 81
editing information 82
contrast
adjusting tone when scanning 104
copies
setting for printing 32
cover sheet
attaching for your PC fax 68
previewing 69
printing 69
crop
images in the Photo Enhancer 138
cropped image
when scanning 103
192
cross-platform
sharing the printer with Windows 2000/XP,
overview 185
custom image type
defining for scanning in simple mode 99
custom paper size
setting for printing 32
custom print quality
setting 27
Custom Settings
for printing 60
D
date format
setting up a fax preference 148
Deep Cleaning
for printing 55
default fax device
setting 159
default print settings
defining 53
default printer
setting 15
defining
fax settings 69
descreen
when scanning 102
despeckle
image in the Photo Enhancer 142
device fax settings
defining 147
device information
displaying with the Status Monitor 160
disk drive
system requirement 2
display
document in the Viewer 121, 124
Index
image in the Photo Enhancer 122
saving the display size in the Viewer 124
specifying preferences 122
display language
setting up a fax preference 148
distribution list
adding to the Address Book 82
editing an entry 85
document
displaying in the Viewer 121
paging through in the Viewer or Photo
Enhancer 123
printing in the Viewer 125
printing thumbnails in the Viewer 125
setting as wallpaper 135
DRPD switch option
setting for receiving faxes 156
E
ECM
setting for receiving faxes 155
setting for sending faxes 151
effects
setting 49
e-mail
specifying for a fax 65
Enable ICM
setting for printing 29
Extension Amount
setting for receiving faxes 149
F
failed fax transmission
setting a warning message 159
fax
automatically forwarding 75
Index
receiving 74
fax activity report
setting up a fax preference 149
fax address book
setting up 79
fax device
setting default 159
fax error correction
setting for receiving faxes 155
setting for sending faxes 151
fax heading position
setting for sending faxes 152
fax information
setting for sending faxes 150
Fax Log
clearing entries 159
using 78
fax mark
setting for sending faxes 152
fax number
specifying for a fax 64
fax paper fit
setting for receiving faxes 153
fax paper size
setting for receiving faxes 148, 149
fax receive conditions
setting for receiving faxes 153
fax recipient
adding to the Address Book 67
specifying for a PC fax 66
specifying from the Address Book 66
fax report
setting for receiving faxes 154
setting for sending faxes 150
fax settings
defining 147
193
fax/phone characters
using in the MultiPASS Suite 183
file associations
specifying in the Viewer 135
file name
setting a scan preference on the Toolbar 116
file type
setting a scan preference on the Toolbar 116
filters
despeckling an image in the Photo Enhancer
142
flip
an image in the Photo Enhancer 128
folders
moving through images 123
understanding in My MultiPASS 17
forwarding
a fax 75
disable 77
faxes with a cover page 76
G
gamma
adjusting tone when scanning 105
grayscale
setting for printing 27
group speed dial
setting up 157
H
halftoning method
setting for printing 28
hard disk space
system requirement 2
Head Cleaning
for printing 54
194
Head Refreshing
for printing 55
histogram
adjusting tone when scanning 106
hold
a PC fax 65
I
image
adjusting the color balance in the Photo
Enhancer 139
adjusting the image type 139
adjusting the orientation 128
automatically adjusting color level in the
Photo Enhancer 140
blurring in the Photo Enhancer 141
colorizing in the Photo Enhancer 144
cropping in the Photo Enhancer 138
despeckling in the Photo Enhancer 142
displaying in the Photo Enhancer 122
making sepia-toned in the Photo Enhancer
144
manipulating 125
manually adjusting the color level in the
Photo Enhancer 140
moving through in the Viewer 123
negating in the Photo Enhancer 145
reducing redeye in the Photo Enhancer 142
resizing in the Photo Enhancer 138
rotating 128
setting as wallpaper 135
sharpening in the Photo Enhancer 141
image effects
colorizing in the Photo Enhancer 144
negating in the Photo Enhancer 145
sepia toning in the Photo Enhancer 144
Index
image file
setting a scan preference on the Toolbar
115, 116
image filters
blurring in the Photo Enhancer 141
reducing redeye in the Photo Enhancer 142
sharpening in the Photo Enhancer 141
image optimizer
setting print effects 50
image quality (resolution)
setting a scan preference on the Toolbar 117
image source
setting a scan preference on the Toolbar 118
image type
adjusting 139
setting a scan preference on the Toolbar 116
Ink Drying Wait Time
setting for printing 60
installation
overview 8
procedures 9, 12
repairing 163
shared printer 15
Internet Explorer
system requirement 2
K
keep on top
setting a Toolbar preference 119
L
landscape
setting the print orientation 31
linked application
setting a scan preference on the Toolbar 115
Index
listen time before ringing
setting for receiving faxes 155
load on Windows startup
setting for the Status Monitor 160
M
magnification
adjusting in the Viewer or Photo Enhancer
123
manual/auto switch
setting for receiving faxes 155
maximized window
displaying the Status Monitor 160
media type
setting for printing 26
memory
system requirement 2
memory card
removable disk 21
menu
displaying for the Status Monitor 160
mirrored image
when scanning 102
moire
reducing when scanning 102
monitor
system requirement 2
monochrome
setting print effects 49
Multi Crop
for scanning 94
MultiPASS Service
overview (Win2000/XP) 8
MultiPASS Status Monitor
See Status Monitor
MultiPASS Suite
reinstalling 163
195
removing 162
software package overview 7
MultiPASS Toolbar
See Toolbar
Multi-Photo Scan
for scanning 92
multiple pages
printing on a single sheet 33
My MultiPASS
opening 20
Outbox folder 18
Received Faxes folder 18
renaming a document in a My MultiPASS
folder 20
Sent Faxes folder 18
understanding folders 17
N
no answer
setting for receiving faxes 155
Nozzle Check
for printing 59
number of rings for a fax
setting for receiving faxes 153
O
off hook alarm
setting for sending faxes 151
on top setting
for the Status Monitor 160
open
document in the Viewer 121
image in the Photo Enhancer 122
the Toolbar 119
operating system
system requirement 2
196
options
specifying in the Viewer 133
orientation
adjusting in the Photo Enhancer 128
setting for printing 31
Outbox
deleting a fax job 73
My MultiPASS folder 18
sending, resending, holding PC fax 73
stopping a fax job 73
viewing documents 73
P
page layout
printing multiple pages on a sheet (Win95/
98/Me/2000/XP) 33
page size
setting for printing 30
paper size
setting a custom size for printing 32
setting a scan preference on the Toolbar 117
setting for printing 31
setting for receiving faxes 148, 149
paper source
setting for printing 26
pause duration
setting for sending faxes 151
PC fax
attaching a cover sheet 68
creating and sending a fax memo 70
defining print setup 69
holding 65
holding in the Outbox 73
receiving 74
send later 65
sending from your computer 63
Index
sending in the Outbox 73
sending now 65
setting image quality 69, 117
stopping 73
phone characters
using in the MultiPASS Suite 183
phone line
setting for sending faxes 150
photo editor
adding in the Viewer 136
editing properties in the Viewer 137
removing in the Viewer 137
specifying as default in the Viewer 137
specifying in the Viewer 136
Photo Enhancer
adjusting magnification 123
adjusting the color balance 139
automatically adjusting color level 140
blurring an image 141
closing 122
colorizing images 144
cropping images 138
despeckling an image 142
displaying an image 122
flipping an image 128
manually adjusting the color level 140
negating images 145
overview 121
paging through a multipage document 123
reducing the redeye effect 142
reloading images 129
resizing an image 138
scrolling through a magnified image 124
sepia toning an image 144
sharpening an image 141
Index
photo optimizer
setting print effects 50
portrait
setting the print orientation 31
poster
details for printing 34
preferences
display 122
preview image
scanning in advanced mode 100
scanning in simple mode 98
preview scan image
adjusting in advanced mode 101
print
a document in a Windows application 23
a document in the Viewer 125
document thumbnails in the Viewer 125
Print Advisor
using to define print settings 24
print during spooling
setting (Win95/98/Me) 36
Print Head Alignment
for printing 55
print profiles
saving 50
print quality
setting 26
setting custom 27
print settings
defining manually 25
defining with the Print Advisor 24
print setup
changing in the Viewer 126
printer
setting as the default 15
printer cable
system requirement 2
197
printer control
setting (Win98/Me) 35
printer driver settings
setting defaults 53
printer installation
sharing 15
printer paper size
setting for printing 31
printing type
setting for printing 31
Q
quality
setting for printing 26
Quiet Mode
setting for printing 61
specified time 61
Quiet Print Mode
setting for receiving faxes 149
R
receive in silence
setting for receiving faxes 153
Received Faxes
My MultiPASS folder 18
redeye reduction
images in the Photo Enhancer 142
reinstall
MultiPASS Suite 163
reload
a document in the Viewer 129
an image in the Photo Enhancer 129
remote ID number
setting for receiving faxes 156
remote receive
setting for receiving faxes 155
198
removable disk
memory card 21
remove
photo editor in the Viewer 137
rename a document
in a My MultiPASS folder 20
repair
MultiPASS Suite installation 163
resize
an image in the Photo Enhancer 138
resized image
when scanning 101
reverse order
setting for printing 32
reversed image
when scanning 102
ring time
setting for receiving faxes 155
ring tone
setting for receiving faxes 155
rotate
image in the Photo Enhancer 128
image in the Viewer 128
rotated image
when scanning 102
rulers
when scanning 102
S
scaled image
when scanning 104
scaling
setting for printing 31
scan
using a Windows application 91
with the Toolbar 89
Index
scan push button
setting a scan preference on the Toolbar 118
ScanGear
preferences 110
showing when scanning with the Toolbar
118
to scan an image 97
working with scan settings 97
scanner driver
viewing 96
send later
on a PC fax 65
send now
for a PC fax 65
Sent Faxes
My MultiPASS folder 18
sepia tone
an image in the Photo Enhancer 144
share the printer
cross-platform in Windows 2000/XP,
overview 185
setup 15
sharpen
an image in the Photo Enhancer 141
show a button
setting a scan preference on the Toolbar 115
show scanner driver
setting a scan preference on the Toolbar 118
simple mode
scanning a preview image 98
simulate illustration
setting print effects 49
software package
overview 7
special characters
when PC faxing or phoning in the
MultiPASS Suite 183
Index
special tone curve
adjusting when scanning 108
speed
setting for receiving faxes 154
setting for sending faxes 151
speed dial
setting up 156
setting up for a group 157
stamps
creating and changing for printing 38
defining a graphic image for printing
(Win2000/XP) 43
defining the text and color for printing
(Win2000/XP) 40
defining the text and color for printing
(Win98/Me) 38
deleting from printing 46
orientation 45
placement for printing 44
position for printing 45
saving for printing 45
using when printing 36
Status Monitor
closing 161
opening 160
using 160
system requirements
to successfully install software 1
system settings
defining 159
T
tone
adjusting when scanning 104
tone curve
adjusting when scanning 108
199
Toolbar
closing 119
using to scan 89
viewing options 119
toolbar
hiding/showing in the Viewer 124
Toolbar scan buttons
defining button settings 114
U
uninstall
removing the MultiPASS Suite 162
Unsharpmask
when scanning 102
V
view documents
paging through 123
view images
moving through in the Viewer 123
Viewer
adding a photo editor 136
adjusting magnification 123
changing the print setup 126
closing 121, 122
displaying a document 121
editing photo editor properties 137
hiding/showing the toolbar 124
overview 121
printing a document 125
printing document thumbnails 125
reloading documents 129
removing a photo editor 137
saving the display size 124
scrolling through a magnified image 124
setting the desktop wallpaper 135
200
specifying a photo editor 136
specifying file associations 135
specifying options 133
specifying the default photo editor 137
viewing documents
in full-screen mode 124
Vivid Photo
setting print effects 50
volume
setting up a fax preference 148
W
WAB, See Windows address book
wallpaper
setting from the Viewer 135
warning message
setting for a failed fax transmission 159
WIA
showing when scanning with the Toolbar
118
to scan an image 111
working with scan settings 111
Windows address book
creating for MultiPASS 79
specifying a different default 86
WAB Contact 80
WAB Distribution List 81
Windows startup
setting a Toolbar preference 119
Index