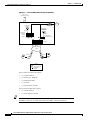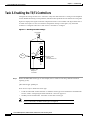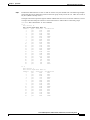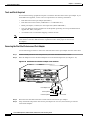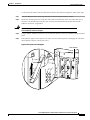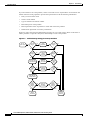
1
Cisco AS5800 Operations,
Administration, Maintenance, and
Provisioning Guide
Corporate Headquarters
Cisco Systems, Inc.
170 West Tasman Drive
San Jose, CA 95134-1706
USA
http://www.cisco.com
Tel: 408 526-4000
800 553-NETS (6387)
Fax: 408 526-4100
Customer Order Number: DOC-7810814=
Text Part Number: 78-10814-02
THE SPECIFICATIONS AND INFORMATION REGARDING THE PRODUCTS IN THIS MANUAL ARE SUBJECT TO CHANGE WITHOUT
NOTICE. ALL STATEMENTS, INFORMATION, AND RECOMMENDATIONS IN THIS MANUAL ARE BELIEVED TO BE ACCURATE BUT ARE
PRESENTED WITHOUT WARRANTY OF ANY KIND, EXPRESS OR IMPLIED. USERS MUST TAKE FULL RESPONSIBILITY FOR THEIR
APPLICATION OF ANY PRODUCTS.
THE SOFTWARE LICENSE AND LIMITED WARRANTY FOR THE ACCOMPANYING PRODUCT ARE SET FORTH IN THE INFORMATION
PACKET THAT SHIPPED WITH THE PRODUCT AND ARE INCORPORATED HEREIN BY THIS REFERENCE. IF YOU ARE UNABLE TO
LOCATE THE SOFTWARE LICENSE OR LIMITED WARRANTY, CONTACT YOUR CISCO REPRESENTATIVE FOR A COPY.
The following information is for FCC compliance of Class A devices: This equipment has been tested and found to comply with the limits for a Class A
digital device, pursuant to part 15 of the FCC rules. These limits are designed to provide reasonable protection against harmful interference when the
equipment is operated in a commercial environment. This equipment generates, uses, and can radiate radio-frequency energy and, if not installed and used
in accordance with the instruction manual, may cause harmful interference to radio communications. Operation of this equipment in a residential area is
likely to cause harmful interference, in which case users will be required to correct the interference at their own expense.
The following information is for FCC compliance of Class B devices: The equipment described in this manual generates and may radiate radio-frequency
energy. If it is not installed in accordance with Cisco’s installation instructions, it may cause interference with radio and television reception. This
equipment has been tested and found to comply with the limits for a Class B digital device in accordance with the specifications in part 15 of the FCC rules.
These specifications are designed to provide reasonable protection against such interference in a residential installation. However, there is no guarantee
that interference will not occur in a particular installation.
Modifying the equipment without Cisco’s written authorization may result in the equipment no longer complying with FCC requirements for Class A or
Class B digital devices. In that event, your right to use the equipment may be limited by FCC regulations, and you may be required to correct any
interference to radio or television communications at your own expense.
You can determine whether your equipment is causing interference by turning it off. If the interference stops, it was probably caused by the Cisco equipment
or one of its peripheral devices. If the equipment causes interference to radio or television reception, try to correct the interference by using one or more
of the following measures:
• Turn the television or radio antenna until the interference stops.
• Move the equipment to one side or the other of the television or radio.
• Move the equipment farther away from the television or radio.
• Plug the equipment into an outlet that is on a different circuit from the television or radio. (That is, make certain the equipment and the television or radio
are on circuits controlled by different circuit breakers or fuses.)
Modifications to this product not authorized by Cisco Systems, Inc. could void the FCC approval and negate your authority to operate the product.
The Cisco implementation of TCP header compression is an adaptation of a program developed by the University of California, Berkeley (UCB) as part of
UCB’s public domain version of the UNIX operating system. All rights reserved. Copyright © 1981, Regents of the University of California.
NOTWITHSTANDING ANY OTHER WARRANTY HEREIN, ALL DOCUMENT FILES AND SOFTWARE OF THESE SUPPLIERS ARE PROVIDED
“AS IS” WITH ALL FAULTS. CISCO AND THE ABOVE-NAMED SUPPLIERS DISCLAIM ALL WARRANTIES, EXPRESSED OR IMPLIED,
INCLUDING, WITHOUT LIMITATION, THOSE OF MERCHANTABILITY, FITNESS FOR A PARTICULAR PURPOSE AND
NONINFRINGEMENT OR ARISING FROM A COURSE OF DEALING, USAGE, OR TRADE PRACTICE.
IN NO EVENT SHALL CISCO OR ITS SUPPLIERS BE LIABLE FOR ANY INDIRECT, SPECIAL, CONSEQUENTIAL, OR INCIDENTAL
DAMAGES, INCLUDING, WITHOUT LIMITATION, LOST PROFITS OR LOSS OR DAMAGE TO DATA ARISING OUT OF THE USE OR
INABILITY TO USE THIS MANUAL, EVEN IF CISCO OR ITS SUPPLIERS HAVE BEEN ADVISED OF THE POSSIBILITY OF SUCH DAMAGES.
AccessPath, AtmDirector, Browse with Me, CCDA, CCDE, CCDP, CCIE, CCNA, CCNP, CCSI, CD-PAC, CiscoLink, the Cisco NetWorks logo, the Cisco
Powered Network logo, Cisco Systems Networking Academy, the Cisco Systems Networking Academy logo, Fast Step, Follow Me Browsing, FormShare,
FrameShare, GigaStack, IGX, Internet Quotient, IP/VC, iQ Breakthrough, iQ Expertise, iQ FastTrack, the iQ Logo, iQ Net Readiness Scorecard, MGX,
the Networkers logo, Packet, RateMUX, ScriptBuilder, ScriptShare, SlideCast, SMARTnet, TransPath, Unity, Voice LAN, Wavelength Router, and
WebViewer are trademarks of Cisco Systems, Inc.; Changing the Way We Work, Live, Play, and Learn, Discover All That’s Possible, and Empowering
the Internet Generation, are service marks of Cisco Systems, Inc.; and Aironet, ASIST, BPX, Catalyst, Cisco, the Cisco Certified Internetwork Expert logo,
Cisco IOS, the Cisco IOS logo, Cisco Systems, Cisco Systems Capital, the Cisco Systems logo, Enterprise/Solver, EtherChannel, EtherSwitch, FastHub,
FastSwitch, IOS, IP/TV, LightStream, MICA, Network Registrar, PIX, Post-Routing, Pre-Routing, Registrar, StrataView Plus, Stratm, SwitchProbe,
TeleRouter, and VCO are registered trademarks of Cisco Systems, Inc. and/or its affiliates in the U.S. and certain other countries.
All other brands, names, or trademarks mentioned in this document or Web site are the property of their respective owners. The use of the word partner
does not imply a partnership relationship between Cisco and any other company. (0104R)
Cisco AS5800 Operations, Administration, Maintenance, and Provisioning Guide
Copyright © 2000-2001, Cisco Systems, Inc.
All rights reserved.
C O N T E N T S
Preface
ix
Document Objectives
Audience
ix
ix
Document Organization
x
Document Conventions
x
Safety Warnings
xi
Related Documentation
For More Information
xii
xiv
Obtaining Documentation
World Wide Web
xiv
xiv
Documentation CD-ROM
xiv
Ordering Documentation
xv
Documentation Feedback
xv
Obtaining Technical Assistance
Cisco.com
xv
xv
Technical Assistance Center
Documentation Feedback
CHA PTER
1
Introduction
xvi
xvii
1-1
Cisco AS5800 Functional Profile
1-1
Cisco AS5800 Hardware Review
1-3
Dial Shelf
1-3
Dial-Shelf Controller
Router Shelf
1-3
1-3
System Architecture
ROM Monitor
1-4
1-4
Network Topology and Equipment Selection
Configuration Design Parameters
Cisco IOS Software Fundamentals
User Interface Command Modes
Command Modes
1-5
1-6
1-8
1-8
1-9
Context-Sensitive Help
1-10
Cisco AS5800 Operations, Administration, Maintenance, and Provisioning Guide
DOC-7810814=
iii
Contents
Saving Configurations
Undoing a Command
1-11
1-11
Basic Cisco AS5800 Start Up
1-11
Cisco AS5800 First-Time Boot
1-15
Cisco AS5800 Boot Process
Dial-Shelf Booting
1-15
Using the Setup Script
1-16
Running the Setup Script
Passwords
1-15
1-16
1-17
Setup-Script Initial Configuration
Deployment and Operation Strategy
CHA PTER
2
Commissioning
1-17
1-22
2-1
Commissioning the Cisco AS5800 Hardware
2-1
Understanding the Basic Hardware Architecture
2-2
Cisco 7206 Router Shelf and Cisco 5814 Dial Shelf
Call-Processing Components
Task 1. Verifying Basic Setup
2-3
2-5
Analyzing the System Boot Dialog
2-5
Matching the Cisco IOS Software Images
Inspecting the Dial Shelf
Using DSIP
2-2
2-8
2-9
2-12
Checking the Initial Running-Config
2-14
Exploring the Cisco IOS File System
2-16
Investigating Memory Usage
Verifying CPU Utilization
2-19
2-21
Task 2. Configuring Basic Cisco IOS Software
2-22
Configuring the Host Name, Enable Secret Password, and Time Stamps
Configuring Local AAA Security
Setting Up a Log In Banner
Configuring Basic IP
2-22
2-23
2-24
2-25
Task 3. Enabling the T3/T1 Controllers
Task 4. Configuring the Serial Interfaces
Task 5. Configuring Modems and Lines
Task 6. Enabling IP Basic Setup
2-26
2-31
2-33
2-35
Task 7. Testing Asynchronous EXEC Shell Connections
2-36
Cisco AS5800 Operations, Administration, Maintenance, and Provisioning Guide
iv
DOC-7810814=
Contents
Task 8. Confirming the Final Running Configuration
CHA PTER
3
Operations
2-39
3-1
Verifying Modem Performance
3-1
Background on Asynchronous Data Communications
Understanding Modem Modulation Standards
Initiating a Modem Loopback Test Call
3-7
3-9
Initiating and Inspecting a V.90 Test Call
Configuring PPP and Authentication
3-17
3-25
Configuring PPP Authentication for Local AAA
Configuring IPCP Options
3-25
3-26
Configuring LCP Options
3-27
Enabling PPP Autoselect
3-28
Testing Asynchronous PPP Connections
Inspecting Active Call States
3-29
3-34
Confirming the Final Running Configuration
Modem Management Operations
3-40
Managing Modem Firmware
3-41
3-38
Configuring Modems Using Modem Autoconfigure
Gathering and Viewing Call Statistics
CHA PTER
4
Administration
3-1
3-48
3-49
4-1
Remote Monitor (RMON)
4-1
Enabling Management Protocols: NTP, SNMP, and Syslog
Understanding Network Management Basics
Enabling the Network Time Protocol
Enabling Syslog
4-4
Enabling SNMP
4-7
4-2
4-3
Disabling the Logging of Access Interfaces
4-9
Confirming the Final Running Configuration
4-10
Access Service Security
4-2
4-13
Local and Remote Server Authentication
Configuring RADIUS
Configuring TACACS+
4-13
4-14
4-24
Cisco AS5800 Operations, Administration, Maintenance, and Provisioning Guide
DOC-7810814=
v
Contents
CHA PTER
5
Maintenance
5-1
Replacement Procedures
5-1
Powering Off the Access Server
5-2
Replacing a DC Power Entry Module
Replacing a Filter Module
5-4
5-8
Replacing an AC-Input Power Supply
5-13
Replacing a Dial-Shelf Controller Card
Replacing a Flash Memory Card
5-22
Replacing the Blower Assembly
5-25
5-15
Replacing a Dial-Shelf Interconnect Port Adapter
Replacing the Backplane Module
Troubleshooting
AS5800 Router Shelf
AS5800 Dial Shelf
Feature Cards
5-44
5-45
5-45
General Configuration
Interactive Users
PPP Users
5-49
Sync Calls
5-50
MMPPP
5-50
RADIUS
5-51
5-47
5-48
Dedicated-PPP Users
SGBP Troubleshooting
Provisioning
5-46
5-47
Interactive Async User
6
5-44
5-45
Controller T1
CHA PTER
5-32
5-44
Common Misconfigurations
Async Calls
5-27
5-49
5-51
6-1
Setting Up Basic IP Modem Services
6-1
Network-Service Considerations
6-3
Establishing a Network-Service Definition
Cisco IOS Upgrades
6-4
6-5
Software Upgrade Requisites
Memory Requirements
6-6
6-6
Cisco AS5800 Operations, Administration, Maintenance, and Provisioning Guide
vi
DOC-7810814=
Contents
Obtaining a New Cisco IOS Version
6-6
Backing Up Your AS5800 Configuration
Installing New IOS Software
Modem Upgrading
Modem Upgrades
6-8
6-13
6-14
Debugging a Modem
6-14
Upgrading Modem Firmware
6-14
Modem Operation at Bootup
6-17
Split Dial Shelves
6-7
6-18
Split-Dial-Shelf Configuration
Changing to Split Mode
Leaving Split Mode
6-18
6-18
6-21
Potential Split-Dial-Shelf Problems
6-21
Split-Dial-Shelf Show Commands
Managing a Split Dial Shelf
6-21
6-23
Configuring Split-Dial-Shelf Routers
Split-Dial-Shelf Error Messages
6-23
6-24
Verifying and Troubleshooting Split-Dial-Shelf Installation
Router-Shelf Redundancy
Failover Operation
6-27
6-27
External Services
6-28
Configuring Redundancy
APPENDIX
A
Advanced Quick Reference
6-28
A-1
Advanced Quick Reference Configurations
Functional Components
Egress Interface
A-2
A-4
Routing Protocol
A-5
Ingress Interface
A-6
A-9
D-Channels (ISDN)
AAA
A-2
A-3
Loopback Interface
Line Signaling
6-25
A-10
A-12
Modem Pools
TTY Line
A-16
A-18
Async Interface
A-19
Cisco AS5800 Operations, Administration, Maintenance, and Provisioning Guide
DOC-7810814=
vii
Contents
Dial Interface
A-21
IP Address Pools
A-23
Virtual Template
A-25
SGBP
A-26
VPDN
A-27
SNMP
A-28
Virtual Profiles
A-29
Multilink Virtual Template
V.120 Support
VoIP
A-30
A-31
A-32
Global Parameters
A-32
Finalizing Operational Configurations
A-34
GLOSSARY
INDEX
Cisco AS5800 Operations, Administration, Maintenance, and Provisioning Guide
viii
DOC-7810814=
Preface
This section discusses the following:
•
Document Objectives, page ix
•
Audience, page ix
•
Document Organization, page x
•
Document Conventions, page x
•
Related Documentation, page xii
•
Obtaining Documentation, page xiv.
•
Obtaining Technical Assistance, page xv
Document Objectives
This document serves as a software installation and configuration guide describing detailed
configuration management alternatives for the Cisco AS5800 universal access server. The guide
provides a conceptual framework for Cisco AS5800 network connectivity and covers five primary levels
of network management: commissioning, operations, administration, maintenance and provisioning.
Administrators can use this document as a reference and procedures manual and quickly commission the
system to take a call and subsequently deploy diverse task-oriented protocol settings to engage all
networking capabilities. This guide references features described in the Cisco IOS configuration guides
and command references. Refer to those documents for additional information.
Audience
This publication includes basic software configuration to enable users to get their systems running as
quickly as possible. However, this document does not include extensive software configuration
instructions enabling users to customize their Cisco AS5800 access servers. For more inclusive software
configuration, refer to the Cisco IOS configuration guides and command references, and in this guide to
the documents listed in the “Related Documentation” section on page xii, and the “For More
Information” section on page xiv.
Cisco AS5800 Operations, Administration, Maintenance, and Provisioning Guide
DOC-7810814=
ix
Preface
Document Organization
This guide is intended primarily for the following audiences:
•
Customers with technical networking background and experience
•
Customers who support dial-in users
•
System administrators who are familiar with the fundamentals of router-based internetworking, but
who may not be familiar with Cisco IOS software
•
System administrators who are responsible for installing and configuring internetworking
equipment, and who are familiar with Cisco IOS software
Document Organization
This document describes software installation, configuration, and troubleshooting instructions, which
are included in the following chapters and appendices:
•
Chapter 1, “Introduction” provides a functional profile of Cisco AS5800; a hardware and network
topology review; Cisco IOS software fundamentals; basic startup, boot, and setup script previews;
and deployment and operation strategies.
•
Chapter 2, “Commissioning” provides formal functional inauguration of the equipment, through
systematic software configurations, to initially engage the system for data/voice call processing.
•
Chapter 3, “Operations” provides routine operations to configure router interfaces.
•
Chapter 4, “Administration” describes management protocols and Network Access Server (NAS)
security and control functionality with AAA and RADIUS servers.
•
Chapter 5, “Maintenance” provides replacement, debugging, and troubleshooting procedures.
•
Chapter 6, “Provisioning” describes basic hardware and service provision considerations such as
system environment requirements, physical infrastructure checklists, IP service considerations, and
system upgrade procedures.
•
Appendix A, “Advanced Quick Reference” provides command line configurations for the advanced
user and system administrator who need to rapidly modify system functionality or enhance system
performance.
•
The glossary at the end provides useful Cisco AS5800-related terminology definitions.
Document Conventions
This publication uses the following conventions to display instructions and information.
Note
The Cisco AS5800 universal access server uses a two-bar (/) command syntax to identify
component (also known as “shelf”), interface, and port locations (shelf/slot/port). The shelf
identification number is the first number identified in the two-bar command syntax.
Interactive examples showing prompts ( AS5800(config-line)#) are used in procedures to show exactly
what the prompt should look like when you enter a command, and what happens after you enter a
command. Examples showing sample output from a show running-config or show startup-config
(without prompts) command are included in the configuration sections.
Cisco AS5800 Operations, Administration, Maintenance, and Provisioning Guide
x
DOC-7810814=
Preface
Document Conventions
Note
Caution
Timesaver
Tips
Means reader take note. Notes contain helpful suggestions or references to materials not
contained in this manual.
Means reader be careful. In this situation, you might do something that could result in
equipment damage or loss of data.
Means the action described saves time. You can save time by performing the action
described in the paragraph.
Means the following information will help you solve a problem.
Safety Warnings
Safety warnings appear throughout this publication in procedures that, if performed incorrectly, may
harm you. A warning symbol precedes each warning statement. To see translations of safety warnings
pertaining to the Cisco AS5800, refer to Cisco AS5800 Universal Access Server Regulatory Compliance
and Safety Information, available online at
http://www.cisco.com/univercd/cc/td/doc/product/access/acs_serv/as5800/5800rcns.htm
Warning
This warning symbol means danger. You are in a situation that could cause bodily injury.
Before you work on any equipment, be aware of the hazards involved with electrical
circuitry and be familiar with standard practices for preventing accidents. To see
translations of the warnings that appear in this publication, refer to the Regulatory
Compliance and Safety Information document that accompanied this device.
Waarschuwing Dit waarschuwingssymbool betekent gevaar. U verkeert in een situatie die lichamelijk
letsel kan veroorzaken. Voordat u aan enige apparatuur gaat werken, dient u zich bewust te zijn van de
bij elektrische schakelingen betrokken risico's en dient u op de hoogte te zijn van standaard maatregelen
om ongelukken te voorkomen. Voor vertalingen van de waarschuwingen die in deze publicatie
verschijnen, kunt u het document Regulatory Compliance and Safety Information (Informatie over
naleving van veiligheids- en andere voorschriften) raadplegen dat bij dit toestel is ingesloten.
Varoitus Tämä varoitusmerkki merkitsee vaaraa. Olet tilanteessa, joka voi johtaa ruumiinvammaan.
Ennen kuin työskentelet minkään laitteiston parissa, ota selvää sähkökytkentöihin liittyvistä vaaroista ja
tavanomaisista onnettomuuksien ehkäisykeinoista. Tässä julkaisussa esiintyvien varoitusten käännökset
löydät laitteen mukana olevasta Regulatory Compliance and Safety Information -kirjasesta (määräysten
noudattaminen ja tietoa turvallisuudesta).
Attention Ce symbole d'avertissement indique un danger. Vous vous trouvez dans une situation
pouvant causer des blessures ou des dommages corporels. Avant de travailler sur un équipement, soyez
conscient des dangers posés par les circuits électriques et familiarisez-vous avec les procédures
couramment utilisées pour éviter les accidents. Pour prendre connaissance des traductions
d’avertissements figurant dans cette publication, consultez le document Regulatory Compliance and
Safety Information (Conformité aux règlements et consignes de sécurité) qui accompagne cet appareil.
Cisco AS5800 Operations, Administration, Maintenance, and Provisioning Guide
DOC-7810814=
xi
Preface
Related Documentation
Warnung Dieses Warnsymbol bedeutet Gefahr. Sie befinden sich in einer Situation, die zu einer
Körperverletzung führen könnte. Bevor Sie mit der Arbeit an irgendeinem Gerät beginnen, seien Sie sich
der mit elektrischen Stromkreisen verbundenen Gefahren und der Standardpraktiken zur Vermeidung
von Unfällen bewußt. Übersetzungen der in dieser Veröffentlichung enthaltenen Warnhinweise finden
Sie im Dokument Regulatory Compliance and Safety Information (Informationen zu behördlichen
Vorschriften und Sicherheit), das zusammen mit diesem Gerät geliefert wurde.
Avvertenza Questo simbolo di avvertenza indica un pericolo. La situazione potrebbe causare infortuni
alle persone. Prima di lavorare su qualsiasi apparecchiatura, occorre conoscere i pericoli relativi ai
circuiti elettrici ed essere al corrente delle pratiche standard per la prevenzione di incidenti. La
traduzione delle avvertenze riportate in questa pubblicazione si trova nel documento Regulatory
Compliance and Safety Information (Conformità alle norme e informazioni sulla sicurezza) che
accompagna questo dispositivo.
Advarsel Dette varselsymbolet betyr fare. Du befinner deg i en situasjon som kan føre til personskade.
Før du utfører arbeid på utstyr, må du vare oppmerksom på de faremomentene som elektriske kretser
innebærer, samt gjøre deg kjent med vanlig praksis når det gjelder å unngå ulykker. Hvis du vil se
oversettelser av de advarslene som finnes i denne publikasjonen, kan du se i dokumentet Regulatory
Compliance and Safety Information (Overholdelse av forskrifter og sikkerhetsinformasjon) som ble
levert med denne enheten.
Aviso Este símbolo de aviso indica perigo. Encontra-se numa situação que lhe poderá causar danos
físicos. Antes de começar a trabalhar com qualquer equipamento, familiarize-se com os perigos
relacionados com circuitos eléctricos, e com quaisquer práticas comuns que possam prevenir possíveis
acidentes. Para ver as traduções dos avisos que constam desta publicação, consulte o documento
Regulatory Compliance and Safety Information (Informação de Segurança e Disposições Reguladoras)
que acompanha este dispositivo.
¡Advertencia! Este símbolo de aviso significa peligro. Existe riesgo para su integridad física. Antes
de manipular cualquier equipo, considerar los riesgos que entraña la corriente eléctrica y familiarizarse
con los procedimientos estándar de prevención de accidentes. Para ver una traducción de las
advertencias que aparecen en esta publicación, consultar el documento titulado Regulatory Compliance
and Safety Information (Información sobre seguridad y conformidad con las disposiciones
reglamentarias) que se acompaña con este dispositivo.
Varning! Denna varningssymbol signalerar fara. Du befinner dig i en situation som kan leda till
personskada. Innan du utför arbete på någon utrustning måste du vara medveten om farorna med
elkretsar och känna till vanligt förfarande för att förebygga skador. Se förklaringar av de varningar som
förkommer i denna publikation i dokumentet Regulatory Compliance and Safety Information
(Efterrättelse av föreskrifter och säkerhetsinformation), vilket medföljer denna anordning.
Related Documentation
The Cisco AS5800 comprises the Cisco 5814 dial shelf, the Cisco 7206 router shelf, and an optional AC
power supply. You might want to install multiple Cisco AS5800 Universal Access Servers at your site.
To help you manage multiple systems, the Cisco 3640 system controller network management system is
available to provide local data gathering and monitoring functions for multiple hardware platforms
within a single point of presence (POP).
The Cisco 3640 system controller includes the Cisco 3640 router running Cisco IOS software. The
system controller can be installed at a remote facility so users can access multiple systems through a
console port or Web interface. System administrators can download software configurations to any
Cisco AS5800 using Simple Network Management Protocol (SNMP) or Telnet. The system controller
monitors Cisco equipment to provide performance data collection, accounting data collection, and
logging.
Cisco AS5800 Operations, Administration, Maintenance, and Provisioning Guide
xii
DOC-7810814=
Preface
Related Documentation
Note
An asynchronous card needs to be installed in the Cisco 3640 to use it as a remote console
server.
The Cisco AS5800 and the Cisco 3640 system controller network management system are available to
help you manage your dial POP site efficiently and effectively. Each of these products is supported by
documentation available on the Cisco.com website.
Timesaver
Table 1
Verify that you have access to the documents listed in Table 1. These documents are
available on the Cisco.com website.
Cisco AS5800 Universal Access Server—Related Documents
Cisco Product
Cisco AS5800
Document Title
•
Read Me First
•
Cisco AS5800 Operations, Administration, Maintenance, and Provisioning
Guide (this book)
•
Cisco AS5800 Universal Access Server Dial Shelf Card Guide
•
Cisco AS5800 Universal Access Server Hardware Installation Guide
•
Cisco AS5800 Universal Access Server Regulatory Compliance and Safety
Information
•
Configuration notes, updates, and release notes
•
Cisco 7206 Installation and Configuration Guide
•
Cisco 7200 Series Port Adapter Hardware Configuration Guidelines
•
Regulatory Compliance and Safety Information for the Cisco 7200 Series
Routers
•
Configuration notes, updates, and release notes
Cisco 5814 dial shelf
•
Configuration notes, updates, and release notes
System controller
•
Read Me First
•
Cisco 3640 System Controller Installation and Configuration Guide
•
Cisco 3640 Router Installation and Configuration Guide
•
Configuration notes, updates, and release notes
•
Configuration notes, updates, and release notes
Cisco 7206 router shelf
Network management system
Cisco IOS software
Cisco marketing tools
Internetworking Solutions Guide
Various documents available online at
http://www.cisco.com/univercd/cc/td/doc/product/software/index.htm
•
Cisco Information Packet
•
Cisco Product Catalog
•
Cisco AS5x00 Case Study for Basic IP Modem Services
•
Cisco AAA Implementation Case Study
Cisco AS5800 Operations, Administration, Maintenance, and Provisioning Guide
DOC-7810814=
xiii
Preface
For More Information
For More Information
The Cisco IOS software running your Cisco AS5800 includes extensive features and functionality. For
information about configuring Cisco AS5800, use the following resources:
•
For Cisco AS5800 universal access server hardware installation and maintenance information, refer
to the Cisco AS5800 Access Server Hardware Installation Guide, available online at
http://www.cisco.com/univercd/cc/td/doc/product/access/acs_serv/as5800/hw_inst/index.htm.
•
For information about the trunk cards, modem cards, and Voice over IP cards used in the Cisco 5814
dial shelf, refer to the Cisco AS5800 Universal Access Server Dial Shelf Card Guide, available
online at
http://www.cisco.com/univercd/cc/td/doc/product/access/acs_serv/as5800/hw_inst/index.htm.
•
For international agency compliance, safety, and statutory information for wide-area network
(WAN) interfaces for the Cisco AS5800 universal access server, refer to Cisco AS5800 Universal
Access Server Regulatory Compliance and Safety Information, available online at
http://www.cisco.com/univercd/cc/td/doc/product/access/acs_serv/as5800/5800rcns.htm.
Obtaining Documentation
The following sections provide sources for obtaining documentation from Cisco Systems.
World Wide Web
You can access the most current Cisco documentation on the World Wide Web at the following websites:
•
http://www.cisco.com
•
http://www-china.cisco.com
•
http://www-europe.cisco.com
Documentation CD-ROM
Cisco documentation and additional literature are available in a CD-ROM package, which ships
with your product. The Documentation CD-ROM is updated monthly and may be more current than
printed documentation. The CD-ROM package is available as a single unit or as an annual subscription.
Cisco AS5800 Operations, Administration, Maintenance, and Provisioning Guide
xiv
DOC-7810814=
Preface
Obtaining Technical Assistance
Ordering Documentation
Cisco documentation is available in the following ways:
•
Registered Cisco Direct Customers can order Cisco product documentation from the Networking
Products MarketPlace at
http://www.cisco.com/cgi-bin/order/order_root.pl
•
Registered Cisco.com users can order the Documentation CD-ROM through the online Subscription
Store at
http://www.cisco.com/go/subscription
•
Nonregistered CCO users can order documentation through a local account representative by calling
Cisco corporate headquarters (California, USA) at 408 526-7208 or, in North America, by calling
800 553-NETS(6387).
Documentation Feedback
If you are reading Cisco product documentation on the World Wide Web, you can submit technical
comments electronically. Click Feedback in the toolbar and select Documentation. After you complete
the form, click Submit to send it to Cisco.
You can e-mail your comments to [email protected].
To submit your comments by mail, for your convenience many documents contain a response card
behind the front cover. Otherwise, you can mail your comments to the following address:
Cisco Systems, Inc.
Document Resource Connection
170 West Tasman Drive
San Jose, CA 95134-9883
We appreciate your comments.
Obtaining Technical Assistance
Cisco provides Cisco.com as a starting point for all technical assistance. Customers and partners can
obtain documentation, troubleshooting tips, and sample configurations from online tools. For Cisco.com
registered users, additional troubleshooting tools are available from the TAC website.
Cisco.com
Cisco.com is the foundation of a suite of interactive, networked services that provides immediate, open
access to Cisco information and resources at anytime, from anywhere in the world. This highly
integrated Internet application is a powerful, easy-to-use tool for doing business with Cisco.
Cisco.com provides a broad range of features and services to help customers and partners streamline
business processes and improve productivity. Through Cisco.com, you can find information about Cisco
and our networking solutions, services, and programs. In addition, you can resolve technical issues with
online technical support, download and test software packages, and order Cisco learning materials and
merchandise. Valuable online skill assessment, training, and certification programs are also available.
Cisco AS5800 Operations, Administration, Maintenance, and Provisioning Guide
DOC-7810814=
xv
Preface
Obtaining Technical Assistance
Customers and partners can self-register on Cisco.com to obtain additional personalized information and
services. Registered users can order products, check on the status of an order, access technical support,
and view benefits specific to their relationships with Cisco.
To access Cisco.com, go to the following website:
http://www.cisco.com
Technical Assistance Center
The Cisco TAC website is available to all customers who need technical assistance with a Cisco product
or technology that is under warranty or covered by a maintenance contract.
Contacting TAC by Using the Cisco TAC Website
If you have a priority level 3 (P3) or priority level 4 (P4) problem, contact TAC by going to the TAC
website:
http://www.cisco.com/tac
P3 and P4 level problems are defined as follows:
•
P3—Your network performance is degraded. Network functionality is noticeably impaired, but most
business operations continue.
•
P4—You need information or assistance on Cisco product capabilities, product installation, or basic
product configuration.
In each of the above cases, use the Cisco TAC website to quickly find answers to your questions.
To register for Cisco.com, go to the following website:
http://www.cisco.com/register/
If you cannot resolve your technical issue by using the TAC online resources, Cisco.com registered users
can open a case online by using the TAC Case Open tool at the following website:
http://www.cisco.com/tac/caseopen
Contacting TAC by Telephone
If you have a priority level 1(P1) or priority level 2 (P2) problem, contact TAC by telephone and
immediately open a case. To obtain a directory of toll-free numbers for your country, go to the following
website:
http://www.cisco.com/warp/public/687/Directory/DirTAC.shtml
P1 and P2 level problems are defined as follows:
•
P1—Your production network is down, causing a critical impact to business operations if service is
not restored quickly. No workaround is available.
•
P2—Your production network is severely degraded, affecting significant aspects of your business
operations. No workaround is available.
Cisco AS5800 Operations, Administration, Maintenance, and Provisioning Guide
xvi
DOC-7810814=
Preface
Obtaining Technical Assistance
Documentation Feedback
If you are reading Cisco product documentation on the World Wide Web, you can submit technical
comments electronically. Click Feedback in the toolbar and select Documentation. After you complete
the form, click Submit to send it to Cisco.
You can e-mail your comments to [email protected].
To submit your comments by mail, for your convenience many documents contain a response card
behind the front cover. Otherwise, you can mail your comments to the following address:
Cisco Systems, Inc.
Document Resource Connection
170 West Tasman Drive
San Jose, CA 95134-9883
We appreciate and value your comments.
Cisco AS5800 Operations, Administration, Maintenance, and Provisioning Guide
DOC-7810814=
xvii
Preface
Obtaining Technical Assistance
Cisco AS5800 Operations, Administration, Maintenance, and Provisioning Guide
xviii
DOC-7810814=
C H A P T E R
1
Introduction
The Cisco AS5800 universal access server is the latest entry into Cisco’s award-winning AS5x00 series
of universal access servers, and provides the highest concentration of modem and integrated services
digital network (ISDN) terminations available in a single remote access concentrator product. The Cisco
AS5800 is specifically designed to meet the demands of large service providers such as post, telephone,
and telegraphs (PTTs), regional Bell operating companies (RBOCs), interexchange carriers (IXCs), and
large Internet service providers (ISPs). The Cisco AS5800 complies with Network Equipment-Building
System (NEBS) Level 3 requirements as defined by Telcordia Technologies SR-3580, and European
requirements are defined by the European Telecommunication Standards Institute (ETSI). Cisco offers
a full spectrum of lifecycle-focused support solutions that are complementary to the Cisco AS5800.
Further, the Cisco AS5800 voice gateway enables highly scalable deployment of toll-quality voice and
fax service over packet networks.
This introductory chapter provides a brief profile and review of the Cisco AS5800 hardware components
and functionality, signal and data throughput logic, access server management flow, and Cisco IOS
software, as well as an information map to this guide.
Cisco AS5800 Functional Profile
The Cisco AS5800 is a high-density, ISDN and modem WAN aggregation system that provides both
digital and analog call termination. It is intended to be used in service-provider dial point-of-presence
(PoP) or centralized-enterprise dial environments. The dial-shelf feature cards and the host router shelf
communicate over a nonblocking interconnect that supports 100-Mbps full-duplex service.
The Cisco AS5800 supports high density dial aggregation and integrates with Cisco AS5200 and
Cisco AS5300 access servers for scaling your service provider network. The Cisco AS5800 also
supports high availability of service through online insertion and removal (OIR) capabilities, and
redundant power supplies that are hot swappable. All active components within the dial-shelf chassis
support OIR, which allows components to be removed or replaced while the system is powered on.
Feature cards can be busied-out through the software to avoid loss of calls.
The Cisco AS5800 includes a Cisco 5814 dial shelf and a Cisco 7206 router shelf. If you are installing
multiple access servers, a system controller is available, which provides a “single system” view of
multiple POPs.
The system controller for the Cisco AS5800 includes the Cisco 3640 router running Cisco IOS software.
The system controller can be installed at a remote facility so that you can access multiple systems
through a console port or Web interface. It is also possible to download software configurations to any
Cisco AS5800 using Simple Network Management Protocol (SNMP) or a Telnet connection using the
TFTP protocols. The system controller also provides performance monitoring and accounting data
collection and logging.
Cisco AS5800 Operations, Administration, Maintenance, and Provisioning Guide
DOC-7810814=
1-1
Chapter 1
Introduction
Cisco AS5800 Functional Profile
In addition to the system controller, a network management system (CiscoWorks) with a graphical user
interface (GUI) runs on a UNIX SPARC station and includes a database management system, polling
engine, trap management, and map integration.
The dial shelf contains ingress interfaces (CT1/CE1/PRI) that terminate ISDN and modem calls, and
break out individual calls (DS0s) from the appropriate telco services. Digital or ISDN calls are
terminated onboard the trunk card HDLC controllers, and analog calls are sent to modem resources on
the modem cards. As a result, any DS0 can be mapped to any HDLC controller or modem module.You
can install multiple ingress interface cards of similar or different types. This enables you to configure
your systems as fully operative, port redundant, or card redundant, depending on your needs.
Trunk cards and modem cards are tied together across a time division multiplexing (TDM) bus on the
dial-shelf backplane. The backplane TDM bus transmits and receives PCM-encoded analog data to and
from the modem cards. Then the dial shelf and the router shelf exchange framed packets via a proprietary
interconnect cable for further processing.
The dial shelf also contains a DSC card that provides clock and power control to the dial-shelf feature
cards. Each dial-shelf controller card contains a block of logic referred to as the common logic and
system clocks. This block generates the backplane Stratum-4 compliant 4-MHz and 8-KHz clocks used
for interface timing and for the TDM bus data movement. The common logic can use a variety of sources
to generate the system timing, including an E1 or T1 input signal from the BNC connector on the
dial-shelf controller card front panel. The clock source can also be telco office timing units (BITS
clocking) extracted from the network ingress interfaces.
On the DSC card, only one common logic is active at any one time, which is identified by the CLK
(clock) LED on the DSC card front panel. The active common logic is user selectable and is independent
from each dial-shelf controller card. This ensures that, if a DSC card needs replacing or if the slave DSC
card becomes master, clocking remains stable. The selected common logic should not be changed during
normal operation, unless related hardware failure is suspected or diagnosed.
Note
Software support for redundant DSC cards will be available soon.
The Cisco 7206 router shelf supports call signaling for PRI interfaces; packet processing, and routing;
and all commonly used high-speed LAN and WAN interfaces including Fast Ethernet (FE),
Asynchronous Transfer Mode (ATM), High-Speed Serial Interface (HSSI), and Fiber Distributed Data
Interface (FDDI). These interfaces are supported by common port adapters that are configured on the
Cisco 7206 router shelf.
You can install and upgrade software remotely, without affecting current system operation. You can also
upload and download configuration files remotely, without affecting current system operation. Remote
access is enabled by using SNMP, a Telnet session to a console port on the router shelf, the World Wide
Web (WWW) interface, or the optional system controller network management system.
The Cisco AS5800 can dynamically adjust any port to support any user configuration. Individual users
can be authenticated as they connect to the system by use of one or more authentication servers using
RADIUS and TACACS+ authentication protocols. Primary and backup authentication servers can define
user authentication parameters via user domain and the number called. User profile information can also
be configured to include time of day, number of simultaneous sessions, and number of B channels used.
A remote LAN user can connect to the Cisco AS5800 via an ISDN line or asynchronous serial
connection, be authenticated, and establish a session. In addition to dynamic or static address
assignments, this connection requires the traditional Cisco IOS software support for different routing
protocols on different ports simultaneously, with virtually no impact on service provider routing tables.
A dial wholesale customer can connect to a Cisco AS5800, and tunnel PPP packet information to a retail
service provider using dial virtual private network (dial VPN).
Cisco AS5800 Operations, Administration, Maintenance, and Provisioning Guide
1-2
DOC-7810814=
Chapter 1
Introduction
Cisco AS5800 Hardware Review
Cisco AS5800 Hardware Review
The Cisco AS5800 consists of two primary system components, the Cisco 5814 dial shelf (DS) and the
Cisco 7206 router shelf (RS).
For detailed Cisco 7206 router-shelf hardware specifications and functionality, refer to the following
documents:
•
Cisco 7200 VXR Installation and Configuration Guide, available online at
http://www.cisco.com/univercd/cc/td/doc/product/core/7200vx/72vxicg/
•
Cisco AS5800 Access Server Hardware Installation Guide, available online at
http://www.cisco.com/univercd/cc/td/doc/product/access/acs_serv/as5800/hw_inst/
For detailed Cisco 5814 dial-shelf hardware specifications and functionality, refer to the following
documents:
•
Cisco AS5800 Access Server Hardware Installation Guide, available online at
http://www.cisco.com/univercd/cc/td/doc/product/access/acs_serv/as5800/hw_inst/
•
Cisco AS5800 Universal Access Server Dial Shelf Card Guide, available online at
http://www.cisco.com/univercd/cc/td/doc/product/access/acs_serv/as5800/hw_inst/
Dial Shelf
The Cisco 5814 dial shelf (DS) houses three primary types of circuit cards or boards. Two of these circuit
cards, commonly referred to as Feature Module (FM) are trunk cards and modems. They support online
insertion and removal (OIR), a feature that permits dynamic replacement without interrupting system
activity. These CE1/T1/T3 trunk cards and DMM modem carriers provide the ingress (signal input)
interfaces for the Cisco AS5800. The third circuit card type is the dial-shelf controller (DSC) card that
provides dial-shelf chassis control and management interfaces.
Dial-Shelf Controller
The Cisco AS5800 dial-shelf controller (DSC) card is located in slots 13 or 14 on the dial-shelf
backplane interconnect bus (BIC). It manages all interfaces through the dial shelf, serves as the dial
shelf’s direct interface to the router shelf, and facilitates the TDM Bus Clock. The DSC card contains
two PC card slots that hold the internal flash (bootflash).
Router Shelf
The Cisco 7206 serves as the host router for the Cisco AS5800 and conducts all route/packet route
processing functionality of carrying data between the dial shelf and an external network. Full Cisco IOS
software functionality is provided on the router shelf. Major components of the Cisco 7206 router shelf
are the network processing engine (NPE), dial-shelf interconnect port adaptor (DSI-PA), and the egress
interfaces (PAs).
The Cisco 7206 router shelf resides in a standard C7206 chassis, holds the Cisco AS5800’s system
configuration, performs all Cisco AS5800 routing functions, supports NPE-400, and provides the
Cisco AS5800’s egress (signal output) interfaces.
Cisco AS5800 Operations, Administration, Maintenance, and Provisioning Guide
DOC-7810814=
1-3
Chapter 1
Introduction
Cisco AS5800 Hardware Review
Note
A virtual console can be opened from the RS to any feature card (including the DSC).
System Architecture
The Cisco AS5800 system architecture consists of backplane bus connections that provide
communications between the dial shelf and the host router shelf, monitor system environment
conditions, and transmit clock/frame pulses to feature/DS controller cards.
For detailed Cisco 7206 router-shelf functionality and hardware specifications refer to the following
documents:
•
Cisco 7200 VXR Installation and Configuration Guide, available online at
http://www.cisco.com/univercd/cc/td/doc/product/core/7200vx/72vxicg/
•
Cisco AS5800 Access Server Hardware Installation Guide, available online at
http://www.cisco.com/univercd/cc/td/doc/product/access/acs_serv/as5800/hw_inst/
ROM Monitor
This section describes the Cisco AS5800 ROM monitors on the Cisco 7206 router shelf and the
Cisco 5814 dial shelf. ROM monitor is the first software to run when the Cisco AS5800 is powered-up
or reset.
The router-shelf ROM monitor operates like a regular Cisco 7206 router ROM monitor. For more
information on basic router usage, refer to the Cisco 7206 Installation and Configuration Guide,
available online at
http://www.cisco.com/univercd/cc/td/doc/product/core/7206/7206ig/.
The dial-shelf ROM monitor is located on dial-shelf controller cards installed in dial-shelf chassis slots
12 and 13. The dial-shelf ROM monitor is configured to autoboot during system power-up or reset. It
always attempts to boot from the first image on Flash memory devices in the following sequence:
Note
•
PCMCIA slot 0
•
PCMCIA slot 1
•
Boot Flash memory
During a normal system boot, PCMCIA slots 0 and 1 should remain empty to allow the
default image on the boot Flash memory to boot the system.
To boot the system from an image other than the default image, copy the image used to boot as the first
file on a PCMCIA Flash memory card and insert the Flash memory card into PCMCIA slot 0 or 1. Reload
the dial-shelf controller, which will cause the system to override the default image and reboot the system
from the PCMCIA Flash memory card.
Cisco AS5800 Operations, Administration, Maintenance, and Provisioning Guide
1-4
DOC-7810814=
Chapter 1
Introduction
Network Topology and Equipment Selection
Network Topology and Equipment Selection
Figure 1-1 shows the topology devices used to build dialup access environments.
Figure 1-1
Network Topology Elements
Network element
management server
(NTP, Syslog, SNMP)
Analog lines
Clients
Modems
PSTN
AAA
server
PRI lines
V
DNS
server
Cisco AS5850
with integrated
modems
IP intranet
Default
gateway
Internet
33166
Internet
firewall
Corporate users and ISPs may have identical network topologies:
Note
•
Remote clients use analog modems to access the IP backbone through the PSTN.
•
A Cisco AS5800 NAS is used as a point-of-presence (POP) to terminate modem calls and
Point-to-Point Protocol (PPP) sessions.
•
PRI lines are used to provide high throughput (64K) for digital and analog calls. In general, T1 lines
can be ISDN PRIs or channelized T1s.
•
A network element management server maintains and monitors the Cisco AS5800 by using the
Network Time Protocol (NTP), system logs (syslog), and the Simple Network Management Protocol
(SNMP).
•
A remote AAA server performs basic user authentication. Corporate users and ISPs can use
TACACS+ or RADIUS.
•
A default gateway forwards packets to the IP intranet and Internet.
•
An Internet firewall is used to protect the IP intranet from intruders and hackers.
•
A router provides connectivity between the access subnet and the IP backbone.
•
For the latest Cisco IOS features and bug fixes, the Cisco AS5800 is upgraded to Cisco AS5800
12.0(4) XL or 12.0(5)T releases.
Use a mature Cisco IOS release whenever possible.
Cisco AS5800 Operations, Administration, Maintenance, and Provisioning Guide
DOC-7810814=
1-5
Chapter 1
Introduction
Network Topology and Equipment Selection
Configuration Design Parameters
Before Cisco AS5800 equipment is deployed at your site, define the following configuration design
parameters:
•
IP subnetting and address strategy
•
Device parameters
•
Network dial plan
Figure 1-2
IP Subnetting Diagram
Hq-access
172.22.66.0/26
PSTN
V
NAS loopbacks
172.22.90.0/24
172.22.99.0/24
Clients
IP intranet
Modems
Internet
Note
33179
Internet
firewall
Uses private RFC 1918 IP addresses. For more information, refer to the Best Current
Practice memo available online at
http://www.ietf.org/rfc/rfc1918.txt
IP Subnetting Plan
The following list describes IP subnetting plan considerations. Identify network names, assigned
subnets, and descriptions.
1.
Headquarters block (172.22.0.0/17)
– The headquarters portion of the class-B IP address block for the corporate user or ISP.
– The top half of 172.22.0.0 is the IP address pool for the incoming remote-node modem users.
The lower half of 172.22.0.0 is reserved for the devices inside the corporate or ISP network.
2.
Remotes block (172.22.128.0/17)
– The upper half of 172.22.0.0 is reserved for remote networks.
3.
Headquarters-access (172.22.66.0/26)
– The headquarters access Ethernet subnet. All access devices are directly connected to this
subnet.
– If additional access servers and POP-management devices are needed, they are assigned to this
IP subnet. This approach simplifies network design.
Cisco AS5800 Operations, Administration, Maintenance, and Provisioning Guide
1-6
DOC-7810814=
Chapter 1
Introduction
Network Topology and Equipment Selection
4.
NAS loopback 0 (172.22.99.0/24)
– Identifies with a unique and stable IP address. One unique IP address from a common block of
addresses is assigned to each device in the IP network. This technique facilitates
security-filtering easy for the network operations center (NOC).
– One class C subnet used for device identification can support 254 distinct devices with unique
loopback addresses.
5.
NAS loopback 1 (172.22.90.0/24)
– Hosts a pool of IP addresses for the remote nodes. In this way, one route instead of 254 routes
is summarized and propagated to the backbone.
Note
Setting up Interior Gateway Protocols (IGP) such as OSPF and EIGRP is outside the scope
of this document.
Device Parameters
The following list describes device parameter considerations.
1.
Router host names
– 5800-NAS
2.
Interface Ethernet 0
– 172.22.66.23 255.255.255.0
3.
Interface loopback 0
– 172.22.99.1 255.255.255.255
4.
Interface loopback 1
– 172.22.90.1 255.255.255.0
5.
IP local address pool
– 5800-NAS = 172.22.90.2 through 172.22.90.254
6.
Primary and secondary name servers
– 172.22.11.10
– 172.22.12.11
7.
Default gateway
– 172.22.66.1
8.
IP domain names
– Corporate or ISP
9.
Network element management server (NTP, SNMP, syslog)
– 172.22.66.18
10. SNMP community strings
– Read only (RO) = poptarts
– Read write (RW) = pixysticks
Cisco AS5800 Operations, Administration, Maintenance, and Provisioning Guide
DOC-7810814=
1-7
Chapter 1
Introduction
Cisco IOS Software Fundamentals
Dial Plan
The following list describes dial plan setup considerations.
1.
PRI telephone numbers assigned to the T1 trunks. One number is used for testing new modem
firmware and the other for isolating debugs for specific users.
– 4085551234
– 4085556789
2.
ISDN PRI switch type
– 5ESS
3.
Username and password for sending test calls into the NAS
– username = user
– password = user-pw
Cisco IOS Software Fundamentals
Cisco IOS software provides the capability to configure a Cisco AS5800 using command-line interface
(CLI) commands.
Use the following helpful reminders when configuring your Cisco IOS software:
•
Use the question mark (?) and arrow keys to help enter commands.
•
Note that each command mode restricts you to a set of commands.
•
Enter the keyword no before a command to disable a feature; for example, no ip routing.
•
Save configuration changes to NVRAM so they are not lost in a system reload or power outage.
•
Use the forward slash (/) command syntax to identify shelf components, interfaces, and port
locations (shelf/slot/port). The shelf identification number is the first number identified in the
two-bar command syntax.
Note
Cisco IOS software is feature specific and licensed on an “as is” basis without
warranty of any kind, either expressed or implied. The version of Cisco IOS
software used in this manual varies depending on configuration requisites for
presentation purposes, and should not be construed as the Cisco IOS software
version of choice for your system or internetwork environment. Consult your
Cisco sales representative regarding your Cisco IOS requirements.
User Interface Command Modes
Cisco routers are configured from user interfaces, known as ports, which provide hardware connectivity.
They are accessed from the console port on a router or Telnet into a router interface from another host.
Typical interfaces are Serial 0 (S0), Serial 1 (S1), and Ethernet 0 (E0). Token Ring interfaces are
referenced as (T0) and FDDI interfaces use (F0).
Cisco AS5800 Operations, Administration, Maintenance, and Provisioning Guide
1-8
DOC-7810814=
Chapter 1
Introduction
Cisco IOS Software Fundamentals
Command Modes
When using the CLI, a command interpreter, called EXEC, is employed by the operating system to
translate any command and execute its operation. This command interpreter has two access modes, user
and privileged, which provide security to the respective command levels. Each command mode restricts
you to a subset of mode-specific commands.
User mode provides restricted access and limits router configuration or troubleshooting. At this level,
miscellaneous functionality is performed, such as viewing system information, obtaining basic router
status, changing terminal settings, or establishing remote device connectivity.
Privileged mode includes user mode functionality and provides unrestricted access. It is used exclusively
for router configuration, debugging, setting operating system (OS) parameters, and retrieving detailed
router status information.
There are many modes of configuration within privileged mode that determine the type of configuration
desired, such as interface configuration (5800-1(config-if)#), line configuration
( 5800-1(config-line)#), and controller configuration ( 5800-1(config-controller)#). Each
configuration command mode restricts you to a subset of mode specific commands.
In the following command sequence, command prompts are automatically modified to reflect command
mode changes. A manual carriage return is implied at the end of each line item.
5800-1> enable
5800-1# configure terminal
5800-1(config)# interface ethernet 0/0/0
5800-1(config-if)# line 0/0/0
5800-1(config-line)# controller t1 0/0/0
5800-1(config-controller)# exit
5800-1(config)# exit
5800-1#
%SYS-5-CONFIG_I: Configured from console by console
5800-1#
The last message is an example of a system response. Press Enter to get the 5800-1# prompt.
Table 1-1 lists common configuration modes. Configure global parameters in global configuration mode,
interface parameters in interface configuration mode, and line parameters in line configuration mode.
Table 1-1
Common Command Modes
Command Mode
Prompt
Access Method
Escape Method
User EXEC
5800-1>
Log in.
Use the exit or logout
command to leave the
command line interface.
Privileged EXEC
5800-1#
From user EXEC mode, enter the Use the disable command to
enable command.
escape back to user EXEC
mode. Use the exit or logout
command to leave the
command line interface.
Global configuration
5800-1(config)#
From privileged EXEC mode,
enter the configure terminal
command.
Use the exit or end (Ctrl-Z)
command to escape to
privileged EXEC mode.
Cisco AS5800 Operations, Administration, Maintenance, and Provisioning Guide
DOC-7810814=
1-9
Chapter 1
Introduction
Cisco IOS Software Fundamentals
Table 1-1
Common Command Modes (continued)
Command Mode
Prompt
Access Method
Escape Method
Interface
configuration
5800-1(config-if)#
Enter the interface type and
number command, such as
interface ethernet 0/0/0.
Use the exit command to
escape to global configuration
mode. Use the end (Ctrl-Z)
command to escape directly to
privileged EXEC mode.
Line configuration
5800-1(config-line)#
Enter the line start-number
end-number command, such as
line 0/0/1 0/0/48.
Use the exit command to
escape to global configuration
mode. Use the end (Ctrl-Z)
command to escape directly to
privileged EXEC mode.
Controller
configuration
5800-1(config-control)#
Enter the controller name and
number command, such as
controller t1 0/0/0.
Use the exit command to
escape to global configuration
mode. Use the end (Ctrl-Z)
command to escape directly to
privileged EXEC mode.
Context-Sensitive Help
Context-sensitive help is available at any command prompt. Enter a question mark (?) for a list of
complete command names, semantics, and command mode command syntax. Use arrow keys at
command prompts to scroll through previous mode-specific commands for display.
Note
Cycle through mode-specific commands at a mode-specific prompt.
•
For a list of available commands, enter a question mark.
5800-1> ?
•
To complete a command, enter known characters followed by a question mark (no space).
5800-1> s?
•
For a list of command variables, enter the command followed by a space and a question mark.
5800-1> show ?
For more information about working with the user interface in the Cisco IOS software, refer to the
document entitled Configuration Fundamentals Configuration Guide for your Cisco IOS software
release, available from the Cisco.com website.
Note
You can press Ctrl-Z in any mode to immediately return to enable mode (5800#), instead
of entering exit, which returns you to the previous mode.
Cisco AS5800 Operations, Administration, Maintenance, and Provisioning Guide
1-10
DOC-7810814=
Chapter 1
Introduction
Basic Cisco AS5800 Start Up
Saving Configurations
To prevent losing the Cisco AS5800 configuration, save it to NVRAM using the following steps.
Step 1
Enter the enable command and password. You are in privileged EXEC mode when the prompt changes
to 5800-1#.
5800-1> enable
Password: password
5800-1#
Note
Step 2
Press Ctrl-Z to return to privileged EXEC mode. Any subsequent system response
message is normal and does not indicate an error.
Execute the copy running-config startup-config command to save configuration changes to
nonvolatile random-access memory (NVRAM) so configuration data will not be lost during a system
reload, power cycle, or outage.
5800-1# copy running-config startup-config
Building configuration...
The following message and prompt appears after a successful configuration copy.
[OK]
5800-1#
Undoing a Command
To undo a command or disable a feature, enter the keyword no before the command; for example, no ip
routing.
Basic Cisco AS5800 Start Up
This section describes how to start up your Cisco AS5800 and configure it using the prompt-driven setup
script.
All Cisco AS5800 interfaces are configured by connecting a terminal station or PC to the Cisco 7206
router-shelf console port. This console port is located on the I/O controller front panel, as shown in
Figure 1-3.
Cisco AS5800 Operations, Administration, Maintenance, and Provisioning Guide
DOC-7810814=
1-11
Chapter 1
Introduction
Basic Cisco AS5800 Start Up
Figure 1-3
Cisco 7206 Router-Shelf Console Port
Port adapter
lever
Dial shelf interconnect
port adapter
Port adapters
3
EN
R
X
TX
R
X
TX
1
R
ETHERNET-10BFL
X
TX
2
R
X
TX
3
R
X
TX
4
EN
AB
LE
D
K
FAST ETHERNET
2
LIN
LB
CD
TD
TC
RD
RC
RD
RC
LB
1
CD
TD
TC
FAST SERIAL
CD
TC
RD
RC
LB
TD
RC
LB
CD
TD
TC
RD
EN
2
0
0
4
3
K
1
EN
3
LIN
AB
2
1
0
LE
D
6
5
ETHERNET 10BT
A
T
1
FE
M
II
FAST ETHERNET INPUT/OUTPUT CONTROLLER
D
I/O controller
PC
M
CIA
EJ
EC
T
SL
O
T
0
FE BLE INK
L
A
FE
EN
CP
PCMCIA Fast Ethernet port
slots
U
RE
S
ET
1O
ER
W
PO K
O
Auxiliary
port
10092
EN
E
BL
O
0
SL
Console
port
To customize your Cisco AS5800 software configuration, you should be familiar with Cisco IOS
software. Review the “Cisco IOS Software Fundamentals” section on page 1-8 to familiarize yourself
with the command-line interface (CLI) commands, then continue with the “Commissioning”chapter for
initial step-by-step configuration instructions.
Your Cisco AS5800 requires multiple Cisco IOS software images.
1.
Router-shelf image—Cisco IOS software image (c5800-p4-mz) supporting Cisco AS5800
router-shelf functionality, and bundled trunk card and modem card images
2.
Router-shelf boot image—Boot helper image (c7200-boot-mz) for Cisco 7206 router shelf
3.
Dial-shelf controller image—With boot helper image (dsc-c5800-mz) for Cisco 5814 dial-shelf
feature cards
4.
Dial-shelf feature board image—Cisco 5814 dial-shelf feature card image (das-c5800-m.ucode)
bundled into the router-shelf image
Although four Cisco IOS software images are required, only three software images (Items 1-3) require
part numbers for ordering.
The dial-shelf controller image can be upgraded by copying the new image onto a Personal Computer
Memory Card International Association (PCMCIA) Flash memory card on the dial-shelf controller card;
however, you will soon be able to upgrade the dial-shelf controller image from the network.
Figure 1-4 and Figure 1-5 show a rack-mounted Cisco AS5800 hardware components that require
configuration or software monitoring.
Cisco AS5800 Operations, Administration, Maintenance, and Provisioning Guide
1-12
DOC-7810814=
Chapter 1
Introduction
Basic Cisco AS5800 Start Up
Figure 1-4
Cisco AS5800 Universal Access Server—Front View
5
LINK
RX
ETHERNET-10BFL
TX
RX
0
TX
RX
1
TX
RX
2
TX
RX
TX
3
4
1
3
0
1
2
3
0
EN
2
3
ENA
BLE
D
6
Router shelf
ETHERNET 10BT
4
TD
TC
RD
RC
LB
D
FAST ETHERNET
2
LIN
K
ENA
CD
BLE
RC
LB
CD
TD
TC
RD
RC
LB
1
CD
TC
RD
EN
TD
TC
RD
RC
LB
CD
TD
FAST SERIAL
1
POWER
OT
MII
FAST ETHERNET INPUT/OUTPUT CONTROLLER
FE
0
SL
LE
AB
EN
D
IA
T
EC
EJ
MC
PC
0
FE LE
AB
OT
SL
EN
K
LIN
FE
U
CP
T
SE
RE
PO
1O
R
WE
OK
FAIL
Blower assembly
Dial shelf
interconnect
cable
NT
R
PW MAI
S
DEM
MO
CALLS
NT
R
PW MAI
HCPU
NT
R
PW MAI
S
DEM
MO
CALLS
HCPU
NT
R
PW MAI
S
DEM
MO
CALLS
HCPU
NT
R
PW MAI
S
DEM
MO
CALLS
HCPU
NT
R
PW MAI
S
DEM
MO
CALLS
HCPU
NT
R
PW MAI
S
DEM
MO
CALLS
HCPU
NT
R
PW MAI
S
DEM
MO
CALLS
HCPU
NT
R
PW MAI
S
DEM
MO
CALLS
HCPU
0
NT
R
PW MAI
R
T1F
U
FCP
HCPU
M
RAL
OP
NLO
HCPU
R
T1F
U
FCP
HCPU
NT
R
PW MAI
E1FR
E1FR
NT
R
PW MAI
HCPU
OR#
NIT
MO
M
LAL
75
S
DEM
MO
PW MBU
R
S
S
DEM
MO
PW MBU
R
S
MAJ
CALLS
CALLS
OR#
NIT
MO
MAJ
MIN
ACO
HIS
T
CUT
OFF
CLE
AR
ALARM
0
1
2
2
3
3
ALARM
SET
4
4
5
5
6
6
7
7
ATT
EN
DISP
CLK
SLO
T1
ALARMS
10 BASE T
N
N
RMO
N
N
DIAL SHELF INTERCONNECT
TMO
DSI
DSI
RMO
NETWORK CLOCK
DIAL SHELF INTERCONNECT
TMO
CONSOLE
10 BASE T
11
ALARMS
11
NETWORK CLOCK
10
MAS
T
SLO
T1
CONSOLE
9
10
DISP
DIAL SHELF CONTROLLER
DIAL SHELF CONTROLLER
8
9
Dial shelf
ATT
EN
SLO
T0
PCMCIA
PCMCIA
8
DISP
CLK
MAS
T
SLO
T0
14-slot card cage
(feature and controller
cards installed)
HIS
T
ALARM
CLE
AR
SET
DISP
1
MIN
ACO
CUT
OFF
ALARM
M
RAL
OP
NLO
M
LAL
75
MODEM
MODEM
MODEM
MODEM
MODEM
MODEM
MODEM
MODEM
MODEM
MODEM
CHANNELIZED E1/T1
CHANNELIZED E1/T1
Dial shelf
controller cards
Trunk cards
Modem cards
Safety cover
PWR OK
CB 2
PWR OK
FAULT
FAULT
AC
1 POWER 2
TEMP
TEMP
I LIM
H11449
I LIM
CB 1
AC-input power shelf (optional)
Cisco AS5800 Operations, Administration, Maintenance, and Provisioning Guide
DOC-7810814=
1-13
Chapter 1
Introduction
Basic Cisco AS5800 Start Up
Figure 1-5
Cisco AS5800 Universal Access Server—Rear View
Power switches
(to boot system)
Router shelf
NETWORK PROCESSING ENGINE-150
Double
ground lug
Dial shelf
PEMs
POWER
POWER
MISWIRE
MISWIRE
Filter module
–48V
–48V
RTN
C NC NO
–48V
–48V
RTN
C NC NO
AC-input power shelf (optional)
H11450
Safety cover
not shown
Cisco AS5800 Operations, Administration, Maintenance, and Provisioning Guide
1-14
DOC-7810814=
Chapter 1
Introduction
Cisco AS5800 First-Time Boot
Cisco AS5800 First-Time Boot
When you power ON your Cisco AS5800, it goes through the following boot sequence:
1.
A power-on self-test diagnostics program verifies basic operation of the CPU, memory, and
interfaces.
2.
The system bootstrap software executes and searches for a valid Cisco IOS software image. The
Cisco IOS software source image is determined by the configuration register setting. The
factory-default setting for the configuration register is 0x2102, which indicates that the router
should attempt to load a Cisco IOS software image from Flash memory or over the network
(depending on boot configuration commands).
3.
If, after five attempts (if netbooting) or one attempt (for a Flash memory boot), a valid Cisco IOS
software image is not found in Flash memory, the router reverts to boot the ROM mode, which is
used to install or upgrade a Cisco IOS software image.
4.
If a valid Cisco IOS software image is found, the router searches for a valid configuration file.
5.
If a valid configuration file is not found in nonvolatile random-access memory (NVRAM), the router
runs the setup script (also called the system configuration dialog), which enables you to configure
your software manually. For normal router operation, you must have a valid Cisco IOS software
image in Flash memory and a configuration file in NVRAM.
Cisco AS5800 Boot Process
The system boot process consists of two-stages. When the system is first powered on, the trunk cards
and modem cards must receive a small image from the dial-shelf controller card, which is then launched
by the ROM monitor. This allows the feature cards the ability to “talk” to the dial-shelf controller card
and download the bootloader program. Communication is then made on the backplane, that allows each
feature cards to talk with the router shelf the Cisco IOS software image. All cards download the
bootloader image simultaneously, which then allows them to “talk” across the proprietary Fast Ethernet
connection and request the image needed for each card. A hello message is exchanged between the router
shelf and the dial shelf.
Because of this two-step boot process, when you first power ON your system, you might not see the
feature card LEDs light immediately.
Dial-Shelf Booting
The dial shelf boots up independently from the router shelf. The dial-shelf controller card (DSC) is the
first component to boot up. It is set for autobooting from internal Flash memory. If, however, a PCMCIA
Flash memory card is present, the DSC tries to first boot from the card, beginning with slot 0.
Cisco AS5800 Operations, Administration, Maintenance, and Provisioning Guide
DOC-7810814=
1-15
Chapter 1
Introduction
Using the Setup Script
Using the Setup Script
The setup script is designed to provide you with the minimum requirements needed to get your router
running. The setup script enables your system controller to “talk” to the network. You can then configure
your system using command-line interface (CLI) commands, or by downloading a predetermined site
configuration file.
Before you power ON your Cisco AS5800 and begin using the setup script, verify that you have:
•
Connected the console cable to the Cisco 7206 router-shelf console port, which is located on the I/O
controller front panel
•
Configured your PC terminal emulation program for 9600 baud, 8 data bits, no parity, and 2 stop bits
•
Noted the IP address of your Ethernet interface
•
Noted the set of available IP addresses to be assigned to dial-in IP clients
•
Noted the host name
•
Noted the ISDN switch types, framing types, and T1 or E1 line codes
•
Noted passwords (see the “Passwords” section on page 1-17)
After you verify the information noted above, perform the configuration steps. Continue with the
“Setup-Script Initial Configuration” section on page 1-17.
Running the Setup Script
You can run the setup script from the command line at any time using the setup command. The following
commands help enable the setup command from the privileged EXEC mode.
Step 1
Enter the enable command.
5800> enable
Step 2
Enter your password. You are in privileged EXEC mode when the prompt changes to 5800#.
Password: password
5800#
Step 3
Enter the setup command and press Return. This will initialize the system configuration dialog as
described in the previous section “Setup-Script Initial Configuration.”
5800# setup
Cisco AS5800 Operations, Administration, Maintenance, and Provisioning Guide
1-16
DOC-7810814=
Chapter 1
Introduction
Using the Setup Script
Passwords
Several passwords are used when configuring your Cisco IOS software. Passwords are used to identify
user authorization and permission rights, virtual terminal configuration, and network management
software initialization. Most passwords can use the same notation.
You need the following types of passwords when configuring Cisco IOS software:
•
Enable password—A nonencrypted and, therefore, less secure password.
•
Enable secret password—A very secure, encrypted password that is used in place of the enable
password. Because many privileged-level EXEC commands are used to set operating parameters,
we recommend that you use the enable secret password to prevent unauthorized use.
Note
•
The enable password and enable secret password should be different. In both
cases, you cannot use a number as the first character. Spaces are valid
characters, but only when following valid characters; lead spaces are ignored.
Virtual console password—Enables terminal emulation.
Setup-Script Initial Configuration
When the system is booted for the first time, NVRAM is blank. Because of this, the system software will
automatically ask if you want to enter the setup script (system configuration dialog). After you have a
configuration, run the setup script again to change it.
The first step is to power ON your Cisco AS5800. The power switch is located on the Cisco 7206
router-shelf rear panel. Be sure to power on the power entry modules (PEMs), which can be accessed
from the Cisco 5814 dial-shelf rear panel. If you are using the optional AC-input power shelf, you also
need to power on the AC-input power supplies.
Cisco AS5800 Operations, Administration, Maintenance, and Provisioning Guide
DOC-7810814=
1-17
Chapter 1
Introduction
Using the Setup Script
Note
The messages vary, depending on the Cisco IOS software release and feature set you
selected. The screen displays in this section are for reference only and might not exactly
reflect the messages on your console.
System Bootstrap, Version 12.x(19990210:195103) [12.0XE 105],
Copyright (c) 19xx-20xx by cisco Systems, Inc.
C7200 platform with 262144 Kbytes of main memory
Self decompressing the image : #################################################
################################################################################
##################################### [OK]
Self decompressing the image : #################################################
################################################################################
################################################################################
########################### [OK]
Restricted Rights Legend
Use, duplication, or disclosure by the Government is subject to restrictions as set forth
in subparagraph (c) of the Commercial Computer Software - Restricted Rights clause at FAR
sec. 52.227-19 and subparagraph (c) (1) (ii) of the Rights in Technical Data and Computer
Software clause at DFARS sec. 252.227-7013.
cisco Systems, Inc.
170 West Tasman Drive
San Jose, California 95134-1706
Cisco Internetwork Operating System Software IOS (tm) 5800 Software (C5800-P4-M),
Copyright (c) 1986-2000 by cisco Systems, Inc.
Compiled Fri 21-Jan-00 07:57 by Image text-base: 0x60008900, data-base: 0x6150C000
cisco 7206VXR (NPE400) processor (revision B) with 253952K/40960K bytes of memory.
Processor board ID 15376291 R7000 CPU at 262Mhz, Implementation 39, Rev 1.0, 256KB L2,
2048KB L3 Cache6 slot VXR midplane, Version 2.0
Last reset from power-on
X.25 software, Version 3.0.0.
Bridging software.
SuperLAT software (copyright 1990 by Meridian Technology Corp).
Primary Rate ISDN software, Version 1.1.
8 Ethernet/IEEE 802.3 interface(s)
1 FastEthernet/IEEE 802.3 interface(s)
4 Serial network interface(s)
288 terminal line(s)
12 Channelized T1/PRI port(s)
125K bytes of non-volatile configuration memory.
16384K bytes of Flash PCMCIA card at slot 0 (Sector size 128K).
4096K bytes of Flash internal SIMM (Sector size 256K).
Building configuration...
[OK]
Building configuration...
SETUP:
SETUP:
SETUP:
SETUP:
SETUP:
SETUP:
SETUP:
SETUP:
new
new
new
new
new
new
new
new
interface
interface
interface
interface
interface
interface
interface
interface
Ethernet0/3/0
Ethernet0/3/1
Ethernet0/3/2
Ethernet0/3/3
Ethernet0/3/4
Ethernet0/3/5
Ethernet0/3/6
Ethernet0/3/7
placed
placed
placed
placed
placed
placed
placed
placed
in
in
in
in
in
in
in
in
"shutdown"
"shutdown"
"shutdown"
"shutdown"
"shutdown"
"shutdown"
"shutdown"
"shutdown"
state
state
state
state
state
state
state
state
Cisco AS5800 Operations, Administration, Maintenance, and Provisioning Guide
1-18
DOC-7810814=
Chapter 1
Introduction
Using the Setup Script
Press RETURN to get started!
The system then asks if you would like to enter the system configuration dialog. Answer yes and
configure your software using the system configuration dialog.
Note
Step 1
If you make a mistake, you can exit and run the system configuration dialog again. Press
Ctrl-c, and type setup at the enable mode prompt ( 5800#).
Enter yes at the following prompt if you are ready to continue with the system configuration dialog. If
you enter no at this prompt, the system software will return you to the router prompt.
Continue with configuration dialog? [yes/no]: yes
Step 2
Enter the router-shelf identification number, followed by a dial-shelf identification number. Substitute
the default values shown with any numeric value between 0 and 9999.
Basic management setup configures only enough connectivity for management of the system, extended
setup will ask you to configure each interface on the system
Router Shelf-ID [0]:
Dial Shelf-ID
[1]:
Note
Step 3
The Cisco AS5800 uses a “two-bar” (/) command syntax to identify component
(also known as “shelf”), interface, and port locations (shelf/slot/port). The shelf
identification number will be the first number to be identified in the two-bar
command syntax.
Determine whether you want to enter basic management setup configuration and respond to the prompt.
Would you like to enter basic management setup? [yes/no]: yes
Configuring global parameters:
Note
Step 4
This example assumes you want to enter the basic management setup
configuration. Extended configuration information is explained in Chapter 2
“Operations”.
Enter the router host name. Substitute your own router host name for the one shown.
Enter host name: 5800-1
Step 5
Enter the enable secret password. The enable secret password is a one-way coded secret used instead of
the enable password when it exists. Substitute your own enable secret password for the one shown.
Enter enable secret [<Use current secret>]: shhhh
Step 6
Enter the enable password. The enable password is used when there is no enable secret and when using
older software and some boot images.
Enter enable password [public]: guesswho
Step 7
Enter the virtual terminal password. Substitute your own virtual terminal password for the one shown.
Enter virtual terminal password: shhhh1
Cisco AS5800 Operations, Administration, Maintenance, and Provisioning Guide
DOC-7810814=
1-19
Chapter 1
Introduction
Using the Setup Script
Step 8
If you plan to use a system controller network management system through which you can administer
your Cisco AS5800, enter yes to the following prompt, then enter substitute your own IP address and
system controller password when prompted.
Configure System Management? [yes/no]: yes
System Controller IP address: 10.10.1.1
System Controller password: cisco
Step 9
The system controller supports the Simple Network Management Protocol (SNMP); enter yes at the
prompt. The community string is used by the system controller to communicate with its managed
shelves. You need to determine a password for this function; the default password is public.
Configure SNMP Network Management? [yes]:
Community string [public]:
Step 10
Enter the interface information used to connect to the system controller at the prompt.
Enter interface name used to connect to the management network from the above interface
summary: Ethernet0/1/0
Step 11
The system then displays current interface summary information, as shown in Table 1-1, that will help
you configure your available egress interfaces.
Configuring interface Ethernet0/1/0:
Configure IP on this interface? [no]:
Table 1-2
Current Interface Summary
Interface
IP-Address
FastEthernet0/0/0
unassigned
OK?1
Method
Status
Protocol
NO
unset
down
down
YES
set
up
up
unassigned
NO
unset
down
down
Ethernet0/1/2
unassigned
NO
unset
down
down
Ethernet0/1/3
unassigned
NO
unset
down
down
Ethernet0/1/0
10.10.1.1
Ethernet0/1/1
2
1. Any interface listed with OK? value “NO” does not have a valid configuration.
2. The IP address shown requires configuration by the user; it is not a default
configuration.
Note
If you change a shelf-ID number, you must perform a reload before the new shelf-ID is
saved in NVRAM. Use the show version command after you have changed a shelf-ID and
performed a reload.
Cisco AS5800 Operations, Administration, Maintenance, and Provisioning Guide
1-20
DOC-7810814=
Chapter 1
Introduction
Using the Setup Script
After you enter the interface used to connect to the management network, the system software will
automatically display the command script that was just created.
The following configuration command script was created:
hostname 5800-1
enable secret 5 $1$g74v$J87e3eDZdh0wWIR7m4ELy/
enable password shhhh
line vty 0 4
password alwaysup
syscon address 10.10.1.1 cisco
snmp-server community public
!
no ip routing
!
interface FastEthernet0/0/0
shutdown
no ip address
!
interface Ethernet0/1/0
no shutdown
no ip address
!
interface Ethernet0/1/1
shutdown
no ip address
!
interface Ethernet0/1/2
shutdown
no ip address
!
interface Ethernet0/1/3
shutdown
no ip address
!
end
Verify that the command script just created is correct and enter yes at the prompt if you want to save the
configuration. If you enter no at the prompt, you will need to repeat the steps described in Table 1-1 until
the desired configuration file is achieved.
[0] Go back to the IOS command prompt without saving configuration
[1] Return back to setup without saving this configuration
[2] Save this configuration to NVRAM and exit.
Selecting choice number [2] builds the configuration into NVRAM as follows:
Building configuration...
Use the enabled mode 'configure' command to modify this configuration.
5800#
*Dec 23 12:48:58: %LINK-3-UPDOWN: Interface Ethernet0/1/0, changed state to up
Press Return to display the privileged EXEC router prompt.
5800#
You have just completed a basic Cisco AS5800 startup configuration; however, you will probably need
to customize this configuration to further meet your site’s requirements.
Cisco AS5800 Operations, Administration, Maintenance, and Provisioning Guide
DOC-7810814=
1-21
Chapter 1
Introduction
Deployment and Operation Strategy
Deployment and Operation Strategy
The following steps describe and suggest a recommended deployment and operation task strategy for the
Cisco AS5800 that serves as a functional task flow for this Guide.
Step 1
Step 2
Step 3
Step 4
Step 5
Step 6
Step 7
Cisco AS5800 Introduction
•
Network topology and equipment selection
•
Configuration design parameters
•
Subnetting plan
•
Dial plan
Cisco AS5800 Provisioning
•
Setting up modem services
•
Dial planning design
•
Network service definition
Cisco AS5800 Commissioning
•
Cisco AS5800 basic hardware architecture and setup
•
Supporting EXEC terminal shell services and login prompts for modem clients
•
Enabling trunk controllers and IP setup
•
Configuring Cisco IOS software, serial interfaces, modems and lines
Cisco AS5800 Operations
•
Understanding and troubleshooting basic modem connectivity
•
Optimizing modem connect speeds
Cisco AS5800 Administration
•
Enabling the NTP, SNMP, and Syslog management protocols as part of commissioning a dial access
service
•
PPP authentication for local AAA.
•
IP Control Protocol (IPCP) options
•
Link Control Protocol (LCP) options
•
PPP autoselect
•
Testing asynchronous PPP connections.
Cisco AS5800 Maintenance
•
Managing modem firmware
•
Configuring modems by using modem autoconfigure
•
Gathering and viewing call statistics
Advanced Operational Configurations of Functional Components.
•
Egress interface
•
Loopback interface
•
Routing protocol
•
Ingress interface
Cisco AS5800 Operations, Administration, Maintenance, and Provisioning Guide
1-22
DOC-7810814=
Chapter 1
Introduction
Deployment and Operation Strategy
•
Line signaling
•
D-channels (ISDN)
•
AAA
•
Modem pools
•
TTY line
•
Async interface
•
Dial interface
•
IP address pools
•
Virtual template
•
SGBP
•
VPDN
•
SNMP
•
Virtual profiles
•
Multilink virtual templates
•
V.120 support
•
VoIP
•
Global parameters
•
Other configuration considerations
Cisco AS5800 Operations, Administration, Maintenance, and Provisioning Guide
DOC-7810814=
1-23
Chapter 1
Introduction
Deployment and Operation Strategy
Cisco AS5800 Operations, Administration, Maintenance, and Provisioning Guide
1-24
DOC-7810814=
C H A P T E R
2
Commissioning
Whether you are a corporate end user or a competitive Internet service provider (ISP), you have
purchased a Cisco AS5800 network access server (NAS) to provide dialup services that facilitate
accessibility for remote or roaming personnel, or Internet admission to consumers for e-mail,
e-commerce, and web browsing.
This chapter details Cisco AS5800 commissioning, or the formal functional setup of the equipment,
through systematic software configurations, to initially prepare the system for data/voice call
processing.
In our discussion, local-based authentication is used. After the Cisco AS5800 hardware is
commissioned, PPP is configured and tested as described in“Configuring PPP and Authentication”
section on page 3-25.
Note
A AAA RADIUS server is recommended. AAA Radius server discussions are available in
the “Configuring RADIUS” section on page 4-14.
Commissioning the Cisco AS5800 Hardware
This section describes configuring the Cisco AS5800 hardware to support terminal EXEC shell services
and log in prompts for client modems, and includes the following:
Note
•
Understanding the Basic Hardware Architecture, page 2-2
•
Task 1. Verifying Basic Setup, page 2-5
•
Task 2. Configuring Basic Cisco IOS Software, page 2-22
•
Task 3. Enabling the T3/T1 Controllers, page 2-26
•
Task 4. Configuring the Serial Interfaces, page 2-31
•
Task 5. Configuring Modems and Lines, page 2-33
•
Task 6. Enabling IP Basic Setup, page 2-35
•
Task 7. Testing Asynchronous EXEC Shell Connections, page 2-36
•
Task 8. Confirming the Final Running Configuration, page 2-39
For a description of terminal EXEC shell services, see the “Task 7. Testing Asynchronous
EXEC Shell Connections” section on page 2-36.
Cisco AS5800 Operations, Administration, Maintenance, and Provisioning Guide
DOC-7810814=
2-1
Chapter 2
Commissioning
Understanding the Basic Hardware Architecture
Understanding the Basic Hardware Architecture
To build an access network using the Cisco AS5800, it is necessary to understand:
•
The Cisco 7206 router shelf
•
The Cisco 5814 dial shelf
•
Call-processing components
Cisco 7206 Router Shelf and Cisco 5814 Dial Shelf
The Cisco AS5800 access server contains:
•
A Cisco 7206 router shelf (egress interface). It connects to the IP backbone.
•
A Cisco 5814 dial shelf (ingress interface). It connects to the PSTN.
Figure 2-1 shows the Cisco AS5800 system architecture.
Figure 2-1
Cisco AS5800 System Architecture
System
controller
shelf
Network
element
management
server
(SNMP)
Cisco
SC3640
Router shelf
Cisco
shelf ID=0
7206
FE 0/1/0
AAA server
DSI
port adapter
0/2/0
Dial shelf
shelf ID=1
T3
IP
backbone
Backbone
router
Cisco DS5814
Modem cards
DSC
1/0/0
Dial shelf
interconnect
cable
PSTN
PRI
Client
modem
0 1 2 3 . . . . . . . . . . . . 13
Slot numbers
33189
Client
PC
Cisco AS5800 Operations, Administration, Maintenance, and Provisioning Guide
2-2
DOC-7810814=
Chapter 2
Commissioning
Understanding the Basic Hardware Architecture
Note
The Cisco IOS software uses a three-element notation to specify interface and port
locations: shelf/slot/port.
•
The Cisco 7206 router shelf contains the following:
– Port adapters. In the example, the Cisco 7206 uses Fast Ethernet (FE) 0/1/0 to connect to the IP
backbone.
– A dial-shelf interconnect (DSI) port adapter. In the example, the adapter is located at 0/2/0.
The Cisco 7206 communicates with the Cisco 5814 dial shelf through an external dial-shelf
interconnect cable. The cable connects from the DSI port adapter to the dial-shelf controller
(DSC) card.
The Dial Shelf Interconnect Protocol (DSIP) enables communication between the Cisco 7206
and the Cisco 5814.
– Service adapters (for example, compression and encryption).
– By default, a shelf ID of 0 is assigned to the router shelf.
•
The Cisco 5814 dial shelf contains the following:
– Dial-shelf controller (DSC) cards. They fit in slots 12 or 13 only. If you have one DSC card,
slot 12 is recommended. One DSC card is used in the example.
The DSC card contains its own Cisco IOS software image. For maintenance purposes only, the
card can be accessed through its console port and Ethernet interface. No IP packets originating
from any trunk or modem cards go out this Ethernet interface.
– T3/T1/E3/E1 cards. They connect to the PSTN and fit in slots 0 through 5 only. Slots 0 and 1
are recommended. In the example, one T3 trunk card is located at 1/0/0.
– Modem/voice cards. They fit in slots 0 through 11. In the example, nine modem cards are
installed. The first modem card is in slot 2. The line-modem range is 1/2/00 to 1/10/143.
– By default, a shelf ID of 1 is assigned to the dial shelf.
•
The Cisco SC3640 system controller is an external management subsystem. It interfaces with the
Cisco 7206 and provides the following functions:
– SNMP and syslog offloading
– Out-of-band console access
Call-Processing Components
As shown in Figure 2-2, the following components process a call:
•
Client modems and ISDN routers dial in to the access server through the PSTN.
•
Asynchronous PPP calls (analog) connect to modems inside the access server.
•
Each modem inside the access server provides a corresponding TTY line and asynchronous interface
for terminating character and packet mode services.
•
Asynchronous interfaces clone their configurations from a group-async interface.
•
Synchronous PPP calls (digital) connect to serial interface channels (for example, S1/0/0:0:0
and S1/0/0:0:1).
•
Synchronous interfaces clone their configurations from a dialer interface.
Cisco AS5800 Operations, Administration, Maintenance, and Provisioning Guide
DOC-7810814=
2-3
Chapter 2
Commissioning
Understanding the Basic Hardware Architecture
Figure 2-2
Cisco AS5800 Call-Processing Components
Inside a Cisco
network access server
IP
network
Routing and
switching engine
Group-async
interface
Dialer interface
controlling the
D channels
Cloning
Asynchronous
interfaces
Cloning
TTY lines
Serial interface
channels S0:1, S0:2…
Modems
TDM bus
T1 controllers
PRI lines
PSTN
POTS line
Client
PC
BRI line
Client
modem
ISDN
router
Client
PC
Legend
= Synchronous PPP
= Configuration
template
33186
= Asynchronous PPP
One asynchronous PPP call requires:
•
(1) T1 DS0 channel
•
(1) channel in a TDM bus
•
(1) integrated modem
•
(1) TTY line
•
(1) asynchronous interface
One synchronous PPP call requires:
Tips
•
(1) T1 DS0 channel
•
(1) serial interface channel
Synchronous PPP calls require HDLC resources. Each T3 trunk card is limited to
256 HDLC resources. T1 trunk cards do not have HDLC resource limitations.
Cisco AS5800 Operations, Administration, Maintenance, and Provisioning Guide
2-4
DOC-7810814=
Chapter 2
Commissioning
Task 1. Verifying Basic Setup
Task 1. Verifying Basic Setup
Verify that basic system components are functioning:
•
Analyzing the System Boot Dialog, page 2-5
•
Matching the Cisco IOS Software Images, page 2-8
•
Inspecting the Dial Shelf, page 2-9
•
Using DSIP, page 2-12
•
Checking the Initial Running-Config, page 2-14
•
Exploring the Cisco IOS File System, page 2-16
•
Investigating Memory Usage, page 2-19
•
Verifying CPU Utilization, page 2-21
Analyzing the System Boot Dialog
To view the boot sequence through a terminal session, you must have a console connection to the access
server before it powers up.
Caution
Always power up the dial shelf before the router shelf. The DSC card checks the dial shelf’s
inventory, which requires extra time. After two minutes, power up the router shelf. The
router shelf depends on the DSC card for the dial shelf’s inventory report.
The following boot sequence occurs. Event numbers and comments are inserted in the example to
describe the boot sequence.
System Bootstrap, Version x.x
Copyright (c) 20xx by cisco Systems, Inc.
C7200 processor with 131072 Kbytes of main memory
Self decompressing the image :
##########################################################################################
################################################# [OK]
%PA-2-UNDEFPA: Undefined Port Adaptor type 106 in bay 2
%SYS-4-CONFIG_NEWER: Configurations from version 12.x may not be correctly understood.
%OIR-3-SEATED: Insert/removal failed (slot 2), check card seating
%OIR-3-SEATED: Insert/removal failed (slot 2), check card
seatingCCCCCCCCCCCCCCCCCCCCCCCCCCCCCCCCCCCCCCCCCCCCCCCCCCCCCCCCCCCCCCCCCCCCCCCCCCCCCCCCCCC
CCCCCCCCCCCCCCCCCCCCCCCCCCCCCCCCCCCCCCCCCCCCCCCCCCCCCCCCCCCCCCCCCCCCCCCCCCCCCCCCCCCCCCCCCC
CCCCCCCCCCCCCCCCCCCCCCCCCCCCCCCCCCCC
Read 7314384 bytes from file slot0:c5800-p4-mz.120-4.XL1.bin
Self decompressing the image :
##########################################################################################
##########################################################################################
##########################################################################################
##########################################################################################
####################################################### [OK]
Cisco AS5800 Operations, Administration, Maintenance, and Provisioning Guide
DOC-7810814=
2-5
Chapter 2
Commissioning
Task 1. Verifying Basic Setup
•
In the previous segment, the NAS decompresses the system boot image, tests the NVRAM for
validity, and decompresses the Cisco IOS software image.
Sometimes boot images do not support hardware cards. Sample error messages look like this:
%PA-2-UNDEFPA: Undefined Port Adapter
%OIR-3-SEATED: Insert/removal failed
Ignore these messages and do not ignore error messages that appear after the Cisco IOS software
image decompresses.
Restricted Rights Legend
Use, duplication, or disclosure by the Government is
subject to restrictions as set forth in subparagraph
(c) of the Commercial Computer Software - Restricted
Rights clause at FAR sec. 52.227-19 and subparagraph
(c) (1) (ii) of the Rights in Technical Data and Computer
Software clause at DFARS sec. 252.227-7013.
cisco Systems, Inc.
170 West Tasman Drive
San Jose, California 95134-1706
Cisco Internetwork Operating System Software IOS (tm) 5800 Software (C5800-P4-M),
Version 12.x
TAC:Home:SW:IOS:Specials for info
Copyright (c) 1986-1999 by cisco Systems, Inc.
Compiled Thu 12-Aug-99 13:16 by ayeh
Image text-base: 0x60008900, data-base: 0x611A6000
cisco 7206 (NPE400) processor with 114688K/16384K bytes of memory.
R5000 CPU at 200Mhz, Implementation 35, Rev 2.1, 512KB L2 Cache
6 slot midplane, Version x
Last reset from power-on
X.25 software, Version 3.0.0.
Bridging software.
SuperLAT software (copyright 1990 by Meridian Technology Corp).
1 FastEthernet/IEEE 802.3 interface(s)
1296 terminal line(s)
1 Channelized T3 port(s)
125K bytes of non-volatile configuration memory.
4096K bytes of packet SRAM memory.
20480K bytes of Flash PCMCIA card at slot 0 (Sector size 128K).
4096K bytes of Flash internal SIMM (Sector size 256K).
•
The following components are detected:
– Cisco IOS release
– Available memory
– Available interfaces
Note
If a hardware card is not recognized, verify that you are running the optimum version of
Cisco IOS software. Refer to the hardware-software compatibility matrix available online
at
http://cco-sj-1.cisco.com/cgi-bin/front.x/Support/HWSWmatrix/hwswmatrix.cgi
Cisco AS5800 Operations, Administration, Maintenance, and Provisioning Guide
2-6
DOC-7810814=
Chapter 2
Commissioning
Task 1. Verifying Basic Setup
The following system message and prompt appears.
--- System Configuration Dialog --Would you like to enter the initial configuration dialog? [yes/no]: no
•
Because the NAS has never been configured, the Cisco IOS software cannot find a startup-config
file. In this example, the Cisco IOS software is configured manually. The automatic setup script is
not used.
00:00:52:
00:00:53:
00:00:56:
00:02:05:
00:02:06:
00:02:06:
00:02:06:
00:02:06:
00:02:06:
00:02:06:
00:02:06:
00:02:06:
00:02:06:
%DSIPPF-5-DS_HELLO: DSIP Hello from shelf 1 slot
%DSC_REDUNDANCY-3-BICLINK: Switching to DSC 12
%DSC_REDUNDANCY-3-BICLINK: Link to active DSC up
%DSIPPF-5-DS_HELLO: DSIP Hello from shelf 1 slot
%DSIPPF-5-DS_HELLO: DSIP Hello from shelf 1 slot
%DSIPPF-5-DS_HELLO: DSIP Hello from shelf 1 slot
%DSIPPF-5-DS_HELLO: DSIP Hello from shelf 1 slot
%DSIPPF-5-DS_HELLO: DSIP Hello from shelf 1 slot
%DSIPPF-5-DS_HELLO: DSIP Hello from shelf 1 slot
%DSIPPF-5-DS_HELLO: DSIP Hello from shelf 1 slot
%DSIPPF-5-DS_HELLO: DSIP Hello from shelf 1 slot
%DSIPPF-5-DS_HELLO: DSIP Hello from shelf 1 slot
%DSIPPF-5-DS_HELLO: DSIP Hello from shelf 1 slot
12 Succeeded
0 Succeeded
2 Succeeded
3 Succeeded
4 Succeeded
5 Succeeded
6 Succeeded
7 Succeeded
8 Succeeded
9 Succeeded
10 Succeeded
Press RETURN to get started!
5800>
•
By using DSIP, the router shelf detects the state of each card in the dial shelf.
Depending on the number of cards in the dial shelf, there is a delay of 60 to 120 seconds before the
“DSIP Hello” messages are displayed on your terminal session.
After powering up the Cisco AS5800, enter the show environment command. Verify that there are
no critical grounding, heating, or power problems. The following shows an operating environment.
5800-NAS> show environment
All measured values are normal
5800-NAS> show environment all
Power Supplies:
Power supply 1 is empty.
Power supply 2 is Zytek AC Power Supply. Unit is on.
Temperature readings:
chassis inlet
measured at
chassis outlet 1 measured at
chassis outlet 2 measured at
chassis outlet 3 measured at
Voltage readings:
+3.45 V measured
+5.15 V measured
+12.15 measured
-11.95 measured
at
at
at
at
25C/77F
27C/80F
33C/91F
41C/105F
+3.49 V
+5.21 V
+12.34 V
-11.81 V
Envm stats saved 1 time(s) since reload
5800-NAS>
Cisco AS5800 Operations, Administration, Maintenance, and Provisioning Guide
DOC-7810814=
2-7
Chapter 2
Commissioning
Task 1. Verifying Basic Setup
Matching the Cisco IOS Software Images
The dial shelf and router shelf run separate Cisco IOS software images:
•
Both images must be from the same Cisco IOS release. They must match. Cisco IOS Release
12.0(4)XL1 is used in this example.
•
The router shelf’s image is in the Cisco 7206s Flash memory. It begins with “c5800.” The dial
shelf’s image is in the DSC card. It begins with “dsc.”
On the router shelf, check the Cisco IOS software image, uptime, and restart reason:
5800# show version
Cisco Internetwork Operating System Software IOS (tm) 5800 Software (C5800-P4-M), Version
12.x
TAC:Home:SW:IOS:Specials for info
Copyright (c) 1986-1999 by cisco Systems, Inc.
Compiled Thu 12-Aug-99 13:16 by ayeh
Image text-base: 0x60008900, data-base: 0x611A6000
ROM: System Bootstrap, Version xCA,
BOOTFLASH: 7200 Software (C7200-BOOT-M), Version x
Router uptime is 2 minutes
System returned to ROM by reload
System image file is "slot0:c5800-p4-mz.120-4.XL1.bin"
cisco 7206 (NPE400) processor with 114688K/16384K bytes of memory.
R5000 CPU at 200Mhz, Implementation 35, Rev 2.1, 512KB L2 Cache
6 slot midplane, Version x
Last reset from power-on
X.25 software, Version 3.0.0.
Bridging software.
SuperLAT software (copyright 1990 by Meridian Technology Corp).
1 FastEthernet/IEEE 802.3 interface(s)
1296 terminal line(s)
1 Channelized T3 port(s)
125K bytes of non-volatile configuration memory.
4096K bytes of packet SRAM memory.
20480K bytes of Flash PCMCIA card at slot 0 (Sector size 128K).
4096K bytes of Flash internal SIMM (Sector size 256K).
Configuration register is 0x2102
Table 2-1 describes the significant output fields in the previous display:
Table 2-1
Show Version Command Field Descriptions
Field
Description
5800 Software (C5800-P4-M),
Version 12.x
Cisco IOS software version.
Router uptime is 2 minutes
Reports the router’s uptime. Watch for unscheduled reloads.
System returned to ROM by
reload
Describes why the access server last reloaded. If the field displays
“power-on,” a power interruption caused the reload.
System image file is
"slot0:c5800-p4-mz.120-4.XL1
.bin"
The Cisco 7206 router shelf booted from the external PCMCIA
Flash card at slot 0.
The router shelf does not have internal Flash memory. If the
PCMCIA Flash card is missing, the router shelf will not boot.
Cisco AS5800 Operations, Administration, Maintenance, and Provisioning Guide
2-8
DOC-7810814=
Chapter 2
Commissioning
Task 1. Verifying Basic Setup
On the dial shelf, check the Cisco IOS software image, uptime, and restart reason. If you do not have a
physical console connection to the dial shelf, enter the execute-on slot [12 | 13] show version command.
The DSC can be in slot 12 or 13.
5800# execute-on slot 12 show version
DA-Slot12>
Cisco Internetwork Operating System Software IOS (tm) 5800 Software (C5800-DSC-M), Version
12.x
TAC:Home:SW:IOS:Specials for info
Copyright (c) 1986-1999 by cisco Systems, Inc.
Compiled Thu 12-Aug-99 18:48 by ayeh
Image text-base: 0x600088F0, data-base: 0x60520000
ROM: System Bootstrap, Version xAA
ROM: 5800 Software (C5800-DSC-M), Version xAA2
DA-Slot12 uptime is 20 hours, 38 minutes
System returned to ROM by reload
System image file is "slot0:dsc-c5800-mz.120-4.XL1.bin"
cisco c5800 (R4K) processor with 24576K/8192K bytes of memory.
R4700 CPU at 150Mhz, Implementation 33, Rev 1.0, 512KB L2 Cache
Last reset from power-on
1 Ethernet/IEEE 802.3 interface(s)
2 Dial Shelf Interconnect(DSI) FE interface(s)
123K bytes of non-volatile configuration memory.
8192K bytes of Flash PCMCIA card at slot 0 (Sector size 128K).
4096K bytes of Flash internal SIMM (Sector size 256K).
Configuration register is 0x2102
Inspecting the Dial Shelf
Verify that feature cards are up (T3, T1, E3, E1, modem, or voice):
5800# show dial-shelf
Slot
Board
CPU
Type
Util
0
CT3
0%/0%
2 Modem(DMM) 20%/20%
3 Modem(DMM)
0%/0%
4 Modem(DMM) 20%/20%
5 Modem(DMM) 20%/20%
6 Modem(DMM) 40%/40%
7 Modem(DMM) 40%/40%
8 Modem(DMM) 35%/35%
9 Modem(DMM)
0%/0%
10 Modem(DMM) 20%/20%
12
DSC
0%/0%
Dial shelf set for auto
5800#
DRAM
Total (free)
21598976( 81%)
46764800( 86%)
46764800( 86%)
46764800( 86%)
46764800( 86%)
46764800( 86%)
46764800( 86%)
46764800( 86%)
46764800( 86%)
46764800( 86%)
19097792( 79%)
boot
I/O Memory
Total (free)
8388608( 41%)
16777216( 74%)
16777216( 74%)
16777216( 74%)
16777216( 74%)
16777216( 74%)
16777216( 74%)
16777216( 74%)
16777216( 74%)
16777216( 74%)
8388608( 66%)
State
Up
Up
Up
Up
Up
Up
Up
Up
Up
Up
Up
Elapsed
Time
00:01:35
00:01:35
00:01:35
00:01:35
00:01:35
00:01:35
00:01:35
00:01:35
00:01:35
00:01:34
00:02:49
•
Always power up the dial shelf before the router shelf. Allow two to three minutes for the DSC card
to take an inventory of the dial shelf.
•
If the DSC card goes down after the feature cards are up, the system will still function properly. This
event will not bring down the system. However, online insertion and removal (OIR) will not work.
•
Possible dial-shelf states include: unknown, down, resetting, booting, and up. The “Up” state means
that the card can communicate with the router shelf.
Cisco AS5800 Operations, Administration, Maintenance, and Provisioning Guide
DOC-7810814=
2-9
Chapter 2
Commissioning
Task 1. Verifying Basic Setup
•
Each modem card contains its own DRAM memory. Double-density modem modules (DMM)
require at least 64 MB of memory with Cisco IOS Release 12.0. Hex modem modules (HMM)
require at least 32 MB with Cisco IOS Release 11.3. Each card performs its own call processing.
•
A fully populated DMM card contains 144 modems. The dial shelf in the example contains
1296 modems.
•
A normal CPU utilization range for modem cards is between 20 to 40 percent.
DSC Troubleshooting Tips
If the DSC card does not come up, perform the following troubleshooting steps. If the DSC card never
comes up, the feature cards in the dial shelf cannot communicate with the router shelf.
Step 1
Look for LED lights on the DSC card. If the lights are off, try reseating the card.
Step 2
Verify that the DSI port adapter on the Cisco 7206 is inserted correctly.
Step 3
Verify that the cable between the DSI port adapter and the DSC card is connected correctly.
Step 4
From the Cisco 7206, verify that the DSI-Fast Ethernet interface and line protocol are up:
5800> show dsi
DSI-Fastethernet0/2/0 is up, line protocol is up
Hardware is DEC21140A, address is 0030.f2f5.1438 (bia 0030.f2f5.1438)
MTU 0 bytes, BW 100000 Kbit, DLY 100 usec,
reliability 255/255, txload 1/255, rxload 1/255
Encapsulation ARPA, loopback not set
Keepalive set (10 sec)
Full-duplex, 100Mb/s, 100BaseTX/FX
ARP type: ARPA, ARP Timeout 04:00:00
Last input 00:00:00, output 00:00:00, output hang never
Last clearing of "show interface" counters never
Queueing strategy: fifo
Output queue 0/40, 0 drops; input queue 0/75, 0 drops
5 minute input rate 0 bits/sec, 0 packets/sec
5 minute output rate 0 bits/sec, 0 packets/sec
Note
The following example shows a dial-shelf interconnection that changes state to up after the
DSC card reloads. Loss of DSIP Keepalive messages indicate no communication between
the router shelf and dial shelf. After DSIP Hello messages succeed, the Fast Ethernet
DSI-Tx 0 and DSI-Rx 1 change their state to up. Until these interfaces are up, the router
shelf and dial shelf cannot communicate. No debug commands are used to create these
console messages; however, the terminal monitor command is required to view messages.
5800#
00:04:29:
00:05:12:
00:05:18:
00:00:03:
00:00:03:
00:00:03:
5800#
Note
%DSIPPF-5-DS_KEEPALIVE_LOSS: DSIP Keepalive Loss from shelf 1 slot 12
%DSIPPF-5-DS_HELLO: DSIP Hello from shelf 1 slot 12 Succeeded
%DIAL12-3-MSG:
%LINK-3-UPDOWN: Interface DSI-Tx-FastEthernet0, changed state to up
%LINK-3-UPDOWN: Interface DSI-Rx-FastEthernet1, changed state to up
%LINK-3-UPDOWN: Interface Ethernet0, changed state to up
Verify that console logging is disabled. Enter the show logging command. If logging is
enabled, the access server might intermittently freeze up as soon as the console port gets
overloaded with log messages. Enter the no logging console command.
Cisco AS5800 Operations, Administration, Maintenance, and Provisioning Guide
2-10
DOC-7810814=
Chapter 2
Commissioning
Task 1. Verifying Basic Setup
The following messages appear on the console-terminal session after the DSC card is physically
removed from slot 12 and re-inserted. Approximately 120 seconds elapse before all these messages
appear.
5800>
04:41:42:
04:42:13:
04:42:14:
04:42:36:
04:42:36:
04:42:46:
04:42:46:
04:42:53:
04:44:59:
04:45:02:
04:45:03:
5800>
%DSC_REDUNDANCY-3-BICLINK: Link to active DSC down
%ISDN-6-LAYER2DOWN: Layer 2 for Interface Se1/0/0:4:23, TEI 0
%DSC_REDUNDANCY-3-BICLINK: Link to active DSC up
%DSIPPF-5-DS_KEEPALIVE_LOSS: DSIP Keepalive Loss from shelf 1
%DSIPPF-5-DS_KEEPALIVE_LOSS: DSIP Keepalive Loss from shelf 1
%DSIPPF-5-DS_KEEPALIVE_LOSS: DSIP Keepalive Loss from shelf 1
%DSIPPF-5-DS_KEEPALIVE_LOSS: DSIP Keepalive Loss from shelf 1
%DSIPPF-5-DS_HELLO: DSIP Hello from shelf 1 slot 12 Succeeded
%DSIPPF-5-DS_HELLO: DSIP Hello from shelf 1 slot 0 Succeeded
%DSIPPF-5-DS_HELLO: DSIP Hello from shelf 1 slot 2 Succeeded
%DSIPPF-5-DS_HELLO: DSIP Hello from shelf 1 slot 3 Succeeded
changed to down
slot
slot
slot
slot
2
3
0
12
The following boot sequence occurs in the previous example:
a.
The DSC card takes 32 seconds to boot up. Afterwards, the card checks the dial shelf’s inventory.
b.
The dial shelf exchanges hardware inventory information with the router shelf. After the exchange,
the router shelf instructs the DSC card to load the appropriate boot images into the feature cards.
c.
More than two minutes elapse before the DSC card detects the first “DSIP Hello” message from the
first feature card (in shelf 1 slot 0). If the DSC card never comes up, the feature cards in the dial
shelf cannot communicate with the router shelf.
d.
The router shelf gives the feature cards the appropriate images.
Step 5
If the DSC card is still down, the card might have an incorrect Cisco IOS software image, or the Flash
card is missing (ROM monitor mode). Open a physical console connection to the DSC card, copy an
image into boot Flash memory, and re-initialize the system.
Step 6
For advanced troubleshooting measures after the DSC card is up, open a virtual-console session to the
DSC card (DA-Slot12). To end the session, enter Ctrl C three times:
5800# dsip console slave 12
Trying Dial shelf slot 12 ...
Entering CONSOLE for slot 12
Type "^C^C^C" to end this session
DA-Slot12>
DA-Slot12#
DA-Slot12#
DA-Slot12#
Terminate NIP IO session? [confirm]
[Connection to Dial shelf slot 12 closed by local host]
5800#
Caution
The router shelf provides the DSC card with the required configuration. Do not change the
DSIP settings in the DSC card configuration.
Cisco AS5800 Operations, Administration, Maintenance, and Provisioning Guide
DOC-7810814=
2-11
Chapter 2
Commissioning
Task 1. Verifying Basic Setup
Feature-Card Troubleshooting Tips
If the show dial-shelf command reports that feature cards are booting for extended periods of time, start
debugging from the router shelf by using the following commands:
debug dsip transport
debug dsip trace
show dsi
•
Debug dsip transport shows the registered MAC address sent from each feature board.
•
Debug dsip trace displays detailed DSIP Hello and Keepalive messages.
•
Debug dsip boot shows if the router shelf is sending the boot image to the feature cards.
Using DSIP
The router shelf communicates with the dial shelf using:
•
Fast Ethernet interconnect cable
•
Dial Shelf Interconnect Protocol (DSIP)
For the DSIP command reference and other system management functions, refer to Dial and System
Management Commands for the Cisco AS5800, available online at
http://www.cisco.com/univercd/cc/td/doc/product/software/ios113ed/113aa/113aa_2/58cfeats/c5800ua
s.htm
To understand how DSIP functions, enter commands from the following bullet list:
•
Verify that the connection between the router shelf and dial shelf is up. The DSI-Fast Ethernet
interface is located at 0/2/0 in the Cisco 7206. Note that the output from the show dsi command is
different from the show dsip command.
5800-NAS# show dsi
DSI-Fastethernet0/2/0 is up, line protocol is up
Hardware is DEC21140A, address is 00d0.d342.4c38 (bia 00d0.d342.4c38)
MTU 0 bytes, BW 100000 Kbit, DLY 100 usec,
reliability 255/255, txload 1/255, rxload 1/255
Encapsulation ARPA, loopback not set
Keepalive set (10 sec)
Full-duplex, 100Mb/s, 100BaseTX/FX
ARP type: ARPA, ARP Timeout 04:00:00
Last input 00:00:00, output 00:00:00, output hang never
Last clearing of "show interface" counters never
Queueing strategy: fifo
Output queue 0/40, 0 drops; input queue 0/75, 0 drops
5 minute input rate 0 bits/sec, 0 packets/sec
Cisco AS5800 Operations, Administration, Maintenance, and Provisioning Guide
2-12
DOC-7810814=
Chapter 2
Commissioning
Task 1. Verifying Basic Setup
•
Verify that each feature card’s MAC address is registered by DSIP. Unregistered cards cannot
communicate with the system. Shelf 0 is the router shelf (master). Shelf 1 is the dial shelf (slave).
5800# show dsip transport
DSIP transport statistics:
IPC : input msgs=4309, bytes=509139; output msgs=4308, bytes=291468
total consumed ipc msgs=2133; total freed ipc msgs = 2133
transmit contexts in use = 13, free = 243, zombie = 0, invalid = 0
ipc getmsg failures = 0, ipc timeouts=0
core getbuffer failures=0, api getbuffer failures=0
dsip test msgs rcvd = 0, sent = 0
CNTL : input msgs=20927, bytes=738902; output msgs=20350, bytes=29816080
getbuffer failures=0
DATA : input msgs=1076, bytes=38736; output msgs=0, bytes=0
DSIP Private Buffer Pool Hits = 0
DSIP registered addresses:
Shelf0 : Master: 00d0.d342.4c38, Status=local
Shelf1 : Slot0 : 0090.bf52.4e00, Status=remote
Shelf1 : Slot2 : 0090.bf52.4e10, Status=remote
Shelf1 : Slot3 : 0090.bf52.4e18, Status=remote
Shelf1 : Slot4 : 0090.bf52.4e20, Status=remote
Shelf1 : Slot5 : 0090.bf52.4e28, Status=remote
Shelf1 : Slot6 : 0090.bf52.4e30, Status=remote
Shelf1 : Slot7 : 0090.bf52.4e38, Status=remote
Shelf1 : Slot8 : 0090.bf52.4e40, Status=remote
Shelf1 : Slot9 : 0090.bf52.4e48, Status=remote
Shelf1 : Slot10: 0090.bf52.4e50, Status=remote
Shelf1 : Slot12: 0090.bf52.4e60, Status=remote
5800#
•
Verify that all feature cards are running DSIP versions that are compatible with the router shelf:
5800# show dsip version
DSIP version information:
-----------------------Local DSIP major version = 5,
minor version = 2
All feature cards are running DSIP versions compatible with router shelf
Local clients registered versions:
-----------------------------------Client Name
Major Version
Minor Version
Console
5
2
Clock
2
1
Modem
0
0
Logger
No version
No version
TDM
No version
No version
Trunk
No version
No version
Async data
No version
No version
VOICE
0
0
Dial shelf
1
1
Environment
No version
No version
FILESYS
No version
No version
DSC Red. UI
0
1
Split DS
No version
No version
DSIP Test
No version
No version
Mismatched remote client versions:
----------------------------------5800#
Note
This command also reports mismatched Cisco IOS software versions. No mismatches exist
in this example.
Cisco AS5800 Operations, Administration, Maintenance, and Provisioning Guide
DOC-7810814=
2-13
Chapter 2
Commissioning
Task 1. Verifying Basic Setup
Checking the Initial Running-Config
The Cisco IOS software creates an initial running configuration. To familiarize yourself with default
settings, inspect the software configuration as follows:
Step 1
Display the configuration on the Cisco 7206 router shelf:
5800# show running-config
Building configuration...
Current configuration:
!
version 12.x
service timestamps debug uptime
service timestamps log uptime
no service password-encryption
!
hostname Router
!
!
shelf-id 0 router-shelf
shelf-id 1 dial-shelf
!
!
resource-pool disable
!
modem-pool Default
pool-range 1/2/0-1/10/143
!
!
spe 1/2/0 1/10/11
firmware ios-bundled default
modem recovery action none
ip subnet-zero
!
isdn voice-call-failure 0
!
!
controller T3 1/0/0
cablelength 224
!
!
process-max-time 200
!
interface FastEthernet0/1/0
no ip address
no ip directed-broadcast
shutdown
!
Cisco AS5800 Operations, Administration, Maintenance, and Provisioning Guide
2-14
DOC-7810814=
Chapter 2
Commissioning
Task 1. Verifying Basic Setup
interface Group-Async0
no ip address
no ip directed-broadcast
group-range 1/2/00 1/10/143
!
ip classless
no ip http server
!
!
line con 0
transport input none
line aux 0
line vty 0 4
line 1/2/00 1/10/143
modem InOut
no modem log rs232
!
end
Step 2
Without connecting to the DSC, display the configuration on the Cisco 5814 dial shelf:
5800# execute-on slot 12 show running-config
DA-Slot12#
Building configuration...
Current configuration:
!
version 12.x
service config
no service pad
service timestamps debug uptime
service timestamps log uptime
no service password-encryption
!
hostname DA-Slot12
!
!
ip subnet-zero
!
!
process-max-time 200
!
interface Ethernet0
no ip address
no ip directed-broadcast
shutdown
!
no ip http server
ip classless
!
!
line con 0
transport input none
line vty 0 4
!
end
Cisco AS5800 Operations, Administration, Maintenance, and Provisioning Guide
DOC-7810814=
2-15
Chapter 2
Commissioning
Task 1. Verifying Basic Setup
Exploring the Cisco IOS File System
Familiarize yourself with the file system and memory storage areas. The Cisco IOS file system provides
a consolidated interface to:
•
The Flash memory file system
•
The network file system (TFTP, rcp, and FTP)
•
Any other endpoint for reading or writing data (such as NVRAM, modem firmware, the running
configuration, ROM, raw system memory, Xmodem, and Flash load helper log).
Figure 2-3 shows the memory locations inside the Cisco AS5800.
Figure 2-3
Router
shelf
Cisco AS5800 Memory Locations
CPU
(NPE200)
slot0: flash:
Processor
memory
slot1:
Packet I/O
memory
bootflash:
nvram
dsc12-slot0:
Dial shelf
interconnect
cable
dsc12-slot1:
Dial
shelf
dsc12-bootflash:
33188
dsc12-nvram:
Table 2-2 describes the memory locations shown in Figure 2-3.
Table 2-2
Memory Location Descriptions
Component
Description
CPU (NPE400)
Central processing unit.
Processor memory
The Cisco IOS software image is initially read out of Flash memory,
decompressed, and loaded into processor memory (also known as main
memory).
Routing tables, call control blocks, and other data structures are also stored
here.
Packet I/O memory
Packets are temporarily stored in I/O memory.
Cisco AS5800 Operations, Administration, Maintenance, and Provisioning Guide
2-16
DOC-7810814=
Chapter 2
Commissioning
Task 1. Verifying Basic Setup
Table 2-2
Memory Location Descriptions (continued)
Component
Description
slot0: flash:
slot1:
PCMCIA Flash memory cards in the router shelf. They store Cisco IOS
software images, modem firmware/portware, and custom web pages.
bootflash:
Flash memory on the Cisco 7206’s motherboard.
nvram:
Nonvolatile configuration memory.
dsc12-slot0:
dsc12-slot1:
PCMCIA Flash memory cards in the DSC card.
dsc12-bootflash:
Flash memory on DSC card’s motherboard.
dsc12-nvram:
Nonvolatile configuration memory in the DSC card.
To verify the file system, enter commands from the following bullet list:
•
View the different file storage areas and file management functions. Additionally, verify that you
have everything you ordered from manufacturing, such as Flash memory. The asterisk (*) indicates
the current directory.
5800# show file systems
File Systems:
Size(b)
129016
*
20578304
3407872
7995392
3407872
126968
5800#
•
Free(b)
128277
13263792
1286636
5825440
1575412
126968
Type
flash
flash
opaque
opaque
network
nvram
flash
flash
flash
opaque
network
network
network
flash
flash
flash
nvram
Flags
rw
rw
rw
rw
rw
rw
rw
rw
rw
wo
rw
rw
rw
rw
rw
rw
rw
Prefixes
disk0:
disk1:
null:
system:
tftp:
nvram:
slot0: flash:
slot1:
bootflash:
lex:
rcp:
pram:
ftp:
dsc12-slot0:
dsc12-slot1:
dsc12-bootflash:
dsc12-nvram:
Display the objects in the system memory directory:
5800# dir system:
Directory of system:/
2
1
dr-x
-rw-
0
787
<no date>
<no date>
memory
running-config
No space information available
5800#
Tips
Remember to include the trailing colon (:) in the dir commands.
Cisco AS5800 Operations, Administration, Maintenance, and Provisioning Guide
DOC-7810814=
2-17
Chapter 2
Commissioning
Task 1. Verifying Basic Setup
•
Inspect the Flash memory on the router and dial shelves. Both images must have matching
Cisco IOS release number. In this example, both images are from Cisco IOS Release 12.0(4)XL1.
As the chassis boots up, the images are copied, decompressed, and loaded into DRAM memory.
5800# pwd
slot0:
5800# dir
Directory of slot0:/
•
1 -rw7314384
Sep 13 1999 20:03:41
20578304 bytes total (13263792 bytes free)
5800#
5800# dir dsc12-slot0:
Directory of dsc12-slot0:/
c5800-p4-mz.120-4.XL1.bin
1 -rw2169824
Sep 13 1999 20:28:53
7995392 bytes total (5825440 bytes free)
5800#
dsc-c5800-mz.120-4.XL1.bin
Inspect the bootFlash on both shelves:
5800# dir bootflash:
Directory of bootflash:/
1
-rw-
2121108
Jan 01 2000 00:00:48
c7200-boot-mz.111-24.CC
3407872 bytes total (1286636 bytes free)
Router
5800# dir dsc12-bootflash:
Directory of dsc12-bootflash:/
1
-rw-
2169824
Nov 18 1999 22:18:30
dsc-c5800-mz.120-4.XL1.bin
3407872 bytes total (1237920 bytes free)
Tips
Keep a backup copy of the dial shelf’s image in boot Flash. Someone may take PCMCIA
Flash cards without notification. The dial shelf does not have its own connection to the IP
backbone for image upgrade purposes.
The squeeze command is required to remove deleted files:
5800-NAS# pwd
dsc12-bootflash:/
5800-NAS# delete dsc-c5800-mz.113-9.AA2
Delete filename [dsc-c5800-mz.113-9.AA2]?
Delete dsc12-bootflash:dsc-c5800-mz.113-9.AA2? [confirm]
5800-NAS# squeeze dsc12-bootflash:
All deleted files will be removed. Continue? [confirm]
Squeeze operation may take a while. Continue? [confirm]
DA-Slot12#
All deleted files will be removed. Continue? [confirm]
Squeeze operation may take a while. Continue? [confirm]
Squeeze of bootflash complete
Squeeze of dsc12-bootflash complete
5800-NAS#
Cisco AS5800 Operations, Administration, Maintenance, and Provisioning Guide
2-18
DOC-7810814=
Chapter 2
Commissioning
Task 1. Verifying Basic Setup
•
Inspect the NVRAM memory on the router and dial shelves. Three files are present:
–
The initial boot or startup-config.
– The private-config is a secure file that supports encryption technologies. It is not user
accessible.
– The underlying-config is the version of the startup-config that is stored in NVRAM.
5800# dir nvram:
Directory of nvram:/
1 -rw739
<no date>
2 ---24
<no date>
3 -rw739
<no date>
129016 bytes total (128277 bytes free)
5800#
startup-config
private-config
underlying-config
5800# dir dsc12-nvram:
Directory of dsc12-nvram:/
1 -rw0
<no date>
2 ---0
<no date>
3 -rw0
<no date>
126968 bytes total (126968 bytes free)
5800#
startup-config
private-config
underlying-config
Investigating Memory Usage
Use the show memory summary command to:
•
Determine how memory is used for different processor and I/O memory processes.
•
Identify memory fragmentation and memory leaks.
– Memory leaks—Memory that is not released back to the processor. Memory leaks are indicated
by steady decreases of free memory. However, the preferred way to track memory leaks is to
monitor the FreeMem variable in the OID MIB.
– Memory fragmentation—Indicated by the largest block of memory not being equal to the free
block. Fragmentation increases as the numbers grow further apart.
To inspect and calculate memory usage complete the following steps:
Step 1
Display the memory status report. Note that the largest-memory block is close to the free-memory block,
which is good. There is no fragmentation.
5800-NAS# show memory summmary
Head
Total(b)
Processor 6164D4E0
94055200
I/O
7000000
16777216
PCI 4B000000
4194304
Caution
Used(b)
42346480
6433400
618584
Free(b)
51708720
10343816
3575720
Lowest(b) Largest(b)
50435436
51592056
10343816
10343772
3575720
3575676
If you enter the show memory summary command with the terminal length 0 command
enabled you will produce many screens of output which might interrupt your session.
Cisco AS5800 Operations, Administration, Maintenance, and Provisioning Guide
DOC-7810814=
2-19
Chapter 2
Commissioning
Task 1. Verifying Basic Setup
Table 2-3 describes the significant fields in the previous display:
Table 2-3
Step 2
Show Memory Summary Output Field Descriptions
Field
Description
Processor
Processor memory. The Cisco IOS software image is initially read out of Flash
memory, decompressed, and placed in main memory. Routing tables and call control
blocks are also stored in main memory.
I/O
Packets are temporarily stored in I/O memory.
Head
Hexadecimal address of the head of the memory allocation chain.
Total(b)
Summary of used bytes plus free bytes.
Used(b)
Total number of bytes currently used for routing tables and call-processing
components.
Free(b)
Total number of free bytes. The free memory size should be close to the largest block
available.
Lowest(b)
Smallest amount of free memory since last boot.
Largest(b)
Size of largest available free block. Whenever the largest available block is equal to
the free block, there is no fragmentation.
Convert bytes to megabytes (MB):
•
Total processor memory = 9,4055,200 bytes = 89.7 MB
•
Used processor memory = 42,346,480 bytes = 40.4 MB
•
Free processor memory = 51,708,720 bytes = 49.3 MB
Total memory (89.7 MB) = Used memory (40.4 MB) + free memory (49.3 MB)
Step 3
Do some useful memory calculations:
Total Processor = Total RAM - Cisco IOS software (use the show version command to get the MB
assigned for all of Cisco IOS software + Processor)
cisco 7206 (NPE400) processor with 114688K/16384K bytes of memory.
114688 KB / (1024 KB / MB) = 112.0 MB
16384 KB = 16 MB
112 MB + 16 MB = 128 MB (what you purchased).
Note
112.0 MB - 89.7 MB = 22.3 MB. This means that 22.3 MB are not available for
processor memory.
Cisco AS5800 Operations, Administration, Maintenance, and Provisioning Guide
2-20
DOC-7810814=
Chapter 2
Commissioning
Task 1. Verifying Basic Setup
Verifying CPU Utilization
High utilization causes network performance problems. Knowing when the router is running at over 50%
utilization is critical because the router might start dropping packets if an unexpected traffic burst comes
through or if OSPF gets recalculated. Fast switching reduces CPU utilization.
5800# show processes cpu
CPU utilization for five seconds: 20%/6%; one minute: 31%; five minutes: 19%
PID Runtime(ms) Invoked uSecs
5Sec
1Min
5Min TTY Process
1
144208
1526300
94
0.00% 0.00% 0.00%
0 Load Meter
2
118732 19749060
6
0.24% 0.12% 0.08%
0 OSPF Hello
3
42752544
2699659 15836
3.75% 0.87% 0.62%
0 Check heaps
4
7260
30062
241
0.00% 0.00% 0.00%
0 Pool Manager
5
0
2
0
0.00% 0.00% 0.00%
0 Timers
6
1472
494101
2
0.00% 0.00% 0.00%
0 Serial Background
7
49424
7631216
6
0.00% 0.00% 0.00%
0 EnvMon
8
0
1
0
0.00% 0.00% 0.00%
0 OIR Handler
9
13368616
3217631
4154
0.32% 0.57% 0.42%
0 ARP Input
10
18932
533419
35
0.00% 0.00% 0.00%
0 DDR Timers
11
116
4 29000
0.00% 0.00% 0.00%
0 Entity MIB API
Look at the top line of the output. If you see utilization at the top of the display over 50%, inspect the
columns 5Sec, 1Min, and 5Min. Find the process that uses the most CPU power. For an idle chassis,
numbers larger than two percent indicate a problem.
Table 2-4 describes the significant output fields in the previous example:
Table 2-4
CPU Utilization Display Fields
Field
Description
CPU utilization for five seconds:
2%/0%;
The first % number is the CPU utilization for the last 5.0
seconds. The second % number is the percentage of CPU
time spent at the packet-based interrupt level.
one minute: 1%;
CPU utilization for the last minute.
five minutes: 14%
CPU utilization for the last 5.0 minutes.
Whenever memory cannot be allocated to a process request (a memory leak), a console error message
appears:
Sep 14 11:30:33.339 EDT: %SYS-2-MALLOCFAIL: Memory allocation of 19960
bytes failed from 0x603D530C, pool Processor, alignment 0
-Process= "Exec", ipl= 0, pid= 48
-Traceback= 603D8610 603DAA70 603D5314 603D5AF0 60373054 60371474 603C33DC
603C3538 603C4378 60371934 603586B8 60358A10 6037C12C 6037C1E4 60372E9C
6037EDEC
To identify the problem, inspect the first few output lines of the show memory summary command and
show processor memory command.
Cisco AS5800 Operations, Administration, Maintenance, and Provisioning Guide
DOC-7810814=
2-21
Chapter 2
Commissioning
Task 2. Configuring Basic Cisco IOS Software
Task 2. Configuring Basic Cisco IOS Software
Apply a basic-running configuration to the NAS:
Tips
•
Configuring the Host Name, Enable Secret Password, and Time Stamps, page 2-22
•
Configuring Local AAA Security, page 2-23
•
Setting Up a Log In Banner, page 2-24
•
Configuring Basic IP, page 2-25
Periodically save the configuration by using the copy running-config startup-config
command.
Configuring the Host Name, Enable Secret Password, and Time Stamps
Assign a host name to the NAS, specify an enable secret password, and turn on time stamps:
Step 1
•
A host name allows you to distinguish between different network devices.
•
A secret enable password allows you to prevent unauthorized configuration changes.
•
Encrypted passwords in the configuration file add greater security to the NAS.
•
Time stamps help you trace debug output for testing connections. Not knowing exactly when an
event occurs prevents you from tracing debug output for testing conditions.
Enter the following commands in global configuration mode:
hostname 5800-NAS
enable secret yourpassword
service password-encryption
service timestamps debug datetime msec
service timestamps log datetime msec
Note
Step 2
Do not use the enable password command.
Log in with the enable secret password. The show privilege command shows the current security
privilege level.
5800-NAS# disable
5800-NAS> enable
Password:
5800-NAS# show privilege
Current privilege level is 15
5800-NAS#
Cisco AS5800 Operations, Administration, Maintenance, and Provisioning Guide
2-22
DOC-7810814=
Chapter 2
Commissioning
Task 2. Configuring Basic Cisco IOS Software
Configuring Local AAA Security
Configure AAA to perform login authentication by using the local username database. The login
keyword authenticates EXEC shell users. Additionally, configure PPP authentication to use the local
database if the session was not already authenticated by login.
AAA is the Cisco IOS software security model used on all Cisco devices. AAA provides the primary
framework through which you set up access control on the NAS.
In this basic discussion, the same authentication method is used on all interfaces. AAA is set up to use
the local database configured on the NAS. This local database is created with the username
configuration commands.
Step 1
Create a local login username database in global configuration mode. In this example,
the administrator’s username is admin. The remote client’s login username is dude.
!
username admin password adminpasshere
username dude password passhere
!
Caution
Step 2
This prevents you from getting locked out of the NAS. If you get locked out, you must
reboot the device and perform password recovery.
Configure local AAA security in global configuration mode. You must enter the aaa new-model
command before the other two authentication commands.
!
aaa new-model
aaa authentication login default local
aaa authentication ppp default if-needed local
!
Table 2-5 describes the configuration:
Table 2-5
Local AAA Commands
Command
Purpose
aaa new-model
Initiates the AAA access control system. This
command immediately locks down login and PPP
authentication.
aaa authentication login default local
Configures AAA to perform login authentication
by using the local username database. The login
keyword authenticates EXEC shell users.
aaa authentication ppp default if-needed local
Configures PPP authentication to use the local
database if the session was not already
authenticated by login.
Cisco AS5800 Operations, Administration, Maintenance, and Provisioning Guide
DOC-7810814=
2-23
Chapter 2
Commissioning
Task 2. Configuring Basic Cisco IOS Software
Step 3
Log in with your username and password:
5800-NAS# login
User Access Verification
Username:admin
Password:
5800-NAS#
A successful login means that your local username works on any TTY or VTY line. Do not disconnect
your session until you can log in.
Setting Up a Log In Banner
Create a login banner. However, do not tell users what device they are connecting to until after they log
in. Providing device sensitive information can tempt unauthorized users to hack into the system.
Step 1
Create the banner:
5800-NAS(config)# banner login |
Enter TEXT message. End with the character '|'.
This is a secured device.
Unauthorized use is prohibited by law.
|
5800-NAS(config)#^Z
5800-NAS#
Step 2
Test the banner:
5800-NAS#
5800-NAS# login
This is a secured device.
Unauthorized use is prohibited by law.
User Access Verification
Username: admin
Password:
5800-NAS#
Cisco AS5800 Operations, Administration, Maintenance, and Provisioning Guide
2-24
DOC-7810814=
Chapter 2
Commissioning
Task 2. Configuring Basic Cisco IOS Software
Configuring Basic IP
To configure a basic dial access service:
•
Configure two loopback interfaces.
•
Bring up one Fast Ethernet interface.
•
Add an IP route to the default gateway.
Follow this procedure:
Step 1
Assign the IP addresses, and create an IP route to the default gateway.
!
interface Loopback0
ip address 172.22.99.1 255.255.255.255
!
interface Loopback1
ip address 172.22.90.1 255.255.255.0
!
interface FastEthernet0/1/0
ip address 172.22.66.23 255.255.255.0
!
ip route 0.0.0.0 0.0.0.0 172.22.66.1
!
The loopback interfaces are used for the following reasons:
Step 2
•
Interface loopback 0:Identifies the router with a unique and stable IP address for network
management purposes. One IP address from a common address block is assigned to each network
device. This technique enables the network operations center (NOC) to more easily perform security
filtering. One class C subnet, that was used to identify devices, can support 254 distinct nodes with
unique loopback IP addresses.
•
Interface loopback 1:Hosts a pool of IP addresses for the remote nodes. In this way, one route is
summarized and propagated to the backbone instead of 254 host routes.
Verify that the Fast Ethernet interface is up. Ping the default gateway.
5800-NAS# ping 172.22.66.1
Type escape sequence to abort.
Sending 5, 100-byte ICMP Echos to 172.22.66.1, timeout is 2 seconds:
.!!!!
Success rate is 80 percent (4/5), round-trip min/avg/max = 1/1/1 ms
5800-NAS#
This step verifies that you have IP connectivity with another device on the subnet. If the ping succeeds
to the default gateway, try pinging the DNS server in your backbone. Make sure the backbone is
configured to get to the access server; otherwise, the ping will not work. Configure the backbone routers
to support the routes to the networks you are using.
Note
An 80% ping-success rate is normal for the first time you ping an external device.
The NAS does not yet have an address resolution protocol (ARP) entry for the
external device. A 100% success rate is achieved the next time you ping the device.
Cisco AS5800 Operations, Administration, Maintenance, and Provisioning Guide
DOC-7810814=
2-25
Chapter 2
Commissioning
Task 3. Enabling the T3/T1 Controllers
Task 3. Enabling the T3/T1 Controllers
Configure the settings for the T3/T1 controllers. They must match the telco’s settings on the telephone
switch. Mismatched settings cause problems; sometimes these problems are not detected for a long time.
Figure 2-4 displays the logical controller components inside a Cisco AS5800. The figure shows that a
T3 trunk card requires T1 and T3 controller configuration settings. In the figure, only the fourth
controller is configured. There are a total of 28 T1 controllers to configure.
Figure 2-4
Matching Controller Settings
Cisco AS5800
T1
controller
T3
controller
PSTN
controller t1 1/0/0:4
framing esf
pri-group timeslots 1-24
T3 trunk
33190
28
controller T3 1/0/0
framing m23
t1 4 controller
Step 1
Define the ISDN PRI switch type. In the example, the T1 trunks are not using channel associated
signaling (CAS).
!
isdn switch-type primary-ni
!
There are two ways to define the switch type:
•
Under the individual serial-D channels. A different switch type can be defined for each PRI trunk.
See the “Task 4. Configuring the Serial Interfaces” section on page 2-31.
•
Globally across all PRI trunks. All trunks use the same switch type.
Note
For T1 CAS trunks, no ISDN switch type is configured.
Cisco AS5800 Operations, Administration, Maintenance, and Provisioning Guide
2-26
DOC-7810814=
Chapter 2
Commissioning
Task 3. Enabling the T3/T1 Controllers
Step 2
Configure the T3 controller. There are 28 T1 controllers in one T3. In this example, only the fourth
controller is configured. The t1 4 controller command automatically creates the logical controllers
controller t1 1/0/0:4. The number of logical T1 controllers should match the number of TI PRI lines
coming into your T3.
!
controller T3 1/0/0
framing m23
cablelength 0
t1 4 controller
!
Step 3
Configure the corresponding T1 controllers:
!
controller t1 1/0/0:4
framing esf
pri-group timeslots 1-24
!
After the controllers are correctly configured, the following cards and interfaces change state:
00:01:59: %CONTROLLER-5-UPDOWN: Controller T3 1/0/0, changed state to up
00:02:01: %CONTROLLER-5-UPDOWN: Controller T1 1/0/0:4, changed state to up
00:02:02: %DIAL12-3-MSG:
07:08:54: %DSCCLOCK-3-SWITCH3: Clock moving to NORMAL from HOLDOVER, selected clock is on
slot 0 port 4 line 0
00:02:05: %ISDN-6-LAYER2DOWN: Layer 2 for Interface Se1/0/0:4:23, TEI 0 changedto down
00:02:21: %ISDN-6-LAYER2UP: Layer 2 for Interface Se1/0/0:4:23, TEI 0 changed to up
5800-NAS>
Cisco AS5800 Operations, Administration, Maintenance, and Provisioning Guide
DOC-7810814=
2-27
Chapter 2
Commissioning
Task 3. Enabling the T3/T1 Controllers
Table 2-6 describes some of the T3 and T1-controller concepts that are applied in the previous steps.
Table 2-6
Controller Terms and Descriptions
Concept
Description
Framing type
Defines the control bits and data bits.
For T3s, Cisco supports:
•
M23—M23 multiplexer framing (default)
•
C-bit—C-bit parity framing
For T1s, Cisco supports:
Line code type
Clock source
•
ESF—Extended super frame. Required for 64 KB operation on DS0s. ESF requires 2k-framing bits
for synchronization. The remaining 6k is used for error detection, CRC, and data link monitoring.
ESF is recommended for PRI configurations.
•
SF—Super frame. SF (D4) is used in channel bank robbed bit signalling (RBS) configurations. The
in-band signaling occurs within the 6th and 12th frames. SF uses the framing bit for frame
synchronization. SF is not recommended for PRI configurations.
An encoding method used to allow synchronous data to be transmitted in a compatible format. Common
line codes are RZ (return to zero), NRZ (non-return to zero), B8ZS, AMI, and HDB3.
•
AMI—Alternate mark inversion. Signal transitions are referenced by a binary 1 (mark). AMI is used
on older T1 circuits. B8ZS is more reliable than AMI.
•
B8ZS—Most popular line-code scheme used in North America. To maintain clock synchronization,
B8ZS replaces string 8 binary 0s with variations. B8ZS is more reliable than AMI, and it should be
used with PRI configurations.
Refers to both timing and synchronization of the T1 carrier. Timing is encoded within the transmitted
data signal, and it ensures synchronization throughout the network.
Clocks are prioritized by slot number (slot 0 to slot 5). The highest priority clock is selected from the
card in slot 0. If this clock fails, the highest priority clock from the card in slot 1 becomes the default
clock, and so forth.
Timeslot
assignment
Timeslots are assigned to channels. For T1 PRI scenarios, all 24 T1 timeslots are assigned as ISDN PRI
channels. After timeslots are assigned by the pri-group command, D-channel serial interfaces are
automatically created in the configuration file (for example S1/0/0:0:23, S1/0/0:1:23, and so on).
Cisco AS5800 Operations, Administration, Maintenance, and Provisioning Guide
2-28
DOC-7810814=
Chapter 2
Commissioning
Task 3. Enabling the T3/T1 Controllers
Step 4
Verify that the controllers are up and no alarms or errors are detected. Error counters are recorded over
a 24-hour period in 15-minute intervals. In the display output, focus on the data in the current interval.
5800-NAS# show controller t3
T3 1/0/0 is up.
Applique type is Channelized T3
No alarms detected.
FEAC code received: No code is being received
Framing is M23, Line Code is B3ZS, Clock Source is Internal
Data in current interval (201 seconds elapsed):
0 Line Code Violations, 0 P-bit Coding Violation
0 C-bit Coding Violation, 0 P-bit Err Secs
0 P-bit Severely Err Secs, 0 Severely Err Framing Secs
0 Unavailable Secs, 0 Line Errored Secs
0 C-bit Errored Secs, 0 C-bit Severely Errored Secs
Total Data (last 1 15 minute intervals):
30664 Line Code Violations, 49191 P-bit Coding Violation,
47967 C-bit Coding Violation, 0 P-bit Err Secs,
0 P-bit Severely Err Secs, 0 Severely Err Framing Secs,
2 Unavailable Secs, 0 Line Errored Secs,
10 C-bit Errored Secs, 10 C-bit Severely Errored Secs
5800-NAS#
5800-NAS# show controller T1 1/0/0:4
T1 1/0/0:4 is up.
Applique type is Channelized T1
Cablelength is short
No alarms detected.
Framing is ESF, Line Code is AMI, Clock Source is Line.
Data in current interval (240 seconds elapsed):
0 Line Code Violations, 0 Path Code Violations
0 Slip Secs, 0 Fr Loss Secs, 0 Line Err Secs, 0 Degraded Mins
0 Errored Secs, 0 Bursty Err Secs, 0 Severely Err Secs, 0 Unavail Secs
Data in Interval 1:
0 Line Code Violations, 8 Path Code Violations
11 Slip Secs, 26 Fr Loss Secs, 0 Line Err Secs, 0 Degraded Mins
0 Errored Secs, 0 Bursty Err Secs, 0 Severely Err Secs, 26 Unavail Secs
Total Data (last 1 15 minute intervals):
0 Line Code Violations, 8 Path Code Violations,
11 Slip Secs, 26 Fr Loss Secs, 0 Line Err Secs, 0 Degraded Mins,
0 Errored Secs, 0 Bursty Err Secs, 0 Severely Err Secs, 26 Unavail Secs
5800-NAS#
After each controller is correctly set up, clear the counters and look for ongoing line violations and
errors. To do this, enter the clear counters command followed by the show counters command:
clear counters t1 1/0/0:4
show counters t1 1/0/0:4
Step 5
Tips
In the display output, focus on the data in the current interval. Error counters stop increasing when the
controller is configured correctly.
The clear counters command does not reset or bring down the controller. The T1 stays up.
Only the counters are cleared.
Cisco AS5800 Operations, Administration, Maintenance, and Provisioning Guide
DOC-7810814=
2-29
Chapter 2
Commissioning
Task 3. Enabling the T3/T1 Controllers
From the reference point of the NAS, Table 2-7 provides a list of T1 alarm conditions and descriptions.
Table 2-7
Alarm Conditions
Alarm
Description
CRC Errors
Occur only in ESF format when a CRC bit has an error.
Excessive CRC Error Indication (ECRCEI)
Reported in ESF format when 32 of any 33 consecutive CRCs are in error.
Out of Frame (OOF)
Occurs when the framing pattern for a T1 line has been lost, and data cannot
be extracted. This is a red alarm. In SF and ESF formats, OOF occurs when
any two of four consecutive frame-synchronization bits are in error.
Loss of Signal (LOS)
Occurs when 175 consecutive 0s are detected in the MC. This is a red alarm.
The signal is recovered if the density of 1s reaches 12.5%. The recovery
happens when four 1s are received within a 32-bit period.
Remote Frame Alarm (RHEA)
Indicates that an OOF framing pattern occurred at the remote end. This is a
yellow alarm.
Alarm Indication Signal (AIS)
Indicates to the remote end a loss of the received signal. This is a blue alarm.
AIS occurs when a stream of 1s is received.
Loopback
Indicates that a remotely initiated loopback (from the network) is in progress.
Errored Seconds
Depending on the framing format, indicates OOF conditions, frame slip
conditions, or error events.
For SF, errored seconds reports the number of seconds the frame was in the
OOF or slip condition. For ESF, errored seconds reports error events in
seconds.
Bursty Errored Seconds
Reports CRC error conditions in seconds (ESF format only).
Severely Errored Seconds
Reports error events or frame slip conditions in seconds.
For more information about controllers, see the information on channelized E1 and channelized T1 setup
commands in Dial-In Port Setup, available online at
http://www.cisco.com/univercd/cc/td/doc/product/software/ios120/12cgcr/dial_r/drprt1/index.htm
Step 6
Verify that individual serial D channels are created. B channels S1/0/0:4:0 through S1/0/0:4:22 are
rotary members (dialers) of the signaling D channel S1/0/0:4:23.
5800-NAS# show ip interface brief | inc :23
Serial1/0/0:4:23
unassigned
YES NVRAM
up
up
5800-NAS#
Step 7
Additionally, enter the show interface S1/0/0:4:23 command to verify the serial interface.
Cisco AS5800 Operations, Administration, Maintenance, and Provisioning Guide
2-30
DOC-7810814=
Chapter 2
Commissioning
Task 4. Configuring the Serial Interfaces
Task 4. Configuring the Serial Interfaces
Configure the serial D channels to route incoming voice calls from the PSTN to the integrated modems.
The behavior of the B channels is controlled by the D channels configuration instructions. The D channel
is the signaling channel.
Table 2-8 describes the relationship between T1 controllers and serial interfaces.
•
After timeslots are assigned by the pri-group command, D-channel serial interfaces are
automatically created in the configuration file (for example, S1/0/0:0:23, S1/0/0:1:23, and so on).
•
Individual B-channel serial interfaces are created as rotary members (dialers) of their signaling
D-channels (for example, S1/0/0:0:0 through S1/0/0:0:22). The D-channel interface functions like
a dialer for all the 23 B-channels using the controller.
•
An ISDN switch type defined on the global level is automatically propagated to the serial D-channel
interface level. However, a switch type defined on the serial-interface level overrides a switch type
defined on the global level.
Table 2-8
Step 1
Controller-to-Channel Relationships
T1 Controllers
D Channels
B Channels
Controller T1 1/0/0:0
Interface serial 1/0/0:0:23
S1/0/0:0:0 through S1/0/0:0:22
Controller T1 1/0/0:1
Interface serial 1/0/0:1:23
S1/0/0:1:0 through S1/0/0:1:22
Controller T1 1/0/0:2
Interface serial 1/0/0:2:23
S1/0/0:2:0 through S1/0/0:2:22
Controller T1 1/0/0:3
Interface serial 1/0/0:3:23
S1/0/0:3:0 through S1/0/0:3:22
Controller T1 1/0/0:4
Interface serial 1/0/0:4:23
S1/0/0:4:0 through S1/0/0:4:22
...
...
...
Apply the isdn incoming-voice modem command to each D-channel serial interface. In this example,
one interface is configured.
!
interface Serial1/0/0:4:23
isdn incoming-voice modem
!
Cisco AS5800 Operations, Administration, Maintenance, and Provisioning Guide
DOC-7810814=
2-31
Chapter 2
Commissioning
Task 4. Configuring the Serial Interfaces
Step 2
Verify that ISDN is functioning properly, and the serial channels are up:
•
Check the ISDN status. Confirm that Layer 1 reports ACTIVE, and the display field
MULTIPLE_FRAME_ESTABLISHED appears at Layer 2. For PRI lines, the terminal endpoint
identifier (TEI) is always 0. The Layer 3 status reports no active calls.
5800-NAS# show isdn status
Global ISDN Switchtype = primary-ni
ISDN Serial1/0/0:4:23 interface
dsl 0, interface ISDN Switchtype = primary-ni
Layer 1 Status:
ACTIVE
Layer 2 Status:
TEI = 0, Ces = 1, SAPI = 0, State = MULTIPLE_FRAME_ESTABLISHED
Layer 3 Status:
0 Active Layer 3 Call(s)
Activated dsl 0 CCBs = 0
The Free Channel Mask: 0x807FFFFF
Total Allocated ISDN CCBs = 0
•
Look at the status of the DS0 channels. In this example, 23 DS0s are idle. The 24th channel is
reserved for PRI D-channel signaling.
5800-NAS# show isdn service
PRI Channel Statistics:
ISDN Se1/0/0:4:23, Channel [1-24]
Configured Isdn Interface (dsl) 0
Channel State (0=Idle 1=Propose 2=Busy 3=Reserved 4=Restart 5=Maint_Pend)
0 0 0 0 0 0 0 0 0 0 0 0 0 0 0 0 0 0 0 0 0 0 0 3
Service State (0=Inservice 1=Maint 2=Outofservice)
0 0 0 0 0 0 0 0 0 0 0 0 0 0 0 0 0 0 0 0 0 0 0 0
5800-NAS#
Step 3
Test the configuration by sending a POTS call into the Cisco AS5800 network access server (NAS). If
the modem answers (you hear modem squelch), the configuration works. In Figure 2-5, a different
telephone number is associated with each end of the connection.
Cisco AS5800 Operations, Administration, Maintenance, and Provisioning Guide
2-32
DOC-7810814=
Chapter 2
Commissioning
Task 5. Configuring Modems and Lines
Figure 2-5
Sending a POTs Telephone Call to a NAS
POTS
PRI
Telephone
switch
ANI
444-1234
DNIS
555-1234
Network gateway receiving
analog call
Note
33184
Standard POTS
telephone
The debug ISDN q931 command (with logging console enabled) displays
incoming call information on the monitor.
•
In the called party number is the dial number identification service (DNIS). It identifies the directory
number assigned to the Cisco AS5800’s PRI trunks. In Figure 2-5, the telephone dialed 555-1234.
•
In the calling part number is the automatic identification number (ANI). It identifies the directory
number assigned to the device that initiates the call. In this example, the telephone line is assigned
444-1234.
Task 5. Configuring Modems and Lines
Modems and lines are configured after:
•
The serial channels are operational
•
POTS telephone calls are successfully routed to the modems
Each modem is mapped to a dedicated asynchronous line inside the NAS. After the modem inout
command is applied to the lines, the NAS is ready to accept modem calls.
AAA security is applied to the lines by the aaa new-model command and aaa authentication login
default local command. AAA performs login authentication by using the local username database. The
login keyword authenticates EXEC shell users.
Note
The modem speed (115200 bps) and hardware flow control are the defaults for integrated
modems.
Cisco AS5800 Operations, Administration, Maintenance, and Provisioning Guide
DOC-7810814=
2-33
Chapter 2
Commissioning
Task 5. Configuring Modems and Lines
Step 1
Configure modem control (DCD/DTR) for incoming and outgoing modem calls:
!
line 1/2/00 1/10/143
modem InOut
!
Note
Step 2
The no modem log rs232 command limits the size of the show modem log
command’s output.
Familiarize yourself with the modem-numbering scheme for the Cisco AS5800. Modems use the
shelf/slot/port notation.
5800-NAS# show modem
Codes:
* - Modem has an active call
T - Back-to-Back test in progress
R - Modem is being Reset
p - Download request is pending and modem cannot be used for taking calls
D - Download in progress
B - Modem is marked bad and cannot be used for taking calls
b - Modem is either busied out or shut-down
d - DSP software download is required for achieving K56flex connections
! - Upgrade request is pending
Mdm
1/2/00
1/2/01
1/2/02
1/2/03
1/2/04
Step 3
Avg Hold
Time
00:00:00
00:00:00
00:00:00
00:00:00
00:00:00
Inc calls
Succ
Fail
0
0
0
0
0
0
0
0
0
0
Out calls
Succ
Fail
0
0
0
0
0
0
0
0
0
0
Busied
Out
0
0
0
0
0
Failed
Dial
0
0
0
0
0
No
Succ
Answer Pct
0
0%
0
0%
0
0%
0
0%
0
0%
Choose a specific modem and inspect the modem-to-TTY line association. TTY lines are simulated
EIA/TIA-232 ports. In this example, TTY 432 is associated with modem 1/2/00.
Cisco AS5800 Operations, Administration, Maintenance, and Provisioning Guide
2-34
DOC-7810814=
Chapter 2
Commissioning
Task 6. Enabling IP Basic Setup
TTY line numbers map to specific slots. Each slot is hard coded with 144 TTY lines. In the example, the
first modem card is in slot—that is, slot 0 and slot 1 do not contain modem cards.
5800-NAS#
Mdm
--1/2/00
show modem 1/2/00
Typ
Status
-------(n/a)
Idle
Tx/Rx
----0/0
G
1
Duration
-------00:00:00
RTS
--RTS
CTS
--CTS
DCD
DTR
----noDCD DTR
Modem 1/2/00, Cisco MICA modem (Managed), Async1/2/00, TTY432
Firmware Rev: 2.6.2.0
Modem config: Incoming and Outgoing
Protocol: (n/a), Compression: (n/a)
Management config: Status polling
RX signals: 0 dBm
Last clearing of "show modem" counters never
0 incoming completes, 0 incoming failures
0 outgoing completes, 0 outgoing failures
0 failed dial attempts, 0 ring no answers, 0 busied outs
0 no dial tones, 0 dial timeouts, 0 watchdog timeouts
0 no carriers, 0 link failures, 0 resets, 0 recover oob
0 recover modem, 0 current fail count
0 protocol timeouts, 0 protocol errors, 0 lost events
Task 6. Enabling IP Basic Setup
Tune IP routing behavior and domain-name services for EXEC shell users by completing the following
steps:
Step 1
Optimize IP routing functions. Enter the following commands in global configuration mode:
ip subnet-zero
no ip source-route
ip classless
Table 2-9 describes the previous commands:
Table 2-9
Step 2
IP Routing Commands
Command
Purpose
ip subnet-zero
Specifies that 172.22.0.0 is a valid subnet.
no ip source-route
Tightens security by ensuring that IP-header packets cannot define their own
paths through the access server.
ip classless
Turns off traditional IP network class distinctions in the router [Class-A,
Class-B, Class-C].
Enter domain-name service global configuration commands to support EXEC shell users:
ip
ip
ip
ip
ip
domain-lookup
host aurora 172.22.100.9
domain-name the.doc
name-server 172.22.11.10
name-server 172.22.12.10
Cisco AS5800 Operations, Administration, Maintenance, and Provisioning Guide
DOC-7810814=
2-35
Chapter 2
Commissioning
Task 7. Testing Asynchronous EXEC Shell Connections
Table 2-10 describes the previous commands:
Table 2-10 Domain-Name Commands
Command
Purpose
ip domain-lookup
Enables IP domain-name lookups.
ip host aurora 172.22.100.9
Creates a local name-to-address map. This map is useful when the
NAS is not entered in a DNS server.
ip domain-name the.doc
Tells the NAS how to qualify DNS look ups. In this example,
the.doc is appended to the end of each name that is looked up.
ip name-server 172.22.11.10
Specifies the primary and secondary name servers. They are used
for mapping names to IP addresses.
ip name-server 172.22.12.10
Task 7. Testing Asynchronous EXEC Shell Connections
This task verifies that the following components are working:
•
Physical asynchronous data path
•
Basic modem links
•
Basic IP functionality to support EXEC shell sessions
The Cisco IOS software provides a command-line interface (CLI) called the EXEC.
The EXEC:
•
Can be accessed by dialing in with a modem
•
Provides access to terminal EXEC shell services (no PPP) to do the following:
– Modify configuration files
– Change passwords
– Troubleshoot possible problems including modem connections
– Access other network resources by using Telnet
During this task, some administrators try to make complex services function such as PPP-based Web
browsing. Do not jump ahead. Many other elements still need to be configured (for example, PPP and
IPCP). The asynchronous-shell test ensures that the EXECs log in prompt can be accessed by a client
modem. Taking a layered approach to building a network isolates problems and saves time.
Note
Step 1
The Cisco AS5800 is designed to process PPP sessions. To support high ratios of
EXEC-shell users or V.120 users, work with your support team.
Locate a client PC, client modem, and analog line. From the client PC, open a terminal emulation
program (such as Hyper Terminal, not dialup networking) and connect to the client modem. Figure 2-6
shows the network environment for this test.
Cisco AS5800 Operations, Administration, Maintenance, and Provisioning Guide
2-36
DOC-7810814=
Chapter 2
Commissioning
Task 7. Testing Asynchronous EXEC Shell Connections
Test Environment
Analog
PRI
Default
gateway
PSTN
Client PC
Client
modem
Network gateway
Step 2
33191
Figure 2-6
From a terminal-emulation program, test the EIA/TIA-232 connection to the client modem. Enter the
at command. The modem sends an OK return message.
at
OK
Step 3
Dial the PRI telephone number assigned to the NAS (5551234). After the modem successfully connects,
a connect message appears.
atdt5551234
CONNECT 28800 V42bis
Tips
Step 4
Many modems support the a/ command, which recalls the last AT command. The ath
command hangs up a modem call. The atdl command dials the last telephone number.
Log into the EXEC session:
This is a secured device.
Unauthorized use is prohibited by law.
User Access Verification
Username: theuser
Password:
5800-NAS>
Cisco AS5800 Operations, Administration, Maintenance, and Provisioning Guide
DOC-7810814=
2-37
Chapter 2
Commissioning
Task 7. Testing Asynchronous EXEC Shell Connections
Step 5
Determine upon which line the call landed. The following example shows that TTY line 436 accepted
the call. The call has been up and active for 20 seconds.
5800-NAS# show caller
Line
con 0
tty 436
User
admin
theuser
Service
TTY
TTY
Active
Time
00:13:43
00:00:20
Idle
Time
00:00:00
00:00:08
5800-NAS# show caller user theuser
User: dude, line tty 436, service TTY
Active time 00:00:34, Idle time 00:00:09
Timeouts:
Absolute Idle
Idle
Session
Exec
Limits:
00:10:00
Disconnect in:
00:09:50
TTY: Line 1/2/04
DS0: (slot/unit/channel)=0/4/2
Status: Ready, Active, No Exit Banner
Capabilities: Hardware Flowcontrol In, Hardware Flowcontrol Out
Modem Callout, Modem RI is CD
Modem State: Ready
5800-NAS#
Note
Step 6
The show caller command is added to Cisco IOS Release 11.3 AA and 12.0 T. If
your software release does not support this command, use the show user
command.
Test the IP functionality to support shell sessions. From the NAS, Telnet to another device in your
network.
5800-NAS> telnet 172.22.66.26
Trying 172.22.66.26 ... Open
User Access Verification
Username: admin
Password:
5800-NAS>
5800-NAS> telnet aurora
Translating "aurora"...domain server (172.22.11.10) [OK]
Trying aurora.cisco.com (172.22.2.2)... Open
SunOS 5.6
login: theuser
Password:
Last login: Wed Oct 6 08:57:46 from dhcp-aus-163-236
Sun Microsystems Inc.
SunOS 5.6
Generic August 1997
aurora%
Cisco AS5800 Operations, Administration, Maintenance, and Provisioning Guide
2-38
DOC-7810814=
Chapter 2
Commissioning
Task 8. Confirming the Final Running Configuration
Task 8. Confirming the Final Running Configuration
After you complete the tasks in this section, the final running configuration looks like this:
5800-NAS# show running-config
Building configuration...
Current configuration:
!
version 12.x
service timestamps debug datetime msec
service timestamps log datetime msec
service password-encryption
!
hostname 5800-NAS
!
aaa new-model
aaa authentication login default local
aaa authentication ppp default if-needed local
enable secret 5 $1$gq.d$nZwr.ElnV/O0nE9U.wZ3D/
!
username admin password 7 105B1D1A0A12
username dude password 7 111C0D061817
!
!
!
!
shelf-id 0 router-shelf
shelf-id 1 dial-shelf
!
!
!
resource-pool disable
!
modem-pool Default
pool-range 1/2/0-1/10/143
!
!
spe 1/2/0 1/10/11
firmware ios-bundled default
modem recovery action none
ip subnet-zero
no ip source-route
ip host aurora 172.22.100.9
ip domain-name the.doc
ip name-server 172.22.11.10
ip name-server 172.22.12.11
!
isdn switch-type primary-ni
isdn voice-call-failure 0
!
!
controller T3 1/0/0
framing m23
cablelength 0
t1 4 controller
!
controller T1 1/0/0:4
framing esf
pri-group timeslots 1-24
!
!
Cisco AS5800 Operations, Administration, Maintenance, and Provisioning Guide
DOC-7810814=
2-39
Chapter 2
Commissioning
Task 8. Confirming the Final Running Configuration
voice-port 1/0/0:4:D
!
!
process-max-time 200
!
interface Loopback0
ip address 172.22.99.1 255.255.255.255
no ip directed-broadcast
!
interface Loopback1
ip address 172.22.90.1 255.255.255.0
no ip directed-broadcast
!
interface FastEthernet0/1/0
ip address 172.22.66.23 255.255.255.0
no ip directed-broadcast
!
interface Serial1/0/0:4:23
no ip address
no ip directed-broadcast
isdn switch-type primary-ni
isdn incoming-voice modem
no cdp enable
!
interface Group-Async0
no ip address
no ip directed-broadcast
group-range 1/2/00 1/10/143
!
ip classless
ip route 0.0.0.0 0.0.0.0 172.22.66.1
no ip http server
!
!
banner login ^C
This is a secured device.
Unauthorized use is prohibited by law.
^C
!
line con 0
transport input none
line aux 0
line vty 0 4
line 1/2/00 1/10/143
modem InOut
no modem log rs232
!
end
Cisco AS5800 Operations, Administration, Maintenance, and Provisioning Guide
2-40
DOC-7810814=
C H A P T E R
3
Operations
This chapter details Cisco AS5800 routine operations performed on a daily basis to configure router
interfaces.
In our discussion, local-based authentication is used. After the Cisco AS5800 hardware is
commissioned, PPP is configured and tested as described in the section “Configuring PPP and
Authentication” on page 25.
Verifying Modem Performance
This section describes how to verify and test modem performance on a Cisco AS5800 by using an EXEC
terminal shell service.
The following sections are provided:
•
Background on Asynchronous Data Communications, page 3-1
•
Understanding Modem Modulation Standards, page 3-7
•
Initiating a Modem Loopback Test Call, page 3-9
•
Initiating and Inspecting a V.90 Test Call, page 3-17
An EXEC terminal shell service tests modem performance (lower layers) independently of PPP (and
higher layers). A terminal-shell service test gets quick test results in a simple environment.
For information on how to manage modem pools and collect call statistics, see the “Modem Management
Operations” section on page 3-40.
Background on Asynchronous Data Communications
Understanding how EIA/TIA-232 states function with the Cisco IOS software helps you test and
troubleshoot modem connections:
•
Async DataComm Model, page 3-2
•
Logical Packet and Circuit Components of a NAS, page 3-2
•
EIA/TIA-232 in Cisco IOS Software, page 3-4
•
Cisco IOS Line-Side Inspection, page 3-6
Cisco AS5800 Operations, Administration, Maintenance, and Provisioning Guide
DOC-7810814=
3-1
Chapter 3
Operations
Verifying Modem Performance
Async DataComm Model
Figure 3-1 shows how traditional DTE-to-DCE relationships map to a Cisco network access server
(NAS). Data terminal equipment (DTE) uses data communication equipment (DCE) to send data over
the PSTN.
In the context of EIA/TIA-232 and Cisco IOS software:
•
The DTE is the client PC and the Cisco IOS TTY lines.
•
The DCE is the client modem and the modem inside the NAS.
•
The dashed line between the DCEs is the modem carrier running on top of the voiceband circuit
through the PSTN. EIA/TIA-232 (whether physical or logical) is used on the DTE lines, not on the
DCE link.
•
The PSTN circuit runs through the circuit-switched half of the NAS.
Figure 3-1
A Standard Dialup Connection
Inside a Cisco
network access server
IOS line (DTE)
DTE
(Client PC)
DCE
(Client modem)
DCE link (circuit)
PSTN
DTE link
DCE
(NAS modem)
Physical
RS-232 cable
DTE
(Cisco IOS line)
Virtual
RS-232 interface
33177
DTE link
Logical Packet and Circuit Components of a NAS
The NAS functions as a gateway between two different networks:
•
A circuit-switched network (for example, the PSTN)
•
A packet-switched network (for example, the Internet)
The NAS is half a circuit switch and half a packet switch (router). EIA/TIA-232 signaling on the line is
displayed by the show line command and debug modem command. Figure 3-2 shows the modem access
connectivity path.
Cisco AS5800 Operations, Administration, Maintenance, and Provisioning Guide
3-2
DOC-7810814=
Chapter 3
Operations
Verifying Modem Performance
Figure 3-2
Modem Access Connectivity Path
Inside a Cisco
network access server
4
IP
network
Asynchronous
interfaces
Packetswitched
half
Routing and
switching engine
3
Packet interface
(Ethernet, frame
relay,etc.)
Asynchronous
Characters
TTY lines
2
Circuitswitched
half
Modems
64K DS0
TDM CSM bus
1
33185
T1 controllers
PSTN interface
(T1, E1, BRI)
Client PC
Client
modem
Circuit network
(PSTN)
To understand the general call-processing sequence, match the following numbered list with the
numbers shown in Figure 3-2:
1.
64K DS0 circuits extend from the NAS modems, through the internal TDM CSM bus, and through
the circuit network (PSTN).
2.
The NAS modems demodulate digital streams into analog-voiceband modulation. The virtual
EIA/TIA-232 interface connects the modems (DCE) to the TTY lines.
3.
The TTY lines are mapped into asynchronous interfaces. Interfaces are Cisco IOS software objects
that move packets. TTY lines function at Layer 1. Interfaces function at Layer 2 and Layer 3.
4.
The packets are delivered into the IP network.
Cisco AS5800 Operations, Administration, Maintenance, and Provisioning Guide
DOC-7810814=
3-3
Chapter 3
Operations
Verifying Modem Performance
EIA/TIA-232 in Cisco IOS Software
The Cisco IOS software variation of asynchronous EIA/TIA-232 is shown in Figure 3-3. The variation
exists between the Cisco IOS line (DTE) and the NAS modem (DCE).
•
Six EIA/TIA-232 pins exist between each NAS modem and Cisco IOS line. One or more grounding
wires also exist on physical EIA/TIA-232 lines; however, these wires do not convey signaling.
•
Each pin controls a different EIA/TIA-232 signal.
•
The arrows in Figure 3-3 indicate the signal transmission direction.
Figure 3-3
Cisco IOS EIA/TIA-232
Inside a Cisco
network access server
DCE
(NAS modem)
Tips
DTE
(IOS line)
33178
DSR
RI
TxD
RxD
RTS
CTS
DTR
DCD
In Figure 3-3, notice that the DSR signal is the DCD signal for the modem. In the scheme
of Cisco IOS software, the DCD pin on the DCE is strapped to the DSR pin on the
Cisco IOS DTE side. What the Cisco IOS software calls DSR is not DSR; it is DCD. The
DCE’s actual DSR pin and ring ignore (RI) pin are ignored by the Cisco IOS software.
Table 3-1 describes how Cisco uses its EIA/TIA-232 pins. The signal direction in the table is from the
perspective of the DTE (IOS line):
•
Data signals (TxD, RxD)
•
Hardware flow control signals (RTS, CTS)
•
Modem signals (DTR, DSR, DCD, RI)
Cisco AS5800 Operations, Administration, Maintenance, and Provisioning Guide
3-4
DOC-7810814=
Chapter 3
Operations
Verifying Modem Performance
Table 3-1
EIA/TIA-232 Signal State Behavior
Signal
Signal Direction
Purpose
Transmit Data (TxD)
——>
(Output)
DTE transmits data to DCE.
Receive Data (RxD)
<——
(Input)
DCE transmits received data to DTE.
Request To Send (RTS)
——>
(Output)
DTE uses the RTS output signal to indicate if it can receive
characters into the Rx input buffer1.
The DCE should not send data to the DTE when DTR input is low
(no RTS).
Clear To Send (CTS)
<——
(Input)
DCE signals to DTE that it can continue to accept data into its
buffers.
DCE asserts CTS only if the DCE is able to accept data.
Data Terminal Ready (DTR)
——>
(Output)
DTE signals to DCE that it can continue to accept data into its
buffers.
DTE asserts RTS only if the DTE is able to accept data.
Data Carrier Detect (DCD)
<——
(Input)
DCE indicates to DTE that a call is established with a remote
modem. Dropping DCD terminates the session.
DCD will be up on the DCE only if the DCE has achieved data
mode with its peer DCE (client modem).
1. The name RTS is illogical with the function (able to receive) due to historical reasons.
Cisco AS5800 Operations, Administration, Maintenance, and Provisioning Guide
DOC-7810814=
3-5
Chapter 3
Operations
Verifying Modem Performance
Cisco IOS Line-Side Inspection
To display the current modem-hardware states applied to a specific Cisco IOS line, enter the show line
tty number command. The states of each logical EIA/TIA-232 pin change according to line conditions
and modem events.
The following shows a line-side inspection of the idle state for TTY line 1:
5800-NAS#show line tty 1
Tty Typ
Tx/Rx
A Modem
I
1 TTY
- inout
Roty AccO AccI
-
Uses
2
Noise
0
Overruns
0/0
Int
-
Line 1, Location:"", Type:""
Length:24 lines, Width:80 columns
Status:No Exit Banner
Capabilities:Hardware Flowcontrol In, Hardware Flowcontrol Out
Modem Callout, Modem RI is CD, Line usable as async interface
Integrated Modem
Modem state:Idle
modem(slot/port)=1/0, state=IDLE
dsx1(slot/unit/channel)=NONE, status=VDEV_STATUS_UNLOCKED
Modem hardware state:CTS noDSR DTR RTS
Special Chars:Escape Hold Stop Start Disconnect Activation
^^x
none
none
Timeouts:
Idle EXEC
Idle Session
Modem Answer Session
Dispatch
00:10:00
never
none
not set
Idle Session Disconnect Warning
never
Login-sequence User Response
00:00:30
Autoselect Initial Wait
not set
Modem type is unknown.
Session limit is not set.
Time since activation:never
Editing is enabled.
History is enabled, history size is 10.
DNS resolution in show commands is enabled
Full user help is disabled
Allowed transports are pad telnet rlogin v120 lapb-ta. Preferred is telnet.
No output characters are padded
No special data dispatching characters
Cisco AS5800 Operations, Administration, Maintenance, and Provisioning Guide
3-6
DOC-7810814=
Chapter 3
Operations
Verifying Modem Performance
Table 3-2 describes some of the significant fields shown in the previous example:
Table 3-2
Show TTY Line Field Descriptions
Field
Description
Capabilities
Describes different aspects of the line:
•
The flowcontrol hardware command displays as “Hardware Flowcontrol In, Hardware
Flowcontrol Out.”
•
The modem inout command displays as “modem callout.”
•
The text “Line usable as async interface” means there is an “interface async N” that
corresponds to “line N.”
•
The text “Modem RI is CD” displays for historical reasons.
Displays the current status of the modem.
Modem state
Possible values include:
•
Idle—Modem
is ready for incoming and outgoing calls.
•
Conn—Modem
is connected to a remote host.
•
Busy—Modem
is out of service and not available for calls.
•
D/L—Modem
is downloading firmware.
•
Bad—Modem
is in an inoperable state, which is manually configured by the modem bad
command.
•
Bad*—During
initial power-up testing, the modem startup-test command automatically put
the modem in an inoperable state.
•
Reset—Modem
•
Bad FW—The
is in reset mode.
downloaded modem firmware is not usable.
Displays the EIA/TIA-232 signal state status.
Modem Hardware state
CTS and no DSR are incoming signals. DTR and RTS are outgoing signals. NoDSR means that no
call is currently connected.
Understanding Modem Modulation Standards
To optimize modem connect speeds, you must understand the basic modem modulation standards.
This section provides the basic rules for achieving maximum V.34 and V.90 modulation speeds:
•
V.34 Basic Rules, page 3-7
•
V.90 Basic Rules, page 3-8
V.34 Basic Rules
V.34 modulation should work on any land-line voiceband circuit. V.34 supports speeds ranging from
2400 to 33600 bps.
Speed is a function of:
•
The amount of usable spectrum across the channel (for example, 2400 to 3429 Hz)
•
The signal to noise ratio (SNR)
Cisco AS5800 Operations, Administration, Maintenance, and Provisioning Guide
DOC-7810814=
3-7
Chapter 3
Operations
Verifying Modem Performance
To achieve 33600 bps, the channel must deliver:
•
A response from 244 to 3674 Hz
•
A SNR of 38 dB or better
In practice, toll-quality voiceband circuits support V.34 at speeds of 21600 to 33600 bps.
The following six items reduce the achieved V.34 speed:
1.
Robbed-bit signaling links in the circuit, which reduce SNR.
2.
Extra analog-to-digital conversions. For example, nonintegrated or universal subscriber line
concentrators (SLCs) reduce bandwidth and SNR.
3.
Load coils on the local loop, which reduce bandwidth.
4.
Long local loops, which reduce bandwidth and SNR.
5.
The following electrical disturbances in the house wiring, which reduce SNR:
– Cross talk from two lines in the same quad cable
– Corroded connectors
– Bridge-tapped lines running parallel to fluorescent lights
– Flat silver-satin cables running parallel to power cables
– Extra electrical equipment sharing the same power jack as the modem
6.
Voiceband circuits that pass through sub-64k coding, such as a cellular or 32K ADPCM link.
With 32k ADMCM, the speed is typically 9600 to 16800 bps.
V.90 Basic Rules
Many circuit components work together to deliver V.90 modulation. See Figure 3-4.
Figure 3-4
V.90 Network Components
33171
PSTN
Client
DTE
Client
DCE
House
wiring
Local
loop
DS0
circuit
through
PSTN
Digital
line
NAS Digital
modem
Here are the V.90 basic rules:
•
Select recommended modem code. The following are reliable V.90 releases at the time of this
publication:
– MICA Portware Version 2.6.2.0
– Microcom Firmware Version 5.2.1.0
The latest modem code is posted on CCO at the following URL:
http://www.cisco.com/kobayashi/sw-center/sw-access.shtml
•
Run a Cisco IOS release that is compatible with V.90. Table 3-3 shows the V.90 supported
Cisco IOS releases at the time of this publication.
Cisco AS5800 Operations, Administration, Maintenance, and Provisioning Guide
3-8
DOC-7810814=
Chapter 3
Operations
Verifying Modem Performance
Table 3-3
V.90 Supported Cisco IOS Releases
Chassis
Modem Type
Cisco IOS Release
Cisco AS5800
MICA
11.3(6+)AA
12.0(1+)T
Exactly one digital to analog conversion must exist in the circuit. The digital line must connect into
a digital switch, not a channel bank. V.90 requires PRI (64k clear-channel DS0s). Channel banks
destroy V.90 by adding additional analog-to-digital conversions. Telcos occasionally refer to
channel banks as line-side services. Digital switches are sometimes referred to as trunk-side
services. Figure 3-5 shows this.
Figure 3-5
No Channel Banks for V.90
Digital switch
Digital switch
Trunk side service
Channel bank
Line side service
NAS
NAS
33173
•
•
In the local loop, less than three miles of twisted-pair copper line with no load coils is ideal. Load
coils limit frequencies (passband). V.90 requires a 3000 Hz passband. A circuit that does not deliver
a 3200 Hz passband will most likely not deliver V.90. Load coils are common in long loops in
North America (at the 3.5 mile mark).
•
Sometimes the PSTN switch fabric is extended by a digital carrier. It is then converted to analog by
a SLC. This setup complies with V.90. The digital-to-analog conversion is moved closer to the
subscriber. However, non-integrated or universal SLCs do not comply to V.90.
•
Use a recommended V.90 client modem.
•
Electrical house wiring sometimes causes V.90 trainup to fail. For details, see the “V.34 Basic
Rules” section on page 3-7.
Initiating a Modem Loopback Test Call
Test the access server’s ability to initiate and terminate a modem call. Similar to sending a ping to the
next-hop router, this test verifies basic connectivity for modem operations. Successfully performing this
test gives you a strong indication that remote clients should be able to dial into the NAS. Figure 3-6
shows this test.
After completing this test, dial into the EXEC from a client PC and a client modem (no PPP).
Cisco AS5800 Operations, Administration, Maintenance, and Provisioning Guide
DOC-7810814=
3-9
Chapter 3
Operations
Verifying Modem Performance
Figure 3-6
Initiating and Terminating a Modem Call on the Same NAS
Modem B receive
Modem A transmit
Call path
Digital switch
33172
PSTN
NAS
Note
When calling between two digital modems, you will not achieve V.90. V.90 requires one
digital and one analog modem.
Step 1
From a workstation, open two Telnet sessions into the NAS. One Telnet session is used to simulate the
client. The other session is used to administer and run the debugs. In this way, the debug messages will
not be scrambled into the loopback screen display.
Step 2
Configure the lines to support dial in, dial out, and outbound Telnet connections:
!
line 1/2/00 1/3/143
modem inout
transport input telnet
!
Step 3
From the administrative Telnet session, turn on the appropriate debug commands. Older software might
require the debug modem csm command.
5800-NAS#debug isdn q931
ISDN Q931 packets debugging is on
5800-NAS#debug csm modem
Modem Management Call Switching Module debugging is on
5800-NAS#debug modem
Modem control/process activation debugging is on
5800-NAS#show debug
General OS:
Modem control/process activation debugging is on
CSM Modem:
Modem Management Call Switching Module debugging is on
ISDN:
ISDN Q931 packets debugging is on
ISDN Q931 packets debug DSLs. (On/Off/No DSL:1/0/-)
DSL 0 --> 31
1 - - - - - - - - - - - - - - - - - - - - - - - - - - - - - - DSL 32 --> 55
- - - - - - - - - - - - - - - - - - - - - - - Modem Management:
Modem Management Call Switching Module debugging is on
5800-NAS#
Cisco AS5800 Operations, Administration, Maintenance, and Provisioning Guide
3-10
DOC-7810814=
Chapter 3
Operations
Verifying Modem Performance
Tips
For channel associated signaling (CAS), robbed bit signaling (RBS), and R2, use the debug
cas command. If this command is not included in your software, use the modem-mgmt
csm debug-rbs command; however, the service internal command is required.
5800-NAS(config)#service internal
5800-NAS(config)#end
5800-NAS#modem-mgmt csm debug-rbs
At the time of this publication, the Cisco AS5800 does not support the debug cas command or
modem-mgmt csm debug-rbs command. As a workaround, complete the following steps:
Step 4
a.
Determine the slot positions of each card. Enter the show dial-shelf command.
b.
Access the trunk card’s console port. Enter the dsip console slave X command where X is the slot
of the card that you want to perform debugging on.
c.
Enter the command debug trunk cas port port-number timeslots range.
Ensure that your EXEC session receives logging and debug output from the NAS:
5800-NAS#logging console
Step 5
From the client Telnet session, Telnet into one of the idle modems (not in use). To do this, Telnet to an
IP address on the NAS (Ethernet or Loopback) followed by 2000 plus a TTY line number. This example
Telnets to TTY line 1 (2001).
5800-NAS#telnet 172.22.66.23 2001
Trying 172.22.66.23, 2001 ... Open
Note
This step is also known as a reverse Telnet.
For a Cisco AS5800, create an arbitrary IP host followed by a reverse Telnet. Use the show modem
shelf/slot/port command to determine which modem is associated with which TTY line. The following
example Telnets to TTY 500, which maps to modem 1/2/68.
5800-NAS#show modem 1/2/68
Mdm Typ
Status
Tx/Rx
--- -----------1/2/68 V.90
Idle
37333/31200
G
1
Duration
-------00:01:05
RTS
--RTS
CTS
--CTS
DCD
DTR
----noDCD DTR
Modem 1/2/68, Cisco MICA modem (Managed), Async1/2/68, TTY500
Firmware Rev: 2.6.2.0
5800-NAS(config)#ip host mod500 2500 172.22.66.23
5800-NAS(config)#^Z
5800-NAS#telnet mod500
Trying mod500 (172.22.66.23, 2500)... Open
Cisco AS5800 Operations, Administration, Maintenance, and Provisioning Guide
DOC-7810814=
3-11
Chapter 3
Operations
Verifying Modem Performance
Step 6
Log in from the client Telnet session. The Cisco IOS software sends out a username-password prompt.
This is a secured device.
Unauthorized use is prohibited by law.
User Access Verification
Username:admin
Password:
Sep
Sep
Sep
Sep
Step 7
23
23
23
23
05:04:58.047:
05:04:58.051:
05:04:58.051:
05:05:03.583:
TTY0:
TTY1:
TTY1:
TTY1:
pause timer type 1 (OK)
asserting DTR
set timer type 10, 30 seconds
set timer type 10, 30 seconds
Enter the at command to test connectivity to the NAS modem. The modem reports an “OK” return
message.
at
OK
Step 8
Dial the PRI phone number assigned to the NAS (in this example, 5551234). A connect string appears
when the modem connects.
atdt5551234
CONNECT 33600 /V.42/V.42bis
In this example:
Step 9
•
Modulation connect speed = 33600 bps. Expect to get a maximum of 33600 bps if you use a
PRI line. If you use RBS, expect to get a maximum of 31200 bps.
•
Error correction = V.42
•
Data compression = V.42bis
From the administrative Telnet session, inspect the debug output:
000434:
000435:
000436:
000437:
000438:
000439:
000440:
*May
*May
*May
*May
*May
*May
*May
2
2
2
2
2
2
2
23:01:39.507
23:01:39.507
23:01:39.507
23:01:39.507
23:01:39.507
23:01:39.507
23:01:39.511
UTC: ISDN Se1/0/0:23: RX <- SETUP pd = 8 callrefB
UTC:
Bearer Capability i = 0x9090A2
UTC:
Channel ID i = 0xA98381
UTC:
Progress Ind i = 0x8083 - Origination
UTC:
Calling Party Number i = 0x2183, '408'
UTC:
Called Party Number i = 0xC1, '324193'
UTC: allocate slot 2 and port 12 is allocated
000441:
000442:
000443:
000444:
000445:
000446:
000447:
000448:
000449:
000450:
000451:
000452:
000453:
000454:
000455:
000456:
*May
*May
*May
*May
*May
*May
*May
*May
*May
*May
*May
*May
*May
*May
*May
*May
2
2
2
2
2
2
2
2
2
2
2
2
2
2
2
2
23:01:39.511
23:01:39.511
23:01:39.511
23:01:39.511
23:01:39.511
23:01:39.539
23:01:39.539
23:01:39.563
23:01:39.563
23:01:39.563
23:01:39.563
23:01:57.778
23:01:57.778
23:01:57.778
23:01:57.778
23:02:05.462
UTC:
UTC:
UTC:
UTC:
UTC:
UTC:
UTC:
UTC:
UTC:
UTC:
UTC:
UTC:
UTC:
UTC:
UTC:
UTC:
ISDN Se1/0/0:23: TX -> CALL_PROC pd = 8 calB
Channel ID i = 0xA98381
CSM v(2/12) c(T1 1/0/0:0): CSM_EVENT_FROM_ISD.
CSM v(2/12) c(T1 1/0/0:0): CSM_PROC_IDLE: ev.
ISDN Se1/0/0:23: TX -> ALERTING pd = 8 callB
CSM v(2/12) c(T1 1/0/0:0): CSM_PROC_IC2_RING:.
ISDN Se1/0/0:23: TX -> CONNECT pd = 8 callrB
ISDN Se1/0/0:23: RX <- CONNECT_ACK pd = 8 cB
ISDN Se1/0/0:23: CALL_PROGRESS: CALL_CONNECTE0
CSM v(2/12) c(T1 1/0/0:0): CSM_EVENT_FROM_ISD.
CSM v(2/12) c(T1 1/0/0:0): CSM_PROC_IC6_WAIT_.
TTY1/2/12: DSR came up
tty1/2/12: Modem: IDLE->(unknown)
TTY1/2/12: EXEC creation
TTY1/2/12: create timer type 1, 600 seconds
TTY1/2/12: set timer type 10, 30 seconds
Cisco AS5800 Operations, Administration, Maintenance, and Provisioning Guide
3-12
DOC-7810814=
Chapter 3
Operations
Verifying Modem Performance
Note
You must have the logging console feature turned on to view this output on the screen.
The bearer capability 0x8090A2 indicates an analog voice call. Alternative bearer services include 64K
data calls, which are indicated by 0x8890. The calling party number is 408 (also known as ANI). The
called party number is 5551234 (also known as DNIS). The debug q931 command shows the call
coming into the NAS over ISDN.
*Jan 1 00:34:47.867:VDEV_ALLOCATE:1/2 is allocated from pool System-def-Mpool
*Jan 1 00:34:47.867:csm_get_vdev_for_isdn_call:fax_call=0
*Jan 1 00:34:47.867:EVENT_FROM_ISDN:(001A):DEV_INCALL at slot 1 and port 2
*Jan 1 00:34:47.867:CSM_PROC_IDLE:CSM_EVENT_ISDN_CALL at slot 1, port 2
*Jan 1 00:34:47.867:Mica Modem(1/2):Configure(0x1 = 0x0)
*Jan 1 00:34:47.867:Mica Modem(1/2):Configure(0x23 = 0x0)
*Jan 1 00:34:47.867:Mica Modem(1/2):Call Setup
*Jan 1 00:34:47.867: Enter csm_connect_pri_vdev function
*Jan 1 00:34:47.867:csm_connect_pri_vdev:tdm_allocate_bp_ts() call.
BP TS allocated at bp_stream0, bp_Ch5,vdev_common 0x610378B0
*Jan 1 00:34:47.883:ISDN Se0:23:RX <- ALERTING pd = 8 callref = 0x8004
*Jan 1 00:34:47.883:
Progress Ind i = 0x8288 - In-band info or appropriate now
available
*Jan 1 00:34:48.019:Mica Modem(1/2):State Transition to Call Setup
*Jan 1 00:34:48.019:Mica Modem(1/2):Went offhook
*Jan 1 00:34:48.019:CSM_PROC_IC2_RING:CSM_EVENT_MODEM_OFFHOOK at slot 1, port 2
*Jan 1 00:34:48.019:ISDN Se0:23:TX -> CONNECT pd = 8 callref = 0x8053
*Jan 1 00:34:48.047:ISDN Se0:23:RX <- CONNECT_ACK pd = 8 callref = 0x0053
*Jan 1 00:34:48.047:EVENT_FROM_ISDN::dchan_idb=0x6149A144, call_id=0x1A,
ces=0x1 bchan=0x0, event=0x4, cause=0x0
*Jan 1 00:34:48.047:EVENT_FROM_ISDN:(001A):DEV_CONNECTED at slot 1 and port 2
*Jan 1 00:34:48.047:CSM_PROC_IC4_WAIT_FOR_CARRIER:CSM_EVENT_ISDN_CONNECTED at slot 1,
port 2
*Jan 1 00:34:48.047:Mica Modem(1/2):Link Initiate
*Jan 1 00:34:48.047:ISDN Se0:23:RX <- CONNECT pd = 8 callref = 0x8004
*Jan 1 00:34:48.047:EVENT_FROM_ISDN::dchan_idb=0x6149A144, call_id=0x8005, ces=0x1
bchan=0x16, event=0x4, cause=0x0
*Jan 1 00:34:48.047:EVENT_FROM_ISDN:(8005):DEV_CONNECTED at slot 1 and port 0
*Jan 1 00:34:48.047:CSM_PROC_OC5_WAIT_FOR_CARRIER:CSM_EVENT_ISDN_CONNECTED at slot 1,
port 0
*Jan 1 00:34:48.051:ISDN Se0:23:TX -> CONNECT_ACK pd = 8 callref = 0x0004
MICA modem 1/2 goes offhook and receives the call. The debug modem csm command shows the call
getting switched over to a modem.
*Jan
*Jan
*Jan
*Jan
*Jan
*Jan
*Jan
1
1
1
1
1
1
1
00:34:49.159:Mica Modem(1/2):State Transition
00:34:53.903:Mica Modem(1/2):State Transition
00:35:02.851:Mica Modem(1/2):State Transition
00:35:04.531:Mica Modem(1/2):State Transition
00:35:04.711:Mica Modem(1/2):State Transition
00:35:04.755:TTY3:DSR came up
00:35:04.755:tty3:Modem:IDLE->(unknown)
to
to
to
to
to
Connect
Link
Trainup
EC Negotiating
Steady State
Cisco AS5800 Operations, Administration, Maintenance, and Provisioning Guide
DOC-7810814=
3-13
Chapter 3
Operations
Verifying Modem Performance
Inspect the different modem trainup phases. The modem goes from Connect to Steady State in
15 seconds. The debug modem csm command displays the trainup phases. The debug modem
command displays the logical EIA/TIA-232 transition message “DSR came up.”
*Jan
*Jan
*Jan
*Jan
*Jan
*Jan
*Jan
*Jan
1
1
1
1
1
1
1
1
00:35:04.759:TTY3:EXEC creation
00:35:04.759:TTY3:set timer type 10, 30 seconds
00:35:08.915:TTY3:Autoselect(2) sample 61 <------------------00:35:09.187:TTY3:Autoselect(2) sample 6164 <----------------00:35:09.459:TTY3:Autoselect(2) sample 61646D <--------------00:35:09.459:TTY3:Autoselect(2) sample 61646D69 <------------00:35:09.715:TTY3:Autoselect(2) sample 646D696E <------------00:35:09.715:TTY3:Autoselect(2) sample 6D696E0D <-------------
a
d
m
i
n
<cr>
Decode the incoming character-byte stream for an EXEC shell login (no PPP). In this example, match
the username “admin” to the character stream: 616D696E0D = admin carriage return.
The Cisco IOS samples four packets at a time. It searches for a header that matches one of your
autoselect styles. The debug modem command generates the autoselect debug output.
*Jan 1 00:35:09.715:TTY3:set timer type 10, 30 seconds
*Jan 1 00:35:11.331:TTY3:Autoselect(2) sample [suppressed--line
*Jan 1 00:35:11.667:TTY3:Autoselect(2) sample [suppressed--line
*Jan 1 00:35:11.987:TTY3:Autoselect(2) sample [suppressed--line
*Jan 1 00:35:11.987:TTY3:Autoselect(2) sample [suppressed--line
*Jan 1 00:35:11.987:TTY3:Autoselect(2) sample [suppressed--line
*Jan 1 00:35:12.339:TTY3:Autoselect(2) sample [suppressed--line
*Jan 1 00:35:12.391:TTY3:create timer type 1, 600 seconds
5800-NAS>
is
is
is
is
is
is
not
not
not
not
not
not
echoing]
echoing]
echoing]
echoing]
echoing]
echoing]
Type 10 is the login timer. The timeout is 30 seconds. The user’s EXEC-shell login password is
suppressed.
Step 10
Identify who is logged in. TTY line 3 corresponds to modem 1/2. Use the show terminal command to
see which modem is assigned to the TTY line.
5800-NAS> show user
Line
User
3 tty 3
admin
* 98 vty 0
joe
Interface
d.
User
Host(s)
idle
172.22.66.1
Idle Location
0
0 leftfield.corporate.com
Mode
Idle Peer Address
Program the terminal window not to pause in the middle of a screen display. To adjust the display
output on a Cisco AS5800, enter the terminal length 0 command instead.
5800-NAS> terminal length 0
Cisco AS5800 Operations, Administration, Maintenance, and Provisioning Guide
3-14
DOC-7810814=
Chapter 3
Operations
Verifying Modem Performance
Step 11
Generate traffic across the modem link. Force the answering modem (in the NAS) to send a data stream
to the client modem. The data stream generated by the show modem log command is about 1 MB.
The data should scroll freely for one or two minutes.
5800-NAS> show modem log
doc-rtr58-01#sh modem log
Modem 1/2/00 Events Log:
3w2d
:Startup event:MICA Hex modem (Managed)
Modem firmware = 0.7.3.7
2w2d
:Modem State event:
State:Terminate
2w2d
:Modem State event:
State:Idle
Modem 1/2/01 Events Log:
3w2d
:Startup event:MICA Hex modem (Managed)
Modem firmware = 0.7.3.7
2w2d
:Modem State event:
State:Terminate
2w2d
:Modem State event:
State:Idle
Modem 1/2/02 Events Log:
3w2d
:Startup event:MICA Hex modem (Managed)
Modem firmware = 0.7.3.7
2w2d
:Modem State event:
State:Terminate
2w2d
:Modem State event:
State:Idle
Step 12
Look at the modem’s operational statistics and verify that you have acceptable speed, line shape, and
throughput. In this example, modem 1/2 accepts the call.
If you do not have a scroll bar in your Telnet application, limit terminal length to 24 lines to see all the
command output.
If you are using Microcom modems, enter the modem at-mode slot/port command followed by the
at@e1 command.
5800-NAS> show modem operational-status 1/2/00
Modem(1/2/00) Operational-Status:
Parameter #0 Disconnect Reason Info: (0x0)
Type (=0 ): <unknown>
Class (=0 ): Other
Reason (=0 ): no disconnect has yet occurred
Parameter #1 Connect Protocol: LAP-M
Parameter #2 Compression: V.42bis both
Parameter #3 EC Retransmission Count: 0
Parameter #4 Self Test Error Count: 0
Parameter #5 Call Timer: 597 secs
Parameter #6 Total Retrains: 0
Parameter #7 Sq Value: 4
Parameter #8 Connected Standard: V.34+
Parameter #9 TX,RX Bit Rate: 33600, 33600
Parameter #11 TX,RX Symbol Rate: 3429, 3429
Parameter #13 TX,RX Carrier Frequency: 1959, 1959
Parameter #15 TX,RX Trellis Coding: 16, 16
Parameter #16 TX,RX Preemphasis Index: 0, 0
Parameter #17 TX,RX Constellation Shaping: Off, Off
Parameter #18 TX,RX Nonlinear Encoding: Off, Off
Parameter #19 TX,RX Precoding: Off, Off
Parameter #20 TX,RX Xmit Level Reduction: 0, 0 dBm
Parameter #21 Signal Noise Ratio: 41 dB
Cisco AS5800 Operations, Administration, Maintenance, and Provisioning Guide
DOC-7810814=
3-15
Chapter 3
Operations
Verifying Modem Performance
Parameter #22 Receive Level: -12 dBm
Parameter #23 Frequency Offset: 0 Hz
Parameter #24 Phase Jitter Frequency: 0 Hz
Parameter #25 Phase Jitter Level: 0 degrees
Parameter #26 Far End Echo Level: -52 dBm
Parameter #27 Phase Roll: 31 degrees
Parameter #28 Round Trip Delay: 1 msecs
Parameter #30 Characters transmitted, received: 70966, 80
Parameter #32 Characters received BAD: 2
Parameter #33 PPP/SLIP packets transmitted, received: 0, 0
Parameter #35 PPP/SLIP packets received (BAD/ABORTED): 0
Parameter #36 EC packets transmitted, received OK: 269, 61
Parameter #38 EC packets (Received BAD/ABORTED): 0
Parameter #39 Robbed Bit Signalling (RBS) pattern: 0
Parameter #40 Digital Pad: None, Digital Pad Compensation:None
Line Shape:
..............................*
................................*
.................................*
................................*
................................*
.................................*
.................................*
.................................*
................................*
.................................*
.................................*
................................*
................................*
................................*
................................*
................................*
................................*
................................*
.................................*
Table 3-4 describes the significant parameters in the previous example. For a complete command
reference description, refer to Modem Management Commands, available online at
http://www.cisco.com/univercd/cc/td/doc/product/software/ios120/12cgcr/dial_r/drprt1/
Table 3-4
Operational Parameter Descriptions for a Loopback Test Call
Parameter
Description
Parameter #1
Connect Protocol: LAP-M
LAP-M is the connection protocol.
Parameter #6
Total Retrains: 0
The modem has no retrain counts.
Parameter #8
Connected Standard: V.34+
The modem connects at V.34.
Parameter #9
TX,RX Bit Rate: 33600, 33600
The receive and transmit bit rate is 33600 bps, which is the fastest
possible V.34 speed. You will never attain V.90 with this test.
MICA-to-MICA calls default to V.34 modulation. V.90 requires
one analog modem.
Parameter #11 TX,RX Symbol Rate: 3429, 3429
The transmit and receive symbol rate is 3429. To achieve 33600
bps, you must have a 3429 Hz passband.
Parameter #21 Signal Noise Ratio: 41 dB
The signal to noise ratio is 41 dB.
Cisco AS5800 Operations, Administration, Maintenance, and Provisioning Guide
3-16
DOC-7810814=
Chapter 3
Operations
Verifying Modem Performance
Table 3-4
Operational Parameter Descriptions for a Loopback Test Call (continued)
Parameter
Description
Parameter #26 Far End Echo Level: -52 dBm
Use this field to detect a near-end digital-to-analog conversion. For
this test, an acceptable value is less than -55 dB.
If you see a high level of far end echo (-55 or higher), a
digital-to-analog conversion probably exists between the NAS and
the switch. This conversion severely impairs modem performance.
Parameter #30 Characters transmitted, received:
70966, 80
The number of characters transmitted and received by the modem.
Line shape:
A line shape is the frequency-response graph of the channel.
..............................*
................................*
.................................*
................................*
................................*
.................................*
.................................*
.................................*
................................*
.................................*
For this modem loopback test call, there should be no rolloff (even
at the highest frequency). High-end rolloff is characteristic of an
analog-to-digital conversion (not good).
A flat vertical line shape is an ideal V.90 line shape. ISDN uses a
64KB clear channel. No statistical roll off should exist at the low
end or the high end of the spectrum. The spectrum has a Y and X
axis.
The Y axis (vertical) represents frequencies from 150 Hz (top of
chart) to 3750 Hz (bottom of chart) in 150 Hz steps. A flat spectrum
plot is best, it is available for V.34, V.90, and K56Flex.
The X axis (horizontal) represents a normal amplitude. The graph
identifies nulls, bandwidth, and distortion (irregular shape).
Step 13
Turn off all debug commands:
5800-NAS# undebug all
All possible debugging has been turned off
Initiating and Inspecting a V.90 Test Call
Before you let users dial in to the NAS, initiate and inspect a V.90 test call. V.90 call performance is
heavily dependent upon the telco’s network topology. There are many variables.
Most modem manufactures have unique AT command sets. The AT commands used in the following
procedure may not be supported by your modem. For more information, refer to the following:
•
Modem manuals, available online at
http://56k.com/links/Modem_Manuals/
•
Modemsite.com’s troubleshooting website, available at
http://808hi.com/56k/trouble1.htm
Step 1
Locate a client PC, client modem, and an analog line.
Step 2
Test your EIA/TIA-232 connection to the client modem:
at
OK
Cisco AS5800 Operations, Administration, Maintenance, and Provisioning Guide
DOC-7810814=
3-17
Chapter 3
Operations
Verifying Modem Performance
Step 3
Verify that the modem is running the recommended firmware version. The following example shows a
U.S. Robotics 56K fax external modem running V.4.11.2. Compare the firmware version with the
version that is posted on the modem vendor’s website.
The ati3 and ati7 modem firmware commands are commonly used and are shown below:
ati3
U.S. Robotics 56K FAX EXT V4.11.2
OK
ati7
Configuration Profile...
Product type
Product ID:
Options
Fax Options
Line Options
Clock Freq
EPROM
RAM
US/Canada External
00568602
V32bis,V.34+,x2,V.90
Class 1/Class 2.0
Caller ID, Distinctive Ring
92.0Mhz
256k
32k
FLASH date
FLASH rev
6/3/98
4.11.2
DSP date
DSP rev
6/3/98
4.11.2
OK
Step 4
Verify that the modem is configured correctly. Enter the ati4 (USR) or at&v (Conexant) command.
To reset the modem to the factory defaults, enter the at&f, at&f1, or at&f2 command.
ati4
U.S. Robotics 56K FAX EXT Settings...
B0 E1 F1
BAUD=38400
DIAL=TONE
&A1
&M4
&B1
&N0
S00=000
S07=060
S15=000
S25=005
S33=000
S41=000
M1 Q0 V1 X1 Y0
PARITY=N WORDLEN=8
ON HOOK
CID=0
&C1
&P0
&D2
&R1
S01=000
S08=002
S16=000
S27=000
S34=000
S42=000
&G0
&S0
&H0
&T5
S02=043
S09=006
S18=000
S28=008
S35=000
&I0
&U0
&K0
&Y1
S03=013 S04=010 S05=008 S06=002
S10=014 S11=070 S12=050 S13=000
S19=000 S21=010 S22=017 S23=019
S29=020 S30=000 S31=128 S32=002
S36=014S38=000 S39=000 S40=001
LAST DIALED #: T14085551234
OK
Cisco AS5800 Operations, Administration, Maintenance, and Provisioning Guide
3-18
DOC-7810814=
Chapter 3
Operations
Verifying Modem Performance
Step 5
Dial the access server’s telephone number, log in, and access the EXEC shell. The client modem is
connected at 48000 bps in this example.
atdt14085551234
CONNECT 48000/ARQ
This is a secured device.
Unauthorized use is prohibited by law.
User Access Verification
Username:user
Password:
5800-NAS>
Step 6
Inspect your call on the access server. In the example, the call landed on TTY line 1. The call has been
up for 36 seconds.
5800-NAS> show caller
Line
vty 0
User
-
Service
VTY
Active
Time
00:07:46
Idle
Time
00:00:00
5800-NAS> show caller
Note
Step 7
The show caller command is supported in Cisco IOS Release 11.3 AA and 12.0 T.
Use the show user command if your software does not support the show caller
command.
Inspect the physical terminal line that received the call. In the example, the call landed on modem 1/0.
5800-NAS> show terminal
Line 1/2/10, Location: "", Type: ""
Length: 24 lines, Width: 80 columns
Status: PSI Enabled, Ready, Active, No Exit Banner
Capabilities: Hardware Flowcontrol In, Hardware Flowcontrol Out
Modem Callout, Modem RI is CD
Modem state: Ready
Modem hardware state: CTS DSR DTR RTS
modem=1/2/10, vdev_state(0x00000000)=CSM_OC_STATE, bchan_num=(T1 1/0/0:0)
vdev_status(0x00000001): VDEV_STATUS_ACTIVE_CALL.
Group codes:
0
Special Chars: Escape Hold Stop Start Disconnect Activation
^^x
none
none
Timeouts:
Idle EXEC
Idle Session
Modem Answer Session
00:10:00
never
none
Idle Session Disconnect Warning
never
Login-sequence User Response
00:00:30
Autoselect Initial Wait
not set
Dispatch
not set
Cisco AS5800 Operations, Administration, Maintenance, and Provisioning Guide
DOC-7810814=
3-19
Chapter 3
Operations
Verifying Modem Performance
Modem type is unknown.
Session limit is not set.
Time since activation: 00:12:24
Editing is enabled.
History is enabled, history size is 10.
DNS resolution in show commands is enabled
Full user help is disabled
Allowed transports are lat pad v120 telnet rlogin dsipcon.
No output characters are padded
No special data dispatching characters
Step 8
Preferred is lat.
Program the display window so it does not pause in the middle of a screen display:
5800-NAS> terminal length 0
Step 9
Generate traffic across the modem link. Perform a lightweight stress test between the modems to
generate meaningful modem-performance statistics.
5800-NAS> show modem log
Modem 1/2/00 Events Log:
3w4d
:Startup event:MICA Hex modem (Managed)
Modem firmware = 2.7.1.0
3w4d
:RS232 event: noRTS, noDTR, CTS, noDCD
3w4d
:RS232 event: noRTS, DTR, CTS, noDCD
The output generated by the show modem log command sends a large data stream across the modem
link - about 1 MB of data. The data should scroll freely for one or two minutes.
Step 10
Inspect the NAS modem that answered the call, and verify that it has acceptable connect speed,
throughput, and line shape. This example examines MICA modem 1/0. If you have Microcom modems,
enter the modem at-mode slot/port command followed by the at@e1 command.
5800-NAS> show modem operational-status 1/2/00
Modem(1/2/00) Operational-Status:
Parameter #0 Disconnect Reason Info: (0x0)
Type (=0 ): <unknown>
Class (=0 ): Other
Reason (=0 ): no disconnect has yet occurred
Parameter #1 Connect Protocol: LAP-M
Parameter #2 Compression: None
Parameter #3 EC Retransmission Count: 2
Parameter #4 Self Test Error Count: 0
Parameter #5 Call Timer: 118 secs
Parameter #6 Total Retrains: 0
Parameter #7 Sq Value: 3
Parameter #8 Connected Standard: V.90
Parameter #9 TX,RX Bit Rate: 48000, 28800
Parameter #11 TX,RX Symbol Rate: 8000, 3200
Parameter #13 TX,RX Carrier Frequency: 0, 1920
Parameter #15 TX,RX Trellis Coding: 0, 16
Parameter #16 TX,RX Preemphasis Index: 0, 6
Parameter #17 TX,RX Constellation Shaping: Off, Off
Parameter #18 TX,RX Nonlinear Encoding: Off, Off
Parameter #19 TX,RX Precoding: Off, Off
Parameter #20 TX,RX Xmit Level Reduction: 0, 0 dBm
Parameter #21 Signal Noise Ratio: 36 dB
Parameter #22 Receive Level: -19 dBm
Parameter #23 Frequency Offset: 0 Hz
Parameter #24 Phase Jitter Frequency: 0 Hz
Parameter #25 Phase Jitter Level: 0 degrees
Cisco AS5800 Operations, Administration, Maintenance, and Provisioning Guide
3-20
DOC-7810814=
Chapter 3
Operations
Verifying Modem Performance
Parameter #26 Far End Echo Level: -37 dBm
Parameter #27 Phase Roll: 0 degrees
Parameter #28 Round Trip Delay: 23 msecs
Parameter #30 Characters transmitted, received: 67109, 43
Parameter #32 Characters received BAD: 0
Parameter #33 PPP/SLIP packets transmitted, received: 0, 0
Parameter #35 PPP/SLIP packets received (BAD/ABORTED): 0
Parameter #36 EC packets transmitted, received OK: 565, 43
Parameter #38 EC packets (Received BAD/ABORTED): 2
Parameter #39 Robbed Bit Signalling (RBS) pattern: 0
Parameter #40 Digital Pad: 6.0
dB, Digital Pad Compensation:None
Line Shape:
.........................*
................................*
.................................*
.................................*
................................*
.................................*
.................................*
.................................*
................................*
................................*
................................*
................................*
................................*
................................*
................................*
................................*
................................*
Table 3-5 describes the significant output fields (bold font) in the previous example:
Table 3-5
Show Modem Operational-Status Field Descriptions
Parameter
Description
Parameter #6 Total Retrains: 0
Total retrains and speed shifts for the current connection. There are
no retrains.
Parameter #8 Connected Standard: V.90
V.90 modulation is negotiated.
Standard connect protocol which can be V.21, Bell03, V.22, V.22bis,
Bell212, V.23, V.32, V.32bis, V.32terbo, V.34, V.34+, K56Flex, or
V.90.
Parameter #9 TX, RX Bit Rate: 48000, 28800
The transmit speed (TX) is 48000 bps. The receive speed (RX) is
28800 bps.
TX is the bit rate from the local DCE (NAS modem) to the remote
DCE (client modem). RX is the bit rate from the remote DCE to the
local DCE. V.90 uplink speed tends to be lower than V.34 uplink
speed.
Parameter #21 Signal Noise Ratio: 36 dB
The signal to noise ratio (SNR) is 36 dB. (40 dB is a perfect SNR.
MICA measures the SNR in the signal band. The SNR value ranges
from 0 to 70 dB, and it changes in 1 dB steps.
A 28.8 kbps connection requires a SNR of about 37 dB. SNRs lower
than 37 dB reduce the quality of the connection.
A 33.6 kbps connection requires a SNR of about 38 to 39 dB.
Cisco AS5800 Operations, Administration, Maintenance, and Provisioning Guide
DOC-7810814=
3-21
Chapter 3
Operations
Verifying Modem Performance
Table 3-5
Show Modem Operational-Status Field Descriptions (continued)
Parameter
Description
Parameter 30
Characters transmitted, received: 67109, 43
67109 characters are transmitted by the NAS modem to the client
modem over the synchronous/asynchronous connection.
Line shape:
.........................*
................................*
.................................*
.................................*
................................*
.................................*
.................................*
.................................*
................................*
................................*
................................*
................................*
................................*
................................*
................................*
A line shape is the frequency-response graph of the channel.
Step 11
A flat vertical line shape is an ideal V.90 line shape. ISDN uses a
64-kb clear channel. No statistical roll off should exist at the low end
or the high end of the spectrum. The spectrum has a Y and X axis.
The Y axis (vertical) represents frequencies from 150 Hz (top of
chart) to
3750 Hz (bottom of chart) in 150 Hz steps. A flat spectrum plot is
best, it is available for V.34, V.90, and K56Flex.
The X axis (horizontal) represents a normal amplitude. The graph
identifies nulls, bandwidth, and distortion (irregular shape).
Enter the +++ command to jump back to the client modem and examine client-side performance
statistics. The modem connection to the NAS is not dropped.
5800-NAS>+++
OK
at
OK
In the example, the client modem reports both “OK” messages. The +++ modem-escape sequence is
similar to a router’s Telnet-escape mode (Shift + Ctrl + 6 + x). See Figure 3-7.
Figure 3-7
Using Modem-Escape Mode to View Client-Side Modem Statistics
+++ enables the client PC
to communicate directly
to the client modem
Client PC
33174
PSTN
Client modem
The connection to
the NAS is still up
NAS
Cisco AS5800 Operations, Administration, Maintenance, and Provisioning Guide
3-22
DOC-7810814=
Chapter 3
Operations
Verifying Modem Performance
Step 12
Enter the ati6 command to display, among other things, the receive and transmit-carrier speeds.
Compare the displayed information with the output from the show modem operational-status
command.
If ati6 is not supported by your modem, try at&v1. For additional client report statistics,
enable Windows modemlog.txt or ppplog.txt files.
ati6
U.S. Robotics 56K FAX EXT Link Diagnostics...
Chars sent
Chars lost
Octets sent
Blocks sent
Blocks resent
Retrains Requested
Line Reversals
Link Timeouts
Data Compression
Equalization
Fallback
Protocol
Speed
V.90 Peak Speed
Current Call
98
0
354
95
4
0
0
0
Chars Received
104701
Octets Received
Blocks Received
104701
914
Retrains Granted
Blers
Link Naks
0
0
1
NONE
Long
Enabled
LAPM
48000/28800
48000
00:04:46
Online
OK
Tips
For a detailed explanation of this command, refer to Modemsite.com’s website at
http://808hi.com/56k/diag3com.htm
Cisco AS5800 Operations, Administration, Maintenance, and Provisioning Guide
DOC-7810814=
3-23
Chapter 3
Operations
Verifying Modem Performance
Step 13
Inspect frequency levels (dB) and other diagnostic functions. The following AT commands display the
client modem’s view of the frequency response. The display is a companion to the output of the show
modem operational-status command (see Step 9).
aty11
Freq
150
300
450
600
750
900
1050
1200
1350
1500
1650
1800
1950
2100
2250
2400
2550
2700
2850
3000
3150
3300
3450
3600
3750
Level (dB)
24
23
22
22
22
22
22
22
22
22
22
23
23
23
23
23
23
23
23
23
23
24
25
27
31
ati11
U.S. Robotics 56K FAX EXT Link Diagnostics...
Modulation
Carrier Freq
(Hz)
Symbol Rate
Trellis Code
Nonlinear Encoding
Precoding
Shaping
Preemphasis
(-dB)
Recv/Xmit Level (-dBm)
Near Echo Loss
(dB)
Far Echo Loss
(dB)
Carrier Offset
(Hz)
Round Trip Delay (msec)
Timing Offset
(ppm)
SNR
(dB)
Speed Shifts Up/Down
Status :
OK
V.90
None/1920
8000/3200
None/64S-4D
None/ON
None/ON
ON/ON
6/2
19/10
7
0
NONE
24
1638
48.1
0/0
uu,5,13Y,19.4,-15,1N,0,51.1,7.3
Cisco AS5800 Operations, Administration, Maintenance, and Provisioning Guide
3-24
DOC-7810814=
Chapter 3
Operations
Configuring PPP and Authentication
Step 14
(Optional) To return to online mode and the router prompt, enter the ato command. After your enter this
command, however, the +++ escape sequence is still in the EXEC session’s input buffer. If you press
the carriage return (<CR>), you will receive an error about +++ being an unknown command.
To clear the input buffer, type Ctrl U after the ato command.
ato
% Unknown command or computer name, or unable to find computer address
5800-NAS>
Configuring PPP and Authentication
This section describes how to configure the Cisco AS5800 for PPP and local authentication.
The following sections are provided:
•
Configuring PPP Authentication for Local AAA, page 3-25
•
Configuring IPCP Options, page 3-26
•
Configuring LCP Options, page 3-27
•
Enabling PPP Autoselect, page 3-28
•
Testing Asynchronous PPP Connections, page 3-29
•
Inspecting Active Call States, page 3-34
•
Confirming the Final Running Configuration, page 3-38
After local authentication is verified, use TACACS+ and a remote authentication server or RADIUS.
Configuring PPP Authentication for Local AAA
Configure AAA to perform log in authentication by using the local username database. The login
keyword authenticates EXEC terminal shell users. Additionally, configure PPP authentication to use the
local database if the session was not already authenticated by login.
Step 1
Create a local log in username database in global configuration mode. In this example, admin is used for
the administrator and the remote client’s login password is user.
!
username admin password adminpass
username theuser password theuserpass
!
Warning
Step 2
This step also prevents you from getting locked out of the NAS. If you get locked out, you
must reboot the device and perform password recovery.
Configure local AAA security in global configuration mode. You must enter the aaa new-model
command before the other two authentication commands.
!
aaa new-model
aaa authentication login default local
aaa authentication ppp default if-needed local
!
Cisco AS5800 Operations, Administration, Maintenance, and Provisioning Guide
DOC-7810814=
3-25
Chapter 3
Operations
Configuring PPP and Authentication
Step 3
Log in with your username and password:
5800-NAS# login
This is a secured device.
Unauthorized use is prohibited by law.
User Access Verification
Username: theuser
Password:
5800-NAS#
Caution
A successful login means that your local username will work on any TTY or VTY line. Do
not disconnect your session until you can log in. (If you get locked out, you will need to
perform password recovery by rebooting the device.)
Configuring IPCP Options
Create a pool of IP addresses to assign to the PC clients dialing in. As the clients connect, they request
IP addresses from the NAS.
Tips
Step 1
Remote ISDN LANs and remote nodes are primarily differentiated by an IP addressing
scheme. Remote LANs can appear as remote nodes by using port address translation
(PAT).
Define the local IP address pool and DNS servers:
!
ip local pool addr-pool 172.22.90.2 172.22.90.254
!
async-bootp dns-server 172.30.10.1 172.30.10.2
!
For clients using server-assigned addressing (if there are any) you must specify primary and secondary
DNS servers. The clients send config-requests to the NAS if the clients are configured to receive NAS
assigned WINS and DNS servers.
Note
Step 2
RFC 1877 describes DNS and NBNS servers. The domain name must also be
configured on the client.
Verify that the IP address pool was created:
5800-NAS# show ip local pool
Pool
Begin
addr-pool
172.22.90.2
5800-NAS#
End
172.22.90.254
Free
253
In use
0
Cisco AS5800 Operations, Administration, Maintenance, and Provisioning Guide
3-26
DOC-7810814=
Chapter 3
Operations
Configuring PPP and Authentication
Configuring LCP Options
The group-async interface is a template that controls the configuration of all the asynchronous interfaces
in the NAS.
Asynchronous interfaces:
•
Are lines that can run in PPP mode
•
Use the same number as its corresponding line
•
Save you time and configuration file size by configuring the asynchronous interfaces as a
group-async
The client PPP framing must match the Cisco IOS interface. Figure 3-8 shows this concept.
Modem Dialup PPP Framing
POTS
RS-232
Async PPP
Client
PC
PRI
PSTN
Client
modem
33187
Figure 3-8
Cisco AS5x00
group-async
The following group-async configuration applies to asynchronous interfaces 1/2/00 through 1/10/143:
!
interface Group-Async0
ip unnumbered FastEthernet0/1/0
encapsulation ppp
async mode interactive
ppp authentication chap pap
peer default ip address pool addr-pool
no cdp enable
no ip directed-broadcast
group-range 1/2/00 1/10/143
!
Table 3-6 describes the previous configuration snippet in more detail:
Table 3-6
Interface Group Async Command Descriptions
Command
Purpose
ip unnumbered FastEthernet0/1/0
Conserves IP address space by configuring the
asynchronous interfaces as unnumbered.
encapsulation ppp
Enables PPP.
async mode interactive
Configures interactive mode on the asynchronous
interfaces. Interactive means that users can dial in and get
to a shell or PPP session on that line.
ppp authentication chap pap
Enables CHAP and PAP authentication on the interface
during LCP negotiation. The NAS first requests to
authenticate with CHAP. If CHAP is rejected by the remote
client (modem), then PAP authentication is requested.
Cisco AS5800 Operations, Administration, Maintenance, and Provisioning Guide
DOC-7810814=
3-27
Chapter 3
Operations
Configuring PPP and Authentication
Table 3-6
Interface Group Async Command Descriptions (continued)
Command
Purpose
peer default ip address pool
addr-pool
Assigns dial-in client IP addresses from the pool named
addr-pool.
no cdp enable
Disables the Cisco discovery protocol.
no ip directed-broadcast
Prevents IP directed broadcasts.
group-range 1/2/00 1/10/143
Specifies the range of asynchronous interfaces to include in
the group, which is usually equal to the number of modems
you have in the NAS.
(The session may pause for several seconds when you issue
this command.)
Enabling PPP Autoselect
Enable remote PPP users to dial in, bypass the EXEC facility, and automatically start PPP on the line.
!
line 1/2/00 1/10/143
autoselect during-login
autoselect ppp
!
These two autoselect commands:
Note
•
Provide the transparent launching of shell and PPP services on the same lines.
•
Circumvent the need to alert the NAS by pressing the return key. Older versions of Cisco IOS
software did not have this feature and required the peer to hit return before the username was
displayed.
The autoselect during-login command displays the username:password prompt after
modems connect.
Cisco AS5800 Operations, Administration, Maintenance, and Provisioning Guide
3-28
DOC-7810814=
Chapter 3
Operations
Configuring PPP and Authentication
Testing Asynchronous PPP Connections
Before you troubleshoot PPP negotiation or AAA authentication, you need to understand what a
successful PPP and AAA debug sequence looks like. In this way, you can save time and effort when
comparing a successful debug session against a faulty completed debug sequence.
Successful PPP Negotiation Debug
The following steps describe how to initiate a PPP test call and interpret a successful debug sequence.
Step 1
Enter the appropriate debug commands:
5800-NAS# debug ppp authentication
PPP authentication debugging is on
5800-NAS# debug aaa authentication
AAA Authentication debugging is on
5800-NAS# show debug
General OS:
AAA Authentication debugging is on
PPP:
PPP authentication debugging is on
Step 2
Make sure that your EXEC session receives logging and debug output:
5800-NAS# logging console
Step 3
From the client, send a test call into the NAS by using dialup networking. Figure 3-9 shows an example
Windows dialup networking display.
Windows Dialup Networking
33183
Figure 3-9
Step 4
Go to the NAS terminal screen to observe and interpret the debug output messages. As the call enters
the NAS, debug output is created.
When examining PPP between two remote peers:
a.
First check to see if DSR came up.
b.
Verify that both sides get through LCP negotiation. If they do, check authentication.
Cisco AS5800 Operations, Administration, Maintenance, and Provisioning Guide
DOC-7810814=
3-29
Chapter 3
Operations
Configuring PPP and Authentication
c.
After authentication succeeds, check IPCP negotiation.
d.
If no debug output appears, troubleshoot ISDN Q.931. Use the debug isdn q931 command.
Given the debug commands entered in Step 1, the following debug output should be generated by the
call:
*Sep 24 13:05:49.052: AAA: parse name=tty1/2/09 idb type=10 tty=441
*Sep 24 13:05:49.052: AAA: name=tty1/2/09 flags=0x1D type=4 shelf=0 slot=1 adapter=2
port=9 channel=0
*Sep 24 13:05:49.052: AAA: parse name=Serial1/0/0:4:21 idb type=12 tty=-1
*Sep 24 13:05:49.052: AAA: name=Serial1/0/0:4:21 flags=0x5D type=1 shelf=0 slot=1
adapter=0 port=4 channel=21
In this example, the call enters the NAS on channel 1/0/0:4:21. This channel maps to the 21st DS0
channel of the 4th PRI line of a CT3 card. Eventually the call terminates on modem 441.
*Sep 24 13:05:49.052: AAA/MEMORY: create_user (0x63E8FB70) user='' ruser='' port
='tty1/2/09' rem_addr='4089548211/51121' authen_type=ASCII service=LOGIN priv=1
*Sep 24 13:05:49.052: AAA/AUTHEN/START (1586904428): port='tty1/2/09' list='' ac
tion=LOGIN service=LOGIN
*Sep 24 13:05:49.052: AAA/AUTHEN/START (1586904428): using "default" list
*Sep 24 13:05:49.052: AAA/AUTHEN/START (1586904428): Method=LOCAL*Sep 24 13:05:49.052:
AAA/AUTHEN (1586904428): status = GETUSER
*Sep 24 13:05:49.072: AAA/AUTHEN/ABORT: (1586904428) because Autoselected.
*Sep 24 13:05:49.072: AAA/MEMORY: free_user (0x63E8FB70) user='' ruser='' port='
An authentication start packet is sent by AAA, and it searches the local username database as the default
authentication method.
tty1/2/09' rem_addr='4089548211/51121' authen_type=ASCII service=LOGIN priv=1
*Sep 24 13:05:51.076: As1/2/09 PPP: Treating connection as a dedicated line
*Sep 24 13:05:55.272: As1/2/09 PPP: Phase is AUTHENTICATING, by this end
*Sep 24 13:05:55.404: As1/2/09 PAP: I AUTH-REQ id 1 len 20 from "theuser"
*Sep 24 13:05:55.404: As1/2/09 PAP: Authenticating peer theuser
PPP is allowed to start on the interface. The client sends an authentication request called theuser. PAP
authentication is used.
*Sep 24 13:05:55.404: AAA: parse name=Async1/2/09 idb type=10 tty=441
*Sep 24 13:05:55.404: AAA: name=Async1/2/09 flags=0x1D type=4 shelf=0 slot=1 adapter=2
port=9 channel=0
*Sep 24 13:05:55.404: AAA: parse name=Serial1/0/0:4:21 idb type=12 tty=-1
*Sep 24 13:05:55.404: AAA: name=Serial1/0/0:4:21 flags=0x5D type=1 shelf=0 slot=1
adapter=0 port=4 channel=21
*Sep 24 13:05:55.404: AAA/MEMORY: create_user (0x63E8FB70) user='theuser'
ruser=''port='Async1/2/09' rem_addr='4089548211/51121' authen_type=PAP service=PPP priv=1
*Sep 24 13:05:55.404: AAA/AUTHEN/START (693233173): port='Async1/2/09' list=''
action=LOGIN service=PPP
*Sep 24 13:05:55.404: AAA/AUTHEN/START (693233173): using "default" list
*Sep 24 13:05:55.404: AAA/AUTHEN (693233173): status = UNKNOWN
*Sep 24 13:05:55.404: AAA/AUTHEN/START (693233173): Method=LOCAL
*Sep 24 13:05:55.404: AAA/AUTHEN (693233173): status = PASS
*Sep 24 13:05:55.404: As1/2/09 PAP: O AUTH-ACK id 1 len 5
The example above shows that local authentication was successful.
Cisco AS5800 Operations, Administration, Maintenance, and Provisioning Guide
3-30
DOC-7810814=
Chapter 3
Operations
Configuring PPP and Authentication
Failed PPP Negotiation Debugging and Troubleshooting
Failed authentication is a common occurrence. Misconfigured or mismatched user names and passwords
create error messages in debug output.
The following example shows that the username maddog does not have permission to dial into the NAS.
The NAS does not have a local username configured for this user. To fix the problem, use the username
name password password command to add the username to the local AAA database in the NAS:
*Sep 24 13:11:28.964: AAA/MEMORY: create_user (0x63E43558) user='maddog' ruser=''
port='Async1/2/10' rem_addr='4089548211/51121' authen_type=PAP service=PPP priv=1
*Sep 24 13:11:28.964: AAA/AUTHEN/START (3281080218): port='Async1/2/10'
list=''action=LOGIN service=PPP
*Sep 24 13:11:28.964: AAA/AUTHEN/START (3281080218): using "default" list
*Sep 24 13:11:28.964: AAA/AUTHEN (3281080218): status = UNKNOWN
*Sep 24 13:11:28.964: AAA/AUTHEN/START (3281080218): Method=LOCAL
*Sep 24 13:11:28.964: AAA/AUTHEN (3281080218): User not found, end of method list
*Sep 24 13:11:28.964: AAA/AUTHEN (3281080218): status = FAIL
*Sep 24 13:11:28.964: As1/2/10 PAP: O AUTH-NAK id 1 len 32 msg is "Password validation
failure"
*Sep 24 13:11:28.964: AAA/MEMORY: free_user (0x63E43558) user='maddog'
ruser=''port='Async1/2/10' rem_addr='4089548211/51121' authen_type=PAP service=PPP priv=1
The following example shows an invalid password. Notice that the same error messages are used for
username failure—“Password validation failure.”
*Sep 24 13:13:59.032: AAA/MEMORY: create_user (0x63E9846C) user='user'
ruser=''port='Async1/2/11' rem_addr='4089548211/51121' authen_type=PAP service=PPP priv=1
*Sep 24 13:13:59.032: AAA/AUTHEN/START (3032205297): port='Async1/2/11'
list=''action=LOGIN service=PPP
*Sep 24 13:13:59.032: AAA/AUTHEN/START (3032205297): using "default" list
*Sep 24 13:13:59.032: AAA/AUTHEN (3032205297): status = UNKNOWN
*Sep 24 13:13:59.032: AAA/AUTHEN/START (3032205297): Method=LOCAL
*Sep 24 13:13:59.032: AAA/AUTHEN (3032205297): status = FAIL
*Sep 24 13:13:59.032: As1/2/11 PAP: O AUTH-NAK id 1 len 32 msg is "Password validation
failure"
*Sep 24 13:13:59.036: AAA/MEMORY: free_user (0x63E9846C) user='user' ruser=''
port='Async1/2/11' rem_addr='4089548211/51121' authen_type=PAP service=PPP priv=1
Troubleshooting Flow Diagrams
Figure 3-10 provides a flowchart for troubleshooting the following three PPP layers:
•
Physical layer
•
Link Control Protocol (LCP) and authentication layer
•
Network Control Protocol (NCP) layer
Cisco AS5800 Operations, Administration, Maintenance, and Provisioning Guide
DOC-7810814=
3-31
Chapter 3
Operations
Configuring PPP and Authentication
Figure 3-10 Troubleshooting Flow Chart for PPP and Authentication
User dials in
Do the
modems
connect?
No
debug modem
debug modem csm
show modem log
Physical layer
Yes
LCP
negotiation
Did it
succeed?
No
debug ppp error
debug ppp negotiation
No
debug ppp authentication
debug aaa authentication
Yes
Authentication
negotiation
Did it
succeed?
LCP layer
Yes
NCP layer
Network layer
configuration
(IPCP)
Did it
succeed?
No
debug ppp negotiation
debug aaa authorization
Enter the show caller
command to inspect
the user's session.
33181
Yes
Cisco AS5800 Operations, Administration, Maintenance, and Provisioning Guide
3-32
DOC-7810814=
Chapter 3
Operations
Configuring PPP and Authentication
LCP negotiation is a series of LCP packets exchanged between PPP peers to negotiate a set of options
and option values when sending data. The LCP negotiation is actually two separate dialogs between two
PPP peers (Peer1 and Peer 2):
Peer 1 and Peer 2 do not have to use the same set of LCP options. When a PPP peer sends its initial
Configure-Request, the response is any of the following:
•
A Configure-Nack because one or more options have unacceptable values.
•
A Configure-Reject because one or more of the options are unknown or not negotiable.
•
A Configure-Ack because all of the options have acceptable values.
When a PPP peer receives a Configure-Nack or Configure-Reject in response to its Configure-Request,
it sends a new Configure-Request with modified options or option values. When a Configure-Ack is
received, the PPP peer is ready to send data.
Figure 3-11 shows an example LCP negotiation process for Peer 1 using the fictional options W, X, Y,
Z. Additionally, Figure 3-11 shows Peer 1 sending data to Peer 2 only. Separate LCP negotiation must
be configured so that Peer 2 can send data back to Peer 1. Very often, the LCP packets for both Peer 1
and Peer 2 are intermixed during the connection process (that is, Peer 1 is configuring the way it sends
data at the same time as Peer 2.).
Figure 3-11 LCP Layer Negotiations
Peer 1
Peer 2
Configure-Reject: Z
3
Configure-Request: W, X=100, Y=0
Configure-Nack: X=200
5
2
4
Configure-Request: W, X=200, Y=0
Configure-Ack: W, X=200, Y=0
6
33182
1
Configure-Request: W, X=100, Y=0, Z
Figure 3-11 shows that:
•
Peer 1 sends a Configure-Request requesting option W, option X set to 100, option Y set to 0, and
option Z. (Options W and Z are flag options.)
•
Peer 2 does not understand option Z so it sends a Configure-Reject containing option Z.
•
Peer 1 sends a new Configure-Request packet requesting option W, option X set to 100, and option
Y set to 0.
•
Peer 2 prefers that option X be set to 200 so it sends a Configure-Nack containing option X and its
preferred value.
•
Peer 1 sends a new Configure-Request packet requesting option W, option X set to 200, and option
Y set to 0.
•
Peer 2 sends a Configure-Ack.
Each time Peer 1 sends a new Configure-Request, it changes the Identifier value in the LCP header so
that Configure-Requests can be matched with their responses.
Cisco AS5800 Operations, Administration, Maintenance, and Provisioning Guide
DOC-7810814=
3-33
Chapter 3
Operations
Configuring PPP and Authentication
Inspecting Active Call States
After a basic PPP modem call comes into the NAS, you should use some show commands to inspect
several active call statistics. If you try to use the client’s web browser after the modems connect, you
will test DNS, IP, and other functions. If your test fails, try pinging the DNS server from the device that
dialed in.
Show Caller Statistics
The show caller command is used to:
•
View individual users and consumed resources on the NAS.
•
Inspect active call statistics for large pools of connections. (Debug commands produce too much
output and tax the CPU too heavily.)
•
Display the absolute and idle times for each user. The current values for both of these settings are
displayed on the TTY line and the asynchronous interface. Users that have been idle for
unacceptably long periods of time can be easily identified. By using this information, you can define
timeout policies and multiple grades of services for different users.
The show caller command has many options:
5800-NAS# show caller ?
full
Provide expanded caller information
interface Provide information on one interface
ip
Display IP information
line
Provide information on one line
timeouts
Display session and idle limits and disconnect time
user
Display information for a particular user
|
Output modifiers
<cr>
5800-NAS# show caller
Line
vty 0
tty 441
As1/2/09
User
admin
theuser
theuser
Service
VTY
Async
PPP
Active
Time
00:54:39
00:00:15
00:00:08
Idle
Time
00:00:00
00:00:00
00:00:00
Cisco AS5800 Operations, Administration, Maintenance, and Provisioning Guide
3-34
DOC-7810814=
Chapter 3
Operations
Configuring PPP and Authentication
5800-NAS# show caller user theuser
User: theuser, line tty 441, service Async
Active time 00:01:24, Idle time 00:01:05
Timeouts:
Absolute Idle
Idle
Session
Exec
Limits:
00:10:00
Disconnect in:
TTY: Line 1/2/09, running PPP on As1/2/09
Location: PPP: 192.168.10.4
DS0: (slot/unit/channel)=0/4/21
Status: Ready, Active, No Exit Banner, Async Interface Active
HW PPP Support Active, Modem Detected
Capabilities: Hardware Flowcontrol In, Hardware Flowcontrol Out
Modem Callout, Modem RI is CD,
Line usable as async interface, Modem Autoconfigure
Modem State: Ready, Modem Configured
User: theuser, line As1/2/09, service PPP
Active time 00:01:17, Idle time 00:01:05
Timeouts:
Absolute Idle
Limits:
Disconnect in:
PPP: LCP Open, PAP (<- AAA), IPCP
IP: Local 172.22.66.23, remote 172.22.90.2
Counts: 30 packets input, 1640 bytes, 0 no buffer
1 input errors, 1 CRC, 0 frame, 0 overrun
14 packets output, 290 bytes, 0 underruns
0 output errors, 0 collisions, 0 interface resets
In the previous example, notice that one call uses the following system resources:
Note
•
TTY line 441
•
Asynchronous interface 1/2/09 (shelf/slot/port)
•
DS0 channel number 0/4/21
•
Modem 1/2/09
Different data is presented at each layer of the connection. Understanding the roles of the
layers is very useful for troubleshooting purposes. The show caller user “username”
detailed command displays detailed LCP negotiated parameters.
Table 3-7 describes some of the significant display output fields of the show caller user command:
Table 3-7
Show Caller User Command Descriptions
Field
Description
User: theuser, line tty 441, service Async
Active user on line TTY 441. The output fields are
very similar to the show line command.
DS0: (slot/unit/channel)=0/4/21
The DS0 channel used by the call.
User: admin, line As1/2/09, service PPP
Active user on asynchronous interface 1/2/09. The
timeouts working on the PPP layer are displayed,
which are different from the TTY line timeouts.
Cisco AS5800 Operations, Administration, Maintenance, and Provisioning Guide
DOC-7810814=
3-35
Chapter 3
Operations
Configuring PPP and Authentication
Table 3-7
Show Caller User Command Descriptions (continued)
Field
Description
PPP: LCP Open, CHAP (<- AAA), IPCP
Superficial information about what is open in PPP.
The field “(<- AAA)” is somewhat misleading.
Local authentication is also from AAA.
For more detailed IPCP information, enter the
show caller user detail command.
IP: Local 172.22.66.23, remote 172.22.90.2
The IP addresses on each end of the link. These
values are only displayed on the output for the
asynchronous interface.
Counts:
Counters from the show interface async 1/2/09
command output.
Fast Switching and Route Caching Statistics
Inspect fast-switching and route-caching performance statistics for the call. Incoming asynchronous
calls can be fast switched. However, some features disable fast switching.
Step 1
Inspect the queuing characteristics of the asynchronous interface. Notice that the queuing strategy is
first-in-first-out (fifo).
5800-NAS# show interface async 1/2/02
Async1/2/02 is up, line protocol is up
modem=1/2/02, vdev_state(0x00000000)=CSM_OC_STATE, bchan_num=(T1 1/0/0:4:6)
vdev_status(0x00000001): VDEV_STATUS_ACTIVE_CALL.
Hardware is Async Serial
Interface is unnumbered. Using address of FastEthernet0/1/0 (172.22.66.23)
MTU 1500 bytes, BW 9 Kbit, DLY 100000 usec,
reliability 255/255, txload 1/255, rxload 1/255
Encapsulation PPP, loopback not set, keepalive not set
DTR is pulsed for 5 seconds on reset
LCP Open
Open: IPCP
Last input 00:00:00, output 00:00:00, output hang never
Last clearing of "show interface" counters never
Queueing strategy: fifo
Output queue 0/10, 0 drops; input queue 1/10, 0 drops
5 minute input rate 0 bits/sec, 1 packets/sec
5 minute output rate 0 bits/sec, 1 packets/sec
1683 packets input, 112764 bytes, 0 no buffer
Received 0 broadcasts, 0 runts, 0 giants, 0 throttles
1 input errors, 1 CRC, 0 frame, 0 overrun, 0 ignored, 0 abort
1626 packets output, 108235 bytes, 0 underruns
0 output errors, 0 collisions, 0 interface resets
0 output buffer failures, 0 output buffers swapped out
0 carrier transitions
Cisco AS5800 Operations, Administration, Maintenance, and Provisioning Guide
3-36
DOC-7810814=
Chapter 3
Operations
Configuring PPP and Authentication
Step 2
Inspect the IP settings of the interface. Notice that IP fast switching is disabled, because TCP/IP header
compression is enabled. Turn off TCP/IP header compress to enable fast switching. Enter the no ip tcp
header-compression command on the asynchronous interface.
5800-NAS# show ip int async 1/2/02
Async1/2/02 is up, line protocol is up
Interface is unnumbered. Using address of FastEthernet0/1/0 (172.22.66.23)
Broadcast address is 255.255.255.255
Peer address is 172.22.90.2
MTU is 1500 bytes
Helper address is not set
Directed broadcast forwarding is enabled
Outgoing access list is not set
Inbound access list is not set
Proxy ARP is enabled
Security level is default
Split horizon is enabled
ICMP redirects are always sent
ICMP unreachables are always sent
ICMP mask replies are never sent
IP fast switching is disabled
IP fast switching on the same interface is disabled
IP multicast fast switching is enabled
Router Discovery is disabled
IP output packet accounting is disabled
IP access violation accounting is disabled
TCP/IP header compression is enabled and compressing
RTP/IP header compression is disabled
Probe proxy name replies are disabled
Gateway Discovery is disabled
Policy routing is disabled
Network address translation is disabled
Step 3
Look at the fast-switching cache in action. Notice that only packets destined to the Fast Ethernet
interface are currently cached.
5800-NAS# show ip cache
IP routing cache 3 entries, 560 bytes
109 adds, 106 invalidates, 3 refcounts
Minimum invalidation interval 2 seconds, maximum interval 5 seconds,
quiet interval 3 seconds, threshold 0 requests
Invalidation rate 0 in last second, 0 in last 3 seconds
Last full cache invalidation occurred 22:17:01 ago
Prefix/Length
172.61.0.0/16
172.22.67.67/32
172.22.68.67/32
Age
15:13:22
00:06:10
00:06:09
Interface
FastEthernet0/1
FastEthernet0/1
FastEthernet0/1
5800-NAS# show interface async 1/2/02 stat
Async1/2/02
Switching path
Pkts In
Chars In
Processor
909
57050
Route cache
155
14260
Total
1064
71310
Next Hop
172.22.66.1
172.22.67.2
172.22.68.3
Pkts Out
1022
0
1022
Chars Out
67918
0
6791
Cisco AS5800 Operations, Administration, Maintenance, and Provisioning Guide
DOC-7810814=
3-37
Chapter 3
Operations
Configuring PPP and Authentication
Timesaver
For more information on this command, refer to Cisco IOS Switching Commands, available
online at
http://www.cisco.com/univercd/cc/td/doc/product/software/ios120/12cgcr/switch_r/
Confirming the Final Running Configuration
After you complete the tasks in this section, the Cisco AS5800 final running configuration looks like the
following example:
5800-NAS# show running-config
Building configuration...
Current configuration:
!
version 12.x
service timestamps debug datetime msec
service timestamps log datetime msec
service password-encryption
!
hostname 5800-NAS
!
aaa new-model
aaa authentication login default local
aaa authentication ppp default if-needed local
enable secret 5 $1$LKgL$tgi19XvWn7fld7JGt55p01
!
username theuser password 7 045802150C2E
username admin password 7 044E1F050024
!
!
!
!
!
!
shelf-id 0 router-shelf
shelf-id 1 dial-shelf
!
!
!
resource-pool disable
!
modem-pool Default
pool-range 1/2/0-1/10/143
!
!
spe 1/2/0 1/10/11
firmware ios-bundled default
modem recovery action none
ip subnet-zero
no ip source-route
ip host aurora 172.22.100.9
ip domain-name the.doc
ip name-server 172.22.11.10
ip name-server 172.22.12.11
!
Cisco AS5800 Operations, Administration, Maintenance, and Provisioning Guide
3-38
DOC-7810814=
Chapter 3
Operations
Configuring PPP and Authentication
async-bootp dns-server 172.30.10.1 172.30.10.2
isdn switch-type primary-ni
isdn voice-call-failure 0
!
!
controller T3 1/0/0
framing m23
cablelength 0
t1 4 controller
!
controller T1 1/0/0:4
framing esf
pri-group timeslots 1-24
!
!
voice-port 1/0/0:4:D
!
!
process-max-time 200
!
interface Loopback0
ip address 172.22.99.1 255.255.255.255
no ip directed-broadcast
!
interface Loopback1
ip address 172.22.90.1 255.255.255.0
no ip directed-broadcast
!
interface FastEthernet0/1/0
ip address 172.22.66.23 255.255.255.0
no ip directed-broadcast
!
interface Serial1/0/0:4:23
no ip address
no ip directed-broadcast
isdn switch-type primary-ni
isdn incoming-voice modem
no cdp enable
!
interface Group-Async0
ip unnumbered FastEthernet0/1/0
no ip directed-broadcast
encapsulation ppp
async mode interactive
peer default ip address pool addr-pool
no cdp enable
ppp authentication chap pap
group-range 1/2/00 1/10/143
!
ip local pool addr-pool 172.22.90.2 172.22.90.254
ip classless
ip route 0.0.0.0 0.0.0.0 172.22.66.1
no ip http server
!
!
banner login ^C
AS5800 Austin
ISP’s Dial Access Server
^C
!
line con 0
transport input none
line aux 0
transport input telnet
Cisco AS5800 Operations, Administration, Maintenance, and Provisioning Guide
DOC-7810814=
3-39
Chapter 3
Operations
Modem Management Operations
line vty 0 4
line 1/2/00 1/10/143
autoselect during-login
autoselect ppp
modem InOut
no modem log rs232
!
end
Modem Management Operations
This section describes how to manage the modems on a Cisco AS5800 by using the Cisco IOS software.
The following sections are provided:
•
Managing Modem Firmware, page 3-41
•
Configuring Modems Using Modem Autoconfigure, page 3-48
•
Gathering and Viewing Call Statistics, page 3-49
In this discussion relative tasks are performed to manage modem operations of network access servers
(NAS).
For information on how to verify modem performance, see the “Verifying Modem Performance” section
on page 3-1.
Table 3-8 provides a list of terms for this section.
Table 3-8
List of Terms
Term
Description
DSP
Digital Signal Processor (DSP). The processor that does the modulating and
demodulating. The modem modulation protocols, such as V.34 and V.90, that run in
the DSP.
Firmware1
Name for Microcom modem code.
MICA module
MICA modem card containing 6 (HMM) or 12 (DMM) modems.
Portware
Name for MICA modem code.
SPE
Service Processing Element (SPE). A SPE unit is defined as the smallest software
downloadable unit.
For Microcom, an SPE is an individual modem. For MICA, SPE is either 6 or 12
modems, depending on whether the MICA module is single or double density.
ucode
Short for microcode. Microcode in a Cisco NAS is code that gets loaded into a card,
and it is typically bundled with the Cisco IOS software image. (In general, Cisco does
not refer to modem code microcode.)
1. Examples and text that refer to both MICA and Microcom modems use the term firmware (not portware).
Cisco AS5800 Operations, Administration, Maintenance, and Provisioning Guide
3-40
DOC-7810814=
Chapter 3
Operations
Modem Management Operations
The following documents are related to modem management operations:
•
Cisco IOS Release 12.0 Dial Solutions Configuration Guide, chapter on managing modems,
available online at
http://www.cisco.com/univercd/cc/td/doc/product/software/ios120/12cgcr/
•
Cisco IOS Release 12.0 Dial Solutions Command Reference, dialer on dial-in port setup and, within
that, on modem-management commands, available online at
http://www.cisco.com/univercd/cc/td/doc/product/software/ios120/12cgcr/dial_r/
•
Firmware and Portware Information, available online at
http://www.cisco.com/univercd/cc/td/doc/product/access/fwpwinfo/index.htm
Managing Modem Firmware
Inspecting and upgrading modem firmware is a fundamental part of commissioning a NAS. Cisco posts
new firmware versions on CCO for you to download via FTP. For more information, go to the Cisco
Software Center at the following URL:
http://www.cisco.com/kobayashi/sw-center/sw-access.shtml
A specific architecture surrounds integrated modem technology. Integrated modems get their modem
firmware from a file that is stored in one of three places:
•
Bundled into the Cisco IOS software
•
Stored in Flash memory
•
Stored in bootFlash memory
The modem looks first for its firmware inside the bundled Cisco IOS software image. The modem does
not look outside the bundled image unless you manually change the configuration settings by using the
copy source modem command or spe command.
Cisco AS5800 Operations, Administration, Maintenance, and Provisioning Guide
DOC-7810814=
3-41
Chapter 3
Operations
Modem Management Operations
Inspecting Modem Firmware
Before you upgrade modem firmware for MICA or Microcom modems, you should perform the
following tasks:
Step 1
Determine the version of firmware that is currently loaded in each modem (for example, 2.6.2.0).
5800-NAS# show modem version
Modem Range
Module
1/2/00 1/2/11
0
1/2/12 1/2/23
1
1/2/24 1/2/35
2
1/2/36 1/2/47
3
1/2/48 1/2/59
4
1/2/60 1/2/71
5
1/2/72 1/2/83
6
1/2/84 1/2/95
7
1/2/96 1/2/107
8
1/2/108 1/2/119
9
1/2/120 1/2/131
10
1/2/132 1/2/143
11
1/3/00 1/3/11
0
1/3/12 1/3/23
1
1/3/24 1/3/35
2
1/3/36 1/3/47
3
1/3/48 1/3/59
4
1/3/60 1/3/71
5
1/3/72 1/3/83
6
1/3/84 1/3/95
7
1/3/96 1/3/107
8
Step 2
Firmware Rev
2.6.2.0
2.6.2.0
2.6.2.0
2.6.2.0
2.6.2.0
2.6.2.0
2.6.2.0
2.6.2.0
2.6.2.0
2.6.2.0
2.6.2.0
2.6.2.0
2.6.2.0
2.6.2.0
2.6.2.0
2.6.2.0
2.6.2.0
2.6.2.0
2.6.2.0
2.6.2.0
2.6.2.0
Upgrade
-
Find the version of firmware that is bundled with the Cisco IOS software. The Cisco AS5800 supports
the show modem bundled-firmware command which replaces the show modem map command that
displays the region of NVRAM that identifies where the modems get their firmware at bootup.
as5800-RS-1# show modem bundled-firmware
List of bundled modem firmware images by slot
Slot 4
2.6.2.0
Slot 5
2.6.2.0
Slot 6
2.6.2.0
Slot 7
2.6.2.0
Slot 8
2.6.2.0
Step 3
Inspect the directory that stores the bundled firmware files. The files are loaded into the system main
memory through the system:/ucode directory.
Cisco AS5800 Operations, Administration, Maintenance, and Provisioning Guide
3-42
DOC-7810814=
Chapter 3
Operations
Modem Management Operations
In the following example, two versions of firmware are found: mica_port_firmware and
microcom_firmware. The file mica_board_firmware is not user upgradeable.
5800-NAS# dir system:ucode
Directory of system:/ucode/
14
15
16
-r--r--r--
516060
375525
381284
<no date>
<no date>
<no date>
mica_board_firmware
mica_port_firmware
microcom_firmware
No space information available
Step 4
Look at the existing contents of Flash/bootFlash for the following reasons:
•
Determine what firmware versions you already have.
•
Determine if your Flash/bootFlash is read-only or read/write.
•
Determine if you have enough free space.
The commands show flash and show bootflash are supported in any version of Cisco IOS software.
The commands dir flash: and dir bootflash: are supported in Cisco IOS Release 12.0T.
AS5800-1# show flash
System flash directory:
File Length
Name/status
1
6436752 c5800-is-mz.120-5.5.T
2
392241
mica-modem-pw.2.7.1.0.bin
[6829124 bytes used, 9948092 available, 16777216 total]
16384K bytes of processor board System flash (Read/Write)
AS5800-1# show bootflash
Boot flash directory:
File Length
Name/status
1
1220196 c5800-boot-mz.120-3.bin
2
375525
mica-modem-pw.2.6.1.0.bin
3
381540
mica-modem-pw.2.6.2.0.bin
[1977456 bytes used, 2216848 available, 4194304 total]
4096K bytes of processor board Boot flash (Read/Write)
Filenames are arbitrary and are not necessarily indicative of their contents. If there is not enough free
space on Flash or bootFlash to store the desired file, then you need to:
a. Copy the existing files that you want to keep onto a TFTP server.
b. Erase the Flash memory.
c. Copy the desired files into Flash memory.
Cisco AS5800 Operations, Administration, Maintenance, and Provisioning Guide
DOC-7810814=
3-43
Chapter 3
Operations
Modem Management Operations
Upgrading Modem Firmware
Cisco regularly enhances modem DSP code to improve modem performance. To obtain the latest DSP
code, upgrade the NAS modem firmware.
Figure 3-12 summarizes the firmware upgrade procedure.
Figure 3-12 Modem Firmware Download Operation Example
Internet
CCO
1
Mica-modem-pw.x.x.x.x.
(portware file)
Legend
TFTP
server
2
1 Download the portware
from CCO to a TFTP
server or directly into
the NAS.
2 Map the portware to
the modems.
Table 3-9
33175
Internal view
of a NAS
Step 1
Read the latest modem release notes about modem and firmware information on CCO. Understand the
latest enhancements and bug fixes before you download code. Refer to the latest release notes, available
online at
http://www.cisco.com/univercd/cc/td/doc/product/access/fwpwinfo/index.htm
Step 2
Download the latest firmware from CCO to the NAS Flash or bootFlash memory. Depending on which
Cisco IOS software you are running, there are two ways you can get the latest firmware from CCO into
the NAS Flash or bootFlash. Table 3-8 describes these two methods.
Firmware Copy Commands
Cisco IOS
Software Release
Command
Purpose
12.0T and later
copy ftp
Copy a file directly from CCO into Flash memory,
without staging it at a local TFTP server.
11.3 and later
copy tftp: { flash: | bootflash:}
Copy from a TFTP server.
Cisco AS5800 Operations, Administration, Maintenance, and Provisioning Guide
3-44
DOC-7810814=
Chapter 3
Operations
Modem Management Operations
The following example uses the copy ftp command. The file mica-modem-pw.2.7.1.0.bin is copied from
ftp.cisco.com to the bootFlash. Be sure to specify your own CCO username and password in the
command line (as indicated in the example).
5800-NAS# ping ftp.cisco.com
Type escape sequence to abort.
Sending 5, 100-byte ICMP Echos to 192.31.7.171, timeout is 2 seconds:
!!!!!
Success rate is 100 percent (5/5), round-trip min/avg/max = 4/4/4 ms
5800-NAS#
5800-NAS#copy ftp://CCOUSERNAME:[email protected]/cisco/access/modems/mica/
mica-modem-pw.2.7.1.0.bin bootflash:
Destination filename [mica-modem-pw.2.7.1.0.bin]? <cr>
Accessing ftp:// CCOUSERNAME:[email protected]/cisco/access/modems/mica/
mica-modem-pw.2.7.1.0.bin...Translating "ftp.cisco.com"...domain
server (171.70.24.56) [OK]
Erase bootflash: before copying? [confirm]n
Loading cisco/access/modems/mica/mica-modem-pw.2.7.1.0.bin
!!!!!!!!!!!!!!!!!!!!!!!!!!!!!!!!!!!!!!!!!!!!!!!!!!!!!!!!!!!!!!!!!!!!!!!!!
[OK - 392241/1024 bytes]
Verifying checksum... OK (0x6638)
392241 bytes copied in 5.940 secs (78448 bytes/sec)
5800-NAS#
Step 3
Verify that the new firmware is in Flash or bootFlash memory. The unbundled firmware file is
mica-modem-pw.2.7.1.0.bin in this example.
5800-NAS# dir flash:
Directory of flash:/
1
2
3
4
5
-rw-rw-rw-rw-rw-
4583276
4675992
392241
5947548
4339
<no
<no
<no
<no
<no
date>
date>
date>
date>
date>
C5800-IS-MZ.113-9_AA
c5800-js-mz.112-18.P.bin
mica-modem-pw.2.7.1.0.bin
c5800-is-mz.120-4.XI1
startup-config.12.0(4)XI1
16777216 bytes total (1173496 bytes free)
Step 4
(Optional) Enable the modem firmware-download command to watch the modem mapping operation
take place:
5800-NAS# modem firmware-download
Modem Firmware-Download debugging is on
Step 5
Map the new firmware to the modems.
For MICA modems, firmware is mapped to entire modem modules (6 or 12 modem-module boundaries;
not individual modems). For Microcom modems, firmware is mapped to one or more individual
modems. The rule requiring that all modems in a MICA module run the same code is an architectural
requirement.
Cisco AS5800 Operations, Administration, Maintenance, and Provisioning Guide
DOC-7810814=
3-45
Chapter 3
Operations
Modem Management Operations
Depending on which Cisco IOS release is loaded in the NAS, there are two commands that you can use.
Table 3-10 describes these two commands.
Table 3-10 Modem Mapping Commands
Cisco IOS
Software Release
Command
Notes
12.0(5)T and later
spe
An SPE unit is defined as the smallest software downloadable unit. For
Microcom, an SPE is an individual modem.
For MICA, an SPE is either 6 or 12 modems, depending on whether the
MICA module is single or double density.
Before Release
12.0(5)T
copy source modem
Replace the source variable with either flash or bootflash.
The following MICA example uses the spe command. The numbers 1/0 1/7 refer to modem module
numbers 0 through 7 in slot 1. These numbers do not refer to specific modem numbers (for example,
slot/port for Microcom modems). In this example, 48 modems are upgraded (8 SPE x 6 modems per
module = 48 modems).
5800-NAS# configure terminal
Enter configuration commands, one per line. End with CNTL/Z.
5800-NAS(config)# spe 1/0 1/7
5800-NAS(config-spe)# firmware location flash:mica-modem-pw.2.7.1.0.bin
5800-NAS(config-spe)#
*Jan 23 11:14:48.702: %MODEM-5-DL_START: Modem (1/0) started firmware download
*Jan 23 11:14:48.702: %MODEM-5-DL_START: Modem (1/1) started firmware download
*Jan 23 11:14:48.702: %MODEM-5-DL_START: Modem (1/2) started firmware download
*Jan 23 11:14:48.702: %MODEM-5-DL_START: Modem (1/3) started firmware download
*Jan 23 11:14:48.702: %MODEM-5-DL_START: Modem (1/4) started firmware download
*Jan 23 11:14:48.702: %MODEM-5-DL_START: Modem (1/5) started firmware download
*Jan 23 11:15:03.042: %MODEM-5-DL_GOOD: Modem (1/0) completed firmware download:
*Jan 23 11:15:03.042: %MODEM-5-DL_GOOD: Modem (1/1) completed firmware download:
*Jan 23 11:15:03.042: %MODEM-5-DL_GOOD: Modem (1/2) completed firmware download:
*Jan 23 11:15:03.042: %MODEM-5-DL_GOOD: Modem (1/3) completed firmware download:
*Jan 23 11:15:03.042: %MODEM-5-DL_GOOD: Modem (1/4) completed firmware download:
*Jan 23 11:15:03.042: %MODEM-5-DL_GOOD: Modem (1/5) completed firmware download:
*Jan 23 11:15:03.046: %MODEM-5-DL_START: Modem (1/6) started firmware download
*Jan 23 11:15:03.046: %MODEM-5-DL_START: Modem (1/7) started firmware download
*Jan 23 11:15:03.046: %MODEM-5-DL_START: Modem (1/8) started firmware download
*Jan 23 11:15:03.050: %MODEM-5-DL_START: Modem (1/9) started firmware download
*Jan 23 11:15:03.050: %MODEM-5-DL_START: Modem (1/10) started firmware download
*Jan 23 11:15:03.050: %MODEM-5-DL_START: Modem (1/11) started firmware download
*Jan 23 11:15:17.394: %MODEM-5-DL_GOOD: Modem (1/6) completed firmware download:
*Jan 23 11:15:17.394: %MODEM-5-DL_GOOD: Modem (1/7) completed firmware download:
*Jan 23 11:15:17.394: %MODEM-5-DL_GOOD: Modem (1/8) completed firmware download:
*Jan 23 11:15:17.394: %MODEM-5-DL_GOOD: Modem (1/9) completed firmware download:
*Jan 23 11:15:17.394: %MODEM-5-DL_GOOD: Modem (1/10) completed firmware download
*Jan 23 11:15:17.394: %MODEM-5-DL_GOOD: Modem (1/11) completed firmware download
.
.
.
*Jan 23 11:16:43.482: %MODEM-5-DL_GOOD: Modem (1/47) completed firmware download
In this example, the specified SPE range gets updated with new firmware in batches of six modems at a
time. If double density modems were installed, batches of 12 modems would be updated.
Cisco AS5800 Operations, Administration, Maintenance, and Provisioning Guide
3-46
DOC-7810814=
Chapter 3
Operations
Modem Management Operations
Note
The SPE range 1/0 to 1/7 is mapped to firmware 2.7.1.0. However, SPE range 2/0
through 2/7 is still mapped to the firmware that is bundled with the Cisco IOS
software.
!
spe 1/0 1/7
firmware location flash:mica-modem-pw.2.7.1.0.bin
spe 2/0 2/7
firmware location system:/ucode/mica_port_firmware
!
The following MICA example is for the copy source modem command. Unlike the spe command, the
numbers 1/0-1/5 refer to specific modem numbers (slot/port). The busyout keyword will gracefully busy
out the modems if the modems are off hook.
cisco# copy bootflash modem
Source filename []? mica-modem-pw.2.6.2.0.bin
Modem Numbers (<slot>/<port> | group <number> | all)? 1/0-1/5
Type of service [busyout/reboot/recovery] busyout
Allow copy of "bootflash:mica-modem-pw.2.6.2.0.bin" to modems? [yes/no]yes
5800#
2d05h: %MODEM-5-DL_START: Modem (1/0) started firmware download
2d05h: %MODEM-5-DL_START: Modem (1/1) started firmware download
2d05h: %MODEM-5-DL_START: Modem (1/2) started firmware download
2d05h: %MODEM-5-DL_START: Modem (1/3) started firmware download
2d05h: %MODEM-5-DL_START: Modem (1/4) started firmware download
2d05h: %MODEM-5-DL_START: Modem (1/5) started firmware download
2d05h: %MODEM-5-DL_GOOD: Modem (1/0) completed firmware download:
2d05h: %MODEM-5-DL_GOOD: Modem (1/1) completed firmware download:
2d05h: %MODEM-5-DL_GOOD: Modem (1/2) completed firmware download:
2d05h: %MODEM-5-DL_GOOD: Modem (1/3) completed firmware download:
2d05h: %MODEM-5-DL_GOOD: Modem (1/4) completed firmware download:
2d05h: %MODEM-5-DL_GOOD: Modem (1/5) completed firmware download:
Step 6
Verify that the new firmware was successfully mapped to the modems.
In the following example:
•
SPE 1/0 applies to modems 1/0 through 1/5.
•
SPE 1/1 applies to modem 1/6 through 1/11, and so on.
•
The MICA modules 0 through 7 in slot 1 are running Version 2.7.1.0 (not 2.6.2.0).
•
All the modems in slot 2 are still running version 2.6.2.0, which is bundled into the Cisco IOS
software image (see the field IOS-Default).
as5800-RS-1# show modem bundled-firmware
List of bundled modem firmware images by slot
Slot 4
2.6.2.0
Slot 5
2.6.2.0
Slot 6
2.6.2.0
Slot 7
2.6.2.0
Slot 8
2.6.2.0
Cisco AS5800 Operations, Administration, Maintenance, and Provisioning Guide
DOC-7810814=
3-47
Chapter 3
Operations
Modem Management Operations
Configuring Modems Using Modem Autoconfigure
This section describes how to apply a new modem capability (modemcap) to an integrated modem. A
modemcap is a database of setup strings that is used by the modem autoconfigure function to change a
modem’s default settings.
Modemcaps have many applications:
•
A modem’s default settings are not optimal. For example, a modem function that you want is not
enabled by default.
•
Two separate modem pools need to be set up in the NAS to perform two different tasks. For
example, one pool supports V.90. The other pool has a maximum speed set at 26400 bps to support
older modems.
•
A specialized application is required. For example, a NAS supporting a point-of-sale (POS)
application such as a charge card reader. A modemcap is required that will tune the modem for a
fast trainup time at the expense of having a slower connect speed.
Always use a modemcap (even if you only want the modem’s default settings). To display the
modemcaps that are built into the Cisco IOS software, enter the show modemcap command.
Modemcaps are configured on a per modem basis. They are not configured on a per modem module or
service processing element (SPE) basis.
Basic Rules for Modem Autoconfigure
The following list describes the basic rules:
•
Never use the modem autoconfigure discovery command. Applying specific modemcaps reduces
the risk of error.
•
Always use the modem autoconfigure type modem-name command. This command improves your
modem’s performance.
•
The modem autoconfigure type mica command can be used to reset any integrated modem (not
only MICA), back to its factory defaults. The keyword mica is a built-in modemcap that only
functions as &F (return to defaults).
•
When you use the modem autoconfigure command, be sure that any script reset function is
removed. A script reset is redundant and possibly harmful.
•
A script reset is a chat script that is applied to a line when the line resets. The modem autoconfigure
function is applied when the system starts up, not just when the line resets.
•
When creating a modemcap, ignore all the strange and confusing fields. Put your modem init string
into the MSC (Miscellaneous) field:
– Always start your init string with &F (or, for third party modems, with the preferred &F1, &F2,
etc.)
– Never put an &W into an init string. An &W can wear out the EPROM on modems where this
is not a no op (that is, a statement or operation that does nothing).
– For MICA modems, always be sure that &D2 (not &D3) is in effect.
Cisco AS5800 Operations, Administration, Maintenance, and Provisioning Guide
3-48
DOC-7810814=
Chapter 3
Operations
Modem Management Operations
Modem Autoconfigure K56Flex Example
The following modem-autoconfigure string disables V.8bis/K56Flex. The string &F&D2s53=0 is
applied to two MICA modems. Disabling V.8bis reduces trainup time by about two seconds, and it
prevents trainup problems with older client modems.
Step 1
Watch the modem autoconfigure function run, so you can see if there are any typos in the modem string:
5800-NAS# debug confmodem
Modem Configuration Database debugging is on
5800-NAS# show debug
Modem Autoconfig:
Modem Configuration Database debugging is on
5800-NAS# terminal monitor
Step 2
Remove any previous modem autoconfigure entry:
5800-NAS# configure terminal
Enter configuration commands, one per line. End with CNTL/Z.
5800-NAS(config)# no modemcap entry mica-noKflex
% Modemcap entry 'mica-noKflex' does not exist
Step 3
Add the new entry:
5800-NAS(config)# modemcap edit mica-noKflex misc &F&D2s53=0
Step 4
Apply the new entry to the specified lines. Re-enter the modem autoconfigure command each time you
change a modemcap. Modem-autoconfigure strings are not applied to busy modems. Modem strings are
applied after modems disconnect.
5800-NAS(config)# line 1 2
5800-NAS(config-line)# modem autoconfigure type mica-noKflex
5800-NAS(config-line)#
Oct 25 19:46:06.960 PDT: TTY1: detection speed (115200) response ---OK--Oct 25 19:46:06.960 PDT: TTY1: Modem command: --AT&F&D2s53=0-Oct 25 19:46:06.960 PDT: TTY2: detection speed (115200) response ---OK--Oct 25 19:46:06.960 PDT: TTY2: Modem command: --AT&F&D2s53=0-Oct 25 19:46:09.520 PDT: TTY1: Modem configuration succeeded
Oct 25 19:46:09.520 PDT: TTY1: Detected modem speed 115200
Oct 25 19:46:09.520 PDT: TTY1: Done with modem configuration
Oct 25 19:46:09.520 PDT: TTY2: Modem configuration succeeded
Oct 25 19:46:09.520 PDT: TTY
5800-NAS(config-line)#
If you want to reset the modem to its factory defaults, do not simply remove the modem autoconfigure
command. Rather, replace it with another modem autoconfigure type name command where name is a
modemcap whose only action is &F. (In recent Cisco IOS software releases, the built-in mica modemcap
entry will do this.)
Gathering and Viewing Call Statistics
Making sure that your modems are connecting at the correct connections speeds is an important aspect
of managing modems. This section details the following methods for gathering and viewing modem
performance statistics:
•
Using the Cisco IOS EXEC (CLI)
•
Using Modem Call-Record Terse
•
Using SNMP
Cisco AS5800 Operations, Administration, Maintenance, and Provisioning Guide
DOC-7810814=
3-49
Chapter 3
Operations
Modem Management Operations
Note
If you detect low connection speeds across all the modems, you may have a faulty
channelized T1/E1 or ISDN PRI line connection.
Using the Cisco IOS EXEC (CLI)
The Cisco IOS software command line interface (CLI) contains many modem management show
commands. Use these commands to gather and view modem statistics. This section provides a bulleted
list detailing some of the most useful commands.
Step 1
List show modem command options:
AS5800-1# show modem ?
<0-1439>
First Modem TTY Number
bundled-firmware
Bundled modem firmware information for all modem slots
call-stats
Calling statistics for all system modems
calltracker
CallTracker modem information
config
Modem configuration
connect-speeds
Connection speeds for all system modems
csm
CSM modem information
group
Modem group information
log
Modem event log
operational-status Modem operational status
summary
Summary statistics for all system modems
test
Modem test log
version
Version information for all system modems
x/y/z
First Shelf/Slot/Port for Internal Modems
|
Output modifiers
<cr>
Step 2
Display a summary of the modem call statistics:
5800-NAS# show modem summary
Incoming calls
Outgoing calls
Usage Succ
Fail Avail
Succ
Fail Avail
43% 60005
4678
25
3
11
0
Busied
Out
0
Failed
Dial
13
No
Ans
8
Succ
Pct.
92%
Table 3-11 describes some of the significant fields in the previous example.
Table 3-11 Show Modem Summary Field Descriptions
Field
Description
Succ 60005
60,005 calls successfully trained up. The Cisco IOS software saw “DSR” go high
(still does not mean that PPP negotiated successfully).
Fail 4678
4,678 calls came into the modem, the modem went offhook, but the modem did not
train up.
Succ Pct. 92%
The overall success percentage is 92%.
No Ans 8
Eight calls came into the modem but the modem did not go offhook (CPU was too
busy). Unless you misconfigured the NAS, this counter should be very low (under 1%
of the total calls).
Cisco AS5800 Operations, Administration, Maintenance, and Provisioning Guide
3-50
DOC-7810814=
Chapter 3
Operations
Modem Management Operations
Step 3
Display the disconnect reasons for the modems that trained up:
5800-NAS# show modem call-stats 0
dial-in/dial-out call statistics
Mdm
Total
compress
#
%
237
retrain lostCarr userHgup rmtLink trainup hostDrop wdogTimr
#
%
#
%
#
%
#
%
#
%
#
%
#
%
916
413
124
9999
1064
8496
0
dial-out call statistics
noCarr noDitone
Mdm
#
%
#
%
Total 1715
0
#
0
busy
%
abort dialStrg autoLgon dialTout
#
%
#
%
#
%
#
%
0
0
0
0
rmtHgup
#
%
0
Table 3-12 describes some of the significant fields in the previous example.
Table 3-12 Show Modem Call-Status Field Descriptions
Field
Description
rmtLink 9999
RmtLink is the most common disconnect reason. RmtLink means that the modem
trained up, error correction was negotiated, and the client DTE decided to hang up.
All the call-stat counters do not go higher than 9999.
hostDrop
HostDrop (or dtrDrop) means the Cisco IOS software (DTE) informed the modem to
terminate the call. For example:
•
Idle timeouts
•
Absolute timeouts
•
Authentication failures
•
PPP negotiation failures
•
The Cisco IOS software learns from the telephone switch that the DS0 was
disconnected.
Besides the “hostDrop” message, all other disconnect reasons are not good. If the call trained up without
EC, then the peer modem will probably not communicate an orderly disconnect with the Cisco IOS
software. For example, the messages “lostCarr” or “retrain” might be displayed even though the peer
DTE voluntarily disconnected. The collective total of disconnect reasons should be less than 10% of the
total number of calls.
Cisco AS5800 Operations, Administration, Maintenance, and Provisioning Guide
DOC-7810814=
3-51
Chapter 3
Operations
Modem Management Operations
Step 4
Look at detailed disconnect reasons for individual modems:
5800-NAS# show modem call-stats
dial-in/dial-out call statistics
*
*
*
*
*
*
Step 5
Mdm
1/0
1/1
1/2
1/3
1/4
1/5
1/6
1/7
1/8
1/9
1/10
1/11
1/12
1/13
compress
#
%
5
2
8
3
3
1
4
1
1
0
2
0
4
1
6
2
5
2
3
1
1
0
2
0
7
2
6
2
retrain lostCarr userHgup rmtLink
#
%
#
%
#
%
#
%
23
2
7
1
2
1 971
2
18
1
12
2
6
4 949
2
14
1
8
1
2
1 954
2
19
2
9
2
1
0 927
2
20
2
10
2
2
1 961
2
19
2
10
2
4
3 893
1
20
2
10
2
3
2 778
1
21
2
7
1
1
0 915
2
21
2
7
1
2
1 1019
2
10
1
8
1
2
1 939
2
29
3
9
2
1
0 918
2
27
2
9
2
4
3 981
2
21
2
10
2
5
4 966
2
21
2
10
2
1
0 977
2
trainup hostDrop wdogTimr
#
%
#
%
#
%
20
1 176
2
0
0
29
2 167
1
0
0
26
2 180
2
0
0
21
1 202
2
0
0
23
2 192
2
0
0
30
2 182
2
0
0
21
1 140
1
0
0
25
2 176
2
0
0
28
2 159
1
0
0
22
2 191
2
0
0
28
2 194
2
0
0
27
2 174
2
0
0
24
2 182
2
0
0
32
3 168
1
0
0
Display a summary of the range of connect speeds. Specify the top speed of interest followed by a 0.
This example displays the initial connect speeds in each direction (transmit and receive) for the range of
speeds that go up to 56K. No connections happened at 56000 bps. The transmit speed with the highest
hit counter is 48K (9161 hits). The receive-connect speeds are all zeros because V.90 is a transmit only
speed.
5800-NAS# show modem connect-speeds 56000 0
transmit connect speeds
Mdm
Tot
Tot %
48000
9161
15
49333
5047
8
50000
1454
2
50667
3291
5
52000
813
1
53333
1427
2
54000
0
0
54667
25
0
56000 TotCnt
0 60012
0
50667
0
0
52000
0
0
53333
0
0
54000
0
0
54667
0
0
56000 TotCnt
0 60012
0
receive connect speeds
Mdm
Tot
Tot %
Step 6
48000
0
0
49333
0
0
50000
0
0
Inspect the range of speeds below 56000 bps (38667 to 46667). This is the distribution of speeds of PCM
users (Kflex users and V.90 users). Compare this output with the previous example. The peak speed is
at 48K, which had 9,161 hits—15% of all callers.
5800-NAS# show modem connect-speeds 46666 0
transmit connect speeds
Mdm
Tot
Tot %
38667
349
0
40000
192
0
41333
700
1
42000
221
0
42667
780
1
44000
2188
3
45333
1123
1
46000
804
1
46667 TotCnt
693 60011
1
42000
0
0
42667
0
0
44000
0
0
45333
0
0
46000
0
0
46667 TotCnt
0 60011
0
receive connect speeds
Mdm
Tot
Tot %
38667
0
0
40000
0
0
41333
0
0
Cisco AS5800 Operations, Administration, Maintenance, and Provisioning Guide
3-52
DOC-7810814=
Chapter 3
Operations
Modem Management Operations
Step 7
Examine the DS0 timeslots on each T1 that are used to carry the modem calls. The following example
shows that the telco is distributing calls into this hunt group evenly across the T1s. There are a total of
29 (20+9) DS0s currently active.
The high-water mark reports the highest number of DS0s that were in use at one time. However, be sure
to inspect the entire dial pool. Entire T1s have been known to remain idle in some hunt groups.
5800-NAS# show controllers t1 call-counters
T1 0:
DS0's Active: 20
DS0's Active High Water Mark: 23
TimeSlot
Type
TotalCalls
TotalDuration
1
pri
6536
3w1d
2
pri
6701
2w3d
3
pri
5789
2w0d
4
pri
5498
1w2d
5
pri
5497
3d02h
6
pri
5126
7w0d
7
pri
4525
6w1d
8
pri
4401
5w3d
9
pri
4096
4w4d
10
pri
3961
3w3d
11
pri
3320
3w0d
12
pri
3138
1w3d
13
pri
2912
4d05h
14
pri
2486
6w4d
15
pri
2042
5w5d
16
pri
1644
4w5d
17
pri
1413
4w1d
18
pri
1071
3w3d
19
pri
884
2w4d
20
pri
675
2w0d
21
pri
507
1w3d
22
pri
380
1w1d
23
pri
263
5d17h
T1 1:
DS0's Active: 9
DS0's Active High Water Mark: 23
TimeSlot
Type
TotalCalls
TotalDuration
1
pri
8985
3w2d
2
pri
8650
2w4d
3
pri
8594
1w3d
4
pri
7813
4d03h
5
pri
7671
6w3d
6
pri
6955
5w5d
7
pri
6492
4w3d
8
pri
6343
3w4d
9
pri
5668
2w3d
10
pri
5398
6d09h
11
pri
4842
6w6d
12
pri
4413
5w3d
13
pri
4050
4w1d
14
pri
3339
2w6d
15
pri
3019
1w2d
16
pri
2493
1d14h
Cisco AS5800 Operations, Administration, Maintenance, and Provisioning Guide
DOC-7810814=
3-53
Chapter 3
Operations
Modem Management Operations
17
18
19
20
21
22
23
pri
pri
pri
pri
pri
pri
pri
2104
1664
1395
1094
811
688
482
6w0d
5w1d
3w6d
3w3d
2w6d
2w0d
1w3d
Total DS0's Active High Water Mark: 46
Using Modem Call-Record Terse
Starting with Cisco IOS Releases 11.3AA and 12.0T, modem call records can be sent to syslog and
examined to perform statistical analysis.
For example, you can monitor:
•
Modulation trends such as V.90 verses V.34
•
Call time durations (consistent short connection times on a modem, regular Lost Carrier counts)
•
Unavailable user IDs
•
PPP negotiation or authentication failures
The following example enables modem call-records and sends the logs to wherever your syslog output
goes, for example:
•
To the console—If you do not have the no logging console command enabled.
•
To the terminal line—If you have the terminal monitor command enabled.
•
To a syslog host—If you have one configured.
5800-NAS# configure terminal
Enter configuration commands, one per line.
5800-NAS(config)# modem call-record terse
End with CNTL/Z.
*Jan 1 04:19:50.262: %CALLRECORD-3-MICA_TERSE_CALL_REC: DS0 slot/contr/chan=0/0/0,
slot/port=2/0, call_id=18, userid=(n/a), ip=0.0.0.0, calling=4082329440,
called=5710945, std=V.34+, prot=LAP-M, comp=V.42bis both, init-rx/tx
b-rate=26400/26400, finl-rx/tx b-rate=26400/26400, rbs=0, d-pad=None, retr=2, sq=3,
snr=25, rx/tx chars=79/94701, bad=0, rx/tx ec=60/204, bad=521, time=698,
finl-state=Steady, disc(radius)=(n/a)/(n/a), disc(modem)=A220 Rx (line to host) data
flushing - not OK/EC condition - locally detected/received DISC frame -- normal LAPM
termination
Using SNMP
Modem connect speeds can be graphed using SNMP MIBs. The graph shown in Figure 3-13 was created
with Cisco Access Manager (CAM). The graph describes the modem connect-speed performance
activity of one NAS for one month. The following connect speeds are transmitted by the NAS and
received by the client modem. Most of the calls performed between 28000 and 31200 bps. This NAS is
one member of an access stack.
For discussions on enabling management protocols such as NTP, SNMP, and Syslog, refer to Chapter 4,
“Administration.”
Cisco AS5800 Operations, Administration, Maintenance, and Provisioning Guide
3-54
DOC-7810814=
Chapter 3
Operations
Modem Management Operations
Figure 3-13 Graphed Modem-Connect Speeds for One Month
3000
2500
2000
Total
number of 1500
connections
5300-02
1000
33180
500
48
00
72
00
96
0
12 0
00
0
14
40
16
80
19 0
20
21 0
60
24 0
00
26 0
40
28 0
80
31 0
20
32 0
00
33 0
60
34 0
00
36 0
00
38 0
00
40 0
00
42 0
00
44 0
00
46 0
00
48 0
00
50 0
00
5 0
U 200
nk 0
no
w
n
0
Transmit – connect speeds (bps)
Cisco AS5800 Operations, Administration, Maintenance, and Provisioning Guide
DOC-7810814=
3-55
Chapter 3
Operations
Modem Management Operations
Cisco AS5800 Operations, Administration, Maintenance, and Provisioning Guide
3-56
DOC-7810814=
C H A P T E R
4
Administration
This chapter describes management protocols and Network Access Server (NAS) security and control
functionality with AAA and RADIUS servers.
•
Remote Monitor (RMON), page 4-1
•
Enabling Management Protocols: NTP, SNMP, and Syslog, page 4-2
– Enabling the Network Time Protocol, page 4-3
– Enabling Syslog, page 4-4
– Enabling SNMP, page 4-7
– Disabling the Logging of Access Interfaces, page 4-9
– Confirming the Final Running Configuration, page 4-10
•
Local and Remote Server Authentication, page 4-13
– Configuring RADIUS, page 4-14
– Configuring TACACS+, page 4-24
Remote Monitor (RMON)
Remote Monitoring (RMON) is an Internet Engineering Task Force (IETF) monitoring standard
(RFC 1757) that allows console systems and network monitors to exchange statistical and functional
monitoring data, through RMON-compliant console managers and network probes. RMON provides
network administrators with flexibility to satisfy networking demands through console and network
monitoring probes to obtain fault diagnostics, planning, and performance information.
RMON delivers information in nine unique monitoring element groups that provide specific types of
data, which satisfies common network-monitoring requirements. Some RMON groups are dependent
upon others for support, but each is optional so that it is not necessary for vendors to support all groups
within the management information base (MIB). See Table 4-1 for RMON group functions.
Cisco AS5800 Operations, Administration, Maintenance, and Provisioning Guide
DOC-7810814=
4-1
Chapter 4
Administration
Enabling Management Protocols: NTP, SNMP, and Syslog
Table 4-1
RMON Groups
RMON Group
Description
Alarm
Periodic statistical sampling from event generated variables in the probe that compares
configured thresholds.
Events
Controls the generation and notification of events from this device.
Filters
Enables packet matching by equation filtering to form data streams that may be
captured or generate events.
History
Records and stores periodic statistical samples, number of samples, and items sampled
from a network.
Host
Contains statistics associated with each discovered network host.
HostTopN
Creates tables describing hosts that top a list ordered by one of their rate-based
statistics.
Matrix
Stores new conversation statistics detected on source and destination device.
Packet
Capture
Enables packet capturing after it flows through a channel.
Statistics
Contains probe calculated statistics for each interface monitored on device.
Enabling Management Protocols: NTP, SNMP, and Syslog
This section describes how to enable basic management protocols on a Cisco AS5800 as part of a dial
access service. It does not however, describe how to integrate the Cisco IOS software with NT or UNIX
servers. Management protocols are described only from the perspective of the Cisco IOS software.
Understanding Network Management Basics
Figure 4-1 shows a logical perspective of how management protocols interact between the Cisco IOS
software (client) and a network element management server. Dashed lines represent different protocols
and functions.
•
NTP synchronizes time between network devices.
•
The SNMP element manager (EM) receives SNMP traps from the Cisco IOS software. The SNMP
manager uses SNMP to query variables and set configurations.
•
The Cisco IOS software sends logging messages to a syslog daemon.
Cisco AS5800 Operations, Administration, Maintenance, and Provisioning Guide
4-2
DOC-7810814=
Chapter 4
Administration
Enabling Management Protocols: NTP, SNMP, and Syslog
Figure 4-1
NTP, SNMP, and Syslog Interactions
NTP
synchronization
SNMP
24527
Syslog
Element
manager
Cisco IOS
Table 4-2 provides the RFCs and URLs for the management protocols described in this section.
Table 4-2
Management Protocol RFCs
Management Protocol
RFC
URL
NTP
RFC 1305
http://www.ietf.org/rfc/rfc1305.txt
SNMP
RFC 1157
http://www.ietf.org/rfc/rfc1157.txt
For more information about system management, refer to Cisco IOS Release 12.0 Configuration
Fundamentals Configuration Guide and Command Reference, available online at
http://www.cisco.com/univercd/cc/td/doc/product/software/ios120/12cgcr/index.htm
Enabling the Network Time Protocol
The Network Time Protocol (NTP) provides a common time base for networked routers, servers, and
other devices. A synchronized time enables you to correlate syslog and Cisco IOS debug output to
specific events. For example, you can find call records for specific users within one millisecond.
Comparing logs from various networks is essential for:
•
Troubleshooting
•
Fault analysis
•
Security incident tracking
Without precise time synchronization between all the various logging, management, and AAA functions,
time comparisons are not possible.
Cisco AS5800 Operations, Administration, Maintenance, and Provisioning Guide
DOC-7810814=
4-3
Chapter 4
Administration
Enabling Management Protocols: NTP, SNMP, and Syslog
An NTP enabled network usually gets its time from an authoritative time source, such as a Cisco router,
radio clock, or an atomic clock attached to a timeserver. NTP then distributes this time across the
network. NTP is extremely efficient; no more than one packet per minute is necessary to synchronize
two machines to within a millisecond of each another. NTP runs over UDP, which in turn runs over IP.
Step 1
Locate an authoritative clock source. For example, you can use a Cisco router or an atomic clock that is
attached to a time server.
Step 2
Specify the primary NTP server IP address and automatic calendar updates as shown below:
!
ntp update-calendar
ntp server 172.22.66.18 prefer
!
Step 3
Verify that the clock is synchronized to the NTP server. Inspect the status and time association.
Clock sources are identified by their stratum levels. The following example shows a stratum level five
clock.
5800-NAS# show ntp status
Clock is synchronized, stratum 5, reference is 172.22.66.18
nominal freq is 250.0000 Hz, actual freq is 250.0000 Hz, precision is 2**24
reference time is BB944312.4451C9E7 (23:11:30.266 PDT Wed Sep 22 1999)
clock offset is 0.5343 msec, root delay is 13.26 msec
root dispersion is 18.02 msec, peer dispersion is 0.09 msec
5800-NAS#
The following command identifies how often the NAS is polling and updating to the stratum clock.
An asterisk (*) next to the NTP servers IP address indicates successful synchronization with the stratum
clock.
5800-NAS# show ntp association
address
ref clock
st when poll reach delay offset
disp
*~172.22.66.18
172.60.8.1
16
46
64 377
1.0
0.53
0.1
* master (synced), # master (unsynced), + selected, - candidate, ~ configured
5800-NAS#
Enabling Syslog
The Cisco IOS software can send syslog messages to one or more element manager servers. Syslog
messages are then collected by a standard UNIX or NT type syslog daemon.
Syslog enables you to:
•
Centrally log and analyze configuration events and system error messages such as interface status,
security alerts, environmental conditions, and CPU process overloads.
•
Capture client debug output sessions in a real-time scenario.
•
Reserve Telnet sessions for making configurations changes and using show commands.
This prevents Telnet sessions from getting cluttered up with debug output.
Figure 4-2 shows the Cisco IOS software sending syslog data to an element manager. Syslog data either
stays in the Cisco IOS software buffer, or is pushed out and written to the element managers hard disk.
Cisco AS5800 Operations, Administration, Maintenance, and Provisioning Guide
4-4
DOC-7810814=
Chapter 4
Administration
Enabling Management Protocols: NTP, SNMP, and Syslog
Figure 4-2
Syslog Messages Written to Hard Disk
Syslog messages
Syslog server
Cisco IOS
Syslog messages
written to
hard disk
Note
Step 1
24528
Internal view
Cisco System’s UNIX syslog format is compatible with 4.3 BSD UNIX.
Enable debug timestamps and include date, time, and milliseconds relative to the local time zone:
!
service timestamps debug datetime msec localtime show-timezone
service timestamps log datetime msec localtime show-timezone
!
Step 2
Verify that console logging is disabled. If it is enabled, the NAS will intermittently freeze up as soon as
the console port is overloaded with log messages. See the field “1 flushes.” Increments on this number
represents bad logging behavior.
5800-NAS# show logging
Syslog logging: enabled (0 messages dropped, 1 flushes, 0 overruns)
Console logging: level debugging, 1523 messages logged
Monitor logging: level debugging, 0 messages logged
Buffer logging: level debugging, 911 messages logged
Trap logging: level informational, 44 message lines logged
5800-NAS(config)# no logging console
5800-NAS(config)# ^Z
5800-NAS# show logging
Syslog logging: enabled (0 messages dropped, 1 flushes, 0 overruns)
Console logging: disabled
Monitor logging: level debugging, 0 messages logged
Buffer logging: level debugging, 912 messages logged
Trap logging: level informational, 45 message lines logged
Caution
Not entering the no logging console command might cause CPU interrupts, dropped
packets, denial of service events, and router lock up.
Cisco AS5800 Operations, Administration, Maintenance, and Provisioning Guide
DOC-7810814=
4-5
Chapter 4
Administration
Enabling Management Protocols: NTP, SNMP, and Syslog
Step 3
Specify the logging configuration:
!
logging 172.22.66.18
logging buffered 10000 debugging
logging trap debugging
!
Table 4-3 describes the commands in the previous configuration fragment.
Table 4-3
Syslog Commands
Command
Purpose
logging 172.22.66.18
Specifies the syslog servers IP address.
logging buffered 10000 debugging
Sets the internal log buffer to 10,000 bytes for debug output
(newer messages overwrite older messages).
logging trap debugging
Allows logging up to the debug level (all 8 levels) for all
messages sent to the syslog server.
If you are working with multiple network access servers, assign a different logging facility tag to each
server. Syslog information can be collected and sorted into different files on the syslog server.
For example:
•
Assign local1 to NAS1
•
Assign local2 to NAS2
•
Assign local3 to NAS3
Assigning a different tag to each device enables you to intelligently sort and view syslog messages:
!
logging facility local7
!
Step 4
Verify that local buffered logging is working:
5800-NAS# show logging
Syslog logging: enabled (0 messages dropped, 0 flushes, 0 overruns)
Console logging: disabled
Monitor logging: level debugging, 0 messages logged
Buffer logging: level debugging, 2 messages logged
Trap logging: level debugging, 53 message lines logged
Logging to 172.22.66.18, 2 message lines logged
Log Buffer (10000 bytes):
Sep 26 16:32:02.848 PDT: %SYS-5-CONFIG_I: Configured from console by admin on console
Sep 26 16:33:16.069 PDT: %SYS-5-CONFIG_I: Configured from console by admin on console
5800-NAS#
Cisco AS5800 Operations, Administration, Maintenance, and Provisioning Guide
4-6
DOC-7810814=
Chapter 4
Administration
Enabling Management Protocols: NTP, SNMP, and Syslog
Enabling SNMP
The SNMP traps generated by Cisco routers provide:
•
Potentially harmful environmental conditions
•
Processor status
•
Port status
•
Security issues
The Cisco IOS software generates SNMP traps based on the features that the Cisco IOS software
supports.
Figure 4-3 shows the interactions and timing of the SNMP protocol between the EM (SNMP manager)
and the NAS (SNMP agent). Traps are unsolicited messages sent from the NAS to the EM. Four
functions of SNMP include: trap, get request, get next, and set request.
Figure 4-3
SNMP Event Interaction and Timing
Get request
Response
Get next
Response
NMS
initiated
Get next
Response
Trap (agent initiated)
Agent
(Cisco IOS device)
Note
26095
NMS
For a listing of all SNMP traps supported by Cisco, refer to Cisco IOS SNMP Traps
Supported and How to Configure Them, available online at
http://www.cisco.com/warp/public/477/SNMP/snmp_traps.html
Cisco AS5800 Operations, Administration, Maintenance, and Provisioning Guide
DOC-7810814=
4-7
Chapter 4
Administration
Enabling Management Protocols: NTP, SNMP, and Syslog
Step 1
Configure the Cisco IOS software to support basic SNMP functions. Access lists 5 and 8 are used for
SNMP community strings:
•
The read only (RO) community string is called “poptarts.” It uses access list 8 as a filter.
•
The read write (RW) community string is called “pixysticks.” It uses access list 5 as a filter.
!
snmp-server
snmp-server
snmp-server
snmp-server
snmp-server
snmp-server
snmp-server
!
access-list
access-list
access-list
access-list
!
contact admin [email protected]
location 5800-NAS-corporate
community poptarts RO 8
community pixysticks RW 5
host 172.22.66.18 maddog
trap-source Loopback0
enable traps snmp
5
5
8
8
permit
permit
permit
permit
172.22.67.1
0.0.0.1 172.22.68.20
172.22.67.1
0.0.0.1 172.22.68.20
Table 4-4 describes commands in the previous configuration fragment.
Table 4-4
SNMP Commands
Command
Purpose
snmp-server contact admin [email protected]
Specifies a contact name to notify whenever a MIB problems occurs.
snmp-server location 5800-NAS-corporate
Specifies a geographic location name for the router.
snmp-server community poptarts RO 8
Assigns a read only (RO) community string. Only queries and get requests
can be performed.
The community string (poptarts) allows polling but no configuration
changes. Without the correct community string on both machines, SNMP
will not let you do the authorization to get or set the request.
snmp-server community pixysticks RW 5
Assigns a read write (RW) community string.
This community string (pixysticks) enables configuration changes to be
performed. For example, you can shut down an interface, download a
configuration file, or change a password.
snmp-server host 172.22.66.18 maddog
Identifies the IP address of the SNMP host followed by a password.
snmp-server trap-source Loopback0
Associates SNMP traps with a loopback interface. In this way, an Ethernet
shutdown will not disrupt SNMP management flow.
snmp-server enable traps
Enables traps for unsolicited notifications for configuration changes,
environmental variables, and device conditions.
access-list 5 permit 172.22.67.1
access-list 8 permit 172.22.67.1
Permits access from a single element management server.
access-list 5 permit 0.0.0.1 172.22.68.20
access-list 8 permit 0.0.0.1 172.22.68.20
Permits access from a block of addresses at your network operations center.
Cisco AS5800 Operations, Administration, Maintenance, and Provisioning Guide
4-8
DOC-7810814=
Chapter 4
Administration
Enabling Management Protocols: NTP, SNMP, and Syslog
Caution
Step 2
If you are not using SNMP, make sure to turn it off. Never use a configuration that uses
“public” or “private” as community strings—these strings are well known in the industry
and are common defaults on hardware. These strings are open invitations to attacks,
regardless if you use filters.
Monitor SNMP input and output statistics. For example, display a real-time view of who is polling the
NAS for statistics and how often.
Excessive polling will:
•
Consume much of the CPU resources
•
Cause packets to be dropped
•
Crash the NAS
5800-NAS# show snmp
Chassis: 11811596
Contact: admin [email protected]
Location: 5800-NAS-corporate
0 SNMP packets input
0 Bad SNMP version errors
0 Unknown community name
0 Illegal operation for community name supplied
0 Encoding errors
0 Number of requested variables
0 Number of altered variables
0 Get-request PDUs
0 Get-next PDUs
0 Set-request PDUs
0 SNMP packets output
0 Too big errors (Maximum packet size 1500)
0 No such name errors
0 Bad values errors
0 General errors
0 Response PDUs
0 Trap PDUs
SNMP logging: enabled
Logging to 172.22.66.18.162, 0/10, 0 sent, 0 dropped.
5800-NAS#
Disabling the Logging of Access Interfaces
Limit the amount of output logged from the group-async interface and ISDN D channels. Carefully
choose the data sources for system management purposes. AAA accounting and the modem-call record
terse feature provides the best data set for analyzing ISDN remote node device activity.
Link status up-down events and SNMP trap signals:
•
Occur regularly on access interfaces. Dialer interfaces going up and down is normal behavior and
does not indicate a problem.
•
Should not be logged or sent to a management server.
Cisco AS5800 Operations, Administration, Maintenance, and Provisioning Guide
DOC-7810814=
4-9
Chapter 4
Administration
Enabling Management Protocols: NTP, SNMP, and Syslog
The following configuration fragment disables logging on access interfaces:
!
interface Serial 0:23
no logging event link-status
no snmp trap link-status
!
interface Serial 1:23
no logging event link-status
no snmp trap link-status
!
interface Serial 2:23
no logging event link-status
no snmp trap link-status
!
interface Serial 3:23
no logging event link-status
no snmp trap link-status
!
interface Group-Async 1
no logging event link-status
no snmp trap link-status
!
Confirming the Final Running Configuration
The following is an example of the Cisco AS5800 running configuration with Cisco IOS Release 12.0(4)
XL1 installed.
5800-NAS# show running-config
Building configuration...
Current configuration:
!
version 12.x
service timestamps debug datetime msec localtime show-timezone
service timestamps log datetime msec localtime show-timezone
service password-encryption
!
hostname 5800-NAS
!
logging buffered 10000 debugging
no logging console
aaa new-model
aaa authentication login default local
aaa authentication ppp default if-needed local
enable secret 5 $1$LKgL$tgi19XvWn7fld7JGt55p01
!
username dude password 7 045802150C2E
username admin password 7 044E1F050024
!
!
!
shelf-id 0 router-shelf
shelf-id 1 dial-shelf
!
!
!
Cisco AS5800 Operations, Administration, Maintenance, and Provisioning Guide
4-10
DOC-7810814=
Chapter 4
Administration
Enabling Management Protocols: NTP, SNMP, and Syslog
resource-pool disable
!
modem-pool Default
pool-range 1/2/0-1/10/143
!
!
spe 1/2/0 1/10/11
firmware ios-bundled default
modem recovery action none
ip subnet-zero
no ip source-route
ip host guessme 172.22.100.9
ip domain-name the.net
ip name-server 172.22.11.10
ip name-server 172.22.12.11
!
async-bootp dns-server 172.30.10.1 172.30.10.2
isdn switch-type primary-ni
isdn voice-call-failure 0
!
!
controller T3 1/0/0
framing m23
cablelength 0
t1 4 controller
!
controller T1 1/0/0:4
framing esf
pri-group timeslots 1-24
!
!
voice-port 1/0/0:4:D
!
!
process-max-time 200
!
interface Loopback0
ip address 172.22.99.1 255.255.255.255
no ip directed-broadcast
!
interface Loopback1
ip address 172.22.90.1 255.255.255.0
no ip directed-broadcast
!
interface FastEthernet0/1/0
ip address 172.22.66.23 255.255.255.0
no ip directed-broadcast
!
interface Serial1/0/0:4:23
no ip address
no ip directed-broadcast
no snmp trap link-status
isdn switch-type primary-ni
isdn incoming-voice modem
no cdp enable
!
interface Group-Async0
ip unnumbered FastEthernet0/1/0
no ip directed-broadcast
encapsulation ppp
async mode interactive
no snmp trap link-status
peer default ip address pool addr-pool
no cdp enable
Cisco AS5800 Operations, Administration, Maintenance, and Provisioning Guide
DOC-7810814=
4-11
Chapter 4
Administration
Enabling Management Protocols: NTP, SNMP, and Syslog
ppp authentication chap pap
group-range 1/2/00 1/10/143
!
ip local pool addr-pool 172.22.90.2 172.22.90.254
ip classless
ip route 0.0.0.0 0.0.0.0 172.22.66.1
no ip http server
!
logging trap debugging
logging 172.22.66.18
access-list 5 permit 172.22.67.1
access-list 5 permit 0.0.0.1 172.22.68.20
access-list 8 permit 172.22.67.1
access-list 8 permit 0.0.0.1 172.22.68.20
snmp-server engineID local 00000009020000D0D3424C1C
snmp-server community poptarts RO 8
snmp-server community pixysticks RW 5
snmp-server community maddog view v1default RO
snmp-server trap-source Loopback0
snmp-server location 5800-NAS-Austin
snmp-server contact admin [email protected]
snmp-server enable traps snmp
snmp-server enable traps isdn call-information
snmp-server enable traps hsrp
snmp-server enable traps config
snmp-server enable traps entity
snmp-server enable traps envmon
snmp-server enable traps syslog
snmp-server enable traps rsvp
snmp-server enable traps frame-relay
snmp-server enable traps rtr
snmp-server enable traps dial
snmp-server enable traps dsp card-status
snmp-server enable traps bgp
snmp-server enable traps voice poor-qov
snmp-server host 172.22.66.18 maddog
!
banner login ^C
This is a secured device.
Unauthorized use is prohibited by law.
^C
!
line con 0
transport input none
line aux 0
transport input telnet
line vty 0 4
line 1/2/00 1/10/143
autoselect during-login
autoselect ppp
modem InOut
no modem log rs232
!
ntp update-calendar
ntp server 172.22.66.18 prefer
end
Cisco AS5800 Operations, Administration, Maintenance, and Provisioning Guide
4-12
DOC-7810814=
Chapter 4
Administration
Access Service Security
Access Service Security
The Cisco AS5800 is designed to support a security paradigm providing authentication, authorization,
and accounting (AAA) security measures using RADIUS and TACACS+.
•
Authentication—requires dial-in users to identify themselves and prove their identity, thus
preventing wrongful access to lines on your Cisco AS5800, or connecting through the lines directly
to network resources.
•
Authorization—prevents users from gaining access to particular services and devices on the
network.
•
Accounting—provides records for billing and other needs to determine who is connected to the
network and how long they have been connected. It does not describe how to configure accounting.
This section describes how to configure security using a local database resident on your Cisco AS5800
or using a remote security database for Terminal Access Controller Access Control System with Cisco
proprietary enhancements (TACACS+) and Remote Authentication Dial-In User Service (RADIUS).
Refer to the “Local and Remote Server Authentication” section on page 4-13 for local and remote
authentication definitions.
Note
This section does not provide a comprehensive security overview. It does not describe how
to completely configure TACACS, Extended TACACS, access lists or RADIUS. It
presents the most commonly used security mechanisms to prevent unauthenticated and
unauthorized access to network resources through a Cisco AS5800. For a comprehensive
overview of Cisco security tools, refer to the security configuration guide in the Cisco IOS
configuration guides and command references documentation.
This section describes the following topics:
•
Local and Remote Server Authentication
•
Configuring RADIUS
•
Configuring TACACS+
Local and Remote Server Authentication
This section describes the differences between local and remote security databases and the basic
authentication process for each. Remote security databases described in this section include Terminal
Access Controller Access Control System with Cisco proprietary enhancements (TACACS+) and
Remote Authentication Dial-In User Service (RADIUS).
Generally the size of the network and type of corporate security policies and control determine whether
you use a local or remote security database.
Local Security Database
If you have one or two Cisco AS5800 providing access to your network, store username and password
security information on your Cisco AS5800. This is referred to as local authentication.
Cisco AS5800 Operations, Administration, Maintenance, and Provisioning Guide
DOC-7810814=
4-13
Chapter 4
Administration
Access Service Security
Remote Security Database
As your network expands, you need a centralized security database that provides username and password
information each access server in the network. This centralized security database resides in a security
server.
A centralized security database helps establish consistent remote access policies throughout a
corporation. An example of a remote security database server is the CiscoSecure product from
Cisco Systems. CiscoSecure is a UNIX security daemon, with which the administrator creates a database
that defines the network users and their privileges. CiscoSecure uses a central database that stores user
and group profiles with authentication and authorization information.
The Cisco AS5800 exchanges user authentication information with a TACACS+ or RADIUS database
on the security server by transmitting encrypted TACACS+ or RADIUS packets across the network.
For specific information about the interaction between the security server and the Cisco AS5800, refer
to the security configuration guide in the Cisco IOS configuration guides and command references
documentation.
Configuring RADIUS
This section describes the Remote Authentication Dial-In User (RADIUS) security system, defines its
operation, and identifies appropriate and inappropriate network environments for using RADIUS
technology. RADIUS Configuration Task List, page 4-16 describes how to configure RADIUS with the
authentication, authorization, and accounting (AAA) command set. RADIUS Configuration Examples,
page 4-20 offers two possible implementation scenarios.
This section includes the following topics:
•
RADIUS Overview, page 4-14
•
RADIUS Operation, page 4-15
•
RADIUS Configuration Task List, page 4-16
For a complete description of the commands used in this section, refer to information on RADIUS
commands in the security command reference for your Cisco IOS release. To locate documentation of
other commands that appear in this section, use the command reference master index or search online.
RADIUS Overview
RADIUS is a distributed client/server system that secures networks against unauthorized access. In the
Cisco implementation, RADIUS clients run on Cisco routers and send authentication requests to a
central RADIUS server. The server contains all user authentication and network service access
information.
RADIUS is a fully open protocol, distributed in source code format, that can be modified to work with
any security system currently available on the market.
Cisco supports RADIUS under its AAA security paradigm. RADIUS can be used with other AAA
security protocols, such as TACACS+, Kerberos, or local username lookup. RADIUS is supported on
all Cisco platforms.
RADIUS has been implemented in a variety of network environments that require high levels of security
while maintaining network access for remote users.
Cisco AS5800 Operations, Administration, Maintenance, and Provisioning Guide
4-14
DOC-7810814=
Chapter 4
Administration
Access Service Security
Use RADIUS in the following network environments that require access security:
•
Networks with multiple-vendor access servers, each supporting RADIUS. For example, access
servers from several vendors use a single RADIUS server-based security database. In an IP-based
network with multiple vendors access servers, dial-in users are authenticated through a RADIUS
server that has been customized to work with the Kerberos security system.
•
Turnkey network security environments in which applications support the RADIUS protocol, such
as in an access environment that uses a “smart card” access control system. In one case, RADIUS
has been used with Enigmas security cards to validate users and grant access to network resources.
•
Networks already using RADIUS. You can add a Cisco router with RADIUS to the network. This
might be the first step when you make a transition to a Terminal Access Controller Access Control
System (TACACS+) server.
•
Networks in which a user must only access a single service. Using RADIUS, you can control user
access to a single host, to a single utility such as Telnet, or to a single protocol such as Point-to-Point
Protocol (PPP). For example, when a user logs in, RADIUS identifies this user as having
authorization to run PPP using IP address10.2.3.4 and the defined access list is started.
•
Networks that require resource accounting. You can use RADIUS accounting independent of
RADIUS authentication or authorization. The RADIUS accounting functions allow data to be sent
at the start and end of services, indicating the amount of resources (such as time, packets, and bytes
used during the session.
•
An Internet service provider (ISP) might use a freeware-based version of RADIUS access control
and accounting software to meet special security and billing needs.
RADIUS is not suitable in the following network security situations:
•
Multiprotocol access environments. RADIUS does not support the following protocols:
–
AppleTalk Remote Access Protocol (ARAP)
– NetBIOS Frame Protocol Control Protocol (NBFCP)
– NetWare Asynchronous Services Interface (NASI)
– X.25 PAD connections
•
Router-to-router situations. RADIUS does not provide two-way authentication. RADIUS can be
used to authenticate from one Cisco router to a third party router if, other company’s router requires
RADIUS authentication.
•
Networks using a variety of services. RADIUS generally binds a user to one service model.
RADIUS Operation
When attempting to log in and authenticate to Cisco AS5800 using RADIUS, the following steps occur:
1.
The user enters a username and password at the corresponding prompts.
2.
The username and encrypted password are sent over the network to the RADIUS server.
3.
The user receives one of the following responses from the RADIUS server:
– ACCEPT - The user is authenticated.
– REJECT - The user is not authenticated and is prompted to reenter the username and password,
or access is denied.
– CHALLENGE - A challenge is issued by the RADIUS server. The challenge collects additional
data from the user.
Cisco AS5800 Operations, Administration, Maintenance, and Provisioning Guide
DOC-7810814=
4-15
Chapter 4
Administration
Access Service Security
– CHANGE PASSWORD - A request is issued by the RADIUS server, asking the user to select
a new password.
The ACCEPT or REJECT response is bundled with additional data that is used for EXEC or network
authorization. You must first complete RADIUS authentication before using RADIUS authorization.
The additional data included with the ACCEPT or REJECT packets consists of the following:
•
Services that the user can access, including Telnet, rlogin, local-area transport (LAT) connections,
and PPP, Serial Line Internet Protocol (SLIP), or EXEC services.
•
Connection parameters, including the host or client IP address, access list, and user timeouts.
RADIUS Configuration Task List
To configure RADIUS on your Cisco AS5800, you must perform the following tasks:
•
Use the aaa new-model global configuration command to enable AAA. AAA must be configured
if you plan to use RADIUS. For more information about using the aaa new-model command, refer
to the “AAA Commands” section on page 4-23.
•
Use the aaa authentication global configuration command to define method lists for RADIUS
authentication. For more information about using the aaa authentication command, refer to the
“Specify RADIUS Authentication” section on page 4-20.
•
Use line and interface commands to enable the defined method lists to be used. For more
information, refer to the “Specify RADIUS Authentication” section on page 4-20.
The following configuration tasks are optional:
•
Use the aaa authorization global command to authorize specific user functions. For more
information about using the aaa authorization command, refer to the “Specify RADIUS
Authorization” section on page 4-20.
•
Use the aaa accounting command to enable accounting for RADIUS connections. For more
information about using the aaa accounting command, refer to the “Specify RADIUS Accounting”
section on page 4-20.
This section describes how to set up RADIUS for authentication, authorization, and accounting on your
network, and includes the following sections:
•
Configure Router to RADIUS Server Communication, page 4-17
•
Configure Router to Use Vendor-Specific RADIUS Attributes, page 4-17
•
Configure Router for Vendor-Proprietary RADIUS Server Communication, page 4-18
•
Configure Router to Query RADIUS Server for Static Routes and IP Addresses, page 4-19
•
Configure Router to Expand Network Cisco AS5800 Port Information, page 4-19
•
Specify RADIUS Authentication, page 4-20
•
Specify RADIUS Authorization, page 4-20
•
Specify RADIUS Accounting, page 4-20
Cisco AS5800 Operations, Administration, Maintenance, and Provisioning Guide
4-16
DOC-7810814=
Chapter 4
Administration
Access Service Security
Configure Router to RADIUS Server Communication
The RADIUS host is normally a multi-user system running RADIUS server software from Livingston,
Merit, Microsoft, or another software provider. A RADIUS server and a Cisco router use a shared secret
text string to encrypt passwords and exchange responses.
To configure RADIUS to use the AAA security commands, you must specify the host running the
RADIUS server daemon, and a secret text string that it shares with the router. Use the radius-server
commands to specify the RADIUS server host and a secret text string.
To specify a RADIUS server host and shared secret text string, perform the following tasks in global
configuration mode:
•
Specify the IP address or host name of the remote RADIUS server host, and assign authentication
and accounting destination port numbers.
radius-server host {hostname | ip-address}
[auth-port port-number] [acct-port port-number]
•
Specify the shared secret text string used between the router and the RADIUS server.
radius-server key string
To customize communication between the router and the RADIUS server, use the following optional
radius-server global configuration commands:
•
Specify the number of times the router transmits each RADIUS request to the server before giving
up (default is three).
radius-server retransmit retries
•
Specify the number of seconds a router waits for a reply to a RADIUS request before retransmitting
the request.
radius-server timeout seconds
•
Specify the number of minutes a RADIUS server, which is not responding to authentication
requests, is passed over by requests for RADIUS authentication.
radius-server deadtime minutes
Configure Router to Use Vendor-Specific RADIUS Attributes
The Internet Engineering Task Force (IETF) draft standard specifies a method for communicating
vendor-specific information between the network Cisco AS5800 and the RADIUS server, by using the
vendor-specific attribute (Attribute 26). Vendor-specific attributes (VSAs) allow vendors to support
their own extended attributes not suitable for general use. The Cisco RADIUS implementation supports
one vendor-specific option using the format recommended in the specification. The Cisco vendor-ID is
9, and the supported option has vendor-type 1, which is named “cisco-avpair.” The value is a string of
the format:
protocol : attribute sep value *
•
“Protocol” is a value of the Cisco “protocol” attribute for a particular type of authorization.
•
“Attribute” and “value” are an appropriate attribute/value (AV) pair defined in the Cisco TACACS+
specification
•
“sep” is “=” for mandatory attributes and “*” for optional attributes.
This allows the full set of features available for TACACS+ authorization to also be used for RADIUS.
Cisco AS5800 Operations, Administration, Maintenance, and Provisioning Guide
DOC-7810814=
4-17
Chapter 4
Administration
Access Service Security
For example, the following AV pair causes the Cisco “multiple named ip address pools” feature to be
activated during IP authorization (during PPP's IPCP address assignment).
cisco-avpair= “ip:addr-pool=first”
The following example causes a “NAS Prompt” user to have immediate access to EXEC commands.
cisco-avpair= “shell:priv-lvl=15”
Other vendors have their own vendor-IDs, options, and associated VSAs. For more information about
vendor-IDs and VSAs, refer to the RADIUS specification RFC 2138, “Remote Authentication Dial-In
User Service (RADIUS),” described in How Does RADIUS Work?, available online at
http://www.cisco.com/warp/public/707/32.html
To configure the NAS to recognize and use VSAs, perform the following task in global configuration
mode:
Enable the network Cisco AS5800 to recognize and use VSAs as defined by RADIUS IETF attribute 26.
radius-server vsa send [accounting|authentication]
For a complete list of RADIUS attributes or more information about vendor-specific Attribute 26, refer
to the RADIUS Attributes appendix.
Configure Router for Vendor-Proprietary RADIUS Server Communication
Although the IETF draft standard for RADIUS specifies a method for communicating vendor-specific
information between the network Cisco AS5800 and the RADIUS server, some vendors have extended
the RADIUS attribute set in a unique way. Cisco IOS software supports a subset of vendor-proprietary
RADIUS attributes.
To configure RADIUS (whether vendor-proprietary or IETF draft-compliant), you must specify the host
running the RADIUS server daemon and the secret text string it shares with the Cisco device. You
specify the RADIUS host and secret text string by using the radius-server commands. To identify that
the RADIUS server is using a vendor-proprietary implementation of RADIUS, use the radius-server host
nonstandard command.
Vendor-proprietary attributes will not be supported unless you use the radius-server host non-standard
command.
To specify a vendor-proprietary RADIUS server host and a shared secret text string, perform the
following tasks in global configuration mode.
Specify the IP address or host name of the remote RADIUS server host and identify that it is using a
vendor-proprietary implementation of RADIUS.
radius-server host {hostname |ip-address} non-standard
Specify the shared secret text string used between the router and the vendor-proprietary RADIUS server.
The router and the RADIUS server use this text string to encrypt passwords and exchange responses.
radius-server key string
Cisco AS5800 Operations, Administration, Maintenance, and Provisioning Guide
4-18
DOC-7810814=
Chapter 4
Administration
Access Service Security
Configure Router to Query RADIUS Server for Static Routes and IP Addresses
Some vendor-proprietary implementations of RADIUS let the user define static routes and IP pool
definitions on the RADIUS server, instead of on each individual Cisco AS5800 in the network. Each
network Cisco AS5800 then queries the RADIUS server for static route and IP pool information.
To have the Cisco AS5800 query the RADIUS server for static routes and IP pool definitions when the
device first starts up, use the following commands in global configuration mode:
radius-server configure-nas
Note
Because the radius-server configure-nas command is performed when the Cisco router
starts up, it will not take effect until you enter a copy running-config startup-config
command.
Configure Router to Expand Network Cisco AS5800 Port Information
In some situations, PPP or login authentication occurs on an interface different from the interface on
which the call itself comes in. For example, in a V.120 ISDN call, login or PPP authentication occurs on
a virtual asynchronous interface “ttt” but the call itself occurs on one of the channels of the ISDN
interface.
The radius-server attribute nas-port extended command configures RADIUS to expand the size of
the NAS-Port attribute (RADIUS IETF Attribute 5) field to 32 bits. The upper 16 bits of the NAS-Port
attribute display the type and number of the controlling interface; the lower 16 bits indicate the interface
undergoing authentication.
To display expanded interface information in the NAS-Port attribute field, perform the following task
in global configuration mode.
Expand the NAS-Port attribute size from 16 to 32 bits to display extended interface information.
radius-server attribute nas-port extended
Note
This command replaces the deprecated radius-server extended-portnames command.
On platforms with multiple interfaces (ports) per slot, the Cisco RADIUS implementation will not
provide a unique NAS-Port attribute that permits distinguishing between the interfaces. For example, if
a dual PRI interface is in slot 1, calls on both Serial1/0:1 and Serial1/1:1 will appear as
NAS-Port = 20101. This is due to the 16-bit field size limitation associated with RADIUS IETF
NAS-port attribute. In this case, replace the NAS-port attribute with a vendor-specific attribute
(RADIUS IETF Attribute 26). The Cisco vendor-ID is 9, and the Cisco-NAS-Port attribute is subtype 2.
Vendor-specific attributes (VSAs) can be turned on by entering the radius-server vsa send command.
The port information in this attribute is provided and configured using the aaa nas port extended
command.
To replace the NAS-Port attribute with RADIUS IETF Attribute 26 and to display extended field
information, use the following commands in global configuration mode.
Enable the network Cisco AS5800 to recognize and use vendor-specific attributes as defined by
RADIUS IETF Attribute 26.
radius-server vsa send [accounting | authentication]
Expand the size of the VSA NAS-Port field from 16 to 32 bits to display extended interface information.
aaa nas-port extended
Cisco AS5800 Operations, Administration, Maintenance, and Provisioning Guide
DOC-7810814=
4-19
Chapter 4
Administration
Access Service Security
The standard NAS-Port attribute (RADIUS IETF Attribute 5) will continue to be sent. If you do not want
this information to be sent, you can suppress it by using the no radius-server attribute nas-port
command. When this command is configured, the standard NAS-Port attribute will no longer be sent.
Specify RADIUS Authentication
After you have identified the RADIUS server and defined the RADIUS authentication key, you need to
define method lists for RADIUS authentication. Because RADIUS authentication is facilitated through
AAA, you need to enter the aaa authentication command, and specify RADIUS as the authentication
method. For more information, refer to information on configuring authentication in the security
configuration guide for your Cisco IOS release.
Specify RADIUS Authorization
AAA authorization lets you set parameters that restrict users network access. Authorization using
RADIUS provides one method for remote access control, including one-time authorization or
authorization for each service, per-user account list and profile, user group support, and support of IP,
IPX, ARA, and Telnet. Because RADIUS authorization is facilitated through AAA, you need to issue
the aaa authorization command, specifying RADIUS as the authorization method.
Specify RADIUS Accounting
The AAA accounting feature enables you to track the services users access and the amount of network
resources they consume. Because RADIUS accounting is facilitated through AAA, you need to issue the
aaa accounting command, specifying RADIUS as the accounting method.
RADIUS Attributes
The network Cisco AS5800 monitors the RADIUS authorization and accounting functions defined by
RADIUS attributes in each user-profile.
Vendor-Proprietary RADIUS Attributes
An Internet Engineering Task Force (IETF) draft standard for RADIUS specifies a method for
communicating vendor-proprietary information between the network Cisco AS5800 and the RADIUS
server. Some vendors, nevertheless, have extended the RADIUS attribute set in a unique way. Cisco IOS
software supports a subset of vendor-proprietary RADIUS attributes.
RADIUS Configuration Examples
RADIUS configuration examples in this section include the following:
•
RADIUS Authentication and Authorization Example, page 4-21
•
RADIUS Authentication, Authorization, and Accounting Example, page 4-21
•
Vendor-Proprietary RADIUS Configuration Example, page 4-22
Cisco AS5800 Operations, Administration, Maintenance, and Provisioning Guide
4-20
DOC-7810814=
Chapter 4
Administration
Access Service Security
RADIUS Authentication and Authorization Example
The following example shows a router configuration to authenticate and authorize using RADIUS.
aaa
aaa
aaa
aaa
authentication login use-radius radius local
authentication ppp user-radius if-needed radius
authorization exec radius
authorization network radius
These RADIUS authentication and authorization configuration commands are defined as follows:
•
The aaa authentication login use-radius radius local command configures the router to use
RADIUS for authentication at the login prompt. If RADIUS returns an error, the user is
authenticated using the local database. In this example, use-radius is the name of the method list,
which specifies RADIUS and then local authentication.
•
The aaa authentication ppp user-radius if-needed radius command configures the Cisco IOS
software to use RADIUS authentication for lines using Point-to-Point Protocol (PPP) with CHAP or
PAP if the user has not already been authorized. If the EXEC facility has authenticated the user,
RADIUS authentication is not performed. In this example, user-radius is the name of the method list
defining RADIUS as the if-needed authentication method.
•
The aaa authorization exec radius command sets the RADIUS information that is used for EXEC
authorization, autocommands, and access lists.
•
The aaa authorization network radius command sets RADIUS for network authorization, address
assignment, and access lists.
RADIUS Authentication, Authorization, and Accounting Example
The following sample is a general configuration using RADIUS with the AAA command set.
radius-server host 123.45.1.2
radius-server key myRaDiUSpassWoRd
username root password ALongPassword
aaa authentication ppp dialins radius local
aaa authorization network radius local
aaa accounting network start-stop radius
aaa authentication login admins local
aaa authorization exec local
line 1 16
autoselect ppp
autoselect during-login
login authentication admins
modem ri-is-cd
interface group-async 1
encaps ppp
ppp authentication pap dialins
The lines in this sample RADIUS authentication, authorization, and accounting configuration are
defined as follows:
•
radius-server host defines the IP address of the RADIUS server host.
•
radius-server key defines the shared secret text string between the network Cisco AS5800 and the
RADIUS server host.
•
aaa authentication ppp dialins radius local defines the authentication method list “dialins,” which
specifies that RADIUS authentication, then (if the RADIUS server does not respond) local
authentication will be used on serial lines using PPP.
•
ppp authentication pap dialins applies the “dialins” method list to the lines specified.
Cisco AS5800 Operations, Administration, Maintenance, and Provisioning Guide
DOC-7810814=
4-21
Chapter 4
Administration
Access Service Security
•
aaa authorization network radius local is used to assign an address and other network parameters
to the RADIUS user.
•
aaa accounting network start-stop radius tracks PPP usage.
•
aaa authentication login admins local defines another method list, “admins,” for login
authentication.
•
login authentication admins applies the “admins” method list for login authentication.
Vendor-Proprietary RADIUS Configuration Example
The following example is a general configuration using vendor-proprietary RADIUS with the AAA
command set.
radius-server host alcatraz non-standard
radius-server key myRaDiUSpassWoRd
radius-server configure-nas
username root password ALongPassword
aaa authentication ppp dialins radius local
aaa authorization network radius local
aaa accounting network start-stop radius
aaa authentication login admins local
aaa authorization exec local
line 1 16
autoselect ppp
autoselect during-login
login authentication admins
modem ri-is-cd
interface group-async 1
encaps ppp
ppp authentication pap dialins
The lines in this example RADIUS AAA configurations are defined as follows:
•
radius-server host non-standard defines the name of the RADIUS server host, and identifies that
this RADIUS host uses a vendor-proprietary version of RADIUS.
•
radius-server key defines the shared secret text string between the network Cisco AS5800 and the
RADIUS server host.
•
radius-server configure-nas defines that the Cisco AS5800 will query the RADIUS server for
static routes and IP pool definitions when the device first starts up.
•
aaa authentication ppp dialins radius local defines the authentication method list “dialins,” which
specifies that RADIUS authentication, then (if the RADIUS server does not respond) local
authentication will be used on serial lines using PPP.
•
ppp authentication pap dialins applies the “dialins” method list to the lines specified.
•
aaa authorization network radius local is used to assign an address and other network parameters
to the RADIUS user.
•
aaa accounting network start-stop radius tracks PPP usage.
•
aaa authentication login admins local defines another method list, “admins,” for login
authentication.
•
login authentication admins applies the “admins” method list for login authentication.
Cisco AS5800 Operations, Administration, Maintenance, and Provisioning Guide
4-22
DOC-7810814=
Chapter 4
Administration
Access Service Security
RADIUS Cisco IOS Software Support
The following Cisco IOS software support is available for RADIUS.
1.
AAA commands
2.
RADIUS commands
3.
RADIUS & AAA debug commands
AAA Commands
aaa
aaa
aaa
aaa
aaa
aaa
aaa
aaa
aaa
aaa
aaa
aaa
aaa
aaa
aaa
aaa
aaa
aaa
aaa
aaa
new-model
authentication login CONSOLE none
authentication login RADIUS_LIST radius
authentication login TAC_PLUS tacacs+ enable
authentication login V.120 none
authentication enable default enable tacacs+
authentication ppp RADIUS_LIST if-needed radius
authorization exec RADIUS_LIST radius if-authenticated
authorization exec V.120 none
authorization network default radius if-authenticated
authorization network V.120 radius if-authenticated
authorization network RADIUS_LIST if-authenticated radius
accounting suppress null-username
accounting delay-start
accounting exec default start-stop radius
accounting commands 0 default start-stop radius
accounting network default start-stop radius
accounting connection default start-stop radius
accounting system default start-stop radius
nas port extended
RADIUS Commands
ip radius source-interface subinterface-name
radius-server configure-nas
radius-server dead-time minutes
radius-server extended-portnames (*deprecated)
radius-server attribute nas-port extended (old)
radius-server attribute nas-port format {a | b | c} (new)
radius-server host {hostname | ip} [auth-port port#] [acct-port
radius-server host {hostname | ip} non-standard
radius-server host {hostname | ip} ignore
radius-server host {hostname | ip}
radius-server key {string}
radius-server retransmit retries
radius-server timeout seconds
port#]
RADIUS & AAA Debug Commands
debug
debug
debug
debug
debug
debug
debug
radius
aaa authorization
aaa authentication
aaa peruser
ppp negotiation
ppp authentication
isdn q931
Cisco AS5800 Operations, Administration, Maintenance, and Provisioning Guide
DOC-7810814=
4-23
Chapter 4
Administration
Access Service Security
Configuring TACACS+
The following global configuration commands provide basic security and local database configuration.
Step 1
Enable the AAA access control modem that includes TACACS+.
5800-1(config)# aaa new-model
Step 2
Enable AAA authentication method during login.
5800-1(config)# aaa authentication login default local
Step 3
Enable AAA authentication method during login using a methods list.
5800-1(config)# aaa authentication login console none
Step 4
Enable AAA authentication method for use on serial interfaces running PPP when TACACS+ is used.
5800-1(config)# aaa authentication ppp default if-needed local
Step 5
Enter authorization for username and password.
5800-1(config)# username username password password
TACACS+ Authentication
Use the AAA facility to authenticate users with either a local or remote security database. For more
information about a local and remote security database, refer to the “Local and Remote Server
Authentication” section on page 4-13.
Whether you maintain a local or remote security database, or use TACACS+ or RADIUS authentication
and authorization, the process of configuring the Cisco AS5800 for these different databases and
protocols is similar. The basic process of configuring the Cisco IOS software for authentication requires
the following tasks:
1.
Securing Access to Privileged EXEC and Configuration Mode
2.
Communicating Between the Access and Security Servers
3.
Enabling AAA Globally
4.
Defining Authentication Method Lists
– Issue the aaa authentication Command, page 4-30
– Specify Protocol or Login Authentication, page 4-30
– Identify a List Name, page 4-30
– Specify the Authentication Method, page 4-31
– Populate the Local Username Database if Necessary, page 4-32
5.
Applying Authentication Method Lists, page 4-33
Cisco AS5800 Operations, Administration, Maintenance, and Provisioning Guide
4-24
DOC-7810814=
Chapter 4
Administration
Access Service Security
Securing Access to Privileged EXEC and Configuration Mode
The first step is to secure access to privileged EXEC (enable) mode. Enable mode provides access to
configuration mode, which enables any type of configuration change to the Cisco AS5800. To secure
privileged EXEC mode access, use one of the following commands.
•
The enable password password command requires that network administrators enter a password to access
privileged EXEC mode. Do not provide access to users who are not administrators.
•
The enable secret password command specifies a secret password that is encrypted, so that the password
cannot be read when crossing a network. After you issue this command, the encryption cannot be reversed.
The enable secret password takes precedence over the enable password when it exists. The same
password cannot be used for both commands. You can view the encrypted version of the enable secret
password using the show running-config or show startup-config commands. (The encrypted version
of the password is noted with * in the following example.)
5800-1(config)# show running-config
Using 1899 out of 126968 bytes
!
Version x AA
.
.
.
!
hostname 5800-1
!
enable secret 5 $1$60L4$X2JYOwoDc0.kqa1lo0/w8/*
.
.
.
Note
For more information about the enable password and enable secret commands and their
complete syntax, refer to the security command reference for your Cisco IOS release in the
Cisco IOS configuration guides and command references documentation.
Caution
If you use the enable secret command and specify an encryption type, you must enter the
encrypted version of a specific password. Do not enter the cleartext version of the password
after specifying an encryption type, otherwise you will be locked out of privileged EXEC
(enable) mode. To regain access to privileged EXEC mode, erase the contents of NVRAM
and your entire configuration, and reconfigure the Cisco AS5800.
Note
The enable secret password overrides the enable password.
The following global configuration commands provide an encrypted password using enable secret.
Cisco AS5800 Operations, Administration, Maintenance, and Provisioning Guide
DOC-7810814=
4-25
Chapter 4
Administration
Access Service Security
Step 1
Enter the cleartext password used to gain access to privileged EXEC mode. Do not specify an encryption
type.
5800-1(config)# enable secret
5800-1(config)#
Step 2
password
Type the exit command to exit out of global configuration mode.
5800-1(config)# exit
5800-1#
Step 3
Enter the show running-config command to view the encrypted version of the cleartext password that
was entered in Step 1. The encrypted password is noted with **.
5800-1# show running-config
Building configuration...
Current configuration:
!
version x AA
! some of the configuration skipped
enable secret 5 $1$h7dd$VTNs4.BAfQMUU0Lrvw6570**
! the rest of the configuration skipped
Note
Step 4
Encryption type 5 is the only valid encryption type for enable secret.
Type Ctrl-Z to return to privileged EXEC mode.
5800-1(config)# Ctrl-Z
5800-1#
Step 5
Save changes.
5800-1# copy running-config startup-config
You can also specify additional protection for privileged EXEC mode, including the following:
•
Privilege levels for Cisco IOS software commands
•
Privileged EXEC passwords for different privilege levels
•
Privilege levels for specific lines on the Cisco AS5800
•
Encrypt passwords using service password-encryption
For more information about these security tools, refer to the security configuration guide for your
Cisco IOS release in the Cisco IOS configuration guides and command references documentation.
Communicating Between the Access and Security Servers
This section describes the Cisco IOS software commands that enable the Cisco AS5800 to communicate
with a security server. This procedure is similar for communicating with TACACS+ and RADIUS
servers, and the following sections describe the process.
If you are using a remote security server for authentication and authorization, you must configure the
security server before performing the tasks described in this section. TACACS+ Security Examples, page
4-38 shows typical TACACS+ and RADIUS server entries corresponding to the Cisco AS5800 security
configurations.
Cisco AS5800 Operations, Administration, Maintenance, and Provisioning Guide
4-26
DOC-7810814=
Chapter 4
Administration
Access Service Security
Communicating with a TACACS+ Server
The following global configuration commands enable communication between the TACACS+ security
(database) server and the Cisco AS5800.
Step 1
Specify the IP address or the host name of the remote TACACS+ server host. This host is typically a
UNIX or NT system running TACACS+ software.
5800-1(config)# tacacs-server host { hostname | ip-address}
Step 2
Specify a shared secret text string used between the Cisco AS5800 and the TACACS+ server. The
Cisco AS5800 and TACACS+ server use this text string to encrypt passwords and exchange responses.
5800-1(config)# tacacs-server key shared-secret-text-string
Step 3
Type Ctrl-Z to return to privileged EXEC mode.
5800-1(config)# Ctrl-Z
5800-1#
Step 4
Save your changes when ready.
5800-1# copy running-config startup-config
For example, to enable the remote TACACS+ server to communicate with the Cisco AS5800, enter the
commands as follows:
5800-1# configure terminal
5800-1(config)# tacacs-server host alcatraz
5800-1(config)# tacacs-server key abra2cad
The host name of the TACACS+ server in the previous example is alcatraz. The key in the previous
example (abra2cad) is the encryption key shared between the TACACS+ server and the Cisco AS5800.
Substitute your own TACACS+ server host name and password for those shown.
For more information about these commands, refer to the security command reference for your
Cisco IOS release, which is part of the Cisco IOS configuration guides and command references
documentation.
Cisco AS5800 Operations, Administration, Maintenance, and Provisioning Guide
DOC-7810814=
4-27
Chapter 4
Administration
Access Service Security
Configuring Authentication on a TACACS+ Server
On most TACACS+ security servers, there are three ways to authenticate a user for login:
•
Include a cleartext (DES) password for a user or for a users group (each user can belong to only one
group). Note that CHAP and global user authentication must be specified in cleartext.
The following is the configuration for global authentication:
user = birdman {global = cleartext “birdman global password”}
To assign different passwords for CHAP, and a normal login, you must enter a string for each user.
Each string must specify the security protocols, state whether the password is cleartext, and specify
if the authentication is performed with a DES card. The following example shows a user aaaa, who
has authentication configured for CHAP and login. The users CHAP password, “chap password,” is
shown in cleartext and the login password has been encrypted.
user = aaaa
chap = cleartext “chap password”
login = des XQj4892fjk}
•
Use password (5) files instead of entering the password into the configuration file directly.
The default authentication is to deny authentication. You can change this at the top level of the
configuration file to have the default use passwd(5) file, by issuing the following command:
default authentication = /etc/passwd
•
Authenticate using an s/key. If you have built and linked in an s/key library and compiled
TACACS+ to use the s/key, you can specify that a user be authenticated using the s/key, as shown
in the following example:
user= bbbb {login = skey}
On the Cisco AS5800, configure authentication on all lines including the VTY and Console lines by
entering the following commands:
5800-1# configure terminal
5800-1(config)# aaa new-model
5800-1(config)# aaa authentication login default tacacs+ enable
Caution
When you issue the aaa authentication login default tacacs+ enable command, you are
specifying that if your TACACS+ server fails to respond (because it is set up incorrectly),
you can log in to the Cisco AS5800 by using your enable password. If you do not have an
enable password set on the Cisco AS5800, you will not be able to log in until you have a
functioning TACACS+ daemon configured with user names and passwords. The enable
password in this case is a last-resort authentication method. You can also specify none as
the last-resort method, which means that no authentication is required if all other methods
have failed.
Cisco AS5800 Operations, Administration, Maintenance, and Provisioning Guide
4-28
DOC-7810814=
Chapter 4
Administration
Access Service Security
Enabling AAA Globally
To use the AAA security facility in the Cisco IOS software, you must issue the aaa new-model
command from global configuration mode.
When you issue the aaa new-model command, all lines on the Cisco AS5800 receive the implicit
login authentication default method list, and all interfaces with PPP enabled have an implicit
ppp authentication pap default method list applied.
Caution
If you authenticate users by a security server, do not inadvertently lock yourself out of the
Cisco AS5800 ports after you issue the aaa new-model command. Enter line configuration
mode and issue the aaa authentication login default tacacs+ enable global configuration
command. This command specifies that if your TACACS+ (or RADIUS) server is not
functioning properly, you can enter your enable password to log in to the Cisco AS5800.
In general, verify that you have a last-resort access method before you are certain that your
security server is set up and functioning properly. For more information about the
aaa authentication command, refer to the “Defining Authentication Method Lists” section
on page 4-29.
Note
Cisco recommends that you use CHAP authentication with PPP, rather than PAP. CHAP
passwords are encrypted when they cross the network, whereas PAP passwords are
cleartext when they cross the network. The Cisco IOS software selects PAP as the default,
so you must manually select CHAP. The process for specifying CHAP is described in
Applying Authentication Method Lists, page 4-33.
5800-1# configure terminal
5800-1(config)# aaa new-model
Defining Authentication Method Lists
After you enable AAA globally on the Cisco AS5800, you need to define authentication method lists,
which you then apply to lines and interfaces. These authentication method lists are security profiles that
indicate the protocol (PPP) or login and authentication method (TACACS+, RADIUS, or local
authentication).
To define an authentication method list:
1.
Issue the aaa authentication command.
2.
Specify protocol (PPP) or login authentication.
3.
Identify a list name or default. A list name is any alphanumeric string you choose. You assign
different authentication methods to different named lists.
4.
Specify the authentication method. You can specify multiple methods, such as tacacs+, followed by
local if a TACACS+ server is not available on the network.
5.
Populate the local username database if you specified local as the authentication method (or one of
the authentication methods). To use a local username database, you must issue the username global
configuration command. Refer to the “Populate the Local Username Database if Necessary” section
on page 4-32.
After defining these authentication method lists, apply them to your interfaces (synchronous or
asynchronous) configured for PPP.
Cisco AS5800 Operations, Administration, Maintenance, and Provisioning Guide
DOC-7810814=
4-29
Chapter 4
Administration
Access Service Security
Refer to the “Applying Authentication Method Lists” section on page 4-33 for information about
applying these lists.
Issue the aaa authentication Command
To define an authentication method list, enter the aaa authentication global configuration command, as
shown in the following example:
5800-1# configure terminal
5800-1(config)# aaa authentication
Specify Protocol or Login Authentication
After you enter aaa authentication, you must specify one of the following dial-in protocols as
applicable for your network:
•
If you are enabling dial-in PPP access, specify ppp.
•
If you are enabling users to connect to the EXEC facility, specify login.
You can specify only one dial-in protocol per authentication method list; however, you can create
multiple authentication method lists with each of these options. You must give each list a different name,
as described in Identify a List Name, page 4-30.
If you specify the ppp option, the default authentication method for PPP is PAP. For greater security,
specify CHAP. The full command is aaa authentication ppp chap.
For example, if you specify PPP authentication, the configuration looks like this:
5800-1# configure terminal
5800-1(config)# aaa authentication ppp
Identify a List Name
A list name identifies each authentication list. You can choose either to use the keyword default, or
choose any other name that describes the authentication list. For example, you name it ppp-radius if you
intend to apply it to interfaces configured for PPP and RADIUS authentication. The list name can be any
alphanumeric string. Use default as the list name for most lines and interfaces, and use different names
on an exception basis.
You can create different authentication method lists and apply them to lines and interfaces selectively.
You can even create a named authentication method list that you do not apply to a line or interface, but
which you intend to apply at some later point, such as when you deploy a new log-in method for users.
After you define a list name, you must identify additional security attributes (such as local authentication
versus TACACS+ or RADIUS).
In the following example, the default authentication method list for PPP dial-in clients uses the local
security database:
5800-1# configure terminal
5800-1(config)# aaa authentication ppp default
In the following example, the PPP authentication method list name is insecure:
5800-1# configure terminal
5800-1(config)# aaa authentication ppp insecure
In the following example, the login authentication method list name is deveng:
5800-1# configure terminal
5800-1(config)# aaa authentication login deveng
Cisco AS5800 Operations, Administration, Maintenance, and Provisioning Guide
4-30
DOC-7810814=
Chapter 4
Administration
Access Service Security
Specify the Authentication Method
After you identify a list name, you must specify an authentication method to identify how users will be
authenticated. Authentication methods are defined with optional keywords in the aaa authentication
command.
The following global configuration commands configure authentication methods for PPP.
Step 1
Configure for AAA.
5800-1(config)# aaa new-model
Step 2
Create a local authentication list. Methods include if-needed, krb5, local, none, radius, tacacs+.
5800-1(config)# aaa authentication ppp {default | list-name} method1 [method2]
Step 3
Apply the authentication list to a line or set of lines.
5800-1(config)# ppp authentication {chap | pap | chap pap | pap chap} [if-needed]
{default | list-name} [callin]
Step 4
Type Ctrl-Z to return to privileged EXEC mode.
5800-1(config)# Ctrl-Z
5800-1#
Step 5
Save your changes when ready.
5800-1# copy running-config startup-config
The keyword list-name is any character string used to name the list you are creating. The keyword
method refers to the actual method the authentication algorithm tries. The additional methods of
authentication are used only if the previous method returns an error, not if it fails. To specify that the
authentication should succeed even if all methods return an error, specify none as the final method in
the command line.
Timesaver
If you are not sure whether you should use TACACS+ or RADIUS, consider the following:
TACACS+ encrypts the entire payload of packets passed across the network, whereas
RADIUS only encrypts the password when it crosses the network. TACACS+ can query
the security server multiple times, whereas a RADIUS server gives one response only and
is not as flexible regarding per-user authentication and authorization attempts.
You can specify multiple authentication methods for each authentication list. The following
authentication method example for PPP first queries a TACACS+ server, then a RADIUS server, then
the local security database. Multiple authentication methods can be useful if you have multiple types of
security servers on the network, and one or more types of security server do not respond.
5800-1(config)# aaa authentication ppp testbed tacacs+ radius local
If you specify more than one authentication method and the first method (TACACS+ in the previous
example) is not available, the Cisco IOS software attempts to authenticate using the next method (such
as RADIUS). If, in the previous example, the RADIUS server has no information about the user, or if
no RADIUS server can be found, the user is authenticated using the local username database that was
populated with the username command.
Cisco AS5800 Operations, Administration, Maintenance, and Provisioning Guide
DOC-7810814=
4-31
Chapter 4
Administration
Access Service Security
If authentication fails using the first method listed, the Cisco IOS software does not permit access. It
does not attempt to authenticate using the subsequent security methods if the user entered the incorrect
password.
Populate the Local Username Database if Necessary
If you specify local as the security method, you must specify username profiles for each user who might
log in. An example of specifying local authentication is as follows:
5800-1(config)# aaa authentication login deveng local
This command specifies that anytime a user attempts to log in to a line on an Cisco AS5800, the
Cisco IOS software checks the username database. To create a local username database, define username
profiles using the username global configuration command.
The following example shows how to use the username command and password:
5800-1(config)# username username password password
The show running-config command shows the encrypted version of the password, as follows:
5800-1# show running-config
Building configuration...
Current configuration:
!
version x AA
! most of config omitted
username xxx password 7 0215055500070C294D
Note
The Cisco IOS software adds the encryption type of 7 automatically for passwords. If you
were to manually enter the number 7 to represent an encryption type, you must follow the
7 with the encrypted version of the password. If you specify the number 7, enter a cleartext
password, the user will not have access to the line, interface, or the network the user is
trying to access, and you must reconfigure the users authentication profile.
Authentication Method List Examples
This section includes authentication method list examples for:
•
Users Logging In to the Cisco AS5800
•
Users Dialing In Using PPP
Users Logging In to the Cisco AS5800
The following example creates a local authentication list for users logging in to any line on the
Cisco AS5800:
5800-1(config)# aaa authentication login default local
The following example specifies login authentication using RADIUS (the RADIUS daemon is polled for
authentication profiles):
5800-1(config)# aaa authentication login default radius
The following example specifies login authentication using TACACS+ (the TACACS+ daemon is
polled for authentication profiles):
5800-1(config)# aaa authentication login default tacacs+
Cisco AS5800 Operations, Administration, Maintenance, and Provisioning Guide
4-32
DOC-7810814=
Chapter 4
Administration
Access Service Security
Users Dialing In Using PPP
The following example creates a TACACS+ authentication list for users connecting to interfaces
configured for dial-in using PPP. The name of the list is marketing. This example specifies that a remote
TACACS+ daemon be used as the security database. If this security database is not available, the
Cisco IOS software then polls the RADIUS daemon. Users are not authenticated if they are already
authenticated on a TTY line.
5800-1(config)# aaa authentication ppp marketing if-needed tacacs+ radius
In this example, default can be substituted for marketing if the administrator wants this list to be the
default list.
Applying Authentication Method Lists
As described in Defining Authentication Method Lists, page 4-29, the aaa authentication global
configuration command creates authentication method lists or profiles. You apply these authentication
method lists to lines or interfaces by issuing the login authentication or ppp authentication command,
as described in Table 4-5.
Table 4-5
Line and Interface Authentication Method Lists
Interface and Line
Command
Action
Port to Which List Is
Applied
login authentication
Logs directly in to the Cisco AS5800
ppp authentication1
Uses PPP to access IP or IPX network Interface
resources
Corresponding Global
Configuration Command
Console port or VTY aaa authentication login
lines
aaa authentication ppp
1. If you issued the ppp authentication command, you must specify either CHAP or PAP authentication. PAP is enabled by default, but Cisco recommends
that you use CHAP because CHAP is more secure. For more information, refer to the security configuration guide for your Cisco IOS release, which is
part of the Cisco IOS configuration guides and command references documentation.
You can create more than one authentication list or profile for login and protocol authentication and
apply them to different lines or interfaces. The following examples show the line or interface
authentication commands that correspond to the aaa authentication global configuration command.
Login Authentication Example
The following example shows the default log-in authentication list applied to the console port and the
default virtual terminal (VTY) lines on the Cisco AS5800:
5800-1(config)# aaa authentication login default local
5800-1(config)# line console 0
5800-1(config-line)# login authentication default
5800-1(config-line)# line vty 0 69
5800-1(config-line)# login authentication default
Cisco AS5800 Operations, Administration, Maintenance, and Provisioning Guide
DOC-7810814=
4-33
Chapter 4
Administration
Access Service Security
In the following example, the login authentication list named rtp2-office, which uses RADIUS
authentication, is created. It is applied to all 54 lines on an configured with a channelized T1 PRI card,
including the console (CTY) port, the 48 physical asynchronous (TTY) lines, the auxiliary (AUX) port,
and 69 virtual terminal (VTY) lines:
5800-1(config)# aaa authentication login rtp2-office radius
5800-1(config)# line 0 118
5800-1(config-line)# login authentication rtp2-office
The following sample output shows lines and their status on the Cisco AS5800.
5800-1# show line
Tty Typ
Tx/Rx
A Modem Roty AccO AccI Uses
* 0 CTY
0
I 1 TTY 115200/115200 - inout
0
I 2 TTY 115200/115200 - inout
0
...
I 48 TTY 115200/115200 - inout
0
49 AUX
9600/9600
0
50 VTY
0
51 VTY
0
52 VTY
0
53 VTY
0
54 VTY
0
Noise
0
0
0
Overruns
0/0
0/0
0/0
0
0
0
0
0
0
0
0/0
0/0
0/0
0/0
0/0
0/0
0/0
PPP Authentication Example
The following example creates the PPP authentication list marketing, which uses TACACS+, and
RADIUS authentication. The list marketing requires authentication only if the user has not been
authenticated on another line. It is then applied to asynchronous lines 1-48 on a Cisco AS5800 and uses
CHAP authentication, instead of the default of PAP.
5800-1(config)# aaa authentication ppp marketing if-needed tacacs+ radius
5800-1(config)# line shelf/slot/1 shelf/slot/48
5800-1(config-line)# ppp authentication chap marketing
TACACS+ Authorization
You can configure the Cisco AS5800 to restrict user access to the network so that users can only perform
certain functions after successful authentication. As with authentication, authorization can be used with
either a local or remote security database. This guide describes only remote security server
authorization.
A typical configuration often uses the EXEC facility and network authorization. EXEC authorization
restricts access to the EXEC, and network authorization restricts access to network services, including
PPP.
Authorization must be configured on both the Cisco AS5800 and the security daemon. The default
authorization is different on the Cisco AS5800 and the security server:
•
By default, the Cisco AS5800 permits access for every user until you configure the system to make
authorization requests to the daemon.
•
By default, the daemon denies authorization of anything that is not explicitly permitted. Therefore,
you have to explicitly allow all per-user attributes on the security server.
Cisco AS5800 Operations, Administration, Maintenance, and Provisioning Guide
4-34
DOC-7810814=
Chapter 4
Administration
Access Service Security
Timesaver
If authentication has not been set up for a user, per-user authorization attributes are not
enabled for that user. That is, if you want a user to obtain authorization before gaining
access to network resources, you must first require that the user provide authentication. For
example, if you want to specify the aaa authorization network tacacs+ (or radius)
command, you must first specify the aaa authentication {ppp} default if-needed tacacs+
(or radius) command.
Configuring Authorization on the Security Server
You typically have the three following methods for configuring default authorization on the security
server:
•
To override the default denial or authorization from a nonexistent user, specify authorization at the
top level of the configuration file:
default authorization = permit
•
At the user level, inside the braces of the user declaration, the default for a user who does not have
a service or command explicitly authorized is to deny that service or command. To permit it:
default service = permit
•
At the service authorization level, arguments are processed according to the following algorithm:
For each AV pair sent from the Cisco AS5800, the following process occurs:
a. If the AV pair from the Cisco AS5800 is mandatory, look for an exact match in the daemons
mandatory list. If found, add the AV pair to the output.
b. If an exact match does not exist, look in the daemons optional list for the first attribute match.
If found, add the Cisco AS5800 AV pair to the output.
c. If no attribute match exists, deny the command if the default is to deny. If the default is permit,
add the Cisco AS5800 AV pair to the output.
d. If the AV pair from the Cisco AS5800 is optional, look for an exact attribute, value match in
the mandatory list. If found, add the daemons AV pair to output.
e. If not found, look for the first attribute match in the mandatory list. If found, add daemons AV
pair to output.
f. If no mandatory match exists, look for an exact attribute, value pair match among the daemons
optional AV pairs. If found, add the daemons matching AV pair to the output.
g. If no exact match exists, locate the first attribute match among the daemons optional AV pairs.
If found, add the daemons matching AV pair to the output.
h. If no match is found, delete the AV pair if default is deny. If the default is permit, add the
Cisco AS5800 AV pair to the output.
i. If there is no attribute match already in the output list after all AV pairs have been processed
for each mandatory daemon AV pair, add the AV pair. Add only one AV pair for each
mandatory attribute.
Cisco AS5800 Operations, Administration, Maintenance, and Provisioning Guide
DOC-7810814=
4-35
Chapter 4
Administration
Access Service Security
Configuring Authorization (Network or EXEC)
The following global configuration commands configure network and EXEC authorization.
Step 1
Prevents unauthorized users from accessing network resources.
5800-1(config)# aaa authorization network
Step 2
Prevents users from logging in to the privileged EXEC facility.
5800-1(config)# aaa authorization exec
Step 3
Type Ctrl-Z to return to privileged EXEC mode.
5800-1(config)# Ctrl-Z
5800-1#
Step 4
Save your changes when ready.
5800-1# copy running-config startup-config
Note
You can also require authorization before a user can issue specific commands by using the
aaa authorization command. For more information, refer to the security configuration
guide for your Cisco IOS release, which is part of the Cisco IOS configuration guides and
command references.
Specifying an Authorization Method
Authorization methods are defined as optional keywords in the aaa authorization command. The
following global configuration command configure both network and EXEC AAA authorization.
Table 4-5 defines authorization methods.
Step 1
Prevents unauthorized users from accessing network resources.
5800-1(config)# aaa authorization {if-authenticated | local | none | radius | tacacs+}
Step 2
Type Ctrl-Z to return to privileged EXEC mode.
5800-1(config)# Ctrl-Z
5800-1#
Step 3
Save your changes when ready.
5800-1# copy running-config startup-config
Cisco AS5800 Operations, Administration, Maintenance, and Provisioning Guide
4-36
DOC-7810814=
Chapter 4
Administration
Access Service Security
Table 4-6
Authorization Methods
Authorization Methods
Purpose
if-authenticated
User is authorized if already authenticated.
local
Uses the local database for authorization. The local database is created using
the username privilege command to assign users to a privilege level from
0 to 15, and the privilege level command to assign commands to these
different levels.
none
Authorization always succeeds.
radius
Uses RADIUS authorization as defined on a RADIUS server.
tacacs+
Uses TACACS+ authorization as defined on a TACACS+ server.
Specifying Authorization Parameters on a TACACS+ Server
When you configure authorization, you must ensure that the parameters established on the
Cisco AS5800 correspond with those set on the TACACS+ server.
Authorization Examples
The following example uses a TACACS+ server to authorize the use of network services, including PPP.
If the TACACS+ server is not available or has no information about a user, no authorization is
performed, and the user can use all network services.
5800-1(config)# aaa authorization network tacacs+ none
The following example permits the user to run the EXEC process if the user is authenticated. If the user
is not authenticated, the Cisco IOS software defers to a RADIUS server for authorization information.
5800-1(config)# aaa authorization exec if-authenticated radius
The following example configures network authorization. If the TACACS+ server does not respond or
has no information about the username being authorized, the RADIUS server is polled for authorization
information for the user. If the RADIUS server does not respond, the user still can access all network
resources without authorization requirements.
5800-1(config)# aaa authorization network tacacs+ radius none
Cisco AS5800 Operations, Administration, Maintenance, and Provisioning Guide
DOC-7810814=
4-37
Chapter 4
Administration
Access Service Security
TACACS+ Security Examples
The following examples show complete security configuration components of a configuration file on a
Cisco AS5800. Each example shows authentication and authorization.
Local TACACS+ Security Example
The following sample configuration uses AAA to configure default authentication using a local security
database on the Cisco AS5800. All lines and interfaces have the default authentication lists applied.
Users aaaa, bbbb, and cccc have been assigned privilege level 7. This prevents them from issuing ppp
and slip commands because these commands have been assigned to privilege level 8.
aaa new-model
aaa authentication login default local
aaa authentication arap default local
aaa authentication ppp default local
aaa authorization exec local
aaa authorization network local
aaa authorization
!
username aaaa privilege exec level 7 privilege network level 8 password 7 095E470B1110
username bbbb privilege network level 7 password 7 0215055500070C294D
username cccc privilege network level 7 password 7 095E4F10140A1916
!
privilege exec level 8 ppp
privilege exec level 8 slip
line console 0
login authentication default
!
line 2/2/0 2/2/47
interface Group-Async1
ppp authentication chap default
group-range 2/2/0 2/2/47
The following configuration displays the sign-on dialog from a remote PC:
atdt5551234
CONNECT 14400/ARQ/V32/LAPM/V42BIS
User Access Verification
Username: username
Password: password
5800-1> enable
Password: password
5800-1#
TACACS+ Security Example for Login and PPP
The following example shows how to create and apply the following authentication lists:
•
A TACACS+ server named AAA is polled for authentication information (so you do not need to
define a local username database). The shared key between the Cisco AS5800 and the TACACS+
security server is 007.
•
A login authentication list named rtp-office is created, then applied to the console port.
•
A PPP authentication list named marketing is created, and applied to group async interface 0, which
includes asynchronous interfaces 2/2/0 to 2/2/47.
Cisco AS5800 Operations, Administration, Maintenance, and Provisioning Guide
4-38
DOC-7810814=
Chapter 4
Administration
Access Service Security
Note
The authentication method lists used in this example use names other than default.
However, you generally specify default as the list name for most lines and interfaces, and
apply different named lists on an exception basis. These names are used only for illustrative
purposes.
hostname 5800-1
!
tacacs-server host aaa
tacacs-server key 007
!
aaa authentication login rtp-office tacacs+
aaa authentication ppp marketing if-needed tacacs+
!
line console0
login authentication rtp-office
!
tacacs-server host aaa
tacacs-server key 007
!
aaa authentication login rtp-office tacacs+
aaa authentication ppp marketing if-needed tacacs+
!
line console0
login authentication rtp-office
!
interface group-async0
ppp authentication chap marketing
group-range 2/2/0 2/2/47
!
line 2/2/0 2/2/47
The following example shows how to create the following authentication lists:
•
A RADIUS server named AAA is polled for authentication information (so you do not need to
define a local username database). The shared key between the Cisco AS5800 and the RADIUS
security server is 007.
•
A login authentication list named fly is created, then applied to all lines that users can log in to,
except the console port. In this example, the console port is physically secure and does not need
password protection. The Cisco AS5800 is locked in a closet and secured behind a deadbolt lock.
Cisco AS5800 Operations, Administration, Maintenance, and Provisioning Guide
DOC-7810814=
4-39
Chapter 4
Administration
Access Service Security
•
A PPP authentication list itsme is created, then applied to group async interface 6, that includes
asynchronous interfaces 2/2/0 to 2/2/47. The more secure CHAP authentication is used over PAP.
radius-server host aaa
radius-server key 007
!
privilege exec level 14 configure
privilege exec level 14 reload
privilege exec level 8 ppp
!
aaa authentication login fly radius
aaa authentication ppp itsme if-needed radius
aaa authorization network radius
aaa authorization exec radius
!
line 2/1/0 2/1/53
login authentication fly
!
interface group-async6
ppp authentication chap itsme
group-range 2/2/0 2/2/47
Cisco AS5800 Operations, Administration, Maintenance, and Provisioning Guide
4-40
DOC-7810814=
C H A P T E R
5
Maintenance
This chapter provides hardware replacement, system debugging, and troubleshooting procedures.
Replacement Procedures
This section provides detailed replacement procedures for the Cisco AS5800 field-replaceable units
(FRUs) and covers the following areas:
Note
•
Powering Off the Access Server, page 5-2
•
Replacing a DC Power Entry Module, page 5-4
•
Replacing a Filter Module, page 5-8
•
Replacing an AC-Input Power Supply, page 5-13
•
Replacing a Dial-Shelf Controller Card, page 5-15
•
Replacing a Flash Memory Card, page 5-22
•
Replacing the Blower Assembly, page 5-25
•
Replacing a Dial-Shelf Interconnect Port Adapter, page 5-27
•
Replacing the Backplane Module, page 5-32
Instructions for replacing the router-shelf components are included in the Cisco 7206
Installation and Configuration Guide, available online at
http://www.cisco.com/univercd/cc/td/doc/product/core/7206/t
Instructions for rack-mounting the AC-input power shelf and for replacing an AC-input
power supply are included in the Cisco AS5800 Access Server Hardware Installation
Guide, available online at
http://www.cisco.com/univercd/cc/td/doc/product/access/acs_serv/as5800/hw_inst/.
Cisco AS5800 Operations, Administration, Maintenance, and Provisioning Guide
DOC-7810814=
5-1
Chapter 5
Maintenance
Replacement Procedures
Powering Off the Access Server
Some procedures in this section require you to power off the access server. See this section when
appropriate.
Powering off the access server involves removing power from the following components:
Warning
Step 1
•
Router shelf
•
Dial shelf
•
AC-input power shelf, if applicable
Before working on equipment that is connected to power lines, remove jewelry
(including rings, necklaces, and watches). Metal objects will heat up when connected
to power and ground and can cause serious burns or weld the metal object to the
terminals.
Power OFF (O) the power switches located on the router-shelf rear panel.
Figure 5-1
Router-Shelf Power Switches
H11572
Power switches
NETWORK PROCESSING ENGINE-150
Cisco AS5800 Operations, Administration, Maintenance, and Provisioning Guide
5-2
DOC-7810814=
Chapter 5
Maintenance
Replacement Procedures
Step 2
Power OFF (O) the power switches located on each dial-shelf PEM front panel. (See Figure 5-2.)
Figure 5-2
Dial-Shelf Power Switches on the PEMs
PEM front panel
PEM front panel
Power switches
POWER
POWER
MISWIRE
MISWIRE
–48V
RTN
C
NC NO
–48V
LEDs
–48V
RTN
C
NC NO
H11655
–48V
Bell alarm
terminal block
DC-input power
terminal block
Filter module
Step 3
If you are using the optional AC-input power shelf, power OFF (O) the power switches located on the
AC-input power shelf front panel. (See Figure 5-3.)
Step 4
Power OFF the central office main circuit breaker for the chassis.
Figure 5-3
AC-Input Power Shelf
PWR OK
CB 2
PWR OK
FAULT
FAULT
TEMP
TEMP
I LIM
I LIM
Power
switches
CB 1
H11098
AC
1 POWER 2
Cisco AS5800 Operations, Administration, Maintenance, and Provisioning Guide
DOC-7810814=
5-3
Chapter 5
Maintenance
Replacement Procedures
Replacing a DC Power Entry Module
This section explains how to remove and replace the power entry modules (PEMs) in the dial-shelf
chassis.
Note
The color coding of the DC-input power supply leads depends on the color coding of the
DC power source at your site. Typically, green or green/yellow is used for ground, black
is used for +48V (return), and red or white is used for –48V. Verify that the lead color
coding for the DC-input power supply matches the color coding at the DC power source.
Tools and Parts Required
To replace a PEM you need the following items:
•
New PEM (DS5814-DC-PEM=)
•
6 American Wire Gauge (AWG), or 10 mm2, cable rated for at least 140 o F (60 o C) (for new
DC-input power supply installations)
•
Standard wire stripper
•
No. 2 Phillips screwdriver
•
1/4-in. flat-blade screwdriver
•
ESD-preventive wrist strap
Removing a Power Entry Module
This section explains how to remove and replace the PEMs in the dial-shelf chassis.
Warning
Before completing any of the following steps, and to prevent short-circuit or shock
hazards, ensure that power is removed from the DC-input or optional AC-input circuit. To
ensure that all power is OFF, locate the circuit breaker on the panel board that services
the DC-input or optional AC-input circuit, switch the circuit breaker to the OFF (O)
position, and tape the switch handle of the circuit breaker in the OFF (O) position.
Warning
When installing the unit, the ground connection must always be made first and
disconnected last.
Caution
If your system requires the AC-input power shelf for AC-to-DC conversion, you should
schedule a time for system maintenance and replace the PEM at that time.
The following procedure for hot-swapping a PEM assumes you are not using the optional AC-input
power shelf, and that each PEM in your dial shelf is connected to a separate DC power source. If you
are removing and replacing a PEM in an AC-configured system, you must perform the replacement
during a scheduled maintenance time and power off the entire system.
Cisco AS5800 Operations, Administration, Maintenance, and Provisioning Guide
5-4
DOC-7810814=
Chapter 5
Maintenance
Replacement Procedures
Warning
Before working on equipment that is connected to power lines, remove jewelry
(including rings, necklaces, and watches). Metal objects will heat up when connected
to power and ground and can cause serious burns or weld the metal object to the
terminals.
To remove a PEM, complete the following steps:
Step 1
Power OFF the central office circuit breaker connected to the PEM you are removing and tape the switch
in the OFF position.
Step 2
Attach an ESD-preventive wrist strap between you and an unpainted chassis surface.
Step 3
Power OFF the power switch located on the PEM front panel. (See Figure 5-4.)
Caution
Terminal blocks may be energized. Ensure that the power source circuit breaker is
disconnected and the PEM power switch is in the OFF (O) position before accessing
terminals.
Figure 5-4
PEM Front Panel
Captive screw
LEDs
Power switch
POWER
MISWIRE
POWER
POWER
MISWIRE
MISWIRE
DC-input power
terminal block
Bell alarm
terminal block
C
–48V
RTN
C
NC NO
–48V
–48V
RTN
–48V
RTN
C
NC NO
To DC
power
source
10138
–48V
–48V
To CO
alarms
NC NO
Step 4
Using a 1/4-in. flat-blade screwdriver, disconnect the DC cables from the DC-input power terminal
block. (See Figure 5-4.)
Step 5
Unplug the alarm cable from the bell alarm terminal block. (See Figure 5-4.)
Step 6
Using a 1/4-in. flat-blade screwdriver, loosen the captive screws on the PEM front panel.
Cisco AS5800 Operations, Administration, Maintenance, and Provisioning Guide
DOC-7810814=
5-5
Chapter 5
Maintenance
Replacement Procedures
Step 7
Grasp the handle and carefully pull the PEM from the backplane connectors using a gentle rocking
motion; then remove the PEM from the DC power supply chassis. (See Figure 5-5.)
Figure 5-5
Removing and Replacing a PEM
Filter module
LEDs
Captive
screw
POWER
POWER
MISWIRE
MISWIRE
PEM
–48V
RTN
C
NC NO
–48V
Captive
screw
–48V
RTN
C
NC NO
DC-input power
terminal block
H11077
–48V
Bell alarm
terminal block
This completes the PEM removal process. Continue with Replacing the Power Entry Module, page 5-6.
Replacing the Power Entry Module
To install a new PEM, complete the following steps. (See Figure 5-5 to locate the PEMs in the dial shelf.)
Step 1
Grasp the PEM handle and carefully align the PEM with the DC-input power supply bay.
Step 2
Slide the PEM into the power supply bay until it is fully seated and connected to the backplane
connectors.
Step 3
Using a 1/4-in. flat-blade screwdriver, tighten the captive screws on the PEM front panel.
Step 4
Plug the alarm cables into the bell alarm terminal block. (See Figure 5-5.)
This completes the procedure for replacing a PEM in the dial shelf. To connect the PEM power cables
and power on the PEM, continue with section “Connecting to Your DC Power Source.”
Note
If you are connecting to an AC power source, continue with section “Connecting to an AC
Power Source.”
Cisco AS5800 Operations, Administration, Maintenance, and Provisioning Guide
5-6
DOC-7810814=
Chapter 5
Maintenance
Replacement Procedures
Connecting to Your DC Power Source
If your site has access to a DC power source, you need to provide your own DC power cables. In the
United States you need to use 6 AWG stranded or solid copper wire; elsewhere use 16 mm 2 solid or
10 mm2 stranded copper wire.
To reconnect the PEM to your DC-input power source, complete the following steps:
Step 1
Locate the DC terminal block located on the dial-shelf PEM front panel and loosen the connector screws
using a 1/4-in. flat-blade screwdriver. (See Figure 5-6.)
Step 2
Strip the DC power cable of its outer insulation to expose about 1/2-in. of copper wire.
Step 3
Connect the power cable stripped wires to the DC terminal block on the PEM and securely tighten the
terminal block connector screws. (See Figure 5-6.)
Figure 5-6
Power Entry Module (PEM) DC Terminal Block
POWER
–48V
–48V
–48V
RTN
C
NC NO
H11575
MISWIRE
–48V
RTN
DC terminal block
Step 4
Connect the other end of your DC power cables to your DC power source.
Step 5
Repeat Step 1 through Step 4 to connect your DC power cables to the second PEM.
Note
If the two DC conductors entering the PEM terminal block are reversed, a yellow warning
LED on the PEM lights to indicate a miswire. No damage will occur; however, you must
power OFF the power at the source and reverse the connections.
Cisco AS5800 Operations, Administration, Maintenance, and Provisioning Guide
DOC-7810814=
5-7
Chapter 5
Maintenance
Replacement Procedures
Step 6
Power ON the central office circuit breaker connected to the PEM you are replacing.
Step 7
Power ON ( | ) the power switch located on the PEM front panel. (See Figure 5-4.)
This completes the procedure for replacing a PEM and connecting to your DC power source. Continue
with section “Verifying and Troubleshooting the Installation” on page 8 for installation troubleshooting
tips.
Connecting to an AC Power Source
If you are using the optional AC-input power shelf, you cannot remove and replace a PEM while the
system is powered on.
Caution
If your system requires the AC-input power shelf for AC-to-DC conversion, you should
schedule a time for system maintenance and replace the PEM at that time. See the
“Replacing an AC-Input Power Supply” section on page 5-13 for installation and
replacement instructions.
Verifying and Troubleshooting the Installation
To complete the installation, verify that the power supply LEDs operate properly and that you have
wired the DC-input connections correctly. Each PEM contains two LEDs on the front panel - POWER
and MISWIRE. (See Figure 5-4.)
•
Verify that the power LED is on.
If neither the power nor the miswire LED is on, check the voltage at the DC-input terminal block.
If the voltage reading falls between –40 and –60 VDC, replace the PEM.
•
Verify that the miswire LED remains off.
If the miswire LED is on, the two DC conductors entering the PEM DC-input terminal block are
reversed. Power OFF power at the source and reverse the connections.
This completes the procedures for installing and troubleshooting a power entry module. To verify that
the PEM is properly installed, refer to the Cisco AS5800 Access Server Hardware Installation Guide,
available online at
http://www.cisco.com/univercd/cc/td/doc/product/access/acs_serv/as5800/hw_inst/
Replacing a Filter Module
The Cisco AS5800 is equipped with a passive DC power filter, which contains a broadband
electromagnetic interference (EMI) filter and circuitry for monitoring power coming into the Cisco 5814
dial shelf. The DC power filter is housed in the filter module, which resides in the dial shelf between the
two power entry modules (PEMs).
Cisco AS5800 Operations, Administration, Maintenance, and Provisioning Guide
5-8
DOC-7810814=
Chapter 5
Maintenance
Replacement Procedures
Tools and Parts Required
To remove and replace the filter module you need the following parts and tools:
•
A new filter module (DS5814-DC-FLT=)
•
1/4-in. flat-blade screwdriver
•
ESD-preventive wrist strap
•
An antistatic bag to return the old filter module
For additional equipment, contact a service representative for ordering information.
Removing a Filter Module
This procedure is ideally performed during a scheduled maintenance time. If not, you must first power
off the dial shelf as follows:
Step 1
Power OFF (O) the power switch located on each dial-shelf PEM front panel. (See Figure 5-7.)
Figure 5-7
Dial-Shelf Power Switches on the PEMS
PEM front panel
PEM front panel
Power switches
POWER
POWER
MISWIRE
MISWIRE
LEDs
–48V
RTN
C
NC NO
–48V
Filter module
–48V
RTN
C
DC-input power
terminal block
NC NO
H11655
–48V
Bell alarm
terminal block
Cisco AS5800 Operations, Administration, Maintenance, and Provisioning Guide
DOC-7810814=
5-9
Chapter 5
Maintenance
Replacement Procedures
Step 2
If you are using the optional AC-input power shelf, power OFF (O) the power switches on the AC-input
power shelf front panel. (See Figure 5-8.)
Figure 5-8
AC-Input Power Shelf Power Switches
PWR OK
CB 2
PWR OK
FAULT
FAULT
TEMP
TEMP
I LIM
I LIM
Power
switches
CB 1
H11098
AC
1 POWER 2
To remove the filter module from the dial shelf, complete the following steps:
Step 1
Attach an ESD-preventive wrist strap between you and an unpainted chassis surface.
Step 2
Ensure that both PEM power LEDs are off.
Step 3
Using a 1/4-in. flat-blade screwdriver, loosen the captive screws on the filter module front panel.
Cisco AS5800 Operations, Administration, Maintenance, and Provisioning Guide
5-10
DOC-7810814=
Chapter 5
Maintenance
Replacement Procedures
Step 4
If you are using the optional AC-input power shelf, disconnect the monitor cable DB-9 connector from
the base of the filter module, as shown in Figure 5-9.
Figure 5-9
Filter Module Monitor Cable Connections
Filter module
POWER
POWER
MISWIRE
MISWIRE
PEM
–48V
–48V
RTN
C
NC NO
–48V
–48V
RTN
C
NC NO
DB-9 cable
connector
H11161
DB-25 cable
connector
AC-input power shelf
Note
Caution
Figure 5-9 shows the location of the DB-9 connector, which is at the base of the
filter module. The safety cover normally covering the AC-input power shelf rear
panel has been removed to show the DB-25 connector, which you use to connect
the monitor cable from the filter module to the AC-input power shelf.
The filter module weighs 5.5 lb (2.5 kg). Use both hands when removing or replacing the
filter module.
Cisco AS5800 Operations, Administration, Maintenance, and Provisioning Guide
DOC-7810814=
5-11
Chapter 5
Maintenance
Replacement Procedures
Step 5
Grasp the filter module handle and gently pull the filter module about halfway out of the dial-shelf
chassis. (See Figure 5-10.)
Figure 5-10 Removing and Replacing the Filter Module
PEM
Captive
screws
Filter module
PEM
POWER
POWER
MISWIRE
MISWIRE
–48V
RTN
C
NC NO
–48V
–48V
RTN
C
NC NO
H11075
–48V
AC-input
power shelf
(optional)
Captive
screws
Step 6
Holding the filter module handle with one hand, place your other hand under the module for support.
Step 7
Pull the filter module from the dial-shelf chassis and place it in an antistatic bag to return to the factory.
This completes the filter module removal process. Continue with Replacing the Filter Module.
Replacing the Filter Module
To replace the filter module, complete the following steps. When you are finished, use a Site Log sheet
to record service maintenance.
Step 1
Attach an ESD-preventive wrist strap between you and an unpainted chassis surface.
Step 2
Using both hands, gently push the new filter module into the dial-shelf chassis until it connects firmly
with the backplane.
Caution
Step 3
When inserting the filter module, avoid unnecessary force, which can damage the
connectors.
Using a 1/4-in. flat-blade screwdriver, tighten the captive screws.
Cisco AS5800 Operations, Administration, Maintenance, and Provisioning Guide
5-12
DOC-7810814=
Chapter 5
Maintenance
Replacement Procedures
Step 4
If you are using the optional AC-input power shelf, connect the monitor cable DB-9 connector at the
base of the filter module and tighten the jackscrews. Verify that the DB-25 connector at the other end of
the cable is connected to the AC-input power shelf (see Figure 5-9). Power ON the AC-input power shelf.
Step 5
Power ON ( | ) the power switches located on each dial-shelf PEM front panel.
Step 6
Note the service maintenance on your Site Log sheet.
This completes the procedure for removing and replacing the filter module.
Replacing an AC-Input Power Supply
The AC-input power shelf is an optional component of the Cisco AS5800 and is used to convert
AC-input power into DC-output power for the DC-powered Cisco 5814 dial shelf. The AC-input power
shelf contains two AC-input power supplies.
This section explains how to remove and replace an individual power supply in the power shelf.
Tools and Parts Required
To remove and replace an individual power supply you need the following tools and parts:
•
AC power supply (DS58-AC-PWR=)
•
ESD-preventive wrist strap
•
If access to the power supply bays is partially blocked by a power strip or other permanent rack
fixture, you need a 1/4-in., flat-blade screwdriver to temporarily detach the fixture from the
equipment rack-mounting strips.
Removing and Replacing a Power Supply
Use the following procedure if you are replacing a faulty power supply, or if you want to reduce the
weight of the power shelf before you install it in a rack. If you do not want to remove power supplies
prior to rack-mounting the AC-input power shelf, skip this section and continue with the “Replacing a
Dial-Shelf Controller Card” section on page 5-15.
The AC-input power shelf is configured with two power supplies. You can remove or replace one of the
power supplies without affecting system operation. When power is removed from one supply, the
redundant power feature causes the second power supply to ramp up to full power and maintain
uninterrupted system operation.
To remove a power supply, perform the following steps:
Caution
A single power supply weighs 14.5 lb (6.6 kg). Use both hands when removing or replacing
a power supply.
Step 1
Attach an ESD-preventive wrist strap between you and an unpainted chassis surface.
Step 2
Ensure that the power switch for the power supply you are removing is in the OFF (O) position.
Cisco AS5800 Operations, Administration, Maintenance, and Provisioning Guide
DOC-7810814=
5-13
Chapter 5
Maintenance
Replacement Procedures
Note
Step 3
Power supplies are numbered 1 and 2 from left to right in the power shelf.
Lift the metal spring-clip in the center of the ejector lever to release the lock. (The power supplies are
secured by self-locking ejector levers. (See Figure 5-11.)
Figure 5-11 Removing and Replacing a Power Supply
PWR OK
CB 2
AC
1 POWER 2
FAULT
TEMP
PWR OK
I LIM
TEMP
I LIM
CB 1
H11156
FAULT
Step 4
Apply downward pressure to the ejector lever to disconnect the power supply from the power backplane.
Step 5
Grasp the power supply handle and pull the power supply halfway out of the bay. Then with your other
hand under the power supply to support it, pull the power supply completely out of the bay.
To replace the power supply, follow these steps:
Step 1
Slide the power supply into the power supply bay. Push the power supply fully into the power shelf until
the front is flush against the power shelf frame. To prevent damage to the backplane connector, do not
jam the power supply into the bay.
Step 2
Push the self-locking ejector lever upward until the metal spring-clip locks into place (listen for the
click). (See Figure 5-11.)
This completes the power supply replacement procedure.
Cisco AS5800 Operations, Administration, Maintenance, and Provisioning Guide
5-14
DOC-7810814=
Chapter 5
Maintenance
Replacement Procedures
Replacing a Dial-Shelf Controller Card
The dial-shelf controller (DSC) card serves as the interface between the dial shelf and the Cisco 7206
router shelf. This section lists tools and parts you need, and explains how to remove and replace a DSC
card in the Cisco 5814 dial-shelf chassis.
Tools and Parts Required
The following parts and tools are required to remove and replace the dial-shelf controller card. If you
need additional equipment, contact a service representative for ordering information.
•
New DSC card (DS58-DSC=)
•
Proprietary interconnect cable (CAB-DSIC-5= or CAB-DSIC-20=)
•
No. 2 Phillips screwdriver
•
T1/E1 input cable (customer supplied)
•
Console cable (customer supplied)
•
Alarm cable (customer supplied)
•
ESD-preventive wrist strap
Removing a Dial-Shelf Controller Card
Caution
DSC cards weigh 8.5 lb (3.8 kg) each. Use both hands when removing or replacing a DSC
card (see Figure 5-13).
Warning
Before working on equipment that is connected to power lines, remove jewelry
(including rings, necklaces, and watches). Metal objects will heat up when connected
to power and ground and can cause serious burns or weld the metal object to the
terminals.
Caution
If your system is equipped with dual DSCs, Cisco recommends that you perform DSC card
replacements during low traffic periods.
Use the hw-module <shelf-id>/<slot-num> stop command to stop the backup DSC before
you remove the backup (slave) DSC.
Cisco AS5800 Operations, Administration, Maintenance, and Provisioning Guide
DOC-7810814=
5-15
Chapter 5
Maintenance
Replacement Procedures
To remove a DSC, complete the following steps:
Note
Step 1
Caution
The power LED and MBus LED on the DSC card remain on until the card is disconnected
from the backplane.
Attach an ESD-preventive wrist strap between you and an unpainted chassis surface.
To prevent ESD damage, handle dial-shelf controller cards by ejector levers and carrier
edges only and use an ESD-preventive wrist strap or other grounding device.
Step 2
Disconnect all cables connected to the DSC card front panel.
Step 3
Using a No. 2 Phillips screwdriver, loosen the two panel fasteners on the top and bottom of the DSC card
front panel. (See Figure 5-12.)
Figure 5-12 Using the Ejector Levers
Step 4
Caution
H11097
MO
DE
MS
NL
R
OO ALM
P
LA
LM
MO
NIT
OR
#
CALLS
75
NL
R
OO ALM
P
PW
R
MA
IN
T
PW
R
MA
IN
T
HCPU
MO
NIT
OR
#
LA
LM
FR
T1
PU
FC
FC
T
PU 1FR
HCPU
75
FR
T1
PU
FC
HCPU
FC
T
PU 1FR
T
R
IN
PW MA
HCPU
E1FR
E1FR
T
R
IN
PW MA
E1FR
E1FR
PW
R
MA
IN
T
Panel fastener
0
HCPU
Grasp the top and bottom ejector levers (see Figure 5-12) and pull them away from the front panel to
disengage the DSC card from the backplane connectors.
Do not use the ejector levers as handles to carry the card. They are not designed to support
the weight of the card.
Cisco AS5800 Operations, Administration, Maintenance, and Provisioning Guide
5-16
DOC-7810814=
Chapter 5
Maintenance
Replacement Procedures
Step 5
Carefully slide the DSC card partially out of the slot, until you can grasp the card front panel with one
hand. Place your other hand under the card to support it. (See Figure 5-13.)
Figure 5-13 Removing or Replacing a Dial-Shelf Controller Card
T
R
IN
PW MA
MS
DE
MO
T
R
IN
PW MA
HCPU
T
R
IN
PW MA
MS
DE
MO
CALLS
HCPU
T
R
IN
PW MA
MS
DE
MO
CALLS
HCPU
T
R
IN
PW MA
MS
DE
MO
CALLS
HCPU
T
R
IN
PW MA
MS
DE
MO
CALLS
HCPU
MS
DE
MO
CALLS
HCPU
T
R
IN
PW MA
HCPU
P
OO
NL
0
T
R
IN
PW MA
MS
DE
MO
CALLS
MS
DE
MO
CALLS
CALLS
PW MB
US
R
MS
DE
MO
CALLS
R#
TO
NI
MO
LM
RA
LM
LA
75
T
R
IN
PW MA
MS
DE
MO
CALLS
HCPU
R#
TO
NI
MO
T
R
IN
PW MA
FR
T1
PU
FC
HCPU
HCPU
FR
T1
PU
FC
HCPU
T
R
IN
PW MA
E1FR
E1FR
T
R
IN
PW MA
HCPU
MA
J
AC
O
MI
N
HI
ST
CU
TO
FF
ALARM
LM
RA
P
OO
NL
LM
LA
75
CL
EA
R
PW MB
US
R
0
MA
J
AC
O
SE
T
MI
N
ALARM
DISP
HI
ST
CU
TO
FF
ALARM
1
1
2
2
3
3
CL
EA
R
SE
T
ALARM
AT
TE
N
DISP
DISP
CL
K
10 BASE T
11
ALARMS
11
ALARMS
10
NETWORK CLOCK
9
10
NETWORK CLOCK
8
9
1
CONSOLE
7
8
CONSOLE
6
7
1
DIAL SHELF CONTROLLER
5
6
SL
OT
PCMCIA
5
MA
ST
0
SL
OT
DIAL SHELF CONTROLLER
4
MA
ST
0
PCMCIA
AT
TE
N
SL
OT
4
DISP
CL
K
SL
OT
DSI
DIAL SHELF INTERCONNECT
10 BASE T
DSI
H11601
MODEM
MODEM
MODEM
DIAL SHELF INTERCONNECT
MODEM
MODEM
MODEM
CHANNELIZED E1/T1
MODEM
CHANNELIZED E1/T1
MODEM
ON
TM
MODEM
ON
RM
ON
TM
MODEM
ON
RM
Note
Step 6
Use care when removing and installing feature cards and DSC cards to avoid
damage to the pin connectors. Only the feature cards and DSC cards should make
contact with the backplane connectors.
Pull the DSC card straight out of the slot. Avoid touching the circuitry or any connector pins.
Caution
When inserting or removing the DSC card, avoid unnecessary force, which can damage the
backplane connectors.
Caution
Never allow anything other than the feature card or dial-shelf controller card connectors to
make contact with the backplane pins.
Caution
Never insert any foreign or metallic object into the dial-shelf chassis. Also, remove all
jewelry and watches prior to placing your hands inside the dial-shelf chassis.
Cisco AS5800 Operations, Administration, Maintenance, and Provisioning Guide
DOC-7810814=
5-17
Chapter 5
Maintenance
Replacement Procedures
Replacing a Dial-Shelf Controller Card
Caution
DSC cards weigh 8.5 lb (3.8 kg) each. Use two hands when removing or replacing a DSC
card. (See Figure 5-13.)
Caution
If your system is equipped with dual DSCs, Cisco recommends that you perform DSC card
replacements during low traffic periods.
Use the hw-module <shelf-id>/<slot-num> stop command to stop the backup DSC before
you remove the backup (slave) DSC.
To replace a dial-shelf controller card, complete the following steps:
Note
Caution
The dial-shelf controller card can be installed in either slot 12 or slot 13; however, if you
install the replacement dial-shelf controller card in the slot that held the former DSC card,
this will accelerate the installation process.
Insertion or removal of a second DSC while there is already an active DSC may result in
loss of calls.
Step 1
Attach your ESD-preventive wrist strap between you and an unpainted chassis surface.
Caution
To prevent ESD damage, handle DSC cards by ejector levers and carrier edges only and
use an ESD-preventive wrist strap or other grounding device.
Step 2
Carefully align the DSC card carrier guides with the top and bottom grooves in the dial-shelf slot. Avoid
touching the circuitry or any connector pins.
Step 3
Slide the replacement DSC card into the dial-shelf slot until the ejector levers make contact with the
chassis frame. (See Figure 5-13.)
Caution
When inserting or removing the DSC card, avoid unnecessary force, which can damage the
backplane connectors.
Step 4
Seat the DSC card in the backplane by pushing the card firmly until the ejector levers fold in toward the
card front panel and the front panel is flush with the chassis frame.
Step 5
Using a No. 2 Phillips screwdriver, tighten the panel fasteners. This secures the backplane connection
and ensures proper EMI shielding.
Caution
Always tighten the panel fasteners on DSC cards. These fasteners prevent accidental
removal and provide proper grounding for the system.
Cisco AS5800 Operations, Administration, Maintenance, and Provisioning Guide
5-18
DOC-7810814=
Chapter 5
Maintenance
Replacement Procedures
Step 6
Caution
Install a blank filler card (part number DS58-BLANK=) in all empty dial-shelf card slots to keep the
chassis dust-free and to maintain proper airflow.
To prevent the overheating of internal components and maintain the proper flow of cooling
air across the cards, always install blank filler cards in empty slots.
This completes the steps for removing and replacing a dial-shelf controller card. For information on
reconnecting the cables, see the “Connecting the Cables” section on page 5-19.
Note
If you install a replacement DSC card into the same dial-shelf slot as the card you just
removed, the system recognizes the existing hardware configuration. There is no need to
reconfigure the hardware. If you install the replacement DSC card in a different dial-shelf
slot, you must configure the hardware. See the “Configuring the Dial-Shelf Controller
Card” section on page 5-21.
Connecting the Cables
The DSC card includes a dial-shelf interconnect cable that connects the card to the dial-shelf
interconnect port adapter in the Cisco 7206 router shelf. The connection between the DSC card and the
dial-shelf interconnect port adapter uses a single full-duplex interconnect cable. (See Figure 5-14.)
H11100
Figure 5-14 Dial-Shelf Interconnect Cable
Attaching the Dial-Shelf Interconnect Cable
To connect the dial-shelf interconnect cable, complete the following steps:
Warning
Hazardous network voltages are present in WAN ports regardless of whether power to
the router is OFF or ON. To avoid electric shock, use caution when working near WAN
ports. When detaching cables, detach the end away from the router first.
Step 1
Attach one end of your interconnect cable to the port labeled Dial Shelf Interconnect on the dial-shelf
controller card front panel.
Step 2
Tighten the jackscrews on either side of the connector.
Step 3
Attach the other end of your cable to the RJ-45 port on the interconnect port adapter in the Cisco 7206
router shelf.
Step 4
Tighten the jackscrews on either side of the connector.
Cisco AS5800 Operations, Administration, Maintenance, and Provisioning Guide
DOC-7810814=
5-19
Chapter 5
Maintenance
Replacement Procedures
Caution
Never disconnect the interconnect cable while the system is operating (except when
replacing a redundant DSC card) because you will lose all calls.
Figure 5-15 Connecting the Dial-Shelf Interconnect Cable
RX
ETHERNET-10BFL
TX
RX
TX
0
RX
1
TX
RX
2
TX
RX
TX
3
4
3
0
1
2
LIN
K
1
3
0
EN
2
3
ENA
BLE
D
6
5
ETHERNET 10BT
4
Dial shelf
interconnect
port adapter
FAST ETHERNET
2
LIN
K
LB
CD
EN
AB
LE
D
RC
LB
CD
TD
TC
RD
1
RC
RD
LB
CD
TD
TC
RD
TD
TC
RC
EN
TD
TC
RD
RC
LB
CD
FAST SERIAL
1
SL
OT
M
II
FAST ETHERNET INPUT/OUTPUT CONTROLLER
LE
0
FE
AB
D
M
EN
CI
A
T
EJ
PC
0
EC
SL
FE LE
AB
OT
EN
LI
NK
SE
FE
U
T
RE
CP
1O
ER
W
POOK
Router shelf
POWER
FAIL
R
MA
INT
PW
DE
MS
MO
PW
R
MA
INT
R
MA
INT
PW
MS
DE
MS
DE
MO
MO
PW
R
MA
INT
PW
R
MA
INT
MS
DE
DE
MS
MO
MO
INT
MA
PW
R
MA
INT
DE
MS
DE
MS
MO
MO
MO
R
INT
R
PW
MA
DE
DE
MS
MS
DE
MS
MO
PW
PW
R
MA
INT
PW
R
MA
INT
PW
R
MA
INT
FC
T1F
PU
R
FC
T1F
PU
R
MO
US
MB
R
PW
J
MA
CALLS
J
CALLS
MA
CALLS
US
MB
R
PW
CALLS
HCPU
CALLS
HCPU
CALLS
HCPU
CALLS
HCPU
CALLS
HCPU
CALLS
HCPU
CALLS
HCPU
HCPU
HCPU
HCPU
HCPU
HCPU
E1FR
E1FR
PW
R
MA
INT
Dial shelf
interconnect
cable
#
#
NIT
OR
NIT
OR
MO
RA
LM
RA
LM
ALARM
OP
OP
NLO
M
M
75
LAL
NLO
ALARM
AR
CLE
AR
CLE
LAL
ALARM
FF
FF
TO
TO
CU
CU
MO
T
T
HIS
HIS
75
O
AC
O
MIN
AC
MIN
0
ALARM
0
T
SE
T
SE
1
DISP
DISP
1
T0
SLO
8
PCMCIA
PCMCIA
DIAL SHELF CONTROLLER
DIAL SHELF CONTROLLER
NETWORK CLOCK
ALARMS
N
RMO
N
RMO
N
N
DIAL SHELF INTERCONNECT
DIAL SHELF INTERCONNECT
TMO
DSI
DSI
TMO
10 BASE T
10 BASE T
11
ALARMS
11
NETWORK CLOCK
10
CONSOLE
CONSOLE
9
10
T1
SLO
T1
SLO
9
ST
MA
7
8
DISP
CLK
6
7
T0
SLO
5
6
ST
MA
4
5
CLK
3
4
DISP
EN
EN
2
3
ATT
ATT
2
10091
MODEM
MODEM
MODEM
MODEM
MODEM
MODEM
MODEM
MODEM
MODEM
MODEM
CHANNELIZED E1/T1
CHANNELIZED E1/T1
Dial shelf
interconnect
port
Dial shelf
Dial shelf
controller cards
Warning
The ports labeled Network clock, 10BaseT, Dial Shelf Interconnect, Console, and Alarms
are safety extra-low voltage (SELV) circuits. SELV circuits should only be connected to
other SELV circuits. Because the E1/T1 circuits are treated like telephone network
voltage, avoid connecting the SELV circuit to the telephone network voltage circuits.
For more information about the dial-shelf interconnect cable and dial-shelf interconnect port adapter,
see the “Replacing a Dial-Shelf Interconnect Port Adapter” section on page 5-27.
Cisco AS5800 Operations, Administration, Maintenance, and Provisioning Guide
5-20
DOC-7810814=
Chapter 5
Maintenance
Replacement Procedures
Verifying and Troubleshooting the Installation
Verify that your new DSC card is properly installed and operative by observing the card LEDs as
follows:
•
Verify that the power LED and MBus LED light after the DSC card has been installed in the dial
shelf and the system is powered on.
– If both the MBus and power LEDs are on, the card should boot normally. During the boot
sequence, the four alarm LEDs momentarily flash and then turn off. In addition, the two
four-character alphanumeric displays will show status messages.
After the boot sequence completes, the alphanumeric display should read:
MSTR
If the boot sequence does not complete, contact a service representative for assistance.
– If either the power or MBus LED remains off, try removing and reinserting the card. If the
problem persists, contact your service representative. You may need to replace the card.
If the problem persists with a new card installed, remove the dial-shelf controller card from the
dial-shelf slot and examine the backplane for bent connector pins.
To inspect the backplane pins, first power OFF the system to avoid hazards caused by high
voltages present on the backplane connectors. Next, remove cards in neighboring slots to allow
an unimpeded view of the backplane connectors. Then, using a flashlight, verify that the
backplane connectors are in good condition. If you discover bent pins, you need a new
backplane. The backplane is an FRU. Contact your service representative to order a new
backplane, and see the “Replacing the Backplane Module” section on page 5-32.
•
You can also use the show command to diagnose a problem with the dial-shelf controller card. Enter
the following command:
5800> enable
enter password <password>
5800# show diag <type {shelf | slot}>
Ctrl-Z
Configuring the Dial-Shelf Controller Card
The Cisco 5814 dial shelf is designed to recognize DSC cards in specific slots within the dial-shelf
chassis. Backplane slots 12 and 13 are the designated DSC card slots. This design supports redundancy
features to eliminate dropped calls.
Caution
Do not configure the Ethernet interface on the DSC to be available on the network.
Users could connect to the system via Telnet (VTY line) without using a password. System
security could be seriously compromised if unauthorized users were to gain access to the
Ethernet interface on the DSC in this way.
Cisco AS5800 Operations, Administration, Maintenance, and Provisioning Guide
DOC-7810814=
5-21
Chapter 5
Maintenance
Replacement Procedures
Commands for Dual-DSC-Equipped Systems
Table 5-1 shows new or modified commands have been added to support redundant-DSC-equipped
systems.
Table 5-1
New of Modified Commands
Command Level
Command
Description
User
show redundancy [history]
The show redundancy command displays the current status of
the DSCs.
The show redundancy hist command displays a table of the last
5 redundancy events for each redundant component on the
DSCs.
User Exec
show tech-support
The show-tech-support command displays the output of the
show redundancy and show redundancy history commands.
show debug
The show debug command displays the debug section for DSC
Redundancy if any debugging is on.
hw-module
<shelf-id>/<slot-num> {start |
stop}
The hw-module command is used to start or stop the DSC cards.
The stop option requires confirmation before execution.
[no] debug redundancy {all |
clk | hub | ui}
The debug redundancy command turns debugging on or off for
the selected components.
The components are
•
clk - DS clock
•
hub - DSI hub
•
ui - user interface
•
all - all of the above.
The no option turns debug redundancy off.
[no] debug all
The debug all command affects all DSC Redundancy
debugging.
The no option turns debugging off.
Replacing a Flash Memory Card
Both the router shelf and the dial shelf contain PCMCIA slots for Flash memory cards. The router-shelf
PCMCIA slots are located on the I/O controller and are oriented horizontally. The dial-shelf PCMCIA
slots are located on the dial-shelf controller card and are oriented vertically. Except for the orientation
of the slots, the installation procedures are the same for both shelves.
This section describes inserting and removing a Flash memory card in the dial shelf. For procedures
specific to the router shelf, refer to the Cisco 7206 Installation and Configuration Guide, available
online at
http://www.cisco.com/univercd/cc/td/doc/product/core/7206/
The dial-shelf controller card has two PCMCIA slots for Flash memory cards. The slots are numbered
left to right, slot 0 and slot 1, respectively.
Cisco AS5800 Operations, Administration, Maintenance, and Provisioning Guide
5-22
DOC-7810814=
Chapter 5
Maintenance
Replacement Procedures
Note
To avoid potential problems when inserting spare Flash memory cards in your DSC cards,
we recommend that you reformat your Flash memory cards on a Cisco 7206 router shelf
running Cisco IOS Release 11.3AA or later during your regularly scheduled service times.
For instructions on formatting a Flash memory card, refer to the Cisco 7206 Installation
and Configuration Guide, available online at
http://www.cisco.com/univercd/cc/td/doc/product/core/7206/
To install a Flash memory card, complete the following steps:
Step 1
Orient the Flash memory card so that the connector end faces the appropriate slot. (See Figure 5-16.)
Step 2
Carefully insert the card in the slot until it mates with the slot connector at the back of the slot and the
eject button for the slot pops out toward you.
Note
Flash memory cards do not insert completely flush with the DSC card front panel; a portion
of the card remains outside of the slot. Do not attempt to force the card past this point.
Cisco AS5800 Operations, Administration, Maintenance, and Provisioning Guide
DOC-7810814=
5-23
Chapter 5
Maintenance
Replacement Procedures
Removing a Flash Memory Card
To remove a Flash memory card from the PCMCIA slot, complete the following steps (see Figure 5-16):
Step 1
Press the ejector button on the slot.
Step 2
Grasp the card and pull it from the slot.
Step 3
Place the card in an antistatic bag.
Figure 5-16 Inserting and Removing a PCMCIA Flash Card
a
CL
K
SL
OT
M
0
AS
T
SL
OT
1
PCMCIA
DIAL SHELF CONTROLLER
CONSOLE
NETWORK CLOCK
b
CL
K
SL
OT
A
0
M
AS
T
SL
OT
1
PCMCIA
DIAL SHELF CONTROLLER
CONSOLE
NETWORK CLOCK
c
CL
K
SL
OT
0
M
AS
T
SL
OT
1
A
PCMCIA
DIAL SHELF CONTROLLER
NETWORK CLOCK
H11099
CONSOLE
A
This completes the dial-shelf controller card and Flash memory installation procedures.
Cisco AS5800 Operations, Administration, Maintenance, and Provisioning Guide
5-24
DOC-7810814=
Chapter 5
Maintenance
Replacement Procedures
Replacing the Blower Assembly
The Cisco AS5800 is equipped with a blower assembly, which is designed to monitor system internal
operating temperatures and maintain acceptable cooling parameters.
This section explains how to remove and replace the blower assembly in the dial-shelf chassis.
Tools and Parts Required
You need the following tools and parts to remove and replace the blower assembly. If you need
additional equipment, contact a service representative for ordering information.
•
New blower assembly (DS58-FAN=)
•
1/4-in. flat-blade screwdriver
•
ESD-preventive wrist strap
•
Antistatic mat or packaging
Removing the Blower Assembly
Caution
The system shuts down cards approximately 2.0 minutes after the system temperature
threshold has been reached. Although normal blower assembly replacement is estimated
not to exceed 30 sec., if you expect the replacement process to exceed 1.0 minutes, we
recommend shutting down the system prior to the removal and replacement process.
Caution
The blower assembly weighs 27.5 lb (12.5 kg). Use both hands when removing or replacing
the blower assembly.
To remove the blower assembly, complete the following steps:
Step 1
Attach an ESD-preventive wrist strap between you and an unpainted chassis surface.
Step 2
Loosen the two captive screws on the blower assembly front panel. (See Figure 5-17.)
Step 3
Grasp the blower assembly handle with one hand and pull the blower assembly straight toward you,
about halfway out of the slot.
Step 4
Place your other hand under the blower assembly as it extends from the dial-shelf chassis to support the
blower and prevent it from falling.
Step 5
Slowly pull the blower assembly all the way out of the slot and place it on an antistatic mat or in
packaging to return it to the factory.
Cisco AS5800 Operations, Administration, Maintenance, and Provisioning Guide
DOC-7810814=
5-25
Chapter 5
Maintenance
Replacement Procedures
Figure 5-17 Blower Assembly Removal and Replacement
POWER
FAIL
Captive screws
T
R
IN
T
R
MA
IN
T
R
MA
IN
T
R
MA
IN
T
R
PU
DE
MS
DE
MO
CALLS
MS
DE
MO
CALLS
MA
IN
T
MS
DE
MO
CALLS
R
PW
MA
IN
T
MS
DE
MO
CALLS
R
PW
MA
IN
T
MS
DE
MO
CALLS
R
PW
MA
IN
T
MS
DE
MO
CALLS
R
PW
MA
IN
T
MS
DE
MO
CALLS
R
PW
MA
IN
T
MS
DE
MO
CALLS
HCPU
FC
HCPU
HCPU
PW
FR
PU
HCPU
PW
HCPU
PW
HCPU
PW
HCPU
T1
HCPU
MA
HCPU
PW
FR
FC
HCPU
T1
R
PW
MA
IN
T
MS
DE
MO
PW MB
R US
MS
TO
R#
NI
MO
CALLS
LM
75
0
CU
NL
LM
RA
P
OO
LA
LM
MA
J
MI
O
HI
R#
MO
RA
LA
TO
NL
TO
1
2
AC
CL
OO
EA
TO
AT
TE
CL
T
R
SE
DISP
AT
N
EA
ALARM
TE
DISP
CL
K
MA
SL
MI
OT
SL
N
T
ALARM
DISP
DISP
K
MA
ST
SL
0
N
ST
FF
ALARM
CL
R
SE
J
O
HI
CU
ALARM
P
0
2
N
ST
FF
LM
75
1
PW MB
R US
MO
MA
CALLS
AC
NI
OT
ST
0
SL
OT
1
OT
1
PCMCIA
PCMCIA
DIA
DIAL
H10999
IN
HCPU
MA
E1FR
E1FR
R
PW
HCPU
This completes the blower assembly removal process. Continue with the “Replacing the Blower
Assembly” section on page 5-26.
Replacing the Blower Assembly
To replace the blower assembly in the dial shelf, complete the following steps.
Caution
The blower assembly weighs 27.5 lb (12.5 kg). Use both hands when removing or replacing
the blower assembly.
Step 1
Attach an ESD-preventive wrist strap between you and an unpainted chassis surface.
Step 2
Place one hand on the blower assembly handle and place your other hand under the blower assembly to
support the weight.
Step 3
Position the blower assembly in the opening and slide it fully into the chassis until the backplane
connectors mate. (See Figure 5-17.)
Note
All electrical connections are fully operative when the backplane connectors mate.
The blower assembly will immediately power up if the system is powered on.
Step 4
Using a 1/4-in. flat-blade screwdriver, tighten the two captive screws on the blower assembly front
panel.
Step 5
Note service maintenance on your Site Log sheet.
This completes the blower assembly installation procedure. Continue with the “Verifying and
Troubleshooting the Installation” section on page 5-27 to verify your installation.
Cisco AS5800 Operations, Administration, Maintenance, and Provisioning Guide
5-26
DOC-7810814=
Chapter 5
Maintenance
Replacement Procedures
Verifying and Troubleshooting the Installation
To verify that the blower assembly is properly installed and operational, complete the following steps:
Step 1
Listen to verify that the fans are operative. In noisy environments, you may want to place your hand to
the rear of the blower assembly and feel for airflow from the exhaust vent.
Step 2
Verify that the green power LED on the blower assembly front panel lights.
•
Step 3
If the power LED remains off, verify that the blower assembly is fully installed in the dial shelf, the
connector is firmly connected to the backplane, and the captive screws are adequately tightened.
Verify that the yellow fault LED on the blower assembly front panel remains off.
•
If the fault LED lights, the newly installed blower assembly may be faulty, or the chassis connector
may be damaged. Shut OFF system power; remove the blower assembly from the dial shelf, and
check the connectors. If the connectors are in good condition, reinstall the blower assembly in the
dial shelf and power ON the system.
•
If the fault LED is still on, assume that the blower assembly is faulty. Install another blower
assembly and return the faulty blower assembly to the factory.
Replacing a Dial-Shelf Interconnect Port Adapter
The Cisco AS5800 is equipped with a dial-shelf interconnect port adapter that provides the connection
between the Cisco 7206 router shelf and the Cisco 5814 dial shelf. The interconnect port adapter installs
in the router shelf and connects to the dial shelf via a full-duplex 100-Mbps interconnect cable. No
installation tools are necessary; the dial-shelf interconnect port adapter connects directly to the router
midplane and locks into position by a port adapter lever. The dial-shelf interconnect port adapter has no
configurable ports.
The Cisco 7206 router shelf supports OIR; however, unless you have installed a second dial-shelf
interconnect port adapter and established a redundant connection to the dial shelf, you must either reload
the system software after removing and replacing a dial-shelf interconnect port adapter in an operating
system, or you must power off the system during the replacement procedure.
You reload the system software at the router-shelf console using the reload command. For a detailed
description of the reload command, refer to the configuration fundamentals command reference for your
Cisco IOS release.
Note
When you reload the software, all active calls are lost. New incoming calls are not accepted
during the reload process.
If you power OFF and restart the system, the system software automatically reboots. For instructions on
powering OFF and powering ON the access server, refer to the Cisco AS5800 Access Server Hardware
Installation Guide, available online at
http://www.cisco.com/univercd/cc/td/doc/product/access/acs_serv/as5800/hw_inst/
Cisco AS5800 Operations, Administration, Maintenance, and Provisioning Guide
DOC-7810814=
5-27
Chapter 5
Maintenance
Replacement Procedures
Tools and Parts Required
You need the following equipment and parts to install the dial-shelf interconnect port adapter. If you
need additional equipment, contact a service representative for ordering information.
Note
•
Dial-shelf interconnect port adapter (PA-DSIC=)
•
Dial-shelf interconnect cables (CAB-DSIC-5= or CAB-DSIC-20=)
•
Blank port adapter, if needed, for unoccupied slots (MAS-72BLANK=)
•
Your own ESD-prevention equipment or the disposable grounding wrist strap included with all
upgrade kits, FRUs, and spares
•
An antistatic mat or an antistatic shipping container or both
When an adapter slot is not in use, a blank adapter must fill the empty slot to allow the
router shelf to conform to EMI emissions requirements and to allow proper air flow across
the adapters.
Removing the Dial-Shelf Interconnect Port Adapter
Use the following procedure to remove the dial-shelf interconnect port adapter from the router shelf:
Step 1
Attach an ESD-preventive wrist strap between you and an unfinished chassis surface.
Step 2
Place the adapter lever for the desired adapter slot in the unlocked position. (See Figure 5-18.)
Figure 5-18 Unlocked and Locked Port Adapter Lever Positions
EN
X
R
TX
0
X
R
TX
ETHERNET-10BFL
X
R
TX
2
X
R
TX
3
X
R
TX
4
EN
AB
LE
D
K
FAST ETHERNET
2
LIN
LB
CD
TD
TC
RD
RC
RD
RC
LB
1
CD
TC
LB
CD
FAST SERIAL
TD
RC
CD
TD
TC
RD
RC
LB
TD
TC
RD
EN
1
4
LINK
1
3
0
0
1
2
3
2
3
EN
AB
LE
D
6
5
ETHERNET 10BT
BL
T
1
FE
M
II
H11102
A
EN
O
FAST ETHERNET INPUT/OUTPUT CONTROLLER
0
SL
ED
P
CM
CIA
E
C
JE
T
SL
O
T
0
FE BLE INK
L
A
FE
EN
CP
U
R
E
ES
T
ER
1O
W
PO K
O
2
Port adapter lever
Locked position
Unlocked position
Slot number
Step 3
Disconnect the dial-shelf interconnect cable from the interconnect port adapter.
Step 4
Grasp the handle and pull the interconnect port adapter out of its slot, disconnecting it from the
router-shelf midplane.
Cisco AS5800 Operations, Administration, Maintenance, and Provisioning Guide
5-28
DOC-7810814=
Chapter 5
Maintenance
Replacement Procedures
Caution
Always handle adapters by the metal carrier edges and handle; never touch the adapter
components or connector pins.
Figure 5-19 Port Adapter Handling—Side View
Metal carrier
H6420
Printed circuit board
Step 5
Place the interconnect port adapter on an antistatic surface with its components facing upward. If you
are returning the port adapter to the factory, immediately place it in a static shielding bag.
This completes the procedure for removing the dial-shelf interconnect port adapter from the router shelf.
Continue with Replacing the Dial-Shelf Interconnect Port Adapter, page 5-29.
Replacing the Dial-Shelf Interconnect Port Adapter
Use the following procedure to install a new dial-shelf interconnect port adapter in the router shelf:
Step 1
Attach an ESD-preventive wrist strap between you and an unfinished chassis surface.
Step 2
Hold the interconnect port adapter with the component side facing downward.
Step 3
Align the left and right edges of the interconnect port adapter’s metal carrier between the guides in the
slot. (See Figure 5-20.)
H7409
Figure 5-20 Aligning the Port Adapter Metal Carrier Between the Slot Guides
FAST ETHERNET
2
0
4
MII
RJ4
5
D
LE
AB
EN
3
2
3
LINK
1
0
2
D
1
LE
3
EN
AB
0
ETHERNET 10BT
LIN
K
Slot
guide
1
0
SL
O
T
EJ
EC
T
PC
M
C
IA
EN
AB
LE
D
II
M N
E
5
J-4
R EN
TX
R
X
4
TX
TX
R
X
3
TX
R
X
2
1
R
X
TX
5
R
X
J-4
0
M
II
FE
SL
O
T
1
EN
ETHERNET-10BFL
R
R
R
5
PW
J-4 K
K
LIN 1O O
Note: this adapter alignment
applies to any port or service
adapter.
Step 4
Slide the interconnect port adapter into the slot until the connectors are properly seated in the midplane.
Step 5
Place the adapter lever in the locked position, as shown in Figure 5-18.
Cisco AS5800 Operations, Administration, Maintenance, and Provisioning Guide
DOC-7810814=
5-29
Chapter 5
Maintenance
Replacement Procedures
Note
If the adapter lever does not move to the locked position, the adapter is not completely
seated in the midplane. Carefully pull the adapter halfway out of the slot, reinsert it, and
place the lever in the locked position.
This completes the procedure for installing a new dial-shelf interconnect port adapter in the router shelf.
Continue with the “Attaching the Dial-Shelf Interconnect Cable” section on page 5-30.
Attaching the Dial-Shelf Interconnect Cable
The interconnect port adapter includes a single dial-shelf interconnect receptacle. For a redundant
connection to the dial shelf, you need to install a second port adapter.
Caution
Do not use the dial-shelf interconnect port adapter for outgoing WAN connections.
Connect the dial-shelf interconnect cable as follows:
Step 1
Attach the interconnect cable directly to the RJ-45 port on the interconnect port adapter.
Step 2
Tighten the jackscrews on either side of the connector.
Step 3
Attach the other end of your interconnect cable to the port labeled Dial Shelf Interconnect on the
Cisco 5814 dial-shelf controller card.
Cisco AS5800 Operations, Administration, Maintenance, and Provisioning Guide
5-30
DOC-7810814=
Chapter 5
Maintenance
Replacement Procedures
Figure 5-21 Connecting the Dial-Shelf Interconnect Cable
K
3
2
RX
RX
TX
ETHERNET-10BFL
RX
TX
0
RX
TX
1
2
RX
TX
TX
3
4
3
1
EN
0
3
EN
LIN
AB
2
1
0
LE
D
6
5
ETHERNET 10BT
4
Dial shelf
interconnect
port adapter
EN
AB
LE
D
NK
FAST ETHERNET
2
LI
RC
LB
CD
LB
CD
TD
TC
RD
CD
TD
TC
RD
1
RC
LB
CD
TD
TC
RD
RC
EN
TD
TC
RD
RC
LB
FAST SERIAL
AB
LE
T
1
M
II
FAST ETHERNET INPUT/OUTPUT CONTROLLER
FE
0
SLO
EN
D
PC
M
CIA
EJE
CT
SLO
T
0
FE BLE
A
EN
LI
FE
NK
CP
U
RE
SE
T
1O
ER
W
POOK
Router shelf
POWER
FAIL
Dial shelf
interconnect
cable
IN
T
T
IN
MO
CALLS
T
DE
PW
R
MA
IN
T
MS
MO
CALLS
DE
PW
R
MA
IN
T
MS
MO
CALLS
DE
PW
R
MA
IN
T
MS
MO
CALLS
DE
PW
R
MA
IN
T
MS
MO
CALLS
DE
PW
R
MA
IN
T
MS
MO
CALLS
DE
PW
R
MA
IN
T
MS
MO
CALLS
DE
PW
R
MA
IN
T
MS
MO
CALLS
DE
PW
R
MA
IN
T
HCPU
PU
HCPU
TO
MA
FR
HCPU
LA
NI
R
HCPU
MO
PW
HCPU
T1
FC
HCPU
LM
RA
P
OO
NL
75
IN
PU
R#
LM
MA
HCPU
LA
NI
R
HCPU
MO
TO
PW
FR
HCPU
T1
FC
HCPU
MA
HCPU
R
E1FR
E1FR
PW
HCPU
PW
R
MA
IN
T
PW
MS
MO
DE
MS
MO
DE
MS
MA
CALLS
CALLS
AC
CU
LM
TO
CL
0
1
1
2
2
AT
4
4
5
5
6
6
7
7
8
8
N
EA
TE
CL
T
AT
N
CL
SL
ST
OT
0
NETWORK CLOCK
ALARMS
10 BASE T
SL
ST
OT
1
DSI
DSI
DIAL SHELF INTERCONNECT
RM
ON
DISP
K
CONSOLE
RM
ON
DISP
DIAL SHELF CONTROLLER
TM
ON
N
ST
ALARM
PCMCIA
DIAL SHELF INTERCONNECT
TM
ON
N
T
MA
OT
10 BASE T
11
SL
1
ALARMS
11
TE
DISP
NETWORK CLOCK
10
R
SE
K
0
MI
ALARM
EA
DISP
MA
OT
MB
US
FF
ALARM
CONSOLE
9
10
TO
CL
R
R
J
O
HI
CU
DIAL SHELF CONTROLLER
9
AC
ST
PCMCIA
3
PW
MA
MI
SE
SL
3
MB
US
FF
ALARM
LM
RA
P
OO
NL
75
0
R
J
O
HI
R#
10091
MODEM
MODEM
MODEM
MODEM
MODEM
MODEM
MODEM
MODEM
MODEM
MODEM
CHANNELIZED E1/T1
CHANNELIZED E1/T1
Dial shelf
interconnect
port
Dial shelf
Dial shelf
controller cards
Warning
The ports labeled Network clock, 10BaseT, Dial Shelf Interconnect, Console, and Alarms
are safety extra-low voltage (SELV) circuits. SELV circuits should only be connected to
other SELV circuits. Because the E1/T1 circuits are treated like telephone network
voltage, avoid connecting the SELV circuit to the telephone network voltage circuits.
Step 4
Tighten the jackscrews on either side of the connector.
Step 5
Reload the system software using the reload command in EXEC mode, or restart the access server to
reboot the system software.
Cisco AS5800 Operations, Administration, Maintenance, and Provisioning Guide
DOC-7810814=
5-31
Chapter 5
Maintenance
Replacement Procedures
This completes the dial-shelf interconnect cable installation procedure. To verify the installation,
continue with the “Verifying and Troubleshooting the Installation” section on page 5-32.
Verifying and Troubleshooting the Installation
To complete the installation, verify that the LEDs operate properly by observing the following LED
states on the dial-shelf interconnect port adapter:
•
The power enabled LED is on.
If the enabled LED is off, the interconnect port adapter may have pulled away from the midplane.
Reseat the interconnect port adapter in its slot.
If the enabled LED remains off, contact a service representative for assistance.
•
The link LED is on.
If the link LED is off, check the interconnect cable connection and tighten the jackscrews.
•
You can also use the show dsi command in EXEC mode to display information about the dial-shelf
interconnect port adapter.
This completes the dial-shelf interconnect port adapter installation. For hardware troubleshooting
procedures, refer to the Cisco 7206 Installation and Configuration Guide, available online at
http://www.cisco.com/univercd/cc/td/doc/product/core/7206/
Replacing the Backplane Module
The Cisco AS5800 includes a passive backplane in the Cisco 5814 dial shelf that can be ordered as a
spare. This section explains how to remove and replace the backplane in the Cisco 5814 dial-shelf
chassis.
In most cases, the Cisco 5814 dial-shelf chassis will be fully installed to include the dial-shelf controller
card and feature cards. As part of the backplane removal, unseat all cards from the dial-shelf backplane.
Warning
Before completing any of the following steps, and to prevent short-circuit or shock
hazards, ensure that power is removed from the DC circuit. To ensure that all power is
off, locate the circuit breaker on the panel board that services the DC circuit, switch the
circuit breaker to the OFF (O) position, and tape the switch handle of the circuit breaker
in the OFF (O) position.
Warning
When installing the unit, the ground connection must always be made first and
disconnected last.
In this section you will be instructed to perform the following actions:
1.
Power off the router shelf and the dial shelf.
2.
Disconnect power and alarm cables to the PEMs.
3.
Unseat the dial-shelf controller cards and feature cards from the backplane.
4.
Remove the PEMs, filter module, and dial-shelf back panel.
5.
Disconnect the blower assembly backplane cable.
6.
Unscrew the backplane and remove it from the dial shelf.
Cisco AS5800 Operations, Administration, Maintenance, and Provisioning Guide
5-32
DOC-7810814=
Chapter 5
Maintenance
Replacement Procedures
Note
You need access to both the front and rear of the Cisco AS5800 universal access server.
Some of the procedures are performed from the front and some are performed from the rear.
Tools and Parts Required
The following parts and tools are required to remove and replace the backplane module. If you need
additional equipment, contact a service representative for ordering information.
•
New backplane module (MAS-5814BP=)
•
1/4-in. flat-blade screwdriver
•
No. 2 Phillips screwdriver
•
ESD-preventive wrist strap
•
Site Log sheet to record service maintenance
•
Cable ties (optional)
•
ESD shielding bag
Removing the Backplane
The backplane cannot be removed while the system is powered on. This procedure is ideally performed
during a scheduled maintenance time. If not, you must first power OFF the system.
Warning
Before working on equipment that is connected to power lines, remove jewelry
(including rings, necklaces, and watches). Metal objects will heat up when connected
to power and ground and can cause serious burns or weld the metal object to the
terminals.
To remove the backplane:
Step 1
Power OFF (O) the Cisco 7206 router shelf using the power switches located on the router-shelf rear
panel. (See Figure 5-22.)
Figure 5-22 Router-Shelf Power Switches
H11572
Power switches
NETWORK PROCESSING ENGINE-150
Cisco AS5800 Operations, Administration, Maintenance, and Provisioning Guide
DOC-7810814=
5-33
Chapter 5
Maintenance
Replacement Procedures
Step 2
Power OFF (O) the dial shelf at the power entry modules (PEMs) using the power switches located on
the PEM front panels. (See Figure 5-23.)
Figure 5-23 Dial-Shelf Power Switches on the PEMS
PEM front panel
PEM front panel
Power switches
POWER
POWER
MISWIRE
MISWIRE
–48V
RTN
C
NC NO
–48V
LEDs
Step 3
Filter module
–48V
RTN
C
DC-input power
terminal block
NC NO
H11655
–48V
Bell alarm
terminal block
If you are using the optional AC-input power shelf, power OFF (O) the AC-input power supplies using
the power switches located on the power shelf front panel. (See Figure 5-24.)
Figure 5-24 AC-Input Power Shelf
PWR OK
CB 2
PWR OK
FAULT
FAULT
TEMP
TEMP
I LIM
I LIM
Power
switches
CB 1
Step 4
H11098
AC
1 POWER 2
Power OFF the central office main circuit breaker.
Cisco AS5800 Operations, Administration, Maintenance, and Provisioning Guide
5-34
DOC-7810814=
Chapter 5
Maintenance
Replacement Procedures
To continue, you must next disconnect power cables and alarm cables to the dial-shelf PEMs.
Step 1
Loosen the screws in the DC-input power terminal blocks and the alarm terminal blocks using a 1/4-in.
flat-blade screwdriver, and disconnect power cables and alarm cables to the dial-shelf PEMs.
Figure 5-25 shows the location of the terminal blocks.
Figure 5-25 PEM Cable and Alarm Terminal Blocks
Captive screw
LEDs
Power switch
POWER
MISWIRE
POWER
POWER
MISWIRE
MISWIRE
DC-input power
terminal block
–48V
RTN
Alarm
terminal block
C
NC NO
–48V
RTN
C
NC NO
–48V
–48V
RTN
C
NC NO
H11000
–48V
–48V
To CO
alarms
The following steps refer to the optional AC-input power shelf. If you are using a DC power source, you
can skip Step 2 and Step 3.
Cisco AS5800 Operations, Administration, Maintenance, and Provisioning Guide
DOC-7810814=
5-35
Chapter 5
Maintenance
Replacement Procedures
Step 2
Disconnect the monitor cable DB-9 connector from the base of the filter module. (See Figure 5-26.)
Figure 5-26 Filter Module Monitor Cable DB-9 Connector
.
Filter module
POWER
POWER
MISWIRE
MISWIRE
PEM
–48V
–48V
RTN
C NC NO
–48V
–48V
RTN
C NC NO
DB-9 cable
connector
H11161
DB-25 cable
connector
AC-input power shelf
Step 3
Disconnect power cables to the optional AC-input power shelf. (See Figure 5-27.)
Figure 5-27 AC-Input Power Shelf Cable Connections
BUS
—
H11154
.
BUS
+
AC power cable
AC-input power
receptacles
After you disconnect the cables, you must disconnect the dial-shelf controller cards and feature cards
from the backplane connectors. You do not need to remove the cards completely from the dial-shelf
chassis; however, you must disconnect incoming CE1/CT1 trunk line cables.
Cisco AS5800 Operations, Administration, Maintenance, and Provisioning Guide
5-36
DOC-7810814=
Chapter 5
Maintenance
Replacement Procedures
To disconnect the feature cards and dial-shelf controller cards from the backplane, follow these steps:
Step 1
Attach an ESD-preventive wrist strap between you and an unpainted chassis surface.
Step 2
Disconnect incoming CE1/CT1 trunk line cables and secure them out of the way using cable ties, if
necessary. On the dial-shelf controller card, disconnect the dial-shelf interconnect cable and the
10BaseT connection, if applicable.
Warning
Before opening the chassis, disconnect the telephone network cables to avoid contact
with telephone-network voltages.
Step 3
Using a number 2 Phillips screwdriver, loosen the panel fasteners at the top and bottom of the card front
panel.
Step 4
Pull either the upper or lower ejector lever away from the card front panel to disengage the card from
the backplane connector. (See Figure 5-28.)
Figure 5-28 Ejector Lever Enlarged
Panel fastener
T
AIN
PW
R
1F
E1FR
E1FR
FR
T1
T1
PU
PU
FC
HCPU
75
AIN
T
OD
EM
S
CALLS
#
OR
IT
M
ON
OR
IT
M
LM
M
M
HCPU
L
RA
LA
R
PU
#
ON
PW
FC
HCPU
M
FR
AIN
T1
PU
FC
T
R AIN
PW M
M
FR
T
T
R AIN
PW M
T
R
LM
RA
P
OO
NL
H11097
M
HCPU
R
E1FR
E1FR
PW
LM
LA
OO
P
NL
75
0
FC
HCPU
Cisco AS5800 Operations, Administration, Maintenance, and Provisioning Guide
DOC-7810814=
5-37
Chapter 5
Maintenance
Replacement Procedures
Step 5
Grasp the ejector levers and pull the card partially out of the dial-shelf slot. (See Figure 5-29.)
T
T
R
IN
MA
PW
MS
MS
CALLS
MO
MO
DE
DE
DE
MO
MO
T
T
MA
IN
R
IN
R
PW
MA
MS
MS
DE
DE
MO
MO
MO
DE
MS
MS
MS
DE
DE
MO
MO
MO
DE
MS
MS
MS
DE
PU
FC
PW
R
IN
PW
MA
PW
R
MA
IN
T
T
T
R
IN
MA
R
IN
MA
PW
PW
R
MA
IN
T
PW
R
T
IN
MA
R
IN
R
PW
MA
PW
MA
T1
FR
PW
T
CALLS
CALLS
MA
CALLS
J
AI
TO
NI
MO
CU
LM
RA
FR
ALARM
ALARM
ALARM
R
LA
75
EA
R
EA
CL
CL
NL
LM
OO
P
T1
FF
FF
TO
TO
PU
ST
ST
HI
HI
R#
M
O
CU
FC
N
AC
O
HCPU
MI
N
MI
AC
NT
CALLS
J
R
CALLS
MA
E1FR
PW
CALLS
US
MB
R
PW
CALLS
US
MB
R
CALLS
PW
CALLS
HCPU
HCPU
HCPU
HCPU
HCPU
HCPU
HCPU
HCPU
HCPU
HCPU
HCPU
E1FR
IN
T
Figure 5-29 Removing Feature Cards and Dial-Shelf Controller Cards
ALARM
0
SE
T
DISP
1
75
LA
NL
LM
O
O
P
RA
LM
M
O
NI
TO
R
#
T
SE
DISP
DISP
N
N
DISP
K
K
CL
CL
2
TE
TE
AT
AT
0
SL
ST
0
OT
OT
ST
MA
MA
SL
0
1
OT
OT
SL
SL
1
1
3
PCMCIA
PCMCIA
4
3
5
4
6
CONSOLE
CONSOLE
NETWORK CLOCK
NETWORK CLOCK
ALARMS
ALARMS
10 BASE T
10 BASE T
5
DIAL SHELF CONTROLLER
DIAL SHELF CONTROLLER
2
7
6
8
7
9
8
10
9
ON
RM
ON
TM
N
O
RM
N
O
H11040
MODEM
MODEM
MODEM
MODEM
CHANNELIZED E1/T1
MODEM
MODEM
MODEM
MODEM
MODEM
MODEM
CHANNELIZED E1/T1
TM
DIAL SHELF INTERCONNECT
DIAL SHELF INTERCONNECT
11
DSI
DSI
11
10
Return to the rear of the dial shelf and continue by removing the PEMs, the filter module, and the back
cover. You also need to remove the horizontal bar that attaches the bottom of the back cover and the tops
of the PEMs and filter module to the chassis.
Cisco AS5800 Operations, Administration, Maintenance, and Provisioning Guide
5-38
DOC-7810814=
Chapter 5
Maintenance
Replacement Procedures
Step 1
Using a 1/4-in. flat-blade screwdriver, loosen the two captive screws on each PEM front panel.
Step 2
Remove the PEMs from the dial shelf and set them aside until you are ready to reinstall them. (See
Figure 5-30.)
Figure 5-30 PEM Removal
Filter module
LEDs
Captive
screw
POWER
POWER
MISWIRE
MISWIRE
PEM
–48V
RTN
C
NC NO
–48V
Captive
screw
–48V
RTN
C
NC NO
DC-input power
terminal block
H11077
–48V
Bell alarm
terminal block
Cisco AS5800 Operations, Administration, Maintenance, and Provisioning Guide
DOC-7810814=
5-39
Chapter 5
Maintenance
Replacement Procedures
Step 3
Using a 1/4-in. flat-blade screwdriver, loosen the captive screws on the filter module front panel.
Step 4
Remove the filter module from the dial shelf and set it aside until you are ready to reinstall it. (See
Figure 5-31.)
Figure 5-31 Filter Module Removal
PEM
Captive
screws
Filter module
PEM
POWER
POWER
MISWIRE
MISWIRE
–48V
RTN
C NC NO
–48V
–48V
RTN
C NC NO
H11075
–48V
AC-input
power shelf
(optional)
Captive
screws
Cisco AS5800 Operations, Administration, Maintenance, and Provisioning Guide
5-40
DOC-7810814=
Chapter 5
Maintenance
Replacement Procedures
Step 5
Remove the back cover using a number 2 Phillips screwdriver. Remove the screws located on the
dial-shelf back cover grill. (See Figure 5-32.) Save the screws.
Figure 5-32 Dial-Shelf Chassis Back Cover
.
Back cover
POWER
POWER
MISWIRE
MISWIRE
PEM
–48V
RTN
C NC NO
–48V
–48V
RTN
C NC NO
H10993
–48V
Filter module
Step 6
Locate the horizontal bar that spans the width of the dial-shelf chassis rear (see Figure 5-32) and remove
the four screws (two on each side of the dial-shelf outer chassis) using a No. 2 Phillips screwdriver. Save
the screws.
Cisco AS5800 Operations, Administration, Maintenance, and Provisioning Guide
DOC-7810814=
5-41
Chapter 5
Maintenance
Replacement Procedures
To complete the backplane removal procedure, complete the following steps:
Step 1
Disconnect the cable connection to the dial-shelf blower assembly. (See Figure 5-33.)
Figure 5-33 Blower Assembly Backplane Connector
Blower assembly backplane connector
H11281
Backplane module
Cisco AS5800 Operations, Administration, Maintenance, and Provisioning Guide
5-42
DOC-7810814=
Chapter 5
Maintenance
Replacement Procedures
Step 2
Remove the 26 M3 x 8-mm screws around the backplane perimeter using a No. 2 Phillips screwdriver.
(See Figure 5-34.) Save the screws.
Figure 5-34 Backplane Module—Rear View
Capacitors
Backplane
perimeter
screws
Connector to
blower assembly
Card connectors
(rear view)
Step 3
H11285
Backplane
perimeter
screws
Remove the backplane and place it in an ESD shielding bag. Use the replacement backplane carton to
return the faulty backplane to the factory, if necessary.
Replacing the Backplane
To replace the backplane complete the following steps and reverse the procedures used to remove cables
and components. When you finish, use a Site Log sheet to record service maintenance.
Step 1
Unpack the new backplane module (MAS-5814BP=) from the ESD shielding bag and install the
backplane in the same position as the one you just removed.
Step 2
Reuse the screws used to secure the old backplane and tighten the screws using a No. 2 Phillips
screwdriver. (See Figure 5-34.)
Step 3
Connect the cable connection to the dial-shelf blower assembly. (See Figure 5-33.)
Step 4
Replace the back cover. Reuse the screws used to secure the back cover and tighten the screws using a
No. 2 Phillips screwdriver. (See Figure 5-32.)
Step 5
Replace the dial-shelf filter module and tighten the captive screws on the front panel using a 1/4-in.
flat-blade screwdriver. If using the AC-input power shelf, connect the monitor cable. The DB-9
connector connects to the filter module; the DB-25 connector connects to the optional AC-input power
shelf. (See Figure 5-26.)
Step 6
Replace the dial-shelf PEMs and tighten the captive screws on the front panels using a 1/4-in. flat-blade
screwdriver. Then reconnect the power cables.
Step 7
From the front of the dial shelf, reseat the dial-shelf controller cards and the feature cards using the
ejector levers and tighten the panel fasteners with a number 2 Phillips screwdriver. (See Figure 5-28 and
Figure 5-29.)
Step 8
Power ON the main power source circuits for the Cisco AS5800.
Cisco AS5800 Operations, Administration, Maintenance, and Provisioning Guide
DOC-7810814=
5-43
Chapter 5
Maintenance
Troubleshooting
Step 9
Power ON ( | ) the dial shelf using the power switches located on each PEM front panel.
Step 10
If using the optional AC-input power shelf, power ON ( | ) the power supplies using the power switches
on the power shelf front panel.
Step 11
Power ON ( | ) the router shelf using the power switches located on the Cisco 7206 router-shelf rear
panel.
Step 12
Note the service maintenance on your Site Log sheet.
This completes the backplane removal and replacement procedure. The backplane is a passive design.
Specific verification and troubleshooting instructions are considered unnecessary.
Troubleshooting
This section describes possible causes for specific symptom related to Cisco AS5800 hardware
components and software configurations.
For system startup and subsystem troubleshooting, refer to the chapter on troubleshooting in the
Cisco AS5800 Access Server Hardware Installation Guide, available online at
http://www.cisco.com/univercd/cc/td/doc/product/access/acs_serv/as5800/hw_inst/
Common Misconfigurations
•
Incorrect ISDN switch-type
•
Orphan async interfaces
•
Encapsulation PPP missing
•
ISDN incoming-voice missing
•
Dialer group/dialer-list missing
•
Async mode interactive missing
•
Multilink bundle-name both not configured
AS5800 Router Shelf
Symptom
•
Cisco AS5800 RS boots up with “boot” prompt.
Possible Cause
•
Invalid boot system statement in the config.
•
No/wrong image on flash card for the platform.
•
Image downloaded in-correctly.
Cisco AS5800 Operations, Administration, Maintenance, and Provisioning Guide
5-44
DOC-7810814=
Chapter 5
Maintenance
Troubleshooting
AS5800 Dial Shelf
Symptom
•
Dial-shelf controller shows “down” state.
•
OIR not detected.
Possible Cause
•
DSIC is not connected securely.
•
DSC has the incorrect image.
•
Faulty DSC.
Feature Cards
Symptom
•
Feature Cards not coming up.
Possible Cause
•
DSC is in the down state.
•
FB not seated properly.
•
FB not in the correct slot.
•
FB is broken.
Controller T1
Symptom
•
Slips on T1 controllers.
Possible Cause
•
T1’s from multiple switches (clocking problem).
•
Problematic T1 is used for clocking.
•
DSC is in free-running mode.
Cisco AS5800 Operations, Administration, Maintenance, and Provisioning Guide
DOC-7810814=
5-45
Chapter 5
Maintenance
Troubleshooting
General Configuration
Symptom
•
The NAS was working okay, then it does not do what is expected.
Possible Cause
•
Configuration changed, do "diff.".
•
Equipment failure (modem).
•
Telco line provision changed.
Symptom
•
Call does not authenticate.
Possible Cause
•
Incorrect AAA authentication.
•
Login/ppp authentication method not defined or not applied for dialer/group-async/virtual-template.
•
Misconfigured radius-server.
Symptom
•
Call connects and authenticates, but can not seem to get traffic across.
Possible Cause
•
Dialer-list not defined or not installed.
•
Route/data filter installed.
•
Modem is in retrain constantly.
•
Incoming connection became part of an existing MLP bundle because account is shared.
Symptom
•
User has idle-timer/session timer installed but never disconnects.
Possible Cause
•
Make sure correct timer is installed.
•
Multicast traffic/routing update is resetting idle-timers.
Cisco AS5800 Operations, Administration, Maintenance, and Provisioning Guide
5-46
DOC-7810814=
Chapter 5
Maintenance
Troubleshooting
Async Calls
Symptom
•
Async user gets fast busy.
Possible Cause
•
ISDN PRI layer 2 is not up/channel busied out.
•
ISDN incoming-voice mode not configured.
•
Modem can not be allocated (busied out, firmware download in progress).
•
DNIS screening is enabled and access-rejected.
•
ISDN switch-type reconfigured, NAS needs reload.
Symptom
•
Some users can connect but some can not.
Possible Cause
•
Incorrect password/modem problem.
•
Dialer caller xxxxxxxxxx configured and user does not deliver caller-id.
•
Telco provision problem.
Symptom
•
Async user modem will not train-up or connect at low speed and retrains often.
Possible Cause
•
Check for slip seconds on the T1 controller.
•
Check for A/u-law, modemcap.
•
Check for client modem firmware version.
•
Check for client modem compatibility issues.
Interactive Async User
Symptom
•
Interactive Async user does not get Username Prompt.
Possible Cause
•
Need to hit return after connect.
•
Async-mode interactive not configured.
Cisco AS5800 Operations, Administration, Maintenance, and Provisioning Guide
DOC-7810814=
5-47
Chapter 5
Maintenance
Troubleshooting
Interactive Users
Symptom
•
Interactive users can not authenticate.
Possible Cause
•
Incorrect method under AAA or method-list under line configuration.
•
Back-end authentication rejected (RADIUS/TACACS).
Symptom
•
Interactive user authenticates but PPP does not/cannot start (even after “ppp default”).
Possible Cause
•
User is not authorized to start PPP based on RADIUS/TACACS profile.
•
Unable to assign an IP address.
Symptom
•
User authenticates and PPP appears to start but fails eventually.
Possible Cause
•
User is double authenticated.
– AAA authen PPP login if-needed radius
•
IP address allocation/PPP negotiation failure.
Cisco AS5800 Operations, Administration, Maintenance, and Provisioning Guide
5-48
DOC-7810814=
Chapter 5
Maintenance
Troubleshooting
Dedicated-PPP Users
Symptom
•
Interactive async user can connect and authenticate, but dedicated PPP user can not authenticate.
Possible Cause
•
AAA authentication PPP not defined.
•
Autoselect PPP not defined under line.
•
Autoselect during-login not defined under line.
•
Back-end authentication rejected.
Symptom
•
User authenticates but gets disconnected.
Possible Cause
•
IP address could not be allocated - pool/dhcp.
•
PPP negotiation failed due to incompatible parameters.
•
MLP call but PPP multilink not enabled.
PPP Users
Symptom
•
User authenticated and successfully logged in but cannot get to anywhere.
Possible Cause
•
Modem is in retrain.
•
User is treated as part of a multilink bundle.
•
Incorrectly defined data-filters.
•
Dialer-list x protocol ip permit is not defined.
Cisco AS5800 Operations, Administration, Maintenance, and Provisioning Guide
DOC-7810814=
5-49
Chapter 5
Maintenance
Troubleshooting
Sync Calls
Symptom
•
Sync user gets “no answer” or “busy.”
Possible Cause
•
Controller T1 / isdn layer 2 is down, channels busied out.
•
ISDN switch-type reconfigured. NAS as need reload.
•
DNIS screening is enabled and call is rejected due to radius server access-reject.
•
Telco provisioning problem.
MMPPP
Symptom
•
First channel/modem dial-in and connect fine, but second channel/modem does not connect to the
same NAS.
Possible Cause
•
First channel/modem not negotiated as a MLP call.
•
PPP multilink not configured.
Symptom
•
First channel/modem dial-in and connect fine, but second channel/modem does not connect to the
different NAS.
Possible Cause
•
SGBP not configured.
•
SGBP not succeeding.
Cisco AS5800 Operations, Administration, Maintenance, and Provisioning Guide
5-50
DOC-7810814=
Chapter 5
Maintenance
Troubleshooting
RADIUS
Symptom
•
No response for Access/Accounting-Requests generated by NAS.
Possible Cause
•
Radius server/ports not reachable from NAS.
•
NAS not configured/recognized by RADIUS server.
•
Shared secret does not match.
•
Unreliable connection between NAS and RADIUS.
Symptom
•
Getting Access-Reject for Access-Request.
Possible Cause
•
User is not in the radius database. Database needs reload.
•
Incorrectly formatted/configured radius user profile.
•
One of the check-items in profile does not match the corresponding value in Access-Request.
Symptom
•
Idle/Session timeout defined in RADIUS but not installed (MLP or PPP w/ 1-channel ISDN).
Possible Cause
•
Virtual-profile aaa not configured.
SGBP Troubleshooting
Debug Commands
•
debug sgbp hellos
•
debug sgbp errors
Cisco AS5800 Operations, Administration, Maintenance, and Provisioning Guide
DOC-7810814=
5-51
Chapter 5
Maintenance
Troubleshooting
Cisco AS5800 Operations, Administration, Maintenance, and Provisioning Guide
5-52
DOC-7810814=
C H A P T E R
6
Provisioning
This chapter describes basic hardware and service provision considerations such as system environment
requirements, physical infrastructure checklists, IP service considerations, and system upgrade
procedures for the Cisco AS5800.
For details on the following, refer to the information on preparing for installation in the Cisco AS5800
Access Server Hardware Installation Guide, available online at
http://www.cisco.com/univercd/cc/td/doc/product/access/acs_serv/as5800/hw_inst/
Note
•
Safety recommendations
•
Site requirements such as shelf specifications, space, chassis heights, rack types, mounting options,
power and plant wiring
•
Site logs for monitoring installation progress, or recording upgrade history
House the Cisco AS5800 in an area with constant temperature and humidity. Cooler
environments are ideal for stabilizing hardware temperatures. Humidity should be high
enough to prevent accumulation of static electricity, yet low enough to prevent
condensation. Relative humidity up to 90% is acceptable.
Setting Up Basic IP Modem Services
This section describes how to set up and provision basic modem IP services using a Cisco AS5800
network access server. It is tailored for network engineers who work with dialup access technologies,
and assumes the reader is Cisco certified or familiar with Cisco IOS routers and technologies.
Corporate users and Internet service providers (ISP) install dialup services to facilitate e-mail,
e-commerce, and application/database access for employees, roaming sales personnel, household
consumers, and students. As a corporate user or ISP, you want to:
•
Enable remote modem users to access IP backbone resources through the Public Switched
Telephone Network (PSTN).
•
Build an access network foundation that scales to support larger dial implementations for the future.
Cisco AS5800 Operations, Administration, Maintenance, and Provisioning Guide
DOC-7810814=
6-1
Chapter 6
Provisioning
Setting Up Basic IP Modem Services
The following section discusses:
•
Planning and designing a basic IP modem dialup network
•
Deploying networking equipment by configuring, verifying, and troubleshooting the Cisco IOS
software
•
Preparing for operations by inspecting modem call statistics and enabling basic management
protocols
Figure 6-1
Business Scenario
Headquarters
providing dialup
services
PSTN
IP intranet
Internet
firewall
Internet
33169
Remote modem
users
Cisco AS5800 Operations, Administration, Maintenance, and Provisioning Guide
6-2
DOC-7810814=
Chapter 6
Provisioning
Setting Up Basic IP Modem Services
Network-Service Considerations
The network-service definition for a corporate user generally differs from that for an ISP, as shown in
Table 6-1.
Table 6-1
Network-Service-Definition Perspectives
Attribute
Corporate-User Perspective
ISP Perspective
Scaling projections
Have smaller projections.
Have larger projections, and require
higher-density network gateways
such as the Cisco AS5850.
Line requirements
Have lower requirements.
Have higher requirements.
Client types and
Internet access
Control the client types used by their Offer Internet access to all client
employees.
types.
Security and billing
Care more about security and less
about billing.
Care more about billing and less
about security.
V.90
Have lower V.90 priority and spend
less time fine-tuning V.90. Revenue
streams do not depend on high
modem-connect speeds, and so will
most likely deploy dialup service for
employees.
Have higher V.90 priority and spend
more time fine-tuning V.90. Primary
objective is to enable 56K modem
connections, because higher connect
speeds equate to increased sales.
AAA design
Consider to be important, because a
defined security policy protects
enterprise network resources.
Consider to be less important.
Multilink PPP support
for remote dialin
Generally do not need.
Need in a stacked solution for future
deployment.
Password changes
Enable network administrators to
Allow users to change their own
change their own passwords using an passwords using a website interface.
EXEC shell login.
Password security
For the short term, store user
passwords in a local username
database inside the route switch
controller (RSC). In the long term,
may scale to remote TACACS+
security for storing user passwords;
users can change passwords using the
EXEC shell.
For the short term, store user
passwords in a local username
database inside the RSC. In the long
term, scale to remote AAA RADIUS
security for storing user passwords;
users can change passwords using the
Cisco Secure website.
Per-user attribute
definitions
(authorization)
Support; enable vendors to dial in,
pass through filters, and access
specific devices.
Do not support; provide Internet
access only.
Cisco AS5800 Operations, Administration, Maintenance, and Provisioning Guide
DOC-7810814=
6-3
Chapter 6
Provisioning
Setting Up Basic IP Modem Services
Establishing a Network-Service Definition
Begin your implementation of basic IP UPC services by establishing a network service definition. Use
the perspectives described in Table 6-1 preceding and in the following list of design and configuration
considerations as a guide. A conservative approach is to project your current deployment and design into
a three-month, one-year, and five-year timeline.
Step 1
Project user growth and resulting line requirements (lines=users/busy-hour ratio) over the following
intervals:
•
3 months (example: 25 lines)
•
1 year (example: 50 lines)
•
5 years (example: 100 lines)
Step 2
Determine user-to-line ratio during busy hours.
Step 3
Determine access media to be used for dial services:
Step 4
Step 5
•
Analog lines
•
ISDN BRI lines
Determine types of remote devices to support:
•
Analog modems
•
Remote LANs
•
PCBUS ISDN terminal adaptors
•
V.110
•
V.120
Determine operating systems to support:
•
Windows 95
•
Windows 98
•
Windows NT
•
UNIX
•
Mac OS
Step 6
Determine if dial-in modem services will be supported.
Step 7
Rank technology priorities:
Step 8
•
AAA design
•
IP design
•
V.90 modem performance
Determine which access service will be used for connecting to modems:
•
EXEC shell sessions
•
PPP sessions
•
SLIP sessions
Step 9
Determine if multilink will be supported. If yes, indicate whether you will scale to a stacked multichassis
solution.
Step 10
Determine if PPP timeouts (accounting) will be supported.
Cisco AS5800 Operations, Administration, Maintenance, and Provisioning Guide
6-4
DOC-7810814=
Chapter 6
Provisioning
Cisco IOS Upgrades
Step 11
Step 12
Step 13
Determine where user passwords will be stored in the short term:
•
Local AAA database in the router
•
Remote AAA database in a server
Determine if an AAA server will be used in the long term. If yes, specify which protocol will be used:
•
TACACS+
•
RADIUS
Determine if users will be allowed to change their own passwords. If yes, specify how:
•
EXEC shell
•
CiscoSecure website
Step 14
Determine if the access network will use an external authentication database such as SecureID, Windows
NT, or Novell NDS.
Step 15
Determine if per-user attribute definitions (authorization) will be supported.
Step 16
Indicate whether an existing accounting system to monitor call-detail records is in place.
Step 17
Indicate whether you are running an existing network-management system. If no, determine whether a
network-element management server is needed
Cisco IOS Upgrades
This section describes Cisco IOS upgrade procedures for the Cisco AS5800. The following tasks are
detailed.
•
Installing a TFTP (Trivial File Transfer Protocol) server for telnet purposes
•
Determining memory requirements
•
Obtaining a new Cisco IOS software version
•
Backing up existing Cisco IOS software images and configurations
•
Upgrading the Cisco IOS image for the Cisco 5814 dial shelf (DS)
•
Upgrading the Cisco IOS image for the Cisco 7206 router shelf (RS)
•
Upgrading the Bootflash boot image for the Cisco 7206 router shelf (RS)
A Cisco IOS upgrade requires a compatible Cisco IOS image upgrade on both the dial-shelf controller
(DSC) cards and router-shelf (RS) components of the system. Two distinct upgrade procedures are
necessary, one for each component.
Note
Sufficient memory (available bytes) is required to accommodate any new image file size
on the RS and DSC! Contact your Cisco Sales Representative for memory upgrades.
Note
Cisco IOS software is feature specific and licensed on an “as is” basis without warranty of
any kind, either expressed or implied. The version of Cisco IOS software used in this
manual varies depending on configuration requisites for presentation purposes, and should
not be construed as the Cisco IOS software version of choice for your system or
internetwork environment. Consult your Cisco Sales Representative regarding your
Cisco IOS requirements.
Cisco AS5800 Operations, Administration, Maintenance, and Provisioning Guide
DOC-7810814=
6-5
Chapter 6
Provisioning
Cisco IOS Upgrades
Software Upgrade Requisites
To upgrade a Cisco IOS software image you need the following:
•
An established network connection between the PC you are designating as your TFTP server and
your access server
•
Access to the Cisco website (CCO) for downloading the Cisco IOS software
Memory Requirements
Before installing new software, first determine the amount of available memory in RAM and Flash.
Note
Step 1
You must have sufficient memory available on your Access Server to accommodate the file
size memory requirements for new software you want to load.
Determine the amount of available random access memory (RAM) for processing purposes.
AS5800#show version
Cisco Internetwork Operating System Software
IOS (tm) 5800 Software (C5800-P4-M), Version 12.x
...
ROM: System Bootstrap, Version 12.x
BOOTFLASH: 7200 Software (C7200-BOOT-M), Version 12.x
...
cisco 7206VXR (NPE400) processor with 253952K/40960K bytes of memory.
...
16384K bytes of Flash PCMCIA card at slot 0 (Sector size 128K).
4096K bytes of Flash internal SIMM (Sector size 256K).
...
AS5800#
Step 2
Determine the amount of available flash memory for storage purposes.
AS5800# show flash
-#- ED --type-- -- --- -seek-- nlen -length- -----date/time------ name
1
.. image
AAD4004B 719C50
25 7314384 May 02 2000 13:55:04
c5800-p4-mz_120-4_XL1.bin
9069488 bytes available (7314512 bytes used)
Step 3
Record this memory values for future reference.
Obtaining a New Cisco IOS Version
To obtain a recent version of the Cisco IOS software, you need access to the Cisco.com website.
Cisco IOS software is version specific bundled software that includes the following compatible
components:
•
Router-shelf (or system) image (c5800-p4-mz.XXX)
•
Dial-shelf controller (DSC) image (dsc-c5800-mz.XXX)
•
Boot image (c7200-boot-mz.XXX)
Cisco AS5800 Operations, Administration, Maintenance, and Provisioning Guide
6-6
DOC-7810814=
Chapter 6
Provisioning
Cisco IOS Upgrades
Step 1
Log onto the Cisco.com website at the following URL to enter your AS5800 image selection criteria:
http://www.cisco.com/cgi-bin/Software/Iosplanner/Planner-tool/iosplanner.cgi
Note
Step 2
Images much match the specific version of Cisco IOS software being installed.
Example: If attempting to run 12.0.7T, you must run the 12.0.7T dial-shelf (DSC)
image (dsc-c5800-mz.XXX) and the 12.0.7T router-shelf image
(C5800-p4-mz.XXX) to secure proper system functionality.
After verifying that you have sufficient memory, download the router shelf, dial shelf, and boot image
to your TFTP server.
Backing Up Your AS5800 Configuration
Cisco recommends backing up all existing Cisco IOS images and configurations from privileged exec
mode.
Note
Step 1
Back up current Cisco IOS images (boot, router-shelf, dial-shelf) and configurations to
your TFTP server before upgrading. By default, files are copied to and from the Cisco
TFTP root directory.
Back up your existing startup configuration. Use a distinct file name for the startup configuration. This
makes it easy to distinguish from other startup configurations previously saved on your TFTP Server.
AS5800# copy startup-config tftp
Address or name of remote host []? 171.71.219.167
Destination filename [startup-config]? AS5800-startup
!!
3449 bytes copied in 0.136 secs
Step 2
Back up your existing running configuration. Use a distinct file name for the running configuration. This
makes it easy to distinguish from other running configurations previously saved on your TFTP Server.
AS5800# copy running-config tftp
Address or name of remote host []? 171.71.219.167
Destination filename [running-config]? AS5800-running-config
!!
3312 bytes copied in 0.140 secs
Step 3
Save your running-configuration to your startup configuration in NVRAM.
Router# copy running-configuration start-up configuration
Note
Step 4
Do not modify your running configuration during the Cisco IOS upgrade process.
Determine the current boot image.
AS5800# show bootflash:
-#- ED --type-- --crc--- -seek-- nlen -length- -----date/time------ name
1
.. image
AC05EDDF 37A6B8
22 3384888 Dec 31 1999 18:08:09 c7200-boot-mz.120-4.XE
Cisco AS5800 Operations, Administration, Maintenance, and Provisioning Guide
DOC-7810814=
6-7
Chapter 6
Provisioning
Cisco IOS Upgrades
Step 5
Back up the boot image (c7200-boot-mz.XXX) from bootflash to your TFTP server. Use the file name
obtained in Step 4.
AS5800# copy bootflash: tftp
Source filename [c]? c7200-boot-mz.120-4.XE
Address or name of remote host []? 171.71.219.167
Destination filename [c7200-boot-mz.120-4.XE]?
!!!!!!!!!!!!!!!!!!!!!!!!!!!!!!!!!!!!!!!!!!!!!!!!!!!!!!!!!!!!!!!!!!!!!!!!!!!!!!!!!!!!!!!!!!
!!!!!!!!!!!!!!!!!!!!!!!!!!!!!!!!!!!!!!!!!!!!!!!!!!!!
3384888 bytes copied in 89.920 secs (38032 bytes/sec)
Step 6
Determine the router shelf’s current flash image.
AS5800# show flash
-#- ED --type-- --crc--- -seek-- nlen -length- -----date/time------ name
1
.. image
AAD4004B 719C50
25 7314384 May 02 2000 13:55:04
c5800-p4-mz_120-4_XL1.bin
Step 7
Back up the current router-shelf Cisco IOS image (C5800-p4-mz.XXX) stored in flash memory. Use the
file name obtained in Step 6.
AS5800# copy flash tftp
Source filename []? c5800-p4-mz_120-4_XL1.bin
Address or name of remote host []? 171.71.219.167
Destination filename [c5800-p4-mz_120-4_XL1.bin]?
!!!!!!!!!!!!!!!!!!!!!!!!!!!!!!!!!!!!!!!!!!!!!!!!!!!!!!!!!!!!!!!!!!!!!!!!!!!!!!!!!!!!!!!!!!
!!!!!!!!!!!!!!!!!!!!!!!!!!!!!!!!!!!!!!!!!!!!!!!!!!!!
7314384 bytes copied in 218.684 secs (33552 bytes/sec)
Step 8
On your TFTP Server, verify that files were copied (backed up).
Note
By default, files are copied to and from the Cisco TFTP root directory.
Installing New IOS Software
A Cisco IOS upgrade requires a compatible Cisco IOS image upgrade on both the dial-shelf controller
(DSC) cards and router-shelf (RS) components of the system. Two distinct upgrade procedures are
necessary, one for each component.
Note
Cisco recommends upgrading the dial-shelf controllers first, since all upgrades are
performed through the router shelf. Once DSCs are upgraded, the router shelf is not be able
to communicate with the DSCs until a compatible Cisco IOS image is installed on the RS.
Note
Do not modify your running configuration during the Cisco IOS upgrade process.
Note
Upgrade verifications are performed after all necessary upgrades are complete, and all
system components are reloaded.
Cisco AS5800 Operations, Administration, Maintenance, and Provisioning Guide
6-8
DOC-7810814=
Chapter 6
Provisioning
Cisco IOS Upgrades
Upgrading the DSC Software
The following procedure outlines commands used to perform a Cisco 5814 dial-shelf controller (DSC)
software upgrade from the router shelf.
Step 1
Log in to the Cisco AS5800 router shelf and enter Enable (privileged exec) mode.
Step 2
Identify Cisco IOS images in the DSC bootflash.
AS5800# execute-on slot 12 show bootflash:
DA-Slot12#
-#- ED --type-- --crc--- -seek-- nlen -length- -----date/time------ name
1
.. image
BC8CA85F 251C60
26 2169824 Nov 18 1999 22:12:15
dsc-c5800-mz.120-4.XL1.bin
Step 3
Delete the current Cisco IOS images from bootflash.
AS5800# execute-on slot 12 delete bootflash:dsc-c5800-mz.120-4.XL1.bin
DA-Slot12#
Delete filename [dsc-c5800-mz.120-4.XL1.bin]?
Delete bootflash:dsc-c5800-mz.120-4.XL1.bin? [confirm]
AS5800#
Step 4
Squeeze the DSC bootflash.
AS5800# execute-on slot 12 squeeze bootflash
DA-Slot12#
All deleted files will be removed. Continue? [confirm]
Squeeze operation may take a while. Continue? [confirm]
Squeeze of bootflash complete
Step 5
Identify Cisco IOS images in the DSC flash.
AS5800# execute-on slot 12 show flash
DA-Slot12#
-#- ED --type-- --crc--- -seek-- nlen -length- -----date/time------ name
1
.. image
BC8CA85F 231C60
26 2169824 Sep 16 1999 18:10:32
dsc-c5800-mz.120-4.XL1.bin
2
.D image
8FDE1F61 45FEC8
18 2286056 Jan 25 2000 18:28:57 dsc-c5800-mz.Jan21
Note
Step 6
Remember, sufficient memory (available bytes) is required to accommodate any
new image file size on the RS and DSC! Compare memory size obtained in
“Memory Requirements”.
Delete images or files no longer required.
AS5800# execute-on slot 12 delete flash:dsc-c5800-mz.120-4.XL1.bin
DA-Slot12#
Delete filename [dsc-c5800-mz.120-4.XL1.bin]?
Delete slot0:dsc-c5800-mz.120-4.XL1.bin? [confirm]
AS5800#
Cisco AS5800 Operations, Administration, Maintenance, and Provisioning Guide
DOC-7810814=
6-9
Chapter 6
Provisioning
Cisco IOS Upgrades
Step 7
Squeeze the DSC flash to remove deleted files.
AS5800# execute-on slot 12 squeeze flash:
DA-Slot12#
All deleted files will be removed. Continue? [confirm]
Squeeze operation may take a while. Continue? [confirm]
Writing sector: 1
Squeeze of slot0 complete
Step 8
Download the new DSC image from your TFTP server to the DSC flash.
Note
By default, files are copied to and from the Cisco TFTP root directory.
AS5800# copy tftp:dsc-c5800-mz.120-7.T.bin dsc12-slot0
Address or name of remote host [171.71.219.167]?
Source filename [dsc-c5800-mz.120-7.T.bin ]?
Destination filename [dsc12-slot0]?
Accessing tftp://171.71.219.167/dsc-c5800-mz.120-7.T.bin ...
%Warning: File not a valid executable for this system
Abort Copy? [confirm]n
Loading dsc-c5800-mz.120-7.T.bin from 171.71.219.167 (via FastEthernet0/0/0):
!!!!!!!!!!!!!!!!!!!!!!!!!!!!!!!!!!!!!!!!!!!!!!!!!!!!!!!!!!
The following Warning message appears.
%Warning: File not a valid executable for this system
Abort Copy? [confirm]
Note
Do not abort the copy process. This message implies that the file being
downloaded is not router-shelf compatible, which is true. However, the router
assumes the file being downloaded will be executed on the router shelf, when, in
fact, the file is a dial-shelf controller file, being downloaded to the dial shelf
through the router, that will ultimately be executed on the dial shelf.
Step 9
Enter n to proceed with the download.
Step 10
Copy the new DSC image to the DSC bootflash:
AS5800# execute-on slot 12 copy slot0:dsc-c5800-mz.120-7.T.bin
bootflash:
DA-Slot12#
Destination filename [dsc-c5800-mz.120-7.T.bin ]?
CCCCCCCCCCCCCCCCCCCCCCCCCCCCCCCCCCCCCCCCCCCCCCCCCCCCCCCCCCCCCCCCCCCCCCCCCCCCCCCCCCCCCCCCCC
CCCCCCCCCCCCCCCCCCCCCCCCCCCCCCCCCCCCCCCCCCCCCCCCCCCC
2169824 bytes copied in 24.464 secs (90409 bytes/sec)
Step 11
Reload the DSC to load the new image.
Router# execute-on slot 12 reload
Step 12
Repeat this procedure if you have a second DSC card to ensure both cards are running the same software
release. The only change to the commands will be the slot number (“13” instead of “12”).
Note
At this juncture, the DSCs and router shelf are not running the same Cisco IOS
image, so you will not be able to communicate with the DSC through the router
shelf.
Cisco AS5800 Operations, Administration, Maintenance, and Provisioning Guide
6-10
DOC-7810814=
Chapter 6
Provisioning
Cisco IOS Upgrades
Upgrading the Router-Shelf Software
The following procedure outlines commands used to perform a Cisco 7206 router-shelf (RS) software
upgrade from the router shelf.
Note
Step 1
Unless you installed new port adapters in the router shelf, do not upgrade the boot image.
See the “Upgrading the Router-Shelf Boot Image” section on page 6-12.
Identify Cisco IOS images in the RS flash.
AS5800# show flash
-#- ED --type-- --crc--- -seek-- nlen -length- -----date/time------ name
1
.. image
AAD4004B 719C50
25 7314384 May 02 2000 13:55:04
c5800-p4-mz_120-4_XL1.bin
9069488 bytes available (7314512 bytes used)
Note
Step 2
Remember, sufficient memory (available bytes) is required to accommodate any
new image file size on the RS and DSC! Compare memory size obtained in
“Memory Requirements”.
Delete images or files no longer required.
AS5800# delete slot0:c5800-p4-mz_120-4_XL1.bin
Delete filename [c5800-p4-mz_120-4_XL1.bin]?
Delete slot0:c5800-p4-mz_120-4_XL1.bin? [confirm]
Step 3
Squeeze the flash to remove all deleted files.
AS5800# squeeze slot0:
All deleted files will be removed. Continue? [confirm]
Squeeze operation may take a while. Continue? [confirm]
Squeeze of slot0 complete
Step 4
Download the new image from your TFTP server to the RS flash.
Note
By default, files are copied to and from the Cisco TFTP root directory.
AS5800# copy tftp:c5800-p4-mz.120-7.T.bin slot0:
Address or name of remote host [171.71.219.167]?
Source filename [c5800-p4-mz.120-7.T.bin ]?
Destination filename [c5800-p4-mz.120-7.T.bin ]?
Accessing tftp://171.71.219.167/c5800-p4-mz.120-7.T.bin ...
Loading c5800-p4-mz.120-7.T.bin from 171.71.219.167 (via
FastEthernet0/0/0):!!!!!!!!!!!!!!!!!!!!!!!!!!!!!!!!!!!!!!!!!!!!!!!!!!!!!!!!!!!!!!!!!!!!!!!
Step 5
Upgrade the bootflash, if applicable. See the “Upgrading the Router-Shelf Boot Image” section on
page 6-12.
Note
Unless you are installing new port adapters in the router shelf, do not upgrade the
boot image. See the “Upgrading the Router-Shelf Boot Image” section on
page 6-12.
Cisco AS5800 Operations, Administration, Maintenance, and Provisioning Guide
DOC-7810814=
6-11
Chapter 6
Provisioning
Cisco IOS Upgrades
Step 6
Reload the router shelf to load the new image.
Router# reload
Upgrading the Router-Shelf Boot Image
The following procedure outlines commands used to perform a Cisco 7206 router-shelf (RS) boot image
software upgrade from the router shelf.
Note
Step 1
Unless you installed new port adapters in the router shelf, do not upgrade the boot image.
Identify the current bootflash image.
AS5800# show bootflash
-#- ED --type-- --crc--- -seek-- nlen -length- -----date/time------ name
1
.. image
AC05EDDF 37A6B8
22 3384888 Dec 31 1999 18:08:09 c7200-boot-mz.120-4.XE
1 bytes available (3407872 bytes used)
Step 2
Delete the current boot image from bootflash.
AS5800# delete bootflash:
Delete filename []? c7200-boot-mz.120-4.XE
Delete bootflash:c7200-boot-mz.120-4.XE? [confirm]
Step 3
Squeeze the bootflash to remove all deleted files.
AS5800# squeeze bootflash:
All deleted files will be removed. Continue? [confirm]
Squeeze operation may take a while. Continue? [confirm]
Squeeze of bootflash complete
Step 4
Copy the boot image from your TFTP server (c7200-boot-mz.XXX) to bootflash.
AS5800# copy tftp bootflash:
Address or name of remote host []? 171.71.219.167
Source filename []? c7200-boot-mz.120-7.T.bin
Destination filename [c7200-boot-mz.120-7.T.bin]?
Accessing tftp://171.71.219.167/c7200-boot-mz.120-7.T.bin...
Loading c7200-boot-mz.120-7.T.bin from 171.71.219.167 (via FastEthernet0/0/0):!!!!
!!!!!!!!!!!!!!!!!!!!!!!!!!!!!!!!!!!!!!!!!!!!!!!!!!!!!!!!!!!!!!!!!!!!!!!!!!!!!!!!
[OK - 3384888/6769664 bytes]
3384888 bytes copied in 65.112 secs (52075 bytes/sec)
Software Upgrade Verification
Perform the following steps to verify that the router shelf and DSCs are running new Cisco IOS images,
and the Bootflash is running a new boot image.
Cisco AS5800 Operations, Administration, Maintenance, and Provisioning Guide
6-12
DOC-7810814=
Chapter 6
Provisioning
Cisco IOS Upgrades
Step 1
Check the dial-shelf controllers for a new Cisco IOS image.
AS5800# execute-on slot 12 show version
DA-Slot12>
Cisco Internetwork Operating System Software
IOS (tm) 5800 Software (C5800-DSC-M), Version 12.x
TAC:Home:SW:IOS:Specials for info
Copyright (c) 1986-1999 by cisco Systems, Inc.
Compiled Thu 12-Aug-99 18:48 by ayeh
Image text-base: 0x600088F0, data-base: 0x60520000
ROM: System Bootstrap, Version x AA, ROM: 5800 Software (C5800-DSC-M),Version 12.x
DA-Slot12 uptime is 41 minutes
System returned to ROM by reload
System image file is "slot0:dsc-c5800-mz.120-7.T.bin "
Router# execute-on slot 13 show version (IF APPLICABLE)
Step 2
Check the router shelf for a new Cisco IOS image.
AS5800# show version
Cisco Internetwork Operating System Software
IOS (tm) 5800 Software (C5800-P4-M), Version 12.x, TAC:Home:SW:IOS:Specials for info
Copyright (c) 1986-1999 by cisco Systems, Inc.
Compiled Thu 12-Aug-99 13:16 by ayeh
Image text-base: 0x60008900, data-base: 0x611A6000
ROM: System Bootstrap, Version 12.x
BOOTFLASH: 7200 Software (C7200-BOOT-M), Version 12.x
doc-rtr58-01 uptime is 9 minutes
System returned to ROM by reload at 16:04:24 CST Fri Jun 9 2000
System restarted at 16:05:39 CST Fri Jun 9 2000
System image file is "slot0:c5800-p4-mz.120-7.T.bin"
Step 3
Check the Bootflash for a new boot image.
AS5800#sh bootflash:
-#- ED --type-- --crc--- -seek-- nlen -length- -----date/time------ name
1
.. image
AC05EDDF 37A6B8
22 3384888 Jun 12 200014:00:23
c7200-boot-mz.120-7.T.bin
22856 bytes available (3385016 bytes used)
Modem Upgrading
Compatible modem firmware is included in each Cisco IOS bundled software version and upgraded as
part of the installation process.
Note
Do not install a separate version of modem firmware independent of the Cisco IOS
software it accompanies. See the “Modem Upgrades” section on page 6-14.
Cisco AS5800 Operations, Administration, Maintenance, and Provisioning Guide
DOC-7810814=
6-13
Chapter 6
Provisioning
Modem Upgrades
Modem Upgrades
This section describes basic debugging and modem commands used for upgrading modem module
firmware as well as modem activation considerations. The show modem version command output is
displayed to verify a successful download.
Debugging a Modem
Use the following commands for debugging a modem or group of modems.
From the Cisco IOS privileged mode AS5800-1# .
•
Debug a modem’s out-of-band port that is used to poll modem events.
debug modem oob shelf/slot/port group group_number
•
Debug a call-switching module that is used to connect calls.
debug csm shelf/slot/port group group_number
•
Debug the call trace, which determines why calls are terminated. Use this keyword only with
manageable modems. Upload the call trace on normal, abnormal, or all call terminations.
debug modem trace {normal |
abnormal | all} shelf/slot/port group group_number
Upgrading Modem Firmware
Each modem card installed in your Cisco AS5800 access server contains 12 MICA modems, each with
six modem SIMMs. This allows you to upgrade firmware for each group of six modem SIMMs.
The default firmware image is loaded on the modem card during system boot-up. Normally, you do not
need to change the firmware image; however, you can override the default image with another firmware
image.
A valid pool range must exist (that is, the pool-range modem pool configuration command must have
been configured) for modem overrides to occur. Modem pooling allows you to define, select, and use
separate modem pools within a single access server or router to enable different dial-in services for
different customers. In this case, the modem pool specifies which modems are loaded with the new
firmware image.
The specified firmware image is loaded on every modem for every slot specified in the pool range. If the
modem is busy, the firmware change is deferred until the modem is available. When the modem is
available, the firmware change takes place immediately.If you specify a firmware image that does not
exist, the information is stored so that, in the event that the modem card is updated with that firmware
image, it will be loaded when the modem card image boots.
At boot-up time, the default firmware image is loaded first. If there is a firmware image specified by the
firmware command, it is then loaded onto the modem card.
Table 6-2 lists modem firmware upgrade commands to override the default modem firmware image with
another specified firmware image.
Cisco AS5800 Operations, Administration, Maintenance, and Provisioning Guide
6-14
DOC-7810814=
Chapter 6
Provisioning
Modem Upgrades
Table 6-2
Step
1.
Modem Firmware Upgrade Commands
Command
Description
AS5800-1> enable
Password: password
AS5800-1#
Enter the enable command.
Enter your password.
You are in privileged EXEC mode when the prompt
changes to AS5800-1#.
2.
AS5800-1# show modem version
Determine the firmware version currently running on the
modem card.
3.
AS5800-1# show modem bundled-firmware
Determine the available bundled modem firmware
images per slot.
4.
AS5800-1# configure terminal
Enter configuration commands, one per line. End
with CNTL/Z.
AS5800-1(config)#
Enter global configuration mode by entering the
configure command. The example is using the terminal
configuration option.
You are in global configuration mode when the prompt
changes to AS5800-1(config)#.
5.
AS5800-1(config)# modem-pool pool-name
Create a modem pool and enter modem pool
configuration mode.
6.
AS5800-1(config-modem-pool)#
pool-range shelf/slot/port shelf/slot/port
Create the range of modems on which you want to
override the modem firmware. Modem range must allow
for all six modems on a modem SIMM. Thus, numbering
range examples include shelf/slot/0 shelf/slot/5;
shelf/slot/0 shelf/slot/11; shelf/slot/6 shelf/slot/23; etc.
7.
AS5800-1(config-modem-pool)# firmware version
Enter the firmware version you want the modem pool to
use. Currently, the default version is 2.2.2.2
8.
AS5800-1(config-modem-pool)# exit
AS5800-1(config)#
[or]
AS5800-1(config)# Ctrl-Z
AS5800-1#
%SYS-5-CONFIG_I: Configured from console by
console
Type exit to exit out of modem-pool configuration mode
AS5800-1# copy running-config startup-config
Save your configuration when ready.
9.
[or]
Press Return to verify your command registers, then type
Ctrl-Z to return to privileged EXEC mode.
This message is normal and does not indicate an error
To deactivate a modem command, type no before the command:
AS5800-1(config)# modem-pool test
AS5800-1(config-modem-pool)# no firmware 2.2.2.2
Cisco AS5800 Operations, Administration, Maintenance, and Provisioning Guide
DOC-7810814=
6-15
Chapter 6
Provisioning
Modem Upgrades
To verify that a download has succeeded, use the show modem version command.
AS5800-1> show modem version
Modem Range
Module
1/6/00 1/6/05
0
1/6/06 1/6/11
1
1/6/12 1/6/17
2
1/6/18 1/6/23
3
1/6/24 1/6/29
4
1/6/30 1/6/35
5
1/6/36 1/6/41
6
1/6/42 1/6/47
7
1/6/48 1/6/53
8
1/6/54 1/6/59
9
1/6/60 1/6/65
10
1/6/66 1/6/71
11
Firmware Rev
2.2.2.2
2.2.2.2
2.2.2.2
2.2.2.2
2.2.2.2
2.2.2.2
2.2.1.7
2.2.1.7
2.2.1.7
2.2.1.7
2.2.1.7
2.2.1.7
Modem board HW version info:
Modem Range:
1/6/00 1/6/05
Modem Module: 0
Manufacture Cookie Info:
EEPROM Type 0x0101, EEPROM Version 0x01, Board ID 0x06,
Board Hardware Version 1.0, Item Number 73-2522-2,
Board Revision 051, Serial Number 06298557,
PLD/ISP Version 255.255, Manufacture Date 17-Jul-1997.
Modem Range:
1/6/06 1/6/11
Modem Module: 1
Manufacture Cookie Info:
EEPROM Type 0x0101, EEPROM Version 0x01, Board ID 0x06,
Board Hardware Version 1.0, Item Number 73-2522-2,
Board Revision 051, Serial Number 06298553,
PLD/ISP Version 255.255, Manufacture Date 17-Jul-1997.
Modem Range:
1/6/12 1/6/17
Modem Module: 2
Manufacture Cookie Info:
EEPROM Type 0x0101, EEPROM Version 0x01, Board ID 0x06,
Board Hardware Version 1.0, Item Number 73-2522-2,
Board Revision 051, Serial Number 06298017,
PLD/ISP Version 255.255, Manufacture Date 17-Jul-1997.
Modem Range:
1/6/18 1/6/23
Modem Module: 3
Manufacture Cookie Info:
EEPROM Type 0x0101, EEPROM Version 0x01, Board ID 0x06,
Board Hardware Version 1.0, Item Number 73-2522-2,
Board Revision 051, Serial Number 06298019,
PLD/ISP Version 255.255, Manufacture Date 17-Jul-1997.
Modem Range:
1/6/24 1/6/29
Modem Module: 4
Manufacture Cookie Info:
EEPROM Type 0x0101, EEPROM Version 0x01, Board ID 0x06,
Board Hardware Version 1.0, Item Number 73-2522-2,
Board Revision 051, Serial Number 06298200,
PLD/ISP Version 255.255, Manufacture Date 17-Jul-1997.
Modem Range:
1/6/30 1/6/35
Modem Module: 5
Manufacture Cookie Info:
EEPROM Type 0x0101, EEPROM Version 0x01, Board ID 0x06,
Board Hardware Version 1.0, Item Number 73-2522-2,
Board Revision 051, Serial Number 06298590,
PLD/ISP Version 255.255, Manufacture Date 17-Jul-1997.
Modem Range:
1/6/36 1/6/41
Modem Module: 6
Manufacture Cookie Info:
EEPROM Type 0x0101, EEPROM Version 0x01, Board ID 0x06,
Cisco AS5800 Operations, Administration, Maintenance, and Provisioning Guide
6-16
DOC-7810814=
Chapter 6
Provisioning
Modem Upgrades
Board Hardware Version 1.0, Item Number 73-2522-2,
Board Revision 051, Serial Number 06298446,
PLD/ISP Version 255.255, Manufacture Date 17-Jul-1997.
Modem Range:
1/6/42 1/6/47
Modem Module: 7
Manufacture Cookie Info:
EEPROM Type 0x0101, EEPROM Version 0x01, Board ID 0x06,
Board Hardware Version 1.0, Item Number 73-2522-2,
Board Revision 051, Serial Number 06298593,
PLD/ISP Version 255.255, Manufacture Date 17-Jul-1997.
Modem Range:
1/6/48 1/6/53
Modem Module: 8
Manufacture Cookie Info:
EEPROM Type 0x0101, EEPROM Version 0x01, Board ID 0x06,
Board Hardware Version 1.0, Item Number 73-2522-2,
Board Revision 051, Serial Number 06298233,
PLD/ISP Version 255.255, Manufacture Date 17-Jul-1997.
Modem Range:
1/6/54 1/6/59
Modem Module: 9
Manufacture Cookie Info:
EEPROM Type 0x0101, EEPROM Version 0x01, Board ID 0x06,
Board Hardware Version 1.0, Item Number 73-2522-2,
Board Revision 051, Serial Number 06298309,
PLD/ISP Version 255.255, Manufacture Date 17-Jul-1997.
Modem Range:
1/6/60 1/6/65
Modem Module: 10
Manufacture Cookie Info:
EEPROM Type 0x0101, EEPROM Version 0x01, Board ID 0x06,
Board Hardware Version 1.0, Item Number 73-2522-2,
Board Revision 051, Serial Number 06297954,
PLD/ISP Version 255.255, Manufacture Date 17-Jul-1997.
Modem Range:
1/6/66 1/6/71
Modem Module: 11
Manufacture Cookie Info:
EEPROM Type 0x0101, EEPROM Version 0x01, Board ID 0x06,
Board Hardware Version 1.0, Item Number 73-2522-2,
Board Revision 051, Serial Number 06298008,
PLD/ISP Version 255.255, Manufacture Date 17-Jul-1997.
Modem Operation at Bootup
When the Cisco 7206 router shelf boots up and parses its NVRAM, the modem cards will not be up. As
a result, the override firmware name is stored in the modem pool structures and no action is taken.
When a modem card becomes active, it sends a startup message to the router shelf. The router shelf then
triggers a search in the various modem pools to see if any modem modules on the modem card have a
specified firmware override. If yes, the firmware override request is relayed to the modem card, which
will load the specified override firmware image on the indicated modem modules.
As a result, the modem modules that are destined to run an override firmware image will experience two
firmware downloads at bootup time. The default modem firmware image is loaded first, followed by the
override modem firmware image.
Error messages result if the following circumstances exist:
•
If you issue a firmware command on a modem pool that has no pool range already specified, an error
message will result.
•
If you issue a firmware command on a modem pool that is neither constrained nor
constraint-capable, an error message will result.
Cisco AS5800 Operations, Administration, Maintenance, and Provisioning Guide
DOC-7810814=
6-17
Chapter 6
Provisioning
Split Dial Shelves
•
If the firmware specified is not part of the firmware list, a message is printed to the console. The
firmware name is stored in the modem pool structures until that modem card is updated with the
specified firmware image. The firmware upgrade then occurs when that modem card is rebooted.
•
If any modem module has an active call on it, the firmware upgrade request is queued and deferred
until the modem module becomes free.
Split Dial Shelves
The split mode is intended to support two router shelves connected to a single dial shelf. To use this
arrangement as intended, both router shelves need a split dial shelf configured. However, a second router
is not required; a single router can run in split mode with all slots owned by that router.
Split-Dial-Shelf Configuration
Split-dial-shelf configuration is implemented by connecting two router shelves to a single dial shelf. You
allocate the slots in the dial shelf between the two router shelves to achieve the desired configuration.
The two router shelves are configured to run in split mode by a new top-level router configuration
command:
dial-shelf split slots {slot-numbers}
where slot-numbers is a list of the dial-shelf slot numbers (from 0 to 11) that the router owns, with the
slot numbers separated by spaces. Slot ownership for each of the two router shelves is configured
individually using the dial-shelf split slots command.
•
While a router is in split mode, additional slots can be added to the set that the router owns by
entering a dial-shelf split slots command listing the new slots. The effect of entering two (or more)
dial-shelf split slots commands with different slot numbers is cumulative.
•
Slots must be explicitly removed from a router’s list of owned slots with the remove command:
dial-shelf split slots remove {slot-numbers}.
•
A single router can also be configured in split mode but with no slots owned, by using the keyword
none instead of slot numbers in the command (dial-shelf split slots none).
When you configure a Cisco AS5800 to operate in split mode, it is the same as having two
Cisco AS5800s, each having a separate set of feature boards assigned to its router that happen to be
sharing a single dial shelf. Modem pooling, for example, is the same as if you had two separate
Cisco AS5800s. Router shelf 1 has a modem pool that consists of all the modem cards that reside in slots
owned by router shelf 1. The same situation applies to router shelf 2.
Changing to Split Mode
This section describes the procedure required to transition a router from normal mode to split mode, and
change the set of slots a router owns while it is in split mode. The process of switching the ownership
of a slot from one router to the other is potentially disruptive. When a feature board is restarted, all calls
through that card are lost. Therefore, a router shelf cannot take over a slot until ownership is relinquished
by the router that currently claims ownership, either by reconfiguring the router or disconnecting that
router or its associated DSC.
Cisco AS5800 Operations, Administration, Maintenance, and Provisioning Guide
6-18
DOC-7810814=
Chapter 6
Provisioning
Split Dial Shelves
The dial shelf is split by dividing the ownership of the feature boards between the two router shelves.
You must configure the division of the dial-shelf slots between the two router shelves so that each router
controls an appropriate mix of trunk and modem cards. Each router shelf controls its set of feature boards
as if those were the only boards present. There is no interaction between feature boards owned by either
router.
Split mode is entered when the dial-shelf split slots command is parsed on the router shelf. This can
occur when the router is starting up and parsing the stored configuration or when the command is entered
when the router is already up. On parsing the dial-shelf split slots command, the router frees any
resources associated with cards in the slots that it no longer owns, as specified by exclusion of slot
numbers from the slot-numbers argument. The router should be in the same state as if the card had been
removed from the slot; all calls through that card will be terminated. The configured router then informs
its connected DSCs that it is in split mode, and which slots it claims to own.
In split mode, a router shelf uses only half of the 1,792 available TDM timeslots. (See the “TDM
Resource Allocation” section on page 6-19.) If a dial-shelf split slots command is entered when the calls
using timeslots exceed the number that would be available to the router in split mode, the command is
rejected. (This should occur only when a change to split mode is attempted where the dial shelf has more
than 896 calls in progress, or more than half of the 1,792 available timeslots. Otherwise, a transition from
normal mode to split mode can be made without disturbing the cards in the slots that remain owned, and
calls going through those cards will stay up.)
TDM Resource Allocation
Trunk cards and modem cards are tied together across a time-division multiplexing (TDM) bus on the
dial-shelf backplane. Timeslots for the TDM bus are allocated by the router shelf on a call-by-call basis.
This is implemented by initializing a queue at start-up with one element for each usable timeslot
(currently 14*128 = 1,792 timeslots are used). Timeslots for a call are allocated from the front of the
queue and replaced at the end of the queue when the call is completed. For split-dial-shelf operation,
timeslots are added to the queue dynamically, as needed. When a TDM slot is required and the queue is
empty, a chunk of TDM slots is allocated to the queue.
In normal mode, the router shelf connected to the DSC in slot 12 allocates timeslots starting from 0 going
up, and the router shelf connected to the DSC in slot 13 allocates timeslots starting from 1,791 going
down. For split-dial-shelf operation each router is assigned half of the usable set of timeslots. The router
shelf connected to the DSC in slot 12 controls the first half of the timeslots (0 to 895). The router shelf
connected to the DSC in slot 13 controls the second half of the timeslots (896 to 1791).
Transition Procedure for Split Mode
To transition from normal mode to split mode, complete the following steps:
Step 1
Ensure that both DSCs and both router shelves are running the same Cisco IOS image.
Having the same version of Cisco IOS software running on both DSCs and both router shelves is not
mandatory; however, it is a good idea. There is no automatic check to ensure that the versions are the
same.
Step 2
Schedule a time when the Cisco AS5800 universal access server can be taken out of service without
unnecessarily terminating calls in progress.
The entire procedure for transitioning from normal mode to split mode should require approximately one
hour if the hardware is already installed.
Step 3
Busy out all feature boards and wait for your customers to log off.
Step 4
Reconfigure the existing router shelf to operate in split mode.
Cisco AS5800 Operations, Administration, Maintenance, and Provisioning Guide
DOC-7810814=
6-19
Chapter 6
Provisioning
Split Dial Shelves
Enter the dial-shelf split slots {slot-numbers} command, specifying the slot numbers that are to be
owned by the existing router shelf.
Step 5
Configure the new router shelf to operate in split mode on other feature boards.
Enter the dial-shelf split slots {slot-numbers} command, specifying the slot numbers that are to be
owned by the new router shelf. Do not specify any of the slot numbers that you specified in Step 4. The
range of valid slot numbers is 0 to 11.
Step 6
Install the second DSC, if it has not already been installed.
Step 7
Connect the dial-shelf interconnect cable from the second DSC to the new router shelf.
Step 8
Ensure that split mode is operating properly.
Enter the show dial-shelf command for each router. This command has been extended so that the
response indicates that the router shelf is running in split mode, and which slots the router shelf owns.
The status of any cards in any owned slots is shown, just as they are in the present show dial-shelf
command.
Step 9
Enable all feature boards to accept calls again.
Changing Slot Sets
You can change the sets of slots owned by the two router shelves while they are in split mode. First
remove slots from the set owned by one router, then add them to the slot set owned by the other router.
The changed slot-set information is sent to the respective DSCs, and the DSCs determine which slots
have been removed and which added. Moving a slot in this manner will disconnect all calls that were
going through the card in that slot.
To move a slot from one router shelf’s control to the others, first modify the router releasing the slot by
entering the dial-shelf split slots remove command specifying the slot numbers to be released. The
released slots can then be added to the slot set of the other router by entering the dial-shelf split slots
command including the new slot numbers.
When a slot is removed, the router shelf that is losing the slot frees any resources and clears any state
associated with the card in the slot it is relinquishing. The DSC reconfigures its hub to ignore traffic from
that slot, and if there is a card in the slot it will be reset. This ensures that the card frees up any TDM
resources it might be using, and allows it to restart under control of the router shelf that is subsequently
configured to own the slot.
When a slot is added, if there are no configuration conflicts, and there is a card present in the added slot,
a dial-shelf OIR insertion event is sent to the router shelf. The router shelf processes the event as a
normal event. The card in the added slot is reset by the DSC to ensure a clean state, and the card
downloads its image from the router shelf that now owns it. If the other router shelf (and the other DSC)
claim ownership of the same slot, the command adding the slot should be rejected. However, should a
configuration conflict exist, error messages are sent to both routers. The card is not reset until one of the
other router shelves and its DSC stop claiming ownership of the slot. Normally this will not happen until
you issue a dial-shelf split slots remove command surrendering the ownership claim on the slot by one
of the routers.
Cisco AS5800 Operations, Administration, Maintenance, and Provisioning Guide
6-20
DOC-7810814=
Chapter 6
Provisioning
Split Dial Shelves
Leaving Split Mode
Split mode is exited when the dial-shelf configuration is changed by a no dial-shelf split slots
command. When the split dial-shelf line is removed, the router shelf will start using all of the TDM
timeslots. Feature boards that were not owned in split mode and are not owned by the other router will
be reset. Cards in slots that are owned by the other router will be reset, but only after the other DSC has
been removed or is no longer claiming the slots. The split-dial-shelf configuration should not be
removed while the second router shelf is still connected to the dial shelf.
When a router configured in split mode fails, all calls associated with the failed router are lost. Users
cannot connect back in until the failed router recovers and is available to accept new incoming calls.
However, the other split mode router shelf will continue to operate normally.
Potential Split-Dial-Shelf Problems
The system will behave as configured as soon as the configuration is changed. The exception is when
there is a misconfiguration, such as when one router is configured in split mode and the other router is
configured in normal mode, or when both routers are configured in split mode and both claim ownership
of the same slots.
Problems can arise if one of the two routers connected to a dial shelf is not configured in split mode, or
if both are configured in split mode and both claim ownership of the same slots. If the state of the second
router is known when the dial-shelf split slots command is entered and the command would result in a
conflict, the command is rejected.
If a conflict in slot ownership does arise, both routers receive warning messages until the conflict is
resolved. Any card in a slot that is claimed by both routers remains under the control of the router that
claimed it first, until you resolve the conflict by correcting the configuration of one or both routers.
Note that there can be slots that are not owned by either router (orphan slots). Cards in orphan slots
cannot boot up until one of the two routers claims ownership of the slot, because neither DSC will
download bootstrap images to cards in orphan slots.
Split-Dial-Shelf Show Commands
In normal mode, all show commands look and behave as they do in the current system. In split mode,
most show commands look and behave as they would in the current system if there were no cards in the
slots for which the other router has configured ownership. This is consistent with the view of a
split-dial-shelf configuration being basically two separate Cisco AS5800 universal access servers. A
router shelf cannot manage or even recognize cards in slots that it does not own. For example,
DSIP console and execute-on commands work only in owned slots.
There are, however, the following exceptions:
•
The show dial-shelf clocks command still shows all configured clock sources, even those from
non-owned trunk cards. This is because only one DSC can provide the master clock, and it may need
to have backup clock sources configured from all trunk cards present (regardless of which DSC
owns them).
•
To avoid confusion, the show dial-shelf command is extended so that when the router is in split
mode, show dial-shelf indicates both the router shelf is running in split mode and which slots the
router shelf owns. The status of any cards in any owned slots is shown, exactly as it is in the present
command. Thus, when in normal mode, show dial-shelf is unchanged from the current version.
Cisco AS5800 Operations, Administration, Maintenance, and Provisioning Guide
DOC-7810814=
6-21
Chapter 6
Provisioning
Split Dial Shelves
When in split mode, the show dial-shelf output is extended. For example:
5800# show dial-shelf
System is in split dial shelf mode.
Slots owned: 0 2 3 4 5 6 (connected to DSC in slot 13)
Slot
Board
CPU
DRAM
I/O Memory
Type
Util
Total (free)
Total (free)
0
CE1
0%/0% 21341728( 87%) 8388608( 45%)
2
CE1
0%/0% 21341728( 87%) 8388608( 45%)
4 Modem(HMM) 20%/20%
6661664( 47%) 6291456( 33%)
5 Modem(DMM)
0%/0%
6661664( 31%) 6291456( 32%)
6 Modem(DMM)
0%/0%
6661664( 31%) 6291456( 32%)
13
DSC
0%/0% 20451808( 91%) 8388608( 66%)
Dial shelf set for auto boot
State
Up
Up
Up
Up
Up
Up
Elapsed
Time
01:11:37
01:11:37
01:11:37
01:11:37
01:11:37
01:16:31
Note that only the first two lines of output are new. The remaining information is exactly the same
as what would currently be displayed if there were no cards in the slots that are not owned (1 and 7
to 12).
•
A new command, show dial-shelf split, has been added to provide some minimal information about
the types of cards in non-owned slots. For example:
5800# show dial-shelf split
System is in split dial shelf mode, connected to DSC in slot 13.
Slots owned: 0 2 3 4 5 6
Non owned slots:
Slot
Board Type
1
CE1
7
Modem(DMM)
8
Modem(DMM)
9
Modem(DMM)
10
Slot Empty
11
Slot Empty
12
DSC
Note
Note that the show dial-shelf split command also shows the slots and corresponding
feature boards for orphan slots (those slots not owned by either router shelf). This means
that OIR events on all slots in the dial shelf are detected by both DSCs, and the feature
boards are added to or deleted from the list of boards physically present in the dial shelf.
When a feature board is inserted into an orphan slot, a message is sent to both router shelves
indicating that a feature board was just inserted. This message differs from an OIR event
message, OIR event processing is done only for owned slots.
•
The show context command works only for owned slots. However, show context all displays all
information available about any slot. This is intended to cover the case where ownership of a feature
board is moved from one router shelf to the other after a crash.
Cisco AS5800 Operations, Administration, Maintenance, and Provisioning Guide
6-22
DOC-7810814=
Chapter 6
Provisioning
Split Dial Shelves
Managing a Split Dial Shelf
If you are installing split-dial-shelf systems, a system controller is available that provides a single
system view of multiple POPs. The system controller for the Cisco AS5800 includes the Cisco 3640
router running Cisco IOS software. The system controller can be installed at a remote facility so that you
can access multiple systems through a console port or Web interface.
There are no new Management Information Bases (MIBs) or MIB variables required for the
split-dial-shelf configuration. A split dial shelf appears to Simple Network Management Protocol
(SNMP) management applications as two separate Cisco AS5800s. You cannot use one console to
manage the whole system—you must have a console session for each router shelf (two console sessions)
to configure each split. The system controller must manage a split-dial-shelf configuration as two
separate Cisco AS5800 universal access servers.
The normal mode configuration of the Cisco AS5800 requires the dial-shelf and router-shelf IDs to be
different. In a split system, four unique shelf IDs are desirable; one for each router shelf and one for each
of the slot sets. However, a split system will function satisfactorily if the router-shelf IDs are the same.
If a system controller is used to manage a split-dial-shelf configuration, then the two routers must have
distinct shelf IDs, just as they must when each router has its own dial shelf.
You can download software configurations to any Cisco AS5800 using SNMP or a Telnet connection.
The system controller also provides performance monitoring and accounting data collection and logging.
In addition to the system controller, a network management system with a graphical user interface (GUI)
runs on a UNIX SPARC station and includes a database management system, polling engine, trap
management, and map integration.
Configuring Split-Dial-Shelf Routers
To configure a router for split-dial-shelf operation, use the following commands in global configuration
mode 5800(config)#
dial-shelf split slots {slot_numbers}
Normal mode: This command changes the router shelf to split mode with ownership of the slots
listed.
In case of conflicting slot assignments, the command is rejected and a warning message is issued.
Issue a show dial-shelf split slots command to the other router shelf to display its list of owned
dial-shelf slots.
OIR events on all slots are detected by both DSCs and added to the list of feature boards physically
present in the dial shelf. However, OIR event processing is done only for assigned slots.
Split mode: This command adds the dial-shelf slots listed to the router shelf’s list of owned slots.
show dial-shelf split
Normal mode: This command is invalid.
Split mode: This command displays the slots assigned to each of the router shelves and the
corresponding feature boards in orphan slots (slots not currently assigned to either router).
dial-shelf split slots none
Normal mode: This command puts the router shelf in split mode; however, it does not assign
ownership of any dial-shelf slots.
To prevent accidentally entering the dial-shelf split slots command, at least one valid dial-shelf slot
number (0–11) or the keyword none must be specified.
Cisco AS5800 Operations, Administration, Maintenance, and Provisioning Guide
DOC-7810814=
6-23
Chapter 6
Provisioning
Split Dial Shelves
If the dial-shelf split slots command is entered in normal mode without valid slot numbers or the
keyword none, the command is rejected.
Split mode: This command will change dial-shelf slot ownership. The router will no longer have
ownership of any dial-shelf slots.
no dial-shelf split slots
Normal mode: This command has no effect. If the router shelf is in normal mode, it stays that way.
Split mode: This command changes the router shelf to normal mode if it is in split mode, and the
other router shelf has already relinquished control of all dial-shelf slots or is switched off.
dial-shelf split slots {slot_numbers}
Normal mode: This command changes the router shelf to split mode with ownership of the slots
listed. Valid slot numbers are 0 through 11.
– In case of conflicting slot assignments, the command is rejected and a warning message is
issued.
– OIR events on all slots are detected by both DSCs and added to the list of feature boards
physically present in the dial shelf. However, OIR event processing is done only for assigned
slots.
Split mode: This command adds the dial-shelf slots listed to the router shelf’s list of owned
dial-shelf slots. The effect of multiple commands is cumulative.
dial-shelf split slots remove {slot_numbers}
Normal mode: This command has no effect.
Split mode: This command removes the dial-shelf slots listed from the router shelf’s list of owned
dial-shelf slots. The effect of multiple commands is cumulative.
Split-Dial-Shelf Error Messages
New error messages for various split-dial-shelf conditions include:
Duplicate priority clock source configured on other router shelf.
Explanation The configuration commands for the master clock specify the clock sources and a
priority for each source. Together, these commands define a prioritized list of the clock sources used
to generate the master clock. This list, configured on the router shelf, is passed to and stored by the
DSC providing the active clock. In the event of failure of the highest priority clock source, the DSC
switches to the source with the next highest priority.
With a split dial shelf, clock sources can be configured on either of the router shelves from the slots
that each shelf owns. All valid clock source configurations are known to the DSC providing the
clock, including the clock sources configured on the other router or DSC.
This error condition results when a clock source input on one router is configured to have the same
priority as one configured on the other router. The original configuration command is not rejected;
however, these error messages are issued to both routers. The two inputs, with identical priorities,
both go into the ordered list of clock sources, but the one received first by the DSC providing the
active clock is assigned a higher priority.
Action Reconfigure the clock sources on the two routers so that they have different priorities.
Cisco AS5800 Operations, Administration, Maintenance, and Provisioning Guide
6-24
DOC-7810814=
Chapter 6
Provisioning
Split Dial Shelves
Other router shelf is in split mode when this one is not.
Explanation Split mode is intended to support two router shelves connected to a single dial shelf. To
use this arrangement, both connected router shelves should be configured for split dial shelves.
Problems can arise if two routers are connected to the dial shelf, but one router is not configured in
split mode.
Action Issue a dial-shelf split slots command to this router or a no-dial-shelf split slots command
to the other router.
Other router shelf is not in split mode when this one is.
Explanation Split mode is intended to support two router shelves connected to a single dial shelf. To
use this arrangement, both connected router shelves should be configured for split dial shelves.
Problems can arise if two routers are connected to the dial shelf, but one router is not configured in
split mode.
Action Issue a dial-shelf split slots command to this router or a no-dial-shelf split slots command
to the other router.
Other router shelf has overlapping slot ownership specified in its split dial shelf
configuration.
Explanation Each router shelf connects to one of the DSCs in the dial shelf. The dial-shelf feature
boards are divided between the two router shelves. Each router controls its own set of feature boards
as if those were the only boards present. There is no interaction between the routers or between
feature boards owned by one router and feature boards owned by the other router.
This error message indicates that both routers are configured in split mode, but there is an overlap in
the set of slots each router claims. While the conflict in slot ownership continues, both router shelves
will periodically receive this error message.
Action Correct the configuration of one of the routers by issuing a dial-shelf split slots command
with a list of slot numbers that does not include the slot that is reporting as having overlapping
ownership. You must configure the division of the dial-shelf slots between the two router shelves so
that each router controls an appropriate mix of trunk and modem cards. Any card in a slot that is
claimed by both routers remains under the control of the router that claimed it first until you resolve
the conflict by correcting the configuration.
Verifying and Troubleshooting Split-Dial-Shelf Installation
Your Cisco 7206 router went through extensive testing before leaving the factory. However, if you
encounter problems starting the routers, do the following:
•
Review the safety warnings in Cisco 7200 Regulatory Compliance and Safety Information, available
online at
http://www.cisco.com/univercd/cc/td/doc/product/core/7206/
•
Review the troubleshooting information in the Cisco 7200 VXR Installation and Configuration
Guide, available online at
http://www.cisco.com/univercd/cc/td/doc/product/core/7200vx/
Cisco AS5800 Operations, Administration, Maintenance, and Provisioning Guide
DOC-7810814=
6-25
Chapter 6
Provisioning
Split Dial Shelves
If you are unable to solve the problem, contact a customer service representative for assistance and
further instructions. Be prepared to provide the representative with the following information:
•
Date you received the router
•
Chassis serial number
•
Type of software and release number
•
Brief description of the problem
•
Brief explanation of the steps taken to isolate and resolve the problem
•
Maintenance agreement or warranty information
Figure 6-2 shows the general troubleshooting strategy for Cisco 7206 routers. Refer to this chart to
isolate problems to a specific subsystem; then attempt to resolve the problem.
Figure 6-2
Turn on
system power
Troubleshooting Strategy for Start-Up Problems
DC OK
LED on
?
Troubleshoot
power
subsystem
No
DC OK
LED on
?
Yes
Fans
operating
?
Yes
Troubleshoot
cooling
subsystem
No
Fans
operating
?
No
Yes
Yes
Reseat
NPE-G1
and restart
Check system
state with I/O
controller LEDs
NPE-G1
LEDs
OK?
or
I/O
controller
LEDs
OK?
No
No
or
Reseat I/O
controller
and restart
Yes
I/O
No
controller
LEDs
OK?
Yes
Check system
state with port
adapter LEDs
No
Reseat port
adapters
and restart
Port
adapter
enabled
LEDs on
?
Yes
System
startup
successful
No
Yes
H6595
Port
adapter
enabled
LEDs on
?
Obtain
technical
assistance
Cisco AS5800 Operations, Administration, Maintenance, and Provisioning Guide
6-26
DOC-7810814=
Chapter 6
Provisioning
Router-Shelf Redundancy
Router-Shelf Redundancy
When an active router shelf in a Cisco AS5800 loses communication with the dial shelf, a backup router
shelf can be automatically invoked to take over dial-shelf resources controlled by the lost router shelf.
This backup method, called redundancy, is provided on the Cisco AS5800 to prevent a single point of
failure, subsequent downtime, and user intervention to resolve unrecoverable hardware faults.
Router-shelf redundancy uses a second router shelf that automatically assumes resource responsibility
(dial-shelf card and traffic control) of the primary, or active router, if it fails. This disruptive failover
makes no attempt to retain established calls on the failed router. All calls are dropped when dial-shelf
cards, controlled by the failing router, are automatically restarted by the secondary or backup router,
which becomes the controlling router after restart.
Failover Operation
Redundancy on a Cisco AS5800 is two router shelves connected, in parallel, to a single dial shelf (as in
split-dial-shelf mode), except only one router is active, or engaged, at any given time. Each router shelf
contains user specific configurations for normal mode operations, as opposed to split mode. The active
router controls all the dial-shelf cards, while the secondary router functions purely as a standby backup.
In the event the active router fails, all dial-shelf cards are restarted by the backup router that
automatically assumes active router functionality.
External interfaces do not share the same IP address between redundant routers or duplicate IP address
errors occur. One (active) router shelf maintains control of dial-shelf cards at a time. However
unsuccessful, it does not interfere with the operation of the primary active router. If the active router
shelf crashes, the link between it and it’s DSC will go down, relinquishing control of all dial-shelf cards
to the other DSC which is connected to the secondary or backup router shelf. This surviving router shelf
restarts the cards and commences normal operations. If the router shelf that crashed recovers, or is
restarted, it will not regain control of the cards, but becomes the backup, serving as the standby router
shelf for the new active router, should it fail.
Note
A failover is triggered if the active DSC (i.e. the DSC connected to the active router) goes
down and doesn’t recover within ninety seconds. Any router-shelf failure that does not
result in the DSC link going down would not cause a failover (for example, the active
router’s egress interface going down would not trigger failover). Conversely any temporary
loss of the link between the active router and its DSC would cause a failover, even if the
router shelf itself had not crashed and connectivity was quickly re-established (for
example, if the BIC cable was knocked out and then quickly replaced).
Load-Sharing
There is no load sharing between routers. Calls can not be routed through the active and backup routers
simultaneously. Consequently, you cannot split the load between the routers to reduce granularity of
failure, or the number of calls that are lost, when a router crashes. Conversely, failover conditions, that
would otherwise occur, such as overwhelming traffic volume on the surviving router after failover,
under load sharing, will not degrade service.
Cisco AS5800 Operations, Administration, Maintenance, and Provisioning Guide
DOC-7810814=
6-27
Chapter 6
Provisioning
Router-Shelf Redundancy
Hitless Redundancy
Hitless redundancy is not supported. When a router-shelf failover occurs, all calls associated with that
router shelf are lost. Cisco AS5800 redundancy ensures that resources (particularly trunk lines) do not
remain unusable while the controlling router is down.
Network Management
Redundancy management via SNMP is not supported. However, an SNMP trap will be issued by the
backup router when the router failover event occurs. The trap “ccrSwitchStatusChange” defined in the
CISCO-C8500-REDUNDANCY-MIB as well as the SNMP variables “ccrCpuMode” and “ccrCpuStatus”
are used for issuing a failover.
Failover Performance
Enabling failover has no significant (greater than 1%) impact on system performance, both before and after
failover has occurred. With a redundant router, of the same model as the active router, acting purely as a
standby, the load capacity threshold is unchanged, thereby not affecting performance.
External Services
A single active router is conceptually simpler, and makes it easier to support failover when dealing with
external servers, such as signalling controllers for RPMS server, SS7.
Note
RPMS server must be configured with the same information for both router shelves to
ensure full functionality before and after a switchover.
SS7 Setup
In an SS7 environment, call signalling comes via an external SC2200 rather than directly from the switch
over the trunk line (as for CAS and ISDN). After a switchover has occurred, both routers must be
connected to the SC2200. Use SS7’s redundant link manager (RLM) to provide redundant links between
a single router and the signalling controller. Configure RLM links from both the active and standby
routers so a change of routers will look like a change from one redundant link to another.
Configuring Redundancy
Router-shelf failover is a simple configuration command on the two router shelves in split-dial-shelf
configuration mode. The command is issued in “redundancy” configuration submode:
router(config)# redundancy
router(config-r)# failover group-number <group-code>
This command must be configured on both routers. The parameter group-code is used by the system
controller and must be the same for both routers forming the redundant pair. It identifies both routers as
the same set of dial-shelf resources.
Cisco AS5800 Operations, Administration, Maintenance, and Provisioning Guide
6-28
DOC-7810814=
Chapter 6
Provisioning
Router-Shelf Redundancy
For successful failover to occur, both router-shelf configurations need to be synchronized. Configure
each router separately, as active and backup, respectively, with the same configuration, except for the
IP address on egress interfaces.
Note
Test the backup router’s configuration for errors discovery before production environment
deployment.
Redundancy Show Commands
The show redundancy command indicates when failover is enabled. The show redundancy history
command logs failover events (where the router has changed from ACTIVE to BACKUP or vice-versa).
Cisco AS5800 Operations, Administration, Maintenance, and Provisioning Guide
DOC-7810814=
6-29
Chapter 6
Provisioning
Router-Shelf Redundancy
Cisco AS5800 Operations, Administration, Maintenance, and Provisioning Guide
6-30
DOC-7810814=
A P P E N D I X
A
Advanced Quick Reference
This appendix provides quick reference configurations for the advanced Cisco AS5800 user and system
administrator who need to rapidly modify system functionality or enhance system performance.
Interface and/or protocol configurations addressed in this section are listed categorically and sequenced
logically by operation.
Remember, Cisco routers are configured using a command line interface (CLI) from a user interface,
known as a port, that provides hardware connectivity. Routers are accessed from the routers console port
or by Telnetting into the routers interface from another host. A command interpreter, called EXEC, is
employed by the operating system to translate and execute Cisco IOS commands. This command
interpreter provide the user with privileged mode of access that promotes security to the respective
command levels, restricting users to a subset of mode-specific commands.
•
User EXEC mode (5800>) provides restricted access and limits router configuration or
troubleshooting. At this level, miscellaneous functionality is performed, such as viewing system
information, obtaining basic router status, changing terminal settings, or establishing remote device
connectivity.
•
Privileged EXEC mode (5800#) includes user mode functionality and provides unrestricted access.
It is used exclusively for router configuration, debugging, setting operating system (OS) parameters,
and retrieving detailed router status information.
– Global configuration mode [5800(config)#] is a preliminary configuration mode that
recognizes commands affecting the whole router. Some of these commands cause the router to
enter other configuration modes that recognize even more detailed commands.
•
There are many modes of configuration within global configuration mode that determine the type of
configuration desired, such as interface configuration [5800(config-if)#]. Each configuration
command mode restricts the user to a subset of mode-specific commands that individualize and
secure a router.
•
ROM monitor mode (> or rommon>) is a CLI allowing router configuration if the router does not
find a valid system image or if the bootup sequence is interrupted during startup.
The end (Ctrl-Z) command provides an escape from any configuration command mode: Terminal
[5800(config)#], Interface [5800(config-if)#], Line [5800(config-line)#], Controller
[5800(config-controll)#], Router [5800(config-router)#], etc., to privileged EXEC mode
(5800#). The exit command provides an escape from any configuration command mode to one
command prompt level higher, or completely out of the command line interface if you are in privileged
EXEC or user EXEC mode. The disable command provides an escape from privileged EXEC mode to
user EXEC mode. The logout command provides a complete escape out of the command line interface
if you are in privileged EXEC or user EXEC mode.
Cisco AS5800 Operations, Administration, Maintenance, and Provisioning Guide
DOC-7810814=
A-1
Appendix A
Advanced Quick Reference
Advanced Quick Reference Configurations
Advanced Quick Reference Configurations
This section provides abridged interface and/or protocol configurations listed categorically and
sequenced logically by operation. Each functional component is dependent on previous component
configurations and includes the following reference information:
•
Basic operational summary
•
List of operational prerequisites
•
Configuration summary with:
– a sample configuration script
– a detailed line item description of the configuration script
– a convenient list of the configuration commands for purposes of editing, copying, and pasting
into your router
•
Other configuration considerations include:
– access lists
– route summarization
– basic show commands
– useful debug commands
Functional Components
Cisco AS5800 operational configurations are provided for the following functional components.
1.
Egress Interface, page A-3
2.
Loopback Interface, page A-4
3.
Routing Protocol, page A-5
4.
Ingress Interface, page A-6
5.
Line Signaling, page A-9
6.
D-Channels (ISDN), page A-10
7.
AAA, page A-12
8.
Modem Pools, page A-16
9.
TTY Line, page A-18
10. Async Interface, page A-19
11. Dial Interface, page A-21
12. IP Address Pools, page A-23
13. Virtual Template, page A-25
14. SGBP, page A-26
15. VPDN, page A-27
16. SNMP, page A-28
17. Virtual Profiles, page A-29
18. Multilink Virtual Template, page A-30
Cisco AS5800 Operations, Administration, Maintenance, and Provisioning Guide
A-2
DOC-7810814=
Appendix A
Advanced Quick Reference
Advanced Quick Reference Configurations
19. V.120 Support, page A-31
20. VoIP, page A-32
21. Global Parameters, page A-32
22. Finalizing Operational Configurations, page A-34
Egress Interface
Egress interfaces are network connections, or ports, used for outbound traffic flow.
Egress Requisites
The following requisites are significant considerations to identify before configuring an egress interface:
•
Interface type
•
IP configuration
•
Interface specific parameters (Duplex, Speed, PVC, Encapsulation, etc.)
Egress Configuration
The following Cisco IOS CLI script serves as a sample egress interface configuration or setup.
Sample Configuration
5800(config)# interface FastEthernet0/0/0
5800(config-if)# ip address 1.1.1.1 255.255.255.0
5800(config-if)# no ip directed broadcast
5800(config-if)# no ip mroute-cache
5800(config-if)# no cdp enable
5800(config-if)# exit
5800(config)#
Command Line Description
5800(config)# interface FastEthernet0/0/0
Defines the interface type.
5800(config-if)# ip address 1.1.1.1 255.255.255.0
Assigns a primary IP address and subnet mask to the interface.
5800(config-if)# no ip directed broadcast
Disables the translation of directed broadcast to physical broadcasts. It drops the directed broadcasts
destined for this subnet.
5800(config-if)# no ip mroute-cache
Turns off IP multicast fast switching.
5800(config-if)# no cdp enable
Disables CDP (Cisco Discovery Protocol).
5800(config-if)# exit
Exits interface configuration mode to global configuration mode.
5800(config)#
Global configuration mode prompt.
Cisco AS5800 Operations, Administration, Maintenance, and Provisioning Guide
DOC-7810814=
A-3
Appendix A
Advanced Quick Reference
Advanced Quick Reference Configurations
To Modify, Copy, & Paste
interface FastEthernet0/0/0
ip address 1.1.1.1 255.255.255.0
no ip directed broadcast
no ip mroute-cache
no cdp enable
exit
Loopback Interface
Loopback interface is a logical interface on the router that can be used for diagnostics and
troubleshooting purposes. It is also used to conserve address space so other physical interfaces can be
unnumbered to this interface. The state of the Loopback interface is always UP/UP.
Loopback Requisites
The following requisite is significant consideration to identify before configuring a loopback interface:
•
IP configuration
Loopback Configuration
The following Cisco IOS CLI script serves as a sample loopback configuration or setup.
Sample Configuration
5800(config)# interface loopback0
5800(config-if)# ip address 2.2.2.2 255.255.255.255
5800(config-if)# no ip directed broadcast
5800(config-if)# exit
5800(config)#
Command Line Description
5800(config)# interface loopback0
Defines the interface type.
5800(config-if)# ip address 2.2.2.2 255.255.255.255
Assigns an IP address to the interface.
5800(config-if)# no ip directed broadcast
Disables the translation of directed broadcast to physical broadcasts.
5800(config-if)# exit
Exits this interface configuration mode to global configuration mode.
5800(config)#
Global configuration mode prompt.
To Modify, Copy, & Paste
interface loopback0
ip address 2.2.2.2 255.255.255.255
no ip directed broadcast
exit
Cisco AS5800 Operations, Administration, Maintenance, and Provisioning Guide
A-4
DOC-7810814=
Appendix A
Advanced Quick Reference
Advanced Quick Reference Configurations
Routing Protocol
Routing protocol that accomplishes routing through the implementation of a specific routing algorithm.
Examples of routing protocols include: RIP, IGRP, EIGRP, OSPF, and BGP.
Routing Protocol Requisites
The following requisites are significant considerations to identify before configuring routing protocols:
•
Routing protocol for egress network
•
Networks to advertise
•
IP summarization if supported
•
Interfaces to advertise routing on
Routing Protocol Configuration
The following Cisco IOS CLI script serves as a sample routing protocol configuration or setup.
Sample Configuration
5800(config)# router rip
5800(config-router)# version 2
5800(config-router)# redistribute static
5800(config-router)# passive-interface Group-Async0
5800(config-router)# passive-interface Virtual-Template1
5800(config-router)# passive-interface Dialer0
5800(config-router)# passive-interface Loopback0
5800(config-router)# network 10.0.0.0
5800(config-router)# network 172.16.0.0
5800(config-router)# no auto-summary
5800(config-router)# exit
5800(config)# ip route 0.0.0.0 0.0.0.0 172.16.1.1
Command Line Description
5800(config)# router rip
Defines the routing protocol used on the router and initiates the routing protocol processes.
5800(config-router)# version 2
Defines the protocol version used. Enables sending and receiving of Version 2 RIP packets.
5800(config-router)# redistribute static
Enables the redistribution of static routes in routing updates. Advertises static routes (including per-user
static routes downloaded from RADIUS or TACACS+).
5800(config-router)# passive-interface Group-Async0
Defines the Group-Async interface as a passive interface so no routing updates are sent out of these
interfaces. Disables sending of updates across the interface and places the interface in listen mode.
5800(config-router)# passive-interface Virtual-Template1
Defines the Virtual-Template as a passive interface so no routing updates are send out the Virtual-Access
interfaces that are cloned off the Virtual-Template.
5800(config-router)# passive-interface Dialer0
Defines the Dialer interface as a passive interface.
Cisco AS5800 Operations, Administration, Maintenance, and Provisioning Guide
DOC-7810814=
A-5
Appendix A
Advanced Quick Reference
Advanced Quick Reference Configurations
5800(config-router)# passive-interface Loopback0
Defines the Loopback interface as a passive interface.
5800(config-router)# network 10.0.0.0
Enables advertisement of interfaces in this network. Defines 10.0.0.0 network as part of the RIP routing
process. The router exchanges routing updates about the 10.0.0.0 network dynamically.
5800(config-router)# network 172.16.0.0
Defines 172.16.0.0 network as part of the RIP routing process. Updates regarding this network are
exchanged dynamically between this router and its neighbors.
5800(config-router)# no auto-summary
Turns off route summarization, so updates are not summarized to classful boundaries.
5800(config-router)# exit
Exits the router configuration mode to global configuration mode.
5800(config)# ip route 0.0.0.0 0.0.0.0 172.16.1.1
Defines a default route for this router. If the router does not have an address in its routing table, the table
forwards the packets to this IP address. Default route for destinations are not learned through the routing
protocol.
To Modify, Copy, & Paste
router rip
version 2
redistribute static
passive-interface Group-Async0
passive-interface Virtual-Template1
passive-interface Dialer0
passive-interface Loopback0
network 10.0.0.0
network 172.16.0.0
no auto-summary
exit
ip route 0.0.0.0 0.0.0.0 172.16.1.1
Ingress Interface
Interfaces used for inbound traffic flow.
Ingress Requisites
The following requisites are significant considerations to identify before configuring ingress interfaces:
•
Facilities (T1 / T3 / E1 / E3)
•
Circuit type (ISDN CAS)
•
Telco parameters
•
ISDN switch type
•
CAS signaling
•
Dial-shelf slots
Cisco AS5800 Operations, Administration, Maintenance, and Provisioning Guide
A-6
DOC-7810814=
Appendix A
Advanced Quick Reference
Advanced Quick Reference Configurations
T3 Ingress Configuration
The following Cisco IOS CLI script serves as a sample T3 ingress interface configuration or setup.
Sample Configuration
5800(config)# isdn switch-type primary-ni (ISDN)
5800(config)# controller t3 1/0/0
5800(config-controller)# framing m23
5800(config-controller)# cablelength 224
5800(config-controller)# t1 1 controller
5800(config-controller)# t1 2 controller
5800(config-controller)# . . .
5800(config-controller)# exit
5800(config)#
Command Line Description
5800(config)# isdn switch-type primary-ni (ISDN)
Defines the ISDN switch-type to be used on the router. This is a global command but can also be
configured under the D-channel in later versions of Cisco IOS software.
5800(config)# controller t3 1/0/0
Identifies controller type and number to be configured. The controller type is a T3 and the controller is
in shelf 1, slot 0, port 0.
5800(config-controller)# framing m23
Enables m23 framing. Sets the framing type under the T3 controller.
5800(config-controller)# cablelength 224
Sets the cable length to 224 feet.
5800(config-controller)# t1 1 controller
Enables the first T1 in the T3. Configures individual T1 controllers under the T3 controller. Range is
1-28.
5800(config-controller)# t1 2 controller
Enables the second T1 in the T3. Configures individual T1 controllers under the T3 controller. Range is
1-28.
5800(config-controller)# . . .
Configures additional individual T1 controllers under the T3 controller. Range is 1-28.
5800(config-controller)# exit
Exits this controller configuration mode to global configuration mode.
5800(config)#
Global configuration mode prompt.
To Modify, Copy, & Paste
isdn switch-type primary-ni (ISDN)
controller t3 1/0/0
framing m23
cablelength 224
t1 1 controller
t1 2 controller
exit
Cisco AS5800 Operations, Administration, Maintenance, and Provisioning Guide
DOC-7810814=
A-7
Appendix A
Advanced Quick Reference
Advanced Quick Reference Configurations
T1 Ingress Configuration
The following Cisco IOS CLI script serves as a sample T1 ingress interface configuration or setup.
Sample Configuration
5800(config)# controller t1 1/0/0:1
5800(config-controller) # framing esf
5800(config-controller) # linecode b8zs
(t1-pri)
5800(config-controller) # pri-group timeslots 1-24
5800(config-controller)# controller t1 1/0/0:2
5800(config-controller)# framing esf
5800(config-controller)# pri-group timeslots 1-24
5800(config-controller)# exit
5800(config)#
Command Line Description
5800(config)# controller t1 1/0/0:1
Configures the first T1 on the T3 card in slot 0. Enters the controller configuration mode and configures
controller t1 1 under the T3 controller.
5800(config-controller) # framing esf
Enables T1 Extended Superframe Framing. Sets framing to Extended Super Frame (ESF).
5800(config-controller) # linecode b8zs
(t1-pri)
Enable Binary 8 Zero Substitution line coding. Sets the line coding to Binary 8 Zero Substitution
(B8ZS).
5800(config-controller) # pri-group timeslots 1-24
Configures the controller for ISDN PRI on time slots 1 through 24. Time slot 24 is the D-channel.
5800(config-controller)# controller t1 1/0/0:2
Configures the second T1 on the T3 card in slot 0. Configures controller t1 2 under the T3 controller.
5800(config-controller)# framing esf
Sets framing to Extended Super Frame (ESF).
5800(config-controller)# pri-group timeslots 1-24
Configures the controller for ISDN PRI on time slots 1 through 24. Time slot 24 is the D-channel.
5800(config-controller)# exit
Exits controller configuration mode to global configuration mode.
5800(config)#
Global configuration mode prompt.
To Modify, Copy, & Paste
controller t1 1/0/0:1
framing esf
linecode b8zs
pri-group timeslots 1-24
controller t1 1/0/0:2
framing esf
pri-group timeslots 1-24
Exit
Cisco AS5800 Operations, Administration, Maintenance, and Provisioning Guide
A-8
DOC-7810814=
Appendix A
Advanced Quick Reference
Advanced Quick Reference Configurations
Line Signaling
When configuring a router for signaling, line signaling can be used for both inbound and outbound calls.
The line signaling configuration must match the corresponding telco switch configuration.
Line Signaling Requisites
The following requisites are significant considerations to identify before configuring line signaling:
•
Facilities(T1 / T3 / E1 / E3)
•
Circuit type (ISDN CAS)
•
Telco parameters
•
ISDN switch type
•
CAS signaling
•
Dial-shelf slots
Line Signaling (ISDN) Configuration
The following Cisco IOS CLI script serves as a sample ISDN line signaling configuration or setup.
Sample Configuration
5800(config)# isdn switch-type primary-ni1
5800(config)# controller t1 1/0/0
5800(config-controller)# pri-group timeslots 1-24
5800(config-controller)# exit
5800(config)#
Command Line Description
5800(config)# isdn switch-type primary-ni1
Configures the ISDN switch-type that the access server is connected to.
5800(config)# controller t1 1/0/0
Configures the first T1 on slot 0.
5800(config-controller)# pri-group timeslots 1-24
Enables this T1 to use ISDN PRI signaling on all 24 timeslots.
5800(config-controller)# exit
Exits controller configuration mode to global configuration mode.
5800(config)#
Global configuration mode prompt.
To Modify, Copy, & Paste
isdn switch-type primary-ni1
controller t1 1/0/0
pri-group timeslots 1-24
exit
Cisco AS5800 Operations, Administration, Maintenance, and Provisioning Guide
DOC-7810814=
A-9
Appendix A
Advanced Quick Reference
Advanced Quick Reference Configurations
Line Signaling (CAS) Configuration
The following Cisco IOS CLI script serves as a sample CAS line signaling configuration or setup.
Sample Configuration
5800(config)# controller t1 1/0/11
5800(config-controll)# framing esf
5800(config-controll)# linecode b8zs
5800(config-controll)# ds0-group 0 timeslots 1-24 type e&m-fgb
5800(config-controller)# exit
5800(config)#
Command Line Description
5800(config)# controller t1 1/0/11
Enters the controller configuration mode.
5800(config-controll)# framing esf
Sets framing to Extended Super Frame (ESF).
5800(config-controll)# linecode b8zs (t1-cas)
Sets the line coding to Binary 8 Zero Substitution (B8ZS).
5800(config-controll)# ds0-group 0 timeslots 1-24 type e&m-fgb
Configures this T1 CAS line to use E&M feature-group B signaling on all 24 timeslots.
5800(config-controller)# exit
Exits controller configuration mode to global configuration mode.
To Modify, Copy, & Paste
controller t1 1/0/0:1
framing esf
linecode b8zs
ds0-group 0 timeslots 1-24 type
exit
D-Channels (ISDN)
This is the 24th timeslot on T1/PRI or the 16th timeslot on E1/PRI and is used for signaling information.
Call setup and tear down information is sent over the D-channel.
D-Channel Requisites
The following requisites are significant considerations to identify before configuring ISDN D-Channels:
•
Interface switch-type
•
IP configuration
•
Encapsulation
•
Analog (voice) access
•
Cause code for hunting
•
Rotary configuration
Cisco AS5800 Operations, Administration, Maintenance, and Provisioning Guide
A-10
DOC-7810814=
Appendix A
Advanced Quick Reference
Advanced Quick Reference Configurations
D-Channel Configuration
The following Cisco IOS CLI script serves as a sample ISDN D-Channel configuration or setup.
Sample Configuration
5800(config)# interface s 1/0/0:1:23
5800(config-if)# no ip address
5800(config-if)# no ip directed-broadcast
5800(config-if)# encapsulation ppp
5800(config-if)# dialer rotary-group 0
5800(config-if)# isdn switch-type primary-5ess
5800(config-if)# isdn incoming-voice modem
5800(config-if)# no cdp enable
5800(config-if)# exit
5800(config)#
Command Line Description
5800(config)# interface s 1/0/0:1:23
Defines the D-channel to configure. Configure the D-channel on controller T1 1 under the T3 controller
in shelf 1, slot 0, and port 0.
5800(config-if)# no ip address
Not assigning an IP address on the D-channel.
5800(config-if)# no ip directed-broadcast
Disables the translation of directed broadcast to physical broadcasts
5800(config-if)# encapsulation ppp
Sets the encapsulation type to PPP.
5800(config-if)# dialer rotary-group 0
Configures the D-channel for rotary-group. Make this interface a member of the Dialer 0 rotary interface.
This is legacy DDR configuration and it assigns the physical interface serial 1/0/0:1:23 to rotary-group 0.
5800(config-if)# isdn switch-type primary-5ess
Sets the ISDN switch-type to primary-5ess.
5800(config-if)# isdn incoming-voice modem
Incoming voice calls should be handed off to the CSM and terminated on a modem. Accept speech
(voice) bearer-type calls and route them to a voice or modem resource.
5800(config-if)# no cdp enable
Disables Cisco Discovery Protocol (CDP). If an incoming speech call cannot be terminated because all
voice/modem resources are in use, disconnect the call with a cause code of user-busy.
5800(config-if)# exit
Exits interface configuration mode to global configuration mode.
To Modify, Copy, & Paste
interface s 1/0/0:1:23
no ip address
no ip directed-broadcast
encapsulation ppp
dialer rotary-group 0
isdn switch-type primary-5ess
isdn incoming-voice modem
no cdp enable
Cisco AS5800 Operations, Administration, Maintenance, and Provisioning Guide
DOC-7810814=
A-11
Appendix A
Advanced Quick Reference
Advanced Quick Reference Configurations
AAA
Triple A security in billing that stands for Authentication, Authorization and Accounting.
AAA Plan and Requisites
The following requisites are significant considerations to identify before configuring AAA:
•
Dial in authentication method
•
Dial in authorization method
•
Dial in accounting method
•
Administrative AAA method
For detailed AAA configuration information, refer to Authentication, Authorization, and Accounting
(AAA), available online at
http://www.cisco.com/univercd/cc/td/doc/product/software/ios113ed/113ed_cr/secur_c/scprt1/
AAA Server Options
The following AAA server options are significant network design considerations:
•
AAA servers
•
Backup plan
For detailed RADIUS Server configuration information, refer to RADIUS Commands, available online at
http://www.cisco.com/univercd/cc/td/doc/product/software/ios113ed/113ed_cr/secur_r/srprt2/
AAA Authentication Configuration
The following Cisco IOS CLI script serves as a sample AAA authentication configuration or setup.
Sample Configuration
5800(config)#
5800(config)#
5800(config)#
5800(config)#
5800(config)#
5800(config)#
5800(config)#
5800(config)#
aaa new-model
aaa authentication login CONSOLE none
aaa authentication login LOCAL none
aaa authentication login USE-RADIUS group radius local
aaa authentication login USE-TACACS tacacs+ enable
aaa authentication enable default enable tacacs+
aaa authentication ppp USE-RADIUS if-needed radius
username cisco password cisco
Command Line Description
5800(config)# aaa new-model
Turns on the AAA process on a Cisco router. Enables the AAA security paradigm.
5800(config)# aaa authentication login CONSOLE none
Configure an authentication method list called CONSOLE that requires no authentication. Defines the
login authentication method for EXEC users. The method list is called CONSOLE and it points to none
so there is no authentication for method list CONSOLE.
Cisco AS5800 Operations, Administration, Maintenance, and Provisioning Guide
A-12
DOC-7810814=
Appendix A
Advanced Quick Reference
Advanced Quick Reference Configurations
5800(config)# aaa authentication login LOCAL none
Configures an authentication method list called LOCAL that consults the local database of user names
and passwords.
5800(config)# aaa authentication login USE-RADIUS group radius local
Defines the login authentication for method list USE-RADIUS that points to RADIUS server. User will
be authenticated against the RADIUS database. Configure an authentication method list called
USE-RADIUS that uses the global RADIUS server list. If the RADIUS servers do not respond, then
fallback to the local user database.
5800(config)# aaa authentication login USE-TACACS tacacs+ enable
Defines the login authentication for method list USE-TACACS that point to TACACS+ server. Users will
be authenticated against the TACACS+ database. Configure an authentication method list called
USE-TACACS that uses the global TACACS+ server list. If the TACACS+ servers do not respond,
fallback to using the enable password.
5800(config)# aaa authentication enable default enable tacacs+
Defines the authentication method for enable privilege on the router. The method list is called “default”
and it points to the enable password defined on the router and then to the TACACS+ server.
5800(config)# aaa authentication ppp USE-RADIUS if-needed radius
Defines the authentication method for PPP users. Method list is called “USE-RADIUS” and it points to
the radius server if authentication is required. The “if-needed” option states that if users have already
been authenticated then do not re-authenticate them. Configure an authentication method list called
USE-RADIUS that uses the global RADIUS server list.
5800(config)# username cisco password cisco
Defines the username and password locally on the router for local authentication. Configure a local user
account to authenticate when the RADIUS server is not available.
To Modify, Copy, & Paste
aaa new-model
aaa authentication login CONSOLE none
aaa authentication login USE-RADIUS radius
aaa authentication login TAC_PLUS tacacs+ enable
aaa authentication login LOCAL local
aaa authentication enable default enable tacacs+
aaa authentication ppp USE-RADIUS if-needed radius
username cisco password cisco
AAA Authorization Configuration
The following Cisco IOS CLI script serves as a sample AAA authorization configuration or setup.
Sample Configuration
5800(config)#
5800(config)#
5800(config)#
5800(config)#
aaa
aaa
aaa
aaa
authorization
authorization
authorization
authorization
exec USE-RADIUS group radius if-authenticated
exec USE-TACACS group tacacs+ if-authenticated
network default radius if-authenticated
network USE-RADIUS group radius if-authenticated
Cisco AS5800 Operations, Administration, Maintenance, and Provisioning Guide
DOC-7810814=
A-13
Appendix A
Advanced Quick Reference
Advanced Quick Reference Configurations
Command Line Description
5800(config)# aaa authorization exec USE-RADIUS group radius if-authenticated
Configures an authorization method list called USE-RADIUS that uses the global RADIUS server list.
EXEC authorization is required to process per-user attribute such as autocommands. Defines the
authorization method for EXEC (shell). Method list is called “USE-RADIUS” and it points to the radius
server. If the radius server does not respond, the user, if authenticated, is automatically authorized due
to the “if-authenticated” option.
5800(config)# aaa authorization exec USE-TACACS group tacacs+ if-authenticated
Configure an authorization method list called USE-TACACS that uses the global TACACS+ server list.
EXEC authorization is required to process per-user attribute such as autocommands. Defines the
authorization method for EXEC (shell). Method list is called “USE-TACACS” and it points to the
TACACS+ server. If the TACACS+ server does not respond, the user, if authenticated, is automatically
authorized due to the “if-authenticated” option.
5800(config)# aaa authorization network default radius if-authenticated
Defines the authorization method for network services (PPP, SLIP, ARAP). Method list is called
“default” and it points to the radius server. If the radius server does not respond the user, if already
authenticated, will be automatically authorized due to the “if-authenticated” option.
5800(config)# aaa authorization network USE-RADIUS group radius if-authenticated
Defines the authorization method for network services (PPP, SLIP, ARAP). Method list is called
“USE-RADIUS” and it points to the radius server. If the radius server does not respond the user, if
already authenticated, will be automatically authorized due to the “if-authenticated” option.
To Modify, Copy, & Paste
aaa
aaa
aaa
aaa
authorization
authorization
authorization
authorization
exec USE-RADIUS group radius if-authenticated
exec USE-TACACS group tacacs+ if-authenticated
network default radius if-authenticated
network USE-RADIUS group radius if-authenticated
AAA Accounting Configuration
The following Cisco IOS CLI script serves as a sample AAA accounting configuration or setup.
Sample Configuration
5800(config)#
5800(config)#
5800(config)#
5800(config)#
aaa
aaa
aaa
aaa
accounting
accounting
accounting
accounting
suppress null-username
exec default start-stop group radius
network default start-stop group radius
system default start-stop group radius
Command Line Description
5800(config)# aaa accounting suppress null-username
Do not generate accounting records for users with a null-username.
5800(config)# aaa accounting exec default start-stop group radius
Generates accounting records for EXEC (shell) service. Start and Stop records should be generated
without wait. Radius server is being used for this accounting. This enables accounting records for all
EXEC sessions. The accounting record will be sent at the beginning and the end of the EXEC session.
The record will be sent to the global RADIUS server list.
Cisco AS5800 Operations, Administration, Maintenance, and Provisioning Guide
A-14
DOC-7810814=
Appendix A
Advanced Quick Reference
Advanced Quick Reference Configurations
5800(config)# aaa accounting network default start-stop group radius
Generates accounting records for network services (PPP, SLIP, ARAP). Start and Stop records should be
generated without wait. Radius server is being used for this accounting. This enables accounting records
for all network sessions (PPP/SLIP). The accounting record will be sent at the beginning and the end of
the network session. The record will be sent to the global RADIUS server list.
5800(config)# aaa accounting system default start-stop group radius
Generates accounting records for systems events. Start and Stop records should be generated using the
Radius server. This enables accounting records for system events. The accounting record will be sent
when the access server is booted and when accounting is turned on or off. The record will be sent to the
global RADIUS server list.
To Modify, Copy, & Paste
aaa
aaa
aaa
aaa
accounting
accounting
accounting
accounting
suppress null-username
exec default start-stop group radius
network default start-stop group radius
system default start-stop group radius
AAA RADIUS Server Configuration
The following Cisco IOS CLI script serves as a sample AAA Radius Server configuration or setup.
Sample Configuration
5800(config)#
5800(config)#
5800(config)#
5800(config)#
5800(config)#
5800(config)#
radius-server
radius-server
radius-server
radius-server
radius-server
radius-server
host x.x.x.x auth-port x acct-port x non-standard
host a.b.c.d auth-port x acct-port y key mysharedsecret
deadtime 5
timeout 3
retransmit 2
attribute nas-port format c
Command Line Description
5800(config)# radius-server host x.x.x.x auth-port x acct-port x non-standard
Defines the radius server IP address and the authentication (UDP 1645) and accounting (UDP 1646)
ports. The non-standard option enable the parsing of attributes that violate the RADIUS standard.
5800(config)# radius-server host a.b.c.d auth-port x acct-port y key mysharedsecret
Defines a RADIUS server at IP address a.b.c.d, with authentication being done on UDP port x and
accounting being done on UDP port y. The key "mysharedsecret" is used to encrypt the wire password.
5800(config)# radius-server deadtime 5
Defines the time to stop using a server that does not respond. The time is defined in minutes.
5800(config)# radius-server timeout 3
Defines the time to wait for a RADIUS server to reply. The time is defined in seconds.
5800(config)# radius-server retransmit 2
Specifies the number of retries to active server.
5800(config)# radius-server attribute nas-port format c
Sets the format of the NAS-Port attribute to “c” which means:
Data format(bits): shelf(2), slot(4), port(5), channel(5).
Cisco AS5800 Operations, Administration, Maintenance, and Provisioning Guide
DOC-7810814=
A-15
Appendix A
Advanced Quick Reference
Advanced Quick Reference Configurations
To Modify, Copy, & Paste
radius-server
radius-server
radius-server
radius-server
radius-server
radius-server
host x.x.x.x auth-port x acct-port x non-standard
host a.b.c.d auth-port x acct-port y key mysharedsecret
deadtime 5
timeout 3
retransmit 2
attribute nas-port format c
TACACS Server Configuration
The following Cisco IOS CLI script serves as a sample TACACS Server configuration or setup.
Sample Configuration
5800(config)# tacacs-server host x.x.x.x key mysharedsecret
Command Line Description
5800(config)# tacacs-server host x.x.x.x key mysharedsecret
Defines a TACACS+ server at IP address a.b.c.d. The key "mysharedsecret" is used to encrypt the all
transactions with the TACACS+ server on the wire.
To Modify, Copy, & Paste
tacacs-server host x.x.x.x key mysharedsecret
Modem Pools
The modem pool covers a specified range of modems that accept calls based on the number called by
dial in users. If there is only one dialin number, then all modems can be defined under the default modem
pool. It is also used for modem firmware upgrades.
Modem Pool Requisites
The following requisites are significant considerations to identify before configuring modem pools:
•
Modem firmware
•
Modem pool plan
•
DNIS pooling
•
Dial-shelf slots
For information, refer to Modem Management Commands, available online at
http://www.cisco.com/univercd/cc/td/doc/product/software/ios120/12cgcr/dial_r/drprt1/drmodmgt.htm
Cisco AS5800 Operations, Administration, Maintenance, and Provisioning Guide
A-16
DOC-7810814=
Appendix A
Advanced Quick Reference
Advanced Quick Reference Configurations
Modem Pool Configuration
The following Cisco IOS CLI script serves as a sample modem pool configuration or setup.
Sample Configuration
5800(config)# modem-pool Default
5800(config-modem-pool)# pool-range 1/2/00-1/11/143
5800(config-modem-pool)# firmware 2.6.2.0
5800(config-modem-pool)# exit
5800(config)# modem recovery action none
5800(config)# modem call-record terse
Command Line Description
5800(config)# modem-pool Default
Defines the default modem pool by creating a new modem pool called "Default".
5800(config-modem-pool)# pool-range 1/2/00-1/11/143
Defines the pool range for the modems to be included in the modem pool. The modem pool spans all
modems between 1/2/00 and 1/11/143. Empty slots are ignored.
5800(config-modem-pool)# firmware 2.6.2.0
Defines the firmware to be loaded onto the modems. Configures all modems within a modem-pool to
run version 2.6.2.0 of Portware.
5800(config-modem-pool)# exit
Exits from the configuration mode.
5800(config)# modem recovery action none
Disables the modem recovery process. Disables the automatic recovery of faulty modems. Modem
recovery may be enabled if you are temporarily working around a specific problem of hung modems.
5800(config)# modem call-record terse
Generates a Terse Modem Call Record at the end of a call. Enables modem call records logging that
provide detailed connection information, which aids in troubleshooting call failure patterns.
To Modify, Copy, & Paste
modem-pool Default
pool-range 1/2/00-1/11/143
firmware 2.6.2.0
exit
modem recovery action none
modem call-record terse
Cisco AS5800 Operations, Administration, Maintenance, and Provisioning Guide
DOC-7810814=
A-17
Appendix A
Advanced Quick Reference
Advanced Quick Reference Configurations
TTY Line
These are asynchronous lines on the router. TTY is a line configuration, not an interface configuration.
These lines correspond to async interfaces that are configured separately.
TTY Line Requisites
The following requisites are significant considerations to identify before configuring a TTY line:
•
Timeouts
•
Autoselected protocols
•
Authorization/Authentication
•
Modem service
•
Transport
TTY Line Configuration
The following Cisco IOS CLI script serves as a sample TTY line configuration or setup.
Sample Configuration
5800(config)# line
5800(config-line)#
5800(config-line)#
5800(config-line)#
5800(config-line)#
5800(config-line)#
5800(config-line)#
5800(config-line)#
5800(config-line)#
5800(config-line)#
5800(config-line)#
5800(config)#
1/2/00 1/11/143
location “Async call”
exec-timeout 0 0
autoselect PPP
autoselect during-login
login authentication USE-RADIUS
authorization exec USE-RADIUS
modem Dialin
no modem log rs232
transport preferred none
exit
Command Line Description
5800(config)#
line 1/2/00 1/11/143
Defines the range for lines to be configured.
5800(config-line)# location “Async call”
Defines the location of the async line.
5800(config-line)# exec-timeout 0 0
Sets the EXEC-timeout under the line to indefinite.
5800(config-line)# autoselect ppp
Sets line to allow PPP autoselection. Enables the automatic the detection of PPP packets.
5800(config-line)# autoselect during-login
Automatically selects at the Username/Password prompt. Present the login prompt before beginning
autoselect process.
5800(config-line)# login authentication USE-RADIUS
Defines the authentication method for login and points it to the “USE-RADIUS” list defined in the AAA
process. Configures EXEC authentication on this line to use the USE-RADIUS method list.
5800(config-line)# authorization exec USE-RADIUS
Cisco AS5800 Operations, Administration, Maintenance, and Provisioning Guide
A-18
DOC-7810814=
Appendix A
Advanced Quick Reference
Advanced Quick Reference Configurations
Defines the authorization method for EXEC service and point it to the “USE-RADIUS” list defined in
the AAA process. Configures EXEC authorization on the line to use the USE-RADIUS method list.
5800(config-line)# modem Dialin
Configures the line to allow a modern modem to dial-in (dial-out not allowed).
5800(config-line)# no modem log rs232
Turns off the rs232 log events. Does not log EIA/TIA-232 events in the modem log.
5800(config-line)# transport preferred none
Sets the preferred protocol to none. Does not try to auto-connect the user to a host with a particular
protocol.
5800(config-line)# exit
Exits line configuration mode to global configuration mode.
To Modify, Copy, & Paste
line 1/2/00 1/11/143
location “Async call”
exec-timeout 0 0
autoselect ppp
autoselect during-login
login authentication USE-RADIUS
authorization exec USE-RADIUS
modem Dialin
no modem log rs232
transport preferred none
Async Interface
Asychronous interface is used to terminate analog (async) dialin calls.
Async Interface Requisites
The following requisites are significant considerations to identify before configuring an async interface:
•
IP configuration
•
Encapsulation
•
Dialer parameters
•
Default IP allocation
•
PPP authentication
•
Multilink
•
Async mode
•
Default timeouts
•
Modem range
Cisco AS5800 Operations, Administration, Maintenance, and Provisioning Guide
DOC-7810814=
A-19
Appendix A
Advanced Quick Reference
Advanced Quick Reference Configurations
Async Interface Configuration
The following Cisco IOS CLI script serves as a sample async interface configuration or setup.
Sample Configuration
5800(config)# interface group-async0
5800(config-if)# ip unnumbered loopback0
5800(config-if)# encapsulation ppp
5800(config-if)# dialer in-band
5800(config-if)# dialer idle-timeout 2700
5800(config-if)# dialer-group 1
5800(config-if)# async mode interactive
5800(config-if)# ntp disable
5800(config-if)# no snmp trap link-status
5800(config-if)# peer default ip address pool default
5800(config-if)# no cdp enable
5800(config-if)# ppp authentication pap callin USE-RADIUS
5800(config-if)# ppp multilink
5800(config-if) group-range 1/2/00 1/11/143
5800(config-if) exit
5800(config)#
Command Line Description
5800(config)# interface group-async0
Creates a group-async interface used to configure all the async interfaces at one time.
5800(config-if)# ip unnumbered loopback0
Unnumbers the interface to the IP address of loopback 0 interface.
5800(config-if)# encapsulation ppp
Sets the default encapsulation type to PPP.
5800(config-if)# dialer in-band
Enables dial on demand routing on this interface. Establishes a dialer interface.
5800(config-if)# dialer idle-timeout 2700
Defines the idle-timeout under the interface. If the call is idle for 45 minutes (2700 seconds) then the
command disconnects the user. Default is 120 seconds.
5800(config-if)# dialer-group 1
Assigns interface to dialer-list 1. Use dialer-list 1 to determine what kind of traffic is valid.
5800(config-if)# async mode interactive
Allows the user to run PPP or SLIP on this interface. Line may be switched between interactive use and
async interface.
5800(config-if)# ntp disable
Disables the processing of Network Time Protocol (NTP) on this interface.
5800(config-if)# no snmp trap link-status
Disables SNMP LINKUP and LINKDOWN traps. Do not send SNMP traps when this interface goes up
or down.
5800(config-if)# peer default ip address pool default
Use IP pool mechanism to allocate a peer IP address. The pool in this case is called “default”.
5800(config-if)# no cdp enable
Disables Cisco Discovery Protocol (CDP) on this interface.
5800(config-if)# ppp authentication pap callin USE-RADIUS
Cisco AS5800 Operations, Administration, Maintenance, and Provisioning Guide
A-20
DOC-7810814=
Appendix A
Advanced Quick Reference
Advanced Quick Reference Configurations
Defines the authentication protocol (PAP) to be used for authenticating incoming calls only. The
USE-RADIUS list is defined in the AAA process. PPP clients must authenticate themselves using the
Password Authentication Protocol. Authentication will be done using the USE-RADIUS method list.
5800(config-if)# ppp multilink
Configures the interface for multilink. Enable this interface to negotiate PPP multilink.
5800(config-if) group-range 1/2/00 1/11/143
Defines the group-range for interface to be covered under this group-async interface. Apply this
configuration to interfaces from Async1/2/00 to Async1/11/143.
5800(config-if) exit
Exits interface configuration mode to global configuration mode.
5800(config)#
Global configuration mode prompt.
To Modify, Copy, & Paste
interface group-async0
ip unnumbered loopback0
encapsulation ppp
dialer in-band
dialer idle-timeout 2700
dialer-group 1
async mode interactive
ntp disable
no snmp trap link-status
peer default ip address pool default
no cdp enable
ppp authentication pap callin USE-RADIUS
ppp multilink
group-range 1/2/00 1/11/143
exit
Dial Interface
These interfaces are used for ending digital calls. Dialer interfaces are also used for async calls.
Dial Interface Requisites
The following requisites are significant considerations to identify before configuring a dial interface:
•
IP configuration
•
Encapsulation
•
Dialer parameters
•
PPP authentication
•
Multilink
•
Default timeouts
Cisco AS5800 Operations, Administration, Maintenance, and Provisioning Guide
DOC-7810814=
A-21
Appendix A
Advanced Quick Reference
Advanced Quick Reference Configurations
Dial Interface Configuration
The following Cisco IOS CLI script serves as a sample dial interface configuration or setup.
Sample Configuration
5800(config)# interface dialer0
5800(config-if)# ip unnumbered loopback0
5800(config-if)# encapsulation ppp
5800(config-if)# no ip mroute-cache
5800(config-if)# dialer in-band
5800(config-if)# dialer idle-timeout 2700
5800(config-if)# dialer-group 1
5800(config-if)# ntp disable
5800(config-if)# no snmp trap link-status
5800(config-if)# peer default ip address pool default
5800(config-if)# no cdp enable
5800(config-if)# ppp authentication pap callin USE-RADIUS
5800(config-if)# ppp multilink
5800(config-if)# exit
5800(config)# dialer-list 1 protocol ip permit
Command Line Description
5800(config)# interface dialer0
Defines the dialer interface. Creates a dialer interface used to configure all dialer interfaces at one time.
5800(config-if)# ip unnumbered loopback0
Unnumbers the interface to the IP address of loopback 0 interface.
5800(config-if)# encapsulation ppp
Sets the default encapsulation type to PPP.
5800(config-if)# no ip mroute-cache
Turns off fast switching for multicast traffic.
5800(config-if)# dialer in-band
Enables dial on demand routing on this interface. Enables this interface to be a dialer interface.
5800(config-if)# dialer idle-timeout 2700
Defines the idle-timeout under the interface. If the call is idle for 45 minutes (2700 seconds) then the
command disconnects the user. Default is 120 seconds.
5800(config-if)# dialer-group 1
Assigns interface to dialer-list 1. Use dialer-list 1 to determine what kind of traffic is considered
interesting.
5800(config-if)# ntp disable
Disables the processing of Network Time Protocol (NTP) on this interface.
5800(config-if)# no snmp trap link-status
Disables SNMP LINKUP and LINKDOWN traps. Do not send SNMP traps when this interface goes up
or down.
5800(config-if)# peer default ip address pool default
Use IP pool mechanism to allocate a peer IP address. The pool in this case is called “default”.
5800(config-if)# no cdp enable
Disables Cisco Discovery Protocol (CDP) on this interface.
5800(config-if)# ppp authentication pap callin USE-RADIUS
Cisco AS5800 Operations, Administration, Maintenance, and Provisioning Guide
A-22
DOC-7810814=
Appendix A
Advanced Quick Reference
Advanced Quick Reference Configurations
Defines the authentication protocol (PAP) to be used for authenticating incoming calls only. The
USE-RADIUS list is defined in the AAA process. PPP clients must authenticate themselves using the
Password Authentication Protocol. Authentication will be done using the USE-RADIUS method list.
5800(config-if)# ppp multilink
Configures the interface for multilink. Enable this interface to negotiate PPP multilink.
5800(config-if)# exit
Exits interface configuration mode to global configuration mode.
5800(config)# dialer-list 1 protocol ip permit
Configures dialer-list 1 to consider all IP traffic as interesting.
To Modify, Copy, & Paste
interface dialer0
ip unnumbered loopback0
no ip directed broadcast
encapsulation ppp
no ip mroute-cache
dialer in-band
dialer idle-timeout 2700
dialer-group 1
ntp disable
no snmp trap link-status
peer default ip address pool default
no cdp enable
ppp authentication pap callin USE-RADIUS
ppp multilink
exit
dialer-list 1 protocol ip permit
IP Address Pools
Administratively defined numeric group of available internet protocol (IP) network device identifier.
Range of numeric IP addresses set aside for a specific allocation purpose, such as DHCP. As clients
connect to the Network Access Server (NAS), they request and are assigned an IP address from the
configured IP address pool.
IP Address Pools Requisites
The following requisites are significant considerations to identify before configuring an IP address pool:
•
Local IP pools
•
DHCP pools
Cisco AS5800 Operations, Administration, Maintenance, and Provisioning Guide
DOC-7810814=
A-23
Appendix A
Advanced Quick Reference
Advanced Quick Reference Configurations
IP Address Pools Configuration
The following Cisco IOS CLI script serves as a sample IP address pool configuration or setup.
Sample Configuration
5800(config)#
5800(config)#
5800(config)#
5800(config)#
5800(config)#
5800(config)#
ip
ip
ip
ip
ip
ip
dhcp-server x.x.x.x (if using dhcp)
local pool default 1.1.1.1 1.1.1.255
local pool default 1.1.2.1 1.1.2.255
local pool default 21.21.21.1 21.21.21.255
local pool 1 10.100.1.1 10.100.1.64
local pool 1 172.17.18.1 172.17.18.255
Command Line Description
5800(config)# ip dhcp-server x.x.x.x (if using dhcp)
Defines the IP address for the DHCP server. Cisco IOS queries this particular DHCP server (instead of
broadcasting on all interfaces) when it needs to get an address for a client from DHCP.
5800(config)# ip local pool default 1.1.1.1 1.1.1.255
Defines the IP address pool for network 1.1.1.0. The range is from 1 to 254 as 255 is a broadcast address.
Configures a local address pool called “default” with addresses spanning 1.1.1.1 to 1.1.1.255.
5800(config)# ip local pool default 1.1.2.1 1.1.2.255
Defines the IP address pool for network 1.1.2.0. The range is from 1 to 254 since 255 is a broadcast
address. Appends the address range 1.1.2.1 to 1.1.2.255 to the address pool called “default”.
5800(config)# ip local pool default 21.21.21.1 21.21.21.255
Defines the IP address pool for network 1.1.2.0. The range is from 1 to 254 since 255 is a broadcast
address. Appends the address range 21.21.21.1 to 21.21.21.255 to the address pool called “default”.
5800(config)# ip local pool 1 10.100.1.1 10.100.1.64
Defines the IP address pool for network 1.1.2.0. Range is from 1 to 64. Configures a local address pool
called “1” with the address spanning from 10.100.1.1 to 10.100.1.64.
5800(config)# ip local pool 1 172.17.18.1 172.17.18.255
Defines the IP address pool for network 1.1.2.0. The range is from 1 to 254 since 255 is a broadcast
address. Appends the address range 172.16.18.1 to 172.17.18.255 to the address pool called “1”.
To Modify, Copy, & Paste
ip
ip
ip
ip
ip
ip
dhcp-server x.x.x.x
local pool default 1.1.1.1 1.1.1.255
local pool default 1.1.2.1 1.1.2.255
local pool default 21.21.21.1 21.21.21.255
local pool 1 10.100.1.1 10.100.1.64
local pool 1 172.17.18.1 172.17.18.255
Cisco AS5800 Operations, Administration, Maintenance, and Provisioning Guide
A-24
DOC-7810814=
Appendix A
Advanced Quick Reference
Advanced Quick Reference Configurations
Virtual Template
Virtual Templates are used for cloning virtual-access interfaces for inbound calls.
Virtual Template Requisites
The following requisites are significant considerations to identify before configuring a virtual template:
•
IP configuration
•
Encapsulation
•
Default IP allocation
•
PPP authentication
Virtual Template Configuration
The following Cisco IOS CLI script serves as a sample virtual template configuration or setup.
Sample Configuration
5800(config)# interface virtual-template 1
5800(config-if)# ip unnumbered loopback0
5800(config-if)# no ip directed broadcast
5800(config-if)# no ip mroute-cache
5800(config-if)# ntp disable
5800(config-if)# no snmp trap link-status
5800(config-if)# ppp authentication pap callin USE-RADIUS
5800(config-if)# ppp multilink
5800(config-if)# exit
Command Line Description
5800(config)# interface virtual-template 1
Defines the Virtual-Template interface used for cloning virtual-access interfaces.
5800(config-if)# ip unnumbered loopback0
Unnumbers the interface to the IP address of loopback 0 interface.
5800(config-if)# no ip directed broadcast
Disables the translation of directed broadcast to physical broadcasts. It drops the directed broadcasts
destined for this subnet.
5800(config-if)# no ip mroute-cache
Turns off fast switching for multicast traffic.
5800(config-if)# ntp disable
Disables the processing of Network Time Protocol (NTP) on this interface.
5800(config-if)# no snmp trap link-status
Disables SNMP LINKUP and LINKDOWN traps. Do not send SNMP traps when this interface goes up
or down.
5800(config-if)# ppp authentication pap callin USE-RADIUS
Defines the authentication protocol (PAP) to be used for authenticating incoming calls only. The
USE-RADIUS list is defined in the AAA process. PPP clients must authenticate themselves using the
Password Authentication Protocol. Authentication will be done using the USE-RADIUS method list.
Cisco AS5800 Operations, Administration, Maintenance, and Provisioning Guide
DOC-7810814=
A-25
Appendix A
Advanced Quick Reference
Advanced Quick Reference Configurations
5800(config-if)# ppp multilink
Configures the interface for multilink. Enables this interface to negotiate PPP multilink.
5800(config-if)# exit
Exits interface configuration mode to global configuration mode.
To Modify, Copy, & Paste
interface virtual-template 1
ip unnumbered loopback0
no ip directed broadcast
no ip mroute-cache
ntp disable
no snmp trap link-status
ppp authentication pap callin USE-RADIUS
ppp multilink
exit
SGBP
Stack Group Bidding Protocol (SGBP) is a protocol used for configuring Multichassis multilink PPP.
SGBP Requisites
The following requisites are significant considerations to identify before configuring SGBP:
•
Global SGBP password
•
Member list hostnames
•
Member list IP addresses
•
Bidding priority—refer to Multichassis Multilink PPP (MMP), available online at
http://www.cisco.com/warp/public/131/3.html
SGBP Configuration
The following Cisco IOS CLI script serves as a sample SGBP configuration or setup.
Sample Configuration
5800(config)#
5800(config)#
5800(config)#
5800(config)#
5800(config)#
username sg-group password anything
sgbp group sg-group
sgbp source-ip [loopback0 ip address]
sgbp member nas01 [nas01 loop0 ip]
sgbp member nas02 [nas02 loop0 ip]
Cisco AS5800 Operations, Administration, Maintenance, and Provisioning Guide
A-26
DOC-7810814=
Appendix A
Advanced Quick Reference
Advanced Quick Reference Configurations
Command Line Description
5800(config)# username sg-group password anything
Defines the username and password for the SGBP stack group. Configures a shared secret for the SGBP
group name that will be used to authenticate peers into the stack group.
5800(config)# sgbp group sg-group
Defines “sg-group” as the sgbp stack group name.
5800(config)# sgbp source-ip [loopback0 ip address]
Defines the source IP address for the SGBP stack. Forces the NAS to source the SGBP packets from the
loopback0 interface.
5800(config)# sgbp member nas01 [nas01 loop0 ip]
Defines the SGBP member “nas01” and its IP address. Statically configures the peer, name, and IP
addresses of other peers in the stack group.
5800(config)# sgbp member nas02 [nas02 loop0 ip]
Defines the member “nas02” and its IP address. Statically configures the peer, name, and IP addresses
of other peers in the stack group.
To Modify, Copy, & Paste
username sg-group password anything
sgbp group sg-group
sgbp source-ip
sgbp member nas01
sgbp member nas02
VPDN
Virtual Private Dialup Network (VPDN) enables forwarding of PPP links from an Internet Service
Provider (ISP) to a Home Gateway. L2TP and L2F are common options for tunneling protocol.
VPDN Requisites
The following requisites are significant considerations to identify before configuring VPDN:
•
L2TP
•
L2F
•
DNIS/Domain based VPDN
•
LNS load-balancing/backup
Cisco AS5800 Operations, Administration, Maintenance, and Provisioning Guide
DOC-7810814=
A-27
Appendix A
Advanced Quick Reference
Advanced Quick Reference Configurations
VPDN Configuration
The following Cisco IOS CLI script serves as a sample VPDN configuration or setup.
Sample Configuration
5800(config)# vpdn enable
5800(config)# vpdn search-order dnis domain
Command Line Description
5800(config)# vpdn enable
Enables VPDN on the router. Enables the processing of VPDN calls. VPDN calls are determined either
by a special DNIS number or a special format to the username.
5800(config)# vpdn search-order dnis domain
Configures the order for searching different VPDN tunnel types. It looks for DNIS based tunnels first
and then looks for DOMAIN based tunnels.
To Modify, Copy, & Paste
vpdn enable
vpdn search-order dnis domain
SNMP
Simple Network Management Protocol (SNMP) is used for monitoring and managing network devices.
SNMP Requisites
The following requisites are significant considerations to identify before configuring SNMP:
•
RO community
•
RW community
•
Trap hosts
•
Traps list
SNMP Configuration
The following Cisco IOS CLI script serves as a sample SNMP configuration or setup.
Sample Configuration
5800(config)#
5800(config)#
5800(config)#
5800(config)#
5800(config)#
5800(config)#
5800(config)#
snmp-server
snmp-server
snmp-server
snmp-server
snmp-server
snmp-server
snmp-server
community public RO
community private RW
enable traps snmp
enable traps envmon
enable traps syslog
host 9.9.9.9 public
host 10.10.10.10 public
Cisco AS5800 Operations, Administration, Maintenance, and Provisioning Guide
A-28
DOC-7810814=
Appendix A
Advanced Quick Reference
Advanced Quick Reference Configurations
Command Line Description
5800(config)# snmp-server community public RO
Enables SNMP and sets community string and access privileges for public to read-only. Allows users
with the public community string to read-only.
5800(config)# snmp-server community private RW
Sets community string and access privileges for private to read-write. Allows users with the private
community string to read and write.
5800(config)# snmp-server enable traps snmp
Enables SNMP traps.
5800(config)# snmp-server enable traps envmon
Enables SNMP environmental monitor traps. Sends an SNMP trap when the router detects an anomaly
in the environmental conditions.
5800(config)# snmp-server enable traps syslog
Enables SNMP syslog traps. Sends traps to the syslog server.
5800(config)# snmp-server host 9.9.9.9 public
Specifies host 9.9.9.9 to receive SNMP notifications for public. Defines the SNMP server and
community string.
5800(config)# snmp-server host 10.10.10.10 public
Specifies host 10.10.10.10 to receive SNMP notifications for public. Defines the SNMP server and
community string.
To Modify, Copy, & Paste
snmp-server
snmp-server
snmp-server
snmp-server
snmp-server
snmp-server
snmp-server
community public RO
community private RW
enable traps snmp
enable traps envmon
enable traps syslog
host 9.9.9.9 public
host 10.10.10.10 public
Virtual Profiles
Virtual Profiles is a unique Point-to-Point application. It can create and configure a virtual access
interface dynamically when a dial-in call is received, and tear down the interface dynamically when the
call ends.
Virtual Profile Requisites
The following requisites are significant considerations to identify before configuring a virtual profile:
•
User profile in AAA server
•
Interface virtual-template
•
Virtual-profile AAA
•
Virtual-profile virtual-template
Cisco AS5800 Operations, Administration, Maintenance, and Provisioning Guide
DOC-7810814=
A-29
Appendix A
Advanced Quick Reference
Advanced Quick Reference Configurations
Virtual Profile Configuration
The following Cisco IOS CLI script serves as a sample virtual profile configuration or setup.
Sample Configuration
5800(config)# virtual-profile virtual-template 1
5800(config)# virtual-profile aaa
Command Line Description
5800(config)# virtual-profile virtual-template 1
Enables virtual profiles by virtual interface template. Creates a virtual-access interface for every user
that is connected to the access server. This is necessary when applying certain per-user attributes (such
as timeouts).
5800(config)# virtual-profile aaa
Enables virtual profiles by AAA configuration. Allows the installation of per-user configurations
specified by the interface-config attributes in a user's TACACS+/RADIUS profile.
To Modify, Copy, & Paste
virtual-profile virtual-template 1
virtual-profile aaa
Multilink Virtual Template
A virtual template from which the specified Multilink PPP bundle can clone its interface parameters.
Multilink Virtual Template Requisites
The following requisites are significant considerations to identify before configuring a multilink virtual
template:
•
IP configuration
•
Encapsulation
•
Default IP allocation
•
PPP authentication
Cisco AS5800 Operations, Administration, Maintenance, and Provisioning Guide
A-30
DOC-7810814=
Appendix A
Advanced Quick Reference
Advanced Quick Reference Configurations
Multilink Virtual Template Configuration
The following Cisco IOS CLI script serves as a sample multilink virtual template configuration or setup.
Sample Configuration
5800(config)# multilink virtual-template 1
5800(config)# multilink bundle-name both
Command Line Description
5800(config)# multilink virtual-template 1
Defines a virtual template used to clone parameters for a virtual access interface for Multilink PPP.
Allows the virtual-access interface for a user to clone form the virtual-template interface in case there is
no physical/dialer interface to clone from. This is necessary on all stack group members.
5800(config)# multilink bundle-name both
Uses peer’s authenticated name and endpoint discriminator for naming multilink bundles. Sets the router
to uniquely identify this multilink session through a combination of the authentication username and the
endpoint discriminator. This is necessary when multiple users are dialing in with the same username.
To Modify, Copy, & Paste
multilink virtual-template 1
multilink bundle-name both
V.120 Support
V.120 dedicated PPP Dialin.
•
Access-dial technical tips, available online at
http://www.cisco.com/warp/public/471/index.shtml
V.120 Requisites
None.
V.120 Configuration
The following Cisco IOS CLI script serves as a sample V.120 configuration or setup.
Sample Configuration
5800(config)# interface s 1/0/0:1:23
5800(config-if)# autodetect encapsulation v120 ppp
5800(config-if)# line vty 5 20
5800(config-line)# transport input v120
5800(config-line)# login authentication USE-RADIUS
5800(config-line)# authorization exec USE-RADIUS
5800(config-line)# exit
5800(config)#
Cisco AS5800 Operations, Administration, Maintenance, and Provisioning Guide
DOC-7810814=
A-31
Appendix A
Advanced Quick Reference
Advanced Quick Reference Configurations
Command Line Description
5800(config)# interface s 1/0/0:1:23
Defines the serial interface to configure.
5800(config-if)# autodetect encapsulation v120 ppp
Configures the router to automatically switch between ISDN PPP users and ISDN V.120 users. Creates
new VTY’s for V.120 users to start on.
5800(config-if)# line vty 5 20
Creates new VTY’s for V.120 users to start on.
5800(config-line)# transport input v120
Only allows V.120 users to connect to this VTY.
5800(config-line)# login authentication USE-RADIUS
Configures EXEC authentication on this line to use the USE-RADIUS method list.
5800(config-line)# authorization exec USE-RADIUS
Configures EXEC authorization on the line to use the USE-RADIUS method list.
5800(config-line)# exit
Exits line configuration mode to global configuration mode.
5800(config)#
Return to global configuration mode.
To Modify, Copy, & Paste
interface s 1/0/0:1:23
autodetect encapsulation v120 ppp
line vty 5 20
transport input v120
login authentication USE-RADIUS
authorization exec USE-RADIUS
exit
VoIP
A technology used to transport voice traffic over the Internet using the existing IP network
infrastructure. For sample configurations and command line descriptions, refer to Voice Over IP for the
Cisco AS5800, available online at
http://www.cisco.com/univercd/cc/td/doc/product/access/nubuvoip/
Global Parameters
These following parameters are defined in global configuration mode on the router.
•
Hostname
•
Service timestamps
•
Service password
•
Network time protocol
•
Timezone
•
Enable secret
Cisco AS5800 Operations, Administration, Maintenance, and Provisioning Guide
A-32
DOC-7810814=
Appendix A
Advanced Quick Reference
Advanced Quick Reference Configurations
Global Parameter Requisites
None.
Global Parameter Configuration
The following Cisco IOS CLI script serves as sample configurations or setups for global parameters.
Sample Configuration
5800(config)#
5800(config)#
5800(config)#
5800(config)#
5800(config)#
5800(config)#
5800(config)#
5800(config)#
5800(config)#
5800(config)#
5800(config)#
5800(config)#
service timestamps debug datetime msec localtime
service timestamps log datetime msec localtime
service password-encryption
hostname [name of your nas]
enable secret thisissecret
clock timezone EST - 5
clock summer-time EDT recurring
ip subnet-zero
no ip source-route
async-bootp dns-server x.x.x.x
ntp server x.x.x.x prefer
ntp server y.y.y.y
Command Line Description
5800(config)# service timestamps debug datetime msec localtime
Turns on millisecond timestamps for debugs. The debugs are printed with a date and time in millisecond
timestamps. Enables debugs to be timestamped with millisecond resolution. This is critical to have when
sending in debug traces to the TAC.
5800(config)# service timestamps log datetime msec localtime
Turns on millisecond timestamps for log messages. Log messages are printed with a date and time in
millisecond timestamps. Enables log messages to be timestamped with millisecond resolution. This is
critical to have when sending in debug traces to the TAC.
5800(config)# service password-encryption
Turns on service password encryption so the passwords defined on the router are encrypted when
displayed in the running and startup config. Enables “light” encryption of passwords.
5800(config)# hostname [name of your nas]
Defines and changes the hostname of the router.
5800(config)# enable secret thisissecret
Configures a cryptographically strong version of the password used to gain access to the router.
5800(config)# clock timezone EST - 5
Sets the clock with the appropriate timezone. Sets the timezone and clock offset from GMT time.
5800(config)# clock summer-time EDT recurring
Configures recurring summer (daylight savings) time. Sets the clock to adjust for daylight savings time.
5800(config)# ip subnet-zero
Allows “subnet zero” subnets. Allows the router to use subnet zero.
5800(config)# no ip source-route
Disables processing of packets with source routing header options.
5800(config)# async-bootp dns-server x.x.x.x
Sets DNS name servers. Configures the DNS server the router responds with when dealing with PPP
clients that implement RFC1877.
Cisco AS5800 Operations, Administration, Maintenance, and Provisioning Guide
DOC-7810814=
A-33
Appendix A
Advanced Quick Reference
Advanced Quick Reference Configurations
5800(config)# ntp server x.x.x.x prefer
Configures NTP server and prefers this peer when possible.
5800(config)# ntp server y.y.y.y
Configures NTP server. Configures the router to sync to the NTP server at y.y.y.y.
To Modify, Copy, & Paste
service timestamps debug datetime msec localtime
service timestamps log datetime msec localtime
service password-encryption
hostname [name of your nas]
clock timezone EST - 5
clock summer-time EDT recurring
ip subnet-zero
no ip source-route
async-bootp dns-server x.x.x.x
ntp server x.x.x.x prefer
ntp server y.y.y.y
Finalizing Operational Configurations
Finishing up the router configurations and getting the router ready for operational mode.
Final Operational Requisites
None.
Final Operational Configurations
The following Cisco IOS CLI script serves as a sample finalized operational configurations or setups.
Sample Configuration
5800(config)#
5800(config)#
5800(config)#
5800(config)#
5800(config)#
5800(config)#
5800(config)#
5800(config)#
5800#
no logging console
line con 0
login authentication CONSOLE
exec-timeout 0 0
line vty 0 4
exec-timeout 0 0
login authentication LOCAL
exit
Cisco AS5800 Operations, Administration, Maintenance, and Provisioning Guide
A-34
DOC-7810814=
Appendix A
Advanced Quick Reference
Advanced Quick Reference Configurations
Command Line Description
5800(config)# no logging console
Turns off console logging so messages do not appear on the router console. Prevents debug messages to
be sent to the console. Flooding of debug messages on the console has an operational impact on the
router.
5800(config)# line con 0
Enters console configuration mode.
5800(config)# login authentication CONSOLE
Sets the login authentication for console access. The method list CONSOLE is defined in the global
AAA process. User will be prompted for a username and password when attempting console access.
Configures EXEC authentication on this line to use the CONSOLE method list.
5800(config)# exec-timeout 0 0
Sets EXEC timeout for the console to indefinite. Disables idle timeout for EXEC sessions on this line.
5800(config)# line vty 0 4
Enters virtual terminal line configuration mode. These lines are used for Telnetting to the router.
5800(config)# exec-timeout 0 0
Sets the EXEC timeout to indefinite. Disables the idle timeout for EXEC sessions on this line.
5800(config)# login authentication LOCAL
Sets the login authentication under the virtual terminal lines. The method list LOCAL is defined in the
global AAA process. Configures EXEC authentication on this line to use the LOCAL method list.
5800(config)# exit
Exits global configuration mode to privileged EXEC mode.
5800#
Privileged EXEC mode prompt.
To Modify, Copy, & Paste
no logging console
line con 0
login authentication CONSOLE
exec-timeout 0 0
line vty 0 4
exec-timeout 0 0
login authentication LOCAL
exit
Other Operational Configuration Considerations
Access Lists
Access lists are defined on the router to control the flow of incoming and outgoing traffic. Access lists
define the kind of traffic permitted and denied.
Route Summarization
Route summarization is used to summarize the routes advertised to other routers in the network. Routes
are normally summarized to classful boundaries.
Cisco AS5800 Operations, Administration, Maintenance, and Provisioning Guide
DOC-7810814=
A-35
Appendix A
Advanced Quick Reference
Advanced Quick Reference Configurations
Show Commands
The show commands are used to look at various information and statistics on the router.
•
show version
•
show controller {t1}
•
show isdn {status | service}
•
show modem {summary}
•
show ip local pool
•
show line summary
•
show caller
•
show caller user username
•
show dial-shelf
Debug Commands
The debug commands are used for isolating and troubleshooting problems on the router. If something
is not working on the router, use debug commands to find the cause of the problem.
•
debug isdn q931
•
debug isdn q921
•
debug csm modem
•
debug aaa authentication
•
debug aaa authorization
•
debug aaa accounting
•
debug aaa per-user
•
debug ppp authentication
•
debug ppp negotiation
•
debug radius
•
debug vpdn l2x-events
•
debug vpdn l2x-errors
Cisco AS5800 Operations, Administration, Maintenance, and Provisioning Guide
A-36
DOC-7810814=
G L O S S A R Y
A
AAA
Triple A security in billing that stands for authentication, authorization and accounting.
access charge
Charges long distance providers pay to local telephone service providers for use of the local network to complete long distance
calls.
access line
The circuit between a telephone subscriber and the local switching center.
access server
Communications processor that connects asynchronous devices to a LAN or WAN through network and terminal emulation
software. Performs both synchronous and asynchronous routing of supported protocols. Sometimes called a network access
server. See also communication server.
accounting management
One of five categories of network management defined by ISO for management of OSI networks. Accounting management
subsystems are responsible for collecting network data relating to resource usage. See also configuration management, fault
management, performance management, and security management.
address
Data structure or logical convention used to identify a unique entity, such as a particular process or network device.
address mapping group (RMON2)
A list of MAC addresses that correspond to the network addresses discovered by the SwitchProbe device.
address mask
Bit combination used to describe which portion of an address refers to the network or subnet and which part refers to the host.
Sometimes referred to simply as mask. See also subnet mask.
administrative applications
TrafficDirector applications performed by a network administrator that concentrate on performing the necessary configuration
tasks to functionally link data-monitoring devices to utilities that display the monitored data.
Cisco AS5800 Operations, Administration, Maintenance, and Provisioning Guide
DOC-7810814=
1
Glossary
advertising
Router process in which routing or service updates are sent at specified intervals so that other routers on the network can
maintain lists of usable routes.
agent
Firmware embedded or software installed on a device.
agent group
A collection of one or more agents created by a network administrator. The TrafficDirector application handles an agent group
as a single agent, allowing you to collectively monitor network statistics from more than one segment or point on a segment.
alarm
SNMP message notifying an operator, or administrator, of a network problem. Similar to event or trap. Notification that a
threshold (rising or falling) established by the user has been met.
alarm discovery
Alarm information displayed on the lower half of the Domain Discovery window that includes alarms configured on an agent.
You can obtain additional details by selecting a specific alarm.
alarm group (RMON1)
Periodically takes statistical samples from variables in the SwitchProbe device and compares them with previously configured
thresholds. If the monitored variable crosses a threshold, an event is generated. A mechanism is implemented to limit the
generation of alarms. This group includes the alarm Table and requires the implementation of the Event group. Elements
include alarm type, interval, starting threshold, and stop threshold.
alert
A message sent to all IP addresses defined in the trap community string.
Alert Monitor
A TrafficDirector application that displays alerts when a threshold is met.
All Conversations
A TrafficDirector application that displays, for a selected domain, all conversations taking place between a pair of hosts.
All Talkers
A TrafficDirector application that displays, for a selected domain, all talkers seen by the agent connected to the network
segment.
analog signal (AS)
A signal in the form of a continuous varying physical quantity, e.g. , voltage, which reflects variations in some quantity, like
loudness in the human voice.
analyzer port
A port on a switch designated by the switch management console to host a SwitchProbe device or analyzer. This port is most
often put in receive-only mode and packets are mirrored to it when the mirroring function is activated.
Cisco AS5800 Operations, Administration, Maintenance, and Provisioning Guide
2
DOC-7810814=
Glossary
assigned numbers
RFC [STD2] documents the currently assigned values from several series of numbers used in network protocol
implementations. This RFC is updated periodically, and current information can be obtained from the IANA. If you are
developing a protocol or application that will require the use of a link, socket, port, protocol, and so forth, contact the IANA
to receive a number assignment.
async interface
Asychronous interface is used to terminate analog (async) dialin calls.
asynchronous transmission
This term describes digital signals that are transmitted without precise clocking. Such signals generally have different
frequencies and phase relationships. Asynchronous transmissions usually encapsulate individual characters in control bits
(called start and stop bits) that designate the beginning and end of each character. A method of sending data over a
communications line by placing a block of transmitted bits in an “envelope.” The envelope begins with a "start" bit that tells
a computer a character is beginning. The “stop” bit sends a message that a character has ended. Asynchronous transmission
also has the advantage of not needing precise clocking mechanisms that maintain a time relationship between transmitter and
receiver.
Asynchronous Transfer Mode (ATM)
An international packet switching standard. The standard uses a cell-switched approach, in which each packet of information
features a uniform size of 53 bytes (digital words of eight bits each). Of the total cell, 48 bytes is the “payload,” or information
to be transmitted. Five bytes are used as a “header,” providing all the addressing information for that particular packet. ATM
could switch and route information of all types, including video, voice and data.
authentication
In security, the verification of the identity of a person or process.
B
B channel
Bearer channel. In ISDN, a full-duplex, 64-kbps channel used to send user data. Compare to D channel, E channel, and
H channel.
backplane
Physical connection between an interface processor or card and the data buses and the power distribution buses inside a chassis.
bandwidth
Difference between the highest and lowest frequencies available for network signals. The term is also used to describe the rated
throughput capacity of a given network medium or protocol. The transmission capacity of a telecommunications link
(e.g., 64 kbps).
baseband
The total frequency band occupied by the aggregate of all the voice and data signals used to modulate a radio carrier.
Cisco AS5800 Operations, Administration, Maintenance, and Provisioning Guide
DOC-7810814=
3
Glossary
baseline report
Compares two similar time ranges in one report. A baseline time range is maintained (protected against purge action) so that
baseline data is available at report time. The baseline time range can be one to 30 days. You can baseline both detail and
summary data, and you can store up to two baseline time ranges. However, the comparison reports run on any two time ranges
where data is available. The baseline comparison is a one-to-one comparison; therefore, no computation of average, minimum,
maximum, or standard deviation is performed on the baseline data.
basic service
The minimum set of capabilities deemed necessary for use of the public telecommunications network. Current basic service
includes an access line (usually one-party, analog, rotary dial), access to local and long distance calling, access to emergency
calling (911), and access to voice/nonvoice relay service.
baud
A unit of signaling speed. The speed in Baud is the number of discrete conditions or signal elements per second. If each signal
event represents only one bit condition, then Baud is the same as bits per second. Baud does not equal bits per second.
Bell operating company (BOC)
A local telephone company formerly owned by AT&T.
Bellcore
Bell Communications Research. Organization that performs research and development on behalf of the RBOCs.
Broadband Integrated Services Digital Network (BISDN)
A high speed ISDN service intended to support full motion video and image applications, as well as data, at speeds of
approximately 150 Mbps.
bit
A binary digit, the smallest unit of information in a computer, represented as a 0 or 1. One character is typically seven or eight
bits in length.
bit rate
The speed at which digital signals are transmitted, expressed in bits per second.
bit/byte
A bit is the most basic element of digital information. One bit represented by either a 0 or 1, the absence or presence of
electricity or light is combined with other bits to form an eight-bit word or Byte. Bytes are the words of our digital language.
Depending on how the bits within them are ordered, these bytes can be translated into numbers, words, or commands.
bps
Bits per second, used to refer to transmission speeds of sending data (e.g., 2400 bps, 14,400 bps, etc.). Speed takes on particular
importance when using on-line Internet services. See also “kbps.”
Basic Rate Interface (BRI)
This ISDN scheme is identified as 2B+D, and permits two “bearer” channels, each operating at 64 kbps, and one “data”
channel, operating at 16 kbps, to be carried over a single twisted pair copper wire.
Cisco AS5800 Operations, Administration, Maintenance, and Provisioning Guide
4
DOC-7810814=
Glossary
broadband
A transmission facility having a bandwidth of greater than 20 kHz. Any communications system able to deliver multiple
channels or services of video, voice, or data to its users or subscribers over a broad band of RF spectrum.
broadcast address
Special address reserved for sending a message to all stations. Generally, a broadcast address is a MAC destination address of
all ones.
bus
Common physical signal path, or highway, composed of wires or other media across which signals can be sent from one part
of a computer to another.
byte
A collection of bits used to form a character or some other information.
C
call
Establishment of (or attempt to establish) a voice or data connection between two endpoints, or between two points which
provide a partial link (e.g. a trunk) between two endpoints.
capture group (RMON 2)
Storage of packets, based on filters, for later retrieval.
carrier
A long distance company which uses primarily its own transmission facilities, as opposed to resellers which lease or buy most
or all transmission facilities from carriers. Many people refer to any type of long distance company, whether it has its own
network or not, as a carrier, so the term is not as restrictive as it used to be.
Channel-Associated Signaling (CAS)
Comitre Consultatif Internationale de Telegraphique et Telephonique (CCITT)
An international group operating under the auspices of the International Telecommunications Union (ITU) and charged with
establishing telecommunications standards. Name recently changed to ITU-TSS (International Telecommunications
Union-Telecommunications Standards Sector).
cell
An ATM unit of segmented data that consists of 53 bytes or octets. Of these, five constitute the header and the remaining 48
carry the data payload. Cell-switching gives maximum utilization of physical resources.
central office (CO)
The telephone company facility housing the switches and other equipment that provide telephone service for customers in an
immediate geographical area.
channel
A transmission path between two points. For example, a DS0 in a T1 line.
Cisco AS5800 Operations, Administration, Maintenance, and Provisioning Guide
DOC-7810814=
5
Glossary
circuit
A path for the transmission of electromagnetic signals to include all conditioning and signaling equipment.
circuit switching
The type of signal switching traditionally used by telephone companies to create a physical connection between a caller and a
called party.
Cisco IOS
Cisco-proprietary Internetwork Operating System.
Cisco Discovery Protocol Media (CDP)
The protocol-independent, device-discovery protocol that runs on all Cisco-manufactured equipment including routers, access
servers, bridges, and switches. Using CDP, a device can advertise its existence to other devices and receive information about
other devices on the same LAN, or on the remote side of a WAN. Runs on all media that support SNAP, including LANs,
Frame Relay, and ATM.
Command Language Interpreter (CLI)
Basic Cisco IOS configuration and management interface.
client
End-user computer on a network (local or Internet).
client/server
A distributed computing architecture in which numerous dispersed terminals, each has its own central processor and memory,
communicates with centralized processing, storage and output resources. In a client/server network, the client is a front end
resource for a user, while the server represents the back end set of resources. Servers include mainframe computers,
minicomputers, personal computers, hard disk, and other types of memory devices. Clients typically are personal computers.
Client/server also is a concept used by software programs running on distributed computing platforms. In a cable TV context,
a client is a set top terminal or other intelligent device at a customer premises.
coaxial cable
Cable that has been used for cable television installation. Being replaced by fiber optic cable of greater capacity and bandwidth.
command line interface
The TrafficDirector command-line interface on UNIX. Accessible at the shell prompt on UNIX, and accessible at the DOS
prompt on Microsoft Windows. When invoked, displays CLI usage options.
common carrier
An entitry that provides a public communications conduit without regard to content.
communications protocol
A collection of rules that ensure compatibility of transmitting and receiving equipment. Protocols usually have three main
parts, the method by which data is coded, the method by which codes are received, and the methods used to establish control,
detect errors and failures, and intiate corrective action.
Cisco AS5800 Operations, Administration, Maintenance, and Provisioning Guide
6
DOC-7810814=
Glossary
Configuration Manager
A TrafficDirector application allows you to add and configure agents, agent groups, switches, and Frame Relay agents.
Configuration Manager also provides a means for installing domains, logging, traps, and resources on a variety of agents
including DLCIs and switch ports.
Configuration Rollup (or Config Rollup)
A TrafficDirector application that allows you to define the number of days that different kinds of data are stored in an SQL
report database before being deleted.
constrained modem pool
A modem pool that has a condition imposed on the starting and ending modem numbers for it pool sub-ranges. The condition
is that the start of a pool sub-range must coincide with the start of a modem module, and the end of a pool sub-range must
coincide with the end of a modem module.
constraint-capable modem pool
A constraint-free modem-pool that has its pool sub-ranges specified that the conditions for a constrained modem-pool are met.
constraint-free modem pool
A modem pool that has no conditions imposed on the starting and ending modem numbers for its pool sub-ranges. A modem
pool is created by default to be constraint-free.
customer premises equipment (CPE)
Equipment employed at the clients location or premises (other than a carrier) to originate, route, or end telecommunications.
D
D-channel (ISDN)
This is the 24th timeslot on T1/PRI or the 16th timeslot on E1/PRI and is used for signaling information. Call setup and
teardown information is sent over the D-channel.
default firmware
The modem firmware in a firmware list that would be loaded on the modem modules in the absence of any modem
firmware-related configuration commands. This will always be the first firmware image in the firmware list.
demodulation (MOD)
The process of retrieving data from a modulated signal.
dial interface
These interfaces are used for ending digital calls. Dialer interfaces are also used for async calls.
dial pulsing (DP)
The transmitting of telephone address signals by momentarily opening a DC circuit a number of times corresponding to the
decimal digit which is dialed. Transmission and/or reception of address digits using “onhook” and “offhook” transitions of the
DC signaling variable.
Cisco AS5800 Operations, Administration, Maintenance, and Provisioning Guide
DOC-7810814=
7
Glossary
dial selective signaling (DSS)
A multipoint network in which the called party is selected by a prearranged dialing code.
dial tone (DT)
A tone indicating that automatic switching equipment is ready to receive dial signals.
dialing parity
A company that is not an affiliate of a local phone company is able to provide phone services in such a manner that customers
have the ability to route their calls automatically without the use of any access code.
digital transmission
Transmission of data, audio, or video messages in discrete codes generated by computers.
domain
The name of a computer or network on the Internet, specifically the characters to the right of the “@” sign, indicating the
organization and the type of organization (.mil=military; .org=nonprofit; .edu=educational institution; .com=commercial, etc.)
that operates that domain or the physical location of the computer (.ca=Canada, .uk=United Kingdom)
DS3
Digital signal level 3. Framing specification used for transmitting digital signals at 44.736 Mbps on a T3 facility. See also E3
and T3.
DS0 Channel
Digital Signal Level 0. A 56 or 64 kbit/s channel. The DS0 channels for the T1 also pass signaling information using
“robbed-bit” signaling.
duplex signaling (DS)
A long-range bidirectional signaling method using paths derived from transmission cable pairs. It is based on a balanced and
symmetrical circuit that is identical at both ends. This circuit presents an E&M lead interface to connecting circuits.
E
E3
Wide-area digital transmission scheme used predominantly in Europe. E3 carries data at a rate of 34.368 Mbps. See also DS3.
Compare with T3.
egress interface
Egress interfaces are network connections, or ports, used for outbound traffic flow.
EIA/TIA-232
Common physical layer interface standard, developed by EIA and TIA, that supports unbalanced circuits at signal speeds up
to 64 kbps. Closely resembles the V.24 specification. Formerly called RS-232.
Cisco AS5800 Operations, Administration, Maintenance, and Provisioning Guide
8
DOC-7810814=
Glossary
eligible telecommunications carrier
A telecommunications carrier is eligible to receive universal service support, if it offers phone service to all customers
throughout a service area without preference, and it advertises the available supported services through the mass media.
Email
Electronic mail. Messages are composed on computers and then sent over a network, in electronic form to other network users.
Ethernet
Baseband LAN specification originated by Xerox and developed jointly by Xerox, Intel, and Digital Equipment Corp. Nodes
on Ethernet networks use CSMA/CD to contend for access to the transmission medium. 10-Mbps Ethernet includes
specifications for many different cable types, including 10Base2, 10Base5, 10BaseF, 10BaseT, and 10Broad36. A newer
standard, Fast Ethernet, calls for data to be carried at 100 Mbps. Ethernet is similar to IEEE 802.3.
exchange access
The offering of access to telephone exchange services or facilities to originate or end telephone toll services.
F
faceplate
The front panel of a plug-in module such as a line card or power supply.
Federal Communications Commission
Government agency that regulates wire, satellite, and over-the-air transmissions.
fiber optic
The rapid transmission of light pulses in a coded digital format through the fiber cable. In a fiber optic transmitter, a light source
such as a laser or light-emitting diode (LED) is connected to the fiber cable. This light source converts an electronic input signal
into a series of light pulses (representing bits) by blinking on and off millions of times per second. This stream of light pulses
is the combination of many lower rate bit streams formed using digital multiplexing techniques. At the other end of the fiber,
fiber optics receivers capture the light pulses for conversion to electrical signals.
fiber optic cable
Cable that consists of several strands of glass-like material capable of transmitting modilated light using a laser, with the
capacity of 600 times that of coaxial cable.
File Transfer Protocol (FTP)
The first and most fundamental way to transfer files to and from remote computer sites. “Anonymous ftp” refers to accessing
public file archives without a password (login=anonymous, password=your email address).
firmware list
The list of available bundled modem firmware images in the modem card image running in a particular modem slot.
Cisco AS5800 Operations, Administration, Maintenance, and Provisioning Guide
DOC-7810814=
9
Glossary
G
grade of service (GS)
The probability of a call being blocked by busy trunks, expressed as a decimal fraction, and usually meaning the busy-hour
probability.
H
host
On the Internet, a host, or host computer, can serve as both way station and entry point for network users. Hosts serve
information to remote users, for example using World Wide Web or Gopher. They also provide access to the Internet for local
users, capable of logging in through a particular account. A host is similar to node, except that “host” usually implies a
computer system, whereas “node” generally applies to any networked system, including access servers and routers. See node.
hypertext
The World Wide Web is built around this concept. Documents are formatted with special tools that permit authors to link
information to other documents of relevance elsewhere on the Internet. The Web is composed of “pages,” documents written
in hypertext, or HyperText Markup Language (HTML). Using this information, graphical browsers like Mosaic or Netscape
display images and text. By clicking on highlighted text, one can move to related information and images located anywhere
around the world, reading and accessing countless pages of online information in various media (audio, video, pictures, etc.).
A nongraphical browser called Lynx also enables access to Hypertext documents, with keystrokes instead of a mouse.
I
information service
The offering for generating, acquiring, storing, transforming, processing, retrieving, utilizing, making information available
using telecommunications. This service includes electronic publishing, but does not include management, control, or operation
of a telecommunications system or the management of a telecommunications service.
ingress interface
Interfaces used for inbound traffic flow.
interexchange carrier (IXC)
Telecommunications providers that provide service between local service areas.
Internet
An international network of computer networks with common protocol standards. World wide computer interconnection.
Provides any computer with the capability of linking to any and all other computers through mainframe computer links and
telephone connections.
IOS
See Cisco IOS.
Cisco AS5800 Operations, Administration, Maintenance, and Provisioning Guide
10
DOC-7810814=
Glossary
IP address
The 32-bit address assigned to hosts using TCP/IP. An IP address belongs to one of five classes (A, B, C, D, or E) and is written
as four octets separated by periods. This is called dotted decimal format. For example: 172.16.211.0. Each address consists of
a network number, an optional subnetwork number, and a host number. The network and subnetwork numbers together are
used for routing, and the host number is used to address an individual host within the network or subnetwork. A subnet mask
is used to extract network and subnetwork information from the IP address. Also called Internet address. See also IP and subnet
mask.
IP address pools
Administratively defined numeric group of available internet protocol (IP) network device identifier. Range of numeric IP
addresses set aside for a specific allocation purpose, such as DHCP. As clients connect to the Network Access Server (NAS),
they request and are assigned an IP address from the configured IP address pool.
Integrated Services Digital Network (ISDN)
In its simplest form, called Basic rate ISDN, it provides a means of transmitting two voice channels (each operating at 64 Kbps)
and one data channel (operating at 16 Kbps) over a single pair of twisted copper conductors. The two voice channels are called
bearer, or “B” channels; the single data channel is the “D” channel. A more complex form of ISDN is called Primary rate ISDN;
in this system there are 23 "B" channels operating at 64 Kbps and one “D” channel operating at 64 Kbps. Thus the transmission
capability of Basic rate is 144 Kbps, and that of Primary rate ISDN at 1.5 Mbps.
Internet service provider (ISP)
A company that allows home and corporate users to connect to the Internet.
ITU-T
International Telecommunications Union, Standardization Sector. ITU-T is the telecommunication standardization sector of
ITU. This sector is responsible for making technical recommendations about telephone and data (including fax)
communications systems for service providers and suppliers. The ITU-T carries out the functions of the former CCITT. A sister
organization, ITU-R, carries out similar functions for radio.
L
local area network (LAN)
A limited distance network connecting a defined set of terminals. It could connect workstations within an office, offices in a
building, or buildings within a campus.
leased line
A dedicated telephone line for whatever purpose designated by the lessee. Leased lines are capable of higher transmission
speeds for data communications than regular telephone lines, and are often required for large computers with multiple users
connecting simultaneously to the Internet.
line
(a) From a switching viewpoint, the Loop, Station Equipment and Central Office - associated equipment assigned to a
customer. (b) From a Transmission view point , the transmission path between a customers station equipment and a switching
System (also called a Loop). (c) In Carrier Systems, the portion of the transmission system between two terminal locations.
The line includes the transmission media and associated line Repeaters. (d) The side of the Central Office equipment that
connects to the Outside Plant. The other side is called the drop side.
Cisco AS5800 Operations, Administration, Maintenance, and Provisioning Guide
DOC-7810814=
11
Glossary
line signaling
When configuring a router for signaling, line signaling can be used for both inbound and outbound calls. The line signaling
configuration must match the corresponding telco switch configuration.
local area network (LAN)
Intraoffice communication system usually used to provide data transmission in addition to voice transmission.
local exchange carrier (LEC)
Any company that is engaged in the provision of telephone exchange service or exchange access.
loopback
A method of performing transmission tests on a circuit not requiring the assistance of personnel at the distant end. A diagnostic
test that returns a transmitted signal to the sending device after it has passed through a network or across a particular link. The
returned signal can then be compared to the transmitted one. The discrepancy between the two helps you to trace faults. When
you are trying to locate a faulty piece of equipment, you can use repeated loopbacks to eliminate healthy machines until the
problem is found.
loopback interface
A logical interface on the router that can be used for diagnostics and troubleshooting purposes. It is also used to conserve
address space so other physical interfaces can be unnumbered to this interface. The state of the Loopback interface is always
UP/UP.
M
management information base (MIB)
A database of network management information that is used and maintained by a network management protocol such as CMIP
(Common Management Information Protocol) or SNMP (Simple Network Management Protocol). The value of a MIB object
can be changed or retrieved using CMIP or SNMP commands, usually through a GUI-based network management system. MIB
objects are organized in a tree structure that includes public (standard) and private (proprietary) branches.
MICA
Multiservice Cisco IOS Channel Aggregation. Technology that enables the simultaneous support of remote-access users
through both analog modems and ISDN devices.
modem
A device that converts digital signals generated by a computer into analog signals for transmission over telephone lines.
Modems also convert analog signals from telephone lines into digital signals for computer use. (The term stands for
modulator/demodulator).
modem pools
The modem pool covers a specified range of modems that accept calls based on the number called by dialin users. If there is
only one dial-in number, then all modems can be defined under the default modem pool. It is also used for modem firmware
upgrades.
modulation
Alterations in the characteristics of carrier waves. Usually impressed on the amplitude and the frequency.
Cisco AS5800 Operations, Administration, Maintenance, and Provisioning Guide
12
DOC-7810814=
Glossary
Multilink virtual template
A virtual template from which the specified Multilink PPP bundle can clone its interface parameters.
multiplexing
Creating multiple channels by interspersing more than one signal over a single relay, such as cable, or microwave.
N
network
A group of stations linked together to broadcast the same program simultaneously. Also used as designate cable program
providers.
network element
A facility or the equipment used in the provision of a telecommunications service. The term includes subscriber numbers,
databases, signaling systems, and information sufficient for billing and collection. It is also used in the transmission, routing,
or other provision of a telecommunications service.
network trunks
Circuits connecting switching centers.
node
Endpoint of a network connection or a junction common to two or more lines in a network. Nodes can be processors,
controllers, or workstations. Nodes, which vary in routing and other functional capabilities, can be interconnected by links, and
serve as control points in the network. “Node” is sometimes used generically to refer to any entity that can access a network,
and is frequently used interchangeably with “device.” See also host.
O
offline
The absence of connection to another computer. In an “off line” mail system, the user reads and writes e-mail messages in an
editor without a modem connection to a remote computer. Another piece of software then automatically establishes a
connection to a remote host computer, sends and receives accumulated e-mail, then hangs up. This is less interactive than
online systems, but tends to be cheaper for the user and is sometimes a necessity in areas with particularly bad telephone lines.
online
A “live” connection to another computer. In an online e-mail system, a user works directly with a remote host computer,
reading and sending e-mail while connected to that computer. Interactive Internet functions like WWW and Gopher require an
online interface.
override firmware
The modem firmware that is indicated as the alternate firmware image to which the modem module is to be upgraded.
Cisco AS5800 Operations, Administration, Maintenance, and Provisioning Guide
DOC-7810814=
13
Glossary
P
packet
A bundle of data packaged for transmission over a network. Packets can be various lengths, ranging from about 40 bytes up to
32,000 bytes on the Internet, but typically about 1,500 bytes in length. The Asynchronous Transfer Mode, a new standard for
switching data of various types over private and public networks, specifies a packet of uniform 53 byte length.
personal communication service (PCS)
Wireless technology that offers ways to exchange voice and data. Competition for cellular telephones.
point of presence (PoP)
A physical location within a LATA at which an IC establishes itself for the purpose of obtaining LATA access, and to which
the BOC provides access services.
point-to-point
A communications circuit between two terminations which does not connect with a public telephone system.
pool subrange
A contiguous range of modems. The pool-range set for a modem-pool is the logical union of a set of pool sub-ranges.
port
Entrance or access point to a computer, multiplexor device, or network where signals may be supplied, extracted, or observed.
public switched telephone network (PSTN)
General term referring to the various telephone networks and services in place worldwide. Sometimes called plain old
telephone service (POTS).
protocol
A set of rules about how computers act when talking to each other. Standard protocols are Ethernet, IEEE 802.5 token ring,
X Modem or Kermit.
Q
quality of service (QoS)
A contracted data rate that is negotiated between two ATM end points that guarantees throughput and data delivery. A
measurement of performance for a transmission system that reflects its transmission quality and service availability.
queue
A temporary delay in providing service caused by the inability of the system provided to handle the number of messages or
calls attempted.
Cisco AS5800 Operations, Administration, Maintenance, and Provisioning Guide
14
DOC-7810814=
Glossary
R
regional Bell operating company ( RBOC)
Corporate entities that emerged from the breakup of the AT&T monopoly to own local telephone service in designated
geographic regions in the USA.
remote access (ra)
The ability of transmission points to gain access to a computer that is at a different location.
routing protocol
Protocol that accomplishes routing through the implementation of a specific routing algorithm. Examples of routing protocols
include RIP, IGRP, EIGRP, OSPF, and BGP.
RS-232
See EIA/TIA-232.
S
server
The main computer on a network, including local area networks (LANs) and hosts on the Internet. So called because it “serves”
software or information to the “client” computers on the network.
service provider
A company or organization that provides e-mail or Internet connectivity, typically for a fee.
Stack Group Bidding Protocol (SGBP)
Aprotocol used for configuring Multichassis Multilink PPP.
signaling
The transmission of Address, Supervision, or other Switching information between stations and Switching Systems, or between
Switching Systems, including billing information.
Serial Line Internet Protocol and Point-to-Point Protocol (SL/IP and PPP)
Protocols used to establish real TCP/IP Internet connections over dialup lines, as opposed to leased lines.
Simple Network Management Protocol (SNMP)
Protocol used for monitoring and managing network devices.
software-defined network (SDN)
A switched long-distance service for large users with multiple locations. Instead of putting together their own network, large
users can get special usage rates for calls made on regular long-distance company switched long distance services. The service
is also know as virtual private network.
Cisco AS5800 Operations, Administration, Maintenance, and Provisioning Guide
DOC-7810814=
15
Glossary
SONET
Synchronous Optical Network. Specification for a high-speed (up to 2.5 Gbps) synchronous network developed by Bellcore
and designed to run on optical fiber. STS-1 is the basic building block of SONET. See also STS-1.
STS-1
Synchronous Transport Signal level 1. Basic building block signal of SONET, operating at 51.84 Mbps. Faster SONET rates
are defined at STS-n, where n is a multiple of 51.84 Mbps. See also SONET.
STS-3c
Synchronous Transport Signal level 3, linked together. SONET format that specifies the frame structure for the 155.52-Mbps
lines used to carry ATM cells. See also SONET.
subnet mask
A 32-bit address mask used in IP to indicate the bits of an IP address that are used for the subnet address. Sometimes referred
to simply as a mask. See also IP address.
switching
The operations involved in interconnecting circuits in order to establish communications.
switching office (SO)
A telephone company office that contains a switch. Also known as Cenral Office (CO).
synchronous transmission
A method of sending information over a transmission line, and separating discrete characters and symbols by a precise
separation in time. Synchronous transmission offers higher throughput because it does not require the start-stop bits used by
asynchronous methods. Synchronous transmission is more expensive than other transmission methods.
T
Terminal Acess Controller Access Control System Plus ( TACACS+)
A proprietary Cisco enhancement to Terminal Access Controller Access Control System (TACACS). Provides additional
support for authentication, authorization, and accounting. Authentication protocol that provides remote access authentication
and related services, such as event logging. User passwords are administered in a central database rather than in individual
routers, providing an easily-scalable network security solution.
T-1 (T-1) (T1)
Twenty-four (24) voice channels digitized at 64,000 bps, combined into a single 1. 544-Mbps digital stream (8000-bps
signaling), and carried over two pairs of regular copper telephone wires. Used primarily by telephone companies until 1983.
Now used for dedicated local access to long distance facilities, long-haul private lines, and for regular local service. Today,
most any 1.544 Mbps digital stream is called T-1, regardless of its makeup or transmission medium.
T-3 (T-3) (T3)
Digital WAN carrier facility. T3 transmits DS-3 formatted data or voice at 44.736 Mbps through the telephone switching
network using fiber optic cable.
Cisco AS5800 Operations, Administration, Maintenance, and Provisioning Guide
16
DOC-7810814=
Glossary
T-carrier (T-1)
A 4-wire digital transmission system which carries a 1.544-Mb/s digital bitstream in each direction. When using one of the
framed formats (for example, D4 or ESF), T-1 has 1.536 Mb/s available for user data or digititized voice. Usually channelized
into 24 voiceband channels using TDM (24 8-bit PCM samples per 193-bit frame).
TCP/IP
Transmission Control Protocol/Internet Protocol, TCP and IP are two open protocol standards used among computers
connected to the Internet, allowing different computer systems and platforms to share data seamlessly. TCP/IP forms the
foundation for Internet communications, and provides such services such as Gopher and World Wide Web.
Tellcordia Technologies
Formerly Bellcore. See Bellcore.
TELCO (BOC)
Local telephone company.
telecommunications
The transmission of voice and data through a medium of electrical impulses, and includes all aspects of transmitting
information.
telecommunications carrier
Any provider or common carrier of telecommunications services.
telecommunications equipment
Equipment, other than customer premises equipment, used by a carrier to provide telecommunications services, and includes
software integral to such equipment (including upgrades).
telecommunications service
The offering of telecommunications, for a fee, directly to the public.
Telnet
A method of connecting from one host computer system to another using the Internet. Telnet allows users to log in to accounts
on remote systems, and retrieve text-based information from a remote host.
terminal
A point where information can enter or leave a communications network.
terminal equipment (TE)
Devices and their associated interfaces used to forward information to a local customer or distant terminal.
TFTP
Trivial File Transfer Protocol. Simplified version of FTP that allows files to be transferred between computers over a network.
Cisco AS5800 Operations, Administration, Maintenance, and Provisioning Guide
DOC-7810814=
17
Glossary
tip and ring
The two sides of a telephone circuit. The names come from old telephone switch board plugs: the tip wire was connected to
the tip of the plug, and the ring wire was connected to the ring at the base of the plug.
topology
Physical arrangement of network nodes and media within an enterprise networking structure.
traffic
Calls being sent and received over a communications network.
transmission (XMISSION) (XMIT)
The electrical transfer of a signal, message, or other form of data from one location to another, with acceptable loss of content
due to attenuation, distortion, or noise.
trunk
A communication channel between two Switching Systems.
TTY line
These are asynchronous lines on the router. TTY is a line configuration, not an interface configuration. These lines correspond
to async interfaces that are configured separately.
V
V.120
Dedicated PPP Dial-in.
virtual profiles
Virtual Profiles is a unique Point-to-Point application that can create and configure a virtual access interface dynamically when
a dial-in call is received, and tear down the interface dynamically when the call ends.
virtual template
Virutal Templates are used for cloning virtual-access interfaces for inbound calls.
voiceband channel
A transmission channel with a nominal 4 kHz bandwidth, suitable for voice transmission. If sampled at an 8 kHz sampling rate
with 8 bit/sample, it becomes a 64 kbit/s data stream.
voice over IP (VoIP)
A technology used to transport voice traffic over the Internet using the existing IP network infrastructure.
VPDN
Virtual Private Dialup Network. The forwarding of PPP links from an Internet Service Provider (ISP) to a home gateway. L2TP
and L2F are common options for tunneling protocol.
Cisco AS5800 Operations, Administration, Maintenance, and Provisioning Guide
18
DOC-7810814=
Glossary
W
wide area network (WAN)
An integrated data network linking metropolitan or local networks over common carrier facilities.
World Wide Web (WWW)
The newest and increasingly the most popular service on the Internet, WWW is a “hypertext” information system capable of
presenting multimedia information to those with a “direct connection” to the Internet. It requires SL/IP, PPP, or some other
dedicated Internet connection and browser software (like Mosaic or Netscape). Users without such a dedicated connection, but
who have an online account, can use Lynx, a nongraphical, text-based browser.
Cisco AS5800 Operations, Administration, Maintenance, and Provisioning Guide
DOC-7810814=
19
Glossary
Cisco AS5800 Operations, Administration, Maintenance, and Provisioning Guide
20
DOC-7810814=
I N D E X
address pools
Symbols
See IP address pools
?
A-23
advanced configurations
IOS command help
1-10
A-2
advanced quick reference
A-1
alarm conditions, T1 controllers
2-30
architecture
A
basic hardware
AAA
Cisco AS5800 system
A-12
debug command
authentication
basic setup verification
A-36
4-24
debug command
A-36
authentication command
dial-shelf troubleshooting
5-45
3-11
2-16
2-16
router shelf troubleshooting
2-23
5-44
See access server
3-25
AS5814 configuration sample
4-29
per-user
2-15
asynchronous
debug command
interface
A-36
aaa authentication login default local command
aaa authentication ppp default if-needed local
command 2-23
aaa new-model command
2-23, 2-33, 4-29
access
2-23, 2-33
A-19
PPP call consumption
PPP calls
testing EXEC shell connections
2-1
async mode interactive command
3-27
authentication
access-list command
4-8
4-9
configuring
4-13
4-24, ?? to 4-34
applying to lines and interfaces
access server
defining
5-2
4-13
AC-input power shelf
3-12
lists
4-13, A-35
power OFF procedure
2-4
2-3
at commands
1-8, A-1
interfaces, disable logging
accounting
2-2
memory locations
A-36
configuring PPP authentication
access lists
Cisco system architecture
memory location descriptions
debug command
configuring
2-1, 2-5
IOS commands, unsupported
4-30
authorization
hardware
2-2
AS5800
accounting
enabling
2-1
local
4-29
4-13
multiple methods, specifying
5-3
4-33
name of list, defining
4-31
4-30
Cisco AS5850 Operations, Administration, Maintenance, and Provisioning Guide
OL-0552-01
1
Index
PPP
call states, inspecting
3-25, 3-31, 4-30
remote
call statistics
4-13
security
gathering
4-31
troubleshooting
typical lists
3-34
3-49
show caller
3-31
viewing
4-32
authentication, authorization, and accounting
See AAA
3-34
3-49
CAM modem connect-speed
card, DSC
3-55
2-8
authorization
4-13
card state detection, DSIP
configuring
4-34
CCO modem firmware, downloading
description
4-13
changes
EXEC
command mode
4-34
network
autoselect during-login command
3-28
3-44
1-9
saving configuration
4-34
2-7
1-11
checking initial running-config
checklists, infrastructure
2-14
6-1
Cisco 3640
B
functionality
banner, login
See system controller
2-24
basic hardware architecture
basic IOS configuration
2-1
Cisco 5814
See dial shelf
2-22
Cisco 7206
basic setup
IP enablement
flash memory
2-1, 2-35
verifying AS5800
boot dialog
2-3
router shelf
2-1, 2-5
2-2
configuration sample
2-5
bootFlash contents
documentation
2-18
booting for the first time
business scenario
2-8
1-15
xiii
Cisco AS5814
configuration sample
1-5
2-14
contents
2-15
2-3
Cisco IOS
C
configuring
2-22
corporate business scenario
calculations
bytes to megabytes
file system
2-20
total processor memory
2-20
2-16
image, matching
installing new
caller
show command
3-6
3-14
release, V.90 support
A-36
call-processing components
calls, asynchronous PPP
6-6
packet sampling
caller user username
show command
2-8
line-side inspection
A-36
2-3
2-3
1-5
3-9
software documentation
software images
versions used
xiii
1-12
1-5
Cisco AS5850 Operations, Administration, Maintenance, and Provisioning Guide
2
OL-0552-01
Index
Cisco marketing tools
CiscoSecure
logout
2-29
A-1
A-1
mode changes
A-1
CLI script definition
PPP multilink
A-14
AAA authentication
AAA RADIUS server
dial interface
A-15
A-20
D-channel (ISDN)
squeeze
2-18
undoing
1-11
AAA accounting
A-22
A-14
AAA authentication
finalized operational
global parameters
IP address pools
async interface
A-24
line signaling (ISDN)
A-9
dial interface
egress
multilink virtual template
routing protocols
A-11
A-22
A-3
finalized operational
A-17
global parameters
A-31
IP address pools
A-5
A-15
A-20
D-channel (ISDN)
A-4
modem pools
A-14
AAA RADIUS server
A-33
A-10
A-12
AAA authorization
A-35
line signaling (CAS)
2-19
command line descriptions
A-11
A-3
loopback
2-7
show memory summary
A-14
A-35
A-33
A-24
SGBP
A-27
line signaling (CAS)
A-10
SNMP
A-29
line signaling (ISDN)
A-9
T1 ingress
A-8
loopback
T3 ingress
A-7
modem pools
TTY line
V.120
VPDN
A-30
A-25
A-28
clocks
locating source
system
A-27
SNMP
A-29
T1 ingress
A-8
T3 ingress
A-7
V.120
1-2
1-10
A-30
A-25
A-28
command modes
A-1
A-5
A-32
virtual templates
VPDN
A-1
help (?) notation
A-23
A-31
A-18
virtual profiles
dialer-list 1 protocol IP permit
exit
SGBP
TTY line
4-4
command
disable
A-17
routing protocols
A-32
virtual templates
A-4
multilink virtual template
A-18
virtual profiles
A-22
A-23
show environment
A-12
AAA authorization
async interface
1-9
PPP authentication pap callin
AAA accounting
egress
A-1
line interface
4-14
clear counters command
CLI
interpreter
xiii
privileged EXEC
1-9
A-1
Cisco AS5850 Operations, Administration, Maintenance, and Provisioning Guide
OL-0552-01
3
Index
rommon
design parameters
A-1
user EXEC
corporate
A-1
user interface
IP
1-8
command scripts
1-6
1-6
dial interface
AAA accounting
egress
A-15
AAA authentication
A-22
A-3
egress custom
A-13
A-3
AAA RADIUS server
A-16
finalized operational
AAA TACACS server
A-16
global parameters
async interface
D-channel
egress
loopback
A-4
finalized operational
global parameters
routing protocol
A-4
A-17
multilink virtual templates
routing protocol
A-6
A-31
SGBP
A-26
SNMP
A-28
T1 ingress
A-8
T3 ingress
A-7
SGBP
A-27
TACACS server
SNMP
A-29
TTY line
A-8
V.120
T3 ingress
A-7
virtual profile
VPDN
A-30
virtual template
VPDN
A-25
A-28
configuration notes
2-1
common logic interface
1-2
operational
xiv
AAA accounting
AAA authorization
A-12
A-13
AAA RADIUS server
async interface
A-11
A-20
A-35
A-2
configuration sample
A-14
AAA authentication
xiii
A-2
quick reference
A-7, A-8
4-25
configurations
advanced
compliance
configuration
A-30
unauthenticated access, preventing
commissioning
D-channel
A-31
configuration mode
A-26
A-28
regulatory
A-16
virtual template
A-19
virtual profiles
1-11
A-18
T1 ingress
TTY line
A-31
A-5
saving changes
A-9
modem pools
A-17
multilink virtual template
A-24
loopback interface
A-10
A-4
modem pools
A-35
A-34
IP address pools
A-9
line signaling (CAS)
A-23
line signaling
A-24
line signal (ISDN)
A-11
dial interface
A-33
IP address pools
A-21
A-34
A-15
7206 router shelf
Cisco AS5814
2-14
2-15
configuring
AAA
2-23
Cisco IOS
6-2
Cisco AS5850 Operations, Administration, Maintenance, and Provisioning Guide
4
OL-0552-01
Index
Cisco IOS basics
dial shelf ID
global parameters script
1-19
modems and lines
PPP
finalized operational script
2-22
line signaling script
3-25
router shelf ID
security
serial interfaces
2-1
SNMP
split dial shelf routers
6-23
system management
1-20
confirming final running-config
2-1, 2-39
SGBP script
A-27
SNMP script
A-29
T1 ingress script
A-8
T3 ingress script
A-7
TTY line script
A-6
A-30
virtual template script
1-10
controller configuration mode
VPDN script
A-1
controllers
A-31
A-19
virtual profiles script
3-29
context-sensitive help
A-26
A-28
corporate
configuration
DSC
A-17
routing protocol script
xiii
console, logging
A-4
multilink virtual templates script
1-20
software
A-9
modem pools script
4-13
2-31
A-24
loopback interface script
1-19
serial interface
A-34
IP address pools script
2-1, 2-33
A-35
configuration design parameters
1-9
IP domain name scenario
2-3
enablement
IP subnetting plan
2-1, 2-26
1-7
1-6
matching settings
2-26
CPU utilization display fields
show t1 command
A-36
csm modem
debug command
system
xiii
T3/T1
2-26
Ctrl-Z
terms
2-28
current interface summary
conventions, document
copy ftp command
egress
3-44
3-46
copy running-config startup-config
copy tftp command
2-21
A-36
A-1
1-20
custom configuration
x
copy modem command
2-22
A-3
T1 ingress
A-8
T3 ingress
A-7
3-44
copy the
AAA accounting script
D
A-15
AAA authentication script
A-13
datacomm, async model
3-2
AAA RADIUS server script
A-16
D-channels (ISDN)
AAA TACACS server script
A-16
debug aaa authentication command
async interface script
D-channel script
A-4
A-21
A-11
dial interface script
egress script
1-6
A-23
A-10
debug cas command
debug commands
3-29
3-11
A-36
debug confmodem command
debug modem command
3-49
3-2
Cisco AS5850 Operations, Administration, Maintenance, and Provisioning Guide
OL-0552-01
5
Index
debug modem csm command
debug ppp authentication command
debug q931 command
Cisco DS5814
3-10, 3-13
3-29
3-13
debug trunk cas port timeslots command
3-11
descriptions
AAA accounting
A-14
AAA authentication
A-14
AAA RADIUS server
A-15
AS5800 memory location
async interface
dial interface
egress
IOS image
2-8
PEM
installing
5-4
removing
5-4
5-3
show command
A-36
dialup networking
3-29
dir flash command
disable command
A-22
global parameters
IP address pools
1-11
display fields, CPU utilization
A-35
DMM card
A-33
A-10
line signaling (ISDN)
A-9
2-10
Cisco 7206 router shelf
Cisco 7206 RS
conventions
A-17
multilink virtual template
related
A-5
xiii
x
list of related
A-31
xiii
xii
SGBP
A-27
resources
SNMP
A-29
system controller
xiv
xiii
T1 ingress
A-8
domain name
T3 ingress
A-7
domain name commands
TTY line
V.120
DRAM
A-18
virtual profiles
2-10, 2-18
card
A-25
design parameters
5-21
troubleshooting
corporate configuration
1-6
detecting DSIP card state
2-7
dialer-list 1 protocol IP permit command
A-21
dial shelf
2-2
2-8
interface
A-28
dial interface
2-36
DSC
A-30
virtual templates
VPDN
1-7
DS5814 dial shelf
A-32
xiii
xiii
Cisco IOS software
A-4
routing protocols
DSIP
2-10, 2-12
2-12
card state detection
A-23
Cisco 7206
2-7
2-3
command reference
2-12
dsip console slave command
Cisco AS5814
2-21
documentation
A-24
line signaling (CAS)
modem pools
2-17
A-1
disabling a feature
finalized operational
2-18, 3-43
3-43
dir system command
A-11
A-3
loopback
2-9
dir bootflash command
2-16
A-20
D-channel (ISDN)
inspecting
powering off
A-12
AAA authorization
2-2
3-11
2-2
Cisco AS5850 Operations, Administration, Maintenance, and Provisioning Guide
6
OL-0552-01
Index
field-replaceable units
E
5-1
fields, CPU utilization display
E0 interface
1-8
file system, exploring IOS
egress
filter module, replacing
7206 router shelf
2-2
A-3
managing
3-4
signal state behavior
upgrading
2-22, 4-25
enabling
3-45
3-44
flash memory, Cisco 7206
fragmentation, memory
IP basic setup
2-1, 2-35
T1/T3 controllers
FreeMem
2-1, 2-26
encapsulation PPP command
encrypted passwords
end command
2-1, 2-39
3-41
unbundling
3-5
enable password command
FRUs
3-27
2-8
2-19
2-19
5-1
functional components
A-2
4-25, 4-32
A-1
environment, system requirements
equipment selections
1-5
boot image
2-6
split dial shelf
6-1
G
global parameters
error messages
A-32
group-async command
3-27
group-range command
3-28
6-24
Ethernet0 interface
1-8
H
EXEC
bypass
3-28
hardware
input buffer, clearing
login keyword
using
5-8
firmware modems
EIA/TIA-232
pin configuration
2-16
final running-config, confirming
custom configuration
2-21
3-25
access
3-25
architecture
3-1, 3-50
2-1
maintenance procedures
EXEC shell connections
asynchronous testing
HDLC resources
2-1, 2-36
2-4
command prompt (?)
show version command
2-9
A-1
context-sensitive
host, Telnet
F
5-1
help
execute-on slot
exit command
1-8, A-1
1-10
1-10
1-8, A-1
I
F0 interface
1-8
icon notation
fast switching statistics
FDDI interface
feature disabling
1-8
3-36
xi
IFS (IOS File System)
image
2-16
2-8
1-11
Cisco AS5850 Operations, Administration, Maintenance, and Provisioning Guide
OL-0552-01
7
Index
dial shelf IOS
upgrade procedures
2-8
DSC card
2-8
matching
2-8
IP
1-7
address pools
router shelf IOS
A-23
address strategy
2-8
infrastructure checklists
6-5
1-6
basic setup enablement
6-1
ingress
configuration design parameters
DS5814 dial shelf
interface
configuring
2-2
domain name
1-2, A-6
1-7
A-8
IPCP configuring options
T3 custom configuration
A-7
local pool
initiating modems, loopback test call
show command
3-9
inspecting
CPU utilization
2-21
network topology
1-5
operation strategy
1-22
2-9
routing commands
2-35
NVRAM
2-19
subnet assignments
1-6
subnetting plan
filter module
3-27
isdn
6-6
show command
5-4
interface
A-36
isdn q921
authentication lists for
configuration
Ethernet (E0)
FDDI (F0)
debug command
4-33
A-36
isdn q931
1-9, A-1
configuring serial
debug command
2-1, 2-31
ISDN status
1-8
A-36
2-32
isdn switch-type command
1-8
2-26
1-8, A-1
router
1-8
Serial0 (S0)
1-8
Serial1 (S1)
1-8
user command
K
K56Flex autoconfigure example
3-49
1-8
international agency compliance
interpreter command
IOS
1-6
ip unnumbered FastEthernet command
5-8
new Cisco IOS version
PEMs
3-26
A-36
dial shelf
installation
1-6
2-25
T1 custom configuration
ports
2-1, 2-35
xiv
L
A-1
2-16
LCP
configuration basics
2-22
dial shelf image
2-8
image matching
2-8
installing new
configure-request
options
router shelf image
3-27
line configuration
6-6
3-33
1-9, 2-1, 2-33, A-1
line item descriptions
2-8
software documentation
AAA accounting
A-14
xiii
Cisco AS5850 Operations, Administration, Maintenance, and Provisioning Guide
8
OL-0552-01
Index
AAA authentication
AAA authorization
egress
logout command
A-11
interface
finalized operational
global parameters
test call
A-35
A-24
A-10
line signaling (ISDN)
A-9
maintenance
A-17
routing protocols
SNMP
A-29
3-9, 3-16
5-1
management system, network configurations
managing a split dial shelf
multilink virtual template
A-27
A-4
M
A-4
SGBP
A-1
A-33
line signaling (CAS)
modem pools
A-31
marketing tools, Cisco
A-5
calculations
2-20
2-17
T3 ingress
A-7
Cisco 7206 flash
2-8
A-18
fragmentation
A-32
leaks
virtual profiles
A-30
virtual templates
A-25
A-28
line signaling
4-33
2-16
processor
2-16
2-19
described
line summary
local authentication
2-16
MICA modem
A-9
show command
2-19
locations
usage
authentication lists for
2-19
location descriptions
lines
3-40
modem autoconfigure type mica command
A-36
4-13
local username database
4-32
Microcom modem
3-40
misconfigurations
5-44
mode
location
3-48
1-9, A-1
modem
AS5800 memory
2-16
configuration
AS5800 memory descriptions
specify interface and port
logging
2-8
memory
cards, PCMCIA
VPDN
6-23
matching Cisco IOS images
A-8
V.120
xiii
xiii
T1 ingress
TTY line
4-33
loopback
A-3
loopback
3-15
login authentication command
A-22
IP address pools
4-6
show modem command
A-15
A-20
D-channel (ISDN)
dial interface
debugging command
A-14
AAA RADIUS server
async interface
logging trap
A-12
3-29
console
csm debug command
3-46
3-40
show command
4-6
A-36
mapping commands
Microcom
3-29
logging command
2-3
2-16
2-1, 2-33
A-36
upgrade procedures
6-13, 6-14
Cisco AS5850 Operations, Administration, Maintenance, and Provisioning Guide
OL-0552-01
9
Index
modem at-mode command
numbering scheme
3-15, 3-20
modem autoconfigure command
show modemcap command
3-49
modem autoconfigure discovery command
modem autoconfigure type command
modem operational-status command
3-40
V.34
3-7
V.90
3-8, 3-17
test call
3-17
1-9
1-8
modify the
3-12
ati3 and ati7 commands
at-mode
3-48
user interface command
3-22
at commands
3-40
using autoconfigure
command
+++ command
3-18
AAA accounting script
A-15
AAA authentication script
3-15
autoconfigure
basic rules
3-48
K56Flex example
call-record terse
call statistics
A-16
AAA TACACS server script
A-16
D-channel script
3-54
egress script
3-22
connect speed, CAM graph
control
3-54
A-21
A-11
dial interface script
3-49
A-23
A-4
finalized operational script
global parameters script
DCD/DTR
line signaling script
3-40, 3-44
escape sequence
field descriptions
show modem
A-24
A-9
loopback interface script
3-22
modem pools script
firmware
A-17
routing protocol script
3-44
SGBP script
A-27
A-29
inspecting
3-42
SNMP script
unbundled
3-45
T1 ingress script
A-8
upgrading
3-44
T3 ingress script
A-7
TTY line script
3-17
loopback test call
A-6
A-30
virtual template script
VPDN script
3-40
related documents
3-41
modulation standards
3-7
NAS access path
A-31
A-19
virtual profiles script
3-9
management
operations
A-4
multilink virtual templates script
3-21
CCO download
A-35
A-34
IP address pools script
2-34
A-13
AAA RADIUS server script
async interface script
3-49
client-side statistics
line shape
3-48
modes
A-16
modems
DSP
3-48
3-11
3-24
SPE
terms used
2-33
modem-mgmt csm debug-rbs command
modem pools
3-48
3-48
modem autoconfigure type mica command
modem inout command
2-34
A-26
A-28
Multilink virtual template
A-30
3-3
Cisco AS5850 Operations, Administration, Maintenance, and Provisioning Guide
10
OL-0552-01
Index
AAA accounting script
N
A-15
AAA authentication script
NEMS, IP address
1-7
network
dial plan
1-6
protocols
4-2
NOC
AAA TACACS server script
A-16
A-21
A-11
dial interface script
xiii
egress script
6-3
topology
A-16
D-channel script
system documentation
service
AAA RADIUS server script
async interface script
network management
A-23
A-4
finalized operational script
1-5
global parameters script
2-25
no cdp enable command
3-28
no ip directed-broadcast command
line signaling script
3-28
no ip tcp header-compression command
no modem log command
A-9
modem pools script
2-34
A-17
routing protocol script
(?) IOS command help
1-10
SGBP script
A-27
shelf/slot/port
2-3
SNMP script
A-29
three-element
2-3
T1 ingress script
A-8
T3 ingress script
A-7
NTP
4-2, 4-3
RFC 1305
TTY line script
4-3
A-6
A-30
virtual template script
2-19
VPDN script
saving configuration to
1-11
A-26
A-28
peer default ip address pool addr-pool command
2-6
PEM, replacing
plan, IP subnetting
O
1-6
See IP address pools
A-34, A-35
POP server
3-1
operation strategy, IP
2-20
parameters, configuration design
1-17
1-6
2-10
port
adapter, DSI
P
A-23
1-5
populated DMM card
1-22
output field descriptions, show memory summary
paste the
6-1
pools
operational configurations
passwords
3-28
5-4
physical infrastructure checklists
operations
A-31
A-19
virtual profiles script
NVRAM
inspecting
A-4
multilink virtual templates script
notation
testing
A-24
loopback interface script
3-37
A-35
A-34
IP address pools script
enabling
A-13
2-3
interface
1-8, A-1
notation
2-3
POTS configuration
2-32
power OFF procedure
access server
5-2
Cisco AS5850 Operations, Administration, Maintenance, and Provisioning Guide
OL-0552-01
11
Index
AC-input power shelf
dial shelf
provisioning
5-3
PSTN
5-3
router shelf
asynchronous connections, testing
authentication
3-29
3-25
debug command
4-29
quick reference configurations
A-2
3-31
autoselect, enabling
call-processing
configuring
A-22
3-28
debug command
multilink command
A-23
regulatory compliance
xiv
remote authentication
4-13
A-36
AAA plan
1-5
troubleshooting
D-channel
3-31
ppp authentication command
3-27
4-29, 4-33
2-3
egress
A-3
final operational
ingress
1-8
1-8
6-1
protocols
5-1
A-9
A-16
multilink virtual template
4-25
4-25
routing protocol
SGBP
A-26
SNMP
A-28
TTY line
V.120
A-30
A-5
A-18
A-31
virtual profile
4-2
A-33
A-4
modem pool
1-9, A-1
unauthenticated access, preventing
procedures
loopback
2-31
preventing unauthenticated access
A-34
A-6
line signaling
telephone numbers used
privileged EXEC mode
A-21
global parameters
PRI
switch type, ISDN
A-19
A-10
dial interface
ppp authentication chap pap command
pri-group command
A-12
async interface
2-4
PPP calls, asynchronous
6-1
requisites
3-29
resource consumption
upgrade
5-1
requirements, system environment
debug command
replacement
A-1
replacement procedures
negotiation
POP server
A-36
reference, quick
3-27
2-4
debugging
4-13
radius
3-34
3-25, 3-33
dialup framing
R
RADIUS
2-3
call states, inspecting
SNMP
1-10
A-36
authentication pap callin command
NTP
Q
question mark (?), IOS command help
CHAP versus PAP
HDLC
2-3
5-2
PPP
failure
6-1
virtual template
A-29
A-25
4-2
Cisco AS5850 Operations, Administration, Maintenance, and Provisioning Guide
12
OL-0552-01
Index
VPDN
AAA accounting
A-27
resources
AAA authentication
allocation
documentation
AS5814
xiv
authentication lists
3-11
D-channel
3-26
route caching statistics
A-1
router
interfaces
A-1
1-7
1-8
router shelf
A-22
A-3
A-33
IP Address Pools
A-24
line signaling (CAS)
A-10
line signaling (ISDN)
A-9
loopback
2-2, 2-3
Cisco 7206 documentation
configuration sample
IOS image
xiii
2-14
powering off
replacing components
restart reason
modem pools
A-17
multilink virtual template
routing protocols
5-2
5-1
route summarization
routing protocol
A-35
A-5
running-config
confirming final
2-1, 2-39, 3-38
initial checking
running-config
security
2-8
2-14
SGBP
A-26
SNMP
A-28
T1 ingress
A-8
T3 ingress
A-7
A-30
1-8
virtual templates
S1 interface
1-8
VPDN
A-25
A-28
sample running-config
2-1
saving configuration changes
xi
1-11
scripts
sample configuration
7206 router shelf
A-16
A-31
S0 interface
xi
4-38
A-18
virtual profile
safety warnings
A-5
TACACS+ for login, PPP
V.120
Safety Warnings
4-34
4-38
TTY line
S
A-31
2-39
TACACS server
2-1, 2-39
4-33
A-4
PPP authentication
2-8
A-34
global parameters
login authentication
Cisco 7206
sample
4-32 to 4-33
finalized operational
3-36
configuration mode
egress
4-38
A-11
dial interface
A-1
ROM monitor command mode
host names
A-20
authentication and authorization, local
2-8
rommon command mode
A-15
2-15
async interface
restart reason, router shelf
RFC 1877
A-13
AAA RADIUS server
2-4
2-4
reverse Telnet
A-12
AAA authorization
6-19
consumption, PPP
HDLC
A-14
2-14
AAA accounting
A-15
Cisco AS5850 Operations, Administration, Maintenance, and Provisioning Guide
OL-0552-01
13
Index
AAA authentication
basic IP enablement
A-13
2-1, 2-35
AAA RADIUS server
A-16
setup script
AAA TACACS server
A-16
verifying basic AS5800
async interface
D-channel
A-26
Cisco 7206 router
A-23
2-2
Cisco DS5814 dial
A-4
finalized operational
global parameters
2-3
shell connections, testing
asynchronous EXEC
A-9
2-1, 2-36
show bootflash command
A-4
show caller command
A-17
multilink virtual templates
routing protocol
2-2
2-3
shelf/slot/port
A-24
loopback interface
modem pools
notation
A-35
A-34
IP address pools
line signaling
2-1, 2-5
shelf
A-11
dial interface
egress
SGBP
A-21
1-16
3-43
2-38, 3-19, 3-34
show caller user command
A-31
show commands
A-6
3-35
A-36
SGBP
A-27
show controller command
SNMP
A-29
show controllers T1 call-counters command
T1 ingress
A-8
show counters command
T3 ingress
A-7
show debug command
TTY line
A-19
virtual profiles
A-30
virtual template
VPDN
sdn incoming-voice modem command
2-31
security
4-13
configuration mode
4-25
defining in authentication list
3-11
show dial-shelf command
2-9, 6-21
show dsip version command
2-13
show environment command
2-7
4-25
profiles, remote security servers, stored on
server, communicating with
4-26
2-17
show flash command
3-43
show interface async
3-36
show ip cache command
5-21
4-31
privileged EXEC mode
4-14
show ip int async command
3-37
show ip interface command
2-30
show ip local pool command
show line command
3-26
3-2, 4-34
1-8
show line tty command
3-6
Serial1 interface
1-8
show memory summary
2-20
service internal command
3-11
service password encryption
setup
2-1, 2-31
4-26
3-36
3-37
Serial0 interface
serial interfaces, configuring
2-13
show interface async command
4-31
Ethernet interfaces on the DSC
multiple methods
3-29
show dial shelf command
show file systems
3-53
2-29
show dsip transport command
A-26
A-28
access service
2-29
show memory summary command
2-19
show modem bundled-firmware command
show modem call-stats command
show modemcap command
3-42
3-51
3-48
Cisco AS5850 Operations, Administration, Maintenance, and Provisioning Guide
14
OL-0552-01
Index
show modem command
router configuration
3-11, 3-50
show modem connect-speeds command
show modem log command
show modem summary command
leaving
3-15, 3-20
6-21
transition procedure
3-50
squeeze command
6-16
show modem version command
3-42
show ntp association command
4-4
3-36
3-36
route caching
show privilege command
2-22
subnet strategy
show terminal command
slot notation
SNMP
buffer
2-8
logging
enabling
format
1-7
4-4
4-5
architecture
4-7
controller
4-9
2-2
xiii, 2-3
environment, requirements
4-3
security
3-54
SNMP commands
snmp-server contact admin
snmp-server host command
4-8
snmp-server location command
snmp-server trap-source
4-8
software upgrade requisites
3-46
6-6
4-8
T
t1 controller command
4-8
2-1, 2-26, 2-31
T3 controllers
2-1, 2-26
TACACS+
4-13
for login, PPP
interface location
port location
2-3
2-3
split dial shelf
2-27
T1 controllers
daemon process
specify
6-1
4-8
4-8
snmp-server enable traps command
6-1
5-21
upgrade procedures
4-8
snmp-server community command
SPE
4-6
system
4-2, 4-7
RFC 1157
using
4-6
commands
2-3
event interaction
2-4
syslog
A-28
enabling
A-35
synchronous PPP call consumption
3-14, 3-19
2-38, 3-14, 3-19
community strings
1-6
summarization, route
4-9
show version command
1-6
subnetting plan, IP
2-21
show user command
2-18
fast switching
4-4
show snmp command
6-19
statistics
show ntp status command
show processes cpu
6-21
split mode
2-34, 3-15, 3-20
show modem operational-status command
show modem version
show commands
3-52
6-23
4-14
4-38
server, configuring authentication
TDM resource allocation
4-28
6-19
Telnet
error messages
managing
6-23
problems
6-21
6-24
from host
reverse
1-8, A-1
3-11
template, Multilink virtual
A-30
Cisco AS5850 Operations, Administration, Maintenance, and Provisioning Guide
OL-0552-01
15
Index
terminal length command
Cisco 7206 Installation and Configuration Guide
3-14
testing
asynchronous EXEC shell connections
three-element notation
2-1, 2-36
2-3
time stamps, configuring
xiii
transition procedure for split mode
6-19
AS5800 dial shelf
5-44
Cisco IOS Release 12.0 Dial Solutions Command
Reference 3-41
6-2
2-12
flow diagrams
4-3
Cisco IOS Release 12.0 Configuration Fundamentals
Configuration Guide 4-3
5-45
AS5800 router shelf
TTY line
Cisco AS5800 Universal Access Server Regulatory
Compliance and Safety Information xi, xiv
Cisco IOS Release 12.0 Command Reference
troubleshooting
Cisco IOS
Cisco AS5800 Access Server Hardware Installation
Guide xiv, 1-3, 1-4, 5-1, 5-8, 5-27, 5-44, 6-1
Cisco AS5800 Universal Access Server Dial Shelf
Card Guide xiv, 1-3
2-22
tools, Cisco marketing
DSC
Cisco IOS Release 12.0 Dial Solutions Configuration
Guide 3-41
3-31
Cisco IOS software
A-18
xiii
Cisco IOS switching commands
Cisco Software Center
U
3-38
3-41
configuration fundamentals, command reference
undoing a command
dial and system management commands
1-11
units, field replaceable
dialin port setup
5-1
modem firmware
Up state
hardware-software matrix
6-1
uptime, router shelf
modem manuals
2-8
DSIP command reference
Modemsite.com
2-12
3-16, A-16
3-17
modem release notes
URLs
3-44
3-17, 3-23
Multichassis Multilink PPP (MMP)
referenced
56K modem diagnostics
access-dial technical tips
AT commands
Networking Products MarketPlace
3-23
NTP management protocol
A-31
RADIUS commands
3-17
RFC 1157, SNMP
CE1 and CT1 setup commands
RFC 1918, IP addresses
Cisco.com
2-30
xvi
Cisco.com software planner
4-3
4-3
1-6
SNMP management protocol
Cisco 7200 Regulatory Compliance and Safety
Information 6-25
Subscription Store
Cisco 7200 VXR Installation and Configuration
Guide 1-3, 1-4, 6-25
TAC
xv
4-3
RFC Best Current Practices memo
6-7
A-26
A-12
Authentication, Authorization, and Accounting
(AAA) A-12
RFC 1305, NTP
2-6
2-6
modem management commands
2-9
2-12
3-41
hardware-software compatibility matrix
6-13, 6-14
4-3
2-30
firmware and portware
upgrade procedures
system
1-4,
5-1, 5-22, 5-23, 5-32
1-6
4-3
xv
supported SNMP traps
4-7
xvi
updated modem code
3-8
Cisco AS5850 Operations, Administration, Maintenance, and Provisioning Guide
16
OL-0552-01
Index
voice over IP
A-32
user-interface command modes
username command
1-8, 1-9, A-1
4-32
utilization, inspecting CPU
2-21
utilization display fields, CPU
2-21
V
V.120
V.34
A-31
3-7
V.90
basic rules
3-8
Cisco IOS support
line shape
test calls
3-9
3-17
3-17
verifying
AS5800 basic setup
Cisco IOS
2-1, 2-5
6-2
version
show command
virtual profiles
virtual template
VoIP
A-36
A-29
A-25
A-32
VPDN
A-27
vpdn l2x-errors
debug command
A-36
vpdn l2x-events
debug command
A-36
W
warnings
modem EPROM
password lock out
safety
3-48
3-26
xi
windows, dialup networking
3-29
Cisco AS5850 Operations, Administration, Maintenance, and Provisioning Guide
OL-0552-01
17
Index
Cisco AS5850 Operations, Administration, Maintenance, and Provisioning Guide
18
OL-0552-01