1
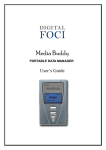
DataPocket ULTRA-SLIM POCKET-SIZED HARD DRIVE WITH SMART BACKUP User’s Guide DataPocket User’s Guide Digital Foci, Inc. reserves the right to make improvements and/or changes to the products and programs described in this User’s Guide at any time without notice. Please read the entire User’s Guide before operating the device. Digital Foci, Inc. assumes no responsibility for errors or omissions in this User’s Guide. Nor does Digital Foci, Inc. make any commitment to update the information contained herein. ©2005 Digital Foci, Inc. All rights reserved. This publication is intended for sole use by the owner of the associated device. Neither this publication nor any part of this publication may be printed and distributed, electronically distributed, reproduced, translated, or reduced to any other electronic medium or machine readable form without the prior written permission of Digital Foci, Inc. Digital Foci, Inc., 3111 Via Mondo, Rancho Dominguez, CA USA 90221-5414 Trademarks DataPocket and Digital Foci are trademarks of Digital Foci, Inc. All names and products mentioned within this document are registered trademarks of their respective companies. i Revision 1.3 DataPocket User’s Guide Limited Warranty As the original purchaser of this product, you receive these warranties from Digital Foci, Inc. Your DataPocket (hereafter referred to as “Device”) will be free from defects in material and workmanship and will perform in substantial compliance with your user documentation accompanying the Device for 1 year from the purchase date providing proper use of the Device. Your warranty rights will be honored so long as you read and follow your user documentation for all aspects of operating the Device. Any unauthorized or improper use of the Device may cause your warranty to become void. If there is a problem or defect with your Device, please contact Digital Foci, Inc. Disclaimer This limited warranty is the only warranty Digital Foci, Inc. makes for the Device. To the extent allowed by Law, no other warranty applies, whether expressed, implied, or statutory, including any warranty of merchantability, of fitness for a particular purpose, or of non-infringement. This warranty does not cover accidental damage, wear and tear, or consequential or incidental loss. Under no conditions is Digital Foci, Inc. liable for loss of or damage to, a computer; nor loss of, or damage to, programs, records, or data; nor any consequential or incidental damages, even if Digital Foci, Inc. has been informed of their possibility. Additional Rights Some states or countries do not allow exclusion or limitation of incidental or consequential damages, or limitations on the length of an implied warranty, so the above limitations or exclusions may not apply to you. This warranty gives you specific legal rights, and you may also have other rights which vary from state to state or country to country. ii Revision 1.3 DataPocket User’s Guide Caring for Your DataPocket To keep DataPocket in good condition and working properly, follow these basic guidelines: • Do not drop, jar, bump, shock or expose DataPocket to severe vibration. • Do not handle or shake DataPocket while data is being transferred. • Do not operate or store DataPocket in dusty environments. • Do not leave DataPocket under direct sunlight, in a parked car, or in other situations where the temperature may be above 140°F (60°C). • To prevent risk of short circuit and damage, do not expose DataPocket to liquids, precipitation or moisture. • To avoid bodily injury or damage to internal components, do not take apart DataPocket. • Never force the USB cable if it does not plug in smoothly. Instead, examine the head of the cable to make sure that the plug orientation is correct. • Run file management tools such as Scan Disk and Disk Defragmentation periodically to keep DataPocket performing at its best. iii Revision 1.3 DataPocket User’s Guide Table of Contents 1. 2. 3. Welcome! ............................................................................................................................1 1.1. System Requirements ........................................................................................................... 1 1.2. Package Contents.................................................................................................................. 1 DataPocket Basics..............................................................................................................2 2.1. Ways to Use DataPocket....................................................................................................... 2 2.2. DataPocket Layout ............................................................................................................... 2 2.3. Connecting DataPocket to Your Computer........................................................................ 3 2.4. Safely Removing DataPocket from Your Computer.......................................................... 4 Using DataPocket Smart Backup Utility (Windows only) ................................................6 3.1. Installing DataPocket Smart Backup Utility...................................................................... 6 3.2. Accessing DataPocket Smart Backup Utility Configuration Menu ................................. 7 3.3. DataPocket Smart Backup Utility Window Flow .............................................................. 8 3.4. Managing Your Backup Task List ....................................................................................... 9 3.5. Adding, Editing, and Deleting Backup Tasks................................................................... 10 3.6. Selecting Active and Inactive Tasks .................................................................................. 13 3.7. Running Your Task List ..................................................................................................... 14 4. Powering DataPocket.......................................................................................................16 5. Installing Windows 98 Driver ..........................................................................................18 6. Backup Tips and Techniques ...........................................................................................19 6.1. Recommended Backup Schedules ..................................................................................... 19 6.2. Recommended Backup Techniques................................................................................... 20 7. Frequently Asked Questions ............................................................................................22 8. Troubleshooting and Technical Support .........................................................................23 9. Appendix...........................................................................................................................25 iv Revision 1.3 DataPocket User’s Guide 1. Welcome! Congratulations on purchasing your DataPocket – ultra-slim pocket-sized hard drive with Smart Backup. DataPocket is the perfect solution for your data management needs. Use DataPocket to create personalized backup tasks and run regular backups with the simple push of DataPocket’s Smart Backup Button. Its compact and lightweight design provides you ultimate portability. DataPocket is powered via your computer USB Port and frees you from having to carry around a cumbersome power adapter. Let DataPocket help you conveniently back up your important data at home, at work, and on the go; synchronize and transport files between multiple computers; as well as carry your collection of music and photos with you right in your pocket. 1.1. System Requirements 1) Computer running any of the following operating systems: o Windows® 98/SE*, Windows 2000, Windows ME, Windows XP Home, Windows XP Professional o Macintosh™ OS 9.x and OS 10.0.x or higher o Linux OS kernel versions 2.4.x and higher 2) One available USB Port** * For Windows 98/SE, a CD-ROM drive is required for driver installation. ** DataPocket will run on USB 1.1 ports. However, high speed transfer rates of up to 480Mbps require a USB 2.0 port. 1.2. Package Contents Before using your DataPocket, check that your package contains the following items: • DataPocket • USB cable • Carrying case • Resource Disc (includes DataPocket Smart Backup Utility software, User’s Guide, Quick Start Guide, and Win 98 driver) • User’s Guide • Quick Start Guide • Warranty card Page 1 Revision 1.3 DataPocket User’s Guide 2. DataPocket Basics 2.1. Ways to Use DataPocket DataPocket can help manage your data in many different ways. You can use DataPocket to: 2.2. • Set up custom backup tasks with DataPocket Smart Backup Utility and run regular backups with just a push of the Smart Backup Button. • Bring DataPocket with you to back up important documents on business trips. • Restore lost files on your computer from your most recent backup. • Transport and synchronize files between multiple computers. • Archive important but infrequently accessed pictures, music, and other files. • Carry your personal library of photos, music, and videos with you to share with your friends. • Transfer files between computers running different operating systems. • Connect DataPocket to your computer and use it as an additional hard drive. DataPocket Layout AC Adapter Jack USB 2.0 Port Smart Backup Button Power and Drive Activity LED Indicator Solid Green – DataPocket is connected to your computer and powered on. Flashing – Data is being transmitted between DataPocket and your computer. Off – Data Pocket is off. Page 2 Revision 1.3 DataPocket User’s Guide 2.3. Connecting DataPocket to Your Computer DataPocket is powered via your computer USB Port and does not require external power.* Use the USB cable included with your DataPocket to connect DataPocket to your computer. This is a special USB cable that has a Power Only USB connector. Under normal circumstances you will not need to use this additional USB connector. To connect DataPocket to your computer, plug in the USB connectors in the following order: 1) Plug the Main USB connector to a free USB Port on your computer. 2) Plug the Mini-USB connector to the USB Port on DataPocket. Mini-USB Main USB Power Only USB (To Computer) (To Computer) (To DataPocket) * In some special cases, your computer USB Port may not be able to provide sufficient power for DataPocket to function properly. See Section 4. Powering DataPocket for more details about this condition. Page 3 Revision 1.3 DataPocket User’s Guide Once connected, your computer will automatically recognize** DataPocket and display it as a Hard Disk Drive on your computer. After DataPocket is recognized by your computer, you can use it just as you would use your computer’s internal hard drive. Note: The drive letter for DataPocket may vary depending on your computer configuration. ** For Windows 98/SE, a device driver must be installed before the computer can recognize DataPocket. See Section 5. Installing Windows 98 Driver for instructions. 2.4. Safely Removing DataPocket from Your Computer To properly remove DataPocket from your computer, disable the device before unplugging it from your computer. Warning: Unplugging DataPocket before properly disabling the device increases the risk of disrupting data transmission between DataPocket and your computer. This may crash your computer and cause data loss. The method to disable DataPocket will vary based on the operating system of your computer. Refer to the instruction manual of your computer for details on how to do this. Page 4 Revision 1.3 DataPocket User’s Guide Disabling DataPocket in Windows XP: 1. Locate the ‘Safely Remove Hardware’ icon in the icon tray at the lower right hand corner of your computer screen. You can move the mouse pointer over the icons until you see the ‘Safely Remove Hardware’ label. 2. Left-click on this icon and you will see a listing that says, ‘Safely remove USB Mass Storage Device - Drive(E). Note: The actual drive letter may vary depending on your computer configuration. 3. Select this hardware device by left-clicking on the name. 4. You will see a confirmation message telling you that it is safe to remove DataPocket. Click ‘OK’ to confirm. Note: DataPocket will not be disabled if it is being accessed by your computer. In such cases, your computer will give you a warning telling you that DataPocket cannot be disabled. If this happens, close all applications and windows that may be accessing DataPocket and repeat Step #3. 5. Now it is safe to unplug DataPocket from your computer. Page 5 Revision 1.3 DataPocket User’s Guide 3. Using DataPocket Smart Backup Utility (Windows only) DataPocket comes with DataPocket Smart Backup Utility that lets you create multiple, customized Smart Backup tasks. After creating your Smart Backup tasks, all you need to do is press the Smart Backup Button on DataPocket to run the backups. 3.1. Installing DataPocket Smart Backup Utility To utilize DataPocket Smart Backup Utility, you must install the program by following these steps: 1. Close all programs running on your computer. 2. Connect DataPocket to your computer. (For detailed instructions, see Section 2.3. Connecting DataPocket to Your Computer.) Note: DataPocket must be connected to your computer during the DataPocket Smart Backup Utility installation. 3. Insert DataPocket Resource Disc into your computer CD-ROM drive. 4. On the Resource Disc, locate the ‘DataPocket Smart Backup Utility v1.2’ folder. 5. From within this folder, locate and double-click on the ‘Setup.exe’ file to begin the installation. After DataPocket Smart Backup Utility has been successfully installed, you will see its application icon labeled ‘DataPocket Smart Backup Utility’ in the icon tray at the lower right hand corner of your screen. Page 6 Revision 1.3 DataPocket User’s Guide 3.2. Accessing DataPocket Smart Backup Utility Configuration Menu Make sure that DataPocket is connected to your computer and powered on. Locate the DataPocket Smart Backup Utility icon in the icon tray at the lower right hand corner of your screen. Double-click on the icon to open the main configuration screen of DataPocket Smart Backup Utility. Note: If the utility is not running, you can start it by clicking on the program icon from the Start menu as demonstrated in the following diagram. The following sections will detail the DataPocket Smart Backup Utility window flow and describe how to use the utility to create your customized backup tasks. Page 7 Revision 1.3 DataPocket User’s Guide 3.3. DataPocket Smart Backup Utility Window Flow The following diagram explains the DataPocket Smart Backup Utility window flow: Page 8 Revision 1.3 DataPocket User’s Guide 3.4. Managing Your Backup Task List From DataPocket Smart Backup Utility main window: 1. Select the DataPocket hard drive. This is the Disk## entry with an asterisk (*). 2. Click on ‘Task List’ to open the Manage Backup Tasks window. • To add, delete, or edit tasks, click ‘Add Task’, ‘Delete Task’, or ‘Edit Task’. • To clear all existing backup tasks and start from a blank list, click ‘Clear List’. • To save the existing list of backup tasks, click ‘Save List’. • To select active and inactive backup tasks, click ‘Active Tasks’. • Click ‘Exit’ when you are finished with managing your backup tasks to return to the previous window. You will be asked to save your current settings. Page 9 Revision 1.3 DataPocket User’s Guide 3.5. Adding, Editing, and Deleting Backup Tasks You can add, edit, and delete your backup tasks from the Manage Backup Tasks window using the buttons on the right side of the window. 3.5.1. Adding and editing backup tasks To add a new task, click ‘Add Task’ and the Task Settings window will open. To edit an existing task, select the task from the Manage Backup Tasks window and click ‘Edit Task’ to open the Task Settings window with the current task settings. Page 10 Revision 1.3 DataPocket User’s Guide Using the Task Settings window: 1. Specify the Computer Directory. Either type the directory path in the Computer Directory field or click ‘Browse’ to search for the desired directory. 2. Specify the DataPocket Directory. Either type the directory path in the DataPocket Directory field or click ‘Browse’ to search for the desired directory. Note: You can create a new directory on the fly by typing a new directory name in the DataPocket Directory field. Also, by editing the existing directory name, you can easily create a newer version of an existing backup. See Section 6.2. Recommended Backup Techniques for more details on how to further utilize this feature. 3. Select the desired Task Attributes for your backup task: • Active: Checking Active will make this task an active task. All active tasks will be run when you run the backup either via Smart Backup Button or the utility. If Active is not checked, this backup task will be placed in the Inactive Task List and will not be run during the backup process. • Subdirectory: Checking Subdirectory will include all of the subdirectories and their contents within the selected directory for the backup. If Subdirectory is not checked, only the files located in the selected directory will be backed up. • Overwrite: Checking Overwrite will allow all files to be backed up to the backup location. Existing files with the same file name on the target location will be overwritten. If Overwrite is not checked, the read-only files on the backup location will be skipped and not overwritten. • Newer: Checking Newer instructs DataPocket to only back up files where the last saved date of the file to be backed up is newer than that of the existing file with the same file name in the target location. If Newer is not checked, DataPocket will not check the last saved dates of the files and will back up all the files to the target location. 4. Select the desired Task Orientation for your backup task: • Backup: Back up files from the Computer to DataPocket. • Restore: Restore files from DataPocket to the Computer. • Synchronize: Synchronize files between DataPocket and the Computer. This will make the DataPocket Directory and the Computer Directory identical and most current based on the last saved dates of the files. Selecting Synchronize will automatically check Newer. 5. Once you have finished selecting or editing your backup task settings, click ‘OK’. Page 11 Revision 1.3 DataPocket User’s Guide 3.5.2. Deleting backup tasks From the Manage Backup Tasks window: To delete an existing task, select the task to be deleted and click ‘Delete Task’. To delete all your existing backup tasks and start from a blank list, click ‘Clear List’. Page 12 Revision 1.3 DataPocket User’s Guide 3.6. Selecting Active and Inactive Tasks With DataPocket, you can select to have certain tasks active and other tasks inactive. This way, you can create different backup tasks for different situations and run them only when the need arises. Open the Active Task List window by clicking the ‘Active Task’ button on the Manage Backup Tasks window. From the Active Task List Window, select the task and click on the direction arrows to move it between the Active Tasks and Inactive Tasks lists. The next time you run DataPocket Smart Backup, only the tasks in the Active Task List will be run. Page 13 Revision 1.3 DataPocket User’s Guide 3.7. Running Your Task List There are two ways to run your DataPocket Smart Backup. 1) By pressing the Smart Backup Button on DataPocket. Smart Backup Button 2) By clicking ‘Run’ from DataPocket Smart Backup Utility. Page 14 Revision 1.3 DataPocket User’s Guide Once the DataPocket Smart Backup is complete, you will see the following confirmation screen. Warning: DO NOT disconnect the USB cable while data is being transferred between DataPocket and your computer. Unplugging DataPocket while data is being transferred may crash your computer and cause data loss. Refer to Section 2.4. Safely Removing DataPocket from Your Computer for details. Page 15 Revision 1.3 DataPocket User’s Guide 4. Powering DataPocket DataPocket is powered by the USB Port on your computer and in normal situations does not require external power. However, in some cases, your computer may not be able to provide sufficient power. Possible situations that may cause insufficient power are: • Plugging DataPocket into a damaged USB Port on your computer that does not provide the standard power level. • Plugging DataPocket into a USB Hub that is not powered by an external power adapter. • Plugging DataPocket into a USB Hub that is powered by an external power adapter, but is connecting other devices with high power requirements. To correct this situation, there are two ways you can supply more power to DataPocket. 1) Plug the Power Only USB connector to a second USB Port on your computer while keeping the Main USB connector plugged in. Mini-USB Main USB Power Only USB (To Computer) (To Computer) Page 16 Revision 1.3 (To DataPocket) DataPocket User’s Guide 2) Use a compatible external power adapter. AC Adapter Jack AC Adapter Specifications Output Voltage: DC 5V Output Current: 2.0A Plug length: 0.38” (9.6 mm) Inner hole: 1.3∅ Outer hole: 3.5∅ Warning: DO NOT use a power adapter that is over DC 5V. Doing so may severely damage DataPocket and your computer. Page 17 Revision 1.3 DataPocket User’s Guide 5. Installing Windows 98 Driver Driver installation is required for computers running on Windows 98/SE. To install the DataPocket driver for Windows 98 follow these steps: 1. Close all programs running on your computer. 2. Insert DataPocket Resource Disc into your computer CD-ROM drive. 3. Double-click on My Computer and locate the ‘Win98’ folder on the Resource Disc. 4. From within the ‘Win98’ folder, double-click on ‘Setup.exe’ to begin driver installation. 5. Follow the installation instructions on the Install Wizard screens. 6. After the Install Wizard has finished, restart your computer to complete the installation. 7. Once your computer has restarted, connect DataPocket to your computer. Your computer will recognize DataPocket as a Hard Disk Drive and create an icon for it in Windows Explorer. Note: The drive letter is automatically assigned and may vary depending on your computer configuration. 8. Now your Windows 98/SE computer is ready to install DataPocket Smart Backup Utility. See Section 3.1. Installing DataPocket Smart Backup Utility for instructions. Page 18 Revision 1.3 DataPocket User’s Guide 6. Backup Tips and Techniques 6.1. Recommended Backup Schedules It is a good habit to back up your important pictures, music, videos, documents, programs, and other files as often as possible. Since it is easy to forget running regular backups, here are some recommendations that will help you establish a regular backup routine. Business users / Heavy users: If you use your computer daily for critical tasks where losing any data would cause a significant setback, it is best that you run a backup at the end of each day. Non-critical users / Personal users: If you use your computer occasionally or do not change your computer contents often, it is sufficient to run a backup from once a week to once a month depending on your level of computer activity. Special Events: You should always back up your computer right after special events where you significantly changed your computer contents. For instance, after coming back from vacation and downloading your vacation pictures to your computer. Or, after finalizing that important presentation that you’ve spent the past 72 hours working on non-stop. And, at particular time markers such as the end of the quarter, the calendar year, and the academic year. Notebook Users: If you use a notebook computer, you should take special care to back up your data even more frequently than desktop users. In addition to your regular backups, you should also run a backup before events where you will be transporting your notebook computer. For example, you should run a backup before getting on the plane for business trips and before leaving the office for meetings across town. Page 19 Revision 1.3 DataPocket User’s Guide 6.2. Recommended Backup Techniques Here are some useful backup techniques to help you get the most out of your DataPocket Smart Backup tasks: Include a date code in the name of the backup folder: This will help you identify the dates of the backup you make on DataPocket. Also, it gives you a convenient way to sort your backups by date on your computer. Your computer file management program can organize DataPocket contents by number and letter sequence. YYMMDD Name of Backup Date Last 2 Digits of Year 2 Digits for Month Example: This is a backup of My Pictures made on February 15, 2005. Keep more than one version of the same backup task: This will provide you extra security in the case that you need to find a file that you deleted or changed before the most recent backup. If you keep multiple versions of the same backup task, you have the option of going back two, three or however many versions you keep to find the data you need. You can use this technique together with using date codes to optimally manage your backup tasks. Combined Example: In the combined example here, you can see that this DataPocket user has backed up her ‘My Critical Data’ and ‘My Pictures’ at the end of 2004 on December 31. You can also see that she regularly backs up her ‘My Critical Data’ once a week on Fridays keeping 3 versions. And, that she backed up her ‘My Pictures’ again on February 15, 2005. Page 20 Revision 1.3 DataPocket User’s Guide Group your backups by date or by name: If you prefer to have all your backups grouped by date, put the 6-digit YYMMDD date code in the front of the backup folder name. If you prefer to view your backups grouped by name, put the date code at the end. Use special characters to organize your backup folder listing: In addition to using numbers and letters, you can also use punctuation marks to make selected folders appear at the top of the list. Alphabetical Reverse Listing Alphabetical Listing Page 21 Revision 1.3 DataPocket User’s Guide 7. Frequently Asked Questions My computer only has USB 1.1 ports available. Can I still use DataPocket? • Yes, DataPocket is backward compatible with USB 1.1. What happens when DataPocket runs out of hard drive space during a back up? • Your computer will display a message telling you that the hard drive is full. You can free up space by deleting unnecessary files. How can I help maintain the data on DataPocket? • There are two ways you can help maintain your DataPocket contents. - First, make sure to keep DataPocket away from hot and dusty environments. Be careful not to drop or bump DataPocket. Do not touch or move DataPocket while it is connected to your computer and transferring data. - Second, periodically run Error-checking, Scan Disk, Defragmentation, and other hard disk drive maintenance programs on DataPocket. Your computer should have adequate tools included with its operating system software. Check the instruction manual of your computer for details. What should I do if I accidentally unplugged DataPocket in the middle of a file transfer? • Make sure that the computer is no longer running the backup operation. In most cases, the computer will show an error message telling you that the operation has been aborted. Once you confirm that the operation has stopped, reconnect DataPocket and restart the backup from the beginning. Page 22 Revision 1.3 DataPocket User’s Guide 8. Troubleshooting and Technical Support My computer does not recognize DataPocket. • Make sure that the Main USB connector is properly connected to your computer and the Mini USB connector is properly connected to DataPocket. If you connect the Power Only USB connector to your computer, DataPocket will not function properly. See Section 2.3. Connecting DataPocket to Your Computer for more detail. • If you are running Windows 98/SE, make sure that you have installed the Windows 98 driver. See Section 5. Installing Windows 98 Driver for instructions. • If DataPocket is connected to a laptop or a USB hub without a power adapter, you may need to provide more power to DataPocket. See Section 4. Powering DataPocket for more detail. • Make sure your computer USB Port is working properly. My computer recognizes DataPocket, but it is not functioning properly. • If DataPocket is connected to a laptop or a USB Hub without a power adapter, DataPocket’s power supply may be unstable. You can fix this by providing more power to DataPocket. See Section 4. Powering DataPocket for more detail. The data transfer between my computer and DataPocket is slow. • DataPocket might be connected to a USB 1.1 port instead of a USB 2.0 port. DataPocket can work on both USB 1.1 and USB 2.0 ports. However, a USB 2.0 port is required to achieve high speed transfer rates of up to 480 Mbps. If your computer does not have USB 2.0 ports, you can consider adding a USB 2.0 card to your computer. Visit your local computer repair store for more information about this. The Smart Backup Button does not work. • Make sure that you have installed the DataPocket Smart Backup Utility and that the utility is running on your computer. Once the utility is running on your computer, you will see the DataPocket Smart Backup Utility icon in the task bar at the lower right hand corner of your screen. See Section 3.1. Installing DataPocket Smart Backup Utility for more detail. • Also make sure that you have set up active backup tasks. See Section 3.5 Adding, Editing, and Deleting Backup Tasks for more detail. • Please note that DataPocket Smart Backup Utility runs on Windows OS only. Page 23 Revision 1.3 DataPocket User’s Guide When disconnecting DataPocket from my computer, I get a message saying that the device was disconnected in an unsafe way. DataPocket was not disabled before it was disconnected from your computer. See Section 2.4. Safely Removing DataPocket from Your Computer for more detail. Technical Support Contact If you are still having troubles using your DataPocket, please contact Digital Foci, Inc. technical support at [email protected]. Page 24 Revision 1.3 DataPocket User’s Guide 9. Appendix DataPocket Technical Specifications Model No. DPK-250 Hard drive capacity Up to 80GB (2.5” HDD) Computer interface USB 2.0 (compatible with USB 1.1) Transfer rate USB 2.0: up to 480 Mbps USB 1.1: up to 12 Mbps Power USB bus-powered (or external DC 5V/2A) OS compatibility Windows 98/SE, 2000, ME, XP Home/Pro Macintosh OS 9.x and 10.0.x and higher Linux OS kernel versions 2.4.x and higher Software DataPocket Smart Backup Utility (Windows OS Only) Dimensions (L x W x H) 5.4 x 3.1 x 0.6 in (138 x 80 x 15 mm) Weight 3.2 oz. (90 g) without hard drive Operating temperature 32°F ~ 158°F (0°C ~ 70°C) Storage temperature -40°F ~ 158°F (-40°C ~ 70°C) Humidity 90% RH Page 25 Revision 1.3 DataPocket User’s Guide FCC Rules and Regulations – Part 15 This device complies with Part 15 of the FCC Rules. Operation is subject to the following conditions: 1. This device may not cause harmful interference. 2. This device must accept any interference received, including interference that may cause undesired operations. The device has been tested and verified to be within the energy emission limits for Class B digital devices as defined in Part 15 of the FCC Rules. These limits are designed to provide reasonable protection against harmful interference in a residential situation. This device generates, uses, and can radiate radio frequency energy and, if not installed and used in accordance with the instructions, may cause harmful interference to radio communications. Installed correctly, it probably will not interfere with your radio or TV. However, we do not guarantee the absence of interference. If you modify the device in any way, without approval from Digital Foci, Inc., your device may violate FCC regulations. Violation of FCC regulations may cause the FCC to void your rights to use the modified device. If you suspect this device is causing interference, power off and on the device while your radio or TV is showing interference. If the interference disappears when you turn the device off and reappears when you turn the device on, something in the device is causing interference. To reduce interference, try these suggestions: • Change the direction of the radio or TV antenna. • Increase the separation between the device and radio or TV. • Connect the device into an outlet on a circuit different from that to which the radio or TV is connected. If these suggestions don’t help, consult your computer dealer or an experienced radio/TV technician for more suggestions. Page 26 Revision 1.3 3111 Via Mondo, Rancho Dominguez, California, United States 90221 Copyright 2005 Digital Foci, Inc. All rights reserved.