1
EPSON Stylus C80
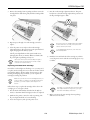
6. Select the best line from the first group of lines on the
printout, then enter its number in box #1 on the screen.
Select the line with the cleanest, straightest edges.
Examining the Nozzle Check Pattern
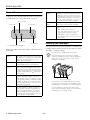
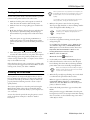
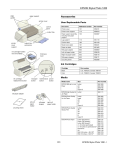
Examine the nozzle check pattern you print. It should look
something like this:
Each staggered horizontal and straight vertical line should be
complete, with no gaps in the dot pattern. If your printout
looks okay, you’re done.
If there are gaps in the lines, clean the print head again.
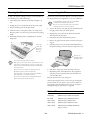
Select the line in the first pattern with
the cleanest, straightest edges...
gaps in nozzle check pattern
and enter its number in the
corresponding box on screen
Aligning the Print Head
7. Select the best line for each of the other groups of lines, and
enter its number in the appropriate box.
If your printouts contain misaligned vertical lines, you may
need to align the print head. Your printer must be connected
to a local port, not on a network, to use the Print Head
Alignment utility. Follow these steps:
8. Do one of the following:
❏ If the middle line (number 8) in each group is the best,
your print head’s vertical alignment is correct. Click
Next to continue.
1. Make sure the printer is on but not printing, and letter-size
plain paper is loaded.
❏ If you select a number other than 8 for any of the
groups, click Realignment and follow the instructions
on the screen to print another vertical alignment test
page. Repeat steps 6 through 8 until number 8 is the
best line for each of the groups. Then click Next to
continue.
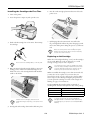
2. If you have an application running, access the printer
settings dialog box.
Or, with Windows, click Start, point to Settings, then
select Printers. Right-click your EPSON Stylus C80
Series printer icon in the Printers window. Select
Properties (Document Defaults in Windows NT,
Printing Preferences in Windows 2000).
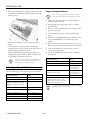
9. Follow the instructions on the screen to print a horizontal
alignment test page. You see seven pairs of gray rectangles
on the printout.
3. Windows: Click the Utility tab.
Macintosh: Click the
Utility button.
10. Select the pattern with the least white or black banding
where the rectangles meet and enter the number on the
screen.
4. You see the Utility menu. Click the Print Head Alignment
button.
11. Do one of the following:
5. Follow the instructions on the screen to print a vertical
alignment test page.
❏ If pattern number 4 is the best choice, your print head’s
horizontal alignment is correct. Click Finish.
❏ If you enter any number but 4, click Realignment and
follow the instructions to print another test page.
Repeat steps 10 and 11 until pattern number 4 is the
best choice. Then click Finish.
10 - EPSON Stylus C80
1/02