1
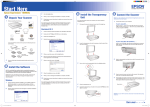
English
®
Color Image Scanner
Setup Guide
1 Safety Instructions . . . . . . . . . . . . . . . . . . . . 4
2 Getting to Know Your Scanner . . . . . . . . . 6
3 Installing the Software. . . . . . . . . . . . . . . . . 8
4 Setting Up the Scanner. . . . . . . . . . . . . . . 11
5 Using Your Scanner . . . . . . . . . . . . . . . . . . 17
6 Options . . . . . . . . . . . . . . . . . . . . . . . . . . . . 21
7 Problems?. . . . . . . . . . . . . . . . . . . . . . . . . . 32
1
Where to Find Information
Setup Guide (this document)
Describes how to set up the scanner, install the scanner software,
and use the scanner to perform basic scanning. It also covers how
to install options.
Online Reference Guide
The CD-ROM shipped with your scanner
includes the following guide as well as the
scanner driver.
Provides basic information about scanning. It also includes
information on settings and functions of the scanner software
(EPSON Scan.) Information is also available on maintenance,
troubleshooting, technical specifications, and customer support.
Information on Epson Scanner Software (online help)
Provides you with detailed information on EPSON Scan. To
access the Software online help, click the Help button in the EPSON
Scan window.
Information on other Software
Refer to the respective documentation for the information.
2
Neither Seiko Epson Corporation nor its affiliates shall be liable to the purchaser of this
product or third parties for damages, losses, costs, or expenses incurred by purchaser or third
parties as a result of: accident, misuse, or abuse of this product or unauthorized modifications,
repairs, or alterations to this product.
Seiko Epson Corporation and its affiliates shall not be liable against any damages or problems
arising from the use of any options or any consumable products other than those designated
as Original Epson Products or Epson Approved Products by Seiko Epson Corporation.
EPSON Scan is based in part on the work of the Independent JEPG Group.
EPSON is a registered trademark of Seiko Epson Corporation.
Microsoft and Windows are registered trademarks of Microsoft Corporation in the United
States of America and other countries.
Adobe, Acrobat Reader, and Photoshop are registered trademarks of Adobe Systems
Incorporated.
Apple, Macintosh, Mac, iMac, and Power Macintosh are registered trademarks of Apple
Computer, Inc.
SilverFast is either a registered trademark or trademark of LaserSoft Imaging AG in the
United States of America and other countries.
General Notice: Other product names used herein are for identification purposes only and
may be trademarks of their respective companies.
Copyright © 2004 by Seiko Epson Corporation, Nagano, Japan.
Warnings, Cautions, and Notes
w
c
Warnings must be followed carefully to avoid bodily injury.
Cautions must be observed to avoid damage to your
equipment.
Notes contain important information and useful tips on the
operation of your scanner.
3
English
All rights reserved. No part of this publication may be reproduced, stored in a retrieval
system, or transmitted in any form or by any means, electronic, mechanical, photocopying,
recording, or otherwise, without the prior written permission of Seiko Epson Corporation.
No patent liability is assumed with respect to the use of the information contained herein.
Neither is any liability assumed for damages resulting from the use of the information
contained herein.
1
Safety Instructions
Important Safety Instructions
Read all these instructions, and save them for later reference.
Follow all warnings and instructions marked on the scanner.
❏ Unplug the scanner before cleaning. Clean with a damp cloth
only. Do not spill liquid on the scanner.
❏ Do not place the scanner on an unstable surface, or near a
radiator or heat source.
❏ Use only the power cord that comes with this product. Use of
another cord may result in fire or electric shock.
❏ This product’s power cord is for use with this product only.
Use with other equipment may result in fire or electric shock.
❏ Use only the type of power source indicated on the scanner's
label and always supply power directly from a standard
domestic electrical outlet with the power cord that meets the
relevant local safety standards.
❏ Connect all equipment to properly grounded electrical
outlets. Avoid using outlets on the same circuit as
photocopiers or air control systems that regularly switch on
and off.
❏ Do not allow the power cord to become damaged or frayed.
❏ If you are using an extension cord with the scanner, make sure
the total ampere rating of the devices plugged into the
extension cord does not exceed the cord's ampere rating. Also,
make sure the total ampere rating of all devices plugged into
the electrical outlet does not exceed the electrical outlet's
ampere rating.
4
Safety Instructions
❏ Unplug the scanner and refer servicing to qualified service
personnel under the following conditions:
❏ If the power cord or plug is damaged.
❏ If liquid has entered the scanner.
❏ If the scanner has been dropped or the case damaged.
❏ If the scanner does not operate normally or exhibits a
distinct change in performance. (Do not adjust controls
that are not covered by the operating instructions.)
❏ If you plan to use the scanner in Germany, observe the
following:
To provide adequate short-circuit protection and
over-current protection for this scanner, the building
installation must be protected by a 10 or 16 Amp circuit
breaker.
Note for German-speaking users:
Bei Anschluss des Scanners an die Stromversorgung muss
sichergestellt werden, dass die Gebäudeinstallation mit einer
10A- oder 16 A-Sicherung abgesichert ist.
Safety Instructions
5
English
❏ Except as specifically explained in this Setup Guide and the
Online Reference Guide, do not attempt to service the scanner
yourself.
2
Getting to Know Your Scanner
Unpacking the Scanner
Your EPSON Expression 10000XL comes shipped with CD-ROMs
that include driver software to run your scanner, and some
additional items. The contents may vary in certain locations.
scanner
USB interface cable
6
Setup Guide
Getting to Know Your Scanner
power cord
CD-ROMs
The following options are available to expand the versatility of
your scanner. For detailed information on the use of these options,
see “Options” on page 21.
Note:
Some options are not available in some areas.
A3 Transparency Unit (B81336✽)
Allows you to scan transparent materials primarily 35 mm slides
and filmstrips. The Transparency Unit’s reading area allows you
to scan films up to 309 x 420 mm in size.
A3 Automatic Document Feeder (B81321✽)
Allows you to scan up to 100 single- or double-sided pages
automatically. This option feeds a document from the top page
down, which preserves the original page order.
Using this option with an optical character recognition (OCR)
software, you can use the scanned text in word processing
programs as if you had typed it by yourself.
EPSON Network Image Express Card (B80839✽)
Enables an Epson scanner supporting EPSON Scan and network
connection to become shareable on a network. This allows you to
perform various scanning operations in a network environment
using less power and space. For more information, see the manual
that comes with this product.
Note:
The asterisk is a substitute for the last digit of the product number, which
varies by country.
Getting to Know Your Scanner
7
English
Options
3
Installing the Software
The software CD contains the scanner software and the Online
Reference Guide.
You must install the software BEFORE connecting the scanner
to your computer.
Note:
❏ For Windows XP and Windows 2000, you need the administrative
privilege to install the software.
❏ EPSON Scan does not support the UNIX File System (UFS) for
Mac OS X. You must install the software on a disk or in a partition
that does not use UFS.
Note for Mac OS X 10.3 users:
Do not use the Fast User Switching function while using Expression
10000XL.
Insert the software CD in the CD-ROM or DVD drive, and then
start the installer following the instructions below.
For Windows users
1. The installer starts automatically. If necessary, start it by
double-clicking the EPSON CD-ROM icon.
2. If a message appears to prompt you to disable your antivirus
software, click Continue.
3. If you are prompted to select a language, select your preferred
language.
4. On the Software Installation screen, click Install EPSON Scan.
Follow the on-screen instruction until all of the software is
installed.
8
Installing the Software
6. When a message appears to indicate that installation is
complete, click Exit.
Note:
If you do not have Adobe Photoshop Elements and LaserSoft SilverFast
on your computer yet, install them from the CD-ROM included with
your scanner. To install the software, insert the Photoshop CD or
SilverFast CD in the CD-ROM drive, and then follow the on-screen
instructions.
For Macintosh users
Installing EPSON Scan
1. For Mac OS X users:
Double-click the EPSON CD-ROM icon on your desk top.
Double-click the EPSON Scan folder in the EPSON folder,
and then double-click the Mac OS X folder.
For Mac OS 9 users:
Double-click the EPSON Scan folder in the EPSON folder.
Double-click the Mac OS 9 folder, and then double-click your
preferred language folder. If the EPSON Scan folder does not
open automatically, double-click the EPSON CD-ROM icon.
2. Double-click the EPSON Scan Installer icon, and then follow
the on-screen instruction until all of the software is installed.
For Mac OS X users:
If the Authenticate window appears, click the key icon, enter
the administrator's name and password, and then click OK.
3. When a message appears to indicate that installation is
complete, click Quit.
Installing the Software
9
English
5. On the Software Installation screen, click Install Reference
Guide. Follow the on-screen instruction until all of the
software is installed.
Installing Reference Guide
1. For Mac OS X users:
Double-click the EPSON CD-ROM icon on your desk top, and
then double-click the Manual folder in the EPSON folder.
For Mac OS 9 users:
Double-click the Manual icon in the EPSON folder. If the
EPSON Scan folder does not open automatically, double-click
the EPSON CD-ROM icon.
2. Double-click the language folder you prefer and then
double-click the Installer icon. Follow the on-screen
instruction until all of the software is installed.
3. When a message appears to indicate that installation is
complete, click OK.
Note:
If you do not have Adobe Photoshop Elements and LaserSoft SilverFast
on your computer yet, install them from the CD-ROM included with
your scanner. To install the software, insert the Photoshop CD or
SilverFast CD in the CD-ROM drive, and then follow the on-screen
instructions.
10
Installing the Software
Setting Up the Scanner
English
4
Choosing a Place for the Scanner
Follow the guidelines below when selecting a location for your
scanner.
❏ Place the scanner on a flat, stable surface. The scanner does
not operate properly if it is tilted at an angle.
❏ Place the scanner close enough to the computer for the
interface cable to reach it easily.
❏ Place the scanner near an electrical outlet where the power
cord can be easily unplugged.
❏ Keep the scanner away from high temperature, humidity and
excessive dirt or dust. Also avoid using or storing the scanner
in places subject to rapid changes of temperature and
humidity.
❏ Keep the scanner away from direct sunlight and strong light
sources.
❏ Avoid places subject to shocks and vibrations.
Setting Up the Scanner
11
❏ Allow space behind the scanner for the cables, and space
above the scanner so that you can fully raise the document
cover.
573 mm
132 mm
150 mm or more
458 mm
656 mm
12
Setting Up the Scanner
You must install the software BEFORE connecting the scanner
to your computer.
1. Make sure that the scanner is turned off. The scanner is off
when the . Power button is raised.
. Power button
2. Connect the power cord to the AC inlet on the back of the
scanner, and then plug the other end into an electrical outlet.
Note:
When you connect the power cord to the AC inlet, you need to force
it in at the entrance; otherwise, the transportation lock will not be
released.
Setting Up the Scanner
13
English
Setting Up
3. Turn on the scanner by pressing the . Power button.
Ready light
. Power button
The scanner turns on and starts initialization. The Ready light
flashes in green until the scanner finishes initialization; it then
stops flashing and stays green. This indicates that the scanner
is ready for use.
c
Caution:
Whenever you turn off the scanner, wait at least 10 seconds before
turning it back on.
Connecting the Scanner to Your Computer
See the sections below to connect the scanner using the USB or
IEEE 1394 interface.
Note:
❏ Be sure to install the scanner software before connecting the scanner
to your computer. See “Installing the Software” on page 8 for details.
❏ Do not use the USB interface cable and an IEEE 1394 interface cable
at the same time.
❏ Do not connect or disconnect the USB interface cable and an IEEE
1394 interface cable when the scanner is in use.
14
Setting Up the Scanner
Note:
The USB 2.0 Hi-speed connection is not supported by Windows 98,
Windows Me, and Mac OS 9.
Connect one end of the supplied USB interface cable to the USB
port on the back of the scanner, and the other end to an USB hub
or the USB port on your computer.
USB interface
connector
Note:
❏ For USB 2.0 Hi-speed connection, make sure USB 2.0 Host Driver
by Microsoft is installed on your computer.
❏ If you connect your scanner through more than one hub, your
system may not work properly. In this case, try connecting the
scanner directly to the computer’s USB port. Also, your system may
not work properly if you use an USB interface cable other than the
one supplied by Epson.
Setting Up the Scanner
15
English
Connecting the scanner using the USB interface
cable
Connecting the scanner using an IEEE 1394
interface cable
Note:
❏ IEEE 1394 interface connection is not supported by Windows 98.
❏ Prepare an IEEE 1394 interface cable before performing this
operation.
1. Connect one end of an IEEE 1394 interface cable to the IEEE
1394 port on the back of the scanner.
2. Connect the other end of the cable to the IEEE 1394 port on
your computer, or another IEEE 1394 device.
If there are already IEEE 1394 devices connected to your
computer, connect the scanner so that it is the last IEEE 1394
device in the daisy chain.
Note:
Basically, use an IEEE 1394 interface cable that comes with 2 six-pin
connectors at each end. If IEEE 1394 devices with four-pin connectors
are used in a daisy chain or tree, you need to use a 6:4 converter cable.
16
Setting Up the Scanner
Using Your Scanner
English
5
Placing a Document
1. Make sure the scanner is turned on.
2. Open the document cover and place the document face down
on the document table.
corner of the document
Note:
An area of 1±0.5 mm from the horizontal and the vertical edges of
the document table glass cannot be scanned.
3. Close the document cover.
Note:
❏ Do not place heavy objects on the top of the scanner.
❏ Do not move the scanner while it is scanning a document; this
is to avoid the scanned image becoming distorted.
Using Your Scanner
17
Scanning Your Document Using EPSON Scan
EPSON Scan provides three modes for you to modify any
scanning settings: Home Mode, Office Mode, and Professional
Mode. This section describes how to start EPSON Scan from
Photoshop Elements in the Home Mode. The Home Mode lets you
scan images using the basic settings. For more details, see your
Online Reference Guide and Software online help.
Note:
If you do not have the Online Reference Guide on your computer, see
“Installing the Software” on page 8 to install it from the CD-ROM.
Note for Macintosh users:
Most illustrations shown in this section are for Windows. They may be
different in appearance from what actually appears on your screen;
however the instructions are the same, except as noted.
Note for Mac OS X 10.3 users:
Do not use the Fast User Switching function while using Expression
10000XL.
1. Start Adobe Photoshop Elements.
For Windows users:
Click Start, point to All Programs (for Windows XP users) or
Programs (for Windows 2000, Me or 98 users), and then click
Adobe Photoshop Elements.
For Macintosh users:
Double-click the Adobe Photoshop Elements folder in
Macintosh HD, and then double-click the Photoshop
Elements icon.
18
Using Your Scanner
Note for Windows XP users:
Do not choose WIA-EPSON Expression10000XL from the menu
to select the scanner. If you select it, you cannot use the Epson
scanner functions fully.
3. Specify the Document Type, Image Type, and Destination
settings to match your images.
4. Click Preview to preview the image.
5. Use Target Size to specify the output size of the scanned
image.
Using Your Scanner
19
English
2. Select Import from the File menu, and then choose EPSON
Expression 10000XL. EPSON Scan starts.
6. Click Scan. EPSON Scan starts scanning.
7. The scanned image is sent to Adobe Photoshop Elements.
Click Close to finish EPSON Scan, if necessary.
8. Select Save As from the File menu in Adobe Photoshop
Elements.
9. Type a file name, select a file format, and then click Save.
20
Using Your Scanner
Options
English
6
Using the Transparency Unit
The optional A3 Transparency Unit (B81336✽) makes it possible
to scan films and slides, in full color. Once you install the
Transparency Unit, you can leave it in place even when you want
to return to scanning reflective (paper) documents.
Unpacking the Transparency Unit
Make sure that all the items shown below are included and have
not been damaged during shipping. Contact your Epson dealer if
any item is missing or damaged.
Transparency Unit
transparency guide
film holders
Options
21
Unlocking the transportation lock
Before you install the Transparency Unit, you need to unlock the
transportation lock.
1. Turn the unit so that the glass side faces up.
2. Use a coin to unlock the transportation lock by turning it
counterclockwise one-quarter.
Note:
❏ Before transporting the scanner, lock its transportation lock to
prevent any damage.
❏ If the unit's lamp assembly is not in its home position, you cannot
turn the transportation lock. If this is the case, attach the unit to the
scanner, close the unit, and turn the scanner on; the unit's lamp
assembly then returns to its home position. Turn off the scanner and
remove the Transparency Unit.
22
Options
English
Installing the Transparency Unit
Follow the steps below to install the Transparency Unit.
1. Make sure the scanner is turned off, and then unplug the
power cord from the scanner.
2. Open the scanner's document cover, and then remove it by
lifting the back of the cover straight up.
3. Align the pins of the unit with the holes of the scanner, and
then lower the unit until it rests securely on the scanner with
the pins in the holes.
4. Remove the reflective documents mat from the Transparency
Unit as shown below.
Options
23
5. Place the transparency guide on the scanner’s document table
as shown below.
6. Close the Transparency Unit.
7. Connect the Transparency Unit’s connector to the option
connector at the back of the scanner.
24
Options
To scan slides or strips of negative or positive film, see the Online
Reference Guide.
Note:
If you do not have the Online Reference Guide on your computer, see
“Installing the Software” on page 8 to install it from the CD-ROM.
Using the Automatic Document Feeder
A3 Automatic Document Feeder (B81321✽) allows you to
automatically load multi-page documents into your scanner. This
document feeder is particularly useful for OCR (optical character
recognition) scanning, or for creating an image database.
Unpacking the Automatic Document Feeder
When you unpack, make sure you have all the parts shown below
and that none is damaged. If you find any missing or damaged
items, contact your Epson dealer immediately.
Automatic Document Feeder
feet (2) for other
models
feet (2) for
knobs (2)
Expression 10000XL
installation screws (2)
screw driver
Options
25
English
c
Caution:
Do not put heavy objects on the Transparency Unit; otherwise
the unit may be damaged.
Installing the Automatic Document Feeder
Before installing the Automatic Document Feeder, be aware that:
❏ The Automatic Document Feeder is heavy, so you may need
to have someone help you lift it.
❏ The Automatic Document Feeder is large, so you should clear
sufficient space around the scanner.
Follow the steps below to install the Automatic Document Feeder
on your Epson scanner.
1. Make sure your scanner is turned off, and then unplug the
power cord.
2. Open the scanner's document cover, and then remove it by
lifting the back of the cover straight up.
3. Attach the two smaller feet with a groove on the side as shown
below.
26
Options
4. Insert the installation screws into the holes on the back of the
scanner, and then secure them using the included
screwdriver.
5. Align the installation screws with the holes in the Automatic
Document Feeder. Slide so that the holes are over the
installation screws.
w
Warning:
The Automatic Document Feeder is heavy. Get assistance
when lifting it.
Options
27
English
Note:
When removing the feet, turn and remove them as shown below.
6. Secure the knobs to the ends of the installation screws using
the included screwdriver.
7. Attach the Automatic Document Feeder’s connector to the
scanner’s option interface.
8. Close the Automatic Document Feeder.
For details on how to use the Automatic Document Feeder, see
the Online Reference Guide.
Note:
If you do not have the Online Reference Guide on your computer, see
“Installing the Software” on page 8 to install it from the CD-ROM.
28
Options
The EPSON Network Image Express Card (B80839✽) enables an
Epson scanner supporting network functions to be used on a
network. This is an alternative to having the scanner connected
to a server PC. For information on how to use it, refer to the
documentation supplied with EPSON Network Image Express
Card.
Note:
Do not install other option card except the EPSON Network Image
Express Card (B80839✽); otherwise damage may occur.
System requirements
The Network Image Express Card supports the following
environments.
Windows
Operating system
Windows® XP, 2000, Me, and 98
Protocol
TCP/IP
Macintosh
Operating system
Mac OS 9.1 to 9.2, Mac OS X 10.2 or later
Protocol
TCP/IP
Options
29
English
Using the Optional Network Image Express
Card
Installing the Network Image Express Card
Install the Network Image Express Card in your scanner by
following the steps below.
1. Turn off the scanner. Unplug any power cords, and then
disconnect all cables from the back panel of your scanner.
2. Remove the two screws using a cross-head screwdriver, and
then remove the plate. Be sure to keep both screws; you may
need to use them again if you re-install the shield plate.
3. Insert the Network Image Express Card in your scanner’s
optional interface slot and then tighten the screws.
c
Caution:
Do not install or uninstall the Network Image Express Card
from the scanner while the scanner is turned on; otherwise
damage may occur.
4. Initialize the Network Image Express Card. To initialize, turn
on the scanner while holding down the Reset button of the
Network Image Express Card for 10 seconds until the red
status light and green data light turn on.
Note:
Be sure to initialize the Network Image Express Card when you
insert or re-insert it in the scanner.
5. Turn off the scanner.
30
Options
c
Caution:
❏ You must use a Category 5 shielded twisted-pair cable to
connect the Network Image Express Card to prevent
malfunction.
❏ Do not connect the Network Image Express Card and the
computer directly. Be sure to use a HUB to connect the
Network Image Express Card to the network.
7. Turn on the scanner.
8. Check the lights on the Network Image Express Card.
Initialization is in progress while the red status light and the
green data light are on. When the yellow status light goes on,
initialization is complete.
Now, you can configure the Network Image Express Card. For
the detail on using your scanner on a network, refer to the
documentation supplied with the EPSON Network Image
Express Card.
Options
31
English
6. Connect an Ethernet cable (Category 5 shielded twisted-pair
cable) to the RJ-45 connector on the Network Image Express
Card, and then connect its other end to the network.
7
Problems?
Checking the lights on the scanner
First, check the indicator light on the scanner.
Indicator light
Description
Flashing green
The scanner is warming up or scanning.
Green
The scanner is ready to scan.
Flashing red
Try restarting your computer and turning the
scanner off, and then on again.
If the red light is still flashing, contact your dealer.
Red
Try the scanning operation again.
Off
Make sure the scanner is connected to your
computer, and turned on.
Troubleshooting
If your problem is listed here, try these suggestions.
32
Problem
Solution
The New Hardware
Wizard appears on
your screen.
Click Cancel, and then follow the steps
described in “Installing the Software” on page
8. Disconnect the scanner before installing the
software.
You see a message
about
a HI-SPEED USB device
on Windows XP.
Click the x in the corner of the message to close
it. Your scanner will work correctly, although not
at maximum speed.
You see an error
message when you try
to scan, or
the scanner does not
scan.
Make sure the scanner is connected to your
computer, plugged into an electrical outlet,
and the power button is turned on.
The corner of your
photo is not scanned.
Move your photo at least 1.5 mm away from the
top and right edges of the document table.
Problems?
Additional information is available in the following sources.
❏ Double-click the Exp10000XL Reference Guide icon on
your desktop. You must have Microsoft Internet Explorer
or Netscape Navigator (versions 5.0 or later) to read the
Online Reference Guide.
Note:
If you do not have the Online Reference Guide on your computer, see
“Installing the Software” on page 8 to install it from the CD-ROM.
❏ On-screen Help for EPSON Scan: Click the Help button
or question mark that appears on the screen in these
programs.
Problems?
33
English
Getting more information about your scanner
34
Problems?