1
70
5.3
en | Installation of the Pipe System
FAS-420-TM Aspirating Smoke Detector
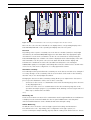
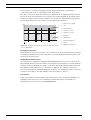
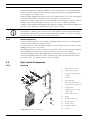
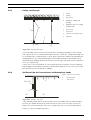
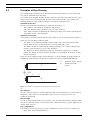
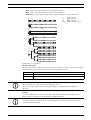
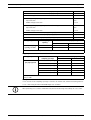
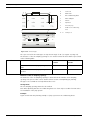
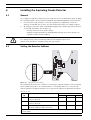
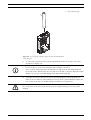
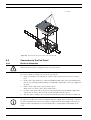
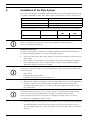
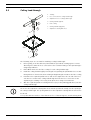
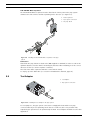
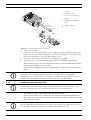
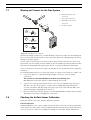
Ceiling Lead-through
1
1.
2
4.
1
T-fitting
2
Hose connection for ceiling lead-through
3
Aspiration hose for ceiling lead-through
4
Ceiling lead-through nut
5
False ceiling
6
Ceiling lead-through (part)
7
Aspiration reducing film sheet
3
4
2.
5
6
3.
5.
7
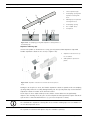
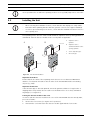
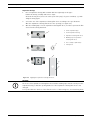
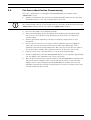
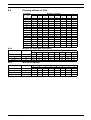
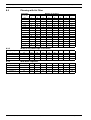
The following steps are essential for installing a ceiling lead-through:
1.
Before gluing, clean the adhesion points with the prescribed cleaning agent to remove
dirt and grease. Glue the hose connection to the relevant T-fitting on the aspiration pipe
using Tangit adhesive.
2.
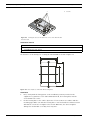
Drill a Ø 13 mm hole in the false ceiling for each ceiling lead-through.
3.
Install the ceiling lead-through by removing the nut, pushing the part with the hose nozzle
through the bore from below, then refitting and tightening the nut above the false ceiling.
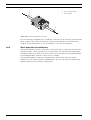
4.
Determine the required aspiration hose and cut to length. Place the cut end of the hose
onto the hose nozzle in the ceiling lead-through and onto the hose connection on the
aspiration pipe T-fitting. If necessary, heat up the hose using a hot air blower.
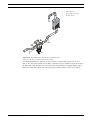
5.
Glue the required aspiration reducing film sheet (as per the planning guidelines) onto the
ceiling lead-through.
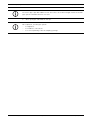
NOTICE!
The hole in the aspiration reducing film sheet must be positioned exactly over the opening in
the ceiling lead-through. The opening diameter in the aspiration reducing film sheet must not
be altered.
To keep the adhesive surfaces of the film sheets free of dust and grease, avoid touching them.
F.01U.088.878 | 4.1 | 2010.11
Operation Guide
Bosch Sicherheitssysteme GmbH