1
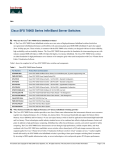
Essence ®
Technology
EIP 7012/EIP 7012P
Essence VoIP Phone User’s Manual
Version 1.0D
Essence Technology Solution, Inc.
TEL: 886-2-8913-2070
5F, No. 205, Beisin Rd., Sec. 3, Sindian, Taipei County 231, Taiwan
FAX: 886-2-8913-2539
http://www.essti.com
E-mail:[email protected]
9/28/2007
VoIP Phone Administration Guide
MAG-07005-2 Rev. D
TABLE OF CONTENTS
1
2
Introduction ....................................................................................................................................... 1
1.1
Harware Overview......................................................................................................... 1
1.2
Software Overview ........................................................................................................ 1
Keypad Interface for IP Phone Demo System.................................................................................. 2
2.1
Keypad Description ....................................................................................................... 2
2.2
Recording...................................................................................................................... 3
2.3
Keypad Function and Setting List ................................................................................. 3
2.3.1
2.3.2
2.3.3
2.3.4
2.3.5
2.3.6
2.3.7
2.3.8
3
Phone Book .......................................................................................................... 3
Call History ........................................................................................................... 4
Phone Setting ....................................................................................................... 5
Network ................................................................................................................ 6
SIP Settings.......................................................................................................... 7
NAT Traversal....................................................................................................... 8
Administrator ........................................................................................................ 8
Sys. Authority ....................................................................................................... 8
Setup the VoIP Phone by Web Browser........................................................................................... 9
3.1
Login ............................................................................................................................. 9
3.2
System Information for the IP Phone ............................................................................ 9
3.3
Phone Book.................................................................................................................10
3.3.1
3.3.2
3.4
Phone Book ........................................................................................................10
Speed Dial List ................................................................................................... 11
Phone Setting..............................................................................................................12
3.4.1
3.4.1.1
3.4.1.2
3.4.1.3
3.4.2
3.4.3
3.4.4
3.4.5
3.4.6
3.4.6.1
3.4.7
3.4.8
3.4.9
3.4.10
3.5
Forward Settings ................................................................................................12
All Forward.................................................................................................12
Busy Forward.............................................................................................12
No Answer Forward ...................................................................................12
SNTP Settings ....................................................................................................13
Volume Settings .................................................................................................13
Ringer Settings ...................................................................................................14
DND Settings......................................................................................................14
Dial Plan Setting.................................................................................................15
Symbol Explain ..........................................................................................16
Call Waiting Settings ..........................................................................................17
Soft-key Settings ................................................................................................17
Hot Line Settings ................................................................................................17
Alarm Settings ....................................................................................................18
Network .......................................................................................................................19
3.5.1
3.5.2
3.5.3
3.5.4
3.5.5
Network Status ...................................................................................................19
WAN Settings .....................................................................................................19
LAN Settings ......................................................................................................20
DDNS Settings ...................................................................................................21
VLAN Settings ....................................................................................................22
ii
9/28/2007
3.5.6
3.5.7
3.5.8
3.6
MAG-07005-2 Rev. D
DMZ Setting........................................................................................................23
Virtual Server......................................................................................................23
PPTP Settings ....................................................................................................24
SIP Settings ................................................................................................................25
3.6.1
3.6.2
3.6.3
3.6.4
3.6.5
3.6.6
3.6.7
Service Domain ..................................................................................................25
Port Settings .......................................................................................................27
Codec Settings ...................................................................................................27
Codec ID Settings ..............................................................................................28
DTMF Settings ...................................................................................................28
RPort Function ...................................................................................................29
Other Settings ....................................................................................................29
3.7
NAT Trans ...................................................................................................................30
3.8
Others .........................................................................................................................30
3.8.1
3.8.2
3.8.3
MAC Clone Setting.............................................................................................30
Tones Settings ....................................................................................................31
Advanced Settings .............................................................................................31
3.9
System Auth ................................................................................................................32
3.10
Save Changes.............................................................................................................32
3.11
Update.........................................................................................................................33
3.11.1
3.11.2
3.11.3
3.12
4
VoIP Phone Administration Guide
Update Firmware................................................................................................33
Auto Update Settings .........................................................................................34
Restore Default Settings ....................................................................................34
Reboot.........................................................................................................................34
Automatic Client Configuration with Essence IP PBX ....................................................................36
iii
9/28/2007
VoIP Phone Administration Guide
MAG-07005-2 Rev. D
1 Introduction
This administration guide is for EIP 7012. The administration guide explains the keypad instruction,
web configuration and command line configuration for VoIP Phone. Before using VoIP Phone, some
setup processes are required to make the VoIP Phone work properly. Please refer to the Setup Menu
for further information.
1.1 Harware Overview
EIP 7012 has the following interfaces for Networking, telephone interface, LED indication, and power
connector. EIP 7012P supports POE that can connect to POE switch and use the power of POE
switch.
Two RJ-45 Networking interface, these two interfaces support 10/100Mps Fast Ethernet. You can
connect one RJ-45 Fast Ethernet port to the ADSL or Switch, and connect the other one to your
computer.
LED Indication: some LED indicators in the VoIP Phone show the functions, like speaker phone,
Register, and so on.
Dimension: approximately 18 x 20 x 8 cm
Weight: approximately 220g
Operating temperature: 0-50°C
Adapter: Input:100-240V, 50-60Hz
Output via general adapter: 6V, 1A
Output via Power over Ethernet on WAN port: Typical 5V, 1.2A (7012P only)
FCC Class B
CE, 89/336/EEC
LVD: 73/23/EEC
RoHS compliant
Warning: AC Input out of defined range will cause phone malfunction or damage!
1.2 Software Overview
Network Interface
Display
SIP
․ Two RJ45 10/100 Base-T
․ 16 characters x 2 lines
․ SIP v2 (RFC 3261)
․ Backlit, grayscale
․ SIP RPORT(RFC 3581)
Ethernet ports
1
9/28/2007
VoIP Phone Administration Guide
․ Many other SIP protocols
․ Mimic second dial tone
Voice Quality
․ Support 3 SIP accounts
․ Incoming call indicator
․ G.168 LEC (Line Echo
․ SIP server redundancy
․ MWI/VMWI
Call Features
․ Provide 4 different
․ Call Hold
․ Call Waiting
ringtones
․ Selectable ringtones
․ Caller ID ringtones
․ Call Forward
․ Programmable tone
․ Unconditional forward
․ Volume/Input gain
․ Busy forward
adjustment
MAG-07005-2 Rev. D
Canceller)
․ AEC (Acoustic Echo
Canceller)
․ VAD (Voice Activity
Detection)
․ CNG (Comfort Noise
Generator
․ Packet loss compensation
․ Call Transfer
․ Dial plan setting
․ Dial without waiting
․ Blind transfer
DTMF
Networking
․ Attended transfer(Ring
․ In-band DTMF
․ IP assignments:
․ Static IP
․ DHCP
․ PPPoE
․ Unavailable forward
and Consult transfer)
․ 3-way Conference
․ RFC2833( Out-of-band
DTMF)
․ Adaptive jitter buffer
․ Call Park/Call Pickup**
․ SIP INFO
․ STUN for NAT traversal
․ On-demand Call
Codecs
․ MAC clone
․ G.711 μ-law/A-law
․ SNTP client
․ G.723.1 6.3k/5.3k bit/s
․ Bridge/NAT mode on LAN
․ G.726 16k/24k/32k/40k
․ DHCP server on NAT
Recording**
․ Hotline
Phone Functions
․ Feature keys
․ Phone Book
․ Redial
․ Do not disturb (DND)
․ Hold
․ Transfer
․ Conference
․ Forward
․ Voice Message
․ Speaker phone
․ Volume Adjustment
․ Call Recording
․ Mute
․ Phone Book (140sets)
․ Speed Dials (8 sets)
․ Call History (64 sets)
․ Caller ID Display
․ Speaker Phone
․ Multi-user(Up to 3)
mode for LAN
bit/s
․ G.729A 8k bit/s
․ DDNS
․ G.729A/B
․ Virtual Server
․ GSM
Security
Administration
․ HTTP 1.1 basic/digest
․ Web-based configuration
authentication for web
․ Direct keypad
setup
configuration
․ Auto Provisioning on
․ MD5 for SIP
authentication (RFC
2069/RFC 2617)
boot**
․ Automatic firmware
upgrade**
QoS
․ IEEE 802.1Q VLAN
․ Firmware upgrade via web
․ Diagnostics (Syslog
support)
2
․ ToS field
9/28/2007
VoIP Phone Administration Guide
MAG-07005-2 Rev. D
2 Keypad Interface
2.1 Keypad Description
Key Name
Description
1
“1”, “-“, “٫”, “!”, “?”
2
“2”, “a”, “b”, “c”, “A”, “B”, “C”
3
“3”, “d”, “e”, ”f”, “D”, “E”, “F”
4
“4”, “g”, “h”, “I”, “G”, “H”, “I”
5
“5”, “j”, “k”, “l”, “J”, “K”, “L”
6
“6”, “m”, “n”, “o”, “M”, “N”, “O”
7
“7”, “p”, “q”, “r”, “s”, “P”, “Q”, “R”, ‘S”
8
“8”, “t”, “u”, “v”, “T”, “U”, “V”
9
“9”, “w”, “x”, “y”, “z”, “W”, “X”, “Y”, “Z”
0
“0”, “space”
*
“*”, “•”, “:”, “@”
#
Start dialing process.
4-way Navigation
Press to scroll through lists and menus on the display.
Keys
MENU
Press to access the menu options or cancel your selection and go back to the
previous level.
ENTER
Phone Book
REDIAL
DND
HOLD
TRANSFER
CONFERENCE
FWD
Press to enter a menu or confirm a selection.
Press to access the personal phonebook directory.
Press to call the last number dialed.
Press to block all incoming calls.
Press to put an active call on hold.
Press to transfer an active call to another VoIP phone on the system.
Press to activate the three-way conference call.
Press to forward all incoming calls to another phone on the system.
DELETE
Press to erase the number you dialed when making a call.
M1~M8
Press any of the keys to speed dial the preset contact number.
M9
Press to enable the Mute function.
2
9/28/2007
M10 / REC
VOICE MSG
SPEAKER
VOLUMN Control
Key
VoIP Phone Administration Guide
MAG-07005-2 Rev. D
Press to record the conversation, please refer to section 2.2 for further details.
Press to listen to voice mail messages.
Press to activate the speakerphone to allow handsfree conversations.
Press to increase or decrease the volume of the ringer tone, handset, or the
volume of the current call using the speakerphone.
2.2 Recording
The recording function is for the user who wants to record the conversations during the calls. The user
only needs to press “M10 / REC” button to start recording and press again to stop it. The voice file will
be saved in the user’s voice mail system. The Message Waiting Indicator on IP phones will be lit to
inform the user.
To listen to the recording, make a call to the user’s voice mail system, press “1” to hear the new
messages of the recording.
2.3 Keypad Function and Setting List
2.3.1 Phone Book
Name
Description
Search
Search Phone Book.
Add Entry
Add new phone number to phone book.
Speed Dial
Add speed dial phone number to speed dial list.
Erase All
Erase all phone number from Phone Book.
The phone book feature enables you to create new entries for your contacts and edit their contact
information. It also enables you to store a number from a received call or a dialed number in your
phone book.
2.3.1.1 Creating a New Entry
To create a new entry, do the following:
1.
Press the Menu key and then select Phone book -> Add Entry to add a new entry to the phone
book.
2.
Type the name of the new contact.
3.
Press the Enter key to save the name.
4.
Enter the phone number of the new contact.
5.
Press the Enter key to save the number.
3
9/28/2007
VoIP Phone Administration Guide
MAG-07005-2 Rev. D
2.3.1.2 Modifying Contact Information
To modify contact information, do the following:
1.
Press the Menu key and then select Phone Book -> Search, and press the Enter key to view
the phone book entries.
2.
Scroll through the phone to select an entry, and press the Enter key to display the contact
information.
3.
Press the Enter key to edit the name, and press it again to save your setting.
4.
Change the phone number as required and press the Enter key to save your changes.
2.3.1.3 Deleting a Contact
You can delete all contacts in the phone book one at a time or all at once.
To delete a single contact, do the following:
1.
Press the Menu key and then select Phone book -> Search.
2.
Press the Enter key to display all contacts in the phone book.
3.
Select the contact you want to delete and press the Delete key. The selected entry is deleted.
To delete all contacts in the phone book, do the following:
1.
Press the Menu key and then select Phone book.
2.
Choose Erase All and then use the up and down navigation keys to select Yes to confirm or No
to cancel.
2.3.1.4 Speed Dial Setting
You can use speed dialing to assign a hotkey (M1 to M8) to the phone numbers that you dial most
frequently. You can then press a hotkey (M1 to M8) to quickly dial a number instead of keying in the
entire phone number or searching for it from the phone book.
To assign speed dial hotkeys, do the following:
1.
Press the Menu key and then select Phone book and Speed Dial.
2.
Input the phone number and press the Enter key. Then select one of the M1~ M8 keys to assign
for speed dialing.
2.3.2 Call History
Name
Description
Incoming Calls
Show all incoming call.
Dialed Numbers
Show all dialed call.
4
9/28/2007
Erase Records
VoIP Phone Administration Guide
MAG-07005-2 Rev. D
Delete call history.
All: Delete all call history.
Incoming: Delete all incoming call.
Dialed: Delete all dialed out call.
2.3.3 Phone Setting
Name
Description
Call Forward
All Fwd.
Activation: To Enabled/Disabled this function.
Number: Forward to a Speed Dial Number.
Busy Fwd.
Activation: To Enabled/Disabled this function.
Number: Forward to a Speed Dial Number.
No Answer Fwd.
Activation: To Enabled/Disabled this function.
Number: Forward to a Speed Dial Number.
Ring Timeout
Set the Ring times to start the no answer forward
function, ex: 2 means after 2 rings then forward to the
dedicated number.
Do Not Disturb
Alarm Setting
Date/Time
Always
Block all phone calls.
By Period
Block all phone calls at a certain period of time.
Period Time
Set the start time and end time to Block Setting.
Activation
Set the Alarm Enabled or Disabled.
Alarm Time
Set the time for alarming.
Date and Time Setting.
Date & Time
Set the IP Phone Date and Time.
Time Format
To set the time as 12-hour or 24-hour clock.
SNTP Setting
SNTP: Enabled / Disable SNTP.
Primary SNTP: Set Primary SNTP server IP address.
Secondary SNTP: Set Secondary SNTP server IP
address.
Time Zone: Set Time zone.
Volume & Gain
Handset Volume
Set Handset volume from 0~15 (max.) for you to hear.
Speaker Volume
Set Speaker phone volume from 0~15 (max.) for you to
5
9/28/2007
VoIP Phone Administration Guide
MAG-07005-2 Rev. D
hear.
Handset Gain
Set Handset Gain from 0~15 (max.) for the other site to
hear.
Speaker Gain
Set Speaker phone Gain from 0~15 (max.) for the other
site to hear.
Ringer
Ringer Volume
Ringer volume setting from 1~15 (max.).
General Ringer
Ringer tone selection from 1~3 and default.
Digit Timeout
Set Auto Dial time from 1~5 seconds.
Call Waiting
Set enable to be informed there is a new incoming call, user can set the function
to disable.
Direct Dial
Set enable to be able to dial the phone numbers in Phone Book by pressing
“**+position”.
Busy Redial
Set enable to redial the call up to 10 times when receiving SIP busy.
2.3.4 Network
Name
Description
WAN Setup
IP Type
Fixed IP: Self configure the IP address.
DHCP: To get IP address through DHCP.
PPPoE: To get IP address through PPPoE.
Set Fixed IP
IP Address: The IP address of the IP phone.
Subnet Mask: Configure subnet mask.
Default Gateway: The gateway address
Set PPPoE
User Name: User name of PPPoE
Password: Password of PPPoE
LAN Setup
DNS
VLAN
Bridge
Set LAN as bridging mode
NAT
Set LAN as NAT mode
Primary DNS
First DNS address
Secondary DNS
Second DNS address
Activation
Activate or disable the VLAN.
VID
Set VID from 2 to 4094.
Priority
Set the priority from 0 to 7.
6
9/28/2007
VoIP Phone Administration Guide
CFI
Status
MAG-07005-2 Rev. D
0~1
Show WAN, LAN IP address and MAC address.
2.3.5 SIP Setting
If you want to use keypad to set the SIP setting, you have to go to item 8 Sys. Authority to input the
password, or you can not change the SIP setting.
Name
Description
Service Domain
First/Second/Third
The realms include following information. You can press
Realm
“1*#”, “2*#”, and ”3*#” to change among these three SIP
realms.
Activation: To enable or disable the realm.
User Name: The SIP’s user name.
Display Name: The SIP’s display name.
Register Name: The SIP’s registered name.
Register Pwd.: The SIP’s password.
Proxy Server: The address of SIP proxy.
Domain Server: The address of domain server.
Outbound Proxy: The address of outbound proxy.
Codec
Codec Type
The codec type includes G.711 uLaw, G.711 aLaw,
G.723, G.729, G.726-16, G.726-24, G.726-32, and
G.726-40.
RTP Setting
VAD
Voice Active Detection Enable/Disable.
Outband DTMF
Enable/Disable outband DTMF.
Duplicate RTP
No Duplicate: Do not resend the voice packages.
One Duplicate: Resend voice packages one time.
Two Duplicate: Resend voice packages two times.
RPort Setting
RPort Enabled/Disabled
Hold by RFC
Enable/Disable Holding the calls, according to RFC3261.
Status
Show the SIP Proxy register status. You can use UP/Down key to check each
Realm’s status.
7
9/28/2007
VoIP Phone Administration Guide
MAG-07005-2 Rev. D
2.3.6 NAT Traversal
If you want to use keypad to set the NAT Traversal settings, you have to go to item 8 Sys. Authority to
input the password, or you can not change the NAT Traversal settings.
Name
Description
STUN Setting
STUN
Enable/Disable STUN.
STUN Server
The address of STUN server.
2.3.7 Administrator
If you want to use keypad to set the Administrator setting, you have to go to item 8 Sys. Authority to
input the password, or you can not change the Administrator setting.
Name
Description
Upgrade System
This function must work with IP PBX.
Upgrade Now
Select to direct connect to IP PBX to check if there is any
upgrade version. If there is a newer version, IP phone
will upgrade the system automatically
Schedule State
Select to see the current status and scheduling time.
Set To Default
You can restore to the default setting.
Change Pwd.
Press ENTER and press a new password to replace the original password with
the new one.
Version
This will show the system’s firmware version.
Vendor ID
To see the vendor ID of the IP Phone
Watch Dog
You can use this to enable Watch Dog function to do the debugging.
Restart
You can use this function to restart your IP Phone.
2.3.8 Sys. Authority
To do the SIP setting, NAT traversal and Administrator from Keypad, you need to input the password
first. Default is “test”.
8
9/28/2007
VoIP Phone Administration Guide
MAG-07005-2 Rev. D
3 Setup the VoIP Phone by Web Browser
Default the IP Phone’s Bridge is enabled, WAN port is in DHCP Client Mode. LAN port is the same as
WAN. Connect the VoIP Phone to DHCP server, and the server assign an IP address to the phone.
Check the IP address and add the port number “:9999” at the end of the IP address to access the web
browser.
Note: When selecting DHCP Client and cannot detecting the IP, the VoIP Phone will provide a default
IP, 192.168.2.25.
Note: It is highly recommended to use Internet Explorer 6.0 or later for web configurations.
3.1 Login
Please input the username and password into the blank field. The default setting is:
1.
For Administrator, the username is: root; and the password is: test. If you use the account login,
you can configure all the setting.
2.
For normal user, the username is: user; and the password is: test. If you use the account login,
but you can not configure the SIP setting.
Click Login to move into the VOIP PHONE web based management information page.
Any changes in the Web Management interface except for Phone Book require clicking Submit in that
page, and then go to the Save Changes page and click Save. The system will restart, and all the
settings can work properly.
3.2 System Information for the VoIP Phone
When you login the web page, you can see the current system information of the VoIP Phone like
Model Name, Firmware Version, Vendor ID and Codec Version in this page.
Also you can see the function lists in the left side. You can use mouse to click the function you want to
set up.
9
9/28/2007
VoIP Phone Administration Guide
MAG-07005-2 Rev. D
Note: The information in this page is useful when you need technical support. You may screen capture
this page and provide the information to technical support team so that they could easily track
the issues you have.
3.3 Phone Book
Phone Book contains Phone Book and Speed Dial Settings. You can setup the Phone Book and Speed
Dial number. The Phone Book can store 140 phone numbers and the Speed Dial can store 8 phone
numbers. If you want to use Speed Dial you just dial the speed dial number then press “#”.
3.3.1 Phone Book
In the Phone Book function, you can add/delete the phone number in the phone book list. You can add
maximum 140 entries phone book list.
10
9/28/2007
VoIP Phone Administration Guide
MAG-07005-2 Rev. D
If you need to add a phone number into the phone book, you need to type the position, the name, and
the phone number 1 and ringer type for the number. When you finished a new phone list, just click Add
Phone.
If you want to delete a phone number, you can select the phone number you want to delete then click
Delete Selected.
If you want to delete all phone numbers, you can click Delete All.
3.3.2 Speed Dial List
In Speed Dial List function, you can add/delete Speed Dial number. You can input maximum 8 entries
speed dial list.
If you need to add a phone number into the Speed Dial list, you need to input the position, the name,
and the phone number (by URL type). When you finished a new phone list, just click Add Phone.
If you want to delete a phone number, you can select the phone number you want to delete then click
Delete Selected.
If you want to delete all phone numbers, you can click Delete All.
1
The format of the phone number here can either be phone numbers or SIP URL format. General phone
numbers will work in most cases if VOIP phone is deployed under IP PBX environment. For direct IP dialing, a
SIP URL format can be also used.
11
9/28/2007
VoIP Phone Administration Guide
MAG-07005-2 Rev. D
3.4 Phone Setting
Phone Setting contains Call Forward, SNTP Settings, Volume Settings, Ringer Settings, DND Settings,
Dial Plan Settings, Call Waiting Settings, Soft-key Setting functions, Hot Line Settings, Alarm Settings
and Daylight Settings.
3.4.1 Forward Settings
You can setup the phone number you want to forward in this page. There are three type of Forward
mode. You can choose All Forward, Busy Forward, and No Answer Forward by clicking the icon.
3.4.1.1 All Forward
All incoming calls will forward to the number you entered. You can input the name and the phone
number in the field accordingly.
3.4.1.2 Busy Forward
If you are on the phone, the new incoming call will forward to the number you entered. You can input
the name and the phone number in the URL/Phone No. box.
3.4.1.3 No Answer Forward
If you can not answer the phone, the incoming call will forward to the number you entered. You can
input the name and the phone number in the URL/Phone No. box. Also you have to set the Time Out
time for system to start to forward the call to the number you select.
When you have finished the settings, click Submit. Go to the Save Changes page and click Save to
12
9/28/2007
VoIP Phone Administration Guide
MAG-07005-2 Rev. D
reflect the changes.
3.4.2 SNTP Settings
You can setup the primary and second SNTP Server IP Address, to get the date/time information. Also
you can base on your location to set the Time Zone, and how long need to synchronize again. When
you have finished the settings, click Submit. Go to the Save Changes page and click Save to reflect
the changes.
3.4.3 Volume Settings
You can setup the Handset Volume, Speaker Volume, Ringer Volume, the Handset Gain, and Speaker
Gain.
Handset Volume is to set the volume you hear from the handset.
Speaker Volume is to set the volume you hear from the speaker phone.
Ringer Volume is to set the ringer volume.
Handset Gain is to set the volume send out from the handset.
Speaker Gain is to set the volume send out from the micro phone.
13
9/28/2007
VoIP Phone Administration Guide
MAG-07005-2 Rev. D
When finished the settings, click Submit. Go to the Save Changes page and click Save to reflect the
changes.
3.4.4 Ringer Settings
You can select the melody for the incoming calls. When you have finished the settings, click Submit.
Go to the Save Changes page and click Save to reflect the changes.
Ring Tone By Caller ID Matching Digits: Enter a digit for the number of caller ID digits. If the total
digit of the phone number is larger or equal to the digit, the ringer type hunts for the phone number that
matches digits at the end, and the melody of that phone number will ring. If the total digit of the phone
number is smaller than the digit, it will hunt for the exact match phone number and ring the ringer type
of the phone number.
Note: The order of the phone number in the Phone Book page matters the hunting sequential.
General Ringer Type: Select general ring tone for the incoming calls.
When you have finished the settings, click Submit. Go to the Save Changes page and click Save to
reflect the changes.
3.4.5 DND Settings
You can setup the DND (Do-not-disturb) Setting to keep the phone silence. You can choose DND
Always or DND Period.
14
9/28/2007
VoIP Phone Administration Guide
MAG-07005-2 Rev. D
DND Always: All incoming call will be blocked until disable this feature.
DND Period: Set a time period and the phone will be blocked during the time period. If the “From” time
is large than the “To” time, the Block time will from Day 1 to Day 2.
Blacklist Rule: Enter a rule 2 to block calls that fit the rule.
When you have finished the settings, click Submit. Go to the Save Changes page and click Save to
reflect the changes.
3.4.6 Dial Plan Setting
This function is when you input the phone number by the keypad but you don’t need to press “#”. After
time out the system will dial directly.
2
For how to configure the rule, please refer to Dial Plan Setting.
15
9/28/2007
VoIP Phone Administration Guide
MAG-07005-2 Rev. D
3.4.6.1 Symbol Explain
x or X
0,1,2,3,4,5,6,7,8,9
+
or
Drop Prefix: The default is No for adding the prefix to the dial plan in Replace Rule. Click Yes to
delete the prefix of the dial plan in Replace Rule.
Replace Rule 1~4: Type rule for matching.
Example:
Drop Prefix
Replace Rule
Description
No
002
When the dialed number begins with
8613+8662
“8613” or “8662”, the number will be
added “002” to call out.
No
002
12
When the dialed number begins with
“12”, the number will be added “002” to
call out.
No
002
5xxx
When the dialed number begins with “5”,
and has total of four digits, the number
will be add “002” to call out.
Yes
002
003+004+005
When the dialed number begins with
“003”, “004” or “005”, the number will be
dropped “003”, “004” or “005”, and then
add “002” to call out.
Yes
002
55xxxx
When the dialed number begins with “55”
and has total of six digits, the number will
be dropped “55”, and add “002” to call
out.
Dial Now: Type a number or dial pattern. When the dialed number match the patter, the phone will
directly send out the number. Note that the first digit cannot set “0”.
Second Dial Tone: Press the entered number to hear the second dial tone.
Digit Timeout: The default is 5 seconds. Type a time in sec for auto dial after the time is up.
Use # As Send Key: The default is Yes. Click No to disable send key function, and the dialed number
will not send out until Auto Dial Time is finished.
Use * For IP Dialing: The default is Yes. Click No to see “*” (star) as it is instead of “.” (dot).
When you have finished the settings, click Submit. Go to the Save Changes page and click Save to
reflect the changes.
16
9/28/2007
VoIP Phone Administration Guide
MAG-07005-2 Rev. D
3.4.7 Call Waiting Settings
If the user doesn’t want to be informed there is a new incoming call, the user can set the function off.
When you have finished the settings, click Submit. Go to the Save Changes page and click Save to
reflect the changes.
3.4.8 Soft-key Settings
EIP 7012 supports soft-key settings for voice messages. You can press VOICE MSG on the VoIP
Phone to dial out the entered number in order to get into the voice mail service.
Voice mail key: Type a serial of number for listening to the voice messages.
When you have finished the settings, click Submit. Go to the Save Changes page and click Save to
reflect the changes.
3.4.9 Hot Line Settings
Hot line setting is a special line for the VoIP Phone. When enable the function, the phone will directly
dial out the number once the phone is picked up.
17
9/28/2007
VoIP Phone Administration Guide
MAG-07005-2 Rev. D
Hot Line Number: Type a phone number as a special line.
When you have finished the settings, click Submit. Go to the Save Changes page and click Save to
reflect the changes.
3.4.10 Alarm Settings
Alarm Settings is to inform user at a certain time. Click On and then type the time for ringing.
Alarm Time: Type a time for reminding.
Current Time: Display the current time of the VoIP Phone.
When you have finished the settings, click Submit. Go to the Save Changes page and click Save to
reflect the changes.
3.4.11 Daylight Settings
If the country has daylight saving time, you can configure the time in this page.
18
9/28/2007
VoIP Phone Administration Guide
MAG-07005-2 Rev. D
Click On, select Format 1 or Format 2, and configure the start/end time to enable daylight saving at
the configured period of time.
When you have finished the settings, click Submit. Go to the Save Changes page and click Save to
reflect the changes.
3.5 Network
In Network, you can check the Network status, configure the WAN Settings, LAN Settings, DDNS
settings, VLAN Settings, DMZ Settings, Virtual Server and PPTP Settings.
3.5.1 Network Status
You can check the current Network settings in this page.
3.5.2 WAN Settings
In this page, you can configure the VoIP Phone’s WAN port setting. The WAN port is for you to connect
19
9/28/2007
VoIP Phone Administration Guide
MAG-07005-2 Rev. D
to the ADSL Router, or Broadband Router. Also, you can use PPPoE to get the WAN IP address from
your ISP.
The default setting is Bridge mode. If you don’t need to use the Bridge mode, you can change to NAT
mode.
The WAN port default is DHCP Client mode. You can change the setting to Fixed IP mode, or PPPoE
mode.
If you change the WAN port’s setting to Fix IP mode, then you have to make sure the IP address. Net
Mask, Gateway, and DNS settings are suitable in your current network environment.
Host Name: Name of the phone. The information can be transmitted in a packet.
If you change the WAN port’s setting to PPPoE mode, you have to input a correct username/password
to get the IP address from your Internet Service Provider.
Service Name: Name of the server. You can contact your SIP provide for the information.
When you have finished the settings, click Submit. Go to the Save Changes page and click Save to
reflect the changes.
Note: When selecting DHCP Client and cannot detecting the IP, the IP Phone will provide a default IP,
192.168.2.25.
3.5.3 LAN Settings
In this page, you can configure the VoIP Phone LAN port’s setting.
20
9/28/2007
VoIP Phone Administration Guide
MAG-07005-2 Rev. D
The LAN settings’ default does not effect as Bridge mode is enabled. To configure LAN settings, go to
Network -> WAN Settings, and click NAT under LAN Mode.
You can connect your PC to the LAN port, set your PC as DHCP Client mode, and then you can get IP
address from the VoIP Phone.
When you have finished the settings, click Submit. Go to the Save Changes page and click Save to
reflect the changes.
3.5.4 DDNS Settings
You can configure the DDNS setting in this page. You need to have the DDNS account and input the
information properly. You can have a DDNS account with a public IP address then others can call you
via the DDNS account. But now most of the VoIP applications are work with a SIP Proxy Server. When
you have finished the settings, click Submit. Go to the Save Changes page and click Save to reflect
the changes.
21
9/28/2007
VoIP Phone Administration Guide
MAG-07005-2 Rev. D
3.5.5 VLAN Settings
You can set the VLAN setting in this page.
There are two kind of destination packets coming from the VoIP Phone’s WAN port. One packet goes
to the VoIP Phone, and the other goes through the LAN port to the PC.
VLAN Packets: If you enable the first VLAN Packets and set the VID, User Priority, and CFI, all the
incoming packets will be check with the IP Address and the VID.
VID: You can follow your service provider to set your VID.
User Priority: Defines user priority, giving 8 priority levels. IEEE 802.1P defines the operation for
these 3 user priority bits. Usually this will be defined by your service provider.
CFI: Canonical Format Indicator is always set to zero for Ethernet switches. CFI is used for
compatibility reason between Ethernet type network and Token Ring type network. If a frame received
at an Ethernet port has a CFI set to 1, then that frame should not be forwarded as it is to an untagged
port.
22
9/28/2007
VoIP Phone Administration Guide
MAG-07005-2 Rev. D
When you enable the first VLAN Packets and set the VID, User Priority, and CFI, all the incoming
packets with the VoIP Phone’s IP address and the same VID will be accept by the VoIP Phone. If the
incoming packets with the VoIP Phone’s IP address but the different VID then the packets will be
discard by the VoIP Phone. The Other incoming packets with different IP address will go through the
LAN port to the PC.
When you have finished the settings, click Submit. Go to the Save Changes page and click Save to
reflect the changes.
3.5.6 DMZ Setting
You can enable DMZ Setting of the VoIP Phone. Click On, and type an IP address of the PC in DMZ
Host IP.
When you have finished the settings, click Submit. Go to the Save Changes page and click Save to
reflect the changes.
3.5.7 Virtual Server
EIP 7012 provides configuring as a virtual server function.
23
9/28/2007
VoIP Phone Administration Guide
MAG-07005-2 Rev. D
If you need to add a virtual server into the Virtual Server list, you need to type the num, server IP,
internal/external port, and select a protocol. When you finished a new phone list, just click Add Server.
If you want to enable a virtual server, you can select the virtual server you want to enable, and then
click Enable Selected.
If you want to delete a virtual server, you can select the virtual server you want to delete, and then click
Delete Selected.
If you want to delete all virtual servers, you can click Delete All.
When you have finished the settings, click Submit. Go to the Save Changes page and click Save to
reflect the changes.
3.5.8 PPTP Settings
PPTP is one kind of VPN. Remote users can use local telephone number and network through ISP.
Click On and type the server, user name and password of PPTP to enable the function. When you
have finished the settings, click Submit. Go to the Save Changes page and click Save to reflect the
changes.
24
9/28/2007
VoIP Phone Administration Guide
MAG-07005-2 Rev. D
Note: You need to configure LAN Mode as NAT in WAN Settings page to enable this function.
3.6 SIP Settings
In SIP Settings, you can setup the Service Domain, Port Settings, Codec Settings, Codec ID Settings,
RTP Setting, RPort Setting and Other Settings. If the VoIP service is provided by ISP, you need to
setup the related information correctly then you can register to the SIP Proxy Server correctly.
3.6.1 Service Domain
In Service Domain Function, you need to input the account and the related information in this page.
Please refer to your ISP provider. You can register three SIP account in the VoIP Phone. You can dial
the VoIP phone to your friends and receive the phone from any of these three SIP accounts.
25
9/28/2007
VoIP Phone Administration Guide
MAG-07005-2 Rev. D
First you need click On in Active to enable the Service Domain, and you can input the following items:
Display Name: You can input the name you want to display.
User Name: You need to input the User Name get from your ISP.
Register Name: You need to input the Register Name get from your ISP.
Note: Usually User Name and Register Name are the same unless specified by ISP.
Register Password: You need to input the Register Password get from your ISP.
Domain Server: You need to input the Domain Server get from your ISP.
Note: The default SIP port of the Domain Server is 5060. If you want to change the SIP port, specify
the port here.
26
9/28/2007
VoIP Phone Administration Guide
MAG-07005-2 Rev. D
Example: 192.168.1.100 (Assume Domain server SIP port = 5060)
192.168.1.100:5678 (change the SIP port to 5678)
Proxy Server: You need to input the Proxy Server get from your ISP.
Outbound Proxy: You need to input the Outbound Proxy get from your ISP. If your ISP does not
provide the information, then you can skip this item.
Subscribe for MWI: You can click On for the VoIP Phone to ask for MWI periodically.
You can see the Register Status in the Status item. If the item shows “Registered”, then your VoIP
Phone is registered to the ISP, you can make a phone call directly.
If you have more than one SIP account, you can follow the steps to register to the other ISP.
When you have finished the settings, click Submit. Go to the Save Changes page and click Save to
reflect the changes.
3.6.2 Port Settings
You can setup the SIP and RTP port number in this page. Each ISP provider will have different
SIP/RTP port setting, please refer to the ISP to setup the port number correctly. When you have
finished the settings, click Submit. Go to the Save Changes page and click Save to reflect the
changes.
3.6.3 Codec Settings
You can setup the Codec priority, RTP packet length, and VAD function in this page. You need to follow
the ISP suggestion to setup these items. When you have finished the settings, click Submit. Go to the
Save Changes page and click Save to reflect the changes.
27
9/28/2007
VoIP Phone Administration Guide
MAG-07005-2 Rev. D
3.6.4 Codec ID Settings
You can set the Codec ID to meet the other device’s requirement. When you have finished the settings,
click Submit. Go to the Save Changes page and click Save to reflect the changes.
3.6.5 DTMF Settings
You can setup the RFC2833 Out-Band DTMF, Inband DTMF and Send DTMF SIP Info in this page. To
change this setting, please follow your ISP information. When you have finished the settings, click
Submit. Go to the Save Changes page and click Save to reflect the changes.
28
9/28/2007
VoIP Phone Administration Guide
MAG-07005-2 Rev. D
3.6.6 RPort Function
You can setup the RPort Enable/Disable in this page. To change this setting, please follow your ISP
information. When you have finished the settings, click Submit. Go to the Save Changes page and
click Save to reflect the changes.
3.6.7 Other Settings
You can setup the Hold by RFC, Voice/SIP QoS and SIP Expire Time in this page. To change these
settings please follow your ISP information. The QoS setting is to set the voice packets’ priority. If you
set the value higher than 0, then the voice packets will get the higher priority to the Internet. Note that
the QoS function still needs to cooperate with the others Internet devices.
When you have finished the settings, click Submit. Go to the Save Changes page and click Save to
reflect the changes.
29
9/28/2007
VoIP Phone Administration Guide
MAG-07005-2 Rev. D
3.7 NAT Trans
In NAT Trans, you can setup STUN 3 function. These functions can help your VoIP Phone working
properly behind NAT.
STUN Setting: You can setup the STUN Enable/Disable and STUN Server IP address in this page.
This function can help your VoIP Phone working properly behind NAT. To change these settings please
following your ISP information. When you have finished the settings, click Submit. Go to the Save
Changes page and click Save to reflect the changes.
3.8 Others
In Others, you can setup MAC Clone Setting, Tones Settings and Advanced Settings.
3.8.1 MAC Clone Setting
When connecting to ISP vial PPPoE, MAC Clone function can copy the PC’s MAC address to IP.
Method: You can manually type a MAC address or let the VoIP Phone automatically detect the PC’s
MAC.
3
STUN (Simple Traversal of UDP (User Datagram Protocol) through NATs (Network Address
Translators) is a network protocol allowing a client behind a NAT (or multiple NATs) to find out its public
address, the type of NAT it is behind and the internet side port associated by the NAT with a particular local
port. This information is used to set up UDP communication between two hosts that are both behind NAT
routers. The protocol is defined in RFC 3489.
30
9/28/2007
VoIP Phone Administration Guide
MAG-07005-2 Rev. D
MAC Address: When click Manual, type an MAC address for WAN port.
When you have finished the settings, click Submit. Go to the Save Changes page and click Save to
reflect the changes.
3.8.2 Tones Settings
Tones Settings function can let you to configure the tones of various sounds.
Unlike traditional phones, VoIP phones generate the tones for different state by itself. The standard of
tones is different from country to country, you can customize the tone settings here.
When you have finished the settings, click Submit. Go to the Save Changes page and click Save to
reflect the changes.
3.8.3 Advanced Settings
You can configure some more advanced settings such as ICMP Not Echo, Send Anonymous CID,
Send Flash Event, PPPoE Retry Period, System Log Server and SIP Log Type in this page.
31
9/28/2007
VoIP Phone Administration Guide
MAG-07005-2 Rev. D
ICMP Not Echo: Setup the ICMP echo Enable/Disable. This function can disable echo when someone
pings this device, it can avoid hacker try to attack the device.
Send Anonymous CID: click Yes for not sending the phones caller ID out.
Send Flash Event: click DTMF EVENT or SIP INFO for the flash event.
PPPoE Retry Period: Type the time in second for PPPoE to redial, if connection is failed.
System Log Server: Type a server’s IP address for saving system log.
System Log Type: Select types of log for saving. The phone offers different debugging levels, each
levels contains different sets of debugging messages to send.
When you have finished the settings, click Submit. Go to the Save Changes page and click Save to
reflect the changes.
3.9 System Auth
In System Authority, you can change your login name and password.
3.10
Save Changes
In Save Changes, you can save the changes you have done. If you want to use new setting in the VoIP
Phone, You have to click Save. After you click Save, the VoIP Phone will automatically restart and the
new settings will take effect.
32
9/28/2007
3.11
VoIP Phone Administration Guide
MAG-07005-2 Rev. D
Update
In Update, you can update the VoIP Phone’s firmware to the new one or do the factory reset to let the
VoIP Phone back to default setting.
3.11.1 Update Firmware
In New Firmware function you can update new firmware via HTTP in this page. You can upgrade the
firmware form your local PC or TFTP.
Update from Local PC:
Click Browse at the right side of the File Location to select a firmware or you can type the correct path
and the filename in File Location blank.
Select the correct file you want to download to the VoIP Phone, and then click Update.
Update from TFTP:
Type the address of the TFTP server, and then click Update.
Note: Do not change the firmware file name, otherwise the system will reject it.
Note: For TFTP server must contain updatelist.dat which reveals the intended update filename.
33
9/28/2007
VoIP Phone Administration Guide
MAG-07005-2 Rev. D
3.11.2 Auto Update Settings
The VoIP Phone provides automatic update function. Once enable the function, the phone will check
the updates at the time in order to have the latest version of firmware. Note that the function must be in
DHCP Client mode.
Note: Please check if the IP PBX supports the function.
Power On Check: click On to check if there is any new firmware when the power of VoIP phone is on.
Scheduling (Date): Type a duration in days for the phone to check the firmware.
Scheduling (Time): Select a period of time for updates.
Immediate Update: When the VoIP Phone detects there is newer version of firmware, you can select
either to send out a notification only or directly update to the newer version.
3.11.3 Restore Default Settings
In Default Settings, you can restore the VoIP Phone to factory default in this page. You can just click
Restore, and the VoIP Phone will restore to default and automatically restart again.
3.12
Reboot
Reboot function is to restart the VoIP Phone. If you want to restart the VoIP Phone, you can just click
Reboot, then the VoIP Phone will automatically.
34
9/28/2007
VoIP Phone Administration Guide
35
MAG-07005-2 Rev. D
9/28/2007
VoIP Phone Administration Guide
MAG-07005-2 Rev. D
4 Automatic Client Configuration with Essence IP PBX
Auto Client Configuration (ACC) function can be used to download the original configurations stored in
the Essence IP-PBX. This is very useful for the administrator who needs to set large amount of VoIP
phones. The administrator can set a new user account in the IP PBX web page. Once the VoIP phone
is connected to the IP PBX, it automatically downloads a predefined configuration setting from
Essence IP-PBX.
ACC function is enabled in IP-Phone default settings. User does not need to change any settings in
EIP 7012.
36