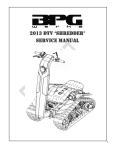
1
SHREDDER
OWNER’S/OPERATOR’S
MANUAL
Original Instructions
Never allow any child under the age of 16 to operate a DTV
Always wear a helmet, it could save your life!
Read this manual thoroughly!
It contains important safety information.
REV060413
To the Owner
Congratulations on your purchase of the BPG Werks DTV Shredder. This Owner’s/Operator’s manual will provide you information regarding safe
operation, operational instructions, maintenance and care. Fully understanding this manual and following all of the instructions herein will provide
the knowledge needed to have safe and enjoyable DTV operation.
For questions regarding operation and maintenance for this DTV, Please email [email protected] or call 480-718-8066
Safety - Notice
This DTV is intended for use by operators age 16 or older. Never allow a child to operate this DTV who is under age 16 .
See dealer for instructions and demonstration of proper riding technique.
THIS DTV IS NOT A TOY AND COULD BE HAZARDOUS TO OPERATE. A DTV handles differently from other vehicles including motorcycles, ATV’s and
cars. A collision or rollover can occur quickly, even during routine maneuvers such as turning, driving on hills and over obstacles.
Reading the Owner’s/ Operator’s Manual
It is important this manual is read from cover to cover carefully by the DTV owner and all operators. Never allow anyone to operate the DTV without
first reading and understanding the Owner’s/Operator’s manual.
This Owner’s/ Operator’s manual should be a permanent part of the DTV and should remain with the vehicle at all times. The manual should also
remain with the vehicle if sold.
Notice
BPG Werks is concerned about the environment and believes in conserving and protecting all natural resources. For this reason , owners should
recycle, trade in, or dispose as appropriate, batteries, oil and tracks.
This manual is based on the latest product information available at the time of publication. BPG Werks has a policy of continually improving its
products. Due to improvements, or other changes, there may be some discrepancies. We reserve the right to make product changes at any time,
without notice and without incurring any obligation to make the same or similar changes to vehicles previously built or sold.
To emphasize special important information in the manual, please note the following :
This is the alert symbol. The symbol means ATTENTION!, BECOME ALERT!,
YOUR SAFETY IS INVOLVED.
!
To emphasize important safety information, the word WARNING, with the alert symbol, has special meaning.:
!
Indicates a potential hazard that could result in SEVERE INJURY or DEATH to the operator,
bystander or person inspecting or repairing the DTV.
WARNING
To emphasize important information, the word CAUTION has special meaning.:
CAUTION:
Indicates special precautions that must be taken to avoid damage to the DTV.
To emphasize important information, the word NOTE has special meaning.:
NOTE:
!
WARNING
Indicates key information to make procedures easier or clearer to understand.
or
CAUTION
The first part will identify a POTENTIAL HAZARD.
The second part will describe WHAT COULD HAPPEN if the warning or caution is
ignored.
The third part will describe HOW TO AVOID THE HAZARD.
TABLE OF CONTENTS
WARNING LABEL LOCATIONS................1
WARNING LABELS.................2
SAFETY .............................................. 4
DESCRIPTION AND PART FUNCTIONS.. 5
RIGHT HAND BRAKE LEVER...............5
THUMB THROTTLE LEVER..................5
ENGINE KILL SWITCH LANYARD........5
HANDLE LOCK RELEASE LEVER.........5
FUEL TANK CAP.................................5
PULL START CORD............................5
CHOKE LEVER..................................5
FUEL PETCOCK................................ 6
DECK............................................... 6
FUEL AND OIL......................................7
FUEL................................................7
ENGINE OIL...................................... 7
BATTERY.............................................. 8
BREAK IN.............................................9
PRE RIDE INSPECTION..........................10
RIDING ATV...........................................11
WARNINGS.......................................11
HELMET, EYE PROTECTION AND
PROTECTIVE CLOTHING....................12
STARTING THE ENGINE.................... 13
STARTING OFF..................................14
TURNING..........................................15
RIDING ON HILLS............................. 16
CLIMBING A HILL.................. 16
DESCENDING A HILL.............17
TRAVERSING A HILL...............17
RIDING OVER OBSTACLES................ 17
SKIDDING OR SLIDING.....................18
RIDING THROUGH WATER................. 18
RIDING IN COLD WEATHER...............19
PROPER CLOTHING............... 19
PRE RIDE INSPECTION......... 20
RIDING ON SNOW AND ICE.............. 21
LOAD GUIDELINES................................22
AFTER MARKET PARTS..........................22
MAINTENANCE.....................................23
MAINTENANCE CHART......................24
AIR FILTER........................................25
SPARK PLUG................................... 26
ENGINE OIL ......................................27
CHECKING............................27
CHANGING............................27
IDLE SPEED ADJUSTMENT.................28
THROTTLE CABLE ADJUSTMENT.........28
FUEL HOSE INSPECTION.................. 29
BRAKES.......................................... 29
BRAKE FLUID ...................... 29
VALVE CLEARANCE...........................29
BRAKES.......................................... 29
BRAKE FLUID ...................... 29
VALVE CLEARANCE...........................29
CHAIN..............................................30
INSPECTION.............................30
TENSION AND ADJUSTMENT......30
CLEANING AND LUBRICATION...30
TRACKS.............................................31
TRACK TENSION.......................31
TRACK CLEANING/
LUBRICATING..........................31
TRACK REPLACEMENT..............32
STEERING ADJUSTMENT....................33
STEERING RESISTANCE.....................33
LUBRICATION POINTS........................34
FASTENER TORQUE VALUES...............35
STORAGE.............................................36
WASHING THE ATV................................37
TRANSPORTING...................................37
TROUBLE SHOOTING............................38
SPECIFICATIONS..................................39
FRAME AND ENGINE NUMBER
LOCATION............................................40
WARNING LABEL LOCATIONS
2
1
3
4
1
1
fit of the helmet.
Securely restrain anything loose that reaches
below the deck.
Guards are supplementary safety devices.
The restraint of hair and clothing is the primary
means of avoiding Entanglement, Death or Injury.
! SAFETY WARNINGS
UNDER
Improper DTV use can result in SEVERE INJURY or DEATH
B EE R
ALWAYS USE NEVER USE
AN APPROVED ON PUBLIC
HELMET AND
ROADS
PROTECTIVE
GEAR
16
B EE R
Operating the DTV if you are under the age of 16
increases your chance of severe injury or death.
NEVER CARRY NEVER USE
PASSENGERS WITH DRUGS
OR ALCOHOL
NEVER OPERATE:
Never operate this DTV if you are under the age of
16
!
! Lithium Battery Warning!
Compact Lithium-Polymer battery stored inside
front handle cover.
The safety items listed below must be followed
otherwise battery may catch fire, explode, or leak,
and battery performance and life WILL be
compromised:
With battery installed:
Always follow local or international regulations for
safe transportation of Lithium Batteries
Never pierce the handle cover near the battery or
its leads.
Do not immerse the DTV in water or seawater.
Do not park the DTV in strong direct sunlight in
extremely hot weather
Never operate the DTV outside the range of -20C to
+55C.
Never store the DTV in temperatures less than -5C
or greater than +35C.
Never store the DTV in conditions greater than 75%
relative humidity.
See Owner's Manual for more battery care
instructions.
at speeds too fast for your skills or the conditions.
on public roads - a collision can occur with
another vehicle.
with a passenger - passengers affect balance and
steering and increase risk of losing control.
on hills with an incline greater than 30 .
ALWAYS:
use proper riding techniques to avoid vehicle
overturns on hills and rough terrain and in turns.
avoid paved surfaces - pavement may seriously
affect handling and control.
avoid traversing a hill without advanced skills.
apply parking brake before starting engine.
ensure handle is securely locked before riding. Be
careful not to press handle lock lever while riding
LOCATE AND READ OWNER’S MANUAL.
FOLLOW ALL INSTRUCTIONS AND WARNINGS
Jumping the DTV could cause loss off control
and result in severe injury or death.
Jumping can also cause damage to the DTV.
Never perform jumping maneuvers on the DTV,
or drop it from any height.
Long hair or loose clothing can get caught in
moving parts below the deck. Restrain hair at or
above shoulder length.
Restrained hair must not interfere with the proper
fit of the helmet.
Securely restrain anything loose that reaches
below the deck.
Guards are supplementary safety devices.
The restraint of hair and clothing is the primary
means of avoiding Entanglement, Death or Injury.
UNDER
2
WARNING LABELS
3
2
!
!
WARNING
Keep hands, fingers, feet
away from sprockets, chains,
rollers and track.
OPERATION WARNINGS
Use caution when applying brakes. Avoid using
brakes at high speeds. Sudden braking may result
in a rollover and personal injury. Always attempt to
decrease speed by gradually letting off the throttle
first. Sudden release of the throttle may also result
in a rollover. Smooth throttle control is paramount
to maintaining control of the vehicle.
4
!
WARNING
Never touch engine or
exhaust after running engine
until they have cooled.
Never operate this DTV at night or in low light
conditions.
3
SAFETY
Never allow anyone under the age of 16 to
operate this DTV.
Never take drugs or alcohol before or
during operating this DTV.
Always wear an approved helmet.
Approved helmets in the USA and Canada
bear a U.S. Department of Transportation
(DOT) label. Approved helmets in Europe,
Asia and Oceania bear the ECE 22.05
label.
Never traverse, climb or go down a hill that
has over a 30° maximum incline. Avoid
hills with loose or slippery terrain.
Always wear over the ankle boots, eye
protection, gloves, long sleeve shirt , long
pants, elbow, shin and knee pads while
operating this DTV.
Never allow a passenger on this DTV. This
DTV is designed for one operator and no
passengers.
Never operate this DTV on paved surfaces
and/or public roads. Pavement may
cause the DTV to become unstable.
Always go slowly and pay attention to
unfamiliar terrain. Be alert to changing
terrain conditions when operating the DTV.
Never attempt to traverse a hill until you
feel comfortable enough with your riding
skill level.
Always follow proper procedures on hills.
Follow the instructions in this manual for
traversing , climbing or going down hills.
Follow the proper instructions located in
this manual if DTV is stalled on a hill.
Never attempt wheelies, jumps or any
other type of stunts on this DTV.
Do not drop DTV from any height.
Always follow the pre-ride inspection
procedures and maintenance procedures
located in this manual before use.
Always go slow on terrain that is not
familiar, be alert, an obstacle could come
up unexpectedly.
4
Always keep both hands on the handlebars
and both feet on the Deck, doing so will
help the operator be ready for unexpected
situations.
Always follow the proper turning
procedures listed in this manual. Practice
turning at slow speeds before attempting
to turn at faster speeds.
Always apply parking brake before starting
engine.
Always insure the handle is securely
locked before riding. Be careful not to
press handle lock while riding.
Always use caution when applying brakes.
Avoid using brakes at high speeds. Sudden
braking may result in a rollover and
personal injury. Always attempt to
decrease speed by gradually letting off the
throttle first. Sudden release of the throttle
may also result in a rollover. Smooth
throttle control is paramount to
maintaining control of vehicle.
DESCRIPTION AND PART FUNCTIONS
Engine Kill
Switch Lanyard
Fuel Tank Cap
Brake Lever
Handle Lock Release Lever: Handle can
be adjusted when the Handle Lock
Release Lever is pulled toward the hand
grip.
Fuel Tank Cap: To open the fuel tank
cap, turn the cap counter clockwise to
remove. To re-install the cap, turn the
cap clockwise until snug. Make sure the
cap is seated properly .
Handle Lock
Release lever
Pull Start Cord
Thumb Throttle
Choke
Pull Start Cord: To start the engine, Pull
the Pull Start Cord.
Brake Lever: Brakes are applied when the
brake lever is pulled toward the hand grip.
Note: Make sure the Engine Kill Switch
Lanyard is attached before attempting
to start the engine. Engine will not run
without the Engine Kill Switch Lanyard
attached.
Thumb throttle lever: Throttle is
applied by depressing the Thumb Throttle.
Engine Kill Switch Lanyard: The engine
will not start and will stall if running, when
the Kill Switch Lanyard is removed from
the DTV.
Note: Always wear the Lanyard Strap
around wrist while operating DTV
Choke Lever: If the engine is cold, the
choke can help start the engine by pulling
out the choke lever to the “ON” position.
Once engine has warmed up , push in the
choke lever to the “OFF” position.
5
DESCRIPTION AND PART FUNCTIONS
Fuel Petcock
Deck
“ON” position: This is the normal
operating position. The “ON” position
allows fuel to flow from the Fuel Petcock to
the carburetor. Turn the Fuel Petcock to
the”ON” position when ready to start and
ride your DTV.
Fuel Petcock: The Fuel Petcock has 3
positions: “OFF”, “ON”, “RESERVE”
Position Locations:
“ON” - 6 oclock
“OFF” - 9 oclock
“RESERVE” - 12 oclock
“OFF” position: Fuel will not flow to the
carburetor in this position. Always turn
the fuel petcock to the “OFF” position
when unit is not in use or is being
transported.
“RESERVE” position: If engine runs out
of fuel when Fuel Petcock is placed in the
“ON” position, place fuel Petcock to the
“RESERVE” position. Re-fuel as soon as
possible. Once re-fueled, make sure to
place the Fuel Petcock back to the “ON”
position.
NOTE:
ONLY use “RESERVE” if and when the
DTV runs out of fuel. Make sure to switch
back to “ON” after refueling. Running for
extended periods of time on “RESERVE”
can lead to fuel line blockages.
6
Deck: The deck provides steering of the
DTV by shifting body weight left or right
FUEL
FUEL AND OIL
Fuel Filling
Never use leaded gasoline in this product.
It could affect the engine’s emissions and
damage the engine. This DTV requires
clean unleaded regular gasoline.
Use premium high-octane fuel due to the
high compression ratio. Use 91 on the AKI
scale (USA) or 95 on the RON scale (rest
of world).
Gasoline/ Ethanol blends
A blend of unleaded gasoline with
Ethanol, also known as GASOHOL, at or
below 10% (E10 ) can be used in your DTV.
Ethanol greater than 10% can damage
your engine and will void your warranty.
Gasoline/Methanol Blends
A blend of gasoline with Methanol of 5%
or less can be used in your DTV. Do not
use gasoline, under any circumstances,
containing more than 5% Methanol, doing
so will damage your engine and will void
the warranty.
Before fueling, place the DTV Handle in the
Horizontal (flat) position. Fill the DTV with
fuel up to the bottom of the filler neck.
Fuel Cap
Handle in
flat position
!
WARNING
Overfilling the fuel tank can cause
the fuel to expand which can cause
overflow due to the heat from the
engine or sun.
Spilled fuel can catch fire.
Always fill the fuel tank with the
handle in the horizontal (flat)
position. Never fill the fuel tank
above the bottom edge of the filler
neck.
7
!
WARNING
Fuel and fuel vapor are highly
flammable and toxic. You can be
burned or poisoned while refueling.
Before refueling make sure to
follow the procedures listed:
1 Shut off engine, Make sure there are no flames, sparks or heat sources close by.
2 Refuel only outdoors in a well ventilated area.
3 Do not smoke while refueling.
4 Wipe up any spills immediately.
5 Avoid breathing any fuel vapors.
6 Keep children and pets away.
ENGINE OIL
The recommended oil for this DTV is
5W-30 Full synthetic oil.
Full synthetic oil is necessary for engine
life due to the high rotation speeds of the
engine.
Quantity of oil - 600 ml (.63 qt.)
Battery Type: 12V Li-Po
Operating temperature range: -20C to +55C
Storage conditions: -5C to +35C, and less
than 75% relative humidity
!
WARNING
The battery can catch fire, explode or leak
if the safety items listed below are not
followed:
• Do not immerse the battery in water
or seawater. Keep the battery in a
cool dry environment during storage.
• Do not mix the battery with a
different type (such as dry battery ) or
a battery with different performance
characteristics altogether.
• Keep all batteries out of the reach
of children. Consult a doctor
immediately if battery or electrolyte
is swallowed.
• Do not use or leave the battery near a
heat source such as a fire or heater.
• When re-charging, use the battery
charger specifically for that purpose.
• Do not reverse the positive (+) and
negative (-) terminals.
BATTERY
• Do not connect the battery to an
electrical outlet.
• Do not dispose the battery in fire or
heat.
• Do not short-circuit the battery by
directly connecting the positive (+)
and negative (-) terminals with metal
objects such as wire.
• Do not transport or store the battery
together with metal objects such as
necklaces, hairpins etc.
• Do not strike or throw the battery
against a hard surface.
• Do not directly solder the battery
• Do not pierce the battery with a nail
or sharp object.
• Never disassemble the battery in any
way.
CAUTION
• Do not use or leave the battery at a
very high temperature (for example,
in strong direct sunlight or in a vehicle
in extremely hot weather). Otherwise
the battery can overheat catching fire
or its performance will degenerate
and its service life will be shortened.
8
• Do not use in a location where static
electricity is prevalent, otherwise
the safety devices may be damaged,
causing a harmful situation.
• If electrolyte gets into eyes due to
leakage of battery, do not rub the
eyes! Rinse eyes with clean running
water, and seek medical attention
immediately . Otherwise it may injure
eyes or cause loss of sight.
• If the battery gives off an odor,
generates heat, becomes discolored
or deformed, or in any way appears
abnormal during use, recharging or
storage, immediately remove it from
the device or battery charger and
place it in a contained vessel such as
a metal box.
• If battery terminals are
contaminated, clean the terminals
with a dry cloth. Otherwise power
failure or charge failure may occur
due to poor connection between the
battery and the electronic circuitry.
• Be aware, discarded batteries may
cause fire. 100% discharge the
battery and tape the battery
terminals to insulate them before disposal.
BREAK - IN
Break in period
The initial 5 hours of operation is most
important in the life of your DTV. Proper
operation during this break in period will
help assure maximum life of your DTV
engine.
The following guidelines will explain the
proper break in procedures.
1. During the first 5 hours of operation,
do not apply more than 1/2 throttle.
stress could cause damage to the engine
components. Be careful not to load the
engine too much.
Allow oil to circulate before
riding
Allow the DTV engine to warm up before
riding. This allows the oil to circulate
throughout the engine which lubricates
the components.
2. During the next 5 hours of
operation do not apply more the 3/4
throttle
Vary the engine speed
Make sure to vary the engine speed
during the break in period, this allows the
engine to load and unload which helps the
parts to seat properly. It is essential to
place some stress on the engine during the
break in process, however, too much
9
Observe your initial and most
critical maintenance service
The initial service( break in maintenance )
is the most important service for your DTV.
During the break-in time frame, all of the
engine components will have mated
together and seated. Maintenance
required as part of the initial service
includes correction of all adjustments,
tightening of all fasteners and
replacement of dirty oil. Timely
performance of this maintenance will help
make sure your DTV will have the best
service life and performance of the engine.
PRE-RIDE INSPECTION
Inspecting and checking the condition
of the DTV before each ride is important.
Following the pre-ride check list will help
insure the you do not have mechanical
problems which could result in injury or
becoming stranded. Make sure the DTV
is in good operating condition before each
ride.
!
WARNING
Failing to inspect and maintain
your DTV could be hazardous.
Not following the pre-ride
inspection procedures could result
in loosing control of the DTV
resulting in an accident or damage
to the DTV
Always perform a Pre-ride
inspection before each ride.
!
WARNING
Performing maintenance and
checks while the engine is running
could be hazardous.
You could be severely injured by
moving parts or hot surfaces.
Never perform maintenance or
check procedures while the engine
is running with the exception of
checking the engine stop switch or
throttle.
WHAT TO
CHECK
CHECK FOR
Steering
• Smoothness
• No restriction of
• movement
Brakes
• Brake pad wear.
• Proper brake lever play
10
Tracks
• Check for exposed and
frayed reinforcement
threads as well as
cracks
Fuel Tank
• Enough fuel for the ride
• Fuel cap secure
• Hoses have no signs of
cracks or leaks
Thumb
Throttle
• Thumb Throttle snaps
back to idle when
released
• Operates freely
• Has correct free play
Engine
Stop
Switch
• Switch shuts off engine
when activated.
Engine
Oil
• Correct oil level
Drive
Chain
• Proper tension
• Lubricated
• No excessive wear or
damage
General
• All nuts and bolts tight
Condition • No rattles from engine
or frame while running
RIDING THE DTV
!
WARNING
!
WARNING
Carrying a passenger on this DTV could be
hazardous
Riding this DTV on any public road or
highway could be hazardous.
Carrying a passenger could cause loss of
control resulting in severe injury of death
to the operator and/or the passenger.
You could collide with another vehicle
if you ride on public roads or highways
resulting in severe injury or death.
This DTV is designed for one operator and
no passengers. Never allow a passenger.
Never ride on public roads and highways.
!
WARNING
Riding this DTV on paved surfaces could
be hazardous.
Riding on paved surfaces , including
parking lots, sidewalks, driveways and
streets can cause loss of control resulting
in severe injury or death. DTV Tracks are
designed for off-road use only, paved
surfaces adversely affect handling and
control.
!
WARNING
Operating this DTV in a irresponsible
manner which includes jumping, doing
wheelies or other stunts could be
hazardous.
Jumping, doing wheelies or other stunts
could result in loss of control of the
DTV resulting in severe injury or death.
Never attempt stunts, such as jumping or
doing wheelies.
Avoid riding DTV on paved surfaces. If you
must cross a paved surface, go slow and
do not make sudden turns or stops.
11
RIDING THE DTV
HELMET, EYE PROTECTION,
PROTECTIVE CLOTHING
Helmet
Wearing a helmet (1) can prevent a severe
head injury. Whenever riding a DTV
always wear a helmet that meets or
exceeds established safety standards.
Approved helmets in the USA and Canada
bear a U.S. Department of
Transportation (DOT) label. Approved
helmets in Europe, Asia and Oceania
bear the ECE 22.05 label. The ECE mark
consists of a circle surrounding the letter
E, followed by the distinguishing number
of the country which has granted approval.
The approval number and serial number
will also be displayed on the label.
Always wear shatter prof eye protection
when riding a DTV such as a face shield or
goggles (2). While riding a DTV you can
be hit in the eyes by any of the following:
dust, branches, rocks, debris from other
riders, bugs, etc. Good eye protection as
well as a helmet and protective riding gear
should be mandatory when riding a DTV.
Wear protective clothing: Long sleeve shirt
(3), Gloves (4), Long pants (5), over the
ankle boots (6), shin pads (7), elbow and
knee pads(8).
Riding an DTV exposes the rider to many
hazards, wearing protective clothing can
help protect the rider from injury.
!
WARNING
Riding a DTV without a helmet, eye
protection, and protective clothing can be
hazardous
Riding a DTV without a helmet increases
the chance of severe head injury or death
in the event of an accident.
Riding a DTV without eye protection such
as a face shield or goggles could result in
severe injury in the event of an accident.
1
2
Riding a DTV without protective clothing;
over the ankle boots, long pants, gloves,
long sleeve shirt, elbow and knee pads
could result in severe injury in the event of
an accident.
3
4
8
5
7
6
12
Always wear a Helmet, eye protection, long
pants, long sleeve shirt, over the ankle
boots, gloves, elbow and knee pads when
riding a DTV
RIDING THE DTV
STARTING ENGINE
To start the engine
1. Set the parking brake.
2. Make sure the Engine Stop Switch
Lanyard is attached before attempting to
start
3. Place the Fuel Petcock to the “ON”
position
4. If engine is cold, place the choke lever
to the “ON” position (pulled out).
Note: If the engine is already warm the
choke may not be needed.
5. Pull the Pull Start Cord
6. Once engine has warmed up for a few
minutes, place the choke to the “OFF”
position (pushed in).
Engine Stop Switch Lanyard
Parking Brake
Pull Start Cord
Fuel Petcock
13
!
Choke
WARNING
Starting or running the DTV in an
enclosed area such as a garage or
shed where there is no ventilation
is hazardous
Inhaling exhaust fumes from the
DTV can cause severe injury or
death
Never start or run the DTV in an
enclosed environment where there
is no ventilation. Always start and
run outdoors.
RIDING THE DTV
STARTING OFF
1. Allow the engine to warm up approximately 3 minutes before starting off.
2. Release the parking brake.
3. Gradually give the DTV throttle.
!
WARNING
!
WARNING
Operating this DTV at excessive speeds
could be hazardous.
Riding at excessive speeds increases your
chances of losing control of the DTV, which
could result in severe injury or death.
Always go at a speed that is proper for the
terrain, visibility, operating conditions,
operator skill, and operator experience.
Always know the terrain before riding.
Depressing the thumb throttle to full
throttle when starting off could be
hazardous.
The DTV could lurch forward causing the
DTV to Flip backwards causing loss of
control.
Always open the throttle gradually when
taking off from a stopped position.
14
!
WARNING
Removing hands from the handlebars
and/or feet from the Deck while
operating the DTV could be hazardous.
Removing both or one hand from the
handlebars and/or feet from the Deck
could result in loss of control of the DTV
resulting in severe injury or death.
Always ride with both hands on the
handlebars and both feet on the Deck
while operating the DTV.
RIDING THE DTV
TURNING
DTVs are different than many other types
of vehicles in that turning is controlled by
the weight of the rider shifting right or left.
Steps for proper turning: Practice these
steps on a flat, level, obstacle free surface.
1. Let off the throttle to slow down before
a turn. The vehicle decelerates very quickly
on its own due to the resistance of the
tracks. Use brakes if necessary.
Decelerating during a turn can easily
cause a loss of balance and control, so
make sure to slow down prior to turning .
2. Once slow enough to make the turn,
move body weight to the inside of the turn.
3. Look into the direction of the turn while
shifting weight to the inside of the turn.
4. Once turned in the proper direction
shift body weight back to the center of the
Deck.
FOR HIGHER SPEEDS OR SHARPER TURNS
Depending on the speed going into a turn,
the rider will need to adjust body weight
accordingly. For faster speeds the rider
will need to shift more body weight to the
inside of the turn. The important factor in
turning is doing so under control. Make
sure the capabilities of the rider can match
the maneuver. Practice turning on a
obstacle free dirt surface.
!
WARNING
Improper turning techniques could be
hazardous
The DTV could roll over or the rider could
be thrown from the DTV which could lead
to severe injury or death.
Follow the turning steps listed in this
owner’s manual, practice turning at slow
speeds on a flat obstacle free dirt surface.
!
WARNING
Braking while turning could be hazardous.
Braking while turning could cause the DTV
to roll over or slide into an object
which could result in severe injury or
death.
Before making a turn, slow down and
release the brake.
15
RIDING THE DTV
RIDING ON HILLS
Climbing a hill
1. Stop and evaluate the hill before
attempting to climb. Make sure the hill is
not too steep, the terrain is not loose or
slippery and that there are no obstacles.
2. Approach the hill at a steady speed
and maintain speed throughout the climb.
3. Shift body weight forward during the
climb.
4. Adjust the angle of the handle forward
using the handle lock release lever
(page 5).
5. When approaching the top of the hill,
slow down.
If it is determined that the DTV will
not make it to the top of the hill:
1. Do not try to turn the DTV around while
riding and come back down, this could
cause the DTV to roll over. Instead, once
the DTV has stopped, dismount the DTV
while applying the brake
2. Stand beside or behind the DTV, lower
the handle enough to reach the hand
controls, keep one hand ready to apply the
brakes and use the throttle gently to drive
forward.
!
WARNING
Riding a DTV on hills could be hazardous
Riding a DTV on a hill could result in
rolling over while traversing, flipping over
backwards while climbing, flipping over
while descending, general loss of control
of the DTV. Any of these accidents on a
hill could result in severe injury of death.
Never operate a DTV on steep hills, never
operate a DTV on any hill that is above the
riders ability to do so. Practice riding the
DTV on small hills using the hill riding
techniques listed in this owner’s manual.
16
RIDING THE DTV
Riding over obstacles
Descending a hill
To operate the DTV down a hill, follow the
instructions below.
1. Stop and evaluate the hill before
attempting to descend. Make sure the hill
is not too steep, the terrain is not loose or
slippery and that there are no obstacles.
2. Do not go down the hill on a sharp
angle, this could cause the DTV to flip over.
Instead, go straight down the hill.
3. Place body weight to the rear of the DTV.
4. Adjust the angle of the handle backward
using the handle lock release lever (page 5)
5. Drive downhill slowly. Apply just enough
throttle to keep the clutch engaged. This
will allow engine compression to help slow
the machine and prevent the DTV from
rolling freely downhill.
Traversing a hill
Traversing is an advanced maneuver due to
the fact that leaning uphill also causes
uphill steering simultaneously. Only
attempt traversing with the recommended
safety gear, and after you feel comfortable
enough with your riding skill level.
You are almost certain to meet obstacles
on most trails, if you meet an obstacle
that is too large, turn the DTV around and
do not attempt it. If an obstacle is not
too large and you have the knowledge and
ability (knowing the proper technique),
you can cross it by applying the following
steps:
1. Go slow while approaching the
obstacle.
2. Right before the obstacle give the DTV
some throttle and pull back on the
handlebars so the tracks go up over the
Obstacle.
3. Keep going slowly until the rear of the
track clears the obstacle.
!
WARNING
Traversing a hill improperly could be
hazardous.
Traversing a hill improperly could result in
loosing control and flipping the DTV over.
This could result in severe injury or death.
17
Never attempt to traverse a hill that is too
steep or has loose or slippery terrain.
Always follow the riding techniques listed
in this manual for traversing a hill.
Never attempt to traverse a large hill
without first practicing on a small hill.
!
WARNING
Riding over large obstacles could be
hazardous.
Riding over large obstacles could cause
loss of control and cause the DTV to turn
over which could result in severe injury or
death.
Never attempt to ride over large obstacles,
such as large rocks or fallen trees. Always
make sure to follow the instructions in this
manual when riding over obstacles.
RIDING THE DTV
Skidding or Sliding
In certain situations you may experience
skidding or sliding even though the brakes
are not applied. Follow the riding
techniques listed below to regain control.
Tracks begin to slide or skid:
To regain traction, let off the throttle until
control of the DTV is achieved
Riding through water
Riding through water can be hazardous,
and can cause damage to the DTV
engine if it is fast moving and/or too
deep. Make sure the water your are
riding through is shallow and is not more
than 10cm (4in) deep. Make sure you
are traveling slow as to not allow water to
enter the Air Box Scoop. Before crossing
any water look at the terrain entering and
exiting the water, the terrain should have
a gradual slope with no obstacles. The
bottom of the river or pool of shallow
water should be hard. If you do not know
the terrain or are not sure about the
bottom of the pool or river, do not attempt
to enter.
Remember to protect the environment,
do not enter a river or pool of water if
doing so could damage the river bank or
shore line.
Brakes need to be inspected, cleaned
and replaced more often if DTV is used in
muddy, wet or sandy conditions. Inspect
the DTV brakes regularly, have a service
center clean or replace as needed.
!
WARNING
Riding this DTV through fast or deep water
could be hazardous;
Deep or fast moving water could cause the
DTV to loose traction resulting in loss of
control which could lead to severe injury
or death.
Never operate this DTV in water that is
more than 10cm (4in) deep. Never operate this DTV in fast moving water.
Always check brakes after riding through
water, wet brakes can reduce stopping
ability.
Make sure brakes are dried out. The
brakes can be dried out from friction by
applying the brakes multiple times.
18
!
WARNING
Applying the brake hard on slippery
surfaces could be hazardous.
Applying the brake too hard on a slippery
surface can cause the Track to lock up
and the DTV to slide out of control. The
DTV could turn over or slide into an object.
This could result in severe injury or death.
Gently apply the brakes when on a
slippery surface.
!
WARNING
Skidding or sliding of the DTV could be
hazardous.
Skidding or sliding could result in the
DTV sliding into an object or overturning
suddenly by regaining traction resulting in
severe injury or death.
Practice controlling skidding or sliding by
following the instructions in this manual.
Practice on a flat level dirt surface
Some surfaces are extremely slippery
such as Ice and snow. On these types of
surfaces, go slow, and use caution.
RIDING THE DTV
Riding in cold weather
Proper clothing
Riding in cold weather can be hazardous.
The body becoming exposed to cold
weather for a short period of time can
result in hypothermia. When the body
temperature drops below normal
hypothermia sets in. Symptoms include
not being able to perform complex tasks
with the hands. The hands become numb
along with the other extremities such as
arms, legs and feet. Breathing becomes
quick and shallow. These are just a few of
the symptoms of hypothermia.
Familiarize yourself with hypothermia
symptoms, treatment and prevention by
gaining information through the library or
governmental agencies.
Wear warm water resistant clothing such
as a snowmobile suit, lined boots, wool
socks, coat, warm gloves, warm hat, face
protection.
!
WARNING
Riding an DTV in cold weather could be
hazardous.
Becoming too cold in cold weather could
result in hypothermia. Hypothermia is
a condition where the body temperature
drops low enough to cause injury or death.
Never operate a DTV in cold weather
without proper clothing. Be prepared for
breakdowns and bad weather.
When planning and preparing for a ride in
cold weather:
Plan for and dress for the worst weather
conditions. Plan for breakdowns.
19
!
WARNING
Wearing loose clothing while riding your
DTV could be hazardous.
Loose clothing, such as a long scarf or
shawl, could get caught in a DTV’s moving
parts.
Never wear loose clothing when riding your
DTV.
RIDING THE DTV
Riding in cold weather
Pre-ride inspection
Brake and throttle linkages:
Cold weather requires additional pre-ride
inspection of the DTV before riding.
Inspect brake and throttle linkages
making sure they operate freely and
correctly. Ice and snow can cause these
items to freeze. If the linkages are frozen,
move the DTV to a warm area until these
items thaw and work properly.
Frozen tracks:
Check to make sure the DTV tracks are
not frozen to the ground, if they are, pour
warm water around the tracks to release.
Do not attempt to break the DTV loose
using engine power, this could damage
the engine and drive train.
Make sure brakes work properly.
If the brakes do not work, take the DTV
to a warm area to thaw out. Once brakes
are thawed, check again for proper
operation, if they still do not work, take
the DTV to a authorized service
center. Do not attempt to ride the DTV
with brakes that do not work correctly.
Preventive maintenance in cold weather
riding is important, after riding in cold
weather with snow, slush, water or ice, dry
off the DTV including brake and throttle
linkages. Apply the brakes several times
making sure that the friction has dried off
the brake pads and shoes. Cover the DTV
with a protective cover so ice and snow
cannot accumulate .
!
WARNING
Riding the DTV with wet or frozen brakes
could be hazardous.
Wet or frozen brakes will increase
stopping distance which could result
in loss of control which could result in
severe injury or death.
Always inspect the brakes before each
ride by following the procedures in this
manual.
CAUTION
Using engine power to release tracks that
are frozen to the ground could damage
DTV.
Damage to engine and drive train may
occur if attempting to use engine power to
free frozen tracks.
Brake inspection:
Start engine and allow to warm up.
Check the braking ability of the DTV by
applying the brakes on level ground while
traveling at a slow (walking rate) of speed.
Always make sure tracks move freely
before starting the DTV in cold weather.
20
RIDING THE DTV
Riding on snow and ice
Be sure to clear the deck and soles of your
boots of excess snow and ice before riding.
Practice riding the DTV on snow and ice on
a flat, obstacle free, familiar area. Learn
how the DTV responds in these conditions
before attempting to ride on any ice or
snow covered trails. Go slow and practice
turning and responding to sliding and
skidding as explained in this owner’s
manual.
Snow and icy sunny conditions are
extremely bright, wear shaded eye
protection such as a tinted face shield or
goggles to help protect your eyes from the
harmful rays of the sun. This will also will
help you see better.
!
WARNING
Riding on a frozen lake or river could be
hazardous.
The ice on a frozen lake or river could
break causing the DTV to fall through
which could result in severe injury or death
Always check the thickness of the ice by
consulting with local authorities on ice
conditions
!
WARNING
Riding on terrain that is covered with snow
could be hazardous.
Terrain covered with snow can hide
obstacles such as holes, large rocks, logs
etc. Running into one of these obstacles
could result in loss of control which could
result in severe injury or death.
Always go slow when riding over snow
covered terrain, be alert to changing
terrain.
21
RIDING THE DTV
Load Guidelines
After Market parts
Load guidelines including accessories:
After market parts and accessories may be
available from other manufactures. BPG
Werks cannot confirm the quality, safety or
suitability of accessories available. When
purchasing an accessory, use caution, the
handling of the DTV could become
affected. Some accessories may make
the DTV unsafe to ride. If you have a
question about a modification or
accessory, contact your dealer or call BPG
Werks.
Never exceed the maximum load capability
of the DTV. This includes the weight of the
rider and any cargo. This DTV is rated at
250 lbs. (113.5kg).
Do not add any accessory or cargo to the
handlebars that could impede vision or
make the DTV harder to steer.
Make sure accessories do not get in the
way of any controls of the DTV.
Only carry cargo that is not bulky or too
heavy.
Make sure all cargo is held securely in
place, loose cargo can become a hazard.
While carrying cargo, go slow. Cargo can
adversely affect handling at higher speeds
Allow plenty of distance to stop while
carrying cargo, The more weight on the
DTV, the longer distance it will take to
stop.
22
!
WARNING
Riding this DTV with modifications or
adding accessories could be hazardous.
Modifications to the DTV, including adding
accessories, could adversely affect the
handling of the DTV causing an accident
which could result in severe injury of
death.
Never Modify this DTV in anyway, including
adding accessories, unless the modification is a genuine certified modification or
accessory approved by the manufacture.
Never modify the DTV with improper
installation. Make sure to follow all
instructions recommended in the certified
modification. Use only genuine parts.
For questions, contact your dealer.
MAINTENANCE
For maintenance, your DTV may be
maintained by an authorized BPG
Werks service dealer or a repair shop of
your choosing.
Following the proper maintenance
procedures and time table for
maintenance listed in this manual is
important for the safety of the rider and
the life span of the DTV. When riding in
harsh conditions, such as water, mud and
dust, the maintenance procedures should
be performed more often.
!
WARNING
Failing to perform the recommended
maintenance on this DTV could be
hazardous.
!
WARNING
Performing maintenance and
inspection while the engine is running
could be hazardous.
Performing maintenance and inspection
while the engine is running could result
in getting body parts or clothing caught in
moving parts, or could result in touching
hot items which could result in severe
injury.
Shut off engine while performing
maintenance and inspection checks, with
the exception of checking the engine stop
switch and throttle.
CAUTION
Failing to perform recommended
maintenance on this DTV could damage
the DTV engine and components
Always perform the recommended
maintenance on this DTV as listed in this
manual.
Maintenance will need to be performed
more often if ridden in wet, muddy or dusty
conditions.
CAUTION
Failing to use compatible parts with
the original replacement parts could
damage DTV.
Using parts that are of low quality could
result in DTV breakdowns and reduce the
useful life of the DTV.
Failing to perform proper maintenance on
this DTV could result in an accident
Never use parts that are not compatible
with the original parts.
Always perform the recommended
maintenance for the DTV as listed in this
manual.
23
MAINTENANCE CHART
First 5 hours
of operation
First 20 hours
of operation
or 1 month
Every
50 hours
or 3 months
Exhaust pipe nuts and muffler bolts
T
T
T
Air cleaner element
I
I
I
ITEM
Valve Clearance**
I
Spark Plug
I
I
Fuel Line
I
I
Idle speed
I
I
Throttle cable play
I
I
Every
100 hours
or 6 months
I
R
Engine oil
R
Oil should be checked after every 5 hours of
use and topped up if necessary. It should be
replaced every 20 hours.
Drive Tracks
Inspect drive Tracks before each ride to ensure they’re free of
cracks, tears or debris.
Brakes
I
I
I
Brake hose
I
I
I
Brake fluid**
If brake lever feels spongy, add DOT4 fluid
Brake lever free play
I
I
I
Chain
I
I
I
Steering
I
I
I
Suspension system
I
I
I
Chassis nuts and bolts
T
T
T
Valve cover and air box drain tubes
Check and empty if req’d the valve cover and air box drain tubes
24
NOTE: I = INSPECT AND CLEAN,
ADJUST, REPLACE OR LUBRICATE
AS NECESSARY, R=REPLACE, T =
TIGHTEN
** Recommended to be performed by
an authorized service center or service
MAINTENANCE
Air Filter
The Air Filter needs to be cleaned or
replaced periodically (see maintenance
chart for cleaning/replacement
intervals). The Air Filter element will need
to be cleaned more often if DTV is ridden in
muddy, wet, or dusty conditions. A clean
Air Filter will help the DTV run at peak
performance allowing better gas mileage,
more power and will protect the engine
from the damaging effects of dirt entering
the engine.
5. To clean Air Filter, tap gently on a hard
surface to loosen and remove dirt and
debris. Use compressed air to blow from
the inside out any excess debris.
Note: Using too high of air pressure while
blowing out the filter could cause
damage to the filter element.
Front Skid Plate
Clean Air Filter frequently if DTV
is driven in wet, muddy or dusty
conditions.
Air filter removal, inspection
and cleaning instructions
1, The Air Filter is located behind the front
Skid Plate. To access the Air Filter
housing, remove front Skid Plate.
CAUTION
Front Skid Plate screws
2. Remove Air Filter access cover.
3. Remove Air Filter
4. Inspect Air Filter. If damaged, replace.
Air Filter access cover
25
Driving in the above conditions
without cleaning frequently can
plug up the air filter which can
cause poor gas mileage, low power
and damage to the engine.
Spark Plug
This DTV comes equipped with an NGK
BPR5ES spark plug.
To inspect the spark plug, remove the plug
cap then remove the spark plug from the
engine.
Inspect the plug for carbon deposits and
clean if necessary. If plug shows
excessive carbon, replace the plug.
MAINTENANCE
Use a thickness feeler to inspect the spark
plug gap (2). The spark plug gap should be
0.6 - 0.7mm (0.024 - 0.028 in.)
Re-install the inspected plug or new plug
until finger tight. Finish tightening plug
with a wrench. If the plug is a new plug,
tighten approximately 1/2 turn more
with the wrench. If plug is an old plug,
tighten approximately 1/8 turn more with
a wrench.
NGK BPR5ES
0.6 - 0.7 mm
(0.024 - 0.028 in)
CAUTION
Dirt can damage the engine if it
enters the spark plug hole.
Make sure the spark plug hole is
covered after removing plug.
2
26
MAINTENANCE
Engine Oil
Changing the engine oil
The proper amount and grade of engine
oil will have a great impact on the life of
the engine. Check the oil daily. Changing
the engine oil as listed in the maintenance
schedule is the most important
maintenance procedure there is for the
engine.
Engine Oil fill plug
and Dipstick
5. Install the drain plug and fill with the
appropriate type of oil as listed in this
manual. This DTV takes 600 ml (.63 qt) of
5w-30 full synthetic engine oil.
6. Re- install fill cap, Start engine and
allow to run for a few minutes, Re-check
oil level and fill accordingly.
Checking the engine oil
1. Make sure the DTV is on level ground.
2. Check engine oil level by looking at the
Dipstick . If oil is below the (L) level on the
Dipstick, add oil.
3. If engine oil is low (L), add oil until oil
is at the Full mark (H) on the Dipstick Use
the correct grade of oil as listed in this
manual. To avoid damage to the engine,
do not over or under fill with oil.
1. Start engine and run for a short period
of time to allow the engine oil to warm up.
A warm engine will help oil drain quicker.
Front Skid Plate screws
2. Remove front skid plate to gain access
to the oil drain plug.
3. Remove Oil Drain Plug.
4. Allow the oil to drain in an appropriate
container. Note: Dispose of oil at an oil
recycle center.
27
Engine Oil Drain
MAINTENANCE
Idle speed adjustment
Throttle Cable adjustment
The idle speed should be set at 2000 ±
200 RPMs
The thumb throttle (2) should have 2.0 4.0mm (0.08 - 0.16) of free play.
To adjust the idle speed:
Throttle cable adjustment:
1. Remove throttle lever housing top
cover (3 screws).
1. locate the idle adjustment (silver finger
knob) located on the Right hand side of
the vehicle just under the deck.
2. Allow the engine to warm up
approximately 10 minutes
3. With the engine running, turn the idle
adjustment knob in or out at small
increments until the correct idle is
achieved.
Note: A service center can perform this
adjustment . A diagnostic tachometer is
required for this adjustment.
2. Loosen cable clamp screw (not shown).
3. Use pliers to pull cable tight and
simultaneously tighten cable clamp screw.
4. Check throttle lever action before
replacing housing top cover
Note: Make sure throttle snaps back to
idle when throttle lever is released.
28
Throttle Lever housing screws
MAINTENANCE
Fuel Hose
Brakes
This DTV is equiped with hydraulic disk
brakes.
Brake Fluid
The brakes are hydraulic and require
special tools to fill the lines. If brake
pressure needs to be increased see
dealership for service.
Fuel Hose Inspection
Inspect the fuel hose for any cracks or
leaks and make sure all clamps are in
place. Replace the fuel hose if any defects are found.
!
WARNING
Failing to inspect the brakes before
each use could be hazardous
Inspect brakes before each use
according to the Pre Ride
inspection chart, make sure to
follow the maintenance schedule
and procedures.
29
Valve Clearance
Adjusting the valves should be done by an
authorized service center or comparable
servicing dealer. Proper valve gap will
help DTV to run at peak performance.
Follow the valve gap adjustment intervals
listed in the maintenance chart.
Proper Valve Clearance
Intake: 0.002 in (0.05mm)
Exhaust: 0.003 in (0.0762mm)
MAINTENANCE
Chain and Sprocket
5 - 15mm (0.2 - 0.6in)
Sprocket Wear Diagram
Chain and sprocket inspection
Inspect the drive chain for wear, rust,
bound links, proper lubrication and proper
tension.
Chain Tension
Check the tension of the chain , The Chain
slack should be
5 - 15mm (0.2 - 0.6in)
If the drive chain has a problem correct or
replace. Contact a service center for chain
replacement.
Chain tension (slack)
adjustment
A worn drive chain could also mean the
sprockets may be worn.
1. Loosen the rear axle bolt
Look for the following on the sprockets:
Worn teeth
Broken or damaged teeth
Loose sprocket mounting nuts.
If the sprocket shows signs of wear,
contact a service center for replacement.
2. Adjust chain tension by turning the
chain tension nut. Clockwise will tighten
the chain. Counter clockwise will loosen
the chain.
3. Once the chain is at the correct tension
re-tighten Axle bolt (see torque spec chart)
4. Re-check chain tension.
30
Rear Axle Bolt
Chain Tension Nut
Chain lubrication
Lubricating the Chain before each ride will
help to ensure maximum life of the Chain
and sprocket.
Instructions for cleaning and
chain lubrication
1. Clean chain with a chain cleaner
2. Lubricate chain with chain lube before each ride.
MAINTENANCE
Tracks
Track Cleaning/Lubrication
To reduce the rolling friction of the tracks
they should be cleaned and lubricated on
the inside after use using a common
automotive “tire shine” spray-on
product.
Track Inspection
Track
Inspect Tracks before each ride for cracks or
frayed threads.
!
WARNING
Operating this DTV with excessive
cracks or frayed threads in the
tracks could be hazardous.
Operating this DTV with worn
tracks will reduce traction which
could result in an accident.
Track tension
adjustment screw
Front swingarm track
clamping bolt
Track Tension - Adjustment
1. Loosen track clamping bolt
2. Adjust track tension with adjustment screw
3. Tighten clamping bolt
31
Track Replacement
Track replacement
If a track derails while riding use the
following procedure to replace it:
1. Remove the two front outside bogie
wheels (remember to pull straight on the
wheel so the bearing doesn’t jam on the
shaft)
2. shut the fuel off at the petcock and tip
the machine on its side.
3. Place track back in position ensuring it
is fully engaged in the drive sprocket and
in the correct position around the upper
and lower bogie wheels. Then push the
track over the front bogie wheels. Rotating
the track can help the track slide on more
easily. Replace the two front outer bogie
wheels making sure the bolt is tight.
4. The track may have come off due to
insufficient tension. Follow the track
tensioning instructions to increase the
track tension. Ensure the track tension is
equal on both sides. A track tending to
momentarily jam during turning is likely too
loose.
5. Right the vehicle, and turn the fuel
petcock back on before continuing to ride.
MAINTENANCE
Bogie wheels
Fuel Petcock
32
MAINTENANCE
Steering Adjustment
Steering Resistance
If the DTV pulls to the left or the right when
attempting to ride a straight line, adjust
the steering connecting rod length to bring
it back to centre (first ensure it’s not
because the deck is being tilted
inadvertently while riding). Turn the rod
clockwise to shorten it and bias the
steering to the left. Turn the rod counterclockwise to lengthen it and bias the
steering to the right.
Adjusting the deck tilting resistance is
accomplished through the pivot bolts.
Turning the bolts clockwise will make deck
tilt feel stiffer, which is better suited for
heavier riders or for more stability at high
speeds. Turning the bolts counter-clockwise will make deck tilt easier.
Pivot Bolts
Steering Adjustment
33
MAINTENANCE
Lubrication Points
Locate the Grease points on the DTV.
Lubricate points periodically. Lubricate
more often if riding in wet, sandy or dusty
environments.
When lubricating the rear swingarm
disconnect the shock at the bottom and
rotate the swingarm up and down while
pumping.
Steering Rod Grease Point
Rear Swing Arm Grease Points
Front Swing Arm Gease point
34
MAINTENANCE
Fastener Torque Values
FASTNER TYPE
5mm hex bolt and nut
6mm hex bolt and nut
8mm hex bolt and nut
10mm hex bolt and nut
12mm hex bolt and nut
5mm screw
6mm screw
8mm screw
TORQUE VALUE (N-m, kgf-m, lb-ft)
6 Nm, .62 kgf-m , 4.5 lb-ft
10 Nm, 1.04 kgf-m, 7.5 lb-ft
25 Nm, 2.49 kgf-m, 18 lb-ft
50 Nm, 5.12 kgf-m, 37 lb-ft
85 Nm, 8.71 kgf-m, 63 lb-ft
6 Nm, .62 kgf-m , 4.5 lb-ft
10 Nm, 1.04 kgf-m, 7.5 lb-ft
25 Nm, 2.49 kgf-m, 18 lb-ft
Fig .1
35
MAINTENANCE
Storage
If the DTV is left unused for an extended
period of time proper storage maintenance
is required.
4. Remove spark plug and pour 1
tablespoon of motor oil in the spark plug
hole. Re-install spark plug.
1. Wash DTV thoroughly, then wax plastics
and painted parts with a non abrasive
auto wax. Coat rubber parts with a vinyl/
rubber protectant.
Note: Keep water away from air intake and
muffler outlet while washing to avoid water
from entering the engine and/or
components.
5. Pull the Pull Start Cord 3 or 4 times with
the Engine Stop Lanyard not attached to
allow the oil to coat the inside of the piston
housing.
2. Drain carburetor by turning Fuel
Petcock to the off position and opening
the carburetor drain screw. Allow all fuel
to drain from the carburetor. Once fuel is
drained, re-tighten drain screw.
Note: Make sure to drain fuel in a proper
storage container.
6. Cover the muffler outlet and air intake
with oily rags so the DTV will be protected
from humidity in storage.
7. If possible, store DTV in a shed or
garage with a cover to protect from dust,
dirt and humidity. If the DTV must be
stored outdoors, cover DTV completely with
a good waterproof cover.
Fuel Petcock
Returning to service
1. Wash DTV thoroughly.
Note: Keep water away from air intake and
muffler outlet while washing to avoid water
from entering the engine and/or
components.
2. Remove oily rags from air intake and
muffler outlet.
3. Drain engine oil and replace with fresh
clean oil as listed in this manual.
3. Fill fuel tank to full with gasoline mixed
with fuel stabilizer as recommended by the
fuel stabilizer manufacture. Note: Fuel
stabilizer can be purchased at most
motorcycle shops and auto part stores.
4. Review this owner’s manual and follow
the pre-ride inspection procedures.
5. Start engine by following the starting
procedures in this manual.
36
MAINTENANCE
Fuel Petcock
Washing the DTV
CAUTION
Never wash DTV with a power
washer.
High pressure will penetrate
bearing and o-ring chain seals
which will cause damaged to
the DTV.
1. Wash mud and dirt off DTV with low
pressure water from a hose.
2. Wash DTV using a mild detergent or car
soap using a sponge, soft rag or brush. Do
not use any cleaning materials that could
scratch the DTV.
Note:
To reduce the rolling friction of the tracks
they should be cleaned and lubricated on
the inside after use using a common
automotive “tire shine” spray-on
product.
Transporting
1. Make sure Fuel Petcock is turned to the
“OFF” position.
2. Fold down DTV handle for storage and
transportation.
(use handle lock release lever to release
handle)
Be careful not to allow water to enter
the muffler outlet, air filter intake, brake
cables or switches.
Handle lock release lever
Transport Position
37
TROUBLESHOOTING
Engine is hard to start or will not
start
1. Ensure the fuel tank petcock is in the “ON” position.
2. Ensure the engine kill switch is in the
“ON” position.
3. Ensure the emergency engine kill lanyard is securely in place.
4. Ensure the deck is level.
5. Pull the choke forward if starting the engine from cold. Let engine idle for about 2 minutes while it warms up,
then push in choke before riding.
6. Depress throttle lever no more than 1/8” (3mm) while attempting to start
(electric and pull-start models).
7. If the above are ok, take your DTV to an authorized service station.
If unit is equipped with electric
start, all of the above applies, plus:
1. Ensure to keep the deck level while
starting
2. If the starter motor does not work
check the battery connections are not
loose, and the battery is charged.
3. If the above are ok, take your DTV to an
authorized service station.
Engine Lacks Power
1. Ensure all connections in the engine air
intake system are tight, and the rubber
carburetor elbow is not kinked.
Engine suddenly starts revving high
1. Ensure choke knob has been pushed back to ‘off’ position.
Poor Steering Performance
1. Ensure there are no rocks or debris blocking the action of the deck.
2. Make sure that you follow the
“Steering Technique” section.
38
DTV pulls left or right
1. Adjust steering connecting rod (see “Steering Adjustment” section).
SPECIFICATIONS
Engine
Displacement 196cc
Starting Manual/Electric (if equipped)
Spark Plug Type
NGK BPR5ES
Cooling
Air cooled
Engine Oil Capacity
600 ml (.63qt.)
5w-30 Full Synthetic
Number of Cylinder
Single
Engine type
4-stroke
Horse Power
14hp/6000rpm
Torque
15 ft-lb
Top Speed
40km/h (25mph)
Battery (if equipped)
Type
12V Li-Po
Operating temperature range: -20C to +55C
Storage conditions: -5C to +35C, and less than 75% relative humidity
Transmission
Linked dual continuously variable belt
transmission.
Type
Braking
Hydraulic Disk
Dimensions and Weights
Length:
Handle down
Handle up
Width
Height:
Handle down
Handle up
Vehicle Wt.
Weight Cap.
Noise
The A-weighted emission sound pressure
level at operating station: 82 dB(A) with
uncertainty 3 dB(A).
1150mm (45 in.)
1321mm (52 in.)
678mm (27 in.)
The A-weighted sound power level emitted
by the DTV: 98 dB(A) with uncertainty 3
dB(A).
584mm (23 in.)
1270mm (50 in.)
111kg (245lbs)
113kg (250lbs)
Vibration
The vibration on handles does not exceed
2.5m/s2.
Fuel
Gas Tank Capacity
3.78L (1 gal.) Fuel type
Use premium high-octane fuel due to the
high compression ratio. Use 91 on the AKI
scale (USA) or 95 on the RON scale (rest
of world).
This product is in conformity with the
following European standards:
• EC Machinery Directive (206/42/EC)
• EC EMC Directive (2004/108/EC)
• Applied Harmonized Standards: EN ISO 12100
• CE AOC (attestation of compliance)
#12 12 82909 001
Suspension
6 Hydraulic shocks
39
Standards
VIN AND ENGINE NUMBER LOCATION
VIN #
The Vehicle identification number and the
engine number are needed when calling for
parts, service center help or when
registering your DTV. Locate the numbers
and list the numbers below for your
reference.
The VIN# is located on top of the trailer hitch
receptacle.
Vehicle Identification Number
Engine Number
The engine number is located on the front
bottom portion of he DTV Engine.
40
BPG Recreational Inc.
2940 Portland Dr. Oakville ON
L6H 5W8 Canada
bpgwerks.com
Phone: 480-718-8066