1
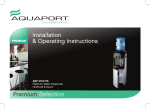
PREMIUM
Installation
& Operating Instructions
AQP-20SIL
Signature Filtered Water Cooler
Premium Selection
Congratulations on your purchase of a
Aquaport Signature Filtered Water Cooler
This unit is easy to install and provides great tasting chilled and ambient filtered water.
Note: Please read through the instructions carefully before using or installing the product and ensure that the
manual is kept in a safe place for future reference.
The system must be properly installed and located in accordance with the installation instructions before it is used.
During the set up of this product if you have any questions/ comments/ issues DO NOT RETURN TO STORE
FOR SERVICE AND TECHNICAL ADVICE ON THIS PRODUCT FREE CALL 1300 764 325
CUSTOMER HOTLINE: 1300 764 325
Aquaport Corporation Pty Ltd
PO Box 81 Findon SA 5023 Australia
Telephone: 1300 764 325 Facsimile: 08 8354 0722
Email: [email protected]
Web: www.aquaport.com.au
Electrical Requirements:
Australia / New Zealand 240V / 230V 50Hz
Due to manufacturing alterations product may
vary slightly from the pictured.
WATER QUALITY
SYSTEM SPECIFICATIONS
Caution: Do not use with water that is microbiologically unsafe
or with water of unknown quality without adequate disinfection
before or after the system. This unit should only be used with
water that has been adequately chlorinated or disinfected. For
use with ambient water only.
Desktop Filter and Chiller Specifications
SPECIAL PRODUCT INSTRUCTIONS
This appliance is designed for either household or personal use.
Each model is designed to supply a certain maximum number of
servings per hour. Please consult with your sales representative
or our website for the proper unit for your specific needs.
Any servicing other than cleaning and user maintenance will
violate the terms of this WARRANTY and warranty will be void.
System Specifications
Signature Filtered Water Cooler
Input Cooling
40W (maximum 60W)
Cold Water Capacity
Up to 2 litre per hour
Electrical Requirements
Filter Replacement Model(s)
Filter Cartridge Flow Rate
Filter Cartridge Life
Total Filter Water Capacity
(inc. internal tank)
Filter Reduction Capabilities
220- 240V 50Hz
AQP-FCR-Q
100-400 ml/min
600 litres (6 months)*
4.1 litres
Chlorine, Taste & Odour, Lead & Copper
* Whichever occurs first
INSTALLATION AND OPERATING INSTRUCTIONS 1
OPERATION CONDITIONS AND SAFETY PRECAUTIONS
• Never clean with scouring powders or abrasives.
Read all instructions carefully.
• Filter bottle not dishwasher safe.
• All components need to be installed in accordance with the
user manual instructions for correct performance of unit.
• Unplug from outlet when not in use and before cleaning.
• To reduce the risk of fire or electric shock, turn off power and
unplug before replacing filter and for cleaning the unit.
• Do not filter hot or boiling water through the unit.
• You may see small amounts of black particles at times;
these are small pieces of carbon from the filter. These carbon
particles are food grade and are not harmful. They will not
impair the performance of your filter or unit.
• Do not leave water in the filter bottle for extended periods
of time. If water has been left in the water filter bottle for
an extended period of time we recommend that you empty
the water filter bottle and repeat the steps in the Operation
Instruction section.
• Replace filter cartridges every 600 litres or 6 months,
whichever occurs first, or whenever you detect a change in
taste, odour or a decrease in flow.
• Please disassemble and clean the unit every 1- 2 months.
Sanitising sachet packs are available on 1300 764 325
or online at www.aquaport.com.au should you choose to
purchase them.
2 INSTALLATION AND OPERATING INSTRUCTIONS
• To protect against fire, electric shock and personal injury, do
not immerse cord, plugs, or appliance in water or other liquid.
• This appliance is not intended for use by persons
(including children) with reduced physical, sensory or mental
capabilities, or lack of experience and knowledge, unless they
have been given supervision or instruction concerning use
of the appliance by a person responsible for their safety.
Children should be supervised to ensure that they do not
play with the appliance.
• Do not operate any appliance with a damaged cord or plug or
after the appliance malfunctions, or has been damaged in any
manner.
• If the supply cord is damaged, it must be replaced by the
manufacturer, its service agent or similarly qualified persons
in order to avoid a hazard
• The use of accessory attachments not recommended by the
appliance manufacturer may result in fire, electric shock or
personal injury. Warranty will be void.
• Keep the product away from direct sunlight.
• Do not use outdoors.
• Do not use appliance for other than intended use.
• This appliance should always be used in conjunction
with a safety switch.
• Ensure unit is properly grounded.
• A power outlet is required to operate the water cooler.
• Do not immerse water cooler base in water or try to
disassemble.
• Ventilation – The water cooler air vents must not be obstructed
at any time and free from dust accumulation, air flow is
required for unit to operate effectively. Place unit in a flat
well-ventilated location at least 100mm from wall or other
appliances.
For best performance, do not place the unit near an oven, heater,
direct sunlight or any other heat source and keep vents clear of
dust.
During the set up of this product if you have any
questions/ comments/ issues
DO NOT RETURN TO STORE
FOR SERVICE AND TECHNICAL ADVICE ON THIS PRODUCT
FREE CALL 1300 764 325
INSTALLATION AND OPERATING INSTRUCTIONS 3
INSTALLATION INSTRUCTIONS
A. Component identification and content check list:
Desktop Filter and Chiller
RefDescription
Cartridges 1
Filter Cartridge
2
Filter cartridge O ring
Main Components
3
Filter Bottle Lid
4
Filter Change Timer
5
Unfiltered water chamber
6
Filtered water chamber
7
Filter bottle O ring
8
Cold tap
9
Room tap
10
Power indicator light
11
Cooling indicator light
12
Power plug and cord 13
Power switch
14
Drain Plug
15
Filter bottle screw nut
Qty
1
1
1
1
1
1
1
1
1
1
1
1
1
1
1
4
3
1
2
10 11
5
9 8
15
6
13
7
14
12
4 INSTALLATION AND OPERATING INSTRUCTIONS
B. OPERATION INSTRUCTIONS
WARNING: Do not use with water that is microbiologically unsafe
or of unknown quality without adequate disinfection before or after the
system.
WARNING: Do not connect power to unit until water flows from all taps
1. Wash all filter bottle parts (except filter cartridge) with warm water
and detergent and rinse thoroughly. In addition, flush clean water
through the unit and drain out via the taps and drain plug located at the
rear of the unit. Tilt the unit back and forth to remove trapped water
from unit. Continue this process until no more water runs
out of the drain.
2. Remove Filter Cartridge (1) from plastic, make sure not to lose the
filter cartridge O ring. Immerse filter in ambient water for 20 minutes.
Shake filter under water to remove any excess black carbon particles
and trapped air.
Note: You may see small amounts of black particles at times; these are
small pieces of carbon from the filter. These carbon particles are food grade
and are not harmful. They will not impair the performance of your filter or
unit
3. Ensure drain plug (14) is secure on the unit and tighten in place.
4. Ensure that the Filter Bottle O ring (7) is seated in the channel at the
top of the cooling unit. See Figure 1 for location.
WARNING: If Filter bottle O ring (7) is not in place or correctly seated
leaking may occur. When the filter bottle is removed special care must be
taken to ensure this part is not lost. Always ensure the O ring is correctly
seated prior to installing the filter bottle.
5. Place filtered water chamber (6) onto the water cooler unit and push
down. There should be no gap between the cooling unit and the filtered
water Chamber (6)
6. Lock the filtered water chamber (6) into position using the filter
bottle screw nut (15). Turn filter bottle screw nut (15) in a clockwise
direction. Tighten by hand only, do not over tighten. See figure 2.
7. Place unfiltered water chamber (5) into the filtered water chamber (6)
8. Install Filter cartridge O ring (2) onto the unfiltered water chamber filter
thread then screw the filter cartridge into place.
9. Pour water into the unfiltered water chamber (5); allow water to filter
through to the filtered water chamber (6).
Fig 1
Fig 2
Channel for
Filter bottle
O Ring
Filter bottle
screw nut
Aerial view
of cooling
unit with
filter bottle
removed
INSTALLATION AND OPERATING INSTRUCTIONS 5
Note: This unit is designed with a wet system. There will always
be a small amount of water left in the unfiltered water chamber
to ensure the filter cartridge doesn’t dry out. If the unit is not
used for an extended period of time the water in the unfiltered
water chamber should be discarded and replaced.
Note: Once the cooler is switched on the orange power indicator
light (10) will illuminate. When the unit is in cooling mode the
blue cooling indicator light (11) will illuminate, it will turn off
when cooling is complete.
C. SETTING THE FILTER CHANGE TIMER
9. Once the filtered water chamber (6) is full of water, push the
cold tap (8) down to ensure that water has entered into the
internal water tank. Hold the cold tap down until water runs
out of the tap.
10. Discard water from first refill through taps (and drain plug if
necessary). Discarded water can be used to water a plant.
Tilt the unit back and forth to remove trapped water from
unit. Continue this process until no more water runs out.
11. Repeat steps 8 & 9 then add more water to the unfiltered
water chamber (5) to completely fill the filter bottle.
Note: Water flow rate is dependant on the volume of water in the
filter bottle. For optimum flow rate keep filter bottle full of water.
12. Place lid on top of filter bottle. See page 6/7 for instructions
on how to set the Filter Change Timer.
13. Plug unit into mains power. Switch on power switch (13)
located at back of unit and allow time for the unit to chill the
water.
6 INSTALLATION AND OPERATING INSTRUCTIONS
UP
DOWN
DAY COUNTER SET
D/T SET
The filter change timer displays the date/ time and number
of days to filter replacement. It should be set every time you
replace the filter cartridge.
SET DATE AND TIME
TO SET 180 DAYS (6 MONTHS) TO FILTER REPLACEMENT
1. Press and hold the D/T SET button for 5 seconds.
IMPORTANT: The filter cartridge AQP-FCR-Q should be replaced every
600L or 6 months, whichever occurs first. The filter change timer should
be used as a guide only to help keep track of 180 days (6 months).
If you detect a change in taste, odour or a decrease in flow before the
end of 180 days you should replace the filter.
2. The ‘Year’ number in the top left hand corner will
start to flash.
3. Press the UP or DOWN button to change to the correct year.
4. Press D/T SET to set the year. The ‘Month’ number will
now be flashing.
1. Press and hold the DAY COUNTER SET button for 5 seconds.
5. Continue to use the UP or DOWN button to change the
numbers and the D/T SET to set and move onto the next
number.
3. Press the UP or DOWN button until the number 1 appears then
press DAY COUNTER SET button.
The date and time is displayed in the following sequence:
YEAR > MONTH > DATE >>> HOUR > MINUTE > SECOND.
Note: The time is displayed as 12 hours. A small PM will
appear at 12 noon.
6. Once you have set the ‘seconds’ push D/T SET which will
complete setting the Date and Time.
2. Three zeros will appear. The first zero will be flashing.
4. The second zero will now be flashing. Press the UP or DOWN button
until the number 8 appears then press DAY COUNTER SET button.
5. The third zero will now be flashing. Press DAY COUNTER SET
button. 180 days will now be displayed.
6. Every 24 hours the number will decrease by 1 day until it gets to
zero, at which time the beeper will sound for 45 seconds. The filter
cartridge should be replaced at this time. If you do not hear the
beeper the day display will remain on zero days, the filter cartridge
should be replaced.
7. Reset the day counter every time you replace the filter cartridge by
following these instructions.
Note: To save power the display will turn off after 2 minutes of no use.
To display the information press any button.
INSTALLATION AND OPERATING INSTRUCTIONS 7
D. SANITATION
WARNING: Turn off power and unplug unit before cleaning. It is
recommended the unit is disassembled and cleaned periodically.
Filter cartridge should be replaced every 600 litres or 6 months,
whichever occurs first, to ensure filters performs as stated.
If water has been left sitting in unit for more than 3 days, discard
water and flush out unit.
WARNING: When the filter bottle is removed the Filter bottle O
ring may remain in the top of the water cooler.
Always ensure this piece is correctly seated on the base of the
filtered water chamber prior to installing the filter bottle
otherwise leaking may occur. See figure 1. on page 5.
5. Replace the filter cartridge if necessary.
6. Repeat steps 2 - 12 in the operations instructions.
1. Mix 1 teaspoon bi-carb of soda with 1 - 2L of warm water.
Remove the filter cartridge then pour mixture into filter
bottle. Hold down the cold tap to ensure mixture fills the
cooling tank. Leave for at least 3 hours.
Do not hesitate to contact our Customer Care Service line
on 1300 764 325 or [email protected]
Note: Sanitising Sachet packs are available on 1300 764 325
or www.aquaport.com.au
FILTERED WATER COOLER NOT USED FOR LONG PERIODS
2. Drain out mixture then flush 2 - 3 L of clean water through
the unit until it has been flushed clean.
Note: Empty tank by unscrewing the drain plug cap at the rear of
the unit. Make sure to drain over a sink, water will immediately
come out upon unscrewing the plug. Completely empty the tank
by tilting the unit back and forth to remove all trapped water.
Continue this process until no more water runs out of the drain.
Press both taps to remove water in taps.
4. Remove filter bottle and wash thoroughly
with warm soapy water.
8 INSTALLATION AND OPERATING INSTRUCTIONS
If Signature Filtered Water Cooler will not be used for a long
period of time unplug the unit from the wall socket. Remove
the filter bottle from the unit and clean with warm soapy water.
Empty the water cooler by draining all water from the taps and
via the drain plug and dry the unit.
E. REPLACEMENT FILTERS
Replacement filter cartridge models compatible with filter bottle.
AQP-FCR-Q
Filters reduces:
• Chlorine
• Bad taste & Odours
• Lead
• Copper
INSTALLATION AND OPERATING INSTRUCTIONS 9
F. TROUBLE SHOOTING
BEFORE YOU CALL FOR SERVICE PLEASE REVIEW THE TROUBLE SHOOTING TIPS FIRST.
Problem
No or limited
water flow
Leaking from taps
Possible Causes
What To Do
Filtered water chamber not placed properly
on unit.
Press filtered water chamber firmly onto unit to allow
opening of anti spill valve. Ensure not gap is present between
chamber and unit.
No water inside cold water tank.
Ensure water is inside the filtered water chamber, hold cold
tap down for 10 seconds to open non spill valve and allow
water to travel into internal cold water tank and until water
flows out from tap.
Water Level in filtered water chamber
is too low.
Rate of flow from tap depends on level of water in filtered
water chamber. Fill unfiltered water chamber with water.
Filtered water chamber is empty.
Fill unfiltered water chamber with water.
Internal cold water tank frozen up water.
Turn unit off for 24hrs, after 24hrs check water flow from cold
tap. Turn unit power on. If unit continues to freeze call
1300 764 325
Filter is too old, not allowing water to filter
through and enter filtered water chamber.
Replace filter cartridge.
Silicone in tap is not sealing
Properly - or tap cracked.
Call customer care 1300 764 325
10 INSTALLATION AND OPERATING INSTRUCTIONS
Problem
Leaking from
top/bottom of unit
Possible Causes
What To Do
If Filter bottle O ring is not correctly
installed leaking may occur.
Remove filtered water chamber off unit and reinstall the
filter bottle O ring. WARNING: Filter bottle O ring may
come off when you remove the filter bottle from the cooler,
please ensure it is located correctly before reinstalling
the filter bottle.
Drain plug at bottom of unit not closed fully.
Check drain plug located at bottom of unit is closed and
sealed completely.
Check connection to wall socket.
Check power switch on back of unit is on.
Not cooling
Unit not plugged into wall socket or wall
socket not switched on
Noise from fan
Due to transport or knock to side panel, the
fan may have moved to a different position
- this will cause a noise.
New, new silicone, new tap.
Bad taste
from cooler
Build up of bacteria.
Unit uses thermoelectric chip to chill water, performance
of unit is dependent on room temperature. Cooing light will
remain on when unit is attempting to cool water to optimal
temperature.
Call customer care 1300 764 325
Replace filter, remove filter bottle and wash thoroughly. Place
a tablespoon of bi-carb soda mixed with warm water approx.
1 litre, pour in cooler until the tap reservoir is full, leave
overnight and then flush 1-2 litres of filtered water through
the unit until the bi-carb solution has been flushed clean.
INSTALLATION AND OPERATING INSTRUCTIONS 11
Your Aquaport 12 Month Repair or Replacement Warranty
Conditions Of This Warranty:
quaport warrants this appliance to the first purchaser and subject
A
to the stated conditions:
1. This product has been fully installed in accordance with the user manual installation instructions.
Warranty covers any defects in material or workmanship in the
manufactured product within the first twelve months from the date
of purchase.
2. The warranty extends only to repairing or replacing any component that proves to be defective in material
or workmanship.
To make a warranty claim you must call Aquaport on toll free
number 1300 764 325 for instructions.
3. The warranty does not cover defects occasioned by misuse,
alterations, accidents, or used for other than the intended
purpose.
If a product is found to be faulty there is a 90 day return policy
from the date of purchase. Product returned to store MUST be
accompanied by a valid proof of purchase and Customer Reference
number received from Aquaport. Call 1300 764 325.
4. The warranty does not cover use of this product where water is
microbiologically unsafe or of unknown quality, without adequate
disinfection before or after the system.
For warranty claims outside of 90 days from date of purchase,
product will be repaired or replaced at our discretion.
Repair or replacement costs of the product will be covered under
warranty by Aquaport.
5. The warranty does not cover damage to the product caused
by accident, fire, or floods.
Goods presented for repair may be replaced by refurbished goods of
the same type rather than being repaired. Refurbished parts may be
used to repair the goods.
Please keep purchase receipt in a safe place.
Warranty does not cover filter cartridge which is a consumable
unless proven to have defects in material or workmanship in the
manufactured product.
Our goods come with guarantees that cannot be excluded under
the Australian Consumer Law. You are entitled to a replacement or
refund for a major failure and compensation for any other reasonably
foreseeable loss or damage. You are also entitled to have the goods
repaired or replaced if goods fail to be of acceptable quality and the
failure does not amount to a major failure. Register your warranty
online at www.aquaport.com.au/warranty
12 INSTALLATION AND OPERATING INSTRUCTIONS
6. Proof of purchase is required for warranty claims.
To enable us to register your warranty and provide service should a
problem occur, we recommend you register your warranty online at
www.aquaport.com.au/warranty
Aquaport Corporation Pty Ltd
5 John Street Flinders Park,
South Australia 5025
Customer Care 1300 764 325
INSTALLATION AND OPERATING INSTRUCTIONS 13
CUSTOMER HOTLINE: 1300 764 325
Aquaport Corporation Pty Ltd
PO Box 81 Findon SA 5023 Australia
Telephone: 1300 764 325 Facsimile: 08 8354 0722
Email: [email protected]
Web: www.aquaport.com.au