1
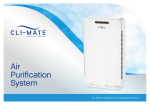
Air
Purification
System
CLI-AP20 | Installation & Operating Instructions
Congratulations on your purchase of a
Cli~Mate Air Purification System
This Air Purifier improves the quality of the air in your home by helping to eliminate airborne matter such as
allergens and unpleasant odours.
Note: Please read through the instructions carefully before using or installing the product and ensure that the
manual is kept in a safe place for future reference.
The system must be properly installed and located in accordance with the installation instructions before it is used.
During the set up of this product if you have any questions / comments / issues DO NOT RETURN TO STORE.
FOR SERVICE AND TECHNICAL ADVICE ON THIS PRODUCT, FREE CALL 1300 764 325.
CUSTOMER HOTLINE: 1300 764 325
Register your warranty online at
www.cli-mate.com.au/warranty-and-registration
Aquaport Corporation Pty Ltd
PO Box 81 Findon SA 5023 Australia
Telephone: 08 8354 0711
Facsimile: 08 8354 0722
Email: [email protected]
Web: www.cli-mate.com.au
Social: /climatebrand
@climatebrand
Electrical Requirements:
Australia / New Zealand 240V / 230V 50Hz
Due to manufacturing alterations product may
vary slightly from the pictured.
SAFETY PRECAUTIONS
Read all instructions carefully.
• All components need to be installed in accordance with the user
manual instructions for correct performance of unit.
• This appliance should be used in conjunction with a safety switch.
• This appliance is not intended for use by persons (including
children) with reduced physical, sensory or mental capabilities, or
lack of experience and knowledge, unless they have been given
supervision or instruction concerning use of the appliance by a
person responsible for their safety.
• Do not operate any appliance with a damaged cord or plug or after
the appliance malfunctions, or has been damaged in any manner.
• If the supply cord is damaged, it must be replaced by the
manufacturer, its service agent or similarly qualified persons in
order to avoid a hazard.
• Children should be supervised to ensure that they do not play with
the appliance.
• Keep the rear air inlet and outlet is free from air blocking
materials such as clothing, plastic bags or papers. Air flow is
required for the unit to operate effectively.
• Place unit on a flat location at least 30cm from wall or other
appliances.
• Unit must be placed on a stable flat surface to reduce possible
excessive vibration and noise.
• Keep the dryer away from fire, flammable gas, combustible
products or vapours, and corrosive substances.
• Do not wash or reuse the filters.
• Do not operate the unit without filters.
• To protect against fire, electric shock and personal injury, do not
immerse cord, plugs, or appliance in water or other liquid.
• Do not place on or near a hot gas, electric burner or heating
appliance.
• Check voltage to be sure that the voltage indicated on the
nameplate agrees with your voltage.
• Do not use appliance for other than intended use.
• Do not disassemble, repair or re-form the unit, it may cause injury,
fire or other malfunctions. A qualified service agent must make all
service adjustments. Removing any part or attempting to service
the dryer will void the warranty.
• Unplug from outlet when not in use and before cleaning. Never
plug in or unplug unit with wet hands.
• Do not use unit outdoors or expose to greasy or damp
environments.
Air Purifier
Model Code
Product Dimensions
Coverage area
Power consumption
Net weight / Gross Weight
Air Change/ Hr
CLI-AP20
H394 x W310 x D139mm
Up to 20m2
Air Flow /Hr
Clean air Delivery rate
133m2
75cbm (smoke)
Power cord length
1.8m
35 watts
Noise level in Turbo Mode
58dB
3.5 kg / 4.2 kg
Noise level in Sleep Mode
30m2 x 4.5
Replacement Filter
28dB
CLI-RF-AP20
INSTALLATION AND OPERATING INSTRUCTIONS 1
OPERATION INSTRUCTIONS
1. Plug unit into power socket, unit will beep and control panel
lights will illuminate before extinguishing. Unit is now in
standby mode.
2. Press POWER button
to turn unit on. The unit will beep
and display panel lights will illuminate indicating current
settings.
During the set up of this product if you have any
questions / comments / issues DO NOT RETURN TO STORE
FOR SERVICE AND TECHNICAL ADVICE ON THIS PRODUCT FREE
CALL 1300 764 325
display panel
Note: The purification default setting is at LOW speed mode.
3. To select speed, press
until LED Light is on desired speedLOW, MEDIUM, HIGH, SLEEP respectively.
HIGH | MEDIUM | LOW | SLEEP - Indicates the Fan speed
4. To set automatic off timer, press
until LED light is on
desired time 1/4/8 hours. Unit will automatically switch off
once selected time duration has lapsed
POWER: Power Indicator:
Illuminates green when power
is turned ON.
5. To select AUTO-MODE, press
and the AUTO led light will
be lit. The unit will now start purifying in a loop cycle on these
settings: HIGH speed for 2 hours MEDIUM speed for 2 hours
LOW speed for 2 hours.
Filter change indicator:
Light will flash when the filter
needs to be changed.
AUTO: Automatic Mode
Child Lock:
Child safety lock
1hr | 4hr | 8hr:
Timer indicator
6. To activate CHILD-LOCK function, hold down AUTO MODE
for 3 seconds or until CHILD LOCK light is lit.
Note: To deactivate the CHILD LOCK function, hold down AUTO
MODE
for 3 seconds or until CHILD LOCK light extinguishes.
2 INSTALLATION AND OPERATING INSTRUCTIONS
Control panel/buttons
component identification
I.
POWER
Turns unit ON/OFF
SPEED
Allows selection for desired fan speed setting: SLEEP,
LOW, MEDIUM and HIGH
Front Cover
4. Display Panel
2. Air Inlet
5. Control Buttons
3. Triple Layer Filter
(Initial Filter, HEPA filter and
active carbon filter)
6. Handle
1
4
5
7. Air Outlet
8. Wall Mounts
6 7
8
AUTO MODE
Operates in a loop cycle on these settings: HIGH speed
for 2 hours - MEDIUM speed for 2 hours - LOW speed for
2 hours
TIMER
To set automatic OFF timer at 1,4,8 hour settings
2
3
INSTALLATION AND OPERATING INSTRUCTIONS 3
FILTERS
CLEANING AND MAINTENANCE
The dual layer filter contains a pre-filter, a HEPA filter and an
activated carbon filter.
Before carrying out any maintenance or cleaning of the unit, make
sure that the power to the unit is turned off and power cord is
unplugged from the power socket.
The pre-filter traps larger particles such as dust, pet hair and largesized allergens.
External cleaning of unit:
The HEPA filter (grade H12) removes 99.5% of particles as small
as 0.3 microns and greater from the air. It is capable of removing
smoke, dust, pollen, pet dander, mold spores, bacteria and
allergens in the air.
• Do not clean unit with any abrasive cleaning agents or solvents
The Activated carbon filter absorbs common household odours,
VOCs, cigarette odours, chemical fumes and smoke.
• Clean the air inlet and outlet with a dry cloth, soft brush or
vacuum cleaner
• Do not apply any water directly onto the unit
• Only use a soft clean cloth for all cleaning purposes
CLEANING THE PRE-FILTER
It is recommended that the Pre-filter (the removable white layer) is
cleaned every 1-2 weeks of unit operation, depending on the air
quality of the room
To clean the Pre-filter:
1. The removable Pre-filter is attached by Velcro. Gently peel away
the Pre-filter.
2. Fill the sink with lukewarm water and gently hand wash the
Pre-filter under the water for 2-3 minutes or until it is completely
clean.
3. Rinse the Pre-filter with clean tap water.
4 INSTALLATION AND OPERATING INSTRUCTIONS
4. Use a towel to remove any excess water from the Pre-filter
REPLACING FILTER
5. Allow the Pre-filter to dry for 12-24 hours
When the lifespan of the 3-layer filter reaches it end, the POWER
light will flash green indicating that it needs to be changed. Discard
the old filter and replace with a new one. It is not reusable.
Cli~Mate Replacement Filter Product Code: CLI-RF-AP20
6. When the Pre-filter is completely dry, re-attach and place back
into the air purifier. Note: When placing the filters back into the
air purifier, ensure that the white belts are facing outwards and
that the Pre-filters are facing towards the air inlet
CLEANING THE HEPA AND ACTIVATED CARBON FILTER
It is recommended that the HEPA and activated carbon filters are
cleaned every 100-500 hours of unit operation, depending on the
air quality of the room.
To clean the HEPA and Activated Carbon Filter:
1. Turn off unit and disconnect the power
2. Place both hands at the bottom corners of the front cover, and
pull out
3. Pull out the filter by the white belt attached
4. Gently peel away the Pre-filter layer
5. Run a vacuum cleaner with a nozzle or brush attachment on low
power setting along the HEPA (white side) and Activated Carbon
(black side) filters to pick up the dust and various particles.
The lifespan and duration of the dual layer filter depends on the air
quality and surrounding environment. The higher level of pollutants,
the shorter the filter lifespan. It is advisable to change the 3-layer
filter at least every 8 months or 1500 hours of unit operation.
HOW TO REPLACE THE FILTER
1. Turn off unit and disconnect the power.
2. OPEN THE FRONT COVER: Place both hands at the bottom
corner of the front cover, press down the buttons on the sides
while pulling out.
3. REMOVE THE FILTER: Pull out the filter by the white belt
attached and discard
4. INSTALL NEW FILTER: Replace with new filter. Ensure that
the white belt is facing outwards
6. Re-attach the Pre-filter layer and place back into the air purifier.
5. Line up the top of the front cover first and then snap in the
lower part of the front cover. Ensure that the front cover is
firmly intact.
Note: When placing the filters back into the air purifier, ensure
that the white belts are facing outwards
6. Hold down Speed
filter timer.
button on the unit to reset the
INSTALLATION AND OPERATING INSTRUCTIONS 5
TROUBLE SHOOTING
BEFORE YOU CALL FOR SERVICE PLEASE REVIEW THE TROUBLE SHOOTING TIPS FIRST.
Problem
Possible Causes
What To Do
No Power
1. Unit is not plugged into wall socket.
1. Check connection to wall socket.
1. Air ventilation around unit
not sufficient
1. There must be at least 30cm between unit and wall
or other appliances
2. Air inlet or air outlet is being obstructed
or blocked by foreign objects
2. Ensure there are no object obstructing the air inlet or
air outlet
3. Internal malfunction
3. Return unit to service agent. Call customer care
1. Filters may be heavily soiled and due for
replacement
1. Replace filter
Unit overheating
The unit is not effective
1. Unit is on an uneven surface
Excessive/loud noise
2. Foreign objects have fallen into the unit
3. Faulty internals
6 INSTALLATION AND OPERATING INSTRUCTIONS
1. Ensure the unit is placed on a level surface
2. Ensure that no foreign objects have fallen into the unit
via the air outlet.
3. Call customer care
Your Aquaport 12 Month Repair or Replacement Warranty
Conditions of this Warranty:
Aquaport warrants this appliance to the first purchaser and subject
to the stated conditions:
1. This product has been fully installed in accordance
with the user manual installation instructions.
Warranty covers any defects in material or workmanship in the
manufactured product within the first twelve months from the date
of purchase.
2. The warranty extends only to repairing or replacing any component that proves to be defective in material
or workmanship.
To make a warranty claim you must call Aquaport on toll free number
1300 764 325 for instructions. If a product is found to be faulty there
is a 90 day return policy from the date of purchase.
3. The warranty does not cover defects occasioned by misuse, alterations, accidents, or used for other than the intended purpose.
For warranty claims outside of 90 days from date of purchase, product
will be repaired or replaced at our discretion. Repair or replacement
costs of the product will be covered under warranty by Aquaport.
4. The warranty does not cover damage to the product caused by accident, fire, or floods.
Goods presented for repair may be replaced by refurbished goods of
the same type rather than being repaired. Refurbished parts may be
used to repair the goods.
Please keep purchase receipt in a safe place.
Warranty does not cover filters which are consumable unless proven to
have defects in material or workmanship in the manufactured product.
Our goods come with guarantees that cannot be excluded under
the Australian Consumer Law. You are entitled to a replacement or
refund for a major failure and compensation for any other reasonably
foreseeable loss or damage. You are also entitled to have the goods
repaired or replaced if goods fail to be of acceptable quality and the
failure does not amount to a major failure.
5. Proof of purchase is required for warranty claims.
To enable us to register your warranty and provide service should a
problem occur, we recommend you register your warranty online at:
www.cli-mate.com.au/warranty-and-registration
Aquaport Corporation Pty Ltd
5 John Street Flinders Park,
South Australia 5025
Customer Care 1300 764 325
INSTALLATION AND OPERATING INSTRUCTIONS 7
8 INSTALLATION AND OPERATING INSTRUCTIONS
INSTALLATION AND OPERATING INSTRUCTIONS 9
CUSTOMER HOTLINE: 1300 764 325
Aquaport Corporation Pty Ltd
PO Box 81 Findon SA 5023 Australia
Telephone: 08 8354 0711
Facsimile: 08 8354 0722
Email: [email protected]
Web: www.cli-mate.com.au
Social: /climatebrand
@climatebrand