1
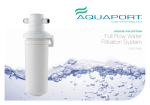
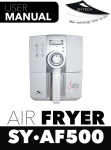
INSTALLATION & OPERATION INSTRUCTIONS PRO-AF1 WWW.PROAPPLIANCES.COM.AU Congratulations on your purchase of a Pro Appliances Air Fryer. Note: Please read through the instructions carefully before using or installing the product and ensure that the manual is kept in a safe place for future reference. The system must be properly installed and located in accordance with the installation instructions before it is used. During the set up of this product if you have any questions/ comments/ issues DO NOT RETURN TO STORE FOR SERVICE AND TECHNICAL ADVICE ON THIS PRODUCT FREE CALL 1300 764 325 CUSTOMER CARE: 1300 764 325 Aquaport Corporation Pty Ltd PO Box 81 Findon SA 5023 Australia Telephone: 08 8354 0711 Facsimile: 08 8354 0722 Email: [email protected] www.proappliances.com.au /proappliances @proappliancesau Electrical Requirements: Australia / New Zealand 240V / 230V 50Hz Due to manufacturing alterations product may vary slightly from that pictured. OPERATION CONDITIONS & SAFETY PRECAUTIONS • All components need to be installed in accordance with the user manual instructions for correct performance of unit. • If an extension cord is used with this unit, the extension cord must have a rating equal to the rating of this appliance. READ ALL INSTRUCTIONS CAREFULLY BEFORE OPERATION OF THE UNIT • Do not use attachments not recommended or sold by the manufacturer as it may lead to fire, electric shock or injury. • This appliance is not intended for use by persons (including children) with reduced physical, sensory or mental capabilities, or lack of experience and knowledge, unless they have been given supervision or instruction concerning use of the appliance by a person responsible for their safety. • Position the appliance at a minimum distance of 20cm away from walls, curtains and other appliances and provide adequate space above and on all sides for air circulation. • Children should be supervised to ensure they do not play with the appliance. • The Air Fryer is for indoor, normal household use only. • Do not operate any appliance with a damaged cord or plug or after the appliance malfunctions, or has been damaged in any manner. • Operate unit on a stable level flat surface, keep away from moving parts. Ensure surface is clean and free from water etc. • Switch unit off and unplug from wall outlet when not in use and before cleaning. • Do not use appliance for other than intended purpose. • If the supply cord is damaged, it must be replaced by the manufacturer, its service agent or similarly qualified persons in order to avoid a hazard. • Do not operate on a non-heat resistant glass, wood cooking surface or a table cloth. It is imperative that a heat resistant cooking surface with heat finish be placed beneath this unit. • To protect against fire, electric shock and personal injury, do not immerse cord, plugs, or appliance in water or other liquids. • Do not place the unit near the edge of a bench or table during operation. • Fully unwind the power cord before use. Connect only to 220V/240V power outlet. • Do not place the unit near hot gas or electric burner, or in a heated oven. • This appliance should be used in conjunction with a safety switch. • To protect against electric shock, cook only in the non-stick cooking pot included. INSTALLATION AND OPERATING INSTRUCTIONS 3 • Do not touch hot surface. Use handles to lift or move. • Use extreme caution when moving a cooking pot containing hot food. SYSTEM SPECIFICATIONS System Specifications PRO-AF1 • During hot air frying, hot steam is released through the air outlet openings. Keep hands and face at a safe distance from the steam and from the air outlet openings. Voltage 220-240V Power 1200-1400W • Immediately unplug the appliance if you see dark smoke coming out of the appliance. Wait for the smoke emission to stop before you remove the pan from the appliance. Temperature Range 50-230°C Time Setting Range 1-60 minutes • Keep the appliance clean. Follow the cleaning instructions provided in this Instruction book. • Before cleaning, always turn the appliance OFF, switch off at the power outlet, unplug at the power outlet and remove the power cord, if detachable, from the appliance and allow all parts to cool. • Do not clean the unit with metal scouring pads. Pieces can break off of the pad and short-circuit electrical parts, creating a possibility of an electrical shock and damaging the unit. 4 INSTALLATION AND OPERATING INSTRUCTIONS Frequency Capacity 50/60Hz 10 Litres PARTS IDENTIFICATION 1. Control Panel 4. Lid Release 2. Air Outlet 5. Housing 3. Lid Handle 6. Transparent Cover 7. Skewer rack 12. Baking pan 8. Baking cage 13. Low / high rack 9. Steamer 14. Tongs 10. Steak Cage 15. Filter 11. Chicken Fork 16. Holder Suitable for holding backing cage, chicken fork, steak cage or skewer rack. INSTALLATION AND OPERATING INSTRUCTIONS 5 OPERATION INSTRUCTIONS Before the first use 4. Press the start key once and the product enters stand-by mode. • Clean the cooking pot with hot water, mild detergent and a non-abrasive sponge. These parts are safe to be cleaned in a dishwasher. 5. Press the Start key to select appropriate Mode (see ‘Mode’ section page 9-10 for default time and temperature). The corresponding default time and temperature will be shown on the LED display screen. • Wipe the interior and exterior of the appliance with a cloth. • There is no need to fill the pot with oil and frying fat. Hot Air Frying 1. Connect the mains plug into an earthed wall socket. 2. Put in place the cooking pot and the suitable accessory (e.g. low/high rack) and the ingredients to be cooked. Note: Do not stack the food close to the heating element or the food may get charred. Note: If the low/high rack and steamer is used, please add suitable amount of water into the cooking pot. Optional: The included filter accessory can be used as added protection for the fan and heating component. Attach to the black grill under the lid according to the direction of the arrow on the filter. 3. Switch the lid release to unlock position and pull down the lid to close. 6 INSTALLATION AND OPERATING INSTRUCTIONS 6. Press the + and -Temperature buttons to decrease or increase the temperature to the desired target temperature. See section ‘Settings’ page 7-8 to determine the right temperature and settings 7. Determine the required cooking time for the ingredient (see ‘Settings’ section page 7-8.) Press the + and - Time adjustment buttons to decrease or increase to the required cooking time. Note: Time and temperature may be set to the individual need (If no mode setting is assigned, the product can still operate if time and temperature is set). 8. Press the Start key to begin the cooking process. Note: During the hot air frying process, the inside light comes on and goes out from time to time. This indicates that the heating element is switched on and off to maintain the set temperature. The process repeats until the set time is reached. Note: If other food is to be added during the cooking process, switch the lid release and pull up the lid. The product will stop heating immediately (but rotation will continue). Close the lid after the food has been added and the process will continue. Tips •‐ It is recommended that the total weight of food should not exceed 5kg. 9. The timer bell will sound when the set time is reached. Check if the ingredients are ready. Note: If the ingredients are not ready yet, simply place it back in the unit and set the timer to a few extra minutes. •‐ Smaller ingredients usually require a slightly shorter preparation time than larger ingredients. A larger amount of ingredients only requires a slightly longer preparation time, a smaller amount of ingredients only requires a slightly shorter preparation time. 10. Remove food and ensure that hot items are handled with extreme caution to avoid burn. • Do not prepare extremely greasy ingredients such as sausages in the Air Fryer. Note: To remove large or fragile ingredients, use a pair of tongs to lift the ingredients out of the Air Fryer. • Snacks that can be prepared in an oven can also be prepared in the Air Fryer. SETTINGS The table on page 8 will help you to select the basic settings for the ingredients you want to prepare. Note: Keep in mind that these settings are indications. As ingredients differ in origin, size, shape as well as brand, we cannot guarantee the best setting for your ingredients. •‐ You can also use the airfryer to reheat ingredients. To reheat ingredients, set the temperature to 150°C for up to 10 minutes. • Stick to the recommended cooking times initially then reduce or increase times in future to achieve your desired result. INSTALLATION AND OPERATING INSTRUCTIONS 7 Food Temperature (°C) Recommended Cooking Time (minutes) Recommended Accessories Whole chicken (1.5 kilos) 200 40-50 Chicken fork Frozen French Fries 230 20-25 Baking cage Fish 210 10-15 Steak cage Cashew Nuts 200 5-8 Baking cage Coffee Beans 230 15-20 Baking cage Chicken Wings 200 15-20 Baking cage or low/high rack Cake 180 20-25 Low/high rack and baking pan Skewer 230 10-15 Skewer rack Pizza 200 10-15 Low/high rack and baking pan Eggs 180 12-15 Low/high rack Steak 190 12-16 Skewer rack or low/high rack Toast 230 5-8 Steak cage or low/high rack Baked Prawns 200 5-8 Baking cage Bread 180 15-20 Low/high rack Popcorn 230 12 Baking cage 8 INSTALLATION AND OPERATING INSTRUCTIONS Extra Information Do not overfill the baking cage MODE SETTING IDENTIFICATION Temperature adjustment key (+) Time adjustment key (+) Roast Bake Defrost Roll Temperature adjustment key (-) Time adjustment key (-) Fry Stir-fry Turbo Preset INSTALLATION AND OPERATING INSTRUCTIONS 9 MODE SETTING IDENTIFICATION Mode Default Temp (°C) Default time (minutes) Suggested Accessories Rotation Roast 200 30 Chicken Fork P Bake 180 20 Baking Pan / Low/High Rack Defrost 60 15 Low/High Rack Turbo 230 15 Low/High Rack Stir-fry 200 15 Low/High Rack / Baking pan Fry 230 25 Baking Cage Preset Option After setting desired time and temperature or mode press the Preset button. The preset time setting range is 0.5 - 9 hours. The default setting is 60 minutes. Use the time setting buttons to set to desired time (1 minute intervals). The setting range is 0.5 - 9 hours. Tip: Hold down the time “+” and “-” buttons and the time will change by 20 minute intervals. Press the “Power” key to confirm the preset function and the cooking time will begin to countdown. 10 INSTALLATION AND OPERATING INSTRUCTIONS P SUGGESTED USAGE OF THE ACCESSORIES Low/High Rack & Baking Pan Low/High Rack & Steamer Chicken Fork Tighten INSTALLATION AND OPERATING INSTRUCTIONS 11 SUGGESTED USAGE OF THE ACCESSORIES Baking Cage 12 INSTALLATION AND OPERATING INSTRUCTIONS Steak Cage Cleaning and Maintenance Before carrying out any maintenance or cleaning of the unit, let the appliance cool down and ensure that the power to the unit is turned off and the power cord is unplugged from the socket. • Clean the appliance after every use. • Wipe the exterior of the unit with a damp cloth. • Do not clean the unit with scourers or with any abrasive cleaning agent or solvents as these will damage the surface. • The inner pot and accessories can be washed and cleaned with hot water, mild detergent and a non-abrasive sponge. • The inner pot is dishwasher safe. • The accessories are not dishwasher safe. • Do not immerse the unit in water or place in a dishwasher. • Ensure that accessories are dry before using it again. INSTALLATION AND OPERATING INSTRUCTIONS 13 TROUBLE SHOOTING BEFORE YOU CALL FOR SERVICE PLEASE REVIEW THE TROUBLE SHOOTING TIPS FIRST. Problem Possible Cause Solution The appliance is not plugged in Plug the unit into a power supply. You have not set the timer Press the + and – time adjustment buttons to set timer The set temperature is too low Press the + and – Temperature buttons to set the required temperature setting (see section ‘ settings’ on page 7-8) The cooking time is too short Press the + and – time adjustment buttons to set timer to the required preparation time (see section ‘settings’ on page 7-8) You used a type of snacks meant to be prepared in a traditional deep fryer Use oven snacks or lightly brush some oil onto the snacks for a crispier result The Air Fryer does not work The ingredients fried with the Air Fryer are not done Fried snacks are not crispy when they come out of the Air Fryer. 14 INSTALLATION AND OPERATING INSTRUCTIONS Your Aquaport 12 Month Repair or Replacement Warranty Conditions Of This Warranty: quaport warrants this appliance to the first purchaser and subject to A the stated conditions: 1. This product has been fully installed in accordance with the user manual installation instructions. Warranty covers any defects in material or workmanship in the manufactured product within the first twelve months from the date of purchase. 2. The warranty extends only to repairing or replacing any component that proves to be defective in material or workmanship. To make a warranty claim you must call Aquaport on toll free number 1300 764 325 for instructions. 3. The warranty does not cover defects occasioned by misuse, alterations, accidents, or used for other than the intended purpose. If a product is found to be faulty there is a 90 day return policy from the date of purchase. Products returned to store MUST be accompanied by a valid proof of purchase. For warranty claims outside of 90 days from date of purchase, product will be repaired or replaced at our discretion. Repair or replacement costs of the product will be covered under warranty by Aquaport. Goods presented for repair may be replaced by refurbished goods of the same type rather than being repaired. Refurbished parts may be used to repair the goods. The benefits given to you by this warranty are in addition to other rights and remedies of the consumer law in relation to the goods or services to which this warranty relates. 4. The warranty does not cover damage to the product caused by accident, fire, or floods. 5. Proof of purchase is required for warranty claims. Please keep purchase receipt in a safe place. Aquaport Corporation Pty Ltd 5 John Street Flinders Park, South Australia 5025 Customer Care 1300 764 325 Our goods come with guarantees that cannot be excluded under the Australian Consumer Law. You are entitled to a replacement or refund for a major failure and compensation for any other reasonably foreseeable loss or damage. You are also entitled to have the goods repaired or replaced if goods fail to be of acceptable quality and the failure does not amount to a major failure. INSTALLATION AND OPERATING INSTRUCTIONS 15 CUSTOMER HOTLINE: 1300 764 325 Aquaport Corporation Pty Ltd 5 John Street Flinders Park, South Australia 5025 Phone: 08 8354 0711 Facsimile: 08 8354 0722 Email: [email protected] www.proappliances.com.au /proappliances @proappliancesau