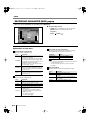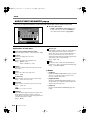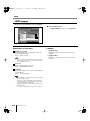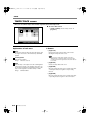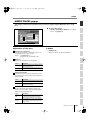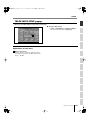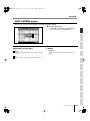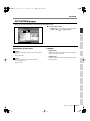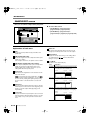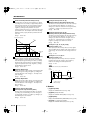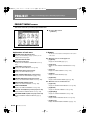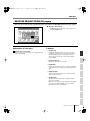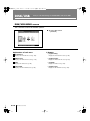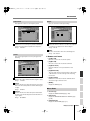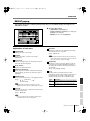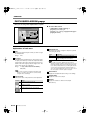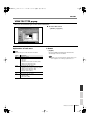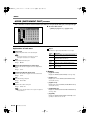
1
MV-8800_r_e.book 1 ページ 2006年11月10日 金曜日 午後12時49分
Screen Guide
Copyright © 2006 ROLAND CORPORATION
All rights reserved. No part of this publication may be reproduced in any
form without the written permission of ROLAND CORPORATION.
Roland International Web Site: http://www.Roland.com
MV-8800_r_e.book 2 ページ 2006年11月10日 金曜日 午後12時49分
Common items in all screens
These items are common
to all screens.
Screen title / F (Function) buttons area
This area shows information such as the screen name, current time, and song name.
• The title area and function buttons area are the same for all
screens ( – ).
Explanation of each area
Screen name
The name of this screen.
Song number, song name/
Pattern number, Pattern name
In Song mode, this shows the number and name of the
currently selected song (current song). In Pattern mode,
this shows the number and name of the currently
selected pattern (current pattern).
PadBank: (pad bank) number
This shows the pad bank number of the sound generator
part you can play from the top panel VELOCITY PADS.
This shows the name of the current function for the eight
top panel sliders.
Value
Explanation
Audio
Audio mixer 1–8 level sliders
Part1–8
Instrument part mixer 1–8 level sliders
Part9–16
Instrument part mixer 9–16 level sliders
AUX/In
AUX, effect, audio phrase, and input mixer
level sliders
Assign
Assignable slider
Now: (now time)
This indicates the current location (measure/beat/tick) of
the sequencer.
Sound Generator
Range
Audio Phrase
01–32
Instrument part
01–06
Pattern
01–08
Scroll bar
Pix jam
01–06
Indicates the approximate portion of the data (horizontal)
and track (vertical) list that are visible.
Target played by the velocity pads
This shows what the velocity pads are assigned to play.
S-2
Slider:
BPM (Beats Per Minute / tempo)
This indicates the tempo of the sequencer.
Menu
When “M” icon displays here, you can press [MENU] to
display the MENU popup (e.g., p. 7) in the LCD.
Display
Explanation
(A.Phrs)
Audio phrase part
(Part01)–(Part16)
Instrument part 1–16
F (function) buttons
(Ptrn)
Pattern
(P.Jam)
Pix jam
The [F1] – [F5] buttons correspond to functions displayed
at the bottom of the LCD.
(Multi)
Multi timber sampler mode
MV-8800 Screen Guide
MV-8800_r_e.book 3 ページ 2006年11月10日 金曜日 午後12時49分
SONG
EDIT NAME popup
COMMON
Common items in all screens
This screen lets you edit the name of a folder, file, library, pad, or track.
PATTERN
INSTRUMENTS AUDIO PHRASES
Explanation of each area
Name
The name of this popup. The popup name will depend on
the type of name you are assigning.
Changes the audio phrase name
EDIT PAD BANK NAME
Changes the pad bank name
EDIT AUDIO PHRASE
NAME
Changes the patch name
EDIT SONG NAME
Changes the song name
EDIT MIDI CLIP NAME
Changes the MIDI clip name
EDIT TRACK NAME
Changes the track name
EDIT LOCATOR NAME
Changes the locator name
EDIT MFX NAME
Changes the MFX library name
EDIT DELAY/
CHORUS NAME
Changes Delay/Chorus library
name
EDIT REVERB NAME
Changes Reverb library name
EDIT MTK NAME
Changes the MTK library name
EDIT VOLUME LABEL
Changes the volume label
EDIT PATTEN NAME
Changes the pattern name
EDIT FOLDER NAME
* Changes the folder name
EDIT FILE NAME
* Changes the file name
EDIT PROJECT NAME
* Changes the project name
MIXDOWN FILE NAME
* Changes the Mixdown file name
MASTERING FILE NAME * Changes the Mastering file name
• You cannot input the space character to the volume label.
The space character will replace to the “_” (underscore).
Displays the HISTORY popup. You can recall (and
re-input) up to the ten most recent names you input in
the EDIT NAME popup since turning on the power.
Selects the name at the cursor in the history list then
press [F5](Select).
• [F2](Insert Space)
Inserts a space at the cursor location.
• [F3](Delete)
Deletes the character at the cursor location. Characters
at the right of the cursor will be moved forward to fill the
gap.
• [F4](A➜a/a➜A)
Switches the character at the cursor location between
uppercase and lowercase.
• [F5](OK) / [F5](Execute)
Finalizes the name and closes the EDIT NAME popup.
MV-8800 Screen Guide
S-3
MIXER
• When the cursor is located at the first character, you can
press the left cursor key to open the SELECT CATEGORY
popup (p. 4). You can use this popup in the following
popups.
• EDIT SAMPLE NAME popup
• EDIT PARTIAL NAME popup
• EDIT PATCH NAME popup
• EDIT AUDIO PHRASE NAME popup
• EDIT MIDI CLIP NAME popup
EFFECTS
• When naming a file or folder (shown as * in the operation
overview above), you cannot assign a name that already
exists within the same folder.
• [F1](History)
IMPORT
EDIT PATCH NAME
F-buttons
SAMPLING
Changes the partial name
MASTERING
Changes the sample name
EDIT PARTIAL NAME
DISK/USB
Explanation
EDIT SAMPLE NAME
(Owner’s Manual; p. 33).
SYSTEM
Popup name
☞ For details on inputting characters, refer to “Inputting text”
PROJECT
You can edit the name.
Popup name
MV-8800_r_e.book 4 ページ 2006年11月10日 金曜日 午後12時49分
Common items in all screens
SELECT CATEGORY popup
This popup lets you select a category.
■ To access this screen
• Accesses the EDIT NAME popup (p. 3) ➜ CURSOR [
]
(Only for EDIT SAMPLE NAME, EDIT PARTIAL NAME, EDIT PATCH
NAME, EDIT AUDIO PHRASE NAME, and EDIT MIDI CLIP NAME.)
• [INSTRUMENTS] ➜ [F4](Library) ➜ [F3](Category)
• [SONG] or [PATTERN] ➜ [F5](Seq Edit) ➜ select a
MIDI track as the current track ➜ [MENU] ➜ Select
“Paste MIDI Clip...” ➜ [F5](Select) ➜ [F1](Category)
• [PROJECT] ➜ move the cursor to the lower row of
icons ➜ [F3](SmplMgr)➜ [MENU] ➜ Select
“Category...” ➜ [F5](Select)
• Accesses the SAMPLE LIST popup (p. 130) ➜
[F3](Category)
Explanation of each area
Category
Content
List
VOX
Voice, choir
Displays a list of categories. The category name selected
by the cursor is highlighted.
PLK
Plucked instruments (e.g., harp, ethnic
instruments)
ETH
Other ethnic instruments
S-4
Category
Content
FRT
Fretted plucked instruments (e.g., mandolin)
---
Not categorized
PRC
Percussion
PNO
Acoustic piano
SFX
Sound effects
EP
Electric piano
BTS
Beats, grooves
KEY
Other keyboards (e.g., clavi, harpsichord)
DRM
Drum sets
BEL
Bell, bell pad
CMB
Other patches using splits or layers
MLT
Mallet
7X0
Roland S-700 series
ORG
Electric organ, church organ
AK
AKAI MPC series/S series
ACD
Accordion
HRM
Harmonica, blues harp
AGT
Acoustic guitar
EGT
Electric guitar
DGT
Distortion guitar
BS
Acoustic bass, electric bass
SBS
Synth bass
STR
Strings
ORC
Orchestra ensemble
HIT
Orchestral hits, hits
WND
Wind instruments (e.g., oboe, clarinet)
FLT
Flute, piccolo
BRS
Acoustic brass
SBR
Synth brass
SAX
Sax
HLD
Synth lead (hard)
SLD
Synth lead (soft)
TEK
Techno synth
PLS
Pulsating sounds
FX
Synth FX (e.g., noise)
SYN
Poly synth
BPD
Synth pad (bright)
SPD
Synth pad (soft)
MV-8800 Screen Guide
F-buttons
• [F1](Select All)
Displays the all categories.
• The [F1](Select All) is valid if displays the follow screens.
• PASTE MIDI CLIP popup (p. 47)
• PATCH LIBRARY popup (p. 117)
• SAMPLE LIST popup (p. 130)
• [F5](Select)
Finalize the category.
MV-8800_r_e.book 5 ページ 2006年11月10日 金曜日 午後12時49分
SONG
PAD BANKS popup
Here you can select pad banks.
PATTERN
■ To access this screen
• [PADBANKS]
Shows the state of the current pads. Red-colored
velocity pads have data recorded in them.
Pad bank list
• [F1](Name)
Displays the EDIT NAME popup (p. 3), allowing you to
name the pad bank.
• [F5](Close)
Closes the PAD BANKS popup (this popup).
SYSTEM
Lists the names of the pad banks. The pad bank
selected by the cursor is highlighted.
F-buttons
PROJECT
Velocity pads
INSTRUMENTS AUDIO PHRASES
Explanation of each area
COMMON
Common items in all screens
You can switch pad banks by using the VALUE dial or
[INC]/[DEC].
DISK/USB
MASTERING
SAMPLING
IMPORT
EFFECTS
MIXER
MV-8800 Screen Guide
S-5
MV-8800_r_e.book 6 ページ 2006年11月10日 金曜日 午後12時49分
Common items in all screens
SELECT DRIVE popup
Here you can select the drive.
■ To access this screen
• Press [F1](Select Drive) shown in various
screens, etc.
Explanation of each area
• [F5](Select)
Drive list
This area lists the drives that are installed in the
MV-8800 (hard disk, CD-R/RW drive). The drive selected
by the cursor is highlighted.
Icon
Explanation
Hard disk drive
CD-ROM/Audio CD drive
• The CD-ROM icon and Audio CD icon let you differentiate
between types of media inserted in the drive.
S-6
F-button
MV-8800 Screen Guide
Selects the drive indicated by the cursor in the drive list.
MV-8800_r_e.book 7 ページ 2006年11月10日 金曜日 午後12時49分
SONG
MENU popup / COMMAND popup
COMMON
Common items in all screens
This page explains the operations that apply in common to any command or menu you access as a
popup.
PATTERN
■ To access this screen
• [MENU]
F-buttons
PROJECT
• [F1](▲) / [F2](▼)
INSTRUMENTS AUDIO PHRASES
• Press [F5](Command) shown in various screens,
etc.
These buttons move the cursor between menu items or
commands shown in the popup.
SYSTEM
• You can also use [DEC]/[INC], the VALUE dial, or the
cursor buttons to move the cursor.
• [F5](Select)
DISK/USB
Executes the menu item or command that is selected by
the cursor.
• You can also use [ENTER] buttons to execute the selected
menu item or command.
MASTERING
SAMPLING
IMPORT
EFFECTS
MIXER
MV-8800 Screen Guide
S-7
MV-8800_r_e.book 8 ページ 2006年11月10日 金曜日 午後12時49分
SONG
Here you can perform sequencer-related operations.
SONG screen
This is the basic screen where you play or record songs.
■ To access this screen
• [SONG]
Explanation of each area
Now time
This indicates the current location (measure/beat/tick,
time code) of the sequencer.
Region of Loop play
Specifies the starting time and end time of the loop. The
following characters show the Loop status.
Characters
Explanation
Time Signature
Loop function is Off.
Displays the time sign of the current song.
Loop function is On.
Step Time
This is the unit by which the current time will move when
you press STEP [ ]/[ ].
Metronome
Displays the metronome setting.
Icon
No. (track number and icon)
Shows the number of the each track recorded in the
sequencer. The icon at the right of the track number
shows the type of track.
Icon
Explanation
Explanation
MIDI track
The metronome will not sound.
Audio track
The metronome will sound only during recording.
Pattern track
The metronome will sound during playback and
recording.
The metronome will always sound.
Loop Quick Set Length
Displays the number of measures that are automatically
specified as the loop length when you press
[QUICK SET].
Region of Punch In/Out
Specifies the starting time and end time of the auto
punch in recording. The following characters show the
Punch In/Out status.
Characters
Explanation
Punch In/Out function is Off.
Punch In/Out function is On.
S-8
MV-8800 Screen Guide
• The line of the track number selected by the cursor is
highlighted. This track is called the “current track.”
Track Name
Shows the name assigned to each track.
MV-8800_r_e.book 9 ページ 2006年11月10日 金曜日 午後12時49分
SONG
Sets the status of the track.
Indication
Explanation
This track will not play.
Only this track will play.
R=Record
Recording will occur on this track.
Displays the SONG MENU screen (p. 78).
• [F2](Track Param)
Displays the TRACK PARAMETER popup for the track
selected by the cursor.
• The TRACK PARAMETER popup that appears will depend
on the type of the current track.
Current track
Popup
The boxes show the existence of data recorded in each
track.
Audio track
TRACK PARAMETER popup (for an
Audio track) (p. 14)
A gray box is shown for data that contains no note
events.
MIDI track
TRACK PARAMETER popup (for a MIDI
track) (p. 11)
Pattern track
TRACK PARAMETER popup (for a
Pattern track) (p. 15)
Play List
Tempo Track
This is a special track that records tempo data. This track
always stays in this location. (Its location is not affected
by scrolling.)
Sequence Memory meter/
Wave Memory meter
View filter indicator
Icon
Explanation
View Filter is off (Events displayed)
If the current track is a MIDI track, displays the PIANO
ROLL EDIT screen (p. 30).
• If the current track is not a MIDI track, the indication
“Current Track is not MIDI Track.” will appear.
• [F5](Seq Edit)
Displays the SEQUENCE EDIT screen (p. 31).
• [MENU]
MASTERING
View Filter is on (Events not displayed)
• [F4](PianoRoll)
DISK/USB
Indicates the View Filter status you specified.
• If the current track is not a MIDI track, the indication
“Current Track is not MIDI Track.” will appear.
SYSTEM
Displays the remaining number of events available for
recording in the sequencer, or the remaining time
available for recording audio tracks.
If the current track is a MIDI track, displays the EVENT
LIST screen (p. 23).
PROJECT
• You can’t record data on the tempo track.
• [F3](Event List)
INSTRUMENTS AUDIO PHRASES
• If you simultaneously turn on M (Mute) and S (Solo) for the
same track, the S (Solo) setting will take priority.
• [F1](Song Menu)
PATTERN
M= Muted
S= Solo
F-buttons and menu
SONG
Track Status (M/S/R)
Displays the MENU popup.
☞ For details on View filter icons refer to VIEW FILTER
popup (p. 53).
SAMPLING
IMPORT
EFFECTS
MIXER
MV-8800 Screen Guide
S-9
MV-8800_r_e.book 10 ページ 2006年11月10日 金曜日 午後12時49分
SONG
14 Recording Parameter
Menu items
1 Tempo Track
Displays the TEMPO TRACK screen (p. 52).
Displays the RECORDING PARAMETER (MIDI) popup
(p. 16), the RECORDING PARAMETER (AUDIO) popup
(p. 19), or the RECORDING PARAMETER (PATTERN)
popup (p. 20).
2 Mute Control Track
Displays the MUTE CONTROL TRACK screen (p. 71).
3 Add MIDI Tracks...
Displays the ADD MIDI TRACKS popup (p. 54).
4 Add Audio Tracks...
Displays the ADD AUDIO TRACKS popup (p. 55).
5 Add Pattern Track
Adds a Pattern track.
• The RECORDING PARAMETER popup that appears will
depend on the type of the current track.
15 Metronome
Displays the METRONOME popup (p. 22).
16 Loop
Displays the LOOP popup (p. 48).
17 Save As User Template
A message of “Save Song setting as User Track
Template?” will appear.
6 Delete Tracks...
Displays the DELETE TRACKS popup (p. 56).
7 Merge Tracks...
Displays the MERGE TRACKS popup (p. 69).
Explanation
[F1](No)
To cancel without saving.
[F5](Yes)
Save the track settings of the current song as a
user template on the hard disk.
18 Drum Grid
8 Track List
Displays the DRUM GRID screen (p. 73).
Displays the TRACK LIST (OUTPUT) screen (p. 50).
9 Track Name...
Displays the EDIT NAME popup (p. 3).
10 Erase All Events
Deletes the all events of current track. The message
“Erase all events in track” will appear.
F-button
Explanation
[F1](No)
To cancel the operation.
[F5](Yes)
To delete the events of current track.
• You can undo only once after executing Erase All Events.
11 Marker
Displays the MARKER popup (p. 57).
12 View Filter
Displays the VIEW FILTER popup (p. 53).
13 Step Time
Displays the STEP TIME popup (p. 58).
S-10
F-button
MV-8800 Screen Guide
MV-8800_r_e.book 11 ページ 2006年11月10日 金曜日 午後12時49分
SONG
SONG
TRACK PARAMETER popup (for a MIDI track)
Here you can make detailed parameter settings for a MIDI track.
• [SONG] or [PATTERN] ➜ select a MIDI track as the
current track ➜ [F2](Track Param)
This is the number and name of the track you are editing.
Output Assign
Specifies the output destination for the data recorded in
the MIDI track.
Explanation
Value
No output.
1–16
Instrument part 1–16
Mute Control
MFX
MFX (Analog modeling bass and effect
parameter adjustments)
Specifies whether the track will be muted by the Track
Mute data recorded in the Mute Control track.
Pix Jam
Pix jam (Switch image clips)
Mixer AUX1–4 Mixer channel (AUX1–4)
Mixer DlyCho
Mixer channel (delay/chorus)
The recorded mute data will be disabled.
(Manual)
Mixer Reverb
Mixer channel (reverb)
Off
Mixer A.Phrs
Mixer channel (audio phrase)
On
The recorded mute data will be enabled.
(Automatic)
Mixer input
Mixer channel (input)
AMix
Mixer channel (audio track)
On
(Default=On)
The recorded mute data will be enabled.
(Automatic)
With this setting, moving to the beginning of
the track will automatically activate muting.
MIDI (MIDI output)
Specifies the MIDI connector and channel used for MIDI
output of the data from the MIDI track.
Explanation
Off
No output.
A-1–A-16
Output to the MIDI OUT A connector
(MIDI channel 1–16)
B-1–B-16
Output to the MIDI OUT B connector
(MIDI channel 1–16)
R-1–R-16
Output to the R-BUS connector
(MIDI channel 1–16)
IMPORT
Value
SAMPLING
On
(Default=Off)
MASTERING
Explanation
DISK/USB
Value
The recorded mute data will be enabled.
(Automatic)
With this setting, moving to the beginning of
the track will automatically defeat muting.
SYSTEM
Off
• You can press [F1](Name) to display the EDIT NAME
popup (p. 3) and edit the name of the track.
PROJECT
Track (Track number and track name)
INSTRUMENTS AUDIO PHRASES
Explanation of each area
PATTERN
■ To access this screen
Prog (Program change)
Range:
Off, 1–128
EFFECTS
Specifies the MIDI program change that will be
transmitted each time you play back from the beginning
of the song or pattern.
MIXER
MV-8800 Screen Guide
S-11
MV-8800_r_e.book 12 ページ 2006年11月10日 金曜日 午後12時49分
SONG
Bank.H/L
Rate
A bank select message will be transmitted together with
the program change message. If you set this to ---, a
bank select message will not be transmitted. This setting
is valid if the Prog parameter is set to anything other than
Off.
When Quantize Type=Shuffle, this specifies how far
away the “backbeat” notes (relative to the Shuffle
Quantize Resolution setting) will be from the downbeats.
You can create a sense of swing by shifting the timing of
the backbeats. With a setting of 50%, the backbeats will
be exactly between the preceding and following
downbeats. With a setting of 0%, the backbeats will be
moved to the same timing as the preceding downbeat.
With a setting of 100%, the backbeats will be moved to
the same timing as the following downbeat.
Parameter
Value
Bank.H
---, 0–127 Bank select MSB (CC#0) value
Explanation
L
---, 0–127 Bank select LCB (CC#32) value
Quantize Type
Select the type of quantization (timing correction) that will
be applied when the sequencer plays.
Explanation
Off
Play Quantize will not be applied.
Grid
The data will be adjusted toward intervals of the
beat specified by the Grid Quantize Resolution
parameter.
Shuffle Quantization will be applied. Notes will be
adjusted forward or backward toward intervals of
the beat specified by the Shuffle Quantize
Resolution parameter, by the amount specified
by Shuffle Rate.
This adds a “shuffle” or “swing” character to the
rhythm.
A quantize template will be applied. By choosing
one of 71 quantization settings, you can easily
modify the beat in a wide variety of ways. In
addition to various shuffle templates, these also
include templates that use velocity to create a
rhythm feel (Groove Quantize).
Template
Strength (Quantize strength)
Sets the strength of quantization that will be applied to
the notes specified by the Grid Quantize Resolution
parameters. Higher value of this parameter will cause
notes to be adjusted more closely toward the rhythmic
intervals specified by Grid Quantize Resolution.
Range:
0%–100%
• A setting of 100 produces the strongest effect; at a setting
of 0 no correction will be applied.
Resolution
Specifies the quantization timing. Choose the shortest
note value that occurs in the region you want to quantize.
Quantize Type
Grid
Shuffle
S-12
Range
(60),
(80),
(240),
(320),
(120),
(240)
MV-8800 Screen Guide
(120),
(480)
0%–66%–100%
Template
When Quantize Type=Template, you can use the
following quantize templates.
Value
Shuffle
Range:
(160),
Dance
01 16 Norm. Dance L.Acc
02 16 Norm. Dance H.Acc
03 16 Norm. Dance L.Swg
04 16 Norm. Dance H.Swg
05 16 Heavy Dance L.Acc
06 16 Heavy Dance H.Acc
07 16 Heavy Dance L.Swg
08 16 Heavy Dance H.Swg
09 16 Pushed Dance L.Acc
10 16 Pushed Dance H.Acc
11 16 Pushed Dance L.Swg
12 16 Pushed Dance H.Swg
Fusion
13 16 Norm. Fusion L.Acc
14 16 Norm. Fusion H.Acc
15 16 Norm. Fusion L.Swg
16 16 Norm. Fusion H.Swg
17 16 Heavy Fusion L.Acc
18 16 Heavy Fusion H.Acc
19 16 Heavy Fusion L.Swg
20 16 Heavy Fusion H.Swg
21 16 Pushed Fusion L.Acc
22 16 Pushed Fusion H.Acc
23 16 Pushed Fusion L.Swg
24 16 Pushed Fusion H.Swg
Reggae
25 16 Norm. Reggae L.Acc
26 16 Norm. Reggae H.Acc
27 16 Norm. Reggae L.Swg
28 16 Norm. Reggae H.Swg
29 16 Heavy Reggae L.Acc
30 16 Heavy Reggae H.Acc
31 16 Heavy Reggae L.Swg
32 16 Heavy Reggae H.Swg
33 16 Pushed Reggae L.Acc
34 16 Pushed Reggae H.Acc
35 16 Pushed Reggae L.Swg
36 16 Pushed Reggae H.Swg
Pops
37 8 Norm. Pops L.Acc
38 8 Norm. Pops H.Acc
39 8 Norm. Pops L.Swg
40 8 Norm. Pops H.Swg
41 8 Heavy Pops L.Acc
42 8 Heavy Pops H.Acc
43 8 Heavy Pops L.Swg
44 8 Heavy Pops H.Swg
45 8 Pushed Pops L.Acc
46 8 Pushed Pops H.Acc
Low dynamics
High dynamics
Light swing
Strong swing
Low dynamics, dragging the beat
High dynamics, dragging the beat
Light swing, dragging the beat
Strong swing, dragging the beat
Low dynamics, rushing the beat
High dynamics, rushing the beat
Light swing, rushing the beat
Strong swing, rushing the beat
Low dynamics
High dynamics
Light swing
Strong swing
Low dyndragging the beat
High dynamics, dragging the beat
Strong swing, dragging the beat
Strong swing, dragging the beat
Low dynamics, rushing the beat
High dynamics, rushing the beat
Light swing, rushing the beat
Strong swing, rushing the beat
Low dynamics
High dynamics
Light swing
Strong swing
Low dynamics, dragging the beat
High dynamics, dragging the beat
Light swing, dragging the beat
Strong swing, dragging the beat
Low dynamics, rushing the beat
High dynamics, rushing the beat
MV-8800_r_e.book 13 ページ 2006年11月10日 金曜日 午後12時49分
SONG
Light swing, rushing the beat
Strong swing, rushing the beat
• [F1](Name)
Displays the EDIT NAME popup (p. 3), where you can
name the current track.
PATTERN
• [F5](Close)
Closes the TRACK PARAMETER popup (for a MIDI
track) (this popup).
INSTRUMENTS AUDIO PHRASES
Low dynamics
High dynamics
Light swing
Strong swing
Low dynamics, dragging the beat
High dynamics, dragging the beat
Light swing, dragging the beat
Strong swing, dragging the beat
Low dynamics, rushing the beat
High dynamics, rushing the beat
Light swing, rushing the beat
Strong swing, rushing the beat
F-buttons
SONG
Samba (for pandero, etc.)
Samba (for surdo and timbale, etc.)
Axe (for caixa)
Axe (for surdo)
Salsa (for cascara)
Salsa (for conga)
Triplets
Pentuplets
Sextuplets
Seven over two beats
Lagging triplets
PROJECT
47 8 Pushed Pops L.Swg
48 8 Pushed Pops H.Swg
Rhumba
49 8 Norm. Rhumba L.Acc
50 8 Norm. Rhumba H.Acc
51 8 Norm. Rhumba L.Swg
52 8 Norm. Rhumba H.Swg
53 8 Heavy Rhumba L.Acc
54 8 Heavy Rhumba H.Acc
55 8 Heavy Rhumba L.Swg
56 8 Heavy Rhumba H.Swg
57 8 Pushed Rhumba L.Acc
58 8 Pushed Rhumba H.Acc
59 8 Pushed Rhumba L.Swg
60 8 Pushed Rhumba H.Swg
Other
61 Samba 1Pandero etc
62 Samba 2Surdo/Timba
63 Axe 1Caixa
64 Axe 2Surdo
65 Salsa 1Cascala
66 Salsa 2Conga
67 Triplets
68 Quintuplets
69 Sextuplets
70 7 Against 2 QuaterNo
71 Lagging Triplets
Velocity
Range:
SYSTEM
When Quantize Type=Template, this specifies the
strength of the velocity correction that will be applied by
the Quantize Template you select. Higher settings will
cause the velocities to be adjusted more closely toward
the velocities of the template.
0–100%
DISK/USB
• With a setting of 0, the velocities will not be adjusted at all.
MASTERING
SAMPLING
IMPORT
EFFECTS
MIXER
MV-8800 Screen Guide
S-13
MV-8800_r_e.book 14 ページ 2006年11月10日 金曜日 午後12時49分
SONG
TRACK PARAMETER popup (for an Audio track)
Here you can make detailed parameter settings for an audio track.
■ To access this screen
• [SONG] or [PATTERN] ➜ select an audio track as
the current track ➜ [F2](Track Param)
Explanation of each area
Track (Track number and track name)
This is the number and name of the track you are editing.
• You can press [F1](Name) to open the EDIT NAME popup
(p. 3) and edit the track name.
Mute Control
Specifies whether the track will be muted by the Track
Mute data recorded in the Mute Control track.
Value
Explanation
Off
The recorded mute data will be disabled.
(Manual)
On
The recorded mute data will be enabled.
(Automatic)
On
(Default=Off)
The recorded mute data will be enabled.
(Automatic)
With this setting, moving to the beginning of
the track will automatically defeat muting.
On
(Default=On)
The recorded mute data will be enabled.
(Automatic)
With this setting, moving to the beginning of
the track will automatically activate muting.
Output Assign
Specifies the output jack from which the audio recorded
on the track will be output.
Value
Explanation
Mix
Mix bus
AUX1–AUX4
AUX bus 1–4
MLT1–MLT8
Multi output bus 1–8 (mono)
MLT1/2–MLT7/8
Multi output bus 1/2–7/8 (stereo)
Level
Specifies the volume of each part.
Range:
S-14
0–100–127
MV-8800 Screen Guide
Pan
Specifies the panning at which the signal is sent to the
bus.
Range:
L63–C–R63
DlyCho Send
Specifies the amount of signal sent to the delay/chorus
effect.
Range:
0–127
Reverb Send
Specifies the amount of signal sent to the reverb effect.
Range:
0–127
F-buttons
• [F1](Name)
Displays the EDIT NAME popup (p. 3), where you can
name the current track.
• [F5](Close)
Closes the TRACK PARAMETER popup (for an Audio
track) (this popup).
MV-8800_r_e.book 15 ページ 2006年11月10日 金曜日 午後12時49分
SONG
SONG
TRACK PARAMETER popup (for a Pattern track)
Make detailed parameter settings for the Pattern track.
• [SONG] ➜ select a pattern track as the current track
➜ [F2](Track Param)
This is the number and name of the track you are editing.
Mute Control
• [F1](Name)
Displays the EDIT NAME popup (p. 3), where you can
name the current track.
• [F5](Close)
Closes the TRACK PARAMETER popup (for a Pattern
track) (this popup).
Specifies whether the track will be muted by the Track
Mute data recorded in the Mute Control track.
The recorded mute data will be disabled.
(Manual)
On
The recorded mute data will be enabled.
(Automatic)
On
(Default=Off)
The recorded mute data will be enabled.
(Automatic)
With this setting, moving to the beginning of
the track will automatically defeat muting.
On
(Default=On)
The recorded mute data will be enabled.
(Automatic)
With this setting, moving to the beginning of
the track will automatically activate muting.
SAMPLING
Off
MASTERING
Explanation
DISK/USB
Value
SYSTEM
• You can press [F1](Name) to open the EDIT NAME popup
(p. 3) and edit the track name.
F-buttons
PROJECT
Track (Track number and track name)
INSTRUMENTS AUDIO PHRASES
Explanation of each area
PATTERN
■ To access this screen
IMPORT
EFFECTS
MIXER
MV-8800 Screen Guide
S-15
MV-8800_r_e.book 16 ページ 2006年11月10日 金曜日 午後12時49分
SONG
RECORDING PARAMETER (MIDI) popup
Here you can set parameters for recording onto a MIDI track.
■ To access this screen
• [SONG] ➜ select a MIDI track as the current track
[MENU] ➜ select “Recording Parameter” ➜
[F5](Select)
• [STOP (
Explanation of each area
Rec Mode (Recording mode)
Specifies how recording will occur
Value
Explanation
Overdub1
Newly recorded data will be added to the
previously-recorded data.
By using this in conjunction with loop recording,
you can repeatedly overdub a specified region.
For example, you can use this method to record
the individual instruments of a drum
performance one by one, like this: bass drum →
123 snare drum → hi-hat.
Overdub2
Replace
If you enter an identical note event at the same
timing as a previously entered note event, the
velocity of the existing event will be replaced by
the new velocity.
Newly recorded data will replace the
previously-recorded data. Use this when you
want to re-record.
S-16
Value
Explanation
Off
Recording will begin the instant you press
[PLAY ( )]. (There will be no count.)
1 Meas
Recording will begin after a one-measure count.
2 Meas
Recording will begin after a two-measure count.
Wait Note
Recording will begin the moment one of the
following occurs.
• A note message is received (you play a
keyboard or other device connected to the
MIDI IN connector)
• You strike a velocity pad
• You press [PLAY ( )]
MV-8800 Screen Guide
)]
Auto Punch In / Auto Punch Out
You can specify two time locations at which recording
will automatically start and stop (“auto punch”).
Parameter
Value
Auto Punch In
0000-01-000–9999-**-***
Auto Punch Out
0000-01-000–9999-**-***
• *-*** will change according to the number of beats specified
in “Time Signature” (p. 79).
• You cannot set Auto Punch In to a location after Auto
Punch Out.
Metronome Mode
Specifies when the metronome signal will be output.
Value
Explanation
Off
The metronome will not sound.
Rec Only
The metronome will sound only during
recording.
Play&Rec
The metronome will sound during playback
and recording.
Always
The metronome will always sound.
Count In
Specifies how recording will start.
)]➜ [REC (
MV-8800_r_e.book 17 ページ 2006年11月10日 金曜日 午後12時49分
SONG
You can apply quantization while you record, so that the
corrected data is recorded on the sequencer track.
• [F1](Rec Filter)
Displays the RECORDING FILTER popup (p. 18).
• [F3](Metronome)
Explanation
Input quantization will not be used.
Grid
The data will be adjusted to the timing intervals
specified by the Grid Quantize Resolution
parameter.
PATTERN
Value
Off
Displays the METRONOME popup (p. 22).
Shuffle quantization will be used. The data will be
adjusted forward or backward relative to the timing
intervals specified by Shuffle Quantize Resolution,
by the amount specified by Shuffle Quantize Rate.
• [F5](Close)
Closes the RECORDING PARAMETER (MIDI) popup
(this popup).
This can give the beat a bouncy feel, such as
“shuffle” or “swing.”
Strength (Quantize strength)
Range:
PROJECT
Specifies the strength of synchronization applied to the
notes specified by Grid Quantize Resolution or Shuffle
Quantize Resolution. Higher values will adjust the notes
further toward the locations specified by the Grid
Quantize Resolution or Shuffle Quantize Resolution
parameter.
INSTRUMENTS AUDIO PHRASES
Shuffle
SONG
F-buttons
Input Quantize Type
0%–100%
• A setting of 100 produces the strongest effect; a setting of
0 produces no adjustment at all.
SYSTEM
Quantize Resolution
Specifies the quantization timing. Select the shortest
note value that occurs in the region you are quantizing.
Grid
Value
(60),
(320),
(120),
(80),
(120),
(160),
(240),
(480)
MASTERING
Shuffle
DISK/USB
Input Quantize
Type parameter
(240)
Rate
IMPORT
Range:
SAMPLING
When Type=Shuffle, this specifies how far away the
“backbeat” notes (relative to the Shuffle Quantize
Resolution setting) will be from the downbeats. You can
create a sense of swing by shifting the timing of the
backbeats. With a setting of 50%, the backbeats will be
exactly between the preceding and following downbeats.
With a setting of 0%, the backbeats will be moved to the
same timing as the preceding downbeat. With a setting
of 100%, the backbeats will be moved to the same timing
as the following downbeat.
0%–66%–100%
EFFECTS
• The Shuffle Quantize Resolution parameter and Shuffle
Quantize Timing parameter settings are valid when Type is
set to Shuffle.
MIXER
MV-8800 Screen Guide
S-17
MV-8800_r_e.book 18 ページ 2006年11月10日 金曜日 午後12時49分
SONG
RECORDING FILTER popup
Here you can restrict the data that will be recorded during MIDI sequence recording.
■ To access this screen
• [SONG] or [PATTERN] ➜ select a MIDI track as the
current track ➜ [MENU] ➜ select “Recording
Parameter” ➜ [F5](Select) ➜ [F1](Rec Filter)
• [STOP (
Explanation of each area
Messages with the ✔ mark will be recorded. If you
remove the ✔ mark, those messages will not be
recorded on the sequencer.
Explanation
Note
Note messages. Data that plays notes.
Poly
Aftertouch
Polyphonic aftertouch. Data that applies
aftertouch independently to an individual key.
Control
Change
Control changes. Data that applies various
effects (e.g., modulation) according to the
control number.
Program
Change
Channel
Aftertouch
Program changes. Data that selects sounds
(patches).
Channel aftertouch. Data that applies
aftertouch to an entire channel.
Pitch Bend Pitch bend. Data that changes the pitch.
Tune
Request
Mode
Message
System
Exclusive
S-18
)] ➜ [F1](Rec Filter)
F-buttons
• [F1](All On)
Filter
Parameter
)]➜ [REC (
This MIDI message causes an analog
synthesizer to tune itself.
MIDI Mode Message that changes the mode
System exclusive messages.
MV-8800 Screen Guide
Specifies all messages will be recorded.
• [F2](All Off)
Specifies all messages will not be recorded.
• [F3](On/Off)
Specifies whether the message at the cursor will be
recorded.
• [F5](Close)
Closes the RECORDING FILTER popup (this popup).
MV-8800_r_e.book 19 ページ 2006年11月10日 金曜日 午後12時49分
SONG
SONG
RECORDING PARAMETER (AUDIO) popup
Here you can set recording parameters for an audio track.
• [SONG] ➜ select an audio track as the current track
[MENU] ➜ select “Recording Parameter” ➜
[F5](Select)
Explanation of each area
)]➜ [REC (
INSTRUMENTS AUDIO PHRASES
• [STOP (
)]
Auto Punch In / Auto Punch Out
Specifies how recording will occur.
Auto Punch In
0000-01-000–9999-**-***
Direct Rec
Record audio directly from the Input to the track
(2-channels).
Auto Punch Out
0000-01-000–9999-**-***
Resample
Mix
Record the audio of the master out.
• *-*** will change according to the number of beats specified
in “Time Signature” (p. 79).
• You cannot set Auto Punch In to a location after Auto
Punch Out.
Record the playback timing of audio phrases
triggered from the velocity pads.
Event
Since only timing data will be recorded, this is a
way to conserve the data size when recording
the identical audio material on the track.
Metronome Mode
Specifies when the metronome signal will be output.
Value
Explanation
Specifies the number of input channels. This setting is
valid if Rec Mode is set to anything other than Event.
Off
The metronome will not sound.
Value
Explanation
The audio will be recorded in stereo (2 channels).
Mono
The audio will be recorded in monaural (1 channel).
Play&Rec
The metronome will sound during playback and
recording.
Always
The metronome will always sound.
Input Quantize Type
You can apply quantization while you record into the
sequencer when Rec Mode is “Event.”
Range: Off, (60),
(80), (120), (160), (240),
(320), (480)
Count In
Specifies how recording will start.
Explanation
Off
Recording will begin the instant you press
[PLAY ( )].(There will be no count.)
Input level meter
1 Meas
Recording will begin after a one-measure count.
Indicates the input level.
2 Meas
Recording will begin after a two-measure count.
• You press [PLAY (
)]
F-buttons
• [F1](Reset Peak)
Clears the indicators of the peak hold in the Level meters.
• [F3](Metronome)
EFFECTS
Wait Note
Recording will begin the moment one of the
following occurs.
• A note message is received (you play a
keyboard or other device connected to the
MIDI IN connector)
• You strike a velocity pad
IMPORT
Value
SAMPLING
Stereo
Rec Only The metronome will sound only during recording.
MASTERING
Sample Type
DISK/USB
Value
Explanation
SYSTEM
Parameter
Value
PROJECT
You can specify two time locations at which recording
will automatically start and stop (“auto punch”).
Rec Mode (Recording mode)
PATTERN
■ To access this screen
Displays the METRONOME popup (p. 22).
Closes the RECORDING PARAMETER (AUDIO) popup
(this popup).
MV-8800 Screen Guide
S-19
MIXER
• [F5](Close)
MV-8800_r_e.book 20 ページ 2006年11月10日 金曜日 午後12時49分
SONG
RECORDING PARAMETER (PATTERN) popup
Here you can set recording parameters for an pattern track.
■ To access this screen
• [SONG] ➜ select a pattern track as the current track
➜ [MENU] ➜ select “Recording Parameter” ➜
[F5](Select)
• [STOP (
Explanation of each area
Specifies how recording will start.
Value
Explanation
Off
Recording will begin the instant you press
[PLAY ( )].(There will be no count.)
1 Meas
Recording will begin after a one-measure count.
2 Meas
Recording will begin after a two-measure count.
Recording will begin the moment one of the
following occurs.
• A note message is received (you play a
keyboard or other device connected to the
MIDI IN connector)
• You strike a velocity pad
• You press [PLAY (
)]
Auto Punch In / Auto Punch Out
You can specify two time locations at which recording
will automatically start and stop (“auto punch”).
Parameter
Value
Auto Punch In
0000-01-000–9999-**-***
Auto Punch Out
0000-01-000–9999-**-***
• *-*** will change according to the number of beats specified
in “Time Signature” (p. 79).
• You cannot set Auto Punch In to a location after Auto
Punch Out.
Metronome Mode
Specifies when the metronome signal will be output.
Value
Explanation
Off
The metronome will not sound.
Rec Only The metronome will sound only during recording.
S-20
Play&Rec
The metronome will sound during playback and
recording.
Always
The metronome will always sound.
MV-8800 Screen Guide
)]
Input Quantize Type
You can apply quantization while you record into the
sequencer when Rec Mode is “Event.”
Range: Off, (60),
(80), (120), (160), (240),
(320), (480)
Count In
Wait Note
)]➜ [REC (
F-buttons
• [F3](Metronome)
Displays the METRONOME popup (p. 22).
• [F5](Close)
Closes the RECORDING PARAMETER (PATTERN)
popup (this popup).
MV-8800_r_e.book 21 ページ 2006年11月10日 金曜日 午後12時49分
SONG
SONG
RECORDING PARAMETER (MUTE CONTROL) popup
Here you can set recording parameters for a mute control track.
• [SHIFT] + [PAD BANKS] ➜ [REC (
)]
INSTRUMENTS AUDIO PHRASES
Explanation of each area
PATTERN
■ To access this screen
Metronome Mode
Specifies how recording will start.
Value
Explanation
Off
The metronome will not sound.
PROJECT
Specifies when the metronome signal will be output.
Count In
Explanation
Off
Recording will begin the instant you press
[PLAY ( )].(There will be no count.)
Rec Only
The metronome will sound only during
recording.
Play&Rec
The metronome will sound during playback
and recording.
1 Meas
When you press [PLAY ( )], a count
(playback) will begin from one measure before
the recording-start location, and recording will
begin at the recording-start location.
Always
The metronome will always sound.
2 Meas
When you press [PLAY ( )], a count
(playback) will begin from two measures before
the recording-start location, and recording will
begin at the recording-start location.
)]
You can specify two time locations at which recording
will automatically start and stop (“auto punch”).
Value
Auto Punch In
0000-01-000–9999-**-***
Auto Punch Out
0000-01-000–9999-**-***
Off,
(60),
(320),
(80),
(120),
(160),
(240),
(480)
F-buttons
• [F3](Metronome)
Displays the METRONOME popup (p. 22).
• [F5](Close)
Closes the RECORDING PARAMETER (MUTE
CONTROL) popup (this popup).
IMPORT
Parameter
Range:
SAMPLING
Auto Punch In / Auto Punch Out
You can apply quantization while you record into the
sequencer.
MASTERING
• You press [PLAY (
DISK/USB
Wait Note
Recording will begin the moment one of the
following occurs.
• A note message is received (you play a
keyboard or other device connected to the
MIDI IN connector)
• You strike a velocity pad
Input Quantize Type
SYSTEM
Value
EFFECTS
• *-*** will change according to the number of beats specified
in “Time Signature” (p. 79).
• You cannot set Auto Punch In to a location after Auto
Punch Out.
MIXER
MV-8800 Screen Guide
S-21
MV-8800_r_e.book 22 ページ 2006年11月10日 金曜日 午後12時49分
SONG
METRONOME popup
Here you can make metronome settings.
■ To access this screen
• [SONG] or [PATTERN] ➜ [MENU] ➜ select
“Metronome” ➜ [F5](Select)
• [STOP (
Explanation of each area
Mode (Metronome Mode)
Specifies when the metronome signal will be output.
Value
Explanation
Off
The metronome will not sound.
Rec Only
The metronome will sound only during
recording.
Play&Rec
The metronome will sound during playback
and recording.
Always
The metronome will always sound.
)]➜ [REC (
)] ➜ [F3](Metronome)
To
Specifies the output destination of the metronome sound.
Explanation
Value
Mix
Mix bus
MLT1 –MLT8
Multi output bus (mono)
M1/2 – M7/8
Multi output bus (stereo)
• The Metronome To parameter is valid only when
Metronome Output is set to Click or Beep.
Accent Note
Output (Metronome Output)
Specifies the note number for the strong beat (first beat).
Specifies the output destination for the metronome
signal.
Range:
C-1–C#2–G9
Accent Velocity
Value
Explanation
Click
Output the internal metronome sound (click).
Specifies the velocity for the strong beat (first beat). The
Accent Note will be output with the specified velocity.
Beep
Output the internal metronome sound
(beep).
Range:
Part 1-16
Use an instrument part to sound the
metronome.
Normal Note
MIDI A-1–A-16
Transmit a note message from MIDI OUT A.
Specifies the note number for the weak beats (other than
the first beat).
MIDI B-1–B-16
Transmit a note message from MIDI OUT B.
Range:
MIDI R-1–R-16
Transmit a note message from R-BUS.
Level
Specifies the volume of the metronome.
Range:
1–50–127
1–100–127
C-1–C#2–G9
• When using the metronome to play a drum set, you can
select a desired percussion instrument by specifying the
note number.
Normal Velocity
• The Metronome Level parameter is valid only when
Metronome Output is set to Click or Beep.
Specifies the velocity for the weak beats (other than the
first beat). The Normal Note will be output with the
specified velocity.
Range:
1–64–127
F-button
• [F5](Close)
Closes the METRONOME popup (this popup).
S-22
MV-8800 Screen Guide
MV-8800_r_e.book 23 ページ 2006年11月10日 金曜日 午後12時49分
SONG
SONG
EVENT LIST screen
Here you can edit the MIDI messages recorded in a MIDI track.
• [SONG] or [PATTERN] ➜ select a MIDI track as the
current track ➜ [F3](Event list)
Event parameters
Velocity
Duration
Duration
OffV
Off-velocity
Pad
Pad number
Note
Note number
Value
Value
Number
Control change number
Value
Value
Number
Program change
number
Name
Patch name on library
Bank H
Program change bank
number (upper)
L
Program change bank
number (lower)
Ch Aftertouch
Value
Value
Pitch Bend
Value
Value
Sys.Excl
Value
Value
Local Control
Value
Local Control On/Off
Mono Mode
Value
Number of channels
Poly Aftertouch
Control Change
Program Change
EFFECTS
Note number
Velo
IMPORT
Pad number
Note
SAMPLING
Pad
MASTERING
Explanation
DISK/USB
Displayed
parameters
SYSTEM
Displays the parameters of the message selected by the
cursor. The parameters shown will depend on the
selected message, as follows.
Use the cursor to select a MIDI event, and press the right
cursor button to move the cursor to each event
parameter. Press the left cursor button to move the
cursor to the time location. If the MIDI event at the
current location is a system exclusive message, the
SYS-EX popup (p. 27) will appear.
PROJECT
Indicates the time location of the MIDI messages
recorded in the current track.
Note
Event list
Lists the MIDI events recorded in the current track.
Event Position
Message
INSTRUMENTS AUDIO PHRASES
Explanation of each area
PATTERN
■ To access this screen
MIXER
MV-8800 Screen Guide
S-23
MV-8800_r_e.book 24 ページ 2006年11月10日 金曜日 午後12時49分
SONG
F-buttons and menu
• [F1](Create)
Displays the CREATE EVENT popup (p. 25).
• [F2](Erase)
Erases the event at the cursor location. The erased data
will be held in the clipboard.
• [F3](Copy)
Copies the event at the cursor location into the clipboard.
• [F4](Paste)
Displays the PASTE EVENT popup (p. 26), allowing you
to paste the event that was held in internal memory by
the Erase or Copy command.
• [F5](View Filter)
Display the VIEW FILTER popup (p. 53).
• [MEMU]
Displays the MENU popup.
Menu items
1 Step Time
Displays the STEP TIME popup (p. 58).
2 Track Parameter
Displays the TRACK PARAMETER popup (for a MIDI
track) (p. 11).
3 Solo On/Off
Turns solo on/off for the current track.
S-24
MV-8800 Screen Guide
MV-8800_r_e.book 25 ページ 2006年11月10日 金曜日 午後12時49分
SONG
SONG
CREATE EVENT popup
This lets you add a new event to a MIDI track.
• [SONG] or [PATTERN] ➜ select a MIDI track as the
current track ➜ [F3](Event List) ➜ [F1](Create)
INSTRUMENTS AUDIO PHRASES
Explanation of each area
F-buttons
Specify the type of MIDI event you want to add.
Program changes. Data that selects sounds
(patches).
Control
Change
Control changes. Data that applies various
effects (e.g., modulation) according to the
control number.
Program
Change
Pitch bend. Data that changes the pitch.
Channel
Aftertouch
Polyphonic aftertouch. Data that applies
aftertouch independently to an individual key.
Pitch Bend
Channel aftertouch. Data that applies
aftertouch to an entire channel.
Tune
Request
This MIDI message causes an analog
synthesizer to tune itself.
Mode
Message
MIDI Mode Message that changes the mode
System
Exclusive
System exclusive messages.
Adds the MIDI event selected by the cursor.
SAMPLING
Poly
Aftertouch
• [F5](Select)
MASTERING
Note messages. Data that plays notes.
DISK/USB
Explanation
Note
These buttons move the cursor between commands
shown in the popup.
SYSTEM
Parameter
PROJECT
• [F1](▲) / [F2](▼)
Event
PATTERN
■ To access this screen
IMPORT
EFFECTS
MIXER
MV-8800 Screen Guide
S-25
MV-8800_r_e.book 26 ページ 2006年11月10日 金曜日 午後12時49分
SONG
PASTE EVENT popup
An event temporarily stored in the event list clipboard can be “pasted” at the specified time location.
■ To access this screen
• [SONG] or [PATTERN] ➜ [F3](Event List) ➜ copy
an event ➜ [F4](Paste)
Explanation of each area
• [F5](Execute)
To
Specifies the time location at which the MIDI event will
be added.
Range:
0000-01-000–9999-**-***
• ** will depend on the number of beats in the time signature
selected in “Time Signature” (p.237).
S-26
F-button
MV-8800 Screen Guide
Adds the event and closes the PASTE EVENT popup.
■ If the “Sequence memory full” message
appears
The data cannot be created because the sequence
memory is full.
MV-8800_r_e.book 27 ページ 2006年11月10日 金曜日 午後12時49分
SONG
SONG
SYS-EX popup
Here you can edit a system exclusive message.
• [SONG] or [PATTERN] ➜ [F3](Event list) ➜ move
the cursor in the event list to a system exclusive
message ➜ CURSOR [ ]
• This screen will appear if the current track is a MIDI track.
Explanation of each area
• [F1](Auto Sum)
When you are inputting a Roland system exclusive
message, you can use Auto Check Sum to calculate the
checksum automatically.
Auto Sum
If Auto Sum is On, the data byte preceding the end of the
message (F7) will be the checksum; the calculated result
will be inserted here automatically.
Make this indicator appear if you want the check-sum to
be calculated automatically. Press [F1](Auto Sum) to
switch this indicator on/off.
If input is not successful, turn Auto Sum “Off” and then
“On” again.
Adds data at the cursor location. A value of “00” will be
inserted; edit this value as desired.
DISK/USB
• [F2](Insert)
SYSTEM
This shows the system exclusive message. Input the
message between F0 and F7. Use the VALUE dial or
[DEC]/[INC] to specify the data.
PROJECT
Message
F-buttons
INSTRUMENTS AUDIO PHRASES
• [SONG] or [PATTERN] ➜ [F3](Event list)
➜[F1](Create) ➜ select “System Exclusive” ➜
[F5](Select)
PATTERN
■ To access this screen
• [F3](Delete)
MASTERING
Deletes the data at the cursor location.
• [F4](Test)
Transmits the currently-shown system exclusive
message from the MIDI OUT connector.
Finalizes the system exclusive message that you input.
SAMPLING
• [F5](Execute)
IMPORT
EFFECTS
MIXER
MV-8800 Screen Guide
S-27
MV-8800_r_e.book 28 ページ 2006年11月10日 金曜日 午後12時49分
SONG
AUDIO EVENT PARAMETER popup
Here you can adjust the parameters of the event at the current time location within an audio track.
■ To access this screen
• [SONG] or [PATTERN] ➜ [F5](Seq Edit) ➜ select
an audio track as the current track ➜ [MENU] ➜
select “Audio Event Parameter” ➜ [F5](Select)
Explanation of each area
Track (Track number and track name)
This is the number and name of the track you are editing.
Position
Displays the starting time of the event.
Duration
Stretch Type
If the BPM Sync parameter is On, this setting adjusts the
audio quality with which the sample is stretched or
shrunk (Time Stretch). The ideal setting will depend on
the type of audio material. If you choose Auto, the
appropriate setting will be automatically assigned based
on the length of the sound and the BPM.
Range:
Auto, 1–10
Specifies the length of the individual event.
Range:
0000-01 (1 tick)–
9999-*** (9999 beats *** ticks)
BPM
Specifies the tempo of audio event. When BPM Sync
parameter is on, audio event played by this BPM setting.
Range:
Sample
5.00–120.00–300.00
Indicates the sample number that exists at the current
time location.
F-button
Level
Specifies the volume of the audio event.
Range:
0–127
Coarse Tune
Adjusts the pitch of the audio event in semitone steps.
Range:
-48–0–+48 (+/-4 octaves)
Fine Tune
Adjusts the pitch of the audio event in one-cent steps.
Range:
-50–0–+50
• One cent = 1/100th of a semitone
BPM Sync
Selects whether the playback speed of the audio event
will be adjusted in realtime according to sequencer
tempo changes. If this is On, tempo changes will shorten
or lengthen the phrase in realtime.
Range:
S-28
Off, On
MV-8800 Screen Guide
• [F1](Move)
Displays the MOVE AUDIO EVENT popup (p. 113). This
allows you to modify the length of the audio event or
move it to a different time location.
• [F2](Sample Edit)
Displays the AUDIO EVENT SAMPLE EDIT popup (p.
29). This allows you to adjust the playback region of the
sample used by the audio event.
• [F5](Close)
Closes the AUDIO EVENT PARAMETER popup (this
popup).
MV-8800_r_e.book 29 ページ 2006年11月10日 金曜日 午後12時49分
SONG
SONG
AUDIO EVENT SAMPLE EDIT popup
Here you can adjust the samples of the event at the current time location within an audio track.
[
Explanation of each area
Indicates the sample number and sample name that you
are editing.
Reverse
Plays the sample backward. If this is On, the sample will
play only once from the End Point to the Start Point in
the reverse direction.
Range:
PROJECT
Sample
INSTRUMENTS AUDIO PHRASES
• [SONG] or [PATTERN] ➜ [F5](Seq Edit) ➜ select
an audio track as the current track ➜ [MENU] ➜
select “Audio Event Parameter” ➜ [F5](Select) ➜
[F2](Sample Edit)
PATTERN
■ To access this screen
Off, On
Zoom level
Start Point
Loop Point
End Point
SYSTEM
Indicates the ratio at which the waveform shown in the
wave window is being magnified or shrunk.
Wave window
Shows the audio event (waveform) that you are editing.
• If you use this in conjunction with the Loop parameter, the
sample will play from the End Point to the Start Point, and
then continue playing repeatedly from the Loop Start Point
to the Start Point in the reverse direction.
Start Point
Loop Point
MASTERING
The point at which playback will start. Set this to skip any
unwanted portion of the waveform at the beginning of the
sample, so that the sample will begin playing at the
desired timing.
End Point
Loop Point
End Point
F-buttons
• [F4](Preview)
Displays the SELECT SAMPLE EDIT COMMAND popup
(p. 132).
EFFECTS
Loops the sample. If this is On, the sample will play from
the Start Point to the End Point, and then continue
playing repeatedly in the forward direction from the Loop
Start Point to the End Point.
On, Off
Start Point
Loop Point
IMPORT
The sample will play while you hold down the button.
• [F5](Command)
Loop
Range:
SAMPLING
Specifies the point at which the playback will begin
repeating (i.e., for the second and subsequent plays).
Set this if you want to the sample to loop from a point
other than the Start Point.
Specifies the point at which playback will end. Set this to
avoid playing any unwanted portion of the waveform at
the end of the sample.
DISK/USB
Start Point
End Point
MIXER
MV-8800 Screen Guide
S-29
MV-8800_r_e.book 30 ページ 2006年11月10日 金曜日 午後12時49分
SONG
PIANO ROLL EDIT screen
Here you can edit the MIDI messages that are recorded on a MIDI track. The piano roll graphically
indicates the pitch, duration, and velocity.
■ To access this screen
• [SONG] or [PATTERN] ➜ select a MIDI track as the
current track ➜ [F4](PianoRoll)
Explanation of each area
Note number (keyboard)
The note numbers (keys) are shown from bottom to top.
Since the actual pitches correspond to the note numbers,
the displayed location of the note tells you the pitch.
Editing Region
• [F3] (Rgn In/Out)
Specifies the editing region. Press this once to set the
beginning (In time) of the editing region, or once again to
set the end (Out time) of the editing region. If you press it
yet again, the beginning (In time) of the editing region will
again be set.
• [F4] (Quick Rgn)
Displays the editing region (region in time–out time).
Piano roll
This shows the note events. The horizontal axis is time,
and the vertical axis is note number (pitch). You can
change the note number or time location by moving the
displayed note event.
Velocity
Selects the data at which the current note and the
current time location intersect.
• [F5] (Command)
Displays the SELECT PIANO ROLL EDIT COMMAND
popup (p. 33).
• [MENU]
Displays the MENU popup.
Indicates the velocity of the note event. The velocity is
shown as a pair with the note event; a longer bar
indicates a stronger velocity.
Step Time
This is the unit by which the current time will move when
you press STEP [
]/[
].
Menu items
1 Step Time
Displays the STEP TIME popup (p. 58).
F-buttons
• [F1](Note Sel)
Selects/de-selects the note number at the note cursor. If
an In time and Out time are specified for the selected
note number, the note numbers existing within that time
range will be selected.
• [F2](All Note Sel)
Selects/de-selects all note numbers. If all note numbers
are selected, and an In time and Out time are specified,
all note numbers existing in that time region will be
selected.
S-30
MV-8800 Screen Guide
2 Track Parameter
Displays the TRACK PARAMETER popup (for a MIDI
track) (p. 11)
3 Solo On/Off
Turns solo on/off for the current track.
MV-8800_r_e.book 31 ページ 2006年11月10日 金曜日 午後12時49分
SONG
SONG
SEQUENCE EDIT screen
Here you can perform a variety of editing operations on the specified region of the events recorded in
each track.
PATTERN
■ To access this screen
• [SONG] or [PATTERN] ➜ [F5](Seq Edit)
INSTRUMENTS AUDIO PHRASES
Explanation of each area
Track status (M/S)
Now time
Indicates the current time (measure/beat/tick) in the
sequencer.
Time Sign
Step Time
This is the unit by which the current time will move when
you press STEP [ ]/[ ].
S column
When displays “M,” mute is
on. Sound will not be played
back from this track.
When displays “S,” solo is on.
Sound will be played back from
only this track.
When Displays “-,” mute is
off.
When displays “-,” solo is off.
Editing Region
Displays the editing region (region in time–out time).
Play List
No. (Track number and icon)
The boxes show the existence of data recorded in each
track.
Icon
MASTERING
This indicates the number of each track recorded in the
sequencer. The icon at the right of the track number
shows the type of track.
DISK/USB
• If you simultaneously turn on M (Mute) and S (Solo) for the
same track, the S (Solo) setting will take priority.
SYSTEM
Indicates the time sign of the current song.
M column
PROJECT
Switches the state of the track.
A gray box is shown for data that contains no note
events.
Explanation
SAMPLING
MIDI track
Audio track
Pattern track
IMPORT
• The line of the track number selected by the cursor is
highlighted. We refer to this track as the “current track.”
Track Name
EFFECTS
Shows the name assigned to each track.
MIXER
MV-8800 Screen Guide
S-31
MV-8800_r_e.book 32 ページ 2006年11月10日 金曜日 午後12時49分
SONG
F-buttons and menu
• [F1](Track Sel)
Selects/de-selects the current track. If an In time and Out
time are specified for the selected tracks, track events
existing in that time region will be selected (highlighted).
• [F2](All Track Sel)
Selects/de-selects all tracks. If all tracks are selected,
and an In time and Out time are specified, all track
events existing in that time region will be selected
(highlighted).
Menu items
1 View Filter
Displays the VIEW FILTER popup (p. 53).
2 Step Time
Displays the STEP TIME popup (p. 58).
3 Insert Measure...
Displays the INSERT MEASURE popup (p. 64).
• [F3](Rgn In/Out)
Specifies the editing region. Press this once to specify
the current time location as the beginning (In time) of the
editing region, or once again to specify it as the end (Out
time) of the editing region. If you press it yet again, the
current time location will once again be specified as the
beginning (In time) of the editing region.
4 Delete Measure...
Displays the DELETE MEASURE popup (p. 65)
5 Audio Event Parameter
Displays the AUDIO EVENT PARAMETER popup
(p. 28).
• [F4](Quick Rgn)
Selects the data at which the current track and the
current time location intersect.
• [F5](Command)
Displays the SELECT SEQUENCE EDIT COMMAND
popup (p. 34).
• [MENU]
Displays the MENU popup.
6 Copy As Audio Phrase...
Displays the COPY AS AUDIO PHRASE popup (p. 45).
7 Pattern Event Parameter
Displays the PATTERN EVENT PARAMETR popup
(p. 112).
• This item is displayed only in Song mode.
8 Paste MIDI Clip...
Displays the PASTE MIDI CLIP popup (p. 47).
9 MIDI Clip Library
Displays the MIDI CLIP LIBRARY popup (p. 46).
10 Paste Pattern...
Displays the PASTE PATTERN popup (p. 106).
S-32
MV-8800 Screen Guide
MV-8800_r_e.book 33 ページ 2006年11月10日 金曜日 午後12時49分
SONG
SONG
SELECT PIANO ROLL EDIT COMMAND popup
You can execute editing commands on selected note events in the PIANO ROLL EDIT screen.
• [SONG] or [PATTERN] ➜ select a MIDI track as the
current track ➜ [F4](PianoRoll) ➜ specify the editing
region and track ➜ [F5](Command)
Displays the MOVE popup (p. 36).
2 Copy&Paste...
3 Copy&Insert...
• [F1](▲) / [F2](▼)
These buttons move the cursor between commands
shown in the popup.
• [F5](Select)
Executes the menu item or command that is selected by
the cursor.
SYSTEM
Displays the COPY&PASTE popup (p. 35).
F-buttons
PROJECT
1 Move...
INSTRUMENTS AUDIO PHRASES
Explanation of each area
PATTERN
■ To access this screen
Displays the COPY&INSERT popup (p. 37).
DISK/USB
4 Erase
Deletes the data. The deleted region will be blank.
5 Quantize...
MASTERING
Displays the QUANTIZE popup (p. 38).
6 Change Velocity...
Displays the CHANGE VELOCITY popup (p. 39).
SAMPLING
7 Change Duration...
Displays the CHANGE DURATION popup (p. 40).
8 Shift Timing...
IMPORT
Displays the SHIFT TIMING popup (p. 41).
9 Transpose...
Displays the TRANSPOSE popup (p. 43).
EFFECTS
MIXER
MV-8800 Screen Guide
S-33
MV-8800_r_e.book 34 ページ 2006年11月10日 金曜日 午後12時49分
SONG
SELECT SEQUENCE EDIT COMMAND popup
You can execute editing commands on selected tracks in the SEQUENCE EDIT screen.
■ To access this screen
• [SONG] or [PATTERN] ➜ [F5](Seq Edit) ➜ specify
the editing region and track ➜ [F5](Command)
Explanation of each area
1 Move...
Displays the MOVE popup (p. 36).
2 Copy&Paste...
Displays the COPY&PASTE popup (p. 35).
3 Copy&Insert...
Displays the COPY&INSERT popup (p. 37).
4 Erase
Deletes the data. The deleted region will be blank.
5 Cut
Deletes the data. Subsequent data will be moved
forward.
6 Quantize...
Displays the QUANTIZE popup (p. 38).
12 Split Notes...
Displays the SPLIT NOTES popup (p. 66).
13 Change Continuous Data...
Displays the CHANGE CONTINUOUS DATA popup
(p. 68).
14 Create Continuous Data...
Displays the CREATE CONTINUOUS DATA popup
(p. 67).
15 Copy As MIDI Clip...
Displays the COPY AS MIDI CLIP popup (p. 44).
16 Copy As New Pattern...
Displays the COPY AS NEW PATTERN popup (p. 105).
F-buttons
• [F1](▲) / [F2](▼)
7 Change Velocity...
Displays the CHANGE VELOCITY popup (p. 39).
8 Change Duration...
Displays the CHANGE DURATION popup (p. 40).
9 Shift Timing...
Displays the SHIFT TIMING popup (p. 41).
10 Data Thin...
Displays the DATA THIN popup (p. 42).
11 Transpose...
Displays the TRANSPOSE popup (p. 43).
S-34
MV-8800 Screen Guide
These buttons move the cursor between commands
shown in the popup.
• [F5](Select)
Executes the menu item or command that is selected by
the cursor.
MV-8800_r_e.book 35 ページ 2006年11月10日 金曜日 午後12時49分
SONG
SONG
COPY&PASTE popup
This copies the data of the “In time–Out time” region to the specified location.
• The parameters in the COPY&PASTE popup will differ
according to whether you access it from PIANO ROLL
EDIT or from SEQUENCE EDIT. In this page we describe
all the parameters that might appear; ignore the ones that
don’t apply.
Explanation of each area
Specifies the copy-destination time.
Range:
0001-01-000–9999-**-***
Transpose
Specifies the amount of transposition in semitone steps.
Specify a positive (+) value to raise the pitch, or a
negative (-) value to lower the pitch. A setting of 0
produces no change.
Range:
-127–0–127
SYSTEM
• *-*** will change according to the number of beats specified
in “Time Signature” (p. 79).
• Transpose appears only if you are using PIANO ROLL
EDIT.
To Track
PROJECT
To
INSTRUMENTS AUDIO PHRASES
• Accesses the SELECT SEQUENCE EDIT
COMMAND popup (p. 34) or SELECT PIANO ROLL
EDIT COMMAND popup (p. 33) ➜ select
“Copy&Paste...” ➜ [F5](Select)
PATTERN
■ To access this screen
Specifies the copy-destination track number.
Times
Specifies the number of times the copy will be repeated.
Range:
F-button
• [F5](Execute)
Executes the Copy operation.
• You can use the VIEW FILTER popup (p. 53) to limit the
events that will be copied.
1–99
SAMPLING
Mode
Selects the way in which any data existing at the
copy-destination will be handled.
Explanation
Mix
The data will be combined with the data that
exists at the copy-destination.
Replace
The data will replace (overwrite) the data that
exists at the copy-destination.
IMPORT
Value
MASTERING
• If you’ve selected two or more tracks, you won’t be able to
select the To Track value. (The display will indicate “Multi
tracks selected.”)
DISK/USB
• To Track appears only if you are using SEQUENCE EDIT.
EFFECTS
MIXER
MV-8800 Screen Guide
S-35
MV-8800_r_e.book 36 ページ 2006年11月10日 金曜日 午後12時49分
SONG
MOVE popup
This moves the data of the “In time–Out time” region to the specified location.
■ To access this screen
• Accesses the SELECT SEQUENCE EDIT
COMMAND popup (p. 34) or SELECT PIANO ROLL
EDIT COMMAND popup (p. 33) ➜ select “Move...”
➜ [F5](Select)
• The parameters in the MOVE popup will differ according to
whether you access it from PIANO ROLL EDIT or from
SEQUENCE EDIT. In this page we describe all the
parameters that might appear; ignore the ones that don’t
apply.
Explanation of each area
• [F5](Execute)
To
Specifies the move-destination time.
Range:
To Track
Specifies the move-destination track number.
• To Track appears only if you are using SEQUENCE EDIT.
• If you’ve selected two or more tracks, you won’t be able to
select the To Track value. (The display will indicate “Multi
tracks selected.”)
Mode
Selects the way in which any data existing at the
move-destination will be handled.
Value
Explanation
Mix
The data will be combined with the data that
exists at the move-destination.
Replace
The data will replace (overwrite) the data that
exists at the move-destination.
Transpose
Specifies the amount (in semitones) by which the data
will be transposed when it is moved.
Specify a positive (+) value to raise the pitch, or a
negative (-) value to lower the pitch. With a setting of 0,
the data will not be transposed.
Range:
Executes the Move operation.
0001-01-000–9999-**-***
• *-*** will change according to the number of beats specified
in “Time Signature” (p. 79).
-127–0–127
• Transpose appears only if you are using PIANO ROLL
EDIT.
S-36
F-button
MV-8800 Screen Guide
• You can use the VIEW FILTER popup (p. 53) to limit the
events that will be moved.
MV-8800_r_e.book 37 ページ 2006年11月10日 金曜日 午後12時49分
SONG
SONG
COPY&INSERT popup
■ To access this screen
• The parameters in the COPY&INSERT popup will differ
according to whether you access it from PIANO ROLL
EDIT or from SEQUENCE EDIT. In this page we describe
all the parameters that might appear; ignore the ones that
don’t apply.
Explanation of each area
F-button
PROJECT
• [F5](Execute)
To
Specifies the insert-destination time.
Range:
Executes the Copy&Insert operation.
0001-01-000–9999-**-***
• You can use the VIEW FILTER popup (p. 53) to limit the
events that will be copied.
To Track
SYSTEM
• *-*** will change according to the number of beats specified
in “Time Signature” (p. 79).
INSTRUMENTS AUDIO PHRASES
• Accesses the SELECT SEQUENCE EDIT
COMMAND popup (p. 34) or SELECT PIANO ROLL
EDIT COMMAND popup (p. 33) ➜ select
“Copy&Insert...” ➜ [F5](Select)
PATTERN
This inserts the data of the “In time–Out time” region into the current time location. Data at the
insert-destination will not be overwritten; it will move backward in time (i.e., later in the song) by the
corresponding distance.
Specifies the insert-destination track number.
DISK/USB
• To Track appears only if you are using SEQUENCE EDIT.
MASTERING
• If you’ve selected two or more tracks, you won’t be able to
select the To Track value. (The display will indicate “Multi
tracks selected.”)
Times
Specifies the number of times the data will be inserted.
The identical data will be inserted the specified number
of times.
SAMPLING
Range:
1–255
Shift All Tracks / Shift All Notes
Range:
IMPORT
Specifies whether the data of other tracks / notes will
also be shifted backward in time following the
insert-destination point.
Off, On
☞ For details on Shift All Track and Shift All Notes refer to
“Copying data and inserting it at another location (Copy &
Insert)” (Owner’s Manual; p. 190).
EFFECTS
MIXER
MV-8800 Screen Guide
S-37
MV-8800_r_e.book 38 ページ 2006年11月10日 金曜日 午後12時49分
SONG
QUANTIZE popup
This adjusts the timing of MIDI note events in the way you specify.
■ To access this screen
• Accesses the SELECT SEQUENCE EDIT
COMMAND popup (p. 34) or SELECT PIANO ROLL
EDIT COMMAND popup (p. 33) ➜ select
“Quantize...” ➜ [F5](Select)
Explanation of each area
Rate
Quantize Type
Selects the type of quantization.
Value
Explanation
Grid
The data will be adjusted toward intervals of the
beat specified by the Resolution parameter.
Shuffle
Shuffle Quantization will be applied. Notes will be
adjusted forward or backward toward intervals of
the beat specified by the Resolution parameter, by
the amount specified by Shuffle Quantize Rate.
This adds a “shuffle” or “swing” character to the
rhythm.
Template
A quantize template will be applied. By choosing
one of 71 quantization settings, you can easily
modify the beat in a wide variety of ways. In
addition to various shuffle templates, these also
include templates that use velocity to create a
rhythm feel (Groove Quantize).
Strength
Sets the strength of quantization. Higher value of this
parameter will cause notes to be adjusted more closely
toward the rhythmic intervals specified by the Resolution
parameter.
Range: 0–100
When Type=Shuffle, this specifies how far away the
“backbeat” notes (relative to the Shuffle Quantize
Resolution setting) will be from the downbeats. You can
create a sense of swing by shifting the timing of the
backbeats. With a setting of 50%, the backbeats will be
exactly between the preceding and following downbeats.
With a setting of 0%, the backbeats will be moved to the
same timing as the preceding downbeat. With a setting
of 100%, the backbeats will be moved to the same timing
as the following downbeat.
Range: 0%–66%–100%
Template
A variety of quantization settings are provided.
☞ See
Template on TRACK PARAMETER popup (for a
MIDI track) (p. 12).
Velocity
When Type=Template, this specifies the strength of the
velocity correction that will be applied by the Quantize
Template you select. Higher settings will cause the
velocities to be adjusted more closely toward the
velocities of the template.
Range: 0–100
• With a setting of 0, the velocities will not be adjusted at all.
• A setting of 100 produces the strongest effect; at a setting
of 0 no correction will be applied.
Note Range
Specifies the range of note numbers that will be quantized.
Resolution
Range:
Specifies the shortest interval to which the note timing
will be quantized. The available values will depend on
the Type parameter setting.
Quantize Type
Parameter
Grid
Shuffle
S-38
• Note Range appears only if you are using SEQUENCE
EDIT.
Range
(60),
(80),
(240),
(320),
(120),
(240)
MV-8800 Screen Guide
0 (C-1)–127 (G 9) (lower limit)
0 (C-1)–127 (G 9) (upper limit)
(120),
(480)
(160),
F-button
• [F5](Execute)
Executes the Quantize operation.
MV-8800_r_e.book 39 ページ 2006年11月10日 金曜日 午後12時49分
SONG
SONG
CHANGE VELOCITY popup
This changes the velocity of note events in the “In time–Out time” region.
Explanation of each area
PROJECT
• [F5](Execute)
Magnify
Executes the Change Velocity operation.
SYSTEM
Reduces or increases velocity differences between
notes. Settings of 99 or lower will reduce the dynamic
variation of the note data; settings of 101 or higher will
make the dynamic variation broader. A setting of 100 will
produce no change.
Range:
F-button
INSTRUMENTS AUDIO PHRASES
• Accesses the SELECT SEQUENCE EDIT
COMMAND popup (p. 34) or SELECT PIANO ROLL
EDIT COMMAND popup (p. 33) ➜ select “Change
Velocity...” ➜ [F5](Select)
PATTERN
■ To access this screen
0%–100%–200%
Bias
Range:
DISK/USB
Specifies a constant value that will be added to the
current velocity. Use this to change all velocities in the
same way.
-99–0–+99
MASTERING
Note Range
Specifies the range of note numbers whose velocities will
be modified.
Range:
C-1–G9 (lower limit)
C-1–G9 (upper limit)
SAMPLING
• Note Range appears only if you are using SEQUENCE
EDIT.
IMPORT
EFFECTS
MIXER
MV-8800 Screen Guide
S-39
MV-8800_r_e.book 40 ページ 2006年11月10日 金曜日 午後12時49分
SONG
CHANGE DURATION popup
This changes the duration (note length) of note events in the “In time–Out time” region.
■ To access this screen
• Accesses the SELECT SEQUENCE EDIT
COMMAND popup (p. 34) or SELECT PIANO ROLL
EDIT COMMAND popup (p. 33) ➜ select “Change
Duration...” ➜ [F5](Select)
Explanation of each area
• [F5](Execute)
Magnify
Shortens or lengthens the duration of notes. Settings of
99 or lower will make the actual duration shorter than the
rhythm value of the note; settings of 101 or higher will
make the duration longer. A setting of 100 will produce
no change.
Range:
0%–100%–200%
Bias
Specifies a constant value that will be added to the
current duration. Use this to change all durations in the
same way.
Range:
-4800–0–+4800
Note Range
Specifies the range of note numbers whose duration will
be modified.
Range:
0 (C-1)–127 (G 9) (lower limit)
0 (C-1)–127 (G 9) (upper limit)
• Note Range appears only if you are using SEQUENCE
EDIT.
S-40
F-button
MV-8800 Screen Guide
Executes the Change Duration operation.
MV-8800_r_e.book 41 ページ 2006年11月10日 金曜日 午後12時49分
SONG
This moves the events of the “In time–Out time” region forward or backward in units of one tick (1/480th
of a quarter note).
Explanation of each area
PROJECT
• [F5](Execute)
Bias
Adjusts the event timing forward or backward in units of
one tick.
Range:
F-button
Executes the Shift Timing operation.
-4800–0–+4800
SYSTEM
Note Range
Specifies the range of note numbers that will be shifted.
Range:
INSTRUMENTS AUDIO PHRASES
• Accesses the SELECT SEQUENCE EDIT
COMMAND popup (p. 34) or SELECT PIANO ROLL
EDIT COMMAND popup (p. 33) ➜ select “Shift
Timing...” ➜ [F5](Select)
PATTERN
■ To access this screen
SONG
SHIFT TIMING popup
0 (C-1)–127 (G 9) (lower limit)
0 (C-1)–127 (G 9) (upper limit)
DISK/USB
• Note Range appears only if you are using SEQUENCE
EDIT.
MASTERING
SAMPLING
IMPORT
EFFECTS
MIXER
MV-8800 Screen Guide
S-41
MV-8800_r_e.book 42 ページ 2006年11月10日 金曜日 午後12時49分
SONG
DATA THIN popup
This thins-out events of the “In time–Out time” region to reduce the amount of data. You can use this to
decrease the amount of space occupied by continuous controller data you recorded, such as pitch bend
and aftertouch.
■ To access this screen
• Accesses the SELECT SEQUENCE EDIT
COMMAND popup (p. 34) ➜ select “Data Thin...” ➜
[F5](Select)
Explanation of each area
• [F5](Execute)
Value
Set this to a high value if you are thinning continuous
data whose value changes significantly. If you don’t want
to thin the data very much even though the change is
large, set this to a low value.
Range:
0–99
Time
Set this to a high value if you are thinning continuous
data that changes slowly. If you don’t want to thin the
data very much even though the change is slow, set this
to a low value.
Range:
0–999
Note Range
Specifies the range of note numbers for polyphonic
aftertouch that will be thinned.
Range:
0 (C-1)–127 (G 9) (lower limit)
0 (C-1)–127 (G 9) (upper limit)
S-42
F-button
MV-8800 Screen Guide
Executes the Data Thin operation.
MV-8800_r_e.book 43 ページ 2006年11月10日 金曜日 午後12時49分
SONG
SONG
TRANSPOSE popup
This transposes the pitch of note events in the “In time–Out time” region, in units of a semitone.
Explanation of each area
Range:
• [F5](Execute)
Executes the Transpose operation.
SYSTEM
Specifies the amount of transposition in semitone steps.
Specify a positive (+) value to raise the pitch, or a
negative (-) value to lower the pitch. A setting of 0
produces no change.
PROJECT
Transpose
F-button
INSTRUMENTS AUDIO PHRASES
• Accesses the SELECT SEQUENCE EDIT
COMMAND popup (p. 34) or SELECT PIANO ROLL
EDIT COMMAND popup (p. 33) ➜ select
“Transpose...” ➜ [F5](Select)
PATTERN
■ To access this screen
-127–0–+127
• If executing this Transpose operation would cause the note
number to be higher than G9 or lower than C-1.
DISK/USB
Note Range
Specifies the range of note numbers that will be
transposed.
0 (C-1)–127 (G 9) (lower limit)
MASTERING
Range:
0 (C-1)–127 (G 9) (upper limit)
• Note Range appears only if you are using SEQUENCE
EDIT.
SAMPLING
IMPORT
EFFECTS
MIXER
MV-8800 Screen Guide
S-43
MV-8800_r_e.book 44 ページ 2006年11月10日 金曜日 午後12時49分
SONG
COPY AS MIDI CLIP popup
This adds the data in the “In time–Out time” region to the MIDI clip library.
■ To access this screen
• Accesses the SELECT SEQUENCE EDIT
COMMAND popup (p. 34) ➜ select “Copy As MIDI
Clip...” ➜ [F5](Select)
Explanation of each area
List
Shows the clips you are adding to the MIDI clip library.
• If you selected two or more tracks in the SEQUENCE EDIT
(or PATTERN EDIT) screen, the data is displayed as two
or more clips.
Clip name
Shows the name of the MIDI clips you are adding.
A provisional category name is automatically assigned in
. The category is copied from the patch name, and the
name is copied from the track name. If you’ve selected
multiple tracks, a number will be added to the last two
digits of the clip name so that the names do not conflict.
S-44
MV-8800 Screen Guide
F-buttons
• [F1](Name)
Displays the EDIT NAME popup (p. 3), allowing you to
edit the clip name.
• [F5](Execute)
Adds the MIDI clip to the MIDI clip library.
MV-8800_r_e.book 45 ページ 2006年11月10日 金曜日 午後12時49分
SONG
SONG
COPY AS AUDIO PHRASE popup
This copies the Audio Event on the current time to a pad.
Explanation of each area
Shows the status of the current pads. Red-colored
velocity pads have data recorded in them.
Assign To
Displays the EDIT NAME popup (p. 3), allowing you to
edit the name of the audio phrase.
• [F5](Execute)
Executes the Copy operation.
SYSTEM
Specifies the copy-destination pad.
• [F1](Name)
PROJECT
Pads
F-buttons
INSTRUMENTS AUDIO PHRASES
• [SONG] or [PATTERN] ➜ [F5](Seq Edit) ➜ select
an audio track as the current track ➜ move to the
time location of the event that you want to use as an
audio phrase ➜ [MENU] ➜ select “Copy As Audio
Phrase...” ➜ [F5](Select)
PATTERN
■ To access this screen
As Audio Phrase
Shows the name of an audio phrase.
DISK/USB
MASTERING
SAMPLING
IMPORT
EFFECTS
MIXER
MV-8800 Screen Guide
S-45
MV-8800_r_e.book 46 ページ 2006年11月10日 金曜日 午後12時49分
SONG
MIDI CLIP LIBRARY popup
Here you can rename or delete items in the MIDI clip library.
■ To access this screen
• [SONG] or [PATTERN] ➜ [F5](Seq Edit) ➜ [MENU]
➜ select “MIDI Clip Library” ➜ [F5](Select)
Explanation of each area
MIDI clip list
Lists the MIDI clips that are currently saved. The MIDI
clip selected by the cursor is highlighted.
F-buttons
• [F1](Name)
Displays the EDIT NAME popup (p. 3), allowing you to
edit the name of the clip.
• [F2](Delete)
Deletes the MIDI clip from the MIDI clip library. Move the
cursor to the MIDI clip you want to delete, and press
[F2](Delete).
• [F4](Preview)
Auditions the MIDI clip selected by the cursor, using the
settings of the current track.
• [F5](Close)
Closes the MIDI CLIP LIBRARY popup (this popup).
S-46
MV-8800 Screen Guide
MV-8800_r_e.book 47 ページ 2006年11月10日 金曜日 午後12時49分
SONG
SONG
PASTE MIDI CLIP popup
Here you can paste a MIDI clip from the MIDI clip library into the current MIDI track.
• [SONG] or [PATTERN] ➜ select a MIDI track as the
current track ➜ [F5](Seq Edit) ➜ [MENU] ➜ select
“Paste MIDI Clip...” ➜ [F5](Select)
Lists the MIDI clips that are saved in the MIDI clip library.
Clip name
Shows the category and name of the MIDI clips.
F-buttons
PROJECT
MIDI clip list
INSTRUMENTS AUDIO PHRASES
Explanation of each area
PATTERN
■ To access this screen
• [F1](Category)
Displays the SELECT CATEGORY popup (p. 4).
• [F4](Preview)
• [F5](Execute)
Pastes the MIDI clip at the cursor into the current track.
DISK/USB
• The clip will be pasted at the current time location of the
current track.
SYSTEM
Auditions the MIDI clip selected by the cursor, using the
settings of the current track.
MASTERING
SAMPLING
IMPORT
EFFECTS
MIXER
MV-8800 Screen Guide
S-47
MV-8800_r_e.book 48 ページ 2006年11月10日 金曜日 午後12時49分
SONG
LOOP popup
Here you can set parameters for loop playback.
■ To access this screen
• [SONG] ➜ [MENU] ➜ select “Loop” ➜ [F5](Select)
Explanation of each area
QUICK Loop Length
Specify the length of the loop that will be set when you
press LOOP [QUICK SET].
Range:
Marker, 1–2–32
• If you choose Marker, the region between markers will be
the loop region. However if not even one marker has been
set, looping will not turn on.
Loop Top
Specifies the starting time of the loop.
Range:
0001-01-000–(Loop End)
Loop End
Specifies the end time of the loop (i.e., where it will return
to the beginning).
Range:
(Loop Top)–9999-**-***
• *-*** will change according to the number of beats specified
in “Time Signature” (p. 79).
• Even if you set the Loop Start/End times, the Quick Loop
Length will be used if you turn looping on in QUICK SET.
(The Loop Start/End times will be lost.)
• Changing the Quick Loop Length does not adjust the Loop
End time location.
• You cannot set Loop Start to a location after Loop End.
S-48
MV-8800 Screen Guide
F-buttons
• [F1](Now➔Top)
Assigns the current time as the value of the Loop Top
parameter.
• [F2](Now➔End)
Assigns the current time as the value of the Loop End
parameter.
MV-8800_r_e.book 49 ページ 2006年11月10日 金曜日 午後12時49分
SONG
SONG
AUTO PUNCH popup
Here you can set the auto punch-in/out parameters.
PATTERN
■ To access this screen
• [SHIFT] + [AUTO PUNCH]
Explanation of each area
Specifies whether auto punch will be used.
Off, On
Assigns the current time as the value of the Punch In
parameter.
PROJECT
• [F1](Now➔In)
Switch
Range:
F-buttons
INSTRUMENTS AUDIO PHRASES
• You can also make Auto Punch settings in the
RECORDING PARAMETER (MIDI) popup (p. 16), or in the
RECORDING PARAMETER (AUDIO) popup (p. 19).
• [F2](Now➔Out)
Assigns the current time as the value of the Punch Out
parameter.
Punch In
SYSTEM
• You can also change this setting by directly pressing
[AUTO PUNCH].
Specifies the starting time of the auto punch recording.
0001-01-000–(Punch Out)
DISK/USB
Range:
Punch Out
Specifies the end time of the auto punch recording.
(Punch In)–9999-**-***
MASTERING
Range:
• *-*** will change according to the number of beats specified
in “Time Signature” (p. 79).
SAMPLING
• You cannot set Auto Punch In to a location after Auto
Punch Out.
IMPORT
EFFECTS
MIXER
MV-8800 Screen Guide
S-49
MV-8800_r_e.book 50 ページ 2006年11月10日 金曜日 午後12時49分
SONG
TRACK LIST (OUTPUT) screen
This lists the parameters of each track. The TRACK LIST (OUTPUT) screen shows the output destination
settings for the playback tracks.
■ To access this screen
• [SONG] or [PATTERN] ➜ [MENU] ➜ select “Track
List” ➜ [F5](Select)
Explanation of each area
No. (track number and icon)
Shows the number of the tracks recorded in the
sequencer. The icon at the right of the track number
shows the type of track.
Icon
Explanation
Audio track
MIDI track
Pattern track
MIDI Output
Shows the Output Assign MIDI parameter setting of MIDI
tracks.
F-buttons
• [F1](Output)
Displays TRACK LIST (OUTPUT) screen (this screen).
• [F2](PlayQtz) Play Quantize
Displays the TRACK LIST (PLAY QUANTIZE) screen (p.
51).
• [F3](Track Param)
• The line of the track number selected by the cursor is
highlighted. This track is called the “current track.”
Displays the TRACK PARAMETER popup for the track
selected by the cursor.
Track Name
Shows the name assigned to each track.
Track Status (M/S/R)
Sets the status of the track.
Indication
Explanation
M= Muted
This track will not play.
S= Solo
Only this track will play.
R=Record
Recording will occur on this track.
• The TRACK PARAMETER popup that appears will depend
on the type of the current track.
Current track
Popup
Audio track
TRACK PARAMETER popup (for an
Audio track) (p. 14)
MIDI track
TRACK PARAMETER popup (for a MIDI
track) (p. 11)
Pattern track
TRACK PARAMETER popup (for a
Pattern track) (p. 15)
• [F4](Move ▲) / [F5](Move ▼)
• If you simultaneously turn on M (Mute) and S (Solo) for the
same track, the S (Solo) setting will take priority.
Output
Shows the Output Assign parameter setting of each
track.
S-50
MV-8800 Screen Guide
These move the current track upward [F4](Move ▲) or
downward [F5](Move ▼) within the displayed list of
tracks.
MV-8800_r_e.book 51 ページ 2006年11月10日 金曜日 午後12時49分
SONG
This lists the parameters of each track. The TRACK LIST (PLAY QUANTIZE) screen shows settings related
to Play Quantization.
• [SONG] or [PATTERN] ➜ [MENU] ➜ select “Track
List” ➜ F5](Select) ➜ [F2](PlayQtz)
Indicates the quantize type.
Off
Quantization will not be used
Grid
Grid quantize
Shuffle
Shuffle quantize
Template’s name
Use a quantize template
* The first 14 characters of the
quantize template name are shown.
Resolution
Indicates the quantization timing.
Displays the TRACK LIST (OUTPUT) screen (p. 50).
• [F2](PlayQtz) Play Quantize
Displays the TRACK LIST (PLAY QUANTIZE) screen
(this screen).
• [F3](Track Param)
Displays the TRACK PARAMETER popup for the track
selected by the cursor.
• The TRACK PARAMETER popup that appears will depend
on the type of the current track.
Indicates the strength of quantization.
Audio track
TRACK PARAMETER popup (for an
Audio track) (p. 14)
Rate (Shuffle rate)
MIDI track
Indicates the time difference between the backbeats and
downbeats of the note value specified by the Resolution
parameter.
TRACK PARAMETER popup (for a MIDI
track) (p. 11)
Pattern track
TRACK PARAMETER popup (for a
Pattern track) (p. 15)
Velo (Template velocity)
These move the current track upward [F4](Move ▲)or
downward [F5](Move ▼)within the displayed list of
tracks.
IMPORT
When Type=Template, this specifies the strength of
velocity adjustment that will be applied by the template
selected by the Quantize Template parameter.
• [F4](Move ▲) / [F5](Move ▼)
SAMPLING
Popup
MASTERING
Current track
Strn (Strength)
DISK/USB
Explanation
• [F1](Output)
SYSTEM
Type
F-buttons
PROJECT
Type (Quantize type)
INSTRUMENTS AUDIO PHRASES
Explanation of each area
PATTERN
■ To access this screen
SONG
TRACK LIST (PLAY QUANTIZE) screen
EFFECTS
MIXER
MV-8800 Screen Guide
S-51
MV-8800_r_e.book 52 ページ 2006年11月10日 金曜日 午後12時49分
SONG
TEMPO TRACK screen
Here you can edit the tempo data and time signature data in the tempo track.
■ To access this screen
• [SONG] ➜ [MENU] ➜ select “Tempo Track” ➜
[F5](Select)
Explanation of each area
• [F2](Create)
Meas
Shows the locations at which the tempo will change, and
the region of measures to which that tempo data will be
applied.
Time Signature
Sets the time signature.
Range:
1–4–32 / 2, 4, 8, 16
Creates tempo data at the first beat of the measure
following the tempo data at the cursor.
• If the message “Tempo/Time signature event full” is
displayed, there is insufficient memory in the track that
records tempo and time signature data. No further data can
be recorded.
• [F3](Delete)
BPM
Sets the tempo of the sequencer in units of BPM (quarter
note beats per minute). In the example shown here, the
five measures starting at the beginning (measure 1) will
play at a time signature of 4/4 and a tempo of 120.0.
Range:
F-buttons
5.0–100.0–300.0
Deletes the tempo data at the cursor.
• [F4](Shift▲)
Moves the tempo data at the cursor and the tempo data
of subsequent measures together to the preceding
measure.
• [F5](Shift▼)
Moves the tempo data at the cursor and the tempo data
of preceding measures together to the next measure.
S-52
MV-8800 Screen Guide
MV-8800_r_e.book 53 ページ 2006年11月10日 金曜日 午後12時49分
SONG
SONG
VIEW FILTER popup
Here you can select the MIDI events that you want to view or edit in the SONG, PATTERN, SEQUENCE
EDIT, and EVENT LIST EDIT screens.
• [SONG] or [PATTERN] ➜ [MENU] ➜ select “View
Filter” ➜ [F5](Select)
• [SONG] or [PATTERN] ➜ [F5](Seq Edit) ➜ [MENU]
➜ select “View Filter” ➜ [F5](Select)
Explanation of each area
MIDI data with a ✔ mark will be displayed. Your editing
will affect only the displayed events. If you remove the ✔
mark, those events will not be displayed or edited.
Note
Explanation
Change
Explanation
All
Accept all control change numbers.
Except
Accept all control changes except for the range
specified by Range.
Only
Accept only the control changes in the
specified Range.
Control changes. Data that applies various
effects (e.g., modulation) according to the
control number.
Program changes. Data that selects sounds
(patches).
Pitch bend. Data that changes the pitch.
Tune
Request
This MIDI message causes an analog
synthesizer to tune itself.
Mode
Message
Mode Messages are messages that switch
the MIDI channel mode.
System
Exclusive
System exclusive messages.
Audio
Event
Audio events (performance data of audio
phrases, or audio data directly recorded) on
audio tracks.
They are displayed on the SONG screen,
PATTERN screen and SEQUENCE EDIT
screen.
Value (lower limit): 0–119
Value (upper limit): 0–119
• The Ctrl Change parameter and Ctrl Change Range
parameter are valid if there is a ✔ mark for the Filter
parameter Ctrl Change.
SAMPLING
Pitch
Bend
This parameter lets you limit the control change values
that will be received. This parameter works in
conjunction with the Ctrl Change parameter.
MASTERING
Channel
Channel aftertouch. Data that applies
Aftertouch aftertouch to an entire channel.
Ctrl Change Range (Control change range)
DISK/USB
Program
Value
Note messages. Data that plays notes.
Poly
Polyphonic aftertouch. Data that applies
Aftertouch aftertouch independently to an individual key.
Control
Change
Of the control change messages, you can limit the range
of control change numbers that will be displayed.
SYSTEM
Parameter
Ctrl Change (Control change)
PROJECT
Filter
INSTRUMENTS AUDIO PHRASES
• [SONG] or [PATTERN] ➜ select a MIDI track as the
current track ➜ [F3](Event List) ➜ [F5](View Filter)
PATTERN
■ To access this screen
F-buttons
• [F1](All On)
IMPORT
Turns the ✔ mark on for all parameters.
• [F2](All Off)
Turns the ✔ mark off for all parameters.
• [F3](On/Off)
EFFECTS
Turns the ✔ mark on/off for an individual parameter.
MIXER
MV-8800 Screen Guide
S-53
MV-8800_r_e.book 54 ページ 2006年11月10日 金曜日 午後12時49分
SONG
ADD MIDI TRACKS popup
This lets you add MIDI tracks.
■ To access this screen
• [SONG] or [PATTERN] ➜ [MENU] ➜ select “Add
MIDI Tracks...” ➜ [F5](Select)
Explanation of each area
Number of Tracks
Specifies the number of tracks that will be added. This
lets you create more than one track at once.
Range:
1–128
(in Pattern mode, the maximum is 64)
F-buttons
• [F1](Name)
Displays the EDIT NAME popup (p. 3), where you can
edit the name of the current track.
• [F5](Execute)
Adds the MIDI track(s).
Output Assign
Specifies the part to which MIDI data recorded on the
track will be output.
Value
Explanation
Off
No output.
1–16
Instrument part 1–16
MFX
MFX (Analog modeling bass and effect
parameter adjustments)
Pix Jam
Pix jam (Switch image clips)
Mixer AUX1–4 Mixer channel (AUX1–4)
Mixer DlyCho
Mixer channel (delay/chorus)
Mixer Reverb
Mixer channel (reverb)
Mixer A.Phrs
Mixer channel (audio phrase)
Mixer input
Mixer channel (input)
Mixer AMix
Mixer channel (audio track)
MIDI
Specifies the MIDI connector and channel from which
data recorded on the MIDI track will be output.
Range:
Off, A-1–A-16, B-1–B-16, R-1–R-16
New Track No.
Displays the track number that will be newly added, and
the name assigned to the track.
S-54
MV-8800 Screen Guide
• The track(s) will be added below the current track.
MV-8800_r_e.book 55 ページ 2006年11月10日 金曜日 午後12時49分
SONG
SONG
ADD AUDIO TRACKS popup
This lets you add audio tracks.
• [SONG] ➜ [MENU] ➜ select “Add Audio Tracks...” ➜
[F5](Select)
Specifies the number of tracks that will be added. This
lets you create more than one track at once.
Range:
1–8
F-buttons
• [F1](Name)
Displays the EDIT NAME popup (p. 3), where you can
edit the name of the current track.
PROJECT
Number of Tracks
INSTRUMENTS AUDIO PHRASES
Explanation of each area
PATTERN
■ To access this screen
• [F5](Execute)
Specifies the bus (audio signal route) to which audio
events recorded on the track will be output.
Explanation
No output.
AUX1–AUX4
AUX bus 1–4
MLT1–MLT8
Multi output bus 1–8 (mono)
MLT1/2–MLT7/8
Multi output bus 1/2–7/8 (stereo)
• The track(s) will be added below the current track.
DISK/USB
Value
Mix
SYSTEM
Adds the audio track(s).
Output Assign
MASTERING
Track number and track name
Displays the number and name of the current track.
SAMPLING
IMPORT
EFFECTS
MIXER
MV-8800 Screen Guide
S-55
MV-8800_r_e.book 56 ページ 2006年11月10日 金曜日 午後12時49分
SONG
DELETE TRACKS popup
Specify the range of tracks that you want to delete.
■ To access this screen
• [SONG] or [PATTERN] ➜ [MENU] ➜ select “Delete
Tracks...” ➜ [F5](Select)
Explanation of each area
Delete From
• [F5](Execute)
Deletes the specified track(s).
To
Specify the range of track(s) (Delete From—To) that you
want to delete.
Range:
S-56
F-button
1–137
(in Pattern mode, the maximum is 65)
MV-8800 Screen Guide
MV-8800_r_e.book 57 ページ 2006年11月10日 金曜日 午後12時49分
SONG
SONG
MARKER popup
Here you can add or delete markers.
PATTERN
■ To access this screen
• [SONG] ➜ [MENU] ➜ select “Marker” ➜
[F5](Select)
Lists the markers in the song. The marker selected by
the cursor is highlighted.
Marker number
• [F3](Delete)
Deletes the marker at the cursor from the marker list.
• [F5](Jump)
Moves the current time to the location of the marker
selected by the cursor in the marker list.
SYSTEM
Markers are numbered consecutively. You can use up to
one hundred markers; 01–99.
F-buttons
PROJECT
Marker list
INSTRUMENTS AUDIO PHRASES
Explanation of each area
Time location
DISK/USB
Indicates the time location (measure/beat/tick) at which
the marker is assigned.
MASTERING
SAMPLING
IMPORT
EFFECTS
MIXER
MV-8800 Screen Guide
S-57
MV-8800_r_e.book 58 ページ 2006年11月10日 金曜日 午後12時49分
SONG
STEP TIME popup
Here you can specify the interval by which STEP [
][
] will change the time location.
■ To access this screen
• [SONG] or [PATTERN] ➜ [MENU] ➜ select “Step
Time” ➜ [F5](Select)
Explanation of each area
F-button
• [F5](Close)
Step Time
Specifies the unit of time by which STEP [
move.
Range:
S-58
(30),
(40),
(160),
(240),
(640),
(960),
MV-8800 Screen Guide
(60),
(80),
]/[
(120),
(320), (480),
(1920),
(3840)
] will
Closes the STEP TIME popup (this popup).
MV-8800_r_e.book 59 ページ 2006年11月10日 金曜日 午後12時49分
SONG
SONG
LOCATOR popup
Here you can manage locator points.
PATTERN
■ To access this screen
• [LOCATOR]
Lists the locator points assigned in the song. The locator
point selected by the cursor is highlighted.
Locator number
Time
Locator name
Displays the name assigned to each locator point.
Stores the current time to the locator number at the
cursor. If you store to a locator number that already has
been used, the previous time location will be overwritten.
• [F2](Clear)
Deletes the locator at the cursor location from the locator
list.
• [F3](Edit)
Displays the EDIT LOCATOR popup. This allows you to
edit the time location of an existing locator point.
• [F4](Name)
• [F5](Jump)
Moves the current time to the location of the locator point
selected by the cursor in the list.
MASTERING
Displays the EDIT NAME popup (p. 3), allowing you to
edit the locator name.
DISK/USB
Displays the time location (measure/beat/tick) at which
the locator point is assigned.
• [F1](Set Now)
SYSTEM
Locator points are displayed in numerical order. You can
use ten points; 0–9.
F-buttons
PROJECT
Locator list
INSTRUMENTS AUDIO PHRASES
Explanation of each area
SAMPLING
IMPORT
EFFECTS
MIXER
MV-8800 Screen Guide
S-59
MV-8800_r_e.book 60 ページ 2006年11月10日 金曜日 午後12時49分
SONG
JUMP popup
Here you can make the current time location jump directly to a location you specify.
■ To access this screen
• [SHIFT] + [JUMP]
Explanation of each area
Jump
Input a time location (measure/beat/tick) and jump to that
location.
• You can edit the value highlighted by the cursor. In addition
to using the VALUE dial, you can use [DEC]/[INC] or the
numeric keys for input.
• You can use the [JUMP]+VALUE dial to move in steps of
one tick.
S-60
MV-8800 Screen Guide
F-button
• [F5](Close)
Closes the JUMP popup (this popup).
MV-8800_r_e.book 61 ページ 2006年11月10日 金曜日 午後12時49分
SONG
SONG
EVENT ERASE popup
This lets you erase specific note events while recording.
PATTERN
■ To access this screen
• (Recording) [EVENT ERASE]
INSTRUMENTS AUDIO PHRASES
Explanation of each area
F-button
PROJECT
• [F5](Close)
Mode
Selects the way in which note events will be deleted.
Explanation
Direct
Only the note events of the pads you hold
down will be erased.
Range
Events will be erased for all pads between
(and including) the pads you hold down.
SYSTEM
Value
Closes the EVENT ERASE popup (this popup).
DISK/USB
• During recording, you can hold down [EVENT ERASE] to
switch to Event Erase mode. While holding down [EVENT
ERASE], press and hold the pad(s) corresponding to the
note event(s) you want to delete; note events that occur
during this time will be deleted.
MASTERING
SAMPLING
IMPORT
EFFECTS
MIXER
MV-8800 Screen Guide
S-61
MV-8800_r_e.book 62 ページ 2006年11月10日 金曜日 午後12時49分
SONG
STEP REC screen
Here you can use the pads to record note data on a MIDI track.
■ To access this screen
• select a MIDI track as the current track ➜
[SHIFT] + [REC (
Explanation of each area
Velocity
Indicates the velocity of the note event. The velocity is
shown as a pair with the note event; a longer bar
indicates a stronger velocity.
Step Time
Specifies the note value of the notes you will input.
Range:
(30),
(40),
(60),
(80),
(160),
(240),
(320),
(640),
(960),
(1920),
)]
(120),
(480),
F-buttons
(3840)
• [F1](Back Step)
• You can change the step time by pressing [
(numeric keys).
(1)] – [
(9)]
Dot (dotted note)
This lets you add a dot to the note value specified by the
Step Time parameter.
Dot
Length relative to the specified Step Time value
None
1x (Step Time is used without change)
1(.)
1.5x (1.5 times the Step Time)
2(..)
1.75x (1.75 times the Step Time)
Duration
Specifies the actual length of the note, as a percentage
of the note value you specified for Step Time.
Range:
1%–200%
Velocity
Specifies the strength of the note.
Range:
Real, 1–127
Note number (keyboard)
The note numbers (keys) are shown from bottom to top.
Since the actual pitches correspond to the note numbers,
the displayed location of the note tells you the pitch.
Piano roll
This shows the note events. The horizontal axis is time,
and the vertical axis is note number (pitch). The range of
shown note changes by inputting the note number.
S-62
MV-8800 Screen Guide
Reverts the preceding input.
• [F3](Tie)
Connects (extends) the event at the current time to the
next step.
• [F5](Rest)
Inputs a rest (silence).
• During step recording, you can press [REC ( )] to make
the REC indicator (red) blink. In this state, pressing the
pads will not record anything. This is a convenient way for
you to check the sound produced by each pad.
MV-8800_r_e.book 63 ページ 2006年11月10日 金曜日 午後12時49分
SONG
SONG
AUDIO PHRASE STEP REC screen
Here you can use the pads to record onto an audio track.
PATTERN
■ To access this screen
• select an audio track as the current track ➜
[SHIFT] + [REC (
INSTRUMENTS AUDIO PHRASES
Explanation of each area
No. (track number and icon)
Specifies the note value of the notes you will input.
(30),
(40),
(60),
(80),
PROJECT
Shows the number of the tracks recorded in the
sequencer. The icon at the right of the track number
shows the type of track.
Step Time
Range:
)]
(120),
(240),
(320),
(480),
(640),
(960),
(1920),
(3840), Meas, Phrase
Icon
Explanation
MIDI track
SYSTEM
(160),
Audio track
• You can change the step time by pressing [
(numeric keys).
(1)] – [
Pattern track
(9)]
This lets you add a dot to the note value specified by the
Step Time parameter.
Length relative to the specified Step Time value
• The line of the track number selected by the cursor is
highlighted. This track is called the “current track.”
Track Name
Shows the name assigned to each track.
None
1x (Step Time is used without change)
Play List
1(.)
1.5x (1.5 times the Step Time)
2(..)
1.75x (1.75 times the Step Time)
The boxes show the existence of data recorded in each
track.
Specifies the actual length of the note, as a percentage
of the note value you specified for Step Time.
Range:
1%–100%
F-buttons
• [F1](Back Step)
Velocity
Real, 1–127
Reverts the preceding input.
IMPORT
Specifies the strength of the note.
Range:
A gray box is shown for data that contains no note
events.
SAMPLING
Duration
MASTERING
Dot
DISK/USB
Dot (dotted note)
• [F3](Tie)
Connects (extends) the event at the current time to the
next step.
EFFECTS
• [F5](Rest)
Inputs a rest (silence).
MV-8800 Screen Guide
S-63
MIXER
• During step recording, you can press [REC ( )] to make
the REC indicator (red) blink. In this state, pressing the
pads will not record anything. This is a convenient way for
you to check the sound produced by each pad.
MV-8800_r_e.book 64 ページ 2006年11月10日 金曜日 午後12時49分
SONG
INSERT MEASURE popup
This lets you insert blank measures.
■ To access this screen
• [SONG] or [PATTERN] ➜ [F5](Seq Edit) ➜ [MENU]
➜ select “Insert Measure...” ➜ [F5](Select)
Explanation of each area
• [F5](Execute)
To
Specify the measure number at which you want to insert
measures.
Range:
current measure number–9999
For
Specify the number of blank measures.
Range:
1–9999
Time Signature
Specify the time signature of the measures you want to
insert.
Range:
The same time signature as the preceding
measure, 1–32 / 2, 4, 8, 16
Tempo Track / Marker / Locator
Specify whether the Insert Measure operation will affect
the tempo track, locators, and markers.
Value
Explanation
Off
The time location of tempo change events,
markers, and locators will not change when you
insert measures.
On (✔)
The time location of tempo change events,
markers, and locators located after the point where
you inserted the blank measures will change
according to the number of measures you inserted.
• The Tempo Track check box can be selected if the tempo
track is enabled.
• To turn the tempo track on/off, press [BPM/TAP] to access
the BPM/TAP popup window, and use [F5](T.Track On)
[F5](T.Track Off) to switch the setting.
• You can’t set these options in Pattern mode.
S-64
F-button
MV-8800 Screen Guide
Insert the blank measures.
MV-8800_r_e.book 65 ページ 2006年11月10日 金曜日 午後12時49分
SONG
SONG
DELETE MEASURE popup
This lets you delete measures.
• [SONG] or [PATTERN] ➜ [F5](Seq Edit) ➜ [MENU]
➜ select “Delete Measure...” ➜ [F5](Select)
INSTRUMENTS AUDIO PHRASES
Explanation of each area
F-button
PROJECT
• [F5](Execute)
From
Specify the number of the first measure you want to
delete.
PATTERN
■ To access this screen
Delete the specified region of measures.
Length
SYSTEM
Specify the number of measures that you want to delete,
starting with the measure specified by From.
Range:
1–9999
Tempo Track / Marker / Locator
DISK/USB
Specify whether the Insert Measure operation will affect
the tempo track, locators, and markers.
Off
The time location of tempo change events,
markers, and locators will not change when you
insert measures.
On (✔)
The time location of tempo change events,
markers, and locators located after the point where
you inserted the blank measures will change
according to the number of measures you inserted.
SAMPLING
Explanation
MASTERING
Value
• The Tempo Track check box can be selected if the tempo
track is enabled.
IMPORT
• To turn the tempo track on/off, press [BPM/TAP] to access
the BPM/TAP popup window, and use [F5](T.Track On)
[F5](T.Track Off) to switch the setting.
• You can’t set these options in Pattern mode.
EFFECTS
MIXER
MV-8800 Screen Guide
S-65
MV-8800_r_e.book 66 ページ 2006年11月10日 金曜日 午後12時49分
SONG
SPLIT NOTES popup
This lets you extract specific note events from the note events recorded in a track, and move them to a
different track.
■ To access this screen
• [SONG] or [PATTERN] ➜ [F5](Seq Edit) ➜ specify
the editing region ➜ [F5](Command) ➜ select “Split
Notes...” ➜ [F5](Select)
Explanation of each area
• [F5](Execute)
Note Range
Specifies the range of note numbers that you want to
extract.
Range:
0 (C-)–127 (G 9)
Type
Specifies how you want to handle the track from which
the note events are extracted.
Value
Explanation
Move
The notes will be moved to the other track. Notes
within the specified Note Range will be deleted
from the source track.
Copy
The notes will be copied to the other track. The
specified notes will remain in the source track.
Send To
Specifies how the extracted note events will be stored.
Value
Explanation
Separate
TracksByPitch
A track will be created for each identical
note.
One Track
The extracted note events will be pasted into
the track you specify by the Track
parameter.
One New Track
A new track will be created, and the
extracted note events will be pasted into it.
Track
Specifies the track number into which the extracted note
events will be placed. This is valid if the Send To
parameter is set to One Track.
Range:
S-66
F-button
1–current track–137
(in Pattern mode, the maximum is 65)
MV-8800 Screen Guide
Extracts the specified note events and pastes them into
another track.
MV-8800_r_e.book 67 ページ 2006年11月10日 金曜日 午後12時49分
SONG
This allows you to enter automation data that changes smoothly in a specified region (Owner’s Manual;
p. 219).
PATTERN
■ To access this screen
Specifies the type of data that you want to enter.
Range:
Control Change, Channel Aftertouch,
Poly Aftertouch, Pitch Bend
Specifies the control change number that you want to
enter. This is valid if the Event parameter is set to
Control Change.
0:BankSel MSB–7:Volume–119:
Note
Range:
0 (C-)–60 (C 4)–127 (G 9)
-3, -2, -1, Linear, +1, +2, +3
Interval Time
Specifies the interval at which the continuous data will be
spaced. This is specified in units of ticks.
Range:
1 (--) –30 (
)–999 (--)
F-button
• [F5](Execute)
MASTERING
Specifies the note number to enter. This is valid if the
Event parameter is set to Poly Aftertouch.
Range:
DISK/USB
Range:
Specifies how the value will change from the starting
point to the ending point of the continuous data. The
graph at the right of this parameter will change according
to this setting.
Creates the continuous data.
Value From
0–127
Pitch Bend
-8192–0–8191
IMPORT
Explanation
Control Change
Channel Aftertouch
Poly Aftertouch
SAMPLING
Specifies the initial value at the starting point of the
continuous data. The range of this value will depend on
your choice of Event parameter.
Value
Value To
0–127
Pitch Bend
-8192–0–8191
MIXER
Explanation
Control Change
Channel Aftertouch
Poly Aftertouch
EFFECTS
Specifies the final value at the ending point of the
continuous data. The range of this value will depend on
your choice of Event parameter.
Value
SYSTEM
Number
Curve
PROJECT
Event
INSTRUMENTS AUDIO PHRASES
• Accesses the SELECT SEQUENCE EDIT
COMMAND popup (p. 34) ➜ select “Create
Continuous Data...” ➜ [F5](Select)
Explanation of each area
SONG
CREATE CONTINUOUS DATA popup
MV-8800 Screen Guide
S-67
MV-8800_r_e.book 68 ページ 2006年11月10日 金曜日 午後12時49分
SONG
CHANGE CONTINUOUS DATA popup
This allows you to modify continuous data in the specified region.
■ To access this screen
• Accesses the SELECT SEQUENCE EDIT
COMMAND popup (p. 34) ➜ select “Change
Continuous Data...” ➜ [F5](Select)
Explanation of each area
Event
Specifies the type of data that you want to edit.
Range:
Control Change, Channel Aftertouch,
Poly Aftertouch, Pitch Bend
Number
Specifies the control change number that you want to
edit. This is valid if the Event parameter is set to Control
Change.
Range:
Value
Explanation
Control Change
Channel Aftertouch
Poly Aftertouch
-99–0–99
Pitch Bend
-999–0–999
F-button
Specifies the range of note numbers that you want to
edit. This is valid if the Event parameter is set to Poly
Aftertouch.
Range (Lower limit):
0 (C-)–127 (G 9)
Range (Upper limit):
0 (C-)–127 (G 9)
Magnify
This parameter lets you increase or decrease the upper
and lower limits of the selected values. Settings of 101%
or higher will increase the amount of change. Settings of
99% or lower will decrease the amount of change. If this
parameter is set to 100%, the amount of change will stay
the same. For example, you would set this parameter to
50% if you want the difference between the maximum
and minimum data values to be half of their current state,
or to 200% if you want the difference to be double the
current state. Negative values for this parameter will
invert the upper and lower limits.
S-68
This parameter lets you increase or decrease the value
for the data by a fixed Bias amount you specify. The
range of this value will depend on your choice of Event
parameter.
0:BankSel MSB–7:Volume–119:
Note Range
Range:
Bias
-200%–100%–200%
MV-8800 Screen Guide
• [F5](Execute)
Applies the change to the specified region of data.
MV-8800_r_e.book 69 ページ 2006年11月10日 金曜日 午後12時49分
SONG
SONG
MERGE TRACKS popup
This merges (combines) the performance data recorded on multiple adjacent MIDI tracks into a single
track.
• [SONG] or [PATTERN] ➜ [MENU] ➜ select “Merge
Tracks...” ➜ [F5](Select)
Specifies the first (Source From) and last (Source To)
track numbers that you want to merge.
Range:
F-button
PROJECT
Source From / Source To
INSTRUMENTS AUDIO PHRASES
Explanation of each area
• [F5](Execute)
Merges the data into the specified MIDI track.
SYSTEM
1–current track–137
(in Pattern mode, the maximum is 65)
Merge To
Specifies the destination for the merged data.
Explanation
New
A new track will be created, and the merged
data will be placed in it.
1–137 *
The merged data will be placed in the track
number you specify.
DISK/USB
Value
MASTERING
* In Pattern mode, the maximum is 65.
Keep Source Tracks
Specifies whether the performance data in the tracks
specified by Source From/To will be preserved after the
merge operation.
Off
The performance data will be deleted from the
Source From/To tracks.
On (✔)
The performance data in the Source From/To
tracks will be preserved.
IMPORT
Explanation
SAMPLING
Value
Fix Quantize
Off
The performance data of Source From/To will
be placed in the destination track without
change (Play Quantize will not be applied).
On (✔)
The Play Quantize settings will be applied to
the performance data when placing it in the
Merge To track.
MIXER
Explanation
EFFECTS
Specifies whether the Play Quantize settings of the
merge-source tracks will be reflected when placing the
data in the merge-destination track.
Value
PATTERN
■ To access this screen
MV-8800 Screen Guide
S-69
MV-8800_r_e.book 70 ページ 2006年11月10日 金曜日 午後12時49分
SONG
BPM/TAP popup
Here you can specify the tempo of the sequencer.
■ To access this screen
• [BPM/TAP]
Explanation of each area
• [F5](T.Track On) / (T.Track Off)
BPM (Tempo)
Specifies the tempo of the sequencer in units of BPM
(the number of beats per minute of playback).
Range:
5.00–300.00
Tap
Specifies whether to use the Tap function.
Value
Explanation
Off
The Tap function will not be used.
On (✔)
When you successively strike [BPM/TAP] at
the desired playback tempo, the sequencer
will be set to the corresponding tempo.
Tap resolution
Specifies the note value corresponding to the interval at
which you strike [BPM/TAP] when using the Tap
function. The BPM (tempo) will be calculated according
to the intervals at which you strike [BPM/TAP], taken as
the note value you specify here.
Range:
(120),
(240),
(480)
Tempo Track On
The Tempo track is enabled if this indication is shown.
You can’t specify the tempo from this popup. In this
case, use the TEMPO TRACK screen (p. 52) to specify
the tempo.
S-70
MV-8800 Screen Guide
F-button
Turns the Tempo track on/off.
When you press [F5](T.Track On), the Tempo track will
be enabled and the sequencer will follow the settings in
the Tempo track.
If you press [F5](T.Track Off), the Tempo track will be
disabled, and the sequencer will follow the setting you
make in the BPM/TAP popup.
• In Pattern mode, this will be [F5] (Close), and the button
will close the BPM/TAP popup (this popup).
MV-8800_r_e.book 71 ページ 2006年11月10日 金曜日 午後12時49分
SONG
SONG
MUTE CONTROL TRACK screen
Here you can edit the track mute data recorded in the Mute Control track.
• [SONG] or [PATTERN] ➜ [MENU] ➜ select “Mute
Control Track” ➜ [F5](Select)
Explanation of each area
Shows the time location of the recorded mute control
events.
Track
Event list
Lists the mute control events recorded in the Mute
Control track.
• [F2](Erase)
Erases the event at the cursor position. At this time the
erased mute control event will be temporarily held in
internal memory.
• [F3](Copy)
Copies the mute control event at the cursor position
temporarily into internal memory.
• [F4](Paste)
Displays the PASTE EVENT popup (p. 26).
This allows you to paste the mute control event that was
stored in internal memory by the Erase or Copy
operation.
• [F5](Track Sel)
Displays the TRACK SELECT popup (p. 72).
SAMPLING
Use the cursor to select a mute control event, and press
the right cursor button to move the cursor to each
parameter. Press the left cursor button to move the
cursor to the time.
MASTERING
Shows the status (on/off) of the recorded mute control
events. Use the cursor to select a mute control event,
and press the right cursor button twice to highlight the
mute indication. Now you can change the mute setting.
Adds a mute control event.
DISK/USB
Mute
• [F1](Create)
SYSTEM
Shows the track number of the recorded mute control
events. Use the cursor to select a mute control event,
and press the right cursor button to highlight the track
number. Now you can change the track number.
PROJECT
Event Position
F-buttons
INSTRUMENTS AUDIO PHRASES
• [SHIFT] + [PAD BANKS] ➜ [MENU] ➜ select “Mute
Control Track” ➜ [F5](Select)
PATTERN
■ To access this screen
IMPORT
EFFECTS
MIXER
MV-8800 Screen Guide
S-71
MV-8800_r_e.book 72 ページ 2006年11月10日 金曜日 午後12時49分
SONG
TRACK SELECT popup
Here you can specify the tracks for which the mute data recorded in the Mute Control track will be shown
in the MUTE CONTROL TRACK screen (p. 71).
■ To access this screen
• [SONG] ➜ [MENU] ➜ select “Mute Control Track” ➜
[F5](Select) ➜ [F5](Track Sel)
• [SHIFT]+[PAD BANKS] ➜ [MENU] ➜ select “Mute
Control Track” ➜ [F5](Select) ➜ [F5](Track Sel)
Explanation of each area
Mode
Specifies whether the MUTE CONTROL TRACK screen
(p. 71) will show mute data for all tracks or for only the
single track you specify.
Value
Explanation
All
Mute control messages of all tracks will be
shown.
One Track
Limit the display to a single track.
Track
Specifies the track that will be shown. This is valid if the
Mode parameter is set to One Track.
S-72
MV-8800 Screen Guide
MV-8800_r_e.book 73 ページ 2006年11月10日 金曜日 午後12時49分
SONG
SONG
DRUM GRID screen
Here you can enter note events by note number (rows) and time (columns).
• [SONG] or [PATTERN] ➜ select a MIDI track as the
current track ➜ [MENU] ➜ select “Drum Grid” ➜
[F5](Select)
Indicates the time value of the notes you will enter.
You can make this setting in the RECORDING
PARAMETER popup (for the drum grid) (p. 74).
Indicates the actual duration (%) of the entered notes
relative to the note value entered in Step Time.
Pad Velocity
43–84
85–126
127
F-buttons
• [F1](16Notes)
Sets the input mode to 16Notes. Velocity pad numbers
will correspond to different note numbers. This allows
you to enter sixteen different note numbers at the
selected time location.
• [F2](16Grid)
Sets the input mode to 16Grid. Velocity pad numbers will
correspond to different step times. This allows you to
enter events of a single note number at sixteen different
steps.
• [F4](REC Param)
Grid Velocity
Range:
---, 1–127
1-01–6-16
• [F5](Solo)
Turns the Solo setting on/off for the current track.
• [MENU]
Displays the MENU popup.
EFFECTS
Indicates the sound assigned to each velocity pad. The
numbers shown indicate the pad bank number and the
velocity pad number.
Displays the RECORDING PARAMETER popup (for the
drum grid) (p. 74).
IMPORT
Modifies the velocity of the note events you enter. If you
set this to ---, that note event will not sound. (The note
event will be deleted.)
SAMPLING
You can make this setting in the RECORDING
PARAMETER popup (for the drum grid) (p. 74).
1–42
MASTERING
Indicates the strength of the notes entered by the
velocity pads. With a setting of 1–127, the notes will be
entered with the corresponding fixed velocity value. If
you choose the Real setting, the notes will be entered
with a velocity value corresponding to the force with
which you actually strike the pad.
0
Drum grid
display
DISK/USB
You can make this setting in the RECORDING
PARAMETER popup (for the drum grid) (p. 74).
Velocity
SYSTEM
Duration
Drum grid
Here you can enter note events and their velocities. The
indication will change according to the velocity of the
note events you enter.
PROJECT
Step Time
INSTRUMENTS AUDIO PHRASES
Explanation of each area
PATTERN
■ To access this screen
Menu item
1 Track Parameter
MV-8800 Screen Guide
S-73
MIXER
Displays the TRACK PARAMETER popup (for a MIDI
track) (p. 11).
MV-8800_r_e.book 74 ページ 2006年11月10日 金曜日 午後12時49分
SONG
RECORDING PARAMETER popup (for the drum grid)
Here you can set parameters that specify how notes will be recorded in the drum grid.
■ To access this screen
• [SONG] or [PATTERN] ➜ select a MIDI track as the
current track ➜ [MENU] ➜ select “Drum Grid” ➜
[F5](Select) ➜ [F4](REC Param)
Explanation of each area
F-button
• [F5](Close)
Step Time
Specifies the time value of the notes you will enter.
Range:
(30),
(40),
(60),
(80),
(160),
(240),
(320),
(640),
(960),
(1920),
(120),
(480),
(3840)
Pad Velocity
Specifies the strength of the notes entered by the
velocity pads.
With a setting of 1–127, the notes will be entered with the
corresponding fixed velocity. If you choose the Real
setting, the notes will be entered with a velocity value
corresponding to the force with which you actually strike
the pad.
Range:
Real, 1–127
Duration
Specifies the actual duration (%) of the entered notes
relative to the Step Time.
Range:
S-74
1%–80%–200%
MV-8800 Screen Guide
Closes the RECORDING PARAMETER popup (for the
drum grid) (this popup).
MV-8800_r_e.book 75 ページ 2006年11月10日 金曜日 午後12時49分
SONG
SONG
TRACK MUTE screen
Here you can use the velocity pads to switch the Mute status of each track.
PATTERN
■ To access this screen
• [SHIFT] + [PAD BANKS]
INSTRUMENTS AUDIO PHRASES
Explanation of each area
F-buttons
PROJECT
• [F1](Mute)
Track Bank
Displays the TRACK MUTE screen (this screen).
The up to 137 tracks in a song and the up to 65 tracks in
a pattern are divided into groups of sixteen tracks, called
“track banks.” One track bank lets you switch the mute
status for a bank of sixteen tracks.
• [F2](Solo)
Range:
• [F4](All Mute Off)
SYSTEM
1–9 (song), 1–5 (pattern)
Displays the TRACK SOLO screen (p. 76).
Defeats muting for all tracks.
Track bank list
Shows the status of all tracks.
•
[F5](All Solo Off)
DISK/USB
Defeats solo for all tracks.
Normal Track muted
• [MENU]
Displays the MENU popup.
Shows the mute/solo status.
Explanation
Normal track.
1 Track Mute Setup
SAMPLING
Velocity Pad
MASTERING
Menu items
Velocity pads
Displays the TRACK MUTE SETUP popup (p. 77).
2 Mute Control Track
Displays the MUTE CONTROL TRACK screen (p. 71).
IMPORT
Track mute is on. The velocity pad is
shown in dark grey, and the MUTE
icon will appear.
EFFECTS
Track Solo is on. The velocity pads
are shown in white, and the SOLO
icon is displayed.
MIXER
Other tracks have been muted
(silenced) by Solo playback. The
velocity pads are shown in dark gray.
MV-8800 Screen Guide
S-75
MV-8800_r_e.book 76 ページ 2006年11月10日 金曜日 午後12時49分
SONG
TRACK SOLO screen
Here you can use the velocity pads to switch the Solo status of each track.
■ To access this screen
• [SHIFT] + [PAD BANKS] ➜ [F2](Solo)
Explanation of each area
F-buttons
• [F1](Mute)
Track Bank
Displays the TRACK MUTE screen (p. 75).
The up to 137 tracks in a song and the up to 65 tracks in
a pattern are divided into groups of sixteen tracks, called
“track banks.” One track bank lets you switch the solo
status for a bank of sixteen tracks.
• [F2](Solo)
Range:
• [F3](All Mute Off)
1–9 (song), 1–5 (pattern)
Displays the TRACK SOLO screen (this screen).
Defeats muting for all tracks.
Track bank list
• [F4](All Solo Off)
Shows the status of all tracks.
Defeats solo for all tracks.
Tracks muted by Track Solo
Track Solo
Velocity pads
Shows the mute/solo status.
Velocity Pad
Explanation
Normal track.
Track mute is on. The velocity pad is
shown in dark grey, and the MUTE
icon will appear.
Track Solo is on. The velocity pads
are shown in white, and the SOLO
icon is displayed.
Other tracks have been muted
(silenced) by Solo playback. The
velocity pads are shown in dark gray.
S-76
MV-8800 Screen Guide
MV-8800_r_e.book 77 ページ 2006年11月10日 金曜日 午後12時49分
SONG
SONG
TRACK MUTE SETUP popup
Here you can make settings for the mute control track.
• [SHIFT] + [PAD BANKS] ➜ [F1](Mute) ➜ [MENU]
➜ select “Track Mute Setup” ➜ [F5](Select)
INSTRUMENTS AUDIO PHRASES
Explanation of each area
PROJECT
Mute Control Track
Specifies whether to enable the dedicated track for
controlling mute operations (the Mute Control track).
Range:
PATTERN
■ To access this screen
Off, On
SYSTEM
DISK/USB
MASTERING
SAMPLING
IMPORT
EFFECTS
MIXER
MV-8800 Screen Guide
S-77
MV-8800_r_e.book 78 ページ 2006年11月10日 金曜日 午後12時49分
SONG
SONG MENU screen
In this menu screen you can choose various song-related items.
■ To access this screen
• [SONG] ➜ [F1](Song Menu)
Explanation of each area
F-buttons
SONG PARAMETER
Displays the SONG PARAMETER screen (p. 79).
SYNC
Displays the SYNC screen (p. 81).
CREATE NEW SONG
Displays the CREATE NEW SONG screen (p. 83).
SELECT SONG
Displays the SELECT SONG screen (p. 85).
DELETE SONG
Displays the DELETE SONG screen (p. 86).
COPY AS NEW SONG
Displays the COPY AS NEW SONG popup (p. 87).
SAVE AS SMF
Displays the SAVE SONG AS SMF popup (p. 88).
LOAD SONG
Displays the LOAD SONG screen (p. 89).
• The F-buttons will change depending on the location of the
cursor.
■ If the cursor is in the upper line
• [F1](SongParam)
Displays the SONG PARAMETER screen (p. 79).
• [F2](Sync)
Displays the SYNC screen (p. 81).
• [F3](CreateNew)
Displays the CREATE NEW SONG screen (p. 83).
• [F4](SelectSong)
Displays the SELECT SONG screen (p. 85).
• [F5](DeleteSong)
Displays the DELETE SONG screen (p. 86).
■ If the cursor is in the lower line
• [F1](CopyAsNew)
Displays the COPY AS NEW SONG popup (p. 87).
• [F2](SaveAsSMF)
Displays the SAVE SONG AS SMF popup (p. 88)
• [F3](LoadSong)
Displays the LOAD SONG screen (p. 89).
S-78
MV-8800 Screen Guide
MV-8800_r_e.book 79 ページ 2006年11月10日 金曜日 午後12時49分
SONG
SONG
SONG PARAMETER screen
Here you can make settings for the current song.
• [SONG] ➜ [F1](Song Menu) ➜ move the cursor to
the upper line of icons ➜ [F1](SongParam)
Tempo Track
Specifies whether the Tempo track (a track that contains
tempo and time signature data) will be used.
Explanation
Off
The Tempo & Time Signature track will not be
used. The song will play according to the Song
parameter settings BPM and Time Signature.
On
The Tempo & Time Signature track will be
used. The BPM and time signature of the song
will change according to the data in this track.
* You can’t use [BPM/TAP] to set the tempo.
Song Name
This is the name of the song.
Comment
BPM (Song tempo)
Specifies the tempo of the song.
Range:
Enables or disables the special track that records mute
operations (the Mute Control track).
Range:
Off, On
MASTERING
• To input the Song Name, press [F1](Name) to access the
EDIT NAME popup (p. 3). To input the Comment, press
[F2](Comment) to access the EDIT COMMENT popup (p.
80).
Mute Control Track
DISK/USB
This is a comment you can add to the song. You can add
a comment of up to fifty characters to each song.
SYSTEM
Value
PROJECT
Song No. (Song number)
This is the song number. The MV-8800 can have up to
16 songs in each project, and these songs are numbered
1–16.
INSTRUMENTS AUDIO PHRASES
Explanation of each area
PATTERN
■ To access this screen
Sequence Memory
Indicates the amount of memory
available for recording data.
5.00–100.00–300.00
used
Specifies the time signature of the song, in terms of the
number of notes in a measure and their note value.
Explanation
Number
1–4–32
Type
2 (half notes), 4 (quarter notes), 8 (eighth
notes), 16 (sixteenth notes)
free
F-buttons
IMPORT
Value
SAMPLING
Time Signature
• [F1](Name)
Displays the EDIT NAME popup (p. 3).
• [F2](Comment)
EFFECTS
Displays the EDIT COMMENT popup (p. 80).
MIXER
MV-8800 Screen Guide
S-79
MV-8800_r_e.book 80 ページ 2006年11月10日 金曜日 午後12時49分
SONG
EDIT COMMENT popup
Here you can add a comment to the current song.
■ To access this screen
• [SONG] ➜ [F1](Song Menu) ➜ move the cursor to
the upper line of icons ➜ [F1](SongParam) ➜
[F2](Comment)
Explanation of each area
Comment
Add a comment or note to the song. You can input a
comment up to fifty characters long.
☞ For details on inputting characters, refer to “Inputting text”
(Owner’s Manual; p. 33).
• You may omit the comment if you wish.
F-buttons
• [F2](Insert Space)
Inserts a space at the cursor location.
• [F3](Delete)
Deletes the character at the cursor location.
• [F4](A➜a/a➜A)
Switches the character at the cursor location between
uppercase and lowercase.
• [F5](OK)
Finalizes the comment and closes the EDIT COMMENT
popup (this popup).
S-80
MV-8800 Screen Guide
MV-8800_r_e.book 81 ページ 2006年11月10日 金曜日 午後12時49分
SONG
SONG
SYNC screen
Here you can make synchronization settings.
• [SONG] ➜ [F1](Song Menu) ➜ move the cursor to
the upper line of icons ➜ [F2](Sync)
Explanation
MASTER
The MV-8800 will operate according to
its own internal clock (Master
operation).
Slave-MIDI (MIDI)
Explanation
Master
The MV-8800 will transmit MMC to control
other connected devices.
Slave (MIDI)
The MV-8800 will receive and be
controlled by MMC transmitted by another
connected device.
Slave (R-BUS)
MMC Output
Specifies the connector from which MMC will be output
(transmitted) when MMC Mode = Master.
The MV-8800 will receive MIDI clock
data at its R-BUS connector, and
operate as a Slave.
Parameters
Value
Slave-MTC (MIDI)
The MV-8800 will receive MTC data at
its MIDI IN connector, and operate as
a Slave.
MIDI OUT A
Off (not transmitted) / On (transmitted)
MIDI OUT B
Off (not transmitted) / On (transmitted)
The MV-8800 will receive MTC data at
its R-BUS connector, and operate as a
Slave.
R-BUS
Off (not transmitted) / On (transmitted)
Slave-MTC (R-BUS)
Remote (R-BUS)
The MV-8800 will receive Start, Stop,
and Continue messages at its R-BUS
connector, and will be remotely
controlled by these messages.
MIDI Clock Output
Specifies the format of the MTC transmitted (output) by
the MV-8800.
Value
Explanation
30
30 frames per second
29.97ND
29.97 frames per second, non-drop
29.97D
29.97 frames per second, drop-frame
25
25 frames per second
24
24 frames per second
IMPORT
The MV-8800 will receive Start, Stop,
and Continue messages at its MIDI IN
connector, and will be remotely
controlled by these messages.
Off (not transmitted) / On (transmitted)
MIDI OUT B
Off (not transmitted) / On (transmitted)
R-BUS
Off (not transmitted) / On (transmitted)
MIXER
Value
MIDI OUT A
EFFECTS
Specifies whether MIDI clock data will be transmitted
from MIDI OUT A, MIDI OUT B, and R-BUS when Sync
Mode = Master.
Parameters
SAMPLING
Remote (MIDI)
MTC Frame Rate
MASTERING
Slave-MIDI (R-BUS)
DISK/USB
The MV-8800 will receive MIDI clock
data at its MIDI IN connector, and
operate as a Slave.
Value
SYSTEM
Parameters
MMC Mode
Specifies the device that will be remotely controlled via
MMC (MIDI Machine Control).
PROJECT
Sync Mode
Specifies how external devices will synchronize with the
MV-8800.
INSTRUMENTS AUDIO PHRASES
Explanation of each area
PATTERN
■ To access this screen
MV-8800 Screen Guide
S-81
MV-8800_r_e.book 82 ページ 2006年11月10日 金曜日 午後12時49分
Error Level
This specifies the interval at which the MTC reception
status is checked. This setting is valid if the Sync Mode
is set to Slave-MTC (MIDI) or Slave-MTC (R-BUS).
Range:
0–5–10 (increasing this setting lengthens the
time interval between checking)
• Synchronized operation will halt if the reception status
check determines that there is a communication problem.
Increasing this setting may allow synchronized operation to
continue even if slight problems occur with MTC reception.
Offset Time
Specifies the time difference between the sequencer
time and the MTC timing when the MV-8800 is
MTC-synchronized from an external device.
Range:
00h00m00s00f–23h59m59s##f
• The equation is as follows.
Setting = (MTC time) - (song time when MTC was
received)
If this calculation would result in a negative value, it will be
performed as:
Setting = (MTC time) + 24:00:00:00 - (song time when
MTC was received)
• ** will depend on the setting of the MTC Frame Rate
parameter.
MTC Output
Specifies whether MTC will be transmitted from MIDI
OUT A, MIDI OUT B, and R-BUS if the Sync Mode
parameter is set to Master.
S-82
Parameters
Value
MIDI OUT A
Off (not transmitted) / On (transmitted)
MIDI OUT B
Off (not transmitted) / On (transmitted)
R-BUS
Off (not transmitted) / On (transmitted)
MV-8800 Screen Guide
MV-8800_r_e.book 83 ページ 2006年11月10日 金曜日 午後12時49分
SONG
SONG
CREATE NEW SONG screen
Here you can create a new song within the current project.
• [SONG] ➜ [F1](Song Menu) ➜ move the cursor to
the upper line of icons ➜ [F3](CreateNew)
INSTRUMENTS AUDIO PHRASES
Explanation of each area
Time Signature
Specifies the time signature of the song, in terms of the
number of notes in a measure and their note value.
Explanation
Number
1–4–32
Type
2 (half notes), 4 (quarter notes), 8 (eighth
notes), 16 (sixteenth notes)
Song Name
Track Layout
Several basic track configurations are provided for your
convenience. You can use these to create a new song.
00 Current Song
This is a comment you can add to the song. You can add
a comment of up to fifty characters to each song.
Create a song with the same track
configuration as the current song.
01 Very Simple
Create a song with one MIDI track and
one audio track.
02 MIDI Sequencer
Create a song with sixteen MIDI tracks.
03 Audio Recorder
Create a song with eight audio tracks.
04 Basic
Create a song with sixteen MIDI tracks
and eight audio tracks.
05 User Template
A song will be created with the structure
saved in the user track template.
☞ “Using a user track template to
create a song” (Owner’s Manual;
p. 147)
• To input the Song Name, press [F1](Name) to access the
EDIT NAME popup (p. 3). To input the Comment, press
[F2](Comment) to access the EDIT COMMENT popup (p.
80).
Sequence Memory
free
IMPORT
used
BPM (Song tempo)
Specifies the tempo of the song in units of BPM (the
number of quarter-note beats in one minute).
Range:
SAMPLING
Explanation
MASTERING
Value
Comment
DISK/USB
This is the song name. When you access this screen, an
initial name of “Init Song ##” will be assigned as a
provisional name. (## will be a number that does not
conflict with an existing filename.)
SYSTEM
Value
PROJECT
Song No. (Song number)
This is the song number. The MV-8800 can have up to
sixteen songs in a project, and these are numbered 1–
16. When you access this screen, the lowest unused
song number will be assigned automatically.
Indicates the amount of data stored
in the DIMM, both numerically and
as a graph.
PATTERN
■ To access this screen
5.00–100.00–300.00
EFFECTS
MIXER
MV-8800 Screen Guide
S-83
MV-8800_r_e.book 84 ページ 2006年11月10日 金曜日 午後12時49分
Copy From Current Song
You can copy parameters or data from the current song
to a new song. Add a check mark ✔ to the parameters
that you want to copy.
Value
Explanation
Instruments
Instrument settings and samples
Effects
Effect (MFX, Dly/Cho, Rev) settings
• If you create a song without checking Instruments, all of the
instrument patches will be “Init Patch,” and there will be no
sound unless you change these settings.
• If you create the song without a check mark in Effects, the
settings of preset number 1 will be loaded from each effect
library.
S-84
MV-8800 Screen Guide
F-buttons
• [F1](Name)
Displays the EDIT NAME popup (p. 3).
• [F2](Comment)
Displays the EDIT COMMENT popup (p. 80).
• [F5](Execute)
Creates a song according to the parameters you
specified. The new song will become the current song,
and the SONG screen (p. 8) will appear.
MV-8800_r_e.book 85 ページ 2006年11月10日 金曜日 午後12時49分
SONG
SONG
SELECT SONG screen
Here you can change the current song by recalling the desired song.
• [SONG] ➜ [F1](Song Menu) ➜ move the cursor to
the upper line of icons ➜ [F4](SelectSong)
INSTRUMENTS AUDIO PHRASES
Explanation of each area
F-button
PROJECT
• [F5](Execute)
Song No. (Song number)
Shows the number of the song. The MV-8800 can have
up to sixteen songs in a project, and these are numbered
1–16.
PATTERN
■ To access this screen
Selects the song at which the cursor is located in the
song list, and the SONG screen (p. 8) will appear.
SYSTEM
Song Name
Shows the song name.
Comment
Shows the memo assigned to the song.
DISK/USB
Sequence Memory
used
MASTERING
Indicates the amount of data stored
in the DIMM, both numerically and
as a graph.
free
Song list
Lists the songs saved in the current project. The song
selected by the cursor is highlighted.
SAMPLING
• The current song has an asterisk “*” by its song name.
IMPORT
EFFECTS
MIXER
MV-8800 Screen Guide
S-85
MV-8800_r_e.book 86 ページ 2006年11月10日 金曜日 午後12時49分
SONG
DELETE SONG screen
Here you can delete an unwanted song.
■ To access this screen
• [SONG] ➜ [F1](Song Menu) ➜ move the cursor to
the upper line of icons ➜ [F5](DeleteSong)
Explanation of each area
F-button
• [F5](Execute)
Song No. (Song number)
Shows the number of the song. The MV-8800 can have
up to sixteen songs in a project, and these are numbered
1–16.
Song Name
Shows the song name.
Deletes the song selected by the cursor in the song list.
• You cannot delete the current song (the song that has an
asterisk “*” by its name).
■ If the display asks “Delete song #### Are you
sure?”
Comment
When you attempt to delete a song, a confirmation
message of “Delete song #### Are you sure?” will
appear (#### is the song name selected by the cursor).
Shows the memo assigned to the song.
BPM
Shows the tempo of the song selected by the cursor.
F-button
Explanation
Sequence Memory
[F1](No)
To cancel without deleting.
Indicates the amount of data stored
in the DIMM, both numerically and
as a graph.
[F5](Yes)
To delete the song.
used
free
Song list
Lists the songs in the current project. The song selected
by the cursor is highlighted.
• The current song has an asterisk “*” by its name.
S-86
MV-8800 Screen Guide
• There is no way for you to recover deleted data (unless
you have previously made a backup of it). Roland
accepts no responsibility for the recovery of lost data,
nor for any damages that may result from such loss.
MV-8800_r_e.book 87 ページ 2006年11月10日 金曜日 午後12時49分
SONG
SONG
COPY AS NEW SONG popup
Here you can copy the current song, and switch the current song to be the resulting copy.
• [SONG] ➜ [F1](Song Menu) ➜ move the cursor to
the lower line of icons ➜ [F1](CopyAsNew)
INSTRUMENTS AUDIO PHRASES
Explanation of each area
F-buttons
You can recall (and re-input) up to the ten most recent
names you input in the EDIT NAME popup since turning
on the power. Selects the name at the cursor in the
history list then press [ENTER].
Assign a name to the song. You can assign a name of up
to twelve characters.
☞ For details on how to enter characters, refer to Owner’s
Manual “Inputting text” (p. 33).
SYSTEM
• [F2](Insert Space)
Sequence Memory
Inserts a space at the cursor location.
Indicates the amount of data stored
in the DIMM, both numerically and
as a graph.
PROJECT
• [F1](History)
Name
PATTERN
■ To access this screen
• [F3](Delete)
DISK/USB
used
Deletes the character at the cursor location.
free
• [F4](A➔a/a➔A)
• [F5](Execute)
Copies the current song, and makes the resulting copy
the current song. The SONG screen (p. 8) will appear.
SAMPLING
■
MASTERING
Switches the character at the cursor location between
uppercase/lowercase and numeral/symbol.
If the message “Sequence memory full.”
appears
IMPORT
The song cannot be created because there is insufficient
sequence memory for the newly created song.
EFFECTS
MIXER
MV-8800 Screen Guide
S-87
MV-8800_r_e.book 88 ページ 2006年11月10日 金曜日 午後12時49分
SONG
SAVE SONG AS SMF popup
Here you can save the current song as a SMF (Standard MIDI File) Format 1 data.
■ To access this screen
• [SONG] ➜ [F1](Song Menu) ➜ move the cursor to
the lower line of icons ➜ [F2](SaveAsAMF)
Explanation of each area
Song number, Song name
Displays the number and name of the song which can be
saved.
Fix Quantize
Indicates whether the Play Quantize settings of the MIDI
track will be reflected in the data that is saved.
If you want to save the song in a condition that reflects
the Play Quantize settings, press [F2](Fix Qtz) to turn it
On.
Current folder name
Displays the destination folder you want to save.
Folder levels below the root folder (the top level folder in
the hard disk) are shown by a slash “/” symbol.
File list
Displays the name of the files and folders saved in the
current folder.
Drive capacity
Displays the free space of the hard disk.
S-88
MV-8800 Screen Guide
F-buttons
• [F2](Fix Qtz)
Switches the setting that specifies whether the Play
Quantize settings of the MIDI track will be reflected in the
data that is saved.
• [F4](Make Folder)
Displays the EDIT NAME popup (p. 3), where you can
create a new folder inside the current folder.
• [F5](Save)
Saves the current song as a SMF format 1 data.
Displays the EDIT NAME popup (p. 3), where you can
specify the file name of the saved SMF data.
MV-8800_r_e.book 89 ページ 2006年11月10日 金曜日 午後12時49分
SONG
SONG
LOAD SONG screen
Here you can load a song saved in another project into the current project.
• [SONG] ➜ [F1](Song Menu) ➜ move the cursor to
the lower line of icons ➜ [F3](LoadSong)
INSTRUMENTS AUDIO PHRASES
Explanation of each area
F-button
PROJECT
• [F5](SongList)
Name
Displays the SONG LIST popup (p. 90).
Shows the project name.
A list of the songs in the selected project will appear.
Wave Size
SYSTEM
Shows the size of the wave data used by the selected
project.
Sequence Memory
DISK/USB
Shows the remaining amount of
sequence memory available for
recording in the current project.
used
PATTERN
■ To access this screen
free
Wave Memory
MASTERING
Shows the remaining amount of wave memory available
for recording in the current project.
Select Project
Selects the project that contains the song you want to
load.
SAMPLING
IMPORT
EFFECTS
MIXER
MV-8800 Screen Guide
S-89
MV-8800_r_e.book 90 ページ 2006年11月10日 金曜日 午後12時49分
SONG
SONG LIST popup
This lists the songs in some other project.
■ To access this screen
• [SONG] ➜ [F1](Song Menu) ➜ move the cursor to
the lower line of icons ➜ [F3](LoadSong) ➜ select a
project ➜ [F5](SongList)
Explanation of each area
SONG LIST
This is a list of the songs in the selected project. Select
the song that you want to load.
S-90
MV-8800 Screen Guide
F-button
• [F5](Execute)
Loads the song and wave data into the current project.
MV-8800_r_e.book 91 ページ 2006年11月10日 金曜日 午後12時49分
PATTERN
These screens let you perform pattern-related operations.
PATTERN screen
PATTERN
Here you can record or play patterns.
■ To access this screen
• [PATTERN]
INSTRUMENTS AUDIO PHRASES
Now time
Specifies the starting time and end time of the loop. The
following characters show the Loop status.
Display
Explanation
Loop function is Off.
Time Signature
Displays the time sign of the current pattern.
This is the unit by which the current time will move when
]/[
].
Metronome
Icon
No. (track number and icon)
Shows the number of the each track recorded in the
pattern. The icon at the right of the track number shows
the type of track.
Icon
MASTERING
Displays the metronome setting.
Loop function is On.
Explanation
Explanation
MIDI track
The metronome will not sound.
Audio track
The metronome will always sound.
• The line of the track number selected by the cursor is
highlighted. This track is called the “current track.”
Track Name
Shows the name assigned to each track.
Records or plays the current pattern.
Track Status (M/S/R)
Region of Punch In/Out
Sets the status of the track.
Explanation
Display
Explanation
M (=Mute)
This track will not play.
S (=Solo)
Only this track will play.
R (=Rec)
Recording will occur on this track.
EFFECTS
Display
IMPORT
Pattern length
Specifies the starting time and end time of the auto
punch in recording. The following characters show the
Punch In/Out status.
SAMPLING
The metronome will sound only during recording.
The metronome will sound during playback and
recording.
DISK/USB
Step Time
you press STEP [
SYSTEM
This indicates the current location (measure/beat/tick,
time code) of the sequencer.
Region of Loop play
PROJECT
Explanation of each area
Punch In/Out function is Off.
• If you simultaneously turn on M (Mute) and S (Solo) for the
same track, the S (Solo) setting will take priority.
MV-8800 Screen Guide
S-91
MIXER
Punch In/Out function is On.
MV-8800_r_e.book 92 ページ 2006年11月10日 金曜日 午後12時49分
PATTERN
F-buttons
Play List
The boxes indicate the presence or absence of
performance data recorded in each track.
A gray box is shown for data that contains no note
events.
Sequence Memory meter/
Wave Memory meter
Displays the remaining number of events available for
recording in the sequencer, or the remaining time
available for recording audio tracks.
View filter indicator
• [F1](Pattern List)
Displays the PATTERN LIST screen (p. 96).
• [F2](Track Param)
Displays the TRACK PARAMETER popup.
• The TRACK PARAMETER popup that appears will depend
on the type of the current track.
Current track
Popup
Audio track
TRACK PRAMETER popup (for
Audio track) (p. 14)
MIDI track
TRACK PRAMETER popup (for MIDI
track) (p. 11)
Indicates the View Filter status you specified.
Icon
Explanation
View Filter is off (Events displayed)
View Filter is on (Events not displayed)
☞ For details on View filter icons refer to VIEW FILTER
popup (p. 53)
• [F3](Event List)
If the current track is a MIDI track, displays the EVENT
LIST screen (p. 23).
• [F4](PianoRoll)
If the current track is a MIDI track, displays the PIANO
ROLL EDIT screen (p. 30).
• [F5](Seq Edit)
Displays the SEQUENCE EDIT screen (p. 31).
• [MENU]
Displays the MENU popup.
S-92
MV-8800 Screen Guide
MV-8800_r_e.book 93 ページ 2006年11月10日 金曜日 午後12時49分
PATTERN
14 Pattern Sync
Menu items
Displays the PATTERN SYNC screen (p. 94).
1 Pattern Parameter...
Displays the PATTERN PARAMETER popup (p. 99).
15 Drum Grid
PATTERN
Displays the DRUM GRID screen (p. 73).
2 Mute Control Track
Displays the MUTE CONTROL TRACK screen (p. 71).
INSTRUMENTS AUDIO PHRASES
3 Add MIDI Tracks...
Displays the ADD MIDI TRACKS popup (p. 54).
4 Add Audio Track
Adds an Audio track.
5 Delete Tracks...
Displays the DELETE TRACKS popup (p. 56).
6 Merge Tracks...
Displays the MERGE TRACKS popup (p. 69).
PROJECT
7 Track List
Displays the TRACK LIST (OUTPUT) screen (p. 50).
SYSTEM
8 Track Name...
Displays the EDIT NAME popup (p. 3).
9 Erase All Events
Explanation
[F1](No)
To cancel the operation.
[F5](Yes)
To delete the events of current track.
MASTERING
F-button
DISK/USB
Deletes the all events of current track. The message
“Erase all events in track” will appear.
• You can undo only once after executing Erase All Events.
10 View Filter
SAMPLING
Displays the VIEW FILTER popup (p. 53).
11 Step Time
Displays the STEP TIME popup (p. 58).
IMPORT
12 Recording Parameter
Displays the RECORDING PARAMETER (MIDI) popup
(p. 16) or the RECORDING PARAMETER (AUDIO)
popup (p. 19).
EFFECTS
• The RECORDING PARAMETER popup that appears will
depend on the type of the current track.
13 Metronome
MIXER
Displays the METRONOME popup (p. 22).
MV-8800 Screen Guide
S-93
MV-8800_r_e.book 94 ページ 2006年11月10日 金曜日 午後12時49分
PATTERN
PATTERN SYNC screen
Here you can make synchronization setting of patterns.
■ To access this screen
• [PATTERN] ➜ [MENU] ➜ select “Pattern Sync” ➜
[F5](Select)
Explanation of each area
Sync Mode
Specifies how synchronization will occur when an
external device and the MV-8800 are operated in
synchronization.
Value
Explanation
Master
MV-8800 will use own internal clock and operate
as a Master.
Slave-MIDI
(MIDI)
MV-8800 will receive MIDI clock data from MIDI
IN connector, and operate as a Slave.
Slave-MIDI
(R-BUS)
MV-8800 will receive MIDI clock data from
R-BUS connector, and operate as a Slave.
Slave-MTC
(MIDI)
MV-8800 will receive MTC (MIDI time code) data
from MIDI IN connector, and operate as a Slave
Slave-MTC
(R-BUS)
MV-8800 will receive MTC data from R-BUS
connector, and operate as a Slave.
Remote
(MIDI)
MV-8800 will receive Start, Stop and Continue
message from MIDI IN connector, and will be
recotely controlled.
Remote
(R-BUS)
MV-8800 will receive Start, Stop and Continue
message from R-BUS connector, and will be
recotely controlled.
MIDI Clock Output
Specifies whether MIDI clock will be transmitted from
MIDI OUT A, MIDI OUT B, and R-BUS if the Sync Mode
parameter is set to Master.
MMC Mode
Specifies how operation will occur when MMC (MIDI
Machine Control) is used for remote control.
Value
Explanation
Master
The MV-8800 will transmit MMC to control other
connected devices
Slave
(MIDI)
The MV-8800 will receive MMC from MIDI IN
connector and be controlled by another connected
device.
Slave
(R-BUS)
The MV-8800 will receive MMC from R-BUS
connector and be controlled by another connected
device.
MMC Output
Specifies whether MMC will be transmitted from MIDI
OUT A, MIDI OUT B, and R-BUS if the Sync Mode
parameter is set to Master.
Parameters Value
OUT A
Off (not transmitted) /
On (Transmitted) from MIDI OUT A
OUT B
Off (not transmitted) /
On (Transmitted) from MIDI OUT B
R-BUS
Off (not transmitted) /
On (Transmitted) from R-BUS
MTC Frame Rate
Specifies the MTC frame rate. Make sure the same
frame rate is set in both master and slave devices.
Parameters Value
OUT A
Off (not transmitted) /
On (Transmitted) from MIDI OUT A
Value
Explanation
30
30 frames per second
OUT B
Off (not transmitted) /
On (Transmitted) from MIDI OUT B
29.97ND
29.97 frames per second (non-drop)
29.97D
29.97 frames per second (drop)
Off (not transmitted) /
On (Transmitted) from R-BUS
25
25 frames per second
24
24 frames per second
R-BUS
S-94
MV-8800 Screen Guide
MV-8800_r_e.book 95 ページ 2006年11月10日 金曜日 午後12時49分
PATTERN
MTC Error Level
This specifies the interval at which the MTC reception
status is checked. This setting is valid if the Sync Mode
is set to Slave-MTC (MIDI) or Slave-MTC (R-BUS).
0–5–10 (increasing this setting lengthens the
time interval between checking)
PATTERN
Range:
INSTRUMENTS AUDIO PHRASES
• Synchronized operation will halt if the reception status
check determines that there is a communication problem.
Increasing this setting may allow synchronized operation to
continue even if slight problems occur with MTC reception.
MTC Offset Time
Specifies the time difference between the sequencer
time and the MTC timing when the MV-8800 is
MTC-synchronized from an external device.
Range:
00h00m00s00f–23h59m59s##f
• The equation is as follows.
Setting = (MTC time) - (song time when MTC was
received)
PROJECT
If this calculation would result in a negative value, it will be
performed as:
Setting = (MTC time) + 24:00:00:00 - (song time when
MTC was received)
SYSTEM
• ** will depend on the setting of the MTC Frame Rate
parameter.
MTC Output
DISK/USB
Specifies whether MTC will be transmitted from MIDI
OUT A, MIDI OUT B, and R-BUS if the Sync Mode
parameter is set to Master.
Parameters Value
Off (not transmitted) /
On (Transmitted) from MIDI OUT A
OUT B
Off (not transmitted) /
On (Transmitted) from MIDI OUT B
R-BUS
Off (not transmitted) /
On (Transmitted) from R-BUS
MASTERING
OUT A
SAMPLING
IMPORT
EFFECTS
MIXER
MV-8800 Screen Guide
S-95
MV-8800_r_e.book 96 ページ 2006年11月10日 金曜日 午後12時49分
PATTERN
PATTERN LIST screen
Here you can assign or recall patterns.
■ To access this screen
• [PATTERN] ➜ [F1](Pattern List)
Explanation of each area
No. (Pattern number)
Indicates the assignment number of the pattern. You can
register patterns 001–500.
Name
• [F5] (Select)
Selects the pattern highlighted by the cursor, and
displays it in the PATTERN screen (p. 91).
• [MENU]
Displays the MENU popup.
Indicates the name of the pattern.
Length
Menu items
Indicates the length (number of measures) in each
assigned pattern.
1 Pattern Name...
BPM
Displays the EDIT NAME popup (p. 3).
Indicates the tempo of each assigned pattern.
2 Copy Pattern...
T.Sign (Time Signature)
Displays the COPY PATTERN popup (p. 97).
Indicates the time signature of each assigned pattern.
Pad
These are the velocity pad numbers that play the
patterns in the PATTERN PLAY screen. Patterns that
are not assigned to a velocity pad are displayed as *-**
(***).
F-buttons
• [F1](Pattern Play)
Displays the PATTERN PLAY screen (p. 98).
• [F2](Pattern Prm)
Displays the PATTERN PARAMETER popup (p. 99).
• [F3](AssignToPad)
Displays the ASSIGN TO PAD popup (p. 100).
• [F4](Preview)
Auditions the pattern selected by the cursor while you
hold down the button.
S-96
MV-8800 Screen Guide
3 Initialize Pattern
Removes the pattern selected by the cursor from the
pattern list. The message “Initialize sure?” will appear.
F-button
Explanation
[F1](No)
Cancels the operation.
[F5](Yes)
Removes the pattern.
4 Automatic Assign To Pad...
Displays the AUTOMATIC ASSIGN TO PAD popup
(p. 108).
5 Save As SMF...
Displays the SAVE PATTERN AS SMF popup (p. 109).
MV-8800_r_e.book 97 ページ 2006年11月10日 金曜日 午後12時49分
PATTERN
COPY PATTERN popup
Here you can copy an assigned pattern to another assignment number.
PATTERN
■ To access this screen
• [PATTERN] ➜ [F1](Pattern List) ➜ [MENU] ➜
select “Copy Pattern...” ➜ [F5](Select)
Indicates the assignment number of the pattern you want
to copy.
F-button
PROJECT
From
INSTRUMENTS AUDIO PHRASES
Explanation of each area
• [F5](Yes)
Copies the pattern to the number specified by the To
setting.
To
SYSTEM
Specifies the number of the copy-destination pattern.
DISK/USB
MASTERING
SAMPLING
IMPORT
EFFECTS
MIXER
MV-8800 Screen Guide
S-97
MV-8800_r_e.book 98 ページ 2006年11月10日 金曜日 午後12時49分
PATTERN
PATTERN PLAY screen
Here you can play the assigned patterns.
■ To access this screen
• [PATTERN] ➜ [F1](Pattern List) ➜
[F1](Pattern Play)
Explanation of each area
Cur: (Current Pattern)
Indicates the pattern number that is currently playing.
Next: (Next Pattern)
Specifies the pattern that will be played next after the
currently playing pattern has finished playing.
Range: 001–500
Use Pattern Tempo
Specifies whether the BPM parameter (pattern tempo) of
the PATTERN PARAMETER popup (p. 99) will be used.
The pattern tempo will be enabled if this setting is on,
and the pattern playback will follow the tempo specified
for each pattern.
The pattern tempo will be disabled if this is off, and the
pattern playback will follow the setting of the BPM
parameter.
BPM
Specifies the playback tempo of the pattern in units of
BPM (Beats Per Minute of playback).
Range: 5.00–300.00
Tap
Specifies whether the Tap function will be used.
Value
Explanation
Off
The Tap function will not be used.
On (✔)
When you repeatedly strike [BPM/TAP] at the
desired playback tempo, the pattern playback
tempo will be set to the corresponding speed.
Tap Resolution
Specifies the note value corresponding to the interval at
which you strike [BPM/TAP] when using the Tap
function. The BPM (tempo) will be calculated according
to the intervals at which you strike [BPM/TAP], taken as
the note value you specify here.
Range:
(120),
(240), (480)
Velocity Pads
This area shows the patterns that you can currently play
by striking the velocity pads. Use the velocity pads to
specify the pattern you want to play. When you strike a
velocity pad to which a pattern is assigned, that pattern
will be specified as the setting of the Next: parameter.
F-buttons
• [F1](Wait)
Patterns will be played in Wait mode. When the pattern
indicated by Cur: has finished playing, playback will
switch to the Next: pattern.
• [F2](Immediate)
Patterns will be played in Immediate mode. When you
change the setting of the Next: parameter, the pattern
will change immediately.
• [F5](Ptn↔APhrs)
Selects whether the velocity pads will play patterns or
audio phrases.
PadBank indicates what the velocity pads will play.
S-98
MV-8800 Screen Guide
MV-8800_r_e.book 99 ページ 2006年11月10日 金曜日 午後12時49分
PATTERN
PATTERN PARAMETER popup
Here you can specify the length, tempo, time signature, and other settings for the pattern.
PATTERN
■ To access this screen
• [PATTERN] ➜ [F1](Pattern List) ➜
[F2](Pattern Prm)
Indicates the name of the selected pattern.
Length
Allows you to specify the length of the pattern.
• [F1](Name)
Displays the EDIT NAME popup (p. 3). Allows you to
assign a name to the pattern.
• [F5](Close)
Closes the PATTERN PARAMETER popup (this popup).
BPM
SYSTEM
Range: 001–999 (Meas)
F-buttons
PROJECT
Pattern
INSTRUMENTS AUDIO PHRASES
Explanation of each area
Specifies the playback tempo of the pattern.
DISK/USB
Range: 5.00–300.00
Time Signature
Allows you to specify the time signature.
Range: 1–32 / 2, 4, 8, 16
MASTERING
Mute Control Track
Specifies whether to enable the dedicated track that
automatically performs mute operations (the Mute
Control track).
SAMPLING
Range: Off, On
Pad
Indicates the velocity pad to which the selected pattern is
assigned.
IMPORT
EFFECTS
MIXER
MV-8800 Screen Guide
S-99
MV-8800_r_e.book 100 ページ 2006年11月10日 金曜日 午後12時49分
PATTERN
ASSIGN TO PAD popup
Here you can assign patterns to velocity pads or cancel the assignments.
■ To access this screen
• [PATTERN] ➜ [F1](Pattern List) ➜
[F3](AssignToPad)
Explanation of each area
• [F5](OK)
Pattern
Indicates the name of the selected pattern.
Velocity Pads
This area indicates how patterns are assigned to the
velocity pads.
Status
Explanation
A pattern is assigned to the velocity pad.
No pattern is assigned.
Pad
Specifies the number of the velocity pad to which you
want to assign the pattern. If you specify *-**(***), the
assignment will be cancelled.
Range: *-** (***), 1-01 (C)–6-16 (G 9)
S-100
F-button
MV-8800 Screen Guide
Assigns the pattern to the velocity pad number specified
by the Pad setting.
MV-8800_r_e.book 101 ページ 2006年11月10日 金曜日 午後12時49分
PATTERN
PATTERN RECORDING PARAMETER (MIDI) popup
Here you can make settings that specify how performance data is recorded into a pattern.
• [PATTERN] ➜ select a MIDI track ➜ [REC (
PATTERN
■ To access this screen
)]
• [PATTERN] ➜ select a MIDI track ➜ [MENU] ➜
select “Recording Parameter” ➜ [F5](Select)
Specifies how recording will occur
Value
Replace
Newly recorded data will replace the
previously-recorded data. Use this when you
want to re-record.
Value
Explanation
Off
Looping will continue without stopping recording.
On
Immediately after the loop, there will be a waiting
time of one measure. When the waiting time of one
measure has elapsed, recording will continue. This
is valid if the Rec Mode parameter is set to
OverDub1 or OverDub2.
Auto Punch In / Auto Punch Out
You can specify two time locations at which recording
will automatically start and stop (“auto punch”).
Parameter
Value
Auto Punch In
0000-01-000–9999-**-***
Auto Punch Out
0000-01-000–9999-**-***
Specifies how recording will start.
Off
Recording will begin the instant you press
[PLAY ( )]. (There will be no count.)
1 Meas
Recording will begin after a one-measure
count.
2 Meas
Recording will begin after a two-measure
count.
Wait Note
Recording will begin the moment one of the
following occurs.
• A note message is received (you play a
keyboard or other device connected to the
MIDI IN connector)
• You strike a velocity pad
• You press [PLAY ( )]
• *-*** will change according to the number of beats specified
in “Time Signature” (p. 79).
• You cannot set Auto Punch In to a location after Auto
Punch Out.
Metronome Mode
Specifies when the metronome signal will be output.
Value
Explanation
EFFECTS
Explanation
IMPORT
Value
SAMPLING
Count In
Loop Rest
Specifies what will happen immediately after looping.
MASTERING
Overdub2
If you enter an identical note event at the same
timing as a previously entered note event, the
velocity of the existing event will be replaced
by the new velocity.
Range: 1–999
DISK/USB
Newly recorded data will be added to the
previously-recorded data.
By using this in conjunction with loop
recording, you can repeatedly overdub a
specified region.
For example, you can use this method to
record the individual instruments of a drum
performance one by one, like this: bass drum
→ 123 snare drum → hi-hat.
Specifies the length of the pattern to be recorded.
SYSTEM
Overdub1
Explanation
Pattern Length
PROJECT
Rec Mode (Recording mode)
INSTRUMENTS AUDIO PHRASES
Explanation of each area
The metronome will not sound.
Rec Only
The metronome will sound only during
recording.
Play&Rec
The metronome will sound during playback
and recording.
Always
The metronome will always sound.
MV-8800 Screen Guide
MIXER
Off
S-101
MV-8800_r_e.book 102 ページ 2006年11月10日 金曜日 午後12時49分
PATTERN
F-buttons
Input Quantize Type
You can apply quantization while you record, so that the
corrected data is recorded on the sequencer track.
Explanation
Off
Input quantization will not be used.
Grid
The data will be adjusted to the timing intervals
specified by the Grid Quantize Resolution
parameter.
Displays the EVENT LIST screen (p. 23).
Shuffle quantization will be used. The data will be
adjusted forward or backward relative to the timing
intervals specified by Shuffle Quantize Resolution,
by the amount specified by Shuffle Quantize Rate.
This can give the beat a bouncy feel, such as
“shuffle” or “swing.”
Strength (Quantize strength)
Specifies the strength of synchronization applied to the
notes specified by Grid Quantize Resolution or Shuffle
Quantize Resolution. Higher values will adjust the notes
further toward the locations specified by the Grid
Quantize Resolution or Shuffle Quantize Resolution
parameter.
Range: 0%–100%
• A setting of 100 produces the strongest effect; a setting of
0 produces no adjustment at all.
Grid Resolution/Shuffle Resolution
Specifies the quantization timing. Select the shortest
note value that occurs in the region you are quantizing.
Input Quantize
Type parameter
Grid
Value
(60),
(320),
Shuffle
(120),
(80),
(120),
(160),
(240),
(480)
(240)
Rate
When Type=Shuffle, this specifies how far away the
“backbeat” notes (relative to the Shuffle Quantize
Resolution setting) will be from the downbeats. You can
create a sense of swing by shifting the timing of the
backbeats. With a setting of 50%, the backbeats will be
exactly between the preceding and following downbeats.
With a setting of 0%, the backbeats will be moved to the
same timing as the preceding downbeat. With a setting
of 100%, the backbeats will be moved to the same timing
as the following downbeat.
Range: 0%–66%–100%
• The Shuffle Quantize Resolution parameter and Shuffle
Quantize Timing parameter settings are valid when Type is
set to Shuffle.
S-102
MV-8800 Screen Guide
Displays the RECORDING FILTER popup (p. 18).
• [F3](Metronome)
Value
Shuffle
• [F1](Rec Filter)
• [F5](Close)
Closes the PATTERN RECORDNG PARAMETER
(MIDI) popup (this popup).
MV-8800_r_e.book 103 ページ 2006年11月10日 金曜日 午後12時49分
PATTERN
PATTERN RECORDING PARAMETER (AUDIO) popup
Here you can make settings that specify how audio data is recorded into a pattern.
• [PATTERN] ➜ select a Audio track ➜ [REC (
)]
• [PATTERN] ➜ select a Audio track ➜ [MENU] ➜
select “Recording Parameter” ➜ [F5](Select)
Pattern Length
Specifies how recording will occur.
Explanation
Record audio directly from the Input to the track
(2-channels).
Resample
Mix
Record the audio of the master out.
Range: 1–999
Loop Rest
Specifies what will happen immediately after looping.
Explanation
Off
Looping will continue without stopping
recording.
On
Immediately after the loop, there will be a
waiting time of one measure. When the
waiting time of one measure has elapsed,
recording will continue. This is valid if the
Rec Mode parameter is set to OverDub1
or OverDub2.
Since only timing data will be recorded, this is a
way to conserve the data size when recording
the identical audio phrase on the track.
Level meter
Auto Punch In/Auto Punch Out
Sample Type
You can specify two time locations at which recording
will automatically start and stop (“auto punch”).
Specifies the number of input channels. This setting is
valid if Rec Mode is set to anything other than Event.
Explanation
Stereo
The audio will be recorded in stereo (2 channels).
Mono
The audio will be recorded in monaural (1 channel).
Count In
Explanation
Off
Recording will begin the instant you press
[PLAY ( )].(There will be no count.)
1 Meas
Recording will begin after a one-measure count.
2 Meas
Recording will begin after a two-measure count.
Wait Note
0000-01-000–9999-**-***
• *-*** will change according to the number of beats specified
in “Time Signature” (p. 79).
• You cannot set Auto Punch In to a location after Auto
Punch Out.
Metronome Mode
Specifies when the metronome signal will be output.
Value
Explanation
Off
The metronome will not sound.
Rec Only The metronome will sound only during recording.
Play&Rec
The metronome will sound during playback and
recording.
Always
The metronome will always sound.
MV-8800 Screen Guide
MIXER
Recording will begin the moment one of the
following occurs.
• A note message is received (you play a
keyboard or other device connected to the
MIDI IN connector)
• You strike a velocity pad
• You press [PLAY ( )]
Auto Punch Out
EFFECTS
Value
0000-01-000–9999-**-***
IMPORT
Specifies how recording will start.
Value
Auto Punch In
SAMPLING
Value
Parameter
MASTERING
Indicates the input level.
DISK/USB
Value
Record the playback timing of audio phrases
triggered from the velocity pads.
Event
SYSTEM
Direct Rec
PROJECT
Specifies the length of the pattern to be recorded.
Rec Mode
Value
INSTRUMENTS AUDIO PHRASES
Explanation of each area
PATTERN
■ To access this screen
S-103
MV-8800_r_e.book 104 ページ 2006年11月10日 金曜日 午後12時49分
PATTERN
F-buttons
Input Quantize Type
You can apply quantization while you record into the
sequencer when Rec Mode is “Event.”
Range:
Off,
(60),
(320),
(80),
(480)
(120),
(160),
(240),
• [F1](Reset Peak)
Clears the indicators of the peak hold in the Level
meters.
• [F3](Metronome)
Displays the METRONOME popup (p. 22).
• [F5](Close)
Closes the PATTERN RECORDNG PARAMETER
(AUDIO) popup (this popup).
S-104
MV-8800 Screen Guide
MV-8800_r_e.book 105 ページ 2006年11月10日 金曜日 午後12時49分
PATTERN
COPY AS NEW PATTERN popup
Here you can copy a portion of the performance data from a song/pattern into the pattern list as a new
pattern.
Explanation of each area
No. (Pattern number)
Shows the pattern assignment number. You can assign
patterns 001–500.
• [F4](Preview)
Auditions the pattern selected by the cursor while you
hold down the button.
• [F5](Select)
Assigns the pattern to the pattern number selected by
the cursor.
Shows the name of the pattern.
Length
MASTERING
Shows the length (number of measures) in each
assigned pattern.
DISK/USB
Pattern name
Displays the EDIT NAME popup (p. 3), allowing you to
name the pattern.
SYSTEM
Shows the pattern name selected by the cursor. If you’ve
selected an empty pattern (Empty) for new assignment,
a provisional pattern name of “PATTERN (pattern
number)” will be automatically assigned.
• [F1](Name)
PROJECT
Name
F-buttons
INSTRUMENTS AUDIO PHRASES
• Accesses the SELECT SEQUENCE EDIT
COMMAND popup (p. 34) ➜ select Copy As New
Pattern...” ➜ [F5](Select)
PATTERN
■ To access this screen
T.Sign (Time sign)
Shows the time signature of each assigned pattern.
SAMPLING
IMPORT
EFFECTS
MIXER
MV-8800 Screen Guide
S-105
MV-8800_r_e.book 106 ページ 2006年11月10日 金曜日 午後12時49分
PATTERN
PASTE PATTERN popup
Here you can paste an assigned pattern into the current song or pattern.
■ To access this screen
• [SONG] or [PATTERN] ➜ [F5](Seq Edit) ➜
[MENU] ➜ select “Paste Pattern...” ➜ [F5](Select)
Explanation of each area
Position
Shows the time location (measure - beat - tick) at which
the selected pattern will be pasted.
No. (Pattern number)
Shows the pattern assignment number. You can assign
patterns 001–500.
Name
Shows the name of the pattern.
Length
Shows the length (number of measures) in each
assigned pattern.
T.Sign (Time sign)
Shows the time signature of each assigned pattern.
S-106
MV-8800 Screen Guide
F-buttons
• [F4](Preview)
Auditions the pattern selected by the cursor while you
hold down the button.
• [F5](Select)
Displays the TRACK REMAP popup (p. 107).
MV-8800_r_e.book 107 ページ 2006年11月10日 金曜日 午後12時49分
PATTERN
TRACK REMAP popup
Here you can specify the tracks of the current song or pattern into which the pattern selected in the
PASTE PATTERN popup (p. 106) will be pasted.
Explanation of each area
This area shows the track structure of the pattern you’ll
be pasting. In the example shown in this illustration, the
pattern consists of three tracks, all of them MIDI tracks.
• [F5](Execute)
Pastes the pattern selected in the PASTE PATTERN
popup (p. 106) into the tracks you specify.
PROJECT
Tracks in the paste-source pattern
F-button
INSTRUMENTS AUDIO PHRASES
• [SONG] or [PATTERN] ➜ [F5](Seq Edit) ➜
[MENU] ➜ select “Paste Pattern...” ➜ [F5](Select) ➜
select a pattern ➜ [F5](Select)
PATTERN
■ To access this screen
SYSTEM
Tracks in the paste destination
Here you can select the paste-destination tracks in the
current song or pattern. If you select the same tracks, the
performance data will be mixed when it is pasted.
DISK/USB
MASTERING
SAMPLING
IMPORT
EFFECTS
MIXER
MV-8800 Screen Guide
S-107
MV-8800_r_e.book 108 ページ 2006年11月10日 金曜日 午後12時49分
PATTERN
AUTOMATIC ASSIGN TO PAD popup
Here you can assign multiple patterns to the velocity pads in a single operation.
■ To access this screen
• [PATTERN] ➜ [F1](Pattern List) ➜ [MENU] ➜
select “Automatic Assign to Pad...” ➜ [F5](Select)
Explanation of each area
Velocity pads
This area shows how patterns are assigned to the
velocity pads.
Status
Explanation
A pattern is assigned to the velocity pad.
No pattern is assigned.
Pattern
Specifies the range of patterns you want to assign.
Pad
Specifies the number of the first velocity pad to which
you want to assign patterns. Patterns will be assigned
successively, starting with the velocity pad number you
specify as the Pad setting.
Range: *-** (***), 1-01 (C -)–6-16 (G 9)
S-108
MV-8800 Screen Guide
F-button
• [F5](OK)
Assigns the patterns to the pads, starting with the
velocity pad number you specify as the Pad setting.
MV-8800_r_e.book 109 ページ 2006年11月10日 金曜日 午後12時49分
PATTERN
SAVE PATTERN AS SMF popup
Here you can save the pattern as a SMF (Standard MIDI File) Format 1 data.
PATTERN
■ To access this screen
• [PATTERN] ➜ [F1](Pattern List) ➜ [MENU] ➜
select “Save As SMF...” ➜ [F5](Select)
Displays the number and name of the pattern which can
be saved.
Fix Quantize
Current folder name
Displays the destination folder you want to save.
Switches the setting that specifies whether the Play
Quantize settings of the MIDI track will be reflected in the
data that is saved.
• [F4](Make Folder)
Displays the EDIT NAME popup (p. 3), where you can
create a new folder inside the current folder.
• [F5](Save)
Saves the pattern as a SMF format 1 data.
Displays the EDIT NAME popup (p. 3), where you can
specify the file name of the saved SMF data.
MASTERING
Folder levels below the root folder (the top level folder in
the hard disk) are shown by a slash “/” symbol.
DISK/USB
If you want to save the song in a condition that reflects
the Play Quantize settings, press [F2](Fix Qtz) to turn it
On.
• [F2](Fix Qtz)
SYSTEM
Indicates whether the Play Quantize settings of the MIDI
track will be reflected in the data that is saved.
F-buttons
PROJECT
Pattern number, Pattern name
INSTRUMENTS AUDIO PHRASES
Explanation of each area
File list
Displays the name of the files and folders saved in the
current folder.
SAMPLING
Drive capacity
Displays the free space of the hard disk.
IMPORT
EFFECTS
MIXER
MV-8800 Screen Guide
S-109
MV-8800_r_e.book 110 ページ 2006年11月10日 金曜日 午後12時49分
PATTERN
PATTERN STEP REC screen
Here you can construct a song by arranging patterns in a pattern track.
■ To access this screen
• [SONG] ➜ with a pattern track as the current track ➜
[SHIFT] + [REC ( )]
Explanation of each area
Play List
Step Time
Specifies the note value of the notes you will input. If you
choose the Pattern setting, the step time will equal the
length of the entire pattern.
Range:
(30),
(40),
(60),
(80),
(160),
(240),
(320),
(640),
(960),
(1920),
The boxes show the existence of data recorded in each
track.
A gray box is shown for data that contains no note
events.
(120),
(480),
F-buttons
(3840), Pattern
• [F1](Back Step)
Reverts the preceding input.
• You can change the step time by pressing [
(numeric keys).
(1)] – [
(9)]
Dot (dotted note)
This lets you add a dot to the note value specified by the
Step Time parameter.
• [F3](Tie)
Connects (extends) the event at the current time to the
next step.
• [F4](Put Pattern)
Displays the PUT PATTERN popup (p. 111).
Dot
Length relative to the specified Step Time value
None
1x (Step Time is used without change)
1(.)
1.5x (1.5 times the Step Time)
2(..)
1.75x (1.75 times the Step Time)
No. (track number and icon)
Shows the number of the tracks recorded in the song.
The icon at the right of the track number shows the type
of track.
Icon
Explanation
MIDI track
Audio track
Pattern track
• The line of the track number selected by the cursor is
highlighted. This track is called the “current track.”
Track name
Shows the name assigned to each track.
S-110
MV-8800 Screen Guide
• [F5](Rest)
Inputs a rest (silence).
• During step recording, you can press [REC ( )] to make
the REC indicator (red) blink. In this state, pressing the
pads will not record anything. This is a convenient way for
you to check the sound produced by each pad.
MV-8800_r_e.book 111 ページ 2006年11月10日 金曜日 午後12時49分
PATTERN
PUT PATTERN popup
Here you can select the patterns to be placed in the pattern track.
• [SONG] ➜ with a pattern track as the current track ➜
[SHIFT] + [REC ( )] ➜ [F4](Put Pattern)
Select the pattern that you want to place in the pattern
track.
Range: 001–500
Specify the number of times the pattern will be
successively placed.
• [F4](Preview)
Auditions the pattern selected by the Pattern parameter
while you hold down the button.
• [F5](Execute)
Places the pattern selected by the Pattern parameter into
the pattern track.
SYSTEM
Times
F-buttons
PROJECT
Pattern
INSTRUMENTS AUDIO PHRASES
Explanation of each area
PATTERN
■ To access this screen
Range: 1–999
DISK/USB
MASTERING
SAMPLING
IMPORT
EFFECTS
MIXER
MV-8800 Screen Guide
S-111
MV-8800_r_e.book 112 ページ 2006年11月10日 金曜日 午後12時49分
PATTERN
PATTERN EVENT PARAMETR popup
Here you can make detailed settings for the pattern event that exists at the current time location.
■ To access this screen
• [SONG] ➜ F5](Seq Edit) ➜ with a pattern track as
the current track ➜ [MENU] ➜ select “Pattern Event
Parameter” ➜ [F5](Select)
Explanation of each area
Track number and track name
Shows the number and name of the pattern track.
Selects a pattern. By changing this pattern you can
replace the pattern at the current time with a different
pattern.
Range: 001–500
Start
Specifies the point from which the selected pattern will
play. By changing this time setting you can make the
pattern play from a point in the middle of the pattern. If
you want the pattern to play from the beginning, set this
to 0001-01-000 (default value).
0001-01-000–(end time of the pattern)
Position
Shows the time location at which the selected pattern is
placed. To change this time, use the MOVE PATTERN
EVENT popup (p. 113).
Duration
Shows the length that the selected pattern will actually
play. To change this length, use the the MOVE
PATTERN EVENT popup (p. 113).
S-112
• [F1](Move)
Displays the MOVE PATTERN EVENT popup (p. 113).
• [F5](Close)
Pattern
Range:
F-buttons
MV-8800 Screen Guide
Closes the PATTERN EVENT PARAMETR popup (this
popup).
MV-8800_r_e.book 113 ページ 2006年11月10日 金曜日 午後12時49分
PATTERN
MOVE PATTERN EVENT popup / MOVE AUDIO EVENT popup
Here you can change the position or length of the pattern event that exists at the current time location.
• [SONG] ➜ F5](Seq Edit) ➜ with a pattern track as
the current track ➜ [MENU] ➜ select “Pattern Event
Parameter” ➜ [F5](Select) ➜ [F1](Move)
• This screen is for the MOVE PATTERN EVENT popup. A
similar popup will also appear for MOVE AUDIO EVENT.
Explanation of each area
Moves the pattern existing at the current time location to
a different time.
Moves the pattern existing at the current time location.
PROJECT
• [F5](Execute)
To
Range:
F-button
INSTRUMENTS AUDIO PHRASES
• [SONG] or [PATTERN] ➜ [F5](Seq Edit) ➜ select
an audio track as the current track ➜ [MENU] ➜
select “Audio Event Parameter” ➜ [F5](Select) ➜
[F1](Move)
PATTERN
■ To access this screen
0001-01-000–(current time)–9999-**-***
SYSTEM
Duration
DISK/USB
Specifies the length that the selected pattern will actually
play. By changing this length, you can make the pattern
stop playing midway. If you want the pattern to play all
the way to its end, set this to a value greater than the
length of the selected pattern. This value is in units of
“beats - ticks.”
Range: 0-001–9999-***
MASTERING
SAMPLING
IMPORT
EFFECTS
MIXER
MV-8800 Screen Guide
S-113
MV-8800_r_e.book 114 ページ 2006年11月10日 金曜日 午後12時49分
INSTRUMENTS
Here you can make instrument-related settings.
INSTRUMENTS screen
Here you can make part settings (patch selection, mixer adjustments) for the instruments.
■ To access this screen
• [INSTRUMENTS]
Explanation of each area
Part number
This is the number of the location to which the patch is
assigned. This is the number you will specify as the
Output Assign setting of the MIDI track.
Patch
This area lists the patch names.
Current part
The part selected by the cursor is called the “current
part.” Its part number is highlighted.
Output (Output Assign)
Specifies the output destination of the part audio.
Value
Explanation
Partial
The Output Assign parameter setting of
the partials in the patch will be used.
Mix
Mix bus
AUX1–AUX4
AUX bus
MLT1–MLT8
Multi output (mono)
MLT1/2–MLT7/8
Multi output (stereo)
VoRsv (Voice reserve)
Specifies the mute status of each part.
Specifies the number of voices that will be reserved for
each part if you attempt to play more than 32 voices of
polyphony simultaneously.
Range: Off (can be played), On (will not play)
Range:
M (Mute)
Levl (Level)
Adjusts the output volume of each part.
Range:
0–100–127
Pan
Sets the panning of each part.
Range:
L63–0–R63
Cho (Delay/chorus send level)
Sends the audio of the part to the delay/chorus effect.
Range:
0–127
Rev (Reverb send level)
Sends the audio of the part to the reverb effect.
Range:
S-114
0–127
MV-8800 Screen Guide
0–32
• The total value of this setting for all parts is limited to 32.
You can’t make settings that would exceed this total.
• The number of voices that can be played will depend not
only on the number of notes being played, but also on the
number of partials used by each patch and the number of
samples that make up each partial. If you are playing one
patch, the number of voices used can be calculated as
follows.
(number of voices) = (number of partials that are sounding)
x (total number of channels for sample SMT 1–4 that make
up the partials)
• The MV-8800 has a maximum polyphony of 64 voices. Of
these, 32 voices are allocated to all of the audio tracks,
meaning that the voice reserve settings available for the
parts will be 32. (This does not mean that the parts have a
maximum total polyphony of 32 voices.) Since the Voice
Reserve parameter specifies “the number of voices
guaranteed to be available under any condition,” you will
be able to play a total of 64 notes using the parts if no
audio tracks are playing.
MV-8800_r_e.book 115 ページ 2006年11月10日 金曜日 午後12時49分
INSTRUMENTS
F-buttons and menu
• [F1](Instruments)
Displays the INSTRUMENTS screen (this screen).
• [F2](MIDI Filter)
Displays the MIDI FILTER screen (p. 116).
• [F4](Library)
Displays the PATCH LIBRARY popup (p. 117).
INSTRUMENTS AUDIO PHRASES
• [F5](Patch Edit)
Displays the PATCH EDIT screen (p. 118).
• [MENU]
Displays the MENU popup.
Menu items
PROJECT
1 Patch Name
Displays the EDIT NAME popup (p. 3), where you can
edit the name of the current patch.
2 Save Patch
SYSTEM
Displays the SAVE PATCH popup (p. 149).
3 Load Patch
Displays the LOAD PATCH screen (p. 150).
DISK/USB
4 Copy Part
Displays the COPY PART popup (p. 151).
5 Initialize Part
MASTERING
A message of “Initialize Part ##. Are you sure?” (“##”
shows the number of current part) will appear. This will
delete the setting of the current part, restoring the default
settings.
Explanation
[F1](No)
To cancel without initializing.
[F5](Yes)
To initialize the current part.
SAMPLING
F-button
6 Delete Patch
IMPORT
Delete the patch assigned to the current part.
A confirmation message “Delete Patch on Part ##. Are
you sure?” (“##” show the number of current part) will
appear.
Explanation
To cancel without deleting.
To delete the patch. The samples will
remain.
[F5](Yes)
To delete the patch and the samples used
by that patch.
MIXER
[F1](No)
[F3](Assign Only)
EFFECTS
F-button
MV-8800 Screen Guide
S-115
MV-8800_r_e.book 116 ページ 2006年11月10日 金曜日 午後12時49分
INSTRUMENTS
MIDI FILTER screen
Of the MIDI messages received by the part, you can specify the messages for which reception will be
enabled.
■ To access this screen
• [INSTRUMENTS] ➜ [F2](MIDI Filter)
MIDI messages
Here you can specify the MIDI messages for which
reception will be enabled. Reception is enabled for
messages with a ✔ mark.
PC
Off
On (✔)
Bank
Off
On (✔)
Bend
Off
Bank Select message reception
Not received.
Received.
Pitch Bender message reception
Not received.
On (✔)
Received.
Aft
Off
C (channel)
P (poly)
Mod
Off
Aftertouch message reception
Not received.
Channel aftertouch will be received.
Polyphonic aftertouch will be received.
Modulation message reception
Not received.
Received.
On (✔)
Vol
Off
On (✔)
Pan
Off
On (✔)
Exp
Off
On (✔)
Hold
Off
On (✔)
S-116
Program Change message reception
Not received.
Received.
Volume message reception
Not received.
Received.
Velocity
Curve
Off
1
Velocity curve setting. Selects the velocity
curve by which velocity values from your MIDI
keyboard etc. will be adjusted.
If you simply want to use the unmodified velocity
response of your keyboard, turn this Off.
3
Actual
volume
On (✔)
Keyboard
playing strength
2
4
Keyboard
playing strength
• [F1](Instruments)
Displays the INSTRUMENTS screen (p. 114).
• [F2](MIDI Filter)
Displays the MIDI FILTER screen (this screen).
• [F4](Library)
Expression message reception
Not received.
Received.
• [F5](Patch Edit)
MV-8800 Screen Guide
Keyboard
playing strength
F-buttons
Pan message reception
Not received.
Received.
Hold 1 message reception
Not received.
Received.
Keyboard
playing strength
Actual
volume
This is the number of the location to which the patch is
assigned. This is the number you will specify as the
Output Assign setting of the MIDI track.
Phase lock switch
Sounds will be played in the order in which note
messages are received.
If simultaneous messages are received, their
sound will be time-aligned.
* If the PhsL (Phase Lock) is on, the part will
sound simultaneously after all the notes are
ready to sound. This means that in some
cases, some time may elapse from when a
note message is received until it sounds.
Actual
volume
Part number
PhsL
Off
Actual
volume
Explanation of each area
Displays the PATCH LIBRARY popup (p. 117).
Displays the PATCH EDIT screen (p. 118).
• [MENU]
Displays the INSTRUMENTS MENU. Displayed menu
items are same as p. 115.
MV-8800_r_e.book 117 ページ 2006年11月10日 金曜日 午後12時49分
INSTRUMENTS
PATCH LIBRARY popup
Here you can select a patch from the patch library, and make it the current patch.
■ To access this screen
• [INSTRUMENTS] ➜ [F4](Library)
The patches in the library are numbered from U001–
U128.
F-buttons
PROJECT
No. (Patch library number)
INSTRUMENTS AUDIO PHRASES
Explanation of each area
• [F1](Write Here)
Displays the WRITE PATCH LIBRARY popup.
Explanation
Name
[F1](No)
To cancel without saving.
Displays the patch names and categories. The patch
currently selected by the cursor is highlighted.
[F5](Yes)
The patch of the current part will be saved to
the cursor location within the list
Category
Preview
Here you can limit the category of the patch that will
appear in the patch library list.
• [F4](Preview)
Switches the value of patch preview on/off.
• [F5](Use This)
Assigns the patch selected by the cursor to the current
part.
MASTERING
If this is on, the patch selected by the cursor will
temporarily be assigned to the pads, allowing you to
audition it.
Displays the SELECT CATEGORY popup (p. 4).
DISK/USB
This area shows the category you selected in the
SELECT CATEGORY popup (p. 4). Only the selected
category is shown in the list.
• [F3](Category)
SYSTEM
F-button
SAMPLING
IMPORT
EFFECTS
MIXER
MV-8800 Screen Guide
S-117
MV-8800_r_e.book 118 ページ 2006年11月10日 金曜日 午後12時49分
INSTRUMENTS
PATCH EDIT screen
Here you can edit the patch of the current part.
■ To access this screen
• [INSTRUMENTS] ➜ [F5](Patch Edit)
Explanation of each area
Current part, current patch name
Displays the currently selected part number and patch
name.
Coarse (Coarse tune)
Adjusts the pitch of each part in steps of one semitone.
Range:
-48–0–+48 (+/-4 octaves)
Fine (Fine tune)
Filter Cutoff Offset
Applies a relative adjustment to the cutoff frequency of
the patch.
Range: -63–0–+63
Filter Resonance Offset
Applies a relative adjustment to the resonance
(emphasis in the region of the cutoff frequency) of the
patch.
Range: -63–0–+63
Adjusts the pitch of each part in steps of one cent.
Range:
-50–0–+50
• One cent = 1/100th of a semitone
Analog Feel (Analog feel depth)
Specifies the depth of 1/f modulation that is to be applied
to the patch. (1/f modulation is a pleasant and
naturally-occurring ratio of modulation that occurs in a
babbling brook or rustling wind.) By adding this “1/f
modulation,” you can simulate the natural instability
characteristic of an analog synthesizer.
Range:
• Raising this value excessively may cause oscillation and
distortion.
Amplifier Attack Offset
Applies a relative adjustment to the amplifier attack time
without changing the settings of the partials.
Range:
-63–0–+63
Amplifier Release Offset
Applies a relative adjustment to the amplifier release
time without changing the settings of the partials.
Range:
-63–0–+63
0–127
Velocity Sens Offset (Velocity sensitivity offset)
Bend Range Down (Picth bend range down)
Specifies the amount by which the pitch of the patch will
change (in semitones) when you operate the pitch
bender downward.
Range:
-48 (-4 octaves)–-2–0
Bend Range Up (Pitch bend range up)
Specifies the amount by which the pitch of the patch will
change (in semitones) when you operate the pitch
bender upward.
Range:
S-118
0–+2–+48 (+4 octaves)
MV-8800 Screen Guide
Applies an adjustment to the velocity sensitivity of the
entire patch while maintaining the velocity sensitivity of
each partial as specified by the following parameters.
• Filter Velo Curve Sens (Filter Velocity Curve
Sensitivity) (p. 143)
• Level Velo Curve Sens (Level Velocity Curve
Sensitivity) (p. 145)
Range:-63–0–+63
• This setting is added to the velocity sensitivity values
of each partial. This means that (for example) if the
velocity sensitivity of a partial is already set to +63
(maximum), setting this parameter to a positive “+”
value will cause no change in the sound.
MV-8800_r_e.book 119 ページ 2006年11月10日 金曜日 午後12時49分
INSTRUMENTS
Voice Priority
Specifies how notes will be prioritized when the
maximum polyphony (64 voices) is exceeded.
Explanation
Last
The last-played voices will be given priority;
voices will be successively turned off starting
with the first-played of the currently sounding
voices.
Loud
(Loudest)
The highest-volume voices will be given
priority; voices will be successively turned off
starting with the lowest-volume of the currently
sounding voices.
• [F1](Control)
Displays the PATCH EDIT (CONTROL) screen (p. 120).
• [F2](Solo/Porta)
Displays the PATCH EDIT (SOLO/PORTAMENTO)
screen (p. 122).
• [F3](Split)
INSTRUMENTS AUDIO PHRASES
Value
F-buttons and menu
Displays the PATCH EDIT (SPLIT) screen (p. 124).
• [F4](Library)
Displays the PATCH LIBRARY popup (p. 117).
• [F5](Partial Edit)
Displays the PARTIAL EDIT screen (p. 125).
• [MENU]
Displays the MENU popup.
PROJECT
Menu items
1 Patch Name
SYSTEM
Displays the EDIT NAME popup (p. 3), where you can
edit the name of the current patch.
2 Save Patch
DISK/USB
Displays the SAVE PATCH popup (p. 149).
3 Load Patch
Displays the LOAD PATCH screen (p. 150).
MASTERING
SAMPLING
IMPORT
EFFECTS
MIXER
MV-8800 Screen Guide
S-119
MV-8800_r_e.book 120 ページ 2006年11月10日 金曜日 午後12時49分
INSTRUMENTS
PATCH EDIT (CONTROL) screen
MIDI messages received by the part can be used to control various parameters of the partial, according to
the settings you make here.
■ To access this screen
• [INSTRUMENTS] ➜ [F5](Patch Edit) ➜
[F1](Control)
Explanation of each area
Current part, current patch name
Displays the number and patch name of the currently
selected part.
Control Change Number
Specifies the control change number that is used when
you set SMT Control Select to Control Change. The
specified control change can be used to control the pitch,
filter, and amplifier sections of the sound source.
Range:
0–119
Sens (SMT control sensitivity)
Sets the amount of the Matrix Control’s effect that is
applied. If you wish to modify the selected parameter in a
positive (+) direction – i.e., a higher value, toward the
right, or faster etc. – from its current setting, select a
positive (+) value. If you wish to modify the selected
parameter in a negative (-) direction – i.e., a lower value,
toward the left, or slower etc. – from its current setting,
select a negative (-) value. When both positive and
negative are selected, the changes are greater as the
value increases. Set it to “0” if you don’t want this effect.
Value:
SMT Control Select
Specifies the type of MIDI message that will be used to
control SMT.
-63–0–+63
Bend (Pitch bend)
Specifies the parameter that will be controlled when
Bend messages are received.
Value
Explanation
Off
No control.
Bend
Control by pitch bend
Aftertouch
Control by aftertouch
Modulation
Control by modulation
Modulation
Control Change
Control by control change (the control
change number is specified by the
Control Change No parameter)
Specifies the parameter that will be controlled when
Modulation messages are received.
Aftertouch
Specifies the parameter that will be controlled when
Aftertouch messages are received.
Control Change
• You can control SMT either by velocity or by the above
MIDI message. You cannot simultaneously use both
velocity and the above MIDI messages. If you want to use
velocity to control this, turn the SMT Velocity Control
parameter On in the PARTIAL EDIT (SMT) screen (p. 141).
S-120
MV-8800 Screen Guide
Specifies the parameter that will be controlled when
control change messages (the control change number is
specified by Control Change Number) are received.
MV-8800_r_e.book 121 ページ 2006年11月10日 金曜日 午後12時49分
INSTRUMENTS
■ Patch parameters controlled when control data
is received
Value
Explanation
Pitch
Specifies the amount of pitch change in
semitone steps.
Range:
-48–0–+48
MIDI message:
Control the filter cutoff frequency.
Range:
-63–0–+63
MIDI message:
Level
Displays the PATCH EDIT (SOLO/PORTAMENTO)
screen (p. 122).
• [F3](Split)
Displays the PATCH EDIT (SPLIT) screen (p. 124).
• [F4](Library)
Displays the PATCH LIBRARY popup (p. 117).
• [F5](Partial Edit)
Displays the PARTIAL EDIT screen (p. 125).
Control the amplifier level.
Range:
-63–0–+63
MIDI message:
LFO Rate
Bend,
Aftertouch,
Control Change
• [F2](Solo/Porta)
INSTRUMENTS AUDIO PHRASES
Cutoff
Aftertouch,
Control Change
F-buttons
Bend,
Aftertouch,
Control Change
PROJECT
Control the LFO rate.
Range:
-63–0–+63
MIDI message: Aftertouch,
Modulation,
Control Change
LFO Depth
Pitch
Aftertouch=+35
Modulation=+30
ControlChange=0
MIDI message:
Aftertouch,
Modulation,
Control Change
MASTERING
Control the change in filter cutoff frequency
(“growl”) produced by the LFO.
Range:
-63–0–+63
MIDI message:
Aftertouch,
Modulation,
Control Change
Control the change in amplifier level (tremolo)
produced by the LFO.
Range:
-63–0–+63
MIDI message:
SAMPLING
LFO Depth
Amplifier
DISK/USB
Initial value:
SYSTEM
LFO Depth
Filter
Control the pitch change (vibrato) produced by
the LFO.
Range:
-63–+63
Aftertouch,
Modulation,
Control Change
IMPORT
EFFECTS
MIXER
MV-8800 Screen Guide
S-121
MV-8800_r_e.book 122 ページ 2006年11月10日 金曜日 午後12時49分
INSTRUMENTS
PATCH EDIT (SOLO/PORTAMENTO) screen
Here you can set polyphonic/monophonic, portamento of patch.
■ To access this screen
• [INSTRUMENTS] ➜ [F5](Patch Edit) ➜
[F2](Solo/Porta)
Explanation of each area
Current part, current patch name
Displays the currently selected part number and patch
name.
Mono Mode
Specifies whether the patch will play polyphonically (Off)
or monophonically (On). The “On” setting is effective
when playing a solo instrument patch such as sax or
flute.
Range
Explanation
Off
Two or more notes can be played
simultaneously.
On
Only the last-played note will sound.
Legato Switch
With the Legato parameter “On,” pressing a key while
continuing to press a previous key causes the note to
change pitch to the pitch of the most recently pressed
key, sounding all the while. This creates a smooth
transition between notes, which is effective when you
wish to simulate the hammering-on and pulling-off
techniques used by a guitarist.
Values:
Off, On
• Legato Switch is valid when the Mono Mode parameter is
set to “On.”
Retrigger (Legato Retrigger)
The setting determines whether sounds are replayed
(On) or not (Off) when performing legato. Normally you
will leave this parameter “On.” When “Off,” when one key
is held down and another key is then pressed, only the
pitch changes, without the attack of the latter key being
played.
Values:
Off, On
• The Legato Retrigger is valid when the Mono Mode
parameter is set to “On” and the Legato Switch parameter
is set to “On.”
• Let’s say you have the Legato Switch set to “On,” and the
Legato Retrigger set to “Off.” When you try to sound a
legato (by pressing a higher key while a lower key is held
down), the pitch may sometimes not be able to rise all the
way to the intended pitch (stopping instead at an
intermediate pitch). This can occur because the limit of
pitch rise, as determined at the wave level, has been
exceeded. Additionally, if differing upper pitch limits are
used for the waves of a Patch that uses multiple tones, it
may stop being heard in MONO. When making large pitch
changes, set the Legato Retrigger to “On.”
• Set this to “Off” when performing wind and string phrases
or when using modulation with the mono synth keyboard
sound.
Portamento Switch
Specifies whether the portamento effect will be applied
(On) or not (Off).
Range: Off, On
• Portamento is an effect which smoothly changes the pitch
from the first-played key to the next-played key.
• By applying portamento when the Mono Mode parameter is
“On,” you can simulate slide performance techniques on a
violin or similar instrument.
S-122
MV-8800 Screen Guide
MV-8800_r_e.book 123 ページ 2006年11月10日 金曜日 午後12時49分
INSTRUMENTS
F-buttons
Portamento Mode
Specifies the performance conditions for which
portamento will be applied.
• [F1](Control)
Displays the PATCH EDIT (CONTROL) screen (p. 120).
• [F3](Split)
Value
Explanation
Normal
Portamento will always be applied.
Legato
Portamento will be applied only when you play
legato (i.e., when you press the next key before
releasing the previous key).
Displays the PATCH EDIT (SPLIT) screen (p. 124).
• [F4](Library)
Displays the PATCH LIBRARY popup (p. 117).
INSTRUMENTS AUDIO PHRASES
• [F5](Partial Edit)
Portamento Type
Displays the PARTIAL EDIT screen (p. 125).
Specifies the type of portamento effect.
Value
Explanation
Rate
The time it takes will depend on the
distance between the two pitches.
Time
The time it takes will be constant, regardless of
how far apart in pitch the notes are.
Portamento Start Pitch
Value
Explanation
Pitch
Starts a new portamento when another key is
pressed while the pitch is changing.
PROJECT
When another key is pressed during a pitch change
produced by portamento, a new pitch change will begin.
This setting specifies the pitch at which the change will
begin.
SYSTEM
Pitch
C5
DISK/USB
D4
C4
Time
press D4 key
press C5 key
Note
MASTERING
press C4 key
Portamento will begin anew from the pitch where
the current change would end.
Pitch
C5
SAMPLING
D4
C4
Time
press D4 key
IMPORT
press C5 key
press C4 key
Portamento Time
Range:
EFFECTS
When portamento is used, this specifies the time over
which the pitch will change. Higher settings will cause
the pitch change to the next note to take more time.
0–20–127
MIXER
MV-8800 Screen Guide
S-123
MV-8800_r_e.book 124 ページ 2006年11月10日 金曜日 午後12時49分
INSTRUMENTS
PATCH EDIT (SPLIT) screen
Here you can assign partials to specific key ranges (note numbers).
■ To access this screen
• [INSTRUMENTS] ➜ [F5](Patch Edit) ➜
[F3](Split)
Explanation of each area
Current part, current patch name
Displays the number and patch name of the currently
selected part.
Pad
Specifies the velocity pad (note number) for the partial
that you want to assign to a different note number. The
specified partial will sound across the range from the
Lower Point parameter to the Upper Point parameter. If a
sample is assigned to the selected velocity pad number,
the sample name is displayed.
Current Lower Point/Upper Point
Displays the lowest note number and highest note
number of the specified pad.
New Lower Point
Specifies the lowest note number that will use the sound
specified by the Pad parameter.
New Upper Point
Specifies the highest note number that will use the sound
specified by the Pad parameter.
• You cannot set the Lower Point above the Higher Point,
nor the opposite.
Keyboard
The region between New Lower Point and New Upper
point is shown in color (gray). Each of these keys (pads)
point to the same partial. A dot or line is displayed above
keys (pads) that are assigned to a partial.
S-124
MV-8800 Screen Guide
F-buttons
• [F3](Set Chroma)
Assigns partials at semitone steps in the region specified
by the New Lower Point parameter and New Upper Point
parameter.
• [F5](Set)
Assigns a partial for the region specified by the New
Lower Point parameter and New Upper Point parameter.
MV-8800_r_e.book 125 ページ 2006年11月10日 金曜日 午後12時49分
INSTRUMENTS
PARTIAL EDIT screen
Here you can edit the partials.
■ To access this screen
• [INSTRUMENTS] ➜ [F5](Patch Edit) ➜
[F5](Partial Edit)
Display the note number and partial name that you want
to edit.
Sets the partial volume.
Range:
Value
Explanation
Sngl
(=Single)
The first-played note will be turned off before
the next-played note is sounded.
Mult
(=Multi)
Multiple instances of the same note number
will be allowed.
One Shot
When the One Shot parameter is On, the sound will play
back until the end of the waveform (or the end of the
envelope, whichever comes first).
0–127
SMT (Sample Mix Table)
Sets the panning of the partial.
Range:
L63–C–R63.
This shows the structure of the samples that make up
the partial selected in
. In the example shown here,
the partial consists of SMT1 and 2.
Excl Group (Exclusive Group)
Specifies the output destination of the partial audio. This
setting is valid if the Output Assign parameter is set to
Partial in the INSTRUMENTS screen (p. 114).
Specifies how notes will be processed when a partial
assigned to the same exclusive group number are
played simultaneously.
Explanation
Mix
Mix bus
When partials assigned to an exclusive group are played
simultaneously (overlapping), the first-played note will be
turned off before the next-played note is sounded.
AUX1–AUX4
AUX bus
Range:
MLT1–MLT8
Multi output (mono)
MLT1/2–MLT7/8
Multi output (stereo)
IMPORT
Value
SAMPLING
Output Assign (Partial output assign)
MASTERING
Pan (Partial pan)
DISK/USB
Level (Partial level)
Specifies how notes will be processed when the identical
note number is played twice (i.e., overlapping).
SYSTEM
• If the same partial is assigned to a range of note numbers,
any edits you make on that partial will affect all of the note
numbers to which the partial is assigned. The PATCH EDIT
(SPLIT) screen (p. 124) shows how the partials are
assigned to notes.
Assign Type
PROJECT
Note number, partial name
INSTRUMENTS AUDIO PHRASES
Explanation of each area
Off, 1–31
Coarse (Partial coarse tune)
Adjusts the pitch of the partial in steps of a semitone.
DlyCho Send (Delay/Chorus send level)
Range:
0–127
Range:
-48–0+48 (+/-4 octaves)
EFFECTS
Sends the partial audio to the delay/chorus effect.
Fine (Partial fine tune)
Adjusts the pitch of the partial in steps of one cent.
Rev Send (Reverb send level)
Sends the partial audio to the reverb effect.
-50–0–+50
0–127
MIXER
Range:
Range:
• One cent = 1/100th of a semitone
MV-8800 Screen Guide
S-125
MV-8800_r_e.book 126 ページ 2006年11月10日 金曜日 午後12時49分
INSTRUMENTS
Filter Type
Filter R (Filter release time)
Selects the type of filter.
Specifies the time from when the note ends (key-off) until
the filter returns to the basic cutoff frequency (the Filter
Cutoff parameter). This corresponds to T4 in the filter
envelope diagram.
Value
Explanation
Off
No filter will be used.
LPF
Low Pass Filter. This cuts the region above the
cutoff frequency (Cutoff), making the sound more
mellow.
BPF
Band Pass Filter. This passes only the region near
the cutoff frequency (Cutoff), cutting the remainder
of the sound. This type is useful for creating
distinctive sounds.
HPF
Range:
0–127
Cutoff
freqency
High Pass Filter. This cuts the region below the
cutoff frequency (Cutoff). This type is useful when
creating percussion sounds that have distinctive
high-frequency components.
T1
T2
T3
L0
L1
L2
Specifies the cutoff frequency of the current partial.
Range:
Filter envelope
0–127
Range:
0–127
Filter A (Filter attack time)
Specifies the time from the beginning of the note until the
specified cutoff frequency is reached. This corresponds
to T1 in the diagram below.
Range:
0–127
Time
Amplifier A (Amplifier attack time)
Specifies the time from when the note begins (key-on)
until the volume reaches the L1 level. This corresponds
to T1 in the amplifier envelope diagram.
Range:
• Raising this value excessively may cause oscillation and
distortion.
L4
Key-off
T: Time, L: Level
Filter Reso (Filter resonance)
L3
Key-on
Filter Cutoff
Emphasizes the sound of the current partial in the region
of the cutoff frequency.
T4
0–127
Amplifier D (Amplifier decay time)
Specifies the time over which the volume of the note
changes to its sustain level following the attack. This
corresponds to T3 in the amplifier envelope diagram.
Range:
0–10–127
Amplifier S (Amplifier sustain level)
Specifies the volume at which the sound will be
sustained. This corresponds to L3 in the amplifier
envelope diagram.
Range:
0–10–127
Amplifier R (Amplifier release time)
Specifies the time from when the note ends (key-off) until
the sound disappears completely. This corresponds to
T4 in the amplifier envelope diagram.
Range:
Volume
0–10–127
T1 T2
T3
T4
Time
L1 L2
L3
Key-off
Key-on
T: Time, L: Level
Amplifier envelope
S-126
MV-8800 Screen Guide
MV-8800_r_e.book 127 ページ 2006年11月10日 金曜日 午後12時49分
INSTRUMENTS
F-buttons and menu
LFO (Low Frequency Oscillator type)
Selects the waveform that the LFO will output.
• [F1](Sample Edit)
Displays the SAMPLE EDIT screen (p. 128).
Value
Explanation
Sine
Sine wave
Tri
Triangle wave
SawU
Sawtooth wave
SawD
Sawtooth wave (inverted)
Squr
Square wave
Rand
Random wave
BenU
The LFO will output a waveform that rises to
the normal level and stays there
BenD
The LFO will output a waveform that falls to the
normal level and stays there
• [F2](SMT)
Displays the PARTIAL EDIT (SMT) screen (p. 141).
• [F3](Filter)
• [F4](Amplifier)
Displays the PARTIAL EDIT (AMPLIFIER) screen (p.
145).
• [F5](LFO) Low Frequency Oscillator
Displays the PARTIAL EDIT (LFO) screen (p. 147).
• If you select “Bend Up” or “Bend Down,” you must set the
Key Sync parameter (PARTIAL EDIT (LFO) screen (p.
147)) to “On.” If this is “Off,” the LFO effect will not be
obtained.
• [MENU]
Displays the MENU popup.
INSTRUMENTS AUDIO PHRASES
Displays the PARTIAL EDIT (FILTER) screen (p. 143).
LFO Rate
Range:
0–102–127, , , , , , , , ,
, , , , , , , , , , ,
,
,
PROJECT
Specifies the rate (frequency) of the waveform produced
by the LFO.
Menu item
1 Partial Name
Specifies the amount by which the LFO will affect the
pitch.
Range:
-63–0–+63
Specifies the amount by which the LFO will affect the
panning.
-63–0–+63
• The PARTIAL EDIT MENU will also appear when you
press [MENU] in the following screens.
•
•
•
•
DISK/USB
LFO Depth Pan
Range:
Displays the EDIT NAME popup (p. 3), where you can
edit the name of the partial.
PARTIAL EDIT (SMT) screen (p. 141)
PARTIAL EDIT (FILTER) screen (p. 143)
PARTIAL EDIT (AMPLIFIER) screen (p. 145)
PARTIAL EDIT (LFO) screen (p. 147)
MASTERING
LFO Depth Filter
Specifies the amount by which the LFO will affect the
filter.
Range:
-63–0–+63
SAMPLING
LFO Depth Amp (LFO Depth Amplifier)
Specifies the amount by which the LFO will affect the
volume.
Range:
SYSTEM
LFO Depth Pitch
-63–0–+63
IMPORT
EFFECTS
MIXER
MV-8800 Screen Guide
S-127
MV-8800_r_e.book 128 ページ 2006年11月10日 金曜日 午後12時49分
INSTRUMENTS
SAMPLE EDIT screen
Here you can edit the sample used by the partial.
■ To access this screen
• [INSTRUMENTS] ➜ [F5](Patch Edit) ➜
[F5](Partial Edit) ➜ [F1](Sample Edit)
• [INSTRUMENTS] ➜ [F5](Patch Edit) ➜
[F5](Partial Edit) ➜ [F2](SMT) ➜ [F2](Sample Edit)
Explanation of each area
Pad
Shows the currently edited velocity pad number and
partial name.
SMT (Sample Mix Table)
Shows the assignments of the samples that make up the
partial you’re editing.
In the example shown here, the partial consists of SMT1.
SMT Number (Sample Mix Table number)
Of the samples (SMT) that make up the currently-edited
partial, this specifies the SMT number that you are
actually editing. In the example shown here, you are
editing SMT1 that make up the partial.
End Point
The point at which playback will end. Set this to avoid
playing any unwanted portion at the end of the sample.
Wave window
Displays the sample (waveform) you are editing. When
you edit parameters
setting of each point.
–
, this area will show the
Loop Mode
Specifies how the sample will play.
Value
Explanation
Forward
The sample will play from the start point to the end
point, and then repeatedly play from the loop point
to the end point in the forward direction.
Start Point
Zoom Level
Loop Point
End Point
This indicates the magnification of the waveform shown
in the wave window.
is the horizontal (time axis) magnification, and
is the vertical (level axis) magnification. You can change
the zoom level by holding down [SHIFT] and pressing
the cursor button of the direction that is colored solid
black.
One Shot
The sample will play once from the start point to
the end point.
Start Point
Loop Point
End Point
Start Point
The point at which playback will start. Set this to skip any
unwanted portion of the waveform at the beginning of the
sample, so that the sample will begin playing at the
desired timing.
Loop Point
The point at which the repeated portion (the second and
subsequent times) will begin playing. Set this if you want
to the sample to loop from a point other than the Start
Point.
S-128
MV-8800 Screen Guide
Alternate
The sample will play from the start point to the end
point, and then repeatedly play from the end point
➔ loop start point ➔ end point ➔ ... in a zig-zag
fashion.
Start Point
Loop Point
End Point
MV-8800_r_e.book 129 ページ 2006年11月10日 金曜日 午後12時49分
INSTRUMENTS
F-buttons and menu
Value
Explanation
Rev One
Shot
The sample will play once in the reverse direction
from the end point to the start point.
Start Point
Loop Point
• [F1](Sample List)
Displays the SAMPLE LIST popup (p. 130).
End Point
• [F2](Sample Prm)
Displays the SAMPLE PARAMETER popup (p. 131).
• [F3](Length Lock)
Reverse
Start Point
Loop Point
End Point
Loop Tune
Adjusts the pitch of the loop region in steps of one cent.
Range:
-50–0–+50
Specifies whether the length between the playback
points of the sample will be fixed.
If the indication “LENG LOCK” is shown at the left of the
Start Point, Loop Point, and End Point parameters, the
length of the corresponding region will be locked. In this
case, changing one value will affect the other value while
maintaining the length of the region.
• [F4](Preview)
When you hold this button, auditions a currently edited
sample.
INSTRUMENTS AUDIO PHRASES
The sample will play from the end point to the start
point, and then play repeatedly in the reverse
direction from the loop start point to the start point.
• [F5](Command)
Displays the SELECT SAMPLE EDIT COMMAND popup
(p. 132).
• [MENU]
PROJECT
• One cent = 1/100th of a semitone
Displays the MENU popup.
SYSTEM
Menu items
Displays the SAVE SAMPLE AS WAV popup (p. 140),
where you can save the sample to disk in WAV format.
Displays the SAVE SAMPLE AS AIFF popup (p. 140),
where you can save the sample to disk in AIFF format.
MASTERING
2 Save Sample As AIFF
DISK/USB
1 Save Sample As WAV
SAMPLING
IMPORT
EFFECTS
MIXER
MV-8800 Screen Guide
S-129
MV-8800_r_e.book 130 ページ 2006年11月10日 金曜日 午後12時49分
INSTRUMENTS
SAMPLE LIST popup
In this popup you can choose from the samples that have been saved in the MV-8800.
■ To access this screen
• [INSTRUMENTS] ➜ [F5](Patch Edit) ➜
[F5](Partial Edit) ➜ [F1](Sample Edit) ➜
[F1](Sample List)
• [INSTRUMENTS] ➜ [F5](Patch Edit) ➜
[F5](Partial Edit) ➜ [F2](SMT) ➜ [F1](Sample List)
• [AUDIO PHRASE] ➜ [F5](Edit) ➜
[F1](Sample List) etc.
Explanation of each area
Wave window
Displays the waveform of the sample selected by the
cursor in the Sample List.
Sample list
Lists the saved samples. The sample number, sample
name, channels (Stereo/Mono), and sample size are
displayed. Choose the desired sample from this list.
Category
Sorts the sample list by category. You will need to have
previously specified a category for each sample in the
SAMPLE PARAMETER popup (p. 131).
S-130
MV-8800 Screen Guide
F-buttons
• [F3](Category)
Displays the SELECT CATEGORY popup (p. 4), where
you can limit the category of samples that will appear in
the sample list.
• [F4](Preview)
Auditions the currently-highlighted sample while you hold
down the button.
• [F5](Select)
Selects (confirms) the currently-highlighted sample, and
closes the popup.
MV-8800_r_e.book 131 ページ 2006年11月10日 金曜日 午後12時49分
INSTRUMENTS
SAMPLE PARAMETER popup
Here you can set various parameters for the samples.
■ To access this screen
• [INSTRUMENTS] ➜ [F5](Patch Edit) ➜
[F5](Partial Edit) ➜ [F1](Sample Edit) ➜
[F2](Sample Prm)
• [AUDIO PHRASE] ➜ [F5](Edit) ➜
[F1](Sample List) ➜ [F2](Sample Param) etc.
Explanation of each area
Displays the number of the selected sample.
Sample name
Displays the name of the selected sample.
• [F1](Name)
Displays the EDIT NAME popup (p. 3), where you can
edit the name of the sample.
PROJECT
Sample number
F-buttons
INSTRUMENTS AUDIO PHRASES
• [INSTRUMENTS] ➜ [F5](Patch Edit) ➜
[F5](Partial Edit) ➜ [F2](SMT) ➜ [F2](Sample Edit)
➜ [F2](Sample Prm)
• [F5](Close)
Specifies the original key of the sample. This is the note
number that will play the sample at its recorded pitch.
SYSTEM
Closes the SAMPLE PARAMETER popup (this popup).
Original Key
DISK/USB
MASTERING
SAMPLING
IMPORT
EFFECTS
MIXER
MV-8800 Screen Guide
S-131
MV-8800_r_e.book 132 ページ 2006年11月10日 金曜日 午後12時49分
INSTRUMENTS
SELECT SAMPLE EDIT COMMAND popup
Here you can choose a sample edit command.
■ To access this screen
• [PROJECT] ➜ move the cursor to the lower row of
icons ➜ [F3](SmplMgr) ➜ [F5](Command)
• [INSTRUMENTS] ➜ [F5](Patch Edit) ➜
[F5](Partial Edit) ➜ [F1](Sample Edit) ➜
[F5](Command)
• [AUDIO PHRASE] ➜ [F5](Edit) ➜ [F5](Command)
etc.
Explanation of each area
7 Fade In
Displays the FADE IN popup (p. 138).
1 Emphasis
Displays the EMPHASIS popup (p. 133), where you can
emphasize the high frequency region of a sample, or
restore an emphasized sample to its original state.
Here you can apply a Fade In effect to the sample
(causing the volume to gradually increase from zero
between the beginning and the point you specify).
* This menu item can be selected when you open this popup
from the SAMPLE MANAGER screen (p. 169).
2 Normalize
Displays the NORMALIZE popup (p. 134). Boost the
overall level of the sample without allowing it to exceed
the maximum number of bits.
3 Time Stretch
Displays the TIME STRETCH popup (p. 135), where you
can extend or shorten the length (time) of the sample
without changing its pitch.
8 Fade Out
Displays the FADE OUT popup (p. 139).
Here you can apply a Fade Out effect to the sample
(causing the sample to gradually decrease between the
point you specify and the end point).
* This menu item can be selected when you open this popup
from the SAMPLE MANAGER screen.
4 Truncate
Displays the TRUNCATE popup (p. 136). Use the
Truncate operation to delete unwanted portions of a
sample.
* This menu item cannot be selected when you open this
popup from the AUDIO EVENT PARAMETER popup (p. 28).
5 Set Mono
• [F1](▲) / [F2](▼)
These buttons move the cursor between commands
shown in the popup.
• [F5](Select)
Displays the SET MONO popup (p. 137).
Here you can convert a stereo sample into a monaural
sample.
6 Delete
Delete selected samples.
A confirmation message “Delete sample. Are you sure?”
will appear.
F-button
Explanation
[F1](No)
To cancel without deleting.
[F5](Yes)
To delete selected samples.
* This menu item can be selected when you open this popup
from the SAMPLE MANAGER screen (p. 169).
S-132
F-buttons
MV-8800 Screen Guide
Confirms the command you chose, and moves to the
corresponding execution screen.
MV-8800_r_e.book 133 ページ 2006年11月10日 金曜日 午後12時49分
INSTRUMENTS
EMPHASIS popup
This command lets you convert the sample into a format that emphasizes or de-emphasizes the
high-frequency region.
■ To access this screen
• Accesses the SELECT SAMPLE EDIT COMMAND
popup (p. 132) ➜ select “Emphasis” ➜ [F5](Select)
INSTRUMENTS AUDIO PHRASES
Explanation of each area
F-button
PROJECT
• [F5](Execute)
Type
Specifies the conversion mode.
Explanation
PreEmphasis
Boosts the high-frequency region.
De-Emphasis
Attenuates the high-frequency region.
• The amount of time required to execute the emphasis.
SYSTEM
Value
Executes the Emphasis command.
Replace
Specifies whether the data after conversion will overwrite
the existing sample or be saved as a different sample.
The waveform data after conversion will be added
as a different sample.
On (✔)
The converted data will overwrite the existing
sample.
MASTERING
Explanation
DISK/USB
Value
Off
SAMPLING
IMPORT
EFFECTS
MIXER
MV-8800 Screen Guide
S-133
MV-8800_r_e.book 134 ページ 2006年11月10日 金曜日 午後12時49分
INSTRUMENTS
NORMALIZE popup
This maximizes the volume of the sample as far as possible.
■ To access this screen
• Accesses the SELECT SAMPLE EDIT COMMAND
popup (p. 132) ➜ select “Normalize” ➜ [F5](Select)
Explanation of each area
• [F5](Execute)
Replace
Specifies whether the data after conversion will overwrite
the existing sample or be saved as a different sample.
S-134
F-button
Value
Explanation
Off
The waveform data after conversion will be added
as a different sample.
On (✔)
The converted data will overwrite the existing
sample.
MV-8800 Screen Guide
Executes the Normalize command.
MV-8800_r_e.book 135 ページ 2006年11月10日 金曜日 午後12時49分
INSTRUMENTS
TIME STRETCH popup
This command lets you modify the length or tempo of the sample.
■ To access this screen
• Accesses the SELECT SAMPLE EDIT COMMAND
popup (p. 132) ➜ select “Time Stretch” ➜
[F5](Select)
Specifies the proportion (%) by which Time Stretch will
modify the playback time.
Range:
75.0–100.0–125.0
Specifies the playback time following the Time Stretch
operation, in terms of minutes, seconds, and
milliseconds.
Specifies whether the data after conversion will overwrite
the existing sample or be saved as a different sample.
Value
Explanation
Off
The waveform data after conversion will be added
as a different sample.
On (✔)
The converted data will overwrite the existing
sample.
DISK/USB
F-button
• If length data (Rate, Time) has been assigned to the
sample, editing the value of one parameter will change the
value of the other parameter in tandem.
• [F5](Execute)
Executes the Time Stretch command.
MASTERING
Type
Lower settings of this value will make the sound more
suitable for faster phrases, and higher settings will make
the sound more suitable for slower phrases.
Explanation
01
for faster phrases
:
05
(initial value)
:
:
10
for slower phrases
IMPORT
:
SAMPLING
Range
Quality Adjust
Make fine adjustments to the tonal quality of the Time
Stretch.
1–10
EFFECTS
Range
SYSTEM
Time
Replace
PROJECT
Rate
INSTRUMENTS AUDIO PHRASES
Explanation of each area
MIXER
MV-8800 Screen Guide
S-135
MV-8800_r_e.book 136 ページ 2006年11月10日 金曜日 午後12時49分
INSTRUMENTS
TRUNCATE popup
Use the Truncate operation to delete unwanted portions of a sample.
■ To access this screen
• Accesses the SELECT SAMPLE EDIT COMMAND
popup (p. 132) ➜ select “Truncate” ➜ [F5](Select)
Explanation of each area
F-button
• [F4](Preview)
Sample
Shows the number, name, number of channels of
currently editing sample.
Wave window
Displays the sample (waveform) you are editing.
While the button is held down, you can audition the
sounds in the region between the Start Point and the
End Point.
• [F5](Execute)
Executes the Truncate command.
Zoom Level
This indicates the magnification of the waveform shown
in the wave window.
You can change the zoom level of both vertical (level)
axis and horizontal (time) axis by holding down [SHIFT]
and pressing the cursor button.
Start Point / End Point
This sets the Truncate Start Point and End Point.
The region between the Start Point and the End Point is
not deleted.
Replace
Specifies whether the data after conversion will overwrite
the existing sample or be saved as a different sample.
S-136
Value
Explanation
Off
The waveform data after conversion will be added
as a different sample.
On (✔)
The converted data will overwrite the existing
sample.
MV-8800 Screen Guide
MV-8800_r_e.book 137 ページ 2006年11月10日 金曜日 午後12時49分
INSTRUMENTS
SET MONO popup
This operation converts a stereo sample to a monaural sample.
■ To access this screen
• Accesses the SELECT SAMPLE EDIT COMMAND
popup (p. 132) ➜ select “Set Mono” ➜ [F5](Select)
INSTRUMENTS AUDIO PHRASES
Explanation of each area
F-button
PROJECT
• [F5](Execute)
Replace
Specifies whether the data after conversion will overwrite
the existing sample or be saved as a different sample.
Explanation
The waveform data after conversion will be added
as a different sample.
On (✔)
The converted data will overwrite the existing
sample.
SYSTEM
Value
Off
Executes the Set Mono command.
DISK/USB
MASTERING
SAMPLING
IMPORT
EFFECTS
MIXER
MV-8800 Screen Guide
S-137
MV-8800_r_e.book 138 ページ 2006年11月10日 金曜日 午後12時49分
INSTRUMENTS
FADE IN popup
This operation applies a fade-in to the sample, causing the volume to gradually increase from zero
between the beginning and the point you specify.
■ To access this screen
• Accesses the SELECT SAMPLE EDIT COMMAND
popup (p. 132) ➜ select “Fade In” ➜ [F5](Select)
Explanation of each area
• [F4](Preview)
Sample
Shows the number, name, number of channels of
currently editing sample.
Wave window
Displays the sample (waveform) you are editing.
Zoom Level
This indicates the magnification of the waveform shown
in the wave window.
You can change the zoom level of both vertical (level)
axis and horizontal (time) axis by holding down [SHIFT]
and pressing the cursor button.
End Point
Specifies the point at which the fade-in will end.
The volume will gradually increase from zero in the
region between the Start Point of the sample and this
point.
Replace
Specifies whether the data after conversion will overwrite
the existing sample or be save as a different sample.
S-138
F-buttons
Value
Explanation
Off
This waveform data after conversion will be added
to the sample list as a different sample.
On (✔)
This converted data will overwrite the existing
sample.
MV-8800 Screen Guide
You can hold down this button to audition the region to
which the fade-in effect will be applied.
• [F5](Execute)
Applies the fade-in effect to the region between the
sample’s Start Point and the End Point.
MV-8800_r_e.book 139 ページ 2006年11月10日 金曜日 午後12時49分
INSTRUMENTS
FADE OUT popup
This operation applies a fade-out to the sample, causing the volume to gradually decrease between the
point you specify and the end point.
■ To access this screen
• Accesses the SELECT SAMPLE EDIT COMMAND
popup (p. 132) ➜ select “Fade Out” ➜ [F5](Select)
INSTRUMENTS AUDIO PHRASES
Explanation of each area
F-buttons
Shows the number, name, number of channels of
currently editing sample.
Wave window
• [F5](Execute)
Applies the fade-out effect to the region between the
Start Point and the sample’s End Point.
SYSTEM
Displays the sample (waveform) you are editing.
You can hold down this button to audition the region to
which the fade-out effect will be applied.
PROJECT
• [F4](Preview)
Sample
Zoom Level
This indicates the magnification of the waveform shown
in the wave window.
DISK/USB
You can change the zoom level of both vertical (level)
axis and horizontal (time) axis by holding down [SHIFT]
and pressing the cursor button.
MASTERING
Start Point
Specifies the point at which the fade-out will begin.
The volume will gradually decrease from this point to the
sample’s End Point.
Replace
SAMPLING
Specifies whether the data after conversion will overwrite
the existing sample or be save as a different sample.
Explanation
Off
This waveform data after conversion will be added
to the sample list as a different sample.
On (✔)
This converted data will overwrite the existing
sample.
IMPORT
Value
EFFECTS
MIXER
MV-8800 Screen Guide
S-139
MV-8800_r_e.book 140 ページ 2006年11月10日 金曜日 午後12時49分
INSTRUMENTS
SAVE SAMPLE AS WAV popup / SAVE SAMPLE AS AIFF popup
Here you can save the sample as a WAV-format or AIFF-format file.
■ To access this screen
• [INSTRUMENTS] ➜ [F5](Patch Edit) ➜
[F5](Partial Edit) ➜ [F1](Sample Edit) ➜
[MENU] ➜ select “Save Sample As WAV” or “Save
Sample As AIFF” ➜ [F5](Select)
• [AUDIO PHRASES] ➜ [F5](Edit) ➜ [MENU] ➜
select “Save Sample As WAV” or “Save Sample As
AIFF” ➜ [F5](Select)
Explanation of each area
Sample number, Sample name
Displays the number and name of the sample which can
be saved.
Current folder name
F-buttons
• [F4](Make Folder)
Displays the EDIT NAME popup (p. 3), where you can
create a new folder inside the current folder.
• [F5](Save)
Displays the destination folder you want to save.
Saves the sample as a WAV-format or AIFF-format file.
Folder levels below the root folder (the top level folder in
the hard disk) are shown by a slash “/” symbol.
Displays the EDIT NAME popup (p. 3), where you can
specify the name of a WAV-format or AIFF-format file.
File list
Displays the name of the files and folders saved in the
current folder.
Drive capacity
Displays the free space of the hard disk.
S-140
MV-8800 Screen Guide
MV-8800_r_e.book 141 ページ 2006年11月10日 金曜日 午後12時49分
INSTRUMENTS
PARTIAL EDIT (SMT) screen
Here you can edit the Sample Mix Table (SMT) used by the partial.
■ To access this screen
• [INSTRUMENTS] ➜ [F5](Patch Edit) ➜
[F5](Partial Edit) ➜ [F2](SMT)
INSTRUMENTS AUDIO PHRASES
Explanation of each area
Pan (SMT pan)
Value
Explanation
L32
The stereo position is fixed at the far left.
SMT (Sample Mix Table)
:
:
Shows the sample usage for the partial you selected in
. In the example shown here, the partial uses SMT1
and 2.
C
The stereo position is fixed at the center.
Sample
:
The stereo position changes irregularly at random.
Key-
The higher up on the keyboard that you play, the
further the sound is shifted to the right.
Key+
The higher the notes played on the
keyboard, the further left the sound is shifted.
Value
Explanation
LFO-
The LFO phase is reversed between LFO+ and
LFO-.
Off
All SMTs will sound.
On
Different SMTs will sound according to the velocity
level of your playing.
LFO+
The sample pan is C (center), and the sound is
panned left and right automatically with the LFO.
The depth of the pan movement is determined by
the LFO Depth Pan (p. 127) parameter.
Sw (Switch)
Specifies whether the SMT will be applied (On) or not
(Off).
Alt
The stereo position of sound is shifted hard left and
hard right (i.e., L32, R32, L32, ...) each time a key
is played.
Range:
Off, On
Level (SMT level)
SAMPLING
Rand
MASTERING
The stereo position is fixed at the far right.
DISK/USB
R32
Specifies the samples that make up the partial.
SMT Velocity Control
SYSTEM
Selects the pad number and partial name that you will
edit.
PROJECT
Specifies the panning of each sample.
Pad
Specifies the level of each sample.
IMPORT
Range:
0–127
EFFECTS
MIXER
MV-8800 Screen Guide
S-141
MV-8800_r_e.book 142 ページ 2006年11月10日 金曜日 午後12時49分
INSTRUMENTS
Pitch KF (Pitch Key Follow)
Velocity Range Upper
Specifies the amount of pitch change that occurs when
you move one octave upward on the keyboard.
Specifies the upper limit of the velocities that will sound
the SMT (Sample Mix Table). Use this setting when you
want to velocity-switch between SMTs.
Range:
-16–Rev–Off–Norm–+16
Range:
Actual Pitch
8
]
+1
6/
orm
8/8
[N
Velocity Range FadeU
(Velocity Range Fade Width Upper)
+
C6
C5
C4
0
C3
-8
C2
/8
-1
C2
C3
C4
C5
[R
ev
]
6/8
C1
(total ranges except for the Upper setting) –
127
C6
C7
Keyboard
pitch
Specifies how the volume will change when you play a
velocity that falls from the specified Velocity Range
FadeU to the specified upper velocity limit. Higher
settings of this value will make the volume decrease
more gradually. If you don’t want any sound to be heard
when you play velocities over the Upper setting, set this
to “0”.
Range:
0–(Upper - FadeL - Lower)
Level
• If you want the pitch to change +1 octave (as on a
conventional keyboard), select “Norm.” With this setting,
the C5 note number will produce the C5 pitch. If you want
the pitch to change +2 octaves, select “+16”. With this
setting, the C5 note number will produce the C6 pitch.
Conversely, if you want the pitch to fall as you play upward
on the keyboard, select a negative (-) number. If you want
the same pitch to be produced regardless of the key you
play, select the “Off” setting.
• This setting is in units of 1/8 octave.
Coarse (SMT coarse tune)
Adjusts the pitch of the sample in steps of a semitone.
Range:
-48–0–+48 (+/-4 octaves)
Fine (SMT fine une)
Adjusts the pitch of the sample in steps of one cent.
Range:
-50–0–+50
• One cent = 1/100th of a semitone
Velocity Range Lower
Specifies the lower limit of the velocities that will sound
the SMT (Sample Mix Table). Use this setting when you
want to velocity-switch between SMTs.
Range:
1–(Upper - FadeU - FadeL - 1)
Velocity Range FadeL
(Velocity Range Fade Width Lower)
Specifies how the volume will change when you play a
velocity that falls from the specified Velocity Range
FadeL to the specified lower velocity limit. Higher
settings of this value will make the volume decrease
more gradually. If you don’t want any sound to be heard
when you play velocities below the Lower setting, set this
to “0”.
Range:
S-142
0–(Upper - FadeU - Lower - 1)
MV-8800 Screen Guide
Velocity
Range L
Range U
FadeL
FadeU
F-buttons
• [F1](Sample List)
Displays the SAMPLE LIST popup (p. 130). In this
popup, the SMT at the cursor location can be assigned
to a different sample.
• [F2](Sample Edit)
Displays the SAMPLE EDIT screen (p. 128). In this
screen, you can adjust the playback region of the SMT
sample at which the cursor is located.
MV-8800_r_e.book 143 ページ 2006年11月10日 金曜日 午後12時49分
INSTRUMENTS
PARTIAL EDIT (FILTER) screen
Here you can edit the filter of the partial.
■ To access this screen
• [INSTRUMENTS] ➜ [F5](Patch Edit) ➜
[F5](Partial Edit) ➜ [F3](Filter)
Selects the pad number and partial name that you will
edit.
SMT (Sample Mix Table)
Filter Type
No filter will be used.
LPF
Low Pass Filter. This cuts the region above the cutoff
frequency (Cutoff), making the sound more mellow.
This is the most frequently used type of filter.
BPF
Band Pass Filter. This passes only the region near
the cutoff frequency (Cutoff), cutting the remainder of
the sound. This type is useful for creating distinctive
sounds.
HPF
High Pass Filter. This cuts the region below the cutoff
frequency (Cutoff). This type is useful when creating
percussion sounds that have distinctive
high-frequency components.
Filter Cutoff
Range:
Filter
Type
0–127
Filter Velo Curve Type
(Filter Velocity Curve Type)
Selects one of the following four types of curve by which
the velocity will affect the filter. If you don’t want velocity
to affect the filter, select “1”.
Range:
1
1, 2, 3, 4
2
3
4
Filter Velo Curve Sens
(Filter Velocity Curve Sensitivity)
Specifies the depth and polarity by which the velocity will
affect the filter curve. Increasingly positive (+) settings
will make the curve closer to the shape specified by Filter
Velo Curve Type. With a setting of 0, the curve will be
the same as Filter Velo Curve Type=1. Negative (-)
settings will invert the shape of the curve.
Range:
-63–0–+63
IMPORT
Specifies the cutoff frequency of the current partial.
• Raising this value excessively may cause oscillation and
distortion.
SAMPLING
Explanation
0–127
MASTERING
Value
Off
Range:
DISK/USB
Selects the type of filter.
Emphasizes the sound of the current partial in the region
of the cutoff frequency.
SYSTEM
Shows the sample usage for the partial you selected in
. In the example shown here, the partial uses SMT1
and 2.
Filter Resonance
PROJECT
Pad
INSTRUMENTS AUDIO PHRASES
Explanation of each area
Filter KF Point (Filter Key Follow Point)
Effect on the Cutoff setting
BPF
The cutoff frequency value will change the overtone
structure of the sound.
HPF
Raising the cutoff frequency will diminish the lower
overtones, emphasizing the bright portion of the sound.
Range:
A0–C4–G#8
MIXER
Lowering the cutoff frequency will diminish the higher
overtones, making the sound more mellow. Raising this
setting will brighten the sound.
EFFECTS
LPF
Use this when you want the cutoff frequency to change
according to the note number you play. The cutoff
frequency will be at its base value for the key you specify
as the KF Point.
MV-8800 Screen Guide
S-143
MV-8800_r_e.book 144 ページ 2006年11月10日 金曜日 午後12時49分
INSTRUMENTS
Filter Cutoff KF (Filter Cutoff Key Follow)
Use this when you want the cutoff frequency to change
according to the note number you play. With positive (+)
settings of this parameter, the cutoff frequency will rise
as you play keys above the specified KF Point. With
negative (-) settings of this parameter, the cutoff
frequency will become lower as you play keys above the
specified KF Point. The example shown in the following
diagram is when you play the C5 key with the KF Point
set to C4.
Range:
Envelope Velocity Sens T1 (A)
(Envelope Velocity Sensitivity Attack Time)
Specifies how velocity will affect T1 of the filter envelope
(see the Filter Envelope diagram). Use positive (+)
settings if you want T1 to be faster for stronger velocities,
or negative (-) settings if you want it to be slower.
Range:
Envelope Velocity Sens T4 (R)
(Envelope Velocity Sensitivity Release Time)
Specifies how velocity will affect T4 of the filter envelope
(see the Filter Envelope diagram). Use positive (+)
settings if you want T4 to be faster for higher note-off
velocities (i.e., releasing the key more quickly), or
negative (-) settings if you want it to be slower.
-63–0–+63
Actual cutoff frequency
3
+6
Range:
0
-6
3
C2
C3
C4
C5
C6
C7
Keyboard
pitch
These specify the filter envelope times (T1–T4). Higher
values lengthen the time until the next cutoff frequency is
reached (e.g., T2 sets the time of the change from L1 to
L2).
Range:
Envelope Time KF (Envelope Time Key Follow)
Specifies how the envelope times (T1–T4) will be
adjusted relative to the key follow point. Increasing this
value will produce greater change. Positive (+) settings
will shorten the envelope times as you play toward the
right of the keyboard. Conversely, negative (-) settings
will lengthen the envelope times.
Range:
-63–0–+63
Envelope Depth Pitch
Adjusts the amount of pitch change. Increasing this value
will produce greater change. Negative (-) settings will
invert the direction of the change (i.e., the shape of the
pitch envelope).
Range:
-63-0–+63
Envelope T1 (A), T2, T3 (D), T4 (R)
(Envelope Times 1–4)
0
C1
-63–0–+63
0–127
Envelope L1, L2, L3 (S), L4
(Envelope Levels 1–4)
These specify the filter envelope levels (L1–L4). Each
parameter specifies the change in cutoff frequency
relative to the setting of the Cutoff parameter.
Range:
0–127
• The note-on level (L0) is linked with L4.
Cutoff
freqency
T1
T2
T3
T4
-63–0–+63
L0
L1
Envelope Depth Filter
Adjusts the amount of filter change. Increasing this value
will produce greater change. Negative (-) settings will
invert the direction of the change (i.e., the shape of the
filter envelope).
Range:
-63–0–+63
Envelope Velocity Sens Filter
(Envelope Velocity Sensitivity Filter)
Specifies how velocity will affect the filter. Use positive
(+) settings if you want filtering to become stronger as
you play higher velocities, or negative (-) settings if you
want filtering to become weaker.
Range:
-63–0–+63
L2
L3
Key-on
L4
Time
Key-off
T: Time, L: Level
Filter envelope
F-buttons
• [F1](Sample Edit)
Displays the SAMPLE EDIT screen (p. 128).
• [F2](SMT) Sample Mix Table
Displays the PARTIAL EDIT (SMT) screen (p. 141).
• [F4](Amplifier)
Displays the PARTIAL EDIT (AMPLIFIER) screen (p. 145).
• [F5](LFO) Low Frequency Oscillator
Displays the PARTIAL EDIT (LFO) screen (p. 147).
S-144
MV-8800 Screen Guide
MV-8800_r_e.book 145 ページ 2006年11月10日 金曜日 午後12時49分
INSTRUMENTS
PARTIAL EDIT (AMPLIFIER) screen
Here you can edit the way in which the volume of the partial will change.
■ To access this screen
• [INSTRUMENTS] ➜ [F5](Patch Edit) ➜
[F5](Partial Edit) ➜ [F4](Amplifier)
INSTRUMENTS AUDIO PHRASES
Explanation of each area
Level KF (Level Key Follow)
Selects the pad number and partial name that you will
edit.
SMT (Sample Mix Table)
Range:
Level Velo Curve Type
(Level Velocity Curve Type)
-63–0–+63
DISK/USB
Actual level
Selects one of the following four types of curve by which
the velocity will affect the volume. If you don’t want
velocity to affect the volume, select “1”.
3
+6
+63
1, 2, 3, 4
0
MASTERING
Range:
0
-63
1
2
3
SYSTEM
Shows the sample usage for the partial you selected in
. In the example shown here, the partial uses SMT1
and 2.
PROJECT
Use this when you want the level to change according to
the note number you play. With positive (+) settings of
this parameter, the level will become louder as you play
keys above the specified KF Point. With negative (-)
settings of this parameter, the level will become quieter
as you play keys above the specified KF Point. The
example shown in the following diagram is when you
play the C5 key with the KF Point set to C4.
Pad
4
-6
3
Range:
-63–0–+63
Use this when you want the level to change according to
the note number you play. The level will be at its base
value for the key you specify as the KF Point.
Range:
C3
C4
C5
C6
C7
Keyboard
pitch
Time KF (Envelope Time Key Follow)
Specifies how the envelope times (T1–T4) will be
adjusted relative to the key follow point (C4). Increasing
this value will produce greater change. Positive (+)
settings will shorten the envelope times as you play
toward the right of the keyboard. Conversely, negative (-)
settings will length the envelope times.
Range:
-63–0–+63
EFFECTS
Level KF Point (Level Key Follow Point)
C2
IMPORT
Specifies the depth and polarity by which the velocity will
affect the volume. Increasingly positive (+) settings will
make the curve closer to the shape specified by Level
Velo Curve Type. With a setting of 0, the curve will be
the same as Level Velo Curve Type=1. Negative (-)
settings will invert the shape of the curve.
C1
SAMPLING
Level Velo Curve Sens
(Level Velocity Curve Sensitivity)
A0–C4–G#8
MIXER
MV-8800 Screen Guide
S-145
MV-8800_r_e.book 146 ページ 2006年11月10日 金曜日 午後12時49分
INSTRUMENTS
F-buttons
Envelope Velo Sens T1 (A)
(Envelope Velocity Sensitivity Attack Time)
• [F1](Sample Edit)
Specifies how velocity will affect T1 of the amplifier
envelope (see the Amplifier Envelope diagram). Use
positive (+) settings if you want T1 to be faster for
stronger velocities, or negative (-) settings if you want it
to be slower.
Range:
-63–0–+63
Specifies how velocity will affect T4 of the amplifier
envelope (see the Amplifier Envelope diagram). Use
positive (+) settings if you want T4 to be faster for higher
note-off velocities (i.e., releasing the key more quickly),
or negative (-) settings if you want it to be slower.
-63–0-+63
Envelope T1 (A), T2, T3 (D), T4 (R)
(Envelope Times 1–4)
These specify the amplifier envelope times (T1–T4).
Higher values lengthen the time until the next level is
reached (e.g., T2 sets the time of the change from L1 to
L2).
Range:
0–127
Envelope L1, L2, L3 (S) (Envelope Levels 1–3)
These specify the amplifier envelope levels (L1–L3).
Each parameter specifies the change in level relative to
the setting of the Level parameter in the PARTIAL EDIT
(SMT) screen (p. 141).
Range:
Volume
0-127
T1 T2
T3
T4
Time
L1 L2
L3
Key-off
Key-on
T: Time, L: Level
Amplifier envelope
S-146
MV-8800 Screen Guide
• [F2](SMT) Sample Mix Table
Displays the PARTIAL EDIT (SMT) screen (p. 141).
• [F3](Filter)
Displays the PARTIAL EDIT (FILTER) screen (p. 143).
Envelope Velo Sens T4 (R)
(Envelope Velocity Sensitivity Release Time)
Range:
Displays the SAMPLE EDIT screen (p. 128).
• [F5](LFO) Low Frequency Oscillator
Displays the PARTIAL EDIT (LFO) screen (p. 147).
MV-8800_r_e.book 147 ページ 2006年11月10日 金曜日 午後12時49分
INSTRUMENTS
PARTIAL EDIT (LFO) screen
Here you can edit the modulation (cyclic change) of the partial.
■ To access this screen
• [INSTRUMENTS] ➜ [F5](Patch Edit) ➜
[F5](Partial Edit) ➜ [F5](LFO)
INSTRUMENTS AUDIO PHRASES
Explanation of each area
Wave Detune (Wave Rate Detune)
SMT (Sample Mix Table)
Shows the sample usage for the partial you selected in
. In the example shown here, the partial uses SMT1
and 2.
Wave Delay Time
SYSTEM
Selects the pad number and partial name that you will
edit.
This parameter creates slight differences in the LFO rate
(Wave Rate parameter) for each note-on. Higher settings
of this parameter will produce greater change. If “Rate” is
set to “note value,” this parameter is ignored.
Range: 0–127
PROJECT
Pad
Specifies the time from note-on (note-off) until the LFO
effect will be applied (will continue).
Range: 0–127
Wave Form
to the sound” (Owner’s Manual; p. 104).
Wave Delay KF (Wave Delay Key Follow)
Sine
Sine wave
Triangle
Triangle wave
Saw Up
Sawtooth wave
Saw Down
Sawtooth wave (inverted)
Square
Square wave
Random
Random wave
Bend Up
The LFO will output a waveform that rises to
the normal level and stays there
Bend Down
The LFO will output a waveform that falls to the
normal level and stays there
Specifies how the Delay Time parameter will be adjusted
according to the location of the key you play relative to
the C4 key (middle C). Set this parameter to a positive
(+) setting if you want the LFO effect to apply sooner as
you play upward on the keyboard, or to a negative (-)
setting if you want the delay to become longer as you
play upward. Higher settings will produce more change.
If you don’t want the keyboard location to affect the delay
until the LFO effect is applied, set this to “0”.
Range: -63–0–+63
SAMPLING
Explanation
MASTERING
Value
DISK/USB
☞ Set this appropriately as described in “To add modulation
Selects the waveform that the LFO will output.
Time
3
IMPORT
+6
• If you select “Bend Up” or “Bend Down,” you must set the
Key Sync parameter PARTIAL EDIT (LFO) screen (p. 147)
to “On.” If this is “Off,” the LFO effect will not be obtained.
+63
Wave Rate
Range:
0–102–127, , , , , , , , ,
, , , , , , , , , , ,
,
0
0
EFFECTS
Specifies the rate (frequency) of the waveform produced
by the LFO.
-63
,
-6
3
C1
C2
C3
C4
C5
C6
C7
Keyboard
Pitch
MIXER
MV-8800 Screen Guide
S-147
MV-8800_r_e.book 148 ページ 2006年11月10日 金曜日 午後12時49分
INSTRUMENTS
Key Sync
Specifies whether the start of the LFO cycle will match
the note-on timing (ON) or not (OFF).
Range:
F-buttons
• [F1](Sample Edit)
Displays the SAMPLE EDIT screen (p. 128).
Off, On
• [F2](SMT) Sample Mix Table
Depth Pitch
Specifies the amount by which the LFO will affect the
pitch.
Range:
-63–0–+63
Depth Filter
Specifies the amount by which the LFO will affect the
cutoff frequency.
Range:
-63–0–+63
Depth Amplifier
Specifies the amount by which the LFO will affect the
volume.
Range:
-63–0–+63
Depth Pan
Specifies the amount by which the LFO will affect the
panning.
Range:
-63–0–+63
• Positive (+) and negative (-) values of these Depth settings
will produce the opposite change in pitch or volume. For
example if you specify a positive (+) Depth value for one
partial and an identical but opposite negative (-) value for
another partial, the two will be modulated in opposite
directions. You can use this to exchange two different
partials, or in conjunction with Pan to make the sound
location move cyclically.
S-148
MV-8800 Screen Guide
Displays the PARTIAL EDIT (SMT) screen (p. 141).
• [F3](Filter)
Displays the PARTIAL EDIT (FILTER) screen (p. 143).
• [F4](Amplifier)
Displays the PARTIAL EDIT (AMPLIFIER) screen (p.
145).
MV-8800_r_e.book 149 ページ 2006年11月10日 金曜日 午後12時49分
INSTRUMENTS
SAVE PATCH popup
Here you can save patches as a file.
■ To access this screen
• [INSTRUMENTS] ➜ [MENU] ➜ select “Save Patch”
➜ [F5](Select)
Displays the name of the patch which can be saved.
Current folder name
Displays the destination folder you want to save.
File list
• [F4](Make Folder)
Displays the EDIT NAME popup (p. 3), where you can
create a new folder inside the current folder.
• [F5](Save)
Saves the patch as a file (with .MV0 extension) to the
hard disk.
Displays the EDIT NAME popup (p. 3), where you can
specify the name of a WAV-format or AIFF-format file.
DISK/USB
Displays the name of the files and folders saved in the
current folder.
SYSTEM
Folder levels below the root folder (the top level folder in
the hard disk) are shown by a slash “/” symbol.
F-buttons
PROJECT
Patch name
INSTRUMENTS AUDIO PHRASES
Explanation of each area
Drive capacity
Displays the free space of the hard disk.
MASTERING
SAMPLING
IMPORT
EFFECTS
MIXER
MV-8800 Screen Guide
S-149
MV-8800_r_e.book 150 ページ 2006年11月10日 金曜日 午後12時49分
INSTRUMENTS
LOAD PATCH screen
Here you can load patch data from the disk, and use it as a patch in the current project.
■ To access this screen
• [INSTRUMENTS] ➜ [MENU] ➜ select “Load Patch”
➜ [F5](Select)
Explanation of each area
Current drive
Shows the currently selected drive with its icon.
Current folder name
Displays the name of the currently selected folder. Folder
levels below the root (the top level of the folder structure)
are shown by a slash “/” symbol.
Cursor Icon
The cursor icon will change shape to indicate whether
you can press the cursor right or left button to change the
displayed folder.
Cursor
icon
Explanation
You can move the cursor up/down.
F-buttons and menu
• [F1](Select Drive)
Displays the SELECT DRIVE popup (p. 6), where you
can switch the drive from which to select patches.
• [F3](Mark On/Off)
Marks or unmarks a file.
• [F4](Preview)
Displays the IMPORT PREVIEW popup.
The message “Reading patch for preview..” will appear,
and the patch will begin loading. When all data has been
loaded, the IMPORT PREVIEW popup will show the
name of the patch that was loaded. You can use the
velocity pads (or other means) to audition and try out the
patch.
☞ For details, refer to “Auditioning or previewing before you
import” (Owner’s Manual; p. 74).
You can move the cursor up/down. If this
indication is displayed, the cursor is located at a
folder (highlighted). Press the right cursor key to
view the contents of the folder (i.e., to switch
folders).
You can move the cursor up/down. If this
indication is displayed, you can press the left
cursor button to
return to the parent folder (i.e., to switch folders).
Wave Memory
• [F5](Load)
Displays the ASSIGN TO PART / LIBRARY popup (p.
224).
• [MENU]
Displays the MENU popup.
Displays the remaining amount of wave memory.
Menu item
File list
1 All Mark
Here you can select the patch that you want to load.
S-150
MV-8800 Screen Guide
Marks or unmarks all patch files shown in the file list.
MV-8800_r_e.book 151 ページ 2006年11月10日 金曜日 午後12時49分
INSTRUMENTS
COPY PART popup
Here you can copy the settings of the current part to another part.
■ To access this screen
• [INSTRUMENTS] ➜ [MENU] ➜ select “Copy Part” ➜
[F5](Select)
F-button
Specifies the copy-destination of the current part
settings.
Copies the settings of the current part to the specified
part.
PROJECT
• [F5](Execute)
To Part
Range:
INSTRUMENTS AUDIO PHRASES
Explanation of each area
1–16
SYSTEM
• You can’t set this to be the number of the current part itself
(i.e., the copy-source itself).
DISK/USB
MASTERING
SAMPLING
IMPORT
EFFECTS
MIXER
MV-8800 Screen Guide
S-151
MV-8800_r_e.book 152 ページ 2006年11月10日 金曜日 午後12時49分
AUDIO PHRASES
Here you can manage audio phrases.
AUDIO PHRASES (PAD) screen
This screen shows the audio phrases that you can play from the velocity pads.
■ To access this screen
• [AUDIO PHRASES]
Explanation of each area
Value
Explanation
Pad Bank
Gate
Specifies the pad bank number. The pads of the selected
pad bank are shown in
(“Velocity Pads”).
Press pad ➜ sound begins
Release pad ➜ sound stops
Trigger
Press pad ➜ sound begins (and continues even
when you release the pad)
Press pad once again ➜ sound stops
Drum
Press pad ➜ sound begins (and continues even
when you release the pad)
Sound stops automatically at the end point of the
phrase
Velocity Pads
This area shows information for each pad. The displayed
pads correspond to the top panel VELOCITY PADS. The
pad selected by the cursor is highlighted.
• You can also select a pad by striking the desired
VELOCITY PAD on the top panel.
F-buttons and menu
• [F1](Pad)
Pad numbers
These are the numbers of each pad. They correspond to
the top panel VELOCITY PADS.
Displays the AUDIO PHRASES (PAD) screen (this
screen).
• [F2](List)
E.Grp (Exclusive group)
This allows you to specify, for multiple audio phrases,
that only one of them can play at once.
When audio phrases assigned to the same group are
played simultaneously (i.e., overlapping), the first-played
phrase will be turned off before the next-played one is
sounded.
Range:
Displays the AUDIO PHRASES (LIST) screen (p. 153).
• [F5](Edit)
Displays the AUDIO PHRASE EDIT screen (p. 155).
• [MENU]
Displays the MENU popup.
Off, 1–31
Category name
Menu items
This is part of the name of the audio phrase (“Category,”
p.70). You can assign a category to each audio phrase
so that it will be easier to find when needed.
1 Audio Phrase Name
Audio phrase name
This is the name assigned to each audio phrase.
Pad play mode
Indicates how the audio phrase will play. This setting is
made in the AUDIO PHRASE EDIT screen (p. 155).
S-152
MV-8800 Screen Guide
Displays the EDIT NAME popup (p. 3), which you can
assign a name to the audio phrase.
2 Save Audio Phrase Bank
Displays the SAVE AUDIO PHRASE BANK popup (p.
154), where you can save the audio phrases in the
current bank to the hard disk as a file.
MV-8800_r_e.book 153 ページ 2006年11月10日 金曜日 午後12時49分
AUDIO PHRASES
AUDIO PHRASES (LIST) screen
This screen lists information on the audio phrases assigned to the pads.
■ To access this screen
• [AUDIO PHRASES] ➜ [F2](List)
These are the numbers of each pad. They correspond to
the top panel VELOCITY PADS. The pad selected by the
cursor is highlighted.
This allows you to specify, for multiple audio phrases,
that only one of them can play at once.
When audio phrases assigned to the same group are
played simultaneously (i.e., overlapping), the first-played
phrase will be turned off before the next-played one is
sounded.
Range:
Off, 1–31
SYSTEM
• You can also select a pad by striking the desired
VELOCITY PAD on the top panel.
Excl.Grp (Exclusive group)
PROJECT
Pad numbers
AUDIO PHRASES
Explanation of each area
Category name
Audio phrase name
Level (Audio phrase level)
Specifies the playback level of the audio phrase.
Range:
0–127
Displays the AUDIO PHRASES (PAD) screen (p. 152)
(this screen).
• [F2](List)
Displays the AUDIO PHRASES (LIST) screen (this
screen).
• [F5](Edit)
SAMPLING
Play Mode (Pad play mode)
Specifies how the audio phrase will play.
• [F1](Pad)
MASTERING
This is the name assigned to each audio phrase.
F-buttons and menu
Displays the AUDIO PHRASE EDIT screen (p. 155).
• [MENU]
Displays the MENU popup.
Gate
Press pad ➜ sound begins
Release pad ➜ sound stops
Displayed menu items are same as the AUDIO
PHRASES (PAD) screen (p. 152).
Trigger
Press pad ➜ sound begins (and continues even
when you release the pad)
Press pad once again ➜ sound stops
Drum
Press pad ➜ sound begins (and continues even
when you release the pad)
Sound stops automatically at the end point of the
phrase
EFFECTS
Explanation
IMPORT
Value
Velocity
MIXER
Specifies whether velocity will affect the volume when
you use the velocity pads to play audio phrases.
Range:
DISK/USB
This is part of the name of the audio phrase (“Category,”
p.70). You can assign a category to each audio phrase
so that it will be easier to find when needed.
Off, On
MV-8800 Screen Guide
S-153
MV-8800_r_e.book 154 ページ 2006年11月10日 金曜日 午後12時49分
AUDIO PHRASES
SAVE AUDIO PHRASE BANK popup
Here you can save audio phrases in the current bank as a file.
■ To access this screen
• [AUDIO PHRASES] ➜ [MENU] ➜ select “Save
Audio Phrase Bank” ➜ [F5](Select)
Explanation of each area
Bank number, Bank name
Displays the number and name of the current audio
phrase bank which can be saved.
Current folder name
Displays the destination folder you want to save.
Folder levels below the root folder (the top level folder in
the hard disk) are shown by a slash “/” symbol.
File list
Displays the name of the files and folders saved in the
current folder.
Drive capacity
Displays the free space of the hard disk.
S-154
MV-8800 Screen Guide
F-buttons
• [F4](Make Folder)
Displays the EDIT NAME popup (p. 3) where you can
create a new folder inside the current folder.
• [F5](Save)
Saves the audio phrases in the current bank as a file to
the hard disk.
Displays the EDIT NAME popup (p. 3), where you can
specify the name of a WAV-format or AIFF-format file.
MV-8800_r_e.book 155 ページ 2006年11月10日 金曜日 午後12時49分
AUDIO PHRASES
AUDIO PHRASE EDIT screen
Here you can make settings for the audio phrase assigned to each pad.
■ To access this screen
• [AUDIO PHRASES] ➜ select the audio phrase you
want to edit ➜ [F5](Edit)
Loop Mode
Specifies how the specified loop region will be repeated.
Value
Explanation
Off
Looping will not occur.
Audio Phrase BPM (Audio Phrase Tempo)
Start-End
The region between the Start Point and the End
Point will play repeatedly.
Loop-End
The region between the Loop Point and the End
Point will play repeatedly.
Displays the tempo at which the audio phrase will play.
The value displayed here is calculated from the BPM
Base Note setting and the number of beats in the loop
region.
Shows the number, name, and number of channels for
the sample used by the audio phrase.
Wave window
Beat line
This line is shown at each beat. The space between lines
is one note.
Specifies how the audio phrase will play.
Gate
Press pad ➜ sound begins
Release pad ➜ sound stops
Trigger
Press pad ➜ sound begins (and continues even
when you release the pad)
Press pad once again ➜ sound stops
Drum
Press pad ➜ sound begins (and continues even
when you release the pad)
Sound stops automatically at the end point of the
phrase
Start Point
The point at which playback will start. Set this to skip any
unwanted portion of the waveform at the beginning of the
sample, so that the sample will begin playing at the
desired timing.
Loop Point
Specifies the point at which the playback will begin
repeating (i.e., for the second and subsequent plays).
Set this if you want to the sample to loop from a point
other than the Start Point.
End Point
Specifies the point at which playback will end. Set this to
avoid playing any unwanted portion of the waveform at
the end of the sample.
MV-8800 Screen Guide
S-155
MIXER
Explanation
/
EFFECTS
Value
,
IMPORT
Pad Play
, , (initial value),
x1–x4–x65535
SAMPLING
Displays the audio phrase (waveform) that you are
editing.
Range:
MASTERING
Zoom level
Indicates the ratio at which the waveform shown in the
wave window is being magnified or shrunk.
BPM Base Note
Specifies the length of the currently-edited audio phrase
as a number of beats at the specified note value. The
playback tempo is determined according to this data.
The tempo is indicated by Audio Phrase BPM.
DISK/USB
• If Pad Play is set to Drum, the Loop Point and Loop Mode
settings will be ignored.
Sample
SYSTEM
Displays the pad number and audio phrase name that
you want to edit.
PROJECT
Pad (Pad number)
AUDIO PHRASES
Explanation of each area
MV-8800_r_e.book 156 ページ 2006年11月10日 金曜日 午後12時49分
AUDIO PHRASES
F-buttons and menu
Level
Specifies the volume of the audio phrase.
Range:
0–127
Velocity Control
Specifies whether velocity will affect the volume when
you use the velocity pads to play audio phrases.
Coarse Tune
Adjusts the pitch of the audio phrase in steps of a
semitone.
Range:
-48–0–+48 (+/-4 octaves)
Fine Tune
Adjusts the pitch of the audio phrase in steps of one
cent.
Range:
-50–0–+50
• [F1](Sample List)
Displays the SAMPLE LIST popup (p. 130).
• [F2](Sample Edit)
Displays the AUDIO PHARASE SAMPLE EDIT screen
(p. 157).
In this screen you can focus on editing the playback
region of the sample used by the audio phrase.
• [F3](Length Lock)
Specifies whether the length between the playback
points of the sample will be fixed.
If the indication “LENG LOCK” is shown at the left of the
Start Point, Loop Point, and End Point parameters, the
length of the corresponding region will be locked. In this
case, changing one value will affect the other value while
maintaining the length of the region.
• One cent = 1/100th of a semitone
Reverse
Makes the audio phrase play backward (from the End
Point toward the Start Point).
Range:
Off, On
• If Reverse is On, the time difference between Start Point
and the Loop Point will be fixed.
• [F4] (Chop)
Displays the CHOP popup (p. 159).
• If Reverse is On and Loop Mode is set to Loop-End, the
loop region will loop backward between the Loop Point and
the Start Point.
BPM Sync (Tempo Sync)
If this parameter is On, the tempo will be calculated
according to the playback time from the Start Point to the
End Point and the note value (Base Note) and number of
notes in that region, so that the sequencer and the audio
phrase will play in synchronization.
Range:
Off, On
• [F5] (Command)
Displays the SELECT SAMPLE EDIT COMMAND popup
(p. 132).
• [MENU]
Displays the MENU popup.
Menu items
Stretch Type
If the BPM Sync parameter is On, this setting adjusts the
audio quality with which the sample is stretched or
shrunk (Time Stretch). The ideal setting will depend on
the type of audio material. If you choose Auto, the
appropriate setting will be automatically assigned based
on the length of the sound and the BPM.
Range:
Auto, 1–10
Excl Group (Exclusive group)
Specifies how audio phrases assigned to the same
exclusive group will be handled when they are played
simultaneously. When audio phrases assigned to the
same group are played simultaneously (i.e.,
overlapping), the first-played phrase will be turned off
before the next-played one is sounded.
Range:
S-156
Off, 1–31
MV-8800 Screen Guide
1 Audio Phrase Name
Displays the EDIT NAME popup (p. 3), where you can
assign a name to the audio phrase.
2 Save Sample As WAV
Displays the SAVE SAMPLE AS WAV popup (p. 140),
where you can save the audio phrase to disk in WAV
format.
3 Save Sample As AIFF
Displays the SAVE SAMPLE AS AIFF popup (p. 140),
where you can save the audio phrase to disk in AIFF
format.
MV-8800_r_e.book 157 ページ 2006年11月10日 金曜日 午後12時49分
AUDIO PHRASES
AUDIO PHARASE SAMPLE EDIT screen
In this screen you can edit the playback points while viewing a waveform display that is larger than that in
the AUDIO PHRASE EDIT screen.
■ To access this screen
• [AUDIO PHRASES] ➜ select the audio phrase you
want to edit ➜ [F5](Edit) ➜ [F2](Sample Edit)
AUDIO PHRASES
Explanation of each area
Loop Mode
Sample
Explanation
Off
Looping will not occur.
Zoom level
Start-End
Indicates the ratio at which the waveform shown in the
wave window is being magnified or shrunk.
The region between the Start Point and the End
Point will play repeatedly.
Loop-End
The region between the Loop Point and the End
Point will play repeatedly.
Wave window
Reverse
Shows the audio phrase (waveform) that you are editing.
Makes the audio phrase play backward (from the End
Point toward the Start Point).
Start Point
Range:
Off, On
• If Reverse is On and Loop Mode is set to Loop-End, the
loop region will loop backward between the Loop Point and
the Start Point.
Loop Point
SAMPLING
Specifies the point at which the playback will begin
repeating (i.e., for the second and subsequent plays).
Set this if you want to the sample to loop from a point
other than the Start Point.
End Point
IMPORT
Specifies the point at which playback will end. Set this to
avoid playing any unwanted portion of the waveform at
the end of the sample.
BPM Base Note
, , (initial value),
x1–x4–x65535
,
EFFECTS
Specifies the length of the currently-edited audio phrase
as a number of beats at the specified note value. The
playback tempo is determined according to this data.
The tempo is indicated by Audio Phrase BPM.
Range:
MASTERING
The point at which playback will start. Set this to skip any
unwanted portion of the waveform at the beginning of the
sample, so that the sample will begin playing at the
desired timing.
DISK/USB
Value
SYSTEM
Indicates the sample number and sample name that you
are editing.
PROJECT
Specifies how the specified loop region will be repeated.
/
MIXER
MV-8800 Screen Guide
S-157
MV-8800_r_e.book 158 ページ 2006年11月10日 金曜日 午後12時49分
AUDIO PHRASES
F-buttons
• [F1](Sample List)
Displays the SAMPLE LIST popup (p. 130).
• [F2](Sample Prm)
Displays the SAMPLE PARAMETER popup (p. 131).
• [F3](Length Lock)
Specifies whether the length between the playback
points of the sample will be fixed.
If the indication “LENG LOCK” is shown at the left of the
Start Point, Loop Point, and End Point parameters, the
length of the corresponding region will be locked. In this
case, changing one value will affect the other value while
maintaining the length of the region.
• If Reverse is On, the time difference between Start Point
and the Loop Point will be fixed.
• [F4](Preview)
When you hold this button, auditions a currently edited
sample.
• [F5](Command)
Displays the SELECT SAMPLE EDIT COMMAND popup
(p. 132).
• [MENU]
Displays the MENU popup.
Menu items
1 Save Sample As WAV
Displays the SAVE SAMPLE AS WAV (p. 140), where
you can save the audio phrase to disk in WAV format.
2 Save Sample As AIFF
Displays the SAVE SAMPLE AS AIFF popup (p. 140),
where you can save the audio phrase to disk in AIFF
format.
S-158
MV-8800 Screen Guide
MV-8800_r_e.book 159 ページ 2006年11月10日 金曜日 午後12時49分
AUDIO PHRASES
CHOP popup
Here you can divide an audio phrase at desired locations and assign each portion to a pad (to create a
patch). You can divide the phrase into as many as ninety-six portions.
■ To access this screen
• [AUDIO PHRASES] ➜ select the audio phrase you
want to edit ➜ [F5](Edit) ➜ [F4](Chop)
• [SAMPLING] ➜ turn off “Auto Divide parameter” ➜
[F5](Start) ➜ sampling... ➜ [F5](Stop) ➜
[F3](Quick Assign) ➜ [F1](Chop)
• [IMPORT] ➜ select the wave file you want to load ➜
[F5](Import) ➜ [F3](Quick Assign) ➜ [F1](Chop)
Indicates the sample number and sample name that you
are editing.
Zoom level
Wave window
Shows the sample (waveform) that you are editing.
No. (number)
This indicates the number of the waveform that was
divided by the Chop operation.
Current Point (Dividing line)
Deletes a chop point. The point selected in No. will be
deleted.
• You cannot do this if no dividing locations are specified, nor
can you delete point number 1.
• [F3](Auto Chop)
The AUTO CHOP popup (p. 160) will appear.
• [F4](Preview)
You can audition the waveform selected in No. by
holding down this button.
• [F5](Execute)
Divides the sample at the dividing points you specified,
and then displays the CHOP QUICK ASSIGN popup (p.
161).
IMPORT
Specifies the location at which the sample will be
divided. Set this value to divide the sample at the desired
point. The dividing line shown in the wave window will
move according to the value you specify as the Current
Address.
• [F2](Clear Point)
SAMPLING
Chop Point
Indicates the position of each divided audio phrase
selected by No.
• You can specify up to 95 dividing points (96 divisions).
MASTERING
The divided waveform is assigned to the velocity pads.
You can strike the velocity pads to audition the divided
waveform.
Adds a dividing point. Its location will be the Current
Address.
DISK/USB
Pad
• [F1](Add Point)
SYSTEM
Indicates the ratio at which the waveform shown in the
wave window is being magnified or shrunk.
F-buttons
PROJECT
Sample
AUDIO PHRASES
Explanation of each area
EFFECTS
MIXER
MV-8800 Screen Guide
S-159
MV-8800_r_e.book 160 ページ 2006年11月10日 金曜日 午後12時49分
AUDIO PHRASES
AUTO CHOP popup
Here you can automatically specify dividing point for a sample.
■ To access this screen
• [AUDIO PHRASES] ➜ select the audio phrase you
want to edit ➜ [F5](Edit) ➜ [F4](Chop) ➜
[F3](Auto Chop)
• [SAMPLING] ➜ turn off “Auto Divide parameter” ➜
[F5](Start) ➜ sampling... ➜ [F5](Stop) ➜
[F3](Quick Assign) ➜ [F1](Chop) ➜
[F3](Auto Chop)
• [IMPORT] ➜ select the wave file you want to load ➜
[F5](Import) ➜ [F3](Quick Assign) ➜ [F1](Chop)
➜ [F3](Auto Chop)
Explanation of each area
F-button
• [F5](Execute)
Chop Type
Specifies the conditions by which the sample will be
automatically divided.
Value
Explanation
Level
Divide according to volume.
Beat
Divide according to beats based on the
sequencer tempo (p. 79).
Divide X
Divide into the specified number of equal regions.
Level
Specifies the level at which the sample will be divided
when Chop Type=Level. Lower settings will cause the
sample to be divided more finely.
Range:
1–6–10
Beat
Specifies the number of beats by which the sample will
be divided when Chop Type=Beat.
Range:
(60),
(80),
(320),
(480),
(1920),
(120),
(640),
(160),
(240),
(960),
(3840)
Times
Specifies the number of regions into which the sample
will be divided when Chop Type=Divide X.
Range:
S-160
2–16
MV-8800 Screen Guide
Start specifying the point automatically. Closes the
AUTO CHOP popup.
MV-8800_r_e.book 161 ページ 2006年11月10日 金曜日 午後12時49分
AUDIO PHRASES
CHOP QUICK ASSIGN popup
Here you can assign each of the sample divided by Chop to their own pads as partials.
■ To access this screen
• [AUDIO PHRASES] ➜ select the audio phrase you
want to edit ➜ [F5](Edit) ➜ [F4](Chop) ➜
[F5](AsgnToPatch)
• [SAMPLING] ➜ turn off “Auto Divide parameter” ➜
[F5](Start) ➜ sampling... ➜ [F5](Stop) ➜
[F3](Quick Assign) ➜ [F1](Chop) ➜
[F5](AsgnToPatch)
Explanation of each area
Indicates the state of the pads in the current pad bank.
State
PROJECT
Velocity Pad
F-button
• [F5](Execute)
Assigns the partial to the velocity pad you specified.
Explanation
A partial is assigned to the pad.
DISK/USB
A partial is assigned to the velocity pad shown
in the frame.
Part
MASTERING
Selects the instrument number to which the divided
sample will be assigned.
1–16
Assign To
SAMPLING
Selects the velocity pad to which the partial is assigned.
The keyboard assignment region is also shown here.
Range:
SYSTEM
• When making automatic assignments, a confirmation
message will appear if a pad to which a sample is already
assigned would be overwritten.
No assignment.
Range:
AUDIO PHRASES
• [IMPORT] ➜ select the wave file you want to load ➜
[F5](Import) ➜ [F3](Quick Assign) ➜ [F1](Chop)
➜ [F5](AsgnToPatch)
1-01 (A 0)–6-16 (G#8)
Partial name
Indicates the name of the assigned partial.
IMPORT
• The last four characters are automatically assigned as
“Cp**” (** is each different number).
EFFECTS
MIXER
MV-8800 Screen Guide
S-161
MV-8800_r_e.book 162 ページ 2006年11月10日 金曜日 午後12時49分
PROJECT
Here you can manage projects and make project settings.
PROJECT MENU screen
This menu screen lets you select project-related items.
■ To access this screen
• [PROJECT]
Explanation of each area
RENAME PROJ (Rename project)
Displays the EDIT NAME popup (p. 3) where you can
assign a name to the project.
SET PROJ PROTECTION
(Set project protection)
Displays the SET PROJECT PROTECTION screen (p.
163).
LOAD PROJ (Load project)
F-buttons
The function of the F-buttons will depend on the location
of the cursor.
■ When the cursor is in the upper row
• [F1](Name)
Displays the EDIT NAME popup (p. 3).
• [F2](Protect)
Displays the SET PROJECT PROTECTION screen (p.
163).
Displays the LOAD PROJECT screen (p. 164).
SAVE PROJ (Save current project)
Displays the SAVE PROJECT popup.
SAVE AS NEW PROJ (Save as new project)
Displays SAVE AS NEW PROJECT popup (p. 165).
CREATE NEW PROJ (Create new project)
Displays the CREATE NEW PROJECT screen (p. 166).
DELETE PROJ (Delete project)
Displays the DELETE PROJECT screen (p. 168).
SAMPLE MANAGER
Displays the SAMPLE MANAGER screen (p. 169).
BACKUP TO CD (Backup current project to CD)
Displays BACKUP PROJECT TO CD screen (p. 170).
RECOVER FROM CD (Recover project from CD)
Displays RECOVER PROJECT FROM CD popup (p.
171).
• [F3](Load)
Displays the LOAD PROJECT screen (p. 164).
• [F4](Save)
Displays the SAVE PROJECT popup.
• [F5](SaveAs)
Displays SAVE AS NEW PROJECT popup (p. 165).
■ When the cursor is in the lower row
• [F1](Create)
Displays the CREATE NEW PROJECT screen (p. 166).
• [F2](Delete)
Displays the DELETE PROJECT screen (p. 168).
• [F3](SmplMgr)
Displays the SAMPLE MANAGER screen (p. 169).
• [F4](Backup)
Displays BACKUP PROJECT TO CD screen (p. 170).
• [F5](Recover)
Displays RECOVER PROJECT FROM CD popup (p. 171).
S-162
MV-8800 Screen Guide
MV-8800_r_e.book 163 ページ 2006年11月10日 金曜日 午後12時49分
PROJECT
SET PROJECT PROTECTION screen
Here you can protect a project saved on disk from being overwritten or deleted.
■ To access this screen
• [PROJECT] ➜ move the cursor to the upper row of
icons ➜ [F2](Protect)
Explanation of each area
Displays the protect status of the project. Projects with a
lock symbol
are protected.
Name
• [F4](Protect On)
Protects the project at the cursor location.
• [F5](Protect Off)
Defeats the protect setting for the project at the cursor
location.
Wave Size
Shows the wave size (the amount of sample data) for the
project at the cursor location.
• A protected project cannot be overwritten or deleted.
SYSTEM
Displays the project name at the cursor in project list.
PROJECT
Project List
F-buttons
DISK/USB
MASTERING
SAMPLING
IMPORT
EFFECTS
MIXER
MV-8800 Screen Guide
S-163
MV-8800_r_e.book 164 ページ 2006年11月10日 金曜日 午後12時49分
PROJECT
LOAD PROJECT screen
Here you can load a project.
■ To access this screen
• [PROJECT] ➜ move the cursor to the upper row of
icons ➜ [F3](Load)
Explanation of each area
Project list
This area lists the saved projects. The project selected
by the cursor is highlighted.
Name
This area shows the names of the saved projects.
Wave Size
Shows the wave size (the amount of sample data) for the
project at the cursor location.
S-164
MV-8800 Screen Guide
F-button
• [F5](Execute)
Loads the project selected by the cursor.
MV-8800_r_e.book 165 ページ 2006年11月10日 金曜日 午後12時49分
PROJECT
SAVE AS NEW PROJECT popup
Here you can save the current project under a different project name.
■ To access this screen
• [PROJECT] ➜ move the cursor to the upper row of
icons ➜ [F5](SaveAs)
Explanation of each area
Specify a new project name.
• [F1](History)
• [F2](Insert Space)
SYSTEM
Displays the HISTORY popup. You can recall (and
re-input) up to the ten most recent names you input in
the EDIT NAME popup since turning on the power.
Selects the name at the cursor in the history list then
press [ENTER].
PROJECT
Project Name
F-buttons
Inserts a space at the cursor location.
Deletes the character at the cursor location. Characters
at the right of the cursor will be moved forward to fill the
gap.
Switches the character at the cursor location between
uppercase and lowercase.
SAMPLING
• [F5](OK)
MASTERING
• [F4](A➜a/a➜A)
DISK/USB
• [F3](Delete)
The project will be saved.
IMPORT
EFFECTS
MIXER
MV-8800 Screen Guide
S-165
MV-8800_r_e.book 166 ページ 2006年11月10日 金曜日 午後12時49分
PROJECT
CREATE NEW PROJECT screen
Here you can create a new project.
■ To access this screen
• [PROJECT] ➜ move the cursor to the lower row of
icons ➜ [F1](Create)
Explanation of each area
Copy From Source Project
You can copy samples or various parameters from an
existing project to the newly created project.
Use [F4](Select Proj) to select the project that contains
the samples or parameters you want to copy, and add a
check mark (✔) to the items you want to copy.
You can choose to copy the following items.
Options
Explanation
Current Song Instruments instruments and samples of
current song
S-166
Current Song Effects
effects settings of current song
Audio Phrases
audio phrases and samples
Patterns
patterns
Patch
patch library and samples
MFX
MFX library
MIDI Clip
MIDI clip library
Delay/Chorus
Delay/Chorus library
Reverb
Reverb library
Mastering Toolkit
Mastering Toolkit library
MV-8800 Screen Guide
F-buttons
• [F4](Select Proj)
Displays the SELECT SOURCE PROJECT popup (p.
167).
• [F5](Execute)
Creates the project.
MV-8800_r_e.book 167 ページ 2006年11月10日 金曜日 午後12時49分
PROJECT
SELECT SOURCE PROJECT popup
Here you can select a project from which to copy samples or parameters when creating a new project.
■ To access this screen
• [PROJECT] ➜ move the cursor to the lower row of
icons ➜ [F1](Create) ➜ [F4](Select Proj)
Explanation of each area
Displays the list of the projects saved on the hard disk.
PROJECT
Project list
F-button
• [F5](Select)
Selects the project selected by the cursor as the
copy-source project.
SYSTEM
DISK/USB
MASTERING
SAMPLING
IMPORT
EFFECTS
MIXER
MV-8800 Screen Guide
S-167
MV-8800_r_e.book 168 ページ 2006年11月10日 金曜日 午後12時49分
PROJECT
DELETE PROJECT screen
Here you can delete an unwanted project.
■ To access this screen
• [PROJECT] ➜ move the cursor to the lower row of
icons ➜ [F2](Delete)
Explanation of each area
Project list
This area lists the saved projects. The project selected
by the cursor is highlighted.
Name
This is the name of the saved project.
Wave Size
Shows the wave size (the amount of sample data) for the
project at the cursor location.
S-168
MV-8800 Screen Guide
F-button
• [F5](Execute)
Deletes the project selected by the cursor.
MV-8800_r_e.book 169 ページ 2006年11月10日 金曜日 午後12時49分
PROJECT
SAMPLE MANAGER screen
Here you can manage the samples used by the current project.
■ To access this screen
• [PROJECT] ➜ move the cursor to the lower row of
icons ➜ [F3](SmplMgr)
Explanation of each area
Displays the waveform of the sample number that’s
selected in the sample list.
No. (number)
• [F1](Quick Assign)
Displays the Select Quick Assign message (p. 213).
• [F2](Sample Prm)
Displays the SAMPLE PARAMETER popup (p. 131).
SYSTEM
This is a unique number assigned to each saved sample.
PROJECT
Wave Window
F-buttons
• [F3](Mark On/Off)
Marks or unmarks the sample.
Name
Shows the name of the sample.
Shows the number of channels in the sample (monaural
or stereo).
Org Key (Original Key)
Size
• [F5](Command)
Displays the SELECT SAMPLE EDIT COMMAND popup
(p. 132).
MASTERING
Shows the original key specified for each sample.
Auditions the currently highlighted sample while you hold
down the button.
• [MENU]
Displays the MENU popup.
Shows the size of the sample.
Menu items
The samples used by the project are listed here. The
waveform of the highlighted sample is shown in the wave
window.
1 Optimize
Category
2 All Mark
Deletes the unused samples.
Marks or unmarks all samples.
IMPORT
This shows the category that was selected in the
SELECT CATEGORY popup (p. 4). Only the selected
category will be shown in the list.
SAMPLING
Sample List
DISK/USB
Wave Size
• [F4](Preview)
3 Category...
Displays the SELECT CATEGORY popup (p. 4).
Displays the SAVE SAMPLE AS WAV popup (p. 140),
where you can save the sample to disk in WAV format.
5 Save Sample As AIFF
MV-8800 Screen Guide
S-169
MIXER
Displays the SAVE SAMPLE AS AIFF popup (p. 140),
where you can save the sample to disk in AIFF format.
EFFECTS
4 Save Sample As WAV
MV-8800_r_e.book 170 ページ 2006年11月10日 金曜日 午後12時49分
PROJECT
BACKUP PROJECT TO CD screen
Here you can backup the current project to a CD-R/RW disc.
■ To access this screen
• [PROJECT] ➜ move the cursor to the lower row of
icons ➜ [F4](Backup)
Explanation of each area
Project list
This area lists the saved projects. The project selected
by the cursor is highlighted.
Name
This area shows the names of the project selected by the
cursor.
Wave Size
Shows the wave size (the amount of sample data) for the
project at the cursor location.
S-170
MV-8800 Screen Guide
F-button
• [F5](Execute)
Backs-up the project selected by the cursor.
MV-8800_r_e.book 171 ページ 2006年11月10日 金曜日 午後12時49分
PROJECT
RECOVER PROJECT FROM CD popup
Here you can recover (restore) a backed-up project from CD into the MV-8800 with the name you specify.
■ To access this screen
• [PROJECT] ➜ move the cursor to the upper row of
icons ➜ [F5](Recover)
Explanation of each area
Specify a new project name when recovering backed-up
data to the hard disk.
• [F1](History)
• [F2](Insert Space)
SYSTEM
Displays the HISTORY popup. You can recall (and
re-input) up to the ten most recent names you input in
the EDIT NAME popup since turning on the power.
Selects the name at the cursor in the history list then
press [F5](OK).
PROJECT
New Project on Hard disk
F-buttons
Inserts a space at the cursor location.
Deletes the character at the cursor location. Characters
at the right of the cursor will be moved forward to fill the
gap.
Switches the character at the cursor location between
uppercase and lowercase.
The project that was backed up to CD will be written
back to the hard disk.
After you’ve recovered the project back to the hard disk,
you can use the LOAD PROJECT screen (p. 164) to
make that project the current project.
SAMPLING
• [F5](Execute)
MASTERING
• [F4](A➜a/a➜A)
DISK/USB
• [F3](Delete)
IMPORT
EFFECTS
MIXER
MV-8800 Screen Guide
S-171
MV-8800_r_e.book 172 ページ 2006年11月10日 金曜日 午後12時49分
SYSTEM
Here you can make system settings for the MV-8800.
SYSTEM MENU screen
This is the menu screen from which you can make MV-8800 system settings.
■ To access this screen
• [SYSTEM]
Explanation of each area
F-buttons
GLOBAL
Displays the GLOBAL screen (p. 173).
PAD/PANEL
Displays the PAD screen (p. 174) or PANEL screen (p.
175).
MIDI
Displays the MIDI screen (p. 177).
V-LINK
Displays the V-LINK screen (p. 179).
SYSTEM INFO
• The function of the F-buttons will depend on the location of
the cursor.
■ When the cursor is in the upper row
• [F1](Global)
Displays the GLOBAL screen (p. 173).
• [F2](Pad/Panel)
Displays the PAD screen (p. 174).
• [F3](MIDI)
Displays the MIDI screen (p. 177).
Displays the SYSTEM INFORMATION screen (p. 181).
• [F4](V-LINK)
SLIDER
Displays the V-LINK screen (p. 179).
Displays the ASSIGNABLE SLIDER screen (p. 182).
R-BUS
Displays the R-BUS screen (p. 183).
DISPLAY/MOUSE
Displays the DISPLAY/MOUSE screen (p. 184).
PIX JAM
Displays the PIX JAM screen (p. 185).
• [F5](SysInfo)
Displays the SYSTEM INFORMATION screen (p. 181).
■ When the cursor is in the upper row
• [F1](Slider)
Displays the ASSIGNABLE SLIDER screen (p. 182).
• [F2](R-BUS)
Displays the R-BUS screen (p. 183).
• [F3](Disp/Mouse)
Displays the DISPLAY/MOUSE screen (p. 184).
• [F4](Pix Jam)
Displays the PIX JAM screen (p. 185).
S-172
MV-8800 Screen Guide
MV-8800_r_e.book 173 ページ 2006年11月10日 金曜日 午後12時49分
SYSTEM
GLOBAL screen
Here you can make settings for the overall system of the MV-8800.
■ To access this screen
• [SYSTEM] ➜ move the cursor to the upper row of
icons ➜ [F1](Global)
Explanation of each area
Range:
415.3–440.0–466.2
Input Select
Selects the input source for sampling or recording.
• If an audio event whose BPM Sync parameter is Off has
been recorded on an audio track, adjusting the Master
Tune parameter will cause the playback timing to drift.
Sampling source
Analog input jack (stereo)
Preview Length
Analog(L+R)
ANALOG INPUT jack (Lch and Rch mixed to
monaural)
Analog(L)
ANALOG INPUT jack (Lch only, monaural)
Specifies the playing time for Preview Playback (PREVIEW
[TO (
)] / [FROM(
)]) in steps of 0.1 seconds.
Sampler Output Gain
Range:
-12, -9, -6, -3, 0 dB
0.1–1.0–10.0 sec
HD Format Protect
Protects the hard disk from being formatted. When the
power is turned on, this setting will automatically be On.
Value
Explanation
Selects the audio signal that will be output from the
DIGITAL output jack.
Off
It will be possible to format the hard disk. Turn this
parameter Off if you want to format the hard disk.
On
It will not be possible to format the hard disk. When
the power is turned on, this setting will be On.
Output signal
Master
The same signal as the Master output will be output.
MLT1/2
The multi output bus 1/2 signal will be output.
Power Up Mode
:
:
MLT7/8
The multi output bus 7/8 signal will be output.
Selects the mode in which the sequencer will be at
power-up.
Digital Out Copy Protect
Explanation
The digital output jack will output a signal without
copy-protect flags.
On
The digital output jack will output a signal with
copy-protect flags. It will not be possible to copy this
data from the recorded media via a digital connection
onto an MD or DAT.
Explanation
Song
At power-up, the sequencer will be in Song mode.
(The SONG screen will appear.)
Pattern
At power-up, the sequencer will be in Pattern mode.
(The PATTERN screen will appear.)
EFFECTS
Value
Off
Value
IMPORT
Allows you to prohibit subsequent digital copying from
media that you digitally recorded from the MV-8800 onto
a digitally-connected MD recorder or similar device.
SAMPLING
Value
MASTERING
Digital Output Select
DISK/USB
Adjusts the level (volume) at which the sample will play.
Range:
SYSTEM
Value
Analog
Master Tune
MIXER
Adjusts the overall tuning of the MV-8800. The displayed
value is the frequency of the A4 key (middle A).
MV-8800 Screen Guide
S-173
MV-8800_r_e.book 174 ページ 2006年11月10日 金曜日 午後12時49分
SYSTEM
PAD screen
Here you can make settings for the velocity pads.
■ To access this screen
• [SYSTEM] ➜ move the cursor to the upper row of
icons ➜ [F2](Pad/Panel)
Explanation of each area
Pad Sens (Pad Sensitivity)
Specifies the sensitivity of the top panel velocity pads.
Value
Explanation
Light
Even a relatively light touch will produce high
velocities.
Medium
Mid-way between the Light and Heavy settings.
heavy
You will need to strike the pad fairly strongly in
order to produce high velocities. This means
that it will be easier to express small differences
when playing lower velocities.
Pad Aftertouch Sens
Specifies the aftertouch sensitivity. Lowering this setting
will lower the sensitivity, meaning that you will need to
press harder to produce an aftertouch effect. With a
setting of Off, aftertouch will not be transmitted.
Range:
Off, 1–7
Pad Roll Interval
Specifies the spacing of the roll when you use the pads
to play a roll.
Range:
(30),
(160),
Pad Trigger Threshold
Specifies that the pads will respond only to strikes that
are stronger than a certain level. For example if striking
one pad causes a different pad to sound as well, you can
adjust this setting to prevent false triggering caused by
vibration picked up by the other pad. Lower threshold
(i.e., higher sensitivity) settings allow the pads to
respond to weaker strikes.
Range:
0–15
(40),
(240),
(60),
(80),
(320),
F-buttons
• [F1](Pad)
Displays the PAD screen (this screen).
Displays the PANEL screen (p. 175).
Fixed Velocity Level
Specifies the velocity level at which the pads will be fixed
if the top panel [FIXED VELOCITY] is turned on.
Range:
1–127
Pad Aftertouch Type
Switches the aftertouch mode of the velocity pads. You
can select either “Channel Aftertouch” which applies the
effect to the entire part, or “Polyphonic Aftertouch” which
applies individually to each velocity pad.
Value
Explanation
Channel Channel aftertouch will be transmitted.
Poly
S-174
Polyphonic aftertouch will be transmitted.
MV-8800 Screen Guide
(480),
(960)
• [F2](Panel)
(120),
(640),
MV-8800_r_e.book 175 ページ 2006年11月10日 金曜日 午後12時49分
SYSTEM
PANEL screen
Here you can make settings for the top panel buttons, knobs, and sliders.
■ To access this screen
• [SYSTEM] ➜ move the cursor to the upper row of
icons ➜ [F2](Pad/Panel) ➜ [F2](Panel)
Explanation of each area
Shift Lock
Value
Explanation
Event Prev
The foot switch will function as [SHIFT] + MEAS
[
](EVENT). The current time location will
move to the previous event.
Specifies how the Shift button will operate.
Explanation
Foot Switch Polarity
The Shift button will be On and the [SHIFT] indicator
will light only while you hold down [SHIFT].
Switches the polarity of the foot switch.
On
The Shift button will turn On when you press [SHIFT],
and will remain On until you press [SHIFT] again.
Once
The Shift button will turn On when you press [SHIFT],
and will turn Off when you execute a function.
Explanation
Standard
Select this setting when using a Roland foot
switch (without a polarity switch).
Reverse
Select this setting if the foot switch operates in
the opposite way from what you expect when
pressed or released.
Foot Switch
Specifies the function of a separately sold foot switch
(e.g., DP-2, BOSS FS-5U).
Play and Stop will alternately occur each time
you press the foot switch.
Damper
The foot switch will function as the damper pedal
of a piano; it will transmit control change number
64 (Hold).
Punch I/O
The foot switch will switch between Recording
and Playback during manual punch-in recording.
Tap Tempo
Marker Set
Value
Explanation
Null
The tempo will be specified by the interval at
which you press the foot switch.
* Turn the Tap Tempo parameter On.
The value will not change until the slider/knob
position matches the actual value. In order to
control the value, you must first move the
slider/knob to the actual value.
Jump
The foot switch will function as [MARKER SET].
A marker will be recorded each time you press
the foot switch.
When you operate a slider/knob, the parameter
will immediately change to the corresponding
value.
Relative
Moving the slider/knob will increase or decrease
the value relative to the current value.
Marker Prev The foot switch will function as [SHIFT] + STEP
[
](MARKER). The current time location will
move to the previous marker.
Event Next
Specifies the Tap Tempo function of the [BPM/TAP]
button.
Value
Explanation
Off
The Tap Tempo function will not be used.
On
The tempo will be set by the interval at which you
press [BPM/TAP].
MV-8800 Screen Guide
S-175
MIXER
The foot switch will function as [SHIFT] + MEAS
[
](EVENT). The current time location will
move to the next event.
Tap Tempo
EFFECTS
Marker Next The foot switch will function as [SHIFT] + STEP
[
](MARKER). The current time location will
move to the next marker.
IMPORT
Play/Stop
SAMPLING
Explanation
MASTERING
Value
Slider Mode / Knob Mode
As you switch screens or perform various operations, the
positions of the top panel sliders and knobs may no
longer match the actual values of the parameters they
are controlling. This setting specifies how the sliders or
knobs will operate in such cases.
DISK/USB
Value
SYSTEM
Value
Off
MV-8800_r_e.book 176 ページ 2006年11月10日 金曜日 午後12時49分
SYSTEM
Tap Resolution
Specifies the beat interval by which the tempo will be set
when you use the Tap Tempo function.
Value
(120)
Press [BPM/TAP] at 16th notes of the tempo you
want to set.
(240)
Press [BPM/TAP] at eighth notes of the tempo
you want to set.
(480)
S-176
Explanation
Press [BPM/TAP] at quarter notes of the tempo
you want to set.
MV-8800 Screen Guide
F-buttons
• [F1](Pad)
Displays the PAD screen (p. 174).
• [F2](Panel)
Displays the PANEL screen (this screen).
MV-8800_r_e.book 177 ページ 2006年11月10日 金曜日 午後12時49分
SYSTEM
MIDI screen
Here you can make MIDI settings.
■ To access this screen
• [SYSTEM] ➜ move the cursor to the upper row of
icons ➜ [F3](MIDI)
Explanation of each area
Device ID
Specifies the MIDI connector and channel on which
performance data from the velocity pads will be
transmitted when Multi Timbre Sample Mode is On.
Messages will be transmitted from MIDI connector
A on channel 1.
:
:
A-16
Messages will be transmitted from MIDI connector
A on channel 16.
B-1
Messages will be transmitted from MIDI connector
B on channel 1.
Tx Active Sensing (Transmit Active Sensing)
:
:
Specifies whether Active Sensing messages will be
transmitted on the MIDI line. This allows a receiving
device to check the connection state.
B-16
Messages will be transmitted from MIDI connector
B on channel 16.
R-1
Messages will be transmitted from R-BUS
connector on channel 1.
Range:
1–32
• The MV-8800 does not transmit exclusive messages.
However it does transmit MTC (MIDI Time Code) and MMC
(MIDI Machine Control).
Value
Explanation
:
:
Off
Active Sensing will not be transmitted.
R-16
On
Active Sensing will be transmitted.
Messages will be transmitted from R-BUS
connector on channel 16.
MASTERING
Explanation
A-1
Audio Phrase Rx Channel
You can play audio phrases by receiving MIDI note
messages from an external MIDI device. Here you can
specify the MIDI channel on which MIDI note messages
will be received.
Performance data from the velocity pads and MIDI
IN is sent to the sequencer section.
Value
Explanation
Off
MIDI note messages will not play audio phrases.
Performance data from the velocity pads is sent
from MIDI OUT. Performance data from MIDI IN is
sent directly to the instrument section.
1–16
MIDI note messages on the specified MIDI channel
will play audio phrases.
EFFECTS
Explanation
IMPORT
Value
Off
SAMPLING
Multi Timbre Sampler Mode
This setting specifies whether the MV-8800’s sound
generator will be played by the internal sequencer or by
messages received from MIDI IN.
On
DISK/USB
Value
SYSTEM
This is a number used to distinguish between multiple
MV-8800 units connected to the same MIDI line. In order
to transmit and receive system exclusive messages, the
two units must be set to the same device ID.
Pad Tx Channel (Pad Transmit Channel)
MIXER
MV-8800 Screen Guide
S-177
MV-8800_r_e.book 178 ページ 2006年11月10日 金曜日 午後12時49分
SYSTEM
MFX Rx Channel
You can control MFX parameters (such as playing the
analog modeling bass) by receiving MIDI messages from
an external MIDI device.
This specifies the MIDI channel on which MIDI
messages will be received.
Value
Explanation
Off
MIDI messages will not be received to control MFX.
1–16
MIDI messages can be received to control MFX.
● The following MIDI messages can be received to control
the results shown.
MIDI message
Result
Control change
(numbers 16–18)
Control the MFX parameter
assigned to the C1–C3 knobs
● The following messages are valid if the analog modeling
bass algorithm is selected.
MIDI message
Result
Note-on/off
Start/stop the note
Control change (number 1)
Modulation
Pitch bend
Pitch bend
* If you set the MFX Rx Channel and the Audio Phrase Rx
Channel to the same MIDI channel number, the MFX Rx
Channel setting will be invalid.
S-178
MV-8800 Screen Guide
MV-8800_r_e.book 179 ページ 2006年11月10日 金曜日 午後12時49分
SYSTEM
V-LINK screen
Here you can make setting for using V-LINK to perform music and video together.
■ To access this screen
• [SYSTEM] ➜ move the cursor to the upper row of
icons ➜ [F4](V-LINK)
• [SHIFT] + [V-LINK]
Explanation of each area
Control Channel
Specifies the MIDI connector and channel used to
control the video clips, color Cb/Cr, brightness, and video
effect switching on a connected V-LINK device.
A-1–A-16, B-1–B-16, R-1–R-16
• [F1](Master)
Displays the V-LINK screen (this screen).
• [F2](Slave)
Displays the V-LINK (SLAVE) screen (p. 180).
SYSTEM
Range:
F-buttons
• [F4](Reset Clip)
Slider1–8
Here you can specify the video effect on your V-LINK
device that will be controlled by sliders 1–8.
The effect applied to the image will be reset, and
brightness, color distance, etc. will all return to the
default value.
MASTERING
Range:
Off, Disolve Time, Color Cb Ctrl, Color Cr Ctrl,
Brightness Ctrl, VFX1 Ctrl, VFX2 Ctrl, VFX3 Ctrl, VFX4,
Ctrl, Fade Ctrl, MD:ColorEQ Fore, MD:ColorEQ Back,
MD:Speed Knob, MD:Total Fader, MD:Cross Fader,
MD:Assign Knob, MD:Visual Knob, MD:Total Select,
MD:FX Select, MD:Play Pos, MD:LoopStartPos,
MD:LoopEndPos, MD:LayerModeSel
• [F5](Reset All)
DISK/USB
Parameters prefixed by “MD:” are MD-P1 parameters.
Turn off the video clips (solid black).
SAMPLING
Local Switch
Specifies whether instruments, audio phrases, or
patterns will also be played at the same time as V-LINK
clip change messages when you press a velocity pad.
You won’t be able to play instruments, audio
phrases, or patterns. Nor will you be able to record
your performance on a track.
On
You will be able to play instruments, audio
phrases, and patterns. You will also be able to
record your performance on a track.
EFFECTS
Explanation
Off
IMPORT
Value
MIXER
MV-8800 Screen Guide
S-179
MV-8800_r_e.book 180 ページ 2006年11月10日 金曜日 午後12時49分
SYSTEM
V-LINK (SLAVE) screen
Here you can make settings so that an external V-LINK compatible device (the V-LINK master) can output
an image from the MV-8800’s VGA OUT connector.
■ To access this screen
• [SYSTEM] ➜ move the cursor to the upper row of
icons ➜ [F4](V-LINK) ➜ [F2](Slave)
• [SHIFT] + [V-LINK] ➜ [F2](Slave)
Explanation of each area
Rx Select
Specifies the connector at which V-LINK ON messages
from an external V-LINK device (the V-LINK master) will
be received.
Range:
Off, MIDI, R-BUS
Rx Sw
This is an on/off switch for V-LINK slave functionality.
Normally, this will be switched automatically in response
to V-LINK ON messages and V-LINK OFF messages
sent from an external V-LINK device.
Range:
Off, On
Rx Channel
Note Mode
Specifies whether images can also be switched by
incoming note messages.
Range:
Off, On
• The table below shows the relationship between the note
messages that can be received and the images that are
switched.
Note Message
Velocity pad number to which an
image is assigned
–20 (–G#0)
No switch will occur.
21 (A 0)
1
22 (A#0)
2
:
:
Specifies the MIDI channel on which V-LINK messages
will be received.
36 (C 2)
16
37 (C#2)
1
Range:
38 (D 2)
2
1–16, Off
:
52 (E 3)
:
16
:
:
127
11
F-buttons
• [F1](Master)
Displays the V-LINK screen (p. 179).
• [F2](Slave)
Displays the V-LINK(SLAVE) screen (this screen).
• [F5](V-LINK Rx Sw)
Turns the Rx Sw parameter on/off.
S-180
MV-8800 Screen Guide
MV-8800_r_e.book 181 ページ 2006年11月10日 金曜日 午後12時49分
SYSTEM
SYSTEM INFORMATION screen
Here you can check the state of the MV-8800’s system.
■ To access this screen
• [SYSTEM] ➜ move the cursor to the upper row of
icons ➜ [F5](SysInfo)
Explanation of each area
F-buttons
• [F1](DIMM Diag)
Version
Indicates the MV-8800’s software version.
Diagnoses the installed memory module.
DIMM (Memory module) Size
For details, refer to “Testing the installed memory”
(Owner’s Manual; p.321).
• When shipped from the factory, a 128 MB DIMM is
installed.
The DIMM holds wave data and event data.
Wave Memory
Indicates the amount of wave data stored in the DIMM,
both numerically and as a graph.
Explanation
[F1](No)
To cancel without initializing.
[F5](Yes)
To initialize the parameters. When you
execute Initialize, all system parameters will be
initialized to their factory-set state.
[EXIT]
To cancel without initializing.
unused
SAMPLING
used
Button
MASTERING
Free capacity
Restores all the MV-8800’s system parameters to their
factory-set state. A confirmation message “Initialize all
system parameters, OK?” will appear.
Sequence Memory
Indicates the amount of data currently in memory, both
numerically and as a graph.
IMPORT
Free capacity
used
DISK/USB
•
• [F3](Initialize)
SYSTEM
Indicates the amount of memory installed in the
MV-8800.
unused
EFFECTS
MIXER
MV-8800 Screen Guide
S-181
MV-8800_r_e.book 182 ページ 2006年11月10日 金曜日 午後12時49分
SYSTEM
ASSIGNABLE SLIDER screen
Here you can make settings for transmitting control change messages from the top panel sliders.
■ To access this screen
• [SYSTEM] ➜ move the cursor to the lower row of
icons ➜ [F1](Slider)
• [SHIFT] + [ASSIGNABLE SLIDER]
• When you press [ASSIGNABLE SLIDER] to make the
indicator light, the sliders will be in ASSIGNABLE SLIDER
mode (they will transmit control changes).
Explanation of each area
Control Number
Specifies the control number assigned to each slider.
When the [ASSIGNABLE SLIDER] indicator is lit,
operating the sliders will transmit the MIDI control
change messages that are assigned.
S-182
Slider
Range
Slider 1
0–7 (Volume)–119
Slider 2
0–10 (Panpot)–119
Slider 3
0–91 (Reverb Send Level)–119
Slider 4
0–93 (Chorus Send Level)–119
Slider 5
0–74 (Cutoff Frequencey)–119
Slider 6
0–71 (Resonance)–119
Slider 7
0–73 (Attack Time)–119
Slider 8
0–72 (Release Time)–119
MV-8800 Screen Guide
MV-8800_r_e.book 183 ページ 2006年11月10日 金曜日 午後12時49分
SYSTEM
R-BUS screen
In this screen you can make R-BUS settings.
■ To access this screen
• [SYSTEM] ➜ move the cursor to the lower row of
icons ➜ [F2](R-BUS)
Explanation of each area
Word Clock
Specifies the word clock that the MV-8800 will use when
an external device and the MV-8800 are connected via
R-BUS to transfer digital audio.
Explanation
Internal
The MV-8800 will operate using its own internal
clock.
External
The MV-8800 will operate using the clock supplied
from the external device connected to R-BUS.
SYSTEM
Value
DISK/USB
Message Type
R-BUS device
Value
Explanation
MV-8800
DIF-AT24
Choose this setting if you’ve
connected a DIF-AT24 (sold
separately) and want to use
the MIDI IN/OUT connectors
of the DIF-AT24, or if you’ve
connected two MV-8800 units
to each other.
IMPORT
Choose this setting if you want
to use R-BUS to transfer
digital audio and to
synchronize operation with an
R-BUS device using MMC or
MTC.
SAMPLING
VS series unit (or
R-BUS
other device) with an
R-BUS connector
MIDI
MASTERING
Specifies the type of messages used to communicate
between R-BUS devices when the MV-8800 is
connected to an external device via R-BUS.
EFFECTS
MIXER
MV-8800 Screen Guide
S-183
MV-8800_r_e.book 184 ページ 2006年11月10日 金曜日 午後12時49分
SYSTEM
DISPLAY/MOUSE screen
In this screen you can make settings for the display (internal and external) and mouse.
■ To access this screen
• [SYSTEM] ➜ move the cursor to the lower row of
icons ➜ [F3](Disp/Mouse)
Explanation of each area
Color Theme
This lets you choose the color theme shown on the
external display. Choose the color theme that suits your
taste. You can separately choose color themes for Song
mode and Pattern mode.
H Position / V Position
Adjust the position of the image shown on a connected
external display.
Refresh Rate
Value
H Position
V Position
60
-3–0–4
-14–0–14
Value
67
-5–0–5
-21–0–22
Blue (default setting for Song mode), Mint, Purple, Grass,
Violet (default setting for Pattern mode), Chocolate, Slate,
Orchid, Tan, Magenta, MossGreen, Copper
72
-5–0–5
-18–0–19
75
-5–0–5
-8–0–9
Mouse Pointer Speed
Screen Saver Type
Specifies the movement sensitivity of the mouse pointer.
Specifies the type of screen saver.
Range:
Range:
1 (slow)–5–9 (fast)
1–6
Time (Screen Saver Time)
Set the time (minutes) until the screen saver begins
working.
F-buttons
• [F4](Preview)
If this is Off, the screen saver will not appear.
Previews the operation of the screen saver you’ve
Range:
specified for Screen Saver Type (
Off, 1–5–60Min
VGA Refresh Rate
Specifies the vertical scanning frequency transmitted to
your external display.
Range:
60, 67, 72, 75 Hz
• If you specify a refresh rate not supported by your
external display, the screen will ripple and you risk
damaging the external display.
• Depending on the settings for H Position and V Position,
the image shown in the external display may be distorted. If
your external display has the ability to adjust the position of
the image, you should first make adjustments on your
external display.
S-184
MV-8800 Screen Guide
).
To stop the preview, press any button or move the
mouse slightly.
• [F5](LCD↔VGA)
Switches the MV-8800’s operating screen (LCD/VGA).
MV-8800_r_e.book 185 ページ 2006年11月10日 金曜日 午後12時49分
SYSTEM
PIX JAM screen
Here you can output images from VGA OUT in synchronization with your performance on the velocity
pads.
■ To access this screen
• [SYSTEM] ➜ move the cursor to the lower row of
icons ➜ [F4](Pix Jam)
Explanation of each area
Velocity Pads
This area shows how images are assigned to the velocity
pads. The image assigned to each velocity pad is shown
as a thumbnail.
F-button
• [F5](Pix Assign)
Displays the PIX ASSIGN screen (p. 186).
SYSTEM
DISK/USB
MASTERING
SAMPLING
IMPORT
EFFECTS
MIXER
MV-8800 Screen Guide
S-185
MV-8800_r_e.book 186 ページ 2006年11月10日 金曜日 午後12時49分
SYSTEM
PIX ASSIGN screen
Here you can assign the desired images to the velocity pads.
■ To access this screen
• [SYSTEM] ➜ move the cursor to the lower row of
icons ➜ [F4](Pix Jam) ➜ [F5](Pix Assign)
Explanation of each area
Current Drive
Shows the currently selected drive with its icon.
F-buttons
• [F1](Select Drive)
Displays the SELECT DRIVE popup (p. 6), where you
can switch the drive from which to select patches.
Thumbnail
This is a thumbnail of the image selected in the PIX JAM
screen (p. 185).
Velocity Pads
This area show the velocity pad numbers selected in the
PIX JAM screen (p. 185). Strike a velocity pad to switch
the pad you’re editing.
File List
Here you can select the image that you want to assign to
the velocity pad.
• [F2](Clear)
Clears the assignment of the image to the selected
velocity pad. The message “Assign Clear. Are you sure?”
will appear.
A confirmation message of “Assign Clear. Are you sure?”
will appear.
Explanation
[F1](No)
Cancels the Clear operation.
[F5](Yes)
Clears the image assignment.
• [F3](Exchange)
Displays the PIX EXCHANGE popup / PIX COPY popup
(p. 187).
• [F4](Copy)
Displays the PIX EXCHANGE popup / PIX COPY popup
(p. 187).
• [F5](Assign)
Assigns the selected image to the velocity pad.
S-186
MV-8800 Screen Guide
MV-8800_r_e.book 187 ページ 2006年11月10日 金曜日 午後12時49分
SYSTEM
PIX EXCHANGE popup / PIX COPY popup
Here you can exchange or copy image assignments between velocity pads.
■ To access this screen
• PIX EXCHANGE
[SYSTEM] ➜ move the cursor to the lower row of
icons ➜ [F4](Pix Jam) ➜ [F5](Pix Assign) ➜
[F3](Exchange)
• PIX COPY
[SYSTEM] ➜ move the cursor to the lower row of
icons ➜ [F4](Pix Jam) ➜ [F5](Pix Assign) ➜
[F4](Copy)
Explanation of each area
From / To
Use the From parameter and To parameter to specify the
numbers of the velocity pads whose image assignments
you want to exchange.
F-button
• [F5](Execute)
Executes the Pix Exchange or Pix Copy operation.
SYSTEM
From / To
DISK/USB
Use the From parameter to specify the velocity pad
containing the copy-source image assignment, and the
To parameter to specify the copy-destination velocity
pad.
MASTERING
SAMPLING
IMPORT
EFFECTS
MIXER
MV-8800 Screen Guide
S-187
MV-8800_r_e.book 188 ページ 2006年11月10日 金曜日 午後12時49分
DISK/USB
Here you can make settings for the MV-8800’s disk and for USB.
DISK/USB MENU screen
This is the menu screen for disk-related operation.
■ To access this screen
• [DISK/USB]
Explanation of each area
FILE UTILITY
Displays the FILE UTILITY screen (p. 189).
DISK UTILITY
Displays the DISK UTILITY screen (p. 193).
USB
Displays the USB screen (p. 194).
CD PLAYER
Displays the CD PLAYER screen (p. 195).
S-188
MV-8800 Screen Guide
F-buttons
• [F1](File Utility)
Displays the FILE UTILITY screen (p. 189).
• [F2](Disk Utility)
Displays the DISK UTILITY screen (p. 193).
• [F3](USB)
Displays the USB screen (p. 194).
• [F4](CD Player)
Displays the CD PLAYER screen (p. 195).
MV-8800_r_e.book 189 ページ 2006年11月10日 金曜日 午後12時49分
DISK/USB
FILE UTILITY screen
Here you can manage files by copying, moving, or deleting them.
■ To access this screen
• [DISK/USB] ➜ [F1](File Utility)
Explanation of each area
Current folder
Displays the name of the currently selected folder.
Current drive
Shows the currently selected drive with its icon.
Explanation
Icon
Hard disk drive
CD-ROM, Audio CD drive
Name
Displays the name of the saved file. One of the following
icons is displayed in front of the file name to indicate the
type of file.
Icon
Explanation
Waveform data (e.g., WAV file)
Sequence data (e.g., MID file)
DISK/USB
Sub-folder
MV-8800 file
• CD-ROM format and AUDIO CD format will depend on the
type of media inserted in the CD-R/RW drive.
Unknown file type
Ext (Extension)
This is a part of the filename, used to indicate the type of
file.
Cursor buttons
Cursor icon
Example
extension
Explanation
.WAV
Waveform data (e.g., Windows wave file)
.MID
MIDI sequence data (e.g., SMF)
SAMPLING
The cursor buttons that can be operated in the file list are
highlighted.
Explanation
You can move the cursor up/down.
MASTERING
Current drive capacity
Displays the total capacity and free space of the current
drive.
Size
Displays the size of the file.
File list
You can move the cursor up/down. If this
indication is displayed, you can press the left
cursor button to return to the parent folder
(i.e., to switch folders).
This is an area in which files can be stored together. You
can use this to organize files by category or purpose. To
see the contents of a sub-folder, move the cursor to the
sub-folder and press CURSOR [ ].
Lists the files saved. The file selected by the cursor is
highlighted.
IMPORT
You can move the cursor up/down. If this
indication is displayed, the cursor is located
at a folder (highlighted). Press the right
cursor key to view the contents of the folder
(i.e., to switch folders).
Sub-folder
S-189
MIXER
MV-8800 Screen Guide
EFFECTS
To return from a sub-folder to the previous folder, press
CURSOR [ ].
MV-8800_r_e.book 190 ページ 2006年11月10日 金曜日 午後12時49分
DISK/USB
F-buttons
• [F1](Select Drive)
Displays the SELECT DRIVE popup (p. 6), where you
can switch the current drive.
• [F3](Rename)
Displays the EDIT NAME popup (p. 3), where you can
edit the name of the file or folder at which the cursor is
located.
• [F4](Make Folder)
Displays the EDIT NAME popup (p. 3), where you can
create a new folder inside the current folder.
• [F5](Command)
Displays the SELECT FILE COMMAND popup (p. 191).
S-190
MV-8800 Screen Guide
MV-8800_r_e.book 191 ページ 2006年11月10日 金曜日 午後12時49分
DISK/USB
SELECT FILE COMMAND popup
Here you can select commands for managing files.
■ To access this screen
• [DISK/USB] ➜ [F1](File Utility) ➜ select a file or
folder ➜ [F5](Command)
Explanation of each area
1 Copy
Displays the SELECT DESTINATION popup (p. 192),
where you can select the copy-destination folder.
F-button
• [F5](Select)
Executes the command selected in the SELECT
COMMAND menu.
2 Move
Displays the SELECT DESTINATION popup (p. 192),
where you can select the move-destination folder.
3 Delete
DISK/USB
Deletes the file or folder.
MASTERING
• There is no way for you to recover deleted data (unless
you have previously made a backup of it). Roland
accepts no responsibility for the recovery of lost data,
nor for any damages that may result from such loss.
SAMPLING
• When you delete a folder, a confirmation message will
appear if that folder contains any files. If you want to delete
all files and folders that are in that folder, press [F5](Yes). If
you decide to cancel without deleting, press [F1](No).
IMPORT
EFFECTS
MIXER
MV-8800 Screen Guide
S-191
MV-8800_r_e.book 192 ページ 2006年11月10日 金曜日 午後12時49分
DISK/USB
SELECT DESTINATION popup
Here you can specify the folder to which the file will be copied or moved.
■ To access this screen
• [DISK/USB] ➜ [F1](File Utility) ➜ select a file or
folder) ➜ [F5](Command) ➜ select “Copy” or “Move”
➜ [F5](Select)
Explanation of each area
Current drive
Shows the currently selected drive with its icon.
Current drive capacity
Displays the total capacity and free space of the current
drive.
Cursor buttons
The cursor buttons that can be operated in the file list are
highlighted.
Cursor
icon
Explanation
You can move the cursor up/down.
You can move the cursor up/down. If this indication
is displayed, the cursor is located at a folder
(highlighted). Press the right cursor key to view the
contents of the folder (i.e., to switch folders).
You can move the cursor up/down. If this indication
is displayed, you can press the left cursor button to
return to the parent folder (i.e., to switch folders).
Current folder
Displays the name of the currently selected folder. Folder
levels below the root (the top level of the folder structure)
are shown by a slash “/” symbol.
Displays the name of the saved file. One of the following
icons is displayed in front of the file name to indicate the
type of file.
Explanation
Waveform data (e.g., WAV file)
Sequence data (e.g., MID file)
Sub-folder
MV-8800 file
Unknown file type
S-192
File list
Lists the files saved in the current drive. The file selected
by the cursor is highlighted.
Sub-folder
This is an area in which files can be stored together.
Select the sub-folder to which you want to copy or move
the file. To see the contents of a sub-folder, move the
cursor to the sub-folder and press CURSOR [ ].
To return from a sub-folder to the previous folder, press
CURSOR [ ].
F-buttons
• [F1](Select Drive)
Displays the SELECT DRIVE popup (p. 6), where you
can switch the copy- or move-destination drive.
• [F3](Make Folder)
Displays the EDIT NAME popup (p. 3), where you can
create a new folder inside the current folder.
• [F5](Execute)
Copies or moves the file to the specified folder.
Name
Icon
Ext (Extension)
This is a part of the filename, used to indicate the type of
file.
MV-8800 Screen Guide
MV-8800_r_e.book 193 ページ 2006年11月10日 金曜日 午後12時49分
DISK/USB
DISK UTILITY screen
Here you can check the disk and perform maintenance.
■ To access this screen
• [DISK/USB] ➜ [F2](Disk Utility)
Explanation of each screen
• [F3](Format)
Drive list
Lists the drives of the MV-8800. The drive selected by
the cursor is highlighted.
Icon
F-buttons
Explanation
Hard disk drive
CD-ROM (CD-R/RW drive)
Formats the disk.
If you are formatting (erasing) a CD-RW disc, the
message “Erase CD-RW” will appear.
F-button
Explanation
[F1](No)
To cancel without erasing.
[F3](Yes (Quick))
The CD-RW disc will be erased quickly.
[F5](Yes (Full))
The CD-RW disc will be erased completely.
Volume Label
This is the name assigned to the drive.
Displays the EDIT NAME popup (p. 3), where you can
assign a name to the disk.
• [F5](VolumeLabel) is displayed if the current drive is the
hard disk.
MASTERING
Drive capacity
Displays the free space of the drive.
DISK/USB
• [F5](Volume Label)
SAMPLING
IMPORT
EFFECTS
MIXER
MV-8800 Screen Guide
S-193
MV-8800_r_e.book 194 ページ 2006年11月10日 金曜日 午後12時49分
DISK/USB
USB screen
This switches the MV-8800 to USB-connection mode, which lets you transfer data between the internal
hard disk and your computer.
■ To access this screen
• [DISK/USB] ➜ [F3](USB)
Explanation of each area
• [F5](Connect) / (Disconnect)
Communication status
Graphically indicates the connection status between the
MV-8800 and your computer.
Status
Explanation
Disconnected
Connected
• You must connect or disconnect the USB cable while
the MV-8800 is powered-off. Never connect or
disconnect the USB cable or turn the power off while
you are in USB mode. Doing so may damage data or
cause malfunctions.
• The MV-8800 can communicate via USB with Windows
Me/2000/XP or later, Mac OS 9.0.4 or later, and Mac OS X
10.2 or later. Also, depending on the type of computer you
are using, this may not work correctly even if your
computer uses one of the above operating systems.
S-194
MV-8800 Screen Guide
F-button
If the MV-8800 is not communicating with your computer,
this will indicate Connect; press [F5](Connect) to initiate
the connection. If the MV-8800 is already communicating
with your computer, this will indicate Disconnect; press
[F5](Disconnect) to stop communication.
MV-8800_r_e.book 195 ページ 2006年11月10日 金曜日 午後12時49分
DISK/USB
CD PLAYER screen
Here you can play back an audio CD.
■ To access this screen
• [DISK/USB] ➜ [F4](CD Player)
Explanation of each area
• [F1](Display)
Track
Indicates the currently-playing track.
Switches the time display format.
• [F2](Reset Peak)
Time
Indicates the elapsed time of the currently-playing track.
• You can press [F1](Display) to switch the time display
format. The screen indicates the displayed format as well
as the time. The default setting is “Track Time.”
Clears the indicators of the peak hold in the Level
meters.
• [F5](Eject)
Press this button to open the CD-R/RW disc tray.
DISK/USB
Display
format
F-buttons
Screen display
Total Time
Displays the total time from the
beginning of the CD to the current time
location.
Track Remain
Displays the time remaining until the end of
the currently-playing track.
Total Remain
Displays the time remaining until the end of
the CD.
SAMPLING
Displays the current time within the track
that is playing.
MASTERING
Track Time
Track list
Indicates the playing time of each track.
Track Time
IMPORT
Shows track information for the CD. The track selected
by the cursor is highlighted. A
symbol is shown for
the currently-playing track.
EFFECTS
MIXER
MV-8800 Screen Guide
S-195
MV-8800_r_e.book 196 ページ 2006年11月10日 金曜日 午後12時49分
MASTERING
Here you can mix down your completed song to a two-track
master, and create an audio CD.
MIXDOWN / MASTERING MENU screen
This menu screen lets you switch to Mixdown mode, or select items such as mastering or creating an
audio CD.
■ To access this screen
• [MASTERING]
Explanation of each area
MIXDOWN MODE
Turns mixdown mode on/off. A confirmation message will
appear.
Button
Explanation
[F1](No)
If you decide not to enter mixdown mode,
press [F1](No) or [EXIT].
[EXIT]
[F5](Yes)
To enter mixdown mode, press [F5](Yes). This
will indicate On when mixdown mode is Off,
and Off when mixdown mode is On.
■ When Mixdown mode is On...
Each screen will indicate “✻✻ Mixdown Mode ✻✻“.
MASTERING
Displays the SELECT MASTERING SOURCE popup
(p. 198).
CREATE AUDIO CD
Displays the CUE SHEET screen (p. 206).
AUDIO FILE LIST
Displays the AUDIO FILE LIST screen (p. 208).
F-buttons
• [F1](Mixdown)
Turns mixdown mode on/off. A confirmation message will
appear.
• [F2](Mastering)
Displays the SELECT MASTERING SOURCE popup
(p. 198).
The mixdown mode button will light in the VGA screen.
• [F3](Create CD)
Displays the CUE SHEET screen (p. 206).
• [F4](Audio List)
Displays the AUDIO FILE LIST screen (p. 208).
S-196
MV-8800 Screen Guide
MV-8800_r_e.book 197 ページ 2006年11月10日 金曜日 午後12時49分
MASTERING
LISTEN AUDIO FILE popup
Here you can listen to the result immediately after mixing-down or mastering.
■ To access this screen
• [MASTERING] ➜ [F2](Mastering) ➜ select a file ➜
[F1](Listen)
• [MASTERING] ➜ [F4](Audio List) ➜ select a file ➜
[F1](Listen)
Explanation of each area
Level meter
Indicates the playback level of the audio data (WAV file).
F-button
• [F5](Close)
Stops playback of the audio data (WAV file) and closes
the LISTEN AUDIO FILE popup (this popup).
Current time
Indicates the current playback time of the audio data
(WAV file).
Progress bar
Indicates the current playback location of the audio data
(WAV file).
MASTERING
SAMPLING
IMPORT
EFFECTS
MIXER
MV-8800 Screen Guide
S-197
MV-8800_r_e.book 198 ページ 2006年11月10日 金曜日 午後12時49分
MASTERING
SELECT MASTERING SOURCE popup / SELECT AUDIO FILE popup
Here you can select the audio data (WAV file) to be mastered, or select the audio data (WAV file) that
you’re using to make an audio CD.
■ To access this screen
• SELECT MASTERING SOURCE
[MASTERING] ➜ [F2](Mastering)
• SELECT AUDIO FILE
[MASTERING] ➜ [F3](Create CD) ➜ [F1](Insert)
Explanation of each area
Name
Displays the names of the mixed-down or mastered files.
Ext (Extension)
This is part of the filename, and is used to indicate the
type of file. The mastering file list shows files with a
.WAV extension.
Time
Indicates the length (playback time) of each audio file.
Audio file list
Displays the stereo audio files that have been
mixed-down or mastered. The file at the cursor location
is highlighted.
S-198
MV-8800 Screen Guide
F-buttons
• [F1](Listen)
Displays the LISTEN AUDIO FILE popup (p. 197).
• [F5](Execute)
Selects a file.
MV-8800_r_e.book 199 ページ 2006年11月10日 金曜日 午後12時49分
MASTERING
MASTERING screen
Here you can use the mastering tool kit to master an audio file (WAV file).
■ To access this screen
• [MASTERING] ➜ [F2](Mastering) ➜ select a file ➜
[F5](Execute)
Explanation of each area
Mastering Tool Kit
Makes settings for the mastering effects.
• In this screen you can set the Compressor parameters of
the mastering tool kit. To set the other parameters of the
mastering tool kit (e.g., the Expander and Equalizer
parameters), use the MASTERING TOOL KIT EDIT screen
(p. 202).
Release
This is the Release Time parameter of the compressor. It
specifies the time from when the volume falls below the
value of the Threshold parameter until compression is
not longer applied.
Range:
50–5000 ms
• You can use the C2 knob to adjust this.
Level
Mastering status
Specifies the output level of the compressor.
Indicates whether the mastering toolkit is off or on. Use
[F3](MTK On/Off) to switch this.
Range:
Frequency band division
• You can use the C3 knob to adjust this.
Threshold
Explanation
High
Parameters for the high-frequency band compressor
Range:
Mid
Parameters for the mid-frequency band compressor
Low
Parameters for the low-frequency band compressor
Attack
Range:
0–100 ms
Ratio
Specifies the compression ratio (source signal:output
signal) applied by the compressor. This is the proportion
by which the output will be reduced when the input level
exceeds the value of the Threshold parameter.
Range:
1:1.00–1:16.0, 1:INF
IMPORT
This is the Attack Time parameter of the compressor. It
specifies the time from when the volume exceeds the
value of the Threshold parameter until compression
begins.
-24–0 dB
SAMPLING
Band
Specifies the volume at which the compressor will begin
to apply.
MASTERING
The mastering tool kit’s Compressor lets you process the
high, mid, and low-frequency regions separately.
-80–6 dB
GR (Gain Reduction meter)
Indicates the amount by which the compressor is
compressing the level.
EFFECTS
• You can use the C1 knob to adjust this.
• Since long settings for the Attack parameter may cause
distortion, 6 dB of headroom is provided at the output. As
necessary, you can adjust the Level parameter of the Mixer
block.
MIXER
MV-8800 Screen Guide
S-199
MV-8800_r_e.book 200 ページ 2006年11月10日 金曜日 午後12時49分
MASTERING
High Split / Low Split
Specifies the frequency at which the source signal is
divided into frequency bands. High Split is the frequency
at which the mid- and high-frequency bands are divided.
Low Split is the frequency at which the low- and
mid-frequency bands are divided.
Parameter
Range
High Split
1.6–16.0 kHz
Low Split
20–800 Hz
In (Input level meter)
Indicates the level of the source signal being input to the
compressor.
Out (Output level meter)
Indicates the output level from the compressor.
S-200
MV-8800 Screen Guide
F-buttons
• [F2](MTK Library)
Displays the MASTERING TOOL KIT LIBRARY popup
(p. 201).
• [F3](Reset Peak)
Clears the indicators of the peak hold in the Level
meters.
• [F4](MTK On/Off)
This is the main switch for the mastering tool kit. Area
(Mastering status) indicates the status of this switch.
• [F5](MTK Edit)
Displays the MASTERING TOOL KIT EDIT screen (p.
202).
MV-8800_r_e.book 201 ページ 2006年11月10日 金曜日 午後12時49分
MASTERING
MASTERING TOOL KIT LIBRARY popup
Here you can save and recall settings for the mastering tool kit.
■ To access this screen
• [MASTERING] ➜ [F2](Mastering) ➜ select a file ➜
[F5](Execute) ➜ [F2](MTK Library)
Explanation of each area
Library list
This area lists the mastering tool kit settings that are
saved in the library. The mastering tool kit name at the
cursor location is highlighted.
F-buttons
• [F1](Write Here)
Saves the current mastering tool kit settings at the cursor
location in the library list. Displays the confirmation
message.
Library
F-button
Explanation
U01–U50
User library (rewritable)
[F1](No)
Cancels the operation.
P01–P21
Preset library (read only)
[F5](Yes)
Adds the current mastering tool kit settings to the
library.
No.
Library Preview
• If you save onto a location that already contains
settings, the previous data will be overwritten.
• [F4](Preview)
Turns the library view on/off.
• [F5](Use This)
SAMPLING
Recalls the mastering tool kit that is saved at the cursor
location in the library list. The current mastering tool kit
settings will change.
MASTERING
Indicates the status of the Preview function. If this is on,
the library item selected by the cursor is temporarily
enabled. In this case you can press [PLAY ( )]. to
audition your audio using the mastering tool kit settings
at the cursor location.
IMPORT
EFFECTS
MIXER
MV-8800 Screen Guide
S-201
MV-8800_r_e.book 202 ページ 2006年11月10日 金曜日 午後12時49分
MASTERING
MASTERING TOOL KIT EDIT screen
Here you can edit all the parameters of the mastering tool kit.
■ To access this screen
• [MASTERING] ➜ [F2](Mastering) ➜ select a file ➜
[F5](Execute) ➜ [F5](MTK Edit)
Explanation of each area
Mastering Tool Kit
Here you can make settings for the mastering effects.
Effect block
Shows the internal structure (blocks) of the mastering
tool kit. The block you are currently editing is shown by
the cursor. Use [F1](Block ▲) or [F2](Block ▼) to move
between blocks.
Block name (EQ)
F (Frequency)
Specifies the center frequency at which each band
(Low/Low-Mid/Hi-Mid/High) will be boosted or cut.
Parameter
Range
Low
20–2000 Hz
Low-Mid
20–8000 Hz
Hi-Mid
20–8000 Hz
High
1.4–20.0 kHz
Q
Indicates the name of the currently selected effect block.
Specifies the sharpness of the frequency response curve
for each band (Low/Low-Mid/Hi-Mid/High).
Switches
Range:
Indicates the operating status of the currently selected
effect block. Use [F5](Sw On/Off) to switch this.
Type
Range:
Specifies the type of equalizer for the Low band and
High band.
Off, On
Output Level Meter
These indicate the overall volume after the signal has
passed through the mastering tool kit.
0.3–16.0
Parameter
Value
Shelving
Shelving type
Peaking
Peaking type
Control knob
You can assign specific effect parameters to these knobs
and control them. The assignments are made in the
KNOB ASSIGN popup (p. 234).
• The Q parameter has no effect for bands whose Type is set
to Shelving.
Input Gain
Adjusts the overall volume before the signal passes
through the equalizer.
Input EQ
Range:
-24–12 dB
Here you can adjust the tonal character.
Output Gain
G (Gain)
Adjusts the overall volume after the signal has passed
through the equalizer.
Specifies the amount of boost/cut for each band
(Low/Low-Mid/Hi-Mid/High).
Range:
Range:
S-202
-12–12 dB
MV-8800 Screen Guide
-24–12 dB
MV-8800_r_e.book 203 ページ 2006年11月10日 金曜日 午後12時49分
MASTERING
Bass Cut Filter
Here you can remove unwanted low-frequency
components such as pop noise.
Input
This divides the source signal into low, mid, and
high-frequency bands.
Frequency
Input Gain
Specifies the frequency below which unwanted
low-frequency components will be cut.
Adjusts the volume before the signal enters the expander
or compressor.
Range:
Range:
Thru, 20–2000 Hz
-24–12 dB
Detect Time
Delays the source signal that enters the expander or
compressor.
Enhancer
Range:
0–10 ms
This adds sparkle to the sound.
Low Split / High Split
Specifies degree of the enhancer effect desired.
Range:
0–100
Range
Low Split
20–800 Hz
Specifies the frequency at which the enhancer begins to
apply.
High Split
1.6–16.0 kHz
Range:
IMPORT
Parameter
Frequency
1.00–10.0 kHz
EFFECTS
Mix Level
Adjusts the volume of the enhancer sound.
Range:
SAMPLING
Sensitivity
Specifies the frequencies at which the source signal is
divided into frequency bands. Low Split is the frequency
at which the low and mid-frequency bands are divided.
High Split is the frequency at which the mid and
high-frequency bands are divided.
MASTERING
• With a conventional compressor, there is a brief lag from
when the above-threshold level is detected until it is
suppressed. However, in this algorithm the input sound is
used only for detecting the level, and the actual processing
and output is performed on a signal that is delayed by a
suitable amount, thus avoiding this problem. The
parameter Detect Time specifies the delay time used for
this purpose. Using this parameter will produce a time
difference between the input and output of the audio signal,
so you must exercise caution if you’re using this for any
purpose other than mastering (e.g., as a channel insert).
-24–12 dB
MIXER
MV-8800 Screen Guide
S-203
MV-8800_r_e.book 204 ページ 2006年11月10日 金曜日 午後12時49分
MASTERING
Expander
Compressor
This expands the dynamic range at a specified ratio.
This reduces the output level when the input level
exceeds a specified value.
Frequency Band Division
Frequency Band Division
You can apply the expander independently to the high,
mid, and low-frequency bands.
You can apply the compressor independently to the high,
mid, and low-frequency bands.
Band
Explanation
Band
Explanation
High
Mid
Parameters for the high-frequency band expander
High
Parameters for the high-frequency band compressor
Parameters for the mid-frequency band expander
Mid
Low
Parameters for the mid-frequency band compressor
Parameters for the low-frequency band expander
Low
Parameters for the low-frequency band compressor
Threshold
Threshold
Specifies the volume at which the expander starts to
apply.
Specifies the volume at which the compressor starts to
apply.
Range:
Range:
-80–0 dB
-24–0 dB
Ratio
Ratio
Specifies the proportion (source signal: output signal) by
which the expander will expand the dynamic range. This
is the proportion by which the output will be reduced
when the input level falls below the value of the
Threshold parameter.
Specifies the compression ratio (source signal:output
signal) of the compressor. This is the proportion by which
the output will be reduced when the input level exceeds
the value of the Threshold parameter.
Range:
Range:
1:1.00–1:16.0, 1:INF
1:1.00–1:16.0, 1:INF
Attack
Attack
This is the Attack Time parameter for the expander. It
specifies the time from when the volume falls below the
value of the Threshold parameter until the expander
starts to apply.
Range:
This is the Attack Time parameter for the compressor. It
specifies the time from when the volume exceeds the
value of the Threshold parameter until compression
begins.
Range:
0–100 ms
0–100 ms
Release
Release
This is the Release Time parameter for the expander. It
specifies the time from when the volume exceeds the
value of the Threshold parameter until the expander
stops being applied.
Range:
S-204
50–5000 ms
MV-8800 Screen Guide
This is the Release Time parameter for the compressor.
It specifies the time from when the volume falls below the
value of the Threshold parameter until compression
stops.
Range:
50–5000 ms
MV-8800_r_e.book 205 ページ 2006年11月10日 金曜日 午後12時49分
MASTERING
Output Mixer
This adjusts the volume of each frequency band.
Output
Here you can make overall output settings.
Level
Soft Clip
Adjust the level of each frequency band (Low/Mid/High)
after it passes through the expander and compressor.
Reduces the distortion that can occur when the expander
or compressor are applied to an extreme degree.
Range: Off, On
Range:
-80–6 dB
Dither
Smoothes the transition where the sound disappears.
Range: Off, 24–8 bit
Limiter
This reduces high input levels to keep the signal from
distorting.
F-buttons and menu
• [F1](Block▲)
Moves the cursor in the effect block upward.
• [F2](Block▼)
Moves the cursor in the effect block downward.
• [F3](Reset Peak)
Clears the indicators of the peak hold in the Level
meters.
This is the main switch for the mastering tool kit. The On
or Off indication is shown at the right of the mastering
tool kit name.
Specifies the volume at which the limiter begins to apply.
Range:
-24–0 dB
0–100 ms
Release
Displays the MENU popup.
IMPORT
Specifies the time from when the input level exceeds the
value of the Threshold parameter until the limiter begins
to apply.
Menu items
50–5000 ms
EFFECTS
1 Knob Assign
Specifies the time from when the input level falls below
the value of the Threshold parameter until the limiter no
longer applies.
Range:
Switches the current block. The On or Off indication is
shown at the right of the block name.
• [MENU]
Attack
Range:
• [F5](Sw On/Off)
SAMPLING
Threshold
MASTERING
• [F4](MTK On/Off)
Displays the KNOB ASSIGN popup (p. 234).
2 MTK Library
Displays the MASTERING TOOL KIT LIBRARY popup
(p. 201).
MIXER
3 Edit MTK Name
Displays the EDIT NAME popup (p. 3).
MV-8800 Screen Guide
S-205
MV-8800_r_e.book 206 ページ 2006年11月10日 金曜日 午後12時49分
MASTERING
CUE SHEET screen
Here you can specify the song order in which the audio files will be written to the CD-R/RW disc.
■ To access this screen
• [MASTERING] ➜ [F3](Create CD)
Explanation of each area
Cue sheet
This lists the song order of the audio files that you will
write to the CD-R/RW disc.
Name
• [F2](Delete)
Deletes (removes) an unwanted audio file from the cue
sheet. The file highlighted by the cursor will be deleted
from the cue sheet.
A confirmation message of “Delete file from Cue Sheet.
Are you sure?” will appear.
Displays the names of the audio files that will be written
to the CD-R/RW disc.
F-button
Explanation
[F1](No)
To cancel without deleting.
Ext (Extension)
[F5](Yes)
Deletes the audio data (WAV file) from the cue
sheet.
This is part of the filename, and is used to indicate the
type of file. The CUE SHEET shows files with a .WAV
extension.
Time
Indicates the absolute time from the beginning of the
CD-R/RW disc that will be written.
Length
Indicates the length of each audio file.
PreGap
• Deleting a file from the cue sheet does not delete the file
itself from the hard disk.
• [F3](Move▲)
Exchanges the file highlighted by the cursor in the cue
sheet with the file above it.
• [F4](Move▼)
Exchanges the file highlighted by the cursor in the cue
sheet with the file below it.
Indicates the time between songs.
• [F5] (Write CD)
Volume of the total audio files
Indicates the size of the audio file that you will write to
the CD-R/RW disc.
Starts the writing operation to CD. A confirmation
message of “Write CD. Are you sure?” will appear.
F-button
Explanation
[F1](No)
To cancel without writing.
[F5](Yes)
To start the writing operation to CD-R/RW disc.
• [MENU]
Displays the MENU popup.
F-buttons and menu
• [F1](Insert)
Displays the SELECT AUDIO FILE popup (p. 198),
where you can select an audio file that you want to write
to CD and add it to the cue sheet at the cursor location.
Songs following the cursor location will be moved back.
S-206
MV-8800 Screen Guide
Menu item
1 Gap Time
Displays the GAP TIME popup (p. 207).
MV-8800_r_e.book 207 ページ 2006年11月10日 金曜日 午後12時49分
MASTERING
GAP TIME popup
Here you can specify the default amount of space between the songs that will be recorded to the audio
CD.
■ To access this screen
• [MASTERING] ➜ [F3](Create CD) ➜ [MENU] ➜
select “Gap Time” ➜ [F5](Select)
Explanation of each area
Gap Time
Specifies the length of the gap that will be left between
songs when writing the audio CD.
Range:
0–2–4 sec
F-buttons
• [F4](SetAll)
The all files will set the specified gap time.
• [F5](Set)
The file highlighted by the cursor will set the specified
gap time.
MASTERING
SAMPLING
IMPORT
EFFECTS
MIXER
MV-8800 Screen Guide
S-207
MV-8800_r_e.book 208 ページ 2006年11月10日 金曜日 午後12時49分
MASTERING
AUDIO FILE LIST screen
Here you can audition, rename or delete audio file.
■ To access this screen
• [MASTERING] ➜ [F4](Audio List)
Explanation of each area
Name
Displays the names of the audio files (mixed-down or
mastered file).
Ext (Extension)
This is part of the filename, and is used to indicate the
type of file. The AUDIO FILE LIST shows files with a
.WAV extension.
Time
Indicates the length (playback time) of each audio file.
Audio file list
Displays the audio files that have been mixed-down or
mastered. The file at the cursor location is highlighted.
F-buttons
• [F1](Listen)
Displays the LISTEN AUDIO FILE popup (p. 197).
• [F3](Name)
Displays the EDIT NAME popup (p. 3) where you can
assign a name to the audio file.
• [F5](Delete)
The file highlighted by the cursor will be deleted. A
confirmation message “Delete File. Are you sure?” will
appear.
F-button
Explanation
[F1](No)
To cancel without deleting.
[F5](Yes)
To delete the file.
• You cannot use Undo (Owner’s Manual; p.166) to recover
a deleted audio file.
S-208
MV-8800 Screen Guide
MV-8800_r_e.book 209 ページ 2006年11月10日 金曜日 午後12時49分
SAMPLING
Here you can capture audio data by “sampling” it.
SAMPLING screen / RE-SAMPLING screen
Here you can perform sampling or re-sampling.
■ To access this screen
• Sampling
[SAMPLING]
• Re-sampling
[SAMPLING] ➜ [F2](Re-Sampling)
Explanation of each area
Level meter
Indicates the level of the audio input signal. When
sampling, adjust this level so that the meter moves in the
region of -12–0 dB.
Level
Specifies the signal level that will initiate sampling if the
Start Trigger parameter is set to Level.
Range:
1–6
• The Level setting is used only when Start Trigger = Level.
• The sound will distort if the display reaches 0 dB (clip
indicator lit).
Sample Type
Specifies the number of channels that will be sampled.
Pre Sample Time
Specifies how much time prior to the actual start of
sampling will be captured in the sample when Start
Trigger is set to Level.
Range:
0, 20, 40, 80, 160, 320, 640, 1000 ms
Value
Explanation
Stereo
Stereo (two channels)
Routing
Mono
Monaural (one channel)
Indicates the sampled source.
Value
Explanation
Specifies the input source for sampling.
ANALOG
Analog input (MIC/LINE or PHONO)
MIX BUS
when Re-Sampling
Value
Sampling source
Analog
Analog input jack (stereo)
Analog(L+R)
ANALOG INPUT jack (Lch and Rch mixed to
monaural)
Analog(L)
ANALOG INPUT jack (Lch only, monaural)
Specifies how sampling will begin.
Value
Explanation
• To Re-Sampling, press [F2](Re-Sampling).
Stop Trigger
Specifies how sampling will stop.
Explanation
Manual
Sampling will be stopped manually.
Beat
Sampling will stop after the number of beats
specified by the Length parameter.
Sampling will be triggered by the input level.
Time
Sampling will stop after the time specified by
the Length parameter.
Pad
Sampling will begin when you strike a pad.
Play
Sampling will begin when you play back the sequencer.
EFFECTS
Value
Manual Sampling will be started manually.
Level
IMPORT
Start Trigger
SAMPLING
Input Select
MIXER
MV-8800 Screen Guide
S-209
MV-8800_r_e.book 210 ページ 2006年11月10日 金曜日 午後12時49分
SAMPLING
F-buttons
Beat
Specifies the time (in units of beats) after which sampling
will stop if the Stop Trigger parameter is set to Beat.
Range:
1–8–20000
• The Beat setting is used only when Stop Trigger=Beat or
Time.
• [F1](Sampling)
Samples an external audio source. The SAMPLING
screen will appear.
• [F2](Re-Sampling)
Samples an internal audio source. The RESAMPLING
screen will appear.
Time
Specifies the time (in units of minutes/seconds) after
which sampling will stop if the Stop Trigger parameter is
set to Time.
• [F3](Reset Peak)
Range:
• [F5](Start)
00m02s–100m00s
Clears the indicators of the peak hold in the Level
meters.
Starts sampling.
• The Time setting is used only when Stop Trigger= Beat or
Time.
• The maximum value for Length depends on the remaining
amount of sampling memory.
Auto Divide
If Start Trigger=Manual, sampling will begin immediately.
Otherwise, sampling will begin according to the
conditions specified by the Start Trigger setting.
● When Start Trigger = Level/Play/Pad
The Auto Divide function detects regions of silence within
the sample, and divides the sample into several samples
at these points.
Range:
Off, On
Auto Emphasis
Automatically pre-emphasis processes after sampling.
Range:
Off, On
Auto Normalize
Automatically normalizes the level after sampling.
Range:
Off, On
Gap Time
When Auto Divide=On, this parameter specifies the
length of the silent regions that will be detected.
Range:
• [F1] (Cancel)
Cancels the sampling operation.
• [F5](Start)
Manually starts sampling. A message of Now Sampling...
will appear.
● When Start Trigger=Manual, or during sampling
0.5, 1.0, 1.5, 2.0 sec
• The Gap Time setting is used only when Auto Divide=On.
Wave Memory
Indicates the amount of wave data stored in the DIMM,
both numerically and as a graph.
• [F1] (Cancel)
Cancels the sampling operation.
• [F5](Stop)
Stops sampling. The RESULT popup (p. 211) will then
appear.
S-210
MV-8800 Screen Guide
MV-8800_r_e.book 211 ページ 2006年11月10日 金曜日 午後12時49分
SAMPLING
RESULT popup
This displays the results of sampling and importing. Here you can edit the sample, and assign it to an
audio phrase or patch.
■ To access this screen
• [SAMPLING] ➜ [F1](Sampling) or
[F2](Re-Sampling) ➜ [F5](Start) (start sampling) ➜
[F5](Stop) (stop sampling)
• [IMPORT] ➜ select a file ➜ [F5](Import)
Explanation of each area
Normalize
Raises the overall level of the sample without allowing
the maximum level to be exceeded.
Sample Name
Indicates the name of the sample.
Range:
Off, On (✔)
Channel
Displays the number of channel of the sample
(Mono/Stereo).
Zoom Level
Indicates the magnification ratio at which the waveform
in the wave window is displayed.
Wave window
Displays the sampled waveform.
Specify the points at which the sample will start playing
and stop playing. The Start Point - End Point region is
highlighted.
BPM Base Note
,
/
Loop
Specifies whether loop playback will occur when
previewing the sample. If this parameter is On when you
assign the sample to a partial or audio phrase, this
parameter will be used as the loop playback setting.
Value
Explanation
Off
The sample will play from the Start Point to the End
Point.
On
The sample will play repeatedly from the Start
Point to the End Point.
IMPORT
• BPM Base Note parameter is valid when you select
[F3](AsgnToAPhrs) in the “Select Quick Assign” message.
0(C)–60(C 4)–127(G 9)
SAMPLING
Draws measure and beat lines on the displayed sample.
, , (initial value),
x 0–x 4–x 65535
Original Key
Specifies the reference pitch (key). When you play the
note number specified by the Original Key parameter,
the sample will sound at the same pitch as that when it
was sampled.
Range:
Start Point / End Point
Range:
• Normalizing will extend the dynamic range (the difference
between the minimum and maximum levels). This will help
improve the precision of waveform editing.
Truncate
Deletes the portions of the sample before the Start Point
and after the End Point.
EFFECTS
Range:
Off, On (✔)
• If you save with Truncate turned Off, the sample will be
saved without these portions being deleted.
MIXER
MV-8800 Screen Guide
S-211
MV-8800_r_e.book 212 ページ 2006年11月10日 金曜日 午後12時49分
SAMPLING
F-buttons
• [F1](Retry)
Discard the displayed sample. The message “Retry
sure?” will appear.
F-button
Explanation
[F1](No)
Cancels the retry operation.
[F5](Yes)
Discards the sample and closes the RESULT
popup.
• [F2](Name)
Displays the EDIT NAME popup (p. 3), where you can
edit the sample name.
• [F3](Quick Assign)
Displays the Select Quick Assign message (p. 213).
• [F4](Preview)
The currently highlighted sample will be auditioned while
you hold down the button.
• [F5](OK)
Closes the RESULT popup (this popup). The sample will
be added to the sample list.
S-212
MV-8800 Screen Guide
MV-8800_r_e.book 213 ページ 2006年11月10日 金曜日 午後12時49分
SAMPLING
Select Quick Assign message
Here you can assign a sample to a patch or an audio phrase.
■ To access this screen
• [SAMPLING] ➜ [F1](Sampling) ➜
[F5](Start) (start sampling) ➜
[F5](Stop) (stop sampling) ➜ [F3](Quick Assign)
• [IMPORT] ➜ select a file ➜ [F5](Import) ➜
[F3](Quick Assign)
• [PROJECT] ➜ the cursor located in the lower row of
icons ➜ [F3](SmplMgr)➜ [F1](Quick Assign) etc.
F-buttons
• [F1](Chop)
Displays the CHOP popup (p. 159).
• [F3](AsgnToAphrs)
Displays the AUDIO PHRASE QUICK ASSIGN popup (p.
214). The sample will be assigned as an audio phrase.
• [F5](AsgnToPatch)
Displays the PATCH QUICK ASSIGN popup (p. 216).
The sample will be assigned as a partial.
SAMPLING
IMPORT
EFFECTS
MIXER
MV-8800 Screen Guide
S-213
MV-8800_r_e.book 214 ページ 2006年11月10日 金曜日 午後12時49分
SAMPLING
AUDIO PHRASE QUICK ASSIGN popup
Here you can assign a sample to an audio phrase.
■ To access this screen
• [SAMPLING] ➜ [F1](Sampling) ➜
[F5](Start) (start sampling) ➜
[F5](Stop) (stop sampling) ➜ [F3](Quick Assign) ➜
[F3](AsgnToAPhrs) etc.
Explanation of each area
• [F4](Preview)
Assign To
Selects the audio phrase to which the sample will be
assigned.
Range:
1-1–32-16
• You can also specify a pad by striking it directly.
Velocity Pads
Indicates the state of the velocity pads in the current pad
bank.
Indicate
Status
An audio phrase is assigned to the pad.
Nothing is assigned.
An audio phrase will assign to the enclosed pad.
Wave window
Displays the sampled data (waveform).
Sample Name
Displays the name of the sample.
Channel
Displays the number of channel of the sample
(Mono/Stereo).
S-214
F-buttons
MV-8800 Screen Guide
To hear auditioning, hold down [F4](Preview).
• [F5](Execute)
Assigns the sample to the specified audio phrase.
• When assigning samples, a confirmation message will
appear if a pad to which a sample is already assigned
would be overwritten.
MV-8800_r_e.book 215 ページ 2006年11月10日 金曜日 午後12時49分
SAMPLING
AUDIO PHRASE QUICK ASSIGN (MULTIPLE) popup
Here you can assign multiple samples to an audio phrases.
■ To access this screen
• [SAMPLING] ➜ [F1](Sampling) ➜ Set the Auto
Divide parameter to On ➜ [F5](Start) (start
sampling) ➜ [F5](Stop) (stop sampling) ➜
[F3](Quick Assign) ➜ [F3](AsgnToAPhrs) etc.
Explanation of each area
• [F5](Execute)
Assign To
Selects the audio phrase to which the sample will be
assigned.
Range:
F-button
Consecutively assigns the samples as audio phrases,
starting with the specified velocity pad number.
1-1–32-16
• You can also specify a pad by striking it directly.
• When assigning samples, a confirmation message will
appear if a pad to which a sample is already assigned
would be overwritten.
Velocity Pads
Indicates the state of the velocity pads in the current pad
bank.
Indicate
Status
An audio phrase is assigned to the pad.
Nothing is assigned.
An audio phrase will assign to the enclosed pad.
SAMPLING
Sample Name
Displays the name of the sample.
IMPORT
EFFECTS
MIXER
MV-8800 Screen Guide
S-215
MV-8800_r_e.book 216 ページ 2006年11月10日 金曜日 午後12時49分
SAMPLING
PATCH QUICK ASSIGN popup
Here you can assign the sampled data to a patch.
■ To access this screen
• [SAMPLING] ➜ [F2](Re-sampling) ➜
[F5](Start) (start sampling) ➜
[F5](Stop) (stop sampling) ➜ [F3](Quick Assign) ➜
[F5](AsgnToPatch)
Explanation of each area
Part
Specifies the instrument part to which you want to assign
the sampled data.
Range:
1–16
Assign To
If the Make Keyboard parameter is checked, this selects
the pads (note numbers) to which the sample data will be
assigned. The value at the left specifies the lowest note,
and the value at the right specifies the highest note. The
center value specifies the original key.
Range:
1-1 (A0)–(lowest vacant note number)–
6-16 (G#8)
• You can also specify the assignments by striking a pad
directly. If you strike a pad to which a sound is already
assigned, that sound will play.
Velocity Pads
Indicates the state of the pads in the current pad bank.
Indicate
Status
A partial is assigned to the pad.
Nothing is assigned.
A partial will assign to the enclosed pad.
S-216
MV-8800 Screen Guide
Make Keyboard
Check this if you want to assign the sample in a pitched
scale (using key follow).
Value
Explanation
Off
Assign as a drum set type (non-pitched).
On (✔)
Assign as a keyboard type. The pitch will
change according to the note number.
• If you add a check (✔) to Make Keyboard so that the
sample is assigned to multiple velocity pads, these velocity
pads will recall and play the same partial. This means that
if you edit the partial parameters, your editing will affect the
sound of all velocity pads that are using that partial. You
can use the PATCH EDIT (SPLIT) screen (p. 124) to check
the velocity pads to which the partial is assigned.
Wave window
Displays the sampled data (waveform) you are editing.
Sample Name
Displays the name of the sample.
Channel
Displays the number of channel of the sample
(Mono/Stereo).
MV-8800_r_e.book 217 ページ 2006年11月10日 金曜日 午後12時49分
SAMPLING
F-buttons
Keyboard
Indicates how the note numbers are used.
• [F4](Preview)
Auditions the sample you are assigning.
• [F5](Execute)
Assigns the sample to the specified partial.
original
key (C 4)
Region Samples
of used
will be
note
assigned
numbers
• When assigning samples, a confirmation message will
appear if a pad to which a sample is already assigned
would be overwritten.
Region of used note numbers
SAMPLING
IMPORT
EFFECTS
MIXER
MV-8800 Screen Guide
S-217
MV-8800_r_e.book 218 ページ 2006年11月10日 金曜日 午後12時49分
SAMPLING
PATCH QUICK ASSIGN (MULTIPLE) popup
Here you can assign multiple samples to a patch.
■ To access this screen
• [SAMPLING] ➜ [F1](Sampling) ➜ Set the Auto
Divide parameter to On ➜ [F5](Start) (start
sampling) ➜ [F5](Stop) (stop sampling) ➜
[F3](Quick Assign) ➜ [F5](AsgnToPatch) etc.
Explanation of each area
Keyboard
Indicates how the note numbers are used.
Part
Specifies the instrument part to which you want to assign
the sampled data.
Range:
1–16
Assign To
Selects the partial (note number) of the instrument part
selected by Part to which the sample will be assigned.
Range:
1-1 (A0)–(lowest vacant note number)–
6-16 (G#8)
• You can also specify the assignments by striking a pad
directly. If you strike a pad to which a sound is already
assigned, that sound will play.
Region Samples
of used
will be
note
assigned
numbers
Region of used note numbers
Velocity Pads
Indicates the state of the pads in the current pad bank.
Indicate
Status
A partial is assigned to the pad.
F-button
• [F5](Execute)
Assigns samples consecutively, starting with the
specified partial.
Nothing is assigned.
A partial will assign to the enclosed pad.
Sample Name
Displays the name of the sample.
S-218
MV-8800 Screen Guide
• When assigning samples, a confirmation message will
appear if a pad to which a sample is already assigned
would be overwritten.
MV-8800_r_e.book 219 ページ 2006年11月10日 金曜日 午後12時49分
IMPORT
Here you can load various types of music data file from the
disk drives and use them on the MV-8800.
IMPORT screen
Here you can select the music data file that you want to load.
■ To access this screen
• [IMPORT]
Explanation of each area
Current drive
Displays the currently selected drive with its icon.
Icon
Explanation
Name
Displays the name of the file. The icon shown in front of
the filename indicates the type of file.
Icon
Explanation
Wave data (e.g., WAV file)
Hard disk drive
Sequence data (e.g., MID file)
Folder
CD-ROM drive or Audio CD drive
MV-8800 file
Unknown file type
Current folder name
Displays the name of the currently selected folder. The
symbol “/” separates the root (top level of the folder) and
the name of the folder.
Ext (Extension)
This is part of the filename, and is used to indicate the
type of file.
Cursor Icon
Size
The cursor icon will change shape to indicate whether
you can press the cursor right or left button to change the
displayed folder.
Indicates the size of the file.
Cursor icon
Wave Memory
Explanation
Indicates the DIMM memory size that is available for
sampling or recording.
You can move the cursor up/down.
The remaining amount is indicated in units of MB.
IMPORT
EFFECTS
You can move the cursor up/down. If this
indication is displayed, the cursor is located
at a folder (highlighted). Press the right
cursor key to view the contents of the folder
(i.e., to switch folders).
You can move the cursor up/down. If this
indication is displayed, you can press the left
cursor button to return to the parent folder
(i.e., to switch folders).
MIXER
File list
Lists the files saved in the current drive. The highlighted
file is selected by the cursor.
MV-8800 Screen Guide
S-219
MV-8800_r_e.book 220 ページ 2006年11月10日 金曜日 午後12時49分
IMPORT
F-buttons and menu
Sequence Memory
Indicates the memory size that is available for recording
performance data for a song or pattern.
The remaining amount is indicated as the unused
percentage (units of %).
• [F1](Select Drive)
Displays the SELECT DRIVE popup (p. 6), letting you
switch the drive from which to select files.
• [F2](View)
Display the VIEW FILE TYPE popup (p. 221)
• [F3](Mark On/Off)
Adds or removes a mark from the file.
used
free
• [F4](Preview)
• Approximately 10 MB of the installed memory is used by
the system. This means that even when wave memory
contains no wave data, the remaining wave memory
display will be approximately 10 MB less than the installed
amount.
• [F5](Import)
Imports the selected file.
• [MENU]
Folder
A folder is an area in which files can be stored together.
You can use folders to organize files by genre or
purpose. To see the contents of a folder, move the
cursor to the folder and press CURSOR [
Displays the MENU popup.
].
To move from a folder back to the “parent” level, press
CURSOR [
Lets you audition the wave file selected by the cursor in
the file list. Press [F4](Stop) to stop auditioning.
].
Import Option
Indicates the status of the Option functions when
importing.
Menu items
1 Import Options
Displays the IMPORT OPTIONS popup (p. 222), letting
you make option settings for importing audio files.
You have the following two options when importing.
2 All Mark
• Emphasis
The audio file will be imported with the
high-frequency range boosted.
• Auto Divide
When importing the audio file, it will be divided into
separate samples at locations of silence.
• To switch the import option setting, press [MENU], choose
“Import Options” (p. 220).
View Type
Indicates how the file list display is being restricted.
S-220
View Type
Explanation
All
All files are shown.
Sample
Only files that can be imported as samples are
shown.
Patch
Only files that can be imported as patches are
shown.
Song
Only files that can be imported as song or
pattern performance data are shown.
Pix
Only files that can be imported as images are
shown.
MV-8800 Screen Guide
Adds or removes marks from all files.
MV-8800_r_e.book 221 ページ 2006年11月10日 金曜日 午後12時49分
IMPORT
VIEW FILE TYPE popup
Here you can restrict the types of files shown in the file list.
■ To access this screen
• [IMPORT] ➜ [F2](View)
Explanation of each area
F-button
• [F5](Set)
Type
Restricts the types of files shown in the file list.
Value
Explanation
All
All files are shown.
Sample
The following files are shown.
Closes the VIEW FILE TYPE popup and shows the
selected types of files in the file list.
•
Roland S-700 series data (samples, partials, patches) are
shown regardless of how the Type parameter is set.
• WAV files
• AIFF files
• AKAI MPC2000/2000XL sound files (.SND)
• AKAI S1000 sample files (.A1S)
• AKAI S3000 sample files (.A3S)
Patch
The following files are shown.
• AKAI MPC2000/2000XL program files (.PGM)
• AKAI S1000 program files (.A1P)
• AKAI S3000 program files (.A3P)
• MV-8800 patches (.MV0)
Song
Standard MIDI files (.MID) are shown.
Pix
The following files are shown.
• JPG files(.JPG)
• Bitmap files (.BMP)
IMPORT
EFFECTS
MIXER
MV-8800 Screen Guide
S-221
MV-8800_r_e.book 222 ページ 2006年11月10日 金曜日 午後12時49分
IMPORT
IMPORT OPTIONS popup
Here you can specify how emphasis and auto divide are handled when music data files are imported.
■ To access this screen
• [IMPORT] ➜ [MENU] ➜ select “Import Options” ➜
[F5](Select)
Explanation of each area
• [F1](Close)
Auto Divide
The Auto Divide function detects regions of silence
during sampling, and divides the sample into several
samples at these points.
Gap Time
When Auto Divide=On, this parameter specifies the
length of the silent regions that will be detected.
Range:
0.5, 1.0, 1.5, 2.0 sec
Pre Emphasis
Specifies whether emphasis processing will be applied
when you import a music data file.
S-222
F-button
Display
Explanation
Off
Emphasis processing will not be applied to the
imported data.
On
Emphasis processing will be applied to the
imported data.
MV-8800 Screen Guide
Closes the IMPORT OPTIONS popup (this popup).
MV-8800_r_e.book 223 ページ 2006年11月10日 金曜日 午後12時49分
IMPORT
ASSIGN TO PARTIAL popup
Here you can assign the S-700 series partial data to a pacth.
■ To access this screen
• [IMPORT] ➜ select a S-700 series partial data ➜
[F5](Import)
Explanation of each area
Part
Specifies the instrument part to which you want to assign
the partial data.
Range:
Velocity Pads
Indicates the status of the velocity pads in the current
pad bank.
Indicate
1–16
Status
A partial is assigned to the pad.
Assign To
Nothing is assigned.
Specifies the note number within the instrument part
selected by Part Number to which the partial data will be
assigned. The value at the left specifies the lowest note,
and the value at the right specifies the highest note. The
center value specifies the original key.
Range:
1-01 (A0)–(lowest vacant note number)
– 6-16 (G#8)
• You can also specify the assignments by striking a velocity
pad directly. If you strike a pad to which a sound is already
assigned, that sound will play.
A partial will assign to the enclosed pad.
Partial Name
Displays the partial name you want to import.
Keyboard
Indicates how the note numbers are used.
• If a range of pads (note numbers) are assigned, they will
play the same partial. This means that if you edit the partial
parameters, your editing will affect the sound of all pads
that use that partial. The PATCH EDIT (SPLIT) screen (p.
124) shows how partials are assigned to the velocity pads.
IMPORT
Region
Samples
of used
will be
note
assigned
numbers
Region of used note numbers
EFFECTS
F-button
• [F5](Execute)
MIXER
Assigns the partial.
MV-8800 Screen Guide
S-223
MV-8800_r_e.book 224 ページ 2006年11月10日 金曜日 午後12時49分
IMPORT
ASSIGN TO PART / LIBRARY popup
When importing a patch file, you can specify whether the patch will be imported as an entire part or
imported into the library.
■ To access this screen
• [IMPORT] ➜ select a patch file ➜ [F5](Import)
Explanation of each area
• [F3](With Delete)
Part
Specifies the part into which the patch will be imported.
Range:
Off (not imported), 1–16
Library
Specifies the library number into which the patch will be
imported.
Range:
Off (not imported), 1–128
Patch Name
Displays the name of the patch selected in the IMPORT
screen (p. 219) for importing.
S-224
F-buttons
MV-8800 Screen Guide
If there is already a patch in the part number specified by
the Part parameter or in the library number specified by
the Library parameter, that patch and the samples it uses
will be deleted (Delete Patch) before the patch is
imported.
☞For details on what Delete Patch does, refer to “Deleting
the patch” (Owner’s Manual; p. 101).
• [F5](Execute)
Imports the patch to the specified location, and closes
the ASSIGN TO PART / LIBRARY popup (this popup).
MV-8800_r_e.book 225 ページ 2006年11月10日 金曜日 午後12時49分
IMPORT
SET TIME popup
Here you can import a specified region of audio from an audio CD.
■ To access this screen
• [IMPORT] ➜ select an audio CD track ➜
[F5](Import)
Explanation of each area
Current time
Indicates the current time of the track to be imported.
F-buttons
• [F1](Set In Time)
While auditioning the CD, sets the In Time as the current
playback location of the CD track.
Track time
Indicates the total length of the track to be imported.
Current time location
Indicates the location within the track that corresponds to
the time shown in Current Time.
In Time
Specifies the starting time from which to begin importing
the specified track. (The units are minutes:seconds).
Out Time
Specifies the ending time at which to stop importing the
specified track. (The units are minutes:seconds).
• [F2](Set Out Time)
While auditioning the CD, sets the Out Time as the
current playback location of the CD track.
• [F3](Play)
Auditions the region from In Time to Out Time.
• [F4](Stop)
Stops auditioning.
• [F5](Execute)
Imports the region from In Time to Out Time, and opens
the RESULT popup (p. 211).
IMPORT
EFFECTS
MIXER
MV-8800 Screen Guide
S-225
MV-8800_r_e.book 226 ページ 2006年11月10日 金曜日 午後12時49分
IMPORT
PIX QUICK ASSIGN popup
Here you can assign imported image files to velocity pads.
■ To access this screen
• [IMPORT] ➜ select an image file ➜ [F5](Import)
Explanation of each area
• [F5](Execute)
Assign To
Specifies the velocity pad to which the imported image
will be assigned.
Range: 1–16
File name
Shows the file name of the image to be imported.
Velocity pads
This area shows the usage status of the velocity pads.
Indicate
Status
An image is assigned to the velocity pad.
Nothing is assigned.
An image will be assigned to the velocity pad
shown with a border.
S-226
F-button
MV-8800 Screen Guide
Assigns the image to the velocity pad specified by the
Assign To parameter.
MV-8800_r_e.book 227 ページ 2006年11月10日 金曜日 午後12時49分
IMPORT
AUDIO PHRASE BANK QUICK ASSIGN popup
Here you can assign the audio phrases to velocity pads by 1 bank.
■ To access this screen
• [IMPORT] ➜ select an Audio Phrase Bank file ➜
[F5](Import)
Explanation of each area
F-button
• [F5](Execute)
Assign To
Specify the bank number to which the imported audio
phrases will be assigned.
Assigns the audio phrases to the velocity pads of the
bank specified by the Assign To parameter.
Range: 1–32
Velocity pads
Shows the usage status of the velocity pads of the
selected pad bank.
Indicate
Status
An Audio Phrase is assigned to the velocity pad.
Nothing is assigned.
Audio phrase bank name
Show the name of the audio phrase bank to be imported.
IMPORT
EFFECTS
MIXER
MV-8800 Screen Guide
S-227
MV-8800_r_e.book 228 ページ 2006年11月10日 金曜日 午後12時49分
IMPORT
EFFECTS ASSIGN TO LIBRARY popup
Here you can assign imported effect settings to the effect library.
■ To access this screen
• [IMPORT] ➜ select a effects file ➜ [F5](Import)
• The popup name will depend on the file that you are
importing.
Explanation of each area
Popup name
MFX
MFX ASSIGN TO LIBRARY
Dly/Cho
DELAY/CHORUS ASSIGN TO LIBRARY
Reverb
EVERB ASSIGN TO LIBRARY
F-button
• [F5](Execute)
Library
Specifies the library number into which the effect setting
will be imported.
Effect
Value
MFX
U001–U100
Dly/Cho
U01–U50
Reverb
U01–U50
Name of effects setting
Displays the name of the effects file selected in the
IMPORT screen (p. 219).
S-228
Effects type
MV-8800 Screen Guide
Imports the effect setting to the specified location, and
closes the EFFECTS ASSIGN TO LIBRARY popup.
MV-8800_r_e.book 229 ページ 2006年11月10日 金曜日 午後12時49分
EFFECTS
Here you can make settings for the built-in MFX (multi-effect),
delay/chorus, and reverb.
EFFECTS screen
In this effects screen you can check the state of the multi-effect, delay/chorus, and reverb.
■ To access this screen
• [EFFECTS]
Explanation of each area
Cursor
The effect section (MFX, delay/chorus, reverb) at which
the cursor is located is highlighted. The highlighted effect
section is called the “current effect.”
Effect section
Indicates the type of effect.
Display
Explanation
Control knobs
Use these knobs to control major parameters of the
effect algorithm used by each effect section.
• There are three knobs for each section; they correspond to
knobs C1–C3 of the top panel.
To operate these knobs, use the cursor (up/down) to move
the highlighted area to the appropriate effect section.
• The Knob Assign function (p. 234) lets you freely assign an
effect parameter to each knob.
MFX
Multi-effect
Effect patch name
Dly/Cho
Delay/Chorus
Indicates the name of the effects patch.
Reverb
Reverb
Effect Algorithm
Algorithm icon
Indicates the name of the algorithm used by each effect.
The effect algorithm used by each effect section is
indicated by the icon shown.
Effect switch
Switches the status of each effect section.
Routing
Specifies where the MFX will be placed within the mixer.
Value
Explanation
Off
MFX is not used.
Input
Input bus
AUX1–4
AUX 1–4 bus
Master
Master out bus
Value
Explanation
Off
The effect is not used.
On
The effect is enabled.
F-buttons
• [F3](Library)
Control parameter
Indicates the names of the parameters controlled by the
control knobs. Three parameters are displayed; from the
left they correspond to the C1, C2, and C3 knobs.
Displays the EFFECT LIBRARY popup (p. 230).
EFFECTS
• You can select the Routing parameter only for MFX.
• [F4](FX On/Off)
Switches the status of the current effect.
• [F5](Edit)
MV-8800 Screen Guide
MIXER
Displays the EFFECTS EDIT screen (p. 231).
S-229
MV-8800_r_e.book 230 ページ 2006年11月10日 金曜日 午後12時49分
EFFECTS
EFFECTS LIBRARY popup
Here you can save and recall effect settings.
■ To access this screen
• [EFFECTS] ➜ select the current effect ➜
[F3](Library)
• The popup name will depend on the current effect.
Explanation of each area
MFX LIBRARY
Dly/Cho
DELAY/CHORUS LIBRARY
Reverb
REVERB LIBRARY
• [F1](Write Here)
The effect library consists of a Preset area containing
factory-set settings and a User area for you to
store/recall your own settings.
Effect
U (User) area
P (Preset) area
MFX
U001–U100
P001–P034
Dly/Cho
U001–U050
P001–P002
Reverb
U001–U050
P001–P004
• The Preset area is read-only; you cannot write settings into
the Preset area.
Name
Displays the name of the effect settings.
Algorithm
Displays the used effect algorithm.
Scroll bar
Indicates the approximate portion of the list that is
visible.
Library Preview
This will indicate “On” while you are previewing the
effect.
MV-8800 Screen Guide
Popup name
MFX
F-buttons
No. (effect library number)
S-230
Current effect
Saves the current effect settings to the cursor location
within the library list. Displays the confirmation message.
F-button
Explanation
[F1](No)
Cancels the operation.
[F5](Yes)
Saves the effect settings.
• [F4](Preview)
Temporarily enables the effect selected by the cursor,
letting you preview the result. The display will indicate
“Library Preview On” while you are previewing the effect.
• [F5](Use This)
Specifies the effect setting parameters selected by the
cursor as the current effect.
• To discard the selection you made in the popup and return
to the previous screen, press [EXIT].
MV-8800_r_e.book 231 ページ 2006年11月10日 金曜日 午後12時49分
EFFECTS
EFFECTS EDIT screen
Here you can make detailed edits to the multi-effect, delay/chorus effect, or reverb effect.
■ To access this screen
• [EFFECTS] ➜ [F5](Edit)
Explanation of each area
Effect section
Indicates the name of the effect section you are editing.
Display
Explanation
MFX EDIT
Multi-effect Edit screen
DELAY/CHORUS EDIT
Delay/Chorus Edit screen
REVERB EDIT
Reverb Edit screen
Effect patch name
Indicates the name of the currently-recalled effect
settings.
Effect algorithm name
Indicates the name of the currently-used effect algorithm.
☞ For more about the effect patch name and effect algorithm
Control knobs
Use these knobs to control major parameters of the
current effect.
• There are several knobs for each effect block, and
indications of C1–C3 are displayed for some of these.
These knobs correspond to the C1–C3 knobs of the top
panel.
• The Knob Assign function (p. 234) lets you freely assign an
effect parameter to each knob.
Effect blocks
These are the individual effects that make up each effect
algorithm. To make settings in a particular effect block,
use [F1](Block ▲) or [F2](Block ▼) to select that block.
☞ The tab area of the effect block shows the individual effects
that make up the effect patch. For details, refer to “Effect
Block” (Appendices; p. 16).
name, refer to “Preset Patches and Algorithm List”
(Appendices; p. 14).
Algorithm icon
The displayed icon indicates the currently-used effect
algorithm.
Switch parameter
This indicates the status of each effect block (individual
effect).
Effect switch
Value
Explanation
Indicates the status of the current effect
Off
The effect block is not used.
On
The effect block is enabled.
Value
Explanation
Off
The effect is bypassed (not used).
On
The effect is enabled.
Effect block parameters
This area displays the parameters of each effect block.
For details on the displayed parameters, refer to “Effect
Block” (Appendices; p. 16).
EFFECTS
MIXER
MV-8800 Screen Guide
S-231
MV-8800_r_e.book 232 ページ 2006年11月10日 金曜日 午後12時49分
EFFECTS
F-buttons and menu
• [F1](Block▲) / [F2](Block▼)
These switch the displayed effect block.
• [F3](Knob Assign)
Displays the KNOB ASSIGN popup (p. 234).
• [F4](FX On/Off)
Switches the current effect off (bypassed) or on.
Menu items
● MFX EDIT screen
1 MFX Library
Displays the MFX LIBRARY popup (p. 230).
2 Edit MFX Name
Displays the EDIT MFX NAME popup (p. 3)
• [F5](SW On/Off)
Switches the effect block off (bypassed) or on.
• [MENU]
Displays the MENU popup.
3 Save MFX
Displays the SAVE MFX popup (p. 233)
● DELAY/CHORUS EDIT screen
1 Dly/Cho Library
Displays the Dly/Cho LIBRARY popup (p. 230).
2 Edit Dly/Cho Name
Displays the EDIT Dly/Cho NAME popup (p. 3)
3 Save Dly/Cho
Displays the SAVE Dly/Cho popup (p. 233)
● REVERB EDIT screen
1 Reverb Library
Displays the REVERB LIBRARY popup (p. 230).
2 Edit Reverb Name
Displays the EDIT REVERB NAME popup (p. 3)
3 Save Reverb
Displays the SAVE REVERB popup (p. 233)
S-232
MV-8800 Screen Guide
MV-8800_r_e.book 233 ページ 2006年11月10日 金曜日 午後12時49分
EFFECTS
SAVE EFFECTS popup
Here you can save multi-effect, delay/chorus, and reverb effect settings to the hard disk as a file.
■ To access this screen
• [EFFECTS] ➜ [F5](Edit) ➜ [MENU] ➜ select “Save
MFX”, “Save Dly/Cho”, or “Save Reverb” ➜
[F5](Select)
• The popup name will depend on the current effect.
Explanation of each area
Effect setting name
Displays the name of the effect setting which can be
saved.
Current folder name
Current effect
Popup name
MFX
SAVE MFX
Dly/Cho
SAVE DELAY/CHORUS
Reverb
SAVE REVERB
■ F-buttons
• [F4](Make Folder)
Displays the EDIT NAME popup (p. 3), where you can
create a new folder inside the current folder.
• [F5](Save)
Displays the destination folder you want to save.
Saves the effect setting as a file to the hard disk.
Folder levels below the root folder (the top level folder in
the hard disk) are shown by a slash “/” symbol.
Displays the EDIT NAME popup (p. 3), where you can
specify the name of a WAV-format or AIFF-format file.
File list
Displays the name of the files and folders saved in the
current folder.
Drive capacity
Displays the free space of the hard disk.
EFFECTS
MIXER
MV-8800 Screen Guide
S-233
MV-8800_r_e.book 234 ページ 2006年11月10日 金曜日 午後12時49分
EFFECTS
KNOB ASSIGN popup
Here you can assign effect parameters to the control knobs (C1–C3). This lets you use the knobs to edit
parameters directly.
■ To access this screen
• [EFFECTS] ➜ select an current effect ➜
[F5](Edit) ➜ use the cursor to select the effect
parameter you want to assign to a knob ➜
[F3](Knob Assign)
• [MASTERING] ➜[F2](Mastering) ➜ select the audio
data (WAV file) that you want to master ➜
[F5](MTK Edit) ➜ [F5](Sw On/Off) ➜ [MENU] ➜
select “Knob Assign” ➜ [F5](Select)
Explanation of each area
New parameter
Shows the parameter that you will be assigning.
Parameter
Displays the names of the effect parameters assigned to
C1, C2, and C3.
S-234
MV-8800 Screen Guide
F-buttons
• [F1](C1) / [F2](C2) / [F3](C3)
These assign the effect parameter at the cursor to the
corresponding knob.
• [F5](Cancel)
Closes the KNOB ASSIGN popup.
MV-8800_r_e.book 235 ページ 2006年11月10日 金曜日 午後12時49分
MIXER
Here you can adjust the volume and panning of each audio track and
instrument part.
MIXER (AUDIO TRACK) screen
This is the audio track mixer screen, where you can set the level, pan, and output assign.
■ To access this screen
• [MIXER] ➜ [F1](Audio Track)
Explanation of each area
Name
Displays the name of the audio track.
• The first few characters of the name are shown.
Subsequent characters are not displayed.
Mute
Temporarily silences the track.
Range:
Output
Specifies the signal output destination for each track.
Off, On
Value
Explanation
Mix
Output the sound to the Mix bus. The sound will
be output from Master and Phones.
AUX1–
AUX4
Output the sound to an AUX bus.
MLT1–
MLT8
Output the sound to a MULTI OUTPUT (mono
output).
M1/2–
M7/8
Output the sound to a pair of MULTI OUTPUT
(stereo output).
DlyCho Send (Delay/Chorus Send Level)
Specifies the amount of signal sent to the delay/chorus
effect.
Range:
0–127
Reverb Send (Reverb Send Level)
Specifies the amount of signal sent to the reverb effect.
Range:
0–127
Pan
Sets the panning of the track.
Range:
L63–0–R63
Level
Specifies the volume of the track.
Range:
0–100–127
• You can use the eight sliders on the top panel to adjust the
Level parameter.
F-buttons
• [F1](Audio Track)
Displays the MIXER (AUDIO TRACK) screen (this
screen).
• [F2](Part 1–8)
Displays parts 1–8 of the MIXER (INSTRUMENT PART)
screen (p. 236).
• [F3](Part 9–16)
Displays parts 9–16 the MIXER (INSTRUMENT PART)
screen (p. 236).
• [F4](AUX/Phrs/In)
Displays the MIXER (AUX/FX/AUDIO PHRASE/INPUT)
screen (p. 237).
• [F5](➔ EQ)
MV-8800 Screen Guide
MIXER
Displays the MIXER (AUDIO TRACK EQ) screen (p.
238).
S-235
MV-8800_r_e.book 236 ページ 2006年11月10日 金曜日 午後12時49分
MIXER
MIXER (INSTRUMENT PART) screen
This is the mixer screen for each instrument part. Here you can specify the level, pan, and output assign.
■ To access this screen
• [MIXER] ➜ [F2](Part 1–8) or [F3](Part 9–16)
Explanation of each area
Patch name
Displays the patch name of the selected part.
• The first few characters of the name are shown.
Subsequent characters are not displayed.
Mute
Temporarily silences the part.
Range:
Off, On
DlyCho Send (Delay/Chorus Send Level)
Specifies the amount of signal sent to the delay/chorus
effect.
Range:
Specifies the amount of signal sent to the reverb effect.
0–127
Sets the panning of the part.
L63–0–R63
Follow the setting of the partial’s Output Assign
(Partial output assign) (p. 125)
Mix
Output the sound to the Mix bus. The sound will be
output from Master and Phones.
AUX1–
AUX4
Output the sound to an AUX bus.
MLT1–
MLT8
Output the sound to a MULTI OUTPUT (mono
output).
M1/2–
M7/8
Output the sound to a pair of MULTI OUTPUT
(stereo output).
F-buttons
• [F1](Audio Track)
Displays the MIXER (AUDIO TRACK) screen (p. 235).
Displays parts 1–8 the MIXER (INSTRUMENT PART)
screen (this screen).
• [F3](Part 9–16)
Level
Specifies the volume of the part.
Range:
Explanation
Prtl
• [F2](Part 1–8)
Pan
Range:
Value
0–127
Reverb Send (Reverb Send Level)
Range:
Output
Specifies the signal output destination for each part.
0–100–127
Displays parts 9–16 the MIXER (INSTRUMENT PART)
screen (this screen).
• [F4](AUX/Phrs/In)
• You can use the eight sliders on the top panel to adjust the
Level parameter.
Displays the MIXER (AUX/FX/AUDIO PHRASE/INPUT)
screen (p. 237).
• [F5](➜EQ)
Displays the MIXER (IMSTRUMENT PART EQ) screen
(p. 239) for channels 1–8 or 9–16.
S-236
MV-8800 Screen Guide
MV-8800_r_e.book 237 ページ 2006年11月10日 金曜日 午後12時49分
MIXER
MIXER (AUX/FX/AUDIO PHRASE/INPUT) screen
This is the mixer screen for the AUX buses, effects, audio phrase parts, and inputs.
■ To access this screen
• [MIXER] ➜ [F4](AUX/Phrs/In)
Explanation of each area
Level meter
Displays the post-fader level of each part.
Name
This is the name of each mixer.
Display
Explanation
• The top indicator of the meter will light when the signal clips
(= 0 dB). If this occurs, lower the value of the Level
parameter.
AUX1–AUX4
AUX bus
DlyCho
Delay/Chorus
Output
Reverb
Reverb bus
A.Phrs
Audio Phrase
Specifies the signal output destination for AUX buses 1–
4 and audio phrases.
In (A)
Analog input
Value
Explanation
MFX (Multi-effect)
Off
No output (AUX buses 1–4 only)
A bus in which MFX is inserted is displayed as “MFX.”
Mix
Output the audio to the Mix bus. The sound will be
output from Master and Phones.
AUX1–
AUX4
Output the audio to the AUX bus (audio phrases
only)
MLT1–
MLT8
Output the audio to a MULTI OUTPUT (mono
output).
M1/2–
M7/8
Output the audio to a pair of MULTI OUTPUT
(stereo output).
• “---” indicates that MFX is not inserted.
DlyCho Send (Delay/Chorus Send Level)
Specifies the amount of signal sent to the delay/chorus
effect.
Range:
0–127
Reverb Send (Reverb Send Level)
Specifies the amount of signal sent to the reverb effect.
Range:
0–127
Specifies the panning of the signal.
L63–0–R63
Displays the MIXER (AUDIO TRACK) screen (p. 235).
Displays parts 1–8 the MIXER (INSTRUMENT PART)
screen (p. 236).
• [F3](Part 9–16)
Level
Specifies the volume of each part.
Range:
• [F1](Audio Track)
• [F2](Part 1–8)
Pan
Range:
F-buttons
Displays parts 9–16 the MIXER (INSTRUMENT PART)
screen (p. 236).
0–100–127
• [F4](AUX/Phrs/In)
• You can use the eight sliders on the top panel to adjust the
Level parameter.
Displays the MIXER (AUX/FX/AUDIO PHRASE/INPUT)
screen (this screen).
Clears the indicators of the peak hold in the Level meters.
MV-8800 Screen Guide
S-237
MIXER
• [F5](Reset Peak)
MV-8800_r_e.book 238 ページ 2006年11月10日 金曜日 午後12時49分
MIXER
MIXER (AUDIO TRACK EQ) screen
This is the equalizer screen for the audio tracks, where you can adjust their tonal character.
■ To access this screen
• [MIXER] ➜ [F1](Audio Track) ➜ [F5](➜ EQ)
Explanation of each area
Name
Shows a portion of the audio track name.
EQ Mid Q (EQ middle Q)
Specifies the width of the frequency band that will be
boosted or cut. Lower settings will broaden the frequency
band; higher settings will sharpen it.
Range:
EQ Sw
Turns the EQ of each track on/off.
Range:
Off, On
EQ High Gain
Specifies the amount of boost or cut at the frequency
specified by EQ High Freq.
Range:
-15–0–15 [dB]
EQ High Freq (EQ high frequency)
Specifies the high-range frequency at which the boost or
cut will occur.
Range:
1000, 1120, 1250, 1400, 1600, 1800, 2000,
2240, 2500, 2800, 3150, 3550, 4000, 4500,
5000, 5600, 6300, 7100, 8000, 9000,10k [Hz]
0.5, 0.6, 0.7, 0.8, 0.9, 1.0, 1.1, 1.2, 1.4, 1.6,
1.8, 2.0, 2.2, 2.5, 2.8, 3.1, 3.5, 4.0, 4.5, 5.0,
5.6, 6.3, 7.1, 8.0, 9.0, 10.0, 11.2, 12.5, 14.0,
16.0
EQ Low Gain
Specifies the amount of boost or cut at the frequency
specified by EQ Low Freq.
Range:
-15–0–15 [dB]
EQ Low Freq (EQ low frequency)
Specifies the low-range frequency at which the boost or
cut will occur.
Range:
100, 112, 125, 140, 160, 180, 200, 224, 250,
280, 315, 355, 400, 450, 500, 560, 630, 710,
800, 900, 1000 [Hz]
EQ Mid Gain
Specifies the amount of boost or cut at the frequency
specified by EQ Mid Freq.
Range:
-15–0–15 [dB]
EQ Mid Freq (EQ middle frequency)
Specifies the midrange frequency at which the boost or
cut will occur.
Range:
100, 112, 125, 140, 160, 180, 200, 224, 250,
280, 315, 355, 400, 450, 500, 560, 630, 710,
800, 900, 1000,1120, 1250, 1400, 1600, 1800,
2000, 2240, 2500, 2800, 3150, 3550, 4000,
4500, 5000, 5600, 6300, 7100, 8000, 9000,
10k [Hz]
F-buttons
• [F1](Audio Track)
Displays the MIXER (AUDIO TRACK EQ) screen (this
screen).
• [F2](Part 1–8)
Displays parts 1–8 of the MIXER (IMSTRUMENT PART
EQ) screen (p. 239).
• [F3](Part 9–16)
Displays parts 9–16 of the MIXER (IMSTRUMENT PART
EQ) screen (p. 239).
• [F5](➔ Level/Pan)
Displays the MIXER (AUDIO TRACK) screen (p. 235).
S-238
MV-8800 Screen Guide
MV-8800_r_e.book 239 ページ 2006年11月10日 金曜日 午後12時49分
MIXER
MIXER (IMSTRUMENT PART EQ) screen
This is the equalizer screen for the instrument parts, where you can adjust their tonal character.
■ To access this screen
• [MIXER] ➜ [F2](Part 1–8) or [F3](Part 9–16) ➜
[F5](➜ EQ)
Explanation of each area
Patch name
Displays the patch name of the selected part.
EQ Mid Q (EQ middle Q)
Specifies the width of the frequency band that will be
boosted or cut. Lower settings will broaden the frequency
band; higher settings will sharpen it.
Range:
• The first few characters of the name are shown.
Subsequent characters are not displayed.
EQ Sw
0.5, 0.6, 0.7, 0.8, 0.9, 1.0, 1.1, 1.2, 1.4, 1.6,
1.8, 2.0, 2.2, 2.5, 2.8, 3.1, 3.5, 4.0, 4.5, 5.0,
5.6, 6.3, 7.1, 8.0, 9.0, 10.0, 11.2, 12.5, 14.0,
16.0
Turns EQ on/off for each part.
EQ Low Gain
EQ High Gain
Specifies the amount of boost or cut at the frequency
specified by EQ Low Freq.
Specifies the amount of boost or cut at the frequency
specified by EQ High Freq.
Range:
-15–0–15 [dB]
EQ High Freq (EQ high frequency)
Specifies the high-range frequency at which the boost or
cut will occur.
Range:
1000, 1120, 1250, 1400, 1600, 1800, 2000,
2240, 2500, 2800, 3150, 3550, 4000, 4500,
5000, 5600, 6300, 7100, 8000, 9000,10k [Hz]
EQ Mid Gain
Specifies the amount of boost or cut at the frequency
specified by EQ Mid Freq.
Range:
-15–0–15 [dB]
EQ Mid Freq (EQ middle frequency)
Specifies the midrange frequency at which the boost or
cut will occur.
Range:
100, 112, 125, 140, 160, 180, 200, 224, 250,
280, 315, 355, 400, 450, 500, 560, 630, 710,
800, 900, 1000,1120, 1250, 1400, 1600, 1800,
2000, 2240, 2500, 2800, 3150, 3550, 4000,
4500, 5000, 5600, 6300, 7100, 8000, 9000,
10k [Hz]
Range:
-15–0–15 [dB]
EQ Low Freq (EQ low frequency)
Specifies the low-range frequency at which the boost or
cut will occur.
Range:
100, 112, 125, 140, 160, 180, 200, 224, 250,
280, 315, 355, 400, 450, 500, 560, 630, 710,
800, 900, 1000 [Hz]
F-buttons
• [F1](Audio Track)
Displays the MIXER (AUDIO TRACK EQ) screen (p.
238).
• [F2](Part 1–8)
Displays parts 1–8 of MIXER (IMSTRUMENT PART EQ)
screen (this screen).
• [F3](Part 9–16)
Displays parts 9–16 of MIXER (IMSTRUMENT PART
EQ) screen (this screen).
• [F5](➔ Level/Pan)
MIXER
Displays 1–8 or 9–16 of the MIXER (INSTRUMENT
PART) screen (p. 236).
MV-8800 Screen Guide
S-239
MV-8800_r_e.book 240 ページ 2006年11月10日 金曜日 午後12時49分
Index
A
ADD AUDIO TRACKS popup ....................................................... 55
ADD MIDI TRACKS popup ........................................................... 54
ASSIGN TO PAD popup ............................................................. 100
ASSIGN TO PART / LIBRARY popup ........................................ 224
ASSIGN TO PARTIAL popup ..................................................... 223
ASSIGNABLE SLIDER screen ................................................... 182
AUDIO EVENT PARAMETER popup ........................................... 28
AUDIO EVENT SAMPLE EDIT popup ......................................... 29
AUDIO FILE LIST screen ........................................................... 208
AUDIO PHARASE SAMPLE EDIT screen ................................. 157
AUDIO PHRASE BANK QUICK ASSIGN popup ........................ 227
AUDIO PHRASE EDIT screen ................................................... 155
AUDIO PHRASE QUICK ASSIGN (MULTIPLE) popup ............. 215
AUDIO PHRASE QUICK ASSIGN popup .................................. 214
AUDIO PHRASE STEP REC screen ............................................ 63
AUDIO PHRASES (LIST) screen ............................................... 153
AUDIO PHRASES (PAD) screen ............................................... 152
AUTO CHOP popup ................................................................... 160
AUTO PUNCH popup ................................................................... 49
AUTOMATIC ASSIGN TO PAD popup ...................................... 108
B
BACKUP PROJECT TO CD screen ........................................... 170
BPM/TAP popup ........................................................................... 70
EDIT FOLDER NAME popup ......................................................... 3
EDIT LOCATOR NAME popup ...................................................... 3
EDIT MFX NAME popup ................................................................ 3
EDIT MIDI CLIP NAME popup ....................................................... 3
EDIT MTK NAME popup ................................................................ 3
EDIT PAD BANK NAME popup ...................................................... 3
EDIT PARTIAL NAME popup ......................................................... 3
EDIT PATCH NAME popup ............................................................ 3
EDIT PATTEN NAME popup .......................................................... 3
EDIT PROJECT NAME popup ....................................................... 3
EDIT REVERB NAME popup ......................................................... 3
EDIT SAMPLE NAME popup ......................................................... 3
EDIT SONG NAME popup ............................................................. 3
EDIT TRACK NAME popup ............................................................ 3
EDIT VOLUME LABEL popup ........................................................ 3
EFFECTS ASSIGN TO LIBRARY popup ................................... 228
EFFECTS screen ....................................................................... 229
EMPHASIS popup ...................................................................... 133
EVENT ERASE popup ................................................................. 61
EVENT LIST screen ..................................................................... 23
F
FADE IN popup .......................................................................... 138
FADE OUT popup ...................................................................... 139
FILE UTILITY screen .................................................................. 189
G
C
CD PLAYER screen ................................................................... 195
CHANGE CONTINUOUS DATA popup ....................................... 68
CHANGE DURATION popup ....................................................... 40
CHANGE VELOCITY popup ........................................................ 39
CHOP popup .............................................................................. 159
CHOP QUICK ASSIGN popup ................................................... 161
COMMAND popup .......................................................................... 7
COPY AS AUDIO PHRASE popup .............................................. 45
COPY AS MIDI CLIP popup ......................................................... 44
COPY AS NEW PATTERN popup ............................................. 105
COPY AS NEW SONG popup ...................................................... 87
COPY PART popup .................................................................... 151
COPY PATTERN popup ............................................................... 97
COPY&INSERT popup ................................................................. 37
COPY&PASTE popup .................................................................. 35
CREATE CONTINUOUS DATA popup ........................................ 67
CREATE EVENT popup ............................................................... 25
CREATE NEW PROJECT screen .............................................. 166
CREATE NEW SONG screen ...................................................... 83
CUE SHEET screen ................................................................... 206
GAP TIME popup ....................................................................... 207
GLOBAL screen ......................................................................... 173
I
IMPORT OPTIONS popup ......................................................... 222
IMPORT screen .......................................................................... 219
INSERT MEASURE popup .......................................................... 64
INSTRUMENTS screen .............................................................. 114
J
JUMP popup ................................................................................. 60
L
LISTEN AUDIO FILE popup ....................................................... 197
LOAD PATCH screen ................................................................. 150
LOAD PROJECT screen ............................................................ 164
LOAD SONG screen .................................................................... 89
LOCATOR popup ......................................................................... 59
LOOP popup ................................................................................ 48
D
M
DATA THIN popup ........................................................................ 42
DELAY/CHORUS EDIT screen .................................................. 231
DELAY/CHORUS KNOB ASSIGN popup .................................. 234
DELAY/CHORUS LIBRARY popup ............................................ 230
DELETE MEASURE popup .......................................................... 65
DELETE PROJECT screen ........................................................ 168
DELETE SONG screen ................................................................ 86
DELETE TRACKS popup ............................................................. 56
DISK UTILITY screen ................................................................. 193
DISK/USB MENU screen ........................................................... 188
DISPLAY/MOUSE screen .......................................................... 184
DRUM GRID screen ..................................................................... 73
MARKER popup ........................................................................... 57
MASTERING FILE NAME popup ................................................... 3
MASTERING screen .................................................................. 199
MASTERING TOOL KIT EDIT screen ........................................ 202
MASTERING TOOL KIT LIBRARY popup ................................. 201
MENU popup .................................................................................. 7
MERGE TRACKS popup .............................................................. 69
METRONOME popup ................................................................... 22
MFX EDIT screen ....................................................................... 231
MFX KNOB ASSIGN popup ....................................................... 234
MFX LIBRARY popup ................................................................ 230
MIDI CLIP LIBRARY popup ......................................................... 46
MIDI FILTER screen ................................................................... 116
MIDI screen ................................................................................ 177
MIXDOWN / MASTERING MENU screen .................................. 196
MIXDOWN FILE NAME popup ....................................................... 3
MIXER (AUDIO TRACK EQ) screen .......................................... 238
MIXER (AUDIO TRACK) screen ................................................ 235
MIXER (AUX/FX/AUDIO PHRASE/INPUT) screen .................... 237
E
EDIT AUDIO PHRASE NAME popup ............................................. 3
EDIT COMMENT popup ............................................................... 80
EDIT DELAY / CHORUS NAME popup .......................................... 3
EDIT FILE NAME popup ................................................................ 3
S-240
MV-8800 Screen Guide
MV-8800_r_e.book 241 ページ 2006年11月10日 金曜日 午後12時49分
Index
MIXER (IMSTRUMENT PART 1–8 EQ) screen ......................... 239
MIXER (IMSTRUMENT PART 9–16 EQ) screen ....................... 239
MIXER (INSTRUMENT PART 1–8) screen ................................ 236
MIXER (INSTRUMENT PART 9–16) screen .............................. 236
MOVE AUDIO EVENT popup ..................................................... 113
MOVE PATTERN EVENT popup ............................................... 113
MOVE popup ................................................................................ 36
MUTE CONTROL TRACK screen ................................................ 71
N
NORMALIZE popup .................................................................... 134
P
PAD BANKS popup ........................................................................ 5
PAD screen ................................................................................ 174
PANEL screen ............................................................................ 175
PARTIAL EDIT (AMPLIFIER) screen ......................................... 145
PARTIAL EDIT (FILTER) screen ................................................ 143
PARTIAL EDIT (LFO) screen ..................................................... 147
PARTIAL EDIT (SMT) screen ..................................................... 141
PARTIAL EDIT screen ................................................................ 125
PASTE EVENT popup .................................................................. 26
PASTE MIDI CLIP popup ............................................................. 47
PASTE PATTERN popup ........................................................... 106
PATCH EDIT (CONTROL) screen ............................................. 120
PATCH EDIT (SOLO/PORTAMENTO) screen ........................... 122
PATCH EDIT (SPLIT) screen ..................................................... 124
PATCH EDIT screen .................................................................. 118
PATCH LIBRARY popup ............................................................ 117
PATCH QUICK ASSIGN (MULTIPLE) popup ............................ 218
PATCH QUICK ASSIGN popup ................................................. 216
PATTERN EVENT PARAMETR popup ...................................... 112
PATTERN LIST screen ................................................................ 96
PATTERN PARAMETER popup .................................................. 99
PATTERN PLAY screen ............................................................... 98
PATTERN RECORDING PARAMETER (AUDIO) popup ........... 103
PATTERN RECORDING PARAMETER (MIDI) popup .............. 101
PATTERN screen ......................................................................... 91
PATTERN STEP REC screen .................................................... 110
PATTERN SYNC screen .............................................................. 94
PIANO ROLL EDIT screen ........................................................... 30
PIX ASSIGN screen ................................................................... 186
PIX COPY popup ........................................................................ 187
PIX EXCHANGE popup .............................................................. 187
PIX JAM screen .......................................................................... 185
PIX QUICK ASSIGN popup ........................................................ 226
PROJECT MENU screen ........................................................... 162
PUT PATTERN popup ................................................................ 111
Q
QUANTIZE popup ........................................................................ 38
R
R-BUS screen ............................................................................. 183
RECORDING FILTER popup ....................................................... 18
RECORDING PARAMETER (AUDIO) popup .............................. 19
RECORDING PARAMETER (MIDI) popup .................................. 16
RECORDING PARAMETER (MUTE CONTROL) popup ............. 21
RECORDING PARAMETER (PATTERN) popup ......................... 20
RECORDING PARAMETER popup (for the drum grid) ............... 74
RECOVER PROJECT FROM CD popup ................................... 171
RE-SAMPLING screen ............................................................... 209
RESULT popup .......................................................................... 211
REVERB EDIT screen ................................................................ 231
REVERB KNOB ASSIGN popup ................................................ 234
REVERB LIBRARY popup ......................................................... 230
S
SAMPLE EDIT screen ................................................................ 128
SAMPLE LIST popup ................................................................. 130
SAMPLE MANAGER screen ...................................................... 169
SAMPLE PARAMETER popup .................................................. 131
SAMPLING screen ..................................................................... 209
SAVE AS NEW PROJECT popup .............................................. 165
SAVE AUDIO PHRASE BANK popup ........................................ 154
SAVE DELAY/CHORUS popup ................................................. 233
SAVE MFX popup ...................................................................... 233
SAVE PATCH popup .................................................................. 149
SAVE PATTERN AS SMF popup ............................................... 109
SAVE REVERB popup ............................................................... 233
SAVE SAMPLE AS AIFF popup ................................................. 140
SAVE SAMPLE AS WAV popup ................................................ 140
SAVE SONG AS SMF popup ....................................................... 88
SELECT AUDIO FILE popup ..................................................... 198
SELECT CATEGORY popup ......................................................... 4
SELECT DESTINATION popup ................................................. 192
SELECT DRIVE popup .................................................................. 6
SELECT FILE COMMAND popup .............................................. 191
SELECT MASTERING SOURCE popup .................................... 198
SELECT PIANO ROLL EDIT COMMAND popup ......................... 33
Select Quick Assign message .................................................... 213
SELECT SAMPLE EDIT COMMAND popup .............................. 132
SELECT SEQUENCE EDIT COMMAND popup .......................... 34
SELECT SONG screen ................................................................ 85
SELECT SOURCE PROJECT popup ........................................ 167
SEQUENCE EDIT screen ............................................................ 31
SET MONO popup ..................................................................... 137
SET PROJECT PROTECTION screen ...................................... 163
SET TIME popup ........................................................................ 225
SHIFT TIMING popup .................................................................. 41
SONG LIST popup ....................................................................... 90
SONG MENU screen ................................................................... 78
SONG PARAMETER screen ........................................................ 79
SONG screen ................................................................................. 8
SPLIT NOTES popup ................................................................... 66
STEP REC screen ........................................................................ 62
STEP TIME popup ....................................................................... 58
SYNC screen ................................................................................ 81
SYS-EX popup ............................................................................. 27
SYSTEM INFORMATION screen ............................................... 181
SYSTEM MENU screen ............................................................. 172
T
TEMPO TRACK screen ................................................................ 52
TIME STRETCH popup .............................................................. 135
TRACK LIST (OUTPUT) screen ................................................... 50
TRACK LIST (PLAY QUANTIZE) screen ..................................... 51
TRACK MUTE screen .................................................................. 75
TRACK MUTE SETUP popup ...................................................... 77
TRACK PARAMETER popup (for a MIDI track) ........................... 11
TRACK PARAMETER popup (for a Pattern track) ....................... 15
TRACK PARAMETER popup (for an Audio track) ....................... 14
TRACK REMAP popup .............................................................. 107
TRACK SELECT popup ............................................................... 72
TRACK SOLO screen .................................................................. 76
TRANSPOSE popup .................................................................... 43
TRUNCATE popup ..................................................................... 136
U
USB screen ................................................................................ 194
V
VIEW FILE TYPE popup ............................................................ 221
VIEW FILTER popup .................................................................... 53
V-LINK (SLAVE) screen ............................................................. 180
V-LINK screen ............................................................................ 179
MV-8800 Screen Guide
S-241
MV-8800_r_e.book 242 ページ 2006年11月10日 金曜日 午後12時49分
...MEMO....
S-242
MV-8800 Screen Guide
MV-8800_r_e.book 243 ページ 2006年11月10日 金曜日 午後12時49分
MV-8800_r_e.book 244 ページ 2006年11月10日 金曜日 午後12時49分
04348412
*
0
4
3
4
8
4
1
2
-
0
2
*
06-11-2N