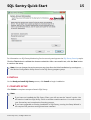
1
SQL Sentry Quick Start
1
Cover Page
QUICK START GUIDE
©2015 SQL Sentry. All Rights Reserved.
1
SQL Sentry Quick Start
2
2
Table of Contents
1.
Cover Page
1
2.
Table of Contents
2-3
3.
Quick Start Guide
4
4.
Important Concepts
5-6
5.
Installation Recommendations
7-8
6.
System Requirements
7.
Installation and Setup Steps
9-11
12
7.1.
Step 1: Install SQL Sentry
12-16
7.2.
Step 2: The Setup Wizard
16-18
7.3.
Step 3: Start Using the Client
18-19
8.
Additional Tasks
20
8.1.
Add Users and Groups
8.2.
Monitor Additional Connections
20-21
8.3.
Introduction to Actions and Settings
21-22
9.
20
8.3.1. How to Configure Actions
22-24
8.3.2. How to Configure Settings
24-26
Security Overview
27
9.1.
Monitoring Service Security
27-29
9.2.
Client Security
29-30
9.3.
Watching Servers Across Domains
30-31
9.3.1. Pass-through Authentication
9.4.
Least Privilege General Performance Monitoring
9.5.
Non-Windows Network Environment Security
10.
Appendix
10.1. SQL Sentry Performance Advisor
31-32
32
32-33
34
34
10.1.1. Performance Advisor Security Requirements
34-35
10.1.2. Performance Advisor Required Ports
35-36
10.1.3. Performance Advisor Data Capacity Planning
36-39
10.2. SMTP Settings
10.3. Uninstalling SQL Sentry
©2015 SQL Sentry. All Rights Reserved.
39
39-40
SQL Sentry Quick Start
3
10.3.1. Object Removal Script for Watched 2000 Servers
40-46
10.3.2. Object Removal Script for Watched 2005+ Servers
47-50
10.4. Watched Server Objects
50-51
10.5. Standard Vs Enterprise Editions
51-52
11.
The SQL Sentry User Guide
53
12.
Contact Information
54
13.
Index
©2015 SQL Sentry. All Rights Reserved.
55-56
SQL Sentry Quick Start
3
4
Quick Start Guide
PURPOSE OF THIS GUIDE
This Quick Start Guide will quickly walk you through the basic Installation and Setup Steps for SQL
Sentry. Following this guide you should be able to install SQL Sentry, complete basic configuration,
start managing schedules, monitoring performance, and generating notifications across your
enterprise within 10 to 30 minutes.
Please note, this guide is focused on initial installation and configuration steps only, and does not
cover such topics as using the visual job calendar, performance monitoring, chaining, queuing, etc.
Please refer to the SQL Sentry User Guide for more information on these and other topics related to
everyday use. The User Guide can be accessed at any time from the SQL Sentry Client Help menu.
©2015 SQL Sentry. All Rights Reserved.
SQL Sentry Quick Start
4
5
Important Concepts
SQL SENTRY COMPONENTS
SQL Sentry consists of the Client (a thin client application), the Monitoring Service (a Windows
service), and a SQL Server Database. The SQL Sentry Database stores event metadata and history
information collected by the SQL Sentry Monitoring Service and the SQL Sentry Client provides a thin
client interface for viewing and managing this information.
One SQL Sentry Monitoring Service is typically required for every 50 to 100 monitored SQL Servers,
Analysis Services connections, SharePoint Servers, Oracle Databases or Windows Task Schedulers.
Multiple Monitoring Services can be installed for scalability, redundancy, or to collect information from
remote sites. Normally a SQL Sentry Client will be installed on each DBA's workstation. All SQL Sentry
Monitoring Services and Clients connect to the same database.
It's important to note that SQL Sentry does not attempt to replace SQL Server Agent, Oracle
Scheduler, Windows Task Scheduler or any other scheduling agents. Instead, SQL Sentry
communicates with these schedulers to ascertain event status, and collect history and performance
information using a lightweight polling architecture. Thus SQL Sentry does not require agents installed
on each monitored server, dramatically reducing associated setup and maintenance overhead of
agent-based systems. SQL Sentry also does not install a database on every monitored SQL Server.
ALERTING AND RESPONSE SYSTEM
As part of its Alerting and Response system, SQL Sentry uses the concept of Conditions and
Actions. Conditions describe the various states of monitored objects in your environment. You
configure Actions to take place when a Condition is met.
All Actions work on the principle of inheritance. This means that if you configure an Action in response
to a Condition being met at the global level (Shared Groups node in the Navigator pane), it will be
automatically passed down to all applicable objects below it. This allows you to define global Actions
for the most common issues across your environment once, and have those passed down to every
monitored server automatically.
You can further refine Actions at each level as needed. This gives you the ability to determine exactly
what happens in response to events occurring in your server environment. Each Connection type
supports multiple Conditions and Actions.
Configuring Actions globally provides a powerful way to significantly reduce the setup and
configuration time required to implement notifications. For example, by enabling the Send Email
Action for the global SQL Server Agent Job: Failure Condition, you will automatically receive email
alerts for any SQL Agent job failures across your enterprise. The only requirement is that the SQL
Server connection and its jobs be "watched" by SQL Sentry. For a more detailed explanation of how
Conditions and Actions work see the Alerting and Response System topic in the SQL Sentry User
Guide.
“WATCHING” CONNECTIONS AND OBJECTS
Throughout this document you'll also see the term "watch" used frequently, in the context of
©2015 SQL Sentry. All Rights Reserved.
SQL Sentry Quick Start
6
watching connections or objects. When you have SQL Sentry “watch” a connection or object via the
context menu this simply means that SQL Sentry will begin monitoring it.
Please consider these rules regarding watched connections and objects:
1. When a connection is watched, SQL Sentry will monitor the connection and fire any
applicable conditions for the connection based on its type.
2. When an object is watched, SQL Sentry will monitor the object and fire conditions for the
object based on its type.
3. A connection can be watched without watching any of its objects.
4. If any object on a connection is set to watched, the connection will also be automatically
set to watched.
5. An object and its connection must be watched to utilize SQL Sentry's queuing, chaining,
and performance monitoring features
©2015 SQL Sentry. All Rights Reserved.
SQL Sentry Quick Start
5
7
Installation Recommendations
WHERE TO INSTALL THE SQL SENTRY COMPONENTS
The SQL Sentry Client, Monitoring Service, and SQL Sentry Database are typically installed as follows:
The SQL Sentry Client is installed on your workstation computer(s)
The SQL Sentry Database is installed on a SQL Server instance on your local area network
The Monitoring Service is installed on the same computer as the SQL Sentry Database, or any
other non-production server in the same LAN.
The SQL Sentry Clients and Monitoring Services are each configured to connect to the same SQL
Sentry Database during setup.
NOTE: The SQL Sentry Database must be installed on a SQL Server 2005 (Service Pack 2) or
higher instance. SQL Server Express Edition is not supported. Please see the System
Requirements section for more information.
INSTALL ALL COMPONENTS ON THE SAME LOCAL AREA NETWORK
For performance reasons, it is recommended that the SQL Sentry Client, Monitoring Service and
database be installed on the same LAN. For example, you would not want to connect the SQL Sentry
Client or Monitoring Service to a SQL Sentry Database over a slow WAN link, as performance will
suffer.
WHERE TO INSTALL THE MONITORING SERVICE(S)
It is not recommended that the Monitoring Service be installed on a production server, as it does incur
some memory and CPU overhead. Exactly how much depends on the number of connections and
objects being monitored.
INSTALLING THE SQL SENTRY MONITORING SERVICE AND DATABASE ON THE SAME
COMPUTER
Depending on your environment, you may want to install the Monitoring Service on the same SQL
Server machine where the SQL Sentry Database is located, to minimize network overhead for
communications between the Monitoring Service and the database. Because both Microsoft SQL
Server and the SQL Sentry Monitoring Service are multi-threaded, to ensure adequate performance
when running both on the same computer it is very important that the computer have at least
two CPUs. See System Requirements for more information.
INSTALLING MULTIPLE SQL SENTRY CLIENTS AND MONITORING SERVICES
Depending on the size of your SQL Server environment, you may need to install multiple SQL Sentry
Clients and Monitoring Services. Typically each DBA will have the SQL Sentry Client installed on their
workstation, and one Monitoring Service will be installed for every 50 to 100 SQL Server, Oracle, or
Windows Task Scheduler instances being monitored.
©2015 SQL Sentry. All Rights Reserved.
SQL Sentry Quick Start
8
CLUSTERING SQL SENTRY MONITORING SERVICES
Multiple Monitoring Services can be installed to handle more than 100 connections, and/or to provide
automatic redundancy and load balancing. There is no configuration required to implement a basic
SQL Sentry cluster. Simply install more than one Monitoring Service and connect each to the same
SQL Sentry Database during setup, and they will automatically distribute the monitoring load evenly
between themselves. If one Monitoring Service fails, the remaining Monitoring Service(s) will pickup
the load automatically. See the Load Balancing and Fault Tolerance topic in the SQL Sentry User
Guide for more details.
INCREASED FAULT TOLERANCE FOR THE SQL SENTRY DATABASE
If increased fault tolerance is required for the SQL Sentry Database, we recommend installing the
database on a clustered SQL Server instance. Log shipping can also be used with the SQL Sentry
Database, however a separate SQL Sentry license is required for the standby server. Customers can
obtain this standby license by visiting our Customer Portal and modifying the Server name of their
current license key to the name of the standby server and applying this license key to the SQL Sentry
Database on the standby server.
©2015 SQL Sentry. All Rights Reserved.
SQL Sentry Quick Start
6
9
System Requirements
SQL SENTRY COMPONENTS
SQL Sentry Client computer
Windows version from supported list below
Microsoft .NET 4.5 (included in the setup package)
Minimum Single 1.6 GHz CPU, 1 GB RAM
SQL Sentry Monitoring Service computer
Windows version from supported list below
Microsoft .NET 4.5 (included in the setup package)
Minimum Dual 1.6 GHz CPUs, or 1.6 GHz multi-core CPU, 1 GB RAM
SQL Sentry Database
SQL Server 2005 (Service Pack 2), Standard and Enterprise
SQL Server 2008, Standard and Enterprise
SQL Server 2008 R2, Standard and Enterprise
SQL Server 2012, Standard, BI, and Enterprise
SQL Server 2014 RTM
Minimum Dual 1.6 GHz CPUs, or 1.6 GHz multi-core CPU, 2 GB RAM (4 GB RAM when running
both Event Manager and Performance Advisor)
Disk Space: 3GB (8GB when running both Event Manager and Performance Advisor)
IMPORTANT: These system requirements are the minimum recommended requirements for a
standard 5-server installation. When monitoring more than 5 servers with SQL Sentry,
additional RAM and disk space may be needed for the database server. See the SQL Sentry
Overhead Analysis document and the Performance Advisor Data Capacity Planning topic for
more details.
NOTE: For performance reasons, it is not recommended that the SQL Sentry Client, Monitoring
Service, or SQL Server (including the instance housing the SQL Sentry Database) be run
simultaneously on the same single CPU computer. However, the Monitoring Service may perform
satisfactorily on one CPU if there are no other CPU intensive programs or services operating on
the same system, such as SQL Server. Additional factors include the number of instances being
monitored and the number of objects on those instances.
SUPPORTED OPERATING SYSTEMS
Supported Operating Systems (x86)
Windows Server 2008
Windows Vista
Windows 7
©2015 SQL Sentry. All Rights Reserved.
SQL Sentry Quick Start
10
Windows 8
Supported Operating Systems (x64)
Windows Server 2008
Windows Server 2008 R2
Windows Server 2012
Windows Server 2012 R2
Windows Vista
Windows 7
Windows 8
WATCHED CONNECTIONS
Watched (monitored) SQL Server instances
SQL Server 2000, both 32-bit and 64-bit (Windows Server 2003 or higher)
SQL Server 2005, both 32-bit and 64-bit
SQL Server 2008, both 32-bit and 64-bit
SQL Server 2008 R2
SQL Server 2012
SQL Server 2014 RTM
NOTE: SQL Sentry does not support monitoring any version of SQL Server Express Edition.
Watched (monitored) SharePoint instances
SharePoint Server 2010 All Editions
Watched (monitored) Windows connections
Windows Server 2003
Windows Server 2008
Windows Server 2008 R2
Windows Server 2012
Windows Server 2012 R2
Windows XP
Windows Vista
Windows 7
Windows 8
Note: You may monitor the individual Windows machines which are part of a Windows Cluster,
but neither Performance Advisor for Windows or Event Manager for Windows is cluster aware.
FEATURES WITH ADDITIONAL REQUIREMENTS
Deadlock tab and associated data in Performance Advisor for SQL Server is available on SQL
2005 and higher
Execution plan collection requires SQL 2005 SP2 or higher
©2015 SQL Sentry. All Rights Reserved.
SQL Sentry Quick Start
11
Monitoring Analysis Services with Performance Advisor requires SQL Server 2005 or higher
Indexes tab and Fragmentation Manager require SQL Server 2005 or higher
Monitoring the Windows Event Log with Event Manager for Windows is only supported for
Windows Vista or higher
Watched (monitored) Windows instances
Windows Server 2003
Windows Server 2008
Windows Server 2008 R2
Windows Server 2012
Windows XP
Windows Vista
Windows 7
Windows 8
NOTE: Windows Vista introduced Task Scheduler 2.0. Task Scheduler 2.0 is backwards compatible
with Task Scheduler 1.0, however, Task Scheduler 1.0 is not forwards compatible with Task
Scheduler 2.0. For this reason, in order to Watch or Synchronize Task Scheduler 2.0 connections,
you must have a SQL Sentry Monitoring Service and SQL Sentry Client running Windows Vista or
higher.
Windows 8 and Windows 2012 also introduced changes to Task Scheduler. In order to Watch or
Synchronize Windows 8 and Windows Server 2012 connections, you must have a SQL Sentry
Monitoring Service and SQL Sentry Client running Windows 8 or Windows 2012.
Watched (monitored) Oracle instances
Oracle 9i
Oracle 10g
Oracle 11g
NOTE: SQL Sentry's Oracle support requires the Oracle client connection software to be installed
on each SQL Sentry Client machine and on each SQL Sentry Server machine. The full Oracle client,
including the Oracle Data Access Components (ODAC) and Oracle Data Provider (ODP)
components, is required.
©2015 SQL Sentry. All Rights Reserved.
SQL Sentry Quick Start
7
12
Installation and Setup Steps
Once you receive your license and setup file download information, copy the setup executable to the
server on which you want to install the SQL Sentry Monitoring Service and then run it.
If you are upgrading SQL Sentry from a previous version, it is strongly recommended that you backup
your SQL Sentry Database prior to beginning the process.
Follow these steps:
1. Install SQL Sentry
2. Complete the Setup Wizard
3. Start Using the Client
7.1 Step 1: Install SQL Sentry
A Welcome dialog will be displayed when the SQL Sentry Setup program is first started, click Next to
continue or Cancel to exit. The License Agreement dialog is displayed next, select the checkbox and
click Next to continue. For future reference, a copy of the license file is located in the "Client" folder of
the installation.
If the setup program detects that SQL Sentry is already installed it will prompt for removal. The
installation process enables you to easily upgrade from previous versions and maintain all of your
existing configuration settings, including any Users and Groups, notification settings, etc. Any time
SQL Sentry is upgraded or another component is installed, the existing software is first uninstalled.
This is to ensure that all components are of the latest version, and therefore compatible. This only
applies to the Client and Server files; the SQL Sentry Database, where all of your settings and history
are kept, is not removed.
NOTE: .NET Framework 4.5 is required for all installations. A reboot may be required if the .NET
Framework files are in use. Temporarily stopping any applications that make use of the .NET
Framework can help to avoid a reboot.
A. CHOOSE THE COMPONENTS
DETERMINE THE MONITORING SERVICE COMPUTER
For the initial installation it is recommended that you first determine which computer the
Monitoring Service will be installed on and then install both the SQL Sentry Monitoring Service
and Client together on that computer.
This is analogous to installing the native client tool and SQL Server on the same computer. Even if you
don't plan on using the SQL Sentry Client regularly from this machine, the SQL Sentry Client is used to
enter your license key and will enable you to complete the licensing process during the initial
installation. You will be prompted to launch the SQL Sentry Client and enter your license key at the
end of the install.
DBA WORKSTATION COMPUTERS
©2015 SQL Sentry. All Rights Reserved.
SQL Sentry Quick Start
13
Only one Monitoring Service is required for your SQL Sentry Enterprise. Unless desired, there is no
need to install a Monitoring Service on any DBA workstation machines. To install just the SQL
Sentry Client do the following: On the Custom Setup screen, select the drop down arrow next to the
Monitoring Service component and choose the Entire feature will be unavailable option.
For more information about where components are typically installed see the Installation
Recommendations topic.
B. CHOOSE THE INSTALL LOCATION
Setup will show the default install location; click Next to use the default location. To install to a
different location, click Browse... then select the appropriate location.
C. SQL SENTRY DATABASE ACCOUNT INFORMATION
On the Database Account Information screen you will chose a location and name for the SQL Sentry
Database. In the SQL Server Name field enter the the server instance where you would like to install
the SQL Sentry Database. In the Database Name field enter a name for the SQL Sentry Database. The
SQL Sentry Database will be created as part of the installation process.
If the Windows user account you are using for the installation does not have SysAdmin privileges on
the selected SQL Server, deselect the "Windows Authentication" and enter a SQL Server login and
password for an account with SysAdmin privileges.
If you are upgrading, specify the existing SQL Sentry Database. All the necessary schema changes will
be applied to the existing database.
©2015 SQL Sentry. All Rights Reserved.
SQL Sentry Quick Start
14
Click the Test button to validate the chosen credentials. After a successful test, click the Next button
to continue the setup.
Note: If an existing database has been selected, clicking test will ask you to confirm that you
want to upgrade the database.
D. SERVICE ACCOUNT INFORMATION
At the Service Account Information screen you will enter the Windows account under which the SQL
Sentry Monitoring Service will run. This account must have SysAdmin privileges on each watched
SQL Server. The account must also have Windows Administrator privileges on any computer with a
watched Windows Task Scheduler connection, or to collect system level performance metrics with SQL
Sentry Performance Advisor.
Note: It is not necessary for this account to be a Domain administrator account. Instead, it is
recommended that the service account be a standard user Domain account that has been added
to the local Administrators group of each monitored target. For more information please see the
Performance Advisor Security Requirements topic.
©2015 SQL Sentry. All Rights Reserved.
SQL Sentry Quick Start
15
For information on SQL Sentry Monitoring Service security settings see the SQL Sentry Security topics.
Click the Test button to validate the chosen credentials. After a successful test, click the Next button
to continue the setup.
Note: You can change the service account any time after the initial installation by runningtrue
the Service Configuration Utility found in the SQL Sentry program group.
E. INSTALL
On the Ready to install SQL Sentry screen, click Install to begin installation.
F. COMPLETE SETUP
Click Finish to complete setup and launch SQL Sentry.
Note:
If you have not installed the SQL Sentry Client, you will not see the “Launch” option. You
will need to install the SQL Sentry Client on another machine and run it in order to enter
your license key and complete the licensing process.
If you have upgraded an existing installation of SQL Sentry, running the Setup Wizard is
not required. All previous settings have been retained.
©2015 SQL Sentry. All Rights Reserved.
SQL Sentry Quick Start
16
Click below to proceed:
Step 2: Complete the Setup Wizard
7.2 Step 2: The Setup Wizard
LAUNCH THE SQL SENTRY CLIENT
The first time you launch the SQL Sentry Client, you will see the “License Not Found” message box.
Click OK and you will be prompted to enter your license key. At the License Entry screen, you can
either paste your license key or drag-and-drop the license file into the large text box. Click Save to
continue.
Once the license has been validated the SQL Sentry Client will launch.
RUN THE SETUP WIZARD
With a new install, the first time the Client is started, the Setup Wizard is automatically launched. The
wizard will quickly walk you through the initial configuration steps. You can run the wizard again at
any time from the Help menu of the Client to add new users or adjust certain global settings.
1. ALERTING SETTINGS
In the SMTP Server field enter the domain name or IP address of the SMTP server to be used for
routing SQL Sentry email notifications. If using localhost, keep in mind this will be the local SMTP
server on the machine where the SQL Sentry Monitoring Service is installed since it is responsible for
sending all notifications. The SQL Sentry Client does not send any notifications.
Note: This step can be skipped and configured later by unchecking the Enable Email Alerts box.
©2015 SQL Sentry. All Rights Reserved.
SQL Sentry Quick Start
17
Note: You may need to contact your network administrator first to ensure that the IP address of
the Monitoring Service computer has been granted both Connect and Relay permissions for the
specified SMTP server.
Next, enter the email From Address. This is the address which will appear on the From line of all email
notifications sent by SQL Sentry. You can also specify a Username and Password if authentication is
required by your SMTP server. This is not usually required in most environments.
Click the Test button to generate a test email to a specific address.
Important: For the most accurate SMTP test, you should use the Client installed on the SQL
Sentry Monitoring Service computer to send the test message. If you use a Client on a different
computer, such as your local workstation, the results may be different. For example, your SMTP
server may allow relay from your workstation but not from the SQL Sentry Monitoring Service
computer, in which case the test from your workstation would succeed but the SQL Sentry
Monitoring Service would be unable to deliver notifications.
At least one user is required for SQL Sentry to be able to send notifications. Enter the user's email
address and name and then click Next to continue.
Note: Tokens are disabled by default in SQL Server 2005 and higher. They must be enabled in
©2015 SQL Sentry. All Rights Reserved.
SQL Sentry Quick Start
18
order to monitor SQL Server Agent Alerts with SQL Sentry. See SQL Server Books Online for more
information on tokens and security.
2. SELECT CONNECTIONS TO WATCH
On the Select Connections to Watch screen the Add Connection dialogue will be displayed. Use the
Connection Type drop-down box to choose your connection type. Enter the server name or the server
name\instance name and click the Connect button to add the connection. To add
additional connections that you would like to monitor use the Add button. After you have added all
the connections that you want SQL Sentry to watch, click Next to continue.
Note: For each connection type you can select up to the number of connections allowed by
your license.
3. CONFIRM SETTINGS
Click Execute to confirm settings and continue
4. SETUP PROGRESS
The Setup Progress dialog will show the status as the wizard settings are applied and watched
connections are synchronized for the first time. If any errors occur, click the button for that step to
access the error details. At least one connection must be synchronized successfully in order to
complete the wizard, at which time the Next button will be enabled.
Important:
If errors occur while synchronizing with one or more connections, it may be due to
problems with security, network connectivity, and/or name resolution. See the topic
Security and the SQL Sentry Server for more details. You can click Back to return to the
"Select Connections" dialog, either resolve the problems or deselect the problem
connections, then click Next to retry the process again.
If there is an error during the SMTP Connectivity test you will be able to complete the
wizard, however, SQL Sentry will not be able to deliver email or pager alerts until the
problem is resolved. If you need to adjust the SMTP settings, you can click Back a few
times to return to the "SMTP Settings" dialog and make the necessary changes and test
them, then proceed back through the wizard.
FINISHED
You have successfully configured SQL Sentry when the final confirmation dialog displays. Please refer
to Additional Tasks for additional configuration options. Click Finish to start using the Client.
Click below to proceed:
Step 3: Start Using the Client!
©2015 SQL Sentry. All Rights Reserved.
SQL Sentry Quick Start
19
7.3 Step 3: Start Using the Client
Congratulations, you have successfully installed SQL Sentry, configured global notification settings,
and are now ready to start using the SQL Sentry Client for managing events across your enterprise.
Use the different options on the Get Started screen to start exploring the features in SQL Sentry.
Please refer to the SQL Sentry User Guide available online and through the Client Help menu, for
additional information about available features.
MAINTENANCE
Just as with any other SQL Server database, it is important that regular maintenance activities be
performed on the SQL Sentry database to ensure optimal performance. Please see the SQL Sentry
Database Maintenance topic in the SQL Sentry User Guide for more details and recommendations.
©2015 SQL Sentry. All Rights Reserved.
SQL Sentry Quick Start
8
20
Additional Tasks Overview
ADDITIONAL TASKS
Refer to these topics for additional information on configuring SQL Sentry.
Add Additional Users and Groups
Monitor Additional Connections
Customize Global Settings
8.1 Add Users and Groups
The Contacts node in the Navigator contains the Users and Groups sub-nodes. This is where you
create and maintain Users and Groups for notification purposes. At least one user is required for
SQL Sentry to be able to send notifications.
Click the Users node to add a new user. Enter the user's name, email address, optional pager
address (SMTP-based), and an optional description. You can add as many users and groups as you
want at this point - groups are optional. Click Save when you are finished adding each user.
For more information about Users and Groups see the Contact Management topic in the SQL Sentry
User Guide.
8.2 Monitor Additional Connections
ADDING CONNECTIONS
You can easily add additional monitored Connections to your SQL Sentry environment. This is
accomplished by right-clicking either the Shared Groups node, a Site node, a Computer Group node,
or an existing Computer node in the Navigator pane and using the Add Connection command. You
can also add a Connection through the File menu.
In the Add Connection dialog you may choose the desired Connection Type from the drop-down
menu (Analysis Services Connection, SharePoint Server Connection, SQL Server Connection, Windows
Connection, Oracle Database Connection).
WATCHING CONNECTIONS
When you add a new Connection to your environment the Watch With Event Manager / Performance
Advisor options are checked by default. Before SQL Sentry will start monitoring a Connection or object,
its status must be set to “watched”. Connections or objects that are not being watched will be
displayed with a grayed-out icon next to their name in the Navigator tree view.
Unwatched Connections or objects can have their status set to watched through their respective
context menus with the Watch command. Once you have watched a new Connection the SQL Sentry
Monitoring Service will start actively monitoring the Connection and its objects, and begin honoring
©2015 SQL Sentry. All Rights Reserved.
SQL Sentry Quick Start
21
any associated configured Conditions and Actions.
Note: Immediately after adding a Connection or setting a Connection to watched status, SQL
Sentry will begin to synchronize with that Connection. Exactly how long the synchronization
process takes depends on the number of objects associated with the Connection, the amount of
historical data available, and how many Connections are being watched at the same time. The
Watch Status Window will keep you informed of the process and alert you about any errors.
8.3 Introduction to Actions and Settings
When you run the Setup Wizard a number of global Settings are configured for your installation. If you
entered your SMTP Settings and added a User, a number of default Conditions and Actions were also
added to help you get up and running quickly. As a reminder, the Wizard can be accessed through the
Help menu at any time.
Before proceeding you should introduce yourself with these basic SQL Sentry Alerting and Response
System concepts.
Conditions Conditions describe the various states of any
monitored objects.
Actions
Actions determine what happens when a Condition
is met.
Settings
Settings define criteria for when a Condition is
considered to be met. Certain Settings known as
Source Settings are used to define what events are
collected by SQL Sentry.
There are a couple of ways to see how Settings and Conditions/Actions are configured for your SQL
Sentry installation. You can use the Reports menu to run the Active Settings List and the Configured
Actions List reports. (Reports menu > General) Or you can view configured Actions and Settings
directly in the Actions and Settings Pane. By default the Actions and Settings pane is displayed on
the right side of the SQL Sentry Client. If you do not see the Actions and Settings pane, it can be
restored with the View menu.
If you would like to configure global Actions or Settings, be sure that the Shared Groups node is
selected in the Navigator pane. The Shared Groups node is the global or root node of your SQL
Sentry installation. The SQL Sentry Alerting and Response System uses the principle of inheritance, so
any Action or Setting you configure at the Shared Groups node will be passed down to all
applicable objects below it.
For example, if you configure a Send Email Action for the SQL Server Agent Job: Failure Condition at
the global level (Shared Groups), you will receive an email anytime a SQL Server Agent job fails across
your entire monitored enterprise.
You can further refine Actions or Settings at each level, as needed. For instance, if you have a
development server in your environment that you don't wish to be alerted about, you can easily
©2015 SQL Sentry. All Rights Reserved.
SQL Sentry Quick Start
22
disable the Send Email Action at the Connection level. This configuration would only apply to that
Connection and it would not affect any other server in your environment. This level of control gives
you the ability to determine exactly what happens in response to events occurring on your monitored
servers.
There are several levels within the SQL Sentry Hierarchy where you can configure applicable Actions
and Settings. These are outlined below.
Shared Groups
|
-Sites
|
-Computer Groups
|
-Computer
|
-Connection
|
-Object
For a more in-depth look at the SQL Sentry Hierarchy and other alerting related features see the
Alerting and Response System topic in the SQL Sentry User Guide.
8.3.1 How to Configure Actions
As a reminder Conditions describe the various states of any monitored objects, and Actions
determine what happens when a Condition is met.
The Conditions displayed in the Actions pane will change depending on which node or object is
selected in the Navigator pane. If you do not see the Actions pane once you have selected your
desired node in the Navigator pane, use the View Menu (View →General Actions).
If you select the Shared Groups node you will see globally applied Conditions in the Actions pane.
When you select any applicable object level below the Shared Groups node, you will see two specific
sets of applied Conditions in the Actions pane.
The top section is the Inherited Section, which shows you any applied Conditions that are being passed
down to the current level. Beneath that, is the Explicit Section, which shows you applied Conditions
that have been set at the current level. Each Action that you set up in your environment will have an
associated behavior. This behavior controls how the Action will be carried out relative to any inherited
Actions. Please see the table below for an introduction to Action behaviors.
Action Behaviors
©2015 SQL Sentry. All Rights Reserved.
SQL Sentry Quick Start
23
Override This behavior can be thought of as a special set of
instructions which are followed instead of the passed
down(inherited) instructions.
Combine This behavior can be thought of as a set of
instructions which are followed in addition to the
passed down(inherited) instructions.
Disable
This behavior can be thought of as a special set of
instructions which simply disallow the passed
down(inherited) set of instructions.
To add a new Action, select the desired node in the Navigator pane. Next you will want to click the
Add button found in the Actions Pane. This will open the Action Selector window. Expand the
applicable Object and Condition. Use the check box(s) to select which Actions should be taken in
response to this Condition being met. Click the OK button.
You may also choose to quickly Disable, Override, or Combine any inherited Actions. To do so, select
the Condition in the Inherited Section of the Actions pane and choose the desired command (Disable
button, Override button, or Combine button). When an Inherited Condition is overridden or
disabled, it will still show up in the Inherited Section, but its text will be grayed-out and its status will
say Overridden.
Action pane
©2015 SQL Sentry. All Rights Reserved.
SQL Sentry Quick Start
24
For more information about Actions and Conditions please see the Alerting and Response System
topics in the SQL Sentry User Guide.
8.3.2 How to Configure Settings
As a reminder, Settings define criteria for when a Condition is considered to be met. Certain Settings
known as Source Settings are used to define what events are collected by SQL Sentry.
To configure Settings first select the desired node in the Navigator pane. For instance, select the
Shared Groups node if you want to configure Settings globally, or select an individual Connection
node if you would like to configure Settings specific to just that Connection. If you do not see the
Settings pane once you have selected your desired node in the Navigator pane, use the View Menu
(View →Settings). Next you will want to use the drop-down lists found in the Settings pane to select
the Settings which you would like to configure. See below for examples.
For instance, if you wanted to configure the Top SQL Minimum Duration Collection Setting
globally:
1. Select the Shared Groups node in the Navigator Pane
2. In the Settings pane, use the top drop-down list and select SQL Server Settings.
©2015 SQL Sentry. All Rights Reserved.
SQL Sentry Quick Start
25
3. Use the second drop-down list to select Top SQL Source. You should now see the Top SQL
Source Settings that are being applied Globally.
4. Change the Minimum Duration to the desired value, it will be saved automatically.
If you wanted to configure the Top SQL Minimum Duration Collection Setting for an individual
Connection:
1. Select the desired Connection node in the Navigator pane.
2. In the Settings pane, use the drop-down list to select Top SQL Source. You should now see
the Top SQL Source Settings that are being applied for that Connection.
3. Change the Inherit From Parent Setting to False.
4. Change the Minimum Duration to the desired value, it will be saved automatically.
ADJUSTING GLOBAL RUNTIME THRESHOLD SETTINGS
By default, the global Runtime Threshold Settings for SQL Server Agent jobs are set at a Minimum
Runtime Threshold Percent of 10% and Maximum Runtime Threshold Percent of 250%. This
means that anytime a job runs for less than 10% of its average runtime or longer than 250% of its
average runtime you will be notified. If you find you are receiving too many notifications, these
settings can be adjusted. See example below:
If you wanted to configure the SQL Server Agent Job Maximum Runtime Threshold Percent
globally:
1. Select the Shared Groups node in the Navigator Pane
2. In the Settings pane, use the top drop-down list and select SQL Server Settings.
3. Use the second drop-down list to select SQL Server Agent Job. You should now see the SQL
Server Agent Job Settings that are configured globally.
4. Change the Maximum and Minimum Runtime Threshold Percents to the desired values.
You can also specify explicit time-based thresholds here. Time-based thresholds are usually less
valuable at the global level, particularly the Minimum Runtime Threshold which doesn't have much
value at all globally. Explicit time-based thresholds tend to be more applicable at the actual connection
or object level for overriding the global percentage thresholds on a case-by-case basis.
Note: Anytime an explicit time-based threshold is specified it will override the percentage based
thresholds for that object.
For example, consider a job that has a great deal of volatility in runtime such as a transaction log
backup, and can run for anywhere between 30 seconds and 30 minutes, with an average runtime of 5
minutes. To avoid unnecessary percentage-based threshold notifications for the job, you might want
to set its Maximum Runtime Threshold to "35 Minutes" and Minimum Runtime Threshold to "20
Seconds". This can be done by selecting either the job's node in the Navigator or an instance of the
©2015 SQL Sentry. All Rights Reserved.
SQL Sentry Quick Start
26
job on the calendar, then following the same steps as above to access and change the job's runtime
threshold settings.
For more information about Settings please see the Alerting and Response System topics in the SQL
Sentry User Guide.
©2015 SQL Sentry. All Rights Reserved.
SQL Sentry Quick Start
9
27
SQL Sentry Security Overview
The Quick Start Guide covers the following topics related to SQL Sentry Security, including required
permissions for the various SQL Sentry components.
Security Topic
Description
Monitoring Service
Security
This topic discusses the permissions required by the SQL Sentry
Monitoring Service account when watching (monitoring) Connections.
Client Security
This topic discusses the permissions required when running the SQL
Sentry Client, including scenarios in which the Client connects directly
to a monitored server.
Watching Servers Across
Domains
This topic is a brief overview of the options available for watching
(monitoring) servers across domains, including information about passthrough authentication and configuring SQL Sentry Sites within your
environment.
Non-Windows
Environment
This topic discusses the options for watching (monitoring) Connections
in a non-Windows environment, including pass-through
authentication.
SQL Sentry Performance
Advisor
See this section for advanced information about the Performance
Advisor Security Requirements, including Port Requirements for
monitored servers.
The User Guide covers the following topics related to restricting user access within SQL Sentry.
Security Topic
Description
Rights Based Security
This topic discusses restricting user access within the SQL Sentry
Client based on Windows and SQL Server Authentication accounts.
Role Based Security
This topic discusses restricting user access within the SQL Sentry Client
based on SQL Sentry Database roles.
9.1 Monitoring Service Security
The SQL Sentry Monitoring Service is a Windows service which runs in the context of a Domain
account.
This account must have SysAdmin privileges on each watched SQL Server.
The account must also have Windows Administrator privileges on any computer with a
watched Windows Task Scheduler connection, or to collect system level performance metrics
©2015 SQL Sentry. All Rights Reserved.
SQL Sentry Quick Start
28
with SQL Sentry Performance Advisor.
It is not necessary for this account to be a Domain Administrator account. Instead, it is recommended
that the service account be a standard user Domain account that has been added to the local
Administrators group of each monitored target. For more information about security and SQL Sentry
Performance Advisor, please see the Performance Advisor Security Requirements topic.
Note: As of SQL Server 2008 the local Administrators group of a Windows server is no longer
automatically given access to a SQL Server instance installed on that Windows server. Keep this in
mind when installing SQL Sentry for use with SQL Server 2008 and above.
Adding the service account to the local Windows Administrators group for the SQL Sentry
Database server does not automatically grant the service user access to the SQL Sentry Database.
CHANGING THE MONITORING SERVICE CREDENTIALS
After the initial installation, the Service Configuration Utility is used to update or change the
credentials of the SQL Sentry Monitoring Service account. The Service Configuration Utility can be
accessed within the SQL Sentry program group in the Windows Start Menu.
Using the Service Configuration Utility is the only supported way of changing the SQL Sentry
Monitoring Service credentials. For more information please see the Service Configuration Utility
topic in the SQL Sentry User Guide.
MONITORING SERVICE CONNECTION PROPERTIES
If you are monitoring a server with SQL Sentry Event Manager, and do not have a need to utilize
Event Manager's General Performance Monitoring features, you may configure the Monitoring
Service to use SQL Server Authentication. This is done through a Connection's Monitoring Service
Connection Properties.
To access the Monitoring Service Connection Properties for a Connection, right-click the
Connection and choose the Monitoring Service Connection Properties command. From the
Connection Properties dialog, uncheck Use Integrated Authentication, and enter the SQL Server
Authentication account you would like the Monitoring Service to use for the Connection.
Important: If you configure SQL Authentication for a Connection which is being monitored with
SQL Sentry Performance Advisor, Performance Advisor will not be able to collect Windows
level metrics for that Connection. This is because Performance Advisor collects various
performance and configuration data directly from Windows, and requires a higher level of access
to the operating system than does Event Manager. See the Performance Advisor Security
Requirements topic for more information.
STARTING THE MONITORING SERVICE
The SQL Sentry Monitoring Service will start automatically after installation. It will become active
upon detecting a valid license on the SQL Sentry Database. If for some reason the Service fails to start,
you may follow these directions to start the service manually.
©2015 SQL Sentry. All Rights Reserved.
SQL Sentry Quick Start
29
1. Select the Services icon from Control Panel -> Administrative Tools.
2. From the list of services select SQL Sentry Monitoring Service, then right-click and select
“Start”, or click the “Play” button on the toolbar.
REQUIRED PERMISSIONS FOR ORACLE DATABASES
The user accounts that the SQL Sentry Client and Monitoring Service use when connecting to Oracle
servers must be granted "view" privileges on the sys schema at a minimum. In order to run, enable, or
disable a DBMS job using the Client, you must be the owner of the job. In order to run, enable, disable,
or reschedule a Scheduler job, you must be either the owner of the job, or a user that has been
granted the "alter" privilege on the job.
Note: SQL Sentry's Oracle support requires the Oracle client connection software to be installed
on each SQL Sentry Client machine and on each SQL Sentry Monitoring Service machine. The
full Oracle client, including the Oracle Data Access Components (ODAC) and Oracle Data Provider
(ODP) components, is required. Oracle client versions prior to 9i, though they may work, are not
supported.
9.2 Client Security
Although the SQL Sentry Client receives the majority of its information from the SQL Sentry
Database, there are times when the Client must connect directly to a monitored server in order to
receive information.
WHEN DOES THE SQL SENTRY CLIENT CONNECT DIRECTLY TO A MONITORED SERVER?
The SQL Sentry Client connects directly to a monitored server when:
a Connection is Watched
a real-time action is initiated
a job is manually started or stopped
a job is rescheduled
a QuickTrace is run
The SQL Sentry Client will also connect directly with the monitored server when a forced metadata and
history synch is performed. Selecting CTRL + Refresh on the toolbar will perform this action. This is
different than just selecting the Refresh button alone, which would only retrieve information from the
SQL Sentry Database.
AUTHENTICATION METHOD USED WHEN THE CLIENT CONNECTS TO A MONITORED SERVER
In those cases where the Client does need to connect directly to a monitored Connection, the
authentication method used varies depending on the specified User Connection Properties of that
Connection. By default, the Client will use the credentials of the interactive user, whenever it needs to
connect directly to a Connection.
As an alternative to integrated authentication, you may specify database specific credentials in the
©2015 SQL Sentry. All Rights Reserved.
SQL Sentry Quick Start
30
User Connection Properties. The User Connection Properties for a Connection can be accessed
through the right-click context menu of the Connection. First unselect the Use Integrated
Authentication check box and then enter your desired account information. For example, for a SQL
Server Connection you would want to enter a SQL Server Authentication Account with the desired
Server Role.
SHARED GROUPS NODE VS SQL SERVER REGISTRATIONS NODE
There are a few differences regarding how authentication works depending on whether you are
accessing the Connection from the context of the Shared Groups node or the context of the SQL
Server Registrations node in the Navigator pane.
For SQL Server Connections accessed within the context of the Shared Groups node, Windows
authentication is used by default. However, if you have specified SQL Server credentials using the
User Connection Properties context item, those credentials will be used instead.
For SQL Server Connections accessed within the context of the SQL Server Registrations node, the
Client uses the authentication method and credentials defined for the corresponding SSMS
registration. This is also referred to as the "native registration" and is accessed using the connection's
Edit Registration Properties context menu item.
If SQL Server authentication credentials are set using the User Connection Properties context item,
those credentials will be used instead, and they will effectively override the authentication settings of
the native registration. The initial connection to the target will always be made using the native
registration credentials, however, so that the Client can ascertain the true identity of the SQL Server,
and ensure it isn't already being watched using a different name, as can be the case when an alias has
been configured for the server.
RESTRICTING ACCESS AND SERVER VISIBILITY IN THE SQL SENTRY CLIENT
For information about restricting user access within the SQL Sentry Client based on Windows and
SQL Server Authentication accounts see the Rights Based Security topic in the SQL Sentry User Guide.
For information about restricting user access within the SQL Sentry Client based on SQL Sentry
Database roles see the Role Based Security topic in the SQL Sentry User Guide
9.3 Watching Servers Across Domains
It is possible to monitor/watch connections across domains with SQL Sentry even when there is no trust relationship
between them. The best option to achieve this depends on the resources available and number of servers you wish to
watch. See below for a short explanation of each option; select the associated link for more information.
OPTIONS FOR WATCHING SERVERS ACROSS DOMAINS
©2015 SQL Sentry. All Rights Reserved.
SQL Sentry Quick Start
Option
31
Description
Pass-through authentication enables Windows computers in different domains or in nonWindows network environments to communicate with one another by using identical user
accounts and passwords on each computer.
Pass-through Authentication
This solution is ideal when you only need to monitor a few servers outside of your
primary domain and you do not have the resources available to install another
Monitoring Service in the secondary domain.
Sites represent a logical grouping of Computers, Connections, SMTP Servers,
and Monitoring Services within your SQL Sentry environment. With the Site Configuration
option, you will install a SQL Sentry Monitoring Service in each domain/location where you
have servers that you wish to monitor.
Site Configuration
Each Monitoring Service will only poll the servers in their own domain. The Monitoring
Service located outside of your primary domain will use either Pass-through authentication
or SQL Server authentication to communicate with the SQL Sentry Database server.
This solution is ideal if you have a need to monitor a large number of servers outside
of your primary domain, or have a need to monitor servers which are geographically
separated from your main installation.
This solution also requires that you have the required resources available in the
secondary location to install a Monitoring Service.
9.3.1 Pass-through Authentication
Pass-through authentication enables Windows computers in different domains or in non-Windows
network environments to communicate with one another by using identical user accounts and
passwords on each computer.
For example, if user “JoeDBA” with password “SQLrocks!” is created on SERVER1 and SERVER2,
JoeDBA will be able to connect and authenticate directly from SERVER1 to SERVER2, and vice versa,
without using domain-level authentication.
It is the job of the SQL Sentry Monitoring Service to collect data from monitored targets, then store
the data in the SQL Sentry Database for analysis with the SQL Sentry Client. In the above scenario,
SERVER1 may be the computer where the SQL Sentry Monitoring Service is running, and SERVER2
either the monitored computer, or the computer where the SQL Sentry Database resides.
Note: Additional configuration may be required on machines running Windows Vista and higher
with the introduction of User Access Control (UAC). When a remote connection is made using
pass-through authentication the machine is unable to resolve elevated permissions under UAC,
and for WMI and registry purposes the account is treated as a regular (non-admin) user, even if
©2015 SQL Sentry. All Rights Reserved.
SQL Sentry Quick Start
32
the account exists in the local administrators group.
Please see the Performance Advisor: WMI or Registry Access KB article for more information and
configuration details about using pass-through authentication on Windows Vista and higher:
Important: SQL Server authentication can be used for any watched Event Manager SQL Server
connection using a connection's "Monitoring Service Connection Properties" context menu
item. This can eliminate the need for pass-through authentication if SQL Sentry's performance
monitoring isn't being utilized to collect Windows performance counters from the target servers,
and if you aren't monitoring the server with Performance Monitor or Event Manager Windows
Task Scheduler.
If performance monitoring is required either via SQL Sentry Performance Advisor or you need to
watch a Windows Task Scheduler, pass-through authentication may still be required.
9.4 Least Privilege General Performance Monitoring
For an overview of the performance monitoring features available with SQL Sentry Event Manager
please see the Schedule Performance Monitoring topic in the SQL Sentry User Guide. It is possible to
collect performance counter data in SQL Sentry Event Manager without Windows Administrator
privileges.
First, you will need to add the SQL Sentry Monitoring Service account to the Performance Monitor
security group of the machine on which the Monitoring Service is installed. Next, for the service to be
able to access the performance counters of your watched connections remotely you will need to grant
the service account read access to certain registry keys. On each machine that you wish to collect
performance counters, follow the steps below.
1. Navigate to the winreg key located at the following path:
HKEY_LOCAL_MACHINE\SYSTEM\CurrentControlSet\Control\SecurePipeServers\winreg
2. Right click on the winreg key and select Permissions. Add the SQL Sentry Monitoring Service
account.
3. Restart Windows
NOTE: For general information on editing the Windows Registry see Microsoft KB article 256986.
SEE ALSO
Schedule Performance Monitoring
General Performance Monitoring
©2015 SQL Sentry. All Rights Reserved.
SQL Sentry Quick Start
33
9.5 Non-Windows Network Environment Security
If you are not using Windows Active Directory for domain management, you may need to take
additional steps to ensure SQL Sentry will work properly. The primary means by which this is
accomplished is using Windows pass-through authentication.
SQL Server authentication can be used for any watched SQL Server connection in a non-Windows
network using a connection's "Monitoring Service Connection Properties" context item.
SQL SENTRY CLIENT
In non-Windows networks, in order to connect to watched SQL Servers using the SQL Sentry Client
you must either:
1. Use SQL Server authentication for any SQL Server registrations, or the SQL Server connection.
2. Use Windows pass-through authentication. This means the Windows user using the SQL Sentry
Client must also exist on the target SQL Server computer. The user name and password on each
computer must match exactly.
SQL SENTRY MONITORING SERVICE
Pass-through authentication is the only means by which the SQL Sentry Monitoring Service can collect
Windows performance counters or watch Windows Task Scheduler in a non-Windows network
environment. Therefore the service user account must exist both on the service computer and all
monitored computers, and the user name and password must match exactly.
©2015 SQL Sentry. All Rights Reserved.
SQL Sentry Quick Start
34
10 Appendix
The Appendix contains the following topics:
SQL Sentry Performance Advisor
Performance Advisor Security Requirements
Performance Advisor Required Ports
Performance Advisor Data Capacity Planning
SMTP Settings
Uninstalling SQL Sentry
Object Removal Script for Watched 2000 Servers
Object Removal Script for Watched 2005+ Servers
Watched Server Objects
Standard Vs Enterprise Editions
10.1 SQL Sentry Performance Advisor
PERFORMANCE ADVISOR
This section contains the following topics:
Performance Advisor Security Requirements
Performance Advisor Required Ports
Performance Advisor Data Capacity Planning
For general information concerning SQL Sentry Performance Advisor, including an explanation of the
Performance Metrics displayed on the Dashboard, please see the Performance Advisor section of the
SQL Sentry User Guide.
10.1.1 Performance Advisor Security Requirements
Performance Advisor collects various performance and configuration data directly from Windows, and
therefore requires a higher level of access to the operating system than does Event Manager. The
easiest approach is to either make the SQL Sentry Monitoring Service account a Domain Administrator
level account, or a member of the local Administrators group on any watched servers.
In some scenarios it may be possible to use a non-Administrator service account, although this is not
an officially supported approach. This article identifies the steps required to do this:
1. Enable DCOM on the SQL Sentry Server machine, SQL Sentry Client machine, and the server to
be watched. (See this link for instructions.)
2. Give the SQL Sentry Monitoring Service account proper permissions to the required WMI
namespaces. You can do this by going to the properties for "WMI Control", found under
©2015 SQL Sentry. All Rights Reserved.
SQL Sentry Quick Start
35
"Services and Applications" in the Computer Management Client. On the Security tab, ensure
that the SQL Sentry Monitoring Service account has at least "Enable Account" and "Remote
Enable" checked for the CIMV2 and WMI nodes.
NOTE: WMI providers and versions will vary from server to server, and whether or not nonadministrative access will function properly for a particular WMI provider is directly dependent on
whether or not the provider was designed to support this. Many providers simply are not, including
many designed by Microsoft.
Please consider the following example:
SERVER-A is the exact same make and model as SERVER-B, and both servers are on the same domain.
The SQL Sentry Monitoring Service user account is a Domain User, but does not have Administrator
privileges on either server. Performance Advisor can successfully watch SERVER-A, but is unable to
watch SERVER-B. The two servers are configured identically, with one exception -- an additional
network adapter from Acme Networking was installed in SERVER-B. Unfortunately, Acme Networking
didn't design the associated WMI provider to support non-administrative access, therefore
Performance Advisor will not be able to successfully watch SERVER-B as a non-Administrator. In this
scenario, the only options are to either replace the network adapter with one that is known to support
non-administrative access, or to contact Acme Networking to see if they have an updated version of
the provider that supports non-administrative access.
10.1.2 Performance Advisor Required Ports
In order for Performance Advisor to properly monitor a server on the network, the following ports on
the monitored server must be accessible to the SQL Sentry Server machine(s):
For SQL Server access:
tcp 1433 (or whatever port is used by SQL Server)
For Windows Performance Counter access:
tcp 445 (SMB, RPC/NP)
For WMI access:
tcp 135 (RPC)
-andone of these ranges:
tcp 49152-65535 (RPC dynamic ports -- Vista and Win2008)
-ortcp 1024-65535 (RPC dynamic ports -- NT4, Win2000, Win2003)
-ora custom RPC dynamic port range (see below)
The only one that may be tricky for firewalls are the RPC dynamic ports. WMI (or any other process
©2015 SQL Sentry. All Rights Reserved.
SQL Sentry Quick Start
36
that uses DCOM) connects to a target server initially using port 135, and the target responds with a
dynamic port number for WMI to use for the rest of the session. This port can be in one of the ranges
above, which are quite large by default.
To address this, you can easily specify a custom range for RPC dynamic ports. You may have
already done this in your environment in order to enable networked DCOM access for other
applications. It is recommended that you start no lower than port 50000, and allocate no fewer than
255 dynamic ports.
For example, to do this on Server 2008, you can use this command:
netsh int ipv4 set dynamicport tcp start=50000 num=255
You may need to reboot. More info: http://support.microsoft.com/default.aspx/kb/929851
On other Windows versions, you can use DCOM config in Component Services
(http://support.microsoft.com/kb/300083) or the registry (http://support.microsoft.com/kb/154596).
You will need to reboot.
You will also need to have your network administrator open up the same port range on the firewall
between the SQL Sentry Server machine and any servers monitored with PA.
How to configure RPC dynamic port allocation to work with firewalls
http://support.microsoft.com/kb/154596
How To Restrict TCP/IP Ports on Windows 2000 and Windows XP
http://support.microsoft.com/kb/300083
How to troubleshoot WMI-related issues in Windows XP SP2
http://support.microsoft.com/kb/875605
DCOM port range configuration problems
http://support.microsoft.com/default.aspx/kb/217351
The default dynamic port range for TCP/IP has changed in Windows Vista and in Windows Server 2008
http://support.microsoft.com/default.aspx/kb/929851
Service overview and network port requirements for the Windows Server system
http://support.microsoft.com/kb/300083
SEE ALSO
.
©2015 SQL Sentry. All Rights Reserved.
SQL Sentry Quick Start
37
10.1.3 Performance Advisor Data Capacity Planning
PERFORMANCE ADVISOR DATA CAPACITY PLANNING
Performance Advisor (PA) uses the SQLSentry database to store all of the performance data it collects,
utilizing a high performance storage scheme. Event Manager (EM) only users should expect their
existing database to approximately double in size if all of the existing SQL Servers watched by EM,
are watched by PA. This is a very rough estimate, however, since exactly how much space will be used
by PA is directly dependent on:
The number of databases on the watched SQL Servers, since some of the performance counters
collected by PA are database specific.
The number of physical disks on the watched servers, since related counters are disk specific.
The Minimum Duration specified for the Top SQL event source. The default global setting is five
seconds, meaning that any batches or stored procedures that run for longer than five seconds
will be collected. If this threshold is lowered, the amount of Top SQL data collected will
increase. Note that a different Minimum Duration can be specified for each SQL Server.
Whether or not "Collect Statement Events" is set to True for the Top SQL event source. The
default is False. If enabled, this may increase the amount of Top SQL data collected by a factor
of two or more. This setting is also adjustable for each SQL Server.
The performance data retention settings. Different settings can be specified for detailed (or raw)
performance data, rolled up performance data, and Top SQL/Blocking SQL/Deadlock data.
For detailed performance data, retention is specified in hours for each performance
counter category in the HistoryDataRetentionHours column of the
PerformanceAnalysisCounterCategory table. The default may be either 48 or 72 hours,
depending on the category. Raw data is shown by default on the Dashboard and Disk
Activity tabs whenever the current date range is <=30 minutes. Over 30 minutes, rolled
up data is used.
If you have an unusually large number of databases on SQL Servers monitored by
PA, you may consider reducing the retention hours for the SQLSERVER:DATABASES
and SQLPERF:VIRTUAL_FILESTATS categories. Data for these categories are stored
in the PerformanceAnalysisDataDatabaseCounter and
PerformanceAnalysisDataDiskCounter tables respectively.
Likewise, if you have an unusually large number of physical disks per server
monitored by PA, you may consider reducing the retention hours for the
PHYSICALDISK category. Data for this category is stored in the
PerformanceAnalysisDataDiskCounter table.
Data for all other categories is stored in the PerformanceAnalysisData table.
Generally, it is a good idea to keep the retention hours the same for categories that
are stored in the same table, otherwise page splitting and fragmentation may result
during the pruning process which may eventually affect performance.
For rolled up performance data, retention is specified in hours for each rollup level in the
HistoryDataRetentionHours column of the PerformanceAnalysisDataRollupLevel table.
Rollup data for each break level (specified by the LevelBreakMinutes column) is stored in a
separate table, all named PerformanceAnalysisDataRollupXX, where XX represents the ID
of the break level. In general, the only rollup table that may get large is the table for
©2015 SQL Sentry. All Rights Reserved.
SQL Sentry Quick Start
38
the two minute break level, or PerformanceAnalysisDataRollup2. The retention hours for
this, or any other break level, can be adjusted as needed.
Retention for raw Top SQL, Blocking and Deadlock data is controlled by the Purge History
Older Than setting on the Performance Monitor tab under SQL Sentry Server->Settings in
the Navigator pane. The default is 15 days.
If you are using EM with PA, which enables viewing PA data on the EM calendar, the raw
Top SQL, Blocking, and Deadlock data is also converted to the native EM storage format
and stored in the EventSourceHistory table alongside data for other EM event sources like
SQL Agent Jobs and DTS. Retention for all EM sources is controlled by the Purge History
Older Than setting on the Event History Monitor tab under SQL Sentry Server->Settings in
the Navigator pane.
Expired performance data is pruned by the SQL Sentry Monitoring Service every minute or so. The
default settings are such that you should always have detailed performance data for the last two
or three days. However, if you find that you are frequently navigating to date ranges using the
Dashboard or Disk Activity tabs where no data is shown, it may mean that you need to increase the
retention hours for the detailed and/or rolled up performance data. You should of course balance any
changes with the resulting impact it will have on database size.
When you start using PA, you will likely find that your SQLSentry database grows quickly at first. After
a few days this will level off though, once the pruning of expired data begins and starts keeping pace
with the incoming new data. You can get a quick idea of the mix of PA data in your environment by
inspecting sizes for the related tables using the script below. Bear in mind that much of the data in
EventSourceHistory is likely related to EM sources.
Performance Advisor Data Script
SELECT
TableName = OBJECT_SCHEMA_NAME([object_id]) + '.' + OBJECT_NAME([object_id]),
[RowCount] = SUM(CASE WHEN index_id IN (0,1) THEN row_count ELSE 0 END),
UsedSpaceMB = SUM(used_page_count / 128),
ReservedSpaceMB = SUM(reserved_page_count / 128)
FROM sys.dm_db_partition_stats
WHERE OBJECT_NAME([object_id]) IN
(
'BlockChainDetail',
'EventSourceHistory',
'MetaHistorySqlServerBlockLog',
'MetaHistorySqlServerTraceLog',
'PerformanceAnalysisData',
'PerformanceAnalysisDataDatabaseCounter',
'PerformanceAnalysisDataDiskCounter',
'PerformanceAnalysisDataRollup11',
'PerformanceAnalysisDataRollup2',
'PerformanceAnalysisDataRollup4',
'PerformanceAnalysisDataRollup6',
©2015 SQL Sentry. All Rights Reserved.
SQL Sentry Quick Start
39
'PerformanceAnalysisDataRollup8',
'PerformanceAnalysisTraceData',
'PerformanceAnalysisPlan',
'PerformanceAnalysisPlanOpTotals',
'PerformanceAnalysisTraceCachedPlanItems',
'PerformanceAnalysisTraceDataToCachedPlans',
'PerformanceAnalysisTraceQueryStats',
'MetaHistorySharePointTimerJob',
'PerformanceAnalysisSsasUsageTotals',
'PerformanceAnalysisSsasCubeDimensionAttribute',
'PerformanceAnalysisSsasTraceDataDetail'
)
AND OBJECTPROPERTY([object_id], 'IsUserTable') = 1
GROUP BY [object_id]
ORDER BY TableName;
10.2 SMTP Settings
Select the SQL Sentry Server -> Settings node in the SQL Sentry Client Navigator pane. The SMTP
Config tab will be displayed by default.
1. In the SMTP Server field enter the domain name or IP address of the SMTP server to be used
for routing SQL Sentry email notifications. If using localhost, keep in mind this will be the local
SMTP server on the machine where the Monitoring Service is installed since it is responsible for
sending all notifications. The SQL Sentry Client does not send any notifications.
NOTE: You may need to contact your network administrator first to ensure that the IP
address of the Monitoring Service computer has been granted both Connect and Relay
permissions for the specified SMTP server.
2. Next, enter the Email From Address. This is the address which will appear on the From line of
all email notifications sent by SQL Sentry.
3. You can also specify a Username and Password if authentication is required by your SMTP
server. Please note that this is usually not required in most environments.
4. Click the Test button and specify an email address, then click Send.
IMPORTANT: For the most accurate SMTP test, you should use the SQL Sentry Client
installed on the Server computer to send the test message. If you use a SQL Sentry
Client on a different computer, such as your local workstation, the results may be
different. For example, your SMTP server may allow relay from your workstation but
not from the SQL Sentry Server computer, in which case the test from your
workstation would succeed; but the SQL Sentry Server would be unable to deliver
notifications.
5. Click Save on the toolbar when finished.
©2015 SQL Sentry. All Rights Reserved.
SQL Sentry Quick Start
40
10.3 Uninstalling SQL Sentry
SQL Sentry can be uninstalled through the Control Panel in Windows. When you uninstall the SQL
Sentry Client or Monitoring Service, the associated program files will be removed. User preferences
stored in the registry, and the SQL Sentry Database will not be deleted.
Additionally, the .NET Framework files will not be removed when uninstalling SQL Sentry. This can be
accomplished using Add/Remove Programs in the Control Panel.
REMOVING WATCHED SERVER OBJECTS
If you have stopped watching a SQL Server instance with SQL Sentry, and have no plans to watch it
again in the near future, scripts are provided to automate the process of removing the objects SQL
Sentry places on a watched server. Click the appropriate link below to view the script.
SQL Server 2000 instances
SQL Server 2005 and above instances
10.3.1 Object Removal Script for Watched 2000 Servers
Object Removal Script for Watched 2000 Servers
USE msdb
if exists (select * from dbo.sysobjects where id = object_id(N'[dbo].
[sp_sentry_mail]') and OBJECTPROPERTY(id, N'IsProcedure') = 1)
drop procedure [dbo].[sp_sentry_mail]
if exists (select * from dbo.sysobjects where id = object_id(N'[dbo].
[sp_sentry_mail_20]') and OBJECTPROPERTY(id, N'IsProcedure') = 1)
drop procedure [dbo].[sp_sentry_mail_20]
if exists (select * from dbo.sysobjects where id = object_id(N'[dbo].
[SQLSentryEmails_20]') and OBJECTPROPERTY(id, N'IsUserTable') = 1)
drop table [dbo].[SQLSentryEmails_20]
if exists (select * from dbo.sysobjects where id = object_id(N'[dbo].
[spGetBlockInfo_20]') and OBJECTPROPERTY(id, N'IsProcedure') = 1)
drop procedure [dbo].[spGetBlockInfo_20]
if exists (select * from dbo.sysobjects where id = object_id(N'[dbo].
[spGetBlockInfo_Pre8sp3]') and OBJECTPROPERTY(id, N'IsProcedure') = 1)
drop procedure [dbo].[spGetBlockInfo_Pre8sp3]
GO
BEGIN TRANSACTION
DECLARE @JobID BINARY(16)
DECLARE @ReturnCode INT
SELECT @ReturnCode = 0
-- Delete the job with the same name (if it exists)
SELECT @JobID = job_id
FROM msdb.dbo.sysjobs
©2015 SQL Sentry. All Rights Reserved.
SQL Sentry Quick Start
41
WHERE (name = N'SQL Sentry 2.0 Queue Monitor')
IF (@JobID IS NOT NULL)
BEGIN
-- Check if the job is a multi-server job
IF (EXISTS (SELECT *
FROM msdb.dbo.sysjobservers
WHERE (job_id = @JobID) AND (server_id <> 0)))
BEGIN
-- There is, so abort the script
RAISERROR (N'Unable to import job ''SQL Sentry Queue Monitor'' since there is already a multi-server job with this name.', 16, 1)
GOTO QuitWithRollback
END
ELSE
-- Delete the [local] job
EXECUTE msdb.dbo.sp_delete_job @job_name = N'SQL Sentry 2.0 Queue Monitor'
SELECT @JobID = NULL
END
COMMIT TRANSACTION
GOTO EndSave
QuitWithRollback:
IF (@@TRANCOUNT > 0) ROLLBACK TRANSACTION
EndSave:
GO
if exists (select * from dbo.sysobjects where id = object_id(N'[dbo].
[spGetJobInfo_20]') and OBJECTPROPERTY(id, N'IsProcedure') = 1)
drop procedure [dbo].[spGetJobInfo_20]
if exists (select * from dbo.sysobjects where id = object_id(N'[dbo].
[spGetDTSLog_20]') and OBJECTPROPERTY(id, N'IsProcedure') = 1)
drop procedure [dbo].[spGetDTSLog_20]
if exists (select * from dbo.sysobjects where id = object_id(N'[dbo].
[spQueueHeartbeat_20]') and OBJECTPROPERTY(id, N'IsProcedure') = 1)
drop procedure [dbo].[spQueueHeartbeat_20]
if exists (select * from dbo.sysobjects where id = object_id(N'[dbo].
[spQueueJob_Start_20]') and OBJECTPROPERTY(id, N'IsProcedure') = 1)
drop procedure [dbo].[spQueueJob_Start_20]
if exists (select * from dbo.sysobjects where id = object_id(N'[dbo].
[spQueueJob_End_20]') and OBJECTPROPERTY(id, N'IsProcedure') = 1)
drop procedure [dbo].[spQueueJob_End_20]
if exists (select * from dbo.sysobjects where id = object_id(N'[dbo].
[spQueueMonitor_20]') and OBJECTPROPERTY(id, N'IsProcedure') = 1)
drop procedure [dbo].[spQueueMonitor_20]
if exists (select * from dbo.sysobjects where id = object_id(N'[dbo].
[spReadLogFile_20]') and OBJECTPROPERTY(id, N'IsProcedure') = 1)
©2015 SQL Sentry. All Rights Reserved.
SQL Sentry Quick Start
42
drop procedure [dbo].[spReadLogFile_20]
if exists (select * from dbo.sysobjects where id = object_id(N'[dbo].
[SQLSentryQueueLog_20]') and OBJECTPROPERTY(id, N'IsUserTable') = 1)
drop table [dbo].[SQLSentryQueueLog_20]
if exists (select * from dbo.sysobjects where id = object_id(N'[dbo].
[SQLSentryLogCache_20]') and OBJECTPROPERTY(id, N'IsUserTable') = 1)
drop table [dbo].[SQLSentryLogCache_20]
if exists (select * from dbo.sysobjects where id = object_id(N'[dbo].
[SQLSentryLogCacheDTS_20]') and OBJECTPROPERTY(id, N'IsUserTable') = 1)
drop table [dbo].[SQLSentryLogCacheDTS_20]
GO
BEGIN TRANSACTION
DECLARE @JobID BINARY(16)
DECLARE @ReturnCode INT
SELECT @ReturnCode = 0
-- Delete the job with the same name (if it exists)
SELECT @JobID = job_id
FROM msdb.dbo.sysjobs
WHERE (name = N'SQL Sentry 2.0 Alert Trap')
IF (@JobID IS NOT NULL)
BEGIN
-- Check if the job is a multi-server job
IF (EXISTS (SELECT *
FROM msdb.dbo.sysjobservers
WHERE (job_id = @JobID) AND (server_id <> 0)))
BEGIN
-- There is, so abort the script
RAISERROR (N'Unable to import job ''SQL Sentry Alert Trap'' since there is already a multi-server job with this name.', 16, 1)
GOTO QuitWithRollback
END
ELSE
-- Delete the [local] job
EXECUTE msdb.dbo.sp_delete_job @job_name = N'SQL Sentry 2.0 Alert Trap'
SELECT @JobID = NULL
END
COMMIT TRANSACTION
GOTO EndSave
QuitWithRollback:
IF (@@TRANCOUNT > 0) ROLLBACK TRANSACTION
EndSave:
GO
if exists (select * from dbo.sysobjects where id = object_id(N'[dbo].
[spTrapAlert_20]') and OBJECTPROPERTY(id, N'IsProcedure') = 1)
©2015 SQL Sentry. All Rights Reserved.
SQL Sentry Quick Start
43
drop procedure [dbo].[spTrapAlert_20]
if exists (select * from dbo.sysobjects where id = object_id(N'[dbo].
[spSetupAlertsTrap_20]') and OBJECTPROPERTY(id, N'IsProcedure') = 1)
drop procedure [dbo].[spSetupAlertsTrap_20]
if exists (select * from dbo.sysobjects where id = object_id(N'[dbo].
[SQLSentryAlertLog_20]') and OBJECTPROPERTY(id, N'IsUserTable') = 1)
drop table [dbo].[SQLSentryAlertLog_20]
if exists (select * from dbo.sysobjects where id = object_id(N'[dbo].
[SQLSentryLogData_20]') and OBJECTPROPERTY(id, N'IsUserTable') = 1)
drop table [dbo].[SQLSentryLogData_20]
if exists (select * from dbo.sysobjects where id = object_id(N'[dbo].
[SQLSentryObjectVersion_20]') and OBJECTPROPERTY(id, N'IsUserTable') = 1)
drop table [dbo].[SQLSentryObjectVersion_20]
if exists (select * from dbo.sysobjects where id = object_id(N'[dbo].
[fnGetSQL_20]') and OBJECTPROPERTY(id, N'IsScalarFunction') = 1)
drop function [dbo].[fnGetSQL_20]
if exists (select * from dbo.sysobjects where id = object_id(N'[dbo].
[fnGetWaittypeDesc_20]') and OBJECTPROPERTY(id, N'IsScalarFunction') = 1)
drop function [dbo].[fnGetWaittypeDesc_20]
USE msdb
if exists (select * from dbo.sysobjects where id = object_id(N'[dbo].
[sp_sentry_mail]') and OBJECTPROPERTY(id, N'IsProcedure') = 1)
drop procedure [dbo].[sp_sentry_mail]
if exists (select * from dbo.sysobjects where id = object_id(N'[dbo].
[sp_sentry_mail_20]') and OBJECTPROPERTY(id, N'IsProcedure') = 1)
drop procedure [dbo].[sp_sentry_mail_20]
if exists (select * from dbo.sysobjects where id = object_id(N'[dbo].
[SQLSentryEmails_20]') and OBJECTPROPERTY(id, N'IsUserTable') = 1)
drop table [dbo].[SQLSentryEmails_20]
if exists (select * from dbo.sysobjects where id = object_id(N'[dbo].
[spGetBlockInfo_20]') and OBJECTPROPERTY(id, N'IsProcedure') = 1)
drop procedure [dbo].[spGetBlockInfo_20]
if exists (select * from dbo.sysobjects where id = object_id(N'[dbo].
[spGetBlockInfo_Pre8sp3]') and OBJECTPROPERTY(id, N'IsProcedure') = 1)
drop procedure [dbo].[spGetBlockInfo_Pre8sp3]
GO
BEGIN TRANSACTION
DECLARE @JobID BINARY(16)
DECLARE @ReturnCode INT
©2015 SQL Sentry. All Rights Reserved.
SQL Sentry Quick Start
44
SELECT @ReturnCode = 0
-- Delete the job with the same name (if it exists)
SELECT @JobID = job_id
FROM msdb.dbo.sysjobs
WHERE (name = N'SQL Sentry 2.0 Queue Monitor')
IF (@JobID IS NOT NULL)
BEGIN
-- Check if the job is a multi-server job
IF (EXISTS (SELECT *
FROM msdb.dbo.sysjobservers
WHERE (job_id = @JobID) AND (server_id <> 0)))
BEGIN
-- There is, so abort the script
RAISERROR (N'Unable to import job ''SQL Sentry Queue Monitor'' since there
is already a multi-server job with this name.', 16, 1)
GOTO QuitWithRollback
END
ELSE
-- Delete the [local] job
EXECUTE msdb.dbo.sp_delete_job @job_name = N'SQL Sentry 2.0 Queue Monitor'
SELECT @JobID = NULL
END
COMMIT TRANSACTION
GOTO EndSave
QuitWithRollback:
IF (@@TRANCOUNT > 0) ROLLBACK TRANSACTION
EndSave:
GO
if exists (select * from dbo.sysobjects where id = object_id(N'[dbo].
[spGetJobInfo_20]') and OBJECTPROPERTY(id, N'IsProcedure') = 1)
drop procedure [dbo].[spGetJobInfo_20]
if exists (select * from dbo.sysobjects where id = object_id(N'[dbo].
[spGetDTSLog_20]') and OBJECTPROPERTY(id, N'IsProcedure') = 1)
drop procedure [dbo].[spGetDTSLog_20]
if exists (select * from dbo.sysobjects where id = object_id(N'[dbo].
[spQueueHeartbeat_20]') and OBJECTPROPERTY(id, N'IsProcedure') = 1)
©2015 SQL Sentry. All Rights Reserved.
SQL Sentry Quick Start
drop procedure [dbo].[spQueueHeartbeat_20]
if exists (select * from dbo.sysobjects where id = object_id(N'[dbo].
[spQueueJob_Start_20]') and OBJECTPROPERTY(id, N'IsProcedure') = 1)
drop procedure [dbo].[spQueueJob_Start_20]
if exists (select * from dbo.sysobjects where id = object_id(N'[dbo].
[spQueueJob_End_20]') and OBJECTPROPERTY(id, N'IsProcedure') = 1)
drop procedure [dbo].[spQueueJob_End_20]
if exists (select * from dbo.sysobjects where id = object_id(N'[dbo].
[spQueueMonitor_20]') and OBJECTPROPERTY(id, N'IsProcedure') = 1)
drop procedure [dbo].[spQueueMonitor_20]
if exists (select * from dbo.sysobjects where id = object_id(N'[dbo].
[spReadLogFile_20]') and OBJECTPROPERTY(id, N'IsProcedure') = 1)
drop procedure [dbo].[spReadLogFile_20]
if exists (select * from dbo.sysobjects where id = object_id(N'[dbo].
[SQLSentryQueueLog_20]') and OBJECTPROPERTY(id, N'IsUserTable') = 1)
drop table [dbo].[SQLSentryQueueLog_20]
if exists (select * from dbo.sysobjects where id = object_id(N'[dbo].
[SQLSentryLogCache_20]') and OBJECTPROPERTY(id, N'IsUserTable') = 1)
drop table [dbo].[SQLSentryLogCache_20]
if exists (select * from dbo.sysobjects where id = object_id(N'[dbo].
[SQLSentryLogCacheDTS_20]') and OBJECTPROPERTY(id, N'IsUserTable') = 1)
drop table [dbo].[SQLSentryLogCacheDTS_20]
GO
BEGIN TRANSACTION
DECLARE @JobID BINARY(16)
DECLARE @ReturnCode INT
SELECT @ReturnCode = 0
-- Delete the job with the same name (if it exists)
SELECT @JobID = job_id
FROM msdb.dbo.sysjobs
WHERE (name = N'SQL Sentry 2.0 Alert Trap')
IF (@JobID IS NOT NULL)
BEGIN
-- Check if the job is a multi-server job
IF (EXISTS (SELECT *
FROM msdb.dbo.sysjobservers
WHERE (job_id = @JobID) AND (server_id <> 0)))
BEGIN
©2015 SQL Sentry. All Rights Reserved.
45
SQL Sentry Quick Start
46
-- There is, so abort the script
RAISERROR (N'Unable to import job ''SQL Sentry Alert Trap'' since there is
already a multi-server job with this name.', 16, 1)
GOTO QuitWithRollback
END
ELSE
-- Delete the [local] job
EXECUTE msdb.dbo.sp_delete_job @job_name = N'SQL Sentry 2.0 Alert Trap'
SELECT @JobID = NULL
END
COMMIT TRANSACTION
GOTO EndSave
QuitWithRollback:
IF (@@TRANCOUNT > 0) ROLLBACK TRANSACTION
EndSave:
GO
if exists (select * from dbo.sysobjects where id = object_id(N'[dbo].
[spTrapAlert_20]') and OBJECTPROPERTY(id, N'IsProcedure') = 1)
drop procedure [dbo].[spTrapAlert_20]
if exists (select * from dbo.sysobjects where id = object_id(N'[dbo].
[spSetupAlertsTrap_20]') and OBJECTPROPERTY(id, N'IsProcedure') = 1)
drop procedure [dbo].[spSetupAlertsTrap_20]
if exists (select * from dbo.sysobjects where id = object_id(N'[dbo].
[SQLSentryAlertLog_20]') and OBJECTPROPERTY(id, N'IsUserTable') = 1)
drop table [dbo].[SQLSentryAlertLog_20]
if exists (select * from dbo.sysobjects where id = object_id(N'[dbo].
[SQLSentryLogData_20]') and OBJECTPROPERTY(id, N'IsUserTable') = 1)
drop table [dbo].[SQLSentryLogData_20]
if exists (select * from dbo.sysobjects where id = object_id(N'[dbo].
[SQLSentryObjectVersion_20]') and OBJECTPROPERTY(id, N'IsUserTable') = 1)
drop table [dbo].[SQLSentryObjectVersion_20]
if exists (select * from dbo.sysobjects where id = object_id(N'[dbo].
[fnGetSQL_20]') and OBJECTPROPERTY(id, N'IsScalarFunction') = 1)
drop function [dbo].[fnGetSQL_20]
if exists (select * from dbo.sysobjects where id = object_id(N'[dbo].
[fnGetWaittypeDesc_20]') and OBJECTPROPERTY(id, N'IsScalarFunction') = 1)
drop function [dbo].[fnGetWaittypeDesc_20]
©2015 SQL Sentry. All Rights Reserved.
SQL Sentry Quick Start
10.3.2
47
Object Removal Script for Watched 2005 and
Above Servers
Object Removal Script for Watched 2005 and above
USE msdb
if exists (select * from sys.objects where object_id = object_id(N'[dbo].
[sp_sentry_mail]') and OBJECTPROPERTY(object_id, N'IsProcedure') = 1)
drop procedure [dbo].[sp_sentry_mail]
if exists (select * from sys.objects where object_id = object_id(N'[dbo].
[sp_sentry_mail_20]') and OBJECTPROPERTY(object_id, N'IsProcedure') = 1)
drop procedure [dbo].[sp_sentry_mail_20]
if exists (select * from sys.objects where object_id = object_id(N'[dbo].
[sp_sentry_dbmail_20]') and OBJECTPROPERTY(object_id, N'IsProcedure') = 1)
drop procedure [dbo].[sp_sentry_dbmail_20]
if exists (select * from sys.objects where object_id = object_id(N'[dbo].
[SQLSentryEmails_20]') and OBJECTPROPERTY(object_id, N'IsUserTable') = 1)
drop table [dbo].[SQLSentryEmails_20]
if exists (select * from sys.objects where object_id = object_id(N'[dbo].
[SQLSentryDBEmails_Attachments_20]') and OBJECTPROPERTY(object_id, N'IsUserTable') = 1)
drop table [dbo].[SQLSentryDBEmails_Attachments_20]
if exists (select * from sys.objects where object_id = object_id(N'[dbo].
[SQLSentryDBEmails_20]') and OBJECTPROPERTY(object_id, N'IsUserTable') = 1)
drop table [dbo].[SQLSentryDBEmails_20]
if exists (select * from sys.objects where object_id = object_id(N'[dbo].
[spGetBlockInfo_20]') and OBJECTPROPERTY(object_id, N'IsProcedure') = 1)
drop procedure [dbo].[spGetBlockInfo_20]
if exists (select * from sys.objects where object_id = object_id(N'[dbo].
[spGetBlockInfo_Pre8sp3]') and OBJECTPROPERTY(object_id, N'IsProcedure') = 1)
drop procedure [dbo].[spGetBlockInfo_Pre8sp3]
if exists (select * from sys.objects where object_id = object_id(N'[dbo].
[spGetQueryStatsData]') and OBJECTPROPERTY(object_id, N'IsProcedure') = 1)
drop procedure [dbo].[spGetQueryStatsData]
if exists (select * from sys.objects where object_id = object_id(N'[dbo].
[spGetProcedureStatsData]') and OBJECTPROPERTY(object_id, N'IsProcedure') = 1)
drop procedure [dbo].[spGetProcedureStatsData]
GO
BEGIN TRANSACTION
DECLARE @JobID BINARY(16)
©2015 SQL Sentry. All Rights Reserved.
SQL Sentry Quick Start
48
DECLARE @ReturnCode INT
SELECT @ReturnCode = 0
-- Delete the job with the same name (if it exists)
SELECT @JobID = job_id
FROM msdb.dbo.sysjobs
WHERE (name = N'SQL Sentry 2.0 Queue Monitor')
IF (@JobID IS NOT NULL)
BEGIN
-- Check if the job is a multi-server job
IF (EXISTS (SELECT *
FROM msdb.dbo.sysjobservers
WHERE (job_id = @JobID) AND (server_id <> 0)))
BEGIN
-- There is, so abort the script
RAISERROR (N'Unable to import job ''SQL Sentry Queue Monitor'' since there is already a multi-server job with this name.', 16, 1)
GOTO QuitWithRollback
END
ELSE
-- Delete the [local] job
EXECUTE msdb.dbo.sp_delete_job @job_name = N'SQL Sentry 2.0 Queue Monitor'
SELECT @JobID = NULL
END
COMMIT TRANSACTION
GOTO EndSave
QuitWithRollback:
IF (@@TRANCOUNT > 0) ROLLBACK TRANSACTION
EndSave:
GO
if exists (select * from sys.objects where object_id = object_id(N'[dbo].
[spGetJobInfo_20]') and OBJECTPROPERTY(object_id, N'IsProcedure') = 1)
drop procedure [dbo].[spGetJobInfo_20]
if exists (select * from sys.objects where object_id = object_id(N'[dbo].
[spGetDTSLog_20]') and OBJECTPROPERTY(object_id, N'IsProcedure') = 1)
drop procedure [dbo].[spGetDTSLog_20]
if exists (select * from sys.objects where object_id = object_id(N'[dbo].
[spQueueHeartbeat_20]') and OBJECTPROPERTY(object_id, N'IsProcedure') = 1)
drop procedure [dbo].[spQueueHeartbeat_20]
if exists (select * from sys.objects where object_id = object_id(N'[dbo].
[spQueueJob_Start_20]') and OBJECTPROPERTY(object_id, N'IsProcedure') = 1)
drop procedure [dbo].[spQueueJob_Start_20]
if exists (select * from sys.objects where object_id = object_id(N'[dbo].
[spQueueJob_End_20]') and OBJECTPROPERTY(object_id, N'IsProcedure') = 1)
drop procedure [dbo].[spQueueJob_End_20]
©2015 SQL Sentry. All Rights Reserved.
SQL Sentry Quick Start
49
if exists (select * from sys.objects where object_id = object_id(N'[dbo].
[spQueueMonitor_20]') and OBJECTPROPERTY(object_id, N'IsProcedure') = 1)
drop procedure [dbo].[spQueueMonitor_20]
if exists (select * from sys.objects where object_id = object_id(N'[dbo].
[spReadLogFile_20]') and OBJECTPROPERTY(object_id, N'IsProcedure') = 1)
drop procedure [dbo].[spReadLogFile_20]
if exists (select * from sys.objects where object_id = object_id(N'[dbo].
[SQLSentryQueueLog_20]') and OBJECTPROPERTY(object_id, N'IsUserTable') = 1)
drop table [dbo].[SQLSentryQueueLog_20]
if exists (select * from sys.objects where object_id = object_id(N'[dbo].
[SQLSentryLogCache_20]') and OBJECTPROPERTY(object_id, N'IsUserTable') = 1)
drop table [dbo].[SQLSentryLogCache_20]
if exists (select * from sys.objects where object_id = object_id(N'[dbo].
[SQLSentryLogCacheDTS_20]') and OBJECTPROPERTY(object_id, N'IsUserTable') = 1)
drop table [dbo].[SQLSentryLogCacheDTS_20]
GO
BEGIN TRANSACTION
DECLARE @JobID BINARY(16)
DECLARE @ReturnCode INT
SELECT @ReturnCode = 0
-- Delete the job with the same name (if it exists)
SELECT @JobID = job_id
FROM msdb.dbo.sysjobs
WHERE (name = N'SQL Sentry 2.0 Alert Trap')
IF (@JobID IS NOT NULL)
BEGIN
-- Check if the job is a multi-server job
IF (EXISTS (SELECT *
FROM msdb.dbo.sysjobservers
WHERE (job_id = @JobID) AND (server_id <> 0)))
BEGIN
-- There is, so abort the script
RAISERROR (N'Unable to import job ''SQL Sentry Alert Trap'' since there is already a multi-server job with this name.', 16, 1)
GOTO QuitWithRollback
END
ELSE
-- Delete the [local] job
EXECUTE msdb.dbo.sp_delete_job @job_name = N'SQL Sentry 2.0 Alert Trap'
SELECT @JobID = NULL
END
©2015 SQL Sentry. All Rights Reserved.
SQL Sentry Quick Start
50
COMMIT TRANSACTION
GOTO EndSave
QuitWithRollback:
IF (@@TRANCOUNT > 0) ROLLBACK TRANSACTION
EndSave:
GO
if exists (select * from sys.objects where object_id = object_id(N'[dbo].
[spTrapAlert_20]') and OBJECTPROPERTY(object_id, N'IsProcedure') = 1)
drop procedure [dbo].[spTrapAlert_20]
if exists (select * from sys.objects where object_id = object_id(N'[dbo].
[spSetupAlertsTrap_20]') and OBJECTPROPERTY(object_id, N'IsProcedure') = 1)
drop procedure [dbo].[spSetupAlertsTrap_20]
if exists (select * from sys.objects where object_id = object_id(N'[dbo].
[SQLSentryAlertLog_20]') and OBJECTPROPERTY(object_id, N'IsUserTable') = 1)
drop table [dbo].[SQLSentryAlertLog_20]
if exists (select * from sys.objects where object_id = object_id(N'[dbo].
[SQLSentryLogData_20]') and OBJECTPROPERTY(object_id, N'IsUserTable') = 1)
drop table [dbo].[SQLSentryLogData_20]
if exists (select * from sys.objects where object_id = object_id(N'[dbo].
[SQLSentryObjectVersion_20]') and OBJECTPROPERTY(object_id, N'IsUserTable') = 1)
drop table [dbo].[SQLSentryObjectVersion_20]
if exists (select * from sys.objects where object_id = object_id(N'[dbo].
[fnGetSQL_20]') and OBJECTPROPERTY(object_id, N'IsScalarFunction') = 1)
drop function [dbo].[fnGetSQL_20]
if exists (select * from sys.objects where object_id = object_id(N'[dbo].
[fnGetWaittypeDesc_20]') and OBJECTPROPERTY(object_id, N'IsScalarFunction') = 1)
drop function [dbo].[fnGetWaittypeDesc_20]
10.4 Watched Server Objects
PERFORMANCE ADVISOR WATCHED SERVER OBJECTS
When a SQL Server instance is watched by SQL Sentry Performance Advisor, the below objects are
placed on the target server. To remove these objects, see the Uninstalling SQL Sentry topic.
TABLES (MSDB):
SQLSentryObjectVersion_20
©2015 SQL Sentry. All Rights Reserved.
SQL Sentry Quick Start
51
STORED PROCEDURES (MSDB):
spGetBlockInfo_20
EVENT MANAGER WATCHED SERVER OBJECTS
When a SQL Server instance is watched by SQL Sentry Event Manager, the below objects are placed
on the target server. To remove these objects, see the Uninstalling SQL Sentry topic.
TABLES (MSDB):
SQLSentryAlertLog_20
SQLSentryDBEmails_20 (SQL Server 2005+)
SQLSentryDBEmail_Attachments_20 (SQL Server 2005+)
SQLSentryEmails_20
SQLSentryLogCache_20
SQLSentryLogData_20
SQLSentryObjectVersion_20
SQLSentryQueueLog_20
STORED PROCEDURES (MSDB):
spGetBlockInfo_20
spGetJobInfo_20
spQueueHeartbeat_20
spQueueJob_End_20
spQueueJob_Start_20
spQueueMonitor_20
spReadLogFile_20
spSetupAlertsTrap_20
spTrapAlert_20
sp_sentry_mail
sp_sentry_mail_20
sp_sentry_dbmail_20 (SQL Server 2005+)
SQL AGENT JOBS:
SQL Sentry 2.0 Alert Trap
SQL Sentry 2.0 Queue Monitor
©2015 SQL Sentry. All Rights Reserved.
SQL Sentry Quick Start
10.5 Standard Vs Enterprise Editions
Please see this link for a Standard Vs. Enterprise feature comparison.
©2015 SQL Sentry. All Rights Reserved.
52
SQL Sentry Quick Start
53
11 The SQL Sentry User Guide
For advanced information on configuring and using SQL Sentry, please refer to the SQL Sentry User
Guide. The User Guide is always accessible from the Help menu of the SQL Sentry Client.
©2015 SQL Sentry. All Rights Reserved.
SQL Sentry Quick Start
54
12 Contact Information
CUSTOMER PORTAL
Access to the SQL Sentry Customer Portal is available around the clock, allowing you to retrieve a
backup license key, expand your enterprise by adding more licenses or even modify an existing license
key in the case of hardware changes. In addition, the Customer Portal is where product updates and
documentation can be found. The page http://www.sqlsentry.com/portal can be used to activate and
log into your account.
SUPPORT
If you have any technical questions, or for help with installation or configuration issues, please don’t
hesitate to contact us:
Email: [email protected]
Phone: 704-895-6241
Toll Free: 855-775-7733
SUPPORT FORUM
SQL Sentry support forum: http://answers.sqlsentry.com
DEMOS
To sign up for one of our regularly scheduled public webinar demos please visit:
http://www.sqlsentry.com/company/news-events#webinars
SALES
If you have any pre-sales questions, or would like to place an order, please contact our sales team
directly:
Email: [email protected]
Phone: 704-895-6241
FEEDBACK
We always welcome your feedback on this guide and SQL Sentry in general. Please email any
feedback, ideas, or feature requests to [email protected]
©2015 SQL Sentry. All Rights Reserved.
SQL Sentry Quick Start
13 Index
Add Users and Groups, 20
Additional Tasks Overview, 20
Appendix, 34
Client Security, 29-30
Contact Information, 54
Cover Page, 1
Customize Global Settings, 21-22
How to Configure Actions , 22-24
How to Configure Settings, 24-26
Important Concepts, 5-6
Installation and Setup Steps, 12
Installation Recommendations, 7-8
Introduction to Actions and Settings, 21-22
Least Privilege General Performance Monitoring, 32
Monitor Additional Connections, 20-21
Monitoring Service Credentials, 27-29
Monitoring Service Permissions, 27-29
Monitoring Service Security, 27-29
Non-Windows Network Environment Security, 32-33
Object Removal Script for Watched 2000 Servers, 40-46
Object Removal Script for Watched 2005 and Above Servers, 47-50
Pass-through Authentication, 31-32
Performance Advisor Data Capacity Planning, 36-39
Performance Advisor Required Ports, 35-36
Performance Advisor Security Requirements, 34-35
Quick Start Guide , 4
Quick Start Guide Root
Contact Information, 54
Cover Page, 1
Important Concepts, 5-6
Installation Recommendations, 7-8
©2015 SQL Sentry. All Rights Reserved.
55
SQL Sentry Quick Start
System Requirements, 9-11
Reference
Standard Vs Enterprise Editions, 51-52
Removing Watched Server Objects, 39-40
Security and the SQL Sentry Client, 29-30
Security and the SQL Sentry Server, 27-29
Security in non-Windows Network Environments, 32-33
Security Overview, 27
SMTP Settings, 39
SQL Sentry Performance Advisor, 34
SQL Sentry Security Overview, 27
Standard Vs Enterprise Editions, 51-52
Starting the Monitoring Service, 27-29
Step 1: Install SQL Sentry, 12-16
Step 2: The Setup Wizard, 16-18
Step 3: Start Using the Client, 18-19
System Requirements, 9-11
The SQL Sentry User Guide, 53
Uninstalling SQL Sentry, 39-40
Watched Server Objects, 50-51
Watching Servers Across Domains, 30-31
©2015 SQL Sentry. All Rights Reserved.
56