1
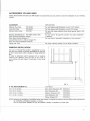
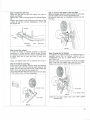
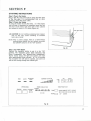
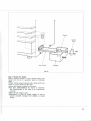
with the 3 # SxKtapping screws(Figure 9). (See Figure
4 for screw size and application.)
Step 6: Install the Flue Pipe
From INSIDE the building, insert the flue pipe (with
arrow pointing "up") into the hole. Fasten the flue pipe
NOTE: Top center port is an extra exhaust port.
tapping screw
Fig. 9
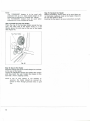
Step 7: Install the Outer Flange
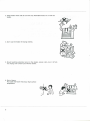
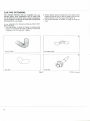
Apply caulking material to the inside ridge of the
rubber packing (Figure 10).
Holding the "Up" mark to the top, slide the rubber
packing onto the sleeve (caulk side to the wall).
NOTE: If it is difficult to slide the packing onto the
sleeve, apply soapy water to the inside of the
packing.
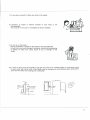
Once the rubber packing is in place, slide the outer
flange onto the sleeve with the conical side pointing
outward (Figure 11).
Screw the flue pipe nut onto the flue pipe grooves,
and tighten it firmly (Figure 11).
Rubber Packing
Flue Pipe Nut.
Outer Flange
Fig. 11
12
Fig. 10