1
Contents
Connections
Playback
Settings
Tips
Appendix
.
Integrated Amplifier
PM5005
You can print more than one page of a PDF onto a single sheet of paper.
Front panel
Rear panel
Remote control
unit
1
Index
Owner’s Manual
Contents
Connections
Playback
Settings
Connecting speakers
Speaker A/B connection
Bi-wiring connection
Connecting a playback device
Connecting a recording device
Connecting devices with remote control connectors
Performing operations by RC on this unit without visual contact
Remotely connecting Marantz audio devices
Connecting the power cord
Rear panel
Remote control
unit
17
18
19
20
21
22
22
22
23
Playback
Turning the power on
Selecting the speakers for audio output
Selecting the input source
Adjusting the volume
Turning off the sound temporarily (Muting)
Adjusting the tone
Playing CDs
Recording
Front panel
Appendix
Connections
4
5
5
6
6
6
7
8
8
10
11
Accessories
Inserting the batteries
Operating range of the remote control unit
Features
High quality sound
High performance
Easy operation
Part names and functions
Front panel
Rear panel
Remote control unit
Tips
2
Index
25
26
26
26
26
26
27
28
Contents
Connections
Playback
Settings
Appendix
Tips
Settings
Setting the Auto Standby mode
Turning Auto Standby mode on
Turning Auto Standby mode off
Setting the remote signal receiving function
Disabling the remote signal receiving function of the remote
control unit
Enabling the remote signal receiving function of the remote
control unit
Setting remote control codes
Setting remote control codes for the remote control
Setting remote control codes for this unit
Front panel
Tips
Rear panel
Remote control
unit
30
30
30
31
Tips
Troubleshooting
35
36
Appendix
Explanation of terms
Specifications
Index
31
31
32
33
33
3
Index
40
41
43
Contents
Connections
Playback
Settings
Tips
Appendix
Thank you for purchasing this Marantz product.
To ensure proper operation, please read this owner’s manual carefully before using the product.
After reading this manual, be sure to keep it for future reference.
Accessories
.
.
.
.
Check that the following parts are supplied with the product.
CD-ROM (Owner’s Manual)
Safety Instructions
.
.
.
Quick Start Guide
Power cord
Front panel
Remote control unit (RC002PMCD)
Rear panel
Remote control
unit
R03/AAA batteries
4
Index
Warranty (for USA/for CANADA)
Connections
Contents
Playback
Settings
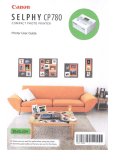
Inserting the batteries
1
Tips
Appendix
NOTE
0 To prevent damage or leakage of battery fluid:
0 Do not use a new battery together with an old one.
0 Do not use two different types of batteries.
0 Remove the batteries from the remote control unit if it will not be in use for long
periods.
0 If the battery fluid should leak, carefully wipe the fluid off the inside of the battery
compartment and insert new batteries.
Remove the rear lid in the direction of the arrow and
remove it.
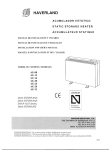
Operating range of the remote control
unit
.
Point the remote control unit at the remote sensor when operating it.
2
Insert two batteries correctly into the battery
compartment as indicated.
R03/AAA batteries
Approx. 23 ft/7 m
.
.
30°
3
Put the rear cover back on.
Front panel
Rear panel
Remote control
unit
5
Index
30°
Contents
Connections
Playback
Settings
Tips
Appendix
Features
High quality sound
High performance
0 All-discrete current feedback amplifier
0
0
0
0
0 Tone control function
This unit uses a high-speed current feedback amplifier circuit for its
preamplifier and power amplifier so that signals from the Super Audio
CD player can be amplified with high fidelity. The high-speed current
feedback amplifier reproduces a natural sound space.
High-power output
This unit features a slimline body, but comes with a large power supply
unit for dynamic music reproduction with high power.
High quality audio design
This unit has a high quality audio design such as minimized signal path,
use of high sound quality parts, and large power circuit, which is
possible only in discrete audio components.
Phono input connectors for connecting turntables
This unit is provided with a phono amplifier so that you can directly
connect a turntable and play records (Only the MM cartridge can be
used). (v p. 20)
Two-sets of speaker output terminals
In addition to using two sets of speakers (Speakers A and Speakers B),
you can connect to bi-wiring speakers with separate input terminals for
high range and low range. (v p. 19)
The unit adopts screw terminals that can connect thick audio cables.
Front panel
Rear panel
Remote control
unit
This unit has a tone control function for adjustment of bass (low
frequency) and treble (high frequency) sound to produce your preferred
tone. (v p. 27)
0 LOUDNESS function
This unit is provided with a LOUDNESS function that makes it easier to
hear music played back at a low volume level. (v p. 27)
6
Index
Contents
Connections
Playback
Settings
Easy operation
0 Remote control compatible with CD players and network audio
players
The remote control provided with this unit can control Marantz CD
players and network audio players in addition to this unit. (v p. 12)
This unit can also switch between three remote control codes. When
using three units in the same area, you can set a different remote
control code for each unit to control them independently. (v p. 33)
Front panel
Rear panel
Remote control
unit
7
Index
Tips
Appendix
Contents
Connections
Playback
Settings
Tips
Appendix
Part names and functions
Front panel
q
w
e
r
.
u
i
o
t
Q0 Q1 Q2
Rear panel
Q4
B Power indicator
This is lit as follows according to the power status:
0 Power on : Off
0 Standby : Red
0 Power off : Off
0 When the protection circuit is activated : Red (blinking)
A Power operation button (X)
This turns the power on/off. (v p. 25)
Front panel
Q3
y
Remote control
unit
8
Index
Contents
Connections
e
r
Playback
t
Settings
Tips
Appendix
H BASS control knob
This setting adjusts the volume level for the bass. (v p. 26)
y
I SOURCE DIRECT button/indicator
This turns SOURCE DIRECT mode on/off.
(v p. 27)
J TREBLE control knob
This setting adjusts the volume level for the treble. (v p. 26)
.
u
i o Q0 Q1Q2 Q3
K Speaker switching buttons/indicators (SPEAKERS A/B)
These select the speaker for audio output. (v p. 26)
Q4
C Input source select knob (INPUT SELECTOR)
This selects the input source. (v p. 26)
L LOUDNESS button/indicator
This turns the LOUDNESS mode on/off.
(v p. 27)
D Input indicators (v p. 26)
E MUTE indicator
This lights while the sound is muted. (v p. 26)
M BALANCE control knob
This adjusts the balance of the volume output from the left and right
speakers. (v p. 26)
F VOLUME knob
These adjust the volume level. (v p. 26)
N Remote control sensor
This receives signals from the remote control unit. (v p. 5)
G Headphones jack (PHONES)
Used to connect headphones.
Turn off speaker output when using headphones. (v p. 26)
8, 0, b and c can be adjusted when 9 is off (SOURCE DIRECT mode is off).
NOTE
To prevent hearing loss, do not raise the volume level excessively when using
headphones.
Front panel
Rear panel
Remote control
unit
9
Index
Contents
Connections
Playback
Settings
Tips
Appendix
Rear panel
w
.
q
er
t y
u
i
o
Q0
Q1
Q2
A SIGNAL GND jacks
Used to connect a turntable. (v p. 20)
H Recorder input/output connectors (RECORDER 2)
Used to connect the input/output connector of a recorder. (v p. 21)
B AC inlet (AC IN)
Used to connect the power cord. (v p. 23)
I Speaker terminals (SPEAKERS)
Used to connect speakers. (v p. 17)
C Turntable input connectors (PHONO)
Used to connect a turntable. (v p. 20)
J FLASHER IN jack
Used when using a control BOX or other such control devices to control
this unit.
D Tuner input connectors (TUNER)
Used to connect a tuner. (v p. 20)
K Remote control input/output connectors (REMOTE CONTROL)
Used to connect to a Marantz audio device that is compatible with the
remote control function. (v p. 22)
E CD input connectors
Used to connect a CD player. (v p. 20)
L AC outlets (AC OUTLETS)
Used to connect the AC outlets of this unit in order to supply power to
other AV equipment. (v p. 23)
F Network audio player input connectors (NETWORK)
Used to connect a network audio player. (v p. 20)
G Recorder input/output connectors (RECORDER 1)
Used to connect the input/output connector of a recorder. (v p. 21)
Front panel
Rear panel
Remote control
unit
10
Index
Contents
Connections
Playback
Settings
Tips
Remote control unit
o Amplifier operations
A Input source select buttons
This selects the input source. (v p. 26)
r
B SOURCE DIRECT button
This turns SOURCE DIRECT mode on/off.
(v p. 27)
q
C MUTE button (:)
This mutes the output audio. (v p. 26)
w
D AMP POWER button (X)
This turns the power on/off (standby).
(v p. 25)
t
E VOLUME buttons (df)
These adjust the volume level. (v p. 26)
.
e
Front panel
Rear panel
Remote control
unit
11
Index
Appendix
Contents
Connections
Playback
Settings
Tips
Appendix
o CD player operations
The supplied remote control can be used to control a Marantz CD player in
addition to this unit. To operate a Marantz CD player, press the REMOTE
MODE CD button to switch the remote control to the CD player operation
mode.
0 REMOTE MODE CD button lights for approximately two seconds.
q
w
A POWER button (X)
Q3
e
r
B Remote mode select button (REMOTE MODE CD)
C Skip buttons (8, 9)
D Stop button (n)
t
E Input source select button (INPUT)
F Information button (INFO)
G TIME button
y
u
H Cursor buttons (uio p)
i
I Program button (PROG)
J Number buttons (0 – 9)
o
K DIMMER button
L RANDOM button (P)
Q0
M SOUND MODE button
.
Q1
Q2
Front panel
Rear panel
Remote control
unit
12
Index
Contents
Connections
Playback
Settings
Tips
Appendix
N Pause button (3)
O Play button (1)
P Playback mode switching button (MODE)
Q ENTER button
R SETUP button
S CLEAR button
T REPEAT A-B button
U REPEAT button (L)
Q4
Q5
The amplifier can be operated with the amplifier operation buttons even when the
remote control operation mode is set to CD.
Q6
Q7
Q8
Q9
.
W0
W1
Front panel
Rear panel
Remote control
unit
13
Index
Contents
Connections
Playback
Settings
Tips
Appendix
o Network audio player operations
The remote control provided with this unit can control a network audio
player in addition to this unit. To operate a Marantz network audio player,
press the REMOTE MODE NET button to switch the remote control to the
network audio player operation mode.
0 REMOTE MODE NET button lights for approximately two seconds.
q
w
A POWER button (X)
B Remote mode select button (REMOTE MODE NET)
e
r
C Skip buttons (8, 9)
D Stop button (n)
t
E Input source select button (INPUT)
F Information button (INFO)
G TOP MENU button
y
u
H Cursor buttons (uio p)
I FAVORITES button
J Number buttons (0 – 9, +10)
i
o
K DIMMER button
L RANDOM button (P)
Q0
.
Q1
Q2
Front panel
Rear panel
Remote control
unit
14
Index
Contents
Connections
Playback
Settings
Tips
Appendix
M Pause button (3)
N Play button (1)
O Playback mode switching button (MODE)
P ENTER button
Q SETUP button
R CLEAR button
S Search button (SEARCH)
T REPEAT button (L)
Q3
Q4
The amplifier can be operated with the amplifier operation buttons even when the
remote control mode is NET.
Q5
Q6
Q7
Q8
.
Q9
W0
Front panel
Rear panel
Remote control
unit
15
Index
Contents
Connections
Playback
Settings
o Contents
Tips
Appendix
o Cables used for connections
17
Connecting a playback device
20
Connecting a recording device
21
Connecting devices with remote control connectors
22
Connecting the power cord
23
Provide necessary cables according to the devices you want to
connect.
Speaker cable
.
Connecting speakers
NOTE
Audio cable
.
0 Do not plug in the power cord until all connections have been completed.
0 Do not bundle power cords together with connection cables. Doing so can result in
humming or noise.
.
Remote connector cable
Front panel
Rear panel
Remote control
unit
16
Index
L
L
R
R
Contents
Connections
Playback
Settings
Tips
Appendix
Connecting speakers
o Connecting the speaker cables
NOTE
0 Disconnect this unit’s power plug from the power outlet before connecting the
speakers.
0 Connect so that the speaker cable core wires do not protrude from the speaker
terminal. The protection circuit may be activated if the core wires touch the rear
panel or if the + and - sides touch each other. (“Protection circuit” (v p. 40))
0 Never touch the speaker terminals while the power cord is connected. Doing so
could result in electric shock.
0 Use speakers with impedances within the ranges shown below to suit how they
are used.
2 (one set)
4 – 16 Ω/ohms
SPEAKERS B
2 (one set)
4 – 16 Ω/ohms
4 (two sets)
8 – 16 Ω/ohms
2 (one set)
4 – 16 Ω/ohms
SPEAKERS A and
SPEAKERS B
SPEAKERS A and
SPEAKERS B
(Bi-wiring
connection)
2
3
Insert the speaker cable’s core wire to the hilt into the
speaker terminal.
Turn the speaker terminal clockwise to tighten it.
.
4
Turn the speaker terminal counterclockwise to loosen it.
.
Speaker
Impedance
Peel off about 3/8 inch (10 mm) of sheathing from the
tip of the speaker cable, then either twist the core wire
tightly or terminate it.
.
No. of connected
speakers
1
.
Speaker terminals
used on this unit
SPEAKERS A
(Standard
connection)
Carefully check the left (L) and right (R) channels and + (red) and – (black)
polarities on the speakers being connected to this unit, and be sure to
connect the channels and polarities correctly.
Front panel
Rear panel
Remote control
unit
17
Index
Contents
Connections
Playback
Settings
Tips
Appendix
Speaker A/B connection
This unit is equipped with two sets of speaker terminals (SPEAKER A and SPEAKER B). One set of speakers can be connected to each set of terminals,
and a total of two sets of speakers can be connected.
The same signal is output from the SPEAKERS A and SPEAKERS B terminals.
When only one set of speakers is to be connected, use either the SPEAKERS A or SPEAKERS B terminals.
SPEAKERS B
SPEAKERS A
(L)
q
w
(L)
q
w
.
w
(R)
Front panel
Rear panel
Remote control
unit
18
Index
(R)
q
w
q
Contents
Connections
Playback
Settings
Tips
Appendix
Bi-wiring connection
This connection limits the effects of signal interference between the high range speakers (tweeters) and low range speakers (woofers), allowing you to
enjoy high quality playback.
When bi-wiring with bi-wireable speakers, connect the mid and high range terminals to SPEAKERS A (or SPEAKERS B), the low range terminals to
SPEAKERS B (or SPEAKERS A).
Speaker
(R)
Speaker
(L)
HIGH
HIGH
w q
w q
LOW
LOW
w q
Remove shorting bar
Remove shorting bar
.
Remove shorting bar
w q
Front panel
Rear panel
Remote control
unit
19
Index
Remove shorting bar
Contents
Connections
Playback
Settings
Tips
Appendix
Connecting a playback device
You can connect turntables, tuners, CD players and network audio players to this unit.
This unit is compatible with turntables equipped with a moving magnet (MM) phono cartridge. When you connect to a turntable with a low output moving
coil (MC) cartridge, use a commercially available MC head amp or a step-up transformer.
If you set this unit’s input source to “PHONO” and you accidentally increase the volume without having a turntable connected, you may hear a hum noise
from the speakers.
Tuner
CD player
AUDIO
OUT
R
L
AUDIO
OUT
R
L
Network audio
player
AUDIO
OUT
R
L
Turntable
AUDIO
OUT
R
L
R
L
R
L
R
L
R
L
R
L
GND
NOTE
The earth terminal (SIGNAL GND) of this unit is not for safety grounding purposes.
If this terminal is connected when there is a lot of noise, the noise can be reduced.
Note that depending on the turntable, connecting the ground line may have the
reverse effect of increasing noise. In this case, it is not necessary to connect the
ground line.
L
R
Front panel
Rear panel
Remote control
unit
20
Index
Contents
Connections
Playback
Settings
Tips
Connecting a recording device
Recording Device (Device 2)
Recording Device (Device 1)
AUDIO IN
R
L
AUDIO OUT
R
AUDIO IN
L
R
L
AUDIO OUT
R
L
L
R
L
R
L
R
L
R
L
R
L
R
L
R
L
.
R
NOTE
Never insert the short-circuiting pin plug into the recording output connectors (RECORDER). Doing so could result in damage.
Front panel
Rear panel
Remote control
unit
21
Index
Appendix
Contents
Connections
Playback
Settings
Tips
Appendix
Connecting devices with remote control connectors
Performing operations by RC on this
unit without visual contact
Remotely connecting Marantz audio
devices
You can connect an external IR receiver to the REMOTE CONTROL
connectors to perform operations on this unit with the supplied remote
control unit without visual contact. This might be necessary if the unit is
hidden in a cupboard or corner, so you can’t directly point with the remote
control unit to the device.
To do this, disable the remote control signal receiving function “Setting the
remote signal receiving function” (v p. 31).
Infrared
retransmitter
You can transmit remote control signals simply by connecting a Marantz
audio device to the REMOTE CONTROL IN/OUT connectors using the
remote connection cable provided with the device.
Set the remote control switch located on the rear panel of the connected
audio component to “EXTERNAL” to use this feature.
Infrared
sensor
.
.
RC OUT
NOTE
When a remote control receiver unit is not connected, be sure to enable the remote
control signal receiving function. Operations cannot be performed with the remote
control if this function is disabled.
Front panel
Rear panel
Remote control
unit
22
Index
Contents
Connections
Playback
Settings
Tips
Appendix
Connecting the power cord
Wait until all connections have been completed before connecting the power cord.
o Connection to the AC outlet
You can use the AC outlets of this unit to supply power to other AV
equipment.
n SWITCHED
The “SWITCHED” AC outlet turns on/off the power supply in sync with
power on/standby of this unit.
You can connect AV equipment that has total power consumption of up to
120 W (1A).
Power cable
for a different
AV device
n UNSWITCHED
The “UNSWITCHED” AC outlet supplies power regardless of power on/
standby of this unit.
You can connect AV equipment that has maximum power consumption of
up to 120 W (1A).
To household power outlet
(AC 120 V, 60 Hz)
.
WARNING :
Do not connect AV equipment exceeding the absolute allowable
power. If you do, it could result in fire or electric shock.
Front panel
Rear panel
Remote control
unit
23
Index
Power cord (supplied)
Contents
Connections
Playback
Settings
o Contents
Turning the power on
25
Selecting the speakers for audio output
26
Selecting the input source
26
Adjusting the volume
26
Turning off the sound temporarily (Muting)
26
Adjusting the tone
26
Playing CDs
27
Recording
28
Front panel
Rear panel
Remote control
unit
24
Index
Tips
Appendix
Contents
Connections
Playback
Settings
Appendix
Turning the power on
AMP POWER X
1
Input source
select buttons
SOURCE
DIRECT
Tips
Press X on this unit to turn the power on.
Input indicator for the selected source lights.
0 Press AMP POWER X to turn on power from standby mode.
0 You can turn the INPUT SELECTOR when the unit is in standby mode to turn on
the power.
VOLUME df
MUTE
NOTE
.
Turn VOLUME on this unit to adjust the volume to the lowest level before turning on
the power.
SOURCE
DIRECT
o Turning the power off
SPEAKERS
A/B
INPUT
SELECTOR
1
LOUDNESS
TREBLE
BALANCE
Press AMP POWERX on the remote control.
The standby indicator lights in red.
VOLUME
.
BASS
All lit indicators turn off.
o Switching the power to standby
1
X
Press X on this unit to turn the power off.
Front panel
Rear panel
Remote control
unit
25
Index
Contents
Connections
Playback
Settings
Selecting the speakers for audio output
1
Appendix
Adjusting the volume
1
Press SPEAKERS A/B to select the speaker system to
be used for playback.
The indicator of the selected speakers lights.
Press VOLUME df to adjust the volume.
You can also adjust the master volume by turning VOLUME on the main unit.
When using headphones, press SPEAKERS A/B to turn off all of the indicators and
turn audio output from the speaker terminals off.
Turning off the sound temporarily
(Muting)
Selecting the input source
1
Tips
1
Press the input source select button to be played back.
Press MUTE :.
The mute indicator lights.
The indicator of the selected input source lights.
To cancel mute, press MUTE : again.
You can also select the input source by turning INPUT SELECTOR on the main unit.
Adjusting the tone
1
2
Press SOURCE DIRECT to turn off source direct mode.
The SOURCE DIRECT indicator turns off.
Turn the BASS, TREBLE and BALANCE to adjust the
tone.
You can also press SOURCE DIRECT on this unit to turn off source direct mode.
Front panel
Rear panel
Remote control
unit
26
Index
Contents
Connections
Playback
Settings
The signal does not pass through the tone adjustment circuitry (BASS,
TREBLE and BALANCE), resulting in playback of a higher sound
quality.
This section uses playback from a CD as an example.
Press X on this unit to turn the power on.
1
Press the input source select button to switch the input
source to “CD”.
Press VOLUME df to adjust the volume.
1
Rear panel
Remote control
unit
The SOURCE DIRECT indicator lights.
When music is played at a low volume level, the effect of the bass and
treble cannot be heard easily. The LOUDNESS function corrects the
bass and treble in these situations, allowing you to enjoy naturalsounding playback.
Playback the CD.
Front panel
Press SOURCE DIRECT to turn on source direct mode.
o Playback in LOUDNESS mode
The “CD” input indicator lights.
3
4
Appendix
o Playback in source direct mode
Playing CDs
1
2
Tips
27
Press LOUDNESS to turn on LOUDNESS mode.
The LOUDNESS indicator lights.
Index
Contents
Connections
Playback
Settings
Recording
Audio signals input into this unit can be output to an external recording
device. When recording audio from a playback device connected to this
unit, audio can be recorded with the playback device still connected to this
unit.
1
2
Press X on this unit to turn the power on.
Press the input source select button to switch to the
input source from which you want to record.
The indicator of the selected input source lights.
3
Recording starts.
0 For information on operations, see the owner’s manual of the
recording device.
Front panel
Rear panel
Remote control
unit
28
Index
Tips
Appendix
Contents
Connections
Playback
Settings
o Contents
Setting the Auto Standby mode
30
Setting the remote signal receiving function
31
Setting remote control codes
32
Front panel
Rear panel
Remote control
unit
29
Index
Tips
Appendix
Contents
Connections
Playback
Settings
Tips
Appendix
Setting the Auto Standby mode
You can set the unit to automatically switch to standby mode if the unit is
not operated for 30 minutes when there is no audio input (Auto Standby
mode).
Auto Standby mode is set to off by default.
Turning Auto Standby mode on
1
Press and hold SOURCE DIRECT for more than 5
seconds to turn the Auto Standby mode on.
The standby indicator flashes three times.
Turning Auto Standby mode off
1
SOURCE DIRECT
Standby indicator
Press and hold SOURCE DIRECT for more than 5
seconds to turn the Auto Standby mode off.
.
The power indicator flashes once.
You can also press SOURCE DIRECT on the remote control unit for this operation.
Front panel
Rear panel
Remote control
unit
30
Index
Contents
Connections
Playback
Settings
Tips
Appendix
Setting the remote signal receiving function
When you connect a IR receiver (sold separately) to the REMOTE
CONTROL IN connector of this unit, use the following procedure to
disable the remote signal receiving function of this unit. When the function
is enabled, you can not perform operations with the remote control unit.
By default, this function is enabled.
Disabling the remote signal receiving
function of the remote control unit
1
RECORDER 2 indicator MUTE indicator
Press SPEAKERS B for approximately 5 seconds to
disable the remote control signal receiving function.
The MUTE indicator flashes three times.
Enabling the remote signal receiving
function of the remote control unit
1
SPEAKERS B
.
SPEAKERS A
Press SPEAKERS A for approximately 5 seconds to
enable the remote control signal receiving function.
The “RECORDER2” input indicator flashes three times.
Front panel
Rear panel
Remote control
unit
31
Index
Contents
Connections
Playback
Settings
Tips
Appendix
Setting remote control codes
Remote control codes are set between this unit and the supplied remote
control. You can select one of the three types of remote control codes, and
the remote control can be used to control the unit when the same remote
control code is used. If three of these units are used in the same location,
all three units can be controlled simultaneously using one remote control
in the default settings. By setting individual remote control codes between
a unit and the remote control, the remote control can be used to control
only the unit that has the same remote control code.
Be sure to check the operation of each unit after setting the remote control
codes.
The default setting is “AMP1”.
REMOTE
MODE CD
ENTER
.
1-3
Front panel
Rear panel
Remote control
unit
32
Index
Contents
Connections
Playback
Settings
Setting remote control codes for the
remote control
1
Hold down REMOTE MODE CD and the number 2
button for more than 5 seconds.
Point the remote control for which the remote control
code was set at this unit, and press REMOTE MODE CD
and ENTER.
The input indicators on the unit flash as shown below according to
the set remote control code.
o To set the remote control codes to AMP3
1
Hold down REMOTE MODE CD and the number 3
button for more than 5 seconds.
To return the remote control code to the default setting, hold down REMOTE MODE
CD and the number 1 button for more than 5 seconds.
Remote control
codes
Input indicator
AMP 1
PHONO indicator flashes three times
AMP 2
TUNER indicator flashes three times
AMP 3
CD indicator flashes three times
NOTE
The remote control codes returns to the default settings when the batteries are
removed. Set the remote control codes again after replacing the batteries.
Front panel
Rear panel
Remote control
unit
Appendix
Setting remote control codes for this
unit
o To set the remote control codes to AMP2
1
Tips
33
Index
Contents
Connections
Playback
Settings
Tips
Appendix
o Contents
Troubleshooting
Tips
I want to adjust the tone myself
35
Power does not turn on / Power is turned off
36
I want sound playback that is faithful to the original sound
35
Operations cannot be performed through the remote control unit
37
No sound comes out
38
Desired sound does not come out
38
Sound is interrupted or noise occurs
39
I want to hear music that is close to the original sound quality at low
volume
35
I want to operate a Marantz CD player or network audio player using
the remote control of this unit
35
I want to use more than one unit in one location
35
Front panel
Rear panel
Remote control
unit
34
Index
Contents
Connections
Playback
Settings
Tips
I want to adjust the tone myself
0 Use the BASS, TREBLE and BALANCE knobs to adjust the sound as desired.
(v p. 26)
I want sound playback that is faithful to the original sound
0 Set the Source Direct mode on. (v p. 27)
I want to hear music that is close to the original sound quality at low volume
0 Turn the LOUDNESS mode on. (v p. 27)
I want to operate a Marantz CD player or network audio player using the remote control of this unit
0 Switch the remote control operating mode. (v p. 12, 14)
0 Also refer to the CD player or network audio player instruction manuals.
I want to use more than one unit in one location
0 Set individual remote control codes for each combination of devices and remote control. (v p. 33)
Front panel
Rear panel
Remote control
unit
35
Index
Tips
Appendix
Contents
Connections
Playback
Settings
Tips
Appendix
Troubleshooting
1. Are the connections correct?
2. Is the set being operated as described in the owner’s manual?
3. Are the other devices operating properly?
If this unit does not operate properly, check the corresponding symptoms in this section.
If none of the symptoms are applicable, consult your dealer as it could be due to a fault in this unit. In this case, disconnect the power immediately and
contact the store where you purchased this unit.
o Power does not turn on / Power is turned off
Symptom
Cause / Solution
Page
Power is not turned on.
0 Check whether the power plug is correctly inserted into the power outlet.
23
Power automatically turns
off.
0 The Auto Standby mode is on. When approx. 30 minutes pass with no audio input and no operations on
30
Power turns off and the
power indicator flashes in
red approx. every 0.25
seconds.
0 The protection circuit has been activated due to a rise in temperature within this unit. Turn the power off,
40
the unit, this unit automatically enters the standby mode. To turn off the Auto Standby mode, press the
SOURCE DIRECT button for 5 seconds or longer.
wait about an hour until this unit cools down sufficiently, and then turn the power on again.
0 Please re-install this unit in a place having good ventilation.
-
0 Check the speaker connections. The protection circuit may have been activated because speaker cable
17
0 Turn down the volume and turn on the power again.
25
0 This unit’s amplifier circuit has failed. Unplug the power cord and contact our customer service center.
-
core wires came in contact with each other or a core wire was disconnected from the connector and
came in contact with the rear panel of this unit. After unplugging the power cord, take corrective action
such as firmly re-twisting the core wire or taking care of the connector, and then reconnect the wire.
Front panel
Rear panel
Remote control
unit
36
Index
Contents
Connections
Playback
Settings
Tips
Appendix
o Operations cannot be performed through the remote control unit
Symptom
Operations cannot be
performed through the
remote control unit.
Cause / Solution
5
0 Operate the remote control unit within a distance of about 23 ft/7 m from this unit and at an angle of within
5
30°.
0 Remove any obstacle between this unit and the remote control unit.
-
0 Insert the batteries in the proper direction, checking the q and w marks.
5
0 The set’s remote control sensor is exposed to strong light (direct sunlight, inverter type fluorescent bulb
-
0 When using a 3D video device, the remote control unit of this unit may not function due to effects of
-
0 Enable the remote signal receiving function.
31
0 The remote control code between this unit and the remote control is different. Set this unit and the remote
33
light, etc.). Move the set to a place in which the remote control sensor will not be exposed to strong light.
infrared communications between units (such as TV and glasses for 3D viewing). In this case, adjust the
direction of units with the 3D communications function and their distance to ensure they do not affect
operations from the remote control unit of this unit.
control to the same remote control code.
Front panel
Page
0 Batteries are worn out. Replace with new batteries.
Rear panel
Remote control
unit
37
Index
Contents
Connections
Playback
Settings
Tips
Appendix
o No sound comes out
Symptom
No sound comes out of
speakers.
Cause / Solution
0 Check the connections for all devices.
Page
16
0 Insert connection cables all the way in.
-
0 Check that input connectors and output connectors are not reversely connected.
-
0 Check cables for damage.
-
0 Check that speaker cables are properly connected. Check that cable core wires come in contact with the
17
0 Securely tighten the speaker terminals. Check speaker terminals for looseness.
17
0 Check that the proper input source is selected.
26
0 Adjust the master volume.
26
0 Cancel the muting mode.
26
0 Check the settings of the SPEAKERS A/B button.
26
metal part on speaker terminals.
o Desired sound does not come out
Symptom
Cause / Solution
Page
No sound comes out of a
specific speaker.
0 Check that speaker cables are properly connected.
17
0 Adjust the BALANCE control knob.
26
The left and right of stereo
sound is reversed.
0 Check whether the left and right speakers are connected to the correct speaker terminals.
17
Front panel
Rear panel
Remote control
unit
38
Index
Contents
Connections
Playback
Settings
Tips
Appendix
o Sound is interrupted or noise occurs
Symptom
Cause / Solution
When playing a record, the 0 Adjust to a proper needle pressure.
sound is distorted.
0 Check the tip of the needle.
When playing a record, a
humming noise comes out
of the speakers.
When playing a record, a
humming noise comes out
of the speakers when the
volume is high. (Howling
phenomenon)
Front panel
Page
-
-
0 Replace the cartridge.
-
0 Check that the turntable is connected correctly.
20
0 If there is a TV or AV device near the turntable, such devices may affect the playback sound. Install the
-
0 Install the turntable and speakers as far from each other as possible.
20
0 The vibrations from the speakers are being transmitted to the player through the floor. Use cushions, etc.,
-
turntable in a location as far away as possible from the TV or other AV devices.
to absorb the speakers’ vibrations.
Rear panel
Remote control
unit
39
Index
Contents
Connections
Playback
Settings
Explanation of terms
Speaker impedance
This is an AC resistance value, indicated in Ω (Ohms).
Greater power can be obtained when this value is smaller.
Source direct
Playback with higher fidelity to the source becomes possible, as input
audio signals are output by bypassing the audio quality-control circuits
(BASS/TREBLE/BALANCE).
Protection circuit
This is a function to prevent damage to devices within the power supply
when an abnormality such as an overload, excess voltage occurs or over
temperature for any reason.
If a malfunction occurs in this unit, the power indicator blinks red and the
unit switches to standby mode.
Front panel
Rear panel
Remote control
unit
40
Index
Tips
Appendix
Connections
Contents
Playback
Settings
Specifications
0 RMS Power output (40 Hz – 20 kHz simultaneous drive of both
channels) :
40 W x 2 (8 Ω/ohms load)
55 W x 2 (4 Ω/ohms load)
0 Total harmonic distortion (40 Hz – 20 kHz simultaneous drive of both
0.01 %
0 Output band width (8 Ω/ohms load, 0.06 %) :
10 Hz – 30 kHz
channels, 8 Ω/ohms load) :
0 Frequency response (CD, 1 W, 8 Ω/ohms load) :
10 Hz – 50 kHz +0 dB, –1 dB
0 Dumping factor (8 Ω/ohms load, 40 Hz – 20 kHz) :
100
0 Input sensitivity/Input impedance
PHONO (MM) :
2.2 mV/47 kΩ/kohms
CD, TUNER, NETWORK, RECORDER :
200 mV/20 kΩ/kohms
0 Maximum allowable PHONO input level (1 kHz) MM :
110 mV
0 RIAA deviation (40 Hz – 20 kHz) :
±0.5 dB
0 S/N (IHF-A, 8 Ω/ohms load)
PHONO (MM) :
83 dB (5 mV input, 1 W output)
CD, TUNER, NETWORK, RECORDER :
103 dB (2 V input, Rated output)
0 Tone Control
BASS (100 Hz) :
±10 dB
TREBLE (10 kHz) :
±10 dB
0 Power requirement :
AC 120 V, 60 Hz
0 Power consumption (EN60065) :
350 W
0 Power consumption in standby mode :
0.3 W
For the purpose of improvement, the specifications and design are subject to change without notice.
Front panel
Rear panel
Remote control
unit
41
Index
Tips
Appendix
Contents
Connections
Playback
Settings
Tips
5/8
(16)
8 55/64 (225)
2 23/64
(60)
14 9/16 (370)
12 61/64 (329)
1 49/64
(45)
63/64
(25)
o Dimensions (Unit : in. (mm))
2 13/64
(56)
13 25/64 (340)
4 9/64 (105)
1 31/32
(50)
.
1 31/32
(50)
35/64
(14)
3 37/64 (91)
17 21/64 (440)
o Weight : 14 lb 12 oz (6.7 kg)
Front panel
Rear panel
Remote control
unit
42
Index
Appendix
Contents
Connections
Index
Playback
Settings
vL
LOUDNESS mode ......................................... 27
vA
Adjusting the tone .......................................... 26
Adjusting the volume ...................................... 26
Auto Standby mode ........................................ 30
vP
Protection circuit ............................................ 40
vR
Remote control ............................................... 22
vB
BALANCE ...................................................... 26
BASS ............................................................. 26
Remote control codes settings ....................... 33
Remote control unit ........................................ 11
vS
vC
Cables ............................................................ 16
Connecting a playback device ....................... 20
Connecting a recording device ....................... 21
Connecting speakers ..................................... 17
Connecting a power cord ............................... 23
Selecting the input source .............................. 26
Source direct ............................................ 27, 40
Speaker impedance ....................................... 40
Speaker (Bi-wiring) connection ...................... 19
vT
Tips ................................................................ 35
vI
Inserting the batteries ....................................... 5
TREBLE ......................................................... 26
Troubleshooting ............................................. 36
Turning off the sound temporarily (Muting) ..... 26
Front panel
Rear panel
Remote control
unit
43
Index
Tips
Appendix
D&M Holdings Inc.
3520 10333 00AM
44
English
Français
ESPAÑOL
Integrated Amplifier
PM5005
Quick Start Guide
Guide de démarrage rapide
Guía de inicio rápido
Welcome
Thank you for choosing a Marantz amplifier. This guide
provides step-by-step instructions for setting up your
amplifier.
Please do not return this unit to the store – call for
assistance.
If you need help… :
If you need additional help in solving problems, contact
Marantz customer service in your area.
Before You Begin
What’s In the Box
Quick Start Guide
Amplifier
Owner’s Manual
Power cord
Safety Instructions
Remote control
unit
R03/AAA batteries
Warranty
(for USA /
for CANADA)
1-855-ONE-Marantz
1-855-663-6272
Call for Assistance:
Monday – Friday 10:00AM to 10:00PM E.S.T,
Saturday 12:00PM to 8:00PM E.S.T
For frequently asked questions please visit
http://marantz.custhelp.com/app/answers/list
For US and Canada only
1
These drawings are for illustrative purposes only and may
not represent the actual product(s).
Setup
There are six steps to the setup process.
1
Install batteries in the remote control unit
2
Connect the speakers to the amplifier
3
Connect the CD player to the amplifier
4
Plug the power cord into a power outlet
5
Turn the amplifier’s power on
6
Begin playback
1 Install batteries in the
remote control unit
R03/AAA batteries
2
2 Connect the speakers to the amplifier
Connecting the speaker cables
(R)
w
(L)
q
w
q
qPeel off about 3/8 inch (10 mm)
of sheathing from the tip of the
speaker cable, then either twist
the core wire tightly or apply
solder to it.
wTurn the speaker terminal
counterclockwise to loosen it.
eInsert the speaker cable’s core
wire to all the way into the
speaker terminal.
rTurn the speaker terminal
clockwise to tighten it.
3
3 Connect the CD player to the amplifier
L
R
CD player
AUDIO
OUT
R
L
R
L
4
4 Plug the power cord into a power outlet
Connect to household
power outlet
(AC 120 V, 60 Hz)
5
Power cord (supplied)
5 Turn the amplifier’s power on
1 Reduce the volume to the minimum level.
2 Press the power operation button.
2
1
6
6 Begin playback
1 Set the input source to “CD”.
2 Play the CD player.
1
3
1
1
33
7
3 Adjust the volume.
Owner’s Manual
Please reference these manuals for more details about the setup and operation of the amplifier and it’s features.
nn Web Manual
To read it on your tablet or PC, please access to Web
Manual site.
manuals.marantz.com/PM5005/NA/EN/
This Web Manual is optimized for
tablets and mobile devices.
nn PDF Manual
To
read the owner's manual on your computer or to print it
out, please open the included CD-ROM or select the “PDF
Download” link from the Web Manual.
1
Insert the disc into
your PC.
Web Manual
Contents
Introductions
Connections
WEB Manual
Amplifier
Playback
Settings
2
Follow the screen or double click on
the PDF file.
Tips
Appendix
PDF
PDF Download
Copyright
c
Amplifier
2014 D&M Holdings Inc. All Rights Reserved.
8
www.marantz.com
You can ftnd your nearest authorized dlsb1butor or dealer on our websne.
JDaPantz• isaregisteredtrademark.
D&M Holdings Inc.
Printed in China 5411 11177 00AM
TEGRATED AMPLIFIER
PM5005
Safety Instructions
ITI.arantz
(Read these safety instructions before operating the unit.)
0 SAFETY PRECAUTIONS
CAUTION:
To completely disconnect this product from the mains, disconnect the plug from the wa ll socket Outlet.
The mains plug is used to completely interrupt the power supply to the unit and must be within easy access by
the user
CAUTION:
TO REDUCE THE RISK OF ELECTRIC SHOCK, DO NOT REMOVE COVER (OR BACK). NO USER-SERVICEABLE
PARTS INSIDE. REFER SERVICING TO QUALIFIED SERVICE PERSONNEL.
A
A
The lightning flash with arrowhead symbol. within an equilateral triangle, is intended to alert the
user to the presence of uninsulated "dangerous voltage" within the product's enclosure that
may be of sufficient magnitude to constitute a risk of electric shock to persons.
The exclamation point within an equilateral triangle is intended to alert the user to the presence
of important operating and maintenance (servicing) instructions in the literature accompanying
the appliance.
WARNING :
TO REDUCE THE RISK OF FIRE OR ELECTRIC SHOCK. DO NOT EXPOSE THIS APPLIANCE TO RAIN OR MOISTURE.
0 INPORTANT SAFETY INSTRUCTIONS
1. Read these instructions.
2. Keep these instructions.
3. Heed all warnings.
4. Follow all instructions.
5. Do not use this apparatus near water.
6. Clean only with dry cloth.
7. Do not block any ventilation openings
Install in accordance with the manufacturer's instructions.
8. Do not install near any heat sources such as radiators, heat registers, stoves. or other apparatus (including
amplifiers) that produce heat.
9. Do not defeat the safety purpose of the polarized or grounding-type plug. A polarized plug has two blades with
one wider than the other. A grounding type plug has two blades and a third grounding prong. The wide blade
or the third prong are provided for your safety. If the provided plug does not fit into your outlet. consult an
electrician for replacement of the obsolete outlet.
10. Protect the power cord from bei ng walked on or pinched particularly at plugs, convenience receptacles, and the
point where they exit from the apparatus
11. Only use attachments/accessones spec1f1ed by the manufacturer
12 Use only w1th the cart stand, tnpod, bracket or table spec1f1ed by the manufacturer, or sold
~
~~b~~=~~~~~~:~~d ~~~ ~~~a~~~~v~~ed, use caut1on when mov1ng the cart/apparatus
~
®
13. Unplug th1s apparatus dunng lightn1ng storms or when unused for long penods of time
~
14. Refer all seiV1cmg to quahf1ed serv1ce person nel Serv1cmg 1s requ1red when the apparatus has
• ~ been damaged many way, such as power-supply cord or plug 1s damaged liqu1d has been sp1lled
or obJects have fallen mto the apparatus, the apparatus has been exposed to rain or moisture, does not operate
normally, or has been dropped.
15. Batteries shall not be exposed to excessive heat such as sunshine, fire or the like .
0 FCC INFORMATION (For US customers)
1. COMPLIANCE INFORMATION
This product complies with Part 15 of the FCC Rules. Operation is subject to the fol lowing two conditions: (1) this
product may not cause harmful interference, and (2) this product must accept any interference received, including
interference that may cause undesired operation.
Marantz America. LLC. Ia D&M Holdings Company)
1DO Corporate Drive, Mahwah, NJ. 07430, U.S.A.
Tel. 201· 762·6500
2. 1MPORTANT NOTICE: DO NOT MODIFY THIS PRODUCT
This product, when installed as indicated in the instructions contained in this manual, meets FCC requirements.
Modification not expressly approved by Marantz may void you r authority, granted by the FCC, to use the product.
3. NOTE
This product has been tested and found to comply with the limits for a Class B digital device, pursuant to Part 15
of the FCC Rules. These limits are designed to provide reasonable protection against harmful interference in a
residential installation
This product generates, uses and can radiate radio frequency energy and, if not installed and used in accordance
with the i nstruc t io~s . may cause harm_ful int:rfere n~e to radio commun ications. However .. there is no gua ra~tee
that i ~~erte re ncew1 11 not_occur in a part1cul?r mstallat1o~ . If this prod uct does cause harmful mterference to rad1o or
telev1s1on reception, wh1ch can be determ1ned by turn1ng the product OFF and ON, the user is encouraged to try
to cor~ect the interference by one or more of the following measures:
• Reonent or relocate the receiving antenna.
• Increase the separation between the equipment and receiver
•Connect the product into an outlet on a circuit different from that to which the receiver is connected
•Consult the local retailer authorized to distribute this type of product or an experienced radio/TV technician for help.
4. IMPORTANT (For Network model)
When connecting this product to network hub or router, use only a shielded STP or ScTP LAN cable which is
available at retailer.
Follow all installation instructions. Failure to follow instructions could void your authority, granted by the FCC, to
use the product.
CAUTIONS ON INSTALLATION
For proper heat dispersal, do not install this unit in a confined space, such as a bookcase or similar enclosure.
• Amplifier: 0.3 m or more
• Other units: 0.1 m or more
PRECAUTIONS D'INSTALLATION
PRECAUTION:
Pour deconnecter compiEnement ce produ it du courant secteur, d8branchez Ia prise de Ia prise murale.
La prise secteur est utilisBe pour couper compiE!tement I' alimentation de l'appareil et l'utilisateur doit pouvoir y
acceder facilement.
PRECAUCI6N:
Para desconectar completamente este producto de Ia alimentaci6n electrica, desconecte el enchufe del enchufe
de Ia pared.
El enchufe de Ia alimentaci6n electrica se utiliza para interrumpir par completo el suministro de alimentaci6n
eiBctrica a Ia unidad y debe de encontrarse en un Iugar al que el usuario tenga facil acceso.
Pou_r permettre Ia d iss i patio~ de chaleur requise, n'installez pas cette unite dans un espace confine tel qu'une
bibhothE!que ou un endrOit s1mila1re.
• Amplificateur: 0,3 m ou plus
• Autres appareils: 0,1 m ou plus
EMPLAZAMIENTO DE LA INSTALACI6N
Para la dispersiOn del calor adecuadamente, no instale este equipo en un Iugar confinado ta l como una librerfa
ounidadsimilar.
• Amplificador: 0,3 m o mas
• Otras unidades: 0,1 m o mas
PRECAU(:OES DE INSTALAI;AO
ATENI;AO:
Para desligar este produto completamente da tomada de alimentayao, retire a ficha da tomada de alimenta<;ao.
A ficha da tomada de ali mentac;:ao e utilizada para cortar completamente a alimenta<;ao de corrente aunidade e
tem de estar facilmente acessfvel ao utilizador.
Para uma correcta d1spersao do calor, nao mstale esta unidade num espac;:o confinado, como uma estante de
livros ou uma estrutura semelhante
• Amplificador: 0.3 m ou mais
• Outros unidades: 0.1 m ou mais
0 NOTES ON USE I OBSERVATIONS RELATIVES A L'UTILISATION I NOTAS SOBRE EL USO INOTAS SOBRE A UTILIZA(:AO
WARNINGS
AVERTISSEMENTS
ADVERTENCIAS
AVISOS
• Avoid high temperatures.
• Allow for sufficient heat dispersion when insta lled in a
rack.
• Handle the power cord carefully.
• Hold the plug when unplugging the cord
• Keep the unit free from moisture, water, and dust.
• Unplug the power cord when not using the unit for long
periods of time.
• Do not obstruct the ventilation holes.
• Do not let foreign objects into the unit
• Do not let insecticides, benzene, and thinner come in
contact with the unit.
• Never disassemble or modify the unit in any way
• Ventilation should not be impeded by covering the
ventilation openings with items, such as newspapers,
tablecloths or curtains .
• Naked flame sources such as lighted candles should
not be placed on the unit
• ObseiVe and follow local regulations regarding battery
disposal
• Do not expose the unit to dripping or splashing fluids.
• Do not place objects filled with liquids, such as vases,
on the unit
• Do not handle the mains cord with wet hands
• When the switch is in the OFF (STANDBY) position, the
equipment is not completely switched off from MAINS.
• The equipment shall be insta lled near the power supply
so that the power supply is easily accessible.
• Do not keep the battery in a place exposed to direct
sunlight or in places with extremely high temperatures,
such as near a heater.
• Eviter des temperatures Slevees.
• Tenir compte d'une dispersion de chaleur suffisante
lors de !'installation sur une etag€re.
• Manipuler le cordon d'alimentation avec precaution .
• Tenir Ia prise lors du debranchement du cordon.
• Proteger l'appareil centre l'humidit8, l'eau et Ia
poussiere.
• D8brancher le cordon d'alimentation lorsque l'appareil
n'est pas utilise pendant de longues periodes.
• Ne pas obstruer les trous d'aeration.
• Ne pas laisser des objets Btrangers dans l'appareil.
• Ne pas mettre en contact des insecticides, du benzene
et un diluant avec l'appareil.
• Ne jamais d8monter ou modifier l'appareil d'une
maniere ou d'une autre
• Ne pas recouvrir les orifices de ventilation avec des
objets tels que des journaux, nappes ou rideaux. Cela
entraverait Ia ventilation .
• Ne jamais placer de flamme nue su r l'apparei!,
notamment des bougies allum8es.
• Veillez arespecter les lois en vigueur lorsque vous jetez
les piles usagees.
• L'appareil ne doit pas etre expose l'eau ou l'humidit8.
• Ne pas poser d'objet contenant du liquide, par exemple
un vase, sur l'appareil.
• Ne pas man ipu ler le cordon d'alimentation avec les
mains mouillees.
• Lorsque l'interrupteur est sur Ia pos1110n OFF
(STANDBY). l'appareil n'est pas compl€tement
deconnecte du SECTEUR IMAINSJ
• L'appareil sera installe pres de Ia source d'alimentation,
de sorte que cette derniere soit facilement accessible.
• Ne placez pas Ia pile dans un endroit expose aIa lumiere
directe du solei\ ou dans des endroits pr8sentant des
temperatures extremement elevees, par exemple pres
d'un radiateur.
• Evite altas temperaturas.
• Permite Ia suficiente dispersiOn del calor cuando esta
instalado en Ia consola.
• Maneje el cord6n de energia con cuidado
• Sostenga el enchufe cuando desconecte el cordOn de
energfa.
• Mantenga el equipo libre de humedad, agua y polvo.
• Desconecte el cordOn de energfa cuando no utilice el
equipo por mucho tiempo.
• No obstruya los orificios de ventilaci6n.
• No deje objetos extralios dentro del equipo.
• No permita el contacto de insecticidas, gasolina y
diluyentes con el equipo
• Nunca desarme o modifique el equipo de ninguna
manera.
• La ventilaci6n no debe quedar obstruida por haberse
cubierto las aperturas con objetos como peri6dicos,
manteles o cortinas.
• No deberan colocarse sabre el aparato fuentes
inflamables sin protecci6n, como velas encendidas
• A Ia hora de deshacerse de las pilas, respete Ia
normativa para el cuidado del medic ambiente.
• No exponer el aparato al goteo o salpicaduras cuando
se utilice.
• No colocar sabre el aparato objetos llenos de liquido,
como Jarros
• No maneje el cable de alimentaci6n con las manos
mojadas.
• Cuando el Interrupter esta en Ia posiciOn OFF
(STANDBY), el equipo no esta completamente
desconectado de Ia alimentaci6n MAINS
• El equipo se instalara cerca de Ia fuente de alimentaci6n
de manera que resulte facil acceder a ella
• No coloque las pilas en un Iugar expuesto a Ia luz directa
del sol o donde Ia temperatura sea extremadamente
alta, como cerca de una ca lefacci6n.
• Evite temperaturas altas.
• Assegure uma suficiente dispersao do calor quando a
unidade for instalada numa prateleira.
• Manuseie o cabo de alimentac;:ao com cuidado
• Puxe pela ficha quando desligar o cabo de alimentac;:ao.
• Mantenha a unidade afastada da humidade, da agua e
do p6
• Desligue o cabo de alimenta<;ao quando nao estiver a
utilizar a unidade por longos periodos de tempo.
• Nao obstrua os oriffcios de ventilac;:ao.
• Nao deixe objectos estranhos dentro da unidade
• Nao permita que insecticidas, benzina e diluente
entrem em contacto com a unidade
• Nunca desmonte ou modifique de alguma forma a
unidade.
• A ventilac;:ao nao deve ser obstruida, tapando as
aberturas de ventilac;:ao com objectos, como jornais,
toalhas ou cortinas .
• Nao devem ser colocadas junto a unidade fontes de
chama aberta, como velas acesas
• Respeite as regulamentac;:6es locais relativas a
eliminac;:ao de pilhas.
• Nao exponha a unidade a gotejamento ou sa!picos de
liquidos.
• Nao coloque objectos com Uquidos. como jarras, em
cima da unidade.
• Nao manuseie o cabo de ali mentac;:ao com as maos
molhadas.
• Quando o interrupter se encontra na posic;: ao OFF
(STANDBY), o equipamento nao esta completamente
desligado da REDE ELECTRICA !MAINS).
• 0 equipamento deve ser instalado junto da fonte de
alimentac;:ao, para que a fonte de alimentac;:ao esteja
facilmente acessfvel.
• Nao mantenha a pilha num loca l directamente exposto a
luz solar ou em locais com temperaturas extremamente
elevadas, tal como perto de um aquecedor.
a
a
5. CAUTION (For Bluetooth/Wi·Fi model)
•To comply with FCC RF exposure compliance requirement, separation distance of at least 20 em must be
maintained between thiS product and all persons.
•This product and its antenna must not be co-located or operating in conjunction with any other antenna or
transmitter.
0 IC INFORMATION (For Canadian customers)
CAN ICES·31BJ/NMB·31BJ
D&M
Holdings Inc. Printed in Ch ina 5431 10372 OOAM
COE1A690Z
CAUTION {FOR AMPLIFIER):
HOT SURFACE. DO NOT TOUCH.
The top surface over the internal heat sink may become hot when operating this product continuously
Do not touch hot areas, especially around the "Hot surface mark" and the top panel.
PRECAUTION {POUR AMPLIFICATEUR):
Hot
surface
mark
SURFACE CHAUDE. NE PAS TOUCHER.
La surface superieure du dissipateur de chaleur peut devenir chaude si vous utilisez ce produit en continu.
Ne touchez pas les zones chaudes. tout particulierement vers !'inscription "Hot surface mark" et le panneau superieur.
PRECAUCION {PARA EL AMPLIFICADOR):
SUPERFICIE CALIENTE. NOTOCAR.
La superticie super1or sabre el disipador de calor interne podria llegar a calentarse al operar este producto de forma continua.
No toque las areas calie ntes, especialmente las situadas alrededor de Ia "Hot surtace mark" y del panel superior
CUIDADO {PARA 0 AMPLIFICADOR):
SUPERFiCIE QUENTE. NAOTOCAR.
A face superior localizada par cima do dissipador interne de calor pode ficar quente ao funcionar com este produto em modo continuo.
Nao tocar nas zonas quentes, especialmente a volta do "Hot surface mark" e no painel superior.
CLASS 1 LASER PRODUCT {FOR DISC PLAYER)
CAUTION:
USE OF CONTROLS OR ADJUSTMENTS OR PERFORMANCE OF PROCEDURES OTHER THAN THOSE
SPECIFIED HEREIN MAY RESULT IN HAZARDOUS RADIATION EXPOSURE.
THIS PRODUCT SHOULD NOT BE ADJUSTED OR REPAIRED BY ANYONE EXCEPT PROPERLY QUALIFIED
SERVICE PERSONNEL
"CLASS 1
LASER PRODUCT"
PRODUIT LASER CLASSE 1 {POUR LECTEUR DE DISQUE)
ATTENTION:
L'UTILISATION DE COMMANDES, DE REGLAGES OU DE PERFORMANCE DE PROCEDURES AUTRES QUE CELLES SPECIFIEES ICI PEUT ENTRAiNER
UNE EXPOSITION DANGEREUSE ADES RADIATIONS
CE PRODUIT DOlT UNIQUEMENT ETRE REGLE OU REPARE PAR UN PERSONNEL DE SERVICE SUFFISAMMENT OUALIFIE.
PRODUCTO lASER DE CLASE 1 {PARA EL REPRODUCTOR DE DISCOS)
PRECAUCI6N:
EL USO DE CONTROLES, AJUSTES. 0 LA REALIZACION DE PROCEDIMIENTOS DISTINTOS A LOS AQUi ESPECIFICADOS, PUEDE PROVOCAR UNA
EXPOSICIQN PELIGROSA A LA RADIACION.
ESTE PRODUCTO NO DEBE SER AJUSTADO 0 REPARADO POR NINGUNA PERSONA EXCEPTO POR PERSONAL DE SERVICIO DEBIDAMENTE
CUALIFICADO.
PRODUTO LASER DE CLASSE 1 {PARA LEITOR DE DISCOS)
CUIDADO:
0 USO DE CONTROLOS, AJUSTES OU DESEMPENHO DE PROCEDIMENTOS QUE NAO OS AOUI ESPECIFICADOS PODE RESULTAR EM EXPOSICAO
A RADIACAO PERIGOSA.
ESTE PRODUTO NAO DEVE SER AJUSTADO OU REPARADO POR NINGUEM EXCEPTO POR PESSOAL TECNICO DEVIDAMENTE QUALIFICADO
WARNING:
DO NOT INGEST BATIERY. CHEMICAL BURN HAZARD
• The remote control supplied with this product contains a coin/button cell battery. If the coin/button cell battery is swallowed, it can cause
severe internal burns 1n JUSt 2 hours and can lead to death.
• Keep new and used batteries away from children. If the battery compartment does not close securely, stop using the product and keep it away
from children.lf you think batteries might have swallowed or placed inside any part of the body, seek immediate Medical attention.
AVERTISSEMENT:
N'INGEREZ PAS LA PILE, RISQUE DE BRULURE CHIMIQUE
• La t81tkommande fournie avec ce produit contient une pile bouton. Une ingestion de Ia pile bouton risque de causer de severes brOiures internes
en a peine 2 heures et peut entrainer Ia mort.
• Conservez les piles neuves et usagees hors de portae des enfants. Si le compartiment a piles ne se ferme pas de maniere securisee, arretez
d'utiliser le produit et conservez-le hors de portee des enfants. Si vous pensez que des piles ant ete ingerees au placees dans n'importe quel
orifice corpore!, contactez immediatement une assistance medicale.
ADVERTENCIA:
NO INGERIR LA BATERiA, RIESGO DE OUEMADURAS POR PRODUCTOS OUiMICOS
• El control remota suministrado con este producto contiene una pila de bot6n. En case de ingestiOn, Ia pila de bot6n puede causar quemaduras
internas graves en solo 2 horas y puede ocasionar Ia muerte.
• Mantenga las pilas nuevas y usadas fuera del alcance de los nirios. Si el compartimento de Ia pita no se cierra firmemente, deje de utilizar el
producto y mant9ngalo fuera del alcance de los nirios. Si cree que se han podido ingerir pilas. o las mismas se encuentran en atguna parte en el
interior del cuerpo, solicite atenci6n medica de inmediato.
AVISO:
NAO INGIRA A PILHA, PERIGO DE QUE IMADURA QUiMICA
Rechargeable battery precautions
{For rechargeable battery compatible model)
Precauciones sobre Ia pila recargable
{Para el modelo compatible con pilas recargables)
• Do not toss the rechargeable battery into a fire, and do not heat up the battery. Doing
so could cause battery heat generation. battery fireS, and battery rupture.
• Do not subject the rechargeable battery to strong impact forces, such as stabbing it
with sharp objects (a nail. etc.). tapping it with a hammer, or stepping on it. Doing so
could cause battery heat generation, battery fires, and battery rupture
• Do not place foreign objects inside the portable speaker dock. Doing so could cause
fires and electrical shocks
• Do not charge, use, or place the portable speaker dock in high-temperature locations such
as near heaters and stove burners, in areas exposed to direct sunlight, or inside a car on a
hot day. Doing so could cause battery heat generation, battery fires. and battery rupture.
Such actions could also affect the performance and shorten the life of the internal
rechargeable battery.
• Stop using the portable speaker dock immediately, and contact the sales outlet or Marantz
in the event that abnormal odors or heat generation occurs while using, charging, or storing
the portable speaker dock, or if other abnormalities such as discoloration. etc., are detected.
• Always observe the following precautions:
- Do not place the portable speaker dock in a microwave oven or in a high-pressure
container.
- Do not place the portable speaker dock on top of an electromagnetic cooker.
- Do not attempt to recharge the internal rechargeable battery by connecting it to a
power outlet or a car's cigarette lighter socket.
- Strictly observe t he recharging procedure and co nditions specified by Marantz.
• If fluid should teak from the rechargeable battery and get into the eyes. do not rub the
eyes. Instead, rinse the eyes thoroughly with tap water, etc.. and see a doctor without
delay for treatment. Leaving the eyes untreated could cause vision impairment.
• Do not use the portable speaker dock near medical devices, automatic doors, or fire
alarms. etc. Signals from the portable speaker dock could interfere with the operation
of those devices, possibly causing malfunctions and accidents
• If recharging fails to complete even though the prescribed recharging time period has
elapsed, stop the recharg ing operation. Continuing to recharge the battery could cause
battery heat generation. battery fires. and battery rupture
• No arroje Ia pila recargabte al fuego, y no Ia caliente. Hacerlo podria provocar Ia
generaci6n de calor de Ia pila. el incendio de Ia misma y su ruptura.
• No someta Ia pila recargable a fuertes impactos, como su perforaci6n con objetos
afilados (un clave, etc.). golpearla con un martillo, o pisarla. Hacerlo pod ria provocar Ia
generaci6n de calor de Ia pila, el incendio de Ia misma y su ruptura.
• No coloque objetos extraf10s enel interior de los altavoz portable con dock. De Ia contrario podria
provocar incendios y sufrir descargas electricas.
• No cargue. utilice o coloque los altavoz portable con dock en ubicaciones sometidas
a altas temperaturas. como por ejemplo cerca de calefactores y estufas, en areas
expuestas a Ia luz solar directa o en el interior de un cache en un d1a caluroso. Hacerlo
pod ria provocar Ia generaci6n de calor de Ia pila, el incendio de Ia misma y su ruptura.
Tales acciones podrian igualmente afectar al rendimiento y acortar Ia vida Util de Ia pila
recargable interna.
• Detenga inmediatamente el uso de los altavoz portable con dock. y p6ngase en contacto
con el punta de venta a Marantz en caso de percibir olores anormales o generaciones
de calor durante el usa, carga o almacenamiento de los altavoz portable con dock, o si
se producen otro tipo de anormalidades, como par ejemplo decoloraci6n, etc.
• Tenga en cuenta siempre las siguientes precauciones:
- No coloque los altavoz portable con dock en un homo microondas a en el interior de
un recipiente a alta presiOn.
- No coloque los altavoz portable con dock sabre una cocina electromagn9tica.
- No intente recargar Ia pila recargable interna conectf:lndola a una toma de corriente o
al enchute del encendedor de cigarrillos de un vehfculo.
• Cumpla estrictamente et procedimiento y las condiciones de recarga especificados
par Marantz.
• Si se producen fugas en Ia pila recargable y tales fugas entran en contacto con los ojos.
no se frote los ojos. En su Iugar, lilvese los ojos minuciosamente con agua del grlfo.
etc., y busque asistencia medica inmediatamente. Dejar los ojos sin tratamiento podria
causar problemas de visi6n.
• No utilice los altavoz portable con dock cerca de dispositivos m€dicos, puertas
automf:lticas o alarmas contra incendios. etc. Las seflales procedentes de los altavoz
portable con dock podrian interferir con el funcionamiento de dichos dispositivos,
causando posiblemente funcionamientos incorrectos y accidentes.
• Si Ia carga no se completa incluso transcurrido el periodo de recarga establecido.
detenga Ia recarga. Continuar recargando Ia pila podria causar que Ia misma genere
calor, se incendie y se rompa.
Mises en garde concernant Ia pile rechargeable
{Pour un modele de pile rechargeable compatible)
• Ne jetez pas Ia pile rechargeable au feu. et ne nkhauffez pas Ia pile. Ceci pourrait
generer de Ia chaleur et des incendies causes par Ia pile. ou rompre Ia pile.
• Ne soumettez pas Ia pile rechargeable des chocs importants. tels que lui donner des
coups avec des objets pointus (un clou. etc.), Ia frapper avec un marteau ou marcher
dessus. Ceci pourrait g€merer de Ia chaleur et un incendie causes par Ia pile. ou rom pre
Ia pile.
• Ne placez pas de corps etrangers dans le enceinte dock portable portable. Ceci pourrait
provoquer des incendies et des chocs electriques.
• Ne rechargez pas, n'utilisez pas ou ne placez pas le enceinte dock portable dans
des lieux aU regnent des temperatures elevees. tels qu·a proximite d'appa reits
de chauffage ou de brOteurs de cuisinieres, dans des endroits exposes
un
ensoleillement direct. au l'int8rieur d'une voiture par une chaude journee. Ceci
pourrait generer de Ia chaleur et des incendies causes par Ia pile. ou rompre Ia pile.
De telles actions pourraient aussi nuire aIa performance et aIa duree de vie de Ia pile
rechargeable interne
• Cessez imm8diatement d'utiliser le enceinte dock portable, et contactez le point de
vente au Marantz si un d8gagement anormal de chaleur ou d'odeurs se produit lors de
I' utilisation, du chargement, ou du rangement du enceinte dock portable, ou si d'autres
anomalies telles qu'une decoloration, etc., sent d8cel€es
• Respectez dans taus les cas les precautions suivantes :
- Ne placez pas te enceinte dock portable dans un four micro-andes au dans un
recipient sous haute-pression.
- Ne placez pas le enceinte dock portable au dessus d'un cuiseur 91ectromagnetique
- N'essayez pas de recharger Ia pile rechargeable interne en Ia branchant a une prise
81ectrique ou Ia prise allume-cigare d'une voiture.
- Respectez strictement Ia procedure de rechargement et les conditions sp€citiees par
Marantz.
• En cas de fuite du liquide contenu dans Ia pile rechargeable et de contact avec les yeux.
ne frottez pas les yeux. Rincez plut6t les yeux abondamment avec de l'eau du robinet,
etc., et consultez sans tarder un medecin pour un traitement. Ne pas trail er les yeux
peut entrainer des troubles de Ia vue.
• N'utilisez pas le enceinte dock portable proximit€ d'appareils medicaux, de partes
automatiques, au d'alarmes incendie. etc. Les signaux 8mis par le enceinte dock
portable pourraient interferer avec le fonctionnement de ces appareils, pouvant
entrainer des dysfonctionnements et des accidents
• Si le rechargement n'aboutit pas meme si Ia p8riode de temps sp8cifiee pour le
rechargement est ecau iE!e, arr€tez I' operation de recharge. Continuer de recharger Ia
batterie pourrait generer de Ia chaleur et des incendies causes par Ia pile. au rompre
Ia pile
a
a
a
a
a
a
Precau~oes para a pilha recarregavel
{Para modelo compativel de pilha recarregavel)
• Nao deite a pilha recarregilvel para o fogo nem aquega a pilha. Faz&-lo pede causar
produgao de calor, incE!ndio e ruptura na pilha.
• Nao sujeite a bateria recarregilvel a grandes for9as de impacto, tal como cortc1-la com
objectos afiados (um prego, etc.). bater-lhe com urn martelo au pisfl-a. Faze-lo pede
causar produgao de calor, inc€ndio e ruptura na pilha.
• N§o coloque objectos estranhos dentro da base da coluna portc1til. Faz&-lo pede causar
inc€ndios e cheques etectricos
• Nao carregue. utilize ou coloque a base da coluna portc1til em focais de altas temperatures,
tal como perto de aquecedores e bicos de togao. em areas expostas a luz solar directa ou
dentro de um carro num dia quente. Faz€!-lo pede causar produgao de calor. incendio e
ruptura na pilha. Tais acg6es tambem podem afectar o desempenho e encurtar a vida da
pilha recarreg<ivel interna.
• Pare de utilizar a base da coluna portiltil imediatamente e contacte o local de venda ou a
Marantz no case de ocorrencia de adores anormais ou produ<;:ao de calor enquanto utiliza.
carrega ou armazena a base da coluna port.3til ou se forem detectadas outras anormalidades.
tal como descoloragao
• Siga sempre as seguintes precaug6es:
- N8o coloque a base da coluna portatil num microondas au num recipiente de alta
pressao
- Nao coloque a base da coluna portatil em cima de urn fogao electromagnetico.
- Nao tente recarregar a pilha recarregS.vel interna ao liga-la a uma tomada el&trica au
a uma tomada para isqueiros de um autom6vel.
- Respeite rigorosamente o procedimento de recarga e as condig6es especificadas
pela Marantz.
• Se vazar fluido da pilha recarregc1vel e este entrar em contacto com as olhos, n§o
esfregue as olhos. Em vez disso, passe os ethos por 8gua meticulosamente com ilgua
da torneira. etc., e consulte rapidamente um medico para tratamento. Deixar as olhos
sem tratamento pode levar a problemas de visao.
• Nao utilize a base da coluna portiltil perto de equipamento medico, portas automflticas
ou alarmes de inc€ndio, etc. Os sinais da base da coluna portatil podem interlerir com
o funcionamento desses equipamentos. possivelmente causando mau funcionamento
ou acidentes.
• Se o recarregamento nao puder ser completado apesar de o tempo recomendado de
recarregamento jitter side ultrapassado, pare a operagao de recarregamento. Continuar
a recarregar a pilha pede causar produgao de calor, inc€ndio e ruptura na pilha.
• 0 controlo remota fornecido com este produto contem uma pilha de celula moeda/botao. Se a pilha de celula moeda/botao for engolida, pode
causar queimaduras internas graves em apenas 2 horas e pode levar a morte
• Mantenha as pilhas novas e usadas Ionge das crian!;as. Se o compartimento da pilha nao f echar com firmeza. pare de utilizar o produto e
mantenha-o afastado das crian9as. Se pensa que as pilhas possam ter side engolidas ou colocadas dentro de qualquer parte do
corpo, procure ajuda medica imediata.
~narantz ·
www.marantz.com
Pour CANADA
mateantz®
GARANTIE LIMITEE DE MARANTZ CANADA
Marantz Canada ("Marantz") garantie les produits suivants
pour les periodes indiquees :
3 ans de garantie pour les pieces et Ia main d'muvre prenant
effet apartir de Ia date d'achat du produit :
Amplificateurs, Preamplificateurs, Pre-ampli-processeurssyntoniseurs; amplificateurs integres, syntoniseurs, recepteurs,
Blu-ray DVD Super Audio CD I Lecteur CD I Changeur,
telecommandes programmables, Docks iPod et projecteurs
avantDLP.
90 jours de garantie pour les pieces et Ia main d'muvre prenant
effet apartir de Ia date d'achat du produit :
LampesDLP
Ce qui est couvert et pas couvert par Ia garantie :
Notre paiement
Nous paierons tous les frais de pieces et de main d'ceuvre
pour tous les produits couverts par la garantie. Le paiement
des frais de livraison est aborde dans la section suivante de
cette garantie.
Comment obtenir du service
1. Si votre produit Marantz requiert du service,
communiquez premierement avec votre revendeur
autorise afin de connaitre s'il peut proceder au service de
votre appareil. Vous pouvez aussi consulter la liste des
centres de service autorises sur notre site web au
http: I I ca.marantz .coml 162.asp ou contactez nous
directement aux coordonnees ci-dessous. Veuillez ne pas
retourner votre appareil chez le manufacturier sans
autorisation obtenue prealablement.
A ]'exception de ce qui est mentionne ci-dessous, cette
garantie couvre les pieces et Ia main d ' ceuvre afin de reparer
tous les defauts de materiel ou de fabrication du produit. Ce
qui suit n'est pas couvert par la garantie:
2. Vous devez payer les frais de livraison dans le cas ou votre
appareil a besoin d' etre envoye au service des reparations.
Toutefois, si les reparations necessaires sont couvertes par
la garantie, nous payerons Jes frais de retour d'expedition
et ce quelle que soit la destination au Canada.
1. Les dommages, deterioration, defauts de fonctionnement,
ou le fait de ne pas respecter les specifications d' executions
resultant d' un (e) :
a) accident, acte de la nature, abus, negligence, utilisation
impropre ou d'une modification de produit non
autorisee;
b) installation incorrecte, deplacement, maintenance ou
d'un emploi contraire aux instructions fournies avec
le produit;
c) reparations ou tentatives de reparations par une
personne non reconnue par Marantz ;
d) envoi de produit (les reclamations doivent etre
presentees au transporteur)
e) cause autre qu'un defaut de produit.
3. Lorsque vous envoyez votre appareil pour un service
sous garantie, vous devez joindre une copie de la facture
d' achat (ticket ou autre preuve d'achat)
2. L'entretien, !'installation initiale, toute verification de produit
ou aucun defaut n' a ete trouve, ou tous frais encourus pour
I' installation, le deplacement ou Ia reinstallation du produit.
3. Tout produit dont le numero de serie a ete efface, modifie
ou enleve.
4. Les accessoires incluant mais non limites aux, piles,
dibles, materiaux de support, accessoires de nettoyage,
antennes et cordons de secteur detachables.
5. La garantie n'est pas valable si l'achat a ete fait au Canada
chez un revendeur non reconnu par Marantz.
Qui peut faire appliquer Ia garantie
Seule la personne qui a achete le produit a l'origine peut faire
appliquer la garantie.
Limites des garanties implicites
Toutes les garanties implicites, y compris les garanties de
valeur marchande et specifique pour un achat particulier,
sont limitees dans la duree a la longueur de cette garantie.
Exclusion des dommages
La responsabilite de Marantz est limitee pour n'importe quel
produit defectueux en ce qui concerne la reparation ou le
remplacement du produit en question. Si des dommages
interviennent a des produits autres que ceux de Marantz,
Marantz n e sera pas tenu responsable des dits dommages,
bases sur le derangement ou la perte d'utilisation du produit
ou tout autre dommage qu'il soit fortuit, indirect ou autre.
Certaines provinces ne permettent pas de limites quant a la
duree d'une garantie sous-entendue etl ou ne permettent pas
!'exclusion de dommages fortuits ; ainsi les limitations et les
exclusions mentionnees ci-dessus peuvent ne pas s'appliquer
a votre cas.
Cette garantie vous donne des droits legaux specifiques, mais
vous pouvez aussi a voir d' autres droits qui peuvent varier
d'une province a I'autre.
Cette garantie n' est seulement valable qu' au Canada.
MARANTZ Canada
Division of D&M Canada Inc.
5-505 Apple Creek Blvd.,
Markham, Ontario
L3R 581
1-888-258-9361
www.marantz.com
PRINTED IN CHINA
11/09
OOM183J854018
CQE1A132V
For CANADA
1narantz®
MARANTZ CANADA LIMITED WARRANTY
Marantz Canada ("Marantz") warrants the following Marantz
products for the periods indicated:
Who May Enforce the Warranty
3-year warranty for both Parts & Labour, from the original
purchase date :
What We Will Pay For
Amplifiers; Pre Amplifiers; Pre Amplifier-Processor-Tuners;
Integrated Amplifiers; Tuners; Receivers; Blu-ray DVD Super
Audio CD I CD Players I Changers; Learning Remote Control
Devices; iPod Docks & DLP front Projectors.
90 day warranty for parts and labour from the original purchase
date:
DLPlamps
What is Covered and What is Not Covered
Except as specified below, this warranty covers parts and
labor to correct all defects in materials and workmanship. The
following are not covered by the warranty:
1. Damage, deterioration, malfunction or failure to meet
performance specifications resulting from:
a) Accident; acts of nature; misuse; abuse; neglect;
unauthorized product modification.
b) Improper installation, removal or maintenance, or
failure to follow instructions supplied with the
product.
c) Repair or attempted repair by anyone not authorized
by Marantz to repair the product.
d) Any shipment of the product (claims must be
presented to the carrier)
e) Any cause other than a product defect
2. Cleaning, initial set-up, check-ups with no defects found,
or charges incurred for installation, removal or
reinstallation of the product.
3. Any product on which the serial number has been
defaced, modified or removed.
4. Accessories, including but not limited to, batteries, cables,
mounting hardware and brackets, cleaning accessories,
antenna and detachable power cords.
5. Warranty is void if purchase was made from anyone
other than an authorized Marantz dealer.
Only the original purchaser may enforce this warranty.
We will pay for all labor and material expenses for items
covered by the warranty. Payment of shipping charges is
discussed in the next section of this warranty.
How You Can Get Service
1. If your unit needs service, please first contact your dealer
to see what support services they do offer. You can also
contact one of our Authorized Marantz Service Centers as
per our website http: I I ca.marantz.com / 162.asp or
contact us directly as below. Please do not return your
unit to the factory without prior authorization.
2. You must pay any shipping charges if it is necessary to
ship the product for service. However, if the necessary
repairs are covered under warranty, we will pay the
return shipping charges to any destination within
Canada.
3. Whenever warranty service is required, you must present
the original dated sales receipt or other proof of date of
purchase.
Limitation of Implied warranties
All implied warranties, including warranties of
merchantability and fitness for a particular purchase, are
limited in duration to the length of this warranty.
Exclusion of damages
Marantz liability for any defective product is limited to repair
or replacement of the product at Marantz's option. Marantz
shall not be liable for damage to other products caused by
any defects in Marantz products, damages based upon
inconvenience or loss of use of the product, or any other
damages, whether incidental, consequential, or otherwise.
Some provinces do not allow limitations on how long an
implied w arranty lasts and / or does not allow the exclusion of
incidental or consequential d amages, so the above limitations
and exclusions may not apply to you.
This warranty gives you specific legal rights, but you may
also have other rights, which vary from province to province.
MARANTZ Canada
Division of D&M Canada Inc.
5-505 Apple Creek Blvd.,
Markham, Ontario
L3R 5B1
1-888-258-9361
www.marantz.com
PRINTED IN CHINA
11/09
OOM 183J854018
For U.S.A.
1na•an tz®
Limited Warranty
Marantz America, Inc. (.. Marantz") warrants the following Marantz
Products for the periods indicated:
1. The following Marantz Audio/Video components, have a 3
year warranty for both Parts & Labor, from the original
purchase date:
Amplifiers, Pre Amplifiers, Pre Amplifier-ProcessorTuners, Integrated Amplifiers, Tuners, Receivers, Blu-ray
DVD SA-CD/CD Players/Changers, Learning Remote
Control Devices, iPod Docks & DLP front Projectors.
Who may enforce the warranty
This warranty extends only to the original purchaser, not
subsequent owners.
What we will pay for
We will pay for all labor and material expenses for items covered
by the warranty. Payment of shipping charges is discussed in the
next section of this warranty.
How you can get service
2. DLP lamps have a 90 day warranty for parts and labor from
the original purchase date.
What is covered and what is not covered
Except as specified below, this warranty covers parts and labor
to correct all defects in materials and workmanship. The
following are not covered by the warranty:
1. Damage, deterioration, malfunction or failure to meet
performance specifications resulting from:
a) Accident, acts of nature, misuse, abuse, neglect or
unauthorized product modification.
b) Improper installation, removal or maintenance, or
failure to follow instructions supplied with the product.
c) Repair or attempted repair by anyone not authorized by
Marantz to repair the product.
d) Any shipment of the product (claims must be presented
to the carrier).
e) Any cause other than a product defect.
2. Cleaning, initial set-up, check-ups with no defects found, or
charges incurred for installation, removal or reinstallation of
the product.
3. Any product on which the serial number has been defaced,
modified or removed.
4. Batteries.
5. Accessories, including but not limited to, batteries, cables,
mounting hardware and brackets, cleaning accessories,
antenna and detachable power cords.
6. Warranty is void if purchase was made from anyone other
than an authorized Marantz dealer.
1. If your unit needs service, contact Marantz customer service
by calling 201-762-6666. We will advise you of the name and
location of one or more authorized Marantz service stations
from which service can be obtained. Please do not return
your unit to the factory without prior authorization.
2. You must pay any shipping charges if it is necessary to ship
the product for service. However, if the necessary repairs are
covered under warranty, we will pay the return shipping
charges to any destination within the United States, its
possessions or territories.
3. Whenever warranty service is required, you must present the
original dated sales receipt or other proof of date of purchase.
Limitation of implied warranties
All implied warranties, including warranties of merchantability
and fitness for a particular purpose are limited in duration to
the length of this warranty and are limited in scope to the terms
contained in this warranty. All other warranties are hereby
disclaimed.
Exclusion of damages
Marantz liability for any defective product is limited to repair or
replacement of the product at Marantz's option. Marantz shall
not be liable for damage to other products caused by any defects
in Marantz products, damages based upon inconvenience or
loss of u se of the product, or a ny other damages, whether
incidental, consequential, or otherwise.
How state law relates to the warranty
Some states do not allow limitations on how long an implied
warranty lasts and/or do not allow the exclusion or limitation of
incidental or consequential damages, so the above limitations or
exclusions may not apply to you.
This warranty gives you specific legal rights, and you may also
have other rights which vary from state to state.
Marantz America, LLC.
100 Corporate Drive,
Mahwah, NJ, 07430-2041
Phone. 201 -762-6666
10/ 201 1
54311010512AM
COE1A131V