1
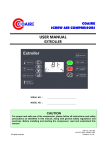
CSOF-S0710
“...together we achieve the extraordinary...”
COAIRE, Div. of Quietside Corporation
8740 Pioneer Blvd., Santa Fe Springs, CA 90670 • Tel (562) 463-3935 Fax (562) 463-4928
www.coaire.com • [email protected] / [email protected]
All rights reserved.
Printed in U.S.A.
COAIRE, Div. of
Quietside Corporation
OILLESS SCROLL AIR COMPRESSOR
Maintenance Manual
and Parts List
MODELS
CSOF-S3PL(H)
CSOF-S5PL(H)
SERIAL NO.
MODEL NO.
CAUTION
For proper and safe use of the compressor, please follow all instructions and safety precautions as identified in this manual, along
with general safety regulations and practices.
SAFETY AND PRECAUTIONS
Before you install the air compressor you should take the time to carefully read all the instructions contained in this
manual. Electricity and compressed air have the potential to cause severe personal injury or property damage. Before
installing, wiring, starting, operating or making any adjustments, identify the components of the air compressor
using this manual as a guide. The operator should use common sense and good working practices while operating
and maintaining this unit. Follow all procedures and piping accurately. Understand the starting and stopping
sequences. Check the safety devices in accordance with the following procedures contained in this manual.
Maintenance should be done by qualified personnel, accurately with proper tools. Follow the maintenance schedule
as outlined in the manual to ensure problem free operation after start up.
SAFETY AND PRECAUTIONS
BEFORE INSTALLING THE COMPRESSOR OR PERFORMING
ANY MAINTENANCE READ THIS MANUAL CAREFULLY.
WARNINGS
COMPRESSED AIR AND ELECTRICITY ARE DANGEROUS. BEFORE DOING ANY WORK ON THIS UNIT, BE SURE THE
ELECTRICAL SUPPLY HAS BEEN SHUT OFF(LOCKED AND TAGGED) AND THE ENTIRE COMPRESSOR SYSTEM HAS
BEEN VENTED OF ALL PRESSURE.
1. Do not remove the cover, loosen or remove any fittings, connections or devices when this unit is operating or
in operation. Hot liquid and air that are contained within this unit under pressure can cause severe injury or
death.
2. The compressor has high and dangerous voltage in the motor, the starter and control box. All installations
must be in accordance with recognized electrical procedure. Before working on the electrical system, ensure
that the system's power has been shut off by use of a manual disconnect switch. A circuit breaker or fuse
switch must be provided in the electrical supply line to be connected to the compressor. The preparation work
for installation of this unit must be done on suitable ground, maintenance clearance and lightning arrestors
for all electrical components.
3. Do not operate the compressor at a higher discharge pressure than those specified on the compressor
nameplate. If so an overload will occur. This condition will result in electric motor compressor shutdown.
4. Use only safety solvent for cleaning the compressor and auxiliary equipment.
5. Install a manual shut off valve(isolation type) in the discharge line for service work.
6. Whenever pressure is released through the safety valve during operation, it is due to excessive pressure in the
system. The cause of excessive pressure should be checked and immediately corrected.
7. Before doing any mechanical work on the compressor,
a) Shut down the unit.
b) Electrically isolate the compressor by use of the manual disconnect switch in the power line to the unit.
Lock and tag the switch so that it cannot be operated.
c) Release all compressed air within the system and isolate the unit from any other sources of air.
8. Allowing the unit lubricants to enter into the plant air system must be avoided at all times. Air line separators,
which are properly selected and installed, can reduce any liquid carry-over close to zero.
9. Before starting the compressor, the maintenance instructions should be thoroughly read and understood.
10. After maintenance work is completed, covers must be securely closed.
11. For questions contact your distributor before proceeding.
1
COAIRE, Div. of Quietside Corporation
STATEMENT OF WARRANTY TERMS & CONDITIONS
COAIRE’s oilless scroll compressors are warranted to be free of defects in materials and workmanship under
proper use, installation, and application. This warranty shall be for a period of 15 months from date of
shipment from our factory or other stocking facilities or 12 months from date of installation. Proof of
installation date will be required. All air pumps outside the U.S. and Canada carry a parts only warranty.
ALL FREIGHT DAMAGE CLAIMS ARE NOT THE RESPONSIBILITY OF THE MANUFACTURER AND ARE NOT
COVERED UNDER WARRANTY AS ALL PRODUCTS ARE SHIPPED F.O.B. SHIPPER.
PLEASE DIRECT ALL FREIGHT CLAIMS TO THE SHIPPER IN QUESTION.
MAINTENANCE AND ADJUSTMENTS
This warranty does not apply to any unit damaged by accident, modification, misuse, negligence, or
misapplication. Damage to pumps by exposure to ammonia, any other corrosive substance or sub-freezing
environment will be considered misuse.
Any air pumps, part or material found defective will be repaired, replaced or refunded, at the sellers option
free of charge, provided that COAIRE is notified within the above stated warranty period. All returns of
allegedly defective equipment must have prior written authorization. Said authorization may be
obtained through our service department. All air pumps, parts, materials must be returned freight prepaid
to the Manufacturer’s factory within 30 days of return authorization date. Any shipment returned to the
factory collect will be refused.
If an item is found to be warrantable, the repaired item or replacement will be returned normal ground
freight prepaid within the continental United States and Canada. Expedited shipment costs are the
responsibility of the requestor.
Any replacement part or material is warranted only to the extent of the remaining warranty period of the
dryer or to the extent as provided by the supplier, whichever is longer.
IDENTIFICATION PLATE
The identification plate is located on the side of the air pumps and shows all the primary data of the pump.
Upon installation, fill in the table on the previous page with all the data shown on the identification plate.
This data should always be referred to when calling the manufacturer or distributor. The removal or
alteration of the identification plate will void the warranty rights.
DISCLAIMER
The warranty does not cover any responsibility or liability for direct or indirect damages to persons, or
equipment caused by improper usage or maintenance, and is limited to manufacturing defects only. Refer
to COAIRE Warranty policy manual for travel, mileage and special charge considerations. The warranty will
be immediately voided if there are changes or alterations to the compressor.
WHO TO CONTACT IF YOU HAVE A WARRANTY CLAIM:
COAIRE, Div. of Quietside Corporation
(888)7coaire, 726-2473 • Phone (562) 463-3935 • Fax (562) 463-4928
8740 Pioneer Blvd., Santa Fe Springs, CA 90670
All freight damage claims should be filed within15 working days and should be directed to the carrier
2
COAIRE, Div. of Quietside Corporation
CONTENTS
......................................................................................
4
...................................................................
5
2.1 General Data ....................................................................................
5
2.2 Compressor Outside View ................................................................
6
INSTALLATION, WIRING AND PIPE PRECAUTIONS ............................
7
3.1 Product Check .................................................................................
7
3.2 Machine Movement ........................................................................
7
3.3 Installation .......................................................................................
7
3.4 Ventilation Condition .......................................................................
8
3.5 Piping ..............................................................................................
9
1.
CAUTIONS
2.
BASIC SPECIFICATION
3.
3.6 Wiring .............................................................................................. 11
4.
OPERATION METHOD
4.1 Trial Operation
..................................................................... 12
.............................................................................. 12
4.2 General Operation ........................................................................... 15
5.
COMPRESSOR STRUCTURE ................................................................. 16
6.
PERIODIC CHECK UP AND MAINTENANCE ........................................ 17
6.1 Maintenance Standard ..................................................................... 17
6.2 Inspection Method ..........................................................................
19
.......................................... 21
7.
CAUSES AND REMEDIES FOR DAMAGE
8.
Wiring diagram .................................................................................. 22
9.
REPAIR and MAINTENANCR PARTS .................................................... 24
WARRANTY CLAIM REPORT ......................................................................
25
STARTUP REPORT .......................................................................................
26
3
COAIRE, Div. of Quietside Corporation
1. CAUTIONS
Please be Please be aware of the dangers that can be caused. If the
danger can not be prevented, loss of life or injury can be caused.
Please install the product in areas free of explosives (acetylene, propane
gas, etc) or flammable substances. In case of operating the product in
flammable environment, fire or explosion can be caused.
Please make sure the circuit breaker has been powered down before
inspection or repairing or maintenance work. If you perform inspection
or repair without powering down the circuit breaker, electric shock or
injury can occur. When connecting power, make sure to use Crimp-Type
terminal. Please check the connecting area and supply power after all
procedures have been completed. Always comply to the National
Electric Code and any local requirements.
When the circuit breaker is turned on during the operation, do not
touch the rotating parts (fan, pulley, belt, etc). Your hand may get stuck
to the product. When the compressor is operating, the product will be
operated or stopped automatically based on the pressure. Please be
aware of the danger.
Compressed air has great power. Flying parts can cause serious injury.
Before stopping the compressor, always make sure to turn off the main
power and eliminate the pressure of all elements related to the
compressor or pipes.
In closed space, install compressor ventilation fan and maintain the
ambient temperature below 104’F (40°C) and please make sure the
average temperature is below 85’F (30°C). Please install the product in
areas free from direct sunlight, rain, dust, corrosion or toxic gas.
Operating in inappropriate areas can cause product deterioration or
damages.
When opening the door or disassembling the panel for inspection, repair
or maintenance during or after operation, do not touch the product
directly. And do not insert flammable substance in hot areas such as
discharge pipe, after-cooler, basic compressor, etc. There can be danger
of fire or burns.
Do not modify the compressor. Do not use the product for purpose
other than air compression. Product can deteriorate or be damaged.
Please use standard parts for parts replacement related to the
compressor repair. Consult your distributor
4
COAIRE, Div. of Quietside Corporation
2. BASIC SPECIFICATION
2.1 General Data
1.
Noise level is the measurement from acoustic room.
2.
The size is the size of the external design of the package. Protruding areas such as discharge
ball valve had been excluded in the measurement.
5
COAIRE, Div. of Quietside Corporation
2.2 Compressor Outside View
<Fig. 1>
6
COAIRE, Div. of Quietside Corporation
3. INSTALLATION, WIRING AND
PIPING PRECAUTIONS
3.1 Product Check
1. Please check whether the product you have received is the one you have ordered.
2. Please check for loosened bolts or nuts in each part.<Fig. 2>
<Fig. 2>
3.2 Machine Movement
3.2.1 Use Forklift or Hand Car
When moving the product using the forklift or hand car, please protect the product using
cushioning to prevent external damage. Check if the fork has been inserted completely into
the hole before moving. <Fig. 3>
3.2.2 Using the Crane
Protect the product from direct contact with chain or rope on the external cover before moving.
<Fig. 4>
<Fig. 3>
<Fig. 4>
3.3 Installation
3.3.1 Installation Precautions
Our compressor is for indoor use. Sufficient size of room where it is easy to inspect and
maintain the machine is needed.
Please select installation location considering below conditions.
7
COAIRE, Div. of Quietside Corporation
1)
Make sure the location has good air circulation with low temperature and humidity.
- Surrounding temperature must not rise above 104˚F(40°C).
- Ventilation fan must be installed in locations with low ventilation.
2)
Please choose a location with little dust.
3)
Please choose locations with no toxic fumes.
4)
Space needed for inspection and maintenance must be secured.
- For disassembled inspection for compressor, secure enough space as shown in <Fig. 5>.
5)
This product has low vibration. Therefore, it may not create negative effect in the surrounding.
However, the ground solidity must be strong enough to endure total weight of the machine.
6)
Please make sure the range of voltage change is within 10%.
7)
If the noise created is reflected off the wall, the noise may increase compared to the noise of
normal operation.
<Fig. 5>
3.4 Ventilation Condition
- In case of bad indoor ventilation in compression room, the discharge air temperature may rise.
1)
Refer to the following table for the ventilation air velocity needed to block 9˚F(5˚C) rise of indoor
temperature. This air flow is the figure for static compression of 0 PSI. Please choose a figure
greater than this figure.
2)
When installing ventilation duct, make sure the pressure drop in the room is as low as possible
and please attach ventilation fan in the ventilation area. Also for easy repair and maintenance,
make sure the distance between duct entrance and compressor ventilation hole is 12 inch (300mm)
or more. <Fig. 6>
8
COAIRE, Div. of Quietside Corporation
3)
Make sure the duct suction hole is greater than the ventilation size below.
MODEL
FAN AIR FLOW cfm(m3/min)
CSOF-S3PL(H)
CSOF-S5PL(H)
883(25)
1342(38)
<Fig. 6>
3.5 Piping
To maximize efficiency pipe bends, connections and piping should be kept to a minimum amount. Improper
piping can cause pressure drop and false air compressor demand higher than necessary operating pressures
which increase your operating costs. Moisture in the piping may rupture in freezing temperatures.
Therefore, moisture management must be considered. Please consult your Coaire distributor for proper
installation.
9
COAIRE, Div. of Quietside Corporation
Precautions
1.
Make sure the length of the pipe is as short as possible for less pressure drop and reduce
the number of connecting joints such as valve, elbow, etc.
2.
Please install drain plug in the lower area of the pipe.
3.
Please install bypass pipe on the compressor to facilitate maintenance.
4.
There is a check valve installed inside the compressor. Do not install separate check valve in
the pipe. When installed, there can be an error in load-unload information.
5.
In cases with varying demand, it is desirable to install a separate tank.
6.
As for the main piping, provide sloping for moisture damage. (About 1/100).
Please consult your distributor.
<Fig. 7>
10
COAIRE, Div. of Quietside Corporation
3.6 Wiring
1)
Wiring is already completed inside the compressor. Just connect the power adaptor to
complete wiring.
2)
Please use terminal when connecting power adaptor.
3)
Power circuit breaker must be installed and short circuit must be protected through
short-circuit breaker.
4)
Please open the front control panel.
5)
Insert power cable through the power cable hole (rubber attachment) on the right surface
to connect to electric connector.
6)
Please refer to the table below to select power cable thickness, terminal size and applying
circuit breaker.
<Fig. 8>
7)
Please refer to following table for the terminal needed for power connection.
Wire AWG Size (mm2)
Models
Power
230V / 460V
Ground
CSOF-S3PL(H)
14 (2.0)
10 (3.5)
CSOF-S5PL(H)
10 (3.5) / 14 (2.0)
10 (3.5)
11
COAIRE, Div. of Quietside Corporation
8)
Please protect short circuit by installation circuit breaker into the main power cable of
the compressor.
9)
To prevent electric leakage, please connect connector to the main terminal block.
10) Refer to following table for the wire thickness and applicable circuit breaker.
11) Always meet NEC and/or local codes, consult your distributor
Circuit Breaker(Amp)
Models
Fuse Type B
CSOF-S3PL(H)
30A
15 / 10
CSOF-S5PL(H)
30A
30 / 15
230V / 460V
4. OPERATION METHOD
4.1 Trial Operation
1)
Please make sure the power cable and connector are connected.
2)
Please make sure the drain valve is closed.
3)
Turn "ON" the power circuit breaker. <Fig. 9>
<Fig. 9>
4)
Please make sure the power lamp has been turned on. At the same time, check if the alarm lamp
is turned off. If the temperature sensor code is detached, alarm lamb will be turned on.
At this time, please reconnect temperature sensor.<Fig. 8>
<Fig. 10>
12
COAIRE, Div. of Quietside Corporation
5)
Please close the discharge ball valve. <Fig. 11>
<Fig. 11>
6)
Press ON button on the control area of the control box and check to make sure the
compressor spins. <Fig. 12>
<Fig. 12>
7) When the pressure does not rise, set Three Phase to "OFF" for power circuit breaker and change
two phases from the power within electronic switch. (Other than that, please check the cause
for appropriate repairing measure from the [Cause and Remedies for Problem].) <Fig. 13>
<Fig. 13>
13
COAIRE, Div. of Quietside Corporation
8)
DISCHARGE PRESSURE CHECK
Using the compression pressure gauge, check if the pressure rises to the level set after the
operation. If the air tank pressure rises up to 114/140 PSI(8.0/9.9 Kg/cm2G), the operation stops
automatically. Figure inside () is high pressure specification.<Fig. 14>
<Fig. 14>
9)
CHECK THE PRESSURE SWITCH OPERATION
Open the discharge ball valve and reduce the pressure and check to make sure if the product
operates automatically at 92/119 PSI(6.5/8.4 Kg/Cm2G). <Fig. 15>
<Fig. 15>
10) STOP
Press OFF button in the control area of the control box. Then, check and make sure if the
discharge pressure is 0PSI/cm2(g). Here, the sound of discharging compressed air is not a
sign of damage. <Fig. 16>
<Fig. 16>
14
COAIRE, Div. of Quietside Corporation
4.2 General Operation
1)
Turn on the power circuit breaker and check and make sure ON lamp is on. <Fig. 17>
<Fig. 17>
2)
START COMPRESSOR
Press the ON button in the control area of the control panel and observe whether the
compressor is operating. If the operation lamp is lighted, check the pressure rise using the
compression pressure gauge.
3)
CHECK DISCHARGE PRESSURE
Check if the air tank compression rises up to 114/140 PSI(8.0/9.9 Kg/cm2G).
5)
STOP
Press OFF button and check if the compressor had stopped operating. If it counter-spins for
more than five seconds after turning off the power, the check valve sheet may be damaged. In
that case, exchange the check valve.
6)
TURN OFF THE POWER CIRCUIT BREAKER
When stopping the compressor for a long period of time, turn "OFF" the power circuit
breaker. <Fig. 18>
<Fig. 18>
15
COAIRE, Div. of Quietside Corporation
5. COMPRESSOR STRUCTURE
<Fig. 19>
16
COAIRE, Div. of Quietside Corporation
6. PERIODIC CHECK UP AND MAINTENANCE
6.1 Maintenance Standard
• Low Pressure Specification(CSOF-S3,5PL)
17
COAIRE, Div. of Quietside Corporation
• High Pressure Specification(CSOF-S3,5PH)
Here, ° means that check up is needed and • means exchange is necessary.
mark requires repair of professional serviceman. In that case, please contact the agency or the shop where you
have purchased the product. (Perform only upon initial operation and perform annual check up (every 2,500Hr).
Maintenance Standard (running time) is the figure computed from standard usage condition. In case
of bad operation condition, reduce the period of usage and perform periodic check up. In particular, the product
can be highly affected by the surrounding temperature. Therefore, the surrounding temperature is set to less than
104'F(40'C) and annual average temperature of less than 86'F(30'C).
Maintenance standard is not the guarantee period.
Standard Use Condition : Less than 8 hours every day, good ventilation and surrounding temperature of
36'F-104'F(2'C-40'C)
18
COAIRE, Div. of Quietside Corporation
CAUTION
Compressed air has great force and rotating part may cause severe injury. When repairing the compressor,
make sure to turn off main power and eliminate pressure from the compressor and all relevant pipes.
CAUTION
When opening the panel immediately after the inspection, repair or operation, do not touch hot areas such as
main operation device, after-cooler, discharge pipe and etc with hands. Also, do not insert flammable substance.
It could cause fire or burn.
6.2 Inspection Method
Periodic Inspection guidelines are minimum standards. Service operating conditions require additional
maintenance and shortened service intervals.
Daily Inspection
• Drain Discharge
To discharge water compressed in the tank, use the drain valve in the tank and discharge
everyday in a point of pressure rise immediately after operation.
Inspect Every 400 Hours
• Filter element cleaning, exchange
1. Separate left cover.
2. Separate suction filter to remove the element.
3. Clean or replace.
4. In case of severe contamination, replace the filter element.
<Fig. 20>
19
COAIRE, Div. of Quietside Corporation
INSPECT EVERY 2,500 HOURS
• Inspect V-BELT tension
- This compressor was manufactured with a adjustable, motor base so it is easy to adjust the
V-BELT tension.
1) Loosen 2 bolts & washers marked in the picture below.
2) Completely loosen the top and bottom height adjusting nut and adjust in a location where
V-Belt is stretched by the motor weight. Rotate two nuts on the upper area and tighten the nut
until it touches the base.
3) Please tighten and lock height adjusting nut at the bottom.
4) Firmly tighten two bolts and washers.
new belt
Models
load/deflection
Re-adjustable belt load/deflection
kg / 10mm
kg / 10mm
CSOF-S3PL(H)
4±0.5
3.5±0.5
CSOF-S5PL(H)
6±0.5
5.5±0.5
<See Fig. 21>
20
COAIRE, Div. of Quietside Corporation
7. CAUSES AND REMEDIES FOR PROBLEM
• In case of problem, please follow the instructions provided in the below table.
• Please refer to the method of handling the cases considered as problem and general
management for the usage.
States
Causes
Remedies
main power is not connect
connect power
not connect or short circuit
repair, replace
substrate is not good
repair, replace
Compressor
cut off fuse
replace
does not
magnet switch badness
repair, replace
switch button badness
repair, replace
motor trouble
repair, replace
voltage drop
check wire thickness and
display is OFF,
does not
operate.
operate
display is ON,
does not
operate.
length
Not increase discharge
pressure
reverse revolution
change phase (in case of 3 phase)
pipe leakage
check, repair
intake filter is stuffy
cleaning, replace
setting pressure value is trouble resetting
setting pressure value is trouble resetting
Safety valve operation
Abnormal noise
21
safety valve badness
replace
motor trouble
replace
contact cooling fan
check, repair
V-belt slip
tension adjustment, replace
loose bolt
tighten a bolt
driving reverse revolution
change phase (in case of 3 phase)
basic trouble
repair replace
COAIRE, Div. of Quietside Corporation
8. WIRING DIAGRAM
8.1 CSOF-S3~5PL(H)11
22
COAIRE, Div. of Quietside Corporation
8.2 CSOF-S3~5PL(H)31
23
COAIRE, Div. of Quietside Corporation
9. REPAIR and MAINTENANCE PARTS
REPAIR PART LIST PUMPS
PART No.
DESCRIPTION
BC5KL-02
FIXED SCROLL SET(L)
BC5KH-02
FIXED SCROLL SET(H)
BC5KL(H)-04
ORBITING SCROLL SET
BC5KL(H)-06
TIP SEAL SET
BC5KL(H)-10
CRANK SHAFT
BC5KL(H)-14
PIN CRANK SET
BC5KL(H)-RK1
SUCTION FILTER ELEMENT
BC5KL(H)-RK2
GREASE
REMARKS
REPAIR PART LIST FOR MACHINE
PART No.
DESCRIPTION
520-70-00
V-BELT
520-71-00
PRESSURE GAGE
520-73-02
AFTER COOLER, 7.5/40HP
520-74-03
VENTILATION FAN, 7.5-40HP@230V
520-74-04
VENTILATION FAN, 7.5-40HP@460V
520-75-02
MICOM P.C. BOARD, 7.5/40HP
520-76-01
TEMPERATURE SENSOR
520-76-03
DISCHARGE CHECK VALVE, 7.5-40HP
520-76-04
PRESSURE TRANSMITTER
24
COAIRE, Div. of Quietside Corporation
REMARKS
WARRANTY CLAIM REPORT
Please complete the following claim form, your claim will be confirmed by our sales representative.
DISTRIBUTOR
CUSTOMER
Company
Company
DATE
Address
Address
MODEL
SERIAL NO.
Phone
Phone
RUN HOURS
HRS.
Fax
Fax
SETTING PRESS
PSIG
OPERATING CONDITIONS
Percent(%) on load
%
No. of days of operation weekly
Days
Hours per day
Hours
Machine setting OL/OL or Mod
1
Ambient Temperature
·F
Discharge temperature
·F
Compressor area temperature
·F
Environment
1
1 to 10, 1 being clean, 10 very dirty
Incoming Voltages
Full load amperage at _______ PSIG
Unload amperage at ______ PSIG
L1 - L2
L2 - L3
L1 - L3
L1 - L2
L2 - L3
L1 - L3
L1 - L2
L2 - L3
L1 - L3
Volts
Amp.
Amp.
Amp.
Amp.
Amp.
Amp.
Amp.
Amp.
Symptom
Fault Diagnosis
Resolution
PARTS REQUIRED
No
Item Number
LABOR COST
Description/MFGR Part Number
Quantity
LABOR TIME
Hrs x
$/Hr
$
1
TRAVEL TIME
Hrs x
$/Hr
$
2
Total Amount:
$
3
4
WRITTEN BY
Technicians name:
SIGNATURE
STARTUP REPORT
Please fill out completely and return to the factory to validate warranty.
CUSTOMER
MACHINE INFORMATION
CUSTOMER
FACTORY SHIP DATE
/
/
ADDRESS
DATE STARTED UP
/
/
CITY/STATE
MODEL NUMBER
PHONE
SERIAL NUMBER
WRITTTEN
HOURS ON MACHINE
Hrs.
MACHINE INFORMATIONS AND INITIAL STARTUP
excellent good fair poor.
Machine Location
indoors outdoors if outdoors, protected from rain? Yes No
Approx. ambient temperature______ adequate ventilation? Yes No
Nameplate amperage for voltage used ______
Did you check for correct rotation? Yes No
Compressor Environment
INCOMING VOLTAGES
L1-L2
L2-L3
Volts
L1-L3
Volts
Volts
FULL LOAD AMPERAGE AT _________ PSIG
L1
L2
Amp.
L3
Amp.
Amp.
UNLOAD AMPERAGE AT _________ PSIG
L1
L2
Amp.
Amp.
Is the machine on a level and stable surface?
Did you have to add lubricant oil?
L3
Amp.
Yes No
Yes No
if yes, please indicate amount and exact name and type. (Amount _____ Name ______ Type _____ )
Was a flexible connector used to connect piping?
Yes No
Approx. time spent during startup procedure ___________ Hrs.
Did you advice customer on operation and maintenance of machine?
Yes No
Application and installation comments: ________________________________________________________________________
__________________________________________________________________________________________________________
__________________________________________________________________________________________________________
Machine Sold By(Company) _________________________________________________________________________________
Startup performed by ________________________________________________ Date _________________________________
There is no warranty without this report!