1
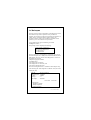
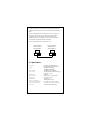
SP2515 SERIES
EtherFast 100Mbps Fiber-Optic Adapter
User’s Guide
FCC Statement
This device compiles with Part 15 of the FCC Rules. Operation
is subject to the following two conditions:
(1) This device may not cause harmful interference, and
(2) This device must accept any interference received, including
interference that may cause undesired operation.
Warning! This equipment has been tested and found to
comply with the limits for a Class B digital device, pursuant to
Part 15 of the FCC Rules. These limits are designed to provide
reasonable protection against harmful interference when the
equipment is operated in a commercial environment. This
equipment generates, uses and can radiate radio frequency
energy and, if not installed and used in accordance with the
instructions, may cause harmful interference to radio
communications. Operation of this equipment in a residential
area is likely to cause harmful interference in which case the user
will be required to correct the interference at his own expense.
CE-Mark Warning
In a domestic environment this product may cause radio
interference in which case the user may be required to take
adequate measures.
Copyright © 2000, All right Reserved.
Document Version: 1.0
All Trademarks and trade names are the properties of their
respective owners.
HTTP://WWW.MICRONET.COM.TW
1. Introduction
Congratulations on the purchasing of your new SP2515 series
100Mbps Fast Ethernet Fiber adapter. This document describes
how to install and use the Fiber Ethernet Adapter. This Fiber
Adapter allows options of different fiber connections, such as
connector types and segment distance. To get the most out of this
manual, you should have an understanding of Ethernet
networking concepts.
1.1 Fe
Features
atures
Micronet SP2515 series adapter delivers high bandwidth and
performance with flexibility and affordability. It complies with
100BASE-FX standard and integrates easily with Fast Ethernet
hub and switch.
Compliant with IEEE 802.3u 100BASE-FX
32-bit bus master for high throughput and low CPU
utilization
Full-duplex operation at both 10Mbps and 100Mbps
Rich diagnostic LED mounted on bracket for easily
viewing and troubleshooting
Support ST, SC, MT-RJ, or VF-45 fiber connectors
Plug and Play Installation.
Network drivers on the diskette for Windows 95, 98, 2000,
NT, NetWare, SCO Unix and Packet driver.
FCC,CE certification
1.2 System Requirements
To use the adapter, you need the following components:
A PCI master mode expansion slot that is compliant with
PCI bus specifications, revisions 2.1
A 3.5-inch, 1.44MB diskette drive
62/125µm multi-mode fiber-optic cable, up to 2 km
2. Installation
This section describes how to install the adapter. For connecting
to the network, you must have the following:
1. Network adapter card installed to your computer.
2. Cabling (compatible with network topology)
3. Software for the adapter card contains both configuration
utilities and drivers
2.1 Unpack and Inspect
Caution:
Under ordinary circumstances, this adapter card will
not be affected by static charge as may be received
through your body during handling of the unit .In
special circumstances where you may carry an
extraordinarily high static charge, it had better reduce
the charge by touching a ground before handling the
adapter card.
Open the shipping gift box and carefully remove all items. In
addition to this User’s guide, please check the following items:
One 100M Fast Ethernet PCI Adapter Card
One 3.5” Drivers and Utilities diskette
This user’s guide
2.2 Install the Adapter
1. Turn off the power to the PC.
2. Remove any metal decorations from your hands and wrists.
3. Remove the cover from your PC.
4. Locate an empty, non-shared bus mastering 32-bit PCI slot
and remove the corresponding backplate. Save the screw for
use in Step 6.
<Note>
i. Do not install the Fiber Adapter in a shared PCI slot. Avoid
any PCI slot next to an ISA slot because this is often a
shared slot and does not support bus mastering.
ii. If you have problems in identifying a suitable slot, check
your PC documentation or ask your system administrator
for help.
5. Carefully insert the Fiber Adapter into the chosen slot and
press firmly with proper push to ensure it is fully seated in
the slot.
6. Secure the Fiber Adapter with the screw you saved in step 4.
7. Replace the PC cover.
8. Proceed to “Connecting to Your Network” section.
2.3 Connecting to Your Network
This section describes how to connect the Fiber Adapter to a 100
Mbps fiber-based Ethernet network, which contributes to its
optimal performance.
1. Remove the protective covers from the Fiber Adapter’s
connector.
2. R Prepare a network cable with corresponding connectors for
the two end devices, one end to the Fiber Adapter and the
other to a 100Mbps fiber port on the network hub or switch.
3. Connect the network cable to the connector on the Fiber
Adapter.
4. Connect the other end of the network cable to a
100BASE-FX hub or a switch.
5. When the cable is properly connected to two end devices,
turn on the power to the PC.
6. Check the LNK (Link) LED. The LED will come on when
the Fiber Adapter is receiving a good link signal from the
connected device, a hub or switch.
7. Proceed to next section for installing the network driver.
2.4
Utilitiess Diskette
2.4 Drivers and Utilitie
The [Divers and Utilities] diskette contains all the popular
operating system drivers.
Novell NetWare (client /server)
Windows NT 3.5, NT4.0
Windows 95/98/2000
Microsoft Client (NDIS 2.0 DOS/OS2)
Windows For Workgroup 3.11
…. and so on
2.5
2.5 Software
Software Installation
Please refer to “Quick Installation Guide”
2.6
2.6 Test Program
This test program verifies configuration of the adapter and assists
the isolation of any faults in operation. Test procedure are
optional, and will only be useful in the unusual event that there is
a fault, such as an interrupt number conflict among your
computer’s add on cards, If your installation provides normal
operation, you do not need these test procedures.
At your DOS prompt, type the following command:
a:\setup.exe <Enter>
The opening screen is displayed as following:
View Current Configuration
Set Up New Configuration
Run Diagnostics
Exit NETSETUP
Choose <Set Up New Configuration> item allows you to set up
the Network Speed, 10 or 100M, and Transmission Mode, Full or
Half Duplex, and so on. Choose <Run Diagnostics> item to run
the adapter test program.
Adapter test program includes:
<EEPROM Test>,
<Run Diagnostics on Board>,
<Run Diagnostics on Network>, and
<Run Power Management Test>.
The Power Management Test is available for WOL adapter only.
After choosing the <Run Diagnostics on Board> item, the screen
will display like,
Node ID.....…….: 00 e0 7d c0 00 01
Network Speed...: 100Mbps
I/O Base .………: E000H
Interrupt ..……...: 11
Full-Duplex …...: Disabled
Pass Count
A.
B.
C.
D.
Fail Count
I/O Register
100Mbps Loopback
10Mbps Loopback
Cable Connection
P/N: 50075-0000
<Cable Connection> test reminds you that the connection link
might be fail, either the cable is not connected or the cable link
fails.
For the <Run Diagnostics on Network> test, it is necessary to
connect your computer with its supporting hub or another
computer. This is a "Ping-Pong" test. This test cannot be
completed except two computers on the LAN for sending or
receiving the test packets between computers.
For the <Run Diagnostics On Network> test
Ethernet Address
00E07DC00001
Master Machine
Ethernet Address
00E07DC00002
Target Machine
Network
2.7 Specifications
Standards
Speed
Performance
Fiber Cable
Wavelength
LED Indicators
Dimensions
Net Weight
Power Consumption
Operating Temperature
Storage Temperature
Humidity
IEEE 802.3u 100BASE-FX
PCI Specifications Revision 2.1
200Mbps full-duplex
100Mbps half-duplex
148,800pps for 100Mbps
62/125µm multi-mode fiber-optic
cable, up to 2 km
1300nm
LNK (Link) /ACT (Activity)
136 mm × 89 mm
90g approx.
5VDC, 500mA max.
0°C to 40° C (32°F to 104°F)
-25°C to 70°C (-13°F to 158°F)
10%-90% non-condensing
Quick Installation Guide
Please take the following steps for driver installation.
Microsoft Windows 95/Windows 98
1.
2.
3.
4.
Turn off the computer.
Insert the adapter into the available PCI slot.
Restart the computer.
After Microsoft Windows reboot, the PCI Ethernet Controller
will be found.
5. The system will prompt for driver installation.
6. Insert the “Driver and Utilities” diskette into diskette driver
and press <Enter>.
7. For Windows 95, Key in a:\win95 path to install driver for
the adapter.
8. For Windows 98, Key in a:\win98 path to install driver for
the adapter.
9. The Windows system will install the driver automatically.
10. Reboot the Windows system.
Micronet Windows NT
1.
2.
3.
4.
Turn off the computer.
Insert the adapter into the available PCI slot.
Restart the computer.
Click “Start” menu bar and select “Setting” item then
“Control Panel” setting
5. Select “Network” icon
6. If this is the first time to install network on the machine then
the system will ask “YES” or “NO” to install network adapter.
Please select “YES”
7. If the computer already install network before then you need
to select “Interface” -> “Add”
8. The system will prompt for driver installation.
9. Insert the “Driver and Utilities” diskette into diskette driver
and press <Enter>.
10. Key in a:\winnt path to install driver for the adapter
11. The Windows system will install the driver automatically.
12. Reboot the Windows system.
Microsoft Windows 2000
1. Turn off the computer.
2. Insert the adapter into the available PCI slot.
3. Restart the computer.
4. After Microsoft Windows reboot, the 100Mbps Fast Ethernet
Adapter will be found and the system will assign the default
network driver to the adapter.
5. Select “Control Panel” from “Start” menu bar
6. Select “Network and Dial-Up Connection” folder and click
“Local Area Connection”.
7. Click “Configure” item and select “Driver”
8. From the “Driver” item then choose “Update Driver”
9. The system will prompt two optional for driver search, one is
auto search and the other is “Display a list of known
drivers ….”. Please select second one “Display …”.
10. The system will prompt for driver installation and please
select “Have Disk” button.
11. Key in a:\win98 path to install driver for the adapter.
Novell Netware System
Please execute the following commands:
For Netware Client
LSL
NETODI
IPXODI
NETX or VLM
F:
LOGIN <USERNAME>
For Netware Server
LOAD NETSRV
BIND IPX TO NETSRV
Note