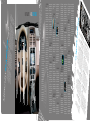
1
Easy Fuel™ ‘no cap’ fuel system: Your vehicle has a ‘no cap’ fuel system which allows
you to simply open the fuel filler door, insert the nozzle and start fueling. The Easy
Fuel™ System is self-sealing and therefore protected against dust, dirt, water, snow
and ice. If you need to fill your fuel tank with a portable fuel container, use the fuel
funnel which is located inside the rear passenger side cargo compartment access
door. Slowly insert the funnel into the Easy Fuel™ system and fill the tank with fuel
from the container. When done, clean the funnel or properly dispose of it. Extra
funnels can be purchased from your authorized dealer. Do not use aftermarket
funnels as they will not work with the Easy Fuel™ system and may cause damage.
Roadside Assistance: Your new Mercury Mariner Hybrid comes with the assurance
and support of 24-hour emergency roadside assistance. Roadside assistance
includes such services as: lockout assistance, limited fuel delivery, battery jump
starts, changing a flat tire, towing, and winch out. To receive roadside assistance
in the United States, call 1 (800) 241-3673. In Canada, call 1 (800) 665-2006. For
more information on coverage period and details of service, refer to the roadside
assistance information.
9M6J 19G217 DA
FORD MOTOR COMPANY
Customer Relationship
Center
P.O. Box 6248
Dearborn, MI 48121
1-800-392-3673 (FORD)
(TDD for the hearing
impaired: 1-800-232-5952)
www.customersaskford.com
Driving: The gas engine
automatically starts and
stops to provide power when
it’s needed and to save fuel
when it’s not. While coasting
at low speeds, coming to a
stop or standing, the engine
normally shuts down and the
vehicle operates in electriconly mode. Conditions that
cause the engine to start up
or remain running include:
• Driver request for moderate to rapid acceleration.
May 2008
First Printing
Quick Reference Guide
• Vehicle speed above 40 mph (65 km/h).
Mercury Mariner Hybrid
• ECON mode not selected (while the climate control is on).
LITHO IN USA
•Ascending a hill.
Neutral: It is not
recommended to idle the
vehicle in (N) Neutral for
extended periods of time
because this will discharge
your high voltage battery
and decrease fuel economy.
Also, the engine cannot
provide power to the hybrid
system in N.
Low Gear: (L) Low gear
is designed to mimic the
enhanced engine braking
available in non-hybrid
vehicles. On long downhill
grades, Low gear may result
in high engine speeds to
provide necessary engine
braking. This is normal
and will not damage your
vehicle. Response during
acceleration should be
the same as in the (D)
Drive position.
In addition, you may hear
fan noise and a slight
tapping sound from the rear
as the vent door operates.
This fan may continue to
operate for short durations
after the vehicle has been
turned off. These noises are
a customary part of hybrid
operation and do not
require service.
Engine: The engine speed
in your hybrid is not directly
tied to your vehicle speed.
Your vehicle’s engine and
transmission are designed
to deliver the power you
need at the most efficient
engine speed. During heavy
accelerations, your hybrid
may reach high engine
Driving to Optimize
Fuel Economy
Your fuel economy should
improve throughout your
hybrid’s break-in period.
As with any vehicle, fuel
economy can be significantly
impacted by your driving
habits and accessory usage.
For best results, keep in
mind these tips:
Tire Inflation: Keep tires
properly inflated and only
use recommended size.
Climate Control: Your hybrid
is equipped with an ECON
button that offers a more
fuel-efficient operation of
your automatic temperature
control system. When
activated, the ECON feature
allows the engine to shut
down at low speeds or when
your vehicle is stopped.
If cooler temperature is
desired, the ECON button
can be turned off, for better
interior cooling but lower
Additional Tips:
•Do not carry extra loads.
•Be mindful of adding
external accessories
that may increase aerodynamic drag.
•Observe posted
speed limits.
•Perform all scheduled maintenance.
•There is no need to wait
for your engine to “warm
up.” The vehicle is ready
to drive immediately after starting.
Moon Roof (if equipped): The moon roof is equipped with an automatic,
one-touch, express opening, closing and venting feature. To open, press and
release the rear portion of the control located in the overhead console. To stop
motion at any time during the one-touch opening, press the control a second
time. To close, press and release the front portion of the control until the glass
stops moving. To open the moon roof to the vent position, press the front portion
of the control. To close, press and hold the rear portion of the control until the
glass stops moving.
rid
N
SYNC (if equipped): Your vehicle may be equipped with
SYNC – a hands-free communications and entertainment
system with special phone and media features. For more information,
please refer to the SYNC Supplement or to the SYNC section in the
Navigation Supplement. Please also feel free to visit
www.SyncMyRide.com.
Hyb
5
2
3
NER
4
14
6
15
7
SATELLITE COMPATIBLE
SIX-DISC/MP3 RADIO
qui
ppe
d)
(if equipped)
1. LOAD
To load a CD into the
system, press LOAD. When
prompted, select the desired
slot (1-6) using the memory
presets and, when prompted,
insert the CD into the
system. Press and hold LOAD
to autoload up to six discs.
Insert the discs, one at a time,
when prompted.
2. DIRECT
Press DIRECT and then, using
the memory presets (0-9),
enter in the numbers of the
desired station, track, MP3
folder (if available) or satellite
channel (if activated).
3.
Press to access special phone
features with SYNC. Refer to
your SYNC supplement for
more information.
4. SCAN
Press for a brief sampling
of radio stations or CD/MP3
tracks. Press again to stop.
5. ON/OFF/VOL
Press to turn on or off. Turn
to increase or decrease
the volume.
6. CD
Press to enter CD/MP3 mode.
If a disc is already loaded into
the system, CD/MP3 play will
begin where it ended last.
7. AM/FM
Press repeatedly to select AM,
FM1 or FM2 frequency band.
8. EJECT
To eject a CD from the system,
press EJECT and select the
desired slot (1-6) using the
memory presets. Press and
hold EJECT to auto eject all
loaded discs.
9. CLOCK
Press to set the time. The
display will read SET TIME.
Use the memory presets 0-9
to enter in the desired time,
hours and minutes. The clock
will then start from that time.
10. SOUND
Press repeatedly to access
settings for: Bass, Treble,
Fade, Balance, Speed
compensated volume (if
equipped) and ALL SEATS
(Occupancy mode, if
equipped). When
the desired selection
appears in the display,
press SEEK/TRACK
to make adjustments.
11. SEEK/TRACK
Press to access the
previous/next strong radio
station, satellite channel (if
equipped) or CD track.
12. MENU
Press repeatedly to cycle
through various menu options
such as: AUTOPRESET, RDS
ON/OFF and SATELLITE
RADIO MENU (if satellite radio
is active). When SATELLITE
RADIO MENU appears in the
display, press OK and then
press / to cycle through
further options of SAVE SONG,
DELETE SONG, DELETE
ALL SONGS and ENABLE/
DISABLE alerts. For more
information on these
features, please refer to
your Owner’s Guide.
13. TUNE/OK
In radio mode, turn to go up/
down the frequency band
in individual increments. If
your vehicle is equipped with
SYNC and/or satellite radio,
you may need to press OK to
confirm menu selections.
14. AUX
Press repeatedly to
access LINE IN (auxiliary
audio mode), or SYNC
(if equipped).
15. SIRIUS
Press repeatedly to
cycle through SAT1,
SAT2 and SAT3 modes.
SIRIUS® Satellite Radio is a
subscription-based satellite
radio service that broadcasts
music, sports, news and
entertainment programming.
For more information and
a complete list of SIRIUS®
satellite radio channels, visit
www.sirius.com in the United
States, www.sirius-canada.ca
in Canada, or call SIRIUS® at
1–888–539–7474.
QUI
CK R
5
Pre
ss
from to acce
AM ss th
(sat , FM1, e Radio
8
F
ellit
e ra M2, SA menu a 1. Radi
Pre
T
d
n
o
1
i
o
d
,
, if a
ss
S
s
(Ad
ctiv AT2 or elect
from to acc
d
ated
es
S
C
des ress b
) m AT3
othe D, DVD s the M
tin
oo
ode
e
r
y
o
d
s.
ou t ations k, Stre
r Ju
favo s. Ju
ia m
2
om
. ME
keb
keb
rite
e
n
c
urr
ua
ake , etc.) et add
o
D
mus ox al
for
low x featu nd se IA
lat
ic
opti ently s any a or Edit ress, P
d
e
r
o
play er acce to the s s you res am lect
View ns suc lected justme Route ( evious
albu speci ss. You ystem to save ong
rou h as C navig nts to allow
fic a
’s
ms.
y
t
c
our
a
s
e, e
har
an t
7. I
rt
You
tc.) ancel R tion ro the
(
can ists, ge hen ch d drive
oute
ute
Pre INFOR
o
eve
n
with
ss to
,
M
D
A
n ch res, tr ose to
e
sele
TIO
tour
acc
N
,
you oose to acks or
Pre
the ct from ess the )
ss to
r ow
crea
syst
opti
Info
n
a
w
m
t
e
play
cces
Bala
ons
e
e
m
r
a
m
l
l
k
C
a
e
lists
s
nce
SIR s SIR alend such a ation m
, Fad adjust the So
.
3. S
I
m
u
can US Tra IUS Tra ar, the s ‘Whe enu a
volu e, SCV ents t nd me OUND
nd
He
ve
help
ve
re
o Ba
(Sp
nu a
me)
m
yo l Link l Link lp me am I
o
Pre
v
n
, DS eed c ss, T
ss to
acce ie listin u locate is a da (if act nu as ’,
P an
omp rebl d
e
acc
d th
accu ss the gs, cur the be ta serv ivated)
e vi ensate ,
sett optio ess me
c
i
r
d
sua
ns, S nu s
ings
to c rate sk urrent ent tra st gas p ce whi .
l
i
z
e
ch
urre
i
, Sy
e
f
r.
w
r
stem etting lection
nt s condit eathe fic aler ices,
4. M
8
t
por
ions
rm
. PH
ENU
ts,
s of
sett he cl
t
a
s ga
a
Di
ings ock,
Pre ONE
mes s well p, get
s
Fe splay
and
Pre
as s
.
equ s to ac
ss to
Vale edbac
core
t
i
i
p
k
v
t
p
view
s
mod
ed w ate t
Pre
sect
he P
ss to
the
e.
i
i
o
t
h
n
mor
n
S
i
h
a
n
a
Y
o
5
c
v
cess
. MAP
igat
e in the N NC). ne m
to s
ion
et a
form
e
R
t
a
VOI
map
de he De
atio vigatio efer to nu (if
c
C
.
n su
n.
the
(Em an sele stinati stinat
equ E REC
6
.
p
i
o
o
erg
D
c
i
p
O
n. I
nm
t fr
ES
lem SYNC
e
reco pped w GNIT
ent
Hos ncy lis om: Qu n this m enu an T
I
i
g
O
for
spe nition th an a N – Y
d
enu
des pitals tings ick D
a
o
d
tina
e
Pre k certa system vance ur syst
tion or prev such as stinat you
s
i
d
e
n
i
s
w
s), S
o
m is
io
P
voi
co
hi
a co
tand usly se olice a ns
mm on you mman ch allo ce
n
t
ard
ws y
ds t
r ste
and
des favorit d
For
o
o
o
e
t
u
r ‘H
tina
m
e
elp’ ring wh he syst to
and ore in
tion
e
afte
e
s
Nav the fea format
r th el and m.
e pr
i
say
Nav gation tures o ion on v
omp
f
igat
s
t.
ion ystem your M oice co
m
,
sup
plem please obile M mand
e
s
r
ent.
di
efer
to y a
our
6
MA
RI
Braking: Your hybrid is
equipped with standard
hydraulic braking and
regenerative braking.
Regenerative braking
is performed by your
transmission and it captures
brake energy and stores it in
the high voltage battery.
twice to confirm all the doors and liftgate
Press
are closed and locked. The doors will lock again, the
to activate the panic
horn will chirp once. Press
alarm. The horn will sound and the turn lamps will flash.
again or turn the ignition on to deactivate the
Press
twice within three seconds to open
panic alarm. Press
twice within three
the liftgate glass. Car finder: Press
seconds. The horn will chirp and the turn lamps will flash.
It is recommended to use this method to locate your vehicle,
rather than using the panic alarm. Note: Ensure that you keep
the adhesive security labels in a safe place for future reference.
Replacements are only available through an authorized dealer.
4
TEM
Transmission Operation:
Due to the technologically
advanced, electronically
controlled Continuously
Variable Transaxle (eCVT)
you will not feel shift
changes like those of a
non-hybrid vehicle. Your
Mercury Mariner Hybrid’s
transmission is designed
to do its work seamlessly.
Since your engine speed
is controlled by the
transmission, it may seem
elevated at times. This is
normal hybrid operation and
helps deliver fuel efficiency
and performance.
Battery: Your Mercury
Mariner Hybrid is equipped
with a high voltage battery
cooling system in the rear of
the vehicle. A cool battery
ensures battery life and
provides the best possible
performance. Your hybrid
high voltage battery may
periodically recondition
itself to ensure maximum
efficiency. You may notice
slight changes in drivability
during this process, but it’s
an important part of your
Mercury Mariner Hybrid’s
high voltage battery
optimization features. You
may hear a series of clicks
from the cargo area when
you first turn the key in the
ignition. This sound is the
high voltage contactors
closing to allow you to start
your hybrid.
1
10
11
12
13
3
7
(if e
Stopping: The gas engine
may shut off as you come
to a stop to conserve fuel.
Restarting the vehicle is not
required. Simply step on the
accelerator when you are
ready to drive.
Your Mercury Mariner
Hybrid, with its new
technology, behaves
differently compared to
a non-hybrid vehicle. A
description of the major
differences follows:
9
2
SYS
•Very high or low outside
temperature (to provide
system cooling/heating).
MA
TIO
Unique Hybrid
Operating
Characteristics
200
9
CUR
Y
For detailed operating and
safety information, please
see your Owner’s Guide.
•Charge level of high voltage
battery is low.
Driver Habits: Aggressive
driving increases the
amount of energy
required to move your
vehicle. In general,
better fuel economy is
achieved with mild to
moderate acceleration and
deceleration. Moderate
braking is particularly
important since it allows
you to maximize the
energy captured by the
regenerative braking
system. Note: Having
your engine running is not
always an indication of
inefficiency – in some
cases it is actually more
efficient than driving in
electric mode.
8
1
MER
Location of spare tire : If you get a flat tire while driving, do not apply the brake
heavily. Instead, gradually decrease your speed. Hold the steering wheel firmly
and slowly move to a safe place on the side of the road. Your vehicle is equipped
with a temporary spare tire located under the vehicle, just forward of the rear
bumper. The temporary spare is designed for emergency use only and should be
replaced as soon as possible. The jack and tools are located in the right rear cargo
area, behind an access panel. For complete details on how to change your tire, refer
to the Roadside Emergencies chapter in your Owner’s Guide.
Starting: Turn the ignition
on while the vehicle is in
Park (P). The gas engine
will turn on, accompanied by
the green “ready indicator”
light. Your engine may shut
off shortly after starting,
depending on temperature
and battery charge level.
This is a natural part
of the Mariner Hybrid’s
fuel-saving features. The
“ready indicator” light will
stay on and you do not need
to restart the vehicle. Note:
You may notice higher
engine speeds upon start-up.
This temporary condition
is normal and necessary
to heat up the cabin for
occupant comfort.
Reverse: (R) Reverse Gear
vehicle speed is limited to 22
mph (35 km/h).
IGA
TION
S.O.S. Post Crash Alert System: Your vehicle is equipped with the S.O.S. Post Crash
Alert system. This system provides audible and visual alarms in the event of a
crash which causes the deployment of airbags or the activation of the safety belt
pretensioners. The turn signals will flash and the horn will sound. To deactivate
button
the system, press the hazard flasher control , or you can press the
on your remote transmitter.
All information contained
in this Quick Reference
Guide was accurate at the
time of duplication. We
reserve the right to change
features, operation and/or
functionality of any vehicle
specification at any time.
Your Mercury dealer is the
best source for the most
current information.
Normal Vehicle
Operation
•Selection of climate control
defrost mode or defrost/
floor mode.
NAV
Fuel Pump/High Voltage Shut-off Switches: The fuel pump shut-off switch is
located in the front passenger’s footwell, behind a flip-up cover. The high voltage
shut-off switch is located in the passenger side of the rear cargo area, in the
jack compartment behind the jack access door. These switches provide added
protection by discontinuing fuel to the engine and by shutting off power to the
high voltage battery in case of an accident. For more information, please see your
Owner’s Guide.
The Mercury Mariner Hybrid
is a whole new kind of SUV
that combines electric and
gasoline propulsion without
compromise, to provide
breakthrough performance
and efficiency. It requires
no special fuels and never
has to be plugged in.
Familiarizing yourself with
these unique characteristics
will help ensure optimal
performance from your
new vehicle.
FOR
Unique Service Intervals: Please check your Owner’s Guide for proper service
intervals. Your vehicle is equipped with a rear air filter that must be inspected or
replaced at every service interval to avoid damage to the hybrid system. Special
caution is required when servicing brake pads. Please refer to the Owner’s Guide
and/or Service Manual for information on servicing brake pads.
HYBRIDOPERATION
ALIN
Tire Pressure: Your tire pressure is properly set at the dealership according to
the recommended specifications found on the Safety Compliance Certification
Label or Tire Label located on the B-Pillar or the edge of the driver’s door. Check
your tire pressure at least once a month and before long trips (including spare).
As an added safety feature, your vehicle has been equipped with a Tire Pressure
Monitoring System (TPMS) that illuminates a low tire pressure warning light
when one or more of your tires is significantly under-inflated. Improperly inflated
tires can affect vehicle handling and can fail suddenly, possibly resulting in loss of
vehicle control. Refer to the Tires, Wheels and Loading chapter in your Owner’s
Guide for more details and safety information.
This Quick Reference Guide
is not intended to replace
your Owner’s Guide which
contains more detailed
information concerning the
features of your vehicle, as
well as important safety
warnings designed to help
reduce the risk of injury to
you and your occupants.
Please read your entire
Owner’s Guide carefully as
you begin learning about
your new vehicle and refer
to the appropriate sections
when questions arise.
Integrated Keyhead Transmitter
(IKT) and Remote Entry System
Features: Your vehicle comes
equipped with two programmed
Integrated Keyhead Transmitters
(IKTs) which are both a programmed
ignition key and a remote keyless entry
transmitter. Handle the IKT carefully
when starting the car to avoid accidentally
pressing any of the remote entry buttons.
once to unlock the driver’s door.
Press
The interior lamps will illuminate. Press
twice to unlock all the doors, the liftgate and
once to lock all the doors.
liftgate glass. Press
If all doors and the liftgate are closed, the turn
lamps will flash.
ITIO
N
Fuel Type and Tank Capacity: Your fuel tank has a capacity of 15 gallons (56.8L).
Your vehicle is designed to use “Regular” unleaded gasoline with an octane rating of
87. Do not use gasoline labeled as “Regular” in high altitude areas that are sold with
octane ratings less than 87. Do not use E85 fuels that are blended with a maximum
of 85% ethanol.
fuel economy. ECON mode
turns itself off when
you select defrost or
defrost/floor mode.
ADD
ESSENTIALINFORMATION
speeds (up to 6000 RPM).
This is a characteristic of
the Atkinson cycle engine
technology helping to
maximize your hybrid’s
fuel economy. In prolonged
mountainous driving, you
may also see the engine
tachometer changing
without your input. This is
intentional and maintains
the battery charge level.
You may also notice during
extended downhill driving
that your engine continues
to run instead of shutting off.
During this “engine braking,”
the engine stays on, but it’s
not using any fuel. You may
also hear a slight whine or
whistle when operating your
vehicle. This is the normal
operation of the electric
generator in the
hybrid system.
EFE
REN
CE G
UID
E
200
9
CUR
YM
MER
2
10
4
7
1
5
3
8
12
14
6
9
11
13
15
16
17
1. HeadlampS
and foglampS
Turn the control one
position to the right
to turn on the parking
lamps, instrument panel
lamps, license plate lamps
and tail lamps. Turn the
control to the second
position on the right
to turn on the headlamps.
Turn the control one
position to the left to
activate the autolamp
feature (if equipped),
which automatically
turns the exterior
lamps on and off,
based on available
daylight. Pull the
control towards
you to activate the
fog lamps. (The
fog lamps will not
operate when the
headlamps are
turned off (0) or
when the high
beams are on).
3. Throttle control/
Powertrain
Illuminates when the
vehicle has detected a
malfunction. Contact
your authorized dealer
as soon as possible.
4. Speed control
To set the speed control,
press and release ON.
Accelerate to the desired
speed. Press and release
the SET + control.
Take your foot off the
accelerator pedal. The
speed control indicator
light
will illuminate
in the cluster. To set
a higher speed: press
and hold SET+ until the
desired speed is reached,
or briefly press SET+
to increase the speed
by small amounts. To
set a lower speed: press
and hold SET- until the
desired speed is reached,
or briefly press SET- to
decrease the speed by
small amounts. Press
RSM to return to the
previously set speed. To
turn speed control off,
press OFF.
5. Tilt steering
wheel
To adjust
the
steering
wheel,
push the
lever
down to unlock the
steering column. While
the lever is down, tilt
the steering wheel to
your desired position.
Then, while holding the
steering column in place,
pull the lever up to its
original position to lock
the steering column.
6. Service engine
soon light
The service engine soon
light
illuminates
briefly when the
ignition is turned on.
If it remains on or is
blinking after the engine
is started, the On Board
Diagnostics System
(OBD-II) has detected
a malfunction. Drive in
a moderate fashion and
contact your authorized
dealer as soon as possible.
7. Low tire pressure
warning light
This light illuminates
when the ignition is
turned on. If the light
does not turn on or
begins to flash, contact
your authorized dealer
as soon as possible. For
more information, please
refer to Tire pressure
monitoring system
(TPMS) in the Tires,
Wheels and Loading
chapter of your
Owner’s Guide.
8. Message Center
The
message
center
displays
important
vehicle
information through
a constant monitoring
of vehicle systems.
The system will also
notify you of potential
vehicle problems with
a display of system
warnings followed by
a long indicator chime.
Please refer to your
Owner’s Guide for more
information.
9. ABS Warning Lamp
The ABS light
illuminates briefly when
the ignition is turned on.
If the ABS light remains
on or continues to flash,
a malfunction has been
detected. Contact your
authorized dealer as
soon as possible. Normal
braking (less ABS) is
still functional unless the
brake warning light
is
also illuminated.
10. Battery Gauge
The battery gauge
provides information
about your vehicle’s
energy usage. When the
pointer is directed at
ASSIST, the battery is
providing extra power
to boost the vehicle’s
acceleration. When it’s
pointing to CHARGE,
extra energy is being
stored in the battery
while idling, coasting or
slowing down. When you
press the brake pedal,
the pointer swings
counterclockwise into
the CHARGE zone to
report that regenerative
braking is underway.
If the needle does not
move when braking, the
battery is fully charged.
11. Ready Indicator
Illuminates after the
vehicle has successfully
started. The vehicle is
ready to drive even if
you don’t
hear the
engine
running.
12. Master Vehicle
Electrical Hazard
Warning Lamp
Indicates a hybrid
component failure or
fault that will cause
the vehicle to shut
down or fail to start.
For additional
information, please see
your Owner’s Guide.
13. Power Point –
110 VAC (if equipped)
This outlet, is used for
powering electrical
devices that require
up to 150W. Exceeding
this limit will cause the
power point to cut off
the power temporarily
to provide overload
protection. The green
indicator light will
illuminate when the
power point is ready
to supply power and
will blink when it is
in fault mode. You do
not need an adapter
in order to plug in an
electrical device.
14. Passenger
Airbag Off
The passenger airbag
off indicator will
illuminate when
the passenger’s
front airbag is off.
Please refer to your
Owner’s Guide for
safety information
and more details.
15. Reverse sensing
system (if equipped)
This system sounds a
tone to warn the driver
of large obstacles near
the rear bumper when R
(Reverse) is selected and
the vehicle is moving at
speeds less than 3 mph
(5 km/h). As you move
closer to the obstacle,
the rate of the tone
increases. When an
obstacle
is less
than 10
inches
(25 cm)
away, the tone sounds
continuously. The
system is not effective
at speeds above 3 mph
(5 km/h) and may not
detect certain angular
or moving objects. With
the ignition on, press
the RSS control, located
below the climate
control system, to turn
the RSS off. An indicator
light will illuminate when
the system is off. Refer to
your Owner’s Guide for
safety information and
more details.
16. Auxiliary
input jack
The auxiliary input
jack provides a way to
connect your portable
music player to the
in-vehicle audio system.
This allows the audio
from a portable music
player to be played
through the vehicle
speakers. For additional
information, please see
your Owner’s Guide.
17. Auxiliary Power
Points (12V)
The 12V power point
outlets, located on the
instrument panel and
the rear of the center
console, are designed
for accessory plugs only.
Do not insert any other
object; damage may
occur and blow the fuse.
AdvanceTrac® with
Roll Stability
Control™ (RSC®)
Stability
Enhancement system
Your vehicle is equipped
with the AdvanceTrac®
stability enhancement
system. This system
consists of: Traction
control, which helps
avoid wheel spin and loss
of traction, Roll Stability
Control™ which helps
avoid a vehicle roll-over,
and Electronic Stability
Control, which helps
avoid skids or lateral
slides. These features
work together to help
you to maintain stability
and steerability of your
vehicle during a variety
of road conditions. If
your vehicle becomes
stuck in the snow, mud
or sand, try turning
off the AdvanceTrac®
system to allow wheel
spin and help increase
momentum to dig the
vehicle out. The system
defaults to on and the
control will illuminate
when turned off. Refer to
your Owner’s Guide for
safety information and
more details.
1
2
3
4
5
TOM
ATIC
CLI
MA
TE C
ON
TRO
L
rid
Hyb
NER
NEW
ARI
THE
window wiper, turn the
rear wiper control to 1
(intermittent speed),
2 (normal speed), or
off. For a rear wash
cycle, turn the rear
wiper control to the
position. To turn on the
highbeams, push the
lever away from you.
Pull the lever toward
you to deactivate. Pull
the lever toward you
slightly to activate the
‘flash to pass’ feature,
and release.
DUA
L AU
INSTRUMENTPANELFEATURES
is 1
0
req 0% SUV
u
has ires no and 10
t
do i o be pl special 0% Hyb
s ge
u
f
r
t in gged i uels an id. It
n
and
d
Wit
driv . All yo never
u ha
h
e.
auth all the
ve t
o
with entic M confid
enc
e
t
r
h
c
e
e be
ury
syst
o
f
a
S
n
e
Hyb m, eve efits o UV com n
f
r
r
any id is eq y Merc a full h bined
w
y
u
mor here a uipped ry Mar brid
t
n
e
i
env efficie d do a o help ner
iron
n
y
men ntly th ything ou go
In o
a
r
n
the der to tally co n ever ow
h
a
feat
n
its u
ures elp you scious nd in a
n
you nique c of you fully a manne
r
p
r
h
t
Quic o explo aracte new ve precia .
te
ri
re
h
k Re
fere this e stics, w icle and
asy
e in
nce
This
v
to-u
Guid
se ite
e.
cha vehicle
r
hyb acteris has un
i
t
r
and id oper ics to m que dri
v
a
Mer wear a tion. D aximiz ing
e
s
c
r
Own ury urg afety b ive wit its
h
e
You er’s Gu es you lt at al care
id
r
t
l
furt SUV o e and o read times.
r
t
t
h
prec er info Truck he Driv he
Su
r
in
auti
ons mation pplem g
and
e
o
Use
inst n safe nt for
e
driv
ruct
any xtrem
ing
i
ons
e
d
.
you evice cautio
or f
r at
n
eatu when
prim tent
i
r
u
ope ary res on off t e that m sing
rati
p
ay t
o
nsib he roa
on o
non
ake
d.
il
f
whe essent the ve ity is th Your
hicl
e
n it’s ial fe
s
safe ature e. Onl afe
y
s
to d
o so and de use
.
vice
s
2. Multi-function
lever
Rotate the end of the
control up to increase
the speed of the wipers
and rotate down to
decrease the speed of
the wipers. Briefly press
the end of the stalk for
a single swipe of the
wipers without washer
fluid. A quick push and
hold results in three
swipes with washer fluid
while a longer push and
hold activates the wash
pattern for up to five
seconds. A ‘courtesy
wipe’ will automatically
occur after the washing
cycle to ensure that any
drips have been cleared
from your windshield.
For better visibility,
your vehicle will also
automatically turn on
your headlights (during
daylight hours) if your
windshield wipers
and autolamps
(if equipped)
are on. To
operate
your rear
6
7
8
9
P
con ress to
trol
10
to inturn th 1. Power
11
crea e sys
se/ tem
12
and
dec
o
n
reas /off fan
defr Distri
e th . Tur
oste bute 2. Flo
e fa
r ve
s
n spn the
8.P
nts, air thror and
eed
F anel
dem oug
.
defr
LOO
iste h the
, Pa
P
o
R
re
st
and r ve
nel
w
Pre
dire ss the d
rear nts, indsh
and
ss th 3. AUT
f
i
c
l
e
e
s
o
t
e
l
s
e
ope
o
flo
d
pan
e co O/D
ired
at fl
d
r
v
t
h
r
e
or
el v
oor
r
nts
c
dete ation ntrol river
o
o
p
u
n
e
ane
gh t
ven
n
t
r
to e
rmi . Th
t
o
,
s
l
ts.
es
ne
rear l vent ), Pan he Pa for a
ng tem
s
i
n
e
r
s
,
reci
A/C fan sp ystem age fu perature
l
e
e
dem and
ven
l (in flow
a
t
l
e
rcul
w
f
l
e
ts, f
l
o
t
a
i
loor oor venister ve Floor ( strume o be
to re ated an or offd, airfloll automutoma
in
n
n
t
ven
ach
wd
ir t
an
9. P
at tic
tem
ts a s) or th ts, floo strum t
a
ss
pera the co the deo heat d eithe istribu ically
nd r
e
r
Pre
ear e Floor vents nt
ss to Temp
Not ture o ntrol t sired t or cool r outsi tion,
t
seat
em
a
(
a
d
e
o
n
e
t
floo demist nd
dec peratuctivate
tem : This c the dr increa mpera he veh e or
r ve
er
reas
re c pass
whe perat ontro iver s se/d ture. icle
n
f
o
t
o
e
e
r
s
n
/
e
).
id
T
l
n th ure
c
aga the pas increa trol. Tunger si
e pa for t will als e of th rease urn
d
s
i
the
od
he
ev
sse
will n to d senge e the rn the e
(PA nger teentire vetermi ehicle.
enti then d eactiva r side otempe contro
ne
SS T
e
m
r
re v eter te (
l
EMP perat hicle c the
ehic min the f the veature s to
) is ure c abin
le ca e th driv
hicl ettin
win Distr
10.
not
o
e
e
e
n
d
b
r
R
.
i
t
b
s
t
i
P
ven
eng rol
n).
emp side
r g
Pre ecircu
ts. C hield d utes ou
age
erat sett ess
d.
an b efro
insi ss to ac lated
tsid 4. Defr
i
u
n
r
e
e
e us ster
for gs
may de the tivate
a
ed t ven air thr ost
the
red vehic /dea ir
ts a
o cl
o
c
u
o
g
u
nd d h th
ct
ear
o
l
c
red l down e the ae cabin ivate a
of fothe win emiste e
the uce un the ve moun . Recir ir circu
g an dsh r
Pre
5. R
d
e
d
t
h
s
v
i
f
d th eld
thin rost s to
e
auto ehicle esirab icle a of tim culated lation
in ic
ac ar defr
er
ic
nd
e
le
mat . Re
a
e.
The e and f and cletivate t
ical circu odors may a neede ir
o
ly w
rear og. P ar t he r ster
late from lso h d to
11.
e
h
h
r
P
a
a
w
d
e
e
utom ind
am
ss a
rea r wi
Pre assenger en MA air e enter elp
X A ngag ing
is d ount of atica ow def gain to r wind ndow
pas ss to ac
/C i
etec
ll
o
r
sen
s se es
ted, time, if y after oster wdeactiv w of
ger tivate heated
lect
or d
or w a lo a pr
ill tu ate.
h
ed.
e
se
1
a
w
ed
2.
e
ted
rn
off o hen
b
seat activat at
ECO ECON
r to the i attery etermi off
e
.
gnit
N
the
t
con ned
h
eco mod
e
io
a
d
Pre 6. Driver ccessor n is turition
to s nomy b e may
ss to
hut
y po ned
prov
y al
r
d
e
l
s
acti
o
q
id
o
ition
w
vateheated
ove uested wn eve ing th e imp
.
or
se
can r fuel e . To pri n if air e gasoroved f
driv deact at
n
o
c
er h ivate
defr ot be onom ritize condit line en uel
con
P
eate
s
i
g
o
y
the
c
diti ress to
A
d
UT st). F elect , dea oolin oning ine
onin
seat
a
air) O. Do or maxed in (d ctivate g comf is
.
to im g. Us ctivate
n
.
o
Mak Set th ot ove imum efrost ECON rt
prov e with /dea
ct 7. A/
e su e te rrid coo ) or . ECO
e co
r
re E mpe e A/ ling: (flo
olin ecircu ivate a C
or N
CON ratu C o
g pe late
P
ir
d
r
mod re to r (re ress /
and form air
c
i
e is
6
effi ance
dea 0˚F (1rculate
cien
ctiv
d
cy.
ated6˚C).
.