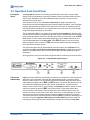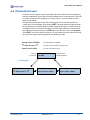
1
Unity4600
Digital Media Receiver/Decoder
Unity4600
Professional Digital Media
Receiver/Decoder
User’s Manual
800032-01 Rev. G
Unity 4600 User’s Manual
Data, drawings, and other material contained herein are proprietary to Wegener
Communications, Inc., and may not be reproduced or duplicated in any form without the
prior written permission of Wegener Communications, Inc.
The information contained herein is subject to change without notice. Revisions may be
issued to advise of such changes and/or additions.
WEGENER®, COMPEL CONTROL®, MEDIAPLAN®, ENVOY, UNITY®, UNITY·IP®, and
iPUMP® are trademarks of Wegener Communications, Inc. All other trademarks are the
property of their respective owners.
© 2007 Wegener Communications, Inc. All rights reserved.
Portions copyright 1992-2001 FairCom Corporation. "FairCom" and "c-tree plus" are
trademarks of FairCom Corporation and are registered in the United States and other
countries. All Rights Reserved.
Correspondence regarding this publication,
800032-01 Rev. G
Seventh Edition: December 2007
should be forwarded to:
Wegener Communications, Inc.
Technology Park/Johns Creek
11350 Technology Circle
Duluth, GA 30097-1502
Phone: 770-814-4000
Fax:
770-623-0698
The Wegener Unity 4600 is approved under FCC Part 15B Class A, UL/C-UL1950 3rd
Edition, and CE [EN60950, EN55022(94), and EN55024(98)].
ii
800032-01 Rev. G
www.wegener.com
Unity 4600 User’s Manual
TABLE OF CONTENTS
CHAPTER 1 GENERAL INFORMATION
1.1 Manual Overview . . . . . . . . . . . . . . . . . . . . . . . . . . . . . . . . . . . . . . . . . . . . . 1
1.2 Unity 4600 Overview . . . . . . . . . . . . . . . . . . . . . . . . . . . . . . . . . . . . . . . . . . 2
Functional Description . . . . . . . . . . . . . . . . . . . . . . . . . . . . . . . . . . . . . . . . . . . . . . . 2
Physical Description . . . . . . . . . . . . . . . . . . . . . . . . . . . . . . . . . . . . . . . . . . . . . . . . 2
Figure 1.1: The Unity 4600 Digital Media Receiver/Decoder . . . . . . . . . . . . . . . . 2
1.3 Unity 4600 Specifications . . . . . . . . . . . . . . . . . . . . . . . . . . . . . . . . . . . . . . 3
Table 1.1:
Technical Specifications . . . . . . . . . . . . . . . . . . . . . . . . . . . . . . . . . . . 3
Table 1.2:
Transport In Options . . . . . . . . . . . . . . . . . . . . . . . . . . . . . . . . . . . . . . 6
1.4 Safety Summary . . . . . . . . . . . . . . . . . . . . . . . . . . . . . . . . . . . . . . . . . . . . 11
1.5 Glossary of Terms and Abbreviations . . . . . . . . . . . . . . . . . . . . . . . . . . 12
CHAPTER 2 INSTALLATION
2.1 Unpacking and Inspection . . . . . . . . . . . . . . . . . . . . . . . . . . . . . . . . . . . . 17
2.2 Location and Mounting . . . . . . . . . . . . . . . . . . . . . . . . . . . . . . . . . . . . . . . 17
Rack Mounting . . . . . . . . . . . . . . . . . . . . . . . . . . . . . . . . . . . . . . . . . . . . . . . . . . . 18
Desktop Installation . . . . . . . . . . . . . . . . . . . . . . . . . . . . . . . . . . . . . . . . . . . . . . . . 18
2.3 Unity 4600 Connections . . . . . . . . . . . . . . . . . . . . . . . . . . . . . . . . . . . . . . 19
Rear panel views . . . . . . . . . . . . . . . . . . . . . . . . . . . . . . . . . . . . . . . . . . . . . . . . . . 19
Figure 1.2: Unity 4600 rear panel without DTMF . . . . . . . . . . . . . . . . . . . . . . . . 19
Figure 1.3: Unity 4600 rear panel with DTMF . . . . . . . . . . . . . . . . . . . . . . . . . . . 19
Transport In Options . . . . . . . . . . . . . . . . . . . . . . . . . . . . . . . . . . . . . . . . . . . . . . . 19
Figure 1.4: Unity 4600 Transport In Options . . . . . . . . . . . . . . . . . . . . . . . . . . . 19
Rear panel Connectors . . . . . . . . . . . . . . . . . . . . . . . . . . . . . . . . . . . . . . . . . . . . . 19
Table 1.3:
Rear panel Connectors . . . . . . . . . . . . . . . . . . . . . . . . . . . . . . . . . . . 20
Table 1.4:
Front-panel Connectors. . . . . . . . . . . . . . . . . . . . . . . . . . . . . . . . . . . 22
2.4 Serial Port Configuration . . . . . . . . . . . . . . . . . . . . . . . . . . . . . . . . . . . . . 22
Device assignments . . . . . . . . . . . . . . . . . . . . . . . . . . . . . . . . . . . . . . . . . . . . . . . 22
Device configurations . . . . . . . . . . . . . . . . . . . . . . . . . . . . . . . . . . . . . . . . . . . . . . 22
Device Configurations . . . . . . . . . . . . . . . . . . . . . . . . . . . . . . . . . . . . 22
Device handling . . . . . . . . . . . . . . . . . . . . . . . . . . . . . . . . . . . . . . . . . . . . . . . . . . . 23
Table 1.5:
2.5 Installation Testing . . . . . . . . . . . . . . . . . . . . . . . . . . . . . . . . . . . . . . . . . . 24
www.wegener.com
800032-01 Rev. G
iii
RF input check . . . . . . . . . . . . . . . . . . . . . . . . . . . . . . . . . . . . . . . . . . . . . . . . . . . .
Audio/video check . . . . . . . . . . . . . . . . . . . . . . . . . . . . . . . . . . . . . . . . . . . . . . . . .
DTMF Setup. . . . . . . . . . . . . . . . . . . . . . . . . . . . . . . . . . . . . . . . . . . . . . . . . . . . . .
Relay Pulse Check. . . . . . . . . . . . . . . . . . . . . . . . . . . . . . . . . . . . . . . . . . . . . . . . .
24
24
24
25
CHAPTER 3 OPERATION
3.1 Theory of Operation . . . . . . . . . . . . . . . . . . . . . . . . . . . . . . . . . . . . . . . . . 27
Functional summary. . . . . . . . . . . . . . . . . . . . . . . . . . . . . . . . . . . . . . . . . . . . . . . . 27
Automated recovery. . . . . . . . . . . . . . . . . . . . . . . . . . . . . . . . . . . . . . . . . . . . . . . . 27
Monitoring and control . . . . . . . . . . . . . . . . . . . . . . . . . . . . . . . . . . . . . . . . . . . . . . 28
Figure 1.5: Unity 4600 Functional Block Diagram . . . . . . . . . . . . . . . . . . . . . . . . 28
3.2 Operation from Front Panel . . . . . . . . . . . . . . . . . . . . . . . . . . . . . . . . . . . 29
Front-panel layout . . . . . . . . . . . . . . . . . . . . . . . . . . . . . . . . . . . . . . . . . . . . . . . . . 29
Figure 1.6: Unity 4600 Front-panel Layout . . . . . . . . . . . . . . . . . . . . . . . . . . . . . 29
LCD screen relationships. . . . . . . . . . . . . . . . . . . . . . . . . . . . . . . . . . . . . . . . . . . . 29
Figure 1.7: LCD Screen Relationships . . . . . . . . . . . . . . . . . . . . . . . . . . . . . . . . 30
LCD screen content . . . . . . . . . . . . . . . . . . . . . . . . . . . . . . . . . . . . . . . . . . . . . . . . 30
Figure 1.8: Unity 4600 Top-level Screens . . . . . . . . . . . . . . . . . . . . . . . . . . . . . 30
Summary of Top-Level LCD Screens and Their Functions . . . . . . . . 31
Home and default screens . . . . . . . . . . . . . . . . . . . . . . . . . . . . . . . . . . . . . . . . . . . 32
Interpreting LEDs . . . . . . . . . . . . . . . . . . . . . . . . . . . . . . . . . . . . . . . . . . . . . . . . . . 33
Table 1.6:
Figure 1.9: LED Indicators . . . . . . . . . . . . . . . . . . . . . . . . . . . . . . . . . . . . . . . . . 33
Front-panel LED Indicator Descriptions . . . . . . . . . . . . . . . . . . . . . . . 33
Front-panel audio monitor . . . . . . . . . . . . . . . . . . . . . . . . . . . . . . . . . . . . . . . . . . . 35
Table 1.7:
3.3 Operation from Local/Remote Terminal . . . . . . . . . . . . . . . . . . . . . . . . . 35
Overview and syntax . . . . . . . . . . . . . . . . . . . . . . . . . . . . . . . . . . . . . . . . . . . . . . . 35
User commands. . . . . . . . . . . . . . . . . . . . . . . . . . . . . . . . . . . . . . . . . . . . . . . . . . . 35
Table 1.8:
Command directory for Unity 4600 terminal commands. . . . . . . . . . 35
CHAPTER 4 MAINTENANCE AND TROUBLESHOOTING
4.1 Maintenance. . . . . . . . . . . . . . . . . . . . . . . . . . . . . . . . . . . . . . . . . . . . . . . . 51
4.2 General Troubleshooting . . . . . . . . . . . . . . . . . . . . . . . . . . . . . . . . . . . . . 51
No output or indications . . . . . . . . . . . . . . . . . . . . . . . . . . . . . . . . . . . . . . . . . . . . . 51
No audio, video, or ASI output . . . . . . . . . . . . . . . . . . . . . . . . . . . . . . . . . . . . . . . . 51
Missing an audio, video, or ASI output while others are okay . . . . . . . . . . . . . . . . 52
4.3 Alarms and Warnings . . . . . . . . . . . . . . . . . . . . . . . . . . . . . . . . . . . . . . . . 52
Table 1.9:
Alarm and Warning Descriptions . . . . . . . . . . . . . . . . . . . . . . . . . . . . 53
CHAPTER 5 CUSTOMER SERVICE
5.1 Warranty. . . . . . . . . . . . . . . . . . . . . . . . . . . . . . . . . . . . . . . . . . . . . . . . . . . 59
iv
800032-01 Rev. G
www.wegener.com
Unity 4600 User’s Manual
5.2 Technical Support . . . . . . . . . . . . . . . . . . . . . . . . . . . . . . . . . . . . . . . . . . . 59
Appendix A Monitoring and Control Details . . . . . . . . . . . . . . . . . . . . . . . . . . . . . . . . . . . . . . . 61
A.1 Basic Navigation . . . . . . . . . . . . . . . . . . . . . . . . . . . . . . . . . . . . . . . . . . . . 61
A.2 Info Screens . . . . . . . . . . . . . . . . . . . . . . . . . . . . . . . . . . . . . . . . . . . . . . . 61
A.3 Menu Screens . . . . . . . . . . . . . . . . . . . . . . . . . . . . . . . . . . . . . . . . . . . . . . 62
A.4 Parameter Screens . . . . . . . . . . . . . . . . . . . . . . . . . . . . . . . . . . . . . . . . . . 63
www.wegener.com
800032-01 Rev. G
v
This page intentionally left blank
vi
800032-01 Rev. G
www.wegener.com
CHAPTER 1 GENERAL INFORMATION
1.1 Manual Overview
This manual provides instructions and reference information for the proper installation
and operation of the Wegener Unity 4600 Digital Media Receiver/Decoder.
The manual is divided into the following chapters:
Chapter 1 General Information - a description of your Unity 4600, its functions
and specifications, and a glossary of terms.
Chapter 2 Installation - procedures and information for the correct and safe
installation of your Unity 4600.
Chapter 3 Operation - instructions for starting and operating your Unity 4600.
Chapter 4 Maintenance and Troubleshooting - information about maintaining
your Unity 4600 and resolving possible operating difficulties.
Chapter 5 Customer Service - Our warranty and information on obtaining help.
An Index of keywords is also provided to help you quickly locate needed information.
Please e-mail any suggestions or comments concerning this manual to
[email protected]. If you prefer to post them through the mail, please send your
comments to the address below. If you have substantial or complex changes to
recommend, our preference is that you copy the page(s) in question, mark your
changes on that copy, and fax or mail us the copy. We always appreciate constructive
criticism.
Our Address:
Attn: Manuals
Wegener Communications, Inc.
Technology Park / Johns Creek
11350 Technology Circle
Duluth, GA 30097-1502
Our Fax Number: (770) 497-0411
wegener.com
800032-01 Rev. G
1
General Information
1.2 Unity 4600 Overview
Functional
Description
The Wegener Model Unity 4600 Digital Media Receiver/Decoder is a fully DVB-compliant
satellite video IRD. The Unity 4600 receives an L-band RF carrier from an external LNB,
demodulates the carrier, extracts the MPEG transport stream, and provides the
decompressed program or programs to DVB-ASI, composite video, and/or stereo audio
outputs.
Features include:
Control by local user or remote COMPEL® system
Download of software application upgrades via satellite
Supports COMPEL®/CA Conditional Access at transport level or by program
Supports receiver card options using either DVB-QPSK or Advanced Turbo-Modulations
(Turbo-QPSK, T-8PSK, or T-16QAM)
DVB-ASI transport stream output with network-controlled program mapping
Supports ISO 13818-1 transport rates from 2.5 to 55 Mbps (with local decompression) or up
to 86.25 Mbps (to program-mapped ASI transport only)
Local decompression of MPEG-2 video and MPEG-2 (L1 and L2) and/or Dolby AC-3 audio
Auto-recognition and support of 525-line NTSC or 625-line PAL
Audio-only mode option for radio networks
Cueing relays and DTMF cue tone outputs standard (DTMF available only on units built
before 10/07)
Alarm relay
Cueing relays
Optional SCTE 35 DPI message filter for network control of local ad avails
Optional front-panel audio and video monitors
Web browser control (August 2004)
Physical
Description
The Unity 4600 is housed in a standard, 1 RU, rack-mountable chassis. Its front panel (see
Figure 1.1) provides a user interface through six push buttons and an LCD as well as
monitoring through both audio and video ports. The rear panel holds connectors for input
and output signals, LNB power supply, serial and Ethernet monitoring and control, alarm
and user relays, and AC input power. The unit also includes two Unity expansion module
slots.
Figure 1.1: The Unity 4600 Digital Media Receiver/Decoder
2
800032-01 Rev. G
www.wegener.com
Unity 4600 User’s Manual
1.3 Unity 4600 Specifications
Table 1.1: Technical Specifications
Characteristic
Specification
POWER
Voltage
90-132 or 175-264 VAC auto-detect/selected
Frequency
60/50 Hz ± 2%
Consumption
< 35 watts typical with full LNB DC load & QPSK receiver
TRANSPORT IN OPTIONS
See See Transport In Options on page 6.
CONDITIONAL ACCESS
®
Wegener COMPEL /CA
Transport-level or by program
PIN Scrambling
Turnaround option to bypass scrambled
streams to ASI output
(Contact factory)
TRANSPORT DEMULTIPLEXING
Aggregate MPEG Transport Rate
2.5 to 86.25 Mbps (55 Mbps in Release 1) if not limited by
symbol-rate limits of installed receiver card. This rate is
guaranteed for reception and transmission to ASI port only. For
local decompression of audio and video, the maximum transport
rate remains 55 Mbps.
Number of Programs
Unlimited
PSI Recognition
Automatic
DVB ASI OUTPUT
Physical Layer
270 Mbaud signaling on coaxial cable
Levels
~1.1 Vp-p into 75 Ω unbalanced
Stream Padding
Minimum of one K28.5 null character padding in inter-byte gaps,
strategy after that is to add equal pad amounts between bytes
before adding extra padding between TS packets
Stream Processing (network-controlled)
Program mapping (routing of incoming program content to up to 16
virtual programs at output) and/or conditional DPI filtering.
PROGRAM DECOMPRESSION
Video
MPEG-2, 4:2:0 Chroma sampling
Audio
MPEG-1 Layers 1 & 2
Audio
Dolby AC-3 (optional), L/R downmix only
COMPOSITE VIDEO OUTPUT
Output Level
1.0 Vp-p, ± 2%
Output Impedance
75 Ω
www.wegener.com
800032-01 Rev. G
3
General Information
Characteristic
Multiburst
Specification
NTSC: From 0.5 to 4.2 MHz: ≤ ±0.8 dB
PAL-B: From 0.5 to 4.8 MHz: ≤ ±1.2 dB
Differential Gain
≤ 4 IRE
Differential Phase
≤ 1.5°
L/C Gain Inequality
≤ ±4 IRE
L/C Delay Inequality
≤ ±26 ns
Line Time W-form Distortion
≤ 1.0 IRE p-p
Field Time W-form Distortion
≤ 3 IRE p-p
Video SNR Weighted
≥ 56 dB
VBI Data Re-insertion
EIA 608 closed captioning & XDS from ATSC and also
Harmonic and Tandberg proprietary protocols
AUDIO OUTPUT
Output Level-MAX PPL
+18.0 dBm into 600 ohms @ 0 dB attenuation
+ 24.0 dBm is optional
Output level adjust range
0 to 20 dB attenuation in 2 dB steps from Output Levels above
Output Impedance
Balanced: < 60 Ω
Frequency Response
20Hz to 20 kHz, + 0.5/-1.5 dB
50 Hz to 15 kHz, ± 0.5 dB
Phase Accuracy
50 Hz to 15 kHz, ≤ ±2° from linear phase
SNR
≥ 80 dB (22 Hz to 20 kHz) unweighted
Dynamic Range
24 bits
DTMF OUTPUT (where available)
Type
Low-Z balanced output
DTMF tones
16 tone-pairs, std. telco DTMF
Tone Timing
< 230 ms to generate 4 tone-pair sequence
Output Level Range
+8 to –2 dBm into 600 Ω; software adjustable in step increments
of 6% of full-scale voltage
FRONT-PANEL MONITORS
(actively-isolated from, but otherwise buffered copies of the
standard analog outputs)
Video
Composite video; 1 Vp-p, 75 Ω
Audio
One stereo pair (user-selectable from audio port 1 or 2),
Level: ~ -13 dB below main audio output
(if set for +18 dBu output PPL)
Impedance: < 60 Ω, unbalanced
4
800032-01 Rev. G
www.wegener.com
Unity 4600 User’s Manual
Characteristic
Specification
SERIAL PORTS
Standard
RS232, DCE
Handshaking
None
Selectable Services
Terminal monitoring and control
Modem dial-in
Auxiliary async data output (Release 2 or later)
® E-mail character-based async output
COMPEL
Local COMPEL control input (testing only)
Baud Rates
Up to 38.4 kilobaud
Formatting
8 data bits, one start, one stop-bit, half-duplex. Parity selection
set by unit software.
ETHERNET PORT
Physical Layer
Full-duplex, auto-negotiating 10baseT, 100baseT (twisted pair)
on RJ45 jack
Media Access and Link Layers
Per IEEE 802.3 (Ethernet)
Network and Transport Layers
Binds to TCP/IP stack which enables Web-based control
(Release 4 or later).
ALARM/CUEING RELAYS
One relay dedicated to indicate unit ALARMS and two relays
dedicated to user control (such as cueing). The ALARM relay
automatically de-energizes for alarm conditions so that power
loss to the unit indicates as an alarm. The user-cue relays may
also be placed in a nonvolatile "Follow Warning" setting such
that the relay is ON for unit warning states and OFF when there
is no warning. When in "Follow Warning", the relay will not
respond to volatile settings, the Pulse command, or any
nonvolatile commands sent to "all" relays. An individual relay
must be addressed directly to set it back to ON or OFF.
Type
Form C, wiper contacts NC contact when de-energized and NO
contact when energized
Polarity
Common, NC and NO contacts supplied externally
Rating
30VDC open circuit, 100 mA max current closed
FRONT-PANEL EMAIL
®
Up to 512-character messages from COMPEL . New
messages over-write older messages. May also be cleared by
local user.
CHASSIS
Height
Std. 1RU 1.75 inches (4.45cm)
Width
EIA std. 19 inches (48.26cm)
Depth
Back of rack-ears to rear panel: 14.9 inches (37.85 cm)
Back of rack-ears to end of connectors: 15.7 inches (39.88 cm)
Weight
www.wegener.com
~10.5 lb. (with Receiver card & AV monitor option only)
800032-01 Rev. G
5
General Information
Characteristic
Specification
Cooling
Fan-cooled with left-side inlet and right-side exhaust (viewed
from front). Fan is activated after unit reaches specific
temperature.
ENVIROMENTAL
Operating Temperature
+10°C to +50°C (+50°F to +122°F) Unit gives warning indication
for over-temperature conditions
Storage Temperature
-20°C to +70°C (-4°F to 158°F)
AGENCY APPROVALS
UL
UL1950, 3rd Edition
FCC
Part 15B Class A, per Title 47 CFR (FCC rules)
CE
EN60950, EN55022(94), and EN55024(98)—tested per
EN61000-4-2(95), -4-3(02), -4-4(95), -4-5(95), -4-6(96), and –411(94)
Table 1.2: Transport In Options
Characteristic
Specification
DVB-QPSK RECEIVER OPTION (No RF Switch)
RF INPUT
Input Impedance
75Ω unbalanced
Input VSWR, 75-Ω system
< 2.1:1 (9.0 dB R.L. min), 950-1450 MHz
< 3.0:1 (6.0 dB R.L. min), 1450-2150 MHz
Surge Resistance
Guaranteed survival from up to 10 direct-coupled 8kV
discharges (per IEC 801-2)
RF TUNING
Input Frequency Range
950 to 2150 MHz
LO Leakage at Input
≤ -50 dBm
Symbol-rate Range
2 to 45 Msps (may be limited by Transport Rate limits)
Tuning Resolution
10 kHz
Input Signal Level Range
-25 to -65 dBm
Signal Level Warning Limits
warns within +10/-5 dB of upper limit and +5/-10 dB of lower limit
Maximum Aggregate Input Power
-5 dBm min
DEMODULATOR/FEC
6
Modulation
QPSK (α =.35) per DVB (EN 300 421)
Carrier acquisition range
±1 MHz or ± 10% of symbol-rate QPSK, whichever is greater
800032-01 Rev. G
www.wegener.com
Unity 4600 User’s Manual
Characteristic
Max Eb/N0 @ Quasi-error-free threshold
(less than one uncorrected error-event per
hour)
RF Power Level Estimator
(locked to carriers or not)
Specification
Per EN300 421:
QPSK R=1/2:
4.5 dB,
QPSK R=2/3:
5.0 dB,
QPSK R=3/4:
5.5 dB,
QPSK R=5/6:
6.0 dB,
QPSK R=7/8:
6.4 dB
Unitless metric SIGNAL corresponds to input power as follows:
above -25dBm
Extrapolated from 90 up to 100+
-25dBm
90
-35dBm
70
-45dBm
50
-55dBm
30
-65dBm
10
below -65dBm
Extrapolate from 10 down to <0
no signal
<0
Accuracy: unit to unit <±5 dBm; over frequency <±10 dBm
LNB DC POWER
(supplied on RF center conductor)
Activation
User- or network-controlled selectable: ON or OFF
Voltage
~ +18.7 VDC nominal at no loading, +18.0 VDC min. at max
loading
Current (full load)
350 mA max
Short-circuit protection
Thermal fuse, tripping at ~500 mA.
European “Universal LNB”
Software may be upgraded for “Universal Single LNB”
polarization and freq-band control per ASTRA recommendation
DVB-QPSK RECEIVER WITH 4-PORT RF SWITCH OPTION
SWITCHED RF INPUTS
Input Impedance
75Ω unbalanced
Isolation, port-to-port
> 45 dB, 950-1450 MHz
> 40 dB, 1450-2150 MHz
Input VSWR, 75-Ω system, selected port
< 2.6:1 (7 dB R.L. min), 950-1450 MHz
Not guaranteed, 1450-2150 MHz
Input VSWR, 75-Ω system, unselected port
< 2.0:1 (10 dB R.L min), 950-1450 MHz
Not guaranteed, 1450-2150 MHz
www.wegener.com
800032-01 Rev. G
7
General Information
Characteristic
Surge Resistance
Specification
Guaranteed survival from up to 10 direct-coupled 8kV
discharges (per IEC 801-2) whether port is selected or not
RF TUNING
Same as QPSK option described above
DEMODULATOR/FEC
Same as QPSK option described above
LNB DC POWER
Supplied on separate 2-pin header. Performance otherwise the
same as QPSK option described above
TURBO PSK RECEIVER OPTION, BROADCOM PROTOCOL
RF INPUT
Input Impedance
75Ω unbalanced
Input VSWR, 75-Ω system
<1.9:1 (10 dB R.L. min), 950-1450 MHz
< 1.9:1 (10 dB R.L. min), 1450-2150 MHz
Surge Resistance
Guaranteed survival from up to 10 direct-coupled 8kV
discharges (per IEC 801-2)
RF TUNING
Input Frequency Range
950 to 2150 MHz
LO Leakage at Input
≤ -60 dBm
Symbol-rate Range
1 to 30 Msps (may be limited by Transport Rate limits)
Tuning Resolution
10 kHz
Input Signal Level Range
-25 to -65 dBm
Signal Level Warning Limits
warns within +10/-5 dB of upper limit and +5/-10 dB of lower
limit
Maximum Aggregate Input Power
0 dBm max
DEMODULATOR/FEC
Modulation
1. DVB-QPSK (α =.35) per EN 300 421
2. Advanced "Turbo-QPSK" (α =.20 default; R=½, ¾) per
Broadcom proprietary protocol
3. Advanced "Turbo-8PSK" (α =.20 default; R=2/3, 5/6, 8/9) per
Broadcom proprietary protocol. [R=¾ Type I and II; contact
factory.]
4. Advanced "Turbo-16QAM" (α =.20 default; R=¾) per
Broadcom proprietary protocol
Carrier acquisition range
8
±1 MHz or ± 10% of symbol-rate QPSK, whichever is greater
800032-01 Rev. G
www.wegener.com
Unity 4600 User’s Manual
Characteristic
Max Eb/N0 @ Quasi-error-free threshold
(less than one uncorrected error-event per
hour)
Specification
1. DVB-QPSK
QPSK R=1/2:
4.5 dB,
QPSK R=2/3:
5.0 dB,
QPSK R=3/4:
5.5 dB,
QPSK R=5/6:
6.0 dB,
QPSK R=7/8:
6.4 dB
2. Turbo-QPSK
R=1/2:
2.4,
R=3/4:
3.6
3. Turbo-8PSK
R=2/3:
4.8 dB,
R=3/4(I): 5.4,
R=3/4(II): 5.8,
R=5/6:
6.8,
R=8/9:
8.2
4. Turbo-16QAM
R=3/4:
RF Power Level Estimator
6.6 dB
Unitless metric SIGNAL corresponds to input power as follows:
(locked to carriers or not)
above -25dBm
Extrapolated from 90 up to 100+
-25dBm
90
-35dBm
70
-45dBm
50
-55dBm
30
-65dBm
10
below -65dBm
Extrapolate from 10 down to <0
no signal
<0
Accuracy: unit to unit <±5 dBm; over frequency <±10 dBm
LNB DC POWER
(supplied on RF center conductor)
Activation
User- or network-controlled selectable: ON or OFF
Voltage
~ +18.7 VDC nominal at no loading, +18.0 VDC min. at max
loading
Current (full load)
350 mA max
Short-circuit protection
Thermal fuse, tripping at ~500 mA.
European “Universal LNB”
Software may be upgraded for “Universal Single LNB”
polarization and freq-band control per ASTRA recommendation
www.wegener.com
800032-01 Rev. G
9
General Information
Characteristic
Specification
TURBO PSK RECEIVER WITH 4-PORT SWITCH OPTION
RF SWITCH INPUT
4-port, single-throw switch
Input Impedance
75Ω unbalanced
Isolation, port-to-port
> 45 dB, 950-1450 MHz
> 40 dB, 1450-2150 MHz
Input VSWR, 75-Ω system, selected port
< 1.9:1 (10 dB R.L. min), 950-1450 MHz
< 1.9:1 (10 dB R.L. min), 1450-2150 MHz
Input VSWR, 75-Ω system, unselected port
< 1.9:1 (10 dB R.L. min), 950-1450 MHz
< 1.9:1 (10 dB R.L. min), 1450-2150 MHz
Surge Resistance
Guaranteed survival from up to 10 direct-coupled 8kV
discharges (per IEC 801-2) whether or not port is selected
RF TUNING
Same as Turbo PSK option described (above)
DEMODULATOR/FEC
Same as Turbo PSK option described (above)
LNB DC POWER
Supplied on RF Input Port 4 - same electrical characteristics as
described for single-input Turbo PSK option (above)
ASI TRANSPORT INPUT OPTION
DVB-ASI INPUT
10
One input per DVB ASI per EN50083-9 Annex B
Physical layer
270 Mbaud signaling on 75Ω coax cable
Minimum byte gaps
Down to 0-byte interbyte gaps
Transport data rate
Limited to rates allowed by parent IRD
800032-01 Rev. G
www.wegener.com
Unity 4600 User’s Manual
1.4 Safety Summary
The Unity 4600 is designed for safe use with few special precautions required of the user.
The following items are basic precautions to use when installing and working with your
Unity 4600:
Do not open the Unity 4600 chassis cover.
The Unity 4600 incorporates security labels over some of the screws. There are no userserviceable components within the Unity 4600. Tampering with these security labels or
opening the unit will void your warranty. If you have questions, contact Wegener's Customer
Service Department at the address or numbers listed in Chapter 5 Customer Service on
page 59.
www.wegener.com
800032-01 Rev. G
11
General Information
1.5 Glossary of Terms and Abbreviations
Term
Ad avail, digital
The opportunity for a local program splicer to insert local content in the MPEG PES streams
in substitution for “regular” network-distributed programming. The avail is bounded by
“splice out” and “splice in” points. "Splice points" are seamless insertion points (located for
the splicer by DPI messages) where the compressed stream may be broken and
substituted without frame-by-frame interruption of video.
Ad avail, analog
The opportunity for local users to switch from the network-supplied programming to locallygenerated content (commercials). This is signaled by use of DTMF tones or closures of cue
relays.
Alarm
A condition or notification of a condition that prevents proper Unity 4600 functioning.
Application Software
The main host software which sets up the unit hardware, runs the process of acquiring
transport stream sources, sets up and monitors the demux and decompression processes,
monitors unit operations, and interfaces with the network and local users.
ASI (or DVB-ASI)
An “asynchronous” bit-serial physical interface for transport streams. Transmitting and
receiving functions are designed such that the time relationships between all packets and
their timing references are unchanged.
Audio Language
Descriptor
Legacy 3-character MPEG descriptor applied to a program’s audio streams. It was
originally allocated to designate languages, but is now used for generic identification.
Automated Recovery
The mechanism used when the Unity 4600 is unable to acquire a valid transport stream,
loses network control or detects an invalid control stream, or is unable to deliver the
required services using its current settings. The unit automatically begins attempting
operations under "backup" unit settings stored in the presets table until it can return to
normal operation or is stopped by local user command.
(or Recovery)
Boot loader
Software residing in non-writable zone of flash which executes at unit reset. It will verify and
load the preselected application.
CA
See "Conditional Access".
®
COMPEL
12
Definition
Wegener's network control software that may be used to manage your Unity 4600 as well
as other hardware.
Conditional Access
Wegener’s system for securing the transmitted transport stream from unauthorized access.
It features distribution of ciphered authorizing messages within a special PID. Upon
deciphering in secure processors within the IRD, these messages continuously update the
IRD with the current descrambling key.
DPI
Digital Program Insert. A special message, borne in an MPEG PID associated with a
particular program, that signals the boundaries of ad avails.
DTMF
Dual-Tone Multi-Frequency. Tone signaling system used by the legacy telephone system.
Tone pairs represented each of the keyboard items 0-9, *, and #. This system may be used
to control external cueing equipment.
DVB
Digital Video Broadcast working group. This is a shorthand designation for a group of
industry standards that provide enhancements in the use of MPEG transport streams. (For
example, one DVB standard defined the standard way QPSK-modulated carriers would
convey these streams over satellite world-wide.)
Eb/N0
Energy-per-bit per Noise density-per-Hertz. This is a unitless ratio that expresses signal-tonoise ratio in carrier transmission systems that convey digital data. A quality measurement
for any such system is the Eb/N0 needed to just convey the digital data within acceptable
error rates. This is called the “Eb/N0 threshold”.
800032-01 Rev. G
www.wegener.com
Unity 4600 User’s Manual
Term
Definition
Ethernet
The widely-used LAN technology specified by IEEE standard 802.3
IRD
Integrated Receiver-Decoder. A product which features a "receiver" to extract transport
streams from satellite-borne carriers and a companion "decoder" to decompress MPEG
elementary streams (from within said transport streams) in order to recreate the original
audio/video/data signals. The Unity 4600 is an IRD.
Keep-alives
Simple COMPEL network messages, addressed to "all", bearing date and time.These are
transmitted regularly (every 5 seconds, for example) so that IRDs may quickly and
continuously verify their network connection.
(COMPEL)
KMS
Key Management System. The sub-system within the Wegener Conditional Access system
that creates and ciphers the scrambling keys and then distributes them to the uplink
UMX5010 and all downlinked IRDs conveyed in a special PID within the transport stream.
LAN
Local area network. Your Unity 4600 may be connected to an Ethernet LAN.
LCD
Liquid crystal display. The front-panel screen on your Unity 4600 is a liquid crystal display.
LED
Light-emitting diode. The front-panel indicator lights on your Unity 4600 are LEDs
Mbps, kbps or Msps
Units of data transport rate - Megabits per second (1 million bits per second), kilobits per
second (1 thousand bits per second), or million symbols per second (1 million symbols per
second)
MPEG
Moving Picture Experts Group - refers to the method of video compression established by
this group. (The Unity 4600 utilizes the MPEG2 format for video.)
Network Protection
Mode
A non-volatile setup parameter whose value is “Shared” or “Protected” (or “not Shared”).
Similarly, each network control stream has a “Share” status field as part of the COMPEL
packet framing. A network control stream is considered “invalid” to the Unity 4600 if the
network ID in the stream differs from that of the IRD and if either the network stream or the
Unity 4600 are set to be “Protected”. For test purposes only, there is a generic network ID
that the COMPEL system may transmit which is always considered to be “valid” by all IRDs.
NTSC
National Television System Committee. The composite color video standard used
domestically (and in a few countries outside US) based on 525-line 59.97 Hz field rate (with
2:1 interlace).
PAL
Phase-Alternating-Line. A set of composite color video standards used worldwide (outside
US) which implements a line-by-line reversal of phase of one of the orthogonal color
components. For our use, all PAL signals are assumed to be 625-line 50 Hz field-rate
systems with varying chroma and luma bandwidths and color subcarrier frequencies.
PAT
Program Allocation Table. A PSI table within an MPEG transport stream which crossreferences all available programs to a PID for its PMT. This table is always present in legal
transport streams and must always be in the clear (not scrambled) even when Conditional
Access scrambling is used.
PCR
Program Clock Reference. A time-base signal used to synchronize the IRDs internal timing
to the same timing in the MPEG encoder for the received program. Multiple programs may
share a PCR, depending on the multiplexer used to create the final transport stream.
PES Stream
Packetized Elementary Stream. The MPEG designation for a compressed component of a
Program (such as audio or video) which includes the timing information necessary for
synchronization (e.g. - synchronizing audio to video).
PID (or Packet ID)
The unique transport stream packet identifier assigned to each constituent data stream
within the transport stream. Also, in this document, “PID” is used to designate the stream
itself.
www.wegener.com
800032-01 Rev. G
13
General Information
Term
PMT
Program Map Table. A PSI table within an MPEG transport stream which cross-references
a program (or programs) against all the PIDs that bear its component streams (such as
audios, video, DPI, PCR, etc.). IRDs need this table to decode the compressed
components of that program.
Presets Table
A non-volatile table of unit presets. This table is used for either automatic recoveries or as a
shorthand method to quickly reconfigure the unit. The presets table may be programmed at
the factory and edited by the customer, either locally or via network control.
Program
A single media stream (combination of audio, video, data, etc.) tied to a common time base.
Program Number
A numerical code representing a program.
PSI Tables
A group of information-bearing tables, each borne by well-known PIDs, regularly
transmitted in the transport stream. See also “PAT” and “PMT”. Also, ISO 13818-1 gives a
thorough description of these and other Tables.
PTS
Presentation Time Stamp. A marker signal associated with audio and video streams within
a program conveyed in MPEG transport stream. This signal allows the audio and video to
be presented in synchronism to each other.
RAM
Random access memory. A general term for all volatile memory types out of which
application software executes and into which its variables, state information, and messages
are stored. RAM is also used to designate the volatile storage used by the Transport
Demux and decompression devices.
RF
Radio frequency
Service Descriptor
Service Descriptors are text entries in the Service Descriptor table (SDT, defined per a DVB
standard). Service Descriptors are used to give text names to the Programs within transport
streams.
Service settings
That part of the Unit Settings which allow for the local detection, decompression, and output
(or "display") of a program's services.
Setting,
The most recent Unit Setting requested by a user (local or network) command. This value is
non-volatile.
Last Commanded
Setting,
Last Successful
14
Definition
The most recent Unit Setting, which is NOT a Temporary Setting, at which the IRD was able
to deliver services while free of alarms. This may also be the Last Commanded setting or it
may be the attempted (Transient) setting at which auto-recovery was successful. This value
is non-volatile.
Setting, Permanent
That non-volatile Unit Setting which the IRD will attempt, if in Normal Operation, after a unit
reset. This will be the Last Commanded setting unless, since that command was issued,
the IRD had executed an Auto-Recovery and successfully acquired at one of the Preset
settings. In other words, the Permanent Setting is the most recent of the Last Commanded
and Last Successful Settings.
Setting, Temporary
A special volatile unit setting with a timed expiration period. The command to invoke this
special setting and the subsequent success of the IRD to find services at this setting does
not affect the non-volatile value of the Last Commanded or Last Successful Settings. Also,
if the compliant IRD receives a command to change its Permanent Setting while in a
Temporary Setting, the Temporary Setting will not be aborted, but the new Permanent
Setting will be recorded in NVRAM as the Last Commanded setting and the Permanent
Setting pointer will refer to that.
Setting, Transient
A volatile Unit Setting used for immediate acquisition of services. Transient settings are
either Temporary settings (see above) or Presets used for attempted acquisition during
Auto-Recovery. If, in the case of Presets, the attempt is successful, those settings become
Permanent Settings.
800032-01 Rev. G
www.wegener.com
Unity 4600 User’s Manual
Term
Definition
TMRA
Maximum Recommended Ambient Temperature, the highest operating temperature for
which the unit is rated
Transport Stream
A multiplex of several data streams, each of which is borne in transport packets, 188-byte
blocks containing a sync word, header information (including a PID), and payload data. This
multiplex includes PSI data tables, programs, padding, and floating PIDs such as those
(or MPEG Transport
Stream)
®
used by COMPEL
Warning
www.wegener.com
network control.
A condition or notification of (1) a condition that may compromise the proper performance
of your Unity 4600; or (2) any non-alarm condition that should be brought to local user’s
attention.
800032-01 Rev. G
15
General Information
This page intentionally left blank
16
800032-01 Rev. G
www.wegener.com
CHAPTER 2 INSTALLATION
This chapter provides instructions on unpacking, mounting, and connecting your Unity
4600 as well as connector information including detailed pinouts.
2.1 Unpacking and Inspection
Carefully unpack the unit and its ac power cord and inspect for obvious signs of
physical damage that might have occurred during shipment. Any damage claims must
be reported to the carrier immediately. Be sure to check the package contents
carefully for important documents and materials.
Note:
Please save the packing materials and original shipping containers in case
you must later return the unit for repair. Packing these units in other
containers in such a way that they are damaged will void your warranty.
2.2 Location and Mounting
The Unity 4600 may be mounted in a standard 19-inch equipment rack or set up for
desktop operation. In either location, maintain a clean, dry environment for your Unity
4600.
FCC-mandated suppression of radiated emissions
If the Ethernet port has a cable connected to it, that cable MUST be properly shielded
and grounded. This must be done to minimize RF emissions which could interfere with
nearby equipment.
WA RNING
This is a Class A product. In a domestic environment this product may cause radio
interference for which the user may need to take mitigating action.
DANGE R
To avoid damage to this and other equipment, or personal injury, the following items
should be strictly observed.
Elevated Operating Ambient
When equipment is installed in a closed or multi-unit rack assembly, the operating
ambient of the rack environment may be greater than the room ambient. Therefore,
consideration should be given to the ambient air temperature within the rack, and not
just inside the room, when deciding if the maximum recommended ambient operating
temperature (TMRA) is being met.
Reduced Air Flow
Equipment should be installed such that airflow required for safe operation of the
equipment is not compromised. The Unity 4600 may be arranged in a rack without
empty spaces between units if heat rise is prevented by ensuring its side vents remain
unblocked with adequate clearance around the vent holes.
wegener.com
800032-01 Rev. G
17
Installation
Mechanical Loading
Mounting of the equipment in a rack should be such that a hazardous condition is not
produced by uneven loading. This unit is not very heavy, but total rack loading must be
considered. Also, do not rest any unsupported equipment on your Unity 4600.
Circuit Overloading
Consideration should be given to the connection of the equipment to the supply circuit and
the effect that overloading of circuits could have on overcurrent protection and supply
wiring. Ensure that the total rack or breaker power consumption does not exceed the limits
of the AC branch circuit. Appropriate consideration of equipment ratings should be used
when addressing this concern.
Reliable Earthing
Reliable earthing of rack-mounted equipment should be maintained. Particular attention
should be given to supply connections other than direct connections to the branch circuit
(use of power strips, chassis ground lugs, etc.).
Rack
Mounting
Your Unity 4600 is sized at a single RU and will fit an EIA-standard, 19-inch-wide equipment
rack.
1.
First install angle brackets or cross-supports capable of supporting both the unit and its
connecting cables. Screw or bolt the supports securely to the equipment rack.
2.
Place the Unity 4600 on its supports and use four anchor screws or bolts and nuts to
secure the Unity 4600 front brackets to the rack.
WA RNING
The front brackets must be secured to the rack. If front brackets are left unsecured, the unit
may shift forward and fall from the rack during installation or operation. Failure to secure the
front brackets may result in personal injury and/or damage to the equipment.
Desktop
Installation
To set up the Unity 4600 in a desktop environment, place the Unity 4600 on a flat surface
where it will not be subject to spills or impacts. Also route cables to the unit so that they will
not be hit or pulled causing damage to the connectors or to the unit itself. Ensure a sufficient
flow of cool air (See Reduced Air Flow on page 17.) so that the unit's operating ambient
temperature range is not exceeded.
WA RNING
Locate the Unity 4600 and its cables to avoid impacts, spills, and pulling cables and to
ensure sufficient air flow. Failure to locate the Unity 4600 in a proper environment may result
in damage to the equipment.
18
800032-01 Rev. G
www.wegener.com
Unity 4600 User’s Manual
2.3 Unity 4600 Connections
Rear panel
views
Figure 2.1 and Figure 2.3 illustrate the rear panel views for the Unity 4600 connections.
Note:
DTMF is not available for units manufactured after 10/22/2007.
Figure 2.1 shows the connector locations on the Unity 4600 rear panel.
Figure 2.1: Unity 4600 rear panel without DTMF
See Figure 2.3 for Transport In
Options for this slot.
Figure 2.2: Unity 4600 rear panel with DTMF
Transport In
Options
Figure 2.3 below shows rear panel views of the five available receiver modules.
Rear panel
Connectors
Table 2.1: Rear panel Connectors below lists the Unity 4600 rear panel connectors, their
types and pinout information. See Interpreting LEDs on page 33 for descriptions of rear
Figure 2.3: Unity 4600 Transport In Options
panel indicators.
www.wegener.com
800032-01 Rev. G
19
Installation
Table 2.1: Rear panel Connectors
Connector
Designation
ALARM/CUEING
DTMF
(where available)
AUDIO
(same for both
ports 1 and 2)
20
Type
Pin
10-pin male header
(mates to removable
terminal-strip)
1
3-pin male header
(mates to removable
terminal-strip)
6-pin male header
(mates to removable
term strip)
COMPOSITE VIDEO
OUT
BNC Jack
SERIAL CONTROL
RS232, 9-pin D
female jacks
Signal Name
OK (COM closes here when OK)
(on left as viewed
from rear of unit)
2
COM:
3
Alarm (COM closes here on alarm or if
power is off)
4
GND
5
Cue Relay #1: N.C. contact
6
Cue Relay #1: Common contact
7
Cue Relay #1: N.O. contact
8
Cue Relay #2: N.C. contact
9
Cue Relay #2: Common contact
10
Cue Relay #2: N.O. contact
1 (on left as viewed
from rear of unit)
DTMF tone, non-inverted output
2
GND
3
DTMF tone, inverted output
1 (on left as viewed
from rear of unit)
Right ‘+’
2
Right GND
3
Right ‘-’
4
Left ‘+’
5
Left GND
6
Left ‘-’
Composite Video Out
1
DCD (internally pulled to +5V)
2
RxD (data output)
3
TxD (data input)
4
DTR (not connected)
5
GND
6
DSR (internally pulled to +5V)
800032-01 Rev. G
www.wegener.com
Unity 4600 User’s Manual
Connector
Designation
ETHERNET
Type
Pin
RJ45 Jack
Signal Name
7
RTS (internally pulled to +5V, may be
upgraded for handshaking)
8
CTS (not used presently, may be upgraded
for handshaking)
9
RI (internally pulled to +5V, with weak
current limiting)
1
TXDO +
(on left as viewed
from rear of unit)
2
TXDO -
3
RXDI +
4
Shorted together, then terminated into an
AC ground.
5
6
RXDI -
7
Shorted together, then terminated into an
AC ground.
8
ASI OUT
BNC Jack
DVB-ASI Transport Output
115/230 VAC
Std. IEC Receptacle
AC line in
DVB-QPSK Transport In Option
RF IN
Type F coax jack
L-band RF Input from external LNB (with
LNB DC on center pin)
DVB-QPSK with 4-way RF Switch Transport In Option
RF IN – 1 through 4
Type F coax jacks
4-way RF Switch Inputs (with DC block)
LNB PWR*
2-pin male header
(mates to removable
terminal-strip)
1
LNB DC Output positive leg
(on left as viewed
from rear of unit)
2
LNB DC Output return leg
Turbo-PSK Transport In Option
ASI IN
<plugged>
RF IN
Type F coax jack
Not used
L-band RF Input from external LNB (with
LNB DC on center pin)
Turbo-PSK with 4-way RF Switch Transport In Option
ASI IN
<plugged>
Not used
RF IN – 1 through 3
Type F coax jacks
4-way RF Switch Inputs (with DC block)
RF IN 4
Type F coax jack
4-way RF Switch Input (with LNB DC on
center pin)
ASI Transport In Option
www.wegener.com
800032-01 Rev. G
21
Installation
Connector
Designation
Type
ASI IN
BNC Jack
DVB-ASI Input
RF IN
<plugged>
Not used
Pin
Signal Name
* LNB DC power may be locked to OFF by network.
Table 2.2 below lists the Unity 4600 front-panel connectors, their types and pinout
information.
Table 2.2: Front-panel Connectors
Connector
Designation
Type
Video Monitor
BNC jack
Audio Monitor
¼” stereo phone jack
Pin
Signal Name
Composite Video monitor
Stereo audio headphone monitor,
selectable between audio ports 1 or 2
2.4 Serial Port Configuration
Device
assignments
The Unity 4600 has one external serial port. A “device” must be assigned once to the serial
port, but no “device” may be assigned more than once. In addition, more than one device
may be assigned at one time but only one device which accepts input may be assigned. (If
multiple devices are assigned to the serial port, the port’s settings are controlled by the
device with higher priority according to the list below.) Device port assignment and device
configuration (see below) may be controlled only from the unit front panel and the network
may disable this capability. The possible devices are:
1.
2.
3.
4.
5.
Device
configurations
Terminal
Modem (“modem” being remote terminal via modem)
Local COMPEL®
Auxiliary Data
Printer (including COMPEL® e-mail and reports)
When a serial port configuration command is received, the specified configuration is
immediately stored for the specified device (e.g. for the “Terminal” device). If a serial port is
currently assigned another device, then its output buffer is immediately flushed and the port
re-configured. Communication is fixed at 1 start, 1 stop, and 8 data bits, with no hardware
handshaking. No provision for software handshaking is made in this Release. The serial
port’s behavior for each of its device types is described in the following table:
Table 2.3: Device Configurations
22
Device
Serial Port Behavior (Italics are Programmable, Bold are Fixed)
Terminal
Configured to 19.2k, N, 8, 1. The unit responds to the terminal commands as
described in 3.4 Operation from Local/Remote Terminal on page 59.
Modem
Configured to B, P, 8, 1. The unit responds to the commands as described in
3.4 Operation from Local/Remote Terminal on page 59.
800032-01 Rev. G
www.wegener.com
Unity 4600 User’s Manual
Device
Serial Port Behavior (Italics are Programmable, Bold are Fixed)
Aux Data
Configured to B, P, 8, 1. This is an output only (all inputs ignored).
Local
COMPEL
Configured to B, P, 8, 1. This is an input for testing only.
Printer
Configured to B, P, 8, 1. This is an output only.
The legal values for B are: 1200, 2400, 4800, 9600, 19.2k, or 38.4 kilobaud.
The legal values for P are: ‘O’, ‘E’, or ‘N’ for Odd, Even, or No parity.
Device
handling
Terminal I/O - The Terminal device is used for command and control of the Unity 4600. This
I/O is a basic VT100-like emulation. All I/O is prompted by user-input text strings terminated
in carriage-returns. The terminal, whether local or remote (via modem or telnet over TCP/
IP), should be set to local echo ON. The unit only echoes a carriage-return/linefeed and then a
‘>’ prompt after user entry.
Modem I/O - The Modem device operates in a similar manner to the Terminal device.
Whereas the Terminal device was limited to a specific configuration, the modem device may
be set to one of several. The Modem device does not use special handshaking or special
control characters, and only supports auto-answer modems. To access the modem
command interface, the serial-port device must first be set to Modem. The "Terminal/IO"
discussion above on emulation and echoing would then apply. The user would send the unit
a carriage return and then the unit would return a prompt to enter the "modem password". If
the correct password is entered, then modem access is enabled. Upon enabling modem
access, the Unity 4600 will output a welcome banner. After that, I/O is indistinguishable from
normal terminal access, with the same restriction on local user access as set by the
Network. Modem access is disabled when either (1) a new input serial-port device is
selected, (2) when there is no user input for 10 minutes, (3) the OH command is received, or
(4) the unit is reset.
Aux Data - The Aux Data device is defined to allow for async data streams to be carried
within the transport stream and their raw payload output on an IRD serial port. The PID of
these streams may or may not be assigned to a program number within a PMT. To recover
the data, the IRD need only be given the PID and baud rate. The range of legal PIDs is
established by the ISO 13818 standard as 20 to 1ffe (hex). This may be performed either by
COMPEL® command or by the local user (if local control is enabled).
COMPEL® - This device is defined to allow for input of the COMPEL control stream (for
testing only). There is no output.
PRINTER OUTPUT - This is an output-only device. For the Printer device, there are three
legal types: COMPEL-requested Reports, COMPEL E-mail, and Raw COMPEL (binary)
Data. The first output type are IRD status reports identical to those that the local user may
request. These are always available for the Printer device. The second output type must be
enabled by a non-volatile control. The last type, Raw COMPEL, must also be enabled by a
non-volatile control (actually a factory setting that can only be modified with debug access).
It is exclusive of the other outputs (the others are not allowed if dumping Raw COMPEL).
For this type, the COMPEL data stream, while being processed normally by the IRD host
processor, is also output as-is to the Printer device. This data is binary and includes nonprinting characters.
www.wegener.com
800032-01 Rev. G
23
Installation
2.5 Installation Testing
The Unity 4600 has a number of installation tests that may be performed from the front
panel. From the Home screen, press the right arrow until the Installation Testing screen is
displayed.
RF input
check
Audio/video
check
DTMF Setup
This test is used to verify an RF connection to a properly functioning LNB at any RF port.
Perform the check as follows:
1.
Press ENT from the Installation Testing screen to bring up the RF Input Check screen.
2.
Press ENT again to display the input level estimate at RF Port 1. This will be an average of
the estimated levels at each of the twenty-four domestic transponder center frequencies.
3.
Press the right-arrow button repeatedly to display the input levels at RF Ports 2, 3, and 4 as
well.
4.
Press ESC to return to the RF Input Check screen.
This test puts out a video test pattern and audio test tones to allow verification of video and
audio connections. The video pattern is vertical color bars. On Port 1, the audio is a slowly
pulsing (triangle-wave) tone with a higher frequency on Right than on Left. On Port 2, the
audio is a slowly pulsing (sine-wave) tone also with higher frequency on Right than on Left.
On each port, the audio tones alternately pulse (~1 second) left then right, then repeat. Use
the following steps to enable or disable this audio/video test mode:
1.
From the RF Input Check screen, press the right-arrow button to bring up the Audio/Video
Check screen.
2.
The Audio/Video Check screen will indicate that the test mode is either "Enabled" or
"Disabled".
3.
Press ENT to switch the test mode between "Enabled" and "Disabled".
4.
Press the left-arrow button to return to the RF Input Check screen or ESC to return to the
Installation Testing screen.
This test allows the setup of DTMF tone levels and verification of connections to cue
equipment.
Note:
DTMF output capability not offered on equipment manufactured after 10/22/07.
Use the following steps to set the DTMF level:
24
1.
From the Audio/Video Check screen, press the right-arrow button to display the DTMF
Setup screen.
2.
Press ENT to display the DTMF Test Tone screen and begin output of the DTMF test
tones. The tones (actually tone-pairs) are played out at about one-second intervals from 1
through 9, 0, *, #, A, B, C, D, and then repeating.
3.
Press the arrow buttons to adjust the volume. Up-arrow or right-arrow to increase volume,
down-arrow or left-arrow to decrease volume. The number of black squares on the LCD
indicates the current volume.
800032-01 Rev. G
www.wegener.com
Unity 4600 User’s Manual
4.
Relay Pulse
Check
www.wegener.com
Press ESC to return to the DTMF Setup screen or ESC to return to the Installation Testing
screen.
This test may be used to verify connections to the alarm or cue relays. Each relay, as it is
tested, will energize and de-energize about once per second. Use the following steps to
check these connections:
1.
First, verify that each relay is set either to ON or OFF. Relays placed in the nonvolatile
"Follow Warning" setting will not respond to the Pulse command used in this test.
2.
From the DTMF Level Set screen, press the right-arrow button to display the Relay Pulse
Check screen.
3.
Press ENT to display the Relay 1 Check screen.
4.
The Relay Check screen will indicate that the relay is On or Off as it switches on and off
about once per second. At the same time, a user should see the ohm-meter reading
between the output contacts alternate between zero and (virtually) infinite.
5.
Press the right-arrow button to test the remaining cue relays and the alarm relay.
6.
Press ESC to return to the Relay Check screen.
800032-01 Rev. G
25
Installation
This page intentionally left blank
26
800032-01 Rev. G
www.wegener.com
CHAPTER 3 OPERATION
This chapter provides an overview of Unity 4600 operation, details of controls and
indicators, the alarm/warning system, and user interface details.
3.1 Theory of Operation
Functional
summary
From one selected RF input feed, the Unity 4600 receives an L-band RF carrier from
an external antenna LNB. It then demodulates the carrier and extracts the transmitted
MPEG transport stream. If the stream is scrambled and the unit is properly authorized,
it applies the descrambling algorithm to re-generate that transport stream as it
appeared at the multiplexer in the uplink compression system. (Alternately, if using
per-program viewing access, only the authorized programs will be descrambled.) This
transport stream is then supplied to the ASI transport output, perhaps with program remapping or conditional DPI filtering (under network control). The Unity 4600 also
decompresses the components of a selected program and provides the audio, video,
and/or data services for output.
Note:
The user or network may wish to have a null program assignment if no
attempt at local decompression is desired. This is required for the new HD
programming.
As needed, auxiliary functions are also provided, such as re-insertion of vertical
blanking interval data (closed captioning for example) in the video output. 3.1 presents
a logical block diagram of Unity 4600 operation.
Available outputs from the Unity 4600 include:
DVB-ASI transport output with program (number and descriptor) mapping
Decompressed MPEG video as composite video output (NTSC or PAL)
Two independent, decompressed audio streams (MPEG or Dolby AC-3 downmix) to
balanced analog audio outputs
Re-insertion of VBI line data from various proprietary and ATSC protocols
Alarm relay
User control relays for cueing
DTMF cueing tones
Front-panel audio (one stereo pair) and composite video monitor outputs
Automated
recovery
wegener.com
If unable to deliver required services to predetermined standards, or if unable to detect
a required network control stream (COMPEL®), the Unity 4600 attempts to resume
normal operation through a process called Automated Recovery. Referring to an
internal, non-volatile list of "presets", the Unity 4600 will attempt to restore either
services or network control, depending on what caused the recovery. A "preset" is a
list of unit settings, and the list of these presets is called the Preset Table. Automated
Recovery will attempt to restore the unit according to each preset (one at a time) in the
order in which they are listed in the table. The process continues (repeating attempts if
necessary) until the unit successfully resumes normal operation or is halted by local
user command. If successful with a preset, the settings in that preset become the
permanent unit settings. Later, the local user (or the network, if available) may abort the
results of the Automated Recovery and force the unit back to its last commanded setting.
800032-01 Rev. G
27
Operation
Several user- or network-programmable objects control the Automated Recovery. In
addition to the contents of the Preset Table, these objects include the Services Recovery
Timeout, the Network Recovery Timeout, the Recovery Iteration Time, and the Local
Control Re-enable Timeout. The first two timeouts control how long the unit will wait after
loss of services or network control, respectively, before entering Automated Recovery. The
Recovery Iteration Time sets the maximum time the unit will spend attempting recovery at
each preset. The last is a special timeout for disaster recovery, such as loss of a satellite,
where units whose local control was previously disabled by the network are re-enabled so
that local users may implement more complex recovery plans.
Monitoring
and control
Most routine Unity 4600 operations can be performed over Wegener’s COMPEL® Network
Control System. Control is "broadcast" to individual units through a "ghost-PID" data
component of the incoming transport stream. The Unity 4600 is considered disconnected
from the network at any time this special stream is not being received.
In addition to the remote COMPEL network control, three methods are provided for "local"
monitoring and control of the Unity 4600: a web browser interface (later release), a terminal
interface (direct serial or via telnet over TCP/IP), and a front-panel interface.
Note:
Local control may be limited by COMPEL command.
The remainder of this chapter details these local monitor and control interfaces.
Figure 3.1: Unity 4600 Functional Block Diagram
28
800032-01 Rev. G
www.wegener.com
Unity 4600 User’s Manual
3.2 Operation from Front Panel
Front-panel
layout
The Unity 4600 front panel (3.2) includes the following four main parts: a liquid crystal
display (LCD), six pushbuttons, eight LED indicators, and the front-panel audio and video
monitor ports. Essentially all control available through the network or terminal is also
available from the front panel.
The front-panel LCD (1, see LCD screen relationships on page 29) supports unit
monitoring and control by displaying screens containing status information, menu navigation
pointers, and parameter input fields. Each LCD screen has a label or heading on the first
row and information, parameters, or prompts on the second row which may cycle through
multiple messages depending on the context.
The six pushbuttons (2) are your means of commanding the Unity 4600 from the front panel.
Use the four arrow buttons to navigate through menu screens and parameter selections and
to scroll through available choices or characters when editing an input field. Press the ENT
(Enter) button to select menus (downward navigation), to open editable input fields, or to
commit edited parameters to the Unity 4600. Press ESC (Escape) to exit an input field
without saving the entry or selection. ESC also provides upward navigation through the
menu structure to the home screen.
The eight front-panel LEDs (3) provide status information about your Unity 4600 and its
processes. See Table 3.2: Front-panel LED Indicator Descriptions on page 33 for complete
details. (Two additional LEDs are located on the rear panel and provide Ethernet status
indications.)
At far right are the video port and audio port (4) included for monitoring from the front panel.
Figure 3.2: Unity 4600 Front-panel Layout
LCD screen
relationships
www.wegener.com
Figure 3.3 shows LCD screen relationships from the top level downward. These screens are
structured in two dimensions, reflecting their relationships as peers, as parents, and as
children of other screens. The up-and-down dimension represents the parent-child screen
relationships (navigated with the ESC and ENT buttons). The side-to-side dimension is the
peer relationship (navigated with the right- and left-arrow buttons). A parent screen is
usually a menu screen covering some category of Unity 4600 operation or status. Its child
screens are opened by pressing ENT at the parent screen. These child screens then
provide access to finer details of unit monitoring and control. Multiple child screens of a
parent menu screen are all peers to each other. However, the most significant set of peer
screens are the top-level screens that have no parent and that include the home screen.
The home screen may be reached by pressing and holding ESC (or pressing it repeatedly) from
any other LCD screen. Appendix A Monitoring and Control Details gives more details on
screen types and using front-panel push buttons to navigate and control the Unity 4600.
800032-01 Rev. G
29
Operation
Figure 3.3: LCD Screen Relationships
LCD screen
content
Available top-level screens are shown in order in Figure 3.4: Unity 4600 Top-level Screens
on page 30. Some screens are only available under certain unit conditions or when certain
optional hardware is installed. These optional screens are represented by hatched boxes.
Figure 3.4: Unity 4600 Top-level Screens
30
800032-01 Rev. G
www.wegener.com
Unity 4600 User’s Manual
Top-Level LCD Screens
Table 3.1 lists the top-level screens and their functions.
Table 3.1: Summary of Top-Level LCD Screens and Their Functions
Screen Name
Home Screen
Functions/Applications
Shows basic receive settings and indications about special unit
conditions
Unit Info (Shortcut) Screen
Shows unit’s serial number, label, and model number
Shows unit’s application software version number
Shows other key unit information.
Alarm/Warning Screens
(when applicable)
Shows current alarms and warnings (if any)
Shows historic alarms
Allows user to clear historic alarm records
Allows user to acknowledge/clear certain warnings.
Recovery Abort
(when applicable)
Allows user to abort a recovery in progress or abort the result of an
automated recovery - or Allows user to adopt a recovered setting as a new permanent
setting
Front-Panel Email
(when applicable)
Allows user to read and clear unread email sent by network control
SW Download Status
(when applicable)
Allows user to monitor the progress of a software download over
satellite
Quick-List Control Screens (Multiple)
A variable number of commonly-used control screens duplicated at
the top level for easy access
RF Switch Bypass
(when RF switch option is installed)
Allows the user to force the receiver to accept a carrier only at a
designated feed port at all times
Installation Test
Allows user to implement special test modes useful at initial unit
installation
www.wegener.com
800032-01 Rev. G
31
Operation
Screen Name
Functions/Applications
Unit Status/History
Allows user to access unit status and diagnostics. Typical items
located under this menu include:
Current unit state
Signal Quality
Last commanded and last successful unit settings
Program Analysis
Local audio/video decompression history
Network control status/history
Current LAN settings
Encryption settings
Unit internal temperature
Option module presence/status
Unit information screen (including software version)
Control to clear diagnostics
Unit Setup
Allows user to control unit. Typical controls located under this menu
include:
Set permanent unit settings (tuning, program, audio selection)
Add/edit/move/delete Presets
NTSC Pedestal
Buffer control (PCR offset)
Audio attenuation
Audio front-panel monitor select
Muting
VBI line re-insertion enable
Recovery mode timeouts
Serial port setup
LNB LO frequency set
LNB DC power set
User cue relays
Signal quality indicator thresholds
Minimum alarm/warning indication times
LAN settings
NVRAM operations
Alarm (history) latching enable
Program Mapping Ghost PID pass list
Current unit software selection
Unit label edit
Unit reset
Home and
default
screens
The home screen appears on the LCD by default at boot up. During operation, the user may
return to the home screen at any time, from any location in the menu hierarchy, by pressing
the Escape (ESC) button repeatedly (or pressing and holding it). Regardless of the current
location within the LCD menu hierarchy, if no front-panel keypress is made for more than 5
minutes, the LCD reverts to the default screen. Usually, this is the home screen. However,
under some conditions (two are described below), another screen becomes the default. If
more than one of these conditions exist simultaneously, priority is given in the order listed.
Note:
Regardless of which screen is the current default, the user may still access all
available screens using the left- and right-arrow, ENT and ESC buttons.)
Download Screen as default
If the Unity 4600 is in an ACCEPT PACKETS Download state, then the Download screen
becomes default.
32
800032-01 Rev. G
www.wegener.com
Unity 4600 User’s Manual
Audio FP Monitor Selection Screen as default
For two minutes, or until ESC is pressed, the Level 2 Audio FP Monitor Selection screen is
the default if the unit features a front-panel audio monitor jack and the user plugs in a ¼”
stereo phone plug. Note that this is NOT usually a first-level screen, unlike other default
examples.
On the home screen, the
(right-pointing arrow) field will quickly flash (a half-second ON
and a half-second OFF) to signal the user that the right arrow button is active for user
control. Pressing either the left or right arrow buttons will cause the Unity 4600 to display the
other top-level screens in succession. If there are current alarm and warning indications, the
text "See alarms" or "See Warnings" will appear before the arrow and pressing the right
arrow will display the applicable alarm or warning message(s).
Interpreting
LEDs
Front panel LEDs
Figure 3.5 provides the meaning of the color and state of each LED.
Figure 3.5: LED Indicators
Table 3.2: Front-panel LED Indicator Descriptions
Indicator Label
CARRIER
TRANSPORT
COMPEL®
www.wegener.com
Color and State*
Meaning
GREEN constant
Unit has demod and FEC lock on the RF carrier
Off
Unit does not have demod and FEC lock on the RF carrier
GREEN constant
Unit recognizes a valid transport stream
Off
Unit does not recognize a valid transport stream
GREEN constant
COMPEL control stream received within last two minutes
(including keep-alives) while locked continuously on the current
transport stream for >2 minutes
GREEN flash
Unit has had a verified transport stream for >2 minutes and
COMPEL is required but no valid COMPEL
GREEN flutter
COMPEL has been addressed to unit within last 5 seconds
(excluding keep-alives)
Off
Otherwise. Note that this LED must be OFF when there is no valid
Transport stream OR COMPEL
800032-01 Rev. G
33
Operation
Indicator Label
SERVICES
WARNING
CUE
ALARM
AUTH
Color and State*
Meaning
GREEN constant
Unit is processing services for delivery
Off
Unit is not processing services
YELLOW constant
One or more warning indications exist, usually the failure of a nonessential item, or to warn of an impending failure of an essential
item
Off
No warning conditions
GREEN constant
A user cue relay is closed (energized).
GREEN flutter
During a user relay “pulse” activation on any relay.
Off
All user cue relays are open (de-energized).
RED constant
One or more current alarm indications.
RED blink
An alarm event has occurred in the past and has not been
acknowledged and cleared by the user. Note that this state may
exist together with a current alarm (RED constant). In that case,
the blink state is defined as quickly cycling OFF-ON-OFF
(~100ms each) approximately every 2 seconds.
Off
No alarm condition currently exists.
GREEN constant
Unit has transport MPEG sync and the stream is not scrambled
(in the clear). Streams that are “clear” are always presumed to be
“authorized”.
OR
Unit is authorized for current scrambled transport stream (or
selected program) and has transport MPEG sync. When using
Wegener CA (’97 Version), being “authorized” means being
addressed with current and valid ciphered keystream messages.
In a PIN system, if the transport stream is scrambled, and the unit
has been programmed with any key other than the null ‘00000’,
then it presumes that it is “authorized”.
GREEN flutter
Unit has successfully deciphered a valid descrambling seed in the
last five seconds. Normal behavior in functioning CA system.
Off
Unit has transport sync, the transport stream is scrambled, and
the unit is NOT authorized. Also OFF if no transport sync.
* LED states are defined as follows: Blink - alternating ON for ~100ms and OFF for ~2 seconds; Flash - alternating
ON for ~500ms and OFF for ~500ms. Flutter - like flash but with shorter ~100ms ON and OFF times.
Rear panel LEDs
The Unity 4600 also has two LED (light-emitting diode) indicators on the rear panel. They
provide the following indications:
LAN – Green LED: On if active LAN connection detected. OFF otherwise.
ACT – Yellow LED: Flashing ON if ethernet packets are output or addressed packets are
input. OFF otherwise.
34
800032-01 Rev. G
www.wegener.com
Unity 4600 User’s Manual
Front-panel
audio monitor
To monitor audio output from the front panel, insert a 1/4-inch stereo phone plug into the
audio monitor port. The Unity 4600 will detect the phone plug and immediately display the
Audio FP (front-panel) Monitor Selection screen. This second-level menu screen allows the
user to select and monitor the desired audio stream. After two minutes without a keypress
from the front panel, the Unity 4600 will revert to the default LCD screen.
3.3 Operation from Local/Remote Terminal
Overview and
syntax
This section applies to control by both the Terminal and Modem devices. Once a user has
fulfilled the password requirement for Modem access, the communication is identical to
Terminal control.
Approved clients for Terminal monitoring and control via telnet include Tera Term,
Windows® 2000 telnet, and Windows® XP telnet and no special login is required. VT100
and ANSI terminals are approved. To exit, use the client’s exit/escape sequence or get
debug access in the IRD to use the QUIT or EXIT command.
Commands listed in this section detail command syntax and action taken. Commands
consist of a command field and a parameter field. Each command field and parameter field
is space delimited. Optional parameters are indicated by square brackets, [ ], and
conditional parameters are indicated by braces, {}.
For example, COMMAND_NAME parameter1 {parameter2} [parameter3] indicates that
parameter1 must be entered, parameter2 entered only when a certain condition is met
(certain option is installed, etc.), and parameter3 is optional. Both commands and
parameters may be entered in upper or lower case; the interface is not case-sensitive.
Incorrect or incomplete commands result in "Invalid Command" being displayed at the
terminal. Parameter errors on User commands generate "Invalid parameter name" where
parameter name is the name of the incorrectly entered parameter.
User
commands
Note:
Any commands controlling carriers, programs, or services may be disabled from
COMPEL®.
Table 3.3: Command directory for Unity 4600 terminal commands
ABORT
Insert is terminated. See TEMP command.
ABORTREC x
x:
C - make the unit’s permanent setting equal to the last commanded setting
S - make the unit’s permanent setting equal to the last successful setting
Command either
1) aborts an ongoing automated recovery;
2) aborts the successful results of an automated recovery; or
3) accepts the successful results of an automated recovery.
With either value for x, this command is interpreted as a direct local user command to establish/confirm
the unit’s permanent settings.
ADDE location COMPEL-req [tags-req] [aud1] [aud1_rt] [aud2] [aud2_rt] [margin]
location:
www.wegener.com
Value from 1 up to max (highest entry #) indicating location in Preset table.
800032-01 Rev. G
35
Operation
COMPEL-req:Values are REQ, NR, or GL.
Forces COMPEL® to be temporarily required, not required, or left as normal global unit
setting (respectively) when attempting this Preset during Recovery.
tags-req:
Values are REQ, NR, or GL.
Forces Carrier ID Tags to be temporarily required, not required, or left as normal global unit
setting (respectively) when attempting this Preset during Recovery.
aud1:
Language descriptor (or wildcard ‘*’) for audio stream to be assigned to Audio port 1.
aud1_rt: S - Stereo (left and right components routed as connected at original MPEG encoder)
1 - Original left component to both L and R outputs
2 - Original right component to both L and R outputs
M - Sum of left and right components to both L and R outputs
R - Reverse of "Stereo" above (if allowed by hardware)
aud2:
Language descriptor (or wildcard ‘*’) for audio stream to be assigned to Audio port 2.
aud1_rt:
Same as aud1_rt above
margin:
Margin offset in dB. Ranges between 0 and N dB. (See MARGIN command for N.)
This command augments the ADDS command to populate the extended Preset Entry. Note that if this
Preset is used to acquire services (through Recovery or user command), these temporary
COMPEL and Tags-required parameters, if used, will be adopted as the permanent global
unit parameters.
ADDS location [format] [feed #] [carrier freq] [data rate] [FEC] [Tag Site] program# [label]
location:
Value from 1 up to max (highest entry #) indicating location in settings table.
For format, feed #, carrier freq, data rate, FEC, tag site, program #, and label see PERM command.
This command adds entries to the U5000-style preset table at the entry number given. If entry at location
was already in use, it will be overwritten.
APPSTAT
Forces IRD to report the status of the two application storage spaces, showing current and backup
application software (if any). A Local Control Command (available from the terminal
regardless of "Local Control Enable/Disable" commands from the network).
APPSWITCH
Unloads the currently executing application software and, instead, loads and runs the backup software.
AUDATTEN port# atten
36
port#:
Either 1 or 2 for audio ports 1 or 2.
atten:
Must be a numeric value for attenuation in dB. Legal values are given in individual IRD
specifications.
800032-01 Rev. G
www.wegener.com
Unity 4600 User’s Manual
This command sets audio attenuation, where 0 gives 0dB attenuation (maximum level). A Local Control
Command (available from the terminal regardless of "Local Control Enable/Disable"
commands from the network).
AUDIOMODES
Lists all the supported audio decompression or pass-through modes (e.g., MPEG1 Layer 2, Dolby AC3, MP3, SMPTE302, etc.)
AUDMON port#
port#:
Either 1 or 2 for audio ports 1 or 2.
Connects a sample of audio port port# to the single audio monitor jack (where available). A Local Control
Command (available from the terminal regardless of "Local Control Enable/Disable"
commands from the network).
AUXPID [PID]
PID:
Selects the PID (in hex) for the transport packets carrying the desired data stream. Must be
20 to 1FFE inclusive. If PID is omitted, the current value is displayed.
Sets the PID used for Aux Data extraction.
CLRDIAG
Clears all the volatile counts and statistics, as if the unit was reset. A Local Control Command (available
from the terminal regardless of "Local Control Enable/Disable" commands from the
network).
CLRIND
Clears both current “Acknowledged” Alarm and Warning indications and (past) Latched Alarm
indications. A Local Control Command (available from the terminal regardless of "Local
Control Enable/Disable" commands from the network).
DELS entry
entry:
Value from 1 up to max (given in section 2.1) indicating entry number in settings table.
Deletes an entry in the Preset Table.
DPAT
Command reports current Program Allocation Table (PAT) from incoming transport stream.
DPSI
Command reports complete PSI information tracing all programs and their components to MPEG PIDs.
A Local Control Command (available from the terminal regardless of "Local Control Enable/
Disable" commands from the network).
DTMFTST [level] [tone]
level:
www.wegener.com
Integer between 0 and 100 inclusive.
800032-01 Rev. G
37
Operation
tone:
Tone code (0-15 signifying digits 1-9,0,*,#,A-C).
Volatile test command for DTMF output, if supplied. Tones will be output at the percentage of full-scale
voltage indicated by level. If tone is supplied, then that tone is output continuously. If tone is
omitted, then the IRD cycles endlessly through all tones, 1 second per tone. Disable with
TESTOFF command. A Local Control Command (available from the terminal regardless of
"Local Control Enable/Disable" commands from the network).
DTMFVOL percent
percent:
Integer between 0 and 100 inclusive.
Command to set DTMF output tone levels. Immediately after entry of the command, the IRD will play out
all 16 tones (at a rate where they are individually identifiable) at the commanded level. If
percent is ‘0’, output is essentially OFF. If percent is ‘100’, level is maximum spec level.
Entering command without parameters still plays out the tone sequence and then reports
current level setting. A Local Control Command (available from the terminal regardless of
"Local Control Enable/Disable" commands from the network).
EMAIL x
x:
Either E for Enabled, or D for Disabled.
Command to enable COMPEL® printed email. A Local Control Command (available from the terminal
regardless of "Local Control Enable/Disable" commands from the network).
ERRORS type threshold
type:
Either E for Error’d Seconds or C for Continuity-count errors.
threshold: Integer between 1 and 255.
Command to set either Error’d-seconds-rate or Continuity-count Alarm threshold. Unit will show an alarm
if, over any previous 60 second interval, the number of type events which are detected
exceeds threshold. A Local Control Command (available from the terminal regardless of
"Local Control Enable/Disable" commands from the network).
EXIT
Command ends telnet sessions. Same as QUIT command.
FORCERF port
port:
Either OFF or the numbers 1, 2, 3, or 4.
Command to either disable or enable effective RF switch bypassing. If port is a number, then all
subsequent carrier reception is sought at that RF feed port, regardless of the current Unit
Setting. If port is OFF, then normal RF switch function is restored. Entering the command
without parameters gives current status, either Normal RF Switch, or Forced RF Feed Port n
where n is either 1, 2, 3, or 4. A Local Control Command (available from the terminal
regardless of "Local Control Enable/Disable" commands from the network).
GHOSTLIST action PID
action:
38
A for Add or D for Delete.
800032-01 Rev. G
www.wegener.com
Unity 4600 User’s Manual
PID:
Hex number between 1 and 1FFE (except 11, reserved for SDT).
Command to add or delete entries in the list of ghost PIDs to pass to the ASI transport output (while
Program Mapping is enabled). Entering command without the action or pid parameter
dumps the current list.
H [command]
command:
Any of the terminal command names (PC, R, PORT, etc.).
If an H or any invalid command beginning with an H is entered and command is omitted, the whole help
screen will be displayed, consisting of a list of all currently available commands and a brief
description of each listing. If an H or any invalid command beginning with an H is entered
and command is a valid User Command Name, then detailed help for command is displayed.
A Local Control Command (available from the terminal regardless of "Local Control Enable/
Disable" commands from the network).
INDPERS indication time
indication: A or Alarm or W for Warning.
time:
Time in seconds.
Command to set the minimum indication-time persistence for either Alarms or Warnings, per the value
of indication, for the time period given by time. Entering command without parameters
shows the current settings. A Local Control Command (available from the terminal
regardless of "Local Control Enable/Disable" commands from the network).
IPCONFIG
Command requests report of all current IP parameters (IP address, Gateway address, subnet mask) and
assignment mode (static or DHCP). A Local Control Command (available from the terminal
regardless of "Local Control Enable/Disable" commands from the network).
LAN GATEWAY addr
addr:
IP address formatted as n1:n2:n3:n4 where n1, n2, n3, and n4 are integers between 0 and
255.
Command sets the IRD’s static internet Gateway IP address. No protection is offered against entry of
non-standard addresses (e.g. 0:0:0:0). Omitting the addr parameter shows the current static
Gateway IP. This will not be the current Gateway IP address if dynamically assigned. Use
the IPCONFIG command for that. A Local Control Command (available from the terminal
regardless of "Local Control Enable/Disable" commands from the network).
LAN IP addr
addr:
IP address formatted as n1:n2:n3:n4 where n1, n2, n3, and n4 are integers between 0 and
255.
Command sets the IRD’s static IP address. No protection is offered against entry of non-standard
addres-ses (e.g., 0:0:0:0). Omitting the addr parameter shows the current static IP. This will
not be the current IP address if dynamically assigned. Usethe IPCONFIG command for that.
A Local Control Command (available from the terminal regardless of "Local Control Enable/
Disable" commands from the network).
www.wegener.com
800032-01 Rev. G
39
Operation
LAN MODE mode
mode:
DHCP, WEG, or STATIC.
Command sets the IP configuration to either dynamic DHCP, "Wegener" mode, or static IP addresses.
If static, see LAN IP, LAN GATEWAY, and LAN SUBNET commands. Omitting the mode
parameter shows the current mode. This is a Local Control Command (available from the
terminal regardless of "Local Control Enable/Disable" commands from the network).
Assigning "Wegener" mode IP address forces the assignment of a static IP address for testing. This
address is of the form: 172.16.xy.yy. The x is the one- or two-decimal-digit Product ID (also
called the COMPEL download ID). 'yyy' are the last (least significant) digits of the unit serial
number (most significant to left). The presumed subnet mask is 255.255.0.0 but the gateway
is not defined. As an example, if a Unity 4600 with product ID=9 and SN=260050 is set to
"Wegener" IP address mode, it's new static IP address becomes 172.16.90.50.
To fix possible address contention, the IRD, when the application initializes, attempts to detect an IP
address conflict (using ARP). If a conflict is detected, the unit adds one hundred (decimal)
to the last field of the attempted IP address and tries again. Using the above example, if
172.16.90.50 has already been assigned on that LAN, then the IRD re-attempts with an IP
address equal to 172.16.90.150.
LAN SUBNET addr
addr:
IP address formatted as n1:n2:n3:n4 where n1, n2, n3, and n4 are integers between 0 and
255. Note that not all values can be legal.
Command sets the IRD’s static subnet mask address. Command entries that do not assert legal IP
address masks will be rejected. Omitting the addr parameter shows the current static subnet
mask. This will not be the current subnet mask if dynamically assigned. Use IPCONFIG
command for that. A Local Control Command (available from the terminal regardless of
"Local Control Enable/Disable" commands from the network).
LATCHALARMS x
x:
Either E for Enable, or D for Disable.
Command enables or disables the latching of unit alarms.
LNBPWR output
output:
Either ON or OFF.
Non-volatile command enables or disables LNB DC power independently of any other settings. A Local
Control Command (available from the terminal regardless of "Local Control Enable/Disable"
commands from the network).
LNBTST voltage_range tone
voltage_range:Either H or L (for High and Low).
tone:
Either ON or OFF.
Volatile test command to force use of the ASTRA Universal LNB functions. Disable with TESTOFF
command. A Local Control Command (available from the terminal regardless of "Local
Control Enable/Disable" commands from the network).
40
800032-01 Rev. G
www.wegener.com
Unity 4600 User’s Manual
LOADNV source
source:
B for Backup (by user), C for Original Customer-configuration, or P for Production-default
settings. Key security parameters (e.g., serial number) are not affected by the C or P loads.
Command reloads NVRAM memory from Flash memory defaults.
Note: The unit must reset after execution of this command.
MARGIN margin_offset
margin_offset:Integer values between 0 and N in the form of x.x, representing dB (to tenths of a dB). N
is defined by individual IRD specifications for every modulation/FEC combination.
Command sets the Margin Warning point. This provides warning to local users that their Eb/No’s are
approaching the error-threshold where system performance will collapse. (Supersedes SNR
command.) A Local Control Command (available from the terminal regardless of "Local
Control Enable/Disable" commands from the network).
MOVEP source destination
source:
Preset Table entry number which will source Unit settings.
destination: Preset Table entry number to which the Unit settings will be moved.
Command moves the Unit settings at the source entry to the destination entry. The setting data at the
original source entry is deleted and that entry position is now considered unused. The setting
data at the original destination entry is then moved to the next lower unused Preset position.
(One will always be available because the entry that held the original source settings was
made “unused”.)
MUTE [source][source][source] [...]
source:
Source can be any of the following:
ASI
- to indicate the DVB-ASI transport output.
V
- to indicate Video.
A[specifier] - to indicate Audio.
An A without the specifier indicates all audio outputs.
If present, The specifier consists of one or two characters. The first character specifies the
audio port number and the second character specifies either the right or left channel, as in
A1L (audio 1, left channel) or A2R (audio 2, right channel).
If the second character is omitted, this indicates both stereo channels are included.
Example: MUTE V A1L A4 A3R mutes the video, audio Port 1 left channel, audio port 4 (both channels),
and audio port 3 right channel
Note:
If no source is specified then video and all audios are selected.
Mutes the specified outputs.
Note: The MUTE command is only allowed when local control is enabled by the network..
OH
On hook. Disables modem access. Modem access is only re-enabled by successful modem password
entry. A Local Control Command (available from the terminal regardless of "Local Control
Enable/Disable" commands from the network).
www.wegener.com
800032-01 Rev. G
41
Operation
PARTPID pid
pid:
Hex value between 20 and 1FFE to set a value, and 0 to disable.
Command sets the borderline (or “partition”) PID at, and above which, the IRD may expect compatible
scrambling against which it may apply the proper descrambler. PIDs below this point may
be scrambled with an alien, 3rd party system. See individual IRD specs for more detail on
unit behavior. A Local Control Command (available from the terminal regardless of "Local
Control Enable/Disable" commands from the network).
PC device baud parity
device:
One of MODEM, TERMINAL, AUXDATA, CA, or COMPEL®.
baud:
1200, 2400, 4800, 9600, 19200, or 38400.
parity:
N, E, or O.
Configures communication parameters for any serial device. A Local Control Command (available from
the terminal regardless of "Local Control Enable/Disable" commands from the network).
PERM [format] [pol/feed#] [carrier freq] [data rate] [FEC] [Tag Site] [program#] [label]
format:
If an RF input, one of the legal modulation formats: QPSK for DVB-QPSK; 8PSK for DVB8PSK;TQPSK for Turbo-QPSK); T8PSK for Turbo-8PSK;T16QAM for Turbo-16-QAM; or 16QAM
for DVB 16QAM. May be omitted if DVB-QPSK.
For an ASI Transport input, specify ASI. If this parameter is set to OK, then the current setting,
if a Transient setting, becomes the new Permanent setting.
pol/feed#: If an RF input, one of four possible RF feeds, 1, 2, 3 or 4.
If an ASI input, one of two possible ASI feeds, 1 or 2.
If no RF option, this field may be used for ASTRA polarization, H or V.
This field may be omitted if no RF switch option is installed.
carrier freq:If an RF input, the downlink carrier frequency in MHz (precision to two decimal places OK).
Field is omitted for an ASI input only.
data rate: If an RF input, the Transport data rate in Mbps (precision to two decimal places OK).
Field is omitted for an ASI input only.
FEC:
If an RF input, the inner FEC ratio. Field is omitted for an ASI input only.
The legal options are: for QPSK- 1/2, 2/3, 3/4, 5/6, and 7/8;
for 8PSK- 2/3, 5/6, 8/9; and for 16 QAM- 3/4, and 7/8.
Other legal values may be defined for new modulation formats.
tag site:
If an RF input, the tag site for Carrier ID tag. Field is omitted for an ASI input only.
program#: Program number, ‘*’ for wildcard, or null (for no program assigned).
label:
Channel Label (optional, may be omitted).
Command to establish new Permanent Unit Setting with the parameter values given. If the format is set
to OK, no other parameters are accepted or required.
PERMCH value
42
800032-01 Rev. G
www.wegener.com
Unity 4600 User’s Manual
value:
Either the value of a settings table entry number OR the Channel Label of an entry, priority
given to Label if any ambiguity. If an entry number, legal values range from 1 up to N (where
N is number of Preset support this product).
Unit Settings set to equal those in the Preset Table entry specified by value.
PING [-t] [-n count] [-l size] [-w timeout] addr
-t:
If supplied as shown, PING specified host until interrupted by console-entry of ‘control-C’.
-n count:
Integer substituted for count is number of echo requests to send.
-l size:
Send buffer specified as size bytes.
-w timeout: Wait for each reply the number of milliseconds specified by timeout.
addr:
IP address formatted as n1:n2:n3:n4 where nn1, n2, n3, and n4 are integers between 0 and
255.
Traditional Unix PING command with verbatim Unix syntax. Response from IRD will indicate success or
failure. User will be warned if PING cannot be attempted because no local IP address has
been set. A Local Control Command (available from the terminal regardless of "Local
Control Enable/Disable" commands from the network).
PORT device
device:
Device assigned to the Aux/Term port, either TERMINAL, MODEM or AUXDATA.
Assigns the given device to the Aux/Term port. A Local Control Command (available from the terminal
regardless of "Local Control Enable/Disable" commands from the network).
PW password
password: One to six alphanumeric characters.
Changes the modem password to the designated password. A Local Control Command (available from
the terminal regardless of "Local Control Enable/Disable" commands from the network).
QUIT
Command ends telnet sessions. Same as EXIT command.
R type [page]
www.wegener.com
800032-01 Rev. G
43
Operation
type:
Indicates the type of report as follows:
C
- Carrier Status
P
- Parameters
G
- Group Status
GL
- Genlock system (if installed and applicable)
M
- MPEG PSI Status
NC
- Network Controller Status
R
- Relay Status
RTLOG - non-volatile log of last 10 “tuning” type commands
S
- Settings Status
ST
- Settings Table
SP
- Serial Port Configuration
See also parameters for RP and RD commands
[page]:
This option can have a value of 1 to 40 and is only applicable for the group status report.
Indicates the page to be reported. If omitted, all eight pages are reported and scrolls off the
terminal screen.
With the R command, the user gets a combined report of unit non-volatile settings and status and
diagnostics for each item grouping (e.g., RF for all unit settings and all status diagnostics for
carrier
acq/tracking). A Local Control Command (available from the terminal regardless of "Local
Control
Enable/Disable" commands from the network).
RD group
group:
Indicates group of status/diagnostic information to report, as follows:
AUD
- Audio service diagnos.
AW
- Alarm/Warning status
CA
- Conditional Access diagnostics
DPI
- Conditional Digital Program Insertion (DPI)
GL
- Genlock system (if installed and applicable)
LAN
- IP/Ethernet diagnostics
NTW
- COMPEL® network control diagnostics
PRGMP - Program mapping at ASI output
MSC
- Miscellaneous diagnostics
REC
- Automated Recovery status
RF
- Carrier Acquisition/Tracking diagnostics
RPA
- Return Path diagnostics
SW
- Software download/self-test status
TS
- Transport Stream diagnostics
VID
- Video service diagnostics
Expanded report on unit volatile diagnostic and status information. A Local Control Command (available
from the terminal regardless of "Local Control Enable/Disable" commands from the
network).
RE state [number]
state:
number:
44
ON, OFF, or W
1 or 2, or E1 thru En (for n-relay expansion option module, if installed) indicating the affected
user relay.
800032-01 Rev. G
www.wegener.com
Unity 4600 User’s Manual
This non-volatile command sets the user (or expansion) relay addressed by number to the ON/OFF or
"Follow-Warn" (if 'W) state specified.
Note: The W value for the state parameter is only accepted for the native relays (1 or 2).
If state is specified, but number is omitted, then the command is applied to ALL installed relays, with one
exception. The exception is that the command to ALL relays will not be accepted by a native
user cue relay already set in the logical "Follow-warn" state. (It MUST be individually
addressed to return it to the ON or OFF non-volatile state. Entering this command without
parameters shows the state of installed relays.
RP group
group:
VID
Indicates group of parameters to report, as follows:
AUD
- Audio service diagnos.
AW
- Alarm/Warning status
CA
- Conditional Access diagnostics
DPI
- Conditional Digital Program Insertion (DPI)
GL
- Genlock system (if installed and applicable)
LAN
- IP/Ethernet diagnostics
NTW
- COMPEL® network control diagnostics
PRGMP - Program mapping at ASI output
MSC
- Miscellaneous diagnostics
REC
- Automated Recovery status
RF
- Carrier Acquisition/Tracking diagnostics
RPA
- Return Path diagnostics
SW
- Software download/self-test status
TS
- Transport Stream diagnostics
- Video service diagnostics
Expanded report on unit NV operating parameters. A Local Control Command (available from the
terminal regardless of "Local Control Enable/Disable" commands from the network).
RESET
Resets unit. A Local Control Command (available from the terminal regardless of "Local Control Enable/
Disable" commands from the network).
RPATH
Command to display all return path non-volatile settings. A Local Control Command (available from the
terminal regardless of "Local Control Enable/Disable" commands from the network). A Local
Control Command (available from the terminal regardless of "Local Control Enable/Disable"
commands from the network).
RPATH FROM domain
domain:
Legal string of keyboard characters in proper domain-name format (e.g.,
string1.string2.string3…)
Domain name portion of “from” email address in Return Path reporting. A Local Control Command
(available from the terminal regardless of "Local Control Enable/Disable" commands from
the network).
RPATH RELAY addr
www.wegener.com
800032-01 Rev. G
45
Operation
addr:
IP address formatted as n1:n2:n3:n4 where nn1, n2, n3, and n4 are integers between 0 and
255.
IP address of local Mail Relay server, if any. A Local Control Command (available from the terminal
regardless of "Local Control Enable/Disable" commands from the network).
RPATH SEND
Command ordering IRD to immediately send a Return Path report. A Local Control Command (available
from the terminal regardless of "Local Control Enable/Disable" commands from the
network).
RPATH TO username@addr
username: Legal string of keyboard characters without white space.
addr:
IP address formatted as n1:n2:n3:n4 where nn1, n2, n3, and n4 are integers between 0 and
255.
Email address destination for Return Path reporting. A Local Control Command (available from the
terminal regardless of "Local Control Enable/Disable" commands from the network).
SAVENV
Saves all the current global and Unit Setting NV parameters (in NVRAM) to the Flash memory space
designated as BACKUP.
Note: Some unit-set parameters, which would not make sense to “back up”, may not be saved.
A Local Control Command (available from the terminal regardless of "Local Control Enable/Disable"
commands from the network).
SAVEP [entry#] [channel_label]
entry#:
A Preset Table Entry number or the text, PERM. If a preset entry, must be equal to a number
between 1 and N inclusive, where N is the highest entry number.
channel_label:Channel Label associated with a unit setting or a Preset Table entry. If attempting to
supply the channel_label parameter alone, a value of PERM is not legal. Parameter must be
a string of continuous non-white-space keyboard characters. Unit will truncate user input to
10 characters.
Command saves current Unit Settings to a Preset Table entry, or if entry# is PERM, a current Transient
Setting is loaded into the unit's Permanent unit setting. Those metadata fields in the
extended Preset Entry that have no analog in the current Unit setting will be populated with
spec defaults. User must use ADDE command to set those fields.
If entry# is supplied alone, current unit settings are written to that entry, overwriting existing data if it had
been in use. If channel_label is supplied alone, and if that same Label already appears at
a used Preset Table entry, then the current unit settings overwrite that old Preset data. If
channel_label is supplied alone and no used Preset has that Label, then the current
settings are written to the lowest empty Preset Table entry and then given that same Label.
If both entry# and channel_label parameters are supplied, then the current unit settings are
written at that Entry (overwriting existing data if any) and that entry is supplied that same
Label (equal to channel_label).
46
800032-01 Rev. G
www.wegener.com
Unity 4600 User’s Manual
SERVICE video_pid [pcr_pid] [audio1_pid] [audio2_pid]
video_pid: Hex value between 20 and 1FFE.
audio1_pid:Hex value between 20 and 1FFE.
audio2_pid:Hex value between 20 and 1FFE.
pcr_pid:
Hex value between 20 and 1FFE.
Command selects A/V services directly by PID number only. This changes Unit Setting #11 to “By PID”
if not already set that way.
SET parameter value
SET TO destination [time]
SET FROM source
parameter: One of format, feed, freq [for “carrier freq”], rate [for “data rate”], FEC, tag [for “tag site”],
prog [for “program”], margin [for “Eb/No margin warning zone”], aud1, or aud2 [for
“descriptors assigned to audio ports 1 and 2”]. See PERM and ADDE commands for
definitions and limits.
value:
Value of the parameter as in any settings command (PERM, TEMP, ADDS, etc.)
destination: PERM, TEMP, number or label of a Preset table entry.
time:
Length of insert in either HH:MM:SS format (valid range is 0:00:00 to 18:00:00, leading zeros
OK to omit on hours) OR in number of seconds. (A one-hour TEMP could have a parameters:
of 1:00:00 or 3600.)
source:
PERM, CURR, number or label of a Preset table entry.
SET sets the value of individual parameters in a ‘scratch pad’ settings group. SET TO will store the scratch
pad settings to a search table entry or to the permanent or temporary settings (requires an
insert time as a second parameter). SET FROM loads the scratch pad settings from a search
table entry or from the current or permanent settings.
SETAUDIO port route [program] [atten]
port:
Value of 1 to 6 indicating an audio port
route:
S - Stereo (Left and Right components routed as connected at original MPEG encoder)
1 - Original Left component to both L and R outputs
2 - Original Right component to both L and R outputs
M - Sum of Left and Right components to both L and R outputs
R - Reverse of “Stereo” above (if allowed by hardware)
program:
www.wegener.com
Can be a three character name or an ‘*’. If the 3-character name is specified, the unit will
route the audio PES stream with the specified name to the port. If ‘‘*’ is specified, the unit
will default to the first audio program in the PMT that is not routed to another port.
800032-01 Rev. G
47
Operation
atten:
Must be a numeric value for attenuation in dB. Legal values are given in Table 1.1 on page 3.
This programs the net audio attenuation, where ‘0’ gives 0dB attenuation (maximum level).
If field omitted, attenuation remains unchanged on that audio port.
The audio PES stream, with the language descriptor program, is decompressed in the port audio port,
and then its components are routed to the Left and Right outputs according to route. That
ports attenuation is changed to atten, if supplied.
SETLABEL label
label:
Unit label. Field entry is truncated at 10 characters.
Sets Unit Label displayed on IRD home LCD screen (and Terminal Welcome Banners), if supported in
this IRD.
SETLNB {Rf_feed} LO_freq
Rf_feed:
If the RF Switch expansion option is installed, this is one input to that switch (1 through 4).
If no RF Switch option is installed, then it is an error to enter data here!
LO_freq:
Either a number or mnemonic. If a number, this value represents the LNB LO frequency in
MHz. It can have up to two decimal places and its valid range is from 0 to 14000.00. The legal
mnemonics are C (for Standard C-band, 5150 MHz default), KU (for US Ku-band, 10750
MHz default), EHKU (for European Hi Ku-band, 10600 MHz default), or ELKU (for European
Low Ku-band, 9750 MHz default).
(1) If the current LNB mode selected is Universal: This command is legal only when entered without
parameters. In this case, the IRD returns the current calculated setting command sent to the
LNB (either “9.75 GHz” or “10.60 GHz”).
(2) If the current LNB mode selected is LO: This command sets the assumed LNB LO frequency to the
value entered in MHz OR the MHz value represented by the mnemonic. If there is an
optional RF switch installed, then the rf_feed field data must be entered. Entering the
command without parameters returns the current setting.
A Local Control Command (available from the terminal regardless of "Local Control Enable/Disable"
commands from the network).
SETPEDEST xxx
xxx:
E for enable or D for disable.
Enables or disables the “pedestal” setup, the addition of +7.5 IRE to the luminance level of active NTSC
video, if NTSC is in use. A Local Control Command (available from the terminal regardless
of "Local Control Enable/Disable" commands from the network).
SETPIN value
value:
Decimal representation of PIN key, between 0 and 16777215.
Command sets the PIN scrambling key number.
SETTIMEOUT source time
48
800032-01 Rev. G
www.wegener.com
Unity 4600 User’s Manual
source:
1 - Not used. (In legacy IRDs, this was Fade timeout.)
2 - Services Recovery Timeout. (In legacy IRDs, this was Installation timeout.)
3 - Network Recovery Timeout. (In legacy IRDs, this was No COMPEL® timeout.
4 - Recovery Iteration Time. (In legacy IRDs, this was Header Seek timeout.)
5 - Local Control Re-enable Timeout. (In legacy IRDs this was Local (Control) Recovery timeout.)
time:
Time-out value in seconds or HHHH:MM:SS format. Minimum value is 1, and maximum value
35999999 (9999:59:59 hms) for all others.
Command sets Automated Recovery timeout specified by source to the value specified by time.
SETUID [id]
id:
Unit ID number between 00 and 99 inclusive.
Command for assigning the unit ID number for gaining "talker" access on a shared serial bus. The factory
default setting for id is '00', which also disables terminal daisy-chain capability. If the
parameter is omitted, then this command returns the current unit ID setting. Command is
only applicable to products that feature serial "daisy-chain".
SP program
program:
Either an integer between 1 and 65,535 (representing a number) or an alphanumeric string
(representing a name), preference being on a number to resolve ambiguity.
Command changes selected program by Program Number (from PAT) or SDT descriptor. This command
works similarly to a PERM command.
TEMP [format] [feed #] [carrier freq] [data rate] [FEC] [Tag Site] program# time
For format, feed #, carrier freq, data rate, FEC, tag site, and program #, see PERM command.
time:
Length of insert in either HH:MM:SS format (valid range is 0:00:00 to 18:00:00, leading zeros
OK to omit on hours) OR in number of seconds. (A one-hour TEMP could have a parameters:
of 1:00:00 or 3600.)
Command which performs a volatile temporary insert for an amount of time given by time. Unit sets its
temporary Unit Settings to the values given.
Note:
No label may be applied using this terminal command.
TEMPCH value time
value:
Either the value of a Preset table entry number OR the Channel Label of an entry, priority given
to Label if any ambiguity. If an entry number, legal values range from 1 up to N (where N is
number of Preset support this product).
time:
Same as for TEMP.
Volatile command which sets volatile temporary Unit Settings to those retrieved from the Preset table
according to value for time given by time. Similar to TEMP command.
TEMPSENS
Command displays internal unit temperature if available.
www.wegener.com
800032-01 Rev. G
49
Operation
TEST group value
group:
Mnemonic for a test group: Either RF, AV, DTMF, or REL.
value:
Parametric value which has meaning depending on the test group selected.
Command to activate Installation Test Modes. A Local Control Command (available from the terminal
regardless of "Local Control Enable/Disable" commands from the network).
If group is RF, the legal values are 1, 2, 3, 4, and OFF. Entering numbers for value cause the IRD to report
the RF level (not locked to carrier) at that RF Feed Port every few seconds. Entering OFF
stops the measurement.
If group is AV, the legal values are ON and OFF. If ON, a test pattern is activated on the video output and
test tones activated on the audio output, the same as the generic TESTMODE command.
If group is DTMF, the legal values are ON and OFF. If ON, the command behaves like the DTMFVOL
command entered with no parameters
If group is REL, the legal values are ON and OFF. If ON, both user cue relays are alternately energized
and de-energized.
TESTOFF
Command stops all volatile test functions as if unit were reset. A Local Control Command (available from
the terminal regardless of "Local Control Enable/Disable" commands from the network).
UNMUTE [source][source][source][...]
source:
Same as the MUTE command.
Identical to MUTE except specified services are unmuted.
VER
Displays the boot-up Welcome banner and the versions of hardware and software components within
the IRD. Should include the unit serial number, model number, and customer ID. A Local
Control Command (available from the terminal regardless of "Local Control Enable/Disable"
commands from the network).
VBI enable line field
enable:
E for Enable or D for Disable.
line:
Line # where VBI data is normally to be re-inserted. Values below 7 or above 22 are illegal.
field:
Field # where VBI data is normally to be re-inserted. Values are 1 or 2 for upper and lower.
Command enables or disables VBI data re-insertion on the line and field indicated for those IRDs that
support that function.
50
800032-01 Rev. G
www.wegener.com
CHAPTER 4 MAINTENANCE AND TROUBLESHOOTING
4.1 Maintenance
Maintenance of the Unity 4600 is limited to keeping the chassis clean and ensuring
that cables remain firmly connected. Occasionally wipe the exterior with a soft, damp
cloth to remove any accumulated dust and dirt and check that cables are securely
attached.
The Unity 4600 incorporates security labels over some of the screws. There are no
user-serviceable components within the Unity 4600. Tampering with the security
labels or opening the unit will void your warranty. If you have any questions, contact
Wegener’s Customer Service Department at the address or numbers listed under
Customer Service.
4.2 General Troubleshooting
This section is not intended as an exhaustive list of all possible situations, but a list of
the most common installation problems. Please contact us (see Chapter 5, Customer
Service), with any problems you cannot resolve independently.
If you are experiencing any difficulties, first check the LED indicators on the Unity
4600 front panel. See Table 3.2: Front-panel LED Indicator Descriptions on page 33
for details about the LED indicators. Note that during typical operation, the green
CARRIER, TRANSPORT, COMPEL, SERVICES, and AUTH LEDS should be
on.
No output or
indications
No audio,
video, or ASI
output
If the unit provides no output and neither the LCD nor any LEDs are lit, there is likely a
loss of AC power or the internal power supply has failed. Do the following:
1.
Check that AC power cord is firmly connected at both ends.
2.
Check that your AC power source is supplying AC power.
3.
If both checks a) and b) are okay, contact Customer Service (see Chapter 5) before
returning the unit for service.
LEDS: ALARM ON and CARRIER OFF
The Unity 4600 is unable to lock to an RF carrier at the selected RF port:
1.
wegener.com
If the first front-panel alarm message is "No RF Signal", then: (1) either the outdoor
antenna LNB is not operating or is not connected to the IRD at the selected RF port;
or (2) the selected IRD RF port has failed; or (3) the IRD receiver card has failed. To
rule out (1), verify that the LNB (and any intermediate line amplifiers) has DC power
and trace the connection from the LNB to the IRD or try replacing the LNB. If a
spectrum analyzer is available, look for the carrier at the L-band intermediate
800032-01 Rev. G
51
Maintenance and Troubleshooting
frequency (for domestic C-band satellites, this is 5150 minus the downlink frequency in
MHz). To rule out (2), try connecting the RF cable to another RF port and select that port (or
use RF Switch Bypass to force that other port). To rule out (3), try using another IRD.
2.
If the first alarm message is “No Carrier Lock”, verify the RF Feed Port, Carrier Frequency,
Data Rate, FEC Ratio, and ID Tag (if Tags are in use) settings. Also verify that the LNB LO
frequency setting (in the IRD) is correct for the selected RF feed port.
3.
If the alarm message is “RF signal overload”, then reduce the carrier power entering the
Unity 4600. Either add in-line attenuation (a splitter will do) or remove line amplification in
the RF circuit between the LNB and the IRD.
LEDS: ALARM ON and CARRIER ON
The Unity 4600 may not be authorized for the network’s Conditional Access. If the AUTH
LED is OFF and the alarm message, "Unauthorized for CA” appears, contact your network
provider to gain authorization in its Conditional Access database.
Missing an
audio, video,
or ASI output
while others
are okay
LEDS: ALARM or WARNING ON
Check the front-panel display for alarm or warning messages. Table 4.1: Alarm and
Warning Descriptions on page 53 describes Unity 4600 alarm and warning messages. If
the message definitions are too technical to help debug the problem, report the messages
to your network provider.
LEDS: ALARM and WARNING OFF
If no alarms or warnings are shown, suspect a bad connection or mis-programming of the
Unity 4600:
1.
If audio or video are missing, check at the front-panel monitor jacks. If okay on the front
monitors, check the signal connections from the rear of the unit to the destination. If an
audio is missing from the rear panel outputs and cannot be detected at the front-panel
monitors, check that a valid audio stream is selected for that port and that the network
provider has supplied non-quiet programming on that audio.
2.
If the ASI output is missing, check the signal connections from the rear of the unit to the
destination. If okay, check with the network provider to verify what Program Mapping
(Release 2 or later) may be in effect.
4.3 Alarms and Warnings
The alarm and warning system is intended to alert the local user of a present or impending
loss of services. Table 4.1 below lists many (but not all) of the possible alarm and warning
messages that the Unity 4600 may display. For problems you cannot resolve on your own,
please contact Wegener Customer Service (see Chapter 5), and be prepared to describe
your signal setup, Unity 4600 configuration, and any displayed alarm and warning
messages.
Alarms
An alarm is asserted when the unit is unable (or presumed to be unable) to perform a
required function or deliver required services.
Warnings
A warning is asserted when an alarm condition is imminent or to indicate other conditions
requiring user attention.
52
800032-01 Rev. G
www.wegener.com
Unity 4600 User’s Manual
Table 4.1: Alarm and Warning Descriptions
LCD Alarm or Warning
Message
Meaning / Possible Cause
App Self-testing
New application software was recently promoted from the
backup to primary executing position and is now performing
its initial self-test. This is a Warning for normal behavior and is
not a fault.
App SW d-load fail
Download of application software to backup flash space has
failed. Contact network TOC and advise.
App SW switch fail
Unable to switch to backup software from network command,
usually because that software image is not available or
corrupted.
ASI TS muted
ASI Transport output has been muted per user or network
command.
Aud N buff overflow
(N=audio port number)
Audio port N PES data buffer overflow. Audio PES data being
delivered faster than can be decompressed. There may be a
problem with the STC at uplink Mux or in the IRD.
Aud N data lost
(N=audio port number)
Audio port N PES data not available (buffer underflow). here
may be a problem in the hardware for that audio port or in the
uplink encoder. Check that PTS values in the audio stream do
not grossly lead PCR.
Aud N LD not in PMT
(N=audio port number)
No audio PID found in PMT with assigned language
descriptor for hard-assigned port N. Check that the language
descriptor requested by the user or network is actually
assigned to an existing audio stream.
Aud N PID not found
(N=audio port number)
Audio PID found in PMT with requested language descriptor but
no PES data detected. Check uplink encoder.
Aud N type invalid
(N=audio port number)
Audio PES stream type not supported.
Auto-Recovery
Auto-recovery in progress. This may be caused by any of the
following problems on a previously commanded or
successfully acquired transport stream: (1) IRD unable to
deliver services for time exceeding Services Recovery
Timeout; (2) IRD required to maintain connection to
®
COMPEL and IRD has not detected COMPEL for time
exceeding Network Recovery Timeout; or (3) IRD detects
invalid incoming COMPEL header.
Bad audio N PTS
(N=audio port number)
Bad PMT
www.wegener.com
Excessive jumps or jitter in Audio port N PTS values
One or more Program Map Tables are corrupted. See "No
PMT" indication.
Bad Sec Micro SN
Serial number read from secure processor does not match
unit. There may be a an attempt at piracy, a defective NVRAM
memory, or a defective secure processor.
Bad VBI Data FN LM
(N=field number;
M=line number)
VBI data for field N, line M is unrecognized or in an
unsupported format. Contact TOC to confirm that the version
of application code in your IRD is current.
800032-01 Rev. G
53
Maintenance and Troubleshooting
LCD Alarm or Warning
Message
Meaning / Possible Cause
Bad Video data
Video PES stream appears to be invalid. Check if other IRDs
see similar problem on the same program.
Bad Video PTS
Excessive jumps or jitter in video PTS values. There may be a
defective uplink encoder or mux.
Content for ASI N/A
Program content requested to route to ASI output cannot be
found in over-satellite transport mux. Contact network TOC
and advise.
Content Routing problem
ASI transport output bears no program content because a
Content Routing Table has not been loaded from the network
or is corrupt. Contact network TOC.
Eb/N0 Margin warning
Eb/N0 value less than sum of Threshold + Margin—evaluated
over 10 sec. intervals. Unless the margin setting is incorrect,
this indicates a marginal downlink.
FP email fail
An FP Email message was received which was corrupt or
invalid. User should acknowledge the warning to clear, and
then notify the network TOC.
High Error Rate
High errored seconds rate, presumably useless signal—
evaluated over 60 sec. intervals. Signal-to-noise ratio is
insufficient or there is severe terrestrial or antenna cross-pol
interference.
High RF level
ID Tag Mismatch
ID Tags Lost
There is carrier lock, but the RF signal level is too high.
Carrier ID frequency text mismatch. User or network has
entered carrier frequency text or tag site ID incorrectly or unit
is on the wrong carrier.
Carrier ID tags disappeared. There may be a failure at the
uplink inserter (UMX5010) or loss of COMPEL
Tag Mismatch" indication.
Invalid COMPEL Hdr
Invalid COMPEL header detected in incoming COMPEL
messages. This will cause the unit to immediately attempt
automatic recovery to a backup preset. The IRD is not set up
for connection to this COMPEL system.
Invalid VBI data fmt
VBI data found in PID or video user data in unrecognized or
unsupported format (protocol).
Invalid video format
Video format in requested program is not supported.
IP address conflict
LAN detected but cannot use because of IP address conflict.
KMS stream lost
KMS stream lost after initially detected in this transport
stream. There could be an uplink problem. See also "No KMS
stream" indication.
Lost COMPEL PID
Lost VBI Data FN LM
(N=field number;
M=line number)
54
® PID. See "ID
Data traffic at designated packet ID (PID) for COMPEL has
been lost for more than two minutes. See "No COMPEL"
indication.
VBI data for field N, line M has disappeared. If any is
expected, contact network TOC.
800032-01 Rev. G
www.wegener.com
Unity 4600 User’s Manual
LCD Alarm or Warning
Message
Low RF level
Meaning / Possible Cause
There is carrier lock, but the RF signal level is too low.
New PAT with changes
The version number on the Program Allocation table has
changed and a new program lineup has been submitted.
Changes have been made on uplink transport mux.
New PMT with changes
The version number on one or more of the Program Map
Tables has changed with a new PID lineup submitted.
Changes have been made on uplink transport mux.
No ASI stream
No audio for Port N
(N=audio port number)
No Carrier Lock
No COMPEL
Corrupt or missing input ASI stream. Only applicable if ASI
input is available and selected. Check connection and source.
No "free" otherwise-unassigned audio can be allocated to
wildcard-assigned port N. There may be fewer audio PES
streams than installed audio ports. If so, explicitly assign a
desired language descriptor to this audio port.
Carrier lock cannot (or has not) been acquired and
maintained. Check that requested settings are correct. Check
RF level indication and RF connection. For new installations,
check antenna pointing and polarization.
Data traffic is detected at designated packet ID (PID) for
®
COMPEL . However, no valid COMPEL messages have
been detected during the last two minutes. There may be no
connection to the network. If required to maintain a
connection, the unit will eventually attempt an automatic
recovery to a backup preset. To debug, check that the
COMPEL system at the uplink is functional and that the data
connection to inserter (such as UMX5010) is good. Also
check for fault indications or functional problems at
UMX5010.
No COMPEL PID
No traffic detected at designated packet ID (PID) for
COMPEL, so no connection is made to the network. The
COMPEL PID setting in the unit may be incorrect. Also see
"No COMPEL indication".
No Def for mapping
ASI transport output bears no program content because an
Output Definition Table has not been loaded from the
network. Contact network TOC.
No DHCP server found
IRD is required to get IP settings from DHCP server but none
are detected on the LAN.
No genlock sync
IRD supports and has genlock option installed and enabled,
but no video reference sync is detected.
No ID Tag found
www.wegener.com
®
No carrier ID tags in COMPEL stream. Set IRD not to
expect ID tags or check uplink UMX5010.
No KMS stream
No KMS stream detected since transport stream acquisition.
Unit will not be authorized if not connected to the KMS
stream. Check that KMS PID is set correctly in unit. If okay,
check the uplink.
No LAN detected
No Ethernet LAN connection. Check LEDs on rear and check
other devices on the LAN.
800032-01 Rev. G
55
Maintenance and Troubleshooting
LCD Alarm or Warning
Message
Meaning / Possible Cause
No PAT
No Program Allocation Table detected in input carrier (or
terrestrial interface). Check that legal ISO transport is
available from uplink mux. Often, this indication may appear
when the connection between the uplink transport mux and
the DVB modulator is lost.
No PCR
No Program Clock Reference found, either in video or standalone PID. Check uplink mux or that program's encoder.
No PMT
No Program Map Table found for a program listed in PAT. This
could be a fault in the uplink mux.
No RF signal
No carrier lock with low RF signal power indication. There
may be a disconnected RF signal. Check connection and
check that LNB has DC power.
No SDT entry
No Service Descriptor Table, or the table is corrupt or missing
proper entries. Uplink mux may not support this DVB feature
or may have fault.
No valid software
No valid application software available in either the primary or
backup flash positions. Unit will need service.
No VBI Data FN LM
(N=field number;
M=line number)
VBI data not found in video user data or PID for Field N line M
If any is expected, contact network TOC.
PAT disappeared
PAT version changed
PCR disappeared
Formerly valid Program Allocation Table ceases to be
received or becomes corrupt. See "No PAT" indication.
Version number in Program Allocation Table has changed but
no change to program lineup.
Formerly valid Program Clock Reference ceases to be
received or becomes corrupt. See "No PCR" indication.
PCR jitter
Excessive jitter in Program Clock Reference values. This may
degrade timing of output video signals. Check uplink encoder
for that program.
PCR value jump
Unrecoverable transition in incoming Program Clock
Reference values. This has forced re-initialization of services.
Check uplink encoder for that program.
PMT disappeared
Formerly valid Program Map Table ceases to be received or
becomes corrupt. See "No PMT" indication.
PMT version changed
Version number on one or more of the Program Map Tables
has changed but no change to PID lineup.
Prog blackout on ASI
Some services available from satellite not routed to IRD ASI
®
output per program mapping instructions from COMPEL .
This is not necessarily a fault.
Program in blackout
56
Selected program not available for local decompression
because this program content was blocked to ASI transport
output by network. Contact network TOC.
800032-01 Rev. G
www.wegener.com
Unity 4600 User’s Manual
LCD Alarm or Warning
Message
Program not found
Program selected for local decompression (to local audio/
video outputs) not available-invalid Program number for this
Transport.
Reverted to b-up app
User-requested application failed self-test and Unit reverted
to Backup application. Notify your network TOC.
RF signal overload
No carrier lock with RF signal power above specification
range. There may be too much line amplification in RF feed.
SDT disappeared
Formerly valid Service Descriptor Table ceases to be
received or becomes corrupt. See "No SDT entry" indication.
Sec Micro no resp
Secure processor does not respond to local host or may be
missing. SIM card may be mis-installed, loose, or defective.
Ser pt N fail
(N=audio port number)
Unknown or miscellaneous hardware failure on serial port N.
Ser pt N input fail
(N=audio port number)
Input buffer overflow on serial port N. Send device at uplink
may be set too fast compared to IRD serial port device,
especially if sending data constantly with only one stop bit.
Try changing to 1.5 stop bits.
Ser pt N output fail
(N=audio port number)
Output buffer overflow on serial port N. Send device at uplink
may be set too fast compared to IRD serial port device,
especially if sending data constantly with only one stop bit.
Try changing to 1.5 stop bits.
Setting out of range
Current unit setting combination is illegal for installed receiver
card. Unit will be unable to acquire a carrier and transport
stream until corrected by the user.
Test Mode in use
Unauthorized for CA
One of the installation test modes is being used. This may
interfere with normal unit operation.
Unit unauthorized for Conditional Access in use. Contact
network provider. Also see "No KMS stream" & "KMS stream
lost" indications.
Unit overheating
Unit overheating. Check that unit vents are not blocked and
that internal fan is connected and operating.
Unread FP email
Unread Front-Panel email message present. Warning should
clear after user opens the screen containing the email.
Using backup settings
www.wegener.com
Meaning / Possible Cause
Current permanent unit settings derived from successful
Auto-Recovery. User should review settings and restore to
primary if desired.
Video Buff overflow
Video PES data buffer overflow. Video PES data is being
delivered faster than can be decompressed. There may be a
problem with the STC at uplink mux or in the IRD.
Video cmd muted
Video output muted by command from network or local user.
Video not found
Video PES data cannot be found at PID declared by PMT.
There may be an uplink mux or encoder failure.
Video PES data lost
Video PES data in selected program is unavailable. There
may be an uplink encoder failure.
800032-01 Rev. G
57
Maintenance and Troubleshooting
This page intentionally left blank
58
800032-01 Rev. G
www.wegener.com
CHAPTER 5 CUSTOMER SERVICE
5.1 Warranty
The following warranty applies to all Wegener Communications products including the
Unity 4600 Professional Media Server:
All Wegener Communications products are warranted against defective materials
and workmanship for a period of one year after shipment to customer. Wegener
Communications' obligation under this warranty is limited to repairing or, at
Wegener Communications' option, replacing parts, subassemblies, or entire
assemblies. Wegener Communications shall not be liable for any special,
indirect, or consequential damages. This warranty does not cover parts or
equipment which have been subject to misuse, negligence, or accident by the
customer during use. All shipping costs for warranty repairs will be prepaid by the
customer. There are no other warranties, express or implied, except as stated
herein.
5.2 Technical Support
If the unit should fail to perform as described, if you need help resolving problems with
your Unity 4600, or for questions about obtaining service for your Unity 4600, please
contact Wegener Communications Customer Service at (770) 814-4057, Fax (678)
624-0294, or e-mail [email protected].
To return a product for service:
1.
Obtain a Return Material Authorization (RMA) number by completing and faxing a
copy of the RMA Request Form to (678) 624-0294. Or you may e-mail the same
information to: [email protected].
2.
To help us identify and control returned units, plainly write the RMA number on the
outside of the product-shipping container. This will help us return your unit to you as
quickly as possible.
3.
Return the product, freight prepaid, to the address below:
Service Department RMA# ________
Wegener Communications, Inc.
359 Curie Drive
Alpharetta, GA 30005
Note:
wegener.com
All returned material must be shipped freight prepaid. C.O.D. shipments will
not be accepted.
800032-01 Rev. G
59
Customer Service
This page intentionally left blank
60
800032-01 Rev. G
www.wegener.com
APPENDIX A MONITORING AND CONTROL DETAILS
A.1 Basic Navigation
Monitoring and control of the Unity 4600 from the front panel is accomplished by first
navigating to the appropriate screen for the desired function (see LCD screen
relationships and LCD screen content on page 30 for screen structure and contents).
Press ENT to move downward through menus and screen levels and ESC to return
upward through the screen structure. Press the right- and left-arrow buttons to move
between peer screens. The home screen may always be reached by pressing and
holding the ESC button or by pressing it repeatedly.
A.2 Info Screens
Info screens are read-only and display information that cannot be edited. The home
screen is this type of screen. Other screens of this type display Unity 4600 status or
navigation helps.
For info screens like the Software Application Version screen shown below, the text on
the second row will contain the current information (the software version in this
example). If no key presses are made, after a brief delay, the second row begins
alternating between this content and the following navigation prompts:
? Other Screens? @
(to move to other screens at the same level)
Menu Up? Press <ESC>
(to move to the parent menu screen)
Home? Hold In <ESC>
(to return to the Home screen)
first row: APPLICATION CURRENT:
second row: V100
-information label
- content
after brief delay
APPLICATION CURRENT:
APPLICATION CURRENT:
APPLICATION CURRENT:
? Other Screens? @
Menu Up? Press <ESC>
Home? Hold In <ESC>
wegener.com
800032-01 Rev. G
61
A.3 Menu Screens
Menu screens are also read-only and display the menu name for a group of screens. For
example, the Miscellaneous Setups screen is a menu screen. The child screens "beneath"
a menu screen (reached by pressing ENT) may be any of the screen types (i.e. other
menus, information screens, etc.
For menu screens like the Miscellaneous Setups screen below, the text on the second row
will cycle between the following prompts:
Press <ENTER>
(to move to the child screens)
? Other Screens? @
(to move to other screens at the same level)
Menu Up? Press <ESC>
(to move to the parent menu screen)
Home? Hold In <ESC>
(to return to the Home screen)
first row: MISC SETUPS
second row: Press <ENTER>
-information label
- navigation prompt
after brief delay
62
MISC SETUPS
MISC SETUPS
MISC SETUPS
? Other Screens? @
Menu Up? Press <ESC>
Home? Hold In <ESC>
800032-01 Rev. G
www.wegener.com
Unity 4600 User’s Manual
A.4 Parameter Screens
Parameter screens display a specific parameter that can be edited (if the correct authority
has been established). Such screens contain an alphanumeric or list-select field. There are
no carries or borrows when wrapping on a numeric field (i.e. to go from 0999 to 1000, 4
digits must be edited).
For parameter screens like the Unit Label screen below, the second row contains the
current value of the parameter. Upon pressing ENT, a blinking underscore appears under
the first character to be edited (Only for editable alphanumeric fields. List-select fields will
not display a cursor). Use the arrow buttons to scroll through characters or list selections.
After making the desired change, press ENT again to commit the entry to the Unity 4600.
Press ESC if you wish to cancel the change. If no key presses are made, after a brief delay,
the second row begins alternating between the following prompts:
Change? Press <ENTER>
(to begin editing the parameter)
? Other Screens? @
(to move to other screens at the same level)
Home? Hold In <ESC>
(to return to the Home screen)
first row: UNIT LABEL:
second row: Unity 4600
-information label
- editable parameter
after brief delay
UNIT LABEL:
UNIT LABEL:
UNIT LABEL:
? Other Screens? @
Menu Up? Press <ESC>
Home? Hold In <ESC>
www.wegener.com
800032-01 Rev. G
63
This page intentionally left blank
64
800032-01 Rev. G
www.wegener.com
Unity 4600 User’s Manual
INDEX
A
ac power connector . . . . . . . . . . 21
ad avail . . . . . . . . . . . . . . . . . . . 12
address
customer service . . . . . . . . . . 59
return materials . . . . . . . . . . . 59
agency approvals . . . . . . . . . . . . 6
air flow for safe operation . . . . . 17
alarm
definition . . . . . . . . . . . . . . . . . 12
ALARM LED . . . . . . . . . . . . . . . 34
alarm/cueing
connector . . . . . . . . . . . . . . . . 20
relays . . . . . . . . . . . . . . . . . . . . 5
amperage, unit. . . . . . . . . . . . . . . 3
anchor screws . . . . . . . . . . . . . . 18
angle brackets . . . . . . . . . . . . . . 18
application software. . . . . . . . . . 12
approvals by agency . . . . . . . . . . 6
ASI. . . . . . . . . . . . . . . . . . . . . . . 12
audio
connectors . . . . . . . . . . . . . . . 20
fp monitor selection screen . . 33
output . . . . . . . . . . . . . . . . . . . . 4
tones. . . . . . . . . . . . . . . . . . . . 24
audio language descriptor . . . . . 12
audio monitor, front-panel . . . . . 35
AUTH LED. . . . . . . . . . . . . . . . . 34
authorized stream . . . . . . . . . . . 34
automated recovery. . . . . . . . . . 12
auxiliary data async input . . . . . . 5
B
baud rates . . . . . . . . . . . . . . . . . . 5
bolts, anchor . . . . . . . . . . . . . . . 18
boot loader. . . . . . . . . . . . . . . . . 12
brackets, mounting . . . . . . . . . . 18
C
cables
connecting to unit . . . . . . . . . . 19
routing of . . . . . . . . . . . . . . . . 18
CARRIER LED . . . . . . . . . . . . . 33
CE certification . . . . . . . . . . . . . . 6
changes to manual, suggestions for
1
chassis
cooling of . . . . . . . . . . . . . . . . . 5
description of . . . . . . . . . . . . . . 2
dimensions of . . . . . . . . . . . . . . 5
www.wegener.com
earthing . . . . . . . . . . . . . . . . . 18
opening . . . . . . . . . . . . . . . . . 11
circuit overloading . . . . . . . . . . . 18
claims of damage . . . . . . . . . . . 17
classification by FCC. . . . . . . . . . 6
cleaning the U4600 . . . . . . . . . . 51
clearance around unit . . . . . . . . 17
command syntax . . . . . . . . . . . . 35
comments or suggestions . . . . . . 1
commercials . . . . . . . . . . . . . . . 12
COMPEL . . . . . . . . . . . . . . . . . . 12
input . . . . . . . . . . . . . . . . . . . . . 5
LED . . . . . . . . . . . . . . . . . . . . 33
components, user-serviceable . 11,
51
composite video output . . . . . . . . 3
Conditional Access . . . . . . . 12, 13
connecting the unit . . . . . . . . . . 19
connection to supply circuit . . . . 18
connectors, rear-panel . . . . . . . 19
consumption, power . . . . . . . . . . 3
contacting Wegener regarding
manual . . . . . . . . . . . . . . . . . 1
controlling the U4600
remotely . . . . . . . . . . . . . . . . . 35
cross supports . . . . . . . . . . . . . . 18
CUE LED. . . . . . . . . . . . . . . . . . 34
customer service phone number 59
D
damage claims . . . . . . . . . . . . . 17
decompression, audio and video. 3
default LCD screens . . . . . . . . . 33
demod and FEC lock. . . . . . . . . 33
demodulator/FEC specifications . 6,
8
description of U4600
functional . . . . . . . . . . . . . . 2, 27
physical . . . . . . . . . . . . . . . . . . 2
descriptor
audio language. . . . . . . . . . . . 12
service . . . . . . . . . . . . . . . . . . 14
desktop installation . . . . . . . . . . 18
difficulties with the U4600 . . . . . 51
digital program insert (DPI) . . . . 12
digital video broadcast (DVB) . . 12
dimensions of chassis . . . . . . . . . 5
down arrow . . . . . . . . . . . . . . . . 29
download
screen . . . . . . . . . . . . . . . . . . 33
800032-01 Rev. G
DPI . . . . . . . . . . . . . . . . . . . . . . 12
dual-tone multi-frequency (DTMF) .
12
connector . . . . . . . . . . . . . . . . 20
output . . . . . . . . . . . . . . . . . . . . 4
DVB. . . . . . . . . . . . . . . . . . . . . . 12
DVB-ASI . . . . . . . . . . . . . . . . . . 12
output . . . . . . . . . . . . . . . . . . . . 3
E
earthing . . . . . . . . . . . . . . . . . . . 18
Eb/No,energy-per-bit noise density
per hertz . . . . . . . . . . . . . . . 12
elevated operating ambient. . . . 17
e-mail
customer service . . . . . . . . . . 59
return materials . . . . . . . . . . . 59
e-mail address
regarding manual . . . . . . . . . . . 1
environment for mounting . . . . . 17
environmental specifications for the
U4600 . . . . . . . . . . . . . . . . . . 6
equipment
earthing . . . . . . . . . . . . . . . . . 18
power ratings . . . . . . . . . . . . . 18
equipment rack . . . . . . . . . . 17, 18
Ethernet. . . . . . . . . . . . . . . . . . . 13
connector pinouts. . . . . . . . . . 21
port specifications . . . . . . . . . . 5
shielding of cable . . . . . . . . . . 17
European certification . . . . . . . . . 6
F
fax number
customer service . . . . . . . . . . 59
manuals . . . . . . . . . . . . . . . . . . 1
return materials . . . . . . . . . . . 59
Wegener Communications. . . . ii
FCC
classification. . . . . . . . . . . . . . . 6
emissions suppression mandated
by . . . . . . . . . . . . . . . . . . . . 17
FEC lock . . . . . . . . . . . . . . . . . . 33
Federal Communications
Commission . . . . . . . . . . . . . 6
follow warning . . . . . . . . . . . . 5, 25
formatting of serial ports . . . . . . . 5
frequency of supplied power . . . . 3
front brackets . . . . . . . . . . . . . . 18
front panel
65
connectors . . . . . . . . . . . . . . . 22
monitors . . . . . . . . . . . . . . . . . . 4
operation from. . . . . . . . . . . . . 27
front-panel
audio monitor . . . . . . . . . . . . . 35
functional description . . . . . . . 2, 27
G
grounding . . . . . . . . . . . . . . . . . . 18
H
handshaking. . . . . . . . . . . . . . . . . 5
height of chassis . . . . . . . . . . . . . 5
housing, U4600 . . . . . . . . . . . . . . 2
I
IEC receptacle . . . . . . . . . . . . . . 21
illustration
front-panel LEDs . . . . . . . . . . . 33
pushbuttons . . . . . . . . . . . . . . 29
U4600 photo . . . . . . . . . . . . . . . 2
info screens . . . . . . . . . . . . . . . . 61
inspecting the U4600 . . . . . . . . . 17
installation . . . . . . . . . . . . . . . . . 17
desktop . . . . . . . . . . . . . . . . . . 18
rack . . . . . . . . . . . . . . . . . . . . . 18
safety during . . . . . . . . . . . . . . 11
integrated receiver-decoder (IRD) .
13
interference, radio . . . . . . . . . . . 17
K
Keep-alives . . . . . . . . . . . . . . . . 13
key management system (KMS) 13
L
labels, security . . . . . . . . . . . 11, 51
LAN . . . . . . . . . . . . . . . . . . . . . . 13
LCD . . . . . . . . . . . . . . . . . . . . . . 13
LED
definition . . . . . . . . . . . . . . . . . 13
indicators. . . . . . . . . . . . . . . . . 33
left arrow . . . . . . . . . . . . . . . . . . 29
light-emitting diodes (LEDs) . . . . 13
liquid crystal display (LCD) . . . . 13
LNB
DC power . . . . . . . . . . . . . . . . . 8
power connector . . . . . . . . . . . 21
loading, mechanical . . . . . . . . . . 18
local-area network (LAN) . . . . . . 13
location and mounting . . . . . . . . 17
lugs, grounding . . . . . . . . . . . . . 18
M
mailing address
66
manual comments or questions 1
maintenance . . . . . . . . . . . . . . . 51
mechanical loading . . . . . . . . . . 18
menu screens . . . . . . . . . . . . . . 62
modem dialing . . . . . . . . . . . . . . . 5
monitors, front-panel audio and
video . . . . . . . . . . . . . . . . . . . 4
mounting
desktop . . . . . . . . . . . . . . . . . . 18
equipment rack . . . . . . . . . . . . 18
location and . . . . . . . . . . . . . . 17
Moving Picture Experts Group
(MPEG) . . . . . . . . . . . . . . . . 13
MPEG transport stream
definition . . . . . . . . . . . . . . . . . 15
multi-unit rack assembly . . . . . . 17
N
National Television System
Committee (NTSC) . . . . . . . 13
network protection mode . . . . . . 13
NTSC . . . . . . . . . . . . . . . . . . . . . 13
O
opening the chassis . . . . . . . . . . 11
operating ambient temperature . 17
operating temperature . . . . . . . . . 6
operation of the U4600 . . . . . . . 27
output
absence of . . . . . . . . . . . . . . . 51
audio . . . . . . . . . . . . . . . . . . . . . 4
composite video . . . . . . . . . . . . 3
DTMF . . . . . . . . . . . . . . . . . . . . 4
DVB-ASI . . . . . . . . . . . . . . . . . . 3
overcurrent protection . . . . . . . . 18
overloaded circuits . . . . . . . . . . . 18
overview of U4600 . . . . . . . . . . . . 2
P
packet ID (PID) . . . . . . . . . . . . . 13
packetized elementary stream . . 13
packing materials . . . . . . . . . . . . 17
PAL . . . . . . . . . . . . . . . . . . . . . . 13
parameter screens . . . . . . . . . . . 63
parity setting . . . . . . . . . . . . . . . . 5
PAT . . . . . . . . . . . . . . . . . . . . . . 13
PCR . . . . . . . . . . . . . . . . . . . . . . 13
PES stream . . . . . . . . . . . . . . . . 13
phase-alternating-line (PAL) . . . 13
phone number
customer service. . . . . . . . . . . 59
physical description of Unity 4600 2
PID . . . . . . . . . . . . . . . . . . . . . . . 13
pinouts, connector . . . . . . . . . . . 20
PMT . . . . . . . . . . . . . . . . . . . . . . 14
800032-01 Rev. G
polarity of alarm/cueing relays . . . 5
port specifications
Ethernet . . . . . . . . . . . . . . . . . . 5
RS232 serial . . . . . . . . . . . . . . . 5
power
LNB. . . . . . . . . . . . . . . . . . . . . . 8
rating of equipment. . . . . . . . . 18
specifications . . . . . . . . . . . . . . 3
power strips, use of . . . . . . . . . . 18
precautions for safety . . . . . . . . 11
presentation time stamp (PTS) . 14
presets table . . . . . . . . . . . . 12, 14
program . . . . . . . . . . . . . . . . . . . 14
program allocation table (PAT) . 13
program clock reference (PCR) . 13
program decompression . . . . . . . 3
program map table (PMT) . . . . . 14
program number . . . . . . . . . . . . 14
protected status . . . . . . . . . . . . . 13
PSI table . . . . . . . . . . . . . . . . . . 14
PTS . . . . . . . . . . . . . . . . . . . . . . 14
pulse activation . . . . . . . . . . . . . 34
pushbuttons . . . . . . . . . . . . . . . . 29
functions of . . . . . . . . . . . . . . . 29
R
rack
earthing of. . . . . . . . . . . . . . . . 18
mounting in . . . . . . . . . . . . . . . 18
spacing in . . . . . . . . . . . . . . . . 17
total loading of . . . . . . . . . . . . 18
rack assembly, temperature of . 17
radiated emissions, suppressing 17
radio interference. . . . . . . . . . . . 17
random access memory (RAM) . 14
rear-panel connections . . . . . . . 19
recovery . . . . . . . . . . . . . . . . . . . 12
reduced air flow . . . . . . . . . . . . . 17
relays, alarm/cueing . . . . . . . . . . 5
reliable earthing . . . . . . . . . . . . . 18
return for repair . . . . . . . . . . . . . 17
Return Material Authorization
(RMA) . . . . . . . . . . . . . . . . . 59
RF emissions . . . . . . . . . . . . . . . 17
RF input specifications . . . . . . 6, 8
right arrow . . . . . . . . . . . . . . . . . 29
RJ45 Ethernet port . . . . . . . . 5, 21
routine operations . . . . . . . . . . . 27
routing cables . . . . . . . . . . . . . . 18
RS232 serial ports . . . . . . . . . . . . 5
pinouts of . . . . . . . . . . . . . . . . 20
S
safety . . . . . . . . . . . . . . . . . . . . . 11
www.wegener.com
Unity 4600 User’s Manual
screen
default. . . . . . . . . . . . . . . . . . . 33
download . . . . . . . . . . . . . . . . 33
home . . . . . . . . . . . . . . . . . . . 33
screws, anchor . . . . . . . . . . . . . 18
SDT . . . . . . . . . . . . . . . . . . . . . . 14
security labels . . . . . . . . . . . 11, 51
security of transport stream . . . . 12
selectable services . . . . . . . . . . . 5
serial port
specifications of . . . . . . . . . . . . 5
service descriptor . . . . . . . . . . . 14
SERVICES LED . . . . . . . . . . . . 33
services, selectable . . . . . . . . . . . 5
setting up the U4600 . . . . . . . . . 17
shared status . . . . . . . . . . . . . . . 13
shipping container . . . . . . . . . . . 17
side vents . . . . . . . . . . . . . . . . . 17
signal, time-base . . . . . . . . . . . . 13
signaling, DTMF . . . . . . . . . . . . 12
signal-to-noise ratio . . . . . . . . . . 12
size of chassis . . . . . . . . . . . . 5, 18
software
application . . . . . . . . . . . . . . . 12
boot loader . . . . . . . . . . . . . . . 12
network control . . . . . . . . . . . . 12
spacing the unit in rack . . . . . . . 17
specifications, U4600 . . . . . . . 3-6
splice points. . . . . . . . . . . . . . . . 12
www.wegener.com
standards, video . . . . . . . . . . . . 13
start bit. . . . . . . . . . . . . . . . . . . . . 5
stop bit. . . . . . . . . . . . . . . . . . . . . 5
storage temperature . . . . . . . . . . 6
stream . . . . . . . . . . . . . . . . . . . . 14
suggestions or comments . . . . . . 1
supply circuit, connection to . . . 18
suppressing emissions . . . . . . . 17
synchronization . . . . . . . . . . . . . 13
syntax, terminal command . . . . 35
T
T(MRA) . . . . . . . . . . . . . . . . 15, 17
table
presets . . . . . . . . . . . . . . . . . . 14
program map (PMT) . . . . . . . . 14
PSI . . . . . . . . . . . . . . . . . . . . . 14
service descriptor (SDT). . . . . 14
tampering . . . . . . . . . . . . . . . . . 11
telnet . . . . . . . . . . . . . . . . . . 28, 35
temperature
ambient operating . . . . . . . . . 17
MRA . . . . . . . . . . . . . . . . . . . . 15
operating and storage . . . . . . . 6
terminal monitoring and control . . 5
terminal operation . . . . . . . . . . . 35
testing . . . . . . . . . . . . . . . . . . . . 24
total rack loading . . . . . . . . . . . . 18
transport
800032-01 Rev. G
demultiplexing . . . . . . . . . . . . . 3
sync . . . . . . . . . . . . . . . . . . . . 34
TRANSPORT LED . . . . . . . . . . 33
transport stream . . . . . . . . . . . . 15
troubleshooting . . . . . . . . . . . . . 51
U
Underwriter Laboratories (UL)
listing. . . . . . . . . . . . . . . . . . . 6
uneven mechanical loading. . . . 18
unpacking and inspection . . . . . 17
up arrow . . . . . . . . . . . . . . . . . . 29
user cue relay . . . . . . . . . . . . . . 34
user-serviceable components . . 11,
51
V
ventilation of unit . . . . . . . . . . . . 17
video standards. . . . . . . . . . . . . 13
voiding warranty . . . . . . . . . 11, 17
voltage of supplied power . . . . . . 3
W
warning
definition. . . . . . . . . . . . . . . . . 15
WARNING LED. . . . . . . . . . . . . 33
warranty . . . . . . . . . . . . . . . . . . 59
voiding of . . . . . . . . . . . . . 11, 17
width of chassis. . . . . . . . . . . . . . 5
67
This page intentionally left blank
© 2007 Wegener Communications, Inc. All rights reserved.
800032-01 Rev. G
Seventh Edition: December 2007
Wegener Communications, Inc.
Technology Park/Johns Creek
11350 Technology Circle
Duluth, GA 30097-1502
Phone: 770-814-4000
Fax: 770-623-0698