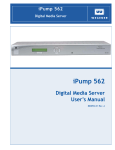
1
iPump 6420 Professional Audio Server iPump 6420 Professional Audio Server User’s Manual 800070-01 Rev. B iPump 6420 User’s Manual Data, drawings, and other material contained herein are proprietary to Wegener Communications, Inc., and may not be reproduced or duplicated in any form without the prior written permission of Wegener Communications, Inc. The information contained herein is subject to change without notice. Revisions may be issued to advise of such changes and/or additions. WEGENER, COMPEL CONTROL, MEDIAPLAN, ENVOY, UNITY, UNITY·IP, and iPUMP are trademarks of Wegener Communications, Inc. All other trademarks are the property of their respective owners. 2009 Wegener Communications, Inc. All rights reserved. Correspondence regarding this publication, 800070-01 Rev. B Second Edition: July 2009 should be forwarded to: Wegener Communications, Inc. Technology Park/Johns Creek 11350 Technology Circle Duluth, GA 30097-1502 Phone: 770-814-4000 Fax: 770-623-0698 The WEGENER iPump 6420 is approved under FCC Part 15B Class A, UL1950, CSA, and CE. www.wegener.com 800070-01 Rev B ii iPump 6420 User’s Manual TABLE OF CONTENTS Chapter 1: GENERAL INFORMATION………………………...1 Chapter 2: INSTALLATION……………………………….......23 Chapter 3: OPERATION.……………………………………....37 Chapter 4: MAINTENANCE AND TROUBLESHOOTING..101 Chapter 5: CUSTOMER SERVICE…………………………..107 Appendix 1: TERMINAL COMMANDS……………………..109 Appendix 2: SNMP MIBS...…………………………………..113 Appendix 3: FAULT CONDITIONS..………………………..129 www.wegener.com 800070-01 Rev B iii iPump 6420 User’s Manual (This page intentionally left blank.) www.wegener.com 800070-01 Rev B iv iPump 6420 User’s Manual Chapter 1: GENERAL INFORMATION This chapter gives a general overview of this Manual and of the iPump 6420. Table of Contents 1.1. Manual Overview...................................................................................................... 2 1.2. iPump 6420 Overview............................................................................................... 3 1.2.1. Basic Store/Forward Mission.............................................................................. 3 Figure 1-1: Store/Forward System overview ........................................................................................5 1.2.2. .................................................................................................................................... 5 Figure 1-2: Using Playlists as indirection ............................................................................................6 1.2.3. Supplemental capabilities ................................................................................... 7 1.2.4. Premium Features ............................................................................................... 8 Automation Mode............................................................................................................ 8 ShowShifting ................................................................................................................... 8 TimeZone Delay .............................................................................................................. 9 MP3 Codec ...................................................................................................................... 9 1.3. Functional Description ............................................................................................. 9 Figure 1-3: iPump6420 Functional Block Diagram ..........................................................................12 1.4. 1.5. 1.6. iPump 6420 Specifications...................................................................................... 13 Safety Summary ...................................................................................................... 19 Glossary of Terms and Abbreviations .................................................................. 20 www.wegener.com 800070-01 Rev B Chapter 1, Page 1 iPump 6420 User’s Manual 1.1. Manual Overview This manual provides instructions and reference information for the proper installation and operation of the WEGENER iPump 6420 Professional Audio Server, referred to throughout the manual as the iPump 6420. This manual is divided into these chapters: Chapter 1 General Information –an overview of the iPump 6420 missions, its functions and specifications, and a glossary of terms. Chapter 2 Installation – instructions for initial installation and setup of the iPump 6420. Chapter 3 Operation-detailed discussion of iPump 6420 operation. Chapter 4 Maintenance and Troubleshooting - information on maintaining the iPump 6420 and resolving possible operating difficulties. Chapter 5 Customer Service - our warranty and information on obtaining help. Index - list of keywords to help you quickly locate information. Please e-mail any suggestions or comments concerning this manual to [email protected]. If you prefer to post through the mail, please send your comments to the address below. If you have substantial or complex changes to recommend, our preference is that you copy the page(s) in question, mark your changes on that copy, and fax or mail us the copy. We always appreciate constructive criticism. Our Address: Attn: Manuals Wegener Communications, Inc. Technology Park / Johns Creek 11350 Technology Circle Duluth, GA 30097-1502 Our fax number:(770) 497-0411 www.wegener.com 800070-01 Rev B Chapter 1, Page 2 iPump 6420 User’s Manual 1.2. iPump 6420 Overview The WEGENER iPump 6420 is an integrated, digital satellite receiver, decoder, and audio server designed to provide the most cost effective method of delivering and storing content for radio network operations. In tandem with WEGENER Compel/MediaPlan, the iPump 6420 is a key part of the WEGENER Digital Media Delivery System, which combines secure MPEG and IP digital transmission with media management and server storage, to provide the most modern Store/Forward solution now possible in the radio network market. 1.2.1. Basic Store/Forward Mission A technological goal in current satellite-based radio network design is to concentrate more control at a central management point, while retaining and expanding the “local” feel. WEGENER is a leader in moving its radio network customers toward this goal. A “linear” satellite network is one where all media content, aggregated at the central uplink, is instantaneously delivered at the edge receivers. To deliver a greater variety of content, more channels, using more bandwidth, was needed. Localization, the origination of unique material from each of many local affiliates, was only possible with some cooperation between the central managing authority and the local operators. The central network could deliver closure or DTMF pulses in the satellite control or media streams, signaling “avails” to the local affiliates. At those avail points, the local affiliates could use their own ad insertion equipment to switch in local programming with minimal conflict. The WEGENER Store/Forward (S/F) solution for satellite-based radio networks provides localization by borrowing and storing bandwidth ahead of its use. Media content is delivered in spare bandwidth, not needed for the linear network “mission”, to the edge receivers. This content may be unique for each of the edge receivers, where it is stored for later and repeated use. Then, using the indirection of “playlists”, the central control system can signal for the local content to be inserted in the programming stream at the proper “avail” points. WEGENER’s S/F solution for radio networks uses the WEGENER COMPEL/MediaPlan control system in tandem with WEGENER iPump6420 Audio Servers. This equipment, along with other components, is shown in a typical radio network application in Figure 1-1. This figure shows the three key components of the application: 1) The real-time linear media streaming sub-system, 2) the non-real-time portion of the S/F sub-system, and 3) the real-time portion of the S/F sub-system. Each of these may now be introduced. The real-time linear media streaming sub-system accepts the aggregated audio feeds from the customer traffic systems and compresses them in an array of MPEG audio encoders. These are then multiplexed together into an MPEG Transport stream. That Transport is then passed through the WEGENER UMX5010, where the network (Compel) control stream is injected. The resulting Transport is fed to the RF system where the information is impressed on a DVB carrier, and then uplinked to the satellite. From there it is distributed to the satellite downlinks and thence to the edge iPump6420s, who are tuned to the proper carrier, Program, and audio stream, to deliver the desired live audio feed. The Compel network control system can support this portion of the overall mission by tuning the edge receivers (which may be i6420s, or other linear receivers, such as WEGENER Unity4600), setting their audio stream assignments, sending the RBDS data traffic, ordering local relay closures, and supporting the logical grouping of the edge receivers. www.wegener.com 800070-01 Rev B Chapter 1, Page 3 iPump 6420 User’s Manual The non-real-time portion of the S/F sub-system accepts a schedule file, on a regular basis, for each supported affiliate site. This schedule will define local spots, as files, to be played in each available segment of the day. These segments are defined by the radio network management as those portions of each hour where specific spots will be eligible for play at the remote receiving i6420 sites. And for each segment of each hour of each day, a playlist name is defined. For each affiliate, that playlist may define a different file, or no file at all. The Compel network control system then orders the building of those playlists on the affiliate i6420s. In addition, the referenced files are also ordered for downloading. The file will be pulled (or pushed) from a file server in the customer traffic system, and then broadcast by UDP to a “satellite” IP address. The emitted UDP messages are encapsulated by MPE protocol, creating a Transport stream which is re-multiplexed with the main Transport and sent over the satellite to the receiving i6420s. The Compel control stream bears control commands that instruct which i6420s, or which groups of i6420s, will receive each file. While setting up the affiliate i6420s, the Compel system also sets up it’s internal scheduling mechanism to re-assign known incoming customer closures, for the supported networks, each to a new playlist-execution command on each segment’s time boundary. This sets up the real-time portion of the S/F system. In real-time, Figure 1-2 represents a method by which the S/F system creates localization under central control. On a PIO input assigned for spots on a specific supported networks, the Compel system receives a closure from the customer’s traffic system. The customer’s traffic system sends this closure to coincide with the start of a network-wide spot, the default play for any “linear” edge receiver. At the time that closure is received by Compel, it causes a playlistexecution command to be emitted to the entire network of i6420s. The name of the playlist has been assigned by the Compel scheduler for that network, day, hour, and segment. The remote affiliate iPumps either have that playlist defined or not. If not, they continue decoding the live network feed, playing out the “network” spot. If they do have that playlist defined, those i6420s each mute the live network feed, and instead, insert the audio for the referenced file, a local spot. As the spot concludes, the live network feed unmutes and resumes on the i6420 audio output. www.wegener.com 800070-01 Rev B Chapter 1, Page 4 www.wegener.com 800070-01 Rev B Customer file server Customer closures, to trigger localization MPE/IP Encapsulator MPEG Audio Mux subsystem Serial cntl stream Wegener UMX5010 Final Mux Transport N relay or TCP triggers Wegener COMPEL/MediaPlan Uplink control system MPE/IP over UDP Mux Transport Return Path over HTTP RF subsystem: Modulator & Upconverter Modem server Ethernet LAN PSTN phone system and/or ... Internet By HTTP over IP link: - Return Status Reports - Return File-play as-run reports - Return file inventory reports - Return NACKs for missing files - Return Off-air (AM/FM) recorded files Thru web access (alternately): - Pull stored audio programming - Pull stored spots - Pull playlists - Pull network (COMPEL) commands scheduling file plays Analog phone modem Wegener iPump6420 Local AM or FM carrier Local affiliate radio stations (typical) Rev 7/15/2009 12:03 PM Audio outputs (1 or 2x) PIO (triggering) closures accepted Relay closures delivered (1 or 2 banks) RBDS RF outputs input (1 or 2x) WAN (direct) or LAN (behind firewall) One of many receive sites Rx antenna Thru satellite link: - Streaming live audio programming - Broadcasted file transfers - Network (COMPEL) cmds to create playlists, assign groups, set channels, etc. - Network cmds to insert local files within live audio program Tx antenna Figure 1: Overview, Store/Forward Radio Networks featuring iPump6420 } FTP Schedules & media files } Uplink site 1.2.2. Customer’s live audio sources Customer Traffic & Automation systems P. 5 of 6 iPump 6420 User’s Manual Figure 1-1: Store/Forward System overview Chapter 1, Page 5 iPump 6420 User’s Manual Figure 1-2: Using Playlists as indirection 13:05 13:06 13:07 Song 26A 13:08 Network spot 13:09 Song 27A 13:10 { At uplink, the request to execute a Playlist, by name Closure from customer traffic system Fires Network (COMPEL) cmd to execute Playlist “CR-100305-13-1”, where ‘CR’ is “Classic Rock” network Song 26A File 4502.mp2 Song 27A { On each local affiliate, if that Playlist exists, it references a different local file @ Affiliate 282: Playlist CR-100305-13-1 = File 4502.mp2 Song 26A File 3a08.mp2 Song 27A { On each local affiliate, if that Playlist exists, it references a different local file @ Affiliate 085: Playlist CR-100305-13-1 = File 4502.mp2 Song 26A Network spot Song 27A { On each local affiliate, if that Playlist does not exist, then the default network spot is heard @ Affiliate 661: Playlist CR-100305-13-1 = Not defined Figure 1-2: Using “Playlists” as indirection, for local inserts www.wegener.com 800070-01 Rev B Chapter 1, Page 6 iPump 6420 User’s Manual 1.2.3. Supplemental capabilities Along with the above basic S/F system functions, certain supplemental capabilities are beneficial to the radio network mission. As shown in Figure 1, Return Path provides a general tool to request and receive low-bandwidth status and logging information from edge i6420s back to the uplink control system. Return Path is implemented with HTTP protocol, allowing the i6420s to communicate with the uplink control system with through either dial-up connections (if modem equipped) or with broadband IP connection. Because HTTP is used, most i6420s should have little problems with corporate firewalls at affiliates sites. With the Return Path tool, several other functions are possible. The function that assures that the satellite-bandwidth-intensive process of MPE/IP file download is working efficiently is called “Asset Healing”. In this function, the uplink control system maintains a database showing what each Compel address (either individual i6420s or groups of such) should have in it’s own file repository. Xml files showing the expected list is then sent to that i6420 or group of i6420s. The i6420s, in turn, delete local files no longer required and request, through Return Path, any files that are still missing. The uplink control system then re-orders the missing files, maintaining synchronism between the files as captured in the Compel/MediaPlan subsystem, and the files resident on each edge i6420. Two functions allow the customer to audit the radio networks to ensure that the local spots have properly played, for audit and billing purposes. Through Return Path, the Compel control system requests returned reports showing spot “as-run” logs for the edge i6420s. From this information, specific reports may be prepared for the customer comparing the original scheduled spot-play requests against the returned logs. Additionally, iPump6420 features an two on-board AM/FM tuners. These can be used to provide true Off-Air Reporting (OAR). When the uplink control system requests the play of local spots, it can also request simultaneous recording of audio demodulated from the local AM or FM radio broadcast. Presumably, this recording will show evidence of the local airing of the requested spot. The i6420 then compresses the recorded material, and when requested by the uplink control system, returns those OAR audit files to through Return Path. To enhance the true “local experience”, WEGENER S/F systems also implement a feature called “DJ Liners”. With this feature, all local affiliates in a radio network share a single on-duty DJ, and that DJ’s liner “greetings” are customized for each and every affiliate. This is done by having the control system maintain a database of all DJs assigned and their on-duty hours. The DJ prepares liner greetings for all the member affiliates in the particular network. These files are then downloaded to special Liner Assets, one at each affiliate, but all “aliased” to the network’s name. When the DJ on-duty wishes to send a liner greeting, of a certain length in seconds, to all the affiliates, he pushes a button that creates an incoming closure to the Compel control system. This causes a request to be sent out to all affiliate i6420s to play one of the liner files of that length, under that “aliased” network name, chosen as a semi-random “shuffle” from all files available. This generates a local DJ liner greeting to be generated at each affiliate, often with mixing where the live network feed continues, but at a “ducked” audio level. The result is the perception, in the final radio audience, that the DJ works their affiliate alone (e.g. “This is Ron Baylor here on your Rock Classics station, WKLS Atlanta!!”). In addition to the above special functions, the system may allow certain i6420s to operate more autonomously. Instead of receiving its network control command through the satellite channel, it may also be setup to receive it’s commands by doing HTTP polls of the uplink control www.wegener.com 800070-01 Rev B Chapter 1, Page 7 iPump 6420 User’s Manual system. This is called “Compel-over-Internet”. Along with this capability, the i6420 may also poll for and then pull in it’s local spot files over the same internet connections. This is called “Internet File Delivery”. This allows the i6420 to easily implement a premium radio network feature called “Automation Mode”, to be discussed. Compel commands, either directly addressed, or addressed as groups, or “indirectly addressed” based on current unit settings, are one method of controlling iPump6420 Audio Servers. Because of timing-delay functions built into Compel, the network operator can accurately overlay network “avails” with local spots. In addition to real-time Compel commands, the network operator can exploit the network-wide time synchronization of all Wegener edge receivers when being fed from a single Compel control system. Just as events may be scheduled in the Compel control system, those same schedules may also be loaded to the remote field iPump6420s. These schedules can create a model for iPump 6420 automatic behavior, guaranteeing that critical commands are executed on target i6420s precisely at expected times. 1.2.4. Premium Features Automation Mode In Automation Mode, the i6420 is totally removed from the need for a satellite downlink connection. In this mode, the i6420 functions as a “radio station in a box”. All its content, from local spots to the music or talk-format material, is downloaded to the unit as audio files. Daily schedule files, which give traffic-system instructions to the unit, are regularly downloaded to the unit. The unit is directed to an NTP time source through its LAN IP connection. With the time reference and the traffic schedule, the unit then autonomously plays it’s files, delivers closures and sends RBDS messages to the local radio network affiliate. ShowShifting Many syndicated radio shows originate at a specific time in the broadcast day. For a radionetwork to resell that show, it often has to record the original feed and then re-broadcast over satellite later at times convenient for the subscribing affiliates. This is a waste of satellite bandwidth when the iPump6420’s ShowShifting feature is purchased and made available. This feature allows the central radio network manager, or a local user, to schedule local recording of the original show episodes, then subsequent planned playback times. These recordings are, unlike a “Tivo”, include more than the streamed audio feed, but also include a capture of the timestamped track of associated Compel commands that went out with the original program episode: Commands for local spot plays, RBDS messages, and for local relay closure outputs. This whole effort is done so seamlessly that, at playback, the local affiliate cannot distinguish between the original show episode broadcast and the ShowShifted episode playback. www.wegener.com 800070-01 Rev B Chapter 1, Page 8 iPump 6420 User’s Manual TimeZone Delay Most radio networks span several time zones. Because of this, to keep the same scheduled “feel” at all affiliates through all those time zones, they, once again must do their own recording and re-broadcasts, using extra satellite bandwidth. The iPump6420 TimeZone Delay (TZD) feature allows the central radio network manager to avoid these complexities. Using TZD, the radio network manager can broadcast one feed over the satellite, with all the correct localization. At those sites in “later” time zones, the i6420, implementing TZD, will hold the entire compressed audio feed, along with all associated Compel commands (like ShowShifting) in a rolling recorded buffer. At the precise buffer depth corresponding to the hour difference in time, the original feed is heard, sounding and feeling the same as the live feed in the most eastern zone. MP3 Codec In addition to the standard wave (PCM only), mp2, and mpg files, iPump6420 may also support the popular mp3 (MPEG1 L3) files. This is convenient for the extra flexibility in file types for the local spots. And it is also required in order to make use of OAR, since files must be compressed as mp3. 1.3. Functional Description This section is to describe the functional theory of operation of the iPump 6420. The iPump 6420 is basically a Linux-based x86 computer with advanced peripheral devices. How this hardware works together to fulfill the i6420’s missions is shown in Figure 1-3. The RF input from the satellite antenna LNB is brought in to a DVB receiver subsystem. This stage takes the incoming L-band carrier, demodulates the carrier to FEC-encoded data, then decodes and de-interleaves the FEC data into the original MPEG Transport stream. This stage also provides the main Local Controller function with key status information, including carrier lock, error’d-second data quality, and RF signal level. After this, the Transport stream is brought in as a serial byte-stream to the Linux-based application software that runs the iPump 6420. There, a software Transport demultiplexer recovers the PSI tables, the COMPEL command packets, MPE/IP data streams, and the desired live audio PES streams. The PSI tables are used to determine the locations of audio streams, finding their Packet IDs (PIDs) from the user-designated Program number and Audio Language Descriptor (LD). The COMPEL packets are parsed to find addressed commands for execution. The MPE/IP data streams are captured and recorded to the HDD storage, as commanded. The desired audio PES streams are identified by their PID, and then fed to software-based MPEG decoders (not to be confused with the unit’s audio outputs). The “Local Controller” shown in the Figure is, functionally, the application software running on the Linux-based x86 processor. The Linux OS and this software boots from a Compact Flash card installed to all iPump 6420s. (This way, in the event of HDD failure, the unit can still continue operation as a traditional IRD.) All the functional blocks not associated with specific hardware are executed, in real-time, in this software system. As stated, the Compact Flash is the booting device, from which first Linux, then the operating application will boot. The writes to the Compact Flash are limited to downloads of www.wegener.com 800070-01 Rev B Chapter 1, Page 9 iPump 6420 User’s Manual new versions of application software, and the maintenance of the basic non-volatile unit parametric settings. The Hard-drive (HDD) storage is provided to store all the media and objects needed for the full Store/Forward mission. From the satellite, media file content, transmitted in the MPE/IP encapsulation, is extracted and the file then stored to the HDD. The database which captures the location, playability, and lengths, of all audio files is also resident on that HDD. Later, on command, those same audio files must be read from the HDD and passed to audio decoders for mixing into the output audio track. When playlists of audio files are built, the results are stored to the HDD. As new events are added, and old ones executed or deleted, the internal scheduler database on the HDD is read and written. As new OAR recordings are captured, the new compressed mp3 files are stored to the HDD. As the unit performs its basic functions, depending on its Log Level, various status data is logged to the HDD. To provide the ability to seamlessly splice or overlap audio sources, the iPump6420 supports up to three instances of software-based audio decompression per audio Output. These software decoder stages may actually decompress live classical MPEG audio, or they may operate on wave (16b PCM), mp2, or (optionally) mp3 audio files. Their outputs feed an audio re-sampling stage, which translates their sample rates to the final user-set sample rate for that audio Output. Then the audios are muted or attenuated, as required, and fed to an audio mixer. The mixer output then feeds the final digital and analog audio outputs. Note that the entire structure shown is duplicated for both the two main audio outputs, as well as the “Aux” audio #3, though only one example is shown in the Figure. As companions to each of the two main audio outputs, a bank of 16 cue relays and an RBDS serial output is associated with each. These are logically grouped together as a “Port”, for purposes of control and advanced operations. The cue relays are used to provide the synchronizing signals to local station equipment. The RBDS serial output, along with the main audio output, may feed the local radio station exciter. This provides the local station listeners with the added experience of station, song, and artist identification. In addition to the main audio, cue relays, and RBDS, each “Port” may also be provided an associated (optional) AM/FM tuner. This tuner is connected to an external radio antenna and is used to pick up the local radio station driven by that Port of the iPump 6420. Under network COMPEL control, the audio feed from the local station is captured, compressed to mp3 file format, and then recorded to the HDD storage. This “Off Air Recording” (OAR) feature is expected to be executed during spot file insertions, so that the uplink control may request return of the recorded file (method to be discussed) for commercial audits. Moving on in Figure TBD, the iPump 6420 features two 100 base-T Ethernet adaptors, the “LAN” and “WAN” ports. The LAN port is used to transmit various Return Path reports (or OAR files) back to the uplink control system via HTTP. It also supports its own web interface, for local user control. It also provides various other network services, such as SMB or FTP access to the folder containing all audio files. It also provides access to a telnet server, which allows either Terminal control, or diagnostic access to Linux. For advanced users, an SSH server is also provided for diagnostic access. Of all these services, only the Return Path capability is also provided in the WAN port. This is a more secure port, as it only allows the outbound HTTP connection and blocks all inbound services, even Ping. Where internet connections are not available from the LAN or WAN ports, an optional modem may be installed to allow dial-up connections back to the uplink control systems. This www.wegener.com 800070-01 Rev B Chapter 1, Page 10 iPump 6420 User’s Manual modem requires a simple analog “POTS” telco line for operation. It would be used as a first alternative to the LAN or WAN ports for attempted Return Path reporting. Moving on in Figure TBD, the Local PIO closures are inputs provided to allow local automation equipment to cue the iPump6420 to deliver specific operations at precise times. These are fully balanced wire pairs, optically isolated from the i6420 chassis. Under Compel network or local user control, specific programmed events (commands) may be associated with any of the seven PIO inputs. When a closure is detected, that command is then immediately executed, whether an order to play an audio file, or to switch the live satellite audio feed. Two more functional blocks not yet discussed are used for unit Monitor and Control. This is the Front-Panel system and the Serial M&C port. The Front-Panel features LEDs for indications, a 2x20 character LCD for status and control menus, and a keypad interface for user control. The Serial M&C port allows the user a local Terminal control session. Lastly, the iPump6420 features an alarm relay contact closure, to allow use of the unit in redundant fail-safe configurations. This closure indicates “Fail” when the unit is in an Alarm state, or when AC power is removed. www.wegener.com 800070-01 Rev B Chapter 1, Page 11 iPump 6420 User’s Manual Figure 1-3: iPump6420 Functional Block Diagram Flash Storage: Software & settings WAN & LAN Ethernet adaptors DVB Receiver subsystem RF Input WAN LAN POTS Modem (option) Analog telco line Local PIO (closure) inputs Incoming closures MPEG Transport Transport Demux Compel Local Controller (Supports Compel, web, terminal, & FP cntl) Internal Control Selected Progr/ Audio stream HDD Storage: Media, playlists, schedules, OAR recordings, logs Audio Decompression module #1: Wave-PCM, mp2, or mp3 (option) Front-Panel Audio Decompression module #2: LCD/Keypad/LEDs Wave-PCM, mp2, or mp3 (option) Terminal Serial port Audio Decompression module #3: Alarm relay Serial M&C Alarm relay closure Wave-PCM, mp2, or mp3 (option) mp3 codec (option) AM/FM Tuner (option) Cue Relay Closures Logically considered “Port n of 2” RBDS serial Data output AM/FM radio antenna input n of 2 Cue relays, Bank n of 2 RBDS Output n of 2 Audio re-sampler & Mixer Audio Output n of 2 www.wegener.com 800070-01 Rev B Chapter 1, Page 12 iPump 6420 User’s Manual 1.4. iPump 6420 Specifications Characteristic Specification DVB-S1-QPSK Tuner RF Input Input Impedance Input VSWR, 75 Ω system Surge Resistance RF Tuning Input Frequency Range LO Leakage at Input Symbol-rate Range Tuning Resolution Input Signal Level Range Signal Level Warning Limits Maximum Aggregate Input Power Demodulator/FEC Modulation Carrier acquisition range Max Eb/No @ Quasierror-free threshold (less than one uncorrected error-event per hour) RF Power Level Estimator (locked to carrier or not) LNB DC POWER Activation Voltage Current (full load) Short circuit protection European “Universal LNB” www.wegener.com 75 Ω unbalanced < 2:1 (9.0 dB R.L. min), 950-1450 MHz < 3:1 (6.0 dB R.L. min), 1450-2150 MHz Survives up to 10 direct-coupled 8kV discharges (per IEC 801-2) 950 to 2150 MHz < -50 dBm 2 to 45 Msps (may be limited by Transport Rate Limits) 10 kHz -25 to -65 dBm Warns within +10/-5 dB of upper limit and +5/-10 of lower limit -8 dBm min QPSK (α=.35) per DVB (EN300 421) +1 MHz or +10% of symbol-rate QPSK, whichever is greater Per EN300 421: QPSK R=1/2: 4.5 dB, QPSK R=2/3: 5.0 dB, QPSK R=3/4: 5.5 dB, QPSK R=5/6: 6.0 dB, QPSK R=7/8: 6.4 dB, Unitless metric SIGNAL corresponds to input power as follows: Above -25dBm: Extrapolated up to 100+ -25dBm: 90 -55dBm: 30 -35dBm: 70 -65dBm: 10 -45dBm: 50 no signal <0 Below -65dBm: Extrapolated from 10 down to <0 Accuracy: unit to unit <+5 dB; over frequency <+10 dB (supplied on RF center conductor) User or network controlled selectable: ON or OFF ~ +18.7 VDC nominal at no loading, +18.0 VDC min. at max loading 350 mA max. Thermal fuse, tripping at ~500 mA. Implements LNB polarization & frequency-band control, per ASTRA recommendation 800070-01 Rev B Chapter 1, Page 13 iPump 6420 User’s Manual Characteristic ASI Transport Input Option DVB-ASI Input Physical layer Minimum byte gap Transport data rate Transport Demux Max Supported Rate Programs Audio streams per program MPE/IP File Downloads Types Max aggregate data-rate over satellite Audio Decoders Compressed modes, live satellite audio streams File playback Specification One input per DVB-ASI per EN50083-9 Annex B 270 Mbaub signaling on 75Ω coax cable Down to 5-byte interbyte gaps 60 Mbps max. MPEG/DVB 60 Mbps Unlimited Unlimited 1) By MPE/UDP/IP in satellite Transport 2) By HTTP over Internet 10 Mbps One live, and up to two file-based audio decoders may be assigned per audio output MPEG-1 Layers 1 and 2, MPEG-2 Layer 2 MPEG-1 Layers 1 & 2, PES or Program (recordings only) MPEG-2 Layer 2, PES or Program (recordings only) 16-bit PCM wave MPEG-1 Layer 3 (“mp3” option, see below) Compressed data-rates Up to 384kbps ES rate Input Sample rates/formats 32, 44.1 and 48 kHz only; mono or stereo Supported User-set output sample 32, 44.1 and 48 kHz rates MP3 codec Constant bit rate only Max ES bit rate 256 kbps ID3 tags: v1 (file-end), v2 (file-start), both, or neither OK. File insertion tools Playlists www.wegener.com 1) Quantity: Unlimited 2) Length: Unlimited number of files, spec’d literally by name or using keyword selection from folders (see next) 3) Execution options: (i) play once as temporary insert; (ii) loop N times as temporary insert; or (iii) loop indefinitely as permanent Port setting (“virtual channel”) 800070-01 Rev B Chapter 1, Page 14 iPump 6420 User’s Manual Characteristic File selection keywords (used in any file-play specification for an insert) Insertion “Profiles” Transitions on file insertions Synchronization of inserts to live audio track Analog Audio Output Output Level-MAX PPL Output level adjust range Output Impedance Frequency Response Phase Accuracy SNR Harmonic Distortion Specification 1) SHUFFLE—select files to play from folder such that each plays once before any repeat, but order is different each time through 2) RANDOM—select files to randomly play from folder, but without any repeats 3) SEQUENTIAL—Like SHUFFLE, but maintains same play order each time through file list in folder 1) Pre-silence mutes live for programmable period before file insert starts 2) Post-silence mutes live for programmable period after file insert ends 3) Programmable attenuation of file audio during insert 4) “Duck” allows live to mix with file audio during insert at programmable attenuation Seemless. No inserted silence. 1) Compel NETCON DELAY 2) Compel Extended Syntax command delay Measured at 256 kbps audio ES rate, stereo mode +18.0 dBm into 600 ohms @ 0 dB attenuation +24.0 dBm is optional 0 to 20 dB attenuation in 1 dB steps from Output Levels above Balanced: < 60 Ω 20Hz to 20 kHz, + 0.5/-1.5 dB 50 Hz to 15 kHz, ± 0.5 dB 50 Hz to 15 kHz, ≤ ±2° from linear phase ≥ 88 dB (22 Hz to 20 kHz) unweighted < 0.1% (1KHz test-tone, 1dB below PPL) Dynamic Range Muting Digital Audio Output Protocol Output Impedance Output level Muting www.wegener.com 16-Bit Delta Sigma DAC Muting control of each Audio Decoder (port) is available, muting both analog & digital outputs in tandem Supplied for two main audios Balanced 16-bit AES3 audio, Sample rate per each audio output Differential pair, 110 ohms Non-adjustable 5 VP-P Muting control of each Audio Decoder (port) is available, muting both analog & digital outputs in tandem 800070-01 Rev B Chapter 1, Page 15 iPump 6420 User’s Manual Characteristic LAN/WAN Ethernet Ports Physical Layer LAN & WAN Media Access and Link Layers Network and Transport Layers Network Services WAN port security Cue Relays Arrangement Type Alarm/User relay Type Polarity Rating RBDS Serial Ports Arrangement Baud/protocols Serial M&C Port Assignment Baud/protocol-- Terminal Specification Full-duplex, auto-negotiating 10baseT, 100base TX (twisted pair) on RJ45 jack Per IEEE 802.3 (Ethernet) Binds to TCP/IP stack Telnet, SMB, FTP, SSH (for diagnostics), HTTP (web) server, HTTP client (for Return Path) All inbound TCP connections blocked; inbound ICMP messages (e.g. PING) blocked Two banks of 16, each bank may be logically associated with a main audio output Form A relay 30VDC @ 100mA. Commons may be wired together (by factory-set jumper), or each wire pair left “floating”. One relay dedicated to indicate ALARMS and one relay dedicated to user control. The ALARM relay automatically de-energizes for alarm conditions so that power loss to unit indicates as an alarm. Form C, wiper contacts NC contact when de-energized and NO contact when energized Common, NC and NO contacts supplied externally 30VDC open circuit, 100mA max current closed Two serial ports, each may be logically associated with a main audio output Programmable to 1200, 2400, 4800, or 9600 baud, fixed at 8N1; output only Baud/protocol—Printer email Terminal (default) or Compel email Programmable to 2400, 9600, or 19.2 k baud; fixed at 8N1; full duplex Programmable to 1200, 2400, 4800, or 9600; fixed at 8N1; output only PIO Inputs Physical Logical 7 balanced wire pairs, triggering on closure Closures may be programmed to trigger stored Compel cmds www.wegener.com 800070-01 Rev B Chapter 1, Page 16 iPump 6420 User’s Manual Characteristic Off-Air Recording (optional) Arrangement AM (domestic US) FM (domestic US) Extended worldwide support option (contact WEGENER sales) Compression System MP3 file compression parameters Total recording time per hour Time Synchronization Unit Control Local User Compel Power AC Voltage AC Frequency Current Chassis Height Width Depth Weight Cooling www.wegener.com Specification Audio captured from demodulated radio carriers. Audio compressed into mp3 files and returned to uplink control system via Return Path. Two AM/FM inputs, each logically associated with one of the two main Audio Decoders (ports), either #1 or #2 Frequency 520 to 1720 kHz Sensitivity 5.0 uV for S/N= 10dB Frequency 87.9 to 107.9 MHz Sensitivity 2.0 uV for S/N = 30 dB In addition to US commercial bands, add these bands: AM (Long Wave) 153 to 279 kHz AM (Medium Wave) 520 to 1710 kHz AM (Short Wave) 2.3 to 21.85 MHz FM 64-108 MHz Real-time compression to mp3 during file capture ES bit-rate: 8, 16, 24, 32, 64 kbps Audio sample rate: 8, 16, and 32 kHz Stereo/mono selection Sample depth 8 or 16 bit For best stability, unit must record 12 minutes or less per hour, from all sources Compel TOD messages or NTP 1) 2) 3) 4) 1) 2) 3) Front-panel Terminal (thru serial port or under Telnet) Web SNMP (status only) Real-time COMPEL command stream in Transport Polled Compel commands (by HTTP, over internet) Stored Compel commands in Scheduler (fixed time or Triggered, either by Compel cmd or PIO input) 90-132 or 175-264 VAC, auto-selected 60/50 Hz ± 2% 0.8A @ 115VAC typical, with full LNB load Std. 1RU 1.75 inches (4.45cm) EIA std. 19 inches (48.26cm) Back of rack-ears to rear panel: 19.4 inches (49.27 cm) Back of rack-ears to end of connectors: 20.2 inches ( cm) ~18.2 Pounds (8.27 kg) Fan-cooled with front-side and right-side inlets with backside and left-side exhausts (viewed from the front). Continuous fan cooling. 800070-01 Rev B Chapter 1, Page 17 iPump 6420 User’s Manual Characteristic Environmental Use Heat dissipation Operating Temperature Storage Temperature Humidity Altitude Agency Approvals UL FCC CE www.wegener.com Specification Indoor only 48 watts typical, with full LNB DC load +10oC to +40oC (+50oF to +104oF) Unit gives warning indication for over-temperature conditions -20oC to +70oC (-4oF to +158oF) To 93% non-condensing Up to 10,000 ft (3048 m) UL 60950-1:2003, First Edition CSA C22.2 No. 60950-1-03 1st Ed. April 1, 2003 EN55022, EN61000-3-2, EN61000-3-3 and FCC, Part 15, Subpart B Rules and regulations, Class A EN60950-1(02), EN55022, EN55024(98)A2(03)-tested per EN61000-4-2(95), -4-3(02), -4-4(95), -4-5(95), -4-6(96) and -411(94) 800070-01 Rev B Chapter 1, Page 18 iPump 6420 User’s Manual 1.5. Safety Summary The iPump 6420 is designed for safe use with few special precautions required of the user. The following items are basic precautions to use when installing and working with your iPump 6420: Do not open the iPump 6420 chassis cover. The iPump 6420 incorporates security labels over some of the screws. There are no user-serviceable components within the iPump 6420. Tampering with these security labels or opening the unit may void your warranty. If you have questions, contact Wegener's Customer Service Department at the address or numbers listed in Chapter 5 Customer Service on page TBD. www.wegener.com 800070-01 Rev B Chapter 1, Page 19 iPump 6420 User’s Manual 1.6. Glossary of Terms and Abbreviations Term Definition AFD Assured File Delivery, the WEGENER system for file downloads through satellite channels An indication of a serious fault, generally expected to prevent the i6420 from fulfilling a basic mission Term used to describe the controlling software that runs on top of an Linux Operating System, and that provides most i6420 functionality. A physical interface for MPEG Transport streams, featuring bit-serial transmission on a baseband signal with 270 MHz signaling rate. The data is sent asynchronously, meaning the interface conveys a data byte when available at the sender, and padding bytes otherwise. A small program that briefly runs on top of the Linux OS in the i6420 that loads and runs the main application. An RF signal whose envelope and phase is modulated (manipulated) in an defined fashion in order to convey information. A program that can be started and ran on a computer that seeks services from server programs. Usually human operators will interface directly with the client to seek these services. WEGENER’s trademark Control system, optimized for control of media distribution systems using edge devices such as WEGENER’s iPump 6420. Digital Video Broadcast. Term used to represent the methods and protocols using MPEG Transport streams to distribute media content over satellite In digital carrier systems, the energy per information-bit divided by the channels noise density per Hertz. This is the key figure of merit for signalto-noise ratio. The widely-used LAN technology specified by IEEE standard 802.3 Forward Error Correction. A transformation done on a stream or block of information, expressed in bits, bytes, or frames, where some small amount of redundancy is added. This is done in a manner such that, when the transformed (FEC-encoded) stream of data is conveyed over error-prone communication links, such as satellite channels, the errors can be removed and the original information message recovered. File Transfer Protocol. Industry-standard method for transferring files between host computers over IP networks. Hypertext Transfer Protocol. This is the protocol supported by web servers and clients. It actually describes a set of methods to upload and download, not only web pages, but any kind of file. The i6420 uses the HTTP POST method to upload files to remote servers, and uses the GET method to download files from remote servers. Internet Protocol. The internetworking protocol that allows host computers to communicated over local networks or over the internet. Alarm Application ASI Boot Loader Carrier Client Compel DVB Eb/No Ethernet FEC FTP HTTP IP Integrated Receiver-Decoder. A product which features a "receiver" to extract Transport streams from satellite-borne carriers & a companion "decoder" to decompress MPEG elementary streams (from within said transport streams) in order to recreate the original audio/video/data signals. The WEGENER Unity 4600 is an IRD. IRD www.wegener.com 800070-01 Rev B Chapter 1, Page 20 iPump 6420 User’s Manual Term Definition Language Descriptor or LD Linux Identifier for a single component compressed audio stream under an MPEG Program within a Transport stream. A modern, open-source (free) operating system (OS). The OS provides these standardized services to the i6420 application software: 1) access to the hardware, 2) rations access to the microprocess for the application’s multiple processes, 3) interrupts the application with events and messages, 4) ration computer resources, and 4) allows standard communication methods to external hosts. Local area network. An IP/Ethernet network to which either the i6420 LAN or WAN ports may be connected. Liquid Crystal Display. Text display technology for i6420 front-panel. Light emitting diode. Display lamps for i6420 front-panel. Low-noise block downconverter - equipment (generally at the antenna) that converts the incoming satellite signal to the appropriate frequency for reception by the iPump 6420. Moving Pictures Experts Group. Often used to describe a set of specifications based on ISO 13818-x. Program Allocation Table. A single metadata structure provided in all MPEG Transport streams that show what Programs are available. A non-volatile setting of the i6420, which has no time limit. Packet ID. Identifies a specific single data stream within an aggregate MPEG Transport stream. Program Map Table. A single metadata structure that is provided in MPEG Transport streams, one such “table” per Program. Gives information about the media components (video, audios, data, etc.) within the Program. In an i6420, an ordered set of playable media files. When used, the entire set is played or executed in its entirety. Under MPEG, these are the basic channels under which media is conveyed in MPEG Transports. Typically, all media services within a Program share a single time-base. An identifier unique to each Program within a Transport. PPP (Point-to-Point Protocol) is a protocol for communication between two computers using a serial interface, typically a personal computer connected by phone line to a server. Quadrature-phase-shift-keying. Term usually used to imply the specific carrier protocol (modulation and FEC) described in DVB specifications and used world-wide to convey MPEG Transports over satellites. Radio Frequency. Often used as a noun to mean any RF signal, such as the satellite downlink signal, or the IF signal emitted from the antenna LNB. A computing program that constantly runs, while waiting to deliver, and then performing the delivery of services to other programs running on the same or other computers. Also used to describe the computer upon which a server program is running. Server message block - a protocol for requesting services from and reading and writing to a file server. An SMB server can present its files for easy viewing by Windows Explorer. Industry-standard method for communicating between host computers over IP networks. LAN LCD LED LNB MPEG PAT Permanent Setting PID PMT Playlist Program Program Number PPP QPSK RF Server SMB Telnet www.wegener.com 800070-01 Rev B Chapter 1, Page 21 iPump 6420 User’s Manual Term Definition Temporary Setting A volatile setting of the i6420, which is limited in time. After this expires, the unit returns to a permanent setting. The aggregate satellite-borne data stream defined by MPEG and DVB. An indication of a minor fault, or perhaps early warning about an imminent major fault. At the point the Warning is displayed, it is for user information only and does not mean that a basic i6420 mission may not be fulfilled. Transport Warning www.wegener.com 800070-01 Rev B Chapter 1, Page 22 iPump 6420 User’s Manual Chapter 2: INSTALLATION This chapter provides instructions on unpacking, mounting, and connecting the iPump 6420, as well as providing connector information, including detailed pinouts. Table of Contents 2.1. 2.2. Unpacking and Inspection...................................................................................... 24 Location and Mounting .......................................................................................... 24 Figure 2-1: Proper rack installation for iPump6420.........................................................................25 2.3. Equipment Setup..................................................................................................... 26 2.3.1. iPump 6420 Rear Panel Connections................................................................ 26 2.3.2. iPump6420 Connector Details .......................................................................... 27 Figure 2-2: iPump 6420 Rear Panel View ..........................................................................................27 Table 2-1: iPump6420 External Connector Information ..................................................................27 2.4. Establishing Compel Network Control................................................................. 31 2.4.1. Getting Local Web Control............................................................................... 32 2.4.2. Setup through the Front-Panel .......................................................................... 33 Check/set LNB LO: ....................................................................................................... 33 Check/set RF carrier settings:........................................................................................ 33 Check/set audio port settings:........................................................................................ 34 Check/set LAN and/or WAN Ethernet port settings: .................................................... 34 Check/set Terminal port settings: .................................................................................. 34 2.5. Unit Indications....................................................................................................... 35 2.5.1. Front-panel LCD Home Screen ........................................................................ 35 Figure 2-3: i6420 Home Screen .........................................................................................................35 2.5.2. Front-panel LED Indications ............................................................................ 36 www.wegener.com 800070-01 Rev B Chapter 2, Page 23 iPump 6420 User’s Manual 2.1. Unpacking and Inspection Carefully unpack the unit and its ac power cord and inspect for obvious signs of physical damage that might have occurred during shipment. Also locate the bag of accessories, including special cable pigtails and adaptors. Any damage claims must be reported to the carrier immediately. Be sure to check the package contents carefully for important documents and materials. Note: Please save the packing materials and original shipping containers in case you must later return the unit for repair. Packing these units in other containers in such a way that they are damaged will void your warranty. 2.2. Location and Mounting The iPump 6420 should be mounted in a standard 19-inch equipment rack. After mounting, maintain a clean, dry environment for the unit. Precautions WARNING: FCC-Mandated Suppression of Radio Frequency Emissions This is a Class A product. In a domestic environment this product may cause radio interference for which the user may need to a t ke mitigating action. If the Ethernet port has a cable connected to it, that cable must be properly shielded and grounded to minimize RF emissions that could interfere with nearby equipment. DANGER To avoid damage to this and other equipment, or personal injury, the following items should be strictly observed. Elevated Operating Ambient When equipment is installed in a closed or multi-unit rack assembly, the operating ambient temperature of the rack environment may be greater than the room ambient temperature. Therefore, consideration should be given to the ambient air temperature within the rack, and not just inside the room, when deciding if the maximum recommended ambient operating temperature (TMRA) is being met. Reduced Air Flow Equipment should be installed such that airflow required for safe operation of the equipment is not compromised. To ensure adequate air flow, the iPump 6420 should be arranged in a rack with at least one empty rack unit between it and adjacent equipment and with adequate clearance around both side vents. Mechanical Loading Mounting of the equipment in a rack should be such that a hazardous condition is not produced by uneven loading. This unit is moderately heavy, so total rack loading must be considered. Also, do not rest any unsupported equipment on your iPump 6420. DANGER Circuit Overloading Consideration should be given to the connection of the equipment to the supply circuit and the effect that overloading of circuits could have on overcurrent protection and supply wiring. Ensure that the total rack or breaker power consumption does not exceed the limits of the ac branch circuit. Appropriate consideration of equipment ratings should be used when addressing this concern. Reliable Earthing Reliable earthing of rack-mounted equipment should be maintained. Particular attention should be given to supply connections other than direct connections to the branch circuit (use of power strips, chassis ground lugs, etc.). www.wegener.com 800070-01 Rev B Chapter 2, Page 24 iPump 6420 User’s Manual Rack Installation The iPump 6420 is sized at 1 RU and should be mounted in an EIA-standard, 19-inch-wide equipment rack. After mounting, maintain a clean, dry environment for the unit. 1) First, install angle brackets or cross-supports capable of supporting both the unit and its connecting cables. Screw or bolt the supports securely to the equipment rack. NOTE: Use of rack supports with cutouts on the sides that allow air circulation are also permitted.(Wegener P/N 26429-07, 26429-08) 2) Place the iPump 6420 on its supports and use four anchor screws or bolts and nuts to secure the unit's front brackets to the rack. 3) Do not block any of the ventilation or fan opening on the front, side, or rear of the unit. Support arrangements that do not allow adequate air flow or that block the openings on front, side and rear vents may result in overheating and damage to the iPump 6420. 4) The front brackets must be secured to the rack. If front brackets are left unsecured, the unit may shift forward and fall from the rack during installation or operation. Failure to secure the front brackets may result in personal injury and/or damage to the equipment. 5) Locate the iPump 6420 and its cables to avoid impacts, spills, and pulling cables and to ensure sufficient air flow. Failure to locate the iPump 6420 in a proper environment may result in damage to the equipment. 6) No more than 3 iPump6420s may be stacked contiguously, after that, there needs to be a 1RU buffer space before any other heat-generating equipment. This may be repeated indefinitely, so long as the local ambient temperature requirements are observed (temperature of air at side and front ventilation points). Figure 2-1: Proper rack installation for iPump6420 Note: Use of rack supports with cutouts on the sides that allow air circulation are also permitted. (Wegener P/N 26429-07, 26429-08) Caution: Do not block any of the front, side, or rear ventilation holes www.wegener.com 800070-01 Rev B Chapter 2, Page 25 iPump 6420 User’s Manual 2.3. Equipment Setup 2.3.1. iPump 6420 Rear Panel Connections Before applying power, make the following connections, as necessary, to your iPump 6240. For connector details, refer to Table 2-1Error! Reference source not found.. For help deciding which connectors and signals to use, consult Chapter 3. 1) Connect the L-band output from your antenna's LNB to your iPump 6240's input RF port, OR, if supplied with ASI Input interface, connect a coax cable to your ASI Transport source (such as another satellite IRD).Connect your balanced analog audio ports (1, 2, or 3 [Aux]) to your analog audio distribution system (DA). Or connect the AES3 digital audio outputs (for 1 & 2 only) to your digital audio distribution system (DA). 2) Connect a CAT5 cable from the iPump 6240's LAN port to the desired LAN segment in order to access the iPump 6240's web control screen. If that LAN segment can reach the internet, then this may be the only adaptor needed (see next). 3) If you wish to have your iPump 6420 be able to send Return Path over internet to the uplink control system, then the LAN segment connected to the LAN port must be allowed to make outbound HTTP connections, and you must protect the iPump 6420 from inbound connections from the internet. If so, then you may skip the next step. 4) Connect a CAT5 cable from the iPump 6240's WAN port to an external broadband internet connection. Remember, this is used only for connections unprotected by NAT router and/or firewall. 5) Connect the Modem jack to a local analog phone line, if using Return Path, but where the Ethernet adaptors cannot be wired to have access to the internet. 6) Connect one of more of your iPump 6240 Cue Relays ports to the local commercial insertion equipment (if used). 7) Connect one or more of your iPump 6420 RBDS output ports to the radio station exciter’s RBDS input, if supporting RBDS distribution in this radio network. 8) Connect one or more of your iPump 6420 AM/FM tuner inputs to appropriate radio antenna, if supplied and using Off-Air Recording audits. You must be using Return Path to support return transmission of recorded OAR files. 9) Connect the local automation systems’s relay closure outputs to the PIO Input connector. 10) For diagnostics, you may connect a text-based monitor to the Serial M&C port. 11) Connect the Alarm port to downstream redundancy control or alarm monitoring system. 12) Connect the supplied ac power cord to the iPump 6240's IEC receptacle and then to a 100-to-120 VAC or 200-to-240 VAC source. Once all of the ports are connected and power is supplied, the iPump 6240 begins the startup process and will require about 2 ½ minutes to complete. www.wegener.com 800070-01 Rev B Chapter 2, Page 26 iPump 6420 User’s Manual 2.3.2. iPump6420 Connector Details Figure 2-2: iPump 6420 Rear Panel View Table 2-1: iPump6420 External Connector Information Connector Designation (Options shown in red) Type Pin # Signal Description On rear panel RF IN Type F coax jack L-band RF from external LNB. LNB-DC output on center-pin. ASI IN BNC jack DVB-ASI Transport input WAN RJ-45 jack 1 EN_Out + (Rightmost as viewed from rear of unit) 2 3 4 5 6 7 8 (Same pin numbering but spatially reversed because of connector inversion) LAN RJ-45 jack AUX AUDIO 9-pin D male jack www.wegener.com 800070-01 Rev B 1 2 3 4 5 6 7 8 9 EN_Out EN_In + NC NC EN_In NC NC (Same as WAN) Left ‘+’ Ground N.C. Ground Right ‘+’ Left ‘-‘ Ground N.C. Right ‘-‘ Chapter 2, Page 27 iPump 6420 User’s Manual Connector Designation (Options shown in red) Type Pin # SERIAL M&C 9-pin D female jack 1 2 3 4 5 6 7 8 9 Signal Description DCD (internally pulled to +5V) RxD (data output) TxD (data input) DTR (not connected) GND DSR (internally pulled to +5V) RTS (not connected) CTS (internally pulled to +5V) RI (internally pulled to +5V, with weak current limiting) PIO INPUT 15-pin D male jack 1 2 3 4 5 6 7 8 9 10 11 12 13 14 15 PIO #1 In PIO #2 In PIO #3 In PIO #4 In PIO #5 In PIO #6 In PIO #7 In Ground PIO #1 Return PIO #2 Return PIO #3 Return PIO #4 Return PIO #5 Return PIO #6 Return PIO #7 Return ALARM 15-pin D male jack 1 2 3 4 5 6 7 Ground RxD (spare data output) TxD (spare data input) Ground Ground Cue Relay #1: Common contact Alarm (COM closes here on alarm or 8 9 10 11 12 13 14 15 OK (COM closes here when OK) Ground Ground Ground Ground Cue Relay #1: N.C. contact Cue Relay #1: N.O. contact COM when power is off) www.wegener.com 800070-01 Rev B Chapter 2, Page 28 iPump 6420 User’s Manual Connector Designation (Options shown in red) Type AUDIO 1 9-pin D male jack 1 2 3 4 5 6 7 8 9 AUDIO 2 9-pin D male jack (same pin numbering) AM/FM IN 1 BNC jack AM or FM antenna unbalanced input (corresponding to port 1 audio) AM/FM IN 2 BNC jack AM or FM antenna unbalanced input (corresponding to port 2 audio) CUE RELAYS 1 37-pin D male jack www.wegener.com Pin # 800070-01 Rev B 1 2 3 4 5 6 7 8 9 10 11 12 13 14 15 16 17 18 19 20 21 22 23 24 Signal Description Left ‘+’ Ground N.C. Ground Right ‘+’ Left ‘-‘ Ground N.C. Right ‘-‘ (Same as AUDIO 1) Cue Relay #1-1: N.O. contact Cue Relay #1-2: N.O. contact Cue Relay #1-3: N.O. contact Cue Relay #1-4: N.O. contact Ground Cue Relay #1-5: N.O. contact Cue Relay #1-6: N.O. contact Cue Relay #1-7: N.O. contact Cue Relay #1-8: N.O. contact Ground Cue Relay #1-9: N.O. contact Cue Relay #1-10: N.O. contact Cue Relay #1-11: N.O. contact Cue Relay #1-12: N.O. contact Ground Cue Relay #1-13: N.O. contact Cue Relay #1-14: N.O. contact Cue Relay #1-15: N.O. contact Cue Relay #1-16: N.O. contact Cue Relay #1-1: Common contact Cue Relay #1-2: Common contact Cue Relay #1-3: Common contact Cue Relay #1-4: Common contact Ground Chapter 2, Page 29 iPump 6420 User’s Manual Connector Designation (Options shown in red) Type Pin # 25 26 27 28 29 30 31 32 33 34 35 36 37 CUE RELAYS 1 (continued) CUE RELAYS 2 37-pin D male jack (same pin numbering) RBDS 1 9-pin D female jack 1 2 3 4 5 6 7 8 9 Signal Description Cue Relay #1-5: Common contact Cue Relay #1-6: Common contact Cue Relay #1-7: Common contact Cue Relay #1-8: Common contact Cue Relay #1-9: Common contact Cue Relay #1-10: Common contact Cue Relay #1-11: Common contact Cue Relay #1-12: Common contact Ground Cue Relay #1-13: Common contact Cue Relay #1-14: Common contact Cue Relay #1-15: Common contact Cue Relay #1-16: Common contact (Same as CUE RELAYS 1, numbered #2-1 to 2-16) DCD (internally pulled to +5V) RxD (data output) TxD (data input) DTR (not connected) GND DSR (internally pulled to +5V) RTS (not connected) CTS (internally pulled to +5V) RI (internally pulled to +5V, with weak current limiting) RBDS 2 9-pin D female jack MODEM RJ-11 phone jack AES3 AUDIO 9-pin D female jack www.wegener.com 800070-01 Rev B (same pin numbering) (Same as RBDS 1) Standard analog telco phone line 1 2 3 4 5 6 7 8 9 AES3 dig audio port 1 ‘+’ AES3 dig audio port 2 ‘+’ AES3 dig audio spare ‘+’ Ground Ground AES3 dig audio port 1 ‘-’ AES3 dig audio port 2 ‘-’ AES3 dig audio spare ‘-’ Ground Chapter 2, Page 30 iPump 6420 User’s Manual Connector Designation (Options shown in red) Type Pin # Signal Description USB USB type A jack Universal Serial Bus host-end 115/230 VAC Std IEC receptacle AC Line In USB type A jack Universal Serial Bus host-end On Front-Panel USB 2.4. Establishing Compel Network Control After racking and cabling your iPump6420, it is now time to bring it up on the satellite carrier (if applicable) or get it connected to the internet (if applicable), such that full Compel network control may be implemented. This will allow your iPump 6420 to fully participate in the rich feature set of WEGENER’s MediaPlan-based Store/Forward system. In many cases, your unit was already pre-set at the factory per the instructions from your network provider, and require no setup operations by the local user. In that case, see Section 2.5 Unit Indications, to confirm unit operation. If, however, your unit is not fully configured for your site, then continue reading. To start, check with your network operator to find out how your iPump6420 will be controlled. Typical satellite networks require network control over the satellite channel. However, special Microcasting sites will pull their network control commands and media file downloads solely over the internet. After you have decided how you need to get network control, then you need to configure, or check configuration of your i6420 unit. If you are going to use local web control, then you are going to need to network a working computer, with approved web browser (See Specifications, Chapter 1) to your i6420, and then, from the FrontPanel, set the i6420’s LAN IP address. Subsection 2.4.1 covers this issue. If you are not using web control to setup the i6420, but need to do some configuration through the Front-Panel user interface, then see subsection 2.4.2. www.wegener.com 800070-01 Rev B Chapter 2, Page 31 iPump 6420 User’s Manual 2.4.1. Getting Local Web Control The user web interface is the preferred method of local control. If it has been enabled at the factory, then this subsection should allow you to properly setup and verify. Even if enabled, you probably may need to setup the iPump6420 LAN network parameters to get it to work. Perform the following steps to accomplish this. If any questions about using the i6420 Front-Panel, please refer to a more thorough discussion in Chapter 3. Note that these quick install instructions cannot go into details about setting up modern IP networks. Please consult your IT department, or, even better, a good book on networking to help you there. Steps to setup LAN port networking in iPump6420: 1. On the front LCD, confirm that you are at the “Home” screen (see Chapter 3), by pressing <ESC> button several times. 2. Press the <Å> button twice to get the “Unit Setup” screen. 3. Press <ENT>, then press either <Å> or <Æ> several times, until you get to the “IP Setup” screen. 4. Press <ENT> and then you should see the “LAN IP Settings” screen. (If you were actually looking for the “WAN IP Settings” screen, then press the <Æ> button once.) 5. Press <ENT> again and then you should see the “LAN Addressing Mode” screen. 6. The choices are either “STATIC” or “DHCP”. If you wanted DHCP, and that is what is shown, then you are done: Press <ESC> several times until you return to the original Home screen; then cycle power on the unit to force a reboot and request for an IP address from the network’s DHCP server. Otherwise, if you wanted LAN and that is what is shown, then skip to step #10. 7. While still at the “LAN Addressing Mode” screen, if you need to change the setting, then press <ENT> to get an “edit session”. 8. Use the <Ç> or <È> button to modify the value, then press <ENT> to ‘save’ it. If you do not wish to make changes, exit by pressing <ESC>. 9. If you were changing to DHCP, then press <ESC> several times to return to the Home screen; then cycle power on the unit to force a reboot and request for an IP address from the network’s DHCP server (you are done). 10. If the desired mode was STATIC, and that is what you now have, then press the <Æ> button once to get the “LAN Static IP Addr” screen. 11. If you want to change the IP address shown, press <ENT> to get an edit screen. 12. Press the <Æ> or <Å> buttons to move the cursor under the digit you wish to edit. Then press the <Ç> or <È> button to modify the value. 13. Repeat above as often as necessary, remembering that all octets (numbers between the periods) less than ‘100’ will be shown with leading ‘0’s (so to show the value ‘’3’, the screen must show ‘003’). When done, press <ENT> to save the change, or press <ESC> to leave the edit screen without saving. 14. Next, press the <Æ> button once to get the “LAN Static Netmask” screen. 15. If you want to change the Netmask shown, press <ENT> to get an edit screen. 16. As done above, finish editing the netmask, then press <ENT> to leave the edit session and save the results, or press <ESC> to leave without saving. 17. Next press the <Æ> button once to get the “LAN Static Gateway” screen. www.wegener.com 800070-01 Rev B Chapter 2, Page 32 iPump 6420 User’s Manual 18. If you want to change the Gateway IP address shown, press <ENT> to get an edit screen. 19. As done above, finish editing the Gateway IP address, then press <ENT> to leave the edit session and save the results, or press <ESC> to leave without saving. Remember, that this must be the address of the router that allows you to connect to remote IP networks. If it is not set correctly, you will not be able to reach your iPump from remote networks, nor will you be able to do Return Path to the uplink control system using this LAN port. 20. When done, press <ESC> repeatedly until back at the Home screen. Now you are ready to access the iPump 6420 from your web browser. 2.4.2. Setup through the Front-Panel This subsection gives you a checklist of items to setup or check to get your iPump 6420 on the carrier and ready for satellite-based network control. Very few items are suggested for user setup, because normally Compel will control must unit settings, and the web interface is much more fully-featured (and thus recommended). These instructions are fairly terse, and, if any difficulty, please refer to the general guide on the Front-Panel interface in Chapter 3. In some cases, control of some or all of the following parameters has been disabled by a factory setting. In this case, it was assumed that the unit was setup well enough to lock onto the carrier and receive Compel network commands when first supplied the correct antenna connection. You may then reference section 2.5 to see if the indications all show OK, and, if not, use the Troubleshooting guide in Chapter 4. Check/set LNB LO: 1. Start or return to the LCD Home screen is reached (see subsection 2.5.1). 2. Move to Unit Setup same level; select that 3. Move to Transport In Setup same level; select that 4. Move to LNB Setup same level; select that 5. For LNB Type, select either “Local Osc” (which is typical) or “Universal/ASTRA” for special European satellites 6. Leave LO Type set to Custom Freq, all versions below 420 7. Move to LO Custom Freq and set it to either 5150 or 10750 MHz, if domestic (consult with satellite provider outside US) Check/set RF carrier settings: 1. Start or return to the LCD Home screen is reached (see subsection 2.5.1). 2. Move to Unit Setup same level; select that 3. Move to Transport In Setup same level; select that 4. Move to Current Channel; select that 5. Move to Symbol Format; select and edit as necessary. “QPSK” is std DVB-S1QPSK. 6. Move to FEC Ratio; select and edit as necessary. 7. Move to Downlink Frequency; select and edit as necessary 8. Move to Transp. Data Rate; select and edit as necessary OR 9. Move to Transp. Symb Rate; select and edit as necessary www.wegener.com 800070-01 Rev B Chapter 2, Page 33 iPump 6420 User’s Manual 10. Move to Program Number; select and edit as necessary. Use ‘*’ to use the first Program available 11. Move to Tag Site; select and edit as necessary. Site ‘15’ is the do-not-use choice. 12. If any changes you wish to keep, move to Done and select Check/set audio port settings: 1. Start or return to the LCD Home screen is reached (see subsection 2.5.1). 2. Move to Unit Setup same level; select that 3. Move to Decoder Setup; select that 4. Select the audio output, 1, 2, or 3 (Aux) under Decoder Number 5. Move to Decoder Setup; select and edit as necessary. Set to “Follow Tune” if the DVB Program assigned in the RF setup is acceptable; set to “Program” to set the DVB Program; set to “Off” if not using that Audio Port. 6. Move back up to Decoder Setup; then move to Audio Setup; select that 7. Select the audio output, 1, 2, or 3 (Aux) under Decoder Number 8. Move to Audio Lang Setting; select and edit that. Use ‘***’ to use the first-available audio stream in the Program (OK if only one audio!). 9. Repeat as necessary for multiple audio ouptuts Check/set LAN and/or WAN Ethernet port settings: 1. Start or return to the LCD Home screen is reached (see subsection 2.5.1). 2. Move to Unit Setup same level; select that 3. Move to Decoder Setup; select that 4. Move to IP Setup; select that 5. Move to LAN IP Settings; select that 6. Move to LAN Addressing Mode; select and edit to be either “Static” or “DHCP”. If “DHCP, you are done with this port. 7. If “Static”, move to LAN Static IP Addr; select and edit 8. If “Static”, move to LAN Static Netmask; select and edit 9. If “Static”, move to LAN Static Gateway; select and edit 10. If the WAN port is to be checked and set, follow similar steps, but substitute ‘WAN’ for ‘LAN’ in instructions Check/set Terminal port settings: 1. Start or return to the LCD Home screen is reached (see subsection 2.5.1). 2. Move to Unit Setup same level; select that 3. Move to Serial Port Setup; select that 4. Move to Device Assigment; the default is “Terminal”. If not set there, select and edit, if you wish to use the Serial M&C port for monitor and control. 5. Move to Term Baud; select and edit the baud rate needed. www.wegener.com 800070-01 Rev B Chapter 2, Page 34 iPump 6420 User’s Manual 2.5. Unit Indications This section discusses what the user can see and learn from the iPump 6420 front-panel LCD screen and LED indicators. 2.5.1. Front-panel LCD Home Screen What you are expecting: The RF setup parameters that you programmed, and valid signal quality indications. After the unit is entered into the uplink control system Compel database, the name will show as assigned in Compel. Figure 2-3: i6420 Home Screen i6420 LCD: Home screen during normal operation I 6 4 2 0 _ n a m e r r r r r r r r r r Unit name: Assigned at factory, and then reassigned in Compel database q RF Setup: “Marquee” of the following items: - Transport Data-rate - Downlink RF frequency - FEC ratio Alternately, if ASI-Input option is installed: “ASI-input” www.wegener.com 800070-01 Rev B S N : 2 8 4 4 0 0 q q q q q q q q q Signal Quality: “Marquee” of the following items: - Estimated link Eb/No - Estimated RF signal level Unit Serial Number Alternately, if no carrier lock: “-No Sig-” If ASI-Input option installed, this field currently unused. Chapter 2, Page 35 iPump 6420 User’s Manual 2.5.2. Front-panel LED Indications What you are expecting: If locked on the satellite carrier, then the green TRANSPORT LED should be ON, and if receiving Compel command stream, the COMPEL LED should be ON. For a unit working exclusively over the internet, you still want to see the COMPEL LED ON, showing that the unit can find the remote Compel server and pull its commands. Glossary of the terms: • Blink is alternating ON for ~200 mS and OFF for ~2 seconds. • Flash is alternating ON for ~600mS and OFF for ~600mS. • Flutter is like flash but shorter ~200mS ON and OFF times. TRANSPORT LIVE SVCS • GREEN if acquired valid Transport Stream from either carrier or terrestrial input. • Flashes GREEN if physical layer detects data (from carrier lock and/or Transport framing), but no valid PSI or Services. This is indication for physical layer lock if no CA Authorization. Note that there may be a fault indication (ALARM or WARNING) if no CA Authorization. • OFF if no physical-layer detection of incoming Transport stream, from any source. • GREEN if playing (decompressing) services selected from incoming Transport stream, on any port. • OFF if no live streaming media playing at any port. COMPEL PLAYBACK • GREEN if incoming COMPEL packets (incl “keep alives”) are detected from any source in last 2 minutes. • Flutter GREEN if addressed COMPEL packet received in last 5 seconds, from any source. • OFF otherwise. • GREEN if playing services from stored media on any port. This includes all “time shifted” or “delayed live” services. • Flutter GREEN when any cue-relay state has changed in previous 5 seconds. • OFF if no media playback at any port. WARNING RECORD • AMBER for one or more current unit Warning conditions. • OFF otherwise. • GREEN if recording Program Streams direct from Transport Stream. • OFF if no current storage operations. ALARM • DOWNLOAD RED for one or more current unit Alarm conditions (and one or more latched Alarms, which is implied, since any current Alarm must also be “latched”). • OFF with RED blink if no current Alarm, but un-cleared latched (past) Alarms. • OFF otherwise. www.wegener.com • GREEN if receiving/storing media files downloaded over IP (either under MPE within Transport or thru WAN port). • OFF if no current download operations from the specified locations. 800070-01 Rev B Chapter 2, Page 36 iPump 6420 User’s Manual Chapter 3: OPERATION This chapter provides information on the operation and functions of the iPump 6420. Table of Contents 3.1. Monitor & Control Interfaces................................................................................ 40 3.1.1. Compel.............................................................................................................. 40 In-channel Compel Control ........................................................................................... 40 Internet-delivered Compel Control................................................................................ 42 Local Scheduler ............................................................................................................. 43 Triggers.......................................................................................................................... 43 3.1.2. Return Path........................................................................................................ 44 Physical Delivery Methods............................................................................................ 44 Report Types.................................................................................................................. 44 Figure 3-1: Typical Status report screen at uplink control system ............................................................45 3.1.3. Local Web......................................................................................................... 45 Home Status screen........................................................................................................ 45 Figure 3-2: Typical Home Status screen, web interface ............................................................................46 Figure 3-3: Parameter info screen, web interface......................................................................................47 Setup screens ................................................................................................................. 47 Figure 3-4: Figure 3-5: Figure 3-6: Figure 3-7: Figure 3-8: Audio Decoder setup screen, web interface ............................................................................48 Transport Input, web interface................................................................................................49 Expansion Relay screen, web interface ..................................................................................50 AM/FM tuning screen, web interface .....................................................................................51 System screen, web interface...................................................................................................52 File Manager screen....................................................................................................... 52 Figure 3-9: File Manager screen, web interface........................................................................................53 Record/play screen......................................................................................................... 53 Figure 3-10: Record/Play screen, web interface ........................................................................................54 Scheduled Events screen................................................................................................ 54 Figure 3-11: Scheduled Events screen, web interface ...............................................................................55 Playlist Builder screen ................................................................................................... 55 Figure 3-12: Playlist Builder screen, web interface....................................................................................56 ShowShifting screen ...................................................................................................... 56 Figure 3-13: ShowShifting initial screen, web interface ...........................................................................57 Logs screen .................................................................................................................... 57 Figure 3-14: As-run Log screen, web interface..........................................................................................58 Figure 3-15: Ops Logs screen, web interface .............................................................................................59 Diagnostic screen........................................................................................................... 59 User Controls ................................................................................................................. 59 3.1.4. Front-Panel Monitor and Control...................................................................... 60 LED Indications............................................................................................................. 60 LCD Screen Modes........................................................................................................ 60 LCD Screen Types......................................................................................................... 60 Push Button Definitions................................................................................................. 61 Default LCD Screen ...................................................................................................... 62 Front-panel Menu structure ........................................................................................... 62 www.wegener.com 800070-01 Rev B Chapter 3, Page 37 iPump 6420 User’s Manual Table 3-1: i6420 Front-panel Menus..........................................................................................................62 User Controls ................................................................................................................. 66 3.1.5. Terminal............................................................................................................ 66 3.1.6. SNMP Status..................................................................................................... 67 3.1.7. PIO Inputs ......................................................................................................... 67 3.1.8. Automatic Restoral of Audio ............................................................................ 67 Loss-of-Signal................................................................................................................ 67 Auto Recovery Modes ................................................................................................... 67 3.1.9. Fault Indications................................................................................................ 68 3.2. Basic IRD Functions ............................................................................................... 69 3.2.1. Transport Front-end .......................................................................................... 69 DVB Tuner .................................................................................................................... 69 Tuning Parameters ......................................................................................................... 69 LNB DC output.............................................................................................................. 70 Transport Demux ........................................................................................................... 70 3.2.2. Live Audio play ................................................................................................ 70 Audio Stream Selection ................................................................................................. 70 Codec, resamplers, timing adjustments (buffer-locked loop)........................................ 71 Audio Buffer delay ........................................................................................................ 71 Audio Settings: Muting, Stereo Routing & Attenuation ............................................... 72 3.2.3. Delivery of Relay closures................................................................................ 72 3.2.4. Delivery of RBDS data ..................................................................................... 73 3.3. Stored File Creation and Management................................................................. 73 3.3.1. File Storage and Management database............................................................ 73 Basic File and Asset Management................................................................................. 73 Automatic File and Asset Deletion................................................................................ 74 User Controls:................................................................................................................ 74 3.3.2. Assured File Delivery over satellite.................................................................. 74 3.3.3. Kencast File Delivery over satellite.................................................................. 75 3.3.4. HTTP File Delivery over internet ..................................................................... 76 3.3.5. Other file creation & delivery mechanisms ...................................................... 76 3.3.6. “Asset Healing”, a content modeling & recovery utility .................................. 77 Figure 3-16: Asset Healing in operation .....................................................................................................78 3.4. Insertion of Audio from Stored Files .................................................................... 79 3.4.1. Simple File inserts............................................................................................. 79 3.4.2. Playlists ............................................................................................................. 80 3.4.3. Timing Model ................................................................................................... 81 Figure 3-17: iPump6420 File Insertion Timing Model .............................................................................82 3.4.4. Insertion Profiles............................................................................................... 83 Overview........................................................................................................................ 83 Current Profile Keywords.............................................................................................. 83 User Controls ................................................................................................................. 83 3.4.5. File Selection Keywords ................................................................................... 84 Figure 3-18: Example of using the SHUFFLE file selection keyword .....................................................85 3.4.6. Asset Aliases..................................................................................................... 86 3.5. Off-Air Recording (option) .................................................................................... 86 3.5.1. AM/FM tuner setup........................................................................................... 87 www.wegener.com 800070-01 Rev B Chapter 3, Page 38 iPump 6420 User’s Manual 3.5.2. Off-Air Capture................................................................................................. 87 3.5.3. File Return for Audit......................................................................................... 88 3.6. Miscellaneous Functions......................................................................................... 88 3.6.1. Application Management.................................................................................. 88 Redundant Application Images...................................................................................... 88 Software Upgrade process ............................................................................................. 88 3.6.2. Non-volatile Parameter Management ............................................................... 90 3.6.3. Logging ............................................................................................................. 90 3.6.4. Time Management ............................................................................................ 91 Master Time Reference.................................................................................................. 91 Time Zone management ................................................................................................ 91 3.6.5. HDD Failure...................................................................................................... 92 3.7. Premium Features................................................................................................... 92 3.7.1. Microcasting (aka “Automation Mode”) .......................................................... 93 Figure 3-19: Automation monitor screen, local web interface ..................................................................95 3.7.2. ShowShifting..................................................................................................... 96 Overview........................................................................................................................ 96 Setup .............................................................................................................................. 96 Operation ....................................................................................................................... 96 ShowShifting authorizing keyfile names....................................................................... 97 User Indications and controls ........................................................................................ 97 Figure 3-20: ShowShift Shift-definition screen, local web interface ........................................................99 3.7.3. 3.7.4. Time Zone Delay .............................................................................................. 99 MP3 Codec...................................................................................................... 100 www.wegener.com 800070-01 Rev B Chapter 3, Page 39 iPump 6420 User’s Manual 3.1. Monitor & Control Interfaces 3.1.1. Compel The Compel control system is the premiere control method in the iPump 6420. It is the only user control method that can overrule and lock out control from other sources. In particular, it may set the edge devices, the remote iPump6420s, to have their local control disabled. This will not disable all control capability, but it will essentially prevent the local user from changing the unit settings in order to access some other audio programming. Once disabled by Compel, only Compel itself, or a secured user with debugging access, or a unit that has reverted to Local Control re-enable as part of unit Auto Recovery (see Section 3.1.8), can see it re-enabled. In-channel Compel Control Compel is the name of the system used for control of most WEGENER products. It is used in a “star” (point-to-many-point) control structure, where Compel will be controlling many “edge” devices (called “receivers”) that deliver media content at remote locations. It is a oneway control system that essentially depends on a command redundancy in a moderate-reliability channel, with refreshes to maintain synchronism between its database and the actual state of the receivers. WEGENER’s Return Path product, at this writing, is not yet used to fully synchronize the remote receivers to the database, except in some special cases (to be discussed). In this section, Compel commands are presumed to be borne in-channel, that is, in a designated “ghost PID” in the MPEG Transport stream, injected by WEGENER UMX5010s. This in-channel control system presumes that receivers will execute their received commands immediately, and that they will be executed in order of arrival, with the last command always taking precedence, if the receiver setting is to be changed. This Manual cannot discuss Compel to exhaustion. The user is referred to their Compel Manual and associated Informative Bulletins. However, the basic types of Compel commands, their structure and basic applied rules, and their addressing rules may be briefly reviewed herein. Command Types: • Grouping commands: Commands that assign a receiver to a logical group, which, in turn, may be used as an address for other commands, including other grouping commands. A more advanced grouping mechanism, the Group Page, may also be employed. While a receiver may be a member of up to 10,000 groups, it may have only one Group Page membership (generally a value between 1 and 255). • Receiver state commands: Commands that change a receiver setting and whose new value is retained in Compel’s internal database. • Meta commands that are a special set of the above state commands: These affect the unit’s ability to process control from Compel or other sources. An examples is the Compel LOCK command, which prevents the receivers from executing any other command except the companion UNLOCK command. Another example is the LOCAL CONTROL enable/disable commands. These serve to block the local user from innocently changing critical receiver settings that would directly affect revenue (though they cannot block malicious actions). • Receiver action commands: Commands that stimulate a receiver to execute a particular function, usually limited in time. It is assumed that the long-term state of www.wegener.com 800070-01 Rev B Chapter 3, Page 40 iPump 6420 User’s Manual the receiver is unaffected by command execution (or the lack thereof). These commands must often be synchronized to other external events. For example, a closure arriving from a customer’s media automation system, requesting the play of a commercial spot must cause a command to edge iPump6420s to insert a particular file, to be aligned precisely with a network “avail” (local spot opportunity). • Time-of-day commands: Non-addressed commands that signal the date/time to all listening receivers. Receivers that must know the precise time will interpolate over many such commands to maintain accurate TOD tracking. • Satellite File download operations: A special command and functions to go with it that allow the download of media files to edge receivers. This is discussed more thoroughly in Section 3.3. • HTTP File download operations: A special command to request that receivers pull media file content from Compel, by HTTP, over the internet. • Playlist build commands: Commands to build playlists on edge receivers who support that function. Playlists are discussed more thoroughly in Section 3.4.2. • Miscellaneous commands: Commands that affect the remote receiver state, but are not retained in the Compel database. For example, a command to pipe a terminal command to iPump6420 may be sent using the Compel SCRIPT TERMINAL command. • Scheduling commands: Commands to add or delete line items in receiver’s Local Scheduler, where supplied. See the discussion following on Local Scheduler. • Refreshes: Not formally a type of “command”. This is a special Compel function to keep remote receiver settings equal to that specified in the Compel database. It uses many receiver state commands to do this. There is an “immediate” version, where a fairly complete refresh is done on command of a human user. And there is a “background” version, where, as time permits, Compel will regularly and automatically refresh edge receivers on a rolling basis. Command Structure: Compel commands are structured as Header, Sequence number, Address, Device, Command, and Data fields. The Header may be a generic 4-character string, or it may be a string unique to a customer. If unique, then it imposes special security measures on all listening receivers, where the receiver’s own Compel header setting must match that of the Compel messages to avoid going into Recovery Mode (see below). The Sequence number is the way the Compel hardware tags each unique command, allowing them to be double-transmitted to avoid data loss. Addressing will be discussed below. The Device is a general command grouping. The Command is a specific command within that grouping. The Data field is interpreted by the receiver based on the Device and Command. Addressing Rules: Except for the Time-of-Day commands, the receivers will only accept and execute those commands that are addressed to them. They may be addressed by four different addressing modes. One is the rarely-used command to “All”. The other is a command directly addressed by unit serial number (though, in the Compel GUI, the user may direct the command by the receiver’s unique name). The truly powerful addressing mode is by Group, where only receivers who know themselves to be members of the addressed Group, will respond. The last mode, which is not truly independent, adds on an additional requirement for an address match: This is called Associated Audio. This last command, part of the complement of Extended Syntax www.wegener.com 800070-01 Rev B Chapter 3, Page 41 iPump 6420 User’s Manual capabilities, allows a receiver to be addressed as a logical AND of a basic address (all, group, or SN) and the unit “state”. In the case of iPump6420, this “state” is the assignment of specific audio streams, by Language Descriptor (LD), to one or more of its constituent Audio Ports. If the base address matches, and the audio stream is assigned to any of the Audio Ports, then that command is executed, and, moreover, directed specifically to that Port. A prime example is a command to pulse a relay. If associated with an audio stream STR, and if STR is only assigned to Port #2, then a relay associated with Port #2 is pulsed. Note that the basic Compel address field may actually be a Boolean expression, combining groups and AND and OR operators, to create more complex addresses. Timing Because Compel commands frequently must be aligned, or synchronized, to events occurring in the live audio streams, Compel provides some methods to assist. For example, the audio track and a closure may originate from a customer automation system “in sync”, where the closure occurs at the moment a local spot is to be inserted. Because the audio track will be delayed in the MPEG compression system, the Compel command created by the Compel Event handler will also need to be delayed. This may be done with the legacy Compel NETCON DELAY command (see Compel Manual). But this affects all commands coming from Compel during the delay period. A superior tool is another capability found in the Compel Extended Syntax: Command Delay. With this, only that one Compel command will see its execution delayed after receipt. The delay can then be fine-tuned to tightly align the overlay of the local spot with the network “avail” (default network spot). When fine-tuning the alignment of switches, inserts, or relay closures, at i6420 outputs, to the live audio track, the system implementer should also be aware that the i6420 will implement an automatic delay in all Compel commands that are timing critical, relative to the audio track. This is called Compel Command Delay. For more details on the i6420 timing model, see section 3.4.3. For Compel control, the unit indications are: 1. COMPEL LED (some units “NETWORK”) ON if Compel command stream is being received, flashing briefly when “personally” addressed commands are received For Compel, the following unit controls are applicable. For most, the user (with debug access) or the factory is the preferred command method: 1. Compel PID (Transport packet ID conveying Compel messages) 2. Compel Header (must match between Compel and receiving i6420s) 3. Local Control Enable (generally set by Compel) 4. Compel sharing flag (if set to “Share” and Compel is a shared Compel, then the unit is allowed to accept the command stream, regardless of conflicting Headers) 5. Compel Command Delay (factory set, defaults to 500 mS) 6. Compel-required factory setting Internet-delivered Compel Control The iPump6420 may be set to receive its Compel commands, not through a satellite channel, but over the internet. In this method, the i6420 will do scheduled HTTP polling of the Compel server (which must, in turn, be set to support this method). At each poll, the set of pending commands that would be addressed to the i6420 are downloaded from Compel. (This is a complex operation in Compel to decode all the Group addresses back to direct by-serial-number addresses.) The commands are then processed in order. Because of the expected latency in this www.wegener.com 800070-01 Rev B Chapter 3, Page 42 iPump 6420 User’s Manual process, some of the “satellite-delivered” Compel commands would not make sense and are not supplied, such as many of the Action commands, the Time-of-Day command, and satellite File Download operations. For Compel control, the unit indications are: 1. COMPEL LED (some units “NETWORK”) ON if Compel server is responding, flashing briefly when “personally” addressed commands are received The user control interfaces feature the following controls. The user (with debug access) or the factory is the preferred command method: 1. Compel internet server IP address 2. Poll time Local Scheduler The Local Scheduler is a database that holds and stores Compel commands each for execution at a pre-specified date and time. This allows Compel to assure itself that receiver’s will all execute a particular function at a specific time, regardless of the availability of Compel command stream at that time. To distinguish the different missions that sets of Compel command might perform, each stored Command has a “priority” code. The user control interfaces feature the following controls. Compel is the preferred command method: 1. Add schedule line (Compel command, date/time, and command priority) 2. Delete schedule lines (by command priority) 3. Delete all schedule lines Triggers Triggers are similar to the Local Scheduler, but instead of executing stored Compel command at a specific time, the commands are executed at the moment a special Event occurs. Two types of such events apply: One are closures on the iPump6420s PIO inputs, the other is the Compel TRIGGER command. In each case, the Trigger is assigned ahead of time, by local user or Compel, then the event forces the execution through the Trigger mechanism. Triggers may be Temporary (“one-shot”) or Permanent. A Temporary Trigger will accept the triggering event, execute the stored command, and then will no longer respond on subsequent triggering events. The Permanent Trigger, on the other hand will cause stored Compel command execution on each and every triggered event. Triggers are assigned a simple number codes, 0 to 255. Any number code from 0 to 6 may be assigned to the local PIO trigger closures. Any number from 1 to 255 may be assigned to Compel TRIGGER commands. Note that numbers from 1 to 6 have a dual role, and either local PIO or Compel TRIGGER commands will “fire” them. The user control interfaces features the following commands. Compel is the preferred command method: 1. Create Temporary or Permanent Triggers, 0 to 255, assigning them to a specific Compel command. 2. Compel trigger command or PIO closure 3. Delete Triggers 4. Abort temporary trigger. www.wegener.com 800070-01 Rev B Chapter 3, Page 43 iPump 6420 User’s Manual 3.1.2. Return Path Return Path is a set of return-channel reporting methods which allow the field iPump6420s, as network “edge” devices, to report back status information to the uplink control system. Its position in the entire Store/Forward system is illustrated in Figure 1-1 in Chapter 1 of this Manual. Physical Delivery Methods The Return Path reports are returned using the POST HTTP method to the listening CGI scripts in the CSM software subsystem. (CSM is a subsystem of the Compel uplink control system, installed exclusively for the Store/Forward missions.). The HTTP connections may be made using IP over the internet or by IP/PPP using the (optional) telephone modem and an analog telco line. Report Types At this writing, the following report types are supported: 1. General Status (Report type #0) 2. Asset Inventory 3. As-run Logs 4. As-run Logs (without local deletion) 5. Operation Logs 6. Operational Logs (without local deletion) 7. ShowShift Show definitions 8. ShowShift Shifted (episode definitions) 9. ShowShift event file 10. OAR capture files In addition to these reports, which are directly user-accessable, there is a higher report type for the NACKs used in Asset Healing, the file modeling and management utility (see Section 3.3.6). With the reports sent in by Return Path, the uplink control system may provide the system operator with access to several processed reports. See Figure 3-1 for an example of the receiver Status web screen, available in the CSM subsystem. The relevant user controls are: 1. WAN or LAN IP settngs (IP address, netmask, and Gateway) 2. Return Path server IP address 3. Return Path backup server IP address 4. Return Path modem phone number 5. Return Path modem PPP login 6. Return Path modem PPP password 7. Return Path modem remote phone number 8. Return Path modem backup remote phone number 9. Commands to request Return Path reports (see above) 10. Action Tag requests to send Return Path file NACKs to support Asset Healing (see Section 3.3.6) www.wegener.com 800070-01 Rev B Chapter 3, Page 44 iPump 6420 User’s Manual Figure 3-1: Typical Status report screen at uplink control system 3.1.3. Local Web The web interface is the premier local user interface. All other modes of local user control, where duplicated, are deprecated in favor of this interface. In the next few paragraphs, several of the web screens will be introduced. Note that if Local Control is disabled by Compel, that some of the user edit capabilities will be blocked. Home Status screen This is the default home screen the user encounters on entry of the unit IP address into the browser. It has basic unit information, such as unit name, serial number, unit status, and key metrics, such as the total unit operation time. See Figure 3-2 for an example “General Status” screen. www.wegener.com 800070-01 Rev B Chapter 3, Page 45 iPump 6420 User’s Manual Figure 3-2: Typical Home Status screen, web interface Under this tab, a side control allows access to “Parameter Info”, a read-only screen to check basic unit settings. See Figure 3-3 for an example. www.wegener.com 800070-01 Rev B Chapter 3, Page 46 iPump 6420 User’s Manual Figure 3-3: Parameter info screen, web interface Setup screens This is a set of screens that allow the user to check and make changes to basic unit settings. The top 3 choices are the “Audio Decoder (Port) setup” screens. Figure 3-4 gives an example of one. www.wegener.com 800070-01 Rev B Chapter 3, Page 47 iPump 6420 User’s Manual Figure 3-4: Audio Decoder setup screen, web interface The “Transport Input” screen allows the user to check or setup important carrier and Transport operating parameters. Figure 3-5 gives an example. www.wegener.com 800070-01 Rev B Chapter 3, Page 48 iPump 6420 User’s Manual Figure 3-5: Transport Input, web interface The “Exp. Relay” screen allows the two sets of Port #1 and #2 cue relay to be checked and tested. Figure 3-6 gives an example. www.wegener.com 800070-01 Rev B Chapter 3, Page 49 iPump 6420 User’s Manual Figure 3-6: Expansion Relay screen, web interface The “AM/FM tuning” screen allows the user to check or change AM/FM tuner settings (if the option is installed) and also check the reception. Figure 3-7 gives an example. www.wegener.com 800070-01 Rev B Chapter 3, Page 50 iPump 6420 User’s Manual Figure 3-7: AM/FM tuning screen, web interface The “System” screen allows the user to view and set time settings. Figure 3-8 gives an example. www.wegener.com 800070-01 Rev B Chapter 3, Page 51 iPump 6420 User’s Manual Figure 3-8: System screen, web interface File Manager screen The “File Manager” screen allows the user to view and delete stored files (as “assets” or individually, see Section 3.3). Figure 3-9 gives an example. www.wegener.com 800070-01 Rev B Chapter 3, Page 52 iPump 6420 User’s Manual Figure 3-9: File Manager screen, web interface Record/play screen The “Record/Play” screen allows the user to view the status of a file or playlist play, and request others, either as temporary inserts or as permanent virtual channels (see Section 3.4). Figure 3-10 gives an example. www.wegener.com 800070-01 Rev B Chapter 3, Page 53 iPump 6420 User’s Manual Figure 3-10: Record/Play screen, web interface Scheduled Events screen The “Scheduled Events” screen shows the status of all current scheduled events in the Local Scheduler. These are divided up into “Play events” (file or playlist inserts), “Record events” (file recordings from audio streams in Transport), and “Miscellaneous events” (requests to deleted schedule entries, permanent audio switches, etc.). Note that Triggered events will be listed under “Play events”. Figure 3-11 gives an example. www.wegener.com 800070-01 Rev B Chapter 3, Page 54 iPump 6420 User’s Manual Figure 3-11: Scheduled Events screen, web interface Playlist Builder screen The “Playlist Builder” screen allows the user to view, build, edit, and delete resident playlists. Figure 3-12 gives an example. www.wegener.com 800070-01 Rev B Chapter 3, Page 55 iPump 6420 User’s Manual Figure 3-12: Playlist Builder screen, web interface ShowShifting screen The “ShowShift” screen is an entry point to viewing and editing the setup of ShowShifting, if this premium feature is authorized. It also shows the status of shows in record or playback, as well as upcoming events in a show episode playback. Figure 3-13 shows the initial screen. www.wegener.com 800070-01 Rev B Chapter 3, Page 56 iPump 6420 User’s Manual Figure 3-13: ShowShifting initial screen, web interface Logs screen The “Logs” screen is actually a set of two subscreens, the “As-run log” screen and the “Ops Log” screen. The As-run Log shows file and playlist insertion history, while the Ops log shows other events, such as relay closures, and audio stream switches. Figures 3-14 & 3-15 give examples. www.wegener.com 800070-01 Rev B Chapter 3, Page 57 iPump 6420 User’s Manual Figure 3-14: As-run Log screen, web interface www.wegener.com 800070-01 Rev B Chapter 3, Page 58 iPump 6420 User’s Manual Figure 3-15: Ops Logs screen, web interface Diagnostic screen From any of the normal web screens, if the user clicks on the WEGENER logo, in the upper left corner, while pressing CRTL, then the user is sent to the web Diagnostics screen. This is a fairly powerful diagnostic and debugging tool, and only advanced users should access this screen. No other information is supplied in this publicly-accessible Manual about this screen. If you are an advanced user, and you have questions, please contact WEGENER Customer Service for more information. User Controls The user controls affecting the web interface are listed. Compel is the preferred command method: 1. LAN IP settngs (IP address, netmask, and Gateway) 2. Allow or disallow local control. This affects many parameters needed to deliver the audio output payload. Set by Compel or the factory. 3. Allow or disallow HTTP (web) access. Set by Compel or the factory. 4. Content access permission on/off. If ON, then local users may modify or delete stored files. www.wegener.com 800070-01 Rev B Chapter 3, Page 59 iPump 6420 User’s Manual 3.1.4. Front-Panel Monitor and Control The front panel interface consists of 8 LEDs, a 2 X 20 character LCD, and six push buttons. With this, a hierarchical M&C structure is implemented. This means that all monitor and control objects (or “screens”) are grouped with related screens under parent menus. Further levels of abstraction are implemented by ordering those parent menus, perhaps with child-less screens under higher parent menus and so forth. Note that the highest level screens are called the “top level screens” and these are peers to the Home Screen, a special screen to which an IRD usually defaults. LED Indications Please see Section 2.5.2. LCD Screen Modes Eligible LCD screens can be in one of the following modes: Mode Description VIEW Information is being displayed on the LCD for the user to view. None of the push buttons can be used for editing in this mode. This mode is entered from the VIEW mode. This is where the users has the ability to edit a parameter. The LCD cursor is on the edit field when in this mode. In the i6420, the cursor will be a flashing underscore. EDIT LCD Screen Types The following table lists the screen types: Type Description MENU This is a read-only screen that displays the menu name for a command group. This command group is a set of lower-level screens. The level "beneath" a menu screen type might contain any of the other screen types (i.e. menus, info, parameter). This type of screen is read-only. STATIC INFO This is a read-only screen that displays information and is NOT editable— though the unit may or may not refresh it dynamically. The Home Screen is considered this type of a screen. Screens of this type have no children, so they are “leaf nodes.” SCROLL Same as STATIC INFO except that the right and left arrow keys are active to INFO scroll through a message more extensive than can be displayed on a 20 character line. Because of this, these screens must be “lone children” of a parent Menu screen. PARAMETER This type of screen displays a specific parameter associated with a command group that CAN be edited (if the correct authority has been established). The initial value displayed is always the current unit setting. This is the only type of screen that can enter the EDIT mode. A PARAMETER screen will contain a field that can be different types (alpha-numeric or list select). There will be no carries or borrows when wrapping on a numeric field (i.e. to go from 0999 to 1000, 4 digits have to be edited). Screens of this type have no children, so they are “leaf nodes.” www.wegener.com 800070-01 Rev B Chapter 3, Page 60 iPump 6420 User’s Manual Push Button Definitions The push buttons react differently based on what mode the user is in and what screen type is currently being displayed. The following table describes this interaction. Note that this is a general guideline. Exceptions will be noted in the individual IRD specifications. LCD Mode Push LCD Screen Function Button Type VIEW ENTER MENU INFO PARAMETER ESCAPE (All) UP DOWN LEFT ENTER (All) (All) (All, except SCROLL INFO) (All, except SCROLL INFO) SCROLL INFO SCROLL INFO PARAMETER ESCAPE PARAMETER UP PARAMETER DOWN PARAMETER LEFT PARAMETER RIGHT PARAMETER RIGHT LEFT RIGHT EDIT www.wegener.com Go to next lower level and display the first screen on that level. N/A Enter EDIT mode and set cursor on first digit if alpha-numeric or blink entire field if field type is list select. EDIT mode is only entered if the user has the authorization to edit the parameter. Go to previous (higher) level and display the current screen OR display the first screen at the current level if at the highest level. The first screen at the top level is the HOME screen. Therefore, pressing ESCAPE numerous times (or pressing and holding) will eventually return the user to the HOME screen. N/A N/A Display the previous screen at the current level OR wrap to the last screen if currently on the first screen. Display the next screen at the current level OR wrap to the first screen if currently on the last screen. Scrolls to the left in a scrolled information screen. Scrolls to the right in a scrolled information screen. If the user input is valid, the IRD accepts the changes that were made and enters the VIEW mode. If the input was invalid, the IRD flashes an “Invalid Entry” message on the LCD momentarily before returning to the same screen in the EDIT mode again. Abort any changes made to the parameter and enter the VIEW mode. List Select: Scrolls up to next value in the list or wraps if currently on the last item in the list. Alpha-numeric: Increases the value of the current field. If numeric and the current value is 9 (if decimal) or 0xF (if hex), the value will wrap to a 0. If alpha-numeric, the value will wrap to the first ASCII value when at 0x7F. List Select: Scrolls down to previous value in the list or wraps to the last item if currently on the first item in the list. Alpha-numeric: Decreases the value of the current field. If numeric and the current value is 0, the value will wrap to 9 (if decimal) or to 0xF (if hex). If alpha-numeric, the value will wrap to the last ASCII value when at the first. List Select: N/A Alpha-numeric: Moves to the previous digit. Wraps to the last digit if currently on the first. List Select: N/A Alpha-numeric: Moves to the next digit. Wraps to the first digit if currently on the last. 800070-01 Rev B Chapter 3, Page 61 iPump 6420 User’s Manual Default LCD Screen No matter where a user may be in the LCD menu hierarchy, if no front-panel keypress is made for more than a factory-set time (typically ~5 minutes), and if the screen is not “parked”, then the LCD menu state reverts to the default screen.* The default screen is always a “Top Level” screen. Typically, this is the “Home Screen”. Layout of the Home Screen is given in Figure 2-3 in Section 2.5. * See User Controls. Front-panel Menu structure Table 3-1 shows the current menu structure for the iPump6420 Front-panel interface. If local control is disabled, some of these screens may be hidden. Main Level Home Screen Download Screen(if applicable) Alarm/Warning (if applicable) Request DHCP Update Unit Setup Table 3-1: i6420 Front-panel Menus Second Level Third Level Fourth Level Fifth Level Current Alarms (if applicable) Current Warnings (if applicable) Clear Indications (if applicable) Decoder Setup Decoder Number n: (n = 1,2 OR 3) Decoder Setting Select: OFF PROGRAM FOLLOW TUNE LAN UNICAST SAT MULTICAST LAN MULTICAST Audio Setup www.wegener.com Decoder Number n: (n = 1,2 OR 3) Audio Lang Setting: (if Availlable) Audio Routing 800070-01 Rev B <Availlabel Lang list> Stereo Left on Both Right on Both Reverse Stereo Chapter 3, Page 62 Program Number : Port Number: ACTIVATE? <Yes/No> MULTICAST Addr : Port Number: ACTIVATE? <Yes/No> MULTICAST Addr : Port Number: ACTIVATE? <Yes/No> iPump 6420 User’s Manual Main Level Second Level Third Level Fourth Level IP Setup Attenuation Level Headroom Level LAN IP Settings 0 - 20 0 -20 Lan Addressing Mode: < STATIC > WAN IP Settings HTTP Proxy Setup Transport In Setup HTTP Proxy Enable Mode: Transport In Status:< > Current Channel LNB Setup LNB DC Power (If www.wegener.com 800070-01 Rev B Fifth Level Lan Addressing Mode: < DHCP > Wan Addressing Mode: < STATIC > Lan Static IP Address Lan Static Netmask Lan Static Gateway Wan Static IP Address Wan Static Netmask Wan Static Gateway Wan Addressing Mode: < DHCP > DISABLE ENABLE HTTP PROXY IP: HTTP PROXY PORT: Select Preset: Permament Last Commanded Last Success Current # (Stored Channels) Symbol Format: <QPSK> FEC Ratio: <1/2,2/3,3/4,5/6,7/8> Download Frequency: Transport Data Rate: Transport Symbol Rate: Program Number: Tag Site: Done LNB Type: <LOCAL OSC.,UNIVERSAL> LO type: (If Type= LOCAL OSC.) LO Custom Freq: (If LO=CUSTOM FREQ) <ON, OFF> Chapter 3, Page 63 CUSTOM FREQ STD C-BAND US KU-BAND EURO LOW KUBAND EURO HI KUBAND <xxxxx.xx> MHZ iPump 6420 User’s Manual Main Level Second Level Third Level LNB type=LO) LNB Polarity (If LNB=Universal/Astra) SNR Margin Warning: < > dB Signal Quality Setup Return Path Setup Content Access Setup File Control Modem/PPP Setup Serial Port Setup RDBS Settings User Relay Setup Expansion Relay Setup AM/FM Tuner Setup Main Server IP: Backup Server IP: Content Access Control: RENAME Files DELETE Files Phone number: Dial-Out Prefix: PPP Username: PPP Password: Device Assignment: Term BAUD: Printer BAUD: RDBS 1 BAUD Rate: RDBS 2 BAUD Rate: User Relay 1: Exp Relay 1 - 32 (Select) AM/FM Tuner <1 , 2> Setup Fourth Level Fifth Level <HORIZONTAL,VERTICAL> Indicator Thresholds <FULL ACCESS, READ ONLY> Rename which file? Delete which file? Errored Seconds Rate Dir:/ … Dir:/ … : Are you sure? Y/N <TERMINAL, PRINTER> <2400,9600,19200,38400,57600> <1200,2400,4800,9600> <1200,2400,4800,9600> <1200,2400,4800,9600> <ON, OFF> <ON, OFF> Tuner <1,2> Mode: Tuner <1,2> Frequency: Date/Time Setup Unit Status Detail Unit Label S/W Switch to Backup MUTING Setup Current Operation (Normal, OR Normal after Recovery, OR In Auto Recovery) Current Date: <YYYY,MM,DD> Current Time: <HH:MM:SS> TIMEZONE selection: <CITY> <AREA> <COUNTRY> From <'Current Ver' to 'Backup Ver'> MUTE On Reset:<Enabled, Disabled> Service Status (Acquiring carrier, OR Services BAD OR Services OK) Active Recordings www.wegener.com 800070-01 Rev B Chapter 3, Page 64 iPump 6420 User’s Manual Main Level Second Level Third Level Fourth Level File Playback Signal Quality Current Quality Eb/No Estimate Signal Strength Loss from Fades Errored Seconds Signal First Acquired Signal Last Acquired Tuner 1 - 2 Mode History this Setting Elapsed Times AM/FM Tuner Status AM/FM Tuner 1 - 2 Status Fifth Level Tuner 1 - 2 Frequency Tuner 1 - 2 Quality Network History Current IP Info COMPEL Lock Status: COMPEL Reqired : Local control : Total Addressed PKTS : Total Valid PKTS : Last Addressed PKT: Last Valid PKT: UNIT Uptime: Current LAN Info Current WAN Info Exp Relay Port 1 { ON = #, OFF = -} Exp Relay Port 2 { ON = #, OFF = -} Unit Temperature (in C) EXP Relay Status Version Info Clear Diagnostic Counters www.wegener.com LAN Current IP Address: LAN Current Netmask LAN Current Gateway: LAN has link? LAN MAC Address: WAN Current IP Address: WAN Current Netmask WAN Current Gateway: WAN has link? WAN MAC Address: - - - - - - - 8 - - - - - - - G { 8 , 16 are ON } 1 - - - - - - - - A - - - - - - {17 , 26 are ON} Software Version Backup Version USW Version CPU/BIOS Info Core OS Version Installed OS Patches Clear Signal Counters? 800070-01 Rev B Chapter 3, Page 65 iPump 6420 User’s Manual User Controls The user controls affecting the Front-panel interface are listed. Compel is the preferred command method: 1. Allow or disallow local control. This affects many parameters needed to deliver the audio output payload. Set by Compel or the factory. 2. Freeze (or “park”) a front-panel screen. Press in the < È > and the <ENT> buttons at the same time. Press any button later to release. 3.1.5. Terminal The Terminal interface is a interactive, text-based control method, somewhat deprecated in favor of the web interface. It may be accessed from the Serial M&C port using a text-based terminal. This can be a legacy VT100, or it can be a PC equipped with a serial port, said PC running Procomm or Teraterm (Hyperterminal is not the best choice). Or it may be accessed from a Telnet session, using the User=term and the Password=termterm.* From the web diagnostic page, the “Terminal Command” text box may also be used to send Terminal commands, with replies posted to the same web page. * To exit out of your terminal session, enter the terminal command exit. A listing of the available user-accessible Terminal commands is given in Appendix 1. However, it is fairly easy to access information about Terminal commands using the ‘apropos searchword’ command, where searchword is a keyword clue with no whitespace. An example would be using ‘wan’ if you are trying to get WAN port setup commands. The user controls affecting the Terminal interface are listed: 1. Assign Terminal to the Serial M&C port. 2. Terminal baud rate. 3. Allow or disallow local control. This affects many parameters needed to deliver the audio output payload. Set by Compel or the factory. www.wegener.com 800070-01 Rev B Chapter 3, Page 66 iPump 6420 User’s Manual 3.1.6. SNMP Status Simple Network Management Protocol (SNMP) is used in network management systems to monitor network-attached devices for conditions that warrant administrative attention. It consists of a set of standards for network management, including an Application Layer protocol, a database schema, and a set of data objects. SNMP exposes management data in the form of variables on the managed systems, which describe the system configuration. These variables can then be queried (and sometimes set) by managing applications. In the Wegener implementation of SNMP, variables will be available for query only. See Appendix 2 for the root and PCMI MIBs. The user controls affecting the Terminal interface are listed: 1. Set the system MIB values of sysName and sysLocation via SNMP. 2. Allow or disallow HTTP (web) access. Set by Compel or the factory. 3. Set the Community String. Set at the factory. 3.1.7. PIO Inputs The local PIO inputs, 1 to 7 may be assigned to Compel Triggers, unfortunately numbered 0 to 6. To assign Triggers, see the discussion on Triggers above in Section 3.1.1. To view the settings, see the Scheduled Events local web page (Figure 3-11). 3.1.8. Automatic Restoral of Audio Loss-of-Signal After loss of a valid MPEG Transport, or more precisely, when an i6420 audio port loses its audio stream, the unit can supply the end listener some relief from the silence that will appear. If the loss is continuous for a user-set interval, then a specific user-created playlist, always with the standard name ‘LOS’ will start to play on that audio port. If the LOS playlist does not exist, then no Loss-of-Signal restoral will be attempted. Of course, if the entire Transport is lost, then all audio ports, whose assignments were not OFF, will play LOS. The LOS playlist will play to completion and then repeat indefinitely for all applicable audio ports, until the expected audio streams are restored, the audio assignments changed, or the unit is reset. The user controls affecting the Loss-of-Signal feature are listed: 1. LOS timeout. Set at the factory. Auto Recovery Modes After the iPump6420 unit loses its source of MPEG Transport from an RF carrier, it will repeatedly attempt to re-acquire that carrier, and relock to the Transport. In the event that this process exceeds some user-set timeout, then the unit will enter an Auto-Recovery mode called Services Recovery. Also, if the Compel network control stream is lost, when it is required, then likewise, the unit will enter a similar Auto-Recovery mode called Network Recovery. In each case, the unit will use an alternate set of carrier Presets in order to attempt to replace the “missing” item, whether the carrier (and all the audio streams) or the Compel network control stream. Each 30 seconds, the unit will attempt to get carrier acquisition on another of the official carrier Presets (see Section 3.2.1). If successful on carrier acquisition while in Services Recovery, then the search is declared a success. If in Network Recovery, it will wait another www.wegener.com 800070-01 Rev B Chapter 3, Page 67 iPump 6420 User’s Manual user-set timeout to get Compel network control commands. If not successful on any of the list of Preset, before repeating on that List, it will first re-attempt at the Last Commanded and Last Successful carrier settings. This cycle will continue indefinitely until success, or an authorized user changes the carrier setting. If a unit does eventually acquire and remain on a new carrier setting because of an Auto Recovery, the local user is, if local control is enabled, authorized to abort the newly-acquired carrier and force a re-attempt at the original authorized carrier settings. Note that a unit may also be forced into Auto Recovery when encountering a Compel network command that bears a Header which does not match the internal Header setting, and whose security does not allow “Sharing”. See Section 3.1.1 for more details. Once the unit enters Auto Recovery, then another timer, called “Local Control Re-enable” may begin counting down. This timer can only be aborted if Auto Recovery is vacated. If this timer expires while the unit is still in active Auto Recovery, the unit will automatically clear the “Local Control Disabled” flag, so that local users now have full local control. This will allow networks, in the ultimate disaster scenario where all backup carrier settings are unusable, to use local personnel to re-program the units to new settings. Entry into Auto Recovery will show both as an indication to the user on the Front-panel, and it will be logged to the Ops Log. If recovery is made to a new carrier setting, that will continue to be a maskable fault condition, a Warning. The user controls affecting Auto Recovery Modes are listed below. The primary method for setting these values will be Compel or the factory: 1. Services Recovery timeout (used for loss of carrier) 2. Compel Recovery timeout (used for loss of Compel) 3. Recovery Iteration timeout (linger time on each carrier, after lock, while waiting to get Compel, if required) 4. Local Control Re-enable timeout 5. Abort Auto Recovery 6. Compel required yes/no flag, factory setting 3.1.9. Fault Indications The iPump6420 interprets fault conditions as either 1) failures in i6420 operation, 2) problems detected in incoming signals, or 3) inability to honor command requests. Typically, fault conditions may be allowed to show as an Alarm, a Warning, or not to indicate at all. Control of this is set by a programmable fault indication mask, usually set at the factory. Fault conditions allowed by the mask to indicate as Alarms will 1) de-energize the rearpanel Alarm contacts, 2) show on the front-panel ALARM LED, 3) show in local web screens, and 4) show on Compel Return Path Status reports. Similarly, Warning indications will show in the same manner, though there is no rear-panel closure. The Fault Indications will usually show for the length of time that the fault exists. In some cases, the fault indication is transitory. In these cases, the indication may be lengthened to several seconds or a few minutes, to allow user recognition and monitoring. In other cases, the indication may last until there is a successful instance of the same operation that had previously faulted (or the unit reboots). Appendix 3 gives a complete list of all the Fault conditions. The relevant user control is only the debug command to edit the fault indication mask. www.wegener.com 800070-01 Rev B Chapter 3, Page 68 iPump 6420 User’s Manual 3.2. Basic IRD Functions 3.2.1. Transport Front-end DVB Tuner The standard configuration of the iPump6420 features a front-end DVB RF tuner. The unit will, at initial reboot, or after a user (local or Compel) changes the applicable setting, attempt to acquire “lock” on an RF carrier, presented at its RF Input. In this case, “lock” is an intricate series of recursive steps, starting with carrier frequency lock, symbol-rate lock, inner convolutional FEC pattern lock, de-interleaver pattern lock, and finally outer Reed-Solomon FEC pattern lock. When all these are achieved, the DVB tuner hardware signals the unit software that “carrier lock” is achieved. In some cases, before “lock” is accepted, the unit must further verify the validity of the carrier. If WEGENER Carrier ID Tags are in use and required, then the carrier Tag must match that expected by the unit software. If not, then the acquisition process resumes.* * Carrier ID Tags are generally only needed for very narrow-band carriers and/or situations with large LNB frequency offsets. In addition to the permanent unit carrier settings, the i6420 provides the user with a Preset Table, an internal list of alternate carrier tuning settings. These may be used as canned shorthands for users to use, rather than remember all the individual settings for alternate carriers. The Preset Table is also significant for support of Automated Recovery (see Section 3.1.8). For an ASI-input option, a much more limited set of steps is needed to detect the ASI Transport timing, and then find symbol and frame-timing lock on the incoming baseband signal. At any rate, the result, for either Transport option, is that a valid MPEG Transport stream is presented to the unit’s internal software Demultiplexer. Key unit indicators, at this stage are: 1. TRANSPORT LED on for good Transport, flashes if RF carrier lock OK, but Transport not usable (such as if encrypted) 2. Estimated RF signal level (shown as a unit-less metric 0 to 100 where 100 is highest) 3. Estimated link Eb/No in dB, a metric for signal-to-noise ratio 4. Error’d Seconds (one second intervals with Transport packets with errors) Tuning Parameters The unit has a primary set of DVB tuning parameters needed to get carrier lock, plus some supporting data structures. This list includes the following: 1. ASTRA Universal LNB On/off (generally a factory or local user setting) 2. LNB LO frequency (generally a factory or local user setting) 3. Carrier downlink frequency 4. Carrier modulation 5. Carrier Transport data-rate (or Symbol-rate, for modern DVB-S2 systems) 6. Carrier inner FEC ratio (may be omitted for modern DVB-S2 systems) 7. Carrier ID Tag (‘15’ means “do not use”) 8. Program number (Significant only when any audio port is assigned as “Follow Tune”, used to remain compatible with legacy systems) 9. Add Preset Table entry 10. Edit Preset Table entry www.wegener.com 800070-01 Rev B Chapter 3, Page 69 iPump 6420 User’s Manual 11. Delete Preset Table entry 12. Select tuning by Preset Table entry LNB DC output To simplify site setup, the i6420 features an LNB DC output source fed outward on the RF Input center conductor. This powers the electronics in the LNB on the satellite antenna. It is protected against shorted loads with an over-current thermal fuse. The user controls are: 1. LNB DC ON/OFF Transport Demux The incoming Transport stream from the tuner (or alternately, ASI-input card) is demultiplexed in a software module. This module recovers the Program Allocation Table (PAT), and for each of the Programs listed, a Program Map Table (PMT). It also recovers the PID assigned to COMPEL, as well as all the PIDs assigned for MPE/IP channels. Using the Tables (see Section 3.2.2), the unit controller then identifies the PIDs bearing the live audio streams, and those are passed to decompression stages assigned to the appropriate audio Port. Key indicators are: 1. No PAT fault indication 2. No PMT fault indication 3.2.2. Live Audio play Live audio decode and playout from the satellite signal is the most important single unit function. There are three audio ports in the iPump6420, with each assigned multiple “MPEG decoders” (see Figure 1-3 in Section 1.3). However, the user is cautioned to be careful here: In most of the user control interfaces, and in other i6420 literature, each port itself is called a “Decoder”. With this caution in mind, the operation of each of the Audio Decoders (ports) may be described. Audio Stream Selection For each Audio Decoder, the Compel or local user may select an audio PES stream, from the Transport, to decode and output. The selection is by Program, and then, within that Program, an audio Language Descriptor. Using the PSI Tables, the unit software identifies the PID bearing the audio PES stream. This is then passed to the correct Audio Decoder (or Decoders, since the same live audio may be played on multiple outputs). Where simple audio stream switches are requested, the command is executed immediately, but the old audio signal runs on until the audio buffer is cleared, and then the new audio signal appears in the output (see Audio Buffer delay, following). Key indicators are: 1. SERVICES LED on during live audio playout on any Decoder 2. “No Audio found” fault indication The user controls, for each Audio Decoder (Port) are: 1. Program number (select OFF, follow-tune, Program number, or use the first available in the PAT www.wegener.com 800070-01 Rev B Chapter 3, Page 70 iPump 6420 User’s Manual 2. Audio Language descriptor (select Language Descriptor from list as found in the PMT, or use the first available in the PMT as indicated by the ‘*’ wildcard) Codec, resamplers, timing adjustments (buffer-locked loop) The live audio PES stream is decomposed into separate audio ES frames, and the compressed data is passed to a software codec. In the i6420, an award-winning, industrystandard audio codec is used. The resulting linear data is passed to an output buffer to prepare for further processing. At this point, the linear audio samples are output by the codec at the sample rate used within the uplink compression system. The i6420, however, does not use the PCR or PTS timing signals normally conveyed in DVB/MPEG Transport streams. Instead, the output timing is set by a fixed oscillator in the i6420. Now, this would normally cause the buffer capturing the data from the codec to eventually over or under-flow, since the uplink is creating and the i6420 audio output consuming the audio samples at different rates. So the i6420 maintains a (fairly) constant buffer by dropping or repeating samples. This is done with an innovative algorithm which seeks out periods of low-complexity audio, either quiet moments or simple tones. Then samples are dropped and added in groups which neatly match the cycle period. Thus, samples are dropped or repeated less often, and when it is done, it is hidden in such a way as to render it inaudible to even professional listeners. After this step, the audio data stream must be passed to an audio mixer where it may be summed with the outputs of codec stages which have processed audio files. The mixer must output the audio samples at a user-set sample-rate, so it requires all its inputs to be the same rate. The software supplies re-sampling to all mixer inputs as needed. Again, this is performed by an industry-standard 3rd party software module. The user controls, for each Audio Decoder (Port) are: 1. Output audio sample rate Audio Buffer delay User should be aware that the decoded live audio is delayed in an audio buffer with a nominal factory-set depth of 500 mS. As file audio is pulled and decoded, it too is passed to the same buffer and encounters the same delay. This must be taken into account when constructing an overall system timing model (see Section 3.4.3). The user controls are: 1. Audio buffer delay (factory set, but may be adjusted with debug access). www.wegener.com 800070-01 Rev B Chapter 3, Page 71 iPump 6420 User’s Manual Audio Settings: Muting, Stereo Routing & Attenuation The two main Audio Decoders (Ports), #1 and #2, feature both digital and analog audio outputs. The auxiliary Audio Decoder, #3, only features an analog audio output. Any of those three sets of outputs may be muted, as an entire signal or by stereo component (Left or Right). After this, the audio signals may then also have their stereo components re-routed. The current routes, as of this writing, are 1) to pass the Left and Right channels to the output, as decoded; 2) to reverse them, Left for Right; 3) to put Left on both as a mono; or 4) put Right on both as a mono. Following this, the audio passed to the AES3 digital audio outputs gets no further processing. But the analog outputs for each of the three Decoders (Ports) may also be programmed for a fixed attenuation. This will reduce the audio output, at clip level, from either the factory-set +18 or +24 dBm levels,* in 1 dB steps. * Levels set by jumpers, not programmable! Note that all the processing described in this subsection would apply to both the audio output decoded from live satellite audio as well as file-based audio, either as used in inserts or as permanent “virtual channels” (see Section 3.4). The user controls, for each Audio Decoder (Port) are: 1. Mute (Off, L, or R, or both) 2. Stereo route (Normal stereo, reverse stereo, L to both, R to both) 3. Analog attenuation (0 to 20 dB, in 1 dB steps, only local control) 3.2.3. Delivery of Relay closures The iPump6420 features two banks each of 16 form A relays, each of which are assigned to, or “associated with”, one of the two main audio Decoders (Ports). These relays are generally used to deliver cueing closures to local affiliates radio stations, signaling the precise time point where local spots may be inserted into the audio feed by downstream ad insertion gear. So that the i6420 may support two different local affiliate missions, such as two different radio stations, one audio and a bank of relays, along with an RBDS signal (see next), may be directed to each. To properly enforce this, it is best to use Compel Associated Audio commands (part of Compel Extended Syntax) to do all the cue relay pulses. This will ensure that the relay number is properly indexed in the bank of relays associated with that audio feed. Note that, to ensure good time alignment with events in the audio feed, Compel Extended Syntax may also invoke an additional delay to the relay pulse command. Along with the fixed Compel Command Delay, the net delay should be set equal to the audio compression system delay, thus allowing the closure to line up precisely on the start of the local avail (see Timing Model, section 3.4.3). One additional user cue relay is provided in the standard iPump6420. This appears on the same rear-pane connector as the Alarm relay contacts. It may be controlled similar to the relays discussed above, but it is not logically associated with any Audio Decoder. All relay activity is logged to the Operational Log (see Section 3.6.3). The user controls, primarily set from Compel, are: 1. Permanent relay setting, on/off 2. Temporary (non-volatile) relay setting, on/off 3. Pulse relay command www.wegener.com 800070-01 Rev B Chapter 3, Page 72 iPump 6420 User’s Manual 3.2.4. Delivery of RBDS data The iPump6420 features two serial ports to perform Radio Broadcast Data Services (RBDS) data output, each assigned and dedicated to one of the two main Audio Decoders (Ports). RBDS is used to deliver metadata to the local affiliate, such as information about the current song, the artist, the station call sign, etc. This output is generally wired directly into the RBDS input of the station’s AM or FM radio exciter. So that the i6420 may support two different local affiliate missions, such as two different radio stations, one audio and a bank of relays (see above), along with this RBDS signal, may be directed to each. To properly enforce this, it is best to use Compel Associated Audio commands (part of Compel Extended Syntax) to do all the RBDS messages. This will ensure that the RBDS data strings are properly associated with that audio feed. The user controls, are: 1. RBDS serial port baud settings, ports #1 and #2 2. RBDS message output (from Compel) 3.3. Stored File Creation and Management The Store/Forward mission of the iPump6420 requires that file-based audio content be prepositioned on the unit before use, and stored there for subsequent repeated uses. This section discusses the delivery (or creation), and then management of that audio content. 3.3.1. File Storage and Management database Basic File and Asset Management All files positioned on the iPump6420 for later use must be registered in a local management database. This database logs in the file and notes its playability, its play-time (length), its location, and its parent “asset”. A key concept in the management of these audio files is this “asset”. Assets are objects in the WEGENER MediaPlan-based Store/Forward system that may encapsulate any number of files, whether playable audio files or not, along with useful metadata. They are all created in the uplink control system and managed by the MediaPlan Content Manager, which is outside the scope of this Manual (see the MPcm User’s Manual). Then they are downloaded to the edge receivers, the iPump6420s, for storage. All downloaded assets are stored in the i6420 filesystem in the /u/user/assets directory. They are usually single-layer folders with the folder name equal to the asset, and all files located directly under that level. However, assets may now have multiple folder layers. When downloaded to the iPump6420 from Compel/MediaPlan, they included a special metadata file called “metadata.xml”. This file tells the i6420 what playable audio files should be included in the asset, what their path is, the asset expiration date, and also will indicate the asset’s “alias”, if any (see section 3.4.6). Generally, the “asset” concept is only used for the management of files and is usually not relevant to the problem of playing single audio files or of building playlists to play one or more such files at a time. However, there is one exception to this, and it is the concept of the “asset alias”. The alias for an asset becomes an alternate name for an asset. So a network may put a different asset in any of many local affiliates, all loaded with content exclusively for that locality. However, if they are all given the same “alias”, then the network can then request a play from that asset at each local affiliate, with one single command. Because of the similarity of use with playlists, the discussion will focus on this in Section 3.4. www.wegener.com 800070-01 Rev B Chapter 3, Page 73 iPump 6420 User’s Manual Note that files may be placed on the iPump6420 by any of several methods. One is WEGENER’s Assured File Delivery (AFD), performed in an MPE/IP channel from Compel, over the satellite. Another is Kencast FAZZT, a 3rd party satellite-based file distribution system. Another is HTTP file download over internet. Other methods are also available to the local user: FTP or SMB upload, and file recording. In the cases of FTP or SMB upload, be aware that the file management database must still be given time to locate and “register” all newly placed files. Those files must be located somewhere in the /u/user/ file structure, though the /u/user/assets directory is strongly recommended for all files placed on, and not recorded by, the i6420. Automatic File and Asset Deletion If an asset is downloaded to the i6420 with an Expiration Date showing in its metadata.xml file, then the file management database will schedule that entire asset for automatic deletion one calendar day after the Expiration Date. Just after midnight, on the day following that Date, all files and the asset folder itself are quietly deleted, if they still exist.* * Advanced users may verify this using logs in the web diagnostics page. Another method whereby files in the /u/user folder structure may be automatically deleted is under those conditions where the HDD storage appears to be insufficient for new asset/file downloads. In this case, the i6420 performs a TBS algorithm to find candidate files for deletion. As new downloads are made, the candidate files are deleted to make room. User Controls: The user controls are: 1. Delete individual files, by name or by using wildcard (Compel only) 2. Move, copy, or rename folders and file (local user only) 3. Delete entire assets 4. Register all new files in database (debugging command only) 3.3.2. Assured File Delivery over satellite Assured File Delivery (AFD) over satellite is the premier method for file distribution in WEGENER MediaPlan-based Store/Forward networks. In those networks, AFD distributes the files to the edge receivers, the iPump6420s. It does this by breaking those files into fixed-size frames, and then using a special “ghost” PID in the Transport stream as the “pipe” to convey those frames to the waiting i6420s. The protocol used to send the frames of data to the i6420s is MPE/UDP/IP (usually called just “MPE/IP”). The data is sent from Compel CSM, by UDP, to the “satellite” IP address used in WEGENER S/F systems (173.16.200.222). Uplink equipment called an IP Encapsulator then “forwards” those UDP packets, encapsulated per MPE protocol, within a small Transport stream. This small stream is then multiplexed within the main Satellite Transport by the main uplink MPEG Multiplexer. Thence, it goes out over the satellite to the waiting iPump6420s. Meanwhile, if any of those i6420s has been set to use an MPE PID which is correct, then that data stream is demultiplexed and fed to the IP stack at the satellite IP address, which is assigned to the virtual “DVB adaptor” in all iPump6420s. Those UDP packets, of course, are sent to a specific port number. As part of AFD, before the file is sent out as UDP packets, Compel had instructed the target i6420s with a command to listen on that port. If it is listening, and the packets are received, the i6420 reads the very first packet, a “control” packet, to get the file name, its size, destination path, and its checksum. Then, if all the other packets are received OK, the file is re-assembled and checksummed, said checksum then compared to that www.wegener.com 800070-01 Rev B Chapter 3, Page 74 iPump 6420 User’s Manual sent in the first packet. If OK, the file is copied into the i6420 HDD filesystem at /u/user, creating new folders as necessary. This completes the immediate file delivery process. However, to keep the i6420 from wasting time accepting files not intended for it, it will receive a follow-on command from Compel ordering it to stop listening on the original UDP port. This completes the actual AFD process for that file. Currently, AFD may send as many as ten files at once, conceivably all directed to the same iPump6420s. So 10 different UDP ports may be simultaneously opened on the i6420’s satellite IP address. At each, the i6420 may be receiving and buffering all or part of a file in process of being downloaded. The relevant indicators are: DOWNLOAD LED on during file downloads The relevant user controls are: 1. Set or edit MPE PID 2. Listen to the UDP port in satellite IP address (MADD in Compel) 3. Stop listening to the above UDP port (MREMOVE in Compel) 4. First packet timeout (timeout waiting for control packet, after MADD; factory-set) 5. File send timeout (timeout waiting for entire file delivery; factory-set) 3.3.3. Kencast File Delivery over satellite WEGENER’s iPump6420 also supports an industry-standard 3rd party server/client application for satellite-based file distribution, Kencast’s FAZZT product (kencast.com). This system utilizes a similar MPE/IP download technique as used in WEGENER’s AFD. The FAZZT client is built into the i6420 standard. However, it is beyond the scope of this Manual to introduce the user to FAZZT, so please reference that product’s literature for help. To do file distribution from Compel, through a FAZZT server, through the satellite Transport stream, to waiting iPump6420s, the implementer must have this setup: The i6420s must have an authorizing FAZZT serial number and key-file, be listening on the correct MPE/IP PID, and be properly assigned to one or more Kencast “channels”. The i6420 will then accept files properly transmitted on those channels by the FAZZT server. Relevant user controls are: 1. Kencast channel assignment 2. Set or edit MPE PID www.wegener.com 800070-01 Rev B Chapter 3, Page 75 iPump 6420 User’s Manual 3.3.4. HTTP File Delivery over internet An alternate method of file delivery from Compel, that does not require a continuous satellite connection, is HTTP File Delivery over Internet. Here, the i6420 is commanded by Compel to request a file download from the Compel server using HTTP messages over IP. If a path to the server can be found, and the file is ready to send, then the i6420 may “pull” packets of file data by HTTP from Compel, using the WGET utility. Again, the first packet delivered is a “control” packet, and any following packets are used to complete the file. The file is then checksummed, and, if OK, placed in the designated path under /u/user, building new folders as necessary. The relevant user controls are: 1. COMPEL server IP address 2. Compel command (scheduled, over internet, or by satellite) to request HTTP file download 3. First packet timeout 4. File send timeout 3.3.5. Other file creation & delivery mechanisms The remaining mechanisms used to either create or place files on the iPump6420 is File Recording, FTP placement, or SMB placement. File recording is a process where an audio stream is designated by Program and Language Descriptor, then it is converted into an MPEG program stream and stored to the i6420 HDD as an mpg file. The files are recorded at the stream rates as they appear in the incoming Transport. The resulting recorded files are stored into /u/user/recorded directory. For SMB placement, the user must access the i6420 over a network at the LAN port as if it were a Windows share location, giving Windows the \\LAN-ip-address format in the Windows Explorer address bar, where ‘LAN-ip-address’ is the IP address of the LAN port. Then the user may PUT the file to the desired location under /u/user.* Meanwhile, for FTP placement, the user, again, access the i6420 at the LAN port. When accessing from text-based FTP programs, the i6420 supplies the user an anonymous FTP login. Then the user may PUT the file to the desired location under /u/user.* However they are placed, about 15 minutes or less after placing files on the iPump6420, the file management database should have located the file, established playability, and made them available for selection in the web File Manager and Playlist Builder views. * Putting the files to /u/user/assets is preferred. The relevant indicators are: 1. RECORD LED on during file recordings The relevant user controls are: 1. FTP access on/off 2. SMB access on/off 3. Content access on/off. Allows access to modify or delete files through web or SMB. 4. Start file recording (by Program/Audio LD) for a specified time duration to a specified file path and name 5. Abort file recording www.wegener.com 800070-01 Rev B Chapter 3, Page 76 iPump 6420 User’s Manual 3.3.6. “Asset Healing”, a content modeling & recovery utility After delivering files using AFD, WEGENER has a utility to allow the customers to model the files loaded to the field iPump6420s. This utility includes a function in the uplink control system and within the i6420. To work, the user must have Compel version 5.07 or later, with MediaPlan and CSM. A Return Path system (see Section 3.1.2) must also be available. “Asset Healing” is a regularly scheduled function which looks at the field iPump6420s and orders them to delete files they are not supposed to have, while requesting NACK messages, through the physical Return path mechanism, to flag files that they lack. Then the uplink control system redownloads the missing files. Because of the complexity of Asset Healing, Figure 3-16 is provided to assist understanding. In the uplink control system MPcm machine, models of all assets are held in a database. Included in each asset, at this location only, is a Compel address tag in an assetname.ini file (where assetname is the name of the asset). This may be a unit serial number or a Compel group number. When the regularly scheduled script requests Asset Healing, CSM copies over the entire asset, and holds the address. It then scours through the asset, building a new metadata.xml file with a correct file list, showing the path for each. It is not limited to a singlelevel folder, but will scan the structure of even deeply-nested folder trees. When done with that, it adds Action Tags (STORAGE CONFIRM and STORAGE CLEANUP) to the metadata.xml file. It then uses AFD to download the metadata.xml file to the address specified in the assetname.ini file. At the iPump6420s, their part of the task begins. The i6420 will take the newly downloaded metadata.xml file and place it in the correct asset, if it exists, or creates a new one if not. It then proceeds to analyse the files it has and compare the resulting list to the files it is supposed to have. Files it is not supposed to have are deleted. For files that are missing, it uses Return Path to send a NACK which flags the file identity and the corresponding asset name. This tells Compel’s CSM program which group (for grouped addresses) needs a particular file. Each file is then re-downloaded by Compel, using either satellite or internet download. When the process is complete, the i6420 renames the metadata.xml file to be z_metadata.xml. Since the i6420 is constantly watching its asset files for metadata.xml files, the rename prevents it from duplicating work already done. The above process is optimum for very large assets, with multiple layers, as is often used for “DJ Liner” assets. In fact, it may not be necessary to ever explicitly request download of this asset. The network operator merely places the asset folder correctly to the MPcm machine, adds files, then posts the correct address file to the asset. The Asset Healing function, running late at night, then does the work of downloading files automatically. www.wegener.com 800070-01 Rev B Chapter 3, Page 77 MPcm www.wegener.com 800070-01 Rev B Rev 7/21/2009 5:05 PM CSM File: metadata.xml File: LastMediaFile.mp2 File: FirstMediaFile.mp2 File: AssetName.ini [SendChanges] <address>=ObjName Asset Folder on CSM: /var/www/html/media/ AssetName iPump has extra files no longer authorized for this asset iPump is missing files which are still authorized for this asset iPump, before resync... File: metadata.xml File: ExtraMediaFile.mp2 File: LastMediaFile.mp2 File: MissingMediaFile.mp2 File: FirstMediaFile.mp2 File: AssetName.ini [SendChanges] <address>=ObjName Asset Folder on remote iPump (one of N targeted by the address in AssetName.ini): <asset root>\assets\ AssetName File Legend STEP #6: When done, the iPump renames the “metadata.xml” file to “z_metadata.xml”, deleting any previous version of “z_metadata.xml”. STEP #5: In response to the STORAGE CLEANUP Action tag, the iPump quietly deletes all files not specified in “metadata.xml”. STEP #4: CSM re-downloads any file flagged by a NACK to the target address in “AssetName.ini” (which may include a group in which this iPump is one member). STEP #3: In response to the STORAGE CONFIRM Action tag, the iPump uses Return Path to send a negative ACK to CSM for each and every file spec’d in “metadata.xml” which is missing from this asset folder. WEGENER “Asset Healing”, an Overview NOTE: If asset folder does exist on any addressed iPump, then it is created and “metadata.xml” is copied therein. STEP #2: CSM downloads the file “metadata.xml” to the target asset folder in all iPumps at the address spec’d in the “AssetName.ini” file. Included within that file are “Action Tags” which requests the iPump implement the STORAGE CONFIRM & STORAGE CLEANUP functions. STEP #1: CSM finds all such “hot” assets, and copies them over to the CSM folder shown. Then it creates this file in each asset folder, which summarizes all files currently in Asset at uplink. } …make sure this asset, and it’s files, are sync’d between the iPumps at the target address and this uplink control system. For this remote address, ether a serial number or group... The Goal ASSET HEALING: Asset healing is initiated when the “csm_fsync.pl” script is invoked (from an FSYNC shell script called from “cron” on the COMPEL/CSM machine). This causes the first 2 steps to be executed within CSM. The response to the incoming file NACKs from field iPumps is handled by the “mpcm_compel.cgi” script. (Note that Step #5 shown does not literally occur, in time, after steps #3 and 4. But since the process of getting files re-downloaded is not connected to the process of deleting the “unauthorized files”, this is irrelevant to understanding the steps involved.) File: LastMediaFile.mp2 File: FirstMediaFile.mp2 File: AssetName.ini [SendChanges] <address>=ObjName Asset Folder on MPcm: <asset root>\assets\ AssetName iPump, after resync... } Existing file Non-existent OR deleted file File: Z_metadata.xml File: ExtraMediaFile.mp2 File: LastMediaFile.mp2 File: MissingMediaFile.mp2 File: FirstMediaFile.mp2 File: AssetName.ini [SendChanges] <address>=ObjName Asset Folder on remote iPump (one of N targeted by the address in AssetName.ini): <asset root>\assets\ AssetName iPump 6420 User’s Manual Figure 3-16: Asset Healing in operation Chapter 3, Page 78 iPump 6420 User’s Manual 3.4. Insertion of Audio from Stored Files This section discusses the reason Store/Forward implementers have purchased and deployed WEGENER iPump6420s. The essential function is to allow local file-based content to play in place of the live audio stream, synchronized to overlay specific time epochs we call “spot avails”. These avails are those time periods a default network commercial is playing in the live audio track, as originating in the customer’s automation system, and usually co-located with the uplink compression and control system. The avail becomes the opportunity to play out a locallyrelevant commercial spot in substitution, thus offering true “localization”. 3.4.1. Simple File inserts The iPump6420 can, under Compel or local user command, seamlessly insert the decoded audio from valid files into the decoded audio track from the live satellite PID streams. When a Decoder is set to play live audio from the satellite Transport, defined by Program and Audio LD, then that is called permanent setting, because it is non-volatile, surviving unit resets. File audio inserts, with only special exceptions, are temporary. The i6420 can execute 1) simple file plays of named files; 2) simple file plays of named files, but with asset alias indirection in the path; 3) or file plays based on keyword indirection into a folder containing a selection of files. It can also play one or more files as part of a playlist, also using the same methods of file identification as just described (see next subsection). For all these file insertions, whether discrete or as part of a playlist, the currently-supported file types are 1) the recorded MPEG program stream files with mpg extensions, 2) MPEG elementary stream files with mp2 extensions, 3) 16-bit PCM wave files with wav extensions, and 4) MPEG I layer 3 files with mp3 extensions (if option is installed, see Section 3.7.4). When a file is requested to play, its compressed file data will be passed to the audio codec after a time interval following the command, depending on the source. If that source is inchannel Compel, a Command Delay is applied and then decoding begins. For all other sources, the decoding begins virtually immediately, probably less than 50 mS. Remembering the model for the i6420 internal functions (see Figure 1-3), the decoded linear audio data is then passed to a 500 mS deep buffer, creating an automatic 500 mS latency on file plays.* So the system implementer must keep this in mind to avoid confusion: After a Compel file (or playlist) play command, there will be a Compel Command Delay before execution. Then, after execution begins, the old live audio will continue to play for 500 mS before the new file-based audio is heard. The same applies on exiting the file play and return to the live satellite audio stream. * For purposes of this discussion, it makes no difference whether the file audio is actually compressed-audio data or linear PCM wave-file data. Logging: All temporary file plays are logged to the As-run Log. Relevant indicators are: 1. PLAYBACK LED on during play of any file-based audio, whether temporary or permanent 2. “File-not-found” fault indication Relevant user controls are: 1. File insertion by named file, by indirection with asset alias (see section 3.4.6), and/or by indirection with keyword-based selection from folder (see section 3.4.5) 2. Abort file play (only a local operation) www.wegener.com 800070-01 Rev B Chapter 3, Page 79 iPump 6420 User’s Manual 3.4.2. Playlists “Playlists” give the user the opportunity for insertion command indirection that makes localization convenient (see Figure 1-2), while allowing for more powerful file-based audio functions. By defining the same playlist name on many field iPump6420s, but each pointing to its own local files, the network, by requesting an audio insert with that playlist, can get a group of field i6420s to do a synchronized local insert. These inserts execute simultaneously at all sites, with each unit using its own local content. In the iPump6420, a playlist is an ordered set of one or more audio file specifications. Each of those file specifications may 1) explicitly name a file by path and filename, 2) name a file as before but using an asset alias in the path (see section 3.4.6), or 3) use a keyword to select a file from an asset folder (see section 3.4.5). Any or all playable file types may be used in a single playlist. When a playlist play is invoked as a temporary insert, the typical use, the live audio feed is muted and then all the files are played, in order, once, and then the audio decoder (port) output returns to the live satellite audio feed. This is a non-volatile operation, and, if the unit reboots, that audio decoder (port) will resume on the permanent live satellite audio feed. The temporary playlist insert aborts not only after resets, but also after any change to a Decoder permanent setting or by special Abort command. The alternative to the temporary playlist insertion is to permanently assign an i6420 Audio Decoder (port) to be a “virtual channel”. This is a permanent non-volatile setting. It is done by assigning a playlist to play under the rule “Loop Forever”. Under this assignment, the audio output from that Decoder will play one file after another until the playlist is complete, then repeat from the top. This repeats endlessly, even through unit reboots, as long as power is applied. It only stops when the Decoder receives a command to go to another permanent setting (e.g. play live audio from the incoming Transport, if available). Playlists are often built in the Compel/MediaPlan system and either 1) downloaded to the field iPump6420s as discrete playlistname.xml files into the /u/user/.system/playlists folder, or 2) built on the i6420 using Compel playlist build commands. The local user, through the web Playlist tab, may also build, edit, and delete playlists. Note that the names of playlists are allowed to contain whitespace. Logging: All temporary playlist plays are logged to the As-run Log. Relevant indicators are: 1. PLAYBACK LED on during play of playlist audio, whether temporary or permanent 2. “Playlist does not exist” fault indication 3. “File-not-found” fault indication Relevant user controls are: 1. Create a playlist (local, or using Compel playlist build command) 2. Download a playlist as a file 3. Edit a playlist: Adding, removing, moving, changing line items (only a local operation) 4. Delete a playlist: by name, using wildcards (Compel only), or “all” 5. Temporary File insertion by named playlist, with optional Profiles (see section 3.4.4) 6. Permanent virtual channel using loop-forever playlist 7. Abort playlist play (explicitly, only a local operation, but any perm setting of the Decoder will abort temp or perm playlist play) www.wegener.com 800070-01 Rev B Chapter 3, Page 80 iPump 6420 User’s Manual 3.4.3. Timing Model The timing model for insertion of file audio into the live audio stream is illustrated by the example shown in Figure 3-17. From the audio feed and companion closures emitted by the customer’s automation system looking forward, WEGENER’s Compel and iPump6420 both provide tools to align the local file insertion onto a network “avail”. This is, in a non-hard-time system, the opportunity to substitute local file content for network-wide audio material, usually a default network commercial spot. Viewing the figure, we see the sum total of all significant delays to the live audio stream. This is shown as “Live audio delay”. Meanwhile, we can see the sum total of all significant delays, in the system, to actual insertion of the file audio content. This is shown as “COMPELcmd’d Insertion delay”. The difference between the two terms is called the “Insertion Timing Error”. Note that this value is minimized when the sum of “NETCON delay” and “iPump COMPEL cmd delay” equals the delay through the uplink MPEG audio compression system. The first term can mean the traditional legacy NETCON DELAY command used in Compel macros, or it can mean the newer Delay term in the Compel Command Extended Syntax. The iPump Compel Cmd Delay is an i6420 setting, usually set by the factory, but WEGENER can advise customers on how to adjust this in their field i6420s. The non-hard-time system shown is not the only example for using local file insertions. In some hard-time systems, file inserts may be scheduled in the iPump6420 Local Scheduler. In these cases, if an insert is scheduled for a specific time, then the file insertion command is executed instantly per the i6420’s real-time clock, and the only delay to seeing the file audio appearing in the final audio output is the standard 500 mS audio buffer delay. Relevant user controls are: 1. Compel Cmd Delay setting (factory setting) 2. NETCON DELAY Compel command OR 3. Compel Extended Syntax command delay www.wegener.com 800070-01 Rev B Chapter 3, Page 81 www.wegener.com 800070-01 Rev B Decoded File audio to mixer Decoded Live Audio to mixer Closure #1 Pulse 0 Nil Music track 60 Music track * Example only, not to scale Insert begins per Closure #1 Spot insert (60 seconds) Nil Insertion Timing error = (NETCON delay + iPump COMPEL cmd delay) - U/L compression delay Insertion Timing error = COMPEL-cmd’d Insertion delay – Live audio delay Music track Chapter 3, Page 82 Insert ends at end of local file Rev 7/22/09 9:53 AM COMPEL-cmd’d = satellite delay + NETCON delay + iPump COMPEL Cmd delay + iPump audio buffer delay Insertion delay { Insert timing error Network commercial spot [avail] Live audio delay = uplink compression system delay + satellite delay + iPump audio buffer delay Closure Event causes insertion request macro in Compel Network commercial spot [avail] I6420 audio decoder outputs to internal mixer seconds Music track Audio & closure inputs to Compel & MPEG audio compression system from customer automation system Wegener i6420 Store/Forward Local File Insertion Timing Model* PIO input (to activate COMPEL macros) Audio input iPump 6420 User’s Manual Figure 3-17: iPump6420 File Insertion Timing Model iPump 6420 User’s Manual 3.4.4. Insertion Profiles Overview Insertion “profiles” are optional modifiers that are applied to an entire temporary insert, whether a discrete file or a playlist. This is invoked only by in-channel Compel commands. A field in the insertion command may specify a profile. Zero (‘0’) is the normal default in Compel commands and means “use no profile”. But a value between 1 and 255 requires a user-specified profile be used, if found. Remember that the effects of the profiles last only as long as the applicable insert, and have no meaning after the end of the file/playlist insert (or any meaning after said insert is aborted). The profiles themselves are defined in special files that reside in the i6420’s /u/user/.sysconfig/profiles directory. The files are named n.def where ‘n’ is the profile number code, between 1 and 255 inclusive. Any kind of profile design may be assigned any number, though it is advised that all i6420s in a network use the same profile number code for the same profile design. The profile files themselves are simple text files of the form: return { key_1 = value_1 , key_2 = value_2, … } where key_1 is one of the possible keywords, and value_1 is a value selection for that keyword, and so on. Note that a profile file may contain any or all of the legal keywords. But if a keyword appears twice in a profile file, or there are other spelling or format errors, the profile will not be used when the Compel insertion command is received. It is best that implementers “try out” their profiles first, in a controlled environment, to be sure that the desired behavior results. Current Profile Keywords preSilence: This forces the start of the file/playlist insert to be delayed by the value given, with audio silence inserted between the end of live and the delayed position of the insert. Values are in mS, 0 to 5000. postSilence: This forces the resumption of the live audio, after the file/playlist insert ends, to be delayed by the value given, with audio silence inserted. Values are in mS, 0 to 5000. ducking: This allows the live permanent audio to continue to mix with the file/playlist insert at the audio output, during the entire time of the insert. The value specifies the amount of attenuation, from normal level, experienced by the live audio while mixing “into” the insert. This value is in dB, and may be specified down to tenths of a dB (e.g. ‘6.2’ for 6.2 dB). atten: This attenuates the file/playlist audio during the insert. The value specifies the amount of attenuation. This value is in dB, and may be specified down to tenths of a dB. User Controls The relevant user controls are: 1. Create a profile file 2. Delete a profile file www.wegener.com 800070-01 Rev B Chapter 3, Page 83 iPump 6420 User’s Manual 3.4.5. File Selection Keywords File selection keywords give the user the ability to play files in “random” order. These are typically used in temporary inserts ordered by Compel commands. However, they can be used as file specs in loop-forever playlist plays, a permanent Decoder (port) setting. The “keyword” signals to the playback process a method to select an audio file from a specified i6420 asset folder, whether top level, or deep in the directory tree. The keywords apply to the file path description, whether in a discrete file play command, or in a single file spec (line item) of a larger playlist. In the path syntax, they literally take the place of a discrete file name. Each keyword assumes that some memory of previous plays is retained. However, this memory is non-volatile, and is not retained through unit resets. As of this writing, three (3) keyword selectors are defined, SHUFFLE, RANDOM, and SEQUENTIAL: 1. SHUFFLE: This keyword means that all files in a directory are each played once, without any repeats, as file insert requests, using this keyword, are made. When all files have played, then the order in the directory is re-shuffled and a new file play order is remembered. The only exception is that the last file from the previous shuffle is not the first in the next, if there is more than one file in the directory. This continues for all file plays called for a particular Decoder (port), until the unit resets or the directory has files added or removed. So the remembered state is: Ordered file list, current position in list, applicable Decoder, and the type of call (from discrete file play, a file spec in a std. playlist, or file spec in a LOA playlist [used for ShowShifting or Time Zone Delay, see sections 3.7.2 & 3.7.3]). 2. RANDOM: This keyword means that a file is randomly selected from a directory as file insert requests, using this keyword, are made. If there is more than one playable file in the directory, then no file is repeated, through repeated requests. This continues for all file plays called for a particular Decoder (port), until the unit resets. So the remembered state is: Last file played, applicable Decoder, and the type of call (from discrete file play, a file spec in a std. playlist, or file spec in a LOA playlist [used for ShowShifting or Time Zone Delay, see sections 3.7.2 & 3.7.3]). 3. SEQUENTIAL: This keyword means that all files in a directory are each played once, without any repeats, in alphanumeric order, as file insert requests, using this keyword, are made. When all files have played, then it repeats in the same order. This continues for all file plays called for a particular Decoder (port), until the unit resets or the directory has files added or removed. So the remembered state is: Alphanumeric file list, current position in list, applicable Decoder, and the type of call (from discrete file play, a file spec in a std. playlist, or file spec in a LOA playlist [used for ShowShifting or Time Zone Delay, see sections 3.7.2 & 3.7.3]). As files are added or deleted from the target folders, the behavior of the unit is this: As files are added, then the new files are “picked up” each time SHUFFLE or SEQUENTIAL finishes the current file list and starts again. As files are deleted, the keywords would skip those file positions in their lists, if any. An example of the use of the SHUFFLE keyword is given in Figure 3-18. There are no relevant user controls for this automatic process, beyond use of these keywords in the standard file and playlist play commands. www.wegener.com 800070-01 Rev B Chapter 3, Page 84 iPump 6420 User’s Manual Figure 3-18: Example of using the SHUFFLE file selection keyword Use of SHUFFLE keyword, a simple playlist example: Consider the following playlist definition: /assets/Song/Song_A.mp2 /assets/Spots/SHUFFLE /assets/Song/Song_B.mp2 /assets/Spots/SHUFFLE /assets/Song/Song_C.mp2 /assets/Spots/SHUFFLE Note that each time this playlist is invoked, it will play 3 files, each randomly selected from the / assets/Spots directory using the SHUFFLE keyword. 1. A command is received to play this playlist on decoder 1. When the first SHUFFLE keyword is reached, the Spots directory listing is shuffled randomly in the following order with the first item (HomeDepot_2.mp2) returned as the file to play: HomeDepot_2.mp2 CocaCola_2.mp2 HomeDepot_1.mp2 CocaCola_1.mp2 2. For the remainder of the playlist, the next 2 files (CocaCola_2.mp2 and HomeDepot_1.mp2) will be played. 3. The next time the receiver is commanded to play this playlist, when it reaches the first SHUFFLE keyword it will play the last unplayed file CocaCola_1.mp2 . 4. When control reaches to the next entry with the SHUFFLE keyword, the /assets/Spots directory listing is reshuffled and the new first item is returned (HomeDepot_1.mp2). This is then played: HomeDepot_1.mp2 CocaCola_1.mp2 HomeDepot_2.mp2 CocaCola_2.mp2 5. To finish on this execution of the playlist, the last SHUFFLE entry file is played (CocaCola_1.mp2). Notice that within this particular playlist execution, the same file is played twice because of the reshuffle. However, the same file is not allowed to play back-to-back. www.wegener.com 800070-01 Rev B Chapter 3, Page 85 iPump 6420 User’s Manual 3.4.6. Asset Aliases Asset “aliases” are another simple method of indirection used to get localization. To use this, one must use asset-based files downloaded and managed from the uplink control system. In any file spec, whether used in a discrete file insert, or used in a line item of a playlist being inserted, the top level asset directory name must appear in the path. However, an asset alias allows an alternative name to be used for an asset. Usually, the real asset name is particular to a specific locality, and the alias is a name used network-wide for a similar class of assets. By using an alias in the file spec for an insert, Compel can use one command to request many different field i6420s to each insert a different local file. For example, a typical full file pathname for a SHUFFLEd DJ Liner insertion request might be: /assets/WKLS-Rock/Fred_McMurray/5-second/SHUFFLE. In this example, the network-wide alias assigned to the “WKLS-Rock” asset was “Rock”. With the alias loaded to the i6420, Compel can request the file insert by asking for /assets/Rock/Fred_McMurray/5second/SHUFFLE. This will then randomly play a 5-second Liner for Fred McMurray in all stations in the “Rock” network, that is, the network where all i6420s share the alias “Rock”. The method to install an asset alias is by using the metadata.xml file traditionally downloaded with each new asset built on field iPump6420s by Compel. The “alias” tag of the xml file will define the alias. This then creates a logical link in the i6420 file system. So the creation of asset aliases is an uplink control system function, usually done with special scripts. If a user wishes to implement this in a network, please contact WEGENER Customer Service. The relevant user controls are: None. 3.5. Off-Air Recording (option) An optional feature in iPump6420 is Off-Air Recording (OAR) capability. OAR capability gives the network operator the power to audit field i6420s to ensure that the correct commercial spots are being played on the air by the local radio stations. One should note that, using Return Path alone, the operator already had the power to confirm the i6420’s “opinion” that a spot was air’d, using returned As-run Logs. However, using OAR, the operator is provided an added level of assurance that nothing else in the system prevented the actual airing of the spot, such as failures in the local radio station equipment. To get OAR capability, the system must be setup for Compel Return Path (see Section 3.1.2). Meanwhile, the i6420s must come equipped with the onboard AM/FM tuners, and be authorized for the mp3 audio codec (see Section 3.7.4). The AM/FM tuners installed must be specified to work in the common commercial bands in use where the i6420s will be deployed. In the US, this would be the well-known 520-1720 kHz AM band, and the 88-109 MHz FM band. This is the standard package shipped if ordering i6420s with AM/FM tuners. But several worldwide bands may optionally be supported as well (see spec in Section 1.4). If any questions, please contact your WEGENER Sales Dept for assistance. To avoid confusion, the local user should observe that the AM/FM ports, #1 and #2 should remain physically associated with the i6420 Audio Decoder (port) numbers 1 and 2, respectively. That way, audio captured “off the air” on AM/FM tuner #2 should be the same signal as output on Audio #2, and thence sent to the local radio transmission system. www.wegener.com 800070-01 Rev B Chapter 3, Page 86 iPump 6420 User’s Manual 3.5.1. AM/FM tuner setup Compel or the local user may setup the AM/FM tuners. The setup consists of programming the desired band and frequency. Once an external antenna connection has been provided, a user may use either the local user web or front-panel interface in order to check for received signal quality. This “signal quality” is also reported to Compel’s CSM program using the standard iPump6420 Return Path Status report. Again, the relevant user controls are: 1. Tuner band, each port 2. Tuner frequency, each port 3.5.2. Off-Air Capture To prepare for an off-air capture, the compression settings must be programmed. The audio signal, once demodulated by the AM/FM tuner section, is captured and digitized, then the linear audio data is compressed to mp3 file format for storage. The compression settings needed will specify to the mp3 codec just how this will be done. The user settings are 1) MPEG elementary stream bit rate (called just “bit rate”), 2) Audio sample rate, 3) Stereo/mono selection, and 4) Sample depth (1 or 2 bytes per sample). Note that there is some advantage for the user to set the compression settings to minimize the resulting mp3 file size, since the bandwidth available to the Return Path function may be limited. After the tuners and the compression system are setup, an audio capture may be executed. This may be done with a simple manual Compel or user command. However, to automate the system, it may be best to combine the OAR-capture command with the playlist-play command into one single Compel macro, fired when the customer automation system requests the local insert. The OAR-capture command itself supplies the Port #, a “tag”, and a capture time amount to the i6420. Immediately after the command, the i6420 will capture the demodulated audio from the requested AM/FM tuner port number, for that specified time. As the audio is captured, it is compressed into an mp3 file and that is written to local HDD storage. The name of the file captured will be of the form “YYYYMMDD_HHMMSS_tag_port_sn_label.mp3”, where ‘YYYMMDD’ is a date code, ‘HHMMSS’ is a 24-hour time code, ‘tag’ is a user-provided identifying “tag”, ‘port’ is the Port number, ‘sn’ is the unit serial number, and ‘label’ is the unit name. The resulting OAR capture file will be stored into the /u/user/.system/oar directory. Again, the relevant user controls are: 1. Capture bit-rate, each port 2. Capture sample rate, each port 3. Capture stereo mode, each port 4. Capture Sample depth 5. Capture audio level (factory set) 6. OAR capture command: Port, Tag, Time length 7. OAR file-capture status request www.wegener.com 800070-01 Rev B Chapter 3, Page 87 iPump 6420 User’s Manual 3.5.3. File Return for Audit As the captured OAR files accumulate on field i6420s, the Compel system may regularly request that they be returned so that they are available for auditing. This is done through the Return Path OAR file return report. This will cause the field iPump6420 to upload all OAR files, by HTTP POST, to the CSM function in the Compel system. The CSM function, in turn, will place the files to a directory for that unit serial number. After the request has been accepted and executed, the iPump6420 will move the OAR files that were sent to a hidden folder /u/user/.system/oar/.to_be_deleted. All files therein are watched by another internal maintenance process. When their age exceeds the automatic deletion time, then they are quietly deleted. The relevant user controls are: 1. OAR Return Path request 2. OAR file auto-deletion time, in days 3. OAR file auto-deletion time of day 3.6. Miscellaneous Functions 3.6.1. Application Management The Linux OS and the linux application that implements the Local Controller, per Figure 13, both have their code stored in a flash memory card. The code is stored there, rather than the hard-drive (HDD), so that the unit will function, albeit as a more limited “IRD”, in the event that the unit’s HDD fails. Storage of the application software is done in two redundant locations. This allows the network operator some measure of security when trying to control many remote, field iPump6420s, especially when local users are unable to, unwilling to, or restricted from assisting in the proper management of the unit. Redundant Application Images Normally, the unit holds two versions of the application code and one is specified to be the “commanded” application. At unit reboot, a boot loader function evaluates the non-volatile instructions specifying which application to load, and the stored flags indicating the status of those application images. If an application image is known to be “good”, and it is the currently commanded (or “primary”) version, then it is loaded and run without further qualification. If the currently commanded (primary) application image is not known to be good, for any of several reasons, then the boot loader will load the alternate (“backup”) version, if it is known to be good. Also, if the boot loader attempts to load and run the commanded application, and if, for any reason, the application cannot be run, then the boot loader, after a few attempts, can revert to the backup application, loading and running that. It will also mark the failing application image as “bad”, avoiding later re-attempts to load and run it. The exceptions to these scenarios can be discussed shortly, after describing the application upgrade process. Software Upgrade process To upgrade software in unit, Compel, or the local web user, may download a new application image to the running system. This is in a special format which uses a *.dl extension, and it is downloaded to the /u/user/.system/dlfiles directory, which is a “hot folder”.* There, www.wegener.com 800070-01 Rev B Chapter 3, Page 88 iPump 6420 User’s Manual the currently-running application will checksum the received image, and if OK, process and load it to the non-volatile Flash storage, in the backup position. It will also mark the application image status flags. If the file was installed by a local user, the flags are always set to “OK” and that is the end of it. If the download was done under Compel management, the flags are set to indicate “OK, but testing”. Regardless of these flags, the download task itself does not complete the upgrade process. Later, Compel or the local user (if local control is enabled), must request that the new application version be loaded and run. This is called the application switch, probably because it can be done as a command to “use the backup application” or as a command to “switch to a particular application version nnn”. The second method is actually preferred, except in a panic situation, because it forces the operator to know what he/she is doing and think about what application the field iPump6420s will be switching to. Regardless of how it is ordered, the incumbent application software first marks the non-volatile storage flags to show the backup (new application version) as the new “primary” (commanded), and its own flag to show as the new backup. Then it jumps to reset, eventually giving control of the unit over to the new application version, as the boot loader loads and runs that new version. * Being a “hot folder”, after the follow-on processing, the downloaded images shall be deleted from dlfiles. Recall that i6420s downloaded from Compel have their newly downloaded application images marked as “OK but testing”. The meaning of the “testing” flag is this: If the user later requests an application switch to this newly-downloaded application, then, if it is “testing”, it will undergo a special performance self-review. In this self-review, the unit must, if Compel is required, acquire the Compel command stream in some short, but reasonable, time interval. It must also not reset more than a couple of times in the first hour of operation. If either criteria fails, the application must mark the application management flags reversing the sense of primary and backup, and then mark itself as “bad”. Then it will jump to reset to allow the old backup to take over. Otherwise, if all is still OK after the “test”, the application marks itself as “good” and continues running normally. Relevant user controls: 1. Application file downloads 2. Application switch, either as a toggle, or directed to specific application string (preferred) 3. Several debugging commands to monitor and manipulate the application flags exist, but contact WEGENER Customer Service before contemplating such actions! www.wegener.com 800070-01 Rev B Chapter 3, Page 89 iPump 6420 User’s Manual 3.6.2. Non-volatile Parameter Management All non-volatile unit settings (NV parameters) are retained in the internal flash memory storage, the same physical location as the Linux OS and the application images. At unit boot-up, these NV parameters are read into volatile memory for use. As these parameters changes, new values are written to the NV storage. These parameters include many factory and user settings. The full set of parameters can be stored, downloaded, and re-loaded. This allows duplication of unit settings in production and service. To facilitate testing of the product, tools are provided to save off and restore the complete set of non-volatile settings. This can be done from or two any of three different storage locations, in addition to the current operating storage position (so there are four total). The “production default” is that used to do standardized tests in production and service. The “customer default” is the ship configuration requested for all the i6420s ordered for a particular network by the customer. A “backup” position is where the current settings might be temporarily stored. Relevant user controls: 1. Store current NV settings to backup 2. Store current NV setting as Production default 3. Store current NV setting as customer default 4. Restore current NV setting from backup, Production, or customer default positions 3.6.3. Logging The iPump6420 is constantly logging many different types of events to non-volatile storage on the hard-drive (HDD). The amount logged can vary considerably based on the current log levels. Most of these logs are only useful to advanced users with debugging access. No other information is supplied in this publicly-accessible Manual about these logs. If you are an advanced user, and you have questions, please contact WEGENER Customer Service for more information. However, two important logs are available at all times to local web users. One is the As-run Log, a log of all temporary file/playlist insertion events, including results entries stating whether the insert was successful or not. The other is the Operational Log (“Ops Log”), a log of miscellaneous events such as relay closure changes, error’d second events in the Transport, audio file and OAR recordings, carrier and/or audio stream switches, and other events. Note that the As-run Log may be requested as a Return Path report by Compel (see section ), and a *.csv file with the same info may be requested by the local web user. As of this writing, the Ops Log is only available for display on the local web, though that page may be saved to the PC running the browser. The relevant user controls are: 1. Clear logs 2. Set log limits (factory setting) 3. Request Return Path As-run Log 4. Request As-run CSV file (local web only) www.wegener.com 800070-01 Rev B Chapter 3, Page 90 iPump 6420 User’s Manual 3.6.4. Time Management Master Time Reference The iPump6420 makes use of a real-time clock (RTC) for many different functions, not just elapsed time. In most missions, the i6420 RTC must be synchronized to some other reference. In the majority of missions, this is the Compel clock. The way this is done is to make use of the Compel time-of-day messages (also called “keep alives”, see Section 3.1.1). These are messages sent to “all” devices which convey a UTC time/date stamp. The i6420 uses these messages to implement a low-bandwidth timebase-tracking loop. Therefore, the i6420 must see at least one such message each second for the most effective time tracking, that is to make guarantees on time tracking for the Local Scheduler and for premium features (see Section 3.7). Of course, if the Compel system itself has its clock synchronized by NTP to a precision local or internet source, then the field i6420s, due to the satellite transit delay seen by the Compel stream (~ 250 mS), will see their current time value lag behind those same NTP sources by the same amount. As an alternate to using the in-channel Compel command stream for synchronizing the i6420 RTC, the unit may also be set to use NTP direct to a specified source. This is recommended for the non-satellite-based installations, which will receive Compel control over the internet and will execute timed events based on a Local Scheduler and its RTC. The relevant user controls are: 1. Time source control (Compel or NTP) 2. NTP time source, by IP address only 3. Set time (if not using Compel or NTP, generally a test scenario only) Time Zone management All timed events loaded into the Local Scheduler show the time of the event as it was set in the Compel system. To set a local Scheduler line, Compel must tell the iPump6420 what time, in local Compel time, that the event must occur. Along with this, Compel communicates its own “timezone rule” to the listening i6420. In turn, the i6420 must translate this command to setup its Scheduler to show the command execution time in terms of the i6420’s own time. This is done by translating the Compel time to UTC using Compel’s timezone rule, then translating UTC to its own time, using its own timezone rule. The “timezone rule” is a logical concatenation of a time zone offset from GMT, a logical Boolean stating whether a daylight savings is observed, and the legal dates of that observance in that locality. For instance, the eastern US uses the America/New_York timezone rule, which implies that the offset from GMT is -5, and that DST is observed between the 2nd Sunday in March and the 1st Sunday in November.* * The set of possible rules are also called the Olson database strings. Since the local web interface displays the time in terms of the i6420’s own timezone rules, users monitoring the Scheduler must be aware of the opportunity for confusion. In the event that the web user’s browser is not running on a PC in the same time zone as the target iPump6420, then the time values shown in the Scheduler may appear to be in error to the observing user. When checking the Scheduler, the user is cautioned to check both the time and the timezone rule setting of the i6420. The relevant user controls are: 1. Set timezone rule (web or front-panel) www.wegener.com 800070-01 Rev B Chapter 3, Page 91 iPump 6420 User’s Manual 3.6.5. HDD Failure The iPump6420 features an internal metal hard-drive (HDD) for storage of media files, playlists, databases, and logs. It also includes a small partition called the “Install partition”, but this is only useful to advanced users who may need, under WEGENER supervision, to rebuild or replace their Compact Flash memory cards. The HDD is critical to all the Store/Forward operations, but is not needed in order to provide basic IRD functions. Therefore, the i6420 was designed to continue this limited IRD operation in the event of HDD failure. The application software will basically declare the HDD as failed and unavailable only if it is not allowed, by the Linux OS, to mount partitions on the HDD for both reading and writing. This will set off a permanent Alarm indication for “HDD Failure”. The unit may or may not reboot at that time, but it will eventually settle down to operate as a simple IRD, continuing to play out the live satellite audio, if commanded and available. This state will continue indefinitely until an advanced user, with debug access, clears the indication and replaces the HDD. A possible interim condition may also exist, if, during routine diagnostic scans, the HDD is found to indicate legitimate pre-failure indicators. The scan for these indicators is based on extensive research on hundreds of thousands of HDD failures, as carried out by Google and Carnegie Mellon University.* In this research, these indicators were found to accurately predict nearly 50% of imminent HDD failures, usually weeks or months before the actual failures occurred. When the i6420 sees any of these indicators, then it will, if not masked, set a Warning of “HDD failure imminent”. * Valid customers may request this information from WEGENER Engineering. 3.7. Premium Features In order to setup and access any of the iPump6420 premium features listed below, the units must have been installed with the proper authorizing key-files. These are small text files that each authorize a specific unit serial number for a specific feature. Their file names are formed as serialnumber-featurename.pem, where serialnumber is the numeric unit serial number, and featurename is a text mnemonic representing the feature (see below). As of this writing, Compel versions 5.07 and higher supply controls to either manually authorize individual units, or to authorize an entire network. This is all done by simple MPE/IP file downloads to a secure, hidden directory in the i6420. Within 5 minutes of the file download, the application will recognize its new authorizations, and be ready to perform the new premium functions. For information on how to order premium features, and acquire authorizing key files, for your iPump6420, please contact the WEGENER Sales Department. For assistance in installing the authorizing keys, please contact the WEGENER Customer Service Department. www.wegener.com 800070-01 Rev B Chapter 3, Page 92 iPump 6420 User’s Manual 3.7.1. Microcasting (aka “Automation Mode”) Microcasting is a new premium feature offered in the WEGENER iPump6420.* This allows the functions of the customer automation system to be embedded in the remote field i6420. Because of this, i6420s with no satellite access may provide operating radio stations with the same rich set of centrally-controlled services provided by their satellite brethren: live media (music/talk/news etc.) play, local spot insertion, cueing closures, RBDS messages, etc. * Microcasting is often called by its former name, “Automation Mode”, in many WEGENER user interfaces and documents. In order to implement Microcasting, the network must first place schedules, playlists, and media content on the target iPump6420s. Because remote i6420s “doing” Microcasting may have no satellite access, this often must be done using Compel-over-Internet and HTTP file downloads. Also, since Microcasting requires an accurate time-of-day clock reference, the unit will need to be set for NTP and be given the IP address of an accessible time source. To support this, the local implementer must ensure permanent, reliable internet access for the i6420. The schedules are simple text files. Within them, are sets of instruction primitives, written in a special automation language. Some of these primitives give instructions for various operations, such as file plays, playlist plays, relay closures, and RBDS outputs, all such outputs being directed to the correct Port. Other primitives supply metadata about 1) how to chain the various operations together (including overlap of multiple audio files), 2) where to wait on external events (such as a PIO input closure), or 3) whether to start operations at fixed times. Suffice it to say, that these sequence files feature all the tools necessary to simulate a working radio station. But it is not within the scope of this Manual to give more detailed information about how to create such files. So if you are implementing Microcasting, and need to build your own sequence files, please contact WEGENER Customer Service for help. The playlists and audio content placed on a Microcasting i6420 are the same things used by traditional iPump6420 functions. After the network properly positions these playlists and content, then one or more of the i6420 Audio Decoders (ports) must be permanently assigned to do the Microcasting task (again, also called “Automation” in many user interfaces). After that, operation begins and continues, automatically, so long as schedules, playlists, and content are supplied to the i6420 well ahead of their needed use. To later disable Microcasting on a Decoder, a user only needs to issue a command to go to some other permanent setting, whether live audio, loop-forever playlist, or to just turn OFF. Microcasting is initiated and run in the following manner. Initialization always begins after Microcasting is permanently assigned (started) on a Decoder. Once started, it also re-initializes 1) 5 minutes before midnight (per local timezone rules), or 2) after unit reboot. At all those times, the unit looks for a file named YYYY-MM-DD-n.seq in the /u/user/.sysconfig/sequences directory, where the first part is the date code, and ‘n’ is the Decoder (port) number assigned to do Microcasting.* If found, then the unit begins processing the file, executing the instructions therein. If not found, then the unit looks in the same directory for another file named defaultn.seq. If that is found, where ‘n’ matches, then the i6420 proceeds to use that file for its daily schedule. If neither file is found, that Decoder remains silent until the next opportunity for reinitialization. * Note that there is a soft link to another location under /u/user/assets, so that sequence files may be downloaded and managed in the same fashion as other assets. Note that if content is missing from the i6420 at the time the running schedule calls for it to play, then the unit will do its best good-faith effort to skip that content and continue running www.wegener.com 800070-01 Rev B Chapter 3, Page 93 iPump 6420 User’s Manual normally. What this means in practice is that operations will be moved up in time until the next “hard time marker”, at which time the unit should return to normal operations. To monitor a Microcasting session, the local web interface features an (Automation) sub-tab under Status for each Decoder. When Microcasting is enabled for that screen’s Decoder, the screen will feature a list of all the current day’s operations, past and future (if desired), with a marker showing the current position in the list. See Figure 3-19 for an example. In addition to the web status screen, the operator should observe that the front-panel’s PLAYBACK LED is lit during Microcasting operation. Note that all operations in Microcasting are logged, just the same as “normal” operations. For each file or playlist play, there will be a pair of As-run Log entries. For the starting and stopping of Microcasting, as well as every relay closure, there will be an Ops Log entry. Microcasting authorizing keyfiles are named serialnumber-automation.pem. The relevant indicators are: 1. PLAYBACK LED on while Microcasting is running with a valid sequence file The relevant new user controls are: 1. Command to start Microcasting on a Decoder 2. Any permanent Audio Decoder command to go to some other perm setting 3. Use the terminal command ‘cert report’ to check for “Automation” authorization www.wegener.com 800070-01 Rev B Chapter 3, Page 94 iPump 6420 User’s Manual Figure 3-19: Automation monitor screen, local web interface www.wegener.com 800070-01 Rev B Chapter 3, Page 95 iPump 6420 User’s Manual 3.7.2. ShowShifting Overview ShowShifting is an exciting new premium feature in iPump6420 which allows satellite network operators to reduce the daily satellite bandwidth, and uplink storage, needed to distribute syndicated radio shows. In ShowShifting, a syndicated talk show (for example) can be air’d on the satellite a single time each day, but, at each of many field i6420s, that show episode can air on the respective local radio stations any number of times, with no start-time necessarily occurring at the original satellite air time. This not just a simple recording and re-play of the live audio feed, but a capture and replay of every component of the show: The audio track and associated Compel commands for local file or playlist plays, cueing relay closures, and RBDS strings. To make use of ShowShifting, the user must use a few simple concepts. A Show is defined as live audio programming that is available on the same Transport Program number, and within that Program, the same audio stream (indentified by Language Descriptor, “LD”), at the same start-time and duration each day, for one or more specified days of the week.* A show episode is one single day’s airing of that Show. A shift (or Showshift) of a show episode is an instance where an episode is recorded and then played back on one of the Decoders (ports) at some later time, lasting for the same duration. The only restriction on the time for playback is that it must start after, but less than one full week after, the original recording of the episode. Note that a shift definition may define shifts of one or more episodes, but all must be from the same Show. * Note that these show definitions, understood correctly, provide much flexibility on re-airing all or portions of syndicated shows. For instance, a Show could be defined as the air’ing of Clark Howard on the satellite on Program 2, Audio LD =204, M-F at 1:00pm Eastern for 3 hours duration. But since Mr. Howard starts each hour somewhat independently of the others, a Show definition like this would also be valid: Program 2, Audio LD =204, Mon-Tues only, 2:00pm Eastern for 1 hour. It is only the imagination of the user which limits how the actual syndicated shows can be defined as Shows for purposes of i6420 ShowShifting. Setup ShowShifting, is a friendly interface to the iPump6420 Local Scheduler. It allows users to setup Shows and Showshift definitions. These definitions become *.json files stored to the i6420 /u/user/.sysconfig/shows and …showshifts directories, respectively. These definitions are then processed into Local Scheduler events. These Scheduler events can be seen in the local web interface. Later, the Scheduler directs the episode recordings and playbacks. During these recordings and playbacks, the local web ShowShift interface allows the user to monitor their status. Figure 3-13 shows an example of a local web Showshift show definition screen, while Figure 3-20 (below) shows a showshift definition screen. A similar interface is also provided to the Compel uplink control system. By creating and downloading *.json files defining shows and shifts, Compel may control ShowShifting on remote i6420s. While doing this, Compel may allow local users the right only to monitor progress, or the local user may be given permission to both setup and monitor the ShowShift functions. However they are created, Compel defines new Return Path reports that allows those definitions to be returned to the uplink for diagnostics and audits. Operation In operation, the Showshift episode recordings always create two files: An MPEG-audio *.mp2 file for the recorded audio track, and a text *.evt file for the Events file. These are both www.wegener.com 800070-01 Rev B Chapter 3, Page 96 iPump 6420 User’s Manual stored to the /u/user/showshifts directory. In the Events file, all Compel commands which were associated with the audio stream while being recorded are themselves recorded. These are stored with precise timestamps indicating the exact time the command is to be executed, relative to the beginning of the episode. For instance, if a Associated Audio Compel command to play a playlist is encountered, and if the playlist and its referenced files exist, then a playlist insert is done in the live audio track. This is done during the playback, just as is done in normal operation if receiving the original live satellite broadcast. In addition, for every audio outage seen in the audio stream during recording, an Event is listed, showing the start and duration of the outage. The significance of this on playback is this: For short outages, the Decoder will output silence. For outages exceeding a threshold (“LOS threshold”), the Decoder will, after a delay (“LOS delay”), play audio from a playlist named “LOA”.* Note that the audio outages may be from any source, whether the unit is reboot, the satellite carrier fades out, uplink failure, or any other event that prevents valid MPEG audio from being available to the record process. * Called LOA only to differentiate from the already used “LOS”. The limits on ShowShift capabilities are as follows: Even while all three Decoders (ports) may be busy playing live audio, or playing back shifted Showshift episodes, or playing other file audio, the i6420 may support two simultaneous Showshift episode recordings. This restriction should be enforced in the user web interface, but if an expected Show episode fails to record, the user should check for conflicts. Note that a showshift playback is considered permanent while it is in progress. If the unit should reboot during a showshift playback, then playback resumes if not completed. But because Showshifting depends on the Local Scheduler, the unit must be up and running at the show episode record start time and at the shift playback start time. If either is missed, the episode may not record, or it may not play back. When Showshift episode playback finally does end, on a Decoder, then that Decoder resumes its normal permanent activities. If any Compel commands arrive during playback that are Associated with the audio stream which is the normal permanent setting for that Decoder, then these are discarded (if no other recording is taking place). Compel commands directed to the unit itself are always obeyed, regardless of ShowShift activities, except that if the permanent assignment for the Decoder doing playback changes, that change only takes affect after the episode playback is completed. Note that it is the showshift definitions that end up driving iPump6420 actions. For any episode of a defined Show, if there are no showshifts defined at the start time of the episode, then that episode is not recorded! During ShowShift ongoing operations, many recorded files will be created, both *.mp2 and *.evt. The name of each will include the creation-date. A cleanup function will run each day, using that date and a user-set expiration time. Those files that exceed the allowed age will be automatically deleted. Logging of ShowShift operations is similar to normal operation. When a record or playback starts or ends, there will be an Ops Log entry. During playback, if any cue relay closures, those are also logged. During playback, if any local file or playlist inserts, those are logged to the Asrun log. ShowShifting authorizing keyfile names ShowShifting authorizing keyfiles are named serialnumber-showshift.pem. User Indications and controls The relevant indicators are: www.wegener.com 800070-01 Rev B Chapter 3, Page 97 iPump 6420 User’s Manual 1. The RECORD LED is on during ShowShift episode recordings 2. The PLAYBACK LED is on during ShowShift episode playback on any Decoder The new relevant user controls are: 1. Create a show definition 2. Edit a show definition 3. Delete a show definition (not allowed if showshifts depend on this!) 4. Create a showshift definition (the ref’d Show must be defined first!) 5. Edit a showshift definition 6. Delete a showshift definition 7. Abort a show episode playback (debug only) 8. Auto-deletion expiration time 9. Use the terminal command ‘cert report’ to check for ShowShift authorization www.wegener.com 800070-01 Rev B Chapter 3, Page 98 iPump 6420 User’s Manual Figure 3-20: ShowShift Shift-definition screen, local web interface 3.7.3. Time Zone Delay The new premium Time Zone Delay (TZD) feature allows network operators to save satellite bandwidth by only having to transmit the feed for the easternmost time zone in his coverage area. With Time Zone Delay, iPump6420s in the time zones further west can store and replay the same audio track, with associated Compel commands, at the same local time everywhere. In operation, this feature operates as a large rolling time-delay buffer, which can be set to delay and play on any delay up to 4 hours.* * Contact WEGENER Sales Dept about the option for larger time delay settings. To operate, either of the two main Audio Decoders (ports) on the i6420, #1 or #2, needs to have a permanent assignment to a valid audio stream in the currently-received Transport. Then Time Zone Delay acts like a permanent “add-on” setting. When first activated, the normal live audio track will continue to play and the associated Compel commands for inserts and relay closures will continue to execute. However, the unit will also begin recording that audio and the associated Compel commands, in a manner similar to that done with ShowShifting (see Section 3.7.2). When the total content recorded reaches the value of the TZ delay time, then the i6420 www.wegener.com 800070-01 Rev B Chapter 3, Page 99 iPump 6420 User’s Manual will switch from playing out the “live” content to playing out “live delayed” content. From that point on, the unit will continue to play audio from that stream and execute Compel commands associated with that audio, but both delayed, by the TZ delay time, from their original transmission over the satellite. If the user wishes to change the TZ delay value, or change the audio stream assigned to that Decoder (port), then the TZD system re-initializes from the top, starting over. Again, it plays true live audio while “charging up” its buffer, and then, when that buffer is full, resumes on live delayed audio. If the unit reboots during operation, then the recording process will note the outage, but the playback process will resume working on the content that is still exactly the TZ Delay in age. For that unit reboot, or any other such outages (e.g. carrier fades), an Event will be written into the rolling event buffer, and, when the unit comes around to the time to play that, it will operate in the same manner as a shifted show episode (see ShowShifting section 3.7.2), using either silence and/or the LOA playlist as a filler. In addition to this recovery mechanism, TZ Delay features another level of protection. At user-set intervals, an audit is done over the content recorded for the previous interval.* If the amount of audio content lost exceeds a userset threshold, then TZ Delay re-initializes from the top, starting over. * These intervals must divide evenly into a 24 hour day and should be set equal to or less than the TZ delay time. Timezone Delay authorizing keyfiles are named serialnumber-tzdelay.pem. The relevant indicators are: 1. The RECORD LED is on during TZ Delay 2. The PLAYBACK LED is on once TZ Delay has a full buffer and is playing delayed content The new relevant user controls are: 1. Set TZ Delay on a Decoder (port) 2. Set content audit interval 3. Set content audit threshold (some portion of the above interval) 4. Use the terminal command ‘cert report’ to check for TimeZone Delay authorization 3.7.4. MP3 Codec For a small added license fee, standard iPump6420s may be upgraded to support MPEG 1, Layer 3 audio files, commonly called “mp3” files. These files are treated no differently than the normally-supported mp2 and wave files. They are playable discretely, or as part of playlists, where they may be combined with the other audio file types. Note that all forms of ID3 tags are supported, either Version 1, or 2, both, or no Tag at all (see spec Section 1.4). MP3 authorizing keyfiles are named serialnumber-mp3.pem. The new relevant user controls are: 1. Use the terminal command ‘cert report’ to check for mp3 authorization www.wegener.com 800070-01 Rev B Chapter 3, Page 100 iPump 6420 User’s Manual Chapter 4: MAINTENANCE AND TROUBLESHOOTING This chapter gives information on maintenance and troubleshooting of the iPump 6420. Table of Contents 4.1. Maintenance .......................................................................................................... 102 4.2. Troubleshooting .................................................................................................... 102 4.2.1. Failure to acquire a carrier .............................................................................. 102 4.2.2. Failure to get Compel control over satellite.................................................... 103 4.2.3. Failure to get Compel control over internet.................................................... 103 4.2.4. Failure to get live audio play on a Decoder output......................................... 103 4.2.5. Failure to get file downloads over satellite ..................................................... 104 4.2.6. Failure to get file downloads over internet (HTTP)........................................ 104 4.2.7. Failure to play file inserts on a Decoder ......................................................... 104 4.2.8. Failure to play playlists................................................................................... 105 4.2.9. Failure to get local web connection ................................................................ 105 4.2.10. Failure to get Return Path reports ................................................................... 105 4.2.11. Failure to upgrade application software.......................................................... 106 www.wegener.com 800070-01 Rev B Chapter 4, Page 101 iPump 6420 User’s Manual 4.1. Maintenance Maintenance of the iPump 6420 is limited to keeping the chassis clean and ensuring that cables remain firmly connected. Occasionally wipe the exterior with soft, damp cloth to remove any accumulated dust and dirt, in order to keep the air vents clear. Occasionally monitor the unit’s temperature indication to see that it remains fairly constant while in use in a static location. A sudden increase in the baseline daily temperature, with no other explanation, may indicate a failure in an internal ventilation fan. If the unit temperature increases, and this may be attributable to a hotter ambient environment, then it is suggested that some effort be made to improve the local cooling. The iPump 6420 will give a much longer operating lifetime if kept cool. Occasionally monitor the unit for any Warnings about over-temperature or HDD problems. This is especially important if the HDD has seen more than 5 years of operation. The iPump 6420 incorporates security labels over some of the chassis screws. There are no user-serviceable components within the iPump 6420. Tampering with security labels or opening the unit will void your warranty, unless you are given written permission by WEGENER Customer Service or some other authorized WEGENER representative. If you have any questions, contact WEGENER’s Customer Service Department at the street address, email address, or phone numbers listed under Customer Service. 4.2. Troubleshooting When the common system problems occur, and they will, it is best to first consult the first three chapters of this Manual. After that, look for your problem in the following subsections and then review the checklists given. Following that, if there is still a problem, call WEGENER Customer Service for assistance. 4.2.1. Failure to acquire a carrier 1. Sure you do not have carrier lock? Check CARRIER LED. 2. Is signal level displayed on Front-panel between 10 and 90? If only 0, then functioning LNB is probably not connected to the i6420, or i6420 internal receiver card is failed. 3. RF input cable securely attached? 4. External LNB powered with DC? Is LNB DC from unit ON? 5. Correct tuning parameters: Carrier frequency, data-rate, FEC ratio? 6. Are carrier ID tags required? Is carrier tag set correctly in i6420? 7. Can other receivers on same antenna lock to this carrier? www.wegener.com 800070-01 Rev B Chapter 4, Page 102 iPump 6420 User’s Manual 8. Can other receivers anywhere lock to this carrier? Any of these i6420s? 9. Does i6420 Compel header setting match to Compel header borne on this carrier? 10. Is carrier encrypted? 11. Does it have compatible modulation. If DVB-S2, is your i6420 compatible? Is it a DVB carrier at all? 4.2.2. 1. 2. 3. 4. 5. Failure to get Compel control over satellite Sure you have carrier lock? Check CARRIER LED. Sure you are not getting Compel? Check COMPEL (or “NETWORK”) LED. Compel PID set correctly? Does i6420 Compel header setting match to Compel header borne on this carrier? Can Compel control other receivers on this carrier? Other i6420s? Other i6420s right on Transport output from WEGENER UMX5010? 4.2.3. Failure to get Compel control over internet 1. Sure you have internet connection? 2. Are you set to receive Compel over internet of over satellite? This setting, the polltime, and the server IP addresses are all factory settings that can be changed by advanced users with debug access. 3. Sure you are not really getting Compel over internet? It is a polled system. Have Compel send a dummy command, such as a grouping command, and wait for the polling interval to expire. Does the COMPEL LED ever flash? 4. Which port, LAN or WAN, are you using to connect to remote Compel server? 5. Check IP address, netmask, and Gateway of port you are using. IP address filtered by netmask must match Gateway address. And Gateway address must be assigned to a router that an “reach” the internet. 6. Can other devices on same local network reach Compel server by telnet on port 80? 7. Can other i6420s anywhere get Compel-over-internet? 8. If not using direct IP connection, but modem, is phone number, PPP username, and PPP password correct? 9. If using a modem, can you manually dial the number for the uplink modem server? 10. Can other i6420s dial in and connect by PPP through this modem server for Compel-over-internet? 4.2.4. Failure to get live audio play on a Decoder output 1. 2. 3. 4. 5. Sure you have carrier lock? Check CARRIER LED. Sure you are on the correct carrier? Is your audio output wired correctly to be able to listen? Have you connected up AES3 digital audio instead of analog audio, OR vice versa? Are you playing live audio to any of the 3 Decoders? Check SERVICES LED. Check the other audio outputs. 6. Are you set to correct Program? 7. If Program is OK, are you set to correct Audio Language Descriptor (LD)? 8. Is your audio output command muted? 9. Are you in Recovery Mode, waiting on the Compel stream? 10. Can any i6420 monitor this audio stream? www.wegener.com 800070-01 Rev B Chapter 4, Page 103 iPump 6420 User’s Manual 11. Can any IRD of any kind monitor this audio stream? 12. On a stream analyzer, is there any activity on that audio PID? 4.2.5. Failure to get file downloads over satellite 1. 2. 3. 4. 5. Sure you have carrier lock? Check CARRIER LED. Are getting Compel? Check COMPEL LED. Sure you are on the correct carrier? Check MPE/IP PID setting matches your uplink. When Compel sends the MADD command, does your COMPEL LED flash? If not, it may not be getting addressed to your i6420. 6. Does your DOWNLOAD LED come on at all? If not, the i6420 is probably not seeing the first file packet with the metadata. 7. Sure you are not actually getting the file download? Check with uplink control on the path/filename used. 8. Can any other i6420 get file downloads, especially the same downloads? Make sure to address another known-working unit at the same time with a download and observe both. 4.2.6. Failure to get file downloads over internet (HTTP) 1. Because of the similarities in the missions, do the same checks as in sections 4.2.3 and 4.2.10. Can you get Compel over internet (if applicable) and send Return Path reports OK? 2. Are you getting Compel commands to request HTTP downloads? When the uplink says it sends the command, verify the COMPEL LED flashes (or flashes when the unit polls the Compel server, for Compel-over-internet). 3. Can other i6420s receive HTTP file downloads OK? 4.2.7. Failure to play file inserts on a Decoder 1. Are you listening to live satellite audio on this decoder now? If not, your wiring may be wrong, or Decoder turned OFF or muted. 2. Sure that the file insert did not actually play? The PLAYBACK LED comes on during play. 3. Sure you are getting Compel, if that is where the command originated? 4. If not playing from Compel, can you play the file from local web? 5. Check that you actually have the file resident on the unit, and you have path/filename correct in the command? 6. Did the file get loaded to the i6420 very recently? If so, it may not yet be registered in the database. 7. When other i6420s are commanded to play this file, are they OK? 8. Is the file playable? Can other i6420s play this file? Can you play this file from Windows Media Player? See spec section 1.4 for playable file limitations. 9. If the file is mp3, are you authorized? 10. If you are using a random keyword selector, are there playable files in the target i6420 directory? www.wegener.com 800070-01 Rev B Chapter 4, Page 104 iPump 6420 User’s Manual 4.2.8. Failure to play playlists 1. Use the list for file inserts above to first check for basic file insertion problems. 2. Double-check the playlist play command for the playlist name. It must match up precisely on the i6420, whitespace and all. 3. Check that your playlist exists. Use the Playlist tab in local web interface. 4. If the playlist play is commanded from Compel, try to play it from the local web. 5. Check that the files you expect to hear are actually in the playlist and resident on the i6420. 6. Check the Profile that might be used to play the playlist from Compel. Is the atten profile used? If so, make sure that the attenuation is not set too high! 4.2.9. Failure to get local web connection 1. Sure that you are trying to access the i6420 at the LAN port? The WAN port does not allow inbound connections. 2. Check the IP address setting on the LAN port, using the front-panel. Did you enter this correctly into your browser? 3. Check that the LAN port is connected to the local Ethernet switch by checking cable connection and looking at the small LEDs on the rear connector. Are they lit? Flashing? 4. Can you PING the i6420 LAN port from the PC hosting your browser? If not, there is no network connection. 5. If no network connection, check that your PC and i6420 are on the same network, as defined by their respective IP addresses and netmasks. 6. If no network connection, and the PC and i6420 are on differing networks, then they must communicate through a router. Is each set to reach the correct gateway router? Is there a network path between the routers, if they are different? After this and the above 2 steps, you are still unable to reach the i6420 from your PC, consult with appropriate IT personnel. 7. Is HTTP access turned OFF in your i6420? Double-check by asking Compel to turn it ON. If you are an advanced user, and can get a serial text terminal on the SERIAL M&C port, then set it ON using the debug ‘netsrvs http on’ command. (It is beyond this Manual scope to inform how to get debug access.) 4.2.10. Failure to get Return Path reports 1. If requested from Compel, are you sure you are getting Compel? Check COMPEL LED is ON. Check that you can address the i6420 from Compel by sending some other command, such as a grouping command. Verify COMPEL LED flashes. 2. When Compel requests the Return Path Status report, does the COMPEL LED flash? If not, the i6420 still never received the command. There may be a Compel/CSM problem. 3. Can you manually send a Return Path report by requesting using the ‘rpath sendrpt 0’ terminal command? This will send a Status report to the CSM function in Compel. Have the uplink personnel check for the incoming Status report (see Figure 3-1). www.wegener.com 800070-01 Rev B Chapter 4, Page 105 iPump 6420 User’s Manual 4. Can Compel order and receive Return Path Status reports from any other i6420s? If not, then the problem may be in the uplink control system or its IP setup. 5. Can a browser running on a PC on the same network with the i6420 reach an internet HTTP server, such as www.wegener.com (or, if no DNS, reach IP address 63.246.5.127)? If not, there is either no connectivity, or no connectivity on the HTTP port 80 from your site back to the internet. In this case, consult with appropriate IT personnel. 6. If internet connection is OK from the local Ethernet network, check that the i6420 has a good connection at the LAN or WAN port (whichever you are trying to use). Is there a connection causing the LEDs to light on the rear connector? 7. If the internet connection is OK from the local Ethernet network, is the i6420s IP address, netmask, and gateway set correctly? The gateway must be a router with internet access. 8. If not using direct IP connection, but modem, is phone number, PPP username, and PPP password correct? 9. If using a modem, can you manually dial the number for the uplink modem server? 10. Can other i6420s dial in and connect by PPP through this modem server for Compel-over-internet? 4.2.11. Failure to upgrade application software 1. Is the problem with application file downloads or switching to the downloaded (now backup) application? 2. If application file download problem, can you get content file downloads? If not, consult section 4.2.5. 3. If you can get other content file downloads, then application file downloads are only not accepted if the same app version is being loaded to the backup that is already resident in one of the two positions, primary or backup. To load the same version to both slots, consult WEGENER Customer Service. 4. If the problem is switching to the backup, be sure you have requested it by the correct version string, the preferred method to load the new application. 5. If the problem is switching to the backup, it may be marked as “bad”. If this version had been downloaded by Compel, and failed its self-test, then it will be marked “bad” and cannot be run. Re-download the application and, when you switch over to it, please be sure it can see Compel quickly and do not reboot the unit, at least for the first hour of operation! www.wegener.com 800070-01 Rev B Chapter 4, Page 106 iPump 6420 User’s Manual Chapter 5: CUSTOMER SERVICE This chapter gives information on the warranty and technical support available for the iPump 6420. Table of Contents 5.1. 5.2. Warranty ............................................................................................................... 108 Technical Support................................................................................................. 108 www.wegener.com 800070-01 Rev B Chapter 5, Page 107 iPump 6420 User’s Manual 5.1. Warranty The following warranty applies to all Wegener Communications products including the iPump 6420 Professional Audio Server: All Wegener Communications products are warranted against defective materials and workmanship for a period of one year after shipment to customer. Wegener Communications' obligation under this warranty is limited to repairing or, at Wegener Communications' option, replacing parts, subassemblies, or entire assemblies. Wegener Communications shall not be liable for any special, indirect, or consequential damages. This warranty does not cover parts or equipment which have been subject to misuse, negligence, or accident by the customer during use. All shipping costs for warranty repairs will be prepaid by the customer. There are no other warranties, express or implied, except as stated herein. 5.2. Technical Support If the unit should fail to perform as described, if you need help resolving problems with your iPump 6420, or for questions about obtaining service for your iPump 6400, please contact Wegener Communications Customer Service at (770) 814-4057, Fax (678) 624-0294, or email [email protected]. To return a product for service: 1. Obtain a Return Material Authorization (RMA) number by completing and faxing a copy of the RMA Request Form to (678) 624-0294. Or you may call or e-mail WEGENER at the contact information given just above. To get an RMA number, you must give us this information: 1) Unit model number (see pre-printed label, usually on the bottom of the unit; 2) Unit serial number (in running i6420, see frontpanel Home LCD screen, or also see same label displaying model number; and 3) Brief description of the problem. 2. To help us identify and control returned units, plainly write the RMA number on the outside of the product-shipping container. This will help us return your unit to you as quickly as possible. 3. Return the product, freight prepaid, to the address given below. It is best to use the original shipping container to optimally protect the unit. If unable to do so, then any substitute container must adequately protect the unit. WEGENER is not responsible for additional damage to the unit resulting from the use of an unsuitable shipping container. Service Department RMA# ________ Wegener Communications, Inc. 359 Curie Drive Alpharetta, GA 30005 Note: All returned material must be shipped freight prepaid. C.O.D. shipments will not be accepted. www.wegener.com 800070-01 Rev B Chapter 5, Page 108 iPump 6420 User’s Manual Appendix 1: TERMINAL COMMANDS Terminal Command Listing Note, this list in process of cleanup. Complete Listing of Available Diagterm Commands: Command - dec 1 audiosamplerate: Sets the output audio sample rate for the decoder Command - dec 2 audiosamplerate: Sets the output audio sample rate for the decoder Command - dec 3 audiosamplerate: Sets the output audio sample rate for the decoder Command - errors: type threshold - Set alarm threshold type: 'E' for Errored Seconds or 'C' for Continuity Errors (C is not supported in this release) threshold: Threshold when to decalre an alarm Command - HTTP PROXY addr: proxy_ip_addr Sets/displays the HTTP Proxy Address Command - HTTP PROXY enabled: 0|1 Disables/Enables the use of the HTTP proxy info Command - HTTP PROXY port: proxy_port Sets/displays the HTTP proxy port Command - ifconfig: Displays the current ethernet device(s) configuration Command - ipconfig: Displays the current ethernet device(s) configuration Command - lan gateway: Sets the network gateway for the LAN interface Command - lan ip: Set the unit's static LAN IP Address Command - lan mode: Sets the LAN addressing mode. DHCP, STATIC Command - lan setup: [ip] [subnet] Sets up IP address and subnet mask for the LAN port Command - lan subnet: Sets the unit's static LAN Subnet Mask Command - localtimezone: Set or display the local timezone. To set: Parameter must be a path to an exisitng binary zoneinfo timezone relative to the zoneinfo top-level directory. Command - margin: margin_offset - Set SNR margin offset Usage: MARGIN margin_offset margin_offset Range: 1.0 - 10.5 dB Command - MODEM passwd: passwd Sets the PPP password Command - MODEM phone: number Sets the dialout phone number Command - MODEM prefix: string Sets the dialout phone number prefix Command - MODEM user: name Sets the PPP user name Command - net dhcpupdate: Tell devices in DHCP mode to poll for DHCP connection Command - net dns: [primary] [secondary] Sets the primary or secondary dns servers Command - net forcedns: Force specified dns servers to take precedence over dhcp dns servers Command - OAR report: Status of Current Active Recording Command - port: [number]> Select RBDS port RBDS Command: Select RBDS DB9 connector sets DataRate {Databits,Parity,Stopbits}. www.wegener.com 800070-01 Rev B Appendix 1, Page 109 iPump 6420 User’s Manual Usage: PORT [number] [datarate] [settings] number = 1 or 2 for the two RBDS DB9 connectors datarate = 1200, 2400, 9600 settings = (7|8)(N|E|O|M|S)(0|1|2) Command - PROFILE report: Reports all profile definitions Command - pw: passwd Sets the PPP password Command - RBDS report: Report RBDS Status Command - RD asi: Report ASI Diagnostics Command - RD ca: Conditional Access Command - RD rf: Report Carrier Acquisition/Tracking Diagnostics Command - RPATH relay: addr, Sets the address of the ReturnPath or mail proxy server. Command - rpath sendrpt: [report_id] Sends the specified report to the ReturnPath server. See addtional help for id values report_id: 0 - Health & Status Report (default) 1 - Asset Inventory Report 2 - As-run Log Report (with delete) 3 - As-run Log Report (no delete) 5 - Operational Log Report (with delete) 6 - Operational Log Report (no delete) 7 - Return ShowShift Show Definitions 8 - Return ShowShift Shift Definitions 10 - Return OAR files Command - RPATH send: [report_id] Sends the specified report to the ReturnPath server. See addtional help for id values report_id: 0 - Health & Status Report (default) 1 - Asset Inventory Report 2 - As-run Log Report (with delete) 3 - As-run Log Report (no delete) 5 - Operational Log Report (with delete) 6 - Operational Log Report (no delete) 7 - Return ShowShift Show Definitions 8 - Return ShowShift Shift Definitions 10 - Return OAR files Command - rpath srvraddrbackup: addr, Sets the backup address of the ReturnPath or mail proxy server. Command - rpath srvraddr: addr, Sets the address of the ReturnPath or mail proxy server. Command - RP ca: Conditional Access Command - RP rec: Report Auto Recovery status Command - RP rf: Report RF Parameters Command - rrbds: Report RBDS Status Command - R c: Report Carrier Status Command - r groups: Report list of groups (not entire table) Command - r g: [pagel] Report COMPEL Group Table (or page of it) www.wegener.com 800070-01 Rev B Appendix 1, Page 110 iPump 6420 User’s Manual Command - R http: Report HTTP Information Command - R ns: Report Network Services Status Command - r oar: Status of Current Active Recording Command - R profile: Reports all profile definitions Command - R p: Report Configuration Information Command - R r: Report Relays Status Command - r sched: Scheduler status Command - R st: Report Preset Table Command - R s: Report Settings Status Command - r trigger: Trigger report Command - sched stat: Scheduler status Command - setlnb: Set the LNB LO Frequency LO_freq : 0 - 14000.00 MHz LO_alias : C, KU, ELKU, EHKU Command - SNMP community: Set SNMPv2 Community Access String Command - snr: margin_offset - Set SNR margin offset margin_offset: 1.0 - 10.5 Command - stat sched: Scheduler status Command - trigger report: Trigger report Command - wan gateway: Sets the network gateway for the WAN interface Command - wan ip: Set the unit's static WAN IP Address Command - wan mode: Sets the WAN addressing mode. DHCP, STATIC, or WEG Command - wan setup: [ip] [subnet] Sets up IP address and subnet mask for the WAN port Command - wan subnet: Sets the unit's static WAN Subnet Mask addTermCmd( {"playlist", "delete"}, luaterm_delPlaylist ) addTermCmd( {"lua", "cmdargs"}, luaterm_dumpArgs ) addTermCmd( {"lua", "test1"}, (function (argv) print("lua command, test1!!!\n"); end) ) addTermCmd( {"core","config"}, (function (argv) table.foreach(SYS._hidden_vals,print); end ) ); addTermCmd( {"core","build"}, (function (argv) addTermCmd( {"core","luaopts"}, function (argv) addTermCmd( "ver", luaterm_verReport ) addTermCmd( "APPSTAT", luaterm_verReport ) addTermCmd( "sp.", luaterm_sp ) addTermCmd( "decoff", luaterm_withDecoder( __decoff ) ) addTermCmd( "decabort", luaterm_withDecoder( __decabort ) ) addTermCmd( "decrejoin", luaterm_withDecoder( __decrejoin ) ) addTermCmd( "decfollowtune", luaterm_withDecoder( __decfollowtune ) ) addTermCmd( "playfile", luaterm_withDecoder( __playfile ) ) addTermCmd( { "playlist", "play" }, luaterm_withDecoder( playPlaylist ) ) addTermCmd( { "record", "start" }, function( argv ) addTermCmd( "rec1" , function( argv ) addTermCmd("date", function() print(os.date()) end) addTermCmd( { "seq", "print" }, addTermCmd( { "seq", "validate" }, www.wegener.com 800070-01 Rev B Appendix 1, Page 111 iPump 6420 User’s Manual addTermCmd( 'syscmd', function(argv) print(os.backticks(unpack(argv))) end ) addTermCmd( { 'group', 'add' }, function( argv ) term_group_cmd( 2, argv[1] ) end ) addTermCmd( { 'group', 'del' }, function( argv ) term_group_cmd( 3, argv[1] ) end ) addTermCmd( {'r', 'dec'}, www.wegener.com 800070-01 Rev B Appendix 1, Page 112 iPump 6420 User’s Manual Appendix 2: SNMP MIBS A2.1. Root MIB WEGENER-ROOT-MIB DEFINITIONS ::= BEGIN IMPORTS MODULE-IDENTITY, enterprises FROM SNMPv2-SMI; wegener MODULE-IDENTITY LAST-UPDATED "200710312000Z" ORGANIZATION "Wegener Communications" CONTACT-INFO "Wegener Communications Customer Service 359 Curie Drive Alpharetta, GA 30005 [email protected] http://www.wegener.com" DESCRIPTION "This MIB Contains the root of the Wegener MIB tree" REVISION "200710312000Z" DESCRIPTION "V1.01 PCMI Release" ::= { enterprises 18137 } cable OBJECT IDENTIFIER ::= { wegener 1 } broadcast OBJECT IDENTIFIER ::= { wegener 2 } business OBJECT IDENTIFIER ::= { wegener 3 } pcmiData OBJECT IDENTIFIER ::= { wegener 4 } pcmiInfo OBJECT IDENTIFIER ::= { wegener 5 } dtv7xx OBJECT IDENTIFIER ::= { cable 1 } END www.wegener.com 800070-01 Rev B Appendix 2, Page 113 iPump 6420 User’s Manual A2.2. PCMI MIB WEGENER-PCMI-MIB DEFINITIONS ::= BEGIN CONF IMPORTS MODULE-IDENTITY, OBJECT-TYPE, NOTIFICATION-TYPE, FROM SNMPv2-SMI MODULE-COMPLIANCE, OBJECT-GROUP, NOTIFICATION-GROUP FROM SNMPv2TEXTUAL-CONVENTION DisplayString, INTEGER TRAP-TYPE wegener FROM FROM FROM FROM SNMPv2-TC RFC1213-MIB RFC-1215 WEGENER-ROOT-MIB ; ----------------------- PCMI Data Module ----------------------pcmiData MODULE-IDENTITY LAST-UPDATED "200710312000Z" ORGANIZATION "Wegener Communications" CONTACT-INFO "Wegener Communications Customer Service 359 Curie Drive Alpharetta, GA 30005 [email protected] http://www.wegener.com" DESCRIPTION "This MIB contains information exported by the common product PCMI framework" REVISION DESCRIPTION "200710312000Z" "V1.01 PCMI Release" ::= { wegener 4 } -- PCMI_GRP_UNIT (indexes: 0) unitGroup OBJECT IDENTIFIER ::= { pcmiData 1 } -- M_SERIAL_NO serialNo OBJECT-TYPE SYNTAX INTEGER MAX-ACCESS read-only STATUS mandatory ::= { unitGroup 1 } -- M_SOFTWARE_VERSION softwareVersion OBJECT-TYPE SYNTAX DisplayString (SIZE (0..255)) MAX-ACCESS read-only STATUS mandatory ::= { unitGroup 2 } -- M_BACKUP_SOFTWARE_VERSION www.wegener.com 800070-01 Rev B Appendix 2, Page 114 iPump 6420 User’s Manual backupsoftwareVersion OBJECT-TYPE SYNTAX DisplayString (SIZE (0..255)) MAX-ACCESS read-only STATUS mandatory ::= { unitGroup 3 } -- M_LOCAL_CONTROL_STATUS localControlStatus OBJECT-TYPE SYNTAX INTEGER MAX-ACCESS read-only STATUS mandatory DESCRIPTION "Local control allows the local user to change unit settings. If Local control is not enabled, certain unit settings may only be modified by the uplink controls stream (Compel)." ::= { unitGroup 5 } -- M_UNIT_LABEL unitLabel OBJECT-TYPE SYNTAX DisplayString (SIZE (0..255)) MAX-ACCESS read-only STATUS mandatory ::= { unitGroup 6 } -- M_INTERN_TEMP internTemp OBJECT-TYPE SYNTAX INTEGER MAX-ACCESS read-only STATUS mandatory ::= { unitGroup 8 } -- M_MODEL_NUM modelNum OBJECT-TYPE SYNTAX DisplayString (SIZE (0..255)) MAX-ACCESS read-only STATUS mandatory ::= { unitGroup 9 } -- M_USW_VERSION uswVersion OBJECT-TYPE SYNTAX DisplayString (SIZE (0..255)) MAX-ACCESS read-only STATUS mandatory ::= { unitGroup 17 } -- PCMI_GRP_TUNER (indexes: 0) tunerGroup OBJECT IDENTIFIER ::= { pcmiData 2 } -- M_AGC_STATUS agcStatus OBJECT-TYPE SYNTAX INTEGER { www.wegener.com good(0) high(1) low(2) 800070-01 Rev B Appendix 2, Page 115 iPump 6420 User’s Manual } MAX-ACCESS read-only STATUS mandatory ::= { tunerGroup 1 } unknown(3) goodHigh(4) goodLow(5) noRF(6) rfPresent(7) -- M_AVAILABILITY availability OBJECT-TYPE SYNTAX INTEGER MAX-ACCESS read-only STATUS mandatory DESCRIPTION "In tenths of a percentage" ::= { tunerGroup 2 } -- M_FADES fades OBJECT-TYPE SYNTAX INTEGER MAX-ACCESS read-only STATUS mandatory ::= { tunerGroup 3 } -- M_GLITCHES_SINCE_SIGNAL_LOSS glitchesSinceSignalLoss OBJECT-TYPE SYNTAX INTEGER MAX-ACCESS read-only STATUS mandatory ::= { tunerGroup 4 } -- M_AVG_EBNO avgEbno OBJECT-TYPE SYNTAX INTEGER MAX-ACCESS read-only STATUS mandatory DESCRIPTION "Average EbNo in tenth of a dB" ::= { tunerGroup 5 } -- M_INSTANT_EBNO instantEbno OBJECT-TYPE SYNTAX INTEGER MAX-ACCESS read-only STATUS mandatory DESCRIPTION "Instant EbNo in tenth of a dB" ::= { tunerGroup 6 } -- M_TIME_SINCE_FIRST_ACQ timeSinceFirstAcq OBJECT-TYPE SYNTAX TimeTicks MAX-ACCESS read-only STATUS mandatory DESCRIPTION www.wegener.com 800070-01 Rev B Appendix 2, Page 116 iPump 6420 User’s Manual "Time since first Acquisition" ::= { tunerGroup 9 } -- M_TIME_SINCE_LAST_ACQ timeSinceLastAcq OBJECT-TYPE SYNTAX TimeTicks MAX-ACCESS read-only STATUS mandatory DESCRIPTION "Time since last Acquisition" ::= { tunerGroup 10 } -- M_M_RF_LVL_0_100 rfLvl0100 OBJECT-TYPE SYNTAX INTEGER MAX-ACCESS read-only STATUS mandatory ::= { tunerGroup 14 } -- M_GLITCHES_IN_1_MIN glitchesIn1Min OBJECT-TYPE SYNTAX INTEGER MAX-ACCESS read-only STATUS mandatory DESCRIPTION "Num. Glitches over last Minute" ::= { tunerGroup 16 } -- M_M_GLITCHES_IN_5_MIN glitchesIn5Min OBJECT-TYPE SYNTAX INTEGER MAX-ACCESS read-only STATUS mandatory DESCRIPTION "Num. Glitches over Last 5 Minutes" ::= { tunerGroup 17 } -- M_HI_EBNO hiEbno OBJECT-TYPE SYNTAX INTEGER MAX-ACCESS read-only STATUS mandatory ::= { tunerGroup 18 } -- M_LO_EBNO loEbno OBJECT-TYPE SYNTAX INTEGER MAX-ACCESS read-only STATUS mandatory ::= { tunerGroup 19 } -- M_RF_HIGH_ERROR_RATE rfHighErrorRate OBJECT-TYPE SYNTAX INTEGER { false(0) true(1) } www.wegener.com 800070-01 Rev B Appendix 2, Page 117 iPump 6420 User’s Manual MAX-ACCESS read-only STATUS mandatory ::= { tunerGroup 195 } -- M_EBNO_AT_MARGIN_LVL ebnoAtMarginLvl OBJECT-TYPE SYNTAX INTEGER { false(0) true(1) } MAX-ACCESS read-only STATUS mandatory ::= { tunerGroup 199 } -- M_CARRIER_STATUS carrierStatus OBJECT-TYPE SYNTAX INTEGER { locked(0) notLocked(1) noSignal(2) signalOverload(3) } MAX-ACCESS read-only STATUS mandatory ::= { tunerGroup 64 } -- PCMI_GRP_SETTINGS (indexes: 1) settingsGroupTable OBJECT-TYPE SYNTAX SEQUENCE OF settingsGroupEntry MAX-ACCESS not-accessible STATUS mandatory ::= { pcmiData 3 } settingsGroupEntry OBJECT-TYPE SYNTAX settingsGroupEntry MAX-ACCESS not-accessible STATUS mandatory INDEX { settingsGroupIndex } ::= { settingsGroupTable 1 } settingsGroupEntry ::= SEQUENCE { settingsGroupIndex INTEGER (0..65535) } -- index 0 (main) settingsGroupIndex OBJECT-TYPE SYNTAX INTEGER { commanded(1) } www.wegener.com 800070-01 Rev B lastsuccess(253) perm(254) current(255) temp(256) Appendix 2, Page 118 iPump 6420 User’s Manual MAX-ACCESS read-only STATUS mandatory ::= { settingsGroupEntry 1 } -- M_SYMBOL_FORMAT symbolFormat OBJECT-TYPE SYNTAX INTEGER { asi(0) qpsk(2) psk8(3) qam16(4) turboqpsk(5) turbopsk8(6) turboqam16(7) dvbs2qpsk(8) dvbs2psk8(9) } MAX-ACCESS read-only STATUS mandatory ::= { settingsGroupEntry 2 } -- M_INPUT_NUMBER inputNumber OBJECT-TYPE SYNTAX INTEGER MAX-ACCESS read-only STATUS mandatory ::= { settingsGroupEntry 3 } -- M_CARRIER_FREQUENCY carrierFrequency OBJECT-TYPE SYNTAX INTEGER MAX-ACCESS read-only STATUS mandatory DESCRIPTION "Units (Mhz) / Factor (.001)" ::= { settingsGroupEntry 4 } -- M_DATA_RATE dataRate OBJECT-TYPE SYNTAX INTEGER MAX-ACCESS read-only STATUS mandatory ::= { settingsGroupEntry 5 } -- M_FEC_RATE fecRate OBJECT-TYPE SYNTAX INTEGER { www.wegener.com fec12(0) fec23(1) fec34(2) fec56(3) fec78(4) fec89(5) fec14(6) turbo1fec34(7) turbo2fec34(8) fec13(9) 800070-01 Rev B Appendix 2, Page 119 iPump 6420 User’s Manual fec25(10) fec35(11) fec45(12) fec910(13) } MAX-ACCESS read-only STATUS mandatory ::= { settingsGroupEntry 6 } -- M_TAG_SITE tagSite OBJECT-TYPE SYNTAX INTEGER MAX-ACCESS read-only STATUS mandatory ::= { settingsGroupEntry 7 } -- M_PROGRAM_NUMBER programNumber OBJECT-TYPE SYNTAX INTEGER MAX-ACCESS read-only STATUS mandatory ::= { settingsGroupEntry 8 } -- M_LABEL label OBJECT-TYPE SYNTAX DisplayString (SIZE (0..255)) MAX-ACCESS read-only STATUS mandatory ::= { settingsGroupEntry 9 } -- M_VALID valid OBJECT-TYPE SYNTAX INTEGER MAX-ACCESS read-only STATUS mandatory ::= { settingsGroupEntry 10 } -- M_SETTINGS_LAST_UPDATE settingsLastUpdate OBJECT-TYPE SYNTAX INTEGER MAX-ACCESS read-only STATUS mandatory ::= { settingsGroupEntry 11 } -- M_POLARIZATION polarization OBJECT-TYPE SYNTAX INTEGER { horizontal(0) vertical(1) } MAX-ACCESS read-only STATUS mandatory ::= { settingsGroupEntry 14 } -- M_SYMBOL_RATE symbolRate OBJECT-TYPE SYNTAX INTEGER www.wegener.com 800070-01 Rev B Appendix 2, Page 120 iPump 6420 User’s Manual MAX-ACCESS read-only STATUS mandatory ::= { settingsGroupEntry 15 } srchAcqGroup OBJECT IDENTIFIER ::= { pcmiData 4 } -- M_IN_RECOVERY inRecovery OBJECT-TYPE SYNTAX INTEGER { false(0) true(1) } MAX-ACCESS read-only STATUS mandatory ::= { srchAcqGroup 192 } -- M_USING_BACKUP_SETTING usingBackupSetting OBJECT-TYPE SYNTAX INTEGER { false(0) true(1) } MAX-ACCESS read-only STATUS mandatory ::= { srchAcqGroup 193 } netconGroup OBJECT IDENTIFIER ::= { pcmiData 5 } -- M_COMPEL_DATA_STATUS compelDataStatus OBJECT-TYPE SYNTAX INTEGER { inactive(0) unknown(1) haveCompel(2) noCompel(3) noContainer(4) lostContainer(5) } MAX-ACCESS read-only STATUS mandatory ::= { netconGroup 64 } alarmsWarningsGroup OBJECT IDENTIFIER ::= { pcmiData 11 } -- M_NUM_ALARMS numAlarms OBJECT-TYPE SYNTAX INTEGER MAX-ACCESS read-only STATUS mandatory www.wegener.com 800070-01 Rev B Appendix 2, Page 121 iPump 6420 User’s Manual ::= { alarmsWarningsGroup 32 } -- M_NUM_WARNINGS numWarnings OBJECT-TYPE SYNTAX INTEGER MAX-ACCESS read-only STATUS mandatory ::= { alarmsWarningsGroup 33 } storageInfoGroup OBJECT IDENTIFIER ::= { pcmiData 15 } -- M_DISK_USAGE_GT_90 diskUsageGt90 OBJECT-TYPE SYNTAX INTEGER { false(0) true(1) } MAX-ACCESS read-only STATUS mandatory ::= { storageInfoGroup 192 } -- M_DISK_FAILURE diskFailure OBJECT-TYPE SYNTAX INTEGER { false(0) true(1) } MAX-ACCESS read-only STATUS mandatory ::= { storageInfoGroup 193 } descramGroup OBJECT IDENTIFIER ::= { pcmiData 18 } -- M_AUTHORIZED_STATUS authorizedStatus OBJECT-TYPE SYNTAX INTEGER { notEncrypted(0) authorized(1) notAuthorized(2) } MAX-ACCESS read-only STATUS mandatory ::= { descramGroup 14 } swDloadGroup OBJECT IDENTIFIER ::= { pcmiData 19 } -- M_REVERTED_TO_BACKUP revertedToBackup OBJECT-TYPE SYNTAX INTEGER { false(0) true(1) www.wegener.com 800070-01 Rev B Appendix 2, Page 122 iPump 6420 User’s Manual } MAX-ACCESS read-only STATUS mandatory ::= { swDloadGroup 193 } progListGroup OBJECT IDENTIFIER ::= { pcmiData 24 } -- M_PROG_NOT_IN_PAT progNotInPat OBJECT-TYPE SYNTAX INTEGER { false(0) true(1) } MAX-ACCESS read-only STATUS mandatory ::= { progListGroup 196 } -- M_PAT_STATUS patStatus OBJECT-TYPE SYNTAX INTEGER { inactive(0) unknown(1) havePAT(2) noPAT(3) lostPAT(4) } MAX-ACCESS read-only STATUS mandatory ::= { progListGroup 64 } -- PCMI_GRP_PROG_INFO (indexes: 1) progInfoGroupTable OBJECT-TYPE SYNTAX SEQUENCE OF progInfoGroupEntry MAX-ACCESS not-accessible STATUS mandatory ::= { pcmiData 25 } progInfoGroupEntry OBJECT-TYPE SYNTAX progInfoGroupEntry MAX-ACCESS not-accessible STATUS mandatory INDEX { progInfoGroupIndex } ::= { progInfoGroupTable 1 } progInfoGroupEntry ::= SEQUENCE { progInfoGroupIndex INTEGER (0..65535) } -- index 0 (main) progInfoGroupIndex OBJECT-TYPE SYNTAX INTEGER (0..65535) www.wegener.com 800070-01 Rev B Appendix 2, Page 123 iPump 6420 User’s Manual MAX-ACCESS read-only STATUS mandatory ::= { progInfoGroupEntry 1 } -- M_PMT_STATUS pmtStatus OBJECT-TYPE SYNTAX INTEGER { inactive(0) unknown(1) havePMT(2) noPMT(3) lostPMT(4) badPMT(5) } MAX-ACCESS read-only STATUS mandatory ::= { progInfoGroupEntry 129 } ----------------------- PCMI Info Module ----------------------- pcmiInfo MODULE-IDENTITY LAST-UPDATED "200710312000Z" ORGANIZATION "Wegener Communications" CONTACT-INFO "Wegener Communications Customer Service 359 Curie Drive Alpharetta, GA 30005 [email protected] http://www.wegener.com" DESCRIPTION "This MIB contains auxiliary information exported by the common product PCMI framework" REVISION DESCRIPTION "200710312000Z" "V1.01 PCMI Release" ::= { wegener 5 } unitInfoTable OBJECT-TYPE SYNTAX SEQUENCE OF unitInfoEntry MAX-ACCESS not-accessible STATUS mandatory DESCRIPTION "A table containing PCMI meta information." ::= { pcmiInfo 1 } www.wegener.com 800070-01 Rev B Appendix 2, Page 124 iPump 6420 User’s Manual unitInfoEntry OBJECT-TYPE SYNTAX unitInfoEntry MAX-ACCESS not-accessible STATUS mandatory INDEX { unitInfoMember unitInfoIndex unitInfoSubIndexOne } ::= { unitInfoTable 1 } unitInfoEntry ::= SEQUENCE { unitInfoMember INTEGER (0..255) } unitInfoMember OBJECT-TYPE SYNTAX INTEGER { serialNo(1) softwareVersion(2) backupSoftwareVersion(3) unitId(4) localControlStatus(5) unitLabel(6) productId(7) internTemp(8) modelNum(9) ac3Support(10) osdDecoderToUse(11) biosVersion(12) cpuType(13) dstObserved(14) localTimezoneOffset(15) featureSupported(16) uswVersion(17) unitPower(18) } MAX-ACCESS read-only STATUS mandatory ::= { unitInfoEntry 1 } unitInfoLastUpdated OBJECT-TYPE SYNTAX TimeTicks MAX-ACCESS read-only STATUS mandatory DESCRIPTION "Last update time for this member/index entry" ::= { unitInfoEntry 4 } unitInfoCmdSource OBJECT-TYPE SYNTAX INTEGER { unknown(1) compel(2) terminal(3) frontPanel(4) osd(5) recovery(6) } MAX-ACCESS read-only STATUS mandatory DESCRIPTION www.wegener.com 800070-01 Rev B Appendix 2, Page 125 iPump 6420 User’s Manual "Source of the last update" ::= { unitInfoEntry 5 } settingsInfoTable OBJECT-TYPE SYNTAX SEQUENCE OF settingsInfoEntry MAX-ACCESS not-accessible STATUS mandatory DESCRIPTION "A table containing PCMI meta information." ::= { pcmiInfo 3 } settingsInfoEntry OBJECT-TYPE SYNTAX settingsInfoEntry MAX-ACCESS not-accessible STATUS mandatory INDEX { settingsInfoMember settingsInfoIndex settingsInfoSubIndexOne } ::= { settingsInfoTable 1 } settingsInfoEntry ::= SEQUENCE { settingsInfoMember INTEGER (0..255), settingsInfoIndex INTEGER (0..65535) } settingsInfoMember OBJECT-TYPE SYNTAX INTEGER { symbolFormat(1) inputNumber(2) carrierFrequency(3) dataRate(4) fecRate(5) tagSite(6) programNumber(7) label(8) valid(9) settingsLastUpdate(10) polarization(13) symbolRate(14) } MAX-ACCESS read-only STATUS mandatory ::= { settingsInfoEntry 1 } settingsInfoIndex OBJECT-TYPE SYNTAX INTEGER (0..65535) www.wegener.com 800070-01 Rev B Appendix 2, Page 126 iPump 6420 User’s Manual MAX-ACCESS read-only STATUS mandatory ::= { settingsInfoEntry 2 } settingsInfoLastUpdated OBJECT-TYPE SYNTAX TimeTicks MAX-ACCESS read-only STATUS mandatory DESCRIPTION "Last update time for this member/index entry" ::= { settingsInfoEntry 4 } settingsInfoCmdSource OBJECT-TYPE SYNTAX INTEGER { unknown(1) compel(2) terminal(3) frontPanel(4) osd(5) recovery(6) } MAX-ACCESS read-only STATUS mandatory DESCRIPTION "Source of the last update" ::= { settingsInfoEntry 5 } settingsInfoIndication OBJECT-TYPE SYNTAX DisplayString (SIZE (0..255)) MAX-ACCESS read-only STATUS mandatory ::= { settingsInfoEntry 6 } END www.wegener.com 800070-01 Rev B Appendix 2, Page 127 iPump 6420 User’s Manual (This page intentionally left blank.) www.wegener.com 800070-01 Rev B Appendix 2, Page 128 iPump 6420 User’s Manual Appendix 3: FAULT CONDITIONS The following list is a compendium of the possible fault conditions. Where it makes sense, any of these may be masked to indicate as Alarms, Warning, or give no indication at all: Front Panel Message Possible Cause App Self-testing App SW D-load fail New application in self-test Download of application software failed so backup flash space still shows INCOMPLETE [until good download] Switch to backup application not allowed; either requested app version does not exist or the code image is corrupt or not available Audio PES data becomes unavailable (buffer underflow) for decoder number-# Audio PID not found for decoder number-# No audio PID found in PMT with assigned language descriptor for decoder number-# Audio output is command muted for decoder number-# PMT PID not found or data corrupt Serial number reported by the internal Secure Micro does not match unit serial number File to play/stream can't be opened Storage device is approaching maximum capacity Eb/No value less than sum of Threshold + Margin-evaluated over 10 sec. intervals File to play doesn't exist Number of incoming Error’d seconds in Transport exceeds fault threshold RF level may be too high for reliable operation Valid ID tags had been detected and used to allow carrier lock, but now are unavailable, preventing carrier re-acquisition after fades or reboots Carrier ID tag in satellite Transport does not match unit tag setting; may have acquired incorrect carrier Compel header in satellite Transport does not match unit Compel header setting; may have acquired incorrect carrier File to play/stream is an unsupported format LAN or WAN IP address conflicts with pre-existing host COMPEL PID packets lost (if valid COMPEL seen since signal acquisition and COMPEL disappeared for >2 minutes) RF level may be too low for reliable operation Got busy signal Defective Modem or unacceptable connection to Modem Called number didn't answer ASI Transport stream not detected on ASI Input No audio allocated to wildcard assigned to decoder number-# Carrier not yet acquired No COMPEL PID packets received >2 minutes, since signal acquisition App SW switch fail Audio Underrun Dec# Aud not found Dec# Aud not in PMT Dec# Aud CMD muted Dec# Bad PMT Bad Sec Micro SN Cannot Open File Disk Usage > 90% Eb/No Margin File Doesn't Exist High Error rate High RF level ID Tags lost ID Tag mismatch Invalid COMPEL Hdr Invalid File Format IP address conflict Lost COMPEL PID Low RF level Modem Busy Signal Modem Failure No Answer on Dialout No ASI stream No audio for Dec# No Carrier lock No COMPEL PID www.wegener.com 800070-01 Rev B Appendix 3, Page 129 iPump 6420 User’s Manual Front Panel Message Possible Cause No ID Tag found No carrier ID tag found on newly-acquired carrier; if carrier ID tag match is required, cannot access this Transport No Ethernet network detected at LAN port No dial tone on phone line No PAT (Program Association Table) found in initial Verify Transport [if a warning, while occurring & carrier/ASI still locked] No PMT (Program Map Table) found for Program listed in PAT PPP connection couldn't be established. No carrier lock and no RF power detected at RF input At unit boot-up, boot loader detects no valid application present to load and run; unit will be inoperative & needs to be returned for service PAT lost after first being verified Playlist to play doesn't exist PMT disappears or becomes corrupt Requested program number not listed in current PAT Auto-Recovery in progress User-requested application failed self-test and Unit reverted to Backup application [until next commanded app switch] Secure micro cannot be accessed at bootup in order to verify unit serial number Current settings derived from successful Auto- Recovery [until local or network user setting command] Unit temperature sensor detects very high internal temperature; operator needs to check that ventilation fans have not failed, vents are clear, and ambient temperature is not exceeded No LAN detected No Modem Dial Tone No PAT No PMT No PPP Connection No Signal No valid software PAT Disappeared Playlist Doesn't Exist PMT Disappeared Program not found Recovery Reverted to B-up app Sec Micro no resp Using backup setting Unit overheating www.wegener.com 800070-01 Rev B Appendix 3, Page 130 iPump 6420 User’s Manual 2009 Wegener Communications, Inc. All rights reserved. 800070-01 Rev. B Second Edition: July 2009 Wegener Communications, Inc. Technology Park/Johns Creek 11350 Technology Circle Duluth, GA 30097-1502 Phone: 770-814-4000 Fax: 770-623-0698 www.wegener.com 800070-01 Rev B