1
ENGLISH
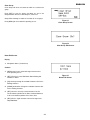
H. Change Lock-Out: Protects settings by disabling the SET
button.
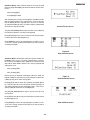
M. Sound Check Screen: can be used to walk test the performance area.
1. To engage lock-out press and hold the UP and DOWN
arrow keys together for 5 seconds, until the padlock symbol appears.
1. From the main display screen, press MENU twice to display the options screen, scroll down to Sound Check and
press set. The sound check screen will be displayed and
it includes the following elements.
2. The MENU button still allows different screens to be displayed but no settings can be changed and ClearScan
will not run.
2. Peak Hold Audio Meter - allows you to set the transmitter gain as high as possible for the application which
maximizes the signal to noise ratio. Sing, yell or play the
guitar at the loudest desired volume and adjust the gain
so the meter peaks between 50 and 100.
3. To reactivate the SET key, press and hold the UP and
DOWN keys again for 5 seconds until the padlock symbol disappears.
I. Continue Set Up: make certain the mixer or amplifier input
used for the REV is muted or turned down to a minimum level.
3. Low Hold RF Meter will tell you if you have adequate
coverage in the performance area. If the RF level drops
below 10 on the meter during a walk of the desired area,
reposition the antennas, or change the channel and
retest.
J. Plug an audio cable (not supplied) into the 3 pin XLR or 1/4
inch output of the receiver.
NOTE: The XLR connector is the preferred connection since the
output is balanced and will be more immune to noise for
longer runs of cable, although either can be used with good
results.
4. Drop Counter - will tell you if you are exceeding the
range or may have some interference problems to contend with. Ideally this count would be zero for the desired
performance area. If there are several squelch breaks
while walking the area, adjust and check the antennas
and re-walk.
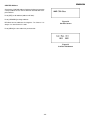
K. Voice or Guitar: The REV system guitar optimization mode
requires both the transmitter and receiver be placed into guitar mode.
5. Dropout Tone - Press the UP button and the speaker
symbol will change. Now when the receiver increments
the dropout counter, it will also send a 1 kHz audio tone
out the output so you can hear where on the stage the
drop occurs. Press DOWN to turn off the tone. The tone
will also deactivate when you return to the main display.
1. Press Menu twice to display the options screen, scroll
down to Audio Edit and press SET.
2. With the Audio Edit Screen displayed press SET until
Audio setting flashes.
3. Use UP/DOWN to select Voice or Guitar mode. The
default setting is Voice.
6. Left and Right Antenna Check - Press and hold the
SET button until the screen changes to two large meters
marked L and R. This screen is used to check the continuity of the left and right antennas. If the RF levels are
not approximately the same, check connections. Press
SET to return to Sound Check Screen.
4. Make certain the bodypack transmitter is in the same
mode.
5. Now refer ahead to transmitter setup and return to step
10 when that is completed.
6. With the transmitter on, speak into the microphone or
play the guitar. Turn up the level on the mixer or
amplifier until you are able to hear the desired signal.
If no audio is present, repeat setup and refer to the
troubleshooting section.
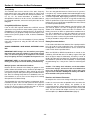
N. Squelch Adjustment - The squelch setting can be used to
maximize range or immunity to noise.
1. Turn the transmitter off and from the receiver Options
screen select Squelch and press SET.
L. Audio Output Level Adjustment: It may be necessary to
adjust the receiver output until the volume level from the
wireless system approximates the level of an equivalent
wired mic/instrument.
2. The current squelch setting will be displayed, the setting
will flash and (the tone coded portion of the squelch is
turned off in set mode to allow you to notice any changes
in the amplitude squelch setting).
1. From the main display screen, press MENU twice to display the menu screen, scroll down to Audio Edit and
press SET.
3. Adjust the squelch using the UP/DOWN keys and walk
test the unit. Maximum squelch (15) maximizes noise
immunity but limits the range. Minimum squelch (1) will
maximize the range but may allow noise at the end of
range.
2. Press SET to step through Mic/Line, Balanced (XLR Lvl)
and Unbalanced Audio (HiZ Lvl).
3. Use the UP and DOWN to adjust output levels when
flashing. The default settings are Mic and -18dB on the
outputs.
4
4. Repeat until desired range coverage is acceptable with
the maximum possible squelch.
Press SET a final time so nothing is flashing to save the
setting.
5. Press MENU to return to main screen.
-5-