1
Step 5: Set the camera date and time
After you select the camera language, the camera prompts you to
enter the current date and time. After you have set the camera’s
clock, it records the date and time at which you take each picture.
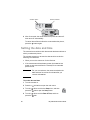
1 Turn the
dial to point to the date format, and then press
the
dial to change it. You can choose MDY (mm/dd/yyyy),
DMY (dd/mm/yyyy), or YMD (yyyy/mm/dd).
2 Turn the
dial to point to the date, and then press
the
dial.
3 Turn the
dial to change the number, and then press
the
dial to confirm it.
4 Set the remaining values in the same way.
5 To save your settings, select Exit. The image display turns off.
Your camera is now ready to take pictures.
Automatic power-off
To conserve battery power, the camera automatically turns off
after 5 minutes if you do not press a button.
Getting started
5