1
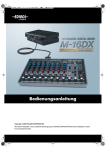
Workshop
M-16DX 16-Channel Digital Mixer
Using the M-16DX as a DAW Controller
© 2007 Roland Corporation U.S.
All rights reserved. No part of this publication may be reproduced in any form without the written permission of Roland Corporation U.S.
SONAR™ and SONAR LE™ are trademarks of Twelve Tone Systems, Inc. Twelve Tone Systems, Inc. is not associated or affiliated with Roland in any manner. Logic Pro™ is a trademark of Apple Inc.
Apple Inc. is not associated or affiliated with Roland in any manner. Live™ is a trademark of Ableton. Ableton is not associated or affiliated with Roland in any manner.
M16DXWS19
1
About the Workshop Booklets
The EDIROL M-16DX 16-Channel Digital Mixer delivers the power of digital
mixing to musicians at an incredibly affordable price. This crystal-clear 24-bit
digital mixer supports sample rates up to 96 kHz, and it’s extremely flexible,
with a wide range of analog and digital inputs and outputs, and effects. The
M-16DX’s USB connectivity makes it an ideal partner for a computer-based
digital audio workstation, and features such its pro EQ and the innovative
Room Acoustic Control make it an excellent live mixer as well.
We’ll assume you know how to operate your DAW. To learn about using it,
consult its documentation. We’ll also assume the M-16DX is connected to
your computer, and that both are powered-up.
Understanding the Symbols in This Booklet
Throughout this booklet, you’ll come across information that deserves
special attention—that’s the reason it’s labeled with one of the following
symbols.
Each M-16DX Workshop Series booklet focuses on one M-16DX topic, and is
intended as a companion to the M-16DX Owner’s Manual.
A note is something that adds information about the topic at hand.
The M-16DX Workshop booklets require M-16DX O.S. Version 2.00 or higher.
You can download the latest O.S. for free from www.RolandUS.com/EDIROL.
A tip offers suggestions for using the feature being discussed.
About This Booklet
With the M-16DX Operating System Version 2.00 or higher, the M-16DX can
act as a control surface for a DAW. You can use the M-16DX’s knobs and
buttons to control settings and operations on your digital audio workstation.
This booklet explains how. (To learn the M-16DX-DAW basics, see the Using
the M-16DX with a DAW Workshop booklet.)
Warnings contain important information that can help you avoid
possible damage to your equipment, your data, or yourself.
Hot Links
Each Workshop booklet is meant to be read in order from beginning
to end. However, if we mention another section—and you see this
arrow—you can click the arrow to jump there immediately.
The M-16DX’s Two DAW-Controller Modes
The M-16DX’s knobs and buttons can operate your DAW and the M-16DX at
the same time, or primarily the DAW. In
• Alt (for “Alternative”) mode—some of the M-16DX’s knobs and buttons
control DAW setting and operations, while others control the M-16DX’s.
Alternative mode is available for Twelve Tone Systems’ SONAR, SONAR
LE, Apple Logic Pro, and Ableton Live.
• Exc (for “Exclusive”) mode—where the M-16DX’s knobs and buttons
In the M-16DX’s Exclusive DAW-control mode, the knobs and
buttons shown here in red can operate the controls of your DAW.
primarily control the DAW, as shown to the left. Since it uses more
M-16DX knobs and buttons, Exclusive mode offers more control over
the DAW. Exclusive mode is available for SONAR/LE and Logic Pro.
2
When you enter DAW-control mode, the M-16DX’s own settings remain
as they were beforehand. When you leave the mode, the physical
positions of the knobs and buttons may therefore no longer reflect the
M-16DX’s current settings. You can move a knob or button, or power
the M-16DX off and on to get things to match up again.
With SONAR/LE, M-16DX DAW control is optimized for SONAR/LE 6.2
or higher. In this booklet, we’ll use in SONAR 7, since it’s the current
SONAR version. (The M-16DX Version 2 software’s M-16DX_v2_e1 PDF
contains instructions for using Alternative mode with earlier versions
of SONAR and SONAR LE.) Likewise, we’ll use Logic Pro 8 here, though
you can also use Logic Pro 7. We’ll explain how to use the M-16DX with
Live 6.
SONAR and SONAR LE Controlled Parameters
Track
level
Aux 1 Aux 2 Aux 3
send send send
Mute
Solo
Track
pan
Record Phase Write
arm switch
Aux 1 Aux 2 Aux 3
pan
pan
pan
Previous
measure
Next
measure
Except for the Previous measure and Next measure buttons, all of
the controls shown here affect the currently selected SONAR/LE track.
In SONAR/LE, the track that’s selected for DAW control has a colored strip at
its left edge.
The M-16DX_v2_e1 PDF also includes overlays you can print and attach
to your M-16DX to help you remember its DAW-control functions.
What DAW Control Gets You
You can select the track you want to control in either of two ways:
M-16DX DAW Control In SONAR and SONAR LE
• Select the tracks in SONAR/LE—by right clicking at the left edge of the
desired track, and highlighting the popup text, as shown here.
SONAR and SONAR LE Alternative Mode
Transport Operation
In Alternative mode, the M-16DX’s
CURSOR BWD and FWD, and
VALUE - and + buttons control
transport functions in SONAR/
SONAR LE, as shown on the
M-16DX display.
Stop
Play
Rewind
Record
• Press the M-16DX’s AUX 2 and AUX 1 buttons—to
select the next or previous, respectively, track.
Press STOP twice to return
to the top of the song.
3
M-16DX DAW Control In Logic Pro
SONAR/SONAR LE Exclusive Mode
What Controls What
Logic Pro Alternative Mode
Rewind
Previous Marker
Fast-Forward
Next Marker
Transport Operation
Stop
Play
Aux 2 send
Aux 3 send
Record
Loop
Write*
Aux 4 send
Pan
Aux 1 send
Record arm
Solo
Mute
Read*
* automation
for selected
track
Level
Previous Bank
Next Bank
In Alternative mode, the M-16DX’s
CURSOR BWD and FWD, and
VALUE - and + buttons control
Logic Pro transport functions, as
shown on the display once you’re
in Alternative DAW mode.
Stop
Play
Rewind
Record
Press STOP twice to return
to the top of the song.
Logic Pro Controlled Parameters
The M-16DX’s channel AUX 1 knobs control the volume faders of eight Logic
Pro tracks at a time.
The controls shown here for Channel 1 are available on each
M-16DX channel for controlling the corresponding track in SONAR/LE.
The M-16DX controls eight tracks at a time in Exclusive mode in SONAR/LE.
You can select the bank of eight tracks you want to control in two ways:
• Select the tracks in SONAR/LE—by right clicking at the left edge of the
first desired track, and highlighting the popup text, as shown here.
• Press the M-16DX’s AUX 2 and AUX 1 buttons—to
select the next or previous, respectively, set of
eight tracks.
To jump now to the setup instructions for SONAR and SONAR
LE, click here.
4
Each channel’s SELECT button solos or un-solos the corresponding Logic
Pro track.
Logic Pro Exclusive Mode
What Controls What
Rewind
Previous Marker
Fast-Forward
Next Marker
Stop
Play
Record
Loop
Write*
Read*
We’re showing all of the tracks’ Solo buttons turned on here so you
can see them—soloing everything is pointless, of course.
You can select the eight tracks you want to control in either of two ways:
• Select the first of the eight tracks in Logic Pro—by
clicking its name in the Arrange window.
Recordenable
Solo
Mute
Master
Volume
* automation
for selected
track
Level
Previous Bank
Next Bank
Record-enable, Solo, Mute, and Level controls are available on each
M-16DX channel for controlling the corresponding track in Logic Pro.
• Press the M-16DX’s AUX 2 and AUX 1 buttons—to
select the next or previous bank of eight tracks.
In Logic Pro, you can see the currently selected set of
eight tracks—each track has a gray bar to its left.
If you’d like to jump now to the setup instructions for Logic
Pro, click here.
Here we can see Tracks 1-8 selected.
5
Setting Up the M-16DX as a DAW Controller
Live Alternative Mode
Transport Operation
In Alternative mode, the
M-16DX’s CURSOR BWD and
FWD, and VALUE - and + buttons
control Live transport functions,
as shown on the display once
you’re in Alternative DAW mode.
Stop
Play
Rewind
Record
Press STOP twice to return
to the top of the song.
We’ll assume that you’ve installed the necessary M-16DX drivers for
your computer, and have successfully established audio connections
between the M-16DX and your DAW, as described in the Using the
M-16DX with a DAW Workshop booklet and the Workshop booklet
specific to your DAW. We’ll also assume the M-16DX and your DAW are
powered up and connected.
Configuring DAW Control in the M-16DX
1
On the M-16DX, hold down the CURSOR BWD and FWD buttons at
the same time to display the UTILITY menu, and then use the FWD
button to highlight the DAW Controller value.
2
Press the + VALUE button to select the desired DAW-controller mode,
if any. You can choose:
Logic Pro Controlled Parameters
The M-16DX’s channel AUX 1 sends control the levels of eight Live tracks at a
time. The M-16DX SELECT buttons toggle the tracks’ Solo on and off.
• OFF—to de-activate the DAW-controller feature.
• ALT—to select Alternative DAW-control mode.
• EXC—to select Exclusive DAW-control mode.
You can select the eight tracks you want to
control by pressing the M-16DX’s AUX 2 and AUX
1 buttons.
3
Press CURSOR FWD once to highlight the DAW Select value.
4
Use the VALUE + and/or - buttons to select the bulit-in controller
preset for your DAW:
• GENERAL—for using the M-16DX with Logic Pro or Live.
• SONAR—for using the M-16DX with SONAR LE or SONAR.
5
Press DISPLAY•EXIT when you’re done.
If you’d like to jump now to the setup instructions for Live,
click here.
6
Turning On DAW Control in the M-16DX
If you’ve successfully connected the M-16DX to your DAW, the M-16DX’s
USB button should be lit. If it’s not, turn it on by pressing it.
After configuring DAW control as described above, turn on
DAW control by pressing the lit USB button. When DAW
control is turned on
1
With the M-16DX connected to your PC, launch SONAR.
2
If the M-16DX’s USB button isn’t lit, press it to light it.
3
Press the M-16DX’s USB button again so it flashes.
4
Select MIDI Devices... from SONAR’s Options menu
to open the MIDI Devices window.
5
In the MIDI
• Inputs area—checkmark 1:EDIROL M-16DX.
• Outputs area—checkmark 1:EDIROL M-16DX.
• the USB button flashes.
• the M-16DX shows you’re in DAW-control mode—by displaying the
transport controls in Alternative mode, or “DAW” along the left edge of
the screen in Exclusive mode.
• M-16DX buttons used in the currently selected DAW-controller mode light.
To turn off DAW control and return to normal M-16DX operations, press the
flashing USB button so it lights solidly.
As you begin to adjust a DAW parameter with the M-16DX, move
the desired M-16DX knob up and down past the parameter’s starting
value—this allows the M-16DX to take control of it.
Configuring Your DAW for M-16DX Control
Setting Up SONAR 7/SONAR LE for DAW Control
Basic Setup for Alternative and Exclusive Modes
This setup procedure requires the Edirol M-16DX ALT_EXC.spp and
M-16DX_EXC.kbn files contained in the M_UTILXX folder within the
M-16DX’s Version 2 or higher operating system installation folder.
Locate these files before proceeding.
In SONAR LE, you activate MIDI inputs and outputs by highlighting them.
To highlight a device, click on it so that it has a blue background. (To
turn off a device, click it again to remove the highlight.)
6
Click OK to close the MIDI Devices window.
7
Select Cakewalk Plug-in Manager from the Tools menu to open the
Cakewalk Plug-in Manager.
8
Click Control Surfaces in the left-hand pane, and then select Cakewalk
Generic Surface in the middle pane as shown in the following
illustration.
The following illustrations are of SONAR 7. The screens and procedures
in SONAR LE 6.2 and higher are the same except where noted.
7
9
10
13
In the Options menu, select Controllers/Surfaces...
14
In the Controllers/Surfaces window, click the Add new Controller/
Surface button—the red arrow points at the button in this
illustration—to open the Controller/Surface Settings window.
15
In the Controller/Surface Settings window, set Controller/Surface
to Cakewalk Generic Surface, and the Input Port and Output Port
settings to 1:EDIROL M-16DX, as shown here.
16
Click OK to close the window and reveal the newly created control
surface.
17
Click Close.
18
From the Tools menu, select Cakewalk Generic Surface-1 to open the
Cakewalk Generic Surface-1 properties window.
19
In the Presets popup, select the Edirol M-16DX ALT (for “Alternative”)
or EXC (for “Exclusive”) Mode preset, depending on whether you
want to use the M-16DX in Alternative or Exclusive DAW-control
mode as shown in the following illustration.
Click Import...
Navigate to the Edirol M-16DX ALT_EXC.spp file and select it as
shown here.
The .spp file adds the M-16DX’s control assignments to SONAR/LE.
11
Click Open to import the file.
12
Click Close in the Cakewalk Plug-in Manager window.
8
25
Click OK to close the Key Bindings window.
You’re now ready to control SONAR or SONAR LE with the M-16DX.
If SONAR still isn’t responding to the M-16DX, it may have become
confused. Return to the Options menu’s Controllers/Surfaces window,
select Cakewalk Generic Surface and Click the Delete Selected
Controller/Surface button. Click the Add New Controller/Surface
button, and in the window that opens, select Cakewalk Generic
Surface as the Controller/Surface value. Then select 1:EDIROL M-16DX
as both the Input Port and Output Port values. Click OK, then Close,
and then repeat Steps 18 through 20. If this still doesn’t work, quit
SONAR and try the procedure in this note again.
To jump back to the pre-programmed SONAR and SONAR LE
assignments for Alternative mode, click here.
20
Close the window.
21
Select Key Bindings from the Options menu.
22
Click the MIDI radio button and check the Enabled box as shown
here.
To jump back to the pre-programmed SONAR and SONAR LE
assignments for Exclusive mode, click here.
Adding Control of More SONAR/LE Elements
You can teach parameters within SONAR and SONAR LE—including plugin parameters—to respond to the following currently unassigned M-16DX
knobs and buttons using the SONAR’s ACT feature.
• EQ FREQ knob
• EQ GAIN knob
• AUX 2 MASTER knob
• FX button
• AUX 1 MASTER knob
To learn how to teach SONAR/LE to respond to new controls from the
M-16DX:
23
Click Import...
24
Navigate to the M-16DX_EXC.kbn file, highlight it, and click Open to
import the file. This file associates the M-16DX’s buttons and knobs
with SONAR/LE features.
1
Create a new controller by repeating Steps 13-17 in the previous
section, selecting ACT MIDI Controller in the Controller/Surface
Popup instead of Cakewalk Generic Surface.
2
In SONAR’s built-in Help, see “Assigning Controls on Your Controller/
Surface to Cells in the ACT MIDI Property Page” for the rest of the
required steps.
9
Setting Up Logic Pro 8 for M-16DX DAW Control
Basic Setup for Alternative and Exclusive Modes
Additional Setup for Exclusive Mode
Optimizing Solo and Mute Control in Logic Pro
To get Logic Pro’s Solo and Mute switches to mirror the M-16DX’s:
If the M-16DX’s USB button is flashing, press it once so it’s not before
proceeding. By activating DAW mode on the M-16DX at the right
moment, Logic Pro automatically configures itself for the M-16DX.
1
From the Logic Pro menu, select Preferences > Control Surfaces >
Controller Assignments...
2
Press Input Channel 1’s Solo button on the M-16DX so it latches in.
Logic Pro’s Controller Assignments window selects Track 1’s Solo
assignment in the right-hand part of the window as circled here.
To configure Logic Pro 8 for control from the M-16DX, follow these steps:
1
With the M-16DX connected to your Mac, launch Logic Pro 8.
2
If the M-16DX’s USB button isn’t lit, press it to light it.
3
Press the M-16DX’s USB button again so it flashes.
In Logic Pro 8, the DAW Surfaces Setup window automatically opens
and displays a Logic Control control surface—the M-16DX emulates
an Emagic Logic Control when it’s controlling Logic Pro.
4
Close the DAW Control Surface Setup window in Logic Pro 8.
You’re ready to control Logic Pro 8 from the M-16DX in Alternative mode.
To jump back to the pre-programmed Logic Pro 8 assignments
for Alternative mode, click here.
10
3
In the window’s Value Change field, change “90 08 07” to “90 08
Lo7”—see the top red arrow in the previous illustration.
2
In the Controller Assignments window, click Learn Mode in the lower
right-hand corner so it darkens—a tool tip appears telling you that
Logic Pro’s ready to learn a new assignment.
4
Set the Value Min/Max fields to 0 and 127, and set the Value Mode
popup to Direct.
5
On the M-16DX, press Input Channel 1’s Mute button so it latches in.
Track 1’s Mute assignment is selected for setup.
6
In the Value Change field, change “90 10 07” to “90 10 Lo7.”
7
Set the Value Min/Max fields to 0 and 127.
8
Set the Value Mode popup to Direct.
3
In the Mixer window, touch Channel 1’s Pan knob with your mouse.
9
Repeat Steps 2-9 for M-16DX Channels 2-8, corresponding to Logic
Pro’s Tracks 2-8.
4
On the M-16DX, move Channel 1’s Pan knob—Logic Pro tells you it’s
learned the new assignment.
These steps configure Solo and Mute for the first eight Logic Pro tracks.
To set up other sets of eight tracks, press the M-16DX’s AUX 1 or 2 knob
to select the desired track bank, and then repeat Steps 2-9.
Adding Control of More Logic Pro Elements
Logic Pro can learn to respond to the following unassigned M-16DX knobs
and buttons:
• channel EQ knobs
• channel AUX knobs • channel PAN knobs
• EQ FREQ and GAIN knobs • AUX 1 MASTER knob
• FX button
As an example, here’s how to teach Logic Pro to respond to the PAN/BALANCE
knobs on the M-16DX channel strips. You can use the same procedure for
teaching Logic Pro to respond to any of the M-16DX’s knobs or buttons.
1
With the Controller Assignments window already open, open the
Mixer pane in Logic Pro’s Arrange window.
If you’re working with two monitors, the following process will be
easier if you move the Controller Assignments and Arrange windows
onto different displays since you’ll be jumping between them. If you’re
on a single display, you may need to move the Controller Assignments
window out of the way when you need to get to Mixer parameters.
If a dialog appears telling you an M-16DX control is already assigned to
another parameter, you can choose to use the M-16DX control for both
parameters or re-assign it only to the new parameter.
5
In the Controller Assignment window, make sure that Format in the
Value area is set to Unsigned, and that Value Mode is set to Direct.
6
Repeat Steps 3-5 for Channels/Tracks 2-8.
7
To set up panning control for additional sets of eight tracks, select the
desired track bank, and then repeat Steps 3-6.
8
When you’re done setting up panning control, click Learn Mode
again so the button turns off, taking you out of Learn mode.
When you’re setting up control from an M-16DX knob, make sure that
the Controller Assignment window’s Value area Format value is set to
Unsigned, and that Mode is set to Direct.
To jump back to the pre-programmed Logic Pro 8 assignments
for Exclusive mode, click here.
11
Setting Up Live 6 for M-16DX DAW Control
1
With the M-16DX connected to your Mac, launch Live.
2
If the M-16DX’s USB button isn’t lit, press it to light it.
3
Press the M-16DX’s USB button again so it flashes.
4
Got to the Live menu, and select Preferences...
5
In the Preferences window, click the MIDI Sync tab to display Live’s
MIDI and Sync settings.
6
In the MIDI Ports section, turn on the M-16DX’s Track switch as shown
below.
7
Select Mackie Control as your control surface, ad then select M-16DX
from its input popup.
8
Close the Preferences window.
The End
We hope you’ve found this workshop helpful. You’ll find other
M-16DX Workshop booklets available for downloading at
www.RolandUS.com/EDIROL.
To jump back to the pre-programmed Live assignments for
Alternative mode, click here.
12