1
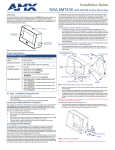
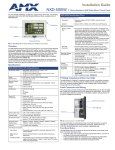
Installation of the NXD-430 While the NXD-430 is designed to fit into pre-existing NXD-CV5 touch panel sites, the actual installation differs from that of the NXD-CV5 in several significant ways. The NXD-430 can be installed either directly into the (optional) CB-TP5I Rough-In Box or another solid surface environment, using either solid surface screws or the included locking tabs for different mounting options. For more information, please refer to the NXD-430/435 Operation/Reference Guide, available at www.amx.com. The NXD-430 is contained within a clear outer housing known as the back box (FIG. 3). This back box is not removed when installing the device into a wall or into a Rough-In Box. Locking tab screws Locking tabs - Closed Locking tabs - Open FIG. 3 NXD-430 backbox with closed and open locking tabs Installing the NXD-430 into a wall Unlike most AMX touchpanels, the NXD-430 comes with a clear plastic backbox (FIG. 7) designed to attach the panel to most standard wall materials. This backbox has a locking tab on three of the four faces (missing only on the face containing the space for the connections) to help lock the backbox to the wall. These locking tabs are only extended AFTER the backbox is inserted into the wall. WARNING: When installing the backbox, make sure that the assembly is in the correct position and in the correct place. Once the locking tabs are extended and locked into place, removing the backbox may be difficult without having access to the back of the wall or causing damage to the wall. Note: In order to guarantee a stable installation of the NXD-430, the thickness of the wall material must be a minimum of .50 inches (1.27cm) and a maximum of .875 inches (2.22cm). WARNING: The maximum recommended torque to screw in the locking tabs on the plastic back box is 5 IN-LB [56 N-CM]. Applying excessive torque while tightening the tab screws, such as with powered screwdrivers, can strip out the locking tabs or damage the plastic back box. 1. Prepare the area by removing any screws or nails from the drywall before beginning the cutout process. 2. Cut out the surface for the back box. Refer to the dimensions in the NXD-430/ 435 Operation/Reference Guide, available from www.amx.com, for more information. CAUTION: Making sure that the actual cutout opening be slightly smaller than the provided dimensions is highly recommended. This action provides the installer with a margin for error if the opening needs to be expanded. Too little wall material removed is always better than too much. 3. Remove the faceplate from the NXD-430. 4. Disconnect the capacitive touch connector from the 10-pin plug on the faceplate. 5. Insert both connectors into their corresponding locations along the left side of the NXD-430 touch panel. 6. Test the incoming wiring by attaching the panel connections to their terminal locations and applying power via the PoE Injector. Verify that the panel is receiving power and functioning properly to prevent repetition of the installation. 7. Thread the incoming Ethernet and mini-USB wiring (if mini-USB access is desired) from their terminal locations through the surface opening. Leave enough slack in the wiring to accommodate any re-positioning of the panel. 8. Push the back box into the wall opening. Insure that the locking tabs lie flush against the back box. 9. Extend the locking tabs on the sides of the back box by tightening the screws inside the box until snug. Not all of the tabs must be extended to lock the back box in place, but extending a minimum of the top and bottom tabs is highly recommended. Apply enough pressure to the screw head to keep the box flush with the wall: this ensures that the locking tabs will tighten up against the inside of the wall. The back box is clear to allow visual confirmation that the tabs have been extended and are gripping the wall, as well as in assisting with removal if necessary. NOTE: Do not disconnect the connectors from the touch panel. The unit must be installed with the attached connectors before being inserted into the drywall. 10. Carefully replace the two Plastite screws holding the device to the back box. 11. Reconnect the capacitive touch connector to the 10-pin plug on the faceplate. 12. 13. Place the faceplate back onto the device. Reconnect the terminal Ethernet and USB to their respective locations on either the Ethernet port or NetLinx Master. Installing the NXD-430 into a Flat Surface using #4 screws Three #4 mounting screws (not included) are secured through circular holes located at the left and right sides of the NXD-430. The most important thing to remember when mounting the NXD-430 is that the outer frame (Mounting Tabs) must be installed flush against the mounting surface. • Refer to SP-2262-02 for detailed installation dimensions. • Cutting out the surface slightly smaller than what is outlined in the installation drawings in order to make any necessary cutout adjustments, is highly recommended. 1. Prepare the area by removing any screws or nails from the surface before beginning the cutout process. 2. Cut out the surface for the NXD-430. 3. Remove the faceplate from the NXD-430. 4. Disconnect the capacitive touch connector from the 10-pin plug on the faceplate. 5. Thread the incoming Ethernet and USB wiring from their terminal sources through the surface opening. Leave enough slack in the wiring to accommodate any re-positioning of the panel. 6. Connect the Ethernet and USB connectors to their corresponding locations along the left side of the un-powered NXD-430 touch panel. The USB connectors can be from either a USB extension cable or a wireless USB RF transmitter. NOTE: Do not disconnect the connectors from the touch panel. The unit must be installed with the necessary connectors before being inserted into the solid surface. 7. Carefully slide the main unit into the cutout until the Mounting Tabs of the NXD-430 lie flush against the wall. 8. Insert and secure three #4 Mounting Screws (not included) into the corresponding holes located along the sides of the NXD-430, using a grounded Phillips-head screwdriver, until the unit is secure and flush against the wall. 9. Reconnect the capacitive touch connector to the 10-pin plug on the faceplate. 10. Place the faceplate back onto the device. 11. Reconnect the terminal Ethernet and USB to their respective locations on either the Ethernet port or NetLinx Master. For full warranty information, refer to the AMX Instruction Manual(s) associated with your Product(s). 11/11 ©2011 AMX. All rights reserved. AMX and the AMX logo are registered trademarks of AMX. AMX reserves the right to alter specifications without notice at any time. 3000 RESEARCH DRIVE, RICHARDSON, TX 75082 • 800.222.0193 • fax 469.624.7153 • technical support 800.932.6993 • www.amx.com 93-2262-01 REV: D