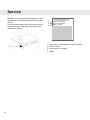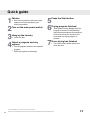
1
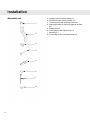
Operating Instructions
Dryer cabinet
Dear Customer,
Thank you for choosing this quality product from ASKO.
We hope it will meet your expectations and fulfil your needs
for many years to come. Scandinavian design combines clean
lines, everyday functionality and high quality. These are key
characteristics of all our products and the reason they are
greatly appreciated throughout the world.
To get the most out of your new machine, we recommend that
you read the operating instructions before using the machine.
The operating instructions also include information on how
you can help protect the environment.
ASKO DC7573, 7583
Contents
Safety instructions
Safety
Interrupting a program
Packing material
Recycling
To minimize the risk of fire in a
dryer cabinet, the following should
be observed:
Description of the dryer cabinet
Control panel
Assembly area
Electrical requirement
User liability
Electrical connection
Connect to the ventilation
Evacuation of the moist air can be
performed in two ways:
Installation
Unpacking
A complete delivery includes
Recommended tools
Assembly set
Positioning
Level adjustment
Fastening
Installing in a built-in cabinet
Connect to the ventilation
Door hanging
Rehanging the door
Operation
Sort the garments
Garment placement
Close the dryer cabinet door and
switch on the main power switch.
Program selection
Selecting Options
Press the Start button
Drying program finished
Once drying has finished
2
3
3
3
3
3
4
5
6
7
8
8
8
9
9
11
11
11
11
12
13
13
13
14
15
16
16
17
17
17
17
18
18
19
19
19
Care
Cleaning
When the dryer cabinet is not used
Troubleshooting
The machine will not start
Overheating cut-out
Drying takes too long
The garments do not dry, or are
too dry
Error messages
Service
Technical information
Technical data
Energy consumption and drying
times
Evacuation/Supply air
Manufacturing standards
Air gap when in-built
Quick guide
Fabrics
Turn on the main power switch
Hang up the laundry
Select a program and any options
Press the Start button
Drying program finished
Once drying has finished
20
20
20
21
21
21
21
21
21
22
23
23
24
24
24
24
28
28
28
28
28
28
28
28
Safety instructions
Read the operating instructions and
keep them in a safe place!
• Clean the inside of the dryer cabinet regularly.
WARNING!
Never stop a dryer cabinet before the program
is completed unless you immediately remove all
the laundry and spread it out so that the heat can
disappear.
• Electrical installation, if required, should be
carried out by a qualified electrician.
• The dryer cabinet should only be used for
drying as described in these instructions.
• The dryer cabinet must be installed or stored
indoors.
• Repairs and maintenance must be carried out
by a qualified professional.
• Damaged mains cables must only be replaced
by a qualified electrician.
• Sufficient ventilation is required to prevent
smoke from open fires or fumes from
equipment burning other fuels being sucked
into the room when the dryer cabinet is
running.
• Items that are stained with e.g. cooking oil,
acetone, alcohol, petrol, kerosene, stain
remover, turpentine, wax and wax remover
should be washed in hot water with extra
detergent before they go in the dryer cabinet.
• Items such as foam rubber, latex, plastic,
rubber-coated items and clothes and
foam-rubber-filled cushions must not be dried
in the dryer cabinet.
• Fabric softener or similar products should be
used as per the recommendations of the
detergent manufacturer.
• The dryer cabinet is not designed to be used
by persons (or children) that are physically or
mentally handicapped or lack experience and
knowledge. Such persons must receive
instruction in how to use the dryer cabinet from
the person responsible for their safety.
• Children must be watched to ensure they do
not play with the dryer cabinet.
• Keep the area around the evacuation duct free
from dust and dirt.
Safety
• The machine must not be used for drying items
that have been dry-cleaned at home or fabrics
that may contain residues of flammable liquids.
• The dryer cabinet is protected by an
overheating cut out. This shuts off the machine
if the temperature gets too high.
Interrupting a program
You can stop a drying program by:
• Open the door. The dryer cabinet will then stop
automatically.
• Press the main power switch.
• Press the Stop button for three seconds.
When you want to resume drying, simply close
the door and press the Startbutton.
The drying result may be too damp or too dry if
the program is stopped and restarted.
Packing material
Sort waste materials in accordance with local
guidelines.
Recycling
The dryer cabinet is manufactured and labelled
for recycling. In order to prevent personal injury
the dryer cabinet must be made inoperable after
deciding to take it out of service. Contact your
local authority for information about where and
how you can recycle it.
3
Safety instructions
To minimize the risk of fire in a
dryer cabinet, the following should
be observed:
• Items that have been spotted or soaked with
vegetable or cooking oil constitute a fire hazard
and should not be placed in a dryer cabinet.
Oil-affected items can ignite spontaneously,
especially when exposed to heat sources such
as in a dryer cabinet. The items become warm,
causing an oxidation reaction in the oil.
Oxidation creates heat. If the heat cannot
escape, the items can become hot enough to
catch fire. Piling, stacking or storing oil-affected
items can prevent heat from escaping and so
create a fire hazard. If it is unavoidable that
fabrics that contain vegetable or cooking oil or
have been contaminated by hair care products
be placed in a dryer cabinet they should first
be washed in hot water with extra detergent this will reduce, but not eliminate, the hazard.
The ’cool down’ cycle of dryer cabinet should
be used to reduce the temperature of the items.
They should not be removed from the dryer
cabinet or piled or stacked while hot.
• Items that have been previously cleaned in,
washed in, soaked in or spotted with
petrol/gasoline, dry-cleaning solvents or other
flammable or explosive substances should not
be placed in a dryer cabinet. Highly flammable
substances commonly used in domestic
environments include acetone, denatured
alcohol, petrol/gasoline, kerosene, spot
4
removers (some brands), turpentine, waxes
and wax removers.
• Items containing foam rubber (also known as
latex foam) or similarly textured rubberlike
materials should not be dried in a dryer cabinet
on a heat setting. Foam rubber materials can,
when heated, produce fire by spontaneous
combustion.
• Fabric softeners or similar products should not
be used in a dryer cabinet to eliminate the
effects of static electricity unless this practice
is specifically recommended by the
manufacturer of the fabric softener or product.
• Plastic articles such as shower caps or babies’
waterproof napkin covers should not be placed
in a dryer cabinet. Rubber-backed articles,
clothes fitted with foam rubber pads, pillows,
galoshes and rubber-coated tennis shoes
should not be placed in a dryer cabinet.
• There has to be adequate ventilation to avoid
the back flow of gases into the room from
appliances burning other fuels, including open
fires, when operating the dryer cabinet.
• The exhaust air must not be discharged into a
flue which is used for exhausting fumes from
appliances burning gas or other fuels
CAUTION!
Air from the dryer cabinet must not be fed
through ducts used for equipment that burns gas
or other fuels.
Description of the dryer cabinet
1
2
5
3
6
7
4
8
9
10
11
1. Connector
7. Door hanger for light goods
2. Control panel
8. Middle hanger section
3. Hanging hooks
9. Glove hanger
4. Type plate (inside)
10. Lower hanger section
5. Upper hanger section 11. Shoe rack (accessory)
6. Door
5
Control panel
1
6
2
3
4
1 Main power switch
4 Display window
2 Program selector
5 Start
3 Options buttons
6 Stop
5 6
Assembly area
• If the dryer cabinet is to be connected to the
exhaust air ventilation this must be available
in the premises.
• An earthed power outlet must be available
within 2 m of the top section of the dryer
cabinet. The dryer cabinet has a 2 m long
earthed cable with plug connected at the top.
The power outlet must be positioned so that
an extension cord is not necessary.
• The power socket should be simple to reach
once the dryer cabinet has been installed.
Observe this even when the dryer cabinet is
installed in an in-built cabinet or the like. See
the section ‘Electrical installation’.
• The floor where the cabinet is to be positioned
must support a weight of about 60 kg.
• The floor must be flat with a drop of max 2,5
cm below the cabinet.
• The dryer cabinet is only intended for
placement indoors with a temperature over 0
°C.
• The dryer cabinet must not be placed in
environments where high-pressure washers
are used for cleaning.
595
127
295
615
O102
DC7573
1695-1720
DC7583
1835-1860
600
7
Electrical requirement
User liability
Electrical connection
It is the responsibility of the user to contact a
qualified electrician if a power outlet as described
in this manual is not available.
• The dryer cabinet is to be connected to
220-240V, 1-Phase, 50-60Hz and the
protective power outlet. The power outlet must
be installed and earthed according to
applicable regulations.
• The dryer cabinet is delivered ready for
connection with a 2 m long cable with earthed
plug.
• Do not change the cable and plug supplied
with the dryer cabinet. If the plug does not
correspond with the power outlet this must be
rectified by a qualified electrician.
• The dryer cabinet must be connected using
the supplied connection cable and must not
be permanently connected!
• The power outlet must be positioned so that
the plug can be removed when necessary.
• The connection cable is drawn out at the rear
of the dryer cabinet on delivery from the
factory. If necessary the connection cable can
be drawn out of the rear hole in the top cover.
• Check that the connection current corresponds
with the data on the type plate and that the
main circuit is earthed correctly according to
applicable standards. We recommend that the
main circuit is fitted with a residual current
device.
• The connection is to make up its own fuse
group.
• The manufacturer relinquishes all responsibility
if the electrical connection is not made
according to the method set out in these
operating instructions.
WARNING!
• Connect to a power outlet with a protective
earth.
• Do not remove the earth connection.
• Do not use an adapter.
• Do not use an extension cord.
If this appliance is supplied from a cord extensions
set or electrical portable outlet device, the cord
extension ser or electrical portable outlet device
must be positioned so that it is not subject to
splashing or ingress of moisture.
8
Connect to the ventilation
Evacuation of the moist air can be
performed in two ways:
1. Moist air out
2. Air intake
• Waste air from the dryer cabinet is led to an
evacuation duct or an outlet in the wall using
the vent hose supplied. Recommended!
• Ventilation out into the room where the dryer
cabinet is positioned.
Ventilation out into the room where the
dryer cabinet is positioned
• Preferably open the door or window in the room
for the best ventilation.
• When the dryer cabinet is built-in, the supplied
ventilation hose (only some markets) is
replaced with a permanent ventilation pipe with
a diameter of 100 mm.
• The distance between the top edge of the
ventilation pipe and the ceiling must not be less
than 300 mm.
• The ventilation pipe must reach outside of the
in-built cabinet.
• Ensure a good air supply to the dryer cabinet’s
air intake.
• The ventilation holes in the dryer cabinet must
not be blocked.
Minimum 300
mm to the
ceiling
2
1
Ventilation out into the room where the dryer
cabinet is positioned. Dryer cabinet freestanding
Minimum 300
mm to the
ceiling
1
2
Ventilation out into the room where the dryer
cabinet is positioned. Dryer cabinet in-built in
tailored in-built cabinet.
9
Connect to the ventilation
Connection to the evacuation duct
3
When the cabinet is on 45 m moist air/hour is
evacuated. Make sure that air can enter the room
to replace the moist air that has been ventilated.
WARNING!
• The dryer cabinet must not be connected to
the duct for flue gases.
• Only the supplied evacuation hose may be
used (on markets where this is supplied).
Permanently fitted to the evacuation duct
(only some markets)
The exhaust air duct valve must be replaced with
a transition section (not supplied).
Do not fit valves that can be found in the
property’s ventilation system inside the dryer
cabinet.
1. Transition section
1
The dryer cabinet can be connected to
the evacuation duct in two ways:
With draught check
The building valve is replaced by the draught
check (supplied with the delivery).
Do not fit valves that can be found in the
property’s ventilation system inside the dryer
cabinet.
1.
2.
3.
4.
Moist air out
Hose.
Connector
Draught check
4
1
2
3
The dryer cabinet is connected to the evacuation duct with the
draught check
10
The dryer cabinet is permanently fitted to the evacuation duct
Installation
Unpacking
WARNING!
• The cabinet can easily tip over if not screwed
in position. At least two persons should handle
the dryer cabinet.
• Packing material such as plastic and cellular
plastic should be kept inaccessible to children.
Observe the risk of suffocation to small
children when they come into contact with
plastic materials.
• Remove all packing material; do not use sharp
tools that can damage the product.
• Check that the dryer cabinet has not been
damaged during transport.
• After unpacking, check that the dryer cabinet
shows no sign of faults. Damage, faults and
the possibility of missing parts must be
reported immediately to the dealer.
A complete delivery includes
• Cabinet with fan unit
• Assembly set
• Set of documents
Recommended tools
•
•
•
•
•
•
•
Spirit level
Measuring-tape
Portable drill
Screwdriver
Drill diam. 8 mm
Pen
Protective gloves (if used)
11
Installation
Assembly set
1
2
3
4
5
5
7
6
7
8
12
1.
2.
3.
4.
5.
6.
7.
8.
Draught check (some markets) x 1
Ventilation hose (some markets) x 1
Connector with two securing screws x 1
Securing screws for securing against the wall
x2
Plastic plug x 2
Cover plug for the cabinet feet x 4
Allen key x 1
Cover plug for the securing screws x 2
Installation
Positioning
Fastening
1. Place the dryer cabinet in the intended
position.
2. Open the door and adjust the level of the dryer
cabinet so that it stands firmly on all four feet.
1. Place the dryer cabinet in the intended
position, open the door and pull out the top
hanger section.
2. Mark out the drill holes on the wall through the
two pre-drilled holes on the rear panel of the
dryer cabinet.
3. Pull forward the cabinet and drill the holes for
the securing screws in the wall. Use the
enclosed plastic plugs or other anchors if
necessary.
4. Slide back the cabinet and screw in position
with the enclosed screws.
5. Fit the cover plugs.
WARNING!
The dryer cabinet must be screwed to the wall.
As the cabinet is top heavy there is a risk of it
tipping forwards.
Level adjustment
1. Check using a spirit level that the cabinet
stands level.
2. Use the supplied Allen key and adjust all four
feet through the holes in the dryer cabinet’s
bottom plate (use pliers if necessary).
3. Insert the four cover plugs (found in the
document bag) in the holes.
1
3
2
1
1. Spirit level
2. Allen key
3. Cover plug x 4
2
4
3
6
5
6
2
1.
2.
3.
4.
5.
6.
Predrilled holes
Securing screws
Plastic plug
Wall behind the dryer cabinet
Rear panel of the dryer cabinet
Cover plug
13
Installing in a built-in cabinet
1
A=B-600
2
B
DC7573
1500-1525
DC7583
1640-1665
5. Open the door. Align the dryer cabinet
horizontally according to the directions in the
section “Level adjustment”.
6. Pull out the top hanger section and mark the
hole position with a pen on the wall behind.
7. Slide back the hanger section, close the door
and pull out the dryer cabinet again. If the
assembly depth “B” is the same as the depth
of the dryer cabinet you can go directly to point
10 below.
8. Cut a wooden batten (2) with the thickness “A”
and length between 500-575 mm. It must be
as thick as the difference between the
assembly depth “B” and 600 mm. If the
assembly depth “B” is 620 mm then the batten
thickness “A” must be 20 mm.
9. Screw the wooden batten into position with two
screws (1) on the wall behind the dryer cabinet
so that it is at the same height as the marked
holes, as set out in point 6.
NOTE!
Figure 1
The dryer cabinet has a depth of 600 mm.
Use screws and possibly plugs of a suitable length
to match the material of the built-in cabinet’s rear
wall.
1. Measure the assembly depth “B” where the
dryer cabinet is to be mounted (see figure 1).
2. If the assembly depth “B” is greater than 600
mm a wooden batten (2) with the thickness “A”
must be cut. The wooden batten is not included
in the delivery.
3. Slide the dryer cabinet into position so that the
front aligns with the built-in cabinet. Keep the
door closed.
4. There should be an air gap of at least 10 mm
above the dryer cabinet (see figure 2) in order
to get optimum performance from the dryer
cabinet.
14
Do not position the screws for the wooden
batten in the same position as the assembly
holes marked on the wall for the dryer cabinet.
Ensure that the wooden batten is screwed
firmly to the wall.
10. Plug the connection cable into the power outlet
and ensure that the cable is not crushed and
can be easily pulled out.
11. Slide in the dryer cabinet in the built-in cabinet.
Make sure that the rear wall of the dryer
cabinet lies against the wall in the built-in
cabinet or the wooden batten (2). Also check
that the front of the dryer cabinet aligns with
the built-in cabinet.
12. Pull out the top hanger section and screw the
cabinet into position using the supplied
securing screws and fit the cover plugs (see
figure 3).
Installing in a built-in cabinet
Connect to the ventilation
Min 10 mm
If the dryer cabinet is in-built, fit the connector
through the ventilation opening in the top section
of the built-in cabinet. The dryer cabinet is then
fitted in its intended position.
1. Place the connector over the hole in the dryer
cabinet’s top panel, align the screw holes and
secure the connector.
2. Connect the fixed ventilation pipe if the dryer
cabinet is built-in or press on the supplied (only
some markets) flexible hose. Also see the
section "Ventilation option".
1
Figure 2
1
1. Connector
2
6
3
Figure 3
1. Predrilled holes
2. Securing screws
3. Cover washers
15
Door hanging
WARNING!
Be aware of the risk of strain injuries. At least two
persons should handle the dryer cabinet.
Rehanging the door
1. Place the dryer cabinet on its back.
2. Loosen the hinge plate, see figure 1.
3. Lift off the door, loosen the glove hanger and the switch plate from the main power switch. Turn the
glove hanger a half-turn and fit in the same fastening hole.
4. Move the switch plate to the other end of the door.
5. Loosen the rivet on the hinge plate and move it to the opposite side.
6. Loosen the hinge pin on the upper hinge and place it on the opposite side.
7. Rotate the door, align the rivet and secure the hinge plate.
Bild 1
16
Operation
1
Sort the garments
• Remove any dry garments from the dryer
cabinet to reduce the drying time for the
remaining garments.
• Attempt to dry garments of the same
type of fabric to produce an even drying
result. Otherwise, with a mixed load,
there is a risk that the garments will not
be dry.
2
Garment placement
• The cabinet has three sections with
extendable hangers. Each section has
a number of hangers that garments are
hung on.
• Do not place garments horizontal on the
hangers.
• Hang long garments closest to the
cabinet walls and short garments in
towards the centre. This improves the
drying result.
• Fold up the two lowermost hanger
sections when long garments are to be
dried.
• Hang gloves, hats, scarves and the like
on the hanger strips on the inside of the
door.
• Pull forward the hanger hooks on the
upper hanger section to facilitate
hanging the garments. Pull these back
when not in use.
• Do not overload the dryer cabinet.
Garments become creased and the
drying result uneven. If possible, leave
some space between garments instead.
• If there is a risk that some garments may
run you should leave space around
these.
• Avoid drying heavy articles of clothing
with light garments as they have very
different drying times.
The drying result is mainly dependent on how the
garments are hung. The figures above show the
airflow in the dryer cabinet. If the airflow in the
middle of the dryer cabinet is obstructed or
blocked this can impair the drying result. Zones
can be formed in the dryer cabinet where
garments will not dry.
When the cabinet is cold the door seals may not
close completely. However, this is fully
compensated for when the cabinet is operated
with heating as the door seals expand.
WARNING!
Read the safety instructions before using the
cabinet.
3
Close the dryer cabinet door
and switch on the main power
switch.
17
Operation
4
Program selection
Always follow the garment’s washing
instructions if these are stated. Select the
program to suit the most delicate garment. If
softener or antistatic agent are used during
washing the manufacturer's instructions for the
use of these products must be followed.
You select a program by turning the program
selector. An LED lights up beside the selected
program. Select the desired options using the
option buttons. Start by pressing the Start/Stop
button.
Drying results depend, among others, on the
ambient temperature, ventilation of the drying
room and hanging. Use trial and error to find out
which program is the best.
Guidelines as to what specific programs can be
used for:
Auto extra dry
This program is for garments that are particularly
difficult to dry e.g. jeans with very thick seams.
Auto dry
Switch off the heating just before Auto extra dry.
Use trial and error to find out what works best.
Use one of these two programs when you want
garments to be completely dry.
Auto normal dry
These programs shut off the heat once the
garments are dry, but not too “dry”.
Warm towels
Program to heat garments or fabrics to a
comfortable temperature in an energy optimised
method, only so much energy is needed to
maintain the heat. Just imagine a warm dressing
gown or ski boots, gloves and hats in the winter.
18
Timed dry
Drying with heat. You can decide on a fixed drying
time yourself. Recommended when drying shoes
and boots or the like. Select the time by pressing
the button with the clock symbol. The time is
shown on the display. Max six hours drying time.
Cold dry
Drying without heat. You can decide on a fixed
drying time yourself. Select the time by pressing
the button with the clock symbol. The time is
shown on the display. Max twelve hours drying
time.
5
Selecting Options
By selecting options, you can tailor drying
programs to suit the requirements of your
garments. The machine remembers which options
you choose for each program and uses them (with
one exception: Delayed Start) the next time you
select the appropriate program.
Temperature
You can choose a lower temperature in all
programs except Cold dry.
• Select a lower temperature by pressing the
button by the symbol
• The lamp by the button comes on when this
option is selected.
Revitalise
This option means that the fan will run for three
seconds per minute over two hours once the
drying program has finished. The option is
recommended when you do not have the option
of removing the clothes from the dryer cabinet
directly after drying. Cannot be selected with Cold
dry.
• Select Revitalise by pressing the button by the
symbol.
• The lamp by the symbol lights when Revitalise
is selected.
Operation
Loading or removing garments
Time saver
The program is shortened by about 12 minutes.
You can choose Time saver with all programs
except Revitalise.
• Press the button by the symbol.
• The lamp by the symbol lights when Time
saver is selected.
Delayed Start
First select which program you want to use and
then select Delayed Start by pressing the button
by the symbol. The display shows Delayed Start
in whole hours. Press the button to select a
delayed start of 1 to 24 hours. The lamp by the
button lights when Delayed Start is selected.
Press the Start button, the machine counts down
1 hour at a time and starts after the selected delay.
This option cannot be used with the Timed dry or
Air fluff programs.
You can stop the dryer cabinet after starting a
program by opening the door. Hang in or remove
garments, close the door again and press the
Startbutton. A new estimate of the remaining
program time will be displayed after a few
minutes.
7
Drying program finished
The text "End" appears on the display when
the program is finished.
Backlighting
Two minutes after the drying program finishes the
backlighting on the display and option buttons
enter energy saving mode.
8
Once drying has finished
Turn off the main power switch. Remove
the clothes and close the door to prevent
small children from climbing into the machine.
6
Press the Start button
Remaining drying time
An estimate of the remaining drying time
will be shown on the display a few minutes after
the drying program starts. For example, "1:35"
means that it will take approximately 1 hour and
35 minutes for the garments to dry.
The actual remaining time may be longer than the
estimated time shown on the display. The
remaining time is then shown as "0:15" until the
garments are sufficiently dry. If you selected Time
saver the display will show "0:05" instead.
Stopping or changing a program
Press and hold the Stopbutton for three seconds.
NOTE!
The program will not be affected if you change
the program selector after the program has
started.
19
Care
Cleaning
High-pressure washers must not be used!
• The cabinet panels can be cleaned using a
mild soap solution and damp cloth.
• Dust collects easily around the air intake on
top of the cabinet. This can cause disturbances
which in turn can result in downtime.
• In order to avoid these problems vacuum clean
around the air intake and the top of the cabinet
at least once a year or more frequently
depending on the environment where the cab.
When the dryer cabinet is not used
During short or long periods
Always remove the dryer cabinet’s plug.
When the cabinet is to be moved
1. Pull out the plug.
2. Secure the door using strong tape.
20
Troubleshooting
The machine will not start
Check
• that the door is closed correctly.
• that the main power switch is on.
• that the machine is not programmed to start at
a specific time (e.g. 13.30)
• that the plug is connected.
• that the fuses (circuit breakers) in your house
are intact. Swap two circuit breakers over to
make sure. You cannot always tell from the
outside if a circuit breaker is broken.
• that the overheating cut-out has not been
triggered (see below).
Overheating cut-out
The overheating cut-out shuts off the dryer cabinet
if the temperature is too high.
• The overheating cut-out will reset automatically
once the machine has cooled down.
Drying takes too long
• Poorly spun or very wet washing.
• The dryer cabinet is positioned in an area
where the ambient temperature is too low.
The garments do not dry, or are too
dry
• The door has been opened while the program
is running, which disrupts the moisture
monitoring function.
• The garments may not have been hung
correctly, obstructing the air flow. See
“Garment placement” in the “Operation”
chapter.
• Wrong program selected, choose another
program, see the chapter “Operation”.
• Poorly spun wash or very wet washing.
• The ventilation pipe/hose is too long. The
length should not exceed 1 m.
• Normal operation requires installation in a room
with a temperature above 0 °C.
Error messages
If F2 flashes on the display, the maximum
permitted program time has been reached. Read
"Drying takes too long" in the "Troubleshooting"
chapter to find out what to do.
21
Service
Make sure you know the model designation, type
designation, and serial number before contacting
service.
The model designation and serial number can be
found on the type plate, which is placed on the
inside of the cabinet.
1
22
2
3
4
1.
2.
3.
4.
Article no. xxxxxxxx
Serial no. xxxxxxxx
Model xxxxxx
Type plate (on the inside of the dryer cabinet)
Article number
Serial number (12 digits)
Model
Technical information
Technical data
Capacity:
approx. 3,5 kg wash (cotton)
Drainage capacity:
Up to 21 gram/min
Electrical connection:
1-Phase, 220-240V, 50-60Hz, 10A
Motor:
35 W
Heater output:
2000W
Overheating protection: Yes
3
Fan capacity
180 m /hour
Hanger length:
16 m
Size:
Height
DC7573: 1700 mm
DC7583: 1840 mm
Adjustable
DC7573: 1695 mm-1720 mm
DC7583: 1835 mm-1860 mm
Width
595 mm.
Depth
600 mm without handle,
620 with handle.
Weight:
approx. 62 kg
Colour:
White, titanium or grey
Sound level:
max 56.5 dB(A) (IEC60704-2-6)
23
Technical information
Energy consumption and drying times
Drying of sup wash *)
Settings
Energy consumption Drying time in
hrs:min
Heat
Auto normal dry, normal tempera- 0.6 kWh/kg
ture.
1:10
normal temperature
Auto normal dry, low temperature. 0.3 kWh/kg
1:00
low temperature
Cold dry
8:00
-
0.06 kWh/kg
*) Stated values apply for 3,5 kg wash and 1600 rpm spin. Values vary depending on spin speed and the
materials in the load.
Evacuation/Supply air
3
When the cabinet is on 45 m moist air/hour is evacuated.
Manufacturing standards
See the cabinet’s type plate.
Air gap when in-built
Minimum 10 mm between the dryer cabinet and in-built (above and behind the dryer cabinet).
24
Your notes
25
Your notes
26
Your notes
27
Quick guide
1
2
3
4
Fabrics
• Sort and hang fabrics of the same type
together to ensure that they dry as
evenly as possible.
Turn on the main power switch
Hang up the laundry
• Close the door.
Select a program and any
options
• Turn the program selector to the required
program.
• Select any options and settings.
5
6
Press the Start button
Drying program finished
• 'End' appears on the display when the
program is finished. If the Revitalise
option has been selected, the fan will run
for three seconds per minute for two
hours after the drying program is
finished.
7
Once drying has finished
• Turn off the mains power switch and
close the door.
Art. No.: 427000606. Rev. 01. We reserve the right to make changes.
Printed on environmentally friendly paper that meets the requirements of Miljöförbundet and Naturskyddsföreningen.
28