1
Thermidistat™ Control
Visit www.carrier.com
Installation, Start-Up, and Operating Instructions
NOTE: Read the entire instruction manual before starting the
installation.
INDEX
Page
SAFETY CONSIDERATIONS .....................................................1
INTRODUCTION ..........................................................................1
INSTALLATION CONSIDERATIONS .......................................1
INSTALLATION........................................................................1-7
Thermidistat Control Location ..............................................1-2
Set DIP Switches ......................................................................2
Install Thermidistat Control ..................................................2-3
Set Thermidistat Control Configuration ...............................3-6
System Start-Up and Checkout.............................................6-7
Final Settings ............................................................................7
HUMIDITY CONTROL FEATURES.......................................7-9
Humidification ..........................................................................7
Dehumidifcation ....................................................................7-9
Vacation ....................................................................................9
OPERATIONAL INFORMATION..........................................9-16
WIRING DIAGRAMS ...........................................................10-16
THERMIDISTAT CONTROL TROUBLESHOOTING ............16
SAFETY CONSIDERATIONS
Read and follow manufacturer instructions carefully. Follow all
local electrical codes during installation. All wiring must conform
to local and national electrical codes. Improper wiring or installation may damage Thermidistat Control.
INSTALLATION CONSIDERATIONS
POWER
Note that this control does not require batteries and is not "power
stealing." It does require 24vac (R and C terminals) of the
low-voltage transformer to be connected to it for proper operation.
It will not operate without these 2 connections.
MODELS
There is only a single programmable model for all applications. It
can be configured for AC or HP, 1- or 2-speed compressor, and for
dual fuel installations, allowing it to be used in place of all Carrier
thermostats.
HUMIDIFY EQUIPMENT AND CONNECTIONS
The humidify output connects directly to 24vac operated humidifiers. No other connection or interlock is required. Any of several
installer-selectable operating modes are available.
DEHUMIDIFY EQUIPMENT AND CONNECTIONS
The dehumidify output connects to the dehumidify input on
variable-speed furnaces and fan coils. Additional dehumidification
is done by controlling the compressor. A variety of operating
modes are available.
OUTDOOR TEMPERATURE SENSOR
Optimum performance is obtained when an outdoor temperature
sensor is used with the Thermidistat Control. Plan installation so
that 2 wires can be run from Thermidistat Control to an outdoor
location, preferably on the north side of the house.
Recognize safety information. This is the safety-alert symbol
.
When you see this symbol on the equipment and in the instruction
manual, be alert to the potential for personal injury.
Understand the signal words DANGER, WARNING, and CAUTION. These words are used with the safety-alert symbol. DANGER identifies the most serious hazards which will result in severe
personal injury or death. WARNING signifies a hazard which
could result in personal injury or death. CAUTION is used to
identify unsafe practices which would result in minor personal
injury or product and property damage.
®
INTRODUCTION
A94134
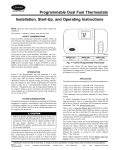
Carrier’s 7-day programmable Thermidistat Control is a wallmounted, low-voltage control which combines temperature and
humidity control in a single attractive unit. An extension of
Carrier’s proven line of programmable thermostats, it provides
separate setpoints for heating and cooling, and now adds humidification and dehumidification. Different heating and cooling setpoints and times are programmable for 4 periods per day and 7
days per week. Humidify and dehumidify outputs provide direct
control of humidity. Batteries are not used. During power loss an
internal memory stores programs and settings for unlimited time,
and the clock continues to run for at least 8 hr.
HEIGHT (IN.)
4-1/4
WIDTH (IN.)
7-1/2
DEPTH (IN.)
1-3/8
Fig. 1—Carrier Programmable
Thermidistat Control
INSTALLATION
Step 1—Thermidistat Control Location
Thermidistat Control should be mounted:
•
Approximately 5 ft (1.5m) from floor.
Manufacturer reserves the right to discontinue, or change at any time, specifications or designs without notice and without incurring obligations.
Book 1
4
PC 101
Catalog No. 92-33TS-TA51C
Printed in U.S.A.
Form TSTAT-13SI
Pg 1
7-97
Replaces: New
Tab misc. misc.
•
Close to or in a frequently used room, preferably on an inside
partitioning wall.
•
On a section of wall without pipes or duct work.
Step 3—Install Thermidistat Control
Before installing Thermidistat Control, turn off all power to
equipment. There may be more than 1 power disconnect.
Electrical shock can cause personal injury or death.
Thermidistat Control should NOT be mounted:
•
Close to a window, on an outside wall, or next to a door leading
to the outside.
•
Exposed to direct light and heat from a lamp, sun, fireplace, or
other temperature-radiating object which may cause a false
reading.
•
Close to or in direct airflow from supply registers and return-air
registers.
•
In areas with poor air circulation, such as behind a door or in
an alcove.
1. Turn off all power to equipment.
2. If an existing thermostat is being replaced:
a. Remove existing thermostat from wall.
b. Disconnect wires from existing thermostat, 1 at a time.
c. As each wire is disconnected, record wire color and
terminal marking.
d. New or additional wire may be needed to accommodate
added humidity outputs.
Step 2—Set DIP Switches
There is a 4 section DIP switch within the Thermidistat Control
which must be properly set by the installer. It is easiest to set these
4 switches before the Thermidistat Control is mounted to the wall,
so STOP and complete the following steps:
e. Discard or recycle old thermostat.
NOTE: Mercury is a hazardous waste and MUST be disposed of
properly.
2. Remove cover completely by snapping it apart at hinge.
3. Select Thermidistat Control rear plastic. (If it is not separated
from the remainder of the Thermidistat Control, refer to Step
2 above.)
3. Open Thermidistat Control by pressing back half of the right
end of plastic case inward while, at the same time, pulling
front and back halves apart at the right end. The 2 halves will
swing apart.
4. Route wires through large hole in rear plastic. Level rear
plastic against wall (for aesthetic value only—Thermidistat
Control need not be leveled for proper operation) and mark
wall through 2 mounting holes.
4. Snap hinge apart to completely separate the 2 halves.
5. Drill two 3/16-in. mounting holes in wall where marked.
5. Switches are located in upper right corner of circuit board. To
change switch position, use corner of a small screwdriver to
slide switch to opposite position.
6. Secure rear plastic to wall with 2 screws and anchors
provided. Additional mounting holes are available for more
secure mounting if needed. Make sure all wires extend
through hole in mounting base.
1. Open hinged Thermidistat Control cover.
6. After switches have been set, do not reassemble the 2 halves.
The rear plastic will be first mounted to wall.
7. Adjust length and routing of each wire to reach proper
connector block and terminal on rear plastic with 1/4-in. extra
length. Strip only 1/4 in. of insulation from each wire to
prevent adjacent wires from shorting together when connected.
SWITCH 1—AC/HP SELECT
Use this switch to select between air conditioner and heat pump
systems.
TO SET:
OFF—for air conditioner installations. This is factory default.
ON—for heat pump installations, using either a fan coil or furnace
(dual fuel).
8. Match and connect equipment wires to proper terminals of
each connector block. (See Table 5 and Wiring Diagrams Fig.
2 through 25.) Remember R and C must be connected for
proper operation.
SWITCH 2—1 SPEED/2 SPEED
This switch tells the system whether the compressor is 1 or 2
speed.
Improper wiring or installation may damage Thermidistat
Control. Check to make sure wiring is correct before proceeding with installation or turning on power.
TO SET:
OFF—for single-speed compressor. This is factory default.
ON—for 2-speed compressors, whether AC or HP.
9. Push any excess wire into wall and against rear plastic. Seal
hole in wall to prevent air leaks. Leaks can affect operation.
SWITCH 3—SMART/CONVENTIONAL RECOVERY
Selects between conventional and smart recovery from setback.
Conventional recovery changes to new setpoint at programmed
time. Smart recovery, which is active in both heating and cooling,
starts 90 minutes earlier and smoothly adjusts setpoint so room
will arrive at programmed temperature at programmed time.
10. Reattach Thermidistat Control body to rear plastic by first
reattaching hinge.
11. Close Thermidistat Control assembly, making sure pins on
back of circuit board align with sockets in connector.
12. Turn on power to equipment.
TO SET:
OFF—for smart recovery. This is factory default.
ON—for conventional recovery.
On power up, all display segments will light for 5 sec. For the next
5 sec, a 2-digit code appears on large display which identifies
Thermidistat Control configuration:
SWITCH 4—INSTALLER TEST OFF/ON
1. AC—for 1-speed air conditioner
Selects a special installer test mode which assists with checkout
and troubleshooting. See Step 5.
2. HP—for 1-speed heat pump
3. A2—for 2-speed air conditioner
TO SET:
OFF—for normal operation. This is factory default.
ON—for installer test mode.
4. H2—for 2-speed heat pump
5. dF—for 1-speed dual fuel
2
6. d2—for 2-speed dual fuel
CONFIGURATION OPTIONS — SELECTION:
7. HS—for special 3-stage auxiliary heat with FK4C Fan Coil
and 1-speed heat pump
Option 1—Anticipator Adjustment
This adjustment controls sensitivity and cycle rate of Thermidistat
Control. Higher numbers decrease sensitivity and slow cycle rate.
Lower numbers increase sensitivity and cycle rate. However, a
limiting feature will not allow more than 4 cycles per hr, regardless
of setting. Anticipator values can range from 1 to 9. Factory
default is 3. This default selection provides optimum performance
in nearly all installations. Try it first. Do not change setting unless
there is evidence of need to do so.
When this identifier disappears, normal operation begins. The
MODE control should be set to OFF and FAN control to AUTO,
so equipment does not start until further configuration and checkout is completed.
Step 4—Set Thermidistat Control Configuration
Configuration options, like DIP switch settings, are intended to be
selected at installation and normally are not modified by the
homeowner. These options are not discussed in the homeowner’s
manual and therefore must be made as part of the installation. A
special procedure allows entry into the configuration mode. While
in configuration mode, up to 15 selections can be made. A
description of each selection and how to use the configuration
mode follows.
Unlike conventional anticipators, this setting is not determined by
current draw. There is no need to measure, know, or compensate
for current draw. There is also no droop with this Thermidistat
Control. Regardless of setting and number of stages, both heating
and cooling will control to their respective setpoints.
TO ADJUST:
1. Enter configuration mode if not already there. See Step 4 "To
Enter Configuration Mode." The upper small (COOL setpoint)
display will be flashing 01. If not, use up and down buttons to
move it to 01.
CONFIGURATION OPTIONS — SUMMARY:
Option 1—Anticipator adjustment
Option 2—Clean filter timer adjustment
2. Press SET TIME/TEMP button once to flash current selection
of 1, 2, 3, 4, 5, 6, 7, 8, or 9 on large display. Factory default
is 3.
Option 3—English/Metric selection
Option 4—Fan (G) ON with W selection
Option 5—Variable-speed blower present selection
3. Use up and down buttons to move between available choices.
Option 6—Cooling lockout below 55° selection
4. Press SET TIME/TEMP button again to flash upper small
display for selection of another option, or press END to exit
configuration mode.
Option 7—Variable speed super dehumidification selection (only
available when variable-speed blower is used)
Option 8—Auxiliary heat lockout temperature adjustment (only
available when heat pump is used)
Option 2—Clean Filter Timer
Select hours of blower operation (heating, cooling, or fan) before
CLEAN FILTER icon is displayed. With OFF selected, icon will
never come on, disabling this feature. Time selection can range
from 400 to 3600 hr by selecting numbers 1 through 9. (Time is
400 X number selected.) Factory default is 2 (800 hr). Recommended selections are: disposable filter—400 to 800 hr, media
filter—1200 to 1600 hr, or electronic air cleaner—1600 to 2400 hr
of blower operation.
Option 9—Three-stage auxiliary heat selection (only available
when single-speed heat pump is used)
Option 10—Dual fuel selection (only available when heat pump is
used)
Option 11—Dual fuel crossover temperature adjustment (only
available when dual fuel is selected)
Option 12—Defrost heat selection (only available when heat pump
is used)
TO SELECT OR ADJUST:
Option 13—Room temperature offset adjustment
1. Enter configuration mode if not already there. See Step 4 "To
Enter Configuration Mode." Use up and down buttons to make
small (now flashing) display indicate 02.
Option 14—Heat/cool dead band adjustment
Option 15—Enable auto mode
2. Press SET TIME/TEMP button once to display current selection of OF, 1, 2, 3, 4, 5, 6, 7, 8, or 9 on large display. Factory
default is 2.
TO ENTER CONFIGURATION MODE:
Press and hold FAN button for approximately 10 sec until COOL
setpoint display indicates a flashing 01. The Thermidistat Control
is now in configuration mode. It will automatically exit this mode
if no button is pressed for 3 minutes. Pressing END button will exit
configuration mode immediately.
3. Use up and down buttons to move between available choices.
4. Press SET TIME/TEMP button again to flash upper small
display for selection of another option, or press END to exit
configuration mode.
WHILE IN CONFIGURATION MODE:
Option 3—English/Metric
The upper small (COOL setpoint) display indicates selected option
number and large display indicates selection made within that
option. One of these will be flashing. The up and down buttons are
used both to move between available options and to make selection
for each option. When option number (small display) is flashing,
up and down buttons adjust it, moving between available option
numbers. After desired option number has been selected, press
SET TIME/TEMP button once. The large display will now flash,
indicating that up and down buttons now control available choices
within that option. Each press of TIME/TEMP button switches
between available option (small display) and available selections
within each option (large display).
Select between Fahrenheit and Celsius operation. Factory default
is Fahrenheit.
TO SELECT OR ADJUST:
1. Enter configuration mode if not already there. See Step 4 "To
Enter Configuration Mode." Use up and down buttons to make
small (now flashing) display indicate 03.
2. Press SET TIME/TEMP button once to flash current selection
of F or C. Factory default is F.
3. Use up and down buttons to move between F and C on large
display.
3
TO SELECT:
4. Press SET TIME/TEMP button again to flash upper small
display for selection of another option, or press END to exit
configuration mode.
Option 4—Fan (G) On With W
1. Enter configuration mode if not already there. See Step 4 "To
Enter Configuration Mode." Use up and down buttons to make
small (now flashing) display indicate 07.
This selection determines whether fan (G) output is to be ON or
OFF when any W (furnace or strip heat) output is ON. Most
furnaces and fan coils manage their own blowers and do not
require separate G signal. For these applications, select OFF. Some
auxiliary heaters require separate G signal to turn on blower. In
this case, select ON. Factory default is OF (off).
2. Press SET TIME/TEMP button once to flash large display.
3. Use up or down buttons to alternate between OF and ON on
large display. Factory default is OF.
4. Press SET TIME/TEMP button again to flash upper small
display for selection of another option, or press END to exit
configuration mode.
Option 8—Auxiliary Heat Lockout Temperature
TO SELECT:
1. Enter configuration mode if not already there. See Step 4 "To
Enter Configuration Mode." Use up and down buttons to make
small (now flashing) display indicate 04.
This option requires prior selection of heat pump (DIP switch 1
ON). It allows selection of an outdoor temperature of OF, 5, 10,
15, 20, 25, 30, 35, 40, 45, 50, or 55°F. Outdoor temperature sensor
MUST be attached. If temperature is selected and outdoor temperature sensor is not attached, error message E3 will appear. See
"Error Codes." In heat pump systems, auxiliary heat is prevented
from operating for outdoor temperatures above selected temperature. In dual fuel systems, furnace is prevented from operating for
outdoor temperatures above selected temperature. If OF is selected, outdoor temperature does not affect system operation.
Factory default is OF (off).
2. Press SET TIME/TEMP button once to flash large display.
3. Use up or down buttons to alternate between OF and ON on
large display.
4. Press SET TIME/TEMP button again to flash upper small
display for selection of another option, or press END to exit
configuration mode.
Option 5—Variable Speed (ICM) Blower
If furnace or fan coil contains a variable-speed (ICM) blower, set
this option to ON. For normal (PSC) blowers, set to OF. This
selection enables system to use special features available only in
units with an ICM blower. Factory default is OF (off).
TO SELECT:
1. Enter configuration mode if not already there. See Step 4 "To
Enter Configuration Mode." Use up and down buttons to make
small (now flashing) display indicate 08.
TO SELECT:
2. Press SET TIME/TEMP button once to flash large display.
1. Enter configuration mode if not already there. See Step 4 "To
Enter Configuration Mode." Use up and down buttons to make
small (now flashing) display indicate 05.
3. Use up or down buttons to move between OF, 5, 10, 15, 20,
25, 30, 35, 40, 45, 50, or 55 on large display. Factory default
is OF.
2. Press SET TIME/TEMP button once to flash large display.
4. Press SET TIME/TEMP button again to flash upper small
display for selection of another option, or press END to exit
configuration mode.
Option 9—Special 3-Stage Electric Heat
3. Use up or down buttons to alternate between OF and ON on
large display. Factory default is OF.
4. Press SET TIME/TEMP button again to flash upper small
display for selection of another option, or press END to exit
configuration mode.
Option 6—Cooling Lockout Below 55°F
This option disables cooling when outdoor temperature is below
55°F. It requires an outdoor temperature sensor. Set to OF to allow
cooling below 55°F. Set to ON to prevent cooling below 55°F.
Factory default is OF (off).
This option requires prior selection of single-speed heat pump and
variable-speed (ICM) fan coil (DIP switch 1—ON, DIP switch
2—OF, Option 7—ON). It provides 3 stages of electric heat from
W1 and W2 by sequencing W1 only, then W2 only, then both W1
and W2. See FK Series Fan Coil Installation Instructions for
further information. For 3-stage heat, select ON. For normal 1- or
2-stage heat, select OF. Factory default is OF (off).
TO SELECT:
TO SELECT:
1. Enter configuration mode if not already there. See Step 4 "To
Enter Configuration Mode." Use up and down buttons to make
small (now flashing) display indicate 06.
1. Enter configuration mode if not already there. See Step 4 "To
Enter Configuration Mode." Use up and down buttons to make
small (now flashing) display indicate 09.
2. Press SET TIME/TEMP button once to flash large display.
2. Press SET TIME/TEMP button once to flash large display.
3. Use up or down buttons to alternate between OF and ON on
large display. Factory default is OF.
3. Use up or down buttons to alternate between OF and ON on
large display. Factory default is OF.
4. Press SET TIME/TEMP button again to flash upper small
display for selection of another option, or press END to exit
configuration mode.
Option 7—Variable Speed Superdehumidify
4. Press SET TIME/TEMP button again to flash upper small
display for selection of another option, or press END to exit
configuration mode.
Option 10—Dual Fuel Equipment
This option requires prior selection of variable-speed (ICM)
blower (Option 5). When selected, this option operates blower at
reduced airflow during dehumidification demand. It is done by
supplying blower with a Y signal and no G signal on a call for
cooling. Not all ICM blowers have this feature. Check Installation
Instructions for ICM air handler used. Select OF for normal
operation (Y and G supplied on a cooling call). Select ON for
super dehumidification (Y with no G on a cooling and dehumidify
call). Factory default is OF (off).
All dual fuel systems must be equipped with a high pressure switch
to turn off the compressor under high pressure condition. It
protects compressor and indoor coil from overpressure which
would occur if a failure or wiring error resulted in the heat pump
and furnace operating at the same time. High Pressure Switch Kit
includes required switch and instructions for proper operation.
This option requires prior selection of heat pump (DIP switch
1—ON), and must be selected in dual fuel installations. It prevents
simultaneous operation of both furnace and heat pump, and
4
The selection procedure is given below. If 0 is selected, operation
is like that of an ordinary thermostat, and a wire is required
between W2 of outdoor unit and a selected W on indoor unit.
When selection 1, 2, or 3 is made, no wire should be connected
from outdoor W2 because this connection may override selection
made. Obviously the heater must be in 2 sections, and fan coil
jumper must be removed between W1 and W2 for there to be a
difference between selections 1, 2, and 3. For most heaters, W1 is
lower wattage heater, and W2 is higher, although some have equal
elements for W1 and W2. Consult fan coil/heater combination for
the actual wattage connected to each of W1 and W2.
prevents direct transition from heat pump to furnace operation.
When system is dual fuel (heat pump and furnace), set to ON.
When system contains fan coil, set to OF. Factory default is OF
(off).
TO SELECT:
1. Enter configuration mode if not already there. See Step 4 "To
Enter Configuration Mode." Use up and down buttons to make
small (now flashing) display indicate 10.
2. Press SET TIME/TEMP button once to flash large display.
3. Use up or down buttons to alternate between OF and ON on
large display. Factory default is OF.
In dual fuel applications, above selection choices apply and can be
used to select low or high fire if furnace is 2 stage. W1 will
produce low fire. W1 and W2 together produce high fire. This
option provides no value with single-stage furnaces because only
1 value of heat is available.
4. Press SET TIME/TEMP button again to flash upper small
display for selection of another option, or press END to exit
configuration mode.
The selection choices guarantee selected outputs will be on during
defrost. If room temperature demand requires additional heat, it
will be supplied, resulting in additional outputs being turned on. If
room overheats, specified outputs will not turn off, guaranteeing a
sufficiently warm leaving air temperature during defrost. Temperature overshoot during defrost can occur, but is almost never
noticeable because of the short duration of the defrost cycle (4
minutes typical, 10 minutes maximum).
All dual fuel installations must be equipped with a high
pressure switch to turn off compressor under a high indoor
coil pressure condition.
Option 11—Dual Fuel Crossover Temperature
This option requires prior selection of heat pump (DIP switch
1—ON) and dual fuel equipment (Option 10—ON). It allows
selection of an outdoor temperature of OF, 5, 10, 15, 20, 25, 30,
35, 40, 45, 50, or 55°F. Outdoor temperature sensor must be
attached. If temperature is selected and outdoor temperature sensor
is not attached, error message E3 will appear. Heat pump is
prevented from operating for outdoor temperatures below selected
temperature. If OF is selected, outdoor temperature does not affect
system operation. Factory default is OF (off).
An additional feature of Thermidistat Control defrost is that it
always allows defrost cycle to run to completion. The Thermidistat
Control leaves the Y output on as long as outdoor unit holds
voltage on the O line, even if it is satisfied. This prevents
premature termination of defrost cycles, which occur with normal
thermostats.
TO SELECT:
TO SELECT:
1. Enter configuration mode if not already there. See Step 4 "To
Enter Configuration Mode." Use up and down buttons to make
small (now flashing) display indicate 12.
1. Enter configuration mode if not already there. See Step 4 "To
Enter Configuration Mode." Use up and down buttons to make
small (now flashing) display indicate 11.
2. Press SET TIME/TEMP button once to flash large display.
2. Press SET TIME/TEMP button once to flash large display.
3. Use up or down buttons to move between 0, 1, 2, or 3 (if
available) on large display. See Table 1 for effect of these
choices. Factory default is 0.
3. Use up or down buttons to move between OF, 5, 10, 15, 20,
25, 30, 35, 40, 45, 50, or 55 on large display. Factory default
is OF.
4. Press SET TIME/TEMP button again to flash upper small
display for selection of another option, or press END to exit
configuration mode.
4. Press SET TIME/TEMP button again to flash upper small
display for selection of another option, or press END to exit
configuration mode.
Option 13—Room Temperature Offset Adjust
Option 12—Defrost Heat Select
This option allows calibration (or deliberate miscalibration) of
room temperature sensor. There are various reasons why homeowners may want to have displayed temperature adjusted to a
higher or lower value. The selected number is number of degrees,
plus or minus, which will be added to actual temperature. The
numbers can range between -5 and +5. Factory default is 0. This
adjusted value will be used as actual temperature for both display
and control action. For example, if 2 is selected, 72°F actual will
read 74°F. If setpoint is 72°F, the room will control to an actual
temperature of 70°F which will be displayed and acted upon as if
it were 72°F. The effect is that a positive number selection will
make the room temperature lower and vice versa. The Thermidistat
Control is calibrated within an accuracy of plus or minus 1° when
shipped from the factory, so this adjustment will provide the best
accuracy when set to 0.
This option allows installer to select the amount of electric heat
provided by Thermidistat Control during a heat pump defrost
cycle. This can be very helpful in maintaining a comfortable
leaving air temperature during defrost. The Thermidistat Control
senses when defrost is in progress by monitoring voltage placed on
the O line by the heat pump while defrosting. It responds by
turning on selected combination of W1 and W2 during defrost.
Note that this is very different from the operation of an ordinary
thermostat, which cannot sense defrost in progress and only turns
on its W outputs in response to a temperature demand. Combinations of W1 and W2 are selected via the following:
Table 1—W1 / W2 Outputs
SELECTION
0
1
2
3
DEFINITION
Neither W1 or W2 is turned on.
This is factory default.
Only W1 is turned on.
Both W1 and W2 turned on.
Only W2 turned on (available
only if 3-stage heat is selected).
TO SELECT:
1. Enter configuration mode if not already there. See Step 4 "To
Enter Configuration Mode." Use up and down buttons to make
small (now flashing) display indicate 13.
2. Press SET TIME/TEMP button once to flash large display.
5
Table 2—Equipment Outputs
Cool—0 to 2 minutes
Cool—2 to 4 minutes
Heat—0 to 2 minutes
Heat—2 to 4 minutes
Eheat—0 to 2 minutes
Eheat—2 to 4 minutes
1-SPEED AC
Y, G
Y, G
W1
W1, W2
-----
2-SPEED AC
Y1, G
Y1, Y2, G
W1
W1, W2
-----
1-SPEED HP
Y, G, O
Y, G, O
Y, G
Y, G
W1
W1, W2†
2-SPEED HP
Y1, G, O
Y1, Y2, G, O
Y1, G
Y1, Y2, G
W1
W1*
* Two-stage heat not available
NOTE: For Y—use terminal Y/Y2, for Y1—use terminal Y1/W2, for W2—use terminal O/W2,
for O—use terminal O/W2, for W1—use terminal W/W1, for W2†, use terminal Y1/W2
Step 5—System Start-Up and Checkout
3. Use up or down buttons to move between -5, -4, -3, -2, -1, 0,
1, 2, 3, 4, or 5 on large display. Factory default is 0.
The Thermidistat Control is designed with a built-in installer test
capability. It allows easy operation of equipment without delays or
setpoint adjustments to force heating or cooling.
4. Press SET TIME/TEMP button again to flash upper small
display for selection of another option, or press END to exit
configuration mode.
To enable installer test mode, move DIP switch No. 4 to ON
position. To access this switch, open case as described in Step 2.
Use the corner of a small screwdriver to slide switch No. 4 to ON
position.
Option 14—Heat/Cool Dead Band Adjustment
This option selects the minimum difference between heat and cool
setpoints. A larger difference saves energy and a smaller difference
decreases temperature difference between heating and cooling.
Factory default is 2, which means cooling setpoint must be a
minimum of 2° above heating setpoint. An attempt to move them
closer will result in one "pushing" the other to maintain the
required difference.
While in installer setup mode, clock will display "InSt," FAN
button will control fan, and MODE button will control heating and
cooling.
TO TEST FAN:
Fan button switches FAN icon between AUTO and ON. While ON
is displayed, G output will be on, turning fan on. Allow up to 10
sec after button is pressed for fan to turn on and off. On some fan
coils, fan continues to operate for 90 sec after G signal is removed.
Depending on setpoints, moving dead band closer than 2° may
result in regular cycling between heat and cool when AUTO mode
is selected. However, this cycling cannot occur more often than 1
transition every 20 minutes. The system has a built-in requirement
that it cannot switch between heat and cool without a 20 minute
"off" time between the 2 operations. Specifically, to switch from 1
mode to the other, there must be no demand for the old mode and
a demand for the new mode, and this must exist continually for 20
minutes before transition to the new mode will occur.
TO TEST COOLING AND DEHUMIDIFICATION:
Press MODE button until COOL icon turns on. Cooling begins
within 10 sec and remains on for 4 minutes. If system is 2-speed,
low speed comes on for first 2 minutes, followed by high speed for
second 2 minutes. At the end of 4-minute run, cooling stops, and
MODE reverts back to OFF. At any time during 4-minute run time,
cooling may be turned off by pressing MODE button until OFF
appears. While cooling is on, successive presses of HUMIDITY
button turn dehumidify output on and off. While this output is
active, "hu" appears in heat setpoint display. Equipment outputs
for different equipment types are listed in Table 2.
TO SELECT:
1. Enter configuration mode if not already there. See Step 4 "To
enter Configuration Mode." Use up and down buttons to make
small (now flashing) display indicate 14.
2. Press SET TIME/TEMP button once to flash large display.
3. Use up or down buttons to move between 0, 1, 2, 3, 4, 5, or 6
on large display. Factory default is 2.
TO TEST PRIMARY HEATING:
4. Press SET TIME/TEMP button again to flash upper small
display for selection of another option, or press END to exit
configuration mode.
Press MODE button until HEAT icon turns on. Primary heating
begins within 10 sec and remains on for 4 minutes. This will be
furnace or electric heat in AC system and heat pump heating in
heat pump system. If system has 2 stages of primary heat, first
stage will be on for 2 minutes followed by second stage for 2
minutes. At the end of 4-minute run, heating stops, and MODE
reverts back to OFF. At any time during 4-minute run time, heating
may be turned off by pressing MODE button until OFF appears.
While heating is on, successive presses of HUMIDITY button turn
humidify output on and off. While this output is active, "dh"
appears in cool setpoint display. Equipment outputs for different
equipment types are listed in Table 2.
Option 15—Enable Auto Mode
This option allows the installer to enable or disable AUTO mode
(automatic changeover between heat and cool). When disabled,
AUTO icon does not appear when successive presses of MODE
button are used to move between OFF, HEAT, COOL, and
EHEAT (in heat pump systems). Factory default is ON (AUTO
enabled).
TO SELECT:
1. Enter configuration mode if not already there. See Step 4 "To
Enter Configuration Mode." Use up and down buttons to make
small (now flashing) display indicate 15.
TO TEST AUXILIARY HEATING:
Auxiliary heating only exists in heat pump systems. To test, press
MODE button until EHEAT icon turns on. This will be electric
heat in standard heat pump systems and furnace in dual fuel
systems. Auxiliary heating begins within 10 sec and remains on for
4 minutes. If there are 2 stages of auxiliary heat, first stage comes
on for 2 minutes followed by second stage for 2 minutes. At the
end of 4-minute run, heating stops and MODE reverts back to
OFF. At any time during 4-minute run time, heating may be turned
2. Press SET TIME/TEMP button once to flash large display.
3. Use up and down buttons to move between OF and ON on
large display. Factory default is ON (AUTO enabled).
4. Press SET TIME/TEMP button again to flash upper small
display for selection of another option, or press END to exit
configuration mode.
6
off by pressing MODE button until OFF appears. Actual outputs
for different equipment types are listed in Table 2.
heating cycles. It allows the humidifier to run longer, supplying
more humidity to the home. Note that fan hours will increase,
using more electricity. Also, the humidifier delivers less moisture
to cooler air than it does to heated air.
Auto Humidify
Step 6—Final Settings
Be sure to return DIP switch No. 4 back to OFF position to exit
installer setup mode. Assuming system is to be left in operation
after installation is complete, use MODE button to select between
HEAT, COOL, or AUTO to provide desired operation of heating,
cooling, or both.
This feature is designed to eliminate the problem of sweating
windows in very cold weather. When selected, the setpoint is
automatically reduced by 1 percent for every drop of 2°F in
outdoor temperature between 50°F and 0°F. The setpoint may be
changed at any time, and it will continue to track outdoor
temperature from the new setpoint and current outdoor temperature. The adjusted setpoint range is still limited to between 10 and
45 percent relative humidity. To use this feature, an outdoor
temperature sensor MUST be attached. If not, E3 error message
will be displayed.
The default setpoints and programmed schedule conform to the
Energy Star® requirements of the U.S. Department of Energy for
both heating and cooling. These provide energy saving temperature settings. Refer to Table 3.
Table 3—Energy Star Schedule
SCHEDULE
Wake 6:00 AM
Day 8:00 AM
Evening 5:00 PM
Sleep 10:00 PM
HEAT
68°F
60°F
68°F
60°F
COOL
78°F
85°F
78°F
82°F
Auto and Fan Humidify
The 2 choices of AUTO and FAN can be selected together. This
provides both functions simultaneously.
Humidify Off
The humidify function can be turned off completely. This does not
require changing existing setpoints.
To Select Humidification (Between NORMAL, FAN, AUTO,
FAN and AUTO, or OFF)
If programmed schedule is to be used, make sure HOLD icon is
off. It is turned on and off by HOLD button.
If fixed temperatures are desired, use HOLD button to turn on
HOLD icon. This will maintain setpoints, not allowing them to
change with programmed schedule.
Press HUMIDITY button to bring up humidity select screen. It is
indicated by "hu" or "dhu" in clock display. Successive presses
will change between "hu" and "dhu" in clock display. Select "hu"
for humidity functions. The large display shows actual humidity
level. The smaller
display (in heat setpoint location) shows humidity setpoint (HSP)
or OF (off). When HSP value is displayed, its value can be
changed with up and down buttons. Successive presses of MODE
button will move between 5 choices described above and each will
be indicated as shown in Table 4.
The FAN button may be used to select between AUTO (fan on
only with equipment) and FAN (fan on continuously) fan modes.
For further information on temperature selection and programming, refer to Homeowner’s Guide.
HUMIDITY CONTROL FEATURES
The various humidity control features of the Thermidistat Control
are explained below. They are grouped into 2 sections: humidification and dehumidification. At the end of each section, instructions on how to select each feature are given.
To exit humidity select screen, press END button.
Additional Humidify Comments
HUMIDIFICATION
The Thermidistat Control directly connects to a standard 24-vac
humidifier to control humidification in the home. A humidify
setpoint between 10 and 45 percent relative humidity is selected by
the homeowner, or all humidification can be turned off. When
humidity in home drops below setpoint, humidifier will be turned
on to raise humidity level. Humidification can only occur in
heating mode (HEAT or AUTO/HEAT). Five different humidification selections are available and are described below.
The humidifier is actually turned on when humidity is 1 percent
below setpoint and turned off when it reaches 1 percent above
setpoint. This built-in hysteresis prevents humidify output from
toggling on and off when humidity level is near setpoint.
The vacation mode provides some additional humidification functions. These are specially designed to provide protection for an
unoccupied home while simultaneously minimizing energy use.
Refer to "Vacation" section for additional information.
DEHUMIDIFICATION
Normal Humidify
In normal humidify, humidifier will be on if there is a humidity
demand and any heating equipment is on. This will include
furnace, heat pump, or auxiliary heat. In heat pump applications,
this is an improvement over using an external humidistat, which
only supplies humidity when auxiliary heat is on.
Dehumidification is done only during cooling. Depending on type
of equipment used, compressor speed, blower speed, setpoint
adjustment, and equipment cycling are modified to provide added
dehumidification. A dehumidification setpoint (separate from
humidification setpoint) is available to the homeowner. It can
range from 50 to 90 percent relative humidity. When actual
humidity is higher than setpoint, a dehumidification demand
exists. The Thermidistat Control responds by activating its dehumidify output. It may also control the compressor and blower,
Fan Humidify
This configuration allows a humidify demand to turn on fan and
humidifier together, even if there is no heat demand. It is
particularly useful when the furnace is oversized, resulting in short
Table 4—Humidification Selections
SELECTION
MODE DISPLAY
FAN DISPLAY
Normal Humidify
Fan Humidify
Auto Humidify
Auto and Fan
Humidify Off
Blank
Blank
AUTO
AUTO
Blank
Blank
FAN
Blank
FAN
Blank
7
HUMIDIFY SP
DISPLAY
HSP Value
HSP Value
HSP Value
HSP Value
OF
Table 5—Dehumidification Selections
SELECTION
MODE DISPLAY
FAN DISPLAY
Normal Dehumidify
Cool to Dehumidify
Dehumidify OFF
Blank
COOL
Blank
Blank
Blank
Blank
depending on equipment type and dehumidify selection choice.
The 3 available selections are described below.
DEHUMIDIFY SP
DISPLAY
DSP Value
DSP Value
OF
superdehumidify capability. During cool-to-dehumidify call, it
provides maximum dehumidification by reducing airflow to a
minimum. The actual superdehumidify command from Thermidistat Control to blower is a Y signal without a G signal in addition
to dehumidify signal. The blower responds to this combination by
reducing the airflow to a minimum. All other characteristics of
cool to dehumidify are the same.
The amount of extra dehumidification available is very dependent
on the type of equipment in the home. Without a variable-speed
blower, the system’s ability to adjust dehumidification is very
limited.
Normal Dehumidify Operation
Additional Dehumidify Comments
When normal dehumidify is selected, the compressor will not turn
on without a cooling demand. If dehumidify demand exists while
cooling, dehumidify output will also be active (24vac removed).
This output commands variable-speed blowers to reduce their
airflow, which improves water removal from the cooled air.
Dehumidification can be enhanced (with some efficiency loss) by
turning blower off immediately at the end of each cooling cycle
(eliminating normal 90 sec blower off delay). Where maximum
humidity removal is desired, this should be done, if possible. Fan
coils have the capability of removing this off delay, furnaces do
not. On FK Fan Coils, set delay tap to 0/0. On standard fan coils,
a jumper can be cut to disable off delay. Refer to fan coil
Installation Instructions for details. If FAN is set for continuous
operation (fan ON icon displayed), G output is turned off for 5
minutes at the end of each cooling cycle as long as dehumidify
demand exists.
Cool to Dehumidify
The cool to dehumidify selection tells the system to operate the
compressor, within limits, when there is a dehumidify demand
even if there is no cooling demand. The limits are that the system
may overcool up to 3°, but no more, while attempting to satisfy a
dehumidify demand. Within this 3° range, there is an additional
balance between overcooling and humidity satisfaction. When
overcooling must occur, the dehumidify setpoint is adjusted
upward by 2 percent per degree of overcooling. For example, a
cooling setpoint of 76°F and a dehumidify setpoint of 60 percent
is equivalent to a cooling setpoint of 75°F and a dehumidify
setpoint of 62 percent. This dehumidify setpoint change is internal
to the Thermidistat Control and is not shown on the display.
Like humidify, dehumidify actions are initiated when humidity is
1 percent above setpoint and are terminated when humidity drops
to 1 percent below setpoint. This prevents unnecessary toggling of
dehumidify actions when humidity is near setpoint.
The vacation mode contains additional dehumidify features designed to protect an unoccupied home. Refer to the "Vacation"
section for additional information.
During cool-to-dehumidify demand, the compressor runs a maximum of 10 minutes on, followed by 10 minutes off. When the
compressor turns off, the fan (G output) is also turned off
immediately. The immediate fan shutoff prevents re-evaporation
of water on the coil, improving dehumidification. If fan is set to
continuous, the G (fan on) signal is removed for 5 minutes starting
when compressor turns off.
With any dehumidify selection, if the system has a 2-speed
compressor (DIP switch No. 2 is ON) and does NOT have a
variable-speed blower (Configuration Option No. 5 set to OFF), all
cooling will be done at high speed while dehumidify demand
exists. This is because the combination of 2-speed compressor
without variable-speed blower generally has poor water removal
on low speed.
In most furnaces and fan coils, the blower operates for 90 sec after
both Y and G disappear. This 90-sec delay should be removed, if
possible, for maximum dehumidification performance. Consult
furnace or fan coil Installation Instructions to see if delay can be
disabled.
Dehumidify Output and Equipment Connections
When there is a dehumidify demand, dehumidify output is
activated, which means that a 24-vac signal is removed from the
DHUM output terminal. In other words, dehumidify output logic is
reversed — output is turned ON when no dehumidify demand
exists and is turned OFF when demand exists. This logic reversal
has come about from historical use of a standard humidistat to do
dehumidification. The humidistat contacts open on high humidity,
thus removing a 24-vac signal to initiate dehumidification. Equipment has been designed to operate in this manner, so the
Thermidistat Control must now accommodate the existing equipment.
Dehumidify Off
Dehumidification can be turned off completely. This can be done
without changing existing setpoints.
To Select Dehumidification (Between NORMAL, COOL TO, and
OFF)
Press HUMIDITY button to bring up humidity selections. Successive presses will show "hu" or "dhu" in clock display. Select "dhu"
for dehumidify selections. The large display shows actual humidity
level. The smaller display (in cool setpoint location) shows
dehumidify setpoint (DSP) or OF (off). When DSP value is
displayed, its value can be changed with up and down buttons.
Successive presses of MODE button moves between 3 choices
above and each will be indicated as in Table 5.
Carrier FK4C Variable-Speed Fan Coils and 58UHV, 58UXV
2-Stage 80% Variable-Speed Furnaces have dehumidify inputs
which should be directly connected to Thermidistat Control
DHUM output. They are compatible with reverse logic output and
will reduce their cooling CFM by 20 percent when a dehumidify
demand is present.
Superdehumidify (With Cool to Dehumidify)
The FK4C Fan Coil has a terminal marked DH which should be
connected to the Thermidistat Control DHUM output. Jumper J1
on fan coil MUST be removed. It is located behind the DH
terminal. Additionally blower delay tap on fan coil should be set to
0/0 (no ON delay and no OFF delay) when using cool to
This selection only affects cool-to-dehumidify operation. It is part
of the installer setup (see Configuration Option No. 7) and must be
made by installer. The Homeowner’s Guide does not cover this
selection. A requirement is the use of a variable-speed blower with
8
Fig. 6—Wiring Diagram Reference Chart
EQUIPMENT SELECTION
Typical Fan Coil
FK4C Fan Coil
1-Stage Furnace
2-Stage Furnace
Variable-Speed
Non-condensing Furnace
Variable-Speed
Condensing Furnace
SINGLE-SPEED
AIR CONDITIONER
Fig. 2
Fig. 6
Fig. 10
Fig. 14
TWO-SPEED
AIR CONDITIONER
Fig. 3
Fig. 7
Fig. 11
Fig. 15
SINGLE-SPEED
HEAT PUMP
Fig. 4
Fig. 8
Fig. 12
Fig. 16
TWO-SPEED
HEAT PUMP
Fig. 5
Fig. 9
Fig. 13
Fig. 17
Fig. 18
Fig. 19
Fig. 20
Fig. 21
Fig. 22
Fig. 23
Fig. 24
Fig. 25
dehumidify. With this selection, the blower stops when G signal is
removed, preventing re-evaporation of water from the coil which
would occur during the normal 90 sec blower off delay. See Table
6 and Fig. 6 through 9.
be different from that of occupied. Vacation dehumidification
selection and setpoints are remembered the next time vacation is
used.
Cool to dehumidify operates slightly differently, allowing the
home to be cooled to as low as 70°F when trying to achieve
dehumidify setpoint. The balance between dehumidify and temperature setpoint adjustments is 1 percent setpoint increase per
degree of overcooling for temperatures below 76°F. For example,
at 74°F dehumidify setpoint is raised 2 percent, and at 72°F
dehumidify setpoint is raised 4 percent. At temperatures above
76°F, dehumidify setpoint is not changed.
On 58UHV and 58UXV Furnaces, a green wire marked DHUM is
connected to a spade lug which is connected to the G input
terminal. Unplug spade lug, cut off spade receptacle from wire
end, and splice a wire between green DEHUM wire and Thermidistat Control DHUM terminal. See Table 6 and Fig. 18 through
21.
Carrier 58MVP Furnaces have a dehumidify input also, but its
logic sense is reversed, and a relay is required between Thermidistat Control and furnace. The relay coil is connected between
DHUM output and C terminal. Its normally closed contact is
connected between R terminal (at furnace) and DH terminal (at
furnace), which is a spade lug located next to transformer
secondary connections. See Table 6 and Fig. 22 through 25. When
dehumidify demand exists, relay is de-energized, and normally
closed contacts supply 24vac to the furnace DH terminal. This
furnace reduces its airflow by 15 percent when dehumidify signal
is present.
Under no conditions will the house be cooled below 70°F,
regardless of dehumidify demand.
OPERATIONAL INFORMATION
FIVE-MINUTE COMPRESSOR TIMEGUARD
This timer prevents compressor from starting unless it has been off
for at least 5 minutes. It can be defeated for 1 cycle by
simultaneously pressing FAN mode button and INCREASE TEMPERATURE button.
VACATION
FIFTEEN-MINUTE CYCLE TIMER
A vacation selection is available specifically for times where the
home will not be occupied for an extended period. For convenience, 1 button selects vacation mode which is indicated by OUT
icon on display. Vacation mode also has an automatic hold,
meaning that setpoints are not affected by the programmed
schedule. While in vacation mode, the system provides temperature and humidity protection for the home in all seasons, but not
comfort.
This timer prevents the start of a heating or cooling cycle until at
least 15 minutes after the last start of the same cycle. Its function
is to assure that equipment is not cycled more than 4 times per hr.
This timer is defeated for 1 cycle when desired temperature is
manually changed. It can also be defeated for 1 cycle by
simultaneously pressing FAN mode button and INCREASE TEMPERATURE button.
FIFTEEN-MINUTE STAGING TIMER
Vacation Setpoints
In multistage heating or cooling, this timer prevents any higher
stage from turning on until preceding stage has been on for 15
minutes. This timer is defeated if temperature error is greater than
5°F (usually due to a large change in desired temperature).
A special set of temperature and humidity setpoints exists which
are active in vacation mode. They are adjustable by the homeowner, are exclusively for vacation mode, and are remembered
from 1 vacation selection to the next. These setpoints will be
higher for cool and dehumidify and lower for heat and humidify
than those of occupied mode.
THREE-MINUTE MINIMUM ON TIME
In normal operation, when a stage turns on, it will not turn off for
a minimum of 3 minutes.
Vacation Humidification
Normal humidify is available, using vacation setpoints. Humidification by fan only is not available as vacation selection. Auto
humidification is available, adjusting its setpoint with outdoor
temperature the same as when occupied. The maximum humidity
setpoint can be adjusted separately from the occupied value, but it
must always be less than occupied value. This allows humidification to track outdoor temperature identically, whether occupied or
vacation, but allows maximum humidification to be less when
unoccupied. Vacation humidification can be turned off independently of occupied humidification.
HEAT/COOL SETPOINTS (DESIRED TEMPERATURE)
A minimum difference of 2° is enforced between heating and
cooling desired temperatures. This is done by allowing 1 setting to
"push" the other, to maintain this difference. This difference is
adjustable via Configuration Option 14.
EQUIPMENT ON INDICATORS
When cooling equipment is on, a COOL icon preceded by a small
triangle is displayed below cool setpoint. While cooling equipment
turn on is delayed by a staging or cycle timer, triangle will flash.
The same is true for HEAT icon and its preceding triangle located
under heat setpoint. These 2 arrows are also used to indicate state
of humidify and dehumidify outputs. See next section.
Vacation Dehumidification
Normal Dehumidify, Cool to Dehumidify, and Dehumidify OFF,
are all available in vacation mode, and selection of 1 of these can
9
THERMIDISTAT
HEAT STAGE 2 O/W2
TYPICAL
FAN COIL
E
N/A Y1/W2
W3
HEAT STAGE 1 W/W1
W2
Y/Y2
Y
FAN
G
G
24 VAC HOT
R
R
24 VAC COMM
C
C
COOL STAGE 1
1-SPEED
AIR CONDITIONER
N/A
OUTDOOR
SENSOR
CONNECTION
HUM
C
COOL STAGE 1 Y1/W2
E
HEAT STAGE 2 O/W2
W3
HEAT STAGE 1 W/W1
W2
2-SPEED
AIR CONDITIONER
Y1
Y/Y2
Y
FAN
G
G
24 VAC HOT
R
R
R
24 VAC COMM
C
C
C
Y2
N/A DHUM
HUMIDIFIER
(24 VAC)
HUMIDIFY HUM
B
S1
TYPICAL
FAN COIL
COOL STAGE 2
Y
N/A DHUM
HUMIDIFY
THERMIDISTAT
OUTDOOR
SENSOR
S2
N/A
B
OUTDOOR
SENSOR
CONNECTION
S1
HUMIDIFIER
(24 VAC)
OUTDOOR
SENSOR
S2
See notes 1, 6, 13, and 16
See notes 1, 6, 13, and 15
A97383
A97382
Fig. 3—Typical Fan Coil With
2-Speed Air Conditioner
Fig. 2—Typical Fan Coil With
1-Speed Air Conditioner
THERMIDISTAT
RVS COOLING
O/W2
HEAT STAGE 3 Y1/W2
HEAT STAGE 2
HEAT/COOL
STAGE 1
W/W1
Y/Y2
TYPICAL
FAN COIL
THERMIDISTAT
1-SPEED
HEAT PUMP
RVS COOLING
E
W3
O
W2
Y
Y
FAN
G
G
24 VAC HOT
R
R
R
24 VAC COMM
C
C
C
HUM
RVS HEATING
B
OUTDOOR
SENSOR
CONNECTION
S1
W/W1
W2
Y/Y2
O
Y1
W2
Y
Y2
FAN
G
G
W3
24 VAC HOT
R
R
R
24 VAC COMM
C
C
C
N/A DHUM
N/A DHUM
HUMIDIFY
W3
HEAT/COOL
STAGE 2
2-SPEED
HEAT PUMP
E
HEAT/COOL Y1/W2
STAGE 1
HEAT STAGE 3
W2
O/W2
TYPICAL
FAN COIL
HUMIDIFIER
(24 VAC)
OUTDOOR
SENSOR
S2
HUMIDIFY
HUM
RVS HEAT
B
OUTDOOR
SENSOR
CONNECTION
S1
HUMIDIFIER
(24 VAC)
OUTDOOR
SENSOR
S2
See notes 1, 4, 5, 14, and 16
See notes 1, 7, 14, and 15
A97384
A97385
Fig. 4—Typical Fan Coil With
1-Speed Heat Pump
Fig. 5—Typical Fan Coil With
2-Speed Heat Pump
10
THERMIDISTAT
FK4C
FAN COIL
1-SPEED
AIR CONDITIONER
FK4C
FAN COIL
THERMIDISTAT
HEAT STAGE 2
O/W2
W2
N/A Y1/W2
Y1
HEAT STAGE 1 W/W1
HEAT STAGE 2 O/W2
W2
HEAT STAGE 1 W/W1
W1
COOL STAGE 1 Y1/W2
Y1
Y1
Y/Y2
Y/Y2
Y2
FAN
G
G
24 VAC HOT
R
R
W1
Y/Y2
Y/Y2
FAN
G
G
24 VAC HOT
R
R
COOL STAGE 1
REMOVE J2 JUMPER
FOR HEAT STAGING
O
Y
COOL STAGE 2
REMOVE
J1 JUMPER
24 VAC COMM
HUMIDIFY
C
HUM
N/A
B
OUTDOOR
SENSOR
CONNECTION
S1
DH
C
24 VAC COMM
HUMIDIFIER
(24 VAC)
HUMIDIFY
OUTDOOR
SENSOR
See notes 1, 2, 6, 13, and 15
C
C
HUM
N/A
B
OUTDOOR
SENSOR
CONNECTION
S1
Fig. 7—FK4C Fan Coil With
2-Speed Air Conditioner
HEAT STAGE 2 W/W1
W1
W2
Y/Y2
Y/Y2
Y
G
G
24 VAC HOT
R
Y1
2-SPEED
HEAT PUMP
O
O
HEAT/COOL Y1/W2
STAGE 1
Y1
Y1
W/W1
W1
HEAT STAGE 3
HEAT/COOL
STAGE 2
W2
FAN
G
Y/Y2
24 VAC HOT
R
G
REMOVE
J1 JUMPER
W2
J2 JUMPER
Y/Y2
R
R
FK4C
FAN COIL
O/W2
RVS COOLING
REMOVE J2 JUMPER
FOR HEAT STAGING
W2
FAN
THERMIDISTAT
O
HEAT STAGE 3 Y1/W2
HEAT/COOL
STAGE 1
OUTDOOR
SENSOR
A97388
1-SPEED
HEAT PUMP
O
HUMIDIFIER
(24 VAC)
See notes 1, 2, 6, 13, and 16
Fig. 6—FK4C Fan Coil With
1-Speed Air Conditioner
RVS COOLING O/W2
C
S2
A97387
FK4C
FAN COIL
R
DEHUMIDIFY DHUM
C
S2
THERMIDISTAT
REMOVE J2 JUMPER
FOR HEAT STAGING
REMOVE
J1 JUMPER
O
DEHUMIDIFY DHUM
2-SPEED
AIR CONDITIONER
Y2
R
R
REMOVE J1
DEHUMIDIFY DHUM
24 VAC COMM
HUMIDIFY
C
HUM
RVS HEATING
B
OUTDOOR
SENSOR
CONNECTION
S1
DEHUMIDIFY DHUM
C
C
24 VAC COMM
HUMIDIFIER
(24 VAC)
HUMIDIFY
OUTDOOR
SENSOR
S2
See notes 1, 2, 7, 14, and 15
C
HUM
RVS HEATING
B
OUTDOOR
SENSOR
CONNECTION
S1
DH
W3
C
C
HUMIDIFIER
(24 VAC)
OUTDOOR
SENSOR
S2
See notes 1, 2, 4, 5, 14, and 16
A97389
A97390
Fig. 8—FK4C Fan Coil With
1-Speed Heat Pump
Fig. 9—FK4C Fan Coil With
2-Speed Heat Pump
11
THERMIDISTAT
1-STAGE
FURNACE
1-SPEED
AIR CONDITIONER
W
Y/Y2
Y
FAN
G
G
24 VAC HOT
R
R
C
C
HUM
N/A
B
OUTDOOR
SENSOR
CONNECTION
S1
HEAT STAGE 1 W/W1
W
Y/Y2
Y
FAN
G
G
24 VAC HOT
R
R
R
24 VAC COMM
C
C
C
COOL STAGE 2
Y
C
Y2
N/A DHUM
N/A DHUM
HUMIDIFY
Y1
COOL STAGE 1 Y1/W2
N/A Y1/W2
COOL STAGE 1
2-SPEED
AIR CONDITIONER
N/A O/W2
N/A O/W2
HEAT STAGE 1 W/W1
1-STAGE
FURNACE
THERMIDISTAT
HUMIDIFY HUM
HUMIDIFIER
(24 VAC)
OUTDOOR
SENSOR
S2
N/A
B
OUTDOOR
SENSOR
CONNECTION
S1
HUMIDIFIER
(24 VAC)
OUTDOOR
SENSOR
S2
See notes 13 and 16
See notes 13 and 15
A97391
A97392
Fig. 10—Single-Stage Furnace With
1-Speed Air Conditioner
THERMIDISTAT
1-STAGE
FURNACE
Fig. 11—Single-Stage Furnace With
2-Speed Air Conditioner
1-SPEED
HEAT PUMP
RVS COOLING O/W2
THERMIDISTAT
(FURNACE)
HEAT/COOL
STAGE 1
W/ W1
Y/Y2
2-SPEED
HEAT PUMP
RVS COOLING O/W2
HEAT/COOL
STAGE 1 Y1/W2
O
N/A Y1/W2
HEAT STAGE 2
1-STAGE
FURNACE
O
Y1
(COMPRESSOR LO)
W
Y
HEAT STAGE 3
W2
W/W1
W
W2
Y/Y2
Y
Y2
FAN
G
G
W3
(FURNACE)
HEAT/COOL
STAGE 2
Y
(COMPRESSOR)
(COMPRESSOR HI)
FAN
G
G
24 VAC HOT
R
R
R
24 VAC HOT
R
R
R
24 VAC COMM
C
C
C
24 VAC COMM
C
C
C
N/A DHUM
N/A DHUM
HUMIDIFY
N/A
OUTDOOR
SENSOR
CONNECTION
HUM
HUMIDIFIER
(24 VAC)
HUMIDIFY
B
S1
OUTDOOR
SENSOR
S2
See notes 3, 9, 14, 15, and 17
HUM
N/A
B
OUTDOOR
SENSOR
CONNECTION
S1
HUMIDIFIER
(24 VAC)
OUTDOOR
SENSOR
S2
See notes 3, 4, 5, 9, 14, 16, and 17
A97393
A97394
Fig. 12—Single-Stage Furnace With
1-Speed Heat Pump (Dual Fuel)
Fig. 13—Single-Stage Furnace With
2-Speed Heat Pump (Dual Fuel)
12
THERMIDISTAT
HEAT STAGE 2
O/ W2
2-STAGE
FURNACE
1-SPEED
AIR CONDITIONER
W2
N/A Y1/W2
HEAT STAGE 1
2-STAGE
FURNACE
THERMIDISTAT
HEAT STAGE 2
O/W2
COOL STAGE 1
Y1/W2
HEAT STAGE 1
W/W1
W/W1
COOL STAGE 2
Y/Y2
Y/Y2
2-SPEED
AIR CONDITIONER
W2
Y1
W/W1
W/W1
Y/Y2
Y/Y2
FAN
G
G
FAN
G
G
24 VAC HOT
R
R
24 VAC HOT
R
R
R
24 VAC COMM
C
C
24 VAC COMM
C
C
C
COOL STAGE 1
N/A
HUMIDIFY
N/A
OUTDOOR
SENSOR
CONNECTION
Y
C
DHUM
HUM
N/A
HUMIDIFIER
(24 VAC)
S1
DHUM
HUMIDIFY
B
N/A
OUTDOOR
SENSOR
OUTDOOR
SENSOR
CONNECTION
S2
HUM
OUTDOOR
SENSOR
S1
S2
See notes 6, 13, and 16
A97395
A97396
Fig. 14—Two-Stage Furnace With
1-Speed Air Conditioner
RVS COOLING
HEAT STAGE 3
(FURNACE HI)
HEAT STAGE 2
(FURNACE LO)
HEAT/COOL
STAGE 1
2-STAGE
FURNACE
O/W2
W2
W/W1
W/W1
Y/Y2
Fig. 15—Two-Stage Furnace With
2-Speed Air Conditioner
1-SPEED
HEAT PUMP
THERMIDISTAT
RVS COOLING O/W2
HEAT/COOL
STAGE 1 Y1/W2
O
Y1/W2
Y/Y2
HEAT STAGE 3
W2
G
G
R
R
24 VAC COMM
C
C
C
N/A
OUTDOOR
SENSOR
CONNECTION
W2
O
Y1
W/W1
W2
Y/Y2
Y/Y2
Y2
FAN
G
G
W3
24 VAC HOT
R
R
R
24 VAC COMM
C
C
C
(COMPRESSOR HI)
24 VAC HOT
HUMIDIFY
2-SPEED
HEAT PUMP
W/W1
(FURNACE)
HEAT/COOL
STAGE 2
Y
R
N/A
2-STAGE
FURNACE
(COMPRESSOR LO)
(COMPRESSOR)
FAN
HUMIDIFIER
(24 VAC)
B
See notes 6, 13, and 15
THERMIDISTAT
Y2
DHUM
HUM
N/A DHUM
HUMIDIFIER
(24 VAC)
HUMIDIFY
B
S1
OUTDOOR
SENSOR
S2
HUM
N/A
B
OUTDOOR
SENSOR
CONNECTION
S1
HUMIDIFIER
OUTDOOR
SENSOR
S2
See notes 3, 4, 5, 8, 9, 10, 14, 16, and 17
See notes 3, 7, 9, 10, 14, 15, and 17
A97397
A97398
Fig. 16—Two-Stage Furnace With
1-Speed Heat Pump (Dual Fuel)
Fig. 17—Two-Stage Furnace With
2-Speed Heat Pump (Dual Fuel)
13
VARIABLE SPEED 80% NON-CONDENSING FURNACE
AFS
BOARD
O
Y1
AFS
BOARD
O
1-SPEED
AIR CONDITIONER
FURNACE
BOARD
THERMIDISTAT
VARIABLE SPEED 80% NON-CONDENSING FURNACE
HEAT STAGE 2
O/W2
N/A
Y1/W2
HEAT STAGE 1
W/ W1
W/W1
COOL STAGE 1
Y/ Y2
Y/Y2
FAN
G
G
24 VAC HOT
R
R
24 VAC COM
C
COM
Y1
THERMIDISTAT
W2
Y
C
COOL STAGE 1
Y1/W2
HEAT STAGE 2
O/W2
W2
HEAT STAGE 1
W/W1
W/W1
COOL STAGE 2
Y/Y2
Y/Y2
FAN
G
G
24 VAC HOT
R
R
R
24 VAC COM
C
COM
C
DEHUMIDIFY
DHUM
HUM
DEHUMIDIFY
N/A
B
OUTDOOR
SENSOR
CONNECTIONS
S1
Y2
DEHUM
PL9-10
PL9-10
HUMIDIFIER
(24 VAC)
HUM
Y1
HUM
DHUM
DEHUM
HUMIDIFY
2-SPEED
AIR CONDITIONER
FURNACE
BOARD
HUMIDIFY
OUTDOOR
SENSOR
S2
HUMIDIFIER
(24 VAC)
HUM
N/A
B
OUTDOOR
SENSOR
CONNECTIONS
S1
OUTDOOR
SENSOR
S2
See notes 6, 10, 12, 13, and 15
See notes 6, 9, 10, 12, 13, and 16
A97434
A97435
Fig. 18—Variable-Speed Non-Condensing Furnace
With 1-Speed Air Conditioner
Fig. 19—Variable-Speed Non-Condensing Furnace
With 2-Speed Air Conditioner
VARIABLE SPEED 80% NON-CONDENSING FURNACE
O
THERMIDISTAT
VARIABLE SPEED 80% NON-CONDENSING FURNACE
AFS
BOARD
1-SPEED
HEAT PUMP
Y1
RVS COOLING
O/W2
FURNACE
BOARD
HEAT STAGE 3
Y1/W2
W2
HEAT STAGE 2
W/ W1
W/W1
W2
Y/ Y2
Y/Y2
Y
G
G
HEAT/COOL
STAGE 1
FAN
THERMIDISTAT
O
24 VAC HOT
R
R
R
24 VAC COM
C
COM
C
DEHUMIDIFY
DHUM
O/W2
FURNACE
BOARD
O
HEAT/COOL
STAGE 1
Y1/W2
W2
Y1
HEAT STAGE 3
W/W1
W/W1
W2
HEAT/COOL
STAGE 2
Y/Y2
Y/Y2
Y2
FAN
G
G
W3
24 VAC HOT
R
R
R
24 VAC COM
C
COM
C
DEHUMIDIFY
DHUM
HUM
DEHUM
DEHUM
PL9-10
N/A
OUTDOOR
SENSOR
CONNECTIONS
HUM
PL9-10
HUMIDIFIER
(24 VAC)
HUMIDIFY
B
S1
2-SPEED
HEAT PUMP
Y1
RVS COOLING
HUM
HUMIDIFY
AFS
BOARD
O
OUTDOOR
SENSOR
S2
See notes 3, 7, 9, 10, 12, 14, 15, and 17
HUM
N/A
B
OUTDOOR
SENSOR
CONNECTIONS
S1
HUMIDIFIER
(24 VAC)
OUTDOOR
SENSOR
S2
See notes 3, 4, 5, 8, 9, 10, 12, 14, 16, and 17
A97436
A97437
Fig. 20—Variable-Speed Non-Condensing Furnace
With 1-Speed Heat Pump (Dual Fuel)
Fig. 21—Variable-Speed Non-Condensing Furnace
With 2-Speed Heat Pump (Dual Fuel)
14
THERMIDISTAT
VARIABLE-SPEED
1-SPEED
CONDENSING
AIR CONDITIONER
FURNACE
VARIABLE-SPEED
2-SPEED
CONDENSING
AIR CONDITIONER
FURNACE
THERMIDISTAT
HEAT STAGE 2 O/W2
HEAT STAGE 2
O/W2
N/A
Y1/W2
HEAT STAGE 1
W/W1
W/W1
COOL STAGE 1
Y/Y2
Y/Y2
FAN
G
G
24 VAC HOT
R
R
W2
W2
Y1
COOL STAGE 1 Y1/W2
HEAT STAGE 1 W/W1
Y/Y2
Y/Y2
FAN
G
G
24 VAC HOT
R
R
R
DH
C
C
COOL STAGE 2
DHUM
C
C
HUM
DEHUMIDIFY DHUM
C
24 VAC COMM
24 VAC COMM
HUMIDIFY
HUMIDIFY
N/A
OUTDOOR
SENSOR
CONNECTION
HUM
HUMIDIFIER
(24 VAC)
N/A
HUM
C
HUM
OUTDOOR
SENSOR
CONNECTION
OUTDOOR
SENSOR
HUMIDIFIER
(24 VAC)
B
B
S1
Y2
Y
DH
DEHUMIDIFY
W/W1
OUTDOOR
SENSOR
S1
S2
S2
See notes 6, 10, 11, 13, and 16
See notes 6, 10, 11, 13, and 15
A97419
A97418
Fig. 23—Variable-Speed Condensing Furnace With
2-Speed Air Conditioner
Fig. 22—Variable-Speed Condensing Furnace With
1-Speed Air Conditioner
THERMIDISTAT
RVS COOLING
O/W2
HEAT STAGE 3 Y1/W2
(FURNACE HI)
HEAT STAGE 2
VARIABLE-SPEED
CONDENSING
FURNACE
VARIABLE-SPEED
CONDENSING
FURNACE
THERMIDISTAT
1-SPEED
HEAT PUMP
O
RVS COOLING O/W2
HEAT/COOL
STAGE 1 Y1/W2
W2
HEAT STAGE 3 W/ W1
(FURNACE)
(FURNACE LO)
W/W1
W/W1
W2
W/W1
W2
HEAT/COOL
STAGE 1
Y/ Y2
Y/Y2
Y
Y/ Y2
Y/Y2
Y2
FAN
G
G
FAN
G
G
W3
24 VAC HOT
R
R
24 VAC HOT
R
R
R
HEAT/COOL
STAGE 2
O
Y1
(COMPRESSOR LO)
W2
2-SPEED
HEAT PUMP
(COMPRESSOR HI)
(COMPRESSOR)
R
DH
DEHUMIDIFY DHUM
DH
C
DEHUMIDIFY DHUM
24 VAC COMM
24 VAC COMM
C
N/A
OUTDOOR
SENSOR
CONNECTION
HUM
HUM
C
HUMIDIFIER
(24 VAC)
N/A
HUM
OUTDOOR
SENSOR
CONNECTION
OUTDOOR
SENSOR
HUMIDIFIER
(24 VAC)
B
B
S1
C
HUM
HUMIDIFY
HUMIDIFY
C
C
S1
OUTDOOR
SENSOR
S2
S2
See notes 3, 7, 9, 10, 11, 14, 15, and 17
See notes 3, 4, 5, 8, 9, 10, 11, 14, 16, and 17
A97420
A97421
Fig. 24—Variable-Speed Condensing Furnace With
1-Speed Heat Pump (Dual Fuel)
Fig. 25—Variable-Speed Condensing Furnace With
2-Speed Heat Pump (Dual Fuel)
15
WIRING DIAGRAM NOTES
1. Refer to Fan Coil Installation Instructions for features and additional wiring information
2. To activate dehumidify function on FK4C, remove J1 jumper at fan coil control board.
3. Heat pump must have a high pressure switch for dual fuel applications.
4. Refer to outdoor equipment Installation Instructions for proper setup.
5. Select the "zone" position on the 2-speed heat pump control board.
6. As an option O/W2 can be used to control second-stage heat. Refer to indoor unit Installation Instructions for proper setup.
7. As an option, Y1/W2 can be used to control third-stage heat. Refer to indoor unit Installation Instructions for proper setup.
8. Furnace must control its own second-stage heat operation via furnace control algorithm.
9. Outdoor air sensor must be attached in all dual fuel applications.
10. Refer to indoor equipment Installation Instructions for proper setup.
11. To activate dehumidify feature on current style variable-speed furnaces (58MVP), a pilot duty 24-vac relay must be used.
12. To activate dehumidify feature on current style variable-speed 80% non-condensing furnace, disconnect green (DEHUM) wire from G on
furnace control board and connect to dehumidify terminal on Thermidistat Control.
13. Dip switch No. 1 should be set in OFF position for air conditioner installations. This is factory default.
14. Dip switch No. 1 should be set in ON position for heat pump installations.
15. Dip switch No. 2 should be set in OFF position for single-speed compressor operation. This is factory default.
16. Dip switch No. 2 should be set in ON position for 2-speed compressor operation.
17. Configuration Option No. 10 "Dual Fuel Selection" must be turned ON in all dual fuel applications.
HUMIDIFY/DEHUMIDIFY OUTPUT ON INDICATORS
Within humidity select screen (selected by Humidity button and
indicated by "hu" or "dhu" on clock display), triangle under
humidity setpoint will be on while humidify output is on. Triangle
under dehumidify setpoint will be on while dehumidify output is
active (turned off, because this output is reverse logic).
AUTO CHANGEOVER
When auto changeover mode is selected, a change from heat to
cool (or vice versa) will not occur until an opposite mode demand
has existed for 20 minutes. If setpoint is changed, 20-minute
requirement is deleted.
EMERGENCY HEAT MODE
When Thermidistat Control is configured as a heat pump and
emergency heat is selected, all Y signals are locked out, and W
becomes energized upon a call for heat.
POWER ON CHECK
When AC power is first applied, all segments of display are turned
on for a few seconds. Following this, temperature display indicates
model/configuration via following 2-digit code:
AC—1-speed air conditioner, HP—1-speed heat pump, A2—2speed air conditioner, H2—2-speed heat pump, HS—1-speed heat
pump with 3-stage auxiliary heat, OF—dual fuel, d2—dual fuel
with 2-speed.
ERROR CODES
-- — If Thermidistat Control cannot properly read room temperature, display will indicate -- and all outputs (except fan if
on) will turn off.
E1, E2 — There is no E1 or E2 error message.
E3 — If Thermidistat Control cannot properly read outdoor
temperature, and it is needed for proper operation, display
will indicate E3.
E4 — If Thermidistat Control’s internal memory fails, E4 will be
displayed. Replace Thermidistat Control.
E5 — If Thermidistat Control cannot properly read humidity, E5
will be displayed. Replace Thermidistat Control.
E6 — If defrost cycle continues for longer than 15 minutes. E6
will be displayed. Check heat pump wiring or for failed
heat pump defrost control.
SMART RECOVERY
With Smart Recovery selected, transition out of setback begins a
fixed time period before selected recovery time and gradually
adjusts room temperature so desired temperature will be achieved
at selected recovery time. The fixed time period is 1.5 hr. It
operates in both heating and cooling.
Thermidistat Control Troubleshooting
SYMPTOM
WHAT TO CHECK
No display
Open Thermidistat Control. Check for 24vac between R and C at screw terminals on mounting base. Reassemble,
making sure pins on board engage sockets in mounting base. If display does not appear, replace the Thermidistat
Control.
"--" in place of room temperature
"E3" or "--" in place of outdoor temperature
"E4" or "E5"
"E6"
Thermidistat Control cannot properly read room temperature. Replace Thermidistat Control.
Thermidistat Control cannot properly read outdoor temperature. Check outdoor sensor and its wiring.
Internal failure. Replace Thermidistat Control.
System is stuck in defrost. Check wiring and heat pump defrost control board.
"Clean Filter" icon displayed
Filter timer has expired. Clean or replace filter, then press VACATION and HOLD/END buttons together to reset.
Cooling or heating will not come on
See Installer Setup to force heating/cooling. Check for 24vac at equipment terminals. If not present, check wiring.
Humidify or dehumidify will not come on
See Installer Setup to force HUM or DEHUM. Check for 24vac at equipment terminals. If not present, check wiring.
Copyright 1997 CARRIER Corp. • 7310 W. Morris St. • Indianapolis, IN 46231
tstat13si
Manufacturer reserves the right to discontinue, or change at any time, specifications or designs without notice and without incurring obligations.
Book 1
4
PC 101
Catalog No. 92-33TS-TA51C
Printed in U.S.A.
Form TSTAT-13SI
Pg 16
7-97
Replaces: New
Tab misc. misc.