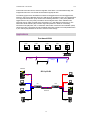
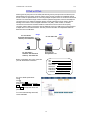
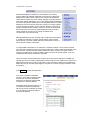
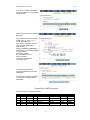
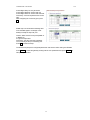
1
DYNAMIX UM-S
SHDSL ROUTER
User Manual
G.shdsl Router User Manual
152
Table of Contents
Descriptions.............................................................................................................. 4
Features ....................................................................................................................... 4
Specification ................................................................................................................ 4
Applications................................................................................................................. 7
Yours Firewall ......................................................................................................... 8
Types of Firewall ......................................................................................................... 8
Packet Filtering.............................................................................................. 8
Circuit Gateway ........................................................................................... 10
Application Gateway ................................................................................... 10
Denial of Service Attack............................................................................................. 11
Yours VLAN (Virtual Local Area Network) ............................................ 14
Specification .............................................................................................................. 14
Frame Specification ................................................................................................... 14
Applications............................................................................................................... 15
Getting to know about the router .................................................................. 17
Front Panel................................................................................................................. 17
Rear Panel.................................................................................................................. 18
SHDSL Line Connector ............................................................................................. 19
Console Cable............................................................................................................ 19
Configuration to the router .............................................................................. 20
Step 1: Check the Ethernet Adapter in PC or NB ........................................................ 20
Step 2: Check the Web Browser in PC or NB ............................................................. 20
Step 3: Check the Terminal Access Program............................................................... 20
Step 4: Determine Connection Setting ........................................................................ 20
Step 5: Install the SHDSL Router ............................................................................... 21
Configuration via Web Browser .................................................................... 23
Basic Setup ............................................................................................................. 25
Bridge Mode .............................................................................................................. 26
Routing Mode ............................................................................................................ 28
1
G.shdsl Router User Manual
152
DHCP Server............................................................................................... 29
DHCP Client ................................................................................................ 30
DHCP relay.................................................................................................. 31
PPPoE or PPPoA........................................................................................ 32
IPoA or EoA ................................................................................................. 34
Advanced Setup .................................................................................................... 36
SHDSL ......................................................................................................... 37
WAN ............................................................................................................. 38
Bridge ........................................................................................................... 40
VLAN ............................................................................................................ 41
Route............................................................................................................ 43
NAT/DMZ ..................................................................................................... 45
Virtual Server............................................................................................... 47
Firewall......................................................................................................... 48
Administration ...................................................................................................... 54
Security ........................................................................................................ 55
SNMP ........................................................................................................... 56
Time Sync .................................................................................................... 58
Utility ........................................................................................................................ 59
System Info.................................................................................................. 60
Config Tool................................................................................................... 61
Upgrade ....................................................................................................... 62
Logout .......................................................................................................... 63
Restart.......................................................................................................... 64
Status ......................................................................................................................... 65
LAN-to-LAN connection with bridge Mode ........................................... 66
CO side ........................................................................................................ 66
CPE Side ..................................................................................................... 67
LAN to LAN Connection with Routing Mode ....................................... 68
CO side ........................................................................................................ 68
CPE side ...................................................................................................... 70
Configuration via Serial Console or Telnet with Manu Driven
2
G.shdsl Router User Manual
152
Interface ................................................................................................................... 71
Serial Console............................................................................................................ 71
Telnet......................................................................................................................... 71
Operation Interface .................................................................................................... 72
Window structure....................................................................................................... 73
Menu Driven Interface Commands............................................................................. 74
Menu Tree.................................................................................................................. 74
Configuration............................................................................................................. 76
Status ......................................................................................................................... 77
Show.......................................................................................................................... 78
Write.......................................................................................................................... 79
Reboot ....................................................................................................................... 80
Ping ........................................................................................................................... 81
Administration ........................................................................................................... 82
User Profile .................................................................................................. 82
Security ........................................................................................................ 83
SNMP ........................................................................................................... 83
Supervisor Password and ID ..................................................................... 84
SNTP............................................................................................................ 84
Utility ........................................................................................................................ 86
Exit ............................................................................................................................ 86
Setup.......................................................................................................................... 87
Mode ............................................................................................................ 87
SHDSL ......................................................................................................... 87
WAN ............................................................................................................. 88
Bridge ........................................................................................................... 89
VLAN ............................................................................................................ 90
Route............................................................................................................ 91
LAN............................................................................................................... 93
IP share........................................................................................................ 93
Firewall......................................................................................................... 97
DHCP ........................................................................................................... 99
DNS proxy ................................................................................................. 100
Host name ................................................................................................. 100
Default........................................................................................................ 100
3
G.shdsl Router User Manual
152
Descriptions
The SHDSL (Single-Paired High Speed Digital Subscriber Loop) routers comply with G.991.2
standard with 10/100 Base-T auto-negotiation. It provides business-class, multi-range form
64Kbps to 2.304Mbps (for 2-wire mode) or 128kbps to 4.608Mbps (for 4-wire mode) payload rates
over exiting single-pair copper wire. The SHDSL routers are designed not only to optimize the
service bit rate from central office to customer premises also it integrates high-end
Bridging/Routing capabilities with advanced functions of Multi-DMZ, virtual server mapping and
VPN pass-through.
Because of rapid growth of network, virtual LAN has become one of the major new areas in
internetworking industry. The SHDSL routers support port-based and IEEE 802.1q VLAN over
ATM network.
The firewall routers provide not only advanced functions, Multi-DMZ, virtual server mapping and
VPN pass-through but advanced firewall, SPI, NAT, DoS protection serving as a powerful firewall
to protect from outside intruders of secure connection.
The 4-port routers support four ports 10Base-T /100Base-T auto-negotiation and auto-MDIX
switching ports to meet the enterprise need.
The SHDSL routers allow customers to leverage the latest in broadband technologies to meet their
growing data communication needs. Through the power of SHDSL products, you can access
superior manageability and reliability.
Features
²
²
²
²
²
²
²
²
²
²
²
Easy configuration and management with password control for various application
environments
Efficient IP routing and transparent learning bridge to support broadband Internet services
VPN pass-through for safeguarded connections
Virtual LANs (VLANs) offer significant benefit in terms of efficient use of bandwidth, flexibility,
performance and security
Build-in advanced SPI firewall (Firewall router)
Four 10/100Mbps Auto-negotiation and Auto-MDIX switching port for flexible local area
network connectivity (4-port router)
DMZ host/Multi-DMZ/Multi-NAT enables multiple workstations on the LAN to access the
Internet for the cost of IP address
Fully ATM protocol stack implementation over SHDSL
PPPoA and PPPoE support user authentication with PAP/CHAP/MS-CHAP
SNMP management with SNMPv1/SNMPv2 agent and MIB II
Getting enhancements and new features via Internet software upgrade
Specification
Routing
Ø
Ø
Ø
Ø
Ø
Ø
Ø
Support IP/TCP/UDP/ARP/ICMP/IGMP protocols
IP routing with static routing and RIPv1/RIPv2 (RFC1058/2453)
IP multicast and IGMP proxy (RFC1112/2236)
Network address translation (NAT/PAT) (RFC1631)
NAT ALGs for ICQ/Netmeeting/MSN/Yahoo Messenger
DNS relay and caching (RFC1034/1035)
DHCP server, client and relay (RFC2131/2132)
4
G.shdsl Router User Manual
152
Bridging
Ø
Ø
Ø
Ø
IEEE 802.1D transparent learning bridge
IEEE 802.1q VLAN
Port-based VLAN (4-port router)
Spanning tree protocol
Security
Ø
Ø
Ø
Ø
Ø
Ø
Ø
DMZ host/Multi-DMZ/Multi-NAT function
Virtual server mapping (RFC1631)
VPN pass-through for PPTP/L2TP/IPSec tunneling
Natural NAT firewall
Advanced Stateful packet inspection (SPI) firewall (Firewall Router)
Application level gateway for URL and keyword blocking (Firewall Router)
User access control: deny certain PCs access to Internet service (Firewall Router)
Management
Ø
Easy-to-use web-based GUI for quick setup, configuration and management
Ø
Menu-driven interface/Command-line interface (CLI) for local console and Telnet
access
Ø
Password protected management and access control list for administration
Ø
SNMP management with SNMPv1/SNMPv2 (RFC1157/1901/1905) agent and MIB II
(RFC1213/1493)
Ø
Software upgrade via web-browser/TFTP server
ATM
Ø
Ø
Ø
ATM QoS
Ø
Ø
Ø
Ø
Up to 8 PVCs
OAM F5 AIS/RDI and loopback
AAL5
UBR (Unspecified bit rate)
CBR (Constant bit rate)
VBR-rt (Variable bit rate real-time)
VBR-nrt (Variable bit rate non-real-time)
AAL5 Encapsulation
Ø
VC multiplexing and SNAP/LLC
Ø
Ethernet over ATM (RFC 2684/1483)
Ø
PPP over ATM (RFC 2364)
Ø
Classical IP over ATM (RFC 1577)
PPP
Ø
Ø
Ø
PPP over Ethernet for fixed and dynamic IP (RFC 2516)
PPP over ATM for fixed and dynamic IP (RFC 2364)
User authentication with PAP/CHAP/MS-CHAP
WAN Interface
Ø
SHDSL: ITU-T G.991.2 (Annex A, Annex B)
Ø
Encoding scheme: 16-TCPAM
Ø
Data Rate (2-wire mode): N x 64Kbps (N=0~36, 0 for adaptive)
Ø
Data Rate (4-wire mode): N x 128kbps (N=0~36, 0 for adaptive)
Ø
Impedance: 135 ohms
5
G.shdsl Router User Manual
152
LAN Interface
Ø
4-ports switching hub (4-port router)
Ø
10/100 Base-T auto-sensing and auto-negotiation
Ø
Auto-MDIX (4-port router)
Hardware Interface
Ø
WAN: RJ-11
Ø
LAN: RJ-45 x 4 (4-port router)
Ø
LAN: RJ-45 x 1 (1-port router)
Ø
Console: RS232 female
Ø
RST: Reset button for factory default
Indicators
Ø
General: PWR
Ø
WAN: LNK, ACT
Ø
LAN: 10M/ACT, 100M/ACT (1-port router)
Ø
LAN: 1, 2, 3, 4 (4-port router)
Ø
SHDSL: ALM
Physical/Electrical
Ø
Dimensions: 18.7 x 3.3 x 14.5cm (WxHxD)
Ø
Power: 100~240VAC (via power adapter)
Ø
Power consumption: 9 watts max
Ø
Temperature: 0~45。C
Ø
Humidity: 0%~95%RH (non-condensing)
Memory
Ø
2MB Flash Memory, 8MB SDRAM
Products’ Information
G.shdsl 2-wire router/bridge with 1-port LAN
G.shdsl 2-wire router/bridge with 1-port LAN VLAN and business class firewall
G.shdsl 2-wire router/bridge with 4-port switching hub LAN
G.shdsl 2-wire router/bridge with 4-port switching hub LAN, VLAN and business class firewall
G.shdsl 4-wire router/bridge with 4-port switching hub LAN
G.shdsl 4-wire router/bridge with 4-port switching hub LAN, VLAN and business class firewall
6
G.shdsl Router User Manual
152
Applications
DSLAM
Internet
SHDSL
SHDSL
Router
Ethernet
LAN
Connection with DSLAM
SHDSL Router
SHDSL Router
LAN
Ethernet
SHDSL
LAN to LAN Connection
7
Ethernet
LAN
G.shdsl Router User Manual
152
Yours Firewall
A firewall protects networked computers from intentional hostile intrusion that could compromise
confidentiality or result in data corruption or denial of service. It must have at least two network
interfaces, one for the network it is intended to protect, and one for the network it is exposed to. A
firewall sits at the junction point or gateway between the two networks, usually a private network
and a public network such as the Internet.
A firewall examines all traffic routed between the two networks to see if it meets certain criteria. If it
does, it is routed between the networks, otherwise it is stopped. A firewall filters both inbound and
outbound traffic. It can also manage public access to private networked resources such as host
applications. It can be used to log all attempts to enter the private network and trigger alarms when
hostile or unauthorized entry is attempted. Firewalls can filter packets based on their source and
destination addresses and port numbers. This is known as address filtering. Firewalls can also
filter specific types of network traffic. This is also known as protocol filtering because the decision
to forward or reject traffic is dependant upon the protocol used, for example HTTP, ftp or telnet.
Firewalls can also filter traffic by packet attribute or state.
An Internet firewall cannot prevent individual users with modems from dialling into or out of the
network. By doing so they bypass the firewall altogether. Employee misconduct or carelessness
cannot be controlled by firewalls. Policies involving the use and misuse of passwords and user
accounts must be strictly enforced. These are management issues that should be raised during
the planning of any security policy, but that cannot be solved with Internet firewalls alone.
Firewall
Unknown Traffic
Access to Specific
Destination
Specified Allowed Traffic
Internet
Internet
Allowed Traffic
Out to Internet
Restricted Traffic
Local User
Internet
Types of Firewall
There are three types of firewall:
Packet Filtering
In packet filtering, only the protocol and the address information of each packet is examined. Its
contents and context (its relation to other packets and to the intended application) are ignored. The
firewall pays no attention to applications on the host or local network and it "knows" nothing about
the sources of incoming data. Filtering consists of examining incoming or outgoing packets and
allowing or disallowing their transmission or acceptance on the basis of a set of configurable rules.
Network Address Translation (NAT) routers offer the advantages of packet filtering firewalls but
can also hide the IP addresses of computers behind the firewall, and offer a level of circuit-based
filtering.
8
G.shdsl Router User Manual
152
Level 5: Application
Protocol
Source/Destination address
Source/destination port
IP options
connection status
Level 4: TCP
Level 3: IP
Level 2: Data Link
Level 1: Physical
Stateful Inspection
Filter remember this
information
UDP
SP=3264
SA=192.168.0.5
DP=1525
DA=172.16.3.4
192.168.0.5
172.16.3.4
Matches outgoing so allows in
UDP
SP=1525
SA=172.16.3.4
DP=3264
DA=192.168.0.5
Nomatches so disallows in
UDP
SP=1525
SA=172.168.3.4
DP=2049
DA=192.168.0.5
NAT (Network Address Translation)
Firewall
192.168.0.10
192.120.8.5
Internet
Internal IP
192.168.0.10
192.168.0.11
External IP
192.120.8.5
192.120.8.5
192.168.0.11
Internal/Protected Network
External/Unprotected Network
9
G.shdsl Router User Manual
152
PAT (Port Address Translation)
192.168.0.10:1025
Firewall
192.120.8.5
192.120.8.5:2205
192.120.8.5:2206
192.168.0.11:4406
Internet
Client IP
Internal Port
External Port
192.168.0.10
1025
2205
192.168.0.11
4406
Internal/Protected Network
2206
External/Unprotected Network
Circuit Gateway
Also called a "Circuit Level Gateway," this is a firewall approach that validates connections before
allowing data to be exchanged. What this means is that the firewall doesn't simply allow or disallow
packets but also determines whether the connection between both ends is valid according to
configurable rules, then opens a session and permits traffic only from the allowed source and
possibly only for a limited period of time.
Level 5: Application
destination IP address and/or port
source IP address and/or port
time of day
protocol
user
password
Level 4: TCP
Level 3: IP
Level 2: Data Link
Level 1: Physical
Application Gateway
The Application Level Gateway acts as a proxy for applications, performing all data exchanges
with the remote system in their behalf. This can render a computer behind the firewall all but
invisible to the remote system. It can allow or disallow traffic according to very specific rules, for
instance permitting some commands to a server but not others, limiting file access to certain types,
varying rules according to authenticated users and so forth. This type of firewall may also perform
very detailed logging of traffic and monitoring of events on the host system, and can often be
instructed to sound alarms or notify an operator under defined conditions. Application-level
gateways are generally regarded as the most secure type of firewall. They certainly have the most
sophisticated capabilities.
10
G.shdsl Router User Manual
152
Level 5: Application
Level 4: TCP
Telnet
FTP
Http
SMTP
Level 3: IP
Level 2: Data Link
Level 1: Physical
Proxy Application
Host PC
Internal
External
Interface
Interface
Proxy Server
Public Server
Request Page
Check URL
Request Page
Return Page
Filter Content
Return Page
Denial of Service Attack
Denial of service (DoS) attacks typically come in two
flavors: resource starvation and resource overload. DoS
attacks can occur when there is a legitimate demand for
Inturruption
a resource that is greater than the supply (i.e. too many
web requests to an already overloaded web server).
Software vulnerabilities or system misconfigurations can also cause DoS situations. The
difference between a malicious denial of service and simple system overload is the requirement of
an individual with malicious intent (attacker) using or attempting to use resources specifically to
deny those resources to other users.
Ping of death- On the Internet, ping of death is a kind of denial of service (DoS) attack caused by
an attacker deliberately sending an IP packet larger than the 65,536 bytes allowed by the IP
protocol. One of the features of TCP/IP is fragmentation; it allows a single IP packet to be broken
down into smaller segments. Attackers began to take advantage of that feature when they found
that a packet broken down into fragments could add up to more than the allowed 65,536 bytes.
Many operating systems didn't know what to do when they received an oversized packet, so they
froze, crashed, or rebooted. Other known variants of the ping of death include teardrop, bonk and
nestea.
11
G.shdsl Router User Manual
152
Ping of Death Packet (112,000 bytes)
Hacker 's
System
Normal IP Packet (Maximun 65,536 bytes)
Target
System
Normal reassembled Packets
bytes from 1~1500
bytes from 1501~3000
bytes from 3000~4500
Reassembled teardrop packets
bytes from 1~1700
bytes from 1300~3200
bytes from 2800~4800
SYN Flood- The attacker sends TCP SYN packet which start connections very fast, leaving the
victim waiting to complete a huge number of connections, causing it to run out of resources and
dropping legitimate connections. A new defense against this is the “SYN cookies”. Each side of a
connection has its own sequence number. In response to a SYN, the attacked machine creates a
special sequence number that is a “cookie” of the connection then forgets everything it knows
about the connection. It can then recreate the forgotten information about the connection where
the next packets come in from a legitimate connection.
TCP SYN
requests
Hacker 's
System
Internet
Backing
quene
TCP SYN-ACK
Packets
Target
System
ICMP Flood- The attacker transmits a volume of ICMP request packets to cause all CPU
resources to be consumed serving the phony requests.
UDP Flood- The attacker transmits a volume of requests for UDP diagnostic services which cause
all CPU resources to be consumed serving the phony requests.
Land attack- The attacker attempts to slow your network down by sending a packet with identical
source and destination addresses originating from your network.
Smurf attack- Where the source address of a broadcast ping is forged so that a huge number of
machines respond back to victim indicated by the address, overloading it.
Broadcast ping
request from spoofed
IP address
Internet
Ping response
Hacker 's
System
Target Router
12
Multiple network
Subnet
G.shdsl Router User Manual
152
Fraggle Attack- A perpetrator sends a large amount of UDP echo packets at IP broadcast
addresses, all of it having a spoofed source address of a victim.
IP Spoofing- IP Spoofing is a method of masking the identity of an intrusion by making it appeared
that the traffic came from a different computer. This is used by intruders to keep their anonymity
and can be used in a Denial of Service attack.
13
G.shdsl Router User Manual
152
Yours VLAN (Virtual Local Area Network)
Virtual LAN (VLAN) is defined as a group of devices on one or more LANs that are configured so
that they can communicate as if they were attached to the same wire, when in fact they are located
on a number of different LAN segments. Because VLAN is based on logical instead of physical
connections, it is extremely flexible.
The IEEE 802.1Q defines the operation of VLAN bridges that permit the definition, operation, and
administration of VLAN topologies within a bridged LAN infrastructure. VLAN architecture benefits
include:
1.
2.
3.
4.
5.
Increased performance
Improved manageability
Network tuning and simplification of software configurations
Physical topology independence
Increased security options
As DSL (over ATM) links are deployed more and more extensively and popularly, it is rising
progressively to implement VLAN (VLAN-to-PVC) over DSL links and, hence, it is possible to be a
requirement of ISPs.
We discuss the implementation of VLAN-to-PVC only for bridge mode operation, i.e., the VLAN
spreads over both the COE and CPE sides, where there is no layer 3 routing involved.
Specification
1.
2.
3.
4.
5.
6.
7.
8.
9.
The unit supports up to 8 active VLANs with shared VLAN learning (SVL) bridge out of 4096
possible VLANs specified in IEEE 802.1Q.
Each port always belongs to a default VLAN with its port VID (PVID) as an untagged member.
Also, a port can belong to multiple VLANs and be tagged members of these VLANs.
A port must not be a tagged member of its default VLAN.
If a non-tagged or null-VID tagged packet is received, it will be assigned with the default PVID
of the ingress port.
If the packet is tagged with non-null VID, the VID in the tag will be used.
The look up process starts with VLAN look up to determine whether the VID is valid. If the VID
is not valid, the packet will be dropped and its address will not be learned. If the VID is valid,
the VID, destination address, and source address lookups are performed.
The VID and destination address lookup determines the forwarding ports. If it fails, the packet
will be broadcasted to all members of the VLAN, except the ingress port.
Frames are sent out tagged or untagged depend on if the egress port is a tagged or untagged
member of the VLAN that frames belong to.
If VID and source address look up fails, the source address will be learned.
Frame Specification
An untagged frame or a priority-tagged frame does not carry any identification of the VLAN to
which it belongs. Such frames are classified as belonging to a particular VLAN based on
parameters associated with the receiving port. Also, priority tagged frames, which, by definition,
carry no VLAN identification information, are treated the same as untagged frames.
A VLAN-tagged frame carries an explicit identification of the VLAN to which it belongs; i.e., it
carries a tag header that carries a non-null VID. This results in a minimum tagged frame length of
68 octets. Such a frame is classified as belonging to a particular VLAN based on the value of the
VID that is included in the tag header. The presence of the tag header carrying a non-null VID
14
G.shdsl Router User Manual
152
means that some other device, either the originator of the frame or a VLAN-aware bridge, has
mapped this frame into a VLAN and has inserted the appropriate VID.
The following figure shows the difference between a untagged frame and VLAN tagged frame,
where the Tag Protocol Identifier (TPID) is of 0x8100 and it identifies the frame as a tagged frame.
The Tag Control Information (TCI) consists of the following elements: 1) User priority allows the
tagged frame to carry user priority information across bridged LANs in which individual LAN
segments may be unable to signal priority information (e.g., 802.3/Ethernet segments). 2) The
Canonical Format Indicator (CFI) is used to signal the presence or absence of a Routing
Information Field (RIF) field, and, in combination with the Non-canonical Format Indicator (NCFI)
carried in the RIF, to signal the bit order of address information carried in the encapsulated frame.
3) The VID uniquely identifies the VLAN to which the frame belongs.
Applications
Port-based VLAN
LAN1
LAN2
LAN3
LAN4
WAN
1
Group 1
8
Group 2
Group 3
SERVER
802.1q VLAN
LAN1
LAN2
LAN1
CO
CPE
LAN2
PWR
WIC0
ACT/CH0
WIC0
ACT/CH0
ETH
ACT
PWR
WIC0
ACT/CH0
WIC0
ACT/CH0
ETH
ACT
OK
ACT/CH1
ACT/CH1
COL
OK
ACT/CH1
ACT/CH1
COL
SHDSL connection
with 2PVC
LAN3
LAN3
SERVER
1 2
4 5
3
1 2
6
7 8
9
8
#
*
4 5
LAN4
LAN4
VoIP
3
6
7 8
9
8
#
*
VoIP
15
G.shdsl Router User Manual
152
VID 20
WAN 4
WAN 5
WAN 6
WAN 3
VID 10
VID 30
WAN 2
WAN 7
WAN 8
WAN 1
Backbone
ATM
Switch
SHDSL
Router
POW ER FAU LT D ATA AL ARM
LAN 1
VID 10
LAN 2
LAN 3
LAN 4
VID 30
VID 20
16
G.shdsl Router User Manual
152
Getting to know about the router
This section will introduce hardware of the router.
Front Panel
The front panel contains LED which show status of the router.
PW R
L NK
SH DS L
AC T
WAN
1
3
2
4
LAN
Front Panel of SHDSL 4-wire/4-port router/bridge
PW R
SH DS L
LNK
AC T
WAN
10M /ACT
100M /ACT ALM
LAN
Front Panel of SHDSL 2-wire/1-port router/bridge
LEDs
PWR
WAN
LNK
ACT
1
2
LAN
3
4
ALM
Active
On
On
Blink
On
On
Blink
On
Blink
On
Blink
On
Blink
On
Blink
LEDs
PWR
WAN
LNK
ACT
10M/ACT
LAN
100M/ACT
ALM
LED status of 4-wire/4-port router
Description
Power on
SHDSL line connection is established
SHDSL handshake
Transmit or received data over SHDSL link
Ethernet cable is connected to LAN 1
Transmit or received data over LAN 1
Ethernet cable is connected to LAN 2
Transmit or received data over LAN 2
Ethernet cable is connected to LAN 3
Transmit or received data over LAN 3
Ethernet cable is connected to LAN 4
Transmit or received data over LAN 4
SHDSL line connection is dropped
SHDSL self test
LED status of 2-wire/1-port router
Active
Description
On
Power adaptor is connected to the router
On
SHDSL line connection is established
Blink
SHDSL handshake
Blink
Transmit or received data over SHDSL link
On
LAN port connect with 10M NIC
Blink
LAN port acts in 10M
On
LAN port connect with 100M NIC
Blink
LAN port acts in 100M
On
SHDSL line connection is dropped
Blink
SHDSL self test
17
ALM
G.shdsl Router User Manual
152
Rear Panel
The rear panel of SHDSL router is where all of the connections are made.
LAN
DC-IN
CONSOLE
LINE
RST
1
2
3
4
Rear Panel of SHDSL 4-wire/4-port router/bridge
DC-IN
LAN
CONSOLE
LINE
RST
Rear Panel of SHDSL 2-wire/1-port router/bridge
DC-IN
LAN
CONSOLE
LINE
RST
Connectors Description of 2-wire/1-port router
Power adaptor inlet: Input voltage 9VDC
Ethernet 10BaseT for LAN port (RJ-45)
RS- 232C (DB9) for system configuration and maintenance
SHDSL interface for WAN port (RJ-11)
Reset button for reboot or load factory default
DC-IN
LAN (1,2,3,4)
CONSOLE
LINE
RST
Connectors Description of 4-wire/4-port router
Power adaptor inlet: Input voltage 9VDC
10/100BaseT auto-sensing and auto- MDIX for LAN port (RJ-45)
RS- 232C (DB9) for system configuration and maintenance
SHDSL interface for WAN port (RJ-11)
Reset button for reboot or load factory default
!
The reset button can be used only in one of two ways.
(1) Press the Reset Button for one second will cause system reboot.
(2) Pressing the Reset Button for four seconds will cause the product loading the factory
default setting and losing all of yours configuration. When you want to change its
configuration but forget the user name or password, or if the product is having
problems connecting to the Internet and you want to configure it again clearing all
configurations, press the Reset Button for four seconds with a paper clip or sharp
pencil.
18
G.shdsl Router User Manual
152
SHDSL Line Connector
4-wire
2-wire
Loop B
Loop
Loop A
1
4
1
Front View
1
4
Front View
4
1
Loop A
Loop
Loop B
Top View
Top View
Console Cable
Pin Number
1
2
3
4
5
6
7
8
9
4
Description
Fuigure
No connection
RxD (O)
TxD (I)
No connection
GND
No connection
CTS (O)
RTS (I)
No connection
5 432 1
98 7 6
19
G.shdsl Router User Manual
152
Configuration to the router
This guide is designed to lead users through Web Configuration of G.shdsl Router in the easiest
and quickest way possible. Please follow the instructions carefully.
Note: There are three methods to configure the router: serial console, Telnet and Web Browser.
Only one configuration application is used to setup the Router at any given time. Users
have to choose one method to configure it.
For Web configuration, you can skip step 3.
For Serial Console Configuration, you can skip step 1 and 2.
Step 1: Check the Ethernet Adapter in PC or NB
Make sure that Ethernet Adapter had been installed in PC or NB used for configuration of the
router. TCP/IP protocol is necessary for web configuration, so please check the TCP/IP protocol
whether it has been installed.
Step 2: Check the Web Browser in PC or NB
According to the Web Configuration, the PC or NB need to install Web Browser, IE or Netscape.
Note: Suggest to use IE5.0, Netscape 6.0 or above and 800x600 resolutions or above.
Step 3: Check the Terminal Access Program
For Serial Console and Telnet Configuration, users need to setup the terminal access program
with VT100 terminal emulation.
Step 4: Determine Connection Setting
Users need to know the Internet Protocol supplied by your Service Provider and determine the
mode of setting.
Protocol Selection
RFC1483
RFC1577
RFC2364
RFC2516
Ethernet over ATM
Classical Internet Protocol over ATM
Point-to-Point Protocol over ATM
Point-to-Point Protocol over Ethernet
20
G.shdsl Router User Manual
152
The difference Protocol need to setup difference WAN parameters. After knowing the Ptorocol
provided by ISP, you have to ask the necessary WAN parameters to setup it.
Route EoA
Bridge EoA
VPI:
VCI:
Encapsulation:
Gateway:
Host Name:
(if applicable)
VPI:
VCI:
Encapsulation:
IP Address:
Subnet Mask:
Gateway:
DNS Server:
Host Name:
(if applicable)
IPoA
PPPoA
VPI:
VCI:
Encapsulation:
User Name:
Password:
DNS Server:
Host Name:
IP Address:
VPI:
VCI:
Encapsulation:
IP Address:
Subnet Mask:
Gateway:
DNS Server:
Host Name:
(if applicable)
(if applicable)
(if applicable)
PPPoE
VPI:
VCI:
Encapsulation:
User Name:
Password:
DNS Server:
Host Name:
(if applicable)
IP Address:
(if applicable)
Step 5: Install the SHDSL Router
!
To avoid possible damage to this Router, do not turn on the router before Hardware
Installation.
ü
Connect the power adapter to the port labeled DC-IN on the rear panel of the product.
ü
Connect the Ethernet cable.
Note: If the 1-port router is directly connected to PC or NB, the Ethernet cable has to be used
cross over one. If the 1-port router is connected to hub or switch, be sure that the hub or
switch supporting auto-sensing. If yes, both cross over and none cross over Ethernet
cable are suitable. If not, only pass through Ethernet cable could be used. The 4-port
router supports auto-MDIX switching hub so both through and cross-over Ethernet cable
can be used.
ü
Connect the phone cable to the product and the other side of phone cable to wall jack.
ü
Connect the power adapter to power source.
ü
Turn on the PC or NB which is used for configuration the Router.
21
G.shdsl Router User Manual
152
NB
PC
Cross
Over
Ethernet
Cable
Power
Adapter
DB-9
Cable
Wall Jack
G.shdsl
Direct Connection with PC or NB for 1-port router
Server
File Server
G.shdsl
Workstation
PC
NB
Mobile
Device
HUB/Switch
Pass
Through
Ethernet
Cable
Power
Adpater
Wireless LAN
Wall Jack
DB-9
Cable
Connection with Hub/Switch for 1-port router
Server
Storage
Server
Wireless
Access Point
Wireless
Note Book
Workstation
Switching
Hub
Mobile
Device
Laser
Printer
PC
Power Adapter
PC
Wall Jack
G.shdsl
RJ-11
DB-9
Cable
4-port router with complex network topology
22
G.shdsl Router User Manual
152
Configuration via Web Browser
For Win85, 98 and Me, click the start button. Select setting
and control panel.
Double click the network icon.
In the Configuration window, select the TCP/IP protocol
line that has been associated with your network card and
then click property icon.
23
G.shdsl Router User Manual
152
Choose IP address tab. Select Obtain IP
address automatically. Click OK button.
The window will ask you to restart the PC. Click Yes button.
After rebooting your PC, open IE or Netscape
Browser to connect the Router. Type
http://192.168.0.1
The default IP address and sub net-mask of the
Router is 192.168.0.1 and 255.255.255.0.
Because the router acts as DHCP server in your
network, the router will automatically assign IP
address for PC or NB in the network.
Type User Name root and Password root and
then click OK.
The default user name and password are both
root. For the system security, suggest to change
them after configuration.
Note: After changing the User Name and
Password, strongly recommend you to
save them because another time when
you login, the User Name and
Password have to be used the new one
you changed.
24
G.shdsl Router User Manual
152
Basic Setup
The Basic Setup contains LAN, WAN, Bridge and Route operation mode.
User can use it to completely setup the router. After successfully
completing it, you can access Internet. This is the easiest and possible
way to setup the router.
Note: The advanced functions are only for advanced users to setup
advanced functions. The uncorrect setting of advanced function will
affect the performance or system error, even disconnection.
Click Basic for basic installation.
25
G.shdsl Router User Manual
152
Bridge Mode
IP: 192.168.0.1
Netmask: 255.255.255.0
Gateway: 192.168.0.254
Bridge
BAS
IP: 192.168.0.254
DSLAM
PC
IP: 192.168.0.2
Netmask: 255.255.255.0
Gateway: 192.168.0.254
VPI:0, VCI:32
Encapsulation: LLC
Before configuration the router in bridge mode
check with your ISP about these information.
VPI:
VCI:
Encapsulation:
Gateway:
Host Name:
(if applicable)
Click Bridge and CPE Side to setup Bridging
mode of the Router and then click Next for
the next setting.
This product can be setup two SHDSL mode:
CO, Central Office, and CPE, Customer
Premises Equipment. For connection with
DSLAM, the SHDSL mode is CPE. For LAN
to LAN connection, one side must be Co and
the other side must be CPE.
LAN Parameters
Enter IP: 192.168.0.1
Enter Subnet Mask: 255.255.255.0
Enter Gateway: 192.168.0.254
The Gateway IP is provided by ISP.
Enter Host Name: SOHO
Some of the ISP requires the host name as
identification. You may check with ISP to
see if your Internet service has been
configured with a host name. In most cases,
this field can be ignored.
WAN1 Parameters
Enter VPI: 0
Enter VCI: 32
Click LLC
Click Next.
26
ISP
G.shdsl Router User Manual
152
The screen will prompt the new configured
parameters. Check the parameters and
Click Restart The router will reboot with the
new setting or Continue to configure
another parameters.
27
G.shdsl Router User Manual
152
Routing Mode
Routing mode contains DHCP server,
DHCP client, DHCP relay, Point-to-Point
Protocol over ATM and Ethernet and IP
over ATM and Ethernet over ATM. You
have to clarify which Internet protocol is
provided by ISP.
Click ROUTE and CPE Side then press
Next.
This product can be setup two SHDSL
mode: CO, Central Office, and CPE,
Customer Premises Equipment. For
connection with DSLAM, the SHDSL mode is
CPE. For LAN to LAN connection, one side
must be Co and the other side must be CPE.
28
G.shdsl Router User Manual
152
DHCP Server
Dynamic Host Configuration Protocol (DHCP) is a communication protocol that lets network
administrators to manage centrally and automate the assignment of Internet Protocol (IP)
addresses in an organization's network. Using the Internet Protocol, each machine that can
connect to the Internet needs a unique IP address. When an organization sets up its computer
users with a connection to the Internet, an IP address must be assigned to each machine.
Without DHCP, the IP address must be entered manually at each computer. If computers move to
another location in another part of the network, a new IP address must be entered. DHCP lets a
network administrator to supervise and distribute IP addresses from a central point and
automatically sends a new IP address when a computer is plugged into a different place in the
network. If the DHCP server is Enable, you have to setup the following parameters for processing
it as DHCP server.
The embedded DHCP server assigns network configuration information at most 253 users
accessing the Internet in the same time.
IP type: Fixed
IP Address: 192.168.0.1
Subnet Mask: 255.255.255.0
Host Name: SOHO
Some of the ISP requires the host name as
identification. You may check with ISP to
see if your Internet service has been
configured with a host name. In most cases,
this field can be ignored.
Trigger DHCP Service: Server
The default setup is Enable DHCP server. If
you want to turn off the DHCP service,
choose Disable.
For example: If the LAN IP address is
192.168.0.1, the IP range of LAN is
192.168.0.2 to 192.168.0.51. The DHCP
server assigns the IP form Start IP Address
to End IP Address. The legal IP address
range is form 0 to 255, but 0 and 255 are
reserved for broadcast so the legal IP
address range is from 1 to 254. On the other
hand, you cannot assign an IP greater than
254 or less then 1. Lease time 72 hours
indicates that the DHCP server will reassign
IP information in every 72 hours.
DNS Server: Your ISP will provide at least
one Domain Name Service Server IP. You
can type the router IP in this field. The router
will act as DNS server relay function.
You may assign fixed IP addresses to some
devices while using DHCP, provided that the
fixed IP address are not within the range
used by the DHCP server.
Press Next to setup WAN1 parameters.
29
G.shdsl Router User Manual
152
DHCP Client
Some of the ISP provides DHCP server service by which the PC in LAN can access IP information
automatically. To setup the DHCP client mode, follow the procedure.
LAN IP Type: Dynamic
Click Next to setup WAN1 parameters.
30
G.shdsl Router User Manual
152
DHCP relay
If you have a DHCP server in LAN and you want to use it for DHCP services, the product provides
DHCP relay function to meet yours need.
IP Type: Fixed
IP Address: 192.168.0.1
Subnet Mask: 255.255.255.0
Host Name: SOHO
Some of the ISP requires the host
name as identification. You may check
with ISP to see if your Internet service
has been configured with a host name.
In most cases, this field can be
ignored.
Trigger DHCP Service: Relay
Press Next to setup DHCP server
parameter.
Enter DHCP server IP address in IP
address field.
Press Next
31
G.shdsl Router User Manual
152
PPPoE or PPPoA
PPPoA (point-to-point protocol over ATM) and PPPoE (point-to-point protocol over Ethernet) are
authentication and connection protocols used by many service providers for broadband Internet
access. These are specifications for connecting multiple computer users on an Ethernet local area
network to a remote site through common customer premises equipment, which is the telephone
company's term for a modem and similar devices. PPPoE and PPPoA can be used to office or
building. Users share a common Digital Subscriber Line (DSL), cable modem, or wireless
connection to the Internet. PPPoE and PPPoA combine the Point-to-Point Protocol (PPP),
commonly used in dialup connections, with the Ethernet protocol or ATM protocol, which supports
multiple users in a local area network. The PPP protocol information is encapsulated within an
Ethernet frame or ATM frame.
IP: 192.168.0.1
Netmask: 255.255.255.0
Gateway: 192.168.0.254
Bridge
BAS
IP: 192.168.0.254
DSLAM
PC
IP: 192.168.0.2
Netmask: 255.255.255.0
Gateway: 192.168.0.254
VPI:0, VCI:32
Encapsulation: LLC
Before configuration the router, check with
your ISP about these information.
VPI:
VCI:
Encapsulation:
User Name:
Password:
DNS Server:
Host Name:
(if applicable)
IP address:
(if applicable)
Key in the WAN1 parameters:
VPI: 0
VCI: 33
AAL5 Encap: LLC
Protocol: PPPoA + NAT or PPPoE +
NAT
Click Next to setup User name and
password.
For more understanding about NAT,
review NAT/DMZ.
32
ISP
G.shdsl Router User Manual
152
Type the ISP1 parameters.
Username: test
Password: test
Password Confirm: test
Your ISP will provide the user name
and password.
Idle Time: 10
You want your Internet connection to
remain on at all time, enter 0 in the
Idle Time field.
There are two IP types, Dynamic and
Static, which you can setup. The
default IP type is Dynamic. It means
that ISP PPP server will provide IP
information including dynamic IP address when SHDSL connection is established. On the other
hand, you do not need to type the IP address of WAN1. Some of the ISP will provide fixed IP
address over PPP. For fixed IP address:
IP Type: Fixed
IP Address: 192.168.1.1
Click Next.
Note: For safety, the password will be prompt as star symbol.
The screen will prompt the parameters that will be written in EPROM. Check the parameters
before writing in EPROM.
Press Restart to restart the router working with new parameters or press continue to setup another
parameter.
33
G.shdsl Router User Manual
152
IPoA or EoA
WAN
LAN
Router
IP: 192.168.0.1
Netmask: 255.255.255.0
IP: 10.1.2.1
Netmask: 255.255.255.0
Gateway: 10.1.2.2
DNS: 168.95.1.1
BAS
IP: 10.1.2.2
Netmask: 255.255.255.0
DSLAM
PC
IP: 192.168.0.2~51
Netmask: 255.255.255.0
Gateway: 192.168.0.1
VPI:0, VCI:33
Encapsulation: LLC
Before configuration the router, check with your
ISP about these information.
VPI:
VCI:
Encapsulation:
IP Address:
Subnet Mask:
Gateway:
DNS Server:
Host Name:
(if applicable)
Type the Wan Parameters;
VPI: 0
VCI: 33
AAL5 Encap: LLC
Protocol: IPoA , EoA , IPoA + NAT or EoA +
NAT
Click Next to setup the IP parameters.
For more understanding about NAT, review
NAT/DMZ.
IP Address: 10.1.2.1
It is router IP address seem from Internet.
Your ISP will provide it and you need to
specify here.
Subnet mask: 255.255.255.0
This is the router subnet mask seen by
external users on Internet. Your ISP will
provide it to you.
Gateway: 10.1.2.2
Your ISP will provide you the default
gateway.
DNS Server 1: 168.95.1.1
Your ISP will provide at least one DNS
(Domain Name System) Server IP address.
Click Next
34
ISP
G.shdsl Router User Manual
152
The screen will prompt the parameters that
will be written in EPROM. Check the
parameters before writing in EPROM.
Press Restart to restart the router working
with new parameters or press continue to
setup another parameter.
35
G.shdsl Router User Manual
152
Advanced Setup
Advanced setup contains SHDSL, WAN, Bridge, Route, NAT/DMZ, Virtual
server and firewall parameters.
36
G.shdsl Router User Manual
152
SHDSL
You can setup the Annex type, data rate and SNR margin for SHDSL
parameters in SHDSL.
Click SHDSL
Annex Type: There are two Annex types,
Annex A (ANSI) and Annex B (ETSI), in
SHDSL. Check with your ISP about it.
Link Type: The product support two link
type, 4-wire mode with 4.0608Mbps
data rate and 2-wire mode with
2.304Mbps data rate.
Data Rate: you can setup the SHDSL
data rate in the multiple of 64kbps.
For adaptive mode, you have to setup
n=0. The router will adapt the data rate
according to the line status.
SHDSL SNR margin: the margin range is from 0 to 10.
SNR margin is an index of line connection. You can see the actual SNR margin in STATUS SHDSL.
The larger SNR margin, the better line connection.
If you set SNR margin in the field as 2, the SHDSL connection will drop and reconnect when the
SNR margin is lower than 2. On the other hand, the device will reduce the line rate and reconnect
for better line connection.
The screen will prompt the parameters
that will be written in EPROM. Check the
parameters before writing in EPROM.
Press Restart to restart the router
working with new parameters or press
continue to setup another parameter.
37
G.shdsl Router User Manual
152
WAN
The SHDSL router supports up to 8 PVCs. WAN 1 was configured via
BASIC except QoS. If you want to setup another PVCs, 2 to 7, the
parameters are setup in WAN. On the other hand, you must apply two or
more Internet Services with ISPs otherwise you do not need to setup WAN.
The WAN Number 1 will be the
parameters setup in Basic Setup. If
you want to setup another PVC,
you can configure them in WAN 2
to WAN 8.
Enter the parameters.
If WAN protocol is PPPoA or
PPPoE with dynamic IP, leave the
default WAN IP address and
Subnet Mask as default setting.
The system will ingore the IP
address and Subnet mask
information but deleating or leaving
blank the items will cause system
error.
If the WAN protocol is IPoA or EoA, leave the ISP parameters as default setting. The system will
ingore the information but deleating or leaving blank the items will cause system error.
QoS (Quality of Service): The Traffic Management Specification V4.0 defines ATM service
cataloges that describe both the traffic transmitted by users onto a network as well as the Quailty of
Service that the network need to provide for that traffic.
UBR (Unspecified Bit Rate) is the simplest service provided by ATM networks. There is no
guarantee of anything. It is a primary service used for transferring Internet traffic over the ATM
network.
CBR (Constant Bit Rate) is used by connections that requires a static amount of bandwidth that is
avilable during the connection life time. This bandwidth is characterized by Peak Cell Rate. Based
on the PCR of the CBR traffic, specific cell slots are assigned for the VC in the schedule table. The
ATM always sends a signle cell duting the CBR connection’s assigned cell slot.
VBR-rt (Varible Bit Rate real-time) is intended for real-time applications, such as compressed voice
over IP and video comferencing, that require tightly constrained delays and delay variation. VBR-rt
is characterized by a peak cell rate (PCR), substained cell rate (SCR), and maximun burst rate
(MBR).
VBR-nrt (Varible Bit Rate non-real-time)
PCR (Peak Cell Rate) in kbps: The maximum rate at which you expect to transmit data, voice and
video. Consider PCR and MBS as a menas of reducing lantency, not increasing bandwidth. The
38
G.shdsl Router User Manual
152
range of PCR is 64kbps to 2400kbps
SCR (Substained Cell Rate): The sustained rate at which you expect to transmit data, voice and
video. Consider SCR to be the true bandwidth of a VC and not the lone-term average traffic rate.
The range of SCR is 64kbps to 2400kbps.
MBS (Maximum Burst Size): The amount of time or the duration at which the router sends at PCR.
The range of MBS is 1 cell to 255 cells.
Press Finish to finish setting.
The screen will prompt the parameters that will be written in EPROM. Check the parameters before
writing in EPROM.
Press Restart to restart the router working with new parameters or press continue to setup another
parameter.
39
G.shdsl Router User Manual
152
Bridge
If your router is setup in bridge mode and you want to setup advanced
filter function, you can use BRIDGE menu to setup the filter function,
blocking function.
Click Bridge to setup.
Press Add to add the static bridge
information.
If you want to filter the definate MAC
address of LAN PC to access Internet, press
Add to establish the filtering table. Key the
MAC address in MAC address field and
select Filter in LAN field.
If you want to filter the definate MAC
address of WAN PC to access LAN, press
Add to establish the filtering table. Key the
MAC address in MAC address field and
select Filter in WAN field. For example: if
your VC is setup at WAN 1, select WAN 1
Filter.
The screen will prompt the parameters that
will be written in EPROM. Check the
parameters before writing in EPROM.
Press Restart to restart the router working
with new parameters or press continue to
setup another parameter.
40
G.shdsl Router User Manual
152
VLAN
Virtual LAN (VLAN) is defined as a group of devices on one or more LANs that are configured so
that they can communicate as if they were attached to the same wire, when in fact they are located
on a number of different LAN segments. Because VLAN is based on logical instead of physical
connections, it is extremely flexible.
Click VLAN to configure VLAN.
The product support two types of VLAN,
802.1Q and Port-Based. User can configure
one of them to the router.
For setting 802.1Q VLAN click the 802.1Q
Tag-Based VLAN. The screem will prompt
as follow.
VID: Virtual LAN ID. It is an definite number of ID which number is from 1 to 4094.
PVID: Port VID which is an untagged member of default VLAN.
Link Type: Access means the port can receive or send untagged packets.
Link Type: Trunk means that the prot can receive or send tagged packets.
41
G.shdsl Router User Manual
152
Port-Based VLANs are VLANs where
the packet forwarding decision is based
on the destination MAC address and its
associated port.
Click Port-Based VLAN to configure the
router.
42
G.shdsl Router User Manual
152
Route
If the Router is connected to more than one network, it may be necessary
to set up a static route between them. A static route is a pre-determined
pathway that network information must travel to reach a specific host or
network.
With Dynamic Routing, you can enable the Router to automatically adjust
to physical changes in the network’s layout. The Router, using the RIP
protocol, determines the network packets’ route based on the fewest
number of hops between the source and the destination. The RIP protocol
regularly broadcasts routing information to other routers on the network.
Click Route to modify the routing information.
To modify the RIP (Routing information
protocol) Parameters:
RIP Mode: Enable
Auto RIP Summary: Enable
Press Modify
43
G.shdsl Router User Manual
152
RIP Mode: this parameter determines how the
product handle RIP (Routing information
protocol). RIP allows it to exchange routing
information with other router. If set to Disable,
the gateway does not participate in any RIP
exchange with other router. If set Enable, the
router broadcasts the routing table of the
router on the LAN and incoporates RIP
broadcast by other routers into it’s routing
table. If set silent, the router does not
broadcast the routing table, but it accepts RIP
broadcast packets that it receives.
RIP Version: It determines the format and
broadcasting method of any RIP
transmissions by the gateway.
RIP v1: it only sends RIP v1 messages only.
RIP v2: it send RIP v2 messages in multicast
and broadcast format.
Authentication required.
None: for RIP, there is no need of
authentication code.
Password: the RIP is protected by password,
authentication code.
MD5: The RIP will be decoded by MD5 than
protected by password, authentication code.
Poison Reserve is for the purpose of promptly
broadcast or multicast the RIP while the route
is changed. (ex shuting down one of the
routers in routing table)
Enable: the gateway will actively broadcast or
multicast the information.
Disable: the gateway will not broadcast or
multicast the information.
After modifying the RIP parameters, press
finish.
The screen will prompt the modified parameter. Check the parameters and perss Restart to restart
the router or press Continue to setup another parameters.
44
G.shdsl Router User Manual
152
NAT/DMZ
NAT (Network Address Translation) is the translation of an Internet
Protocol address (IP address) used within one network to a different IP
address known within another network. One network is designated the
inside network and the other is the outside. Typically, a company maps its
local inside network addresses to one or more global outside IP addresses
and reverse the global IP addresses of incoming packets back into local IP
addresses. This ensure security since each outgoing or incoming request
must go through a translation process, that also offers the opportunity to
qualify or authenticate the request or match it to a previous request. NAT
also conserves on the number of global IP addresses that a company
needs and lets the company to use a single IP address of its
communication in the Internet world.
DMZ (demilitarized zone) is a computer host or small network inserted as
a “neutral zone” between a company private network and the outside
public network. It prevents outside users from getting direct access to a
server that has company private data.
In a typical DMZ configuration for an enterprise, a separate computer or host receives requests
from users within the private network to access via Web sites or other companies accessible on the
public network. The DMZ host then initiates sessions for these requests to the public network.
However, the DMZ host is not able to initiate a session back into the private network. It can only
forward packets that have already been requested.
Users of the public network outside the company can access only the DMZ host. The DMZ may
typically also have the company’s Web pages so these could serve the outside world. However, the
DMZ provides access to no other company data. In the event that an outside user penetrated the
DMZ host’s security, the Web pages might be corrupted, but no other company information would
be exposed.
Press NAT/DMZ to setup the parameters.
If you want to enable the NAT/DMZ
functions, click Enable. Enable the DMZ
host Function is used the IP address
assigned to the WAN for enabling DMZ
function for the virtual IP address.
Multi-DMZ: Some users who have two or
more global IP addresses assigned by
ISP can be used the multi DMZ. The table
is for the mapping of global IP address
and virtual IP address.
45
G.shdsl Router User Manual
152
Multi-NAT: Some of the virtual IP
addresses (eg: 192.168.0.10 ~
192.168.0.50) collectively use two of the
global IP addresses (eg: 69.210.1.9 and
69.210.1.10). The Multi-NAT table will be
setup as;
Virtual Start IP Address: 192.168.0.10
Count: 40
Global Start IP Address: 69.210.1.9
Count: 2
Press Finish to continue.
The screen will prompt the parameters that will be written in EPROM. Check the parameters before
writing in EPROM. Press Restart to restart the router working with new parameters or Continue to
configure another parameter.
46
G.shdsl Router User Manual
152
Virtual Server
For example: Specific ports on the WAN interface are re-mapped to
services inside the LAN. As only 69.210.1.8 (e.g., assigned to WAN from
ISP) is visible to the Internet, but does not actually have any services
(other than NAT of course) running on gateway, it is said to be a virtual
server. Request with TCP made to 69.210.1.8:80 are remapped to the
server 1 on 192.168.0.2:80 for working days from Monday to Friday 8 AM
to 6PM, other requests with UDP made to 69.210.1.8:25 are remapped to
server 2 on 192.168.0.3:25 and always on.
You can setup the router as Index 1, protocol TCP, interface WAN1,
service name test1, private IP 192.168.0.2, private port 80, public port 80,
schedule from Day Monday to Friday and time 8:0 to 16:0 and index 2,
protocol UDP, interface WAN1, service name test2, private IP 192.168.0.3,
private port 25, public port 25, schedule always.
Click Virtual Server to configure the parameters.
Press Modify for modify 1.
Type the necessary parameters then click
Finish.
Press Restart to restart the router or press
continue to setup another function.
47
G.shdsl Router User Manual
152
Firewall
A firewall is a set of related programs that protects the resources of a
private network from other networks. It is helpful to users that allow
preventing hackers to access its own private data resource accidentally.
This level only enables the
NAT firewall and the remote
management security. The
NAT firewall will take effect
if NAT function is enabled.
The remote management
security is default to block
any WAN side connection
to the device. Non-empty
legal IP pool in ADMIN will
block all remote
management connection
except those IPs specified
in the pool.
Press Finish to finish setting
of firewall
The screen will prompt the parameters,
which will be written in EPROM. Check
the parameters.
Press restart to restart the router or
press continue to setup another function.
48
G.shdsl Router User Manual
152
This level enables basic
firewall security, all DoS
protection, and the SPI
filter function.
Press Finsih to finish
setting firewall.
The screen will prompt the parameters,
which will be written in EPROM. Check
the parameters.
Press restart to restart the router or
press Continue to setup another
function.
User can determine the
security level for special
purpose, environment,
and applications by
configuring the DoS
protection and defining an
extra packet filter with
higher priority than the
default SPI filter. Note that,
an improper filter policy
may degrade the
capability of the firewall
and/or even block the
normal network traffic.
49
G.shdsl Router User Manual
152
Click Advanced Firewall Security and
then press Finish.
A SYN flood attack attempts to slow
your network by requesting new
connections but not completing the
process to open the connection.
Once the buffer for these pending
connections is full a server will not
accept any more connections and
will be unresponsive.
ICMP Flood: A sender transmits a
volume of ICMP request packets to
cause all CPU resources to be
consumed serving the phony requests.
UDP Flood: A sender transmits a volume of requests for UDP diagnostic services which cause all
CPU resources to be consumed serving the phony requests.
A ping of death attack attempts to crash your system by sending a fragmented packet, when
reconstructed is larger than the maximum allowable size. Other known variants of the ping of death
include teardrop, bonk and nestea.
A land attack is an attempt to slow your network down by sending a packet with identical source
and destination addresses originating from your network.
IP Spoofing is a method of masking the identity of an intrusion by making it appeared that the traffic
came from a different computer. This is used by intruders to keep their anonymity and can be used
in a Denial of Service attack.
A smurf attack involves two systems. The attacker sends a packet containing a ICMP echo request
(ping) to the network address of one system. This system is known as the amplifier. The return
address of the ping has been faked (spoofed) to appear to come from a machine on another
network (the victim). The victim is then flooded with responses to the ping. As many responses are
generated for only one attack, the attacker is able use many amplifiers on the same victim.
IP Spoofing: Falsify the IP header information to deceive the destination host.
Traditional firewall are stateless meaning they have no memory of the connections of data or
packets that pass through them. Such IP filtering firewalls simply examine header information in
each packet and attempt to match it to a set of define rule. If the firewall finds a match, the
prescribe action is taken. If no match is found, the packet is accepted into the network, or dropped,
depending on the firewall configuration.
A stateful firewall maintains a memory of each connection and data passing through it. Stateful
firewall records the context of connections during each session, continuously updating state
information in dynamic tables. With this information, stateful firewalls inspect each connection
traversing each interface of the firewall, testing the validity of data packets throughout each
session. As data arrives, it is checked against the state tables and if the data is part of the session,
it is accepted. Stateful firewalls enable a more intelligent, flexible and robust approach to network
security, while defeating most intrusion methods that exploit state-less IP filtering firewalls.
50
G.shdsl Router User Manual
152
If you want to configure the Packet
Filtering Parameters, choose Enable
and press Add.
Select the protocol and configure the
parameter.
If you want to ban all of the protocol
from the IP (e.g.: 200.1.1.1) to
access the all PCs (e.g.:
192.168.0.2 ~ 192.168.0.50) in the
LAN, key in the parameter as;
Protocol: ANY
Direction: INBOUND (INBOUND is
from WAN to LAN, and OUTBOUND
is LAN to WAN.)
Description: Hacker
Src. IP Address: 200.1.1.1
Dest. IP Address:
192.168.0.2-192.168.0.50
Press OK to finish.
The screen will prompt the
configured parameters. Check the
parameters.
Click Restart to restart the gateway
or Continue to configure another
parameters.
Filtering Rule for SMTP connection
Filtering rule will be configured as follow
Index
1
2
3
4
5
Protocol
TCP
TCP
TCP
TCP
Any
Direction Action
Inbound Permit
Outbound Permit
Outbound Permit
Inbound Permit
Either
Deny
Source
External
Internal
Internal
External
Any
Destination
Internal
External
External
Internal
Any
51
Dest. Port
25
>1023
25
>1023
Any
Schedule
Always
Always
Always
Always
Always
G.shdsl Router User Manual
Packet Direction
1
Inbound
2
Outbound
152
Source
192.168.3.4
172.16.1.1
Destination
172.16.1.1
192.168.3.4
Protocol Dest. Port Action (Rule)
TCP
25
Permit (A)
TCP
1234
Permit (B)
172.16.1.1:25
192.168.3.4:1234
1
Internet
2
Firewall
SMTP Server
Packet Direction
3
Outbound
4
Inbound
Source
172.16.1.1
192.168.3.4
SMTP Client
Destination
192.168.3.4
172.16.1.1
Protocol Dest. Port Action (Rule)
TCP
25
Permit (C)
TCP
1357
Permit (D)
172.16.1.1:1357
192.168.3.4:25
3
Internet
4
Firewall
SMTP Client
Packet Direction
5
Inbound
6
Outbound
Source
10.1.2.3
171.16.3.4
SMTP Server
Destination
171.16.3.4
10.1.2.3
Protocol Dest. Port Action (Rule)
TCP
6000
Deny (E)
TCP
5150
Deny (E)
171.16.3.4:6000
10.1.2.3:5150
5
Internet
6
X11 Server
Firewall
Attacker
Update Filtering Rule
Index Protocol
1
TCP
2
TCP
3
TCP
4
TCP
5
Any
Filtering Result
Direction Action
Inbound Permit
Outbound Permit
Outbound Permit
Inbound Permit
Either
Deny
Index
1
2
3
4
5
6
Direction Action
Source
Inbound Permit(A) 192.168.3.4
Outbound Permit(B) 171.16.1.1
Outbound Permit(C) 171.16.1.1
Inbound Permit(D) 192.168.3.4
Inbound Deny(E) 10.1.2.3
Outbound Deny(E) 171.16.3.4
Protocol
TCP
TCP
TCP
TCP
TCP
TCP
Source
External
Internal
Internal
External
Any
Destination
Internal
External
External
Internal
Any
52
Source Port
>1023
25
>1023
25
Any
Dest. Port
25
>1023
25
>1023
Any
Destination Source Port
171.16.1.1
1234
192.168.3.4 25
192.168.3.4 1357
171.16.1.1
25
171.16.3.4
5150
10.1.2.3
6000
Dest. Port
25
1234
25
1357
6000
5150
G.shdsl Router User Manual
152
Rule Order
The rules order affects the filtering result. The filtering process will proceed from top to bottom,
changing the order as the different result of filtering.
Rule
A
B
C
Source Address
10.0.0.0
10.1.99.0
Any
Destination Address
172.16.6.0
172.16.0.0
Any
Action
Permit
Deny
Deny
Where “0” at the last eight bits indicates “from 1 to 254”, “0” at any eight bits preceding “0”,
or “0.0.0” indicates “from 1 to 254”. On the other hand, “0” and all “0” successive with “0”
represents any.
When the rule is ordered as ABC.
Index
1
2
3
4
5
Source Address
10.1.99.1
10.1.99.1
10.1.1.1
10.1.1.1
192.168.3.4
Destination Address
172.16.1.1
172.16.6.1
172.16.6.1
172.16.1.1
172.16.6.1
Action
Deny (B)
Permit (A)
Permit (A)
Deny (C)
Deny (C)
The rule order will permit 10.1.99.1 to access 172.16.6.1.
When the rule is ordered as BAC.
Index
Source Address
Destination Address
1
10.1.99.1
172.16.1.1
2
10.1.99.1
172.16.6.1
3
10.1.1.1
172.16.6.1
4
10.1.1.1
172.16.1.1
5
192.168.3.4
172.16.6.1
The rule order will deny 10.1.99.1 to access 172.6.6.1.
53
Action
Deny (B)
Deny (B)
Permit (A)
Deny (C)
Deny (C)
“0.0”
G.shdsl Router User Manual
152
Administration
This session introduces security and simple network management protocol
(SNMP) and time synchronous.
54
G.shdsl Router User Manual
152
Security
For system secutiry, suggest to change the default user name and password
in the first setup otherwise unauthorized persons can access the router and
change the parameters.
There are three ways to configure the router, Web browser, telnet and serial
console.
Press Security to setup the parameters.
For greater security, change the Supervisor
ID and password for the gateway. If you don’t
set them, all users on your network can be
able to access the gateway using the default
IP and Password root.
You can authorize five legal users to access
the router via telnet or console. There are two
UI modes, menu driven mode and command
mode to configure the router.
Legal address pool will setup the legal IP
addresses from which authorized person can
configure the gateway. This is the more
secure function for network administrator to
setup the legal address of configuration.
Configured 0.0.0.0 will allow all hosts on
Internet or LAN to access the router.
Leaving blank of trust host list will cause
blocking all PC from WAN to access the
router. On the other hand, only PC in LAN can
access the router.
If you type the excact IP address in the filed,
only the host can access the router.
Click Finish to finish the setting.
The browser will prompt the configured parameters and check it before writing into EPROM.
Press Restart to restart the gateway working with the new parameters and press Continue to
setup other parameters.
55
G.shdsl Router User Manual
152
SNMP
Simple Network Management Protocol (SNMP) provides for the exchange of
messages between a network management client and a network
management agent for remote management of network nodes. These
messages contain requests to get and set variables that exist in network
nodes in order to obtain statistics, set configuration parameters, and monitor
network events. SNMP communications can occur over the LAN or WAN
connection.
The router can generate SNMP traps to indicate alarm conditions, and it relies
on SNMP community strings to implement SNMP security. This router support
MIB I and MIB II.
Click SNMP to configure the parameters.
In the table of current community pool, you can
setup the access authority.
In the table of current trap host pool, you can
setup the trap host.
Press Modify to modify the community pool.
SNMP status: Enable
56
G.shdsl Router User Manual
152
Access Right: Deny for deny all access
Access Right: Read for access read only
Access Right: Write for access read and write.
Community: it serves as password for access
right.
After configuring the community pool, press
OK.
SNMP trap is an informational message sent
from an SNMP agent to a manager. Click
Modify to modify the trap host pool.
Version: select version for trap host (SNMP v1
or SNMP v2).
IP: type the trap host IP
Community: type the community password.
The community is setup in community pool.
Press OK to finish the setup.
The browser will prompt the configured parameters and check it before writing into EPROM.
Press Restart to restart the gateway working with the new parameters and press Continue to
setup other parameters.
57
G.shdsl Router User Manual
152
Time Sync
Time synchronization is an essential element for any business that relies
on an IT system. The reason for this is that these systems all have clocks
that are the source of time for files or operations they handle. Without time
synchronization, time on these systems varies with each other or with the
correct time and this can cause-, firewall packet filtering schedule
processes to fail, security to be compromised, virtual server works in
wrong schedule.
Click TIME SYNC.
There are two synchronization modes:
Sample Network Time Protocol (SNTP)
and synchronization with PC. For
synchronization with PC, select Sync
with PC. The gateway will synchronize
the time with the connecting PC.
SNTP is the acronym for Simple
Network Time Protocol, which is an
adaptation of the Network Time
Protocol (NTP) used to synchronize
computer clocks in the Internet. SNTP
can be used when the ultimate
performance of the full NTP
implementation.
For SNTP, select SNTP v4.0.
SNTP service: Enable
Time Server: All of the time server
around the world can be used but
suggest to use the timeserver nearby.
Time Zone: you have to choose the
right time zone.
Press Finish to finish the setup. The browser will prompt the configured parameters and check it
before writing into EPROM.
58
G.shdsl Router User Manual
152
Utility
This section will describe the utility of the product including system
information, load the factory default configuration, upgrade the firmware
logout and restart the gateway.
59
G.shdsl Router User Manual
152
System Info
Click System Info for review the information.
The browser will prompt the system information.
60
G.shdsl Router User Manual
152
Config Tool
This configuration tool has three functions: load Factory Default, Restore
Configuration and Backup Configuration.
Press Config Tool.
Choose the function and then press finish.
Ø
Load Factory Default function: it will load the factory default
parameters to the gateway.
Note: All of the settings will be changed to factory default. On the other
hand you will lose all the configured parameters.
Restore Configuration: Sometime the configuration will be crushed
unintentionally. Restore configuration will help you to recover the
backup configuration easily.
² Click Finish after selecting Restore Configuration.
² Browse the route of backup file then press finish. The router will automatically restore the
saved configuration.
Ø
Backup Configuration: After
configuration, suggest using the
function to backup your router
parameters in the PC.
² Select the Backup Configuration and
then press Finish.
² Browse the place of backup file
named backup. Press Finish. The
router will automatically backup the configuration.
Ø
61
G.shdsl Router User Manual
152
Upgrade
You can upgrade the gateway using the upgrade function.
Press Upgrade.
Browse the file and press OK button to
upgrade. The system will reboot
automatically after finishing.
62
G.shdsl Router User Manual
152
Logout
To logout the router, press logout.
63
G.shdsl Router User Manual
152
Restart
For restarting the router, click the Restart in UTILITY.
Press Restart to reboot the router.
64
G.shdsl Router User Manual
152
Status
You can monitor the SHDSL status including mode, Tx power and Bitrate
and Performance information including SNR margin, atteunation and CRC
error count.
LAN status will prompt the MAC address, IP address, Subnet mask and
DHCP client table.
WAN status will display the WAN interface information.
You can view the routing table in the status of route.
Interface status inculdes LAN and WAN statistics information.
Firewall status display DoS protection status and dropped packets statistics.
65
G.shdsl Router User Manual
152
LAN-to-LAN connection with bridge Mode
STU-C (CO)
STU-R (CPE)
Bridge
Bridge
IP: 192.168.0.1
Netmask: 255.255.255.0
PC
IP: 192.168.0.2
Netmask: 255.255.255.0
VPI:0, VCI:32
Encapsulation: LLC
IP: 192.168.0.100
Netmask: 255.255.255.0
Gateway: 192.168.0.1
IP: 192.168.0.200
Netmask: 255.255.255.0
Gateway: 192.168.0.2
CO side
Click Bridge and CO Side to setup
Bridging mode of the Router and then
click Next.
LAN Parameters
Enter IP: 192.168.0.1
Enter Subnet Mask: 255.255.255.0
Enter Gateway: 192.168.0.1
Enter Host Name: SOHO
WAN1 Parameters
Enter VPI: 0
Enter VCI: 32
Click LLC
Click Next
The screen will prompt the new
configured parameters. Check the
parameters and Click Restart The router
will reboot with the new setting.
66
G.shdsl Router User Manual
152
CPE Side
Click Bridge and CO Side to setup
Bridging mode of the Router and then click
Next.
LAN Parameters
Enter IP: 192.168.0.2
Enter Subnet Mask: 255.255.255.0
Enter Gateway: 192.168.0.2
Enter Host Name: SOHO
WAN1 Parameters
Enter VPI: 0
Enter VCI: 32
Click LLC
Click Next
The screen will prompt the new configured
parameters. Check the parameters and
Click Restart The router will reboot with
the new setting.
67
G.shdsl Router User Manual
152
LAN to LAN Connection with Routing Mode
STU-C (CO)
STU-R (CPE)
Router
IP: 192.168.20.1
Netmask: 255.255.255.0
IPoA or EoA
VPI:0, VCI:32
Encapsulation: LLC
Router
IP: 192.168.10.1
Netmask: 255.255.255.0
IP: 192.168.30.2
Netmask: 255.255.255.0
Gateway: 192.168.30.1
IP: 192.168.30.1
Netmask: 255.255.255.0
Gateway: 192.168.30.2
IP: 192.168.20.100
Netmask: 255.255.255.0
Gateway: 192.168.20.1
IP: 192.168.10.200
Netmask: 255.255.255.0
Gateway: 192.168.10.1
CO side
Click ROUTE and CO Side then press
Next.
Type LAN parameters:
IP Address: 192.168.20.1
Subnet Mask: 255.255.255.0
Host Name: SOHO
DHCP Service: For more DHCP service,
review DHCP Service.
Type the Wan Parameters;
VPI: 0
VCI: 32
AAL5 Encap: LLC
Protocol: IPoA , EoA , IPoA + NAT or EoA +
NAT
Note: The Protocol used in CO and CPE
have to be the same.
Click Next to setup the IP parameters.
For more understanding about NAT, review
NAT/DMZ in page 19.
68
G.shdsl Router User Manual
152
IP Address: 192.168.20.1
Subnet mask: 255.255.255.0
Gateway: 192.169.30.2
Click Next
The screen will prompt the parameters that will be written in EPROM. Check the parameters before
writing in EPROM.
Press Restart to restart the router working with new parameters or press continue to setup another
parameter.
69
G.shdsl Router User Manual
152
CPE side
Click ROUTE and CPE Side then press
Next.
Type LAN parameters:
IP Address: 192.168.10.1
Subnet Mask: 255.255.255.0
Host Name: SOHO
DHCP Service: For more DHCP service,
review DHCP Service.
Type the Wan Parameters;
VPI: 0
VCI: 32
AAL5 Encap: LLC
Protocol: IPoA , EoA , IPoA + NAT or EoA +
NAT
Note: The Protocol used in CO and CPE
have to be the same.
Click Next to setup the IP parameters.
For more understanding about NAT, review
NAT/DMZ in page 19.
IP Address: 192.168.30.2
Subnet mask: 255.255.255.0
Gateway: 192.169.30.1
Click Next
The screen will prompt the parameters that will be written in EPROM. Check the parameters before
writing in EPROM.
Press Restart to restart the router working with new parameters or press continue to setup another
parameter.
70
G.shdsl Router User Manual
152
Configuration via Serial Console or Telnet with Manu
Driven Interface
Serial Console
Check the connectivity of the RS-232 cable from your computer to the serial port of ROUTER. Start
your terminal access program with VT100 terminal emulation. Configure the serial link with the
following value:
Parameter
Value
Baudrate
Data Bits
Parity Check
Stop Bits
Flow-control
9600
8
No
1
No
Press the SPACE key until the login screen appears. When you see the login screen, you can
logon to Router.
Note: You have to use SPACE key. Pressing other keys does not work.
User: admin
Password: *****
Note: The factory default user and passwords are both “admin”.
Telnet
Make sure the correct Ethernet cable is used for connecting the LAN port of your computer to
ROUTER. The LAN LNK indicator on the front panel shall light if a correct cable is used. Starting
your Telnet client with VT100 terminal emulation and connecting to the management IP of Router,
wait for the login screen appears. When you see the login screen, you can logon to Router.
User: admin
Password: *****
Note: The default IP address is 192.168.0.1.
71
G.shdsl Router User Manual
152
Operation Interface
For serial console and Telnet management, the ROUTER implements two operational interfaces:
command line interface (CLI) and menu driven interface. The CLI mode provides users a simple
interface, which is better for working with script file. The menu driven interface is a user-friendly
interface to general operations. The command syntax for CLI is the same as that of the menu
driven interface. The only difference is that the menu driven interface shows you all of available
commands for you to select. You don’t need to remember the command syntax and save your
time on typing the whole command line.
The following figure gives you an example of the menu driven interface. In the menu, you scroll
up/down by pressing key I / K, select one command by key L, and go back to a higher level of
menu by key J. For example, to show the system information, just logon to the ROUTER, move
down the cursor by pressing key K twice and select “show” command by key L, you shall see a
submenu and select “system” command in this submenu, then the system will show you the
general information.
72
G.shdsl Router User Manual
152
Window structure
From top to bottom, the window will be divided into four parts:
1.
Product name
2.
Menu field: Menu tree is prompted on this field. “>>” symbol indicates the cursor place.
3.
Configuring field: You will configure the parameters in this field. < parameters > indicates the
parameters you can choose and < more…> indicates that there have submenu in the title.
4.
Operation command for help
The following table shows the parameters in the brackets.
Command
<ip>
<Route|Bridge>
[1~1999]
[1~65534|-t]
Description
An item enclosed in brackets is required. If the item is shown in lower
case bold, it represents an object with special format. For example,
<ip> may be 192.168.0.3.
Two or more items enclosed in brackets and separated by vertical
bars means that you must choose exactly one of the items. If the item
is shown in lower case bold with leading capital letter, it is a command
parameter. For example, Route is a command parameter in
<Route|Bridge>.
An item enclosed in brackets is optional.
Two or more items enclosed in brackets and separated by vertical
bars means that you can choose one or none of the items.
73
G.shdsl Router User Manual
152
Menu Driven Interface Commands
Before changing the configuration, familiarize yourself with the operations list in the following table.
The operation list will be shown on the window.
Keystroke
[UP] or I
[DOWN] or K
[LEFT] or J
[RIGHT] or L
[ENTER]
[TAB]
Ctrl + C
Ctrl + Q
Menu Driven Interface Commands
Description
Move to above field in the same level menu.
Move to below field in the same level menu.
Move back to previous menu.
Move forward to submenu.
Move forward to submenu.
To choose another parameters.
To quit the configuring item.
For help
Menu Tree
The menu three are as following figures. All of the configuration commands are placed in the
subdirectories of Enable protected by supervisor password. On the other hand, unauthorized user
cannot change any configurations but viewing the status and configuration of the router and using
ping command to make sure the router is worked.
74
G.shdsl Router User Manual
152
User Name
Password
Enable
Enable
Setup
Status
Show
Write
Reboot
Ping
Admin
Utility
Exit
Status
Show
Protocol
Adress
VPI_VCI
Encap
QoS
ISP
IP_type
List
Mode
SHDSL
WAN
Bridge
VLAN
Route
LAN
IP_share
Firewall
DHCP
DNS_proxy
Hostname
Default
Mode
Modify
PVID
Link_mode
List
SHDSL
WAN
Route
Interface
Firewall
Static
RIP
System
Config
Script
Mode
Link
N*64
Type
Clear
Margin
Gateway
Static
Generic
LAN
WAN
LIst
IP_type
Address
Attrib
Level
pkt_filter
DoS_protect
Upgrade
Backup
Restore
System
Config
Script
SHDSL
WAN
Route
Interface
Firewall
Class
PCR
SCR
MBS
Add
Delete
Modify
List
MAC
LAN_port
WAN1_port
WAN2_port
WAN3_port
WAN4_port
WAN5_port
WAN6_port
WAN7_port
WAN8_port
Add
Delete
List
Attrib
Version
Authe
Clear
Modify
List
Active
Gateway
Netmask
IP_range
Lease_time
Name_server1
Name_server2
Name_server3
Active
Drop_frag
Add
Delete
Modify
Exchange
List
Add
Delete
User
Security
SNMP
Password
ID
SNTP
Exit
Range
Delete
List
Virtual
Global
Fixed
NAT
PAT
DMZ
Generic
Fixed
Relay
List
Ping
Clear
Modify
List
Port
IP_pool
List
Attrib
Profile
Modify
Clear
Community
Trap
Edit
List
75
Range
Interface
Delete
List
Modify
Interface
Delete
List
Interface
Port
Server
Protocol
Name
Begin
End
Active
Address
sync_flood
icmp_flood
udp_flood
ping_death
land_attack
ip_spoof
smurf_attack
fraggle_attack
Protocol
Direction
src_IP
dest_IP
Port
TCP_flag
ICMP_type
Description
Enable
End
Action
Method
Service
Time_server1
Time_server2
Time_server3
Update_rate
Time_zone
List
G.shdsl Router User Manual
152
Configuration
To setup the router, move the cursor “ >>” to enable and press enter key. While the screen
appears, type the supervisor password. The default supervisor password is root. The password
will be prompted as “ * “ symbol for system security.
---------------------------------------------------------------------Command: enable <CR>
Message: Please input the following information.
Supervisor password: ****
---------------------------------------------------------------------In this sub menu, you can setup management features and upgrade software, backup the system
configuration and restore the system configuration via utility tools.
For any changes of configuration, you have to write the new configuration to EPROM and reboot
the router to work with new setting.
The screen will prompt as follow.
>> enable
setup
status
show
write
reboot
ping
admin
utility
exit
Modify command privilege
Configure system
Show running system status
View system configuration
Update flash configuration
Reset and boot system
Packet internet groper command
Setup management features
TFTP upgrade utility
Quit system
The description of the commands are:
Command
Description
enable
Modify command privilege. When you login via serial console or Telnet, the
router defaults to a program execution (read-only) privileges to you. To change
the configuration and write changes to nonvolatile RAM (NVRAM), you must
work in enable mode.
setup
To configure the product, you have to use the setup command.
status
View the status of product.
show
Show the system and configuration of product.
write
Update flash configuration. After you have completed all necessary setting,
make sure to write the new configuration to NVRAM by “write” command and
reboot the system, or all of your changes will not take effect.
reboot
Reset and boot system. After you have completed all necessary setting, make
sure to write the new configuration to NVRAM and reboot the system by
“reboot” command, or all of your changes will not take effect.
ping
Packet internet groper command.
admin
You can setup management features in this command.
utility
Upgrade software and backup and restore configuration are done via “utility”
command.
exit
Quit system
76
G.shdsl Router User Manual
152
Status
You can view running system status of SHDSL, WAN, route and interface via status command.
Move cursor “ >> “ to status and press enter.
>> shdsl
wan
route
interface
firewall
Command
shdsl
wan
route
interface
firewall
Show
Show
Show
Show
Show
SHDSL status
WAN interface status
routing table
interface statistics status
firewall status
Description
The SHDSL status includes line rate, SNR margin, TX power, attenuation and
CRC error of the product, and SNR margin, attenuation and CRC error of remote
side. The product access remote side information via EOC (embedded operation
channel).
WAN status shows the 8 PVC information which are configured.
You can see the routing table via route command.
The statistic status of WAN and LAN interface can be monitor by interface
command.
The current and history status of firewall are shown in this command.
77
G.shdsl Router User Manual
152
Show
You can view the system information, configuration and configuration in command script by show
command.
Move cursor “ >> “ to show and press enter.
>> system
config
script
Command
system
config
script
Show general information
Show all configuration
Show all configuration in command script
Description
The general information of the system will show in system command.
Config command can display detail configuration information.
Configuration information will prompt in command script.
78
G.shdsl Router User Manual
152
Write
For any changes of configuration, you must write the new configuration to EPROM using write
command and reboot the router to take affect.
Move cursor to “ >> “ to write and press enter.
---------------------------------------------------------------------Command: write <CR>
Message: Please input the following information.
Are you sure? (y/n): y
----------------------------------------------------------------------
79
G.shdsl Router User Manual
152
Reboot
To reboot the router, use reboot command. Move cursor to “ >> “ to write and press enter.
---------------------------------------------------------------------Command: reboot <CR>
Message: Please input the following information.
Do you want to reboot? (y/n): y
----------------------------------------------------------------------
80
G.shdsl Router User Manual
152
Ping
Ping command will be used to test the connection of router. Move cursor “ >> “ to ping and press
enter.
---------------------------------------------------------------------Command: ping <ip> [1~65534|-t] [1~1999]
Message: Please input the following information.
IP address <IP> : 10.0.0.1
Number of ping request packets to send (TAB select): -t
Data size [1~1999]: 32
---------------------------------------------------------------------There are 3 types of number of ping request packet to send, default, 1~65534 and –t. Default will
send 4 packet and –t continuous packet until you key in Ctrl+c to stop.
81
G.shdsl Router User Manual
152
Administration
You can modify the user profile, telnet access, SNMP (Sample Network Management Protocol),
supervisor information and SNTP (Simple Network Time Protocol) in admin. The route is enable
è admin.
For configuration the parameters, move the cursor “ >> “ to admin and press enter.
>> user
security
snmp
passwd
id
sntp
Manage user profile
Setup system security
Configure SNMP parameter
Change supervisor password
Change supervisor ID
Configure time synchronization
User Profile
You can use user command to clear, modify and list the user profile. You can setup at most five
users to access the router via console port or telnet in user profile table however users who have
the supervisor password can change the configuration of the router. Move the cursor “ >> “ to user
and press enter key.
>> clear
modify
list
Clear user profile
Modify the user profile
List the user profile
You can delete the user by number using clear command. If you do not make sure the number of
user, you can use list command to check it. Modify command is to modify an old user information
or add a new user to user profile.
To modify or add a new user, move the cursor to modify and press enter.
---------------------------------------------------------------------Command: admin user modify <1~5> <more...>
Message: Please input the following information.
Legal access user profile number <1~5> : 2
---------------------------------------------------------------------The screen will prompt as follow.
>> Attrib
Profile
UI mode
User name and password
There are two UI mode, command and menu mode, to setup the product. We will not discuss
command mode in this manual.
82
G.shdsl Router User Manual
152
Security
Security command can be configured sixteen legal IP address for telnet access and telnet port
number.
Move the cursor “ >> “ to security and press enter. The default legal address is 0.0.0.0. It means
that there is no restriction of IP to access the router via telnet.
>> port
ip_pool
list
Configure telent TCP port
Legal address IP address pool
Show security profile
SNMP
Simple Network Management Protocol (SNMP) is the protocol not only governing network
management, but also the monitoring of network devices and their functions.
The router can generate SNMP traps to indicate alarm conditions, and it relies on SNMP
community strings to implement SNMP security. This router support MIB I & II.
Move the cursor “ >> “ to snmp and press enter.
>> community
trap
Configure community parameter
Configure trap host parameter
5 SNMP community entry can be configured in this system. Move the cursor to community and
press enter.
---------------------------------------------------------------------Command: admin snmp community <1~5> <more...>
Message: Please input the following information.
Community entry number <1~5> : 2
---------------------------------------------------------------------The screen will prompt as follow:
>> edit
list
Edit community entry
Show community configuration
5 SNMP trap entry can be configured in this system. Move the cursor to trap and press enter.
---------------------------------------------------------------------Command: admin snmp trap <1~5> <more...>
Message: Please input the following information.
Trap host entry number <1~5> : 2
----------------------------------------------------------------------
83
G.shdsl Router User Manual
152
The screen will prompt as follow:
>> edit
list
Edit trap host parameter
Show trap configuration
Supervisor Password and ID
The supervisor password and ID are the last door for security but the most important. Users who
access the router via web browser have to use the ID and password to configure the router and
users who access the router via telnet or console mode have to use the password to configure the
router. Suggest to change the ID and password after the first time of configuration, and save it. At
next time when you access to the router, you have to use the new password.
---------------------------------------------------------------------Command: admin passwd <pass_conf>
Message: Please input the following information.
Input old Supervisor password: ****
Input new Supervisor password: ********
Re-type Supervisor password: ********
------------------------------------------------------------------------------------------------------------------------------------------Command: admin id <pass_conf>
Message: Please input the following information.
Legal user name (Enter for default) <root> : test
----------------------------------------------------------------------
SNTP
Time synchronization is an essential element for any business that relies on an IT system. The
reason for this is that these systems all have clocks that are the source of time for files or
operations they handle. Without time synchronization, time on these systems varies with each
other or with the correct time and this can cause- virtual server schedule processes to fail and
system log exposures with wrong data.
There are two methods to synchronize time, synchronize with PC or SNTPv4. If you choose
synchronize with PC, the router will synchronize with PC. If you choose SNTPv4, the router will
use the protocol to synchronize with the time server. Synchronization with time server, SNTP v4,
needs to configure service, time_server and time_zone. Synchronization with PC does not need to
configure the above parameters.
Move the cursor “ >> “ to sntp and press enter.
>> method
service
time_server1
time_server2
time_server3
updaterate
time_zone
list
Select time synchronization method
Tigger SNTP v4.0 service
Configure time server 1
Configure time server 2
Configure time server 3
Configure update period
Configure GMT time zone offset
Show SNTP configuration
84
G.shdsl Router User Manual
152
To configure SNTP v4 time synchronization, follow the below procedures.
move the cursor to method and press enter.
---------------------------------------------------------------------Command: admin sntp method <SNTPv4|SyncWithPC>
Message: Please input the following information.
SYNC method (Enter for default) <SyncWithPC> : SNTPv4
---------------------------------------------------------------------Move the cursor to service and press enter.
---------------------------------------------------------------------Command: admin sntp service <Disable|Enable>
Message: Please input the following information.
Active SNTP v4.0 service (Tab Select) <Enable> : Enable
---------------------------------------------------------------------Move the cursor to time_server1 and press enter.
---------------------------------------------------------------------Command: admin sntp time_server1 <string>
Message: Please input the following information.
Time server address(Enter for default) <ntp-2.vt.edu> : ntp-2.vt.edu
---------------------------------------------------------------------You can configure three time server in this system.
Move the cursor to update_rate and press enter.
---------------------------------------------------------------------Command: admin sntp update_rate <10~268435455>
Message: Please input the following information.
Update period (secs) (Enter for default) : 86400
---------------------------------------------------------------------Move the cursor to time_zone and configure where your router is placed. The easiest way to know
the time zone offset hour is from your PC clock. Double click the clock at the right corner of monitor
and check the time zone.
---------------------------------------------------------------------Command: admin sntp time_zone <-12~12>
Message: Please input the following information.
GTM time zone offset (hours) (Enter for default) : -8
---------------------------------------------------------------------Move the cursor to list and review the setting.
85
G.shdsl Router User Manual
152
Utility
There are three utility tools, upgrade, backup and restore, embedded in the firmware. You can
update the new firmware via TFTP upgrade tools and backup the configuration via TFTP backup
tool and restore the configuration via TFTP restore tool. For upgrade, TFTP server with the new
firmware will be supported by supplier but for backup and restore, you must have your own TFTP
server to backup and restore the file.
Move the cursor “ >> “ to utility and press enter.
>> upgrade
backup
Restore
Upgrade main software
Backup system configuration
Restore system configuration
Exit
If you want to exit the system without saving, use exit command to quit system.
86
G.shdsl Router User Manual
152
Setup
All of the setup parameters are located in the subdirectories of setup. Move the cursor “ >> “ to
setup and press enter.
>> mode
shdsl
wan
bridge
vlan
route
lan
ip_share
firewall
dhcp
dns_proxy
hostname
default
Switch system operation mode
Configure SHDSL parameters
Configure WAN interface profile
Configure transparent bridging
Configure virtual LAN paramters
Configure routing parameters
Configure LAN interface profile
Configure NAT/PAT parameters
Configure Firewall parameters
Configure DHCP parameters
Configure DNS proxy parameters
Configure local host name
Restore factory default setting
Mode
The product can act as routing mode or bridging mode. The default setting is routing mode. You
can change the system operation mode by using mode command. Move the cursor “ >> “ to mode
and press enter.
---------------------------------------------------------------------Command: setup mode <Route|Bridge>
Message: Please input the following information.
System operation mode (TAB select) <Route>: Route
----------------------------------------------------------------------
SHDSL
You can setup the SHDSL parameters by the command shdsl. Move the cursor “ >> “ to shdsl and
press enter.
>> mode
Link
n*64
type
clear
margin
Configure SHDSL mode
Configure SHDSL link
Configure SHDSL data rate
Configure SHDSL annex type
Clear current CRC error count
Configure SHDSL SNR margin
There are two types of SHDSL mode, STU-R and STU-C. STU-R means the terminal of central
office and STU-C customer premises equipment.
Link type will be 2-wire or 4-wire mode according to the product. 4-wire product can be worked
under 2-wire mode.
You can setup the data rate by the multiple of 64Kbps where n is from 0 to 32. If you configure n is
0, the product will perform as adaptive mode.
There are two types of SHDSL Annex type, Annex-A and Annex-B.
87
G.shdsl Router User Manual
152
Clear command can clear CRC error count.
Generally, you cannot need to change SNR margin, which range is from 0 to 10. SNR margin is an
index of line connection. You can see the actual SNR margin in STATUS SHDSL. The larger SNR
margin, the better line connection. If you set SNR margin in the field as 2, the SHDSL connection
will drop and reconnect when the SNR margin is lower than 2. On the other hand, the device will
reduce the line rate and reconnect for better line connection.
WAN
The router supports 8 PVC, private virtual circuit, and so you can setup eight WAN, WAN1 to
WAN8. Move the cursor “ >> “ to wan and press enter. To setup WAN1, type 1.
---------------------------------------------------------------------Command: setup wan <1~8>
Message: Please input the following information.
Interface number <1~8>: 1
--------------------------------------------------------------------->> protocol
address
vpi_vci
encap
qos
isp
ip_type
list
Link type protocol
IP address and subnet mask
Configure VPI/VCI value
Configure encapsulation type
Configure VC QoS
Configure account name, password and idle time
Configure IP type in PPPoA and PPPoE
WAN interface configuration
There are four types of protocols, IPoA, EoA, PPPoA and PPPoE, which you can setup.
For dynamic IP of PPPoA and PPPoE, you do not need to setup IP address and subnet mask.
There is an unique VPI and VCI value for Internet connection supported by ISP. The range of VIP
is from 0 to 255 and VCI from 0 to 65535.
There are two types of encapsulation types, VC-Mux and LLC.
You can setup virtual circuit quality of service, VC QoS, using qos command. The product supports
UBR, CBR, VBR-rt and VBR-nrt. The peak cell rate can be configured from 64kbps to 2400kbps.
Move the cursor to qos and press enter.
>> class
pcr
scr
mbs
Configure
Configure
Configure
Configure
QoS class
peak cell rate (kbps)
sustainable cell rate (kbps)
max. burst size (cell)
88
G.shdsl Router User Manual
152
ISP command can configure account name, password and idle time. Idle time are from 0 minute to
300 minutes.
Most of the ISP use dynamic IP for PPP connection but some of the ISP use static IP. Configure
the IP type, dynamic or fixed, via ip_type command.
You can review the WAN interface configuration via list command.
Bridge
You can setup the bridge parameters in bridge command. If the product is configured as a router,
you do not want to setup the bridge parameters. Move the cursor “ >> “ to bridge and press enter.
>> gateway
static
Default gateway
Static bridging table
You can setup default gateway IP via gateway command.
You can setup 20 sets of static bridge in static command. After entering static menu, the screen
will prompt as below:
>> add
delete
modify
list
Add static MAC entry
Delete static MAC entry
Modify static MAC entry
Show static bridging table
After enter add menu, the screen will prompt as follow
>> mac
lan_port
wan1_port
wan2_port
wan3_port
wan4_port
wan5_port
wan6_port
wan7_port
wan8_port
list
Configure MAC address
Configure LAN interface bridging type
Configure WAN1 interface bridging type
Configure WAN2 interface bridging type
Configure WAN3 interface bridging type
Configure WAN4 interface bridging type
Configure WAN5 interface bridging type
Configure WAN6 interface bridging type
Configure WAN7 interface bridging type
Configure WAN8 interface bridging type
Show static bridging table
89
G.shdsl Router User Manual
152
VLAN
Virtual LAN (VLAN) is defined as a group of devices on one or more LANs that are configured so
that they can communicate as if they were attached to the same wire, when in fact they are located
on a number of different LAN segments. Because VLAN is based on logical instead of physical
connections, it is extremely flexible.
You can setup the Virtual LAN (VLAN) parameters in vlan command. The router support the
implementation of VLAN-to-PVC only for bridge mode operation, i.e., the VLAN spreads over both
the COE and CPE sides, where there is no layer 3 routing involved. The unit supports up to 8
active VLANs with shared VLAN learning (SVL) bridge out of 4096 possible VLANs specified in
IEEE 802.1Q.
Move the cursor “ >> “ to vlan and press enter.
>> mode
modify
pvid
link_mode
list
Trigger virtual LAN function
Modify virtual LAN rule
Modify port default ID
Modify port link type
Show VLAN configuration
To active the VLAN function, move the cursor “ >> “ to mode and press enter. The products
support two types of VLAN, 802.11q and Port-Based. The IEEE 802.1Q defines the operation of
VLAN bridges that permit the definition, operation, and administration of VLAN topologies within a
bridged LAN infrastructure. Port-Based VLANs are VLANs where the packet forwarding decision is
based on the destination MAC address and its associated port.
802.11Q VLAN
Follow the following steps to configure 802.11q VLAN.
---------------------------------------------------------------------Command: setup vlan active <Disable|8021Q|Port>
Message: Please input the following information.
Tigger VLAN function (Tab select) <Disable>: 8021Q
---------------------------------------------------------------------To modify the VLAN rule, move the cursor “ >> “ to modify and press enter.
---------------------------------------------------------------------Command: setup vlan modify <1~8> <1~4094> <string>
Message: Please input the following information.
Rule entry index <1~8>: 1
VLAN ID (Enter for default) <1>: 10
VLAN port status (Enter for default): 11001
---------------------------------------------------------------------For each VLAN, VLAN ID is a unique number among 1~4095.
90
G.shdsl Router User Manual
152
VLAN port status is a 12-digit binary number whose bit-1 location indicates the VLAN port
membership in which 4MSBs and 8MSB represents LAN ports and WAN port, respectively. For
example: the above setting means that the VID 20 member port includes LAN1, LAN2 and WAN.
The member ports are tagged members. Use PVID command to change the member port to
untagged members
To assign PVID (Port VID), move the cursor “>>” to PVID and press enter. The port index 1 to 4
represents LAN1 to LAN4 respectively and port index 5 to 12 represents WAN1 to WAN8. VID
value is the group at which you want to assign the PVID of the port. PVID is
---------------------------------------------------------------------Command: setup vlan pvid <1~12> <1~4094>
Message: Please input the following information.
Port index <1~12>: 1
VID Value (Enter for default) <10>: 10
---------------------------------------------------------------------To modify the link type of the port, move the cursor to link mode and press enter. There are two
types of link: access and trunk. Trunk link will send the tagged packet form the port and access link
will send un-tagged packet form the port. Port index 1 to 4 represents LAN1 to LAN4 respectively.
According to the operation mode of the device, link type of WAN port is automatically configured. If
the product operates in bridge mode, the WAN link type will be trunk, and in routing mode, access.
---------------------------------------------------------------------Command: setup vlan link_mode <1~12> <Access|Trunk>
Message: Please input the following information.
Port index <1~12>: 1
Port link type (Tab select) <Trunk>: Access
---------------------------------------------------------------------To view the VLAN table, move the cursor to list and press enter.
Route
You can setup the routing parameters in route command. If the product is configured as a bridge,
you do not want to setup the route parameters. Move the cursor “ >> “ to route and press enter.
>> static
rip
Configure static routing table
Configure RIP tool
If the Router is connected to more than one network, it may be necessary to set up a static route
between them. A static route is a pre-determined pathway that network information must travel to
reach a specific host or network.
With Dynamic Routing, you can enable the Router to automatically adjust to physical changes in
the network’s layout. The Cable/DSL Firewall Router, using the RIP protocol, determines the
network packets’ route based on the fewest number of hops between the source and the
destination. The RIP protocol regularly broadcasts routing information to other routers on the
91
G.shdsl Router User Manual
152
network.
You can setup 20 sets of static route in static command. After entering static menu, the screen will
show as follow:
>> add
delete
list
Add static route entry
Delete static route entry
Show static routing table
You can add 20 sets of static route entry by using add command. Type the IP information of the
static route including IP address, subnet mask and gateway.
You can delete the static route information via delete command.
You can review the static route entry by using list command.
To configure Routing Information Protocol (RIP), you can use rip command to setup the
parameters. Move the cursor “>>” to rip and press enter.
>> generic
lan
wan
list
Configure operation and auto summery mode
Configure LAN interface RIP parameters
Configure WAN interface RIP parameters
Show RIP configuration
Generic command can setup RIP mode and auto summery mode.
If there are any routers in your LAN, you can configure LAN interface RIP parameters via lan
command.
The product supports 8 PVCs and you can configure the RIP parameters of each WAN via wan
command. Move the cursor “>>” to wan and press enter.
---------------------------------------------------------------------Command: setup route rip wan <1~8> <more...>
Message: Please input the following information.
Active interface number <1~8>: 1
---------------------------------------------------------------------The screen will prompt as follow:
>> attrib
version
authe
Operation, authentication and Poison reverse mode
RIP protocol version
Authentication code
92
G.shdsl Router User Manual
152
Attrib command can configure RIP mode, authentication type and Poison reverse mode.
Version command can configure RIP protocol version.
Authe command can configure authentication code.
You can review the list of RIP parameters via list command.
LAN
LAN interface parameters can be configured LAN IP address, subnet mask and NAT network type.
>> address
attrib
LAN IP address and subnet mask
NAT network type
IP share
You can configure Network Address Translation (NAT), Port Address Translation (PAT) and
Demilitarized Zone parameters in ip_share menu. Move the cursor “>>” to ip_share then press
enter.
>> nat
pat
dmz
Configure network address translation
Configure port address translation
Configure DMZ host function
NAT (Network Address Translation) is the translation of an Internet Protocol address (IP address)
used within one network to a different IP address known within another network. One network is
designated the inside network and the other is the outside. Typically, a company maps its local
inside network addresses to one or more global outside IP addresses and reverse the global IP
addresses of incoming packets back into local IP addresses. This ensure security since each
outgoing or incoming request must go through a translation process, that also offers the
opportunity to qualify or authenticate the request or match it to a previous request. NAT also
conserves on the number of global IP addresses that a company needs and lets the company to
use a single IP address of its communication in the Internet world.
DMZ (demilitarized zone) is a computer host or small network inserted as a “neutral zone”
between a company private network and the outside public network. It prevents outside users from
getting direct access to a server that has company private data.
NAT
You can configure NAT parameters in nat menu.
>> virtual
global
fixed
Virtual IP address pool
Global IP address pool
Fixed IP address mapping
93
G.shdsl Router User Manual
152
The virtual menu contains range of virtual IP address, delete virtual IP address and show virtual
IP address.
>> range
delete
list
Edit virtual IP address pool
Delete virtual IP address pool
Show virtual IP address pool
You can create five virtual IP address pool range in range command.
---------------------------------------------------------------------Command: setup ip_share nat virtual range <1~5> <ip> <1~253>
Message: Please input the following information.
NAT local address range entry number <1~5>: 1
Base address: 192.168.0.2
Number of address: 49
---------------------------------------------------------------------You can delete virtual IP address range- from 1 to 5- by using delete command.
You can view the virtual IP address range via list command.
To setup global IP address pool, move the cursor “>>” to global command and press enter.
>> range
interface
delete
list
Edit global IP address pool
Bind address pool to specific interface
Delete global IP address pool
Show global IP address pool
You can create five global IP address pool range via range command.
---------------------------------------------------------------------Command: setup ip_share nat global range <1~5> <ip> <1~253>
Message: Please input the following information.
NAT global IP address range entry number <1~5>: 1
Base address: 122.22.22.2
Number of address: 3
---------------------------------------------------------------------After configuration global IP address range, You can bind address pool to specific interface via
bind command.
---------------------------------------------------------------------Command: setup ip_share nat global interface <1~5> <1~8>
Message: Please input the following information.
NAT global ddress range entry number <1~5>: 1
Active interface number <1~8>: 1
----------------------------------------------------------------------
94
G.shdsl Router User Manual
152
You can delete global IP address range- from 1 to 5- by using delete command.
You can view the global IP address range via list command.
To modify fixed IP address mapping, move the cursor “>>” to fixed command and press enter.
>> modify
interface
delete
list
Modify fixed NAT mapping
Bind address pair to specific interface
Delete fixed NAT mapping
Show fixed IP address mapping
You can create up to 10 fixed NAT mapping entry via range command.
---------------------------------------------------------------------Command: setup ip_share nat fixed modify <1~1o> <ip> <ip>
Message: Please input the following information.
Fixed NAT mapping entry number <1~10>: 1
Local address: 192.168.0.250
Global address: 122.22.22.2
---------------------------------------------------------------------After configuration fixed IP address entry, you can bind the entry to specific interface via interface
command.
---------------------------------------------------------------------Command: setup ip_share nat fixed interface <1~5> <1~8>
Message: Please input the following information.
Fixed NAT mapping entry number <1~5>: 1
Active interface number (Enter for default) <1~8>: 1
---------------------------------------------------------------------You can delete fixed NAT mapping entry- from 1 to 5- by using delete command.
You can view the fixed NAT mapping entry via list command.
PAT
To configure Port Address Translation, move the cursor “>>” to pat and press enter.
>> clear
modify
list
Clear virtual server mapping
Modify virtual server mapping
Show virtual server mapping pool
You can delete virtual server mapping entry- from 1 to 10- by using clear command.
You can create up to 10 virtual server mapping entry via modify command.
95
G.shdsl Router User Manual
152
---------------------------------------------------------------------Command: setup ip_share pat modify <1~10>
Message: Please input the following information.
Virtual server entry number <1~10>: 1
---------------------------------------------------------------------After key in enter, the screen will prompt as below.
>> interface
port
server
protocol
name
begin
end
Active interface
TCP/UDP port number
Host IP address and port number
Transport protocol
Service name
The schedule of beginning time
The schedule of ending time
Set the active interface number via interface command.
You can configure the global port number by using port command.
The local server, host, IP address and port number are configured via server command.
The authorized access protocol is setup via protocol command.
Name command can be used to configure the service name of the host server.
Begin and end command is used to setup the local server schedule to access.
You can view the fixed NAT mapping entry via list command.
DMZ
To setup demilitarized zone, move the cursor “>>” to dmz and press enter.
>> active
address
Tigger DMZ host function
Configure virtual IP address and interface
You can enable the demilitarized zone via active command.
96
G.shdsl Router User Manual
152
After enabling the DMZ, shift the cursor to address and press enter.
---------------------------------------------------------------------Command: setup ip_share dmz address <ip> <1~10>
Message: Please input the following information.
Virtual IP address: 192.168.0.251
Active interface number (Enter for default) <1>: 1
----------------------------------------------------------------------
Firewall
The product supports advanced firewall. To setup the advanced firewall, you can use firewall to
configure.
>> Level
Configure firewall security level
pkt_filter
Configure packet filter
dos_protection Configure DoS protection
There are three level of firewall which you can setup in this product.
Level one, basic, only enables the NAT firewall and the remote management security. The NAT
firewall will take effect if NAT function is enabled. The remote management security is default to
block any WAN side connection to the device. Non-empty legal IP pool in ADMIN will block all
remote management connection except those IPs specified in the pool.
Level two, automatic, enables basic firewall security, all DoS protection, and the SPI filter function.
Level three, advanced, is an advanced level of firewall where user can determine the security level
for special purpose, environment, and applications by configuring the DoS protection and defining
an extra packet filter with higher priority than the default SPI filter. Note that, an improper filter
policy may degrade the capability of the firewall and/or even block the normal network traffic.
The firewall security level can configure via level command.
Packet Filtering
Packet filtering function can be configured by pkt_filter command. Move the cursor to pkt_filter
and press enter.
>> active
drop_flag
add
delete
modify
exchange
list
Tigger packet filtering function
Drop fragment packets
Add packet filtering rule
Delete packet filtering rule
Modify packet filtering rule
Exchange the filtering rule
Show packet filtering table
To enable the packet filtering function, you can use active command.
Add the packet filtering rule via add command.
97
G.shdsl Router User Manual
>> protocol
direction
src_ip
dest_ip
port
tcp_flag
icmp_type
description
enable
begin
end
action
152
Configure protocol type
Configure direction mode
Configure source IP parameter
Configure destination IP parameter
Configure port parameter (TCP and UDP only)
Configure TCP flag (TCP only)
Configure ICMP flag (ICMP only)
Packet filtering rule description
Enable the packet filtering rule
The schedule of beginning time
The schedule of ending time
Configure action mode
DoS Protection
DoS protection parameters can be configured in dos_protection menu. Move the cursor to
dos_protection and press enter.
Enable
>> syn_flood
icmp_flood
Enable
udp_flood
Enable
ping_death
Enable
land_attack
Enable
ip_spoff
Enable
smurf_attack Enable
fraggle_attack Enable
protection
protection
protection
protection
protection
protection
protection
protection
SYN flood attack
ICMP flood attack
UDP flood attack
ping of death attack
land attack
IP spoofing attack
smurf attack
fraggle attack
A SYN flood attack attempts to slow your network by requesting new connections but not
completing the process to open the connection. Once the buffer for these pending connections is
full a server will not accept any more connections and will be unresponsive.
ICMP Flood: A sender transmits a volume of ICMP request packets to cause all CPU resources to
be consumed serving the phony requests.
UDP Flood: A sender transmits a volume of requests for UDP diagnostic services which cause all
CPU resources to be consumed serving the phony requests.
A ping of death attack attempts to crash your system by sending a fragmented packet, when
reconstructed is larger than the maximum allowable size. Other known variants of the ping of death
include teardrop, bonk and nestea.
A land attack is an attempt to slow your network down by sending a packet with identical source
and destination addresses originating from your network.
IP Spoofing is a method of masking the identity of an intrusion by making it appeared that the traffic
came from a different computer. This is used by intruders to keep their anonymity and can be used
in a Denial of Service attack.
A smurf attack involves two systems. The attacker sends a packet containing a ICMP echo request
98
G.shdsl Router User Manual
152
(ping) to the network address of one system. This system is known as the amplifier. The return
address of the ping has been faked (spoofed) to appear to come from a machine on another
network (the victim). The victim is then flooded with responses to the ping. As many responses are
generated for only one attack, the attacker is able use many amplifiers on the same victim.
DHCP
Dynamic Host Configuration Protocol (DHCP) is a communication protocol that lets network
administrators to manage centrally and automate the assignment of Internet Protocol (IP)
addresses in an organization's network. Using the Internet Protocol, each machine that can
connect to the Internet needs a unique IP address. When an organization sets up its computer
users with a connection to the Internet, an IP address must be assigned to each machine.
Without DHCP, the IP address must be entered manually at each computer. If computers move to
another location in another part of the network, a new IP address must be entered. DHCP lets a
network administrator to supervise and distribute IP addresses from a central point and
automatically sends a new IP address when a computer is plugged into a different place in the
network.
To configure DHCP server, move the cursor to dhcp and press enter.
>> generic
fixed
list
Configure generic DHCP parameters
Configure fixed host IP address list
Show DHCP configuration
The generic DHCP parameters can be configured via generic command.
>> active
gateway
netmask
ip_range
lease_time
name_server1
name_server2
name_server3
Tigger DHCP function
Default gateway for DHCP client
Subnet mask for DHCP client
Dynamic assigned IP address range
Configure max lease time
Domain name server1
Domain name server2
Domain name server3
Active the DHCP function with active command.
Set the default gateway vie gateway command.
The subnet mask for DHCP client is configured by netmask command.
Ip_range command is to configure dynamic assigned IP address range.
The dynamic IP maximum lease time is configured by lease_time command.
99
G.shdsl Router User Manual
152
You can setup 3 domain name servers via name_server commands.
Fixed Host IP Address list are setup via fixed command.
>> add
delete
Add a fixed host entry
Delete a fixed host entry
You can view the DHCP configuration via list command.
DNS proxy
You can setup three DNS servers in the product. The number 2 and 3 DNS servers are option.
Move cursor “ >> “ to dns_proxy and press enter.
---------------------------------------------------------------------Command: setup dns_proxy <IP> [IP] [IP]
Message: Please input the following information.
DNS server 1 (ENTER for default) <168.95.1.1>: 10.0.10.1
DNS server 2: 10.10.10.1
DNS server 3:
----------------------------------------------------------------------
Host name
Enter local host name via hostname command. Move cursor “ >> “ to hostname and press enter.
---------------------------------------------------------------------Command: setup hostname <name>
Message: Please input the following information.
Local hostname (ENTER for default) <SOHO>: test
----------------------------------------------------------------------
Default
If you want to restore factory default, first move the cursor “ >> “ to default and then press enter.
---------------------------------------------------------------------Command: setup default <name>
Message: Please input the following information.
Are you sure? (Y/N): y
----------------------------------------------------------------------
100
G.shdsl Router User Manual
152
Copyright & Regulatory Information
Manual Copyright Ó 2004.
This manual described in it is copyrighted with all rights reserved. This manual may not
be copied, in whole or in part, without written consent. All product names are trademarks
and or registered trademarks of their respective companies.
101