1
4Set up the remote control
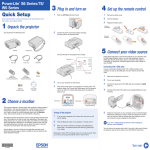
3Plug in and turn on
EX30/EX50/EX70
Quick Setup
1
Open the A/V Mute slide (lens cover).
Before using the projector, read these instructions and the safety instructions in the
User’s Guide on your projector CD-ROM.
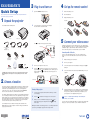
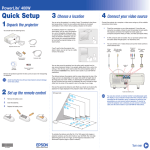
1 Unpack the projector
1
Remove the battery cover.
2
Insert the batteries.
3
Replace the battery cover.
EX30/EX50
You should have the following items:
2
onnect the power cord to the projector and plug
C
the other end into an electrical outlet.
EX70
Projector
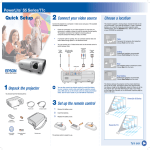
5Connect your video source
Carrying case
The
power light on the projector turns orange.
Power light
Component-to-VGA
adapter
(EX30/EX50 only)
VGA cable
USB cable
Power cord
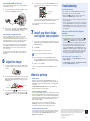
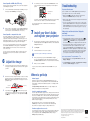
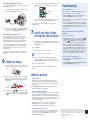
Follow these instructions to connect the projector to your computer using
the USB cable (Windows® only), or to your video equipment using an HDMI
cable (EX70 only) or component video cable. For instructions on using
other connection options, see the User’s Guide on your CD-ROM.
Connecting with a USB cable
If you’re connecting a Windows Vista , XP, or 2000 computer to the
®
Projector
remote control
(EX30/EX50)
Password
Protected sticker
Projector
remote control
(EX70)
User’s Guide
CD-ROM
Power button
Batteries
Interface label stickers
(Included for Canada only)
3
4
Canada only: For French speakers, remove sticker(s) from the interface
label backing sheet and place over corresponding text on the control
panel.
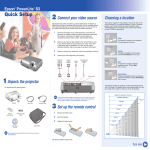
2Choose a location
The projector supports 4 viewing setups: front projection, ceiling projection,
rear projection, and rear/ceiling projection. Choose the best one for your
environment. If you install the projector in a rear or overhead position,
you’ll need to choose the correct projection option from the Extended
menu. See the User’s Guide on your CD-ROM for instructions.
The distance between the projector and the screen generally determines the
size of the image, but the size can also vary depending on the aspect ratio
(image shape), how you zoom into the image, and whether you’ve adjusted
other image settings. Depending on the projector model you are using and
the image settings you’ve chosen, you can place the projector anywhere
from 33 to 412 inches (84 to 1047 cm) from the screen.
Use the tables in the User’s Guide or the Image Size calculator on the
Multimedia Projectors page on Epson’s website to help you determine the
proper projection distance.
*411506800*
*411506800*
projector, you can use the USB cable. You don’t need to use the VGA
cable.
Turn on your computer.
ress the
P
power button on the projector or remote control. The
projector beeps, the
power light flashes green, and the projector
warms up. When the
power light stays green, the projector is
ready for use.
4
Connect the square end of the USB cable to the projector’s TypeB
USB port.
Connect the flat end of the cable to any available USB port on your
computer.
Power button
EX70
Turning off the projector
If you’re using a computer, shut it down first, while you can still
see the display.
2
Press the
3
2
3
EX30/EX50
Make sure the projector is turned on.
Turn on your computer or video source.
Power button
1
1
power button on the projector or remote control.
hen you see the confirmation message, press the
W
power button again. The projector beeps twice and the
power light
turns orange.
5
Follow the instructions on your computer screen to install the Epson
USB Display software (you need to install the software only the first
time you connect). After the software has been installed, you see
your computer’s screen displayed by the projector.
NOTE If
you see a “Digital Signature Warning” while installing the
software, select Continue.
You can connect an optional audio cable if you want to play sound through
the projector. See the User’s Guide on your CD-ROM for instructions.
W
ith Epson’s Instant Off® technology, there’s no cool-down period. When
you’re done, just unplug the projector and it’s ready to travel.
Turn over